rack assembly instructions - thor tarp · attach the two cross braces at their centers using the 4...
TRANSCRIPT
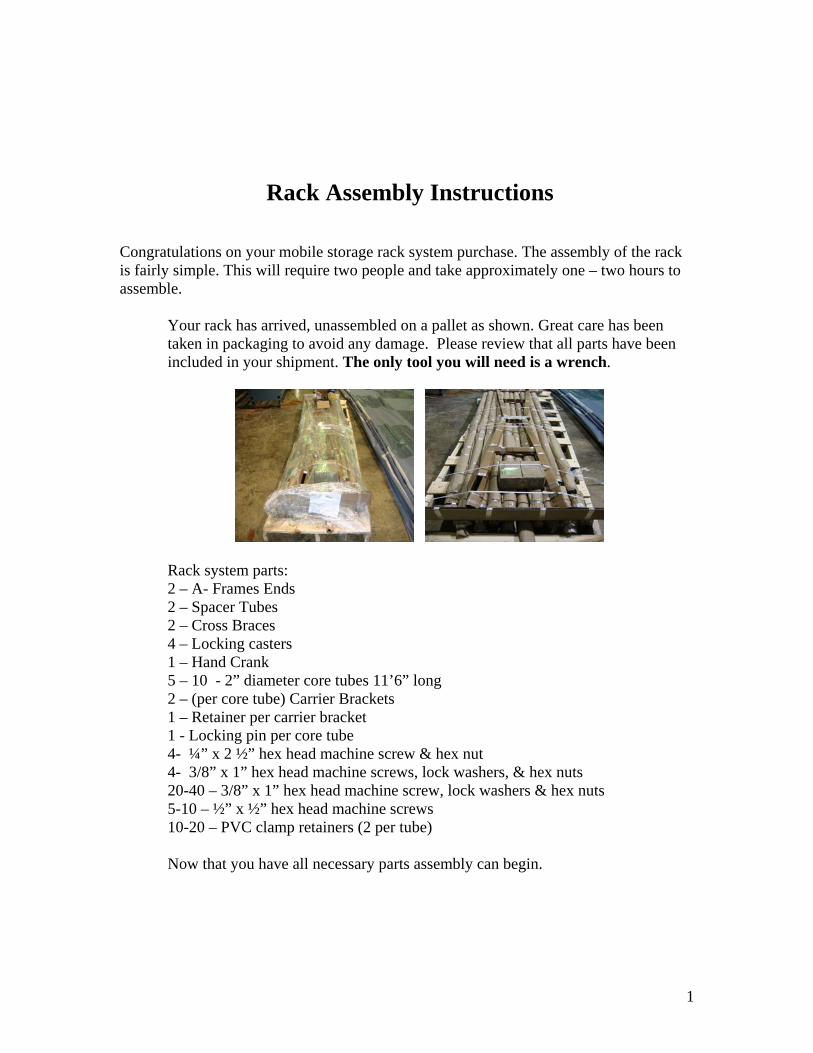
Rack Assembly Instructions Congratulations on your mobile storage rack system purchase. The assembly of the rack is fairly simple. This will require two people and take approximately one – two hours to assemble.
Your rack has arrived, unassembled on a pallet as shown. Great care has been taken in packaging to avoid any damage. Please review that all parts have been included in your shipment. The only tool you will need is a wrench.
Rack system parts: 2 – A- Frames Ends
2 – Spacer Tubes 2 – Cross Braces 4 – Locking casters 1 – Hand Crank 5 – 10 - 2” diameter core tubes 11’6” long 2 – (per core tube) Carrier Brackets 1 – Retainer per carrier bracket 1 - Locking pin per core tube 4- ¼” x 2 ½” hex head machine screw & hex nut 4- 3/8” x 1” hex head machine screws, lock washers, & hex nuts 20-40 – 3/8” x 1” hex head machine screw, lock washers & hex nuts 5-10 – ½” x ½” hex head machine screws 10-20 – PVC clamp retainers (2 per tube) Now that you have all necessary parts assembly can begin.
1
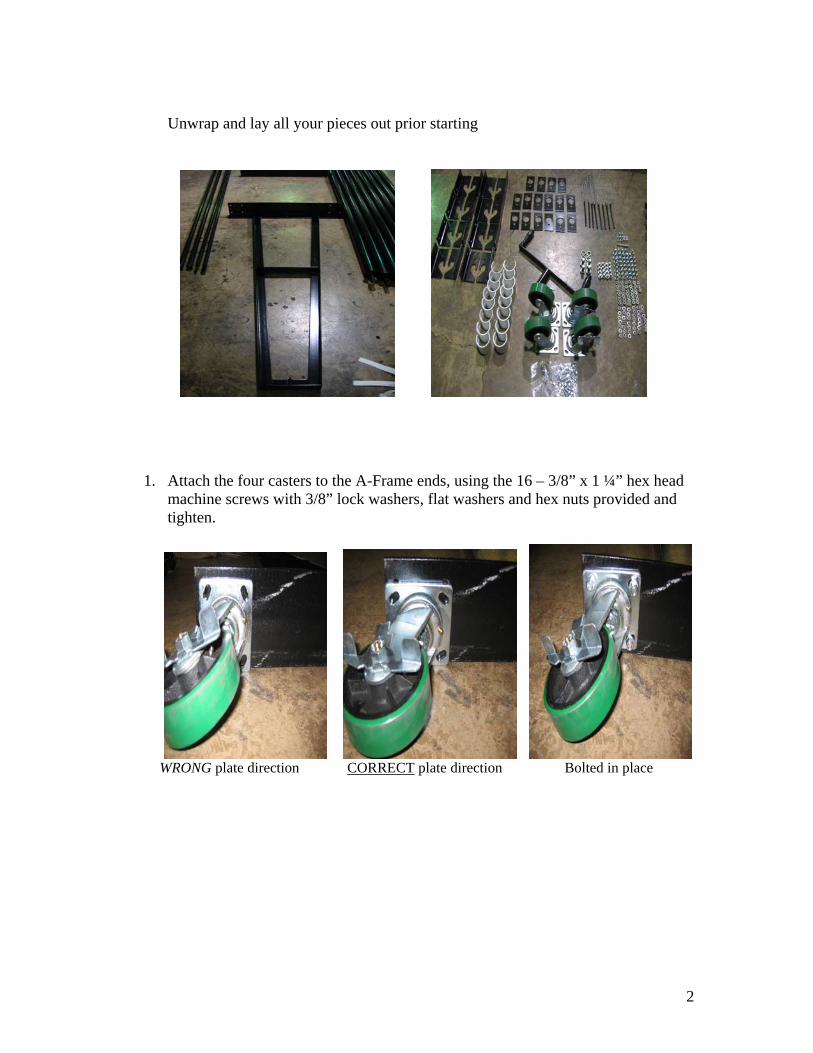
Unwrap and lay all your pieces out prior starting
1. Attach the four casters to the A-Frame ends, using the 16 – 3/8” x 1 ¼” hex head machine screws with 3/8” lock washers, flat washers and hex nuts provided and tighten.
WRONG plate direction CORRECT plate direction Bolted in place
2
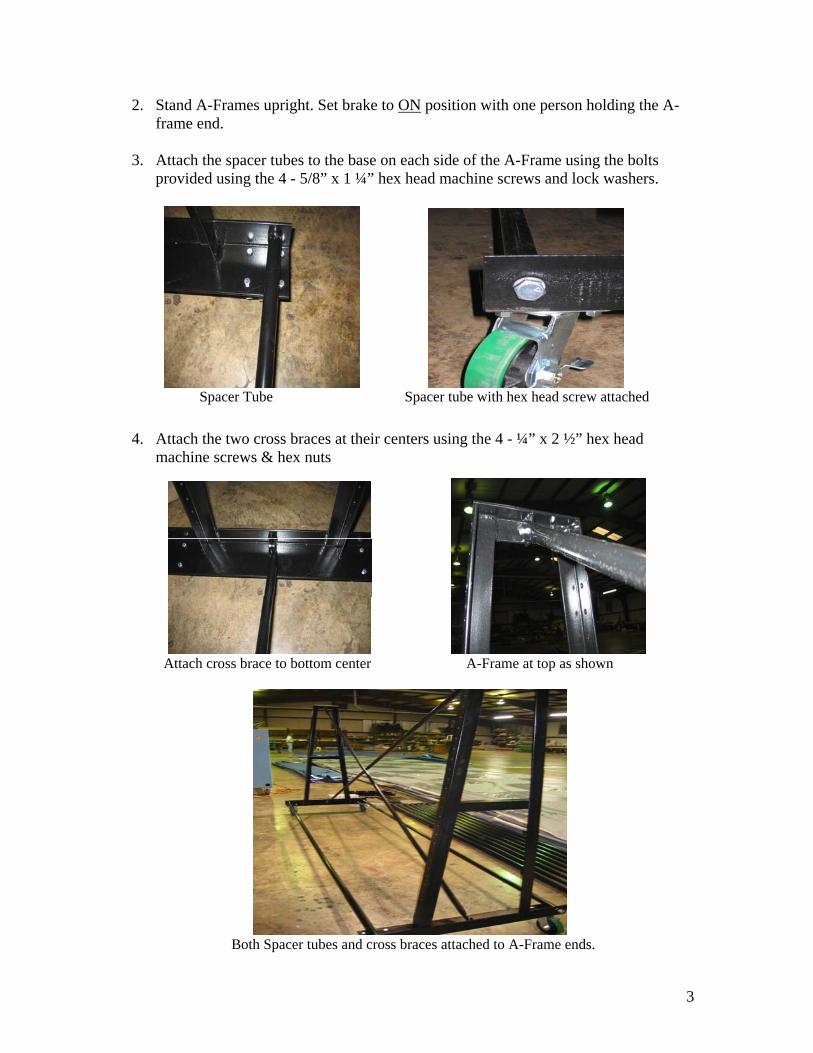
2. Stand A-Frames upright. Set brake to ON position with one person holding the A-frame end.
3. Attach the spacer tubes to the base on each side of the A-Frame using the bolts
provided using the 4 - 5/8” x 1 ¼” hex head machine screws and lock washers.
Spacer Tube Spacer tube with hex head screw attached
4. Attach the two cross braces at their centers using the 4 - ¼” x 2 ½” hex head machine screws & hex nuts
Attach cross brace to bottom center A-Frame at top as shown
Both Spacer tubes and cross braces attached to A-Frame ends.
3

5. Take one locking pin per carrier bracket. Place cotter pin through center hole of carrier bracket.
Carrier Brackets Locking Pins
6. Spread open cotter pin as shown. Attach carrier as stated below.
4

7. Starting at the bottom, fasten the right carrier brackets to the right side of A-
Frame and left carrier brackets to the left side of A-Frame using the 3/8” x 1” hex head machine screws, lock washers, and hex nuts. Space evenly.
8. Slots on carrier brackets should face upwards. Space evenly according to the number of core tubes per side ordered for your system. Repeat on opposite side of
A-Frame. NOTE: Locking pins to be set in place BEFORE attaching carrier brackets. Close up shown without locking pin is for reference only.
9. Attach the core tubes by sliding the grooved ends into slots on carrier brackets
5

10. Attach retainers to carrier brackets using ½” x ½” hex head machine screws as shown.
11. When manually loading, simply slip handle on end for winding. Moving it from Tube end to tube end
12. Place cotter pin in core tube end hole after each section is rolled onto tube. This stops the roll from unrolling.
6

13. This is how your assembled rack should appear
11’ long x 6’ high x 34” wide at base
Please review proper loading and unloading instructions PRIOR to first use.
ALWAYS Evenly distribute the weight of rolled gym floor covers when loading/unloading rack.
For proper weight distribution and safety, load from the bottom up alternately from side to side and front to back. Unload the rack following the same procedure in reverse top to bottom.
7
Loading/Unloading Instructions
Read through loading/unloading instructions prior to first use.
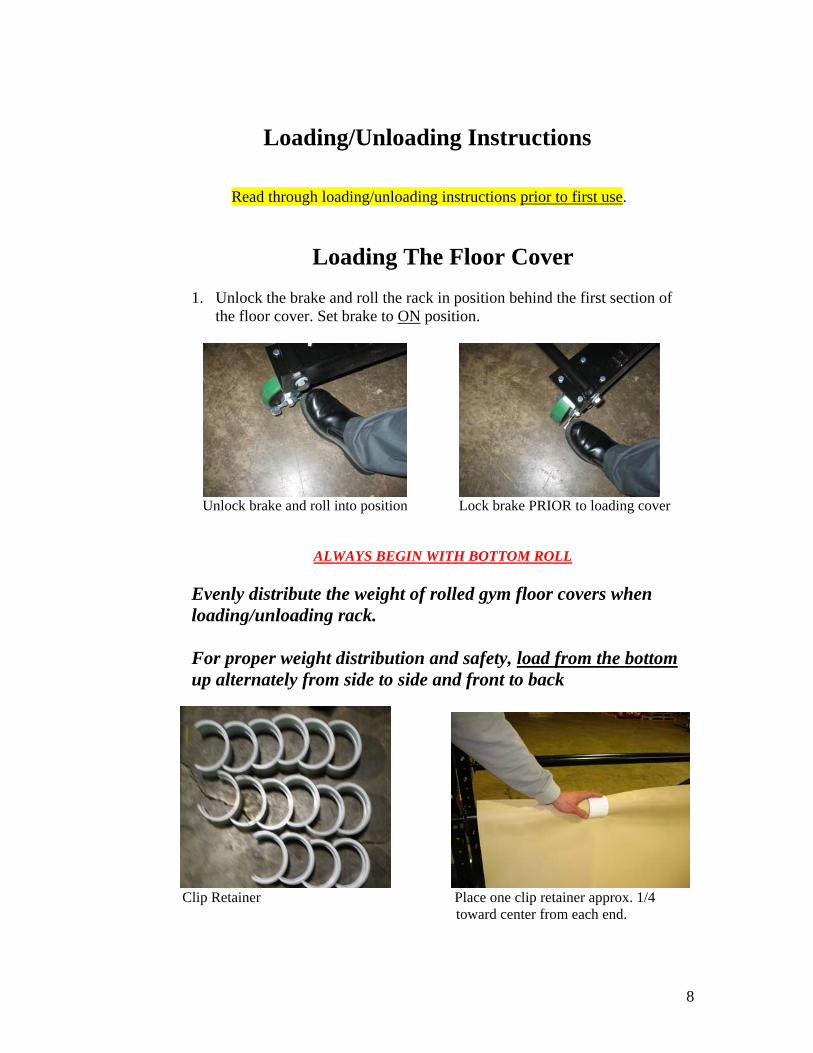
Loading The Floor Cover 1. Unlock the brake and roll the rack in position behind the first section of
the floor cover. Set brake to ON position.
Unlock brake and roll into position Lock brake PRIOR to loading cover
ALWAYS BEGIN WITH BOTTOM ROLL
Evenly distribute the weight of rolled gym floor covers when loading/unloading rack.
For proper weight distribution and safety, load from the bottom up alternately from side to side and front to back
Clip Retainer Place one clip retainer approx. 1/4 toward center from each end.
8

2. When loading the rack system ALWAYS load from the bottom up alternately from side to side. Pull material onto first bottom tube and place one clip retainer approx. ¼ on each end to hold cover securely on tube.
Remove cotter pin BEFORE winding
3. Be sure to remove cotter pin prior to winding. Make sure the cover is centered on the core tube and wrinkle free.
4. Place one person on each side of the floor cover.
5. Wind slowly with each person guiding the floor cover evenly as it rolls Caution must be used to keep the edges of the floor cover from coming
in contact with the brackets on each end of the core tube; damage to the cover could result Using the hand crank, slowly roll the floor cover onto the
core tube, guiding it by hand to keep it centered on the tube.
9
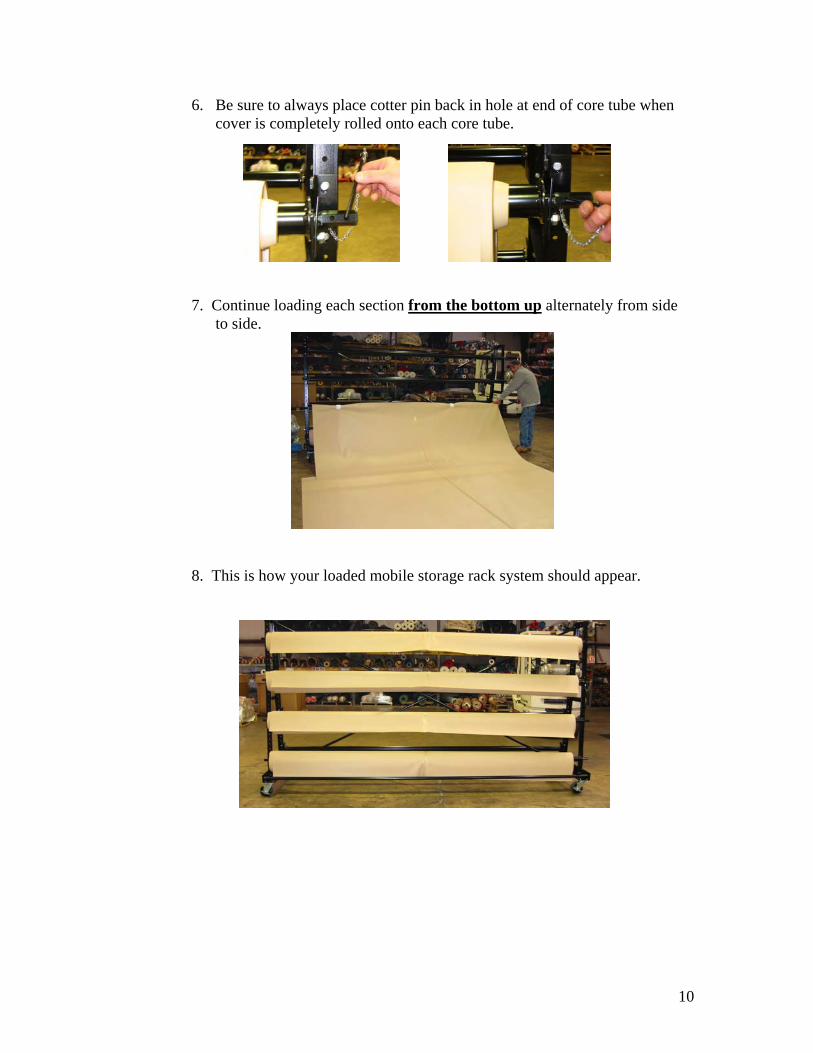
6. Be sure to always place cotter pin back in hole at end of core tube when cover is completely rolled onto each core tube.
7. Continue loading each section from the bottom up alternately from side to side.
8. This is how your loaded mobile storage rack system should appear.
10
Unloading The Floor Cover
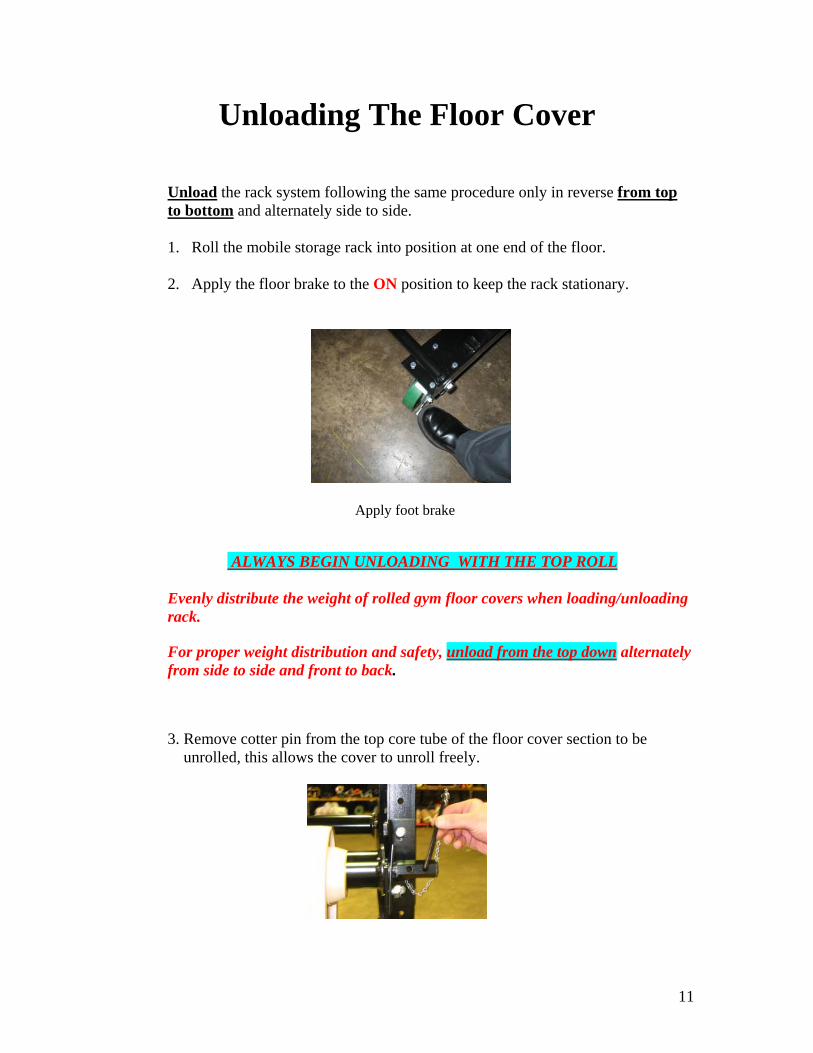
Unload the rack system following the same procedure only in reverse from top to bottom and alternately side to side. 1. Roll the mobile storage rack into position at one end of the floor. 2. Apply the floor brake to the ON position to keep the rack stationary.
Apply foot brake
ALWAYS BEGIN UNLOADING WITH THE TOP ROLL
Evenly distribute the weight of rolled gym floor covers when loading/unloading rack.
For proper weight distribution and safety, unload from the top down alternately
from side to side and front to back.
3. Remove cotter pin from the top core tube of the floor cover section to be unrolled, this allows the cover to unroll freely.
11
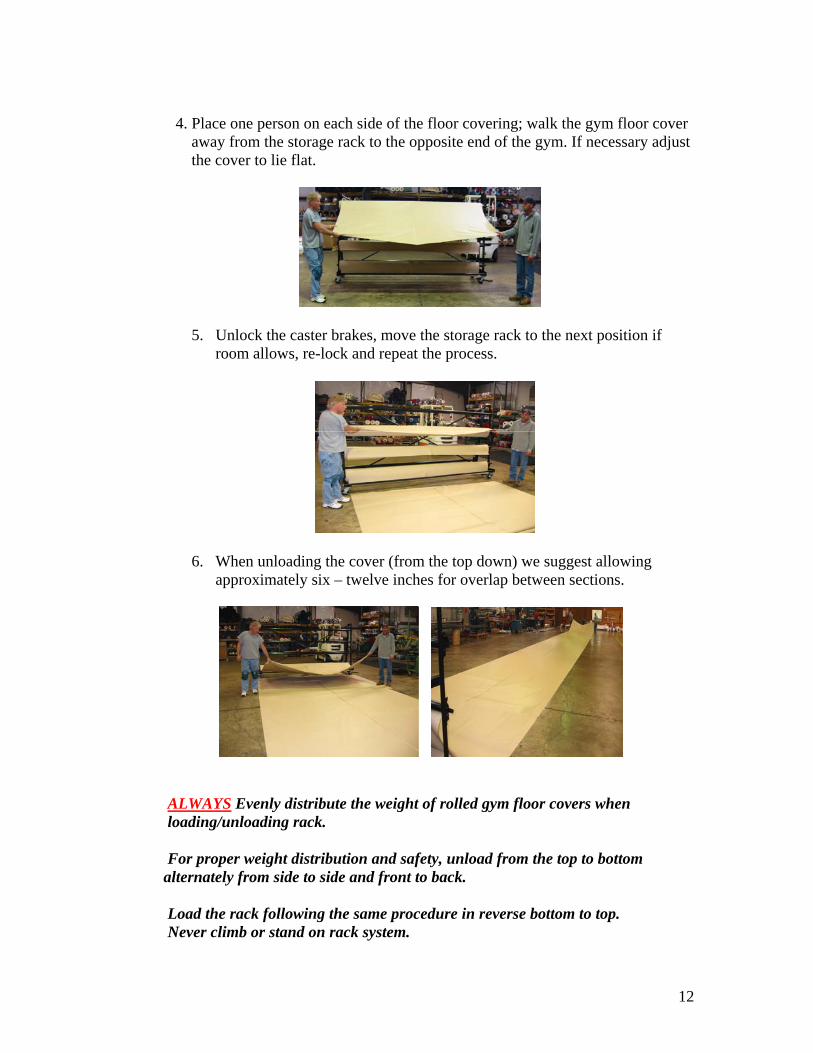
4. Place one person on each side of the floor covering; walk the gym floor cover away from the storage rack to the opposite end of the gym. If necessary adjust the cover to lie flat.
5. Unlock the caster brakes, move the storage rack to the next position if room allows, re-lock and repeat the process.
6. When unloading the cover (from the top down) we suggest allowing approximately six – twelve inches for overlap between sections.
ALWAYS Evenly distribute the weight of rolled gym floor covers when loading/unloading rack.
For proper weight distribution and safety, unload from the top to bottom alternately from side to side and front to back.
Load the rack following the same procedure in reverse bottom to top. Never climb or stand on rack system.
12
Optional Power Winder
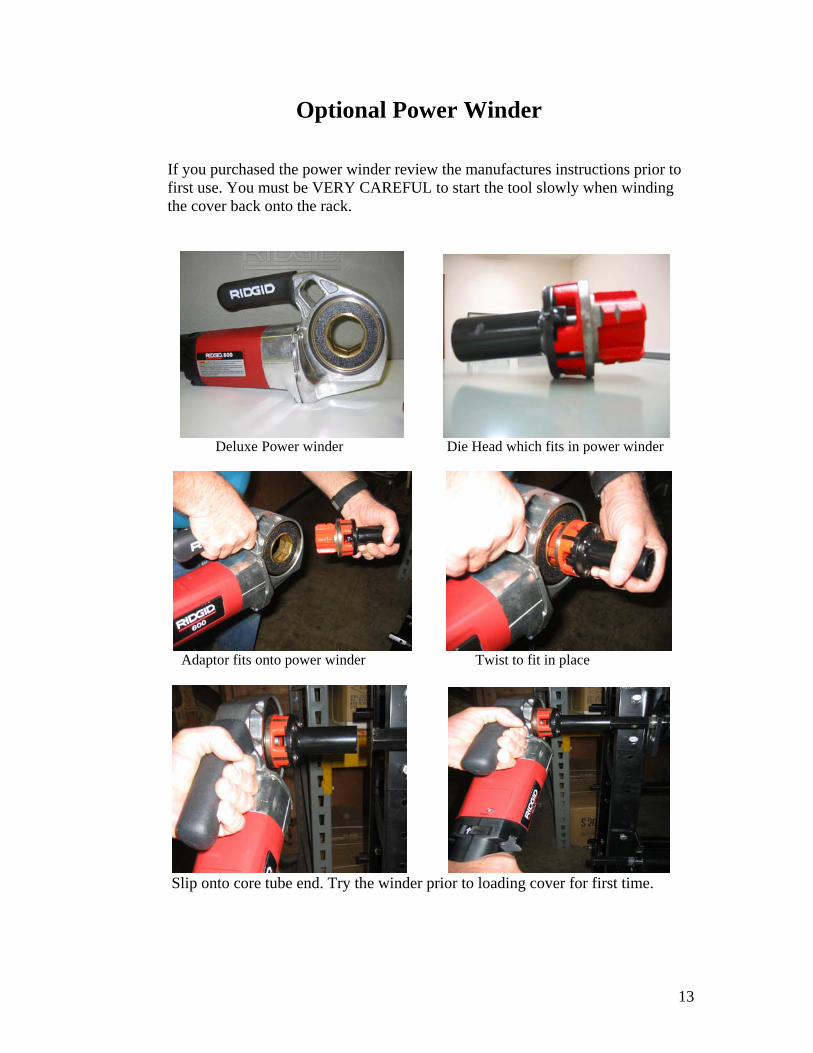
If you purchased the power winder review the manufactures instructions prior to first use. You must be VERY CAREFUL to start the tool slowly when winding the cover back onto the rack.
Deluxe Power winder Die Head which fits in power winder
Adaptor fits onto power winder Twist to fit in place
Slip onto core tube end. Try the winder prior to loading cover for first time.
13