raf drill and ceremonial · ap818 chapter list part one -drill chapter no title subject matter ......
TRANSCRIPT

AP 818 7th Edition
i
RAF DRILL
AND CEREMONIAL
Approved by:
Air Officer Administration Headquarters Personnel and Training Command
200 (Torquay) Squadron ATC Condensed Version

ii
INTRODUCTION AP 818
1. Drill is a powerful aid to discipline. It develops a sense of corporate pride, alertness, precision and readiness to obey orders instantly. Good drill in aircraft is directly fostered by the habit of drilling smartly on parade. Personnel are better prepared for combat and any work they have to do – on the ground or in the air – if fit and mentally alert. Thus, smartness on parade is not only a sign of good discipline, but a basic factor in raising the standard of performance of all Service duties. 2. The immediate reaction to orders shown by highly disciplined personnel derives directly from the performance of carefully conceived close-order exercises. It is this property that will enable a unit to keep cohesion and efficiency under a strain that would normally break it, thus enhancing the fighting unit. 3. This introduction is deliberately the same as in previous editions.

iii
AP818
CHAPTER LIST Part One - Drill
Chapter
No Title Subject Matter
1 Principles Sequence of Instruction / Commands / Timings / Aids to Instruction / Notes for Inspecting Officers
2 Foot Drill At the Halt Lesson Plans with Photographs 3 Foot Drill In Quick Time Lesson Plans with Photographs 4 Foot Drill In Slow Time Lesson Plans with Photographs 5 Arms Drill Lesson Plans with Photographs 6 Sword Drill Introduction / Lesson Plans with Photographs 7 Stick Drill - Basic Stick Drill (Closed) Lesson Plans with Photographs 8 Funeral Drill Lesson Plans with Photographs (Arms & Sword) 9 Colour/Standard Drill Lesson Plans with Photographs
Part Two - Ceremonial
Chapter No
Title Subject Matter
1 Paying Compliments Reasons / Occasions for Saluting / Service Ranks 2 Cheering Tradition / Commands 3 Squad Drill Format / Commands 4 Flight Drill Format / Commands / Diagrams 5 Squadron Drill Format / Commands / Diagrams 6 Wing Drill Format / Commands / Diagrams 7 Parades - General Instructions Parade Ground / The Review / Diagrams Key / Spectators 8 Review of a Flight Format / Commands 9 Review of a Squadron Format / Commands 10 Review of a Wing Format / Commands 11 Guards of Honour Half & Royal Guard Format / Commands / Diagrams 12 Queen’s Colours and Sqn Standards Marching On & Off Parade / Ceremonial in Church 13 Queen’s Colours - Presentation Presentation 14 Squadron Standards - Presentation Presentation 15 Colours & Standards - Handing Over Format for Squadron Reformation and Disbandment 16 The RAF Ensign Handling / Flagstaff / Rank Flags 17 Royal Standards Handling / Ordering 18 Freedom of Entry to a City or Town Initial & Subsequent Parades 19 Service Funerals Planning, Preparation, Ceremonial & Bearer Party Drill 20 Services at Local War Memorials Order of Events
Part Three - Public Duties
Chapter
No Title Subject Matter
1 Stick Drill - Advanced Stick Drill (Open) Lesson Plans with Photographs 2 Sentry Drill Duties of Single & Double Sentries including Patrolling 3 State Ceremonial Street Lining / Carpet Lining / Step Guards 4 Forming Change of Direction by Forming 5 London Public Duties Changing the Guard at Buckingham Palace

viii
DEFINITIONS
ALIGNMENT Any straight line on which a body of personnel is formed, or is to form.
ARMED PARTY An armed party is a party armed with swords, guns,
rifles, sidearms or a party consisting of 2 or more armoured vehicles. Also, a church party is considered an armed party even if arms are not carried.
BLANK FILE An incomplete file. In 2 (or 3) ranks a front rank person
only; in 3 ranks, with front and rear persons only. CHANGE OF POSITION The movement when personnel take up a new
alignment. COLUMN Unit in parallel and successive alignments at a distance
from one another equal to their own frontage. CLOSE COLUMN OF A squadron with its flights in line on parallel and FLIGHTS successive alignments at a fixed distance. CLOSE COLUMN OF A wing with its squadrons in line on parallel and SQUADRONS successive alignments at a fixed distance. CLOSE ORDER The formation of a squad or unit in three ranks, one (3 RANKS) behind the other at a distance of one pace of 30 in/
75cm between ranks. The ranks are termed the “front rank”, “centre rank” and “rear rank”; each person in the centre and rear ranks covering the corresponding person in the front rank. To achieve this position from the “Open Order” the “centre rank” stands fast and the “front rank” and “rear rank” moves.
CLOSE ORDER The formation of a squad or unit in 2 ranks, at a (2 RANKS) distance of 2 paces of 75 cm/30 in between ranks. The
ranks are termed the “front rank” and “rear rank” and each person in the rear rank covers the corresponding person in the front rank. To achieve this position from the “Open Order” the “front rank” stands fast and the “rear rank” moves.
COLUMN OF ROUTE A column of threes with not more than 3 persons
abreast in any part of the column, including officers and supernumeraries. This is the normal formation for personnel marching on a road.
COLUMN OF THREES A succession of personnel standing side by side in
threes, covering.

ix
COVERING The act of one or more personnel or formed bodies being placed directly in rear of another.
DEPTH The space occupied from front to rear by a body of
personnel. DIRECTING FLANK The flank by which units march and dress. DIRECTING BODY The squadron, flight, file or individual responsible for
maintaining direction in a drill movement. DISTANCE The space between personnel or units measured from
front to rear, measured from heel to heel. In the case of units it is measured from the heels of the front rank of one unit to the heels of the front rank of the next unit.
DRESSING The act of taking up alignment correctly. It may be
“normal” at an arms length between individuals or “without intervals” at one elbow distance (with the left hand clenched and placed on top of the left hip).
DRILL The means whereby a body of personnel is controlled
and directed efficiently, through the executive command of one man, towards the attainment of the aim.
ENSIGN 1. The Royal Air Force flag is an ensign (ie The
Royal Air Force Ensign). 2. The officer appointed (usually the most junior) to bear a Queen’s Colour for his unit or formation.
FILE Any person of the front rank together with the personnel covering immediately behind. FLANK Either side of a formed body, as opposed to its front or rear. FLIGHT A sub-unit, 2 or more of which comprise a squadron. Equates in size approximately to a naval or army platoon. FORMATION A number of units grouped together under one
commander. FRONT The direction in which personnel or units are facing or
moving at any given time. FRONTAGE The extent of ground covered laterally by a body or
bodies of personnel.

x
GUARD OF HONOUR A parade unit used to present formal ceremonial
compliments to royal or presidential (by guard not exceeding 100 personnel) and other particularly distinguished (by a guard not exceeding 50 personnel) persons.
GUIDE A person placed on the left and/or right of a line to
maintain direction and alignment. HALF GUARD A colloquial term describing a Guard of Honour of not
more than 50 personnel. INCLINE The movement by which direction is faced or gained to
the front and flank simultaneously. IN FILE A succession of personnel, covering one behind the
other. INTERVAL The lateral space between personnel or units on the
same alignment measured between adjacent flanks. LINE Personnel or units formed on the same alignment. LINE OF SQUADRONS IN A wing with its squadrons in close column of flights at CLOSE COLUMN OF FLIGHTS 10 paces interval between squadrons. MARKER A person placed in position to mark a point where the
flank of a squad or unit is to rest. OPEN ORDER The formation of a unit or squad in 3 ranks, one (3 RANKS) behind the other, at a distance of 3 paces of 30 in (75
cm) between ranks. To achieve this position from “Close Order” the “centre rank” stands fast and the “front rank” and “rear rank” moves.
OPEN ORDER The formation of a unit or squad in 2 ranks, one (2 RANKS) behind the other, at a distance of 3 paces of 30 in (75
cm) between ranks. To achieve this position from “Close Order” the “front rank” stands fast and the “rear rank” moves.
OUTER FLANK The opposite flank to the inner or directing flank. PACE 1. A measured distance on foot.
2. The rate of movement when marching.
PARADE A formation of 2 or more units.

xi
PARADE COMMANDER The officer in actual command of all the personnel on a parade (ground). PATROL A small party of personnel usually commanded by an NCO carrying out some specific duty such as visiting sentries, inspecting an area or building as guards etc. PERAMBULATE Officers walking as individuals or pairs, just off the
parade ground, prior to falling in. PICQUET / PICKET A party of personnel usually commanded by an NCO,
detailed to carry out some specific duty, eg guard, fire picquet etc.
PIVOT FLANK The flank on which a unit pivots when changing
direction. PIVOT GUIDE A guide on a pivot flank of a unit. QUARTER GUARD A ceremonial guard which may be mounted at the
entrance to a unit to pay compliments as required. (The term should not be confused with a Guard of Honour). A Quarter Guard is to consist of one officer, one SNCO and 6 or 8 junior ranks formed up in 2 ranks.
RANK A line of personnel formed up side by side. REVIEW A ceremonial parade mounted for the specific purpose
of honouring a particular distinguished person. ROYAL GUARD A colloquial term used to describe a Guard of Honour
of not more than 100 personnel. SECTION A sub-division of a flight (especially RAF Regiment). SQUAD A small body of personnel formed for drill or working
party. SQUADRON A unit consisting of two or more flights (sub-units).
Equates in size approximately with a naval or army company.
SUB-UNIT The smallest body of personnel under their own officer
or NCO commander, as part of a unit. SUPERNUMERARIES Additional officers and NCOs of a unit who, for parade
purposes are not fulfilling an executive role.
xii
SUPERNUMERARY RANK An extra rank composed of supernumerary officers or SNCOs. The supernumerary rank of NCOs will be 2 paces of 30 in (75 cm) to the rear of the rear rank. That of officers will be three paces of 30 in (75 cm) to the rear of the rear rank.
TO CANT To incline or tilt an object; to set at an angle. TO DRESS To take up a correct alignment. UNIT A group of 2 or more sub-units under a commander. UNIT OF FORMATION The expression used in drill to describe the squadron or
flight on which a change of direction is based. WHEELING A movement by which a body of personnel bring
forward a flank on a fixed or moving pivot. WING A formation consisting of 2 or more squadrons or units.
Equates in size approximately with a naval division or army battalion.

1-1-1
PART 1 - CHAPTER 1
PRINCIPLES
OBJECT OF THE MANUAL 1. The purpose of the manual is to set out the correct procedures for RAF drill and ceremonial. The only drill movements which are to be taught in the Service are those laid down in this manual. Exceptions to this ruling can be made when operating on a Dual or Tri-Service parade when the traditions of the senior Service take precedence. Additionally it may be necessary to modify some of the procedures for ceremonial contained in this publication having regard to the size of the parade area, the number of personnel available and the time allowed for rehearsals. Limited variations to drill movements may be authorised exclusively for use by The Queen’s Colour Squadron. THE INSTRUCTOR 2. Qualities of the Instructor. Drill is exacting and to teach it successfully the instructor must have the following qualities:
a. Patience – never loose your temper. b. Enthusiasm – you must inspire your squad with a will to learn. c. Consistent Attitude – set the standard and do not deviate from it. d. Humanity – understand the squad’s problems. Praise readily but do not become familiar, and never humiliate individual members of the squad. e. Strength of Personality – as a drill instructor you must impress the squad with your personality and always control them fully.
3. Example. Recruits imitate their instructors and it is by example that they will learn most. Therefore:
a. When drilling a squad, stand at Attention. b. When moving, march as you would wish your squad to march. c. When demonstrating, do so accurately and if the movement is with a rifle, use a rifle and nothing else. d. Do not use foul or abusive language. e. Be impeccably turned out. f. Never exaggerate a movement of drill.

1-1-2
SEQUENCE OF INSTRUCTION 4. The following sequence is to be used:
a. Form the Squad. b. Explanation. c. Demonstration. d. Questions. e. Practice, which should be collective, then individual and collective again.
5. Formation of a Squad. Bear 2 factors in mind:
a. Consider the comfort of the squad. Make sure that they are not looking into the sun or are unnecessarily exposed to the elements. b. Consider the formation in which they will learn most quickly. The following is a guide: Use Formation Foot Drill Straight Line/Hollow Square Rifle Exercise Half Circle Saluting at the Halt Three Ranks, Open Order, Inclined to the Right.
6. Explanation. Explain what you are about to teach and why it is necessary.
7. Demonstration. Broken down as follows: a. Complete demonstration, calling out the words of command. b. Demonstration by numbers, pointing out important details. c. Another complete demonstration.
8. Questions. After giving the first demonstration by numbers, ask the squad if they have any questions and do so after each subsequent demonstration by numbers.
9. Practice. After each demonstration by numbers, practise the squad in that movement, checking for faults. Finally, after demonstrating the whole movement, practise the squad judging the time. INSTRUCTIONAL TECHNIQUE 10. To achieve common standards of drill instruction in the Royal Air Force the following instructional techniques are to be used:
a. Regulation Pause. The regulation pause is equal to 2 beats in Quick Time. When spoken in the course of instruction this pause is represented by the words “LEFT RIGHT”.
b. Movements. Parts of a drill movement are to be represented by the word

1-1-3
“ONE” except in the few exceptions detailed in Part 1. SAFETY 11. Before each lesson or drill practice normal safety precautions (NSPs) are to be carried out on rifles. Due regard is to be given to the safe handling of bayonets. THE WORD OF COMMAND 12. Words of Command. All words of command must be clear and powerful since the way in which they are given affects the reaction that they inspire. The word of command is divided into three parts:
a. Introductory. This tells the squad what movements they are about to carry out ie “Into Line”. b. Cautionary. The drawn out and loud reminder to the squad ie “Right”. c. Executive. The high-pitched, sharp command ie “Turn”.
Sometimes there is no need for an introductory word of command ie “For-ward”. The following are examples of the delivery of a word of command: Introductory Cautionary Executive
!
Voice Voice Voice Informative, clear and level. Drawn out, loud and falling. Sudden, sharp and loud. Example 1 - “Into Line” “Right” “Turn”. Example 2 - No introductory command “Squadron” “Halt”. 13. Timings of Words of Command. The table at Annex A shows on which foot the executive word of command is given. The cautionary word of command should be consistently drawn out over about the equivalent of 4 paces in Quick Time. There should be a pause between it and the executive word of command as follows:
a. At the halt – the regulation pause. b. In Quick Time – about four paces. c. In Slow Time – about three paces.
1-1-4
TIMINGS 14. Drill instructors should know the following rates of marching, and lengths of pace:
a. Rates of Marching. The rates of marching are: (1) Quick Time - 116 paces to the minute (2) Slow Time - 65 paces to the minute.
b. Lengths of Pace. The lengths of pace in marching are:
(1) Quick and Slow Time - 30 in (750 mm) (2) Stepping out - 33 in (830 mm) (3) Stepping short - 21 in (530 mm) (4) Side Pace - 12 in (300 mm).
THE PARADE/CONDUCTING WARRANT OFFICER 15. The Parade/Conducting Warrant Officer is responsible for the organisation, planning and detailed rehearsals of a parade. All personnel junior in rank to the Warrant Officer are to stand at the position of attention whilst addressing or being addressed by him. The Warrant Officer is responsible for attending to any unplanned incidents that may occur. The Warrant Officer is privileged to be free-lance at any stage of a parade subject to his appreciation of the circumstances of the moment. For example the Warrant Officer would not initiate the retrieval of a hat or dropped bayonet at the instant of a General Salute. Indeed there may be circumstances in which the Warrant Officer decides to do nothing at all. Great responsibility rests with the Warrant Officer to foster the smooth completion of a parade by discreet and appropriate handling of unplanned incidents.
Annexes: A. Table for Timings and Words of Command. B. Aids to Drill Instruction. C. Notes for Inspecting Officers.

1-1-A-1
AP818 PART 1 CHAPTER 1 ANNEX A
TABLE FOR TIMINGS AND WORDS OF COMMAND
COMMAND EXECUTIVE COMMAND IS GIVEN (In alphabetical order)
(a) (b) About – TURN(quick time) When the left heel strikes the ground About – TURN(slow time) When the left foot is on the ground Break into double time When the right heel strikes the ground Double – MARCH (from quick time) Break into mark time When the left heel strikes the ground Mark – TIME(quick time) Break into mark time When the left foot is on the ground Mark – TIME(slow time) Break into quick time When the right foot strikes the ground Quick – MARCH (from double time) Break into quick time When the right foot is on the ground Quick – MARCH (from slow time) Break into slow time When the left heel strikes the ground Slow – MARCH (from quick time) Change – STEP(quick time) When the right heel strikes the ground Change – STEP(slow time) When the right foot is on the ground (when marching) Change – STEP(quick time) When the right foot strikes the ground Change – STEP(slow time) When the right foot is on the ground (when marking time) Eyes – LEFT/RIGHT/FRONT(quick time) When the left heel strikes the ground Eyes – LEFT/RIGHT/FRONT(slow time) When the right foot is on the ground For – WARD(mark time) When the left foot strikes the ground

1-1-A-2
Squad/Flight – HALT(double time) When the left foot strikes the ground Squad/Flight – HALT(quick time) When the left heel strikes the ground Squad/Flight – HALT(slow time) When the right foot is on the ground Squad/Flight – HALT(mark time) When the left foot strikes the ground Left – TURN(quick time) When the right heel strikes the ground Left – TURN(slow time) When the right foot is on the ground Left – FORM(quick time) When the left heel strikes the ground Left – FORM(slow time) When the left foot is on the ground Quick – MARCH See Note 1 Right – FORM(quick time) When the right heel strikes the ground Right – FORM(slow time) When the right foot is on the ground Right – TURN(quick time) When the left heel strikes the ground Right – TURN(slow time) When the left foot is on the ground To the Left/Right/Front – SALUTE(quick time) When the left heel strikes the ground To the Left/Right/Front – SALUTE(slow time) See Note 2 Slow – MARCH See Note 1 Variations in pace Step – OUT/SHORT(quick time) When the left heel strikes the ground Step – OUT/SHORT(slow time) When the left foot is on the ground Quick – MARCH When the left heel strikes the ground (from step out/short) Slow – MARCH When the left foot is on the ground (from step out/short) Note 1 To move off with a preceding unit the Squadron or Flight Commander must step off in the correct cadence. To achieve this he must give the word of command “Quick” as the left heel of the unit in front strikes the ground and “March” as the right heel strikes the ground. Thus when the unit behind the preceding unit steps off it will be in step. Note 2 Officers Saluting with the sword in Slow Time (The Flourish).

1-1-B-1
AP818 PART 1 CHAPTER 1 ANNEX B
AIDS TO DRILL INSTRUCTION
1. Calling out the Time. Personnel in the early stages of training should call out the time until considered proficient. They must learn to be still when calling out “LEFT RIGHT” for the regulation pause. Calling out the time will enable:
a. Every member of a squad to implement the regulation pause. b. The squad to learn to act together.
2. Time and Pace. Para 14 of this chapter contains the lengths of pace, rates of marching and timings of movements. 3. Mechanical Aids. There are three aids the instructor may use to help obtain accurate and smart drill. They are as follows:
a. The Pace Stick. The Pace Stick is used to gauge the correct length of pace and to measure the distance between ranks. It is a difficult instrument to wield and perfection in the art of turning it, requires constant practice. The instructor should march beside the leading person of the squad, with the stick open and turning to control the length of pace. The instructor should periodically check the length of pace by marching behind the squad with the Pace Stick open and turning (see separate chapters). b. The Metronome. This gives an accurate check on the rate of marching and on the timing of rifle exercises. It can be set to any number of beats per-minute and should be used frequently to maintain uniformity of instruction with regard to timings. The electronic metronome with an LCD readout is replacing the swinging arm version.

1-1-B-2
c. The Drum. When foot drill and rifle exercises are being taught by numbers at the halt, a drummer may be used by the instructor to provide the cue for a movement. Three scenarios are as follows:
(1) The drummer is stationed behind the squad and will judge the regulation pause between the cautionary word of command and the drum-tap. A specimen word of command would sound like this: “RIFLE EXERCISES, BY NUMBERS, WORKING WITH THE DRUM, SHOULDER ARMS – TAP!” “SQUAD – TAP!” “SQUAD – TAP!”.
The squad will react more sharply to the tap of the drum than they would to the instructor’s word of command. (2) When foot and rifle exercises are being done at the halt whilst judging the time, station a drummer to the rear of the squad. The drummer should have a metronome (set at 40) and should be far enough behind the squad for them not to hear the tick of the metronome. A specimen word of command would sound like this: “RIFLE EXERCISES, WORKING WITH THE DRUM, SLOPE – TAP!” “TAP!” “TAP!” The drummer will judge the regulation pause between the cautionary word of command and his first tap, if this is possible. Thereafter he will tap the drum on every beat of the metronome for the same number of times as there are movements. (3) To beat the rate of marching, set the metronome to the rate required. The drummer now beats in time with the metronome and the squad stands still and listens. When the instructor is ready to practise his squad he must have the drummer beating the time to the metronome and then give: “QUICK MARCH”.

1-1-C-1
AP818 PART 1 CHAPTER 1 ANNEX C
NOTES FOR INSPECTING OFFICERS INTRODUCTION 1. Before drill personnel should be inspected to ensure that:
a. They are dressed correctly. b. Their clothing and equipment is serviceable and clean. c. Their weapons are clean and cared for. d. They are alert and healthy.
2. Personnel should be at Attention when inspected, rifles in the shoulder and with bayonets fixed. 3. The Inspecting Officer, Warrant Officer or NCO should be accompanied by the next most senior NCO who should note down any observations made by the Inspecting Officer. An NCO should be posted in front of the squad to see that they stand still and look to their front. GENERAL IMPRESSION 4. First of all look at the Squad:
a. Are they standing correctly to Attention? b. Are they dressing and covering off correctly?
5. Take a quick look at each individual:
a. Are personnel clean and shaved? b. Are they standing well? c. Are uniforms clean and pressed? Do they fit?
DETAIL 6. Head.
a. No 1 HD Hat. The No 1 HD Hat is to be clean and is to be worn square on the head with the front of the peak at a level just above the eyes. The cap badge and peak are to be clean. The black mohair band is to be clean and worn with the stitching in the front centre of the cap, in line with the badge.
1-1-C-2
b. Beret. The beret is to be clean and worn so that the band is horizontal around the head and 1 in (2.5 cm) above the eyebrows. Loose cap material is to be drawn down to the right so that the badge is clearly displayed in a position vertically above the left eye. Loose ends of the draw cord are to be secured inside the head band. c. Hair. The hair of the head is to be kept well cut and trimmed. Women’s hair is not to fall below the bottom edge of the back of the jacket collar or show below the peak or front of the cap. Beard or whiskers are not to be worn except by personnel with specific permission in writing on medical grounds; personnel so authorised are not normally to appear on ceremonial parades. If a moustache is worn, the upper lip is to be entirely unshaven and the moustache trimmed neatly for length; exaggerated or “handlebar” whiskers are not permitted. d. Glasses. Glasses may be worn on parade with the exception of state ceremonial parades.
7. Body.
a. Neckwear. The collar is to be clean and pressed. b. Tie. The tie is to be tied as a full Windsor knot. It is not to be tucked in to the shirt-front nor display any pin, brooch or fastener which can be seen. c. Buttons. All buttons are to be sewn on securely so that the crown is uppermost and the eagle horizontal. d. Badges. Rank and other authorised badges are to be worn in accordance with current dress regulations. e. Medals/Medal Ribbons. When orders, decorations, medals or medal ribbons are worn they are to be appropriately worn and correctly positioned in accordance with current dress regulations. Ribbons are to be clean and in good repair. Personnel should be discouraged from burnishing medals as this destroys the minting; it is sufficient that the metal parts be carefully cleaned with mild soapy water. f. Pockets. All pockets are to be worn flat and emptied of bulky objects. Press studs on tunic breast pockets are to be securely fastened. g. Trinkets. No trinkets, ear-rings or unauthorised badges are to be worn on parade. Plain wedding rings may be worn. h. White Ceremonial Belt. The belt is to be fitted so that it will not be pulled down by a bayonet or allow the jacket to ride up underneath it during a parade. The buckle is to be in line with the centre of the body, correctly fastened and polished, when made of brass. The belt may have to have a looser fit on female personnel to avoid distorting the uniform jacket.
1-1-C-3
i. Bayonet. When carried, the bayonet is to be clean, with the scabbard scrubbed white and worn on the left side of the body over the left buttock. Brass components are to be polished. j. Trousers. The trousers are to be pressed correctly and braced so that they break on the second lace hole from the front of the shoe or boot. k. Footwear. Boots and shoes are to be clean and in good repair, laced straight across and laces neatly tied.
8. Rifles. When rifles are to be inspected, the Inspecting Officer is to ensure that:
a. The exterior of the rifle is clean and free from rust. b. The magazine and action are clear and in good order. c. The SUSAT is covered when fitted. d. No parts of the rifle are loose or damaged. e. The barrel is to be cleaned and oiled and free from obstruction.
9. Mourning Bands. When mourning bands are worn they are to be of black crepe, 3¼ in (8.3 cm) wide, and are to be secured midway between the point of the elbow of the left arm and the shoulder. See QR J196. SOME DO’S AND DON’TS FOR INSPECTING OFFICERS 10. Do:
a. Be consistent and impersonal. b. Be decisive and tell the Warrant Officer or NCO who is accompanying you the action that you require. c. Give praise readily.
11. Do not:
a. Make it a battle between you and them. b. Allow the Warrant Officer or NCO to touch personnel on parade without first stating: “I am going to touch you because………….” c. Ridicule or humiliate individual members of the squad. d. Spend a long time in front of each person.
1-1-C-4
e. Allow those accompanying you to inspect for you. f. Point vaguely at things and expect them to vanish or change colour.

1-2-1
PART 1 - CHAPTER 2
FOOT DRILL AT THE HALT
CONTENTS
LESSON
No TITLE PAGE No
1 The Stand Easy 1-2-2 2 Stand At Ease 1-2-6 3 Attention 1-2-10 4 Left Turn At The Halt 1-2-15 5 Right Turn At The Halt 1-2-21 6 About Turn At The Halt 1-2-27 7 Left Incline At The Halt 1-2-33 8 Right Incline At The Halt 1-2-39 9 To The Front Salute At the Halt 1-2-45 10 To The Left/Right Salute At The Halt 1-2-51 11 The Fall out/Dismiss At The Halt 1-2-57 12 An Officer On Parade – Dismiss 1-2-62 13 Right Dress/Left Dress and Eyes Front 1-2-68 14 Dressing Without Intervals 1-2-74 15 Open/Close Order March 1-2-80 16 Paces Forward or Rearward March 1-2-84 17 Paces Sideways March 1-2-87 18 The Formation of a Squad/Flight 1-2-91 19 Sizing of a Squad/Flight 1-2-95
1-2-2
LESSON 1 – THE STAND EASY INSTRUCTOR’S NOTES Aim To Teach the Position of the Stand Easy. Timings One 10 minute period. Method A basic outdoor or indoor instructional lesson. Explain the EXECUTION of the movements and emphasise the
POINTS TO NOTE, as under column headings below. Dress & Stores Clean Working Dress. Preparation Select an area on the parade square or any area of hard ground or indoor equivalent. CONDUCT OF LESSON A. PRELIMINARIES. Squad Formation The squad stood in a straight line. Revision Nil. Spoken Introduction To introduce you to foot drill the first position we will cover will be the Stand Easy. The reason this
movement is taught is to enable an individual or a body of personnel to learn the basic position from which all other drill movements originate.
1-2-3
B. COMPLETE DEMONSTRATION. INSTRUCTOR EXECUTION POINTS TO NOTE The instructor is to give a complete demonstration: INSTRUCTOR STAND EASY.
1. There is one part to this movement.
2. There is no timing for this movement.
FOR THE PURPOSE OF INSTRUCTION YOU WILL LEARN THIS AS ONE MOVEMENT.
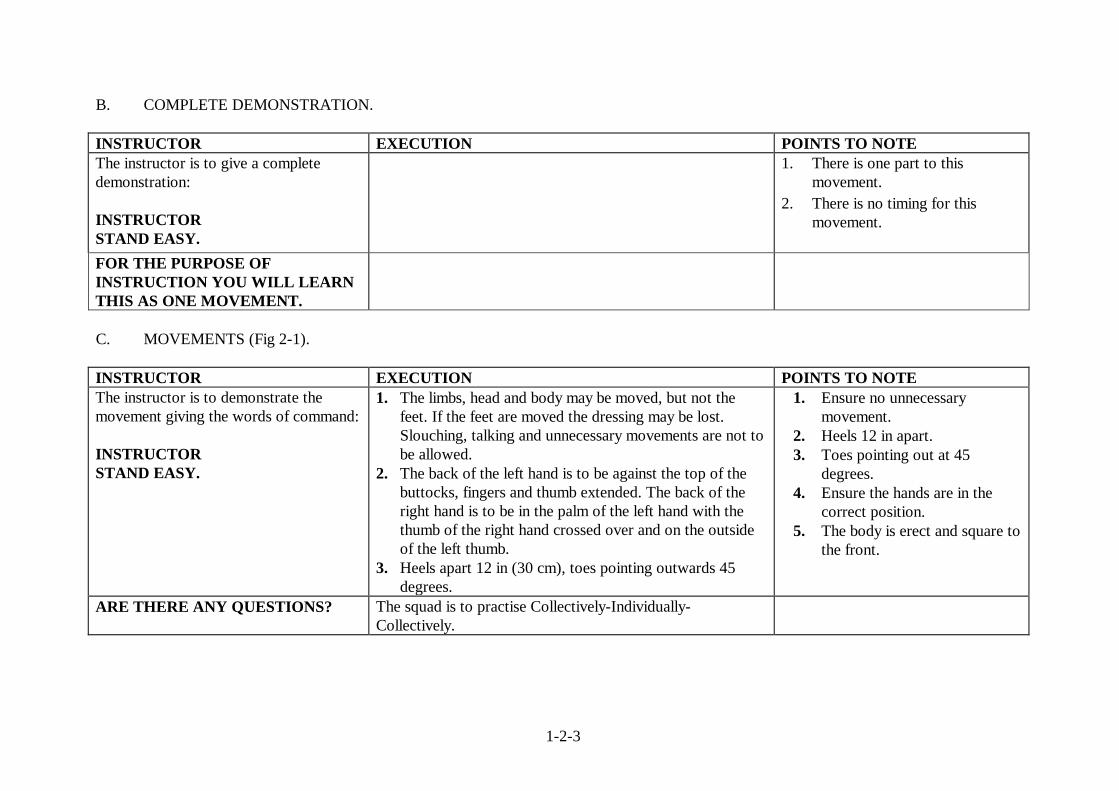
C. MOVEMENTS (Fig 2-1). INSTRUCTOR EXECUTION POINTS TO NOTE The instructor is to demonstrate the movement giving the words of command: INSTRUCTOR STAND EASY.
1. The limbs, head and body may be moved, but not the feet. If the feet are moved the dressing may be lost. Slouching, talking and unnecessary movements are not to be allowed.
2. The back of the left hand is to be against the top of the buttocks, fingers and thumb extended. The back of the right hand is to be in the palm of the left hand with the thumb of the right hand crossed over and on the outside of the left thumb.
3. Heels apart 12 in (30 cm), toes pointing outwards 45 degrees.
1. Ensure no unnecessary movement.
2. Heels 12 in apart. 3. Toes pointing out at 45
degrees. 4. Ensure the hands are in the
correct position. 5. The body is erect and square to
the front.
ARE THERE ANY QUESTIONS? The squad is to practise Collectively-Individually-Collectively.

1-2-4
D. FINAL DEMONSTRATION (Fig 2-1). INSTRUCTOR EXECUTION POINTS TO NOTE The instructor is to give a final and complete demonstration: INSTRUCTOR STAND EASY.
ARE THERE ANY QUESTIONS? The squad is to practise Collectively-Individually-Collectively.
E. END OF LESSON DRILLS. INSTRUCTOR EXECUTION POINTS TO NOTE Reform the squad in Close Formation of Threes and confirm by collective practise: SQUAD STAND EASY.
Students to execute the movement. 1. Make any corrections where necessary.

1-2-5
Front View Rear View
Fig 2-1 Fig 2-1
THE STAND EASY

1-2-6
LESSON 2 – THE STAND AT EASE INSTRUCTOR’S NOTES
Aim To Teach the Stand At Ease. Timings One 10 minute period. Method A basic outdoor or indoor instructional lesson. Explain the EXECUTION of the movements and emphasise
the POINTS TO NOTE, as under column headings below. Dress & Stores Clean Working Dress. Preparation Select an area on the parade square or any area of hard ground, or indoor equivalent. CONDUCT OF LESSON
A. PRELIMINARIES.
Squad Formation The squad stood properly at Stand Easy in a straight line. Revision Stand Easy. Spoken Introduction The next stage in foot drill is the Stand At Ease. The reason this movement is taught is to enable an
individual or a body of personnel to learn the basic position from which all other drill movements originate.

1-2-7
B. COMPLETE DEMONSTRATION.
INSTRUCTOR EXECUTION POINTS TO NOTE The instructor is to give a complete demonstration of the movement: INSTRUCTOR FOOT DRILL JUDGING THE TIME SQUAD.
On the execution of the movement the instructor is to call out: ONE.
1. There is one part to this movement.
FOR THE PURPOSE OF INSTRUCTION YOU WILL LEARN THIS AS ONE MOVEMENT.
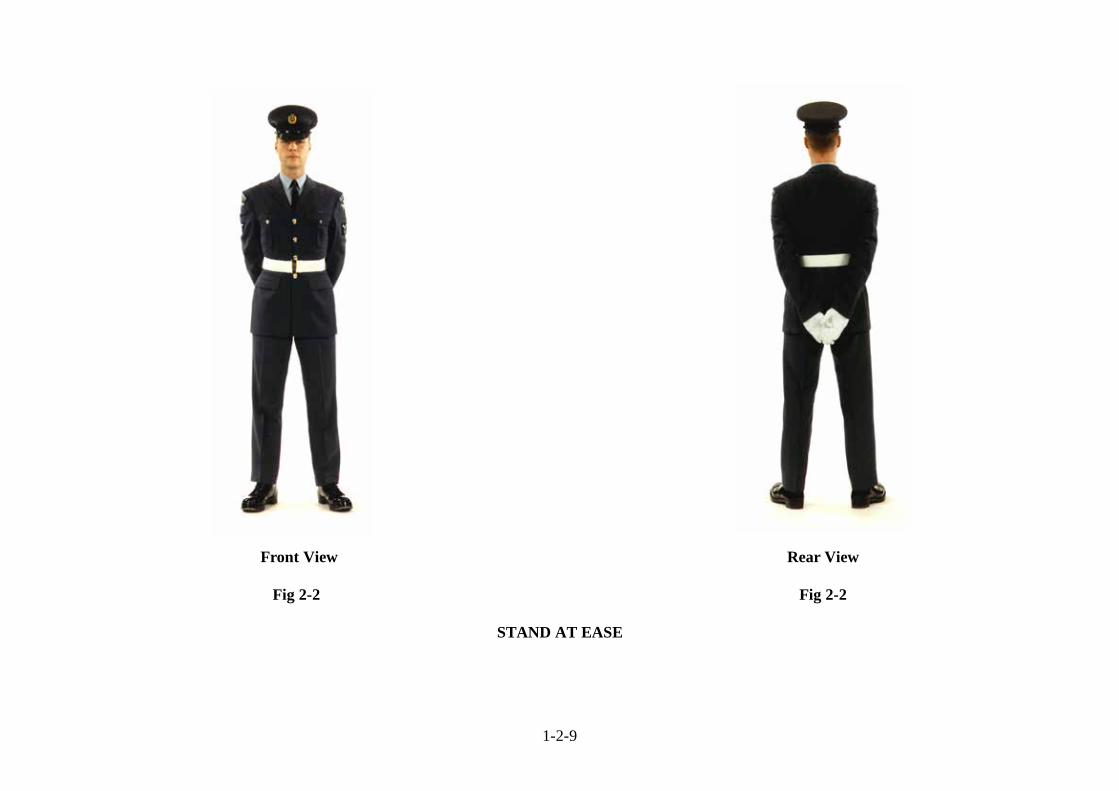
C. MOVEMENTS (Fig 2-2). INSTRUCTOR EXECUTION POINTS TO NOTE The instructor is to demonstrate the movement giving the words of command: INSTRUCTOR ONE.
1. The body is braced with the weight equally over both legs, which are braced.
2. The arms are straight and forced to their fullest extent down behind the back.
3. The back of the right hand is in the palm of the left hand, with the fingers straight and extended.
4. The thumb of the right hand is crossed over the left.
1. Arms to the rear at their fullest extent.
2. Both knees are braced. 3. The body is erect and square to the
front.
ARE THERE ANY QUESTIONS? The squad is to practise Collectively-Individually-Collectively.
1-2-8
D. FINAL DEMONSTRATION (Fig 2-2). INSTRUCTOR EXECUTION POINTS TO NOTE The instructor is to give a final and complete demonstration: INSTRUCTOR FOOT DRILL JUDGING THE TIME SQUAD.
On the execution of the movement the instructor is to call out: ONE.
ARE THERE ANY QUESTIONS? The squad is to practise Collectively-Individually-Collectively.
E. END OF LESSON DRILLS. INSTRUCTOR EXECUTION POINTS TO NOTE Reform the squad in Close Formation of Threes and confirm by collective practise: FOOT DRILL JUDGING THE TIME SQUAD.
Students to execute the movement and call out the timing: ONE.
1. Make any corrections where necessary.
1-2-9
Front View Rear View
Fig 2-2 Fig 2-2
STAND AT EASE

1-2-10
LESSON 3 – ATTENTION INSTRUCTOR’S NOTES Aim To Teach the Position of Attention. Timings One 10 minute period. Method A basic outdoor or indoor instructional lesson. Explain the EXECUTION of the movements and emphasise
the POINTS TO NOTE, as under column headings below. Dress & Stores Clean Working Dress. Preparation Select an area on the parade square or any area of hard ground or indoor equivalent. CONDUCT OF LESSON A. PRELIMINARIES. Squad Formation The squad stood At Ease in a straight line. Revision Stand At Ease. Spoken Introduction The next stage in foot drill is the Attention from the position of Stand At Ease. The reason this
movement is taught is to enable an individual or a body of personnel to learn the basic position from which all drill movements originate.
1-2-11
B. COMPLETE DEMONSTRATION. INSTRUCTOR EXECUTION POINTS TO NOTE The instructor is to give a complete demonstration of the movement: INSTRUCTOR FOOT DRILL JUDGING THE TIME SHUN.
On the execution of the movement the instructor is to call out: ONE.
1. There is one part to this movement.
FOR THE PURPOSE OF INSTRUCTION YOU WILL LEARN THIS AS ONE MOVEMENT.

1-2-12
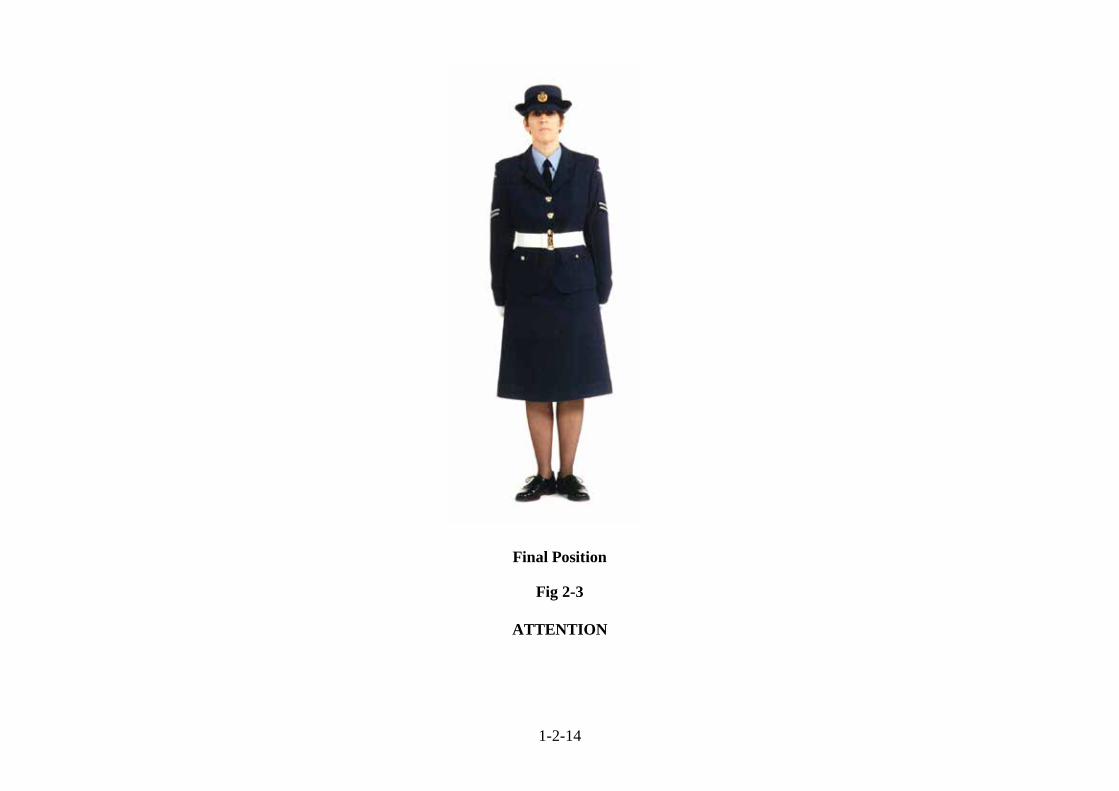
C. MOVEMENTS (Fig 2-3). INSTRUCTOR EXECUTION POINTS TO NOTE The instructor is to demonstrate the movement giving the words of command: INSTRUCTOR ONE.
1. Whilst keeping the right foot still and the leg braced, bend the left knee raising the thigh parallel to the ground. Bring the left foot smartly into a position alongside the right foot.
2. At the same time pull the arms to the side of the body by the shortest route. 3. The heels are to be together in line. The feet are turned outwards at an angle of
approximately 45 degrees. The knees are straight and the weight of the body is balanced on both feet.
4. The body is erect and is evenly carried over the thighs. The shoulders are level and square to the front, drawn downwards and backwards without strain or stiffness so as bring the chest to its natural position.
5. The arms are to be braced from the shoulders. The wrists are to be straight and the palms of the hands are to be turned towards the thighs. The fingers are to be lightly clenched and the thumbs are to be to the front, touching the forefingers. The thumbs and tips of the fingers are to rest lightly on the thighs with the thumb on the side seam of the trousers or skirt.
6. The neck is to be erect, the neck and eyes are to be square to the front. The eyes are to look straight to the front (except when an individual is being personally addressed when he/she is to look at the person addressing him/her, without turning the head). Breathing is not to be restricted and no part of the body is to be stiff, tense or strained. The mouth is to be closed.
7. The position of Attention is one of alertness in readiness for a word of command. 8. Unless stated, all drill movements follow from the position of Attention. 9. On the execution of this movement the squad is to call out: ONE.
1. The left foot comes through the bent knee position, the thigh is brought to a position parallel to the ground.
2. The body is braced and the shoulders pulled back and down.
3. Keep head and eyes steady
4. The wrists are locked and the hands clenched, with the thumbs on the seam of the trousers or skirt, the backs of the fingers touching the thigh.
5. Feet and body are square to the front, heels together, toes pointing out at 45 degrees.

1-2-13
6. The body is erect and square to the front.
ARE THERE ANY
QUESTIONS?
The squad is to practise Collectively-Individually-Collectively.
D. FINAL DEMONSTRATION (Figs 2-3). INSTRUCTOR EXECUTION POINTS TO NOTE The instructor is to give a final and complete demonstration: INSTRUCTOR – SHUN.
On the execution of the movement the instructor is to call out: ONE.
ARE THERE ANY QUESTIONS? The squad is to practise Collectively-Individually-Collectively.
E. END OF LESSON DRILLS. INSTRUCTOR EXECUTION POINTS TO NOTE Reform the squad in Close Formation of Threes and confirm by collective practise: FOOT DRILL JUDGING THE TIME SQUAD SHUN.
Students to execute the movement and call out the timing: ONE.
1. Make any corrections where necessary.
1-2-14
Final Position
Fig 2-3
ATTENTION

1-2-15
LESSON 4 - LEFT TURN AT THE HALT INSTRUCTOR’S NOTES
Aim To teach the left turn at the Halt. Timings One 20 minute period. Method A basic outdoor or indoor instructional lesson. Explain the EXECUTION of the movements and emphasise
the POINTS TO NOTE, as under column headings below. Dress & Stores Clean Working Dress. Preparation Select an area on the parade square or any area of hard ground, or indoor equivalent. CONDUCT OF LESSON
A. PRELIMINARIES.
Squad Formation The squad stood properly to Attention in a straight line. Revision The Attention. Spoken Introduction The next stage in foot drill is the Left Turn at the Halt. The reason this movement is taught is to enable
an individual or a body of personnel to turn through an angle of 90 degrees to the left, in a smart, uniform manner.

1-2-16
B. COMPLETE DEMONSTRATION.
INSTRUCTOR EXECUTION POINTS TO NOTE The instructor is to give a complete demonstration of the movement: INSTRUCTOR FOOT DRILL JUDGING THE TIME LEFT TURN.
On the execution of the movement the instructor is to call out: ONE LEFT - RIGHT/ONE.
1. There are two parts to this movement.
FOR THE PURPOSE OF INSTRUCTION THIS MOVEMENT IS BROKEN DOWN INTO TWO PARTS.
1-2-17
C. MOVEMENTS.
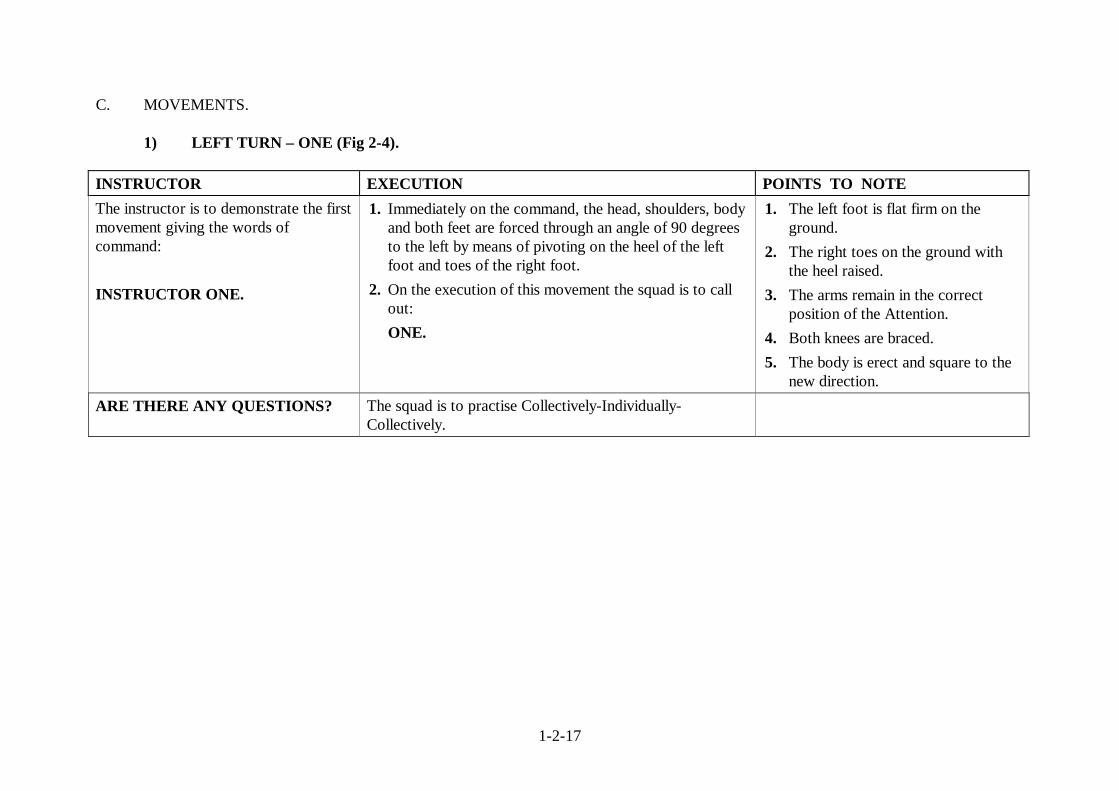
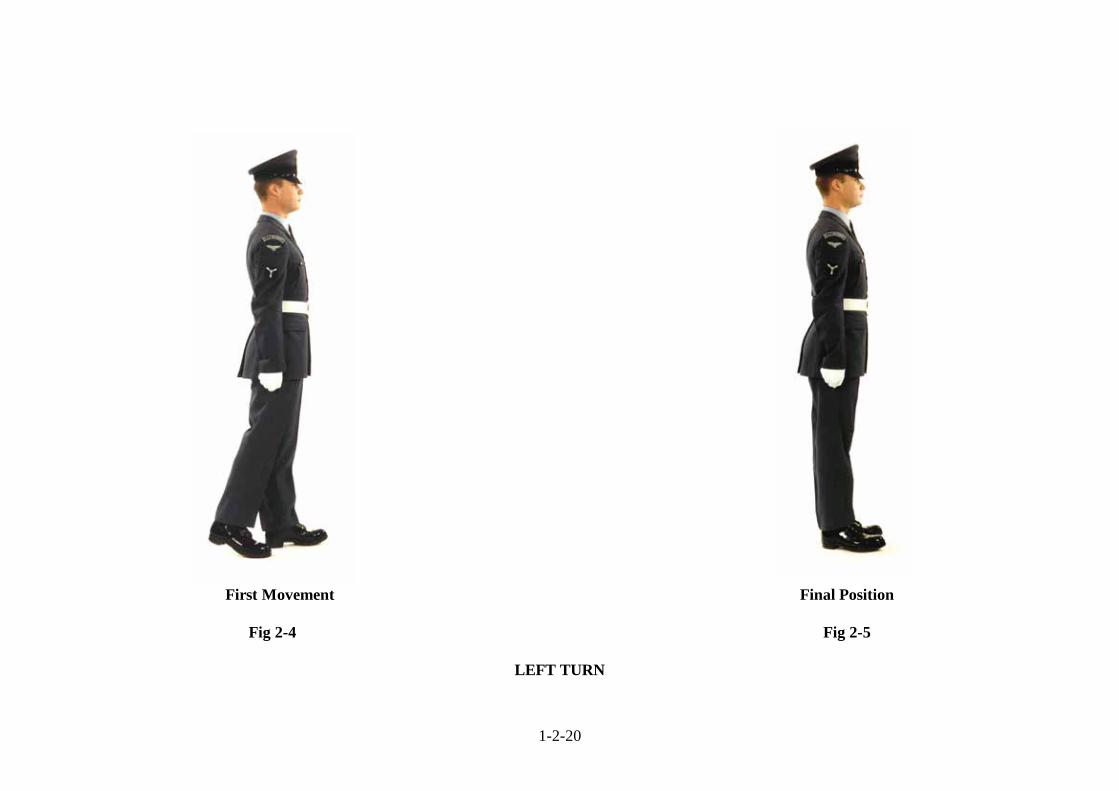
1) LEFT TURN – ONE (Fig 2-4). INSTRUCTOR EXECUTION POINTS TO NOTE The instructor is to demonstrate the first movement giving the words of command: INSTRUCTOR ONE.
1. Immediately on the command, the head, shoulders, body and both feet are forced through an angle of 90 degrees to the left by means of pivoting on the heel of the left foot and toes of the right foot.
2. On the execution of this movement the squad is to call out:
ONE.
1. The left foot is flat firm on the ground.
2. The right toes on the ground with the heel raised.
3. The arms remain in the correct position of the Attention.
4. Both knees are braced. 5. The body is erect and square to the
new direction. ARE THERE ANY QUESTIONS? The squad is to practise Collectively-Individually-
Collectively.

1-2-18
2) LEFT TURN – TWO (Fig 2-5).
INSTRUCTOR EXECUTION POINTS TO NOTE The instructor is to demonstrate the second movement giving the words of command: INSTRUCTOR ONE.
1. Immediately on the command, the right leg is bent in front of the body so that the thigh is parallel to the ground with the right foot hanging naturally below the knee. The foot is then placed down beside the left foot at the correct position of Attention.
2. On the execution of this movement the squad is to call out:
ONE.
1. The body is now in the correct position of Attention facing its new direction.
2. The arms are at the correct position of the Attention.
3. The feet are at 45 degrees with the heels together.
4. The body is erect and square to the new direction.
ARE THERE ANY QUESTIONS? The squad is to practise Collectively-Individually-
Collectively.

1-2-19
D. FINAL DEMONSTRATION (Fig 2-5). INSTRUCTOR EXECUTION POINTS TO NOTE The instructor is to give a final and complete demonstration: INSTRUCTOR FOOT DRILL JUDGING THE TIME LEFT TURN.
On the execution of the movement the instructor is to call out: ONE LEFT - RIGHT/ONE.
ARE THERE ANY QUESTIONS? The squad is to practise Collectively-Individually-Collectively.
E. END OF LESSON DRILLS. INSTRUCTOR EXECUTION POINTS TO NOTE Reform the squad in Close Formation of Threes and confirm by collective practise: FOOT DRILL JUDGING THE TIME MOVE TO THE LEFT LEFT TURN.
Students to execute the movement and call out the timing: ONE LEFT - RIGHT/ONE.
1. Make any corrections where necessary.
1-2-20
First Movement Final Position
Fig 2-4 Fig 2-5
LEFT TURN
1-2-21
LESSON 5 - RIGHT TURN AT THE HALT INSTRUCTOR’S NOTES
Aim To teach the Right Turn at the Halt. Timings One 20 minute period. Method A basic outdoor or indoor instructional lesson. Explain the EXECUTION of the movements and emphasise
the POINTS TO NOTE, as under column headings below. Dress & Stores Clean Working Dress. Preparation Select an area on the parade square or any area of hard ground, or indoor equivalent.
CONDUCT OF LESSON
A. PRELIMINARIES.
Squad Formation The squad stood properly to Attention in a straight line. Revision Left Turn at the Halt. Spoken Introduction The next stage in foot drill is the Right Turn at the Halt. The reason this movement is taught is to
enable an individual or a body of personnel to turn through an angle of 90 degrees to the right, in a smart, uniform manner.
1-2-22
B. COMPLETE DEMONSTRATION.
INSTRUCTOR EXECUTION POINTS TO NOTE The instructor is to give a complete demonstration of the movement: INSTRUCTOR FOOT DRILL JUDGING THE TIME RIGHT TURN.
On the execution of the movement the instructor is to call out: ONE LEFT - RIGHT/ONE.
1. There are two parts to this movement.
FOR THE PURPOSE OF INSTRUCTION THIS MOVEMENT IS BROKEN DOWN INTO TWO PARTS.

1-2-23
C. MOVEMENTS.
1) RIGHT TURN – ONE (Fig 2-6).
INSTRUCTOR EXECUTION POINTS TO NOTE The instructor is to demonstrate the first movement giving the words of command: INSTRUCTOR ONE.
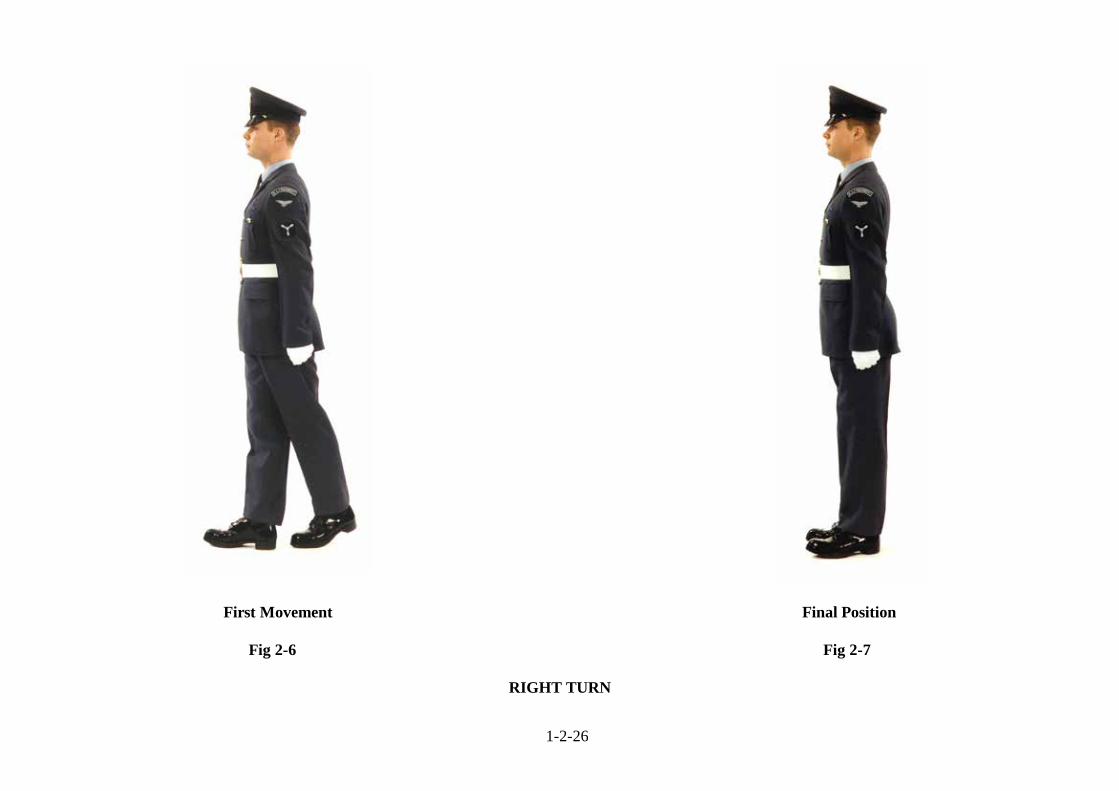
1. Immediately on the command, the head, shoulders, body and right foot are forced through an angle of 90 degrees to the right by means of pivoting on the heel of the right foot and the toes of the left.
2. On the execution of this movement the squad is to call out:
ONE.
1. The right foot is flat firm on the ground.
2. The left toes on the ground with the heel raised.
3. The arms are in the correct position of the Attention.
4. Both knees are braced. 5. The body is erect and square to the
new direction. ARE THERE ANY QUESTIONS? The squad is to practise Collectively-Individually-
Collectively.

1-2-24
2) RIGHT TURN – TWO (Fig 2-7). INSTRUCTOR EXECUTION POINTS TO NOTE The instructor is to demonstrate the second movement giving the words of command: INSTRUCTOR ONE.
1. Immediately on the command, the left leg is bent in front of the body so that the thigh is parallel to the ground with the left foot hanging naturally below the knee.
2. The foot is then placed down beside the right foot at the correct position of Attention.
3. On the execution of this movement the squad is to call out:
ONE.
1. The body is now in the correct position of Attention facing its new direction.
2. The arms are at the correct position of Attention, the thigh being brought to a position parallel to the ground.
3. The body is erect and square to the new direction.
ARE THERE ANY QUESTIONS? The squad is to practise Collectively-Individually-Collectively.
D. FINAL DEMONSTRATION (Fig 2-7). INSTRUCTOR EXECUTION POINTS TO NOTE The instructor is to give a final and complete demonstration: INSTRUCTOR FOOT DRILL JUDGING THE TIME RIGHT TURN.
On the execution of the movement the instructor is to call out: ONE LEFT - RIGHT/ONE.
ARE THERE ANY QUESTIONS? The squad is to practise Collectively-Individually- Collectively.

1-2-25
E. END OF LESSON DRILLS. INSTRUCTOR EXECUTION POINTS TO NOTE Reform the squad in Close Formation of Threes and confirm by collective practise: FOOT DRILL JUDGING THE TIME MOVE TO THE RIGHT RIGHT TURN.
Students to execute the movement and call out the timing: ONE LEFT - RIGHT/ONE.
1. Make any corrections where necessary.
1-2-26
First Movement Final Position
Fig 2-6 Fig 2-7
RIGHT TURN
1-2-27
LESSON 6 - THE ABOUT TURN AT THE HALT INSTRUCTOR’S NOTES
Aim To teach the About Turn at the Halt. Timings One 20 minute period. Method A basic outdoor or indoor instructional lesson. Explain the EXECUTION of the movements and emphasise
the POINTS TO NOTE, as under column headings below. Dress & Stores Clean Working Dress. Preparation Select an area on the parade square or any area of hard ground, or indoor equivalent. CONDUCT OF LESSON.
A. PRELIMINARIES.
Squad Formation The squad stood properly to Attention in a straight line. Revision Attention from Stand Easy and Stand At Ease. Spoken Introduction The next stage in foot drill is the About Turn at the Halt. The reason this movement is taught is to
enable an individual or a body of personnel to turn through an angle of 180 degrees to the right, in a smart, uniform manner.

1-2-28
B. COMPLETE DEMONSTRATION.
INSTRUCTOR EXECUTION POINTS TO NOTE The instructor is to give a complete demonstration of the movement: INSTRUCTOR FOOT DRILL JUDGING THE TIME ABOUT TURN.
On the execution of the movement the instructor is to call out: ONE LEFT – RIGHT/ONE.
1. There are two parts to this movement.
FOR THE PURPOSE OF INSTRUCTION THIS MOVEMENT IS BROKEN DOWN INTO TWO PARTS.

1-2-29
C. MOVEMENTS.
1) ABOUT TURN – ONE (Fig 2-8).
INSTRUCTOR EXECUTION POINTS TO NOTE The instructor is to demonstrate the first movement giving the words of command: INSTRUCTOR ONE.
1. Immediately on the command, the head, shoulders, body and right foot is forced through an angle of 180 degrees to the right by means of pivoting on the heel of the right foot and the toes of the left.
2. On the execution of this movement the squad is to call out:
ONE.
1. The right foot is flat firm on the ground.
2. The toes of the left foot are on the ground with the heel raised.
3. Both knees are braced and the body is erect and square to the new direction.
ARE THERE ANY QUESTIONS? The squad is to practise Collectively-Individually-Collectively
2) ABOUT TURN – TWO (Fig 2-9).
INSTRUCTOR EXECUTION POINTS TO NOTE The instructor is to demonstrate the second movement giving the words of command: INSTRUCTOR ONE.
1. Immediately on the command, the left leg is bent in front of the body so that the thigh is parallel to the ground with the left foot hanging naturally below the knee. The foot is then forced down beside the right foot, into the correct position of Attention.
2. On the execution of this movement the squad is to call out:
ONE.
1. The body is now in the correct position of Attention facing its new direction.
2. The left leg came through the bend the knee position.
3. The body is erect and square to the new direction.
ARE THERE ANY QUESTIONS? The squad is to practise Collectively-Individually-
Collectively.

1-2-30
D. FINAL DEMONSTRATION (Fig 2-9). INSTRUCTOR EXECUTION POINTS TO NOTE The instructor is to give a final and complete demonstration: INSTRUCTOR FOOT DRILL JUDGING THE TIME ABOUT TURN.
On the execution of the movement the instructor is to call out: ONE LEFT - RIGHT/ONE.
ARE THERE ANY QUESTIONS? The squad is to practise Collectively-Individually-Collectively.
E. END OF LESSON DRILLS. INSTRUCTOR EXECUTION POINTS TO NOTE Reform the squad in Close Formation of Threes and confirm by collective practise: FOOT DRILL JUDGING THE TIME ABOUT TURN.
Students to execute the movement and call out the timing: ONE LEFT - RIGHT/ONE.
1. Make any corrections where necessary.

1-2-31
First Movement Final Position
Fig 2-8 Fig 2-9
ABOUT TURN

1-2-33
LESSON 7 - LEFT INCLINE AT THE HALT INSTRUCTOR’S NOTES
Aim To teach the Left Incline at the Halt. Timings One 20 minute period. Method A basic outdoor or indoor instructional lesson. Explain the EXECUTION of the movements and emphasise the
POINTS TO NOTE, as under column headings below. Dress & Stores Clean Working Dress. Preparation Select an area on the parade square or any area of hard ground, or indoor equivalent. CONDUCT OF LESSON.
A. PRELIMINARIES.
Squad Formation The squad stood properly to Attention in a straight line. Revision The About Turn at the Halt. Spoken Introduction The next stage in foot drill is the Left Incline at the Halt. The reason this movement is taught is to enable
an individual or a body of personnel to turn through an angle of 45 degrees to the left, in a smart, uniform manner.
1-2-34
B. COMPLETE DEMONSTRATION.
INSTRUCTOR EXECUTION POINTS TO NOTE The instructor is to give a complete demonstration of the movement: INSTRUCTOR FOOT DRILL JUDGING THE TIME LEFT INCLINE.
On the execution of the movement the instructor is to call out: ONE LEFT - RIGHT/ONE.
1. There are two parts to this movement.
FOR THE PURPOSE OF INSTRUCTION THIS MOVEMENT IS BROKEN DOWN INTO TWO PARTS.

1-2-35
C. MOVEMENTS.
1) LEFT INCLINE – ONE.
INSTRUCTOR EXECUTION POINTS TO NOTE The instructor is to demonstrate the first movement giving the words of command: INSTRUCTOR ONE.
1. Immediately on the command, the head, shoulders, body and both feet are forced through an angle of 45 degrees to the left by means of pivoting on the heel of the left foot and the toes of the right.
2. On the execution of this movement the squad is to call out:
ONE.
1. The left foot is flat firm on the ground the right toes on the ground with the heel raised.
2. The arms are at the correct position of Attention.
3. Both knees are braced. 4. The body is erect and square to the
new direction. ARE THERE ANY QUESTIONS? The squad is to practise Collectively-Individually-
Collectively.

1-2-36
2) LEFT INCLINE – TWO (Fig 2-10). INSTRUCTOR EXECUTION POINTS TO NOTE The instructor is to demonstrate the second movement giving the words of command: INSTRUCTOR ONE.
1. Immediately on the command, the right leg is bent in front of the body so that the thigh is parallel to the ground with the right foot hanging naturally below the knee.
2. The foot is then placed down beside the left foot at the correct position of Attention.
3. On the execution of this movement the squad is to call out:
ONE.
1. The body is now in the correct position of Attention facing its new direction.
2. The arms are in the correct position of Attention.
3. The body is erect and square to the new direction.
ARE THERE ANY QUESTIONS? The squad is to practise Collectively-Individually-Collectively.
1-2-37
D. FINAL DEMONSTRATION (Fig 2-10). INSTRUCTOR EXECUTION POINTS TO NOTE The instructor is to give a final and complete demonstration: INSTRUCTOR FOOT DRILL JUDGING THE TIME LEFT INCLINE.
On the execution of the movement the instructor is to call out: ONE LEFT - RIGHT/ONE.
ARE THERE ANY QUESTIONS? The squad is to practise Collectively-Individually- Collectively.
E. END OF LESSON DRILLS. INSTRUCTOR EXECUTION POINTS TO NOTE Reform the squad in Close Formation of Threes and confirm by collective practise: FOOT DRILL JUDGING THE TIME MOVE TO THE LEFT LEFT INCLINE.
Students to execute the movement and call out the timing: ONE LEFT - RIGHT/ONE.
1. Make any corrections where necessary.

1-2-38
Final Position
Fig 2-10
LEFT INCLINE

1-2-39
LESSON 8 - RIGHT INCLINE AT THE HALT INSTRUCTOR’S NOTES
Aim To teach the Right Incline at the Halt. Timings One 20 minute period. Method A basic outdoor or indoor instructional lesson. Explain the EXECUTION of the movements and emphasise the
POINTS TO NOTE, as under column headings below. Dress & Stores Clean Working Dress. Preparation Select an area on the parade square or any area of hard ground, or indoor equivalent. CONDUCT OF LESSON
A. PRELIMINARIES.
Squad Formation The squad stood properly to Attention in a straight line. Revision Left Incline at the Halt. Spoken Introduction The next stage in foot drill is the Right Incline at the Halt. The reason this movement is taught is to
enable an individual or a body of personnel to turn through an angle of 45 degrees to the right, in a smart, uniform manner.

1-2-40
B. COMPLETE DEMONSTRATION.
INSTRUCTOR EXECUTION POINTS TO NOTE The instructor is to give a complete demonstration: INSTRUCTOR FOOT DRILL JUDGING THE TIME RIGHT INCLINE.
On the execution of the movement the instructor is to call out: ONE LEFT - RIGHT/ONE.
1. There are two parts to this movement.
FOR THE PURPOSE OF INSTRUCTION THIS MOVEMENT IS BROKEN DOWN INTO PARTS.
1-2-41
C. MOVEMENTS
1) RIGHT INCLINE – ONE.
INSTRUCTOR EXECUTION POINTS TO NOTE The instructor is to demonstrate the first movement giving the words of command: INSTRUCTOR ONE.
1. Immediately on the command, the head, shoulders, body and right foot are forced through an angle of 45 degrees to the right by means of pivoting on the heel of the right foot and the toes of the left.
2. On the execution of this movement the squad is to call out:
ONE.
1. The right foot is flat firm on the ground.
2. The left toes on the ground with the heel raised.
3. The arms are at the correct position of Attention.
4. Both knees are braced and the body is erect and square to the new direction.
ARE THERE ANY QUESTIONS? The squad is to practise Collectively-Individually-Collectively.
1-2-42
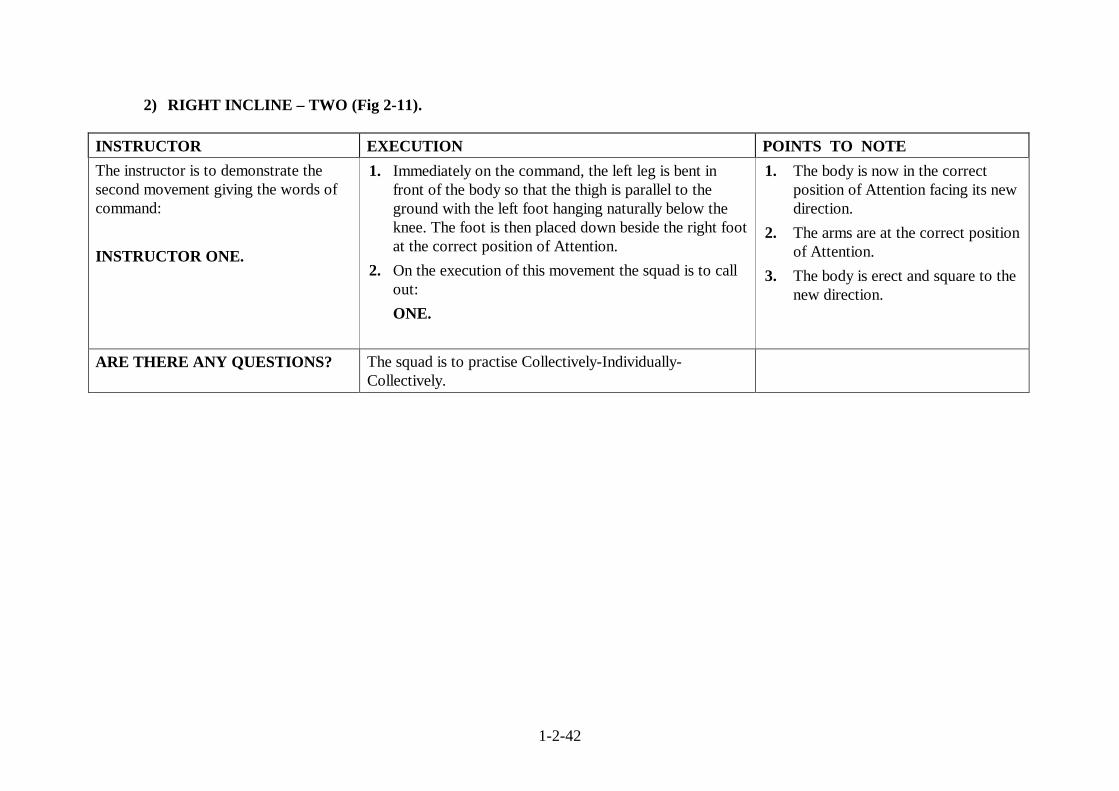
2) RIGHT INCLINE – TWO (Fig 2-11).
INSTRUCTOR EXECUTION POINTS TO NOTE The instructor is to demonstrate the second movement giving the words of command: INSTRUCTOR ONE.
1. Immediately on the command, the left leg is bent in front of the body so that the thigh is parallel to the ground with the left foot hanging naturally below the knee. The foot is then placed down beside the right foot at the correct position of Attention.
2. On the execution of this movement the squad is to call out:
ONE.
1. The body is now in the correct position of Attention facing its new direction.
2. The arms are at the correct position of Attention.
3. The body is erect and square to the new direction.
ARE THERE ANY QUESTIONS? The squad is to practise Collectively-Individually-Collectively.

1-2-43
D. FINAL DEMONSTRATION (Fig 2-11). INSTRUCTOR EXECUTION POINTS TO NOTE The instructor is to give a final and complete demonstration: INSTRUCTOR FOOT DRILL JUDGING THE TIME RIGHT INCLINE.
On the execution of the movement the instructor is to call out: ONE LEFT - RIGHT/ONE.
ARE THERE ANY QUESTIONS? The squad is to practise Collectively-Individually-Collectively.
E. END OF LESSON DRILLS INSTRUCTOR EXECUTION POINTS TO NOTE Reform the squad in Close Formation of Threes and confirm by collective practise: FOOT DRILL JUDGING THE TIME MOVE TO THE RIGHT RIGHT INCLINE.
Students to execute the movement and call out the timing: ONE LEFT - RIGHT/ONE.
1. Make any corrections where necessary.
1-2-44
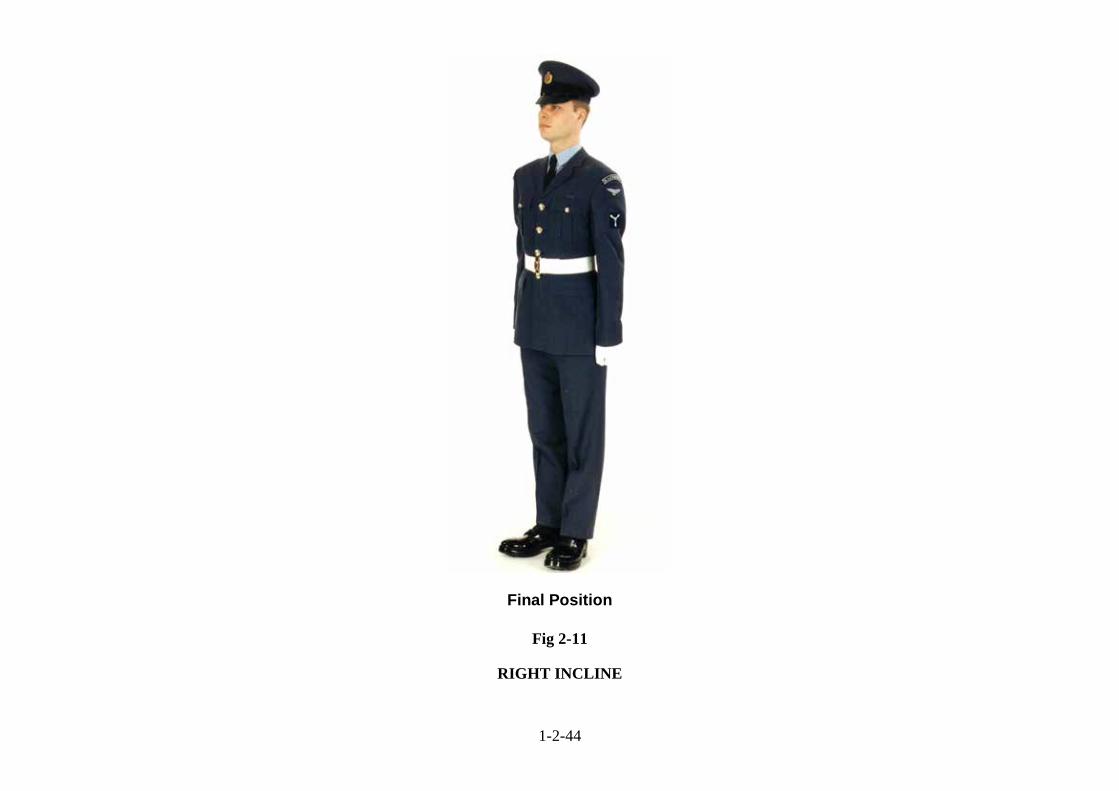
Final Position
Fig 2-11
RIGHT INCLINE
1-2-45
LESSON 9 - TO THE FRONT SALUTE AT THE HALT INSTRUCTOR’S NOTES
Aim To teach Saluting to the Front when Halted. Timings One 10 minute period. Method A basic outdoor or indoor instructional lesson. Explain the EXECUTION of the movements and emphasise
the POINTS TO NOTE, as under column headings below. Dress & Stores Clean Working Dress. Preparation Select an area on the parade square or any area of hard ground, or indoor equivalent. CONDUCT OF LESSON
A. PRELIMINARIES.
Squad Formation The squad stood properly to Attention in a straight line at the Right Incline. Revision Right Incline. Spoken Introduction The next stage in foot drill is Saluting to the Front when halted. The reason this movement is taught
is to enable an individual or body of personnel to pay the correct compliment to a commissioned officer or an uncased colour or standard in a smart, uniform manner.

1-2-46
B. COMPLETE DEMONSTRATION.
INSTRUCTOR EXECUTION POINTS TO NOTE The instructor is to give a complete demonstration of the movement: INSTRUCTOR FOOT DRILL JUDGING THE TIME SALUTING TO THE FRONT TO THE FRONT SALUTE.
On the execution of the movement the instructor is to call out: UP TWO – THREE/DOWN.
1. There are two movements to this lesson.
2. Saluting at the halt is to be carried out at the Right Incline position to avoid injury when the right arm is raised.
FOR THE PURPOSE OF INSTRUCTION THIS MOVEMENT IS BROKEN DOWN INTO TWO PARTS.

1-2-47
C. MOVEMENTS.
1) TO THE FRONT SALUTE – ONE (Fig 2-12).
INSTRUCTOR EXECUTION POINTS TO NOTE The instructor is to demonstrate the first movement giving the words of command: INSTRUCTOR ONE.
1. The right hand is to be brought smartly, with a circular motion, to the side of the head. The palm of the hand is to be to the front with the thumb and fingers held closely together.
2. The fore-finger is to be placed 1in (20 mm) behind and to the right of the right eye. The wrist is to be straight and the elbow in line and square with the right shoulder.
3. On the execution of this movement the squad is to call out:
ONE.
1. The body and head remain erect. 2. The forearm is to be forced to the
rear. 3. The right hand has straight fingers
and flat palm to the front. 4. The left arm remains at the correct
position of the attention. 5. The body is erect and square to the
front.
ARE THERE ANY QUESTIONS? The squad is to practise Collectively-Individually-Collectively.

1-2-48
2) TO THE FRONT SALUTE – TWO (Fig 2-13).
INSTRUCTOR EXECUTION POINTS TO NOTE The instructor is to demonstrate the second movement giving the words of command: INSTRUCTOR ONE.
1. After a pause equal to two paces in quick time, the right arm is to be brought smartly down to the side of the body by the shortest route, resuming the position of Attention, without striking the thigh.
2. On the execution of the movement the squad is to call out: ONE.
1. The hand forms a clenched fist as it returns to the side of the body.
2. The body is erect and square to the front.
ARE THERE ANY QUESTIONS? The squad is to practise Collectively-Individually-Collectively.
D. FINAL DEMONSTRATION. INSTRUCTOR EXECUTION POINTS TO NOTE The instructor is to give a final and complete demonstration: INSTRUCTOR FOOT DRILL JUDGING THE TIME TO THE FRONT SALUTE.
On the execution of the movement the instructor is to call out: UP TWO – THREE/DOWN.
ARE THERE ANY QUESTIONS? The squad is to practise Collectively-Individually-Collectively.

1-2-49
E. END OF LESSON DRILLS. INSTRUCTOR EXECUTION POINTS TO NOTE Reform the squad in Close Formation of Threes and confirm by collective practise: FOOT DRILL JUDGING THE TIME TO THE FRONT SALUTE.
Students to execute the movement and call out the timing: UP TWO – THREE/DOWN.
1. Make any corrections where necessary.

1-2-50
First Movement Final Position
Fig 2-12 Fig 2-13
TO THE FRONT SALUTE

1-2-51
LESSON 10 - TO THE LEFT/RIGHT SALUTE AT THE HALT INSTRUCTOR’S NOTES
Aim To teach Saluting to a Flank when Halted Left or Right. Timings One 10 minute period. Method A basic outdoor or indoor instructional lesson. Explain the EXECUTION of the movements and emphasise the
POINTS TO NOTE, as under column headings below. Dress & Stores Clean Working Dress. Preparation Select an area on the parade square or any area of hard ground, or indoor equivalent. CONDUCT OF LESSON
A. PRELIMINARIES.
Squad Formation The squad stood properly to Attention at the Right Incline. Revision Saluting to the Front at the Halt. Spoken Introduction The next stage in foot drill is Saluting to the Flank when Halted. The reason this movement is taught is to
enable an individual or body of personnel to pay the correct compliment to a commissioned officer or an uncased colour or standard in a smart, uniform manner.

1-2-52
B. COMPLETE DEMONSTRATION.
INSTRUCTOR EXECUTION POINTS TO NOTE The instructor is to give a complete demonstration: INSTRUCTOR FOOT DRILL JUDGING THE TIME SALUTING TO THE FLANKS TO THE LEFT/RIGHT SALUTE.
On the execution of the movement the instructor is to call out: UP TWO – THREE – FOUR - FIVE/DOWN.
1. There are two movements to this lesson.
2. Saluting at the halt is to be carried out at the Right Incline position to avoid injury when the right arm is raised.
FOR THE PURPOSE OF INSTRUCTION THIS MOVEMENT IS BROKEN DOWN INTO TWO PARTS.

1-2-53
C. MOVEMENTS.
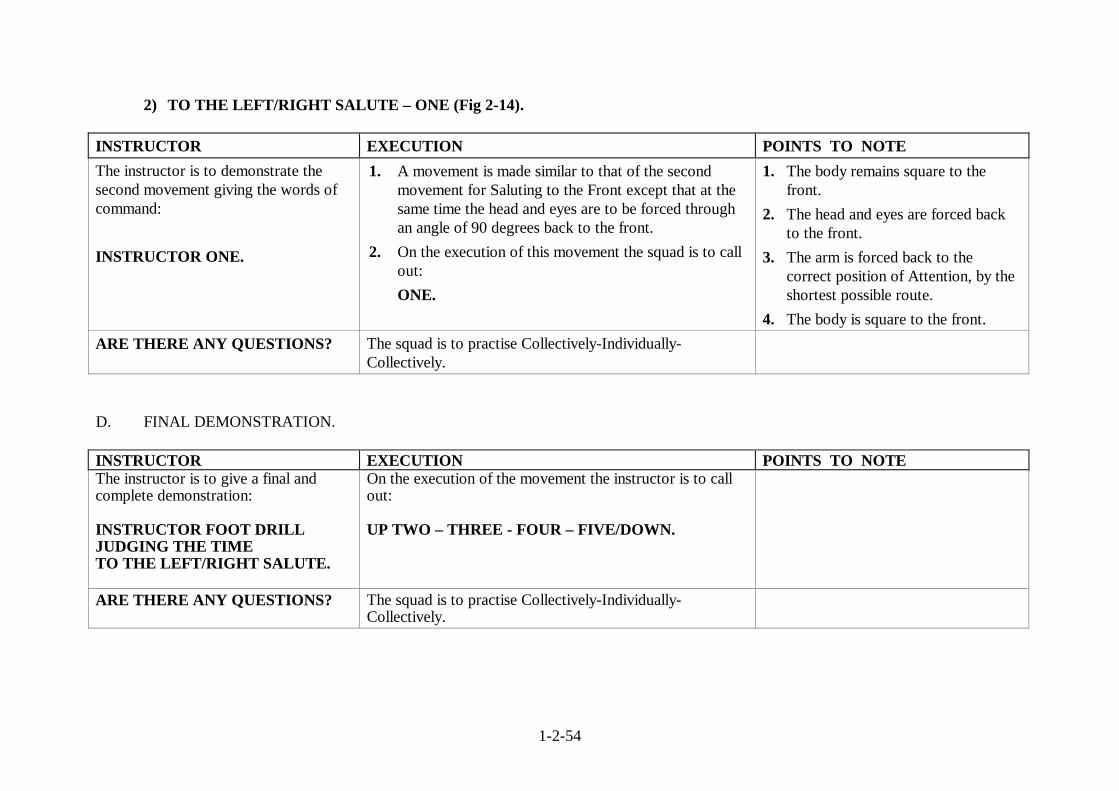
1) TO THE LEFT/RIGHT SALUTE – ONE (Fig 2-14). INSTRUCTOR EXECUTION POINTS TO NOTE The instructor is to demonstrate the first movement giving the words of command: INSTRUCTOR ONE.
1. A movement is made similar to that of the first movement for Saluting to the Front except that at the same time the head and eyes are to be forced through an angle of 90 degrees square over the shoulder in the direction ordered.
2. On the execution of this movement the squad is to call out:
ONE.
1. The body remains square to the front.
2. The head and eyes are forced across the shoulder to look in the direction ordered.
3. When saluting to the right/left the index finger is to be 1 in (20 mm) behind and to the right of the right eye.
4. The elbow is to be forced well back. 5. The body is erect and square to the
front. ARE THERE ANY QUESTIONS? The squad is to practise Collectively-Individually-
Collectively.
1-2-54
2) TO THE LEFT/RIGHT SALUTE – ONE (Fig 2-14). INSTRUCTOR EXECUTION POINTS TO NOTE The instructor is to demonstrate the second movement giving the words of command: INSTRUCTOR ONE.
1. A movement is made similar to that of the second movement for Saluting to the Front except that at the same time the head and eyes are to be forced through an angle of 90 degrees back to the front.
2. On the execution of this movement the squad is to call out:
ONE.
1. The body remains square to the front.
2. The head and eyes are forced back to the front.
3. The arm is forced back to the correct position of Attention, by the shortest possible route.
4. The body is square to the front. ARE THERE ANY QUESTIONS? The squad is to practise Collectively-Individually-
Collectively.
D. FINAL DEMONSTRATION. INSTRUCTOR EXECUTION POINTS TO NOTE The instructor is to give a final and complete demonstration: INSTRUCTOR FOOT DRILL JUDGING THE TIME TO THE LEFT/RIGHT SALUTE.
On the execution of the movement the instructor is to call out: UP TWO – THREE - FOUR – FIVE/DOWN.
ARE THERE ANY QUESTIONS? The squad is to practise Collectively-Individually-Collectively.

1-2-55
E. END OF LESSON DRILLS. INSTRUCTOR EXECUTION POINTS TO NOTE Reform the squad in Close Formation of Threes and confirm by collective practise: FOOT DRILL JUDGING THE TIME TO THE LEFT/RIGHT SALUTE.
Students to execute the movement and call out the timing: UP TWO – THREE - FOUR – FIVE/DOWN.
1. Make any corrections where necessary.

1-2-56
Salute to the Left Salute to the Right.
Fig 2-14 Fig 2-14
TO THE FLANK SALUTE

1-2-57
LESSON 11 - THE FALL OUT / DISMISS AT THE HALT INSTRUCTOR’S NOTES
Aim To teach the Fall Out / Dismiss at the Halt. Timings One 10 minute period. Method A basic outdoor or indoor instructional lesson. Explain the EXECUTION of the movements and emphasise
the POINTS TO NOTE, as under column headings below. Dress & Stores Clean Working Dress. Preparation Select an area on the parade square or any area of hard ground, or indoor equivalent. CONDUCT OF LESSON
A. PRELIMINARIES.
Squad Formation The squad stood properly to Attention in a straight line. Revision To The Left/Right Salute at the Halt. Spoken Introduction The next stage in foot drill is the Fall out/Dismiss. The reason this movement is taught is to allow an
individual or body of personnel to Fall Out/Dismiss in a smart, uniform manner.
1-2-58
B. COMPLETE DEMONSTRATION.
INSTRUCTOR EXECUTION POINTS TO NOTE The instructor is to give a complete demonstration: INSTRUCTOR FOOT DRILL JUDGING THE TIME FALL OUT.
On the execution of the movement the instructor is to call out: ONE LEFT - RIGHT/ONE LEFT - RIGHT/LEFT RIGHT LEFT RIGHT.
1. There are two parts to this movement.
FOR THE PURPOSE OF INSTRUCTION THIS MOVEMENT IS BROKEN DOWN INTO TWO PARTS.
1-2-59
C. MOVEMENTS.
1) FALL OUT/DISMISS – ONE (Fig 2-15).
INSTRUCTOR EXECUTION POINTS TO NOTE The instructor is to demonstrate the first movement giving the words of command: INSTRUCTOR ONE.
1. Execute a Right Incline. 2. On the execution of this movement the squad is to call
out: ONE LEFT - RIGHT/ONE.
1. The Right Incline, as previously taught, is carried out.
2. The body is erect and square to the front.
ARE THERE ANY QUESTIONS? The squad is to practise Collectively-Individually-Collectively.
2) FALL OUT/DISMISS – TWO (Fig 2-16).
INSTRUCTOR EXECUTION POINTS TO NOTE The instructor is to demonstrate the second movement giving the words of command: INSTRUCTOR ONE.
1. After a pause equal to two beats in quick time, the left foot is advanced forward and the quick march is continued for four paces.
2. On the execution of the movement the squad is to call out:
LEFT RIGHT LEFT RIGHT.
1. Ensure that full 30 inch marching paces are carried out.
2. The body is erect and square to the front.
ARE THERE ANY QUESTIONS? The squad is to practise Collectively-Individually-Collectively.

1-2-60
D. FINAL DEMONSTRATION INSTRUCTOR EXECUTION POINTS TO NOTE The instructor is to give a final and complete demonstration: INSTRUCTOR FOOT DRILL JUDGING THE TIME FALL OUT/DISMISS.
On the execution of the movement the instructor is to call out: ONE LEFT - RIGHT/ONE LEFT - RIGHT/LEFT RIGHT LEFT RIGHT.
ARE THERE ANY QUESTIONS? The squad is to practise Collectively-Individually-Collectively.
E. END OF LESSON DRILLS INSTRUCTOR EXECUTION POINTS TO NOTE Reform the squad in Close Formation of Threes and confirm by collective practise: FOOT DRILL JUDGING THE TIME SQUAD/FLIGHT/PARADE FALL – OUT/DISMISS.
Students to execute the movement and call out the timing: ONE - LEFT - RIGHT/ONE - LEFT - RIGHT/LEFT RIGHT LEFT RIGHT.
1. Make any corrections where necessary.
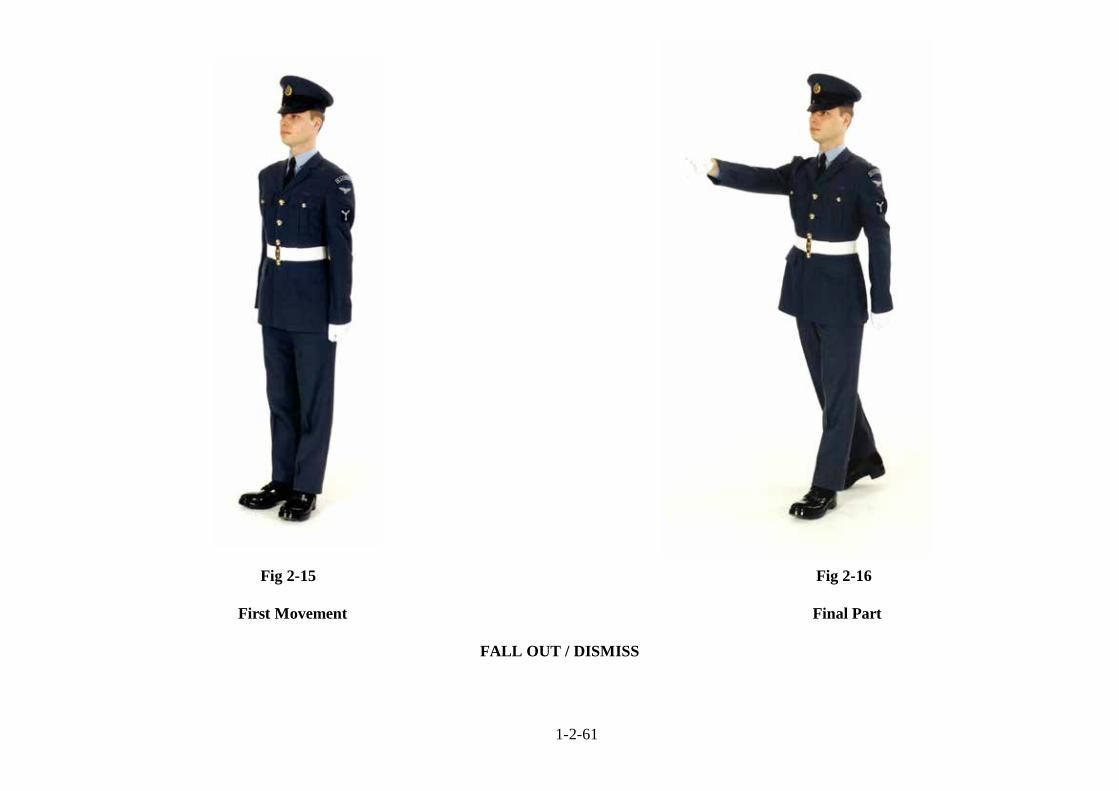
1-2-61
Fig 2-15 Fig 2-16
First Movement Final Part
FALL OUT / DISMISS
1-2-62
LESSON 12 - AN OFFICER ON PARADE - DISMISS INSTRUCTOR’S NOTES
Aim To teach An Officer on Parade - Dismiss. Timings One 10 minute period. Method A basic outdoor or indoor instructional lesson. Explain the EXECUTION of the movements and emphasise the
POINTS TO NOTE, as under column headings below. Dress & Stores Clean Working Dress. Preparation Select an area on the parade square or any area of hard ground, or indoor equivalent. CONDUCT OF LESSON
A. PRELIMINARIES.
Squad Formation The squad stood properly to Attention in a straight line. Revision The Fall Out/Dismiss at the Halt. Spoken Introduction The next stage in foot drill is An Officer on Parade - Dismiss. The reason this movement is taught is to
allow an individual or body of personnel to be dismissed whilst an officer is on parade, in a smart, uniform manner.

1-2-63
B. COMPLETE DEMONSTRATION.
INSTRUCTOR EXECUTION POINTS TO NOTE The instructor is to give a complete demonstration of the movement: INSTRUCTOR FOOT DRILL JUDGING THE TIME AN OFFICER ON PARADE FALL OUT / DISMISS.
On the execution of the movement the instructor is to call out: ONE LEFT - RIGHT/ONE LEFT - RIGHT/UP TWO - THREE/DOWN LEFT - RIGHT/LEFT RIGHT LEFT RIGHT.
1. There are three parts to this movement.
FOR THE PURPOSE OF INSTRUCTION THIS MOVEMENT IS BROKEN DOWN INTO THREE PARTS.
1-2-64
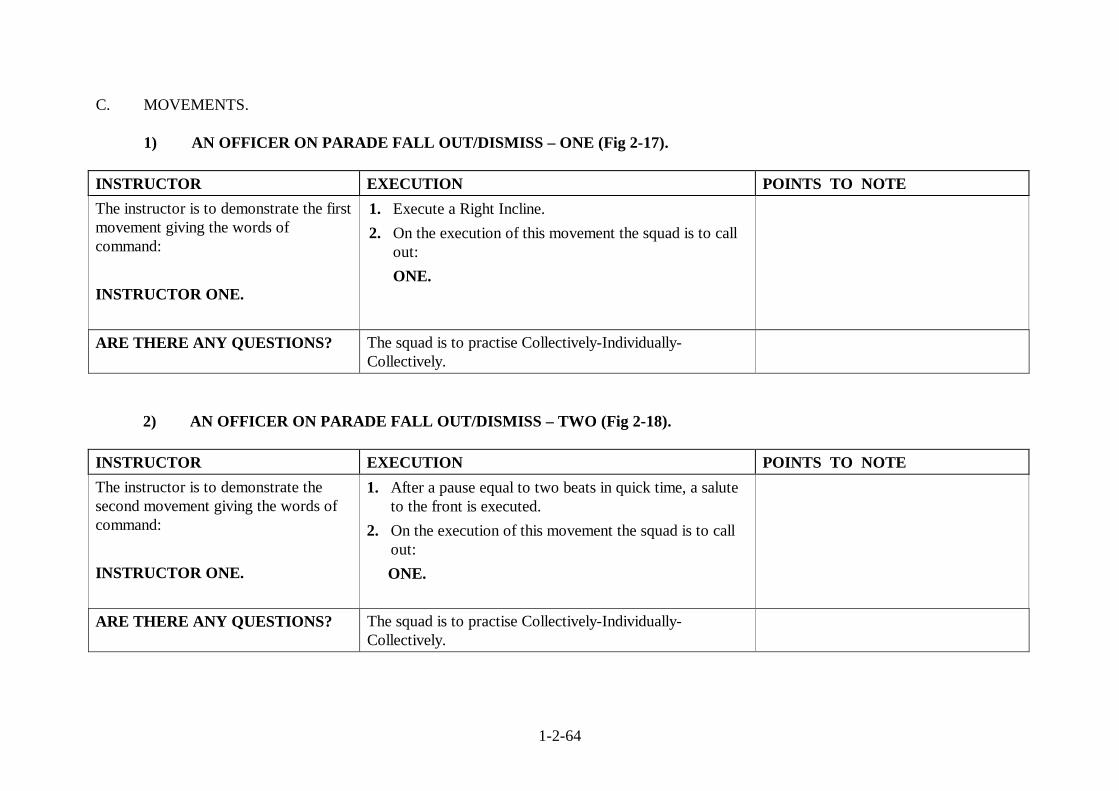
C. MOVEMENTS.
1) AN OFFICER ON PARADE FALL OUT/DISMISS – ONE (Fig 2-17). INSTRUCTOR EXECUTION POINTS TO NOTE The instructor is to demonstrate the first movement giving the words of command: INSTRUCTOR ONE.
1. Execute a Right Incline. 2. On the execution of this movement the squad is to call
out: ONE.
ARE THERE ANY QUESTIONS? The squad is to practise Collectively-Individually-Collectively.
2) AN OFFICER ON PARADE FALL OUT/DISMISS – TWO (Fig 2-18).
INSTRUCTOR EXECUTION POINTS TO NOTE The instructor is to demonstrate the second movement giving the words of command: INSTRUCTOR ONE.
1. After a pause equal to two beats in quick time, a salute to the front is executed.
2. On the execution of this movement the squad is to call out:
ONE.
ARE THERE ANY QUESTIONS? The squad is to practise Collectively-Individually-Collectively.

1-2-65
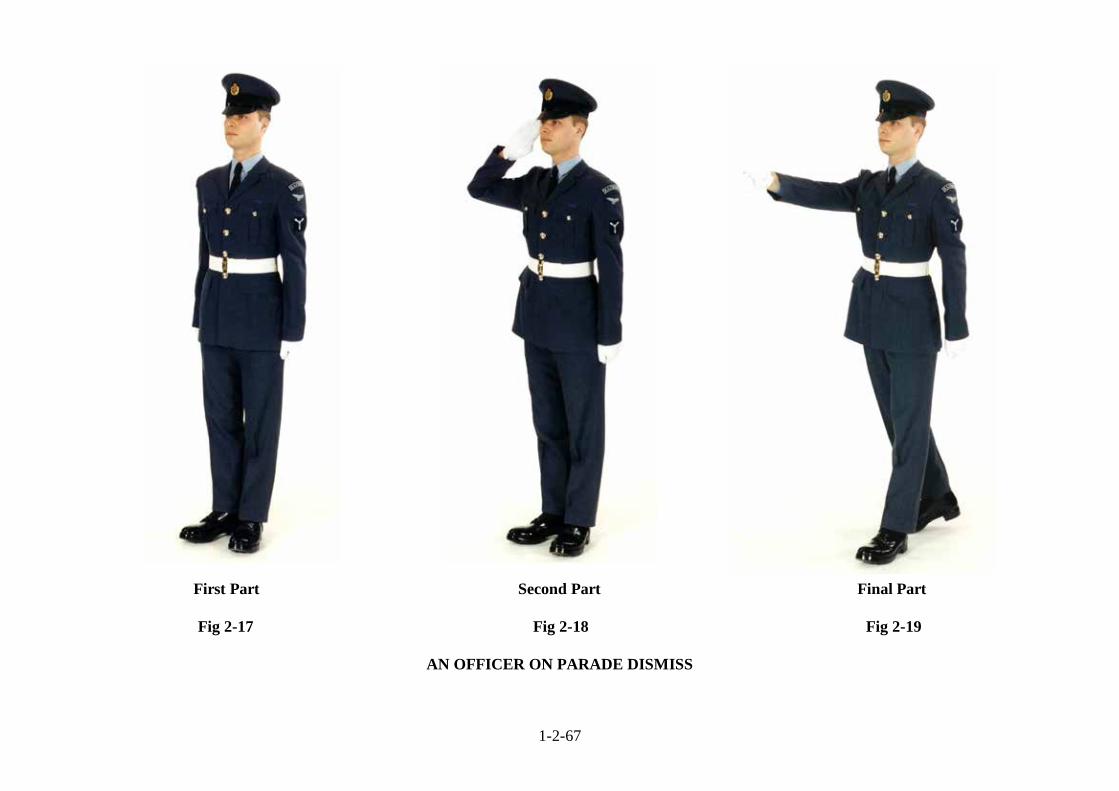
3) AN OFFICER ON PARADE FALL OUT/DISMISS – THREE (Fig 2-19).
INSTRUCTOR EXECUTION POINTS TO NOTE The instructor is to demonstrate the third movement giving the words of command: INSTRUCTOR ONE.
1. After a further pause equal to two beats in quick time, advance the left foot forward and continue to march four paces in quick time.
2. On the execution of this movement the squad is to call out:
ONE.
1. Ensure a full 30 inch marching pace is carried out.
2. Arm swing up to own shoulder height.
3. The body is erect and square to the front.
ARE THERE ANY QUESTIONS? The squad is to practise Collectively-Individually-Collectively.
D. FINAL DEMONSTRATION. INSTRUCTOR EXECUTION POINTS TO NOTE The instructor is to give a final and complete demonstration: INSTRUCTOR FOOT DRILL JUDGING THE TIME AN OFFICER ON PARADE FALL OUT/DISMISS.
On the execution of the movement the instructor is to call out: ONE LEFT - RIGHT/ONE LEFT - RIGHT/UP TWO - THREE/DOWN LEFT - RIGHT/LEFT RIGHT LEFT RIGHT.
ARE THERE ANY QUESTIONS? The squad is to practise Collectively-Individually-Collectively.

1-2-66
E. END OF LESSON DRILLS INSTRUCTOR EXECUTION POINTS TO NOTE Reform the squad in Close Formation of Threes and confirm by collective practise: FOOT DRILL JUDGING THE TIME SQUAD/FLIGHT/PARADE AN OFFICER ON PARADE FALL OUT/DISMISS.
Students to execute the movement and call out the timing: ONE LEFT - RIGHT/ONE LEFT - RIGHT/UP TWO - THREE/DOWN LEFT - RIGHT/LEFT RIGHT LEFT RIGHT.
1. Make any corrections where necessary.
1-2-67
First Part Second Part Final Part
Fig 2-17 Fig 2-18 Fig 2-19
AN OFFICER ON PARADE DISMISS

1-2-68
LESSON 13 - RIGHT DRESS/LEFT DRESS AND EYES FRONT INSTRUCTOR'S NOTES
Aim To teach the Right Dress/Left Dress and the Eyes Front. Timings One 30 minute period. Method A basic outdoor or indoor instructional lesson. Explain the EXECUTION of the movements and emphasise the
POINTS TO NOTE, as under column headings below. Dress & Stores Clean Working Dress. Preparation Select an area on the parade square or any area of hard ground, or indoor equivalent.
CONDUCT OF LESSON
A. PRELIMINARIES.
Squad Formation The squad stood properly to Attention in a straight line. Revision Dismiss and An Officer On Parade Dismiss. Spoken Introduction The next stage in foot drill is the Right Dress/Left Dress and the Eyes Front. The reason this movement is
taught is to enable an individual or body of personnel to take up alignment correctly in a smart, uniform manner.

1-2-69
B. COMPLETE DEMONSTRATION.
INSTRUCTOR EXECUTION POINTS TO NOTE The instructor is to give a full demonstration: INSTRUCTOR FOOT DRILL JUDGING THE TIME RIGHT DRESS. EYES FRONT.
On the execution of the movements the instructor is to call out: UP - LEFT - RIGHT – DRESSING. ONE.
1. There are two parts to the movement.
FOR THE PURPOSE OF INSTRUCTION THIS MOVEMENT IS BROKEN DOWN INTO TWO PARTS.

1-2-70
C. MOVEMENTS.
1) RIGHT DRESS/LEFT DRESS – ONE (Fig 2-20).
INSTRUCTOR EXECUTION POINTS TO NOTE The instructor is to demonstrate the first movement giving the words of command: INSTRUCTOR ONE.
1. All personnel except the right markers of each rank are to turn their head and eyes smartly to the right.
2. Personnel in the front rank are to raise their right arm sharply to the right to a horizontal position, hands clenched with backs of the hands upwards, each with the knuckles just touching the person immediately to their right. (The elbow is bent briefly when bringing up the arm).
3. The clenched hand is driven to the right taking care not to strike the next person; the movement must initially be directed behind the person on the right.
4. After a pause equal to two beats in quick time, each person is to take a dressing in line as quickly as possible, moving with short quick paces until they are able to see the lower part of the face of the second person beyond.
5. The shoulders are to be kept square to the front without bending the body or head forward or backward.
6. On the execution of this movement the squad is to call out:
ONE.
1. The arm and head are moved smartly.
2. The arm is locked at the elbow. 3. Keep the shoulders square to the
front. 4. Personnel in the centre and rear
ranks are to cover, at one pace distance, those in the front rank. The distance of one pace between ranks is measured by the right-hand Markers in the centre and rear ranks who, at the same time as the front rank, are also to raise their arms, hands clenched, to just touch the shoulder of the person in front.
5. The body is erect and square to the front.

1-2-71
INSTRUCTOR EXECUTION POINTS TO NOTE INSTRUCTOR FOOT DRILL JUDGING THE TIME LEFT DRESS.
1. On the execution of the movement the instructor is to call out: ONE.
1. Exactly the same procedure is to be followed, except that the left arms are to be raised and heads turned to the left.
ARE THERE ANY QUESTIONS? The squad is to practise Collectively-Individually-
Collectively.
2) EYES FRONT – ONE.
INSTRUCTOR EXECUTION POINTS TO NOTE The instructor is to demonstrate the second movement giving the words of command: INSTRUCTOR ONE.
1. Each person, except the right (or left) hand person of each rank, is to turn the head smartly to the front.
2. At the same time all those with raised arms are to force their arms smartly to their sides, without bending the elbow or striking their thighs, thereby resuming the correct position of Attention.
3. On the execution of this movement the squad is to call out:
ONE.
ARE THERE ANY QUESTIONS? The squad is to practise Collectively-Individually-Collectively.

1-2-72
D. FINAL DEMONSTRATION (See Fig 2-20). INSTRUCTOR EXECUTION POINTS TO NOTE The instructor is to give a final and complete demonstration: INSTRUCTOR FOOT DRILL JUDGING THE TIME RIGHT DRESS LEFT DRESS.
On the execution of the movement the instructor is to call out: UP LEFT - RIGHT/DRESSING.
INSTRUCTOR - EYES FRONT.
ONE.
ARE THERE ANY QUESTIONS?
The squad is to practise Collectively-Individually-Collectively.
E. END OF LESSON DRILLS. INSTRUCTOR EXECUTION POINTS TO NOTE Reform the squad in Close Formation of Threes and confirm by collective practise: FOOT DRILL JUDGING THE TIME SQUAD/FLIGHT/PARADE RIGHT DRESS LEFT DRESS.
Students to execute the movement and call out the timing: UP LEFT - RIGHT/DRESSING.
1. Make any corrections where necessary.
EYES FRONT.
ONE.

1-2-73
Right Dress Left Dress
Fig 2-20 Fig 2-20
DRESSING
1-2-74
LESSON 14 – DRESSING WITHOUT INTERVALS INSTRUCTOR’S NOTES
Aim To teach Without Intervals Right/Left Dress and the Eyes Front. Timings One 30 minute period. Method A basic outdoor or indoor instructional lesson. Explain the EXECUTION of the movements and emphasise
the POINTS TO NOTE, as under column headings below. Dress & Stores Clean Working Dress. Preparation Select an area on the parade square or any area of hard ground, or indoor equivalent.
CONDUCT OF LESSON
A. PRELIMINARIES.
Squad Formation The squad stood properly to Attention in a straight line. Revision Right Dress/Left Dress and Eyes Front. Spoken Introduction The next stage in foot drill is the Without Intervals Right/Left Dress and the Eyes Front. The reason
this movement is taught is to enable an individual or body of personnel to take up alignment correctly without intervals in a smart, uniform manner.

1-2-75
B. COMPLETE DEMONSTRATION.
INSTRUCTOR EXECUTION POINTS TO NOTE The instructor is to give a full demonstration: INSTRUCTOR FOOT DRILL JUDGING THE TIME WITHOUT INTERVALS RIGHT DRESS.
On the execution of the movement the instructor is to call out: UP LEFT – RIGHT/DRESSING.
1. There are two parts to the movement.
FOR THE PURPOSE OF INSTRUCTION THIS MOVEMENT IS BROKEN DOWN INTO TWO PARTS.

1-2-76
C. MOVEMENTS.
1) WITHOUT INTERVALS RIGHT DRESS/LEFT DRESS – ONE (Fig 2-21). INSTRUCTOR EXECUTION POINTS TO NOTE The instructor is to demonstrate the first movement giving the words of command: INSTRUCTOR ONE.
1. All personnel except the right markers of each rank are to turn their heads and eyes smartly to the right.
2. Personnel in the front rank are to raise their right arm sharply to the right, bending the arm at the elbow, hands clenched and on own hip at waist belt level, with the back of the hand to the front.
3. The right elbow just touching the person immediately to their right.
4. After a pause equal to two beats in quick time, each person is to take a dressing in line as quickly as possible, moving with short quick paces until they are able to see the lower part of the face of the second person beyond.
5. The shoulders are to be kept square to the front without bending the body or head forward or backward.
6. On the execution of this movement the squad is to call out:
ONE.
1. The arm and head are moved smartly.
2. The arm is bent at the elbow, with the clenched hand on own hip at waist belt level.
3. Keep the shoulders square to the front.
4. Personnel in the centre and rear ranks are to cover, at one pace distance, those in the front rank.
5. The distance of one pace between ranks is measured by the first file of three (centre and rear ranks only).
6. Markers who, are to raise their arms, hands clenched, to just touch the shoulder of the person in front.
7. The body is erect and square to the front.

1-2-77
INSTRUCTOR EXECUTION POINTS TO NOTE WITHOUT INTERVALS LEFT DRESS INSTRUCTOR ONE.
1. On the execution of this movement the squad is to call out:
ONE.
1. Exactly the same procedure is to be followed, except that the left arms are to be used and heads turned to the left.
ARE THERE ANY QUESTIONS? The squad is to practise Collectively-Individually-Collectively.
2) EYES FRONT – ONE.
INSTRUCTOR EXECUTION POINTS TO NOTE The instructor is to demonstrate the second movement giving the words of command: INSTRUCTOR ONE.
1. Each person, except the right (or left) hand person of each rank, is to turn the head smartly to the front. At the same time all those with raised arms are to force their arms smartly to the correct position of Attention.
2. On the execution of this movement the squad is to call out:
ONE.
ARE THERE ANY QUESTIONS? The squad is to practise Collectively-Individually-Collectively.

1-2-78
D. FINAL DEMONSTRATION (Fig 2-21). INSTRUCTOR EXECUTION POINTS TO NOTE The instructor is to give a final and complete demonstration: INSTRUCTOR FOOT DRILL JUDGING THE TIME WITHOUT INTERVALS RIGHT DRESS/LEFT DRESS. INSTRUCTOR EYES FRONT.
On the execution of the movement the instructor is to call out: UP LEFT – RIGHT/DRESSING. ONE.
ARE THERE ANY QUESTIONS? The squad is to practise Collectively- Individually- Collectively.
E. END OF LESSON DRILLS. INSTRUCTOR EXECUTION POINTS TO NOTE Reform the squad in Close Formation of Threes and confirm by collective practise: FOOT DRILL JUDGING THE TIME SQUAD/FLIGHT/PARADE WITHOUT INTERVALS RIGHT DRESS/LEFT DRESS.
Students to execute the movement and call out the timing: UP LEFT – RIGHT/DRESSING.
1. Make any corrections where necessary.
EYES FRONT.
ONE.

1-2-79
Right Dress
Fig 2-21
DRESSING WITHOUT INTERVALS

1-2-80
LESSON 15 - OPEN/CLOSE ORDER MARCH INSTRUCTOR’S NOTES
Aim To teach the Open and Close Order March. Timings One 10 minute period. Method A basic outdoor or indoor instructional lesson. Explain the EXECUTION of the movements and emphasise the
POINTS TO NOTE, as under column headings below. Dress & Stores Clean Working Dress. Preparation Select an area on the parade square or any area of hard ground, or indoor equivalent. CONDUCT OF LESSON
A. PRELIMINARIES.
Squad Formation The squad stood properly to Attention in three ranks. Revision The Right Dress/Left Dress/Dressing without Intervals and the Eyes Front. Spoken Introduction The next stage in foot drill is the Open and Close Order March. The reason this movement is taught is to
enable a body of personnel to dress in Open Order prior to being inspected or when fixing or unfixing bayonets and when being drilled in a smart, uniform manner.

1-2-81
B. COMPLETE DEMONSTRATION.
INSTRUCTOR EXECUTION POINTS TO NOTE The instructor is to give a complete demonstration: INSTRUCTOR FOOT DRILL JUDGING THE TIME OPEN/CLOSE ORDER MARCH.
On the execution of the movement the instructor is to call out: ONE ONE TWO.
1. There are two parts to the movement.
FOR THE PURPOSE OF INSTRUCTION THIS MOVEMENT IS BROKEN DOWN INTO TWO PARTS.
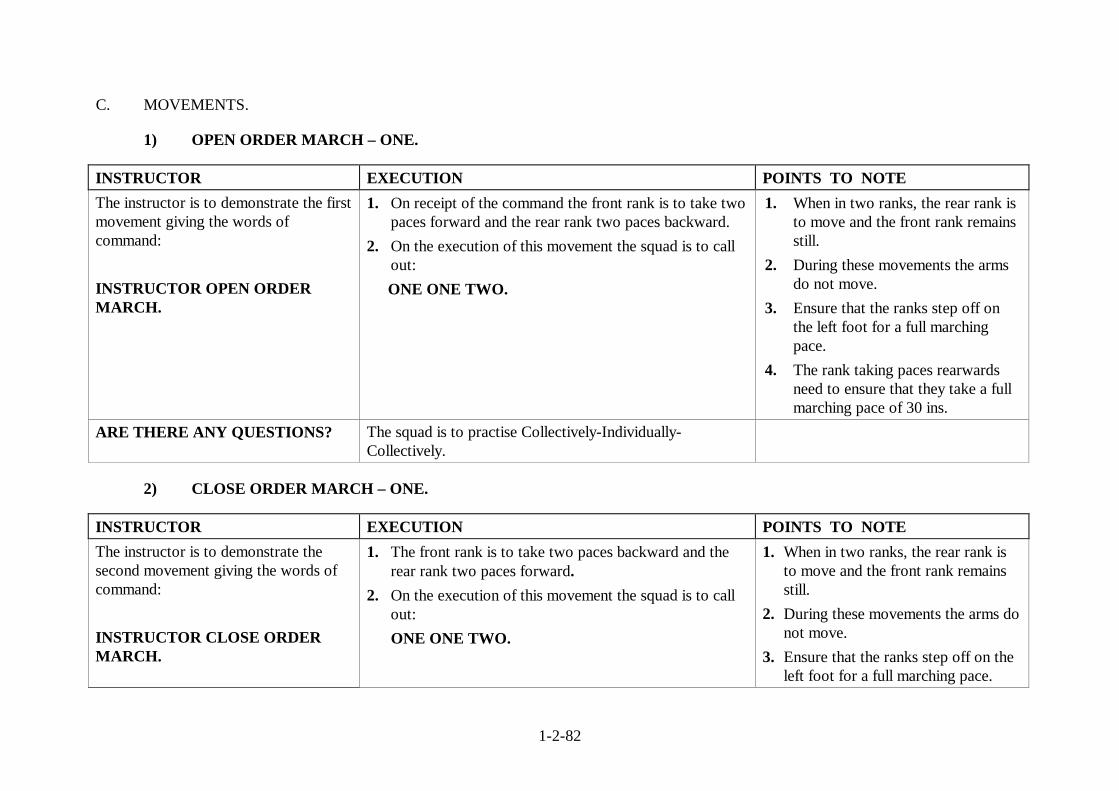
1-2-82
C. MOVEMENTS.
1) OPEN ORDER MARCH – ONE. INSTRUCTOR EXECUTION POINTS TO NOTE The instructor is to demonstrate the first movement giving the words of command: INSTRUCTOR OPEN ORDER MARCH.
1. On receipt of the command the front rank is to take two paces forward and the rear rank two paces backward.
2. On the execution of this movement the squad is to call out:
ONE ONE TWO.
1. When in two ranks, the rear rank is to move and the front rank remains still.
2. During these movements the arms do not move.
3. Ensure that the ranks step off on the left foot for a full marching pace.
4. The rank taking paces rearwards need to ensure that they take a full marching pace of 30 ins.
ARE THERE ANY QUESTIONS? The squad is to practise Collectively-Individually-Collectively.
2) CLOSE ORDER MARCH – ONE.
INSTRUCTOR EXECUTION POINTS TO NOTE The instructor is to demonstrate the second movement giving the words of command: INSTRUCTOR CLOSE ORDER MARCH.
1. The front rank is to take two paces backward and the rear rank two paces forward.
2. On the execution of this movement the squad is to call out:
ONE ONE TWO.
1. When in two ranks, the rear rank is to move and the front rank remains still.
2. During these movements the arms do not move.
3. Ensure that the ranks step off on the left foot for a full marching pace.

1-2-83
4. The rank taking paces rearwards need to ensure that they take a full marching pace of 30 ins.
ARE THERE ANY QUESTIONS? The squad is to practise Collectively-Individually-Collectively.
D. FINAL DEMONSTRATION. INSTRUCTOR EXECUTION POINTS TO NOTE The instructor is to give a final and complete demonstration: INSTRUCTOR FOOT DRILL JUDGING THE TIME OPEN ORDER MARCH.
On the execution of the movement the instructor is to call out: ONE ONE TWO.
1. Step off with the left foot. 2. The arms remain still.
INSTRUCTOR CLOSE ORDER MARCH.
ONE ONE TWO. 1. Step off with the left foot. 2. The arms remain still.
ARE THERE ANY QUESTIONS?
The squad is to practise Collectively-Individually-Collectively.
E. END OF LESSON DRILLS. INSTRUCTOR EXECUTION POINTS TO NOTE Reform the squad in Close Formation of Threes and confirm by collective practise: FOOT DRILL JUDGING THE TIME SQUAD OPEN/CLOSE ORDER MARCH.
Students to execute the movement and call out the timing: ONE ONE TWO.
1. Make any corrections where necessary.

1-2-84
LESSON 16 – PACES FORWARD OR REARWARD MARCH INSTRUCTOR’S NOTES
Aim To teach moving forward or backward a given number of paces. Timings One 15 minute period. Method A basic outdoor or indoor instructional lesson. Explain the EXECUTION of the movements and emphasise
the POINTS TO NOTE, as under column headings below. Dress & Stores Clean Working Dress. Preparation Select an area on the parade square or any area of hard ground, or indoor equivalent. CONDUCT OF LESSON
A. PRELIMINARIES
Squad Formation The squad stood properly to Attention in a straight line.
Revision Open/Close Order March.
Spoken Introduction The next stage in foot drill is moving forward or backward a given number of paces. The reason this movement is taught is to enable an individual or body of personnel to move forward or backward a maximum number of five paces in a smart, uniform manner.
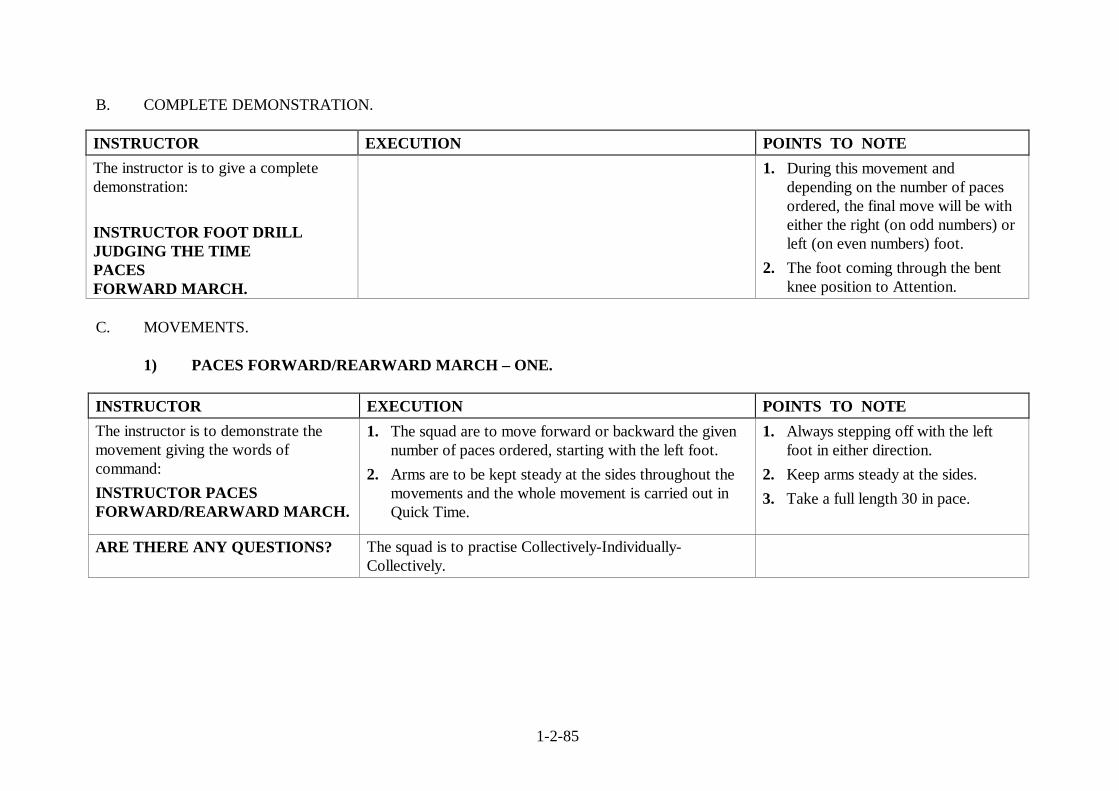
1-2-85
B. COMPLETE DEMONSTRATION.
INSTRUCTOR EXECUTION POINTS TO NOTE The instructor is to give a complete demonstration: INSTRUCTOR FOOT DRILL JUDGING THE TIME PACES FORWARD MARCH.
1. During this movement and depending on the number of paces ordered, the final move will be with either the right (on odd numbers) or left (on even numbers) foot.
2. The foot coming through the bent knee position to Attention.
C. MOVEMENTS.
1) PACES FORWARD/REARWARD MARCH – ONE. INSTRUCTOR EXECUTION POINTS TO NOTE The instructor is to demonstrate the movement giving the words of command: INSTRUCTOR PACES FORWARD/REARWARD MARCH.
1. The squad are to move forward or backward the given number of paces ordered, starting with the left foot.
2. Arms are to be kept steady at the sides throughout the movements and the whole movement is carried out in Quick Time.
1. Always stepping off with the left foot in either direction.
2. Keep arms steady at the sides. 3. Take a full length 30 in pace.
ARE THERE ANY QUESTIONS? The squad is to practise Collectively-Individually-Collectively.

1-2-86
D. FINAL DEMONSTRATION. INSTRUCTOR EXECUTION POINTS TO NOTE The instructor is to give a final and complete demonstration: INSTRUCTOR FOOT DRILL JUDGING THE TIME PACES FORWARD/REARWARD MARCH.
1. Always stepping off with the left foot in either direction.
2. Keep arms steady at the sides. 3. Take a full 30 in pace.
ARE THERE ANY QUESTIONS? The squad is to practise Collectively-Individually-Collectively.
E. END OF LESSON DRILLS. INSTRUCTOR EXECUTION POINTS TO NOTE Reform the squad in Close Formation of Threes and confirm by collective practise: SQUAD FOOT DRILL JUDGING THE TIME PACES FORWARD/REARWARD MARCH.
Students to execute the movement. 1. Make any corrections where necessary.
1-2-87
LESSON 17 - PACES SIDEWAYS MARCH INSTRUCTOR’S NOTES
Aim To teach moving sideways a given number of paces. Timings One 15 minute period. Method A basic outdoor or indoor instructional lesson. Explain the EXECUTION of the movements and emphasise the
POINTS TO NOTE, as under column headings below. Dress & Stores Clean Working Dress. Preparation Select an area on the parade square or any area of hard ground, or indoor equivalent.
CONDUCT OF LESSON
A. PRELIMINARIES.
Squad Formation The squad stood properly to Attention in a straight line. Revision Moving forward or backward a given number of paces. Spoken Introduction The next stage in foot drill is moving sideways a given number of paces. The reason this movement is
taught is to enable an individual or body of personnel to move sideways a maximum number of five paces in a smart, uniform manner.

1-2-88
B. COMPLETE DEMONSTRATION
INSTRUCTOR EXECUTION POINTS TO NOTE The instructor is to give a complete demonstration: INSTRUCTOR FOOT DRILL JUDGING THE TIME PACES RIGHT/LEFT CLOSE MARCH.
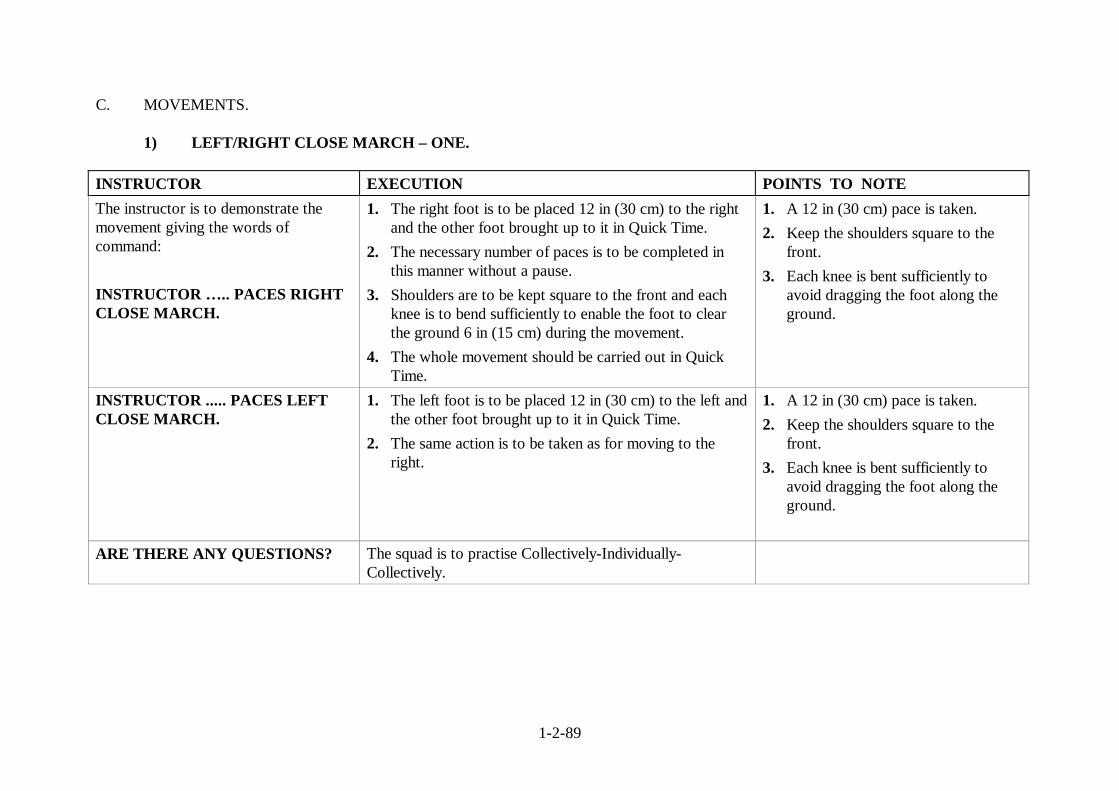
1-2-89
C. MOVEMENTS.
1) LEFT/RIGHT CLOSE MARCH – ONE. INSTRUCTOR EXECUTION POINTS TO NOTE The instructor is to demonstrate the movement giving the words of command: INSTRUCTOR ….. PACES RIGHT CLOSE MARCH.
1. The right foot is to be placed 12 in (30 cm) to the right and the other foot brought up to it in Quick Time.
2. The necessary number of paces is to be completed in this manner without a pause.
3. Shoulders are to be kept square to the front and each knee is to bend sufficiently to enable the foot to clear the ground 6 in (15 cm) during the movement.
4. The whole movement should be carried out in Quick Time.
1. A 12 in (30 cm) pace is taken. 2. Keep the shoulders square to the
front. 3. Each knee is bent sufficiently to
avoid dragging the foot along the ground.
INSTRUCTOR ..... PACES LEFT CLOSE MARCH.
1. The left foot is to be placed 12 in (30 cm) to the left and the other foot brought up to it in Quick Time.
2. The same action is to be taken as for moving to the right.
1. A 12 in (30 cm) pace is taken. 2. Keep the shoulders square to the
front. 3. Each knee is bent sufficiently to
avoid dragging the foot along the ground.
ARE THERE ANY QUESTIONS? The squad is to practise Collectively-Individually-
Collectively.

1-2-90
D. FINAL DEMONSTRATION. INSTRUCTOR EXECUTION POINTS TO NOTE The instructor is to give a final and complete demonstration: INSTRUCTOR FOOT DRILL JUDGING THE TIME PACES LEFT/RIGHT CLOSE MARCH.
1. A 12 in (30 cm) pace is taken. 2. Keep the shoulders square to the
front. 3. Each knee is bent sufficiently to
avoid dragging the foot along the ground.
ARE THERE ANY QUESTIONS? The squad is to practise Collectively-Individually-
Collectively.
E. END OF LESSON DRILLS INSTRUCTOR EXECUTION POINTS TO NOTE Reform the squad in Close Formation of Threes and confirm by collective practise: SQUAD/FLIGHT/PARADE PACES LEFT/RIGHT CLOSE MARCH.
Students are to execute the movement. 1. Make any corrections where necessary.
1-2-91
LESSON 18 - THE FORMATION OF A SQUAD/FLIGHT INSTRUCTOR’S NOTES
Aim To teach The Formation of a Squad/Flight. Timings One 15 minute period. Method A basic outdoor or indoor instructional lesson. Explain the EXECUTION of the movements and emphasise the
POINTS TO NOTE, as under column headings below. Dress & Stores Clean Working Dress. Preparation Select an area on the parade square or any area of hard ground, or indoor equivalent. CONDUCT OF LESSON
A. PRELIMINARIES.
Squad Formation The squad stood properly At Ease in three ranks. Revision Moving sideways a given number of paces. Spoken Introduction The next stage in foot drill is Formation of a Squad/Flight. The reason this movement is taught is to
enable a body of personnel to form a squad/flight in a smart, uniform manner.

1-2-92
B. COMPLETE DEMONSTRATION.
INSTRUCTOR EXECUTION POINTS TO NOTE The instructor is to give a complete explanation of the movement.
1. The instructor may use the squad to assist in the explanation of the movement.
C. MOVEMENTS
1) RIGHT MARKER.
INSTRUCTOR EXECUTION POINTS TO NOTE The instructor is to give the words of command: RIGHT MARKER.
1. On the RIGHT of RIGHT MARKER, the squad braces up into the At Ease position.
2. The marker marches forward 15 paces, halting on the 15th pace.
3. The marker stands At Ease.
1. The marker is to advance 14 paces 1-2.

1-2-93
2) ON PARADE.
INSTRUCTOR EXECUTION POINTS TO NOTE The instructor is to give the words of command: GET ON PARADE.
1. The marker (in position) and the squad (off-parade position) come to Attention. 2. The squad is to observe a pause, then march forward and form up in three ranks with two
persons covering the marker to form the first file; the remainder to form up on the left of the first file.
3. After observing a further pause each file with the exception of the right file, are to turn their heads and eyes to the right. The front rank are to raise their right arms (Right Dress).
4. Each file is then to observe a further pause and take up their dressing in line by moving with short quick paces until they are just able to see the lower part of the face of the second person beyond.
5. The shoulders are to be kept square to the front without bending the body or the head either backwards or forwards.
6. Personnel in the centre and rear are to cover the rank of the first person in their file at a distance of one pace behind each other. (At this distance personnel are in Close Order.)
7. When the right hand person of the leading file is satisfied that the squad is steady, he is to turn the head and eyes to the front and smartly lower the arm to the side.
8. On this movement all personnel, in succession by files, from left to right are to turn their head and eyes to the front.
9. At the same time personnel of the front rank are to lower their arms to their sides. 10. Again, after a pause, and in succession, each file from the left to the right is to Stand At
Ease.
1. If there are only two people in any file, the centre rank is to be left blank.
2. If there is only one person, the centre and rear ranks are to be left blank.
3. Such incomplete files, known as Blank Files, are always to be positioned as the second file from the left flank.
4. If there is less than nine persons to form a squad, they are to be formed up in two ranks with the same intervals between individuals as described.
5. The distance forward may be shortened if there is not enough space.
ARE THERE ANY
QUESTIONS?
The squad is to practise Collectively.
1-2-94
D. FINAL DEMONSTRATION INSTRUCTOR EXECUTION POINTS TO NOTE The instructor is to give a final explanation of the movement.
ARE THERE ANY QUESTIONS? The squad is to practise Collectively. E END OF LESSON DRILLS INSTRUCTOR EXECUTION POINTS TO NOTE Confirm by collective practise: RIGHT MARKER. GET ON PARADE.
Students to execute the movement.
1. Make any corrections where necessary.

1-2-95
LESSON 19 - SIZING OF A SQUAD/FLIGHT INSTRUCTOR’S NOTES
Aim To teach Sizing of a Squad/Flight. Timings One 30 minute period. Method A basic outdoor or indoor instructional lesson. Explain the EXECUTION of the movements and emphasise the
POINTS TO NOTE, as under column headings below. Dress & Stores Clean Working Dress. Preparation Select an area on the parade square or any area of hard ground, or indoor equivalent. CONDUCT OF LESSON
A. PRELIMINARIES.
Squad Formation The squad stood properly to Attention in a straight line. Revision Formation of a Squad. Spoken Introduction The next stage in foot drill is Sizing of a Squad/Flight. The reason this movement is taught is that a
correctly sized squad drills betters together and gives a better impression to the spectator. A recruit squad will be sized early in its training. Level ground should be used for sizing. It is done by forming everyone into a single rank and grading them using the top of the head-dress as a guide.
1-2-96
B. COMPLETE DEMONSTRATION.
INSTRUCTOR EXECUTION POINTS TO NOTE When sizing a squad the instructor is to use the tallest person of the squad to act as right marker.
C. MOVEMENTS.
1) SIZING A SQUAD/FLIGHT – ONE. INSTRUCTOR EXECUTION POINTS TO NOTE The instructor is to demonstrate the movement giving the words of command: FOOT DRILL JUDGING THE TIMING TALLEST ON THE RIGHT SHORTEST ON THE LEFT IN SINGLE RANK SIZE.
1. Personnel, with the exception of the marker, are to right incline, break ranks and fall in on the left of the marker in a single rank, according to size, and dress off without intervals.
1. A correct Left Turn is carried out. 2. Individuals can most easily assess
their height by comparing shoulder height with the person next to them.
ARE THERE ANY QUESTIONS? The squad is to practise Collectively-Individually-Collectively.

1-2-97
2) SIZING A SQUAD/FLIGHT – TWO. INSTRUCTOR EXECUTION POINTS TO NOTE The instructor is to demonstrate the movement giving the words of command: SQUAD – NUMBER.
1 All personnel except the marker are to turn head and eyes smartly to the right. At the same time, the right marker is to start the numbering by calling out:
ONE. 2. This is to be followed immediately by the next person
on the marker’s left turning the head to the front and at the same time calling out:
TWO. and so on, until all the personnel are numbered.
1. Numbering is sometimes necessary while personnel are in three ranks.
2. In this case the procedure is the same, the personnel in each rank taking on the number of the person calling out in the front rank for the file as a whole.
3. Only the front rank are to turn their heads and call out the numbers; the rest pay attention to hear their numbers called.
ARE THERE ANY QUESTIONS? The squad is to practise Collectively-Individually-Collectively.

1-2-98
3) SIZING A SQUAD/FLIGHT – THREE. INSTRUCTOR EXECUTION POINTS TO NOTE The instructor is to demonstrate the movement, giving the word of command: ODD NUMBERS TWO PACES FORWARD MARCH.
1. Odd numbered personnel take two paces forward, while even numbers stand fast.
On the command: NUMBER 1 STAND FAST RANKS RIGHT AND LEFT TURN.
1. Personnel of the front rank (odd numbers), except No 1, are to turn to the right and those of the rear rank (even numbers) are to turn to the left.
ARE THERE ANY QUESTIONS? The squad is to practise Collectively-Individually-Collectively.

1-2-99
4) SIZING A SQUAD/FLIGHT – FOUR.
INSTRUCTOR EXECUTION POINTS TO NOTE On the command: FORM SQUAD QUICK MARCH.
1. Personnel, except No 1, who stands fast, are to step off in the direction they are facing. The rear rank is to wheel to the right and follow the last person of the front rank.
2. No 3 is to halt one pace to the rear of No 1. No 5 is to halt one pace to the rear of No 3 (to form the first file of threes). No 7 halts to the left of No 1. Those following continue to form files of three until all are assembled.
3. On coming to a halt in their positions, individuals in a file are to wait until the individual forming the rear rank has halted. After a pause, the file is to turn to face the front at the same time, and take up the dressing by the right.
ARE THERE ANY QUESTIONS? The squad is to practise Collectively-Individually-Collectively.
1-2-100
D. FINAL DEMONSTRATION. INSTRUCTOR EXECUTION POINTS TO NOTE The instructor is to give a final and complete demonstration: FOOT DRILL JUDGING THE TIME. TALLEST ON THE RIGHT SHORTEST ON THE LEFT IN SINGLE RANK SIZE. SQUAD NUMBER. ODD NUMBERS TWO PACES FORWARD MARCH. NUMBER ONE STAND FAST RANKS RIGHT AND LEFT TURN. FORM SQUAD QUICK MARCH.
Students to execute the movements.
ARE THERE ANY QUESTIONS? The squad is to practise Collectively-Individually-Collectively.

1-2-101
E. END OF LESSON DRILLS. INSTRUCTOR EXECUTION POINTS TO NOTE Reform the squad in Close formation of Threes and confirm by collective practise: FOOT DRILL JUDGING THE TIME. TALLEST ON THE RIGHT SHORTEST ON THE LEFT IN SINGLE RANK SIZE. SQUAD NUMBER ODD NUMBERS TWO PACES FORWARD MARCH. NUMBER ONE STAND FAST RANKS RIGHT AND LEFT TURN. FORM SQUAD QUICK MARCH.
Students to execute the movements. 1. Make any corrections where necessary.

1-3-1
PART 1 - CHAPTER 3
FOOT DRILL IN QUICK TIME
CONTENTS
LESSON No TITLE PAGE No
1 The Quick March 1-3-2 2 Halt from The Quick March 1-3-9 3 The Right Turn on the March 1-3-15 4 The Left Turn on the March 1-3-21 5 The About Turn on the March 1-3-28 6 An Officer Passing Your Front Salute 1-3-37 7 An Officer To Your Left/Right Salute 1-3-44 8 To The Front Salute (Individual) 1-3-53 9 Compliments on the March (Eyes Left/Right) 1-3-57 10 Variations in Pace 1-3-63 11 Mark Time 1-3-71 12 Halt In Mark Time 1-3-77 13 Change Step In Mark Time 1-3-81 14 Forward From Mark Time 1-3-85 15 Change Step in Quick Time 1-3-89

1-3-2
LESSON 1 – THE QUICK MARCH INSTRUCTOR’S NOTES
Aim To teach marching at the regulation rate of 116 paces per minute. Timings One 30 minute period. Method A basic outdoor or indoor instructional lesson. Explain the EXECUTION of the movements and emphasise the
POINTS TO NOTE, as under column headings below. Dress & Stores Clean Working Dress. Preparation Select an area on the parade square or any area of hard ground, or indoor equivalent.
CONDUCT OF LESSON
A. PRELIMINARIES.
Squad Formation The squad stood properly to Attention in a straight line. Revision Open/Close Order March. Spoken Introduction The next stage in foot drill is the Quick March. The reason this movement is taught is to enable an
individual or body of personnel to march at the regulation rate of 116 paces per minute in a smart uniform manner.

1-3-3
B. COMPLETE DEMONSTRATION.
INSTRUCTOR EXECUTION POINTS TO NOTE The instructor is to give a complete demonstration of the movement: INSTRUCTOR FOOT DRILL JUDGING THE TIME QUICK MARCH.
On the execution of the movement the instructor is to call out: LEFT RIGHT LEFT RIGHT LEFT.
1. There are three parts to this movement.
FOR THE PURPOSE OF INSTRUCTION THIS MOVEMENT IS BROKEN DOWN INTO PARTS.

1-3-4
C. MOVEMENTS.
1) QUICK MARCH - ONE (Fig 3-1).
INSTRUCTOR EXECUTION POINTS TO NOTE The instructor is to demonstrate the first movement giving the words of command: INSTRUCTOR ONE.
1. The left foot is to advance forward a pace of 30 in (750 mm). The foot making contact with the ground heel first.
2. At the same time, the right arm is forced forward and the left arm to the rear. Fingers are to be clenched with the thumb to the front, on top and touching the forefinger. The arm is locked at the elbow.
3. The right arm is to swing forward to the individuals own shoulder height.
4. On the execution of this movement the squad is to call out:
LEFT.
1. Ensure a 30 in (750 mm) pace is taken.
2. Ensure the right arm is forced forward to the individuals own shoulder height.
3. The left arm is forced to the rear. 4. The body is erect and square to the
front.
ARE THERE ANY QUESTIONS? The squad is to practise Collectively-Individually-Collectively.

1-3-5
2) QUICK MARCH – TWO (Fig 3-2).
INSTRUCTOR EXECUTION POINTS TO NOTE The instructor is to demonstrate the second movement giving the words of command: INSTRUCTOR ONE.
1. The right foot is to advance forward a pace of 30 in (750 mm). The foot making contact with the ground heel first.
2. At the same time, the left arm is forced forward and the right arm to the rear. Fingers are to be clenched with the thumb to the front, on top and touching the forefinger. The arm is locked at the elbow.
3. The left arm is to swing forward to the individuals own shoulder height.
4. On the execution of this movement the squad is to call out:
RIGHT.
1. Ensure a 30 in (750 mm) pace is taken.
2. Ensure the left arm is forced forward to the individuals own shoulder height.
3. The right arm is forced to the rear. 4. The body is erect and square to the
front.
ARE THERE ANY QUESTIONS? The squad is to practise Collectively-Individually-Collectively.
1-3-6
3) QUICK MARCH – THREE (Fig 3-1).
INSTRUCTOR EXECUTION POINTS TO NOTE The instructor is to demonstrate the third movement giving the words of command: INSTRUCTOR ONE.
1. The movement is the same as squad RIGHT, except the left foot is brought forward a full 30 in (750 mm) marching pace.
2. On the execution of this movement the squad is to call out:
LEFT.
1. Ensure a 30 in (750 mm) pace is taken.
2. Ensure the right arm is forced forward to the individuals own shoulder height.
3. The left arm is forced to the rear. 4. The body is erect and square to the
front. ARE THERE ANY QUESTIONS? The squad is to practise Collectively-Individually-
Collectively.
1-3-7
D. FINAL DEMONSTRATION (Figs 3-1 & 3-2). INSTRUCTOR EXECUTION POINTS TO NOTE The instructor is to give a final and complete demonstration: INSTRUCTOR FOOT DRILL JUDGING THE TIME BY THE LEFT QUICK MARCH.
On the execution of the movement the instructor is to call out: LEFT RIGHT LEFT RIGHT LEFT.
1. The instructor is to continue marching in Quick Time for 11 paces.
2. The instructor is to march to 116 paces to the minute.
ARE THERE ANY QUESTIONS? The squad is to practise Collectively-Individually-Collectively.
E. END OF LESSON DRILLS. INSTRUCTOR EXECUTION POINTS TO NOTE Reform the squad in Close Formation of Threes and confirm by collective practise: SQUAD FOOT DRILL JUDGING THE TIME BY THE LEFT QUICK MARCH.
Students to execute the movement and call out the timing: LEFT RIGHT LEFT RIGHT LEFT.
1. Make any corrections where necessary.
2. Ensure the squad march to the regulation pace of 116 paces to the minute.

1-3-8
First Movement Second Movement
Fig 3-1 Fig 3-2
THE QUICK MARCH

1-3-9
LESSON 2 - HALT FROM THE QUICK MARCH INSTRUCTOR’S NOTES
Aim To teach Halt from the Quick March. Timings One 10 minute period. Method A basic outdoor or indoor instructional lesson. Explain the EXECUTION of the movements and emphasise
the POINTS TO NOTE, as under column headings below. Dress & Stores Clean Working Dress. Preparation Select an area on the parade square or any area of hard ground, or indoor equivalent. CONDUCT OF LESSON
A. PRELIMINARIES.
Squad Formation The squad stood properly to Attention in a straight line. Revision The Quick March. Spoken Introduction The next stage in foot drill is Halt from the Quick March. The reason this movement is taught is to
enable an individual or body of personnel to Halt from the Quick March in a smart, uniform manner.

1-3-10
B. COMPLETE DEMONSTRATION.
INSTRUCTOR EXECUTION POINTS TO NOTE The instructor is to give a complete demonstration of the movement: INSTRUCTOR FOOT DRILL JUDGING THE TIME HALT.
On the execution of the movement the instructor is to call out: ONE ONE TWO.
1 There are three parts to this movement.
FOR THE PURPOSE OF INSTRUCTION THIS MOVEMENT IS BROKEN DOWN INTO THREE PARTS.

1-3-11
C. MOVEMENTS.
1) HALT – ONE (Fig 3-3). INSTRUCTOR EXECUTION POINTS TO NOTE The instructor is to demonstrate the first movement giving the words of command: INSTRUCTOR ONE.
1. Given when the left foot strikes the ground a check pace is to be completed with the right foot.
2. The arm swing is continued in the correct Quick March.
3. On the execution of this movement the squad is to call out:
ONE.
1. A full 30 in pace is completed with the right foot.
2. The arm swing is continued up to shoulder level.
ARE THERE ANY QUESTIONS? The squad is to practise Collectively-Individually-Collectively.
2) HALT – TWO (Fig 3-4).
INSTRUCTOR EXECUTION POINTS TO NOTE The instructor is to demonstrate the second movement giving the words of command: INSTRUCTOR ONE.
1. A further check pace of only 15 in (380 mm) is completed by the left foot.
2. The arm swing is continued in the correct Quick March. 3. On the execution of the movement the squad is to call
out: ONE.
1. A 15 in check pace is completed with the left foot.
2. The arm swing is continued up to shoulder level.
3. The body is erect and square to the front.
ARE THERE ANY QUESTIONS? The squad is to practise Collectively-Individually-
Collectively.

1-3-12
3) HALT – THREE (Fig 3-5).
INSTRUCTOR EXECUTION POINTS TO NOTE The instructor is to demonstrate the movement giving the words of command: INSTRUCTOR ONE.
1. The right knee comes through the bent knee position and the right foot is placed smartly down in line with the left at the correct position of Attention.
2. At the same time, the arms are smartly cut to the sides of the body.
3. On the execution of the movement the squad is to call out:
ONE.
1. The right knee comes through the bent knee position, with the thigh parallel to the ground.
2. The arm swing is cut smartly to the sides of the body.
3. The body is erect and square to the front.
4. All movement ceases at the position of Attention.
ARE THERE ANY QUESTIONS? The squad is to practise Collectively-Individually-Collectively.
D. FINAL DEMONSTRATION INSTRUCTOR EXECUTION POINTS TO NOTE The instructor is to give a final and complete demonstration: INSTRUCTOR FOOT DRILL JUDGING THE TIME HALT.
On the execution of the movement the instructor is to call out: ONE ONE TWO.
ARE THERE ANY QUESTIONS?
The squad is to practise Collectively-Individually-Collectively.

1-3-13
E. END OF LESSON DRILLS INSTRUCTOR EXECUTION POINTS TO NOTE Reform the squad in Close Formation of Threes and confirm by collective practise: SQUAD/FLIGHT/PARADE FOOT DRILL JUDGING THE TIME HALT.
Students to execute the movement and call out the timing: ONE ONE TWO.
1. Make any corrections where necessary.

1-3-14
First Movement Second Movement Final Position
Fig 3-3 Fig 3-4 Fig 3-5
HALT FROM THE QUICK MARCH

1-3-15
LESSON 3 - THE RIGHT TURN ON THE MARCH INSTRUCTOR’S NOTES
Aim To teach the Right Turn On The March. Timings One 20 minute period. Method A basic outdoor or indoor instructional lesson. Explain the EXECUTION of the movements and emphasise the
POINTS TO NOTE, as under column headings below. Dress & Stores Clean Working Dress. Preparation Select an area on the parade square or any area of hard ground, or indoor equivalent. CONDUCT OF LESSON
A. PRELIMINARIES.
Squad Formation The squad stood properly to Attention in a straight line. Revision Halt from the Quick March. Spoken Introduction The next stage in foot drill is the Right Turn on the March. The reason this movement is taught is to
enable an individual or body of personnel to turn through an angle of 90 degrees without being halted in a smart, uniform manner.

1-3-16
B. COMPLETE DEMONSTRATION.
INSTRUCTOR EXECUTION POINTS TO NOTE The instructor is to give a complete demonstration of the movement: INSTRUCTOR FOOT DRILL JUDGING THE TIME RIGHT TURN.
On the execution of the movement the instructor is to call out: CHECK TURN FORWARD.
1. There are three parts to this movement.
FOR THE PURPOSE OF INSTRUCTION THIS MOVEMENT IS BROKEN DOWN INTO THREE PARTS.
1-3-17
C. MOVEMENTS.
1) RIGHT TURN – ONE (Fig 3-6).
INSTRUCTOR EXECUTION POINTS TO NOTE The instructor is to demonstrate the first movement giving the words of command: INSTRUCTOR ONE.
1. Given when the left foot strikes the ground, a full 30 in (750 mm) pace is to be completed with the right foot.
2. At the same time swinging the left arm forward and the right arm to the rear, in the correct Quick March.
3. On the execution of the movement the squad is to call out:
ONE.
1. The right leg takes a full marching pace forward.
2. The arm swing is continued. 3. The body is erect and square to the
front.
ARE THERE ANY QUESTIONS? The squad is to practise Collectively-Individually-Collectively.
1-3-18
2) RIGHT TURN - TWO (Fig 3-7).
INSTRUCTOR EXECUTION POINTS TO NOTE The instructor is to demonstrate the second movement giving the words of command: INSTRUCTOR ONE.
1. The left leg comes through the bent knee position and is placed on the ground approximately 3 in (80 mm), diagonally to the right and in front of the right toecap.
2. The arms are forced, in a scissor-like movement, to the sides of the body.
3. On the execution of the movement the squad is to call out:
ONE.
1. The forward movement is halted as the left foot hits the ground.
2. The arms are forced smartly to the sides of the body into the correct position of Attention.
3. The body is erect and square to the front.
ARE THERE ANY QUESTIONS? The squad is to practise Collectively-Individually-Collectively.
3) RIGHT TURN - THREE (Fig 3-8).
INSTRUCTOR EXECUTION POINTS TO NOTE The instructor is to demonstrate the third movement giving the words of command: INSTRUCTOR ONE.
1. The right foot is forced forward, a full 30 in (750 mm) pace in the new direction ordered.
2. As the right foot is forced forward the left arm is swung forward to shoulder level and the right arm forced fully to the rear in the correct Quick March.
3. On the execution of the movement the squad is to call out:
ONE.
1. A full 30 in (750 mm) pace is completed by the right foot.
2. The correct Quick March arm swing is continued.
3. The body is erect and square to the front.
4. Quick March is now continued in the new direction ordered.
ARE THERE ANY QUESTIONS? The squad is to practise Collectively-Individually-Collectively.

1-3-19
D. FINAL DEMONSTRATION INSTRUCTOR EXECUTION POINTS TO NOTE The instructor is to give a final and complete demonstration: INSTRUCTOR FOOT DRILL JUDGING THE TIME RIGHT TURN.
On the execution of the movement the instructor is to call out: CHECK TURN FORWARD.
ARE THERE ANY QUESTIONS? The squad is to practise Collectively-Individually- Collectively.
E. END OF LESSON DRILLS INSTRUCTOR EXECUTION POINTS TO NOTE Reform the squad in Close Formation of Threes and confirm by collective practise: FOOT DRILL JUDGING THE TIME MOVE TO THE RIGHT RIGHT TURN.
Students to execute the movement and call out the timing: CHECK TURN FORWARD.
1. Make any corrections where necessary.

1-3-20
First Movement Second Movement Final Position Fig 3-6 Fig 3-7 Fig 3-8
RIGHT TURN ON THE MARCH IN QUICK TIME
1-3-21
LESSON 4 - THE LEFT TURN ON THE MARCH INSTRUCTOR’S NOTES
Aim To teach the Left Turn On The March. Timings One 20 minute period. Method A basic outdoor or indoor instructional lesson. Explain the EXECUTION of the movements and emphasise the
POINTS TO NOTE, as under column headings below. Dress & Stores Clean Working Dress. Preparation Select an area on the parade square or any area of hard ground, or indoor equivalent. CONDUCT OF LESSON
A. PRELIMINARIES.
Squad Formation The squad stood properly to Attention in a straight line. Revision Right Turn on the Quick March. Spoken Introduction The next stage in foot drill is the Left Turn on the March. The reason this movement is taught is to
enable an individual or body of personnel to turn through an angle of 90 degrees without first being halted in a smart, uniform manner

1-3-22
B. COMPLETE DEMONSTRATION.
INSTRUCTOR EXECUTION POINTS TO NOTE The instructor is to give a complete demonstration of the movement: INSTRUCTOR FOOT DRILL JUDGING THE TIME LEFT TURN.
On the execution of the movement the instructor is to call out: CHECK TURN FORWARD.
1. There are three parts to this movement.
FOR THE PURPOSE OF INSTRUCTION THIS MOVEMENT IS BROKEN DOWN INTO THREE PARTS

1-3-23
C. MOVEMENTS.
1) LEFT TURN - ONE (Fig 3-9).
INSTRUCTOR EXECUTION POINTS TO NOTE The instructor is to demonstrate the first movement giving the words of command: INSTRUCTOR ONE.
1. Given when the right foot strikes the ground, a full 30 in (750 mm) pace is to be completed with the left foot.
2. At the same time swinging the right arm forward and the left arm to the rear, in the correct Quick March.
3. On the execution of the movement the squad is to call out: ONE.
1. The left leg takes a full marching pace forward.
2. The arm swing is continued. 3. The body is erect and square to the
front.
ARE THERE ANY QUESTIONS? The squad is to practise Collectively-Individually-Collectively.

1-3-24
2) LEFT TURN - TWO (Fig 3-10).
INSTRUCTOR EXECUTION POINTS TO NOTE The instructor is to demonstrate the second movement giving the words of command: INSTRUCTOR ONE.
1. The right leg comes through the bent knee position and is placed on the ground approximately 3 in (80 mm), diagonally to the left, in front of the left toecap.
2. The arms are forced in a scissor-like movement to the sides of the body.
3. On the execution of the movement the squad is to call out:
ONE.
1. The forward movement is halted as the right foot hits the ground.
2. The arms are forced smartly to the sides of the body into the correct position of Attention.
3. The body is erect and square to the front.
ARE THERE ANY QUESTIONS? The squad is to practise Collectively-Individually-Collectively.
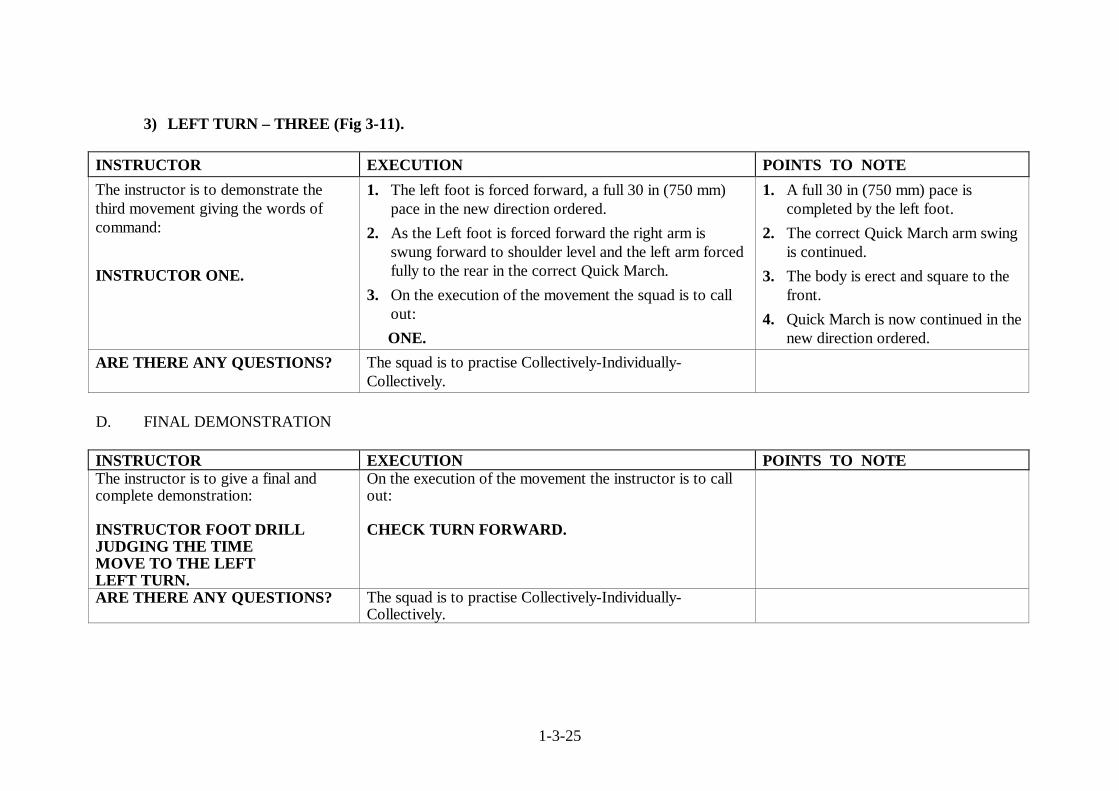
1-3-25
3) LEFT TURN – THREE (Fig 3-11).
INSTRUCTOR EXECUTION POINTS TO NOTE The instructor is to demonstrate the third movement giving the words of command: INSTRUCTOR ONE.
1. The left foot is forced forward, a full 30 in (750 mm) pace in the new direction ordered.
2. As the Left foot is forced forward the right arm is swung forward to shoulder level and the left arm forced fully to the rear in the correct Quick March.
3. On the execution of the movement the squad is to call out:
ONE.
1. A full 30 in (750 mm) pace is completed by the left foot.
2. The correct Quick March arm swing is continued.
3. The body is erect and square to the front.
4. Quick March is now continued in the new direction ordered.
ARE THERE ANY QUESTIONS? The squad is to practise Collectively-Individually-Collectively.
D. FINAL DEMONSTRATION INSTRUCTOR EXECUTION POINTS TO NOTE The instructor is to give a final and complete demonstration: INSTRUCTOR FOOT DRILL JUDGING THE TIME MOVE TO THE LEFT LEFT TURN.
On the execution of the movement the instructor is to call out: CHECK TURN FORWARD.
ARE THERE ANY QUESTIONS? The squad is to practise Collectively-Individually-Collectively.
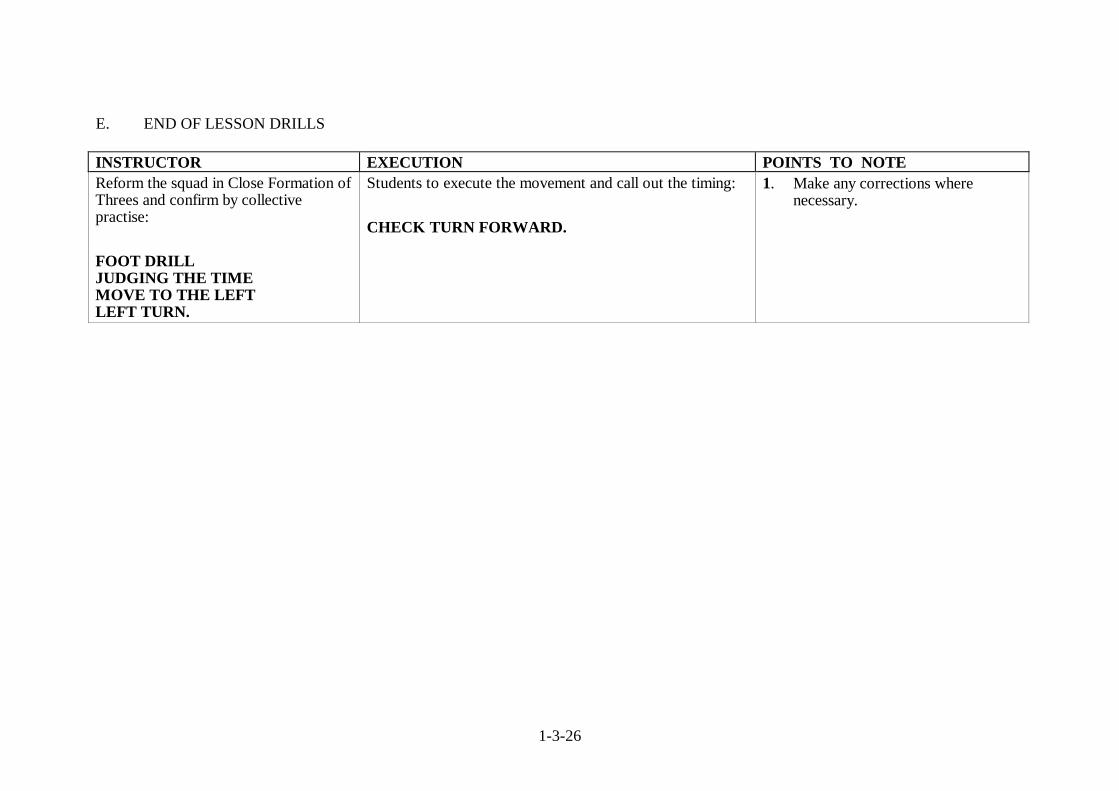
1-3-26
E. END OF LESSON DRILLS INSTRUCTOR EXECUTION POINTS TO NOTE Reform the squad in Close Formation of Threes and confirm by collective practise: FOOT DRILL JUDGING THE TIME MOVE TO THE LEFT LEFT TURN.
Students to execute the movement and call out the timing: CHECK TURN FORWARD.
1. Make any corrections where necessary.
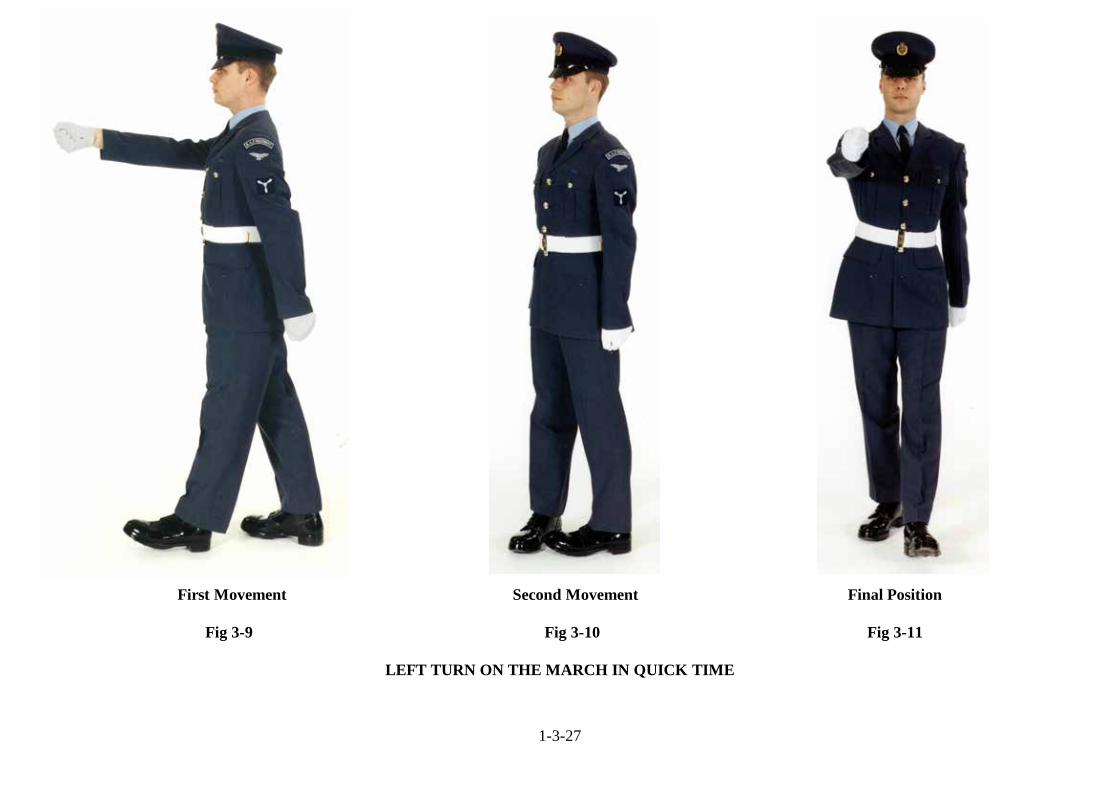
1-3-27
First Movement Second Movement Final Position
Fig 3-9 Fig 3-10 Fig 3-11
LEFT TURN ON THE MARCH IN QUICK TIME
1-3-28
LESSON 5 - THE ABOUT TURN ON THE MARCH INSTRUCTOR’S NOTES
Aim To teach the About Turn On The March. Timings One 20 minute period. Method A basic outdoor or indoor instructional lesson. Explain the EXECUTION of the movements and emphasise
the POINTS TO NOTE, as under column headings below. Dress & Stores Clean Working Dress. Preparation Select an area on the parade square or any area of hard ground, or indoor equivalent. CONDUCT OF LESSON
A. PRELIMINARIES.
Squad Formation The squad stood properly to Attention in a straight line. Revision Left / Right Turn On The March. Spoken Introduction The next stage in foot drill is the About Turn on the March. The reason this movement is taught is to
enable an individual or body of personnel to turn through an angle of 180 degrees without first being halted in a smart, uniform manner.

1-3-29
B. COMPLETE DEMONSTRATION.
INSTRUCTOR EXECUTION POINTS TO NOTE The instructor is to give a complete demonstration of the movement: INSTRUCTOR FOOT DRILL JUDGING THE TIME ABOUT TURN.
On the execution of the movement the instructor is to call out: CHECK LEFT RIGHT LEFT FORWARD.
1. There are four parts to this movement.
FOR THE PURPOSE OF INSTRUCTION,THIS MOVEMENT IS BROKEN DOWN INTO FOUR PARTS.
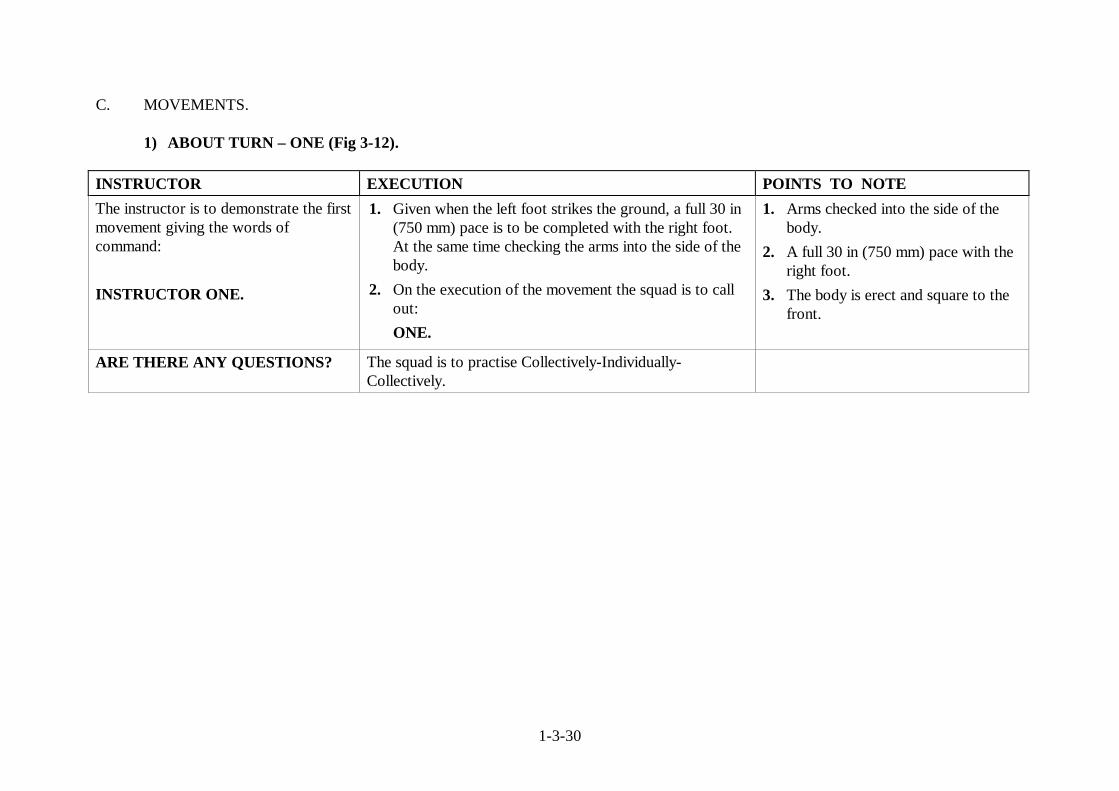
1-3-30
C. MOVEMENTS.
1) ABOUT TURN – ONE (Fig 3-12).
INSTRUCTOR EXECUTION POINTS TO NOTE The instructor is to demonstrate the first movement giving the words of command: INSTRUCTOR ONE.
1. Given when the left foot strikes the ground, a full 30 in (750 mm) pace is to be completed with the right foot. At the same time checking the arms into the side of the body.
2. On the execution of the movement the squad is to call out:
ONE.
1. Arms checked into the side of the body.
2. A full 30 in (750 mm) pace with the right foot.
3. The body is erect and square to the front.
ARE THERE ANY QUESTIONS? The squad is to practise Collectively-Individually-
Collectively.

1-3-31
2) ABOUT TURN - TWO (Fig 3-13).
INSTRUCTOR EXECUTION POINTS TO NOTE The instructor is to demonstrate the second movement giving the words of command: INSTRUCTOR ONE.
1. On receipt of the command the body is forced through an angle of 90 degrees to the right by means of pivoting on the ball of the right foot.
2. At the same time, the left leg is bent through the bent knee position and the foot placed flat on the ground next to the right foot.
3. On the execution of the movement the squad is to call out:
ONE
1. Arms checked into the side of the body.
2. The left leg bends through the bent knee position.
3. The left foot placed flat on the ground next to the right foot.
ARE THERE ANY QUESTIONS? The squad is to practise Collectively-Individually-Collectively.

1-3-32
3) ABOUT TURN – THREE (Fig 3-14).
INSTRUCTOR EXECUTION POINTS TO NOTE The instructor is to demonstrate the third movement giving the words of command: INSTRUCTOR ONE.
1. The right leg moves through the bent knee position and the foot placed flat on the ground at an angle of approximately 90 degrees to the left foot.
2. On the execution of the movement the squad is to call out:
ONE.
1. Arms checked into the side of the body.
2. The right leg bends through the bent knee position.
3. The right foot placed flat on the ground 90 degrees to the left foot.
4. The body is erect and square to the front.
ARE THERE ANY QUESTIONS? The squad is to practise Collectively-Individually-Collectively.
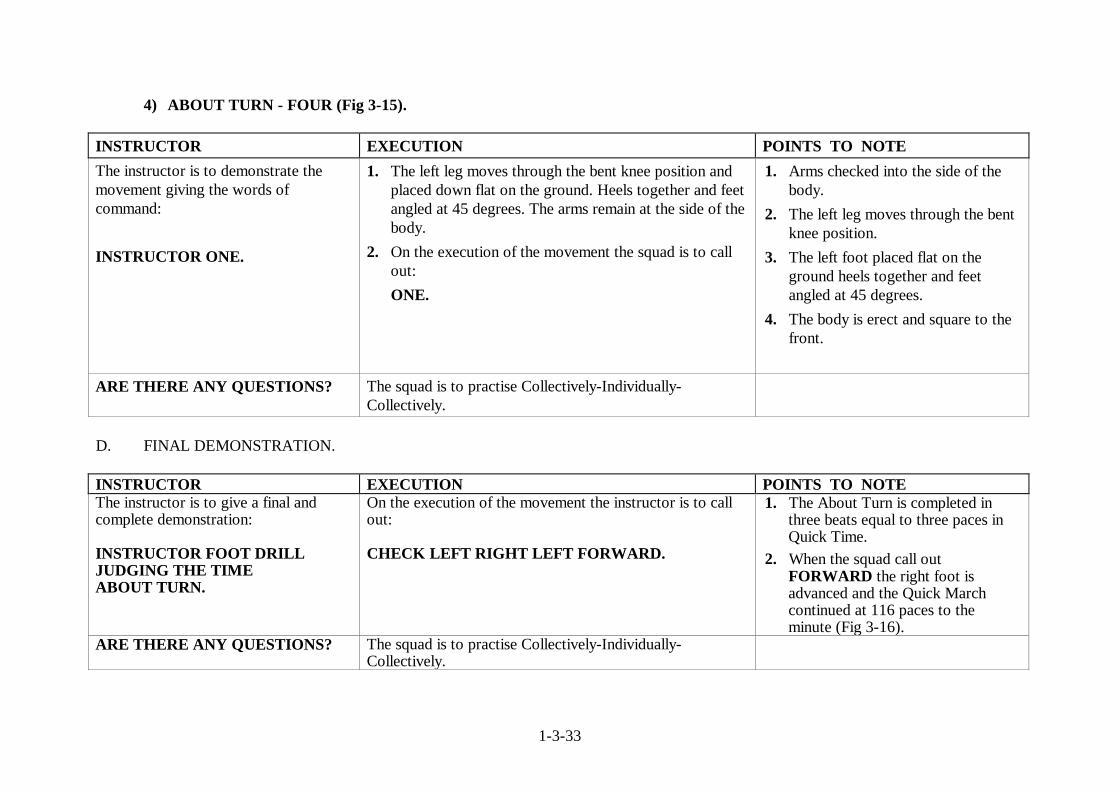
1-3-33
4) ABOUT TURN - FOUR (Fig 3-15).
INSTRUCTOR EXECUTION POINTS TO NOTE The instructor is to demonstrate the movement giving the words of command: INSTRUCTOR ONE.
1. The left leg moves through the bent knee position and placed down flat on the ground. Heels together and feet angled at 45 degrees. The arms remain at the side of the body.
2. On the execution of the movement the squad is to call out:
ONE.
1. Arms checked into the side of the body.
2. The left leg moves through the bent knee position.
3. The left foot placed flat on the ground heels together and feet angled at 45 degrees.
4. The body is erect and square to the front.
ARE THERE ANY QUESTIONS? The squad is to practise Collectively-Individually-
Collectively.
D. FINAL DEMONSTRATION. INSTRUCTOR EXECUTION POINTS TO NOTE The instructor is to give a final and complete demonstration: INSTRUCTOR FOOT DRILL JUDGING THE TIME ABOUT TURN.
On the execution of the movement the instructor is to call out: CHECK LEFT RIGHT LEFT FORWARD.
1. The About Turn is completed in three beats equal to three paces in Quick Time.
2. When the squad call out FORWARD the right foot is advanced and the Quick March continued at 116 paces to the minute (Fig 3-16).
ARE THERE ANY QUESTIONS? The squad is to practise Collectively-Individually-Collectively.
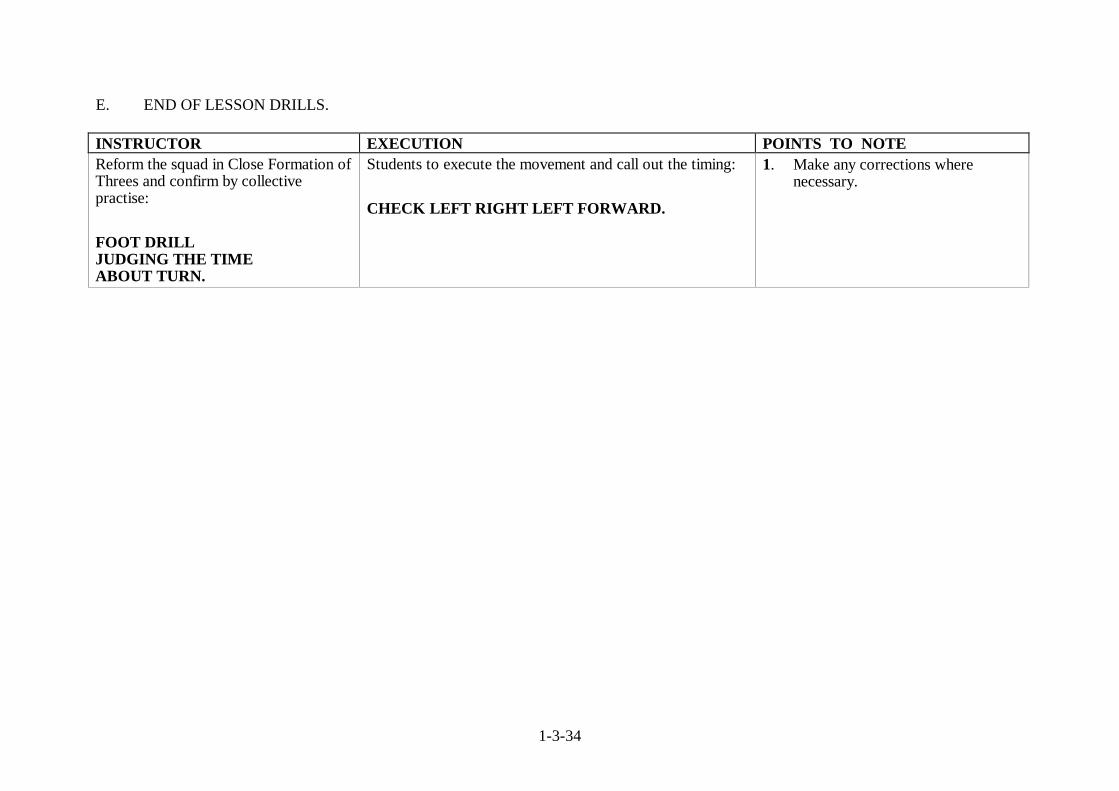
1-3-34
E. END OF LESSON DRILLS. INSTRUCTOR EXECUTION POINTS TO NOTE Reform the squad in Close Formation of Threes and confirm by collective practise: FOOT DRILL JUDGING THE TIME ABOUT TURN.
Students to execute the movement and call out the timing: CHECK LEFT RIGHT LEFT FORWARD.
1. Make any corrections where necessary.

1-3-35
First Movement Second Movement Third Movement
Fig 3-12 Fig 3-13 Fig 3-14
THE ABOUT TURN ON THE MARCH IN QUICK TIME

1-3-36
Final Position Forward
Fig 3-15 Fig 3-16
THE ABOUT TURN ON THE MARCH IN QUICK TIME
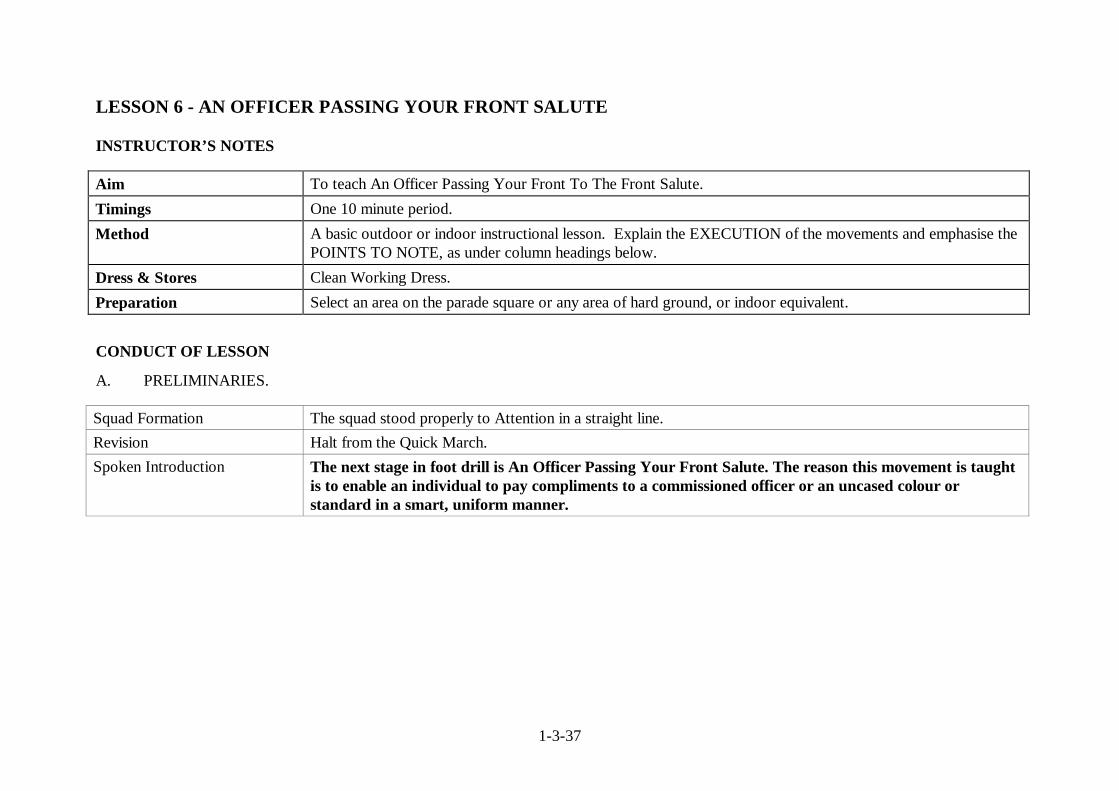
1-3-37
LESSON 6 - AN OFFICER PASSING YOUR FRONT SALUTE INSTRUCTOR’S NOTES
Aim To teach An Officer Passing Your Front To The Front Salute. Timings One 10 minute period. Method A basic outdoor or indoor instructional lesson. Explain the EXECUTION of the movements and emphasise the
POINTS TO NOTE, as under column headings below. Dress & Stores Clean Working Dress. Preparation Select an area on the parade square or any area of hard ground, or indoor equivalent. CONDUCT OF LESSON
A. PRELIMINARIES.
Squad Formation The squad stood properly to Attention in a straight line. Revision Halt from the Quick March. Spoken Introduction The next stage in foot drill is An Officer Passing Your Front Salute. The reason this movement is taught
is to enable an individual to pay compliments to a commissioned officer or an uncased colour or standard in a smart, uniform manner.
1-3-38
B. COMPLETE DEMONSTRATION.
INSTRUCTOR EXECUTION POINTS TO NOTE The instructor is to give a complete demonstration of the movement: INSTRUCTOR FOOT DRILL JUDGING THE TIME AN OFFICER PASSING YOUR FRONT TO THE FRONT SALUTE.
On the execution of the movement the instructor is to call out: CHECK/UP - TWO - THREE - FOUR - FIVE/DOWN SWING.
1. There are four parts to this movement.
FOR THE PURPOSE OF INSTRUCTION THIS MOVEMENT IS BROKEN DOWN INTO FOUR PARTS.

1-3-39
C. MOVEMENTS.
1) AN OFFICER PASSING YOUR FRONT SALUTE – ONE (Fig 3-17).
INSTRUCTOR EXECUTION POINTS TO NOTE The instructor is to demonstrate the first movement giving the words of command: INSTRUCTOR ONE.
1. Given when the left foot strikes the ground. A full 30 in (75 cm) pace is completed with the right foot and the arms are checked into the sides of the body.
2. On the execution of the movement the squad is to call out: ONE.
1. The arms are at the sides of the body as in the correct position of Attention.
2. The body is erect and square to the front.
ARE THERE ANY QUESTIONS? The squad is to practise Collectively-Individually-Collectively.
2) AN OFFICER PASSING YOUR FRONT SALUTE – TWO (Fig 3-18).
INSTRUCTOR EXECUTION POINTS TO NOTE The instructor is to demonstrate the second movement giving the words of command: INSTRUCTOR UP TWO THREE FOUR FIVE.
1. The salute is executed as the left heel strikes the ground.
2. A further four paces are taken holding the salute. 3. The left arm is to be kept steady at the side of the body
during the salute. 4. On the execution of the movement the squad is to call
out: UP – TWO – THREE – FOUR – FIVE.
1. The left foot and the right arm move at exactly the same time.
2. The body, head and shoulders are kept to the front.
3. Look directly at the person/item being saluted.
ARE THERE ANY QUESTIONS? The squad is to practise Collectively-Individually-Collectively.

1-3-40
3) AN OFFICER PASSING YOUR FRONT SALUTE – THREE (Fig 3-19).
INSTRUCTOR EXECUTION POINTS TO NOTE The instructor is to demonstrate the third movement giving the words of command: INSTRUCTOR ONE.
1. As the right foot completes the next pace, the right arm is to be brought to the side of the body.
2. The left arm is to be kept steady at the side of the body. 3. On the execution of the movement the squad is to call
out: ONE.
1. The left foot and the right arm move at exactly the same time.
2. The body, head and shoulders are kept to the front.
ARE THERE ANY QUESTIONS? The squad is to practise Collectively-Individually-Collectively.
4) AN OFFICER PASSING YOUR FRONT SALUTE – FOUR (Fig 3-20).
INSTRUCTOR EXECUTION POINTS TO NOTE The instructor is to demonstrate the fourth movement giving the words of command: INSTRUCTOR ONE.
1. As the left foot completes the next pace, the right arm is swung forward of the body, back into the Quick March.
2. The left arm is swung to the rear of the body. 3. On the execution of the movement the squad is to call
out: ONE.
1. The left foot and the right arm move at exactly the same time.
2. The body, head and shoulders are kept to the front.
ARE THERE ANY QUESTIONS? The squad is to practise Collectively-Individually-Collectively.

1-3-41
D. FINAL DEMONSTRATION. INSTRUCTOR EXECUTION POINTS TO NOTE The instructor is to give a final and complete demonstration: INSTRUCTOR FOOT DRILL JUDGING THE TIME AN OFFICER PASSING YOUR FRONT TO THE FRONT SALUTE.
On the execution of the movement the instructor is to call out: CHECK/UP - TWO - THREE - FOUR - FIVE/DOWN SWING.
ARE THERE ANY QUESTIONS? The squad is to practise Collectively-Individually-Collectively.
E. END OF LESSON DRILLS. INSTRUCTOR EXECUTION POINTS TO NOTE Reform the squad in Close Formation of Threes and confirm by collective practise: FOOT DRILL JUDGING THE TIME AN OFFICER PASSING YOUR FRONT TO THE FRONT SALUTE.
Students to execute the movement and call out the timing: CHECK/UP - TWO - THREE - FOUR - FIVE/DOWN SWING.
1. Make any corrections where necessary.

1-3-42
First Movement Second Movement
Fig 3-17 Fig 3-18
AN OFFICER PASSING YOUR FRONT - TO THE FRONT – SALUTE
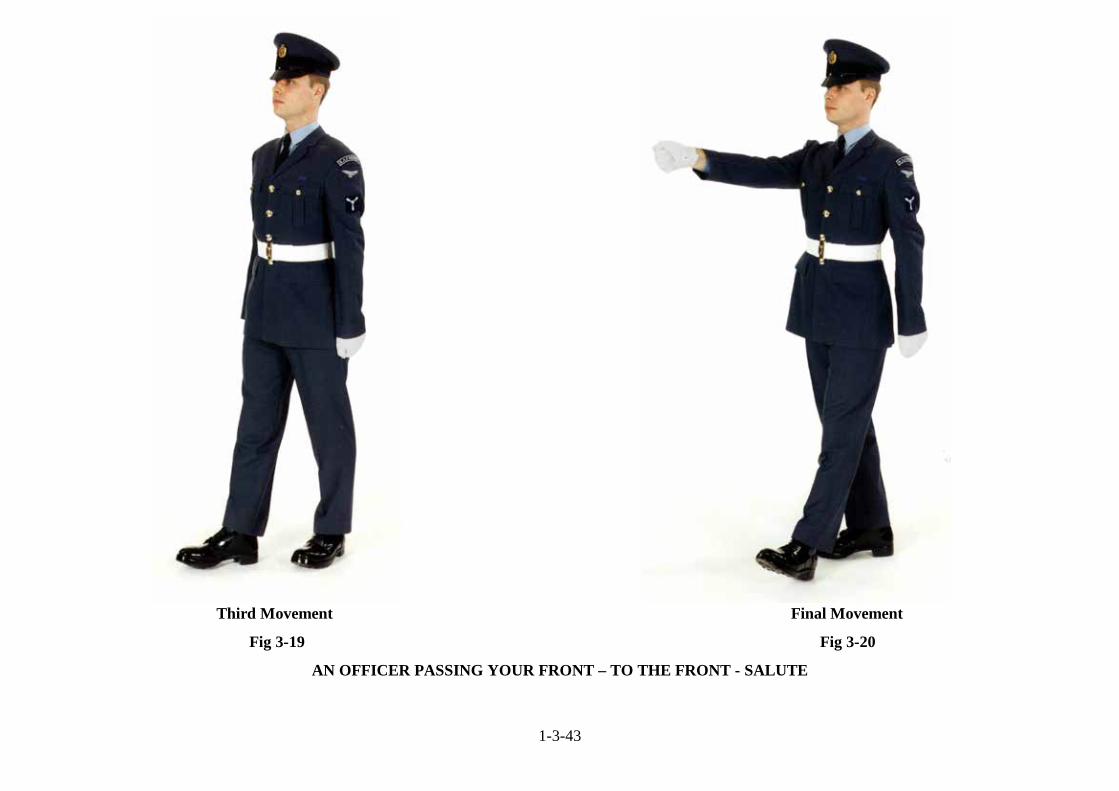
1-3-43
Third Movement Final Movement
Fig 3-19 Fig 3-20
AN OFFICER PASSING YOUR FRONT – TO THE FRONT - SALUTE

1-3-44
LESSON 7 - AN OFFICER TO YOUR LEFT/RIGHT SALUTE INSTRUCTOR’S NOTES
Aim To teach An Officer To Your Left/Right To The Left/Right Salute. Timings One 10 minute period. Method A basic outdoor or indoor instructional lesson. Explain the EXECUTION of the movements and emphasise
the POINTS TO NOTE, as under column headings below. Dress & Stores Clean Working Dress. Preparation Select an area on the parade square or any area of hard ground, or indoor equivalent. CONDUCT OF LESSON
A. PRELIMINARIES.
Squad Formation The squad stood properly to Attention in a straight line. Revision An Officer Passing Your Front To The Front Salute. Spoken Introduction The next stage in foot drill is An Officer To Your Left/Right Salute. The reason this movement is
taught is to enable an individual to pay compliments to a commissioned officer or an uncased colour or standard in a smart, uniform manner.

1-3-45
B. COMPLETE DEMONSTRATION.
INSTRUCTOR EXECUTION POINTS TO NOTE The instructor is to give a complete demonstration of the movement: INSTRUCTOR FOOT DRILL JUDGING THE TIME AN OFFICER TO YOUR LEFT/RIGHT TO THE LEFT/RIGHT SALUTE.
On the execution of the movement the instructor is to call out: CHECK/UP - TWO - THREE - FOUR - FIVE/DOWN SWING.
1. There are four parts to this movement.
FOR THE PURPOSE OF INSTRUCTION THIS MOVEMENT IS BROKEN DOWN INTO FOUR PARTS.

1-3-46
C. MOVEMENTS.
1) AN OFFICER TO YOUR LEFT/RIGHT SALUTE – ONE (Fig 3-21).
INSTRUCTOR EXECUTION POINTS TO NOTE The instructor is to demonstrate the first movement giving the words of command: INSTRUCTOR ONE.
1. Given when the left foot strikes the ground. A full 30 in (75 cm) pace is completed with the right foot and the arms are checked into the sides of the body.
2. On the execution of the movement the squad is to call out: ONE.
1. The arms are at the sides of the body as in the correct position of Attention.
2. The body is erect and square to the front.
ARE THERE ANY QUESTIONS? The squad is to practise Collectively-Individually-Collectively.

1-3-47
2) AN OFFICER PASSING YOUR LEFT/RIGHT SALUTE – TWO (Figs 3-22 & 3-24).
INSTRUCTOR EXECUTION POINTS TO NOTE The instructor is to demonstrate the second movement giving the words of command: INSTRUCTOR ONE – TWO – THREE – FOUR – FIVE.
1. When the left foot comes forward and strikes the ground, the salute is to be given.
2. At the same time the head and eyes are forced over to the direction ordered.
3. Then four 30 in (75 cm) paces are taken forward starting with the right foot, holding the salute.
4. The left arm is to be kept steady at the side of the body during the salute.
5. On the execution of the movement the squad is to call out: ONE – TWO – THREE – FOUR – FIVE.
1. The left foot and the right arm move at exactly the same time.
2. The body and shoulders are kept to the front.
3. Look directly at the person/item being saluted.
ARE THERE ANY QUESTIONS? The squad is to practise Collectively-Individually-Collectively.
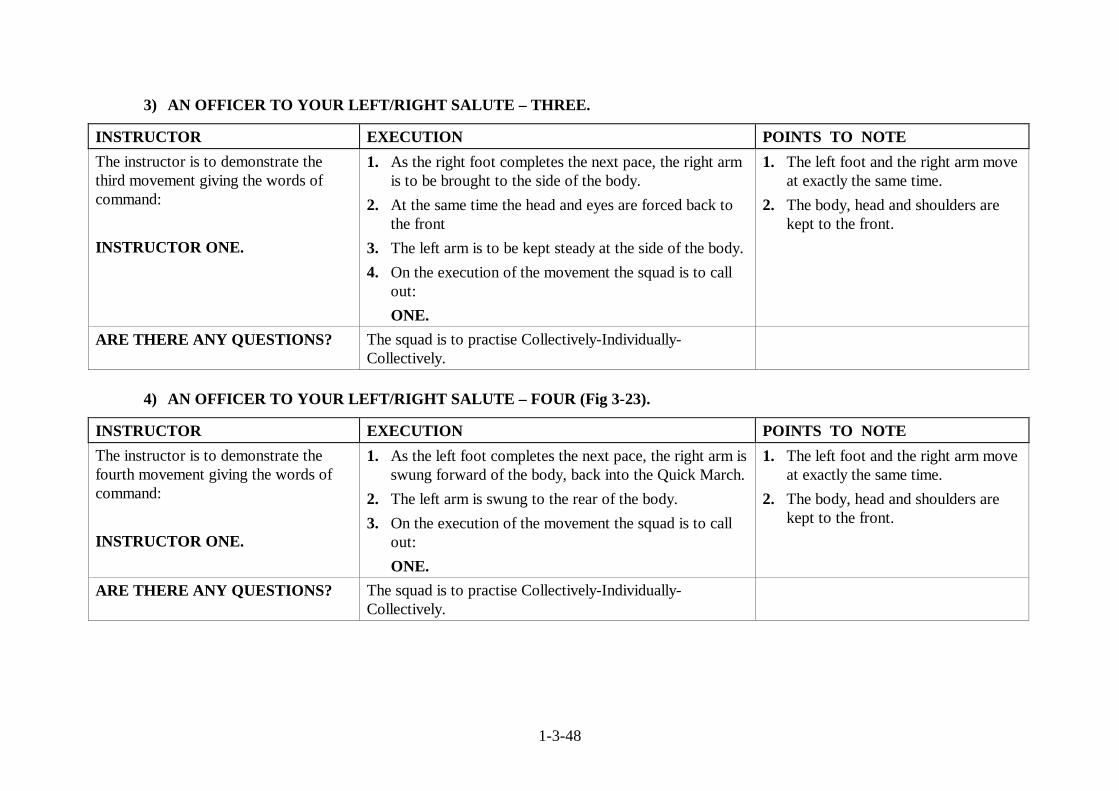
1-3-48
3) AN OFFICER TO YOUR LEFT/RIGHT SALUTE – THREE.
INSTRUCTOR EXECUTION POINTS TO NOTE The instructor is to demonstrate the third movement giving the words of command: INSTRUCTOR ONE.
1. As the right foot completes the next pace, the right arm is to be brought to the side of the body.
2. At the same time the head and eyes are forced back to the front
3. The left arm is to be kept steady at the side of the body. 4. On the execution of the movement the squad is to call
out: ONE.
1. The left foot and the right arm move at exactly the same time.
2. The body, head and shoulders are kept to the front.
ARE THERE ANY QUESTIONS? The squad is to practise Collectively-Individually-Collectively.
4) AN OFFICER TO YOUR LEFT/RIGHT SALUTE – FOUR (Fig 3-23).
INSTRUCTOR EXECUTION POINTS TO NOTE The instructor is to demonstrate the fourth movement giving the words of command: INSTRUCTOR ONE.
1. As the left foot completes the next pace, the right arm is swung forward of the body, back into the Quick March.
2. The left arm is swung to the rear of the body. 3. On the execution of the movement the squad is to call
out: ONE.
1. The left foot and the right arm move at exactly the same time.
2. The body, head and shoulders are kept to the front.
ARE THERE ANY QUESTIONS? The squad is to practise Collectively-Individually-Collectively.

1-3-49
D. FINAL DEMONSTRATION. INSTRUCTOR EXECUTION POINTS TO NOTE The instructor is to give a final and complete demonstration: INSTRUCTOR FOOT DRILL JUDGING THE TIME AN OFFICER TO YOUR LEFT/RIGHT TO THE LEFT/RIGHT SALUTE.
On the execution of the movement the instructor is to call out: CHECK/UP - TWO - THREE - FOUR - FIVE/DOWN SWING.
ARE THERE ANY QUESTIONS? The squad is to practise Collectively- Individually- Collectively.
E. END OF LESSON DRILLS. INSTRUCTOR EXECUTION POINTS TO NOTE Reform the squad in Close Formation of Threes and confirm by collective practise: FOOT DRILL JUDGING THE TIME AN OFFICER TO YOUR LEFT/RIGHT TO THE LEFT/RIGHT SALUTE.
Students to execute the movement and call out the timing: CHECK/UP - TWO - THREE - FOUR - FIVE/DOWN SWING.
1. Make any corrections where necessary.

1-3-50
First Movement Second Movement
Fig 3-21 Fig 3-22
AN OFFICER TO YOUR LEFT - TO THE LEFT – SALUTE
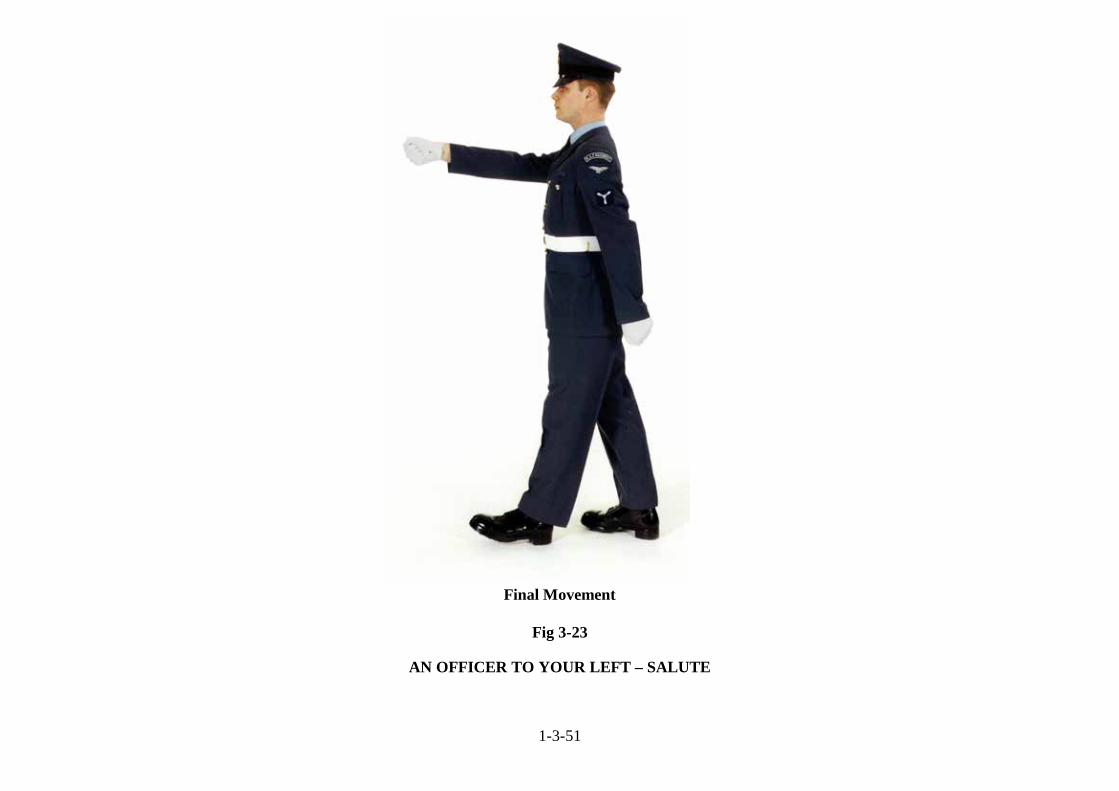
1-3-51
Final Movement
Fig 3-23
AN OFFICER TO YOUR LEFT – SALUTE
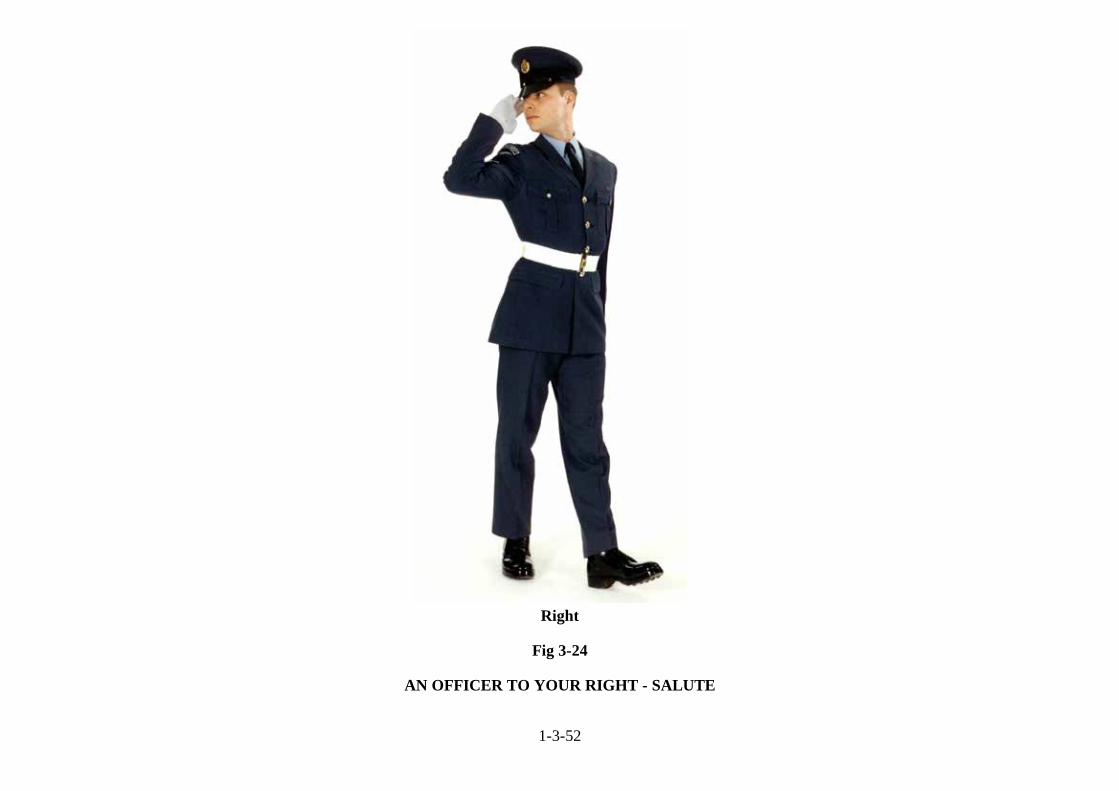
1-3-52
Right
Fig 3-24
AN OFFICER TO YOUR RIGHT - SALUTE
1-3-53
LESSON 8 - TO THE FRONT SALUTE (INDIVIDUAL) INSTRUCTOR’S NOTES
Aim To Teach To The Front Salute. Timings One 20 minute period. Method A basic outdoor or indoor instructional lesson. Explain the EXECUTION of the movements and emphasise
the POINTS TO NOTE, as under column headings below. Dress & Stores Clean Working Dress. Preparation Select an area on the parade square or any area of hard ground, or indoor equivalent. CONDUCT OF LESSON
A. PRELIMINARIES.
Squad Formation The squad stood properly At Ease in a straight line. Revision To The Left/Right Salute On The March. Spoken Introduction The next stage in foot drill is To The Front Salute. The reason this movement is taught is to teach an
individual the actions to be carried out when approaching to speak to an officer.
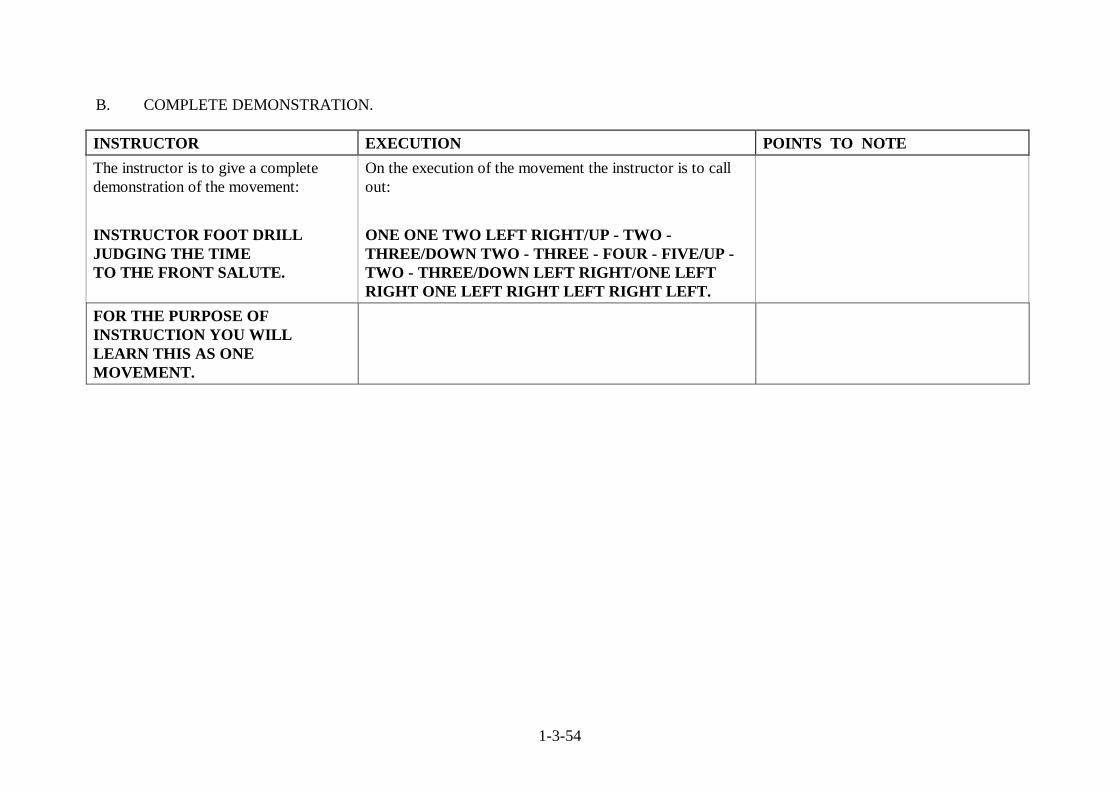
1-3-54
B. COMPLETE DEMONSTRATION.
INSTRUCTOR EXECUTION POINTS TO NOTE The instructor is to give a complete demonstration of the movement: INSTRUCTOR FOOT DRILL JUDGING THE TIME TO THE FRONT SALUTE.
On the execution of the movement the instructor is to call out: ONE ONE TWO LEFT RIGHT/UP - TWO - THREE/DOWN TWO - THREE - FOUR - FIVE/UP - TWO - THREE/DOWN LEFT RIGHT/ONE LEFT RIGHT ONE LEFT RIGHT LEFT RIGHT LEFT.
FOR THE PURPOSE OF INSTRUCTION YOU WILL LEARN THIS AS ONE MOVEMENT.

1-3-55
C. MOVEMENTS.
(1) TO THE FRONT SALUTE. INSTRUCTOR EXECUTION POINTS TO NOTE The instructor is to demonstrate the movement giving the words of command: INSTRUCTOR FOOT DRILL JUDGING THE TIME TO THE FRONT SALUTE.
1. Immediately on the command, given as the left heel strikes the ground, personnel are to halt, observe a pause equal to two paces in Quick Time and then salute to the front.
2. After completing the salute as previously taught, personnel are to observe a pause equal to four paces in Quick Time and then salute to the front for a second time.
3. After the second salute personnel are to observe a pause equal to two paces in Quick Time, turn about as previously taught observe another pause equal to two paces in Quick Time and then Quick March (leading with the left foot) back in the direction from which they had approached.
4. On the execution of this movement the squad is to call out:
ONE ONE TWO LEFT RIGHT/UP - TWO - THREE/DOWN TWO - THREE - FOUR - FIVE /UP - TWO - THREE/DOWN LEFT RIGHT/ ONE LEFT RIGHT/ONE LEFT RIGHT LEFT RIGHT LEFT.
1. The pause between salutes represents the delivery or receipt of a message.
ARE THERE ANY QUESTIONS? The squad is to practise Collectively-Individually-Collectively.

1-3-56
D. FINAL DEMONSTRATION. INSTRUCTOR EXECUTION POINTS TO NOTE The instructor is to give a final and complete demonstration: INSTRUCTOR FOOT DRILL JUDGING THE TIME TO THE FRONT SALUTE.
On the execution of the movement the instructor is to call out: ONE ONE TWO LEFT RIGHT/UP - TWO - THREE/ DOWN TWO - THREE - FOUR - FIVE/UP - TWO - THREE/DOWN LEFT RIGHT/ONE LEFT RIGHT/ ONE LEFT RIGHT LEFT RIGHT LEFT.
ARE THERE ANY QUESTIONS? The squad is to practise Collectively-Individually-Collectively.
E. END OF LESSON DRILLS INSTRUCTOR EXECUTION POINTS TO NOTE Reform the squad in Close Formation of Threes and confirm by collective practise: FOOT DRILL JUDGING THE TIME TO THE FRONT SALUTE.
Students to execute the movement and call out the timing: ONE ONE TWO LEFT RIGHT/UP - TWO - THREE / DOWN TWO - THREE - FOUR - FIVE/UP - TWO - THREE/DOWN LEFT RIGHT/ONE LEFT RIGHT/ ONE LEFT RIGHT LEFT RIGHT LEFT.
1. Make any corrections where necessary.

1-3-57
LESSON 9 – COMPLIMENTS ON THE MARCH (EYES LEFT/RIGHT) INSTRUCTOR’S NOTES
Aim To teach Eyes Left/Right and Eyes Front. Timings One 10 minute period. Method A basic outdoor or indoor instructional lesson. Explain the EXECUTION of the movements and emphasise
the POINTS TO NOTE, as under column headings below. Dress & Stores Clean Working Dress. Preparation Select an area on the parade square or any area of hard ground, or indoor equivalent. CONDUCT OF LESSON
A. PRELIMINARIES.
Squad Formation The squad stood properly to Attention in a straight line. Revision To The Front Salute. Spoken Introduction The next stage in foot drill is Eyes Left/Right. The reason this movement is taught is to enable a body
of personnel to pay compliments to a commissioned officer or an uncased colour or standard in a smart, uniform manner.
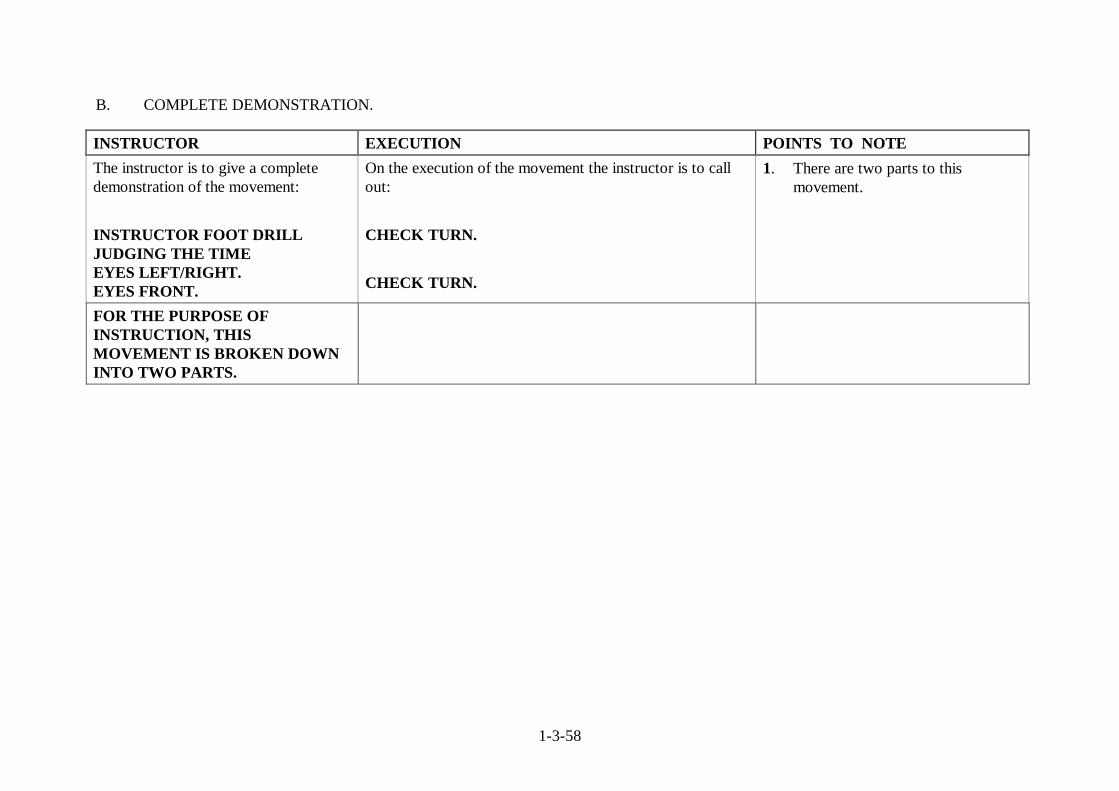
1-3-58
B. COMPLETE DEMONSTRATION.
INSTRUCTOR EXECUTION POINTS TO NOTE The instructor is to give a complete demonstration of the movement: INSTRUCTOR FOOT DRILL JUDGING THE TIME EYES LEFT/RIGHT. EYES FRONT.
On the execution of the movement the instructor is to call out: CHECK TURN. CHECK TURN.
1. There are two parts to this movement.
FOR THE PURPOSE OF INSTRUCTION, THIS MOVEMENT IS BROKEN DOWN INTO TWO PARTS.

1-3-59
C. MOVEMENTS.
1) COMPLIMENTS ON THE MARCH – EYES LEFT/RIGHT (Figs 3-25 & 3-26).
INSTRUCTOR EXECUTION POINTS TO NOTE The instructor is to demonstrate the first movement giving the words of command: INSTRUCTOR FOOT DRILL JUDGING THE TIME EYES LEFT/RIGHT.
1. Given when the left foot strikes the ground, a full forward pace is to be completed with the right foot.
2. When the left foot again strikes the ground the head and eyes are to be turned smartly in the direction ordered
3. The arms are to continue to swing in the normal manner.
4. On the execution of the movement the squad is to call out:
CHECK TURN.
1. The arms are swung in the correct manner of the Quick March.
2. The head is turned smartly in the direction ordered.
3. Observe the check pace before turning the head in the direction ordered.
4. Keep the chin up to avoid it dropping on the shoulder.
ARE THERE ANY QUESTIONS? The squad is to practise Collectively-Individually-Collectively.
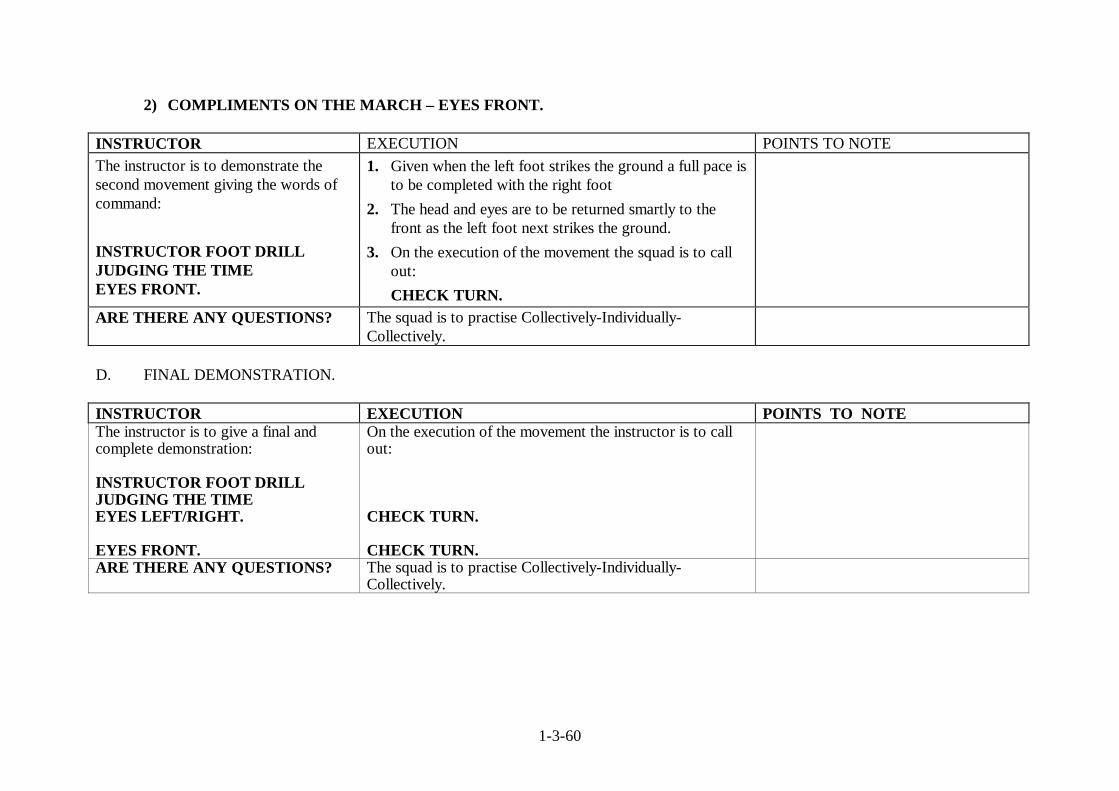
1-3-60
2) COMPLIMENTS ON THE MARCH – EYES FRONT.
INSTRUCTOR EXECUTION POINTS TO NOTE The instructor is to demonstrate the second movement giving the words of command: INSTRUCTOR FOOT DRILL JUDGING THE TIME EYES FRONT.
1. Given when the left foot strikes the ground a full pace is to be completed with the right foot
2. The head and eyes are to be returned smartly to the front as the left foot next strikes the ground.
3. On the execution of the movement the squad is to call out:
CHECK TURN.
ARE THERE ANY QUESTIONS? The squad is to practise Collectively-Individually-Collectively.
D. FINAL DEMONSTRATION. INSTRUCTOR EXECUTION POINTS TO NOTE The instructor is to give a final and complete demonstration: INSTRUCTOR FOOT DRILL JUDGING THE TIME EYES LEFT/RIGHT. EYES FRONT.
On the execution of the movement the instructor is to call out: CHECK TURN. CHECK TURN.
ARE THERE ANY QUESTIONS? The squad is to practise Collectively-Individually- Collectively.

1-3-61
E. END OF LESSON DRILLS. INSTRUCTOR EXECUTION POINTS TO NOTE Reform the squad in Close Formation of Threes and confirm by collective practise: FOOT DRILL JUDGING THE TIME COMPLIMENTS ON THE MARCH EYES LEFT/RIGHT. EYES FRONT.
Students to execute the movement and call out the timing: CHECK – TURN. CHECK – TURN.
1. Make any corrections where necessary.

1-3-62
Eyes Left Eyes Right
Fig 3-25 Fig 3-26
COMPLIMENTS ON THE MARCH
1-3-63
LESSON 10 – VARIATIONS IN PACE INSTRUCTOR’S NOTES
Aim To teach Step Out and Step Short and Quick March from the Step Out and Step Short. Timings One 10 minute period. Method A basic outdoor or indoor instructional lesson. Explain the EXECUTION of the movements and emphasise the
POINTS TO NOTE, as under column headings below. Dress & Stores Clean Working Dress. Preparation Select an area on the parade square or any area of hard ground, or indoor equivalent. CONDUCT OF LESSON
A. PRELIMINARIES.
Squad Formation The squad stood properly to Attention in a straight line. Revision Eyes Left/Right and Eyes Front. Spoken Introduction The next stage in foot drill is Variations in Pace and Quick March from Variations in Pace. The reason
these movements are taught is to enable an individual or body of personnel to regulate the length of pace in a smart, uniform manner.

1-3-64
B. COMPLETE DEMONSTRATION
INSTRUCTOR EXECUTION POINTS TO NOTE The instructor is to give a complete demonstration of the movement: INSTRUCTOR FOOT DRILL JUDGING THE TIME VARIATIONS IN PACE STEP OUT QUICK MARCH.
On the execution of the movements the instructor is to call out: STEP OUT QUICK MARCH.
INSTRUCTOR FOOT DRILL JUDGING THE TIME VARIATIONS IN PACE STEP SHORT QUICK MARCH.
STEP SHORT QUICK MARCH.

1-3-65
C. MOVEMENTS.
1) STEP OUT – ONE (Fig 3-27).
INSTRUCTOR EXECUTION POINTS TO NOTE The instructor is to demonstrate the first movement giving the words of command: INSTRUCTOR FOOT DRILL JUDGING THE TIME STEP OUT.
1. Given when the left foot strikes the ground, a further pace of 30 in (75 cm) is to be completed with the right foot.
2. After which the pace is to be lengthened to 33 in (85 cm) starting with the left foot, without altering the marching time.
3. On the execution of this movement the squad is to call out:
STEP OUT.
1. The length of the pace is extended to 33 in (85 cm).
2. The arm swing remains constant as in the Quick March.
3. The body is erect and to the front.
ARE THERE ANY QUESTIONS? The squad is to practise Collectively-Individually-Collectively.
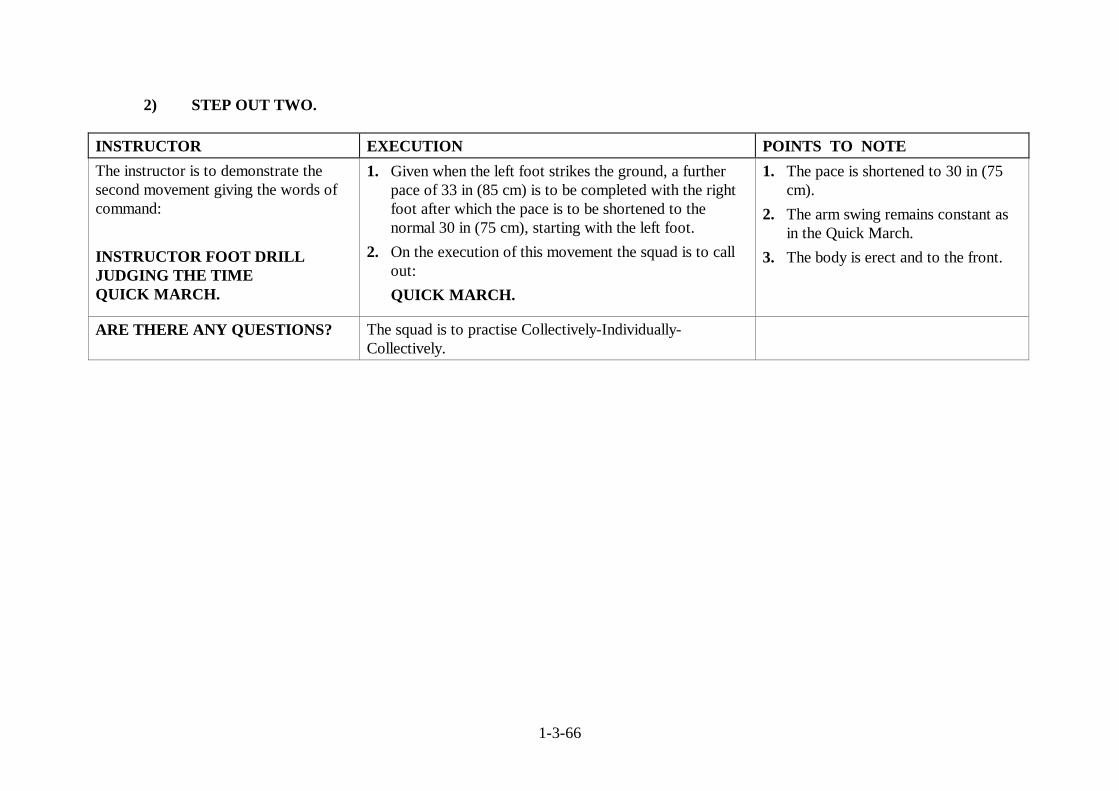
1-3-66
2) STEP OUT TWO.
INSTRUCTOR EXECUTION POINTS TO NOTE The instructor is to demonstrate the second movement giving the words of command: INSTRUCTOR FOOT DRILL JUDGING THE TIME QUICK MARCH.
1. Given when the left foot strikes the ground, a further pace of 33 in (85 cm) is to be completed with the right foot after which the pace is to be shortened to the normal 30 in (75 cm), starting with the left foot.
2. On the execution of this movement the squad is to call out:
QUICK MARCH.
1. The pace is shortened to 30 in (75 cm).
2. The arm swing remains constant as in the Quick March.
3. The body is erect and to the front.
ARE THERE ANY QUESTIONS? The squad is to practise Collectively-Individually-Collectively.

1-3-67
3) STEP SHORT – ONE (Fig 3-28).
INSTRUCTOR EXECUTION POINTS TO NOTE The instructor is to demonstrate the third movement giving the words of command: INSTRUCTOR FOOT DRILL JUDGING THE TIME VARIATIONS IN PACE STEP SHORT.
1. Given when the left foot strikes the ground, a further pace of 30 in (75 cm) is to be completed with the right foot.
2. After which the pace is to be shortened to 21 in (53 cm) starting with the left foot, without altering the marching time.
3. On the execution of this movement the squad is to call out:
STEP SHORT.
1. The length of the pace is shortened to 21 in (53 cm).
2. The arm swing is maintained as in the Quick March.
3. The body is erect and square to the front.
ARE THERE ANY QUESTIONS? The Squad is to practise Collectively-Individually-Collectively.

1-3-68
4) STEP SHORT - TWO INSTRUCTOR EXECUTION POINTS TO NOTE The instructor is to demonstrate the fourth movement giving the words of command: INSTRUCTOR FOOT DRILL JUDGING THE TIME QUICK MARCH.
1. Given when the left foot strikes the ground, a further pace of 21 in (53 cm) is to be completed with the right foot.
2. After which the pace is to be lengthened to the normal 30 in (75 cm), starting with the left foot.
3. On the execution of this movement the squad is to call out:
QUICK MARCH.
1. The pace is lengthened to 30 in (75 cm) starting on the next left foot.
2. The arm swing is continued in the Quick March.
3. The body is erect and to the front.
ARE THERE ANY QUESTIONS? The squad is to practise Collectively-Individually-Collectively.

1-3-69
D. FINAL DEMONSTRATION. INSTRUCTOR EXECUTION POINTS TO NOTE The instructor is to give a final and complete demonstration: INSTRUCTOR FOOT DRILL JUDGING THE TIME STEP OUT QUICK MARCH STEP SHORT QUICK MARCH.
On the execution of the movement the instructor is to call out: STEP OUT QUICK MARCH STEP SHORT QUICK MARCH.
ARE THERE ANY QUESTIONS? The squad is to practise Collectively-Individually-Collectively.
E. END OF LESSON DRILLS. INSTRUCTOR EXECUTION POINTS TO NOTE Reform the squad in Close Formation of Threes and confirm by collective practise: FOOT DRILL JUDGING THE TIME STEP OUT QUICK MARCH STEP SHORT QUICK MARCH.
Students to execute the movement and call out the timing: STEP OUT QUICK MARCH STEP SHORT QUICK MARCH.
1. Make any corrections where necessary.
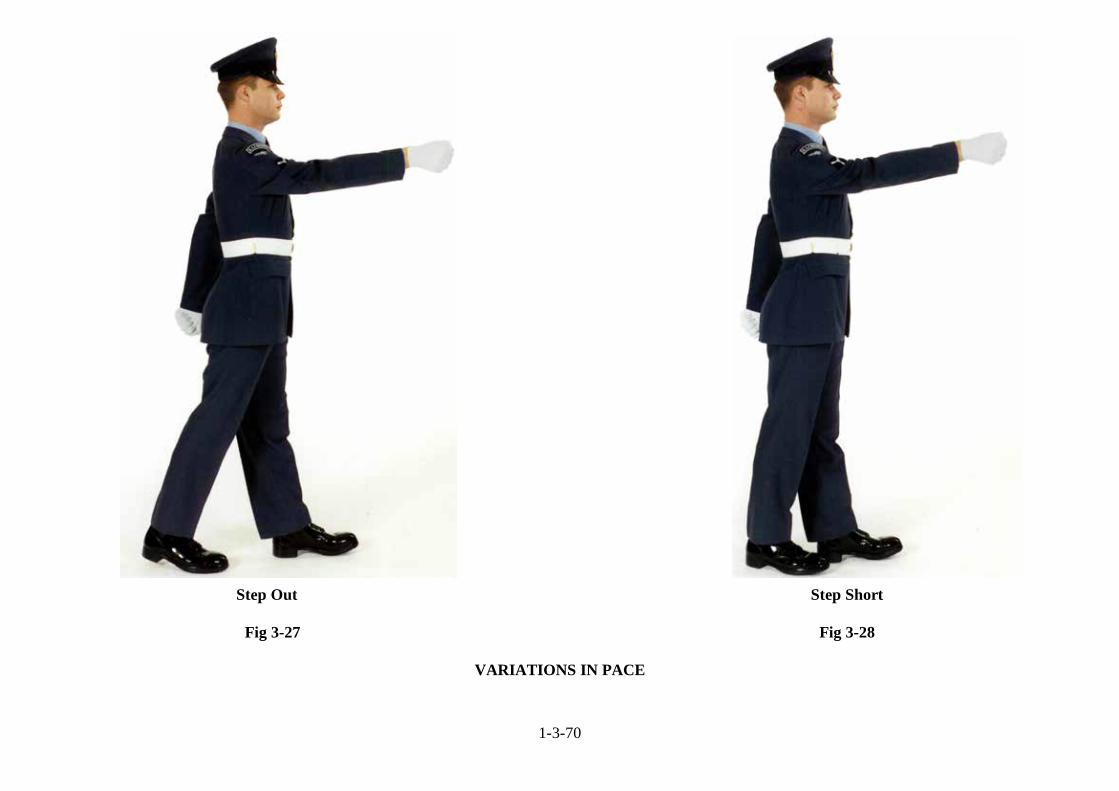
1-3-70
Step Out Step Short
Fig 3-27 Fig 3-28
VARIATIONS IN PACE
1-3-71
LESSON 11 - MARK TIME INSTRUCTOR’S NOTES
Aim To teach Mark Time. Timings One 10 minute period. Method A basic outdoor or indoor instructional lesson. Explain the EXECUTION of the movements and emphasise the
POINTS TO NOTE, as under column headings below. Dress & Stores Clean Working Dress. Preparation Select an area on the parade square or any area of hard ground, or indoor equivalent. CONDUCT OF LESSON
A. PRELIMINARIES.
Squad Formation The squad stood properly to Attention in a straight line. Revision Variations In Pace. Spoken Introduction The next stage in foot drill is Mark Time. The reason this movement is taught is to enable an individual
or body of personnel to Mark Time in a smart, uniform manner.

1-3-72
B. COMPLETE DEMONSTRATION.
INSTRUCTOR EXECUTION POINTS TO NOTE The instructor is to give a complete demonstration of the movement: INSTRUCTOR FOOT DRILL JUDGING THE TIME MARK TIME.
On the execution of the movement the instructor is to call out: CHECK LEFT RIGHT LEFT.
1. There are two parts to this movement.
FOR THE PURPOSE OF INSTRUCTION THIS MOVEMENT IS BROKEN DOWN INTO TWO PARTS.
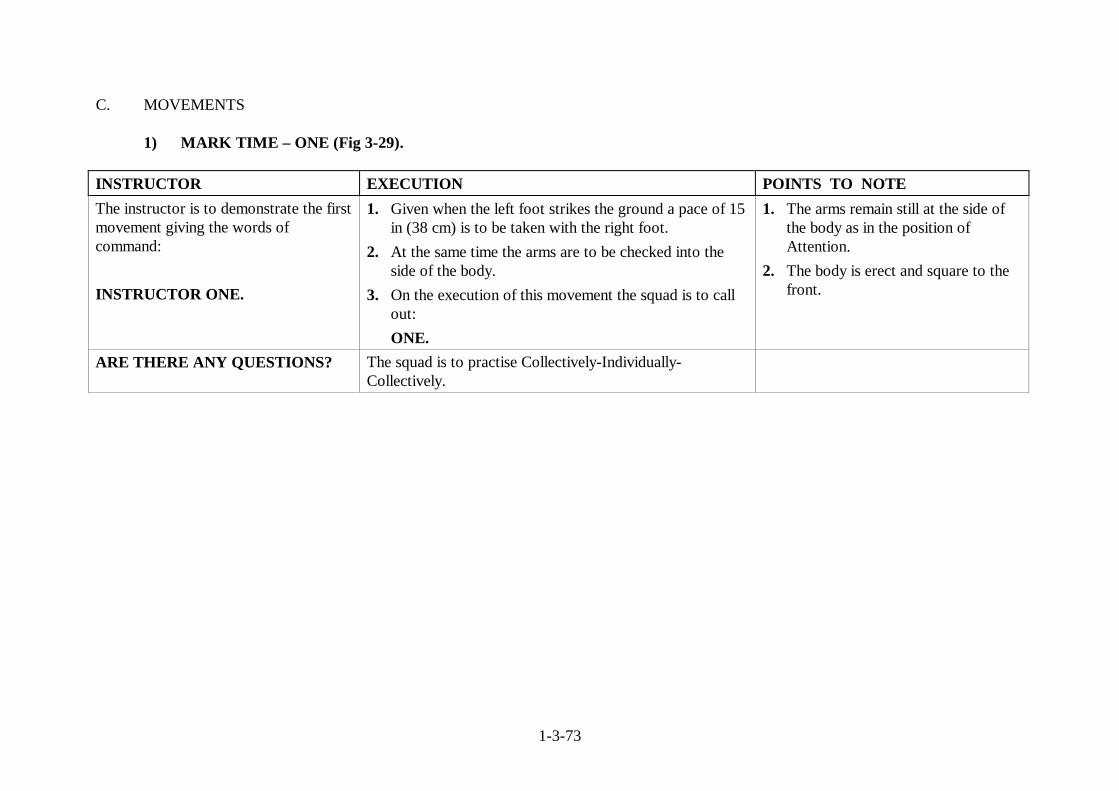
1-3-73
C. MOVEMENTS
1) MARK TIME – ONE (Fig 3-29).
INSTRUCTOR EXECUTION POINTS TO NOTE The instructor is to demonstrate the first movement giving the words of command: INSTRUCTOR ONE.
1. Given when the left foot strikes the ground a pace of 15 in (38 cm) is to be taken with the right foot.
2. At the same time the arms are to be checked into the side of the body.
3. On the execution of this movement the squad is to call out:
ONE.
1. The arms remain still at the side of the body as in the position of Attention.
2. The body is erect and square to the front.
ARE THERE ANY QUESTIONS? The squad is to practise Collectively-Individually-Collectively.
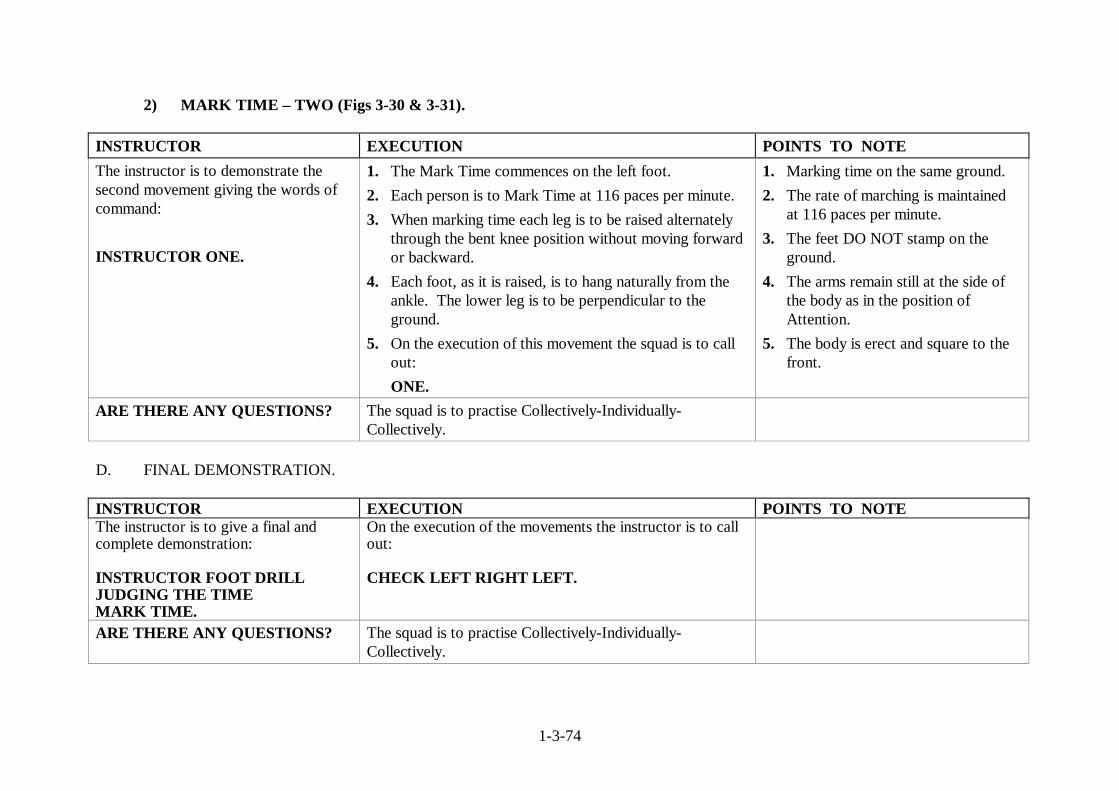
1-3-74
2) MARK TIME – TWO (Figs 3-30 & 3-31).
INSTRUCTOR EXECUTION POINTS TO NOTE The instructor is to demonstrate the second movement giving the words of command: INSTRUCTOR ONE.
1. The Mark Time commences on the left foot. 2. Each person is to Mark Time at 116 paces per minute. 3. When marking time each leg is to be raised alternately
through the bent knee position without moving forward or backward.
4. Each foot, as it is raised, is to hang naturally from the ankle. The lower leg is to be perpendicular to the ground.
5. On the execution of this movement the squad is to call out: ONE.
1. Marking time on the same ground. 2. The rate of marching is maintained
at 116 paces per minute. 3. The feet DO NOT stamp on the
ground. 4. The arms remain still at the side of
the body as in the position of Attention.
5. The body is erect and square to the front.
ARE THERE ANY QUESTIONS? The squad is to practise Collectively-Individually-Collectively.
D. FINAL DEMONSTRATION. INSTRUCTOR EXECUTION POINTS TO NOTE The instructor is to give a final and complete demonstration: INSTRUCTOR FOOT DRILL JUDGING THE TIME MARK TIME.
On the execution of the movements the instructor is to call out: CHECK LEFT RIGHT LEFT.
ARE THERE ANY QUESTIONS? The squad is to practise Collectively-Individually-Collectively.

1-3-75
E. END OF LESSON DRILLS. INSTRUCTOR EXECUTION POINTS TO NOTE Reform the squad in Close Formation of Threes and confirm by collective practise: FOOT DRILL JUDGING THE TIME MARK TIME.
Students to execute the movements and call out the timing: CHECK LEFT RIGHT LEFT.
1. Make any corrections where necessary.

1-3-76
First Movement Second Movement Next Movement
Fig 3-29 Fig 3-30 Fig 3-31
MARK TIME

1-3-77
LESSON 12 – HALT IN MARK TIME INSTRUCTOR’S NOTES
Aim To teach Halt In Mark Time. Timings One 10 minute period. Method A basic outdoor or indoor instructional lesson. Explain the EXECUTION of the movements and emphasise
the POINTS TO NOTE, as under column headings below. Dress & Stores Clean Working Dress. Preparation Select an area on the parade square or any area of hard ground, or indoor equivalent. CONDUCT OF LESSON
A. PRELIMINARIES.
Squad Formation The squad stood properly to Attention in a straight line. Revision Mark Time. Spoken Introduction The next stage in foot drill is Halt In Mark Time. The reason this movement is taught is to enable an
individual or body of personnel to Halt In Mark Time in a smart, uniform manner.

1-3-78
B. COMPLETE DEMONSTRATION.
INSTRUCTOR EXECUTION POINTS TO NOTE The instructor is to give a complete demonstration of the movement: INSTRUCTOR FOOT DRILL JUDGING THE TIME HALT.
On the execution of the movement the instructor is to call out: ONE.
1. There is one part to this movement.
FOR THE PURPOSE OF INSTRUCTION YOU WILL LEARN THIS AS ONE MOVEMENT.

1-3-79
C. MOVEMENTS.
1) HALT FROM MARK TIME – ONE. INSTRUCTOR EXECUTION POINTS TO NOTE The instructor is to demonstrate the movement giving the words of command: INSTRUCTOR ONE.
1. Given when the left foot strikes the ground. The right leg comes through the bent knee position and the foot is placed on the ground next to the left foot, into the position of Attention.
2. On the execution of this movement the squad is to call out: ONE.
1. The right leg goes through the bent knee position.
2. The feet are at the position of Attention.
3. The body is erect and square to the front with no further movement.
4. The arms remain still at the side of the body at the position of Attention.
ARE THERE ANY QUESTIONS? The squad is to practise Collectively-Individually-
Collectively.
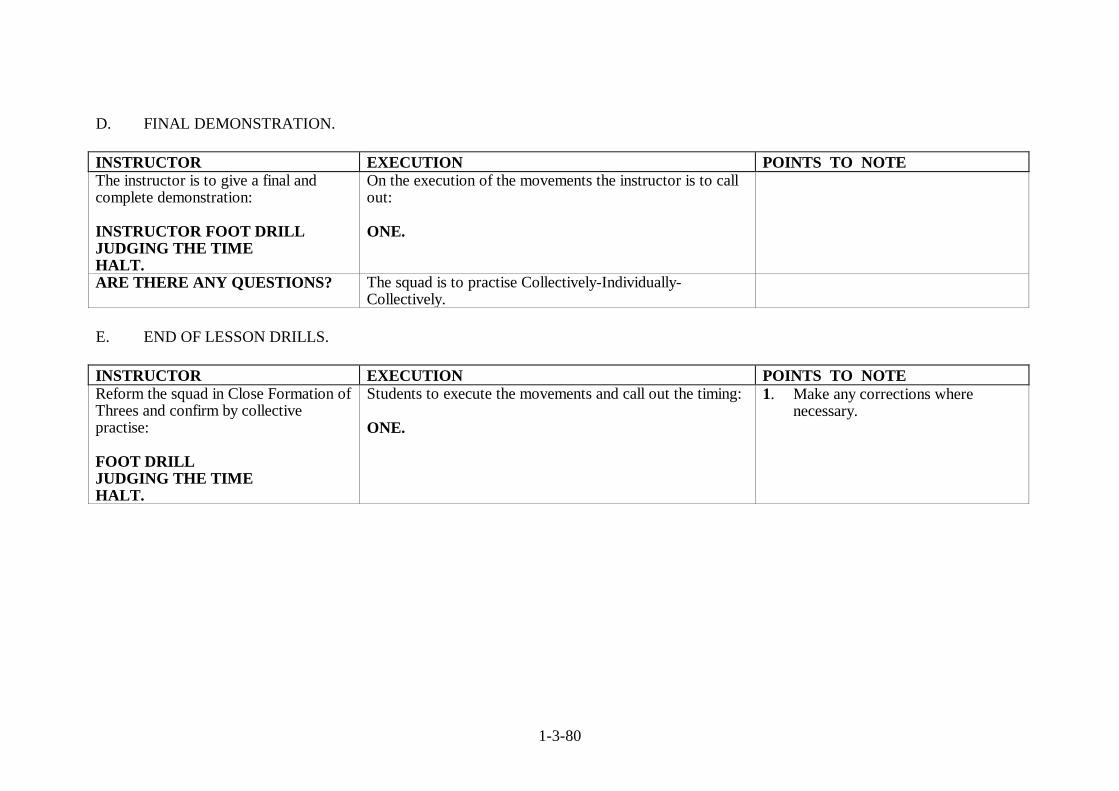
1-3-80
D. FINAL DEMONSTRATION. INSTRUCTOR EXECUTION POINTS TO NOTE The instructor is to give a final and complete demonstration: INSTRUCTOR FOOT DRILL JUDGING THE TIME HALT.
On the execution of the movements the instructor is to call out: ONE.
ARE THERE ANY QUESTIONS? The squad is to practise Collectively-Individually-Collectively.
E. END OF LESSON DRILLS. INSTRUCTOR EXECUTION POINTS TO NOTE Reform the squad in Close Formation of Threes and confirm by collective practise: FOOT DRILL JUDGING THE TIME HALT.
Students to execute the movements and call out the timing: ONE.
1. Make any corrections where necessary.

1-3-81
LESSON 13 – CHANGE STEP IN MARK TIME INSTRUCTOR’S NOTES
Aim To teach Change Step in Mark Time. Timings One 10 minute period. Method A basic outdoor or indoor instructional lesson. Explain the EXECUTION of the movements and emphasise the
POINTS TO NOTE, as under column headings below. Dress & Stores Clean Working Dress. Preparation Select an area on the parade square or any area of hard ground, or indoor equivalent. CONDUCT OF LESSON
A. PRELIMINARIES.
Squad Formation The squad stood properly to Attention in a straight line. Revision Halt From Mark Time. Spoken Introduction The next stage in foot drill is Change Step in Mark Time. The reason this movement is taught is to
enable an individual or body of personnel to Change Step in Mark Time in a smart, uniform manner.

1-3-82
B. COMPLETE DEMONSTRATION.
INSTRUCTOR EXECUTION POINTS TO NOTE The instructor is to give a complete demonstration of the movement: INSTRUCTOR FOOT DRILL JUDGING THE TIME CHANGE STEP.
On the execution of the movement the instructor is to call out: LEFT LEFT RIGHT.
1. There is one part to this movement.
FOR THE PURPOSE OF INSTRUCTION YOU WILL LEARN THIS AS ONE MOVEMENT.

1-3-83
C. MOVEMENTS.
1) CHANGE STEP – ONE. INSTRUCTOR EXECUTION POINTS TO NOTE The instructor is to demonstrate the movement, giving the word of command INSTRUCTOR FOOT DRILL JUDGING THE TIME CHANGE STEP.
1. The word of command is given when the right foot strikes the ground.
2. The left leg moves through the bent knee position for two beats.
3. Marking time is then to be restarted alternating between the right and left feet.
4. On the execution of this movement the squad is to call out:
LEFT LEFT RIGHT.
1. The arms remain at the sides of the body in the position of Attention.
2. There is no forward, rearward or lateral movement.
3. The body is erect and square to the front.
ARE THERE ANY QUESTIONS? The squad is to be practised Collectively-Individually-Collectively.
D. FINAL DEMONSTRATION INSTRUCTOR EXECUTION POINTS TO NOTE The instructor is to give a final and complete demonstration: INSTRUCTOR FOOT DRILL JUDGING THE TIME CHANGE STEP.
On the execution of the movement the instructor is to call out: LEFT LEFT RIGHT.
ARE THERE ANY QUESTIONS? The squad is to practise Collectively-Individually-Collectively.

1-3-84
E. END OF LESSON DRILLS INSTRUCTOR EXECUTION POINTS TO NOTE Reform the squad in Close Formation of Threes and confirm by collective practise: FOOT DRILL JUDGING THE TIME CHANGE STEP.
Students to execute the movements and call out the timing: LEFT LEFT RIGHT.
1. Make any corrections where necessary.

1-3-85
LESSON 14 – FORWARD FROM MARK TIME INSTRUCTOR’S NOTES
Aim To teach Forward from Mark Time. Timings One 10 minute period. Method A basic outdoor or indoor instructional lesson. Explain the EXECUTION of the movements and emphasise the
POINTS TO NOTE, as under column headings below. Dress & Stores Clean Working Dress. Preparation Select an area on the parade square or any area of hard ground, or indoor equivalent. CONDUCT OF LESSON
A. PRELIMINARIES.
Squad Formation The squad stood properly to Attention in a straight line. Revision Change Step in Mark Time. Spoken Introduction The next stage in foot drill is Forward From Mark Time. The reason this movement is taught is to
enable an individual or body of personnel to return to the Quick March from Mark Time in a smart, uniform manner.

1-3-86
B. COMPLETE DEMONSTRATION.
INSTRUCTOR EXECUTION POINTS TO NOTE The instructor is to give a complete demonstration of the drill movement: INSTRUCTOR FOOT DRILL JUDGING THE TIME FORWARD.
On the execution of the movement the instructor is to call out: CHECK FORWARD.
1. There is one part to this movement.
FOR THE PURPOSE OF INSTRUCTION YOU WILL LEARN THIS AS ONE MOVEMENT.

1-3-87
C. MOVEMENTS. 1) FORWARD FROM MARK TIME – ONE. INSTRUCTOR EXECUTION POINTS TO NOTE The instructor is to demonstrate the movement giving the words of command: INSTRUCTOR FOOT DRILL JUDGING THE TIME FORWARD.
1. Given when the left foot strikes the ground, the movement of the right foot is to be completed and the Quick March resumed, starting with the left foot.
2. On the execution of this movement the squad is to call out:
CHECK FORWARD.
ARE THERE ANY QUESTIONS? The squad is to practise Collectively-Individually-Collectively.
D. FINAL DEMONSTRATION. INSTRUCTOR EXECUTION POINTS TO NOTE The instructor is to give a final and complete demonstration: INSTRUCTOR FOOT DRILL JUDGING THE TIME FORWARD.
On the execution of the movements the instructor is to call out: CHECK FORWARD.
ARE THERE ANY QUESTIONS? The squad is to practise Collectively-Individually-Collectively.

1-3-88
E. END OF LESSON DRILLS INSTRUCTOR EXECUTION POINTS TO NOTE Reform the squad in Close Formation of Threes and confirm by collective practise: FOOT DRILL JUDGING THE TIME FORWARD.
Students to execute the movements and call out the timing: CHECK FORWARD.
1. Make any corrections where necessary.
1-3-89
LESSON 15 – CHANGE STEP IN QUICK TIME INSTRUCTOR’S NOTES
Aim To teach Change Step in Quick Time. Timings One 10 minute period Method A basic outdoor or indoor instructional lesson. Explain the EXECUTION of the movements and emphasise
the POINTS TO NOTE, as under column headings below. Dress & Stores Clean Working Dress. Preparation Select an area on the parade square or any area of hard ground, or indoor equivalent. CONDUCT OF LESSON
A. PRELIMINARIES.
Squad Formation The squad stood properly to Attention in a straight line. Revision Forward from Mark Time. Spoken Introduction The next stage in foot drill is the Change Step in Quick Time. The reason this movement is taught is to
enable an individual or body of personnel to correct the step on the march in a smart, uniform manner.
1-3-90
B. COMPLETE DEMONSTRATION.
INSTRUCTOR EXECUTION POINTS TO NOTE The instructor is to give a complete demonstration of the movement: INSTRUCTOR FOOT DRILL JUDGING THE TIME CHANGE STEP.
On the execution of the movement the instructor is to call out: LEFT RIGHT LEFT.
1. There are three parts to this movement.
FOR THE PURPOSE OF INSTRUCTION THIS MOVEMENT IS BROKEN INTO THREE PARTS.
1-3-91
C. MOVEMENTS
1) CHANGE STEP – ONE (Fig 3-32). INSTRUCTOR EXECUTION POINTS TO NOTE The instructor is to demonstrate the first movement giving the words of command: INSTRUCTOR ONE.
1. Given when the right heel is on the ground. A full 30 in (75cm) pace is taken with the left foot.
2. The arm swing is continued as in the Quick March. 3. On the execution of this movement the squad is to call
out: ONE.
1. A full marching pace of 30 in (75 cm) is carried out. With the left foot firm and flat on the floor.
2. The arm swing is continued. 3. The body is erect and square to the
front.
ARE THERE ANY QUESTIONS? The squad is to practise Collectively-Individually-Collectively.
1-3-92
2) CHANGE STEP – TWO (Fig 3-33). INSTRUCTOR EXECUTION POINTS TO NOTE The instructor is to demonstrate the second movement giving the words of command: INSTRUCTOR ONE.
1. The right foot is then brought forward so that the hollow of the right foot is against the heel of the left foot, causing a momentary pause in forward movement.
2. At the same time the arms are checked into the sides of the body in a scissor-like movement.
3. On the execution of this movement the squad is to call out:
ONE.
1. The arms are moved in a scissor-like movement to the sides of the body.
2. The body is erect and square to the front.
ARE THERE ANY QUESTIONS? The squad is to practise Collectively-Individually-Collectively.
3) CHANGE STEP – THREE (Fig 3-34).
INSTRUCTOR EXECUTION POINTS TO NOTE The instructor is to demonstrate the third movement, giving the word of command: INSTRUCTOR ONE.
1. The left foot is then forced forward a full 30 in (75 cm) marching pace.
2. The right arm is swung forward and the left arm rearwards in the Quick March.
3. On the execution of this movement the squad is to call out:
ONE.
1. A full marching pace is carried out with the left foot.
2. Although the step is changed the timing of the Quick March is not altered.
3. The body is erect and square to the front.
ARE THERE ANY QUESTIONS? The squad is to be practised Collectively-Individually-Collectively.

1-3-93
D. FINAL DEMONSTRATION. INSTRUCTOR EXECUTION POINTS TO NOTE The instructor is to give a final and complete demonstration: INSTRUCTOR FOOT DRILL JUDGING THE TIME CHANGE STEP.
On the execution of the movement the instructor is to call out: LEFT RIGHT LEFT.
ARE THERE ANY QUESTIONS? The squad is to practise Collectively-Individually-Collectively.
E. END OF LESSON DRILLS. INSTRUCTOR EXECUTION POINTS TO NOTE Reform the squad in Close Formation of Threes and confirm by collective practise: FOOT DRILL JUDGING THE TIME CHANGE STEP.
Students to execute the movement and call out the timing: LEFT RIGHT LEFT.
1. Make any corrections where necessary.

1-3-94
First Movement Second Movement Third Movement
Fig 3-32 Fig 3-33 Fig 3-34
CHANGE STEP ON THE MARCH IN QUICK TIME
1-4-1
PART 1 - CHAPTER 4
FOOT DRILL SLOW MARCH
CONTENTS
LESSON
No TITLE PAGE No
1 The Slow March 1-4-2 2 Halt from the Slow March 1-4-9 3 The Right Turn on the Slow March 1-4-14 4 The Left Turn on the Slow March 1-4-19 5 The About Turn on the Slow March 1-4-24 6 Compliments on the Slow March – Eyes Left/Right
and Eyes Front 1-4-31
7 Slow Mark Time 1-4-35 8 Halt from Slow Mark Time 1-4-40 9 Change Step on Slow Mark Time 1-4-44
10 Forward from Slow Mark Time 1-4-47 11 Change Step on the Slow March 1-4-51 12 Breaking into Slow Time from Quick Time 1-4-56 13 Breaking into Quick Time from Slow Time 1-4-61
SLOW MARCH LESSON PLANS 1. The majority of Slow March lesson plans do not contain photographs, as the
movements executed are the same as in Quick Time with the exception of the position of the arms (which remain as in the position of Attention).
2. Lessons 1 and 2 are illustrated.
1-4-2
LESSON 1 –THE SLOW MARCH INSTRUCTOR’S NOTES
Aim To teach marching at the regulation rate of 65 paces per minute. Timings One 30 minute period. Method A basic outdoor or indoor instructional lesson. Explain the EXECUTION of the movements and emphasise the
POINTS TO NOTE, as under column headings below. Dress & Stores Clean Working Dress. Preparation Select an area on the parade square or any area of hard ground, or indoor equivalent.
CONDUCT OF LESSON
A. PRELIMINARIES.
Squad Formation The squad stood properly to Attention in a straight line. Revision Nil. Spoken Introduction The next stage in foot drill is the Slow March. The reason this movement is taught is to enable an
individual or body of personnel to march at the regulation rate of 65 paces per minute in a smart, uniform manner.
B. COMPLETE DEMONSTRATION.

1-4-3
INSTRUCTOR EXECUTION POINTS TO NOTE The instructor is to give a complete demonstration of the movement: INSTRUCTOR FOOT DRILL JUDGING THE TIME SLOW MARCH.
On the execution of the movement the instructor is to call out: LEFT RIGHT LEFT RIGHT LEFT.
1. There are three parts to this movement.
FOR THE PURPOSE OF INSTRUCTION THIS MOVEMENT IS BROKEN DOWN INTO THREE PARTS.

1-4-4
C. MOVEMENTS.
1) SLOW MARCH - ONE (Fig 4-1). INSTRUCTOR EXECUTION POINTS TO NOTE The instructor is to demonstrate the first movement giving the words of command: INSTRUCTOR ONE.
1. The left foot is to advance forward a pace of 30 in (75 cm). The foot is to be turned outward at the same angle as when halted.
2. The foot is to be stretched with the toes pointing towards the ground.
3. The arms remain still at the sides of the body, in the position of Attention.
4. The foot touches the ground toes first. 5. On the execution of this movement the squad is to call
out: LEFT.
1. Ensure a 30 in (75 cm) pace is taken. 2. Ensure the arms are forced into the
sides of the body. 3. The knee is bent sufficiently to
enable the foot to just clear the ground as the leg swings forward.
4. As the leg extends to take the pace the knee is straightened and braced.
5. The body is to be balanced over the thighs to avoid any tendency to rock.
6. The body is erect and square to the front.
ARE THERE ANY QUESTIONS? The squad is to practise Collectively-Individually-Collectively.

1-4-5
2) SLOW MARCH – TWO (Fig 4-2).
INSTRUCTOR EXECUTION POINTS TO NOTE The instructor is to demonstrate the second movement giving the words of command: INSTRUCTOR ONE.
1. The right foot is to advance forward a pace of 30 in (75 cm). The foot is to be turned outward at the same angle as when halted.
2. The foot is to be stretched with the toes pointing towards the ground.
3. The arms remain still at the sides of the body, in the position of Attention.
4. The foot touches the ground toes first. 5. On the execution of this movement the squad is to call
out: RIGHT.
1. Ensure a 30 in (75 cm) pace is taken. 2. Ensure the arms are forced into the
sides of the body. 3. The knee is bent sufficiently to
enable the foot to just clear the ground as the leg swings forward.
4. As the leg extends to take the pace the knee is straightened and braced.
5. The body is to be balanced over the thighs to avoid any tendency to rock.
6. The body is erect and square to the front.
ARE THERE ANY QUESTIONS? The squad is to practise Collectively-Individually-Collectively.

1-4-6
3) SLOW MARCH – THREE (Fig 4-1).
INSTRUCTOR EXECUTION POINTS TO NOTE The instructor is to demonstrate the third movement giving the words of command: INSTRUCTOR ONE.
1. The movement is the same as squad RIGHT, except the left foot is brought forward a full 30 in (75 cm) marching pace.
2. On the execution of this movement the squad is to call out:
LEFT.
1. Ensure a 30 in (75 cm) pace is taken. 2. Ensure the arms are forced into the
sides of the body. 3. The knee is bent sufficiently to
enable the foot to just clear the ground as the leg swings forward.
4. As the leg extends to take the pace the knee is straightened and braced.
5. The body is to be balanced over the thighs to avoid any tendency to rock.
6. The body is erect and square to the front.
7. The Slow March is to be smooth and continuous to avoid any tendency to jerk between paces.
ARE THERE ANY QUESTIONS? The squad is to practise Collectively-Individually-Collectively.

1-4-7
D. FINAL DEMONSTRATION (Figs 4-1 & 4-2). INSTRUCTOR EXECUTION POINTS TO NOTE The instructor is to give a final and complete demonstration: INSTRUCTOR FOOT DRILL JUDGING THE TIME SLOW MARCH.
On the execution of the movement the instructor is to call out: LEFT RIGHT LEFT RIGHT LEFT.
1. The instructor is to continue marching in Slow Time for 11 paces.
2. The instructor is to march to 65 paces to the minute.
ARE THERE ANY QUESTIONS? The squad is to practise Collectively-Individually-Collectively.
E. END OF LESSON DRILLS. INSTRUCTOR EXECUTION POINTS TO NOTE Reform the squad in Close Formation of Threes and confirm by collective practise: SQUAD FOOT DRILL JUDGING THE TIME BY THE LEFT SLOW MARCH.
Students to execute the movement and call out the timing: LEFT RIGHT LEFT RIGHT LEFT.
1. Make any corrections where necessary.
2. Ensure the squad march to the regulation pace of 65 paces to the minute.
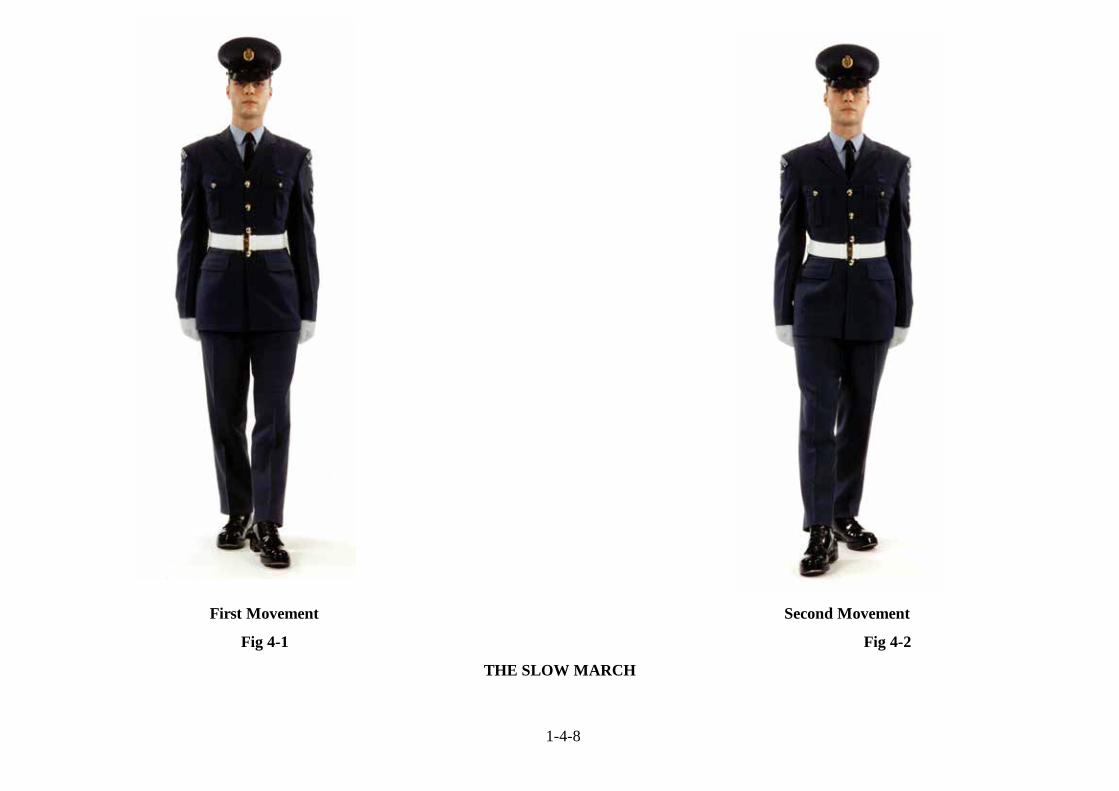
1-4-8
First Movement Second Movement
Fig 4-1 Fig 4-2
THE SLOW MARCH
1-4-9
LESSON 2 - HALT FROM THE SLOW MARCH INSTRUCTOR’S NOTES
Aim To teach Halt from Slow March. Timings One 10 minute period. Method A basic outdoor or indoor instructional lesson. Explain the EXECUTION of the movements and emphasise
the POINTS TO NOTE, as under column headings below. Dress & Stores Clean Working Dress. Preparation Select an area on the parade square or any area of hard ground, or indoor equivalent. CONDUCT OF LESSON
A. PRELIMINARIES.
Squad Formation The squad stood properly to Attention in a straight line. Revision The Slow March. Spoken Introduction The next stage in foot drill is Halt from Slow March. The reason this movement is taught is to enable
an individual or body of personnel to Halt from Slow March in a smart, uniform manner.

1-4-10
B. COMPLETE DEMONSTRATION.
INSTRUCTOR EXECUTION POINTS TO NOTE The instructor is to give a complete demonstration of the movement: INSTRUCTOR FOOT DRILL JUDGING THE TIME HALT.
On the execution of the movement the instructor is to call out: ONE TWO.
1. There are two parts to this movement.
FOR THE PURPOSE OF INSTRUCTION THIS MOVEMENT IS BROKEN DOWN INTO TWO PARTS.

1-4-11
C. MOVEMENTS.
1) HALT – ONE (Fig 4-3). INSTRUCTOR EXECUTION POINTS TO NOTE The instructor is to demonstrate the first movement giving the words of command: INSTRUCTOR ONE.
1. Given when the right foot is on the ground a check pace of 15 in (38 cm) is to be completed with the left foot, maintaining the pace of the Slow March.
2. The arms are still at the sides of the body. 3. On the execution of this movement the squad is to call
out: ONE.
1. A 15 in (38 cm) pace is completed with the left foot.
2. The arms are at the position of Attention.
ARE THERE ANY QUESTIONS? The squad is to practise Collectively-Individually-Collectively.
2) HALT – TWO (Fig 4-4).
INSTRUCTOR EXECUTION POINTS TO NOTE The instructor is to demonstrate the second movement giving the words of command: INSTRUCTOR ONE.
1. The right leg comes through the bent knee position, and is forced down so that the feet are in the position of Attention.
2. On the execution of the movement the squad is to call out: ONE.
1. The right leg moves at the pace of the Quick March.
2. The arms remain at the sides of the body.
3. The body is erect and to the front.
ARE THERE ANY QUESTIONS? The squad is to practise Collectively-Individually-Collectively.

1-4-12
D. FINAL DEMONSTRATION. INSTRUCTOR EXECUTION POINTS TO NOTE The instructor is to give a final and complete demonstration: INSTRUCTOR FOOT DRILL JUDGING THE TIME HALT.
On the execution of the movement the instructor is to call out: ONE TWO.
ARE THERE ANY QUESTIONS?
The squad is to practise Collectively-Individually-Collectively.
E. END OF LESSON DRILLS. INSTRUCTOR EXECUTION POINTS TO NOTE Reform the squad in Close Formation of Threes and confirm by collective practise: SQUAD FOOT DRILL JUDGING THE TIME HALT.
Students to execute the movement and call out the timing: ONE TWO.
1. Make any corrections where necessary.

1-4-13
First Movement Final Position
Fig 4-3 Fig 4-4
HALT FROM THE SLOW MARCH

1-4-14
LESSON 3 - THE RIGHT TURN ON THE SLOW MARCH INSTRUCTOR’S NOTES
Aim To teach the Right Turn on the Slow March. Timings One 20 minute period. Method A basic outdoor or indoor instructional lesson. Explain the EXECUTION of the movements and emphasise
the POINTS TO NOTE, as under column headings below. Dress & Stores Clean Working Dress. Preparation Select an area on the parade square or any area of hard ground, or indoor equivalent. CONDUCT OF LESSON
A. PRELIMINARIES
Squad Formation The squad stood properly to Attention in a straight line. Revision Halt from the Quick March. Spoken Introduction The next stage in foot drill is the Right Turn on the Slow March. The reason this movement is taught is
to enable an individual or body of personnel to turn through an angle of 90 degrees to the right without first being halted in a smart, uniform manner.

1-4-15
B. COMPLETE DEMONSTRATION.
INSTRUCTOR EXECUTION POINTS TO NOTE The instructor is to give a complete demonstration of the movement: INSTRUCTOR FOOT DRILL JUDGING THE TIME RIGHT TURN.
On the execution of the movement the instructor is to call out: CHECK TURN FORWARD.
1. There are three parts to this movement.
FOR THE PURPOSE OF INSTRUCTION THIS MOVEMENT IS BROKEN DOWN INTO THREE PARTS.

1-4-16
C. MOVEMENTS.
1) RIGHT TURN – ONE.
INSTRUCTOR EXECUTION POINTS TO NOTE The instructor is to demonstrate the first movement giving the words of command: INSTRUCTOR ONE.
1. Given when the left foot is on the ground, a full 30 in (75 cm) pace is to be completed with the right foot.
2. The arms remain as in the position of Attention. 3. On the execution of the movement the squad is to call
out: ONE.
1. The right leg takes a full marching pace forward.
2. The movement is carried out at the pace of the Slow March.
3. The body is erect and square to the front.
ARE THERE ANY QUESTIONS? The squad is to practise Collectively-Individually-
Collectively.

1-4-17
2) RIGHT TURN – TWO.
INSTRUCTOR EXECUTION POINTS TO NOTE The instructor is to demonstrate the second movement giving the words of command: INSTRUCTOR ONE.
1. The left leg comes through the bent knee position and is placed on the ground approximately 3 in (80 mm), diagonally to the right, in front of the right toe-cap.
2. The arms remain as in the position of Attention. 3. On the execution of the movement the squad is to call
out: ONE.
1. The movement is carried out at the pace of the Slow March.
2. The forward movement is halted as the left foot hits the ground.
3. The arms remain in the correct position of Attention.
4. The body is erect and square to the front.
ARE THERE ANY QUESTIONS? The squad is to practise Collectively-Individually-Collectively
3) RIGHT TURN – THREE.
INSTRUCTOR EXECUTION POINTS TO NOTE The instructor is to demonstrate the third movement giving the words of command: INSTRUCTOR ONE.
1. The right foot is forced forward, a full 30 in (750 mm) pace in the new direction ordered, and the Slow March is continued.
2. On the execution of the movement the squad is to call out:
ONE.
1. A full 30 in (750 mm) pace is completed by the right foot.
2. The Slow March is then continued. 3. The body is erect and square to the
front.
ARE THERE ANY QUESTIONS? The squad is to practise Collectively-Individually-Collectively.

1-4-18
D. FINAL DEMONSTRATION. INSTRUCTOR EXECUTION POINTS TO NOTE The instructor is to give a final and complete demonstration: INSTRUCTOR FOOT DRILL JUDGING THE TIME RIGHT TURN.
On the execution of the movement the instructor is to call out: CHECK TURN FORWARD.
ARE THERE ANY QUESTIONS? The squad is to practise Collectively-Individually-Collectively.
E. END OF LESSON DRILLS. INSTRUCTOR EXECUTION POINTS TO NOTE Reform the squad in Close Formation of Threes and confirm by collective practise: FOOT DRILL JUDGING THE TIME MOVE TO THE RIGHT RIGHT TURN.
Students to execute the movement and call out the timing: CHECK TURN FORWARD.
1. Make any corrections where necessary.
1-4-19
LESSON 4 - THE LEFT TURN ON THE SLOW MARCH INSTRUCTOR’S NOTES
Aim To teach the Left Turn on the Slow March. Timings One 20 minute period. Method A basic outdoor or indoor instructional lesson. Explain the EXECUTION of the movements and emphasise the
POINTS TO NOTE, as under column headings below. Dress & Stores Clean Working Dress. Preparation Select an area on the parade square or any area of hard ground, or indoor equivalent. CONDUCT OF LESSON
A. PRELIMINARIES.
Squad Formation The squad stood properly to Attention in a straight line. Revision Right Turn on the Slow March. Spoken Introduction The next stage in foot drill is the Left Turn on the Slow March. The reason this movement is taught is to
enable an individual or body of personnel to turn through an angle of 90 degrees to the left without first being halted in a smart, uniform manner.

1-4-20
B. COMPLETE DEMONSTRATION.
INSTRUCTOR EXECUTION POINTS TO NOTE The instructor is to give a complete demonstration of the movement: INSTRUCTOR FOOT DRILL JUDGING THE TIME LEFT TURN.
On the execution of the movement the instructor is to call out: CHECK TURN FORWARD.
1. There are three parts to this movement.
FOR THE PURPOSE OF INSTRUCTION THIS MOVEMENT IS BROKEN DOWN INTO THREE PARTS.

1-4-21
C. MOVEMENTS.
1) LEFT TURN – ONE.
INSTRUCTOR EXECUTION POINTS TO NOTE The instructor is to demonstrate the first movement giving the words of command: INSTRUCTOR ONE.
1. Given when the right foot is on the ground, a full 30 in (750 mm) pace is to be completed with the left foot.
2. The arms remain as in the position of Attention. 3. On the execution of the movement the squad is to call
out: ONE.
1. The left leg takes a full marching pace forward.
2. The movement is carried out at the pace of the Slow March.
3. The arms remain at the position of Attention.
4. The body is erect and square to the front.
ARE THERE ANY QUESTIONS? The squad is to practise Collectively-Individually-
Collectively.

1-4-22
2) LEFT TURN – TWO.
INSTRUCTOR EXECUTION POINTS TO NOTE The instructor is to demonstrate the second movement giving the words of command: INSTRUCTOR ONE.
1. The right leg comes through the bent knee position and is placed on the ground approximately 3 in (80 mm), diagonally to the left, in front of the left toecap.
2. The arms remain at the position of Attention. 3. On the execution of the movement the squad is to call
out: ONE.
1. The forward movement is halted as the right foot hits the ground.
2. The movement is carried out at the pace of the Slow March.
3. The arms remain at the correct position of Attention.
4. The body is erect and square to the front.
ARE THERE ANY QUESTIONS? The squad is to practise Collectively-Individually-Collectively.
3) LEFT TURN – THREE.
INSTRUCTOR EXECUTION POINTS TO NOTE The instructor is to demonstrate the third movement giving the words of command: INSTRUCTOR ONE.
1. The left foot is forced forward, a full 30 in (750 mm) pace in the new direction ordered.
2. The arms remain at the position of Attention. 3. On the execution of the movement the squad is to call
out: ONE.
1. A full 30 in pace is completed by the left foot.
2. The correct Slow March is then continued.
3. The body is erect and square to the front.
ARE THERE ANY QUESTIONS? The squad is to practise Collectively-Individually-
Collectively.

1-4-23
D. FINAL DEMONSTRATION. INSTRUCTOR EXECUTION POINTS TO NOTE The instructor is to give a final and complete demonstration: INSTRUCTOR FOOT DRILL JUDGING THE TIME MOVE TO THE LEFT LEFT TURN.
On the execution of the movement the instructor is to call out: CHECK TURN FORWARD.
ARE THERE ANY QUESTIONS? The squad is to practise Collectively-Individually-Collectively.
E. END OF LESSON DRILLS. INSTRUCTOR EXECUTION POINTS TO NOTE Reform the squad in Close Formation of Threes and confirm by collective practise: FOOT DRILL JUDGING THE TIME MOVE TO THE LEFT LEFT TURN.
Students to execute the movement and call out the timing: CHECK TURN FORWARD.
1. Make any corrections where necessary.

1-4-24
LESSON 5 - THE ABOUT TURN ON THE SLOW MARCH INSTRUCTOR’S NOTES
Aim To teach the About Turn on the Slow March. Timings One 20 minute period. Method A basic outdoor or indoor instructional lesson. Explain the EXECUTION of the movements and emphasise
the POINTS TO NOTE, as under column headings below. Dress & Stores Clean Working Dress. Preparation Select an area on the parade square or any area of hard ground, or indoor equivalent. CONDUCT OF LESSON
A. PRELIMINARIES.
Squad Formation The squad stood properly to Attention in a straight line. Revision Left / Right Turn On The Slow March. Spoken Introduction The next stage in foot drill is the About Turn on the Slow March. The reason this movement is taught
is to enable an individual or body of personnel to turn through an angle of 180 degrees without first being halted in a smart, uniform manner.

1-4-25
B. COMPLETE DEMONSTRATION.
INSTRUCTOR EXECUTION POINTS TO NOTE The instructor is to give a complete demonstration demonstration of the movement: INSTRUCTOR FOOT DRILL JUDGING THE TIME ABOUT TURN.
On the execution of the movement the instructor is to call out: CHECK LEFT RIGHT LEFT FORWARD.
1. There are four parts to this movement.
FOR THE PURPOSE OF INSTRUCTION THIS MOVEMENT IS BROKEN DOWN INTO FOUR PARTS.

1-4-26
C. MOVEMENTS.
1) ABOUT TURN – ONE.
INSTRUCTOR EXECUTION POINTS TO NOTE The instructor is to demonstrate the first movement giving the words of command: INSTRUCTOR ONE.
1. Given when the left foot strikes the ground, a full 30 in (75 cm) pace is to be completed with the right foot.
2. The arms remain as in the position of Attention. 3. On the execution of the movement the squad is to call
out: ONE.
1. Arms remain checked into the side of the body.
2. The movement is carried out at the pace of the Slow March.
3. A full 30 in (750 mm) pace with the right foot.
4. The body is erect and square to the front.
ARE THERE ANY QUESTIONS? The squad is to practise Collectively-Individually-Collectively.

1-4-27
2) ABOUT TURN – TWO.
INSTRUCTOR EXECUTION POINTS TO NOTE The instructor is to demonstrate the second movement giving the words of command: INSTRUCTOR ONE.
1. On receipt of the command the body is forced through an angle of 90 degrees to the right by means of pivoting on the ball of the right foot.
2. At the same time, the left leg moves through the bent knee position and the foot is placed flat on the ground next to the right foot.
3. On the execution of the movement the squad is to call out:
ONE.
1. Arms remain checked into the side of the body.
2. The movement is carried out at the pace of the Slow March.
3. The left leg bends through the bend the knee position.
4. The left foot is placed flat on the ground next to the right foot.
ARE THERE ANY QUESTIONS? The squad is to practise Collectively-Individually-
Collectively.

1-4-28
3) ABOUT TURN – THREE.
INSTRUCTOR EXECUTION POINTS TO NOTE The instructor is to demonstrate the third movement giving the words of command: INSTRUCTOR ONE.
1. On receipt of the command the right leg moves through the bent knee position and the foot placed flat on the ground at an angle of approximately 90 degrees to the left foot.
2. On the execution of the movement the squad is to call out:
ONE.
1. Arms remain checked into the side of the body.
2. The movement is carried out at the pace of the Slow March.
3. The right leg moves through the bent knee position.
4. The right foot placed flat on the ground 90 degrees to the left foot.
ARE THERE ANY QUESTIONS? The squad is to practise Collectively-Individually-
Collectively.

1-4-29
4) ABOUT TURN – FOUR.
INSTRUCTOR EXECUTION POINTS TO NOTE The instructor is to demonstrate the fourth movement giving the words of command: INSTRUCTOR ONE.
1. The left leg moves through the bent knee position and placed down flat on the ground. Heels together and feet angled at 45 degrees.
2. The arms remain at the side of the body. 3. On the execution of the movement the squad is to call
out: ONE.
1. Arms remain checked into the side of the body.
2. The movement is carried out at the pace of the Slow March.
3. The left leg moves through the bent knee position.
4. The left foot placed flat on the ground heels together and feet angled at 45 degrees.
5. The body is erect and square to the new direction.
ARE THERE ANY QUESTIONS? The squad is to practise Collectively-Individually-
Collectively.

1-4-30
D. FINAL DEMONSTRATION. INSTRUCTOR EXECUTION POINTS TO NOTE The instructor is to give a final and complete demonstration: INSTRUCTOR FOOT DRILL JUDGING THE TIME ABOUT TURN.
On the execution of the movement the instructor is to call out: CHECK LEFT RIGHT LEFT FORWARD.
1. The About Turn is completed in three beats equal to three paces in Slow Time.
2. On completion of the movement and calling out FORWARD the right foot is advanced, and the Slow March continued at 65 paces per minute.
ARE THERE ANY QUESTIONS? The squad is to practise Collectively-Individually-Collectively.
E. END OF LESSON DRILLS. INSTRUCTOR EXECUTION POINTS TO NOTE Reform the squad in Close Formation of Threes and confirm by collective practise: FOOT DRILL JUDGING THE TIME ABOUT TURN.
Students to execute the movement and call out the timing: CHECK LEFT RIGHT LEFT FORWARD.
1. Make any corrections where necessary.

1-4-31
LESSON 6 - COMPLIMENTS ON THE SLOW MARCH - EYES LEFT/RIGHT AND EYES FRONT INSTRUCTOR’S NOTES
Aim To teach Eyes Left/Right and Eyes Front on the Slow March. Timings One 20 minute period. Method A basic outdoor or indoor instructional lesson. Explain the EXECUTION of the movements and emphasise the
POINTS TO NOTE, as under column headings below. Dress & Stores Clean Working Dress. Preparation Select an area on the parade square or any area of hard ground, or indoor equivalent. CONDUCT OF LESSON
A. PRELIMINARIES.
Squad Formation The squad stood properly to Attention in a straight line. Revision About turn on the Slow March. Spoken Introduction The next stage in foot drill is Eyes Left/Right on the Slow March. The reason this movement is taught is
to enable an individual or body of personnel to pay the correct compliments to a commissioned officer or an uncased colour or standard in a smart, uniform manner.
1-4-32
B. COMPLETE DEMONSTRATION.
INSTRUCTOR EXECUTION POINTS TO NOTE The instructor is to give a complete demonstration of the movement: INSTRUCTOR FOOT DRILL JUDGING THE TIME EYES LEFT/RIGHT EYES FRONT.
On the execution of the movement the instructor is to call out: TURN TURN.
1. There are two parts to this movement.
FOR THE PURPOSE OF INSTRUCTION, THIS MOVEMENT IS BROKEN DOWN INTO TWO PARTS.

1-4-33
C. MOVEMENTS.
1) COMPLIMENTS ON THE MARCH – EYES LEFT/RIGHT.
INSTRUCTOR EXECUTION POINTS TO NOTE The instructor is to demonstrate the first movement giving the words of command: INSTRUCTOR FOOT DRILL JUDGING THE TIME EYES LEFT/RIGHT.
1. Given when the right foot strikes the ground, as the left foot touches the ground the head and eyes are to be turned smartly in the direction ordered.
2. The arms are to remain at the Attention position in the normal manner of the Slow March.
3. On the execution of the movement the squad is to call out:
TURN.
1. The arms are at the Attention position as in the Slow March.
2. The head is turned smartly in the direction ordered as the left foot touches the ground.
3. Keep the chin up to avoid it dropping on the shoulder.
ARE THERE ANY QUESTIONS? The squad is to practise Collectively-Individually-Collectively.
2) COMPLIMENTS ON THE MARCH – EYES FRONT.
INSTRUCTOR EXECUTION POINTS TO NOTE The instructor is to demonstrate the second movement giving the words of command: INSTRUCTOR FOOT DRILL JUDGING THE TIME EYES FRONT.
1. Given when the right foot touches the ground. 2. As the left foot touches the ground the head and eyes
are to be returned smartly to the front. 3. On the execution of the movement the squad is to call
out: TURN.
ARE THERE ANY QUESTIONS? The squad is to practise Collectively-Individually-Collectively.

1-4-34
D. FINAL DEMONSTRATION. INSTRUCTOR EXECUTION POINTS TO NOTE The instructor is to give a final and complete demonstration: INSTRUCTOR FOOT DRILL JUDGING THE TIME EYES LEFT/RIGHT EYES FRONT.
On the execution of the movement the instructor is to call out: TURN TURN.
ARE THERE ANY QUESTIONS? The squad is to practise Collectively-Individually-Collectively.
E. END OF LESSON DRILLS. INSTRUCTOR EXECUTION POINTS TO NOTE Reform the squad in Close Formation of Threes and confirm by collective practise: FOOT DRILL JUDGING THE TIME COMPLIMENTS ON THE MARCH EYES LEFT/RIGHT EYES FRONT.
Students to execute the movement and call out the timing: TURN TURN.
1. Make any corrections where necessary.
2. On the ceremonial parade ground this movement would be conducted between points A and B (a distance of 20 paces).

1-4-35
LESSON 7 – SLOW MARK TIME INSTRUCTOR’S NOTES
Aim To teach Slow Mark Time. Timings One 10 minute period. Method A basic outdoor or indoor instructional lesson. Explain the EXECUTION of the movements and emphasise
the POINTS TO NOTE, as under column headings below. Dress & Stores Clean Working Dress. Preparation Select an area on the parade square or any area of hard ground, or indoor equivalent. CONDUCT OF LESSON
A. PRELIMINARIES.
Squad Formation The squad stood properly to Attention in a straight line. Revision Compliments on the Slow March. Spoken Introduction The next stage in foot drill is Slow Mark Time. The reason this movement is taught is to enable an
individual or body of personnel to Slow Mark Time in a smart, uniform manner.

1-4-36
B. COMPLETE DEMONSTRATION.
INSTRUCTOR EXECUTION POINTS TO NOTE The instructor is to give a complete demonstration of the movement: INSTRUCTOR FOOT DRILL JUDGING THE TIME MARK TIME.
On the execution of the movement the instructor is to call out: CHECK LEFT RIGHT LEFT.
1. There are two parts to this movement.
FOR THE PURPOSE OF INSTRUCTION, THIS MOVEMENT IS BROKEN DOWN INTO TWO PARTS.
1-4-37
C. MOVEMENTS.
1) SLOW MARK TIME – ONE.
INSTRUCTOR EXECUTION POINTS TO NOTE The instructor is to demonstrate the first movement giving the words of command: INSTRUCTOR ONE.
1. Given when the left foot strikes the ground. A pace of 15 in (38 cm) is to be taken with the right foot.
2. The arms are to remain checked into the side of the body.
3. On the execution of this movement the squad is to call out: ONE.
1. The arms remain still at the side of the body as in the position of Attention.
2. The body is erect and square to the front.
3. The movement is carried out at the pace of the Slow March.
ARE THERE ANY QUESTIONS? The squad is to practise Collectively-Individually-
Collectively.

1-4-38
2) SLOW MARK TIME – TWO.
INSTRUCTOR EXECUTION POINTS TO NOTE The instructor is to demonstrate the second movement giving the words of command: INSTRUCTOR ONE.
1. The Mark Time commences on the left foot. 2. Each person is to Mark Time at 65 paces per minute. 3. When marking time each foot is to be raised alternately
and is to move through the bent knee position with the thigh parallel to the ground. No ground is to be gained or lost.
4. Each foot, as it is raised, is to be pointed downwards and the leg (below the knee) is to be perpendicular to the ground.
5. On the execution of this movement the squad is to call out: ONE.
1. Marking time on the same ground. 2. The rate of marching is maintained
at 65 paces per minute. 3. The feet DO NOT stamp on the
ground. 4. The arms remain still at the side of
the body as in the position of Attention.
5. The body is erect and square to the front.
ARE THERE ANY QUESTIONS? The squad is to practise Collectively-Individually-Collectively.
1-4-39
D. FINAL DEMONSTRATION. INSTRUCTOR EXECUTION POINTS TO NOTE The instructor is to give a final and complete demonstration: INSTRUCTOR FOOT DRILL JUDGING THE TIME MARK TIME.
On the execution of the movements the instructor is to call out: CHECK LEFT RIGHT LEFT.
ARE THERE ANY QUESTIONS? The squad is to practise Collectively-Individually-Collectively.
E. END OF LESSON DRILLS. INSTRUCTOR EXECUTION POINTS TO NOTE Reform the squad in Close Formation of Threes and confirm by collective practise: FOOT DRILL JUDGING THE TIME MARK TIME.
Students to execute the movements and call out the timing: CHECK LEFT RIGHT LEFT.
1. Make any corrections where necessary.

1-4-40
LESSON 8 – HALT FROM SLOW MARK TIME INSTRUCTOR’S NOTES
Aim To teach Halt from Slow Mark Time. Timings One 10 minute period. Method A basic outdoor or indoor instructional lesson. Explain the EXECUTION of the movements and emphasise
the POINTS TO NOTE, as under column headings below. Dress & Stores Clean Working Dress. Preparation Select an area on the parade square or any area of hard ground, or indoor equivalent. CONDUCT OF LESSON
A. PRELIMINARIES.
Squad Formation The squad stood properly to Attention in a straight line. Revision Slow Mark Time. Spoken Introduction The next stage in foot drill is Halt from Slow Mark Time. The reason this movement is taught is to
enable an individual or body of personnel to Halt from Slow Mark Time in a smart, uniform manner.
1-4-41
B. COMPLETE DEMONSTRATION.
INSTRUCTOR EXECUTION POINTS TO NOTE The instructor is to give a complete demonstration of the movement: INSTRUCTOR FOOT DRILL JUDGING THE TIME HALT.
On the execution of the movement the instructor is to call out: ONE.
1. There is one part to this movement.
FOR THE PURPOSE OF INSTRUCTION YOU WILL LEARN THIS AS ONE MOVEMENT.
1-4-42
C. MOVEMENTS.
1) HALT FROM SLOW MARK TIME – ONE. INSTRUCTOR EXECUTION POINTS TO NOTE The instructor is to demonstrate the first movement giving the words of command: INSTRUCTOR ONE.
1. Given when the left foot strikes the ground. The right leg comes through the bend the knee position and the foot is placed firmly on the ground next to the left foot, into the position of Attention.
2. On the execution of this movement the squad is to call out: ONE.
1. The right leg goes through the bent knee position.
2. The feet are at the position of Attention.
3. The body is erect and square to the front with no further movement.
4. The arms remain still at the side of the body at the position of Attention.
ARE THERE ANY QUESTIONS? The squad is to practise Collectively-Individually-Collectively.

1-4-43
D. FINAL DEMONSTRATION. INSTRUCTOR EXECUTION POINTS TO NOTE The instructor is to give a final and complete demonstration: INSTRUCTOR FOOT DRILL JUDGING THE TIME HALT.
On the execution of the movements the instructor is to call out: ONE.
ARE THERE ANY QUESTIONS? The squad is to practise Collectively-Individually-Collectively.
E. END OF LESSON DRILLS. INSTRUCTOR EXECUTION POINTS TO NOTE Reform the squad in Close Formation of Threes and confirm by collective practise: FOOT DRILL JUDGING THE TIME HALT.
Students to execute the movements and call out the timing: ONE.
1. Make any corrections where necessary.

1-4-44
LESSON 9 – CHANGE STEP ON SLOW MARK TIME INSTRUCTOR’S NOTES
Aim To teach Change Step on Slow Mark Time. Timings One 10 minute period. Method A basic outdoor or indoor instructional lesson. Explain the EXECUTION of the movements and emphasise
the POINTS TO NOTE, as under column headings below. Dress & Stores Clean Working Dress. Preparation Select an area on the parade square or any area of hard ground, or indoor equivalent. CONDUCT OF LESSON
A. PRELIMINARIES.
Squad Formation The squad stood properly to Attention in a straight line. Revision Halt From Slow Mark Time. Spoken Introduction The next stage in foot drill is Change Step on Slow Mark Time. The reason this movement is taught is
to enable an individual or body of personnel to Change Step on Slow Mark Time in a smart, uniform manner.

1-4-45
B. COMPLETE DEMONSTRATION.
INSTRUCTOR EXECUTION POINTS TO NOTE The instructor is to give a complete demonstration of the movement: INSTRUCTOR FOOT DRILL JUDGING THE TIME CHANGE STEP.
On the execution of the movement the instructor is to call out: LEFT LEFT RIGHT.
1. There is one part to this movement.
FOR THE PURPOSE OF INSTRUCTION YOU WILL LEARN THIS AS ONE MOVEMENT.
C. MOVEMENTS.
1) CHANGE STEP – ONE. INSTRUCTOR EXECUTION POINTS TO NOTE The instructor is to demonstrate the movement giving the words of command: INSTRUCTOR FOOT DRILL JUDGING THE TIME CHANGE STEP.
1. Given when the right foot strikes the ground, two successive movements are to be completed with the left foot; marking time is then to be restarted with the right foot.
2. On the execution of this movement the squad is to call out:
LEFT LEFT RIGHT.
1. The arms remain at the sides of the body in the position of Attention.
2. There is no forward, rearward or lateral movement.
3. The movement is carried out at the pace of the Slow March.
4. The body is erect and square to the front.
ARE THERE ANY QUESTIONS? The squad is to be practised Collectively-Individually-Collectively.

1-4-46
D. FINAL DEMONSTRATION. INSTRUCTOR EXECUTION POINTS TO NOTE The instructor is to give a final and complete demonstration: INSTRUCTOR FOOT DRILL JUDGING THE TIME CHANGE STEP.
On the execution of the movement the instructor is to call out: LEFT LEFT RIGHT.
ARE THERE ANY QUESTIONS? The squad is to practise Collectively-Individually-Collectively.
E. END OF LESSON DRILLS. INSTRUCTOR EXECUTION POINTS TO NOTE Reform the squad in Close Formation of Threes and confirm by collective practise: FOOT DRILL JUDGING THE TIME CHANGE – STEP.
Students to execute the movements and call out the timing: LEFT LEFT RIGHT.
1. Make any corrections where necessary.

1-4-47
LESSON 10 – FORWARD FROM SLOW MARK TIME INSTRUCTOR’S NOTES
Aim To teach Forward from Slow Mark Time. Timings One 10 minute period. Method A basic outdoor or indoor instructional lesson. Explain the EXECUTION of the movements and emphasise the
POINTS TO NOTE, as under column headings below. Dress & Stores Clean Working Dress. Preparation Select an area on the parade square or any area of hard ground, or indoor equivalent. CONDUCT OF LESSON
A. PRELIMINARIES.
Squad Formation The squad stood properly to Attention in a straight line. Revision Change Step from Slow Mark Time. Spoken Introduction The next stage in foot drill is Forward from Slow Mark Time. The reason this movement is taught is to
enable an individual or body of personnel to return to the Slow March from Slow Mark Time in a smart, uniform manner.

1-4-48
B. COMPLETE DEMONSTRATION.
INSTRUCTOR EXECUTION POINTS TO NOTE The instructor is to give a complete demonstration of the movement: INSTRUCTOR FOOT DRILL JUDGING THE TIME FORWARD.
On the execution of the movement the instructor is to call out: CHECK FORWARD.
1. There is one part to this movement.
FOR THE PURPOSE OF INSTRUCTION YOU WILL LEARN THIS AS ONE MOVEMENT.

1-4-49
C. MOVEMENTS. 1) FORWARD FROM SLOW MARK TIME – ONE. INSTRUCTOR EXECUTION POINTS TO NOTE The instructor is to demonstrate the movement giving the words of command: INSTRUCTOR FOOT DRILL JUDGING THE TIME FORWARD.
1. Given when the left foot touches the ground, the movement of the right foot is to be completed and the Slow March resumed, starting with the left foot.
2. The arms remain at the sides of the body as in the Attention position.
3. On the execution of this movement the squad is to call out:
CHECK FORWARD.
1. The right leg goes through the bent knee position at the pace of the Slow March.
2. The left foot is forced forward and resumes the Slow March regulation pace of 65 paces a minute.
3. The arms remain at the position of Attention.
ARE THERE ANY QUESTIONS? The squad is to practise Collectively-Individually-Collectively.
D. FINAL DEMONSTRATION. INSTRUCTOR EXECUTION POINTS TO NOTE The instructor is to give a final and complete demonstration: INSTRUCTOR FOOT DRILL JUDGING THE TIME FORWARD.
On the execution of the movement the instructor is to call out: CHECK FORWARD.
ARE THERE ANY QUESTIONS? The squad is to practise Collectively-Individually-Collectively.
1-4-50
E. END OF LESSON DRILLS. INSTRUCTOR EXECUTION POINTS TO NOTE Reform the squad in Close Formation of Threes and confirm by collective practise: FOOT DRILL JUDGING THE TIME FORWARD.
Students to execute the movements and call out the timing: CHECK FORWARD.
1. Make any corrections where necessary.

1-4-51
LESSON 11 – CHANGE STEP ON THE SLOW MARCH INSTRUCTOR’S NOTES
Aim To teach Change Step on the Slow March Timings One 10 minute period Method A basic outdoor or indoor instructional lesson. Explain the EXECUTION of the movements and emphasise
the POINTS TO NOTE, as under column headings below. Dress & Stores Clean Working Dress. Preparation Select an area on the parade square or any area of hard ground, or indoor equivalent. CONDUCT OF LESSON
A. PRELIMINARIES.
Squad Formation The squad stood properly to Attention in a straight line. Revision Forward from Slow Mark Time. Spoken Introduction The next stage in foot drill is the Change Step on the Slow March. The reason this movement is
taught is to enable an individual or body of personnel to Change Step on the Slow March in a smart, uniform manner.
1-4-52
B. COMPLETE DEMONSTRATION.
INSTRUCTOR EXECUTION POINTS TO NOTE The instructor is to give a complete demonstration of the movement: INSTRUCTOR FOOT DRILL JUDGING THE TIME CHANGE STEP.
On the execution of the movement the instructor is to call out: LEFT RIGHT LEFT.
1. There are three parts to this movement.
FOR THE PURPOSE OF INSTRUCTION, THIS MOVEMENT IS BROKEN DOWN INTO THREE PARTS.
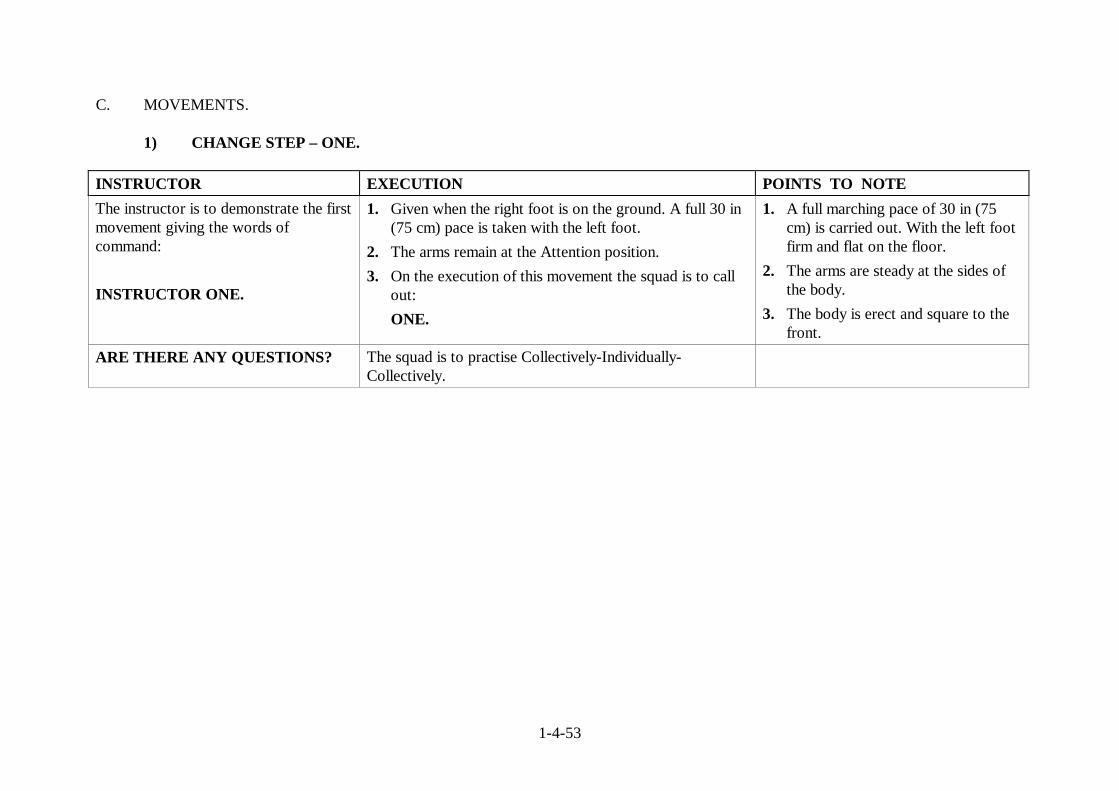
1-4-53
C. MOVEMENTS.
1) CHANGE STEP – ONE. INSTRUCTOR EXECUTION POINTS TO NOTE The instructor is to demonstrate the first movement giving the words of command: INSTRUCTOR ONE.
1. Given when the right foot is on the ground. A full 30 in (75 cm) pace is taken with the left foot.
2. The arms remain at the Attention position. 3. On the execution of this movement the squad is to call
out: ONE.
1. A full marching pace of 30 in (75 cm) is carried out. With the left foot firm and flat on the floor.
2. The arms are steady at the sides of the body.
3. The body is erect and square to the front.
ARE THERE ANY QUESTIONS? The squad is to practise Collectively-Individually-Collectively.
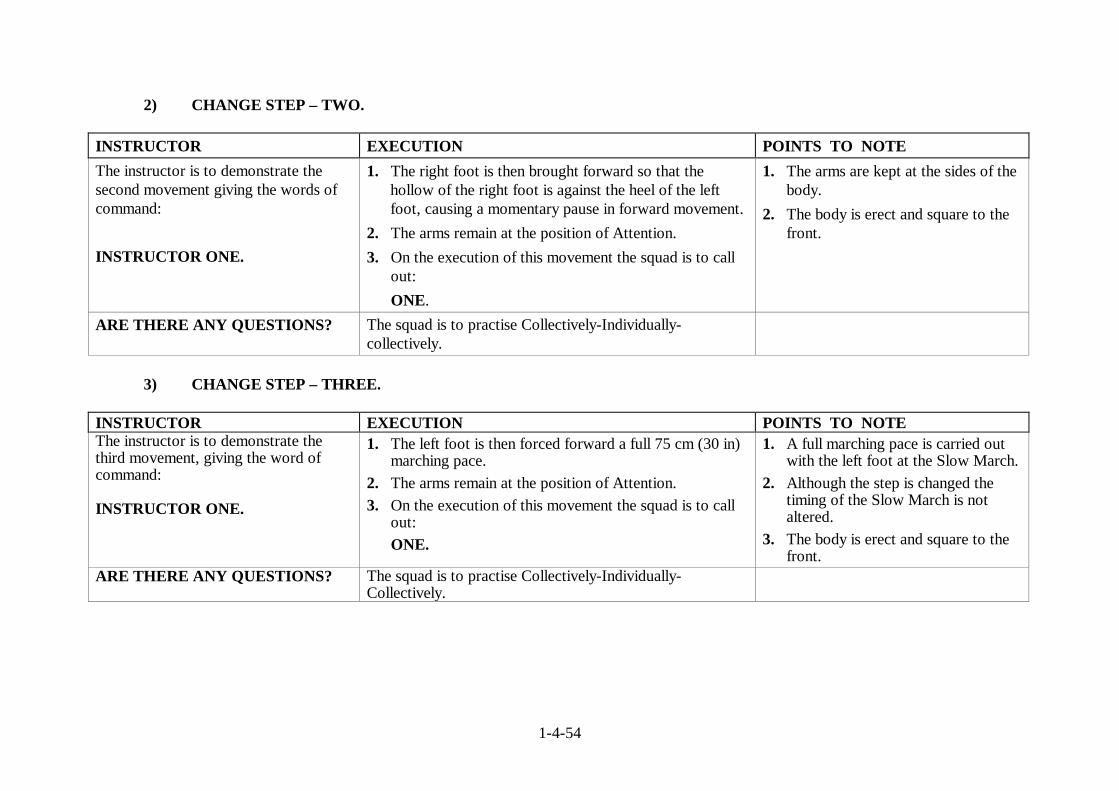
1-4-54
2) CHANGE STEP – TWO. INSTRUCTOR EXECUTION POINTS TO NOTE The instructor is to demonstrate the second movement giving the words of command: INSTRUCTOR ONE.
1. The right foot is then brought forward so that the hollow of the right foot is against the heel of the left foot, causing a momentary pause in forward movement.
2. The arms remain at the position of Attention. 3. On the execution of this movement the squad is to call
out: ONE.
1. The arms are kept at the sides of the body.
2. The body is erect and square to the front.
ARE THERE ANY QUESTIONS? The squad is to practise Collectively-Individually-collectively.
3) CHANGE STEP – THREE.
INSTRUCTOR EXECUTION POINTS TO NOTE The instructor is to demonstrate the third movement, giving the word of command: INSTRUCTOR ONE.
1. The left foot is then forced forward a full 75 cm (30 in) marching pace.
2. The arms remain at the position of Attention. 3. On the execution of this movement the squad is to call
out: ONE.
1. A full marching pace is carried out with the left foot at the Slow March.
2. Although the step is changed the timing of the Slow March is not altered.
3. The body is erect and square to the front.
ARE THERE ANY QUESTIONS? The squad is to practise Collectively-Individually-Collectively.
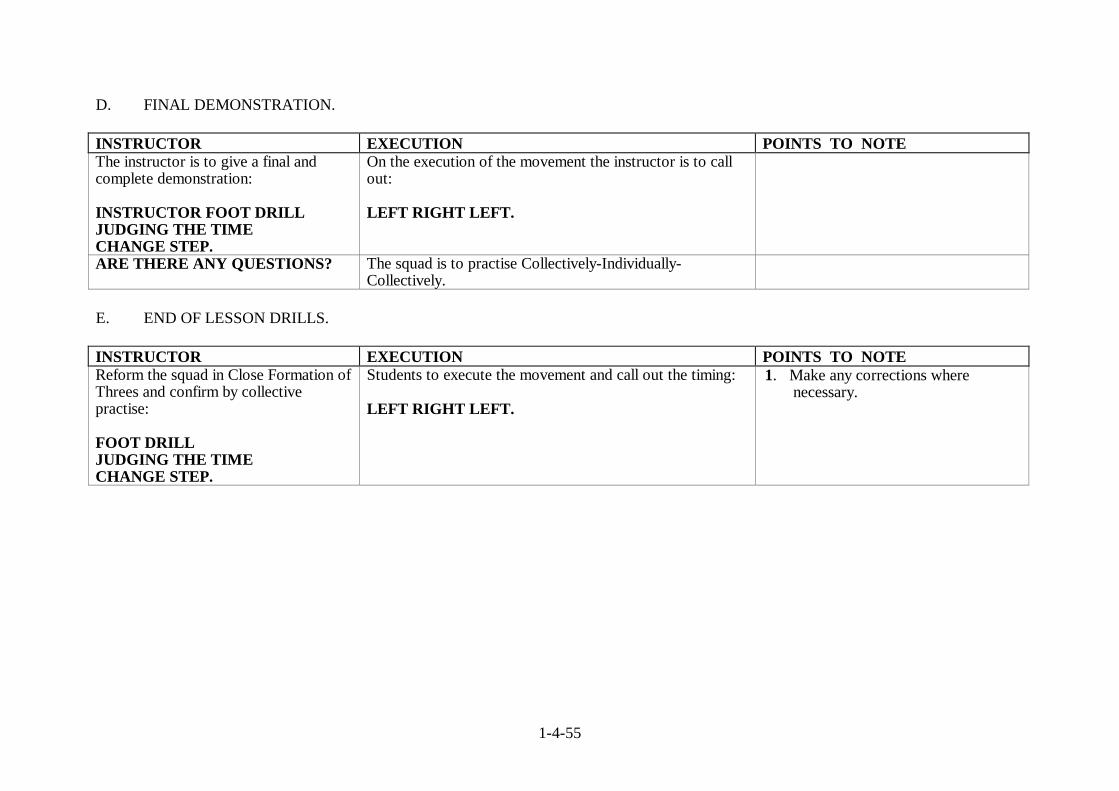
1-4-55
D. FINAL DEMONSTRATION. INSTRUCTOR EXECUTION POINTS TO NOTE The instructor is to give a final and complete demonstration: INSTRUCTOR FOOT DRILL JUDGING THE TIME CHANGE STEP.
On the execution of the movement the instructor is to call out: LEFT RIGHT LEFT.
ARE THERE ANY QUESTIONS? The squad is to practise Collectively-Individually-Collectively.
E. END OF LESSON DRILLS. INSTRUCTOR EXECUTION POINTS TO NOTE Reform the squad in Close Formation of Threes and confirm by collective practise: FOOT DRILL JUDGING THE TIME CHANGE STEP.
Students to execute the movement and call out the timing: LEFT RIGHT LEFT.
1. Make any corrections where necessary.

1-4-56
LESSON 12 –BREAKING INTO SLOW TIME FROM QUICK TIME INSTRUCTOR’S NOTES
Aim To teach Breaking into Slow Time from Quick Time. Timings One 30 minute period. Method A basic outdoor or indoor instructional lesson. Explain the EXECUTION of the movements and emphasise
the POINTS TO NOTE, as under column headings below. Dress & Stores Clean Working Dress. Preparation Select an area on the parade square or any area of hard ground, or indoor equivalent. CONDUCT OF LESSON
A. PRELIMINARIES.
Squad Formation The squad stood properly to Attention in a straight line. Revision Change Step on Slow March. Spoken Introduction The next stage in foot drill is Breaking into Slow Time from Quick Time. The reason this movement is
taught is to enable an individual or body of personnel to Break into Slow Time from Quick Time in a smart, uniform manner.

1-4-57
B. COMPLETE DEMONSTRATION.
INSTRUCTOR EXECUTION POINTS TO NOTE The instructor is to give a full demonstration: INSTRUCTOR FOOT DRILL JUDGING THE TIME BREAKING INTO SLOW TIME SLOW MARCH.
On the execution of the movement the instructor is to call out: CHECK LEFT RIGHT LEFT.
1. There are two parts to this movement.
FOR THE PURPOSE OF INSTRUCTION, THIS MOVEMENT IS BROKEN DOWN INTO TWO PARTS.
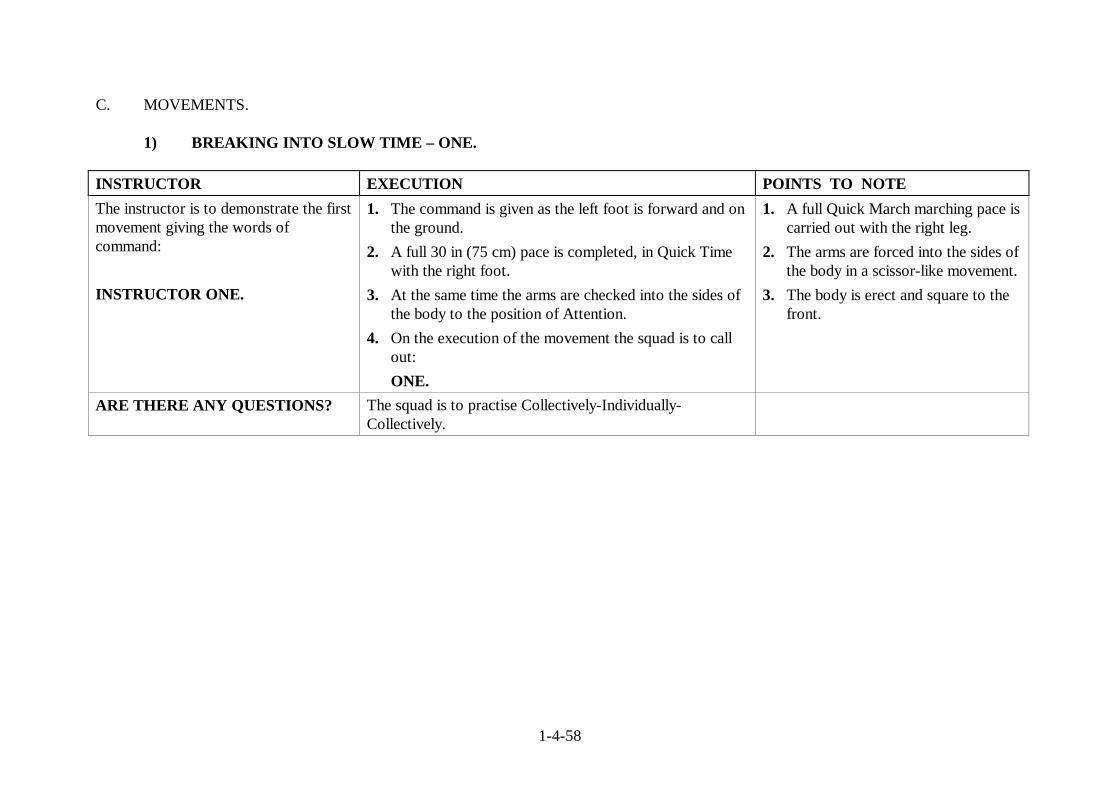
1-4-58
C. MOVEMENTS.
1) BREAKING INTO SLOW TIME – ONE.
INSTRUCTOR EXECUTION POINTS TO NOTE The instructor is to demonstrate the first movement giving the words of command: INSTRUCTOR ONE.
1. The command is given as the left foot is forward and on the ground.
2. A full 30 in (75 cm) pace is completed, in Quick Time with the right foot.
3. At the same time the arms are checked into the sides of the body to the position of Attention.
4. On the execution of the movement the squad is to call out: ONE.
1. A full Quick March marching pace is carried out with the right leg.
2. The arms are forced into the sides of the body in a scissor-like movement.
3. The body is erect and square to the front.
ARE THERE ANY QUESTIONS? The squad is to practise Collectively-Individually-Collectively.
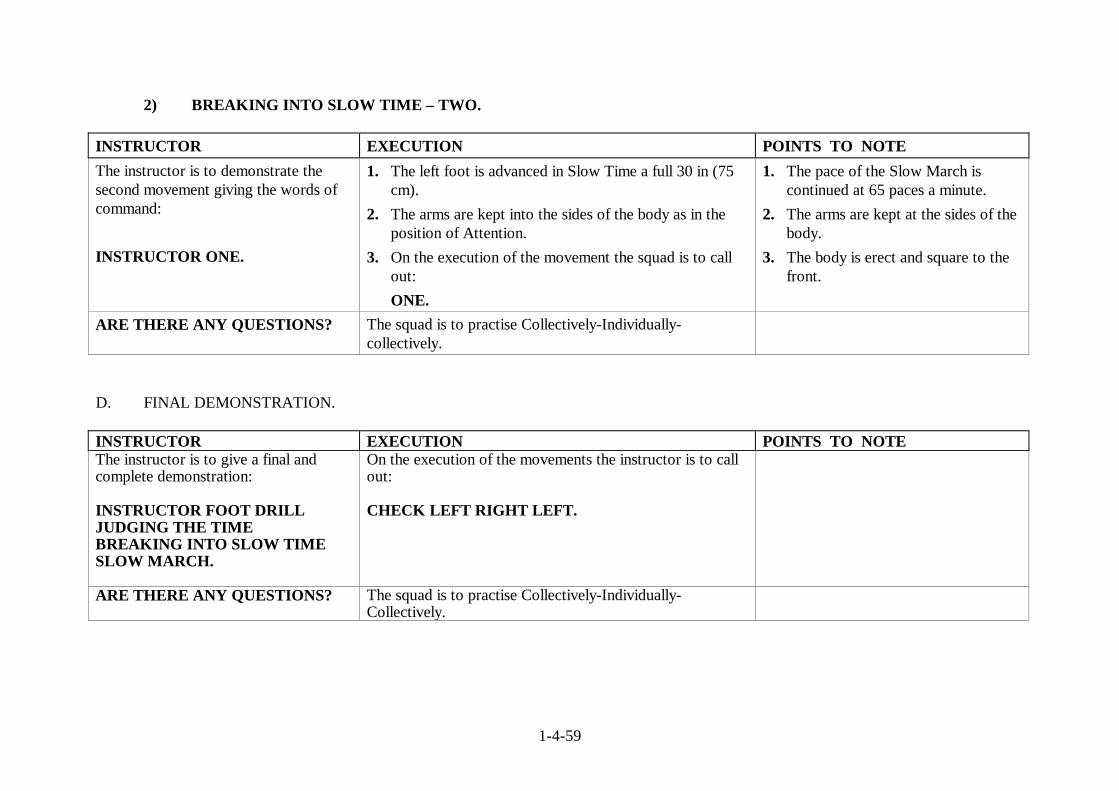
1-4-59
2) BREAKING INTO SLOW TIME – TWO.
INSTRUCTOR EXECUTION POINTS TO NOTE The instructor is to demonstrate the second movement giving the words of command: INSTRUCTOR ONE.
1. The left foot is advanced in Slow Time a full 30 in (75 cm).
2. The arms are kept into the sides of the body as in the position of Attention.
3. On the execution of the movement the squad is to call out: ONE.
1. The pace of the Slow March is continued at 65 paces a minute.
2. The arms are kept at the sides of the body.
3. The body is erect and square to the front.
ARE THERE ANY QUESTIONS? The squad is to practise Collectively-Individually-collectively.
D. FINAL DEMONSTRATION. INSTRUCTOR EXECUTION POINTS TO NOTE The instructor is to give a final and complete demonstration: INSTRUCTOR FOOT DRILL JUDGING THE TIME BREAKING INTO SLOW TIME SLOW MARCH.
On the execution of the movements the instructor is to call out: CHECK LEFT RIGHT LEFT.
ARE THERE ANY QUESTIONS? The squad is to practise Collectively-Individually-Collectively.

1-4-60
E. END OF LESSON DRILLS. INSTRUCTOR EXECUTION POINTS TO NOTE Reform the squad in Close Formation of Threes and confirm by collective practise: FOOT DRILL JUDGING THE TIME BREAKING INTO SLOW TIME SLOW MARCH.
Students to execute the movement and call out the timing: CHECK LEFT RIGHT LEFT.
1. Make any corrections where necessary.
1-4-61
LESSON 13 – BREAKING INTO QUICK TIME FROM SLOW TIME INSTRUCTOR’S NOTES
Aim To teach Breaking into Quick Time from Slow Time. Timings One 30 minute period. Method A basic outdoor or indoor instructional lesson. Explain the EXECUTION of the movements and emphasise
the POINTS TO NOTE, as under column headings below. Dress & Stores Clean Working Dress. Preparation Select an area on the parade square or any area of hard ground, or indoor equivalent. CONDUCT OF LESSON
A. PRELIMINARIES.
Squad Formation The squad stood properly to Attention in a straight line. Revision Breaking into Slow Time from Quick Time. Spoken Introduction The next stage in foot drill is Breaking into Quick Time from Slow Time. The reason this movement is
taught is to enable an individual or body of personnel to Break into Quick Time from Slow Time in a smart, uniform manner.
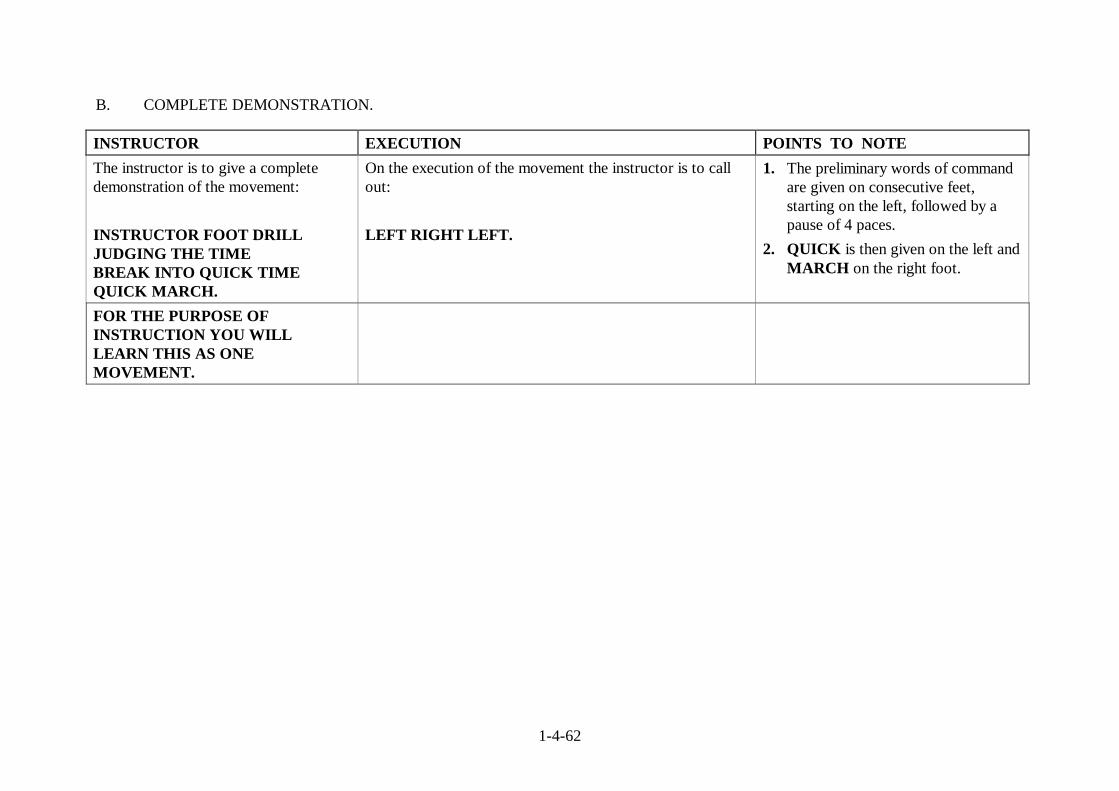
1-4-62
B. COMPLETE DEMONSTRATION.
INSTRUCTOR EXECUTION POINTS TO NOTE The instructor is to give a complete demonstration of the movement: INSTRUCTOR FOOT DRILL JUDGING THE TIME BREAK INTO QUICK TIME QUICK MARCH.
On the execution of the movement the instructor is to call out: LEFT RIGHT LEFT.
1. The preliminary words of command are given on consecutive feet, starting on the left, followed by a pause of 4 paces.
2. QUICK is then given on the left and MARCH on the right foot.
FOR THE PURPOSE OF INSTRUCTION YOU WILL LEARN THIS AS ONE MOVEMENT.
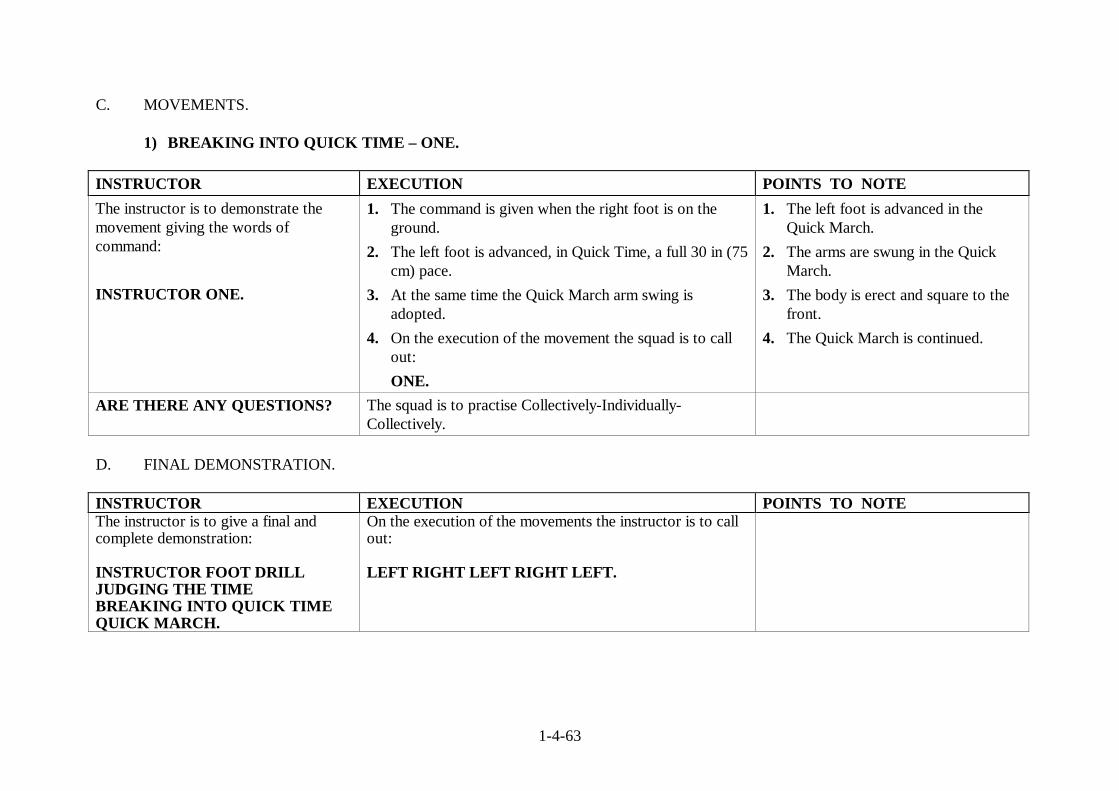
1-4-63
C. MOVEMENTS.
1) BREAKING INTO QUICK TIME – ONE.
INSTRUCTOR EXECUTION POINTS TO NOTE The instructor is to demonstrate the movement giving the words of command: INSTRUCTOR ONE.
1. The command is given when the right foot is on the ground.
2. The left foot is advanced, in Quick Time, a full 30 in (75 cm) pace.
3. At the same time the Quick March arm swing is adopted.
4. On the execution of the movement the squad is to call out: ONE.
1. The left foot is advanced in the Quick March.
2. The arms are swung in the Quick March.
3. The body is erect and square to the front.
4. The Quick March is continued.
ARE THERE ANY QUESTIONS? The squad is to practise Collectively-Individually-Collectively.
D. FINAL DEMONSTRATION. INSTRUCTOR EXECUTION POINTS TO NOTE The instructor is to give a final and complete demonstration: INSTRUCTOR FOOT DRILL JUDGING THE TIME BREAKING INTO QUICK TIME QUICK MARCH.
On the execution of the movements the instructor is to call out: LEFT RIGHT LEFT RIGHT LEFT.

1-4-64
E. END OF LESSON DRILLS. INSTRUCTOR EXECUTION POINTS TO NOTE Reform the squad in Close Formation of Threes and confirm by collective practise: FOOT DRILL JUDGING THE TIME BREAKING INTO QUICK TIME QUICK MARCH.
Students to execute the movements and call out the timing: LEFT RIGHT LEFT.
1. Make any corrections where necessary.

1-9-1
PART ONE-CHAPTER 9
COLOUR/STANDARD DRILL
CONTENTS
LESSON No TITLE PAGE No
1 Uncasing the Colour/Standard 1-9-2 2 Casing the Colour/Standard 1-9-7 3 Colour/Standard Dressed at the Order - Positions of
At Ease and Attention 1-9-12
4 Carry Colour/Standard from the Order 1-9-19 5 Order Colour/Standard from the Carry 1-9-26 6 Slope Colour/Standard from the Carry 1-9-33 7 Change Arms at the Slope (Right to Left shoulder) 1-9-40 8 Change Arms at the Slope (Left to Right shoulder) 1-9-47 9 Carry Colour/Standard from the Slope 1-9-54 10 Port Colour /Standard from the Carry 1-9-61 11 Salute at the Halt with the Colour/Standard 1-9-68 12 Carry Colour/Standard from Salute at the Halt 1-9-76 13 Salute with the Colour/Standard when Marching
Past 1-9-83
14 Carry Colour/Standard from the Salute when Marching Past in Slow Time
1-9-89
Colour / Standard Drill Lessons 1. All lesson plans apply equally to Colours and Standards. 2. The movements in these drills are to be performed in the same cadence as rifle exercises.
When there are only 2 movements with the colour and 3 movements with the rifle, the colour is to be moved on the first and third movements of the rifle. When there are 4 movements for the rifle the colour it is to be moved on the first, second and fourth movements of the rifle.
3. The right hand only is to be used in these drills except when changing arms or as stated in
the drill. 4. For drill, demonstration and parade rehearsal purposes, only practice colours/standards
are to be used.

1-9-2
LESSON 1 - UNCASING THE COLOUR/STANDARD INSTRUCTOR’S NOTES
Aim To teach Uncasing the Colour or Standard. Timings One 25 minute period. Method A basic outdoor or indoor instructional lesson. Explain the EXECUTION of the movements and emphasise the
POINTS TO NOTE, as under column headings below. Dress & Stores Clean Working Dress. Practise Colour/Standard. Practise Colour/Standard Belt. Preparation Select an area on the parade square or any area of hard ground, or indoor equivalent with sufficient height
clearance. CONDUCT OF LESSON
A. PRELIMINARIES.
Squad Formation The squad stood properly At Ease in a half circle. Revision Nil. Spoken Introduction The first stage of colour/standard drill is Uncasing the Colour or Standard. The reason this movement is
taught is enable the colour/standard to be used on parade.

1-9-3
B. COMPLETE DEMONSTRATION (ONLY IF DEMONSTRATORS ARE AVAILABLE). INSTRUCTOR EXECUTION POINTS TO NOTE The demonstration team is to give a complete demonstration of the movement.
1. Explain your use of demonstrators. If no demonstrators are available the instructor is to conduct the lesson without ceremony and take the part of the Colour/Standard Bearer himself.
1. The Colour/Standard Party is to be formed up with the two SNCO escorts one and a half paces either side of the Colour/Standard and the WO two paces centrally to the rear, with the orderly to his left covering off the left-hand escort.
2. The instructor is to give the words of command and is to emphasise that this is done by the Colour/Standard Bearer in the actual situation.

1-9-4
C. MOVEMENTS.
1) UNCASING THE COLOUR/STANDARD – ONE. INSTRUCTOR EXECUTION POINTS TO NOTE The Colour/Standard party is to execute the movement. The Bearer is to give the words of command: ESCORTS SHUN. INWARDS TURN UNCASE THE QUEENS COLOUR / STANDARD PRESENT ARMS.
1. On receipt of the word of command both escorts, the WO and the Orderly adopt the position of Attention.
2. The escorts Slope Arms and carry out an incline inwards towards the Colour/Standard.
3. The escorts Present Arms after which the WO and orderly execute a right turn, and left wheel marching a total of ten paces (8,1-2) and halt two paces short of and facing the Bearer and left escort respectively.
1. The Bearer is to be at the position of Attention with the Colour/Standard at the Order.
2. As the WO and the orderly step off they are to start the count with the first left foot to strike the ground as ‘one’.
3. The WO and orderly take a total of ten paces (8, 1-2).
ARE THERE ANY QUESTIONS? The squad is to practise Collectively-Individually-Collectively

1-9-5
2) UNCASING THE COLOUR/STANDARD – TWO. INSTRUCTOR EXECUTION POINTS TO
NOTE
1. When the WO and orderly have halted the Bearer is to lower the Colour/Standard to a horizontal position with the pike firmly gripped under the right armpit and the top of the Colour/Standard case supported in the WO’s right hand.
2. The Bearer is to untie the tapes of the Colour/Standard case with the left hand. 3. The WO and orderly now turn inwards to face each other on either side of the Colour/Standard. The
WO removes the case with the Bearer supporting the silk and tassels. The case is then handed to the orderly who places it over the left forearm. The WO then removes the chamois cover from the Crown/Eagle and hands it to the orderly who holds it in the right hand.
4. The WO is to free the tassels so that they hang from the head of the pike. The WO and orderly now turn outwards to face the Bearer and escort.
5. The Bearer and WO release the silk allowing it to hang straight down the pike. The Bearer is to then return the Colour/Standard to the Order.
6. The Bearer is to hold the Colour/Standard at the position of Attention with the right hand. The left forearm is to be across the sword belt with fingers extended and covering the Colour.
7. The WO is to take two paces forward and dress the Colour/Standard by evenly distributing the folds on either side of the pike in order to cover it completely. The Royal Cipher is to be readily seen.
8. The Bearer is then to resume the position of Attention. The WO is to take two paces to the rear. Both the WO and the orderly salute together, execute a Right Turn and step off together. The WO wheels around to his left a total of ten paces (8,1-2) to resume his original position, two paces to the rear of the Bearer. The orderly is to march off parade to the rear of the Colour/Standard Party. The orderly is responsible for the safe custody of the case until the Colour/Standard is cased.
1. There is no timing to be observed.
ARE THERE ANY
QUESTIONS?
The squad is to practise Collectively-Individually-Collectively.

1-9-6
3) UNCASING THE COLOUR/STANDARD – THREE. INSTRUCTOR EXECUTION POINTS TO NOTE The Colour/Standard Bearer is to give the word of command: ESCORTS SLOPE ARMS ESCORTS OUTWARDS TURN ESCORTS SHOULDER ARMS COLOUR/STANDARD PARTY STAND AT EASE.
1. The escorts are to turn outwards so that they once again are facing to the front.
1. Colour/Standard Parties are not to Stand Easy.
2. Troops are not to Stand Easy with Colours or Standards on parade.
ARE THERE ANY QUESTIONS? The squad is to practise Collectively-Individually-Collectively.
D. FINAL CONFIRMATION. INSTRUCTOR EXECUTION POINTS TO NOTE The instructor is to exercise the Colour/Standard Party in the drills that have been taught.
ARE THERE ANY QUESTIONS? The squad is to practise Collectively-Individually-Collectively.
E. END OF LESSON DRILLS. INSTRUCTOR EXECUTION POINTS TO NOTE Confirm by questions and practise.
1. Make any corrections where necessary.
1-9-7
LESSON 2 - CASING THE COLOUR/STANDARD INSTRUCTOR’S NOTES
Aim To teach Casing the Colour or Standard. Timings One 25 minute period. Method A basic outdoor or indoor instructional lesson. Explain the EXECUTION of the movements and emphasise the
POINTS TO NOTE, as under column headings below. Dress & Stores Clean Working Dress. Practise Colour/Standard. Practise Colour/Standard Belt. Preparation Select an area on the parade square or any area of hard ground, or indoor equivalent with sufficient height clearance. CONDUCT OF LESSON
A. PRELIMINARIES.
Squad Formation The squad stood properly At Ease in a half circle. Revision Nil. Spoken Introduction The next stage in Colour/Standard drill is Casing the Colour or Standard. The reason this movement is taught
is to enable the Colour/Standard to be stored correctly after a parade.
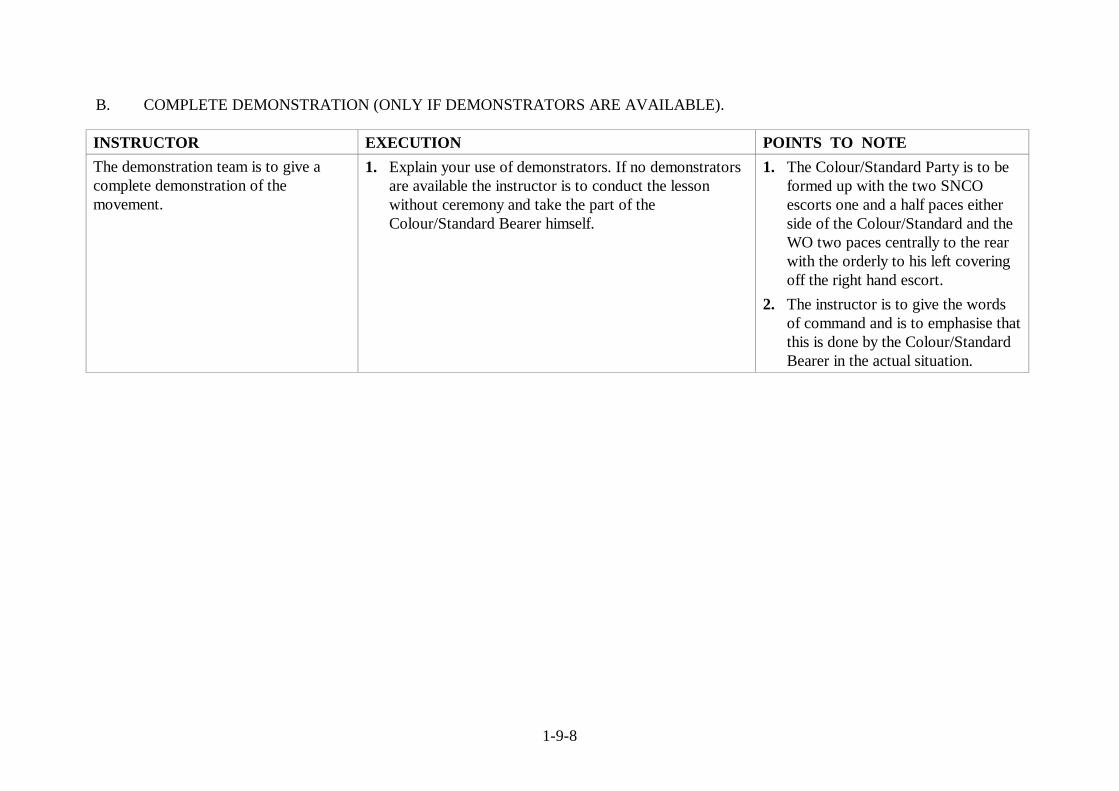
1-9-8
B. COMPLETE DEMONSTRATION (ONLY IF DEMONSTRATORS ARE AVAILABLE).
INSTRUCTOR EXECUTION POINTS TO NOTE The demonstration team is to give a complete demonstration of the movement.
1. Explain your use of demonstrators. If no demonstrators are available the instructor is to conduct the lesson without ceremony and take the part of the Colour/Standard Bearer himself.
1. The Colour/Standard Party is to be formed up with the two SNCO escorts one and a half paces either side of the Colour/Standard and the WO two paces centrally to the rear with the orderly to his left covering off the right hand escort.
2. The instructor is to give the words of command and is to emphasise that this is done by the Colour/Standard Bearer in the actual situation.
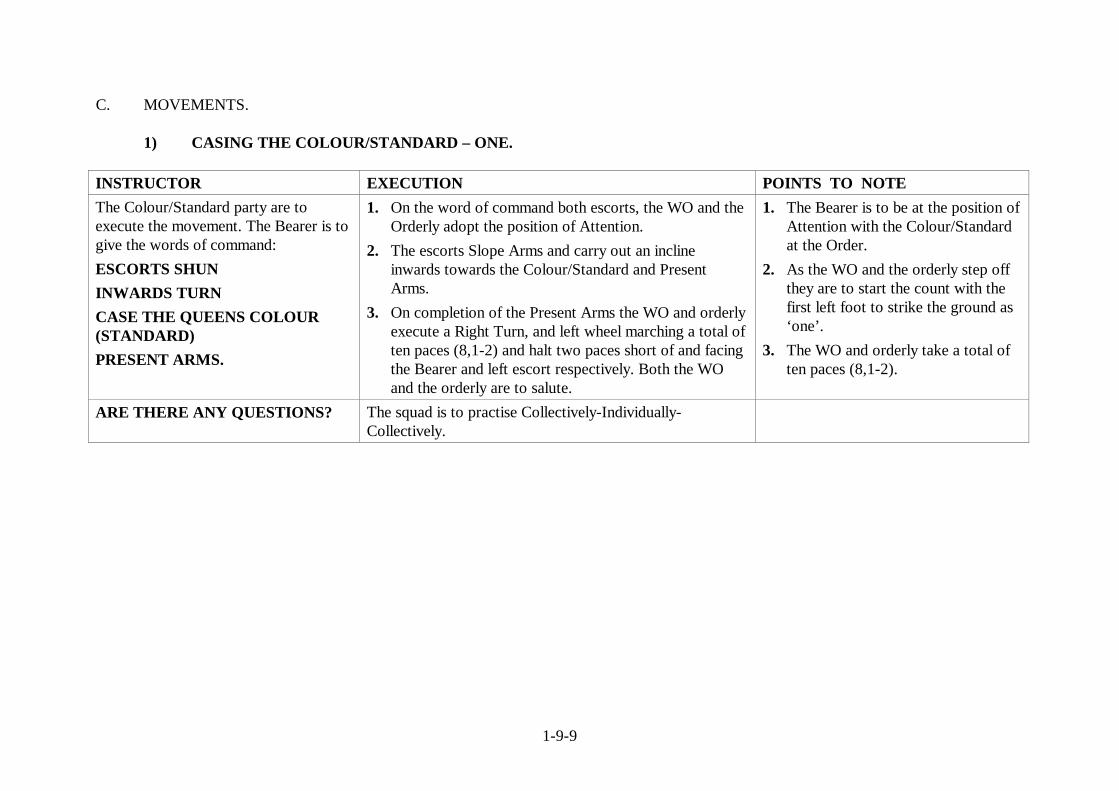
1-9-9
C. MOVEMENTS.
1) CASING THE COLOUR/STANDARD – ONE. INSTRUCTOR EXECUTION POINTS TO NOTE The Colour/Standard party are to execute the movement. The Bearer is to give the words of command: ESCORTS SHUN INWARDS TURN CASE THE QUEENS COLOUR (STANDARD) PRESENT ARMS.
1. On the word of command both escorts, the WO and the Orderly adopt the position of Attention.
2. The escorts Slope Arms and carry out an incline inwards towards the Colour/Standard and Present Arms.
3. On completion of the Present Arms the WO and orderly execute a Right Turn, and left wheel marching a total of ten paces (8,1-2) and halt two paces short of and facing the Bearer and left escort respectively. Both the WO and the orderly are to salute.
1. The Bearer is to be at the position of Attention with the Colour/Standard at the Order.
2. As the WO and the orderly step off they are to start the count with the first left foot to strike the ground as ‘one’.
3. The WO and orderly take a total of ten paces (8,1-2).
ARE THERE ANY QUESTIONS? The squad is to practise Collectively-Individually-Collectively.
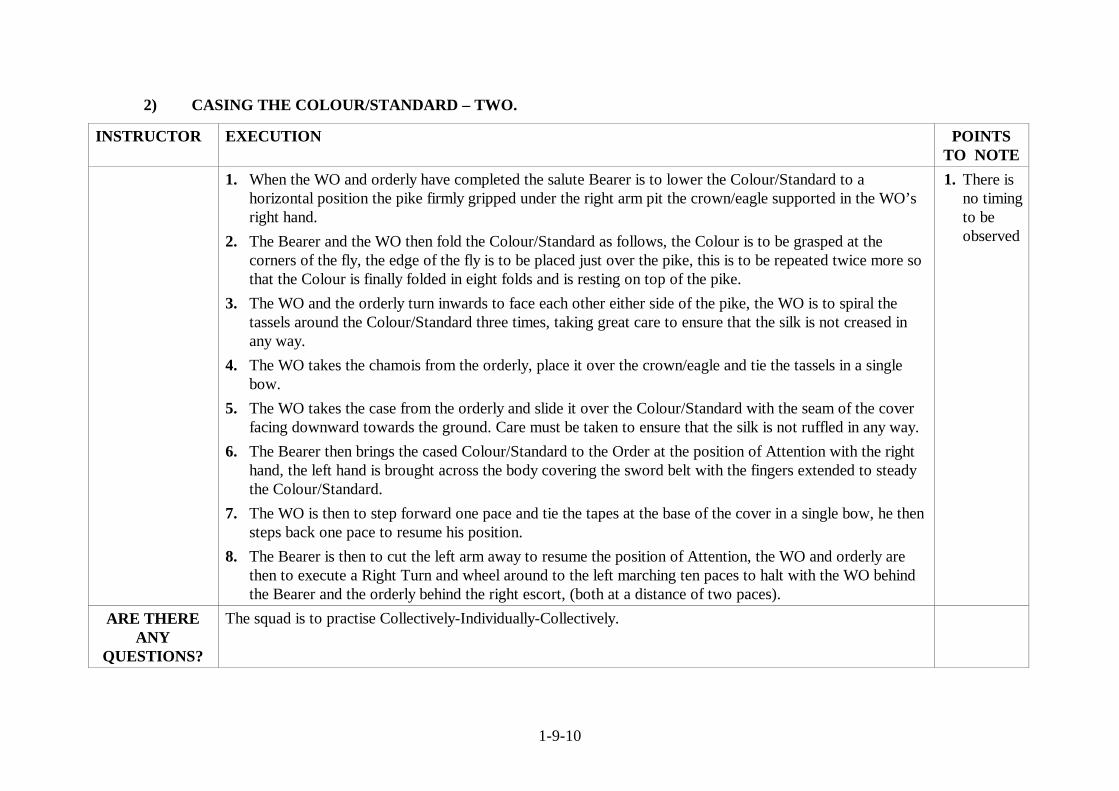
1-9-10
2) CASING THE COLOUR/STANDARD – TWO.
INSTRUCTOR EXECUTION POINTS TO NOTE
1. When the WO and orderly have completed the salute Bearer is to lower the Colour/Standard to a horizontal position the pike firmly gripped under the right arm pit the crown/eagle supported in the WO’s right hand.
2. The Bearer and the WO then fold the Colour/Standard as follows, the Colour is to be grasped at the corners of the fly, the edge of the fly is to be placed just over the pike, this is to be repeated twice more so that the Colour is finally folded in eight folds and is resting on top of the pike.
3. The WO and the orderly turn inwards to face each other either side of the pike, the WO is to spiral the tassels around the Colour/Standard three times, taking great care to ensure that the silk is not creased in any way.
4. The WO takes the chamois from the orderly, place it over the crown/eagle and tie the tassels in a single bow.
5. The WO takes the case from the orderly and slide it over the Colour/Standard with the seam of the cover facing downward towards the ground. Care must be taken to ensure that the silk is not ruffled in any way.
6. The Bearer then brings the cased Colour/Standard to the Order at the position of Attention with the right hand, the left hand is brought across the body covering the sword belt with the fingers extended to steady the Colour/Standard.
7. The WO is then to step forward one pace and tie the tapes at the base of the cover in a single bow, he then steps back one pace to resume his position.
8. The Bearer is then to cut the left arm away to resume the position of Attention, the WO and orderly are then to execute a Right Turn and wheel around to the left marching ten paces to halt with the WO behind the Bearer and the orderly behind the right escort, (both at a distance of two paces).
1. There is no timing to be observed
ARE THERE ANY
QUESTIONS?
The squad is to practise Collectively-Individually-Collectively.

1-9-11
3) CASING THE COLOUR/STANDARD – THREE.
INSTRUCTOR EXECUTION POINTS TO NOTE The Colour/Standard Bearer is to give the word of command: ESCORTS SLOPE ARMS ESCORTS OUTWARDS TURN. The Colour/Standard Bearer is to give the word of command: COLOUR PARTY DISMISS.
1. The escorts are to turn outwards so that they once again are facing to the front.
2. The Bearer is then to take two paces forward and about turn to face the Colour/Standard Party.
3. The WO, escorts and orderly execute a Right Incline, salute and dismiss.
1. Colour/Standard parties are not to Stand Easy.
2. Troops are not to Stand Easy with Colours or Standards on parade.
ARE THERE ANY QUESTIONS? The squad is to practise Collectively-Individually-Collectively.
D. FINAL CONFIRMATION. INSTRUCTOR EXECUTION POINTS TO NOTE The instructor is to exercise the Colour/Standard Party in the drills that have been taught.
ARE THERE ANY QUESTIONS? The squad is to practise Collectively-Individually-Collectively.
E. END OF LESSON DRILLS. INSTRUCTOR EXECUTION POINTS TO NOTE Confirm by questions and practise
1. Make any corrections where necessary.

1-9-12
LESSON 3 - COLOUR/STANDARD DRESSED AT THE ORDER-POSITIONS OF AT EASE AND ATTENTION INSTRUCTOR’S NOTES
Aim To teach the position of the Order and Dressing the Colour/Standard, and the positions of At Ease and Attention. Timings One 40 minute period. Method A basic outdoor or indoor instructional lesson. Explain the EXECUTION of the movements and emphasise the
POINTS TO NOTE, as under column headings below. Dress & Stores Clean Working Dress. Practise Colour/Standard. Practise Colour/Standard Belt. Preparation Select an area on the parade square or any area of hard ground, or indoor equivalent with sufficient height
clearance. CONDUCT OF LESSON
A. PRELIMINARIES.
Squad Formation The squad stood properly At Ease in a half circle. Revision Nil. Spoken Introduction The next stage in Colour/Standard drill is to teach the position of the Colour/Standard at the Order, the
correct procedure for dressing the Colour/Standard, and the positions of At Ease and Attention.
1-9-13
B. COMPLETE DEMONSTRATION (Fig 9-1).
INSTRUCTOR EXECUTION POINTS TO NOTE The instructor is to give a complete demonstration of the position.
1. There is only one movement to the position of the Colour/Standard at the Order.
2. There are three movements to dressing the Colour/Standard.
3. The positions of At Ease and Attention are the same as in foot drill with the exception of the right hand supporting the Colour/Standard.

1-9-14
C. MOVEMENTS.
1) THE COLOUR/STANDARD AT THE POSITION OF THE ORDER – ONE (Fig 9-1). INSTRUCTOR EXECUTION POINTS TO NOTE The instructor is to demonstrate the position of the Order and explain:
1. The pike and the silk are to be held with the right hand on the pike at the lowest corner of the silk.
2. The pike is to be perpendicular with the base resting on the ground in line with and against the right toe.
3. The elbow is to be close to the body. 4. The silk is not to be stretched taut but is to be allowed
to hang naturally down the pike.
ARE THERE ANY QUESTIONS? The squad is to practise Collectively-Individually-Collectively.

1-9-15
2) DRESSING THE COLOUR/STANDARD AT THE ORDER – ONE/TWO/THREE. INSTRUCTOR EXECUTION POINTS TO NOTE The instructor is to demonstrate and explain:
1. Firstly the Colour/Standard is to be dressed at the Order the Bearer is to bring the left hand smartly across the front of the body.
2. Secondly the Bearer is to distribute the folds of the silk evenly on either side of the pike so that the pike is covered and the Royal Cipher/Sqn Badge is clearly displayed. In the case of a Standard, the eagle is to face forwards.
3. Thirdly the Bearer is then to bring the left arm smartly back across the front of the body to resume the correct position of Attention.
ARE THERE ANY QUESTIONS? The squad is to practise Collectively-Individually-Collectively.

1-9-16
3) THE POSITIONS OF AT EASE – ONE. INSTRUCTOR EXECUTION POINTS TO NOTE The instructor is to demonstrate the movement giving the word of command. COLOUR BEARER/STANDARD BEARER STAND AT EASE.
1. The left knee is bent so that the thigh is parallel to the ground with the left foot hanging naturally below the knee, the left leg is then forced down to the ground 12 in (300 mm) from the right foot.
2. The right hand continues to hold the silk against the pike to where the lowest corner of the silk reaches, with the right arm pulled into the side of the body.
3. The left arm remains braced at the left hand side of the body with the fingers curled to make a fist and the thumb in line with the seam of the trousers, not moving throughout the execution of the movement.
1. The body is now in the correct position of the At Ease with the Colour/Standard. The body is erect and square to the front.
ARE THERE ANY QUESTIONS? The squad is to practise Collectively-Individually-Collectively.

1-9-17
4) THE POSITION OF ATTENTION – ONE (Fig 9-1).
INSTRUCTOR EXECUTION POINTS TO NOTE The instructor is to demonstrate the movement giving the word of command. COLOUR BEARER/STANDARD BEARER SHUN.
1. The left knee is bent so that the thigh is parallel to the ground with the left foot hanging naturally below the knee, the left foot is then forced down beside the right to resume the correct position of Attention.
2. The right hand continues to hold the silk against the pike to where the lowest corner of the silk reaches, with the right arm pulled in to the right hand side of the body.
3. The left arm remains braced at the left hand side of the body with the fingers curled to make a fist and the thumb in line with the seam of the trousers, not moving throughout the execution of the movement.
1. The body is now in the correct position of Attention with the Colour/Standard.
2. The body is erect and square to the front.
ARE THERE ANY QUESTIONS? The squad is to practise Collectively-Individually- Collectively.
D. FINAL CONFIRMATION.
INSTRUCTOR EXECUTION POINTS TO NOTE The instructor is to exercise the Colour/Standard Party in the drills that have been taught.
ARE THERE ANY QUESTIONS?
The squad is to practise Collectively-Individually-Collectively.
E. END OF LESSON DRILLS.
INSTRUCTOR EXECUTION POINTS TO NOTE Confirm by practise. 1. Make any corrections where
necessary.
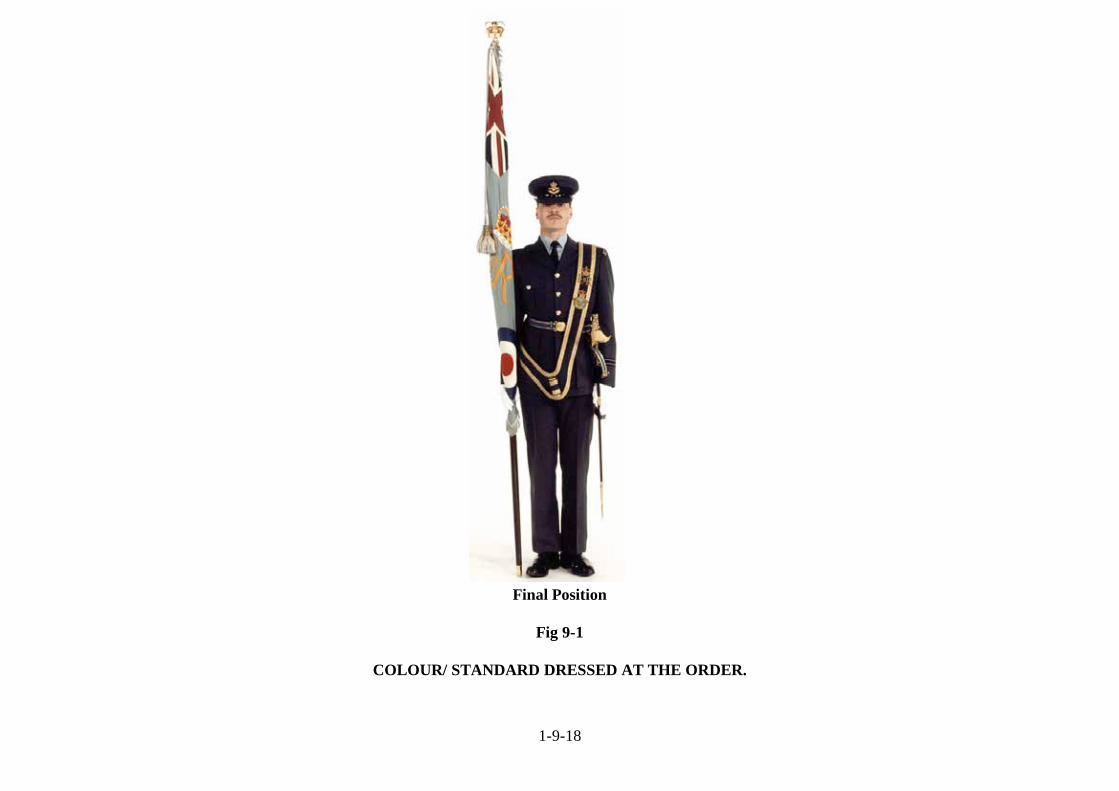
1-9-18
Final Position
Fig 9-1
COLOUR/ STANDARD DRESSED AT THE ORDER.

1-9-19
LESSON 4 - CARRY COLOUR/STANDARD FROM THE ORDER INSTRUCTOR’S NOTES
Aim To teach the Carry from the Order. Timings One 40 minute period. Method A basic outdoor or indoor instructional lesson. Explain the EXECUTION of the movements and emphasise the
POINTS TO NOTE, as under column headings below. Dress & Stores Clean Working Dress. Practise Colour/Standard. Practise Colour/Standard Belt. Preparation Select an area on the parade square or any area of hard ground, or indoor equivalent with sufficient height
clearance. CONDUCT OF LESSON
A. PRELIMINARIES.
Squad Formation The squad stood properly At Ease in a half circle. Revision Colour/Standard dressed at the Order. Spoken Introduction The next stage in Colour/Standard drill is the position of the Carry from the Order. The reason this
movement is taught is to enable the Colour/Standard Bearer to move from the position of the Order to the Carry.

1-9-20
B. COMPLETE DEMONSTRATION.
INSTRUCTOR EXECUTION POINTS TO NOTE The instructor is to give a full demonstration calling out the time as the movement is executed. COLOUR/STANDARD DRILL JUDGING THE TIME CARRY COLOUR/STANDARD.
On the execution of the movement the instructor is to call out: ONE LEFT – RIGHT/ONE LEFT – RIGHT/ONE.
1. There are three parts to this movement.
FOR THE PURPOSE OF INSTRUCTION THIS MOVEMENT IS BROKEN DOWN INTO THREE PARTS.
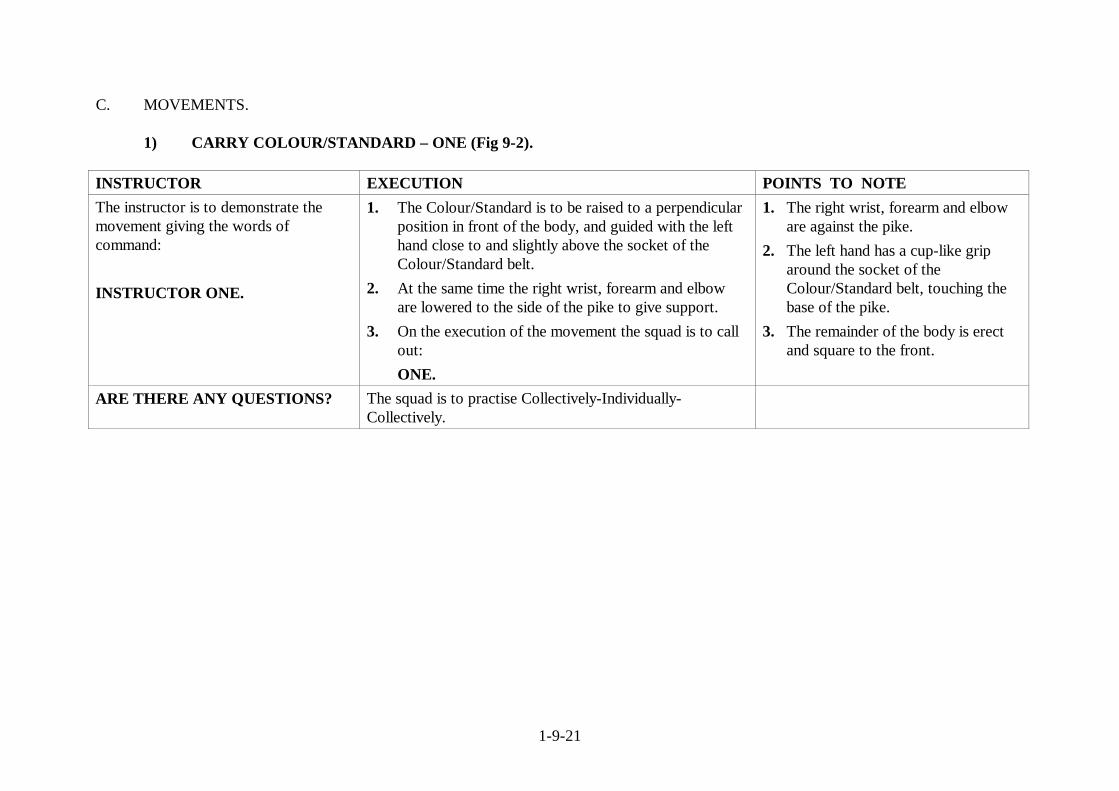
1-9-21
C. MOVEMENTS.
1) CARRY COLOUR/STANDARD – ONE (Fig 9-2). INSTRUCTOR EXECUTION POINTS TO NOTE The instructor is to demonstrate the movement giving the words of command: INSTRUCTOR ONE.
1. The Colour/Standard is to be raised to a perpendicular position in front of the body, and guided with the left hand close to and slightly above the socket of the Colour/Standard belt.
2. At the same time the right wrist, forearm and elbow are lowered to the side of the pike to give support.
3. On the execution of the movement the squad is to call out:
ONE.
1. The right wrist, forearm and elbow are against the pike.
2. The left hand has a cup-like grip around the socket of the Colour/Standard belt, touching the base of the pike.
3. The remainder of the body is erect and square to the front.
ARE THERE ANY QUESTIONS? The squad is to practise Collectively-Individually-Collectively.
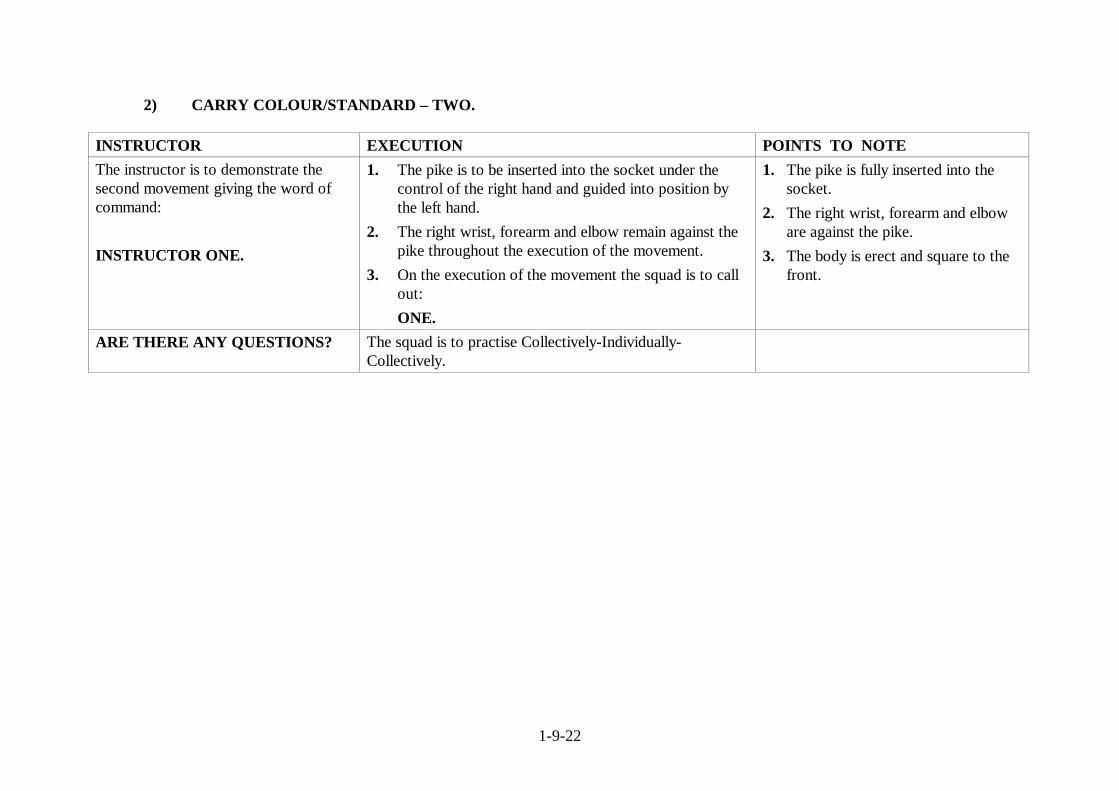
1-9-22
2) CARRY COLOUR/STANDARD – TWO. INSTRUCTOR EXECUTION POINTS TO NOTE The instructor is to demonstrate the second movement giving the word of command: INSTRUCTOR ONE.
1. The pike is to be inserted into the socket under the control of the right hand and guided into position by the left hand.
2. The right wrist, forearm and elbow remain against the pike throughout the execution of the movement.
3. On the execution of the movement the squad is to call out:
ONE.
1. The pike is fully inserted into the socket.
2. The right wrist, forearm and elbow are against the pike.
3. The body is erect and square to the front.
ARE THERE ANY QUESTIONS? The squad is to practise Collectively-Individually-Collectively.

1-9-23
3) CARRY COLOUR/STANDARD – THREE.(Fig 9-3). INSTRUCTOR EXECUTION POINTS TO NOTE The instructor is to demonstrate the third movement giving the word of command: INSTRUCTOR ONE.
1. The left hand is cut away from the socket to resume the position of Attention at the left hand side of the body.
2. At the same time the right forearm is raised to a horizontal position to the right hand side with the right thumb in front of the mouth and the back of the hand facing to the front.
3. On the execution of the movement the squad is to call out:
ONE.
1. The right forearm is horizontal and parallel to the ground.
2. The right thumb is in front of and in line with the mouth.
3. The back of the hand is facing towards the front.
4. The left arm is at the correct position of Attention.
5. The body is erect and square to the front.
ARE THERE ANY QUESTIONS? The squad is to practise Collectively-Individually-Collectively.
D. FINAL DEMONSTRATION. INSTRUCTOR EXECUTION POINTS TO NOTE The instructor is to give a complete and final demonstration of the movement, giving the word of command: COLOUR/STANDARD DRILL JUDGING THE TIME CARRY COLOUR/STANDARD.
On the execution of the movement the instructor is to call out: ONE LEFT – RIGHT/ONE LEFT – RIGHT/ONE.
ARE THERE ANY QUESTIONS?

1-9-24
E. END OF LESSON DRILLS. INSTRUCTOR EXECUTION POINTS TO NOTE Form the squad in a half circle or the individual to your front and confirm by practise: COLOUR/STANDARD DRILL JUDGING THE TIME CARRY COLOUR/STANDARD.
Students are to execute the movement calling out the time: ONE LEFT – RIGHT/ONE LEFT – RIGHT/ONE.
1. The right wrist, forearm and elbow are pulled close into the pike on the first and second positions.
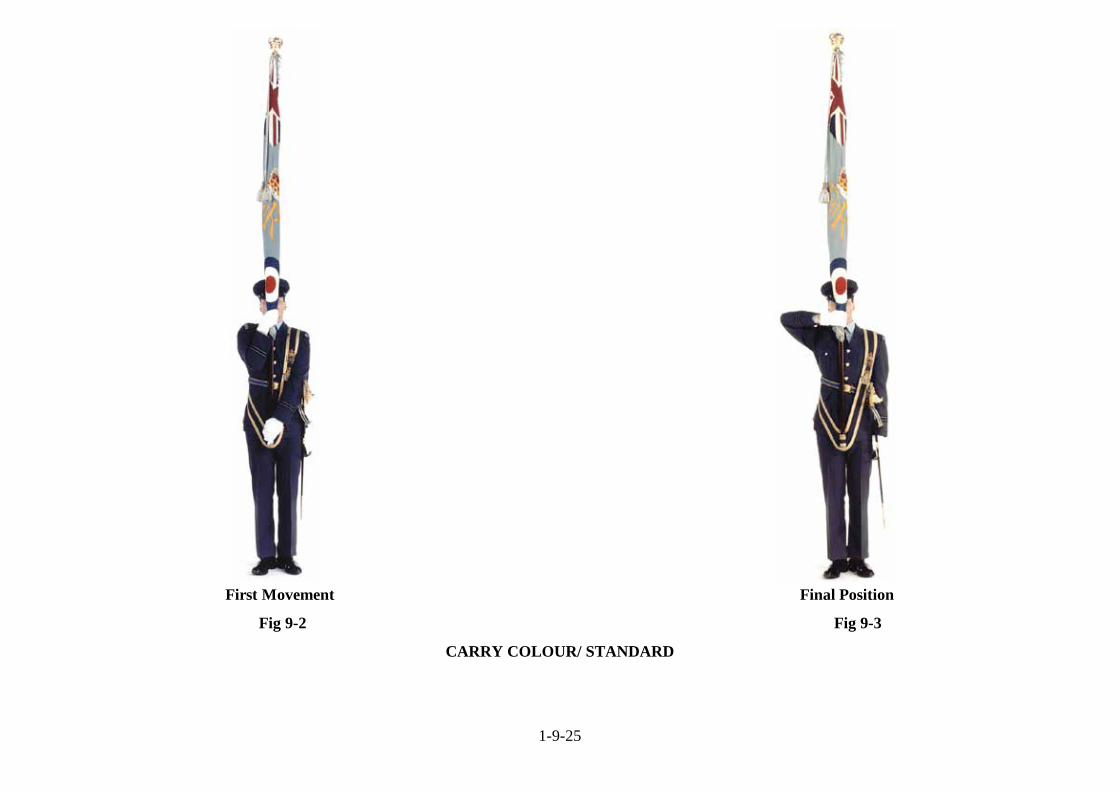
1-9-25
First Movement Final Position
Fig 9-2 Fig 9-3
CARRY COLOUR/ STANDARD

1-9-26
LESSON 5 - ORDER COLOUR/STANDARD FROM THE CARRY INSTRUCTOR’S NOTES
Aim To teach the Order Colour/Standard from the Carry position. Timings One 25 minute period. Method A basic outdoor or indoor instructional lesson. Explain the EXECUTION of the movements and emphasise the
POINTS TO NOTE, as under column headings below. Dress & Stores Clean Working Dress. Practise Colour/Standard. Practise Colour/Standard belt. Preparation Select an area on the parade square or any area of hard ground, or indoor equivalent with sufficient height
clearance. CONDUCT OF LESSON
A. PRELIMINARIES.
Squad Formation The squad stood properly At Ease in a half circle. Revision Carry from the Order. Spoken Introduction The next stage in Colour/Standard Drill is the Order from the Carry. The reason this movement is taught
is to enable the Bearer to move from the Carry to the Order.
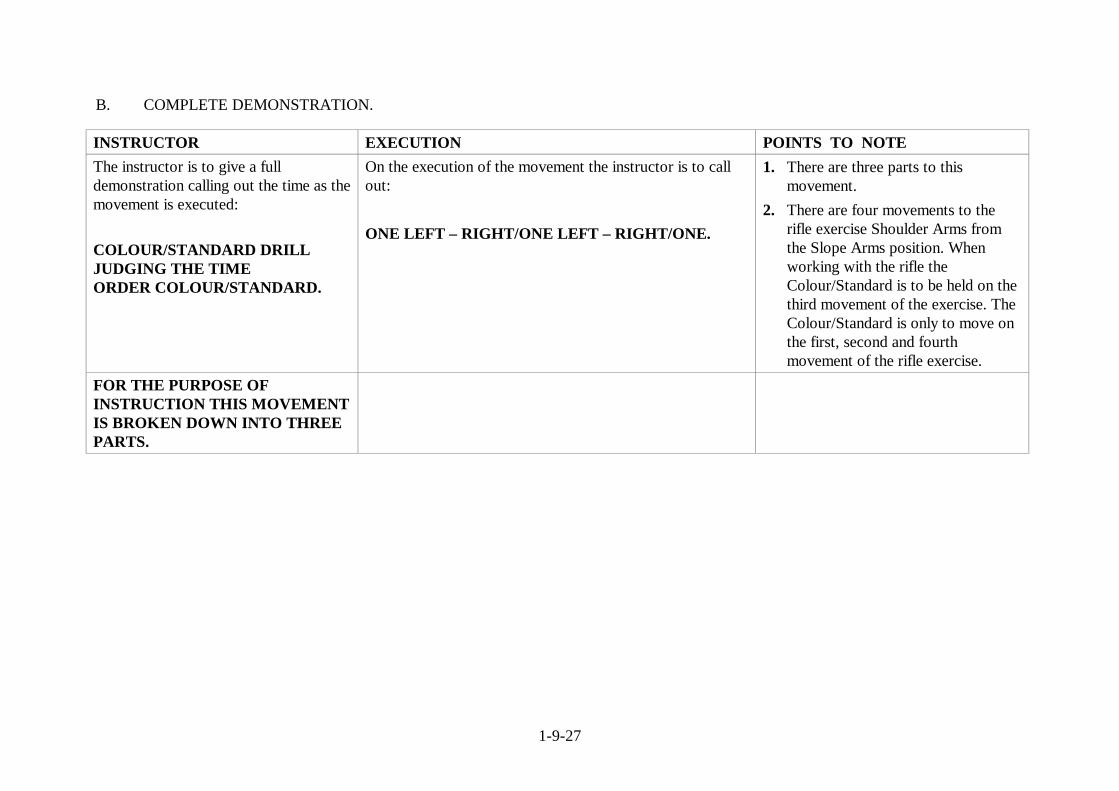
1-9-27
B. COMPLETE DEMONSTRATION.
INSTRUCTOR EXECUTION POINTS TO NOTE The instructor is to give a full demonstration calling out the time as the movement is executed: COLOUR/STANDARD DRILL JUDGING THE TIME ORDER COLOUR/STANDARD.
On the execution of the movement the instructor is to call out: ONE LEFT – RIGHT/ONE LEFT – RIGHT/ONE.
1. There are three parts to this movement.
2. There are four movements to the rifle exercise Shoulder Arms from the Slope Arms position. When working with the rifle the Colour/Standard is to be held on the third movement of the exercise. The Colour/Standard is only to move on the first, second and fourth movement of the rifle exercise.
FOR THE PURPOSE OF INSTRUCTION THIS MOVEMENT IS BROKEN DOWN INTO THREE PARTS.

1-9-28
C. MOVEMENTS.
1) ORDER COLOUR/STANDARD – ONE (Fig 9-4). INSTRUCTOR EXECUTION POINTS TO NOTE The instructor is to demonstrate the first movement giving the words of command: INSTRUCTOR ONE.
1. The pike is to be raised just clear of the socket of the Colour/Standard belt under the control of the right hand.
2. At the same time the right wrist, forearm and elbow are lowered against the pike for control and the left hand is brought across the body by the shortest possible route to grasp the socket in a full grip.
3. On the execution of the movement the squad is to call out:
ONE.
1. The base of the pike is raised just clear of the socket of the Colour/Standard belt.
2. The right wrist, forearm and elbow are lowered against the pike.
3. The left hand has a full grip on the socket of the Colour/Standard belt.
4. The body is erect and square to the front.
ARE THERE ANY QUESTIONS? The squad is to practise Collectively-Individually-Collectively.

1-9-29
2) ORDER COLOUR/STANDARD – TWO (Fig 9-5). INSTRUCTOR EXECUTION POINTS TO NOTE The instructor is to execute the second movement giving the words of command: INSTRUCTOR ONE.
1. The pike is lowered to the position of the Order under the control of the right hand.
2. At the same time the left hand is brought across the front of the body by the shortest possible route to steady the Colour/Standard with the hand open and fingers together.
3. On the execution of the movement the squad is to call out: ONE.
1. The pike is perpendicular with the base on the ground in line with and against the right toe.
2. The pike and the silk are held with the right hand at the lowest point of the silk.
3. The left wrist, forearm and elbow are parallel to the ground with the hand open and fingers together.
4. The body is erect and square to the front.
ARE THERE ANY QUESTIONS? The squad is to practise Collectively-Individually-Collectively.

1-9-30
3) ORDER COLOUR/STANDARD – THREE (Fig 9-6). INSTRUCTOR EXECUTION POINTS TO NOTE The instructor is to demonstrate the movement giving the following words of command: INSTRUCTOR ONE.
1. The left arm is cut away sharply to the left-hand side of the body to resume the correct position of Attention.
2. On the execution of the movement the squad is to call out:
ONE.
1. The Colour/Standard is in the correct position of the Order.
2. The body is erect and square to the front.
ARE THERE ANY QUESTIONS? The squad is to practise Collectively-Individually-Collectively.
D. FINAL DEMONSTRATION. INSTRUCTOR EXECUTION POINTS TO NOTE The instructor is to give a complete and final demonstration of the movement: INSTRUCTOR COLOUR/STANDARD DRILL JUDGING THE TIME ORDER COLOUR/STANDARD.
On the execution of the movement the instructor is to call out: ONE LEFT – RIGHT/ONE LEFT - RIGHT/ONE.
ARE THERE ANY QUESTIONS? The squad is to practise Collectively-Individually-Collectively.

1-9-31
E. END OF LESSON DRILLS. INSTRUCTOR EXECUTION POINTS TO NOTE Reform the squad in a half circle or the individual in front of you and confirm by practise: COLOUR/STANDARD DRILL JUDGING THE TIME ORDER COLOUR/STANDARD.
Students are to execute the movement and call out the timing: ONE LEFT – RIGHT/ ONE LEFT – RIGHT/ ONE.
1. Ensure that the pike is at the correct position of the Order on the completion of the movement.

1-9-32
First Movement Second Movement Final Position
Fig 9-4 Fig 9-5 Fig 9-6
ORDER COLOUR/ STANDARD

1-9-33
LESSON 6 - SLOPE COLOUR/STANDARD FROM THE CARRY INSTRUCTOR’S NOTES
Aim To teach the Slope from the Carry. Timings One 25 minute period Method A basic outdoor or indoor instructional lesson. Explain the EXECUTION of the movements and emphasise the
POINTS TO NOTE, as under column headings below. Dress & Stores Clean Working Dress. Practise Colour/Standard. Practise Colour/Standard Belt. Preparation Select an area on the parade square or any area of hard ground, or indoor equivalent with sufficient height
clearance. CONDUCT OF LESSON
A. PRELIMINARIES.
Squad Formation The squad stood properly At Ease in a half circle. Revision Order from the Carry. Spoken Introduction The next stage in Colour/Standard Drill is the position of the Slope from the Carry. The reason this
movement is taught is to enable the Bearer to rest from the Carry position on parade when the ceremonial situation allows.
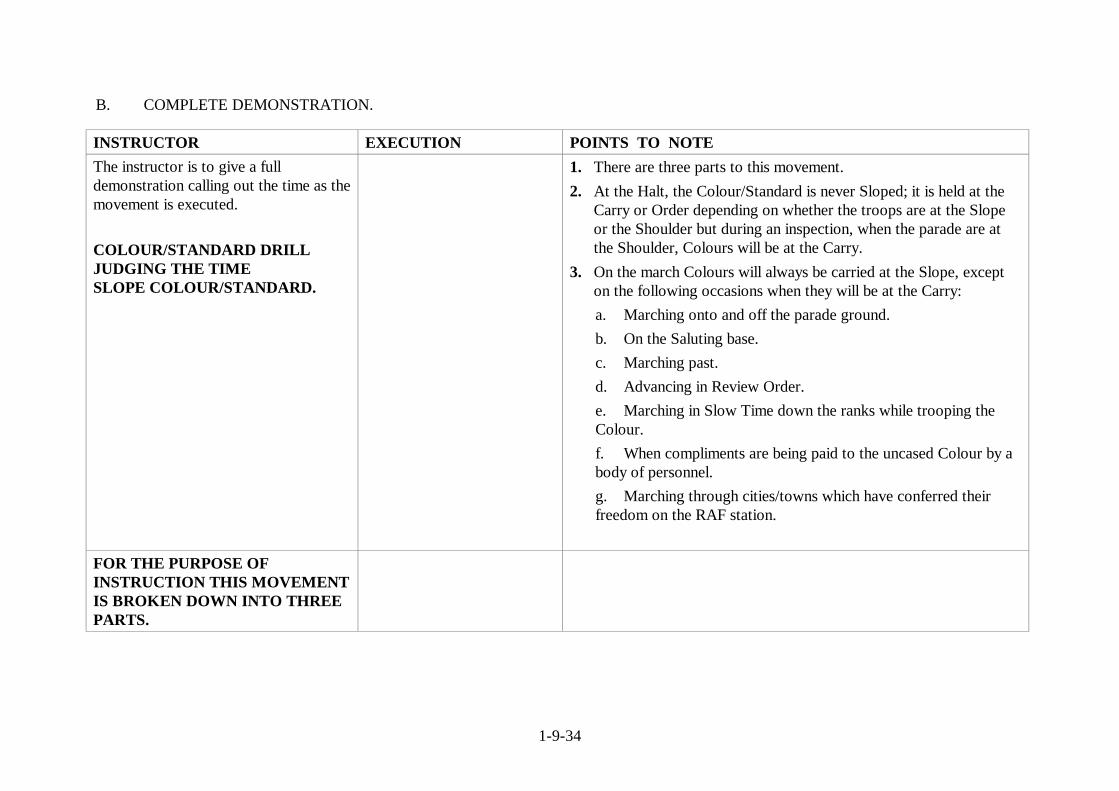
1-9-34
B. COMPLETE DEMONSTRATION.
INSTRUCTOR EXECUTION POINTS TO NOTE The instructor is to give a full demonstration calling out the time as the movement is executed. COLOUR/STANDARD DRILL JUDGING THE TIME SLOPE COLOUR/STANDARD.
1. There are three parts to this movement. 2. At the Halt, the Colour/Standard is never Sloped; it is held at the
Carry or Order depending on whether the troops are at the Slope or the Shoulder but during an inspection, when the parade are at the Shoulder, Colours will be at the Carry.
3. On the march Colours will always be carried at the Slope, except on the following occasions when they will be at the Carry: a. Marching onto and off the parade ground. b. On the Saluting base. c. Marching past. d. Advancing in Review Order. e. Marching in Slow Time down the ranks while trooping the Colour. f. When compliments are being paid to the uncased Colour by a body of personnel. g. Marching through cities/towns which have conferred their freedom on the RAF station.
FOR THE PURPOSE OF INSTRUCTION THIS MOVEMENT IS BROKEN DOWN INTO THREE PARTS.
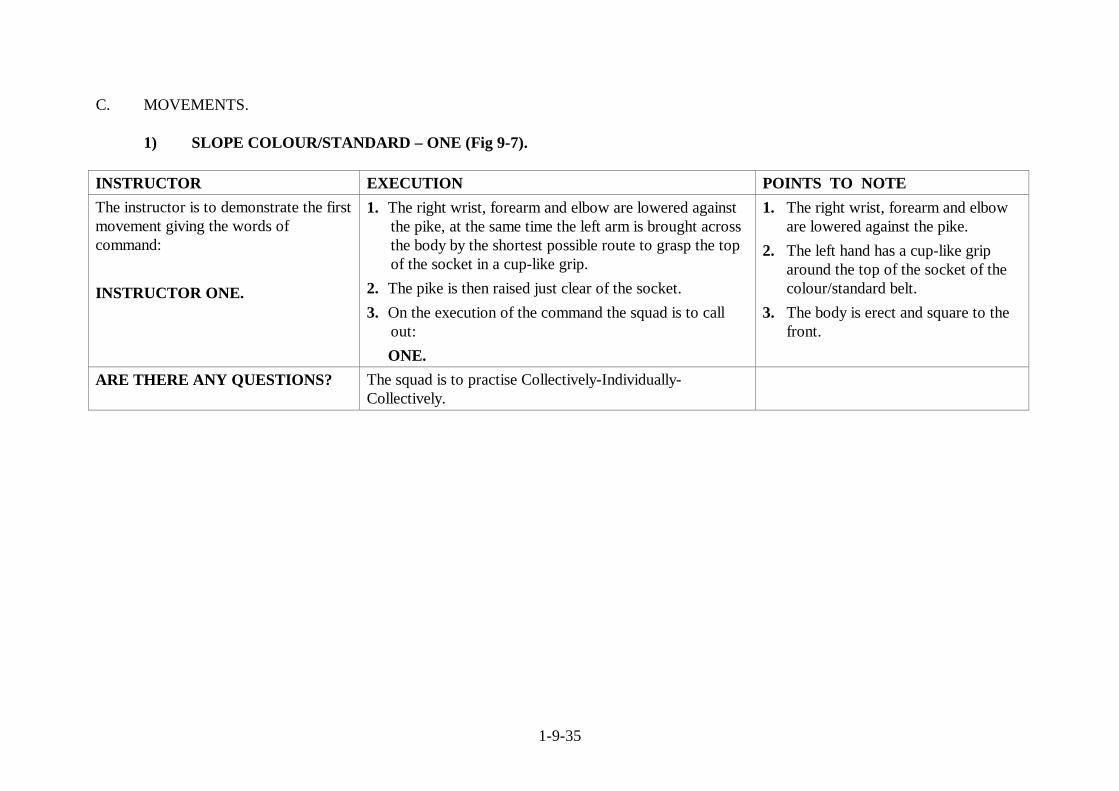
1-9-35
C. MOVEMENTS.
1) SLOPE COLOUR/STANDARD – ONE (Fig 9-7). INSTRUCTOR EXECUTION POINTS TO NOTE The instructor is to demonstrate the first movement giving the words of command: INSTRUCTOR ONE.
1. The right wrist, forearm and elbow are lowered against the pike, at the same time the left arm is brought across the body by the shortest possible route to grasp the top of the socket in a cup-like grip.
2. The pike is then raised just clear of the socket. 3. On the execution of the command the squad is to call
out: ONE.
1. The right wrist, forearm and elbow are lowered against the pike.
2. The left hand has a cup-like grip around the top of the socket of the colour/standard belt.
3. The body is erect and square to the front.
ARE THERE ANY QUESTIONS? The squad is to practise Collectively-Individually-Collectively.
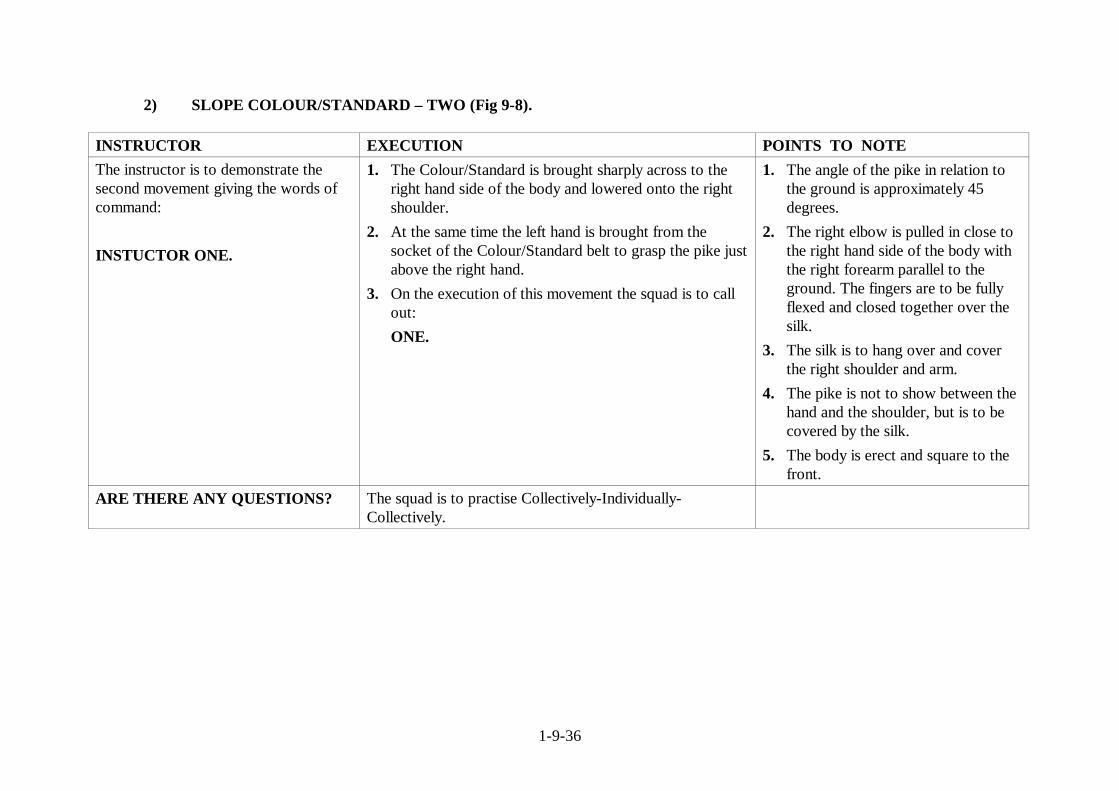
1-9-36
2) SLOPE COLOUR/STANDARD – TWO (Fig 9-8). INSTRUCTOR EXECUTION POINTS TO NOTE The instructor is to demonstrate the second movement giving the words of command: INSTUCTOR ONE.
1. The Colour/Standard is brought sharply across to the right hand side of the body and lowered onto the right shoulder.
2. At the same time the left hand is brought from the socket of the Colour/Standard belt to grasp the pike just above the right hand.
3. On the execution of this movement the squad is to call out:
ONE.
1. The angle of the pike in relation to the ground is approximately 45 degrees.
2. The right elbow is pulled in close to the right hand side of the body with the right forearm parallel to the ground. The fingers are to be fully flexed and closed together over the silk.
3. The silk is to hang over and cover the right shoulder and arm.
4. The pike is not to show between the hand and the shoulder, but is to be covered by the silk.
5. The body is erect and square to the front.
ARE THERE ANY QUESTIONS? The squad is to practise Collectively-Individually-Collectively.

1-9-37
3) SLOPE COLOUR/STANDARD – THREE (Fig 9-9). INSTRUCTOR EXECUTION POINTS TO NOTE The instructor is to demonstrate the third movement giving the words of command: INSTRUCTOR ONE.
1. The left arm is cut away sharply from the pike to resume the correct position of Attention.
2. On the execution of the movement the squad is to call out:
ONE.
1. The Colour/Standard and the right wrist, forearm and elbow do not move throughout the execution of the movement.
2. The Colour/Standard is approximately 45 degrees in relation to the ground.
3. The Colour/Standard is the correct position of the Slope on the right shoulder.
4. The body is erect and square to the front.
ARE THERE ANY QUESTIONS? The squad is to practise Collectively-Individually-Collectively.
D. FINAL DEMONSTRATION. INSTRUCTOR EXECUTION POINTS TO NOTE The instructor is to give a complete and final demonstration of the movement: COLOUR/STANDARD DRILL JUDGING THE TIME SLOPE COLOUR/STANDARD.
On the execution of the movement the instructor is to call out: ONE LEFT – RIGHT/ONE LEFT – RIGHT/ONE.
ARE THERE ANY QUESTIONS? The squad is to practise Collectively-Individually-Collectively.

1-9-38
E. END OF LESSON DRILLS. INSTRUCTOR EXECUTION POINTS TO NOTE Reform the squad in a half circle, or the Bearer in front of you, and confirm by practise: COLOUR/STANDARD DRILL JUDGING THE TIME SLOPE COLOUR/STANDARD.
Students are to execute the movement calling out the timing: ONE LEFT – RIGHT/ONE LEFT – RIGHT/ONE.
1. The Colour/Standard is at an angle of 45 degrees in relation to the ground.
2. The right wrist, forearm and elbow are parallel to the ground.
3. When executing this movement in Quick Time each movement is carried out on consecutive left feet.
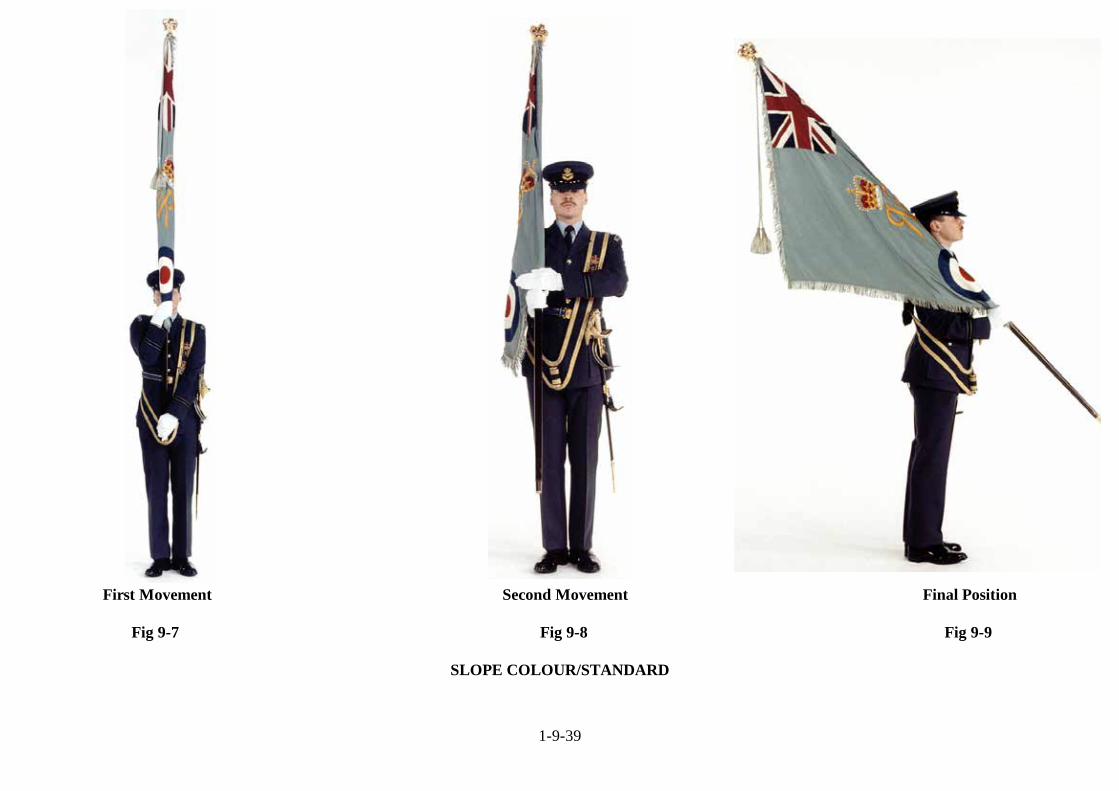
1-9-39
First Movement Second Movement Final Position
Fig 9-7 Fig 9-8 Fig 9-9
SLOPE COLOUR/STANDARD
1-9-40
LESSON 7 - CHANGE ARMS AT THE SLOPE (RIGHT TO LEFT SHOULDER) INSTRUCTOR’S NOTES
Aim To teach Change Arms at the Slope with the Colour/Standard from the right to the left shoulder. Timings One 40 minute period. Method A basic outdoor or indoor instructional lesson. Explain the EXECUTION of the movements and emphasise the
POINTS TO NOTE, as under column headings below. Dress & Stores Clean Working Dress. Practise Colour/Standard. Practise Colour/Standard Belt Preparation Select an area on the parade square or any area of hard ground, or indoor equivalent with sufficient height
clearance. CONDUCT OF LESSON
A. PRELIMINARIES.
Squad Formation The squad stood properly At Ease in a half circle. Revision Slope from the Carry. Spoken Introduction The next stage in Colour/Standard Drill is the Change Arms with the Colour/Standard from the right to
the left shoulder. The reason this movement is taught is to enable the Bearer to rest the arm.
1-9-41
B. COMPLETE DEMONSTRATION.
INSTRUCTOR EXECUTION POINTS TO NOTE The instructor is to give a full demonstration calling the time as the movement is executed: COLOUR/STANDARD DRILL JUDGING THE TIME CHANGE ARMS.
On the execution of the movement the instructor is to call out: ONE LEFT – RIGHT/ONE LEFT – RIGHT/ONE.
1. There are three parts to this movement.
FOR THE PURPOSE OF INSTRUCTION THIS MOVEMENT IS BROKEN DOWN INTO THREE PARTS.

1-9-42
C. MOVEMENTS.
1) CHANGE ARMS – ONE (Fig 9-10). INSTRUCTOR EXECUTION POINTS TO NOTE The instructor is to demonstrate the first movement giving the words of command: INSTRUCTOR ONE.
1. The left hand is brought across the front of the body by the shortest possible route to grasp the silk and pike with the left hand just above the right hand.
2. On the execution of this movement the squad is to call out:
ONE.
1. The left hand has a full grip on the silk/pike just above but not touching the right hand.
2. The right hand, wrist, forearm and elbow, and the Colour/Standard do not move throughout the execution of this movement.
3. The body is erect and square to the front.
ARE THERE ANY QUESTIONS? The squad is to practise Collectively-Individually-Collectively.

1-9-43
2) CHANGE ARMS – TWO.(Fig 9-11). INSTRUCTOR EXECUTION POINTS TO NOTE The instructor is to demonstrate the second movement giving the words of command: INSTRUCTOR ONE.
1. The pike is to carry smartly across the front of the body and placed on the left shoulder.
2. On the execution of this movement the squad is to call out:
ONE.
1. The Colour/Standard is now positioned on the left shoulder with the pike approximately 45 degrees to the ground.
2. The right hand is positioned just above the left in a full grip.
3. The body is erect and square to the front.
ARE THERE ANY QUESTIONS? The squad is to practise Collectively-Individually-Collectively.

1-9-44
3) CHANGE ARMS – THREE (Fig 9-12). INSTRUCTOR EXECUTION POINTS TO NOTE The instructor is to demonstrate the third movement giving the words of command: INSTRUCTOR ONE.
1. The right arm is cut away sharply to the right hand side of the body to resume the correct position of Attention.
2. On the execution of this movement the squad is to call out:
ONE.
1. The Colour/Standard is now in the correct position of the Slope on the left shoulder.
2. The body is erect and square to the front.
ARE THERE ANY QUESTIONS? The squad is to practise Collectively-Individually-Collectively.
D. FINAL DEMONSTRATION. INSTRUCTOR EXECUTION POINTS TO NOTE The instructor is to give a complete and final demonstration of the movement: COLOUR/STANDARD DRILL JUDGING THE TIME CHANGE ARMS.
On the execution of the movement the instructor is to call out: ONE LEFT – RIGHT/ONE LEFT – RIGHT/ONE.
ARE THERE ANY QUESTIONS? The squad is to practise Collectively-Individually-Collectively.

1-9-45
E. END OF LESSON DRILLS. INSTRUCTOR EXECUTION POINTS TO NOTE Reform the squad in a half circle, or the individual in front of you, and confirm by practise: COLOUR/STANDARD DRILL JUDGING THE TIME CHANGE ARMS.
Students are to execute the movement and call out the timing: ONE LEFT – RIGHT/ONE LEFT – RIGHT/ONE.
1. Ensure that the Colour/ Standard is positioned at an angle of 45 degrees in relation to the ground.
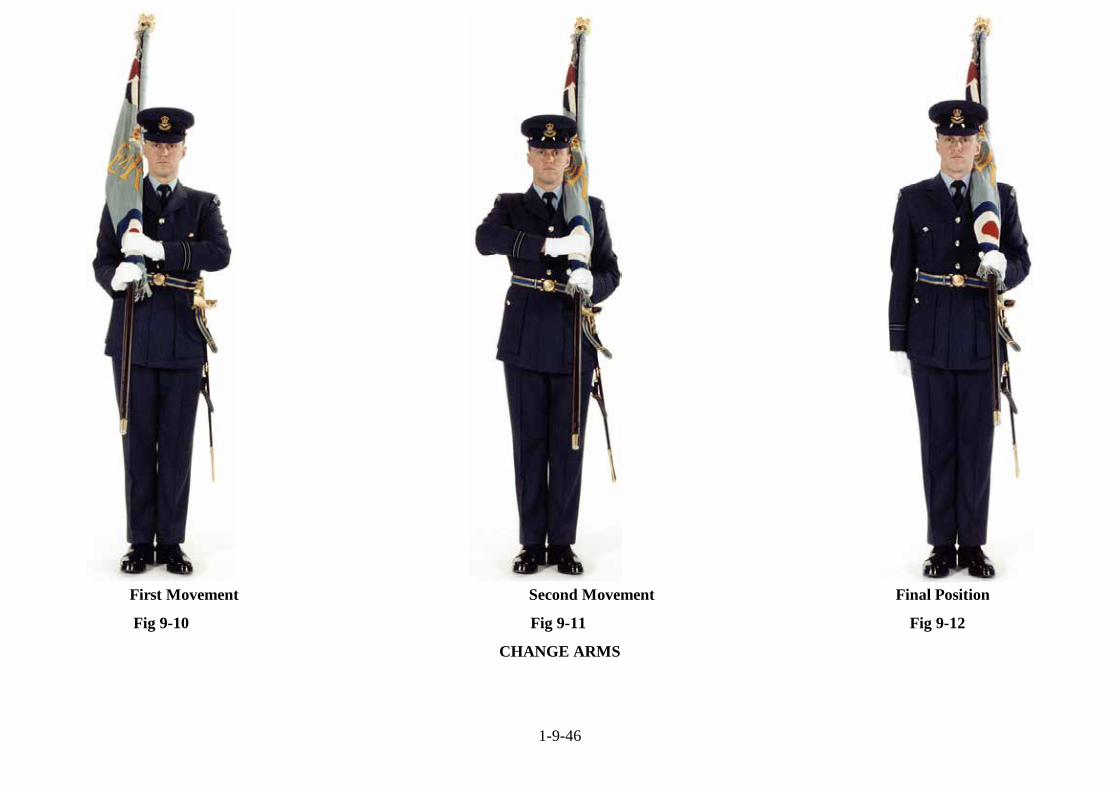
1-9-46
First Movement Second Movement Final Position
Fig 9-10 Fig 9-11 Fig 9-12
CHANGE ARMS
1-9-47
LESSON 8 - CHANGE ARMS AT THE SLOPE (LEFT TO RIGHT SHOULDER) INSTRUCTOR’S NOTES
Aim To teach Change Arms at the Slope with the Colour/Standard from the left to the right shoulder. Timings One 40 minute period. Method A basic outdoor or indoor instructional lesson. Explain the EXECUTION of the movements and emphasise the
POINTS TO NOTE, as under column headings below. Dress & Stores Clean Working Dress. Practise Colour/Standard. Practise Colour/Standard Belt. Preparation Select an area on the parade square or any area of hard ground, or indoor equivalent with sufficient height
clearance. CONDUCT OF LESSON
A. PRELIMINARIES.
Squad Formation The squad stood properly At Ease in a half circle. Revision Change Arms at the Slope left to right. Spoken Introduction The next stage in Colour/Standard Drill is the Change Arms with the Colour/Standard from the left to
the right shoulder. The reason this movement is taught is to enable the Bearer to rest the arm.

1-9-48
B. COMPLETE DEMONSTRATION.
INSTRUCTOR EXECUTION POINTS TO NOTE The instructor is to give a full demonstration calling the time as the movement is executed: COLOUR/STANDARD DRILL JUDGING THE TIME CHANGE ARMS.
On the execution of the movement the instructor is to call out: ONE LEFT – RIGHT/ONE LEFT – RIGHT/ONE.
1. There are three parts to this movement.
FOR THE PURPOSE OF INSTRUCTION THIS MOVEMENT IS BROKEN DOWN INTO THREE PARTS.

1-9-49
C. MOVEMENTS.
1) CHANGE ARMS – ONE (Fig 9-13). INSTRUCTOR EXECUTION POINTS TO NOTE The instructor is to demonstrate the first movement giving the words of command: INSTRUCTOR ONE.
1. The right hand is brought across the front of the body by the shortest possible route to grasp the silk and pike with the right hand just above the left hand.
2. On the execution of this movement the squad is to call out:
ONE.
1. The right hand has a full grip on the silk/pike just above but not touching the left hand.
2. The left hand, wrist, forearm and elbow, and the Colour/Standard do not move throughout the execution of this movement.
3. The body is erect and square to the front.
ARE THERE ANY QUESTIONS? The squad is to practise Collectively-Individually-Collectively.

1-9-50
2) CHANGE ARMS – TWO.(Fig 9-14). INSTRUCTOR EXECUTION POINTS TO NOTE The instructor is to demonstrate the second movement giving the words of command: INSTRUCTOR ONE.
1. The pike is to carry smartly across the front of the body and is placed on the right shoulder.
2. On the execution of this movement the squad is to call out:
ONE.
1. The Colour/Standard is now positioned on the right shoulder with the pike approximately 45 degrees to the ground.
2. The left hand is positioned just above the right in a full grip.
3. The body is erect and square to the front.
ARE THERE ANY QUESTIONS? The squad is to practise Collectively-Individually-Collectively.

1-9-51
3) CHANGE ARMS – THREE (Fig 9-15).
INSTRUCTOR EXECUTION POINTS TO NOTE The instructor is to demonstrate the third movement giving the words of command: INSTRUCTOR ONE.
1. The left arm is cut away sharply to the left hand side of the body to resume the correct position of Attention.
2. On the execution of this movement the squad is to call out:
ONE.
1. The Colour/Standard is now in the correct position of the Slope on the right shoulder.
2. The body is erect and square to the front.
ARE THERE ANY QUESTIONS? The squad is to practise Collectively-Individually-Collectively.
D. FINAL DEMONSTRATION. INSTRUCTOR EXECUTION POINTS TO NOTE The instructor is to give a complete and final demonstration of the movement: COLOUR/STANDARD DRILL JUDGING THE TIME CHANGE ARMS.
On the execution of the movement the instructor is to call out: ONE LEFT – RIGHT/ONE LEFT – RIGHT/ONE.
ARE THERE ANY QUESTIONS? The squad is to practise Collectively-Individually-Collectively.

1-9-52
E. END OF LESSON DRILLS. INSTRUCTOR EXECUTION POINTS TO NOTE Reform the squad in a half circle, or the individual in front of you, and confirm by practise: COLOUR/STANDARD DRILL JUDGING THE TIME CHANGE ARMS.
Students are to execute the movement and call out the timing: ONE LEFT – RIGHT/ONE LEFT – RIGHT/ONE.
1. Ensure that the Colour/Standard is positioned at an angle of 45 degrees to the ground on the right shoulder.
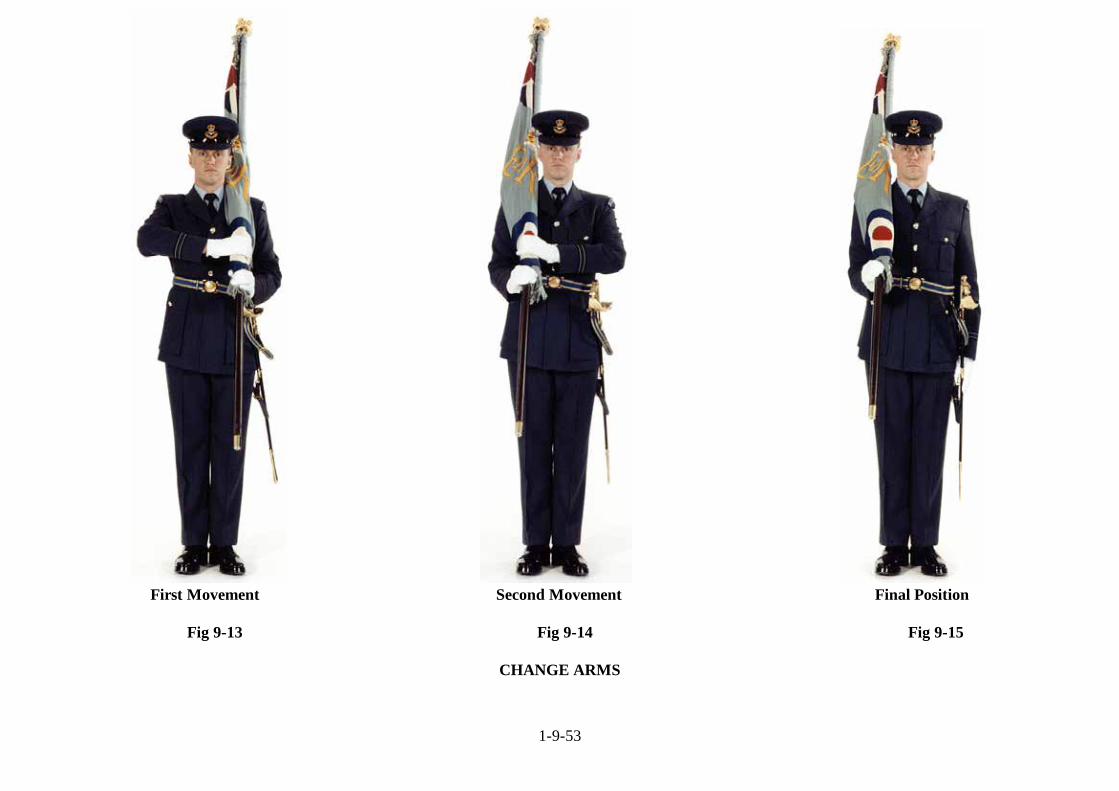
1-9-53
First Movement Second Movement Final Position Fig 9-13 Fig 9-14 Fig 9-15
CHANGE ARMS
1-9-54
LESSON 9 - CARRY COLOUR/STANDARD FROM THE SLOPE INSTRUCTOR’S NOTES
Aim To teach The Carry from the Slope position. Timings One 25 minute period. Method A basic outdoor or indoor instructional lesson. Explain the EXECUTION of the movements and emphasise the
POINTS TO NOTE, as under column headings below. Dress & Stores Clean Working Dress. Practise Colour/Standard. Practise Colour/Standard Belt. Preparation Select an area on the parade square or any area of hard ground, or indoor equivalent with sufficient height
clearance. CONDUCT OF LESSON
A. PRELIMINARIES.
Squad Formation The squad stood properly At Ease in a half circle. Revision Change arms at the Slope left to the right shoulder. Spoken Introduction The next stage in Colour/Standard drill is the position of the Carry from the Slope. The reason this
movement is taught is to enable the Bearer to move the Colour/Standard from the Slope to the Carry.
1-9-55
B. COMPLETE DEMONSTRATION.
INSTRUCTOR EXECUTION POINTS TO NOTE The instructor is to give a full demonstration calling out the time as the movement is executed: COLOUR/STANDARD DRILL JUDGING THE TIME CARRY COLOUR/STANDARD.
On the execution of the movement the instructor is to call out: ONE LEFT – RIGHT/ONE LEFT – RIGHT/ONE.
1. There are three parts to this movement.
FOR THE PURPOSE OF INSTRUCTION THIS MOVEMENT IS BROKEN DOWN INTO THREE PARTS.
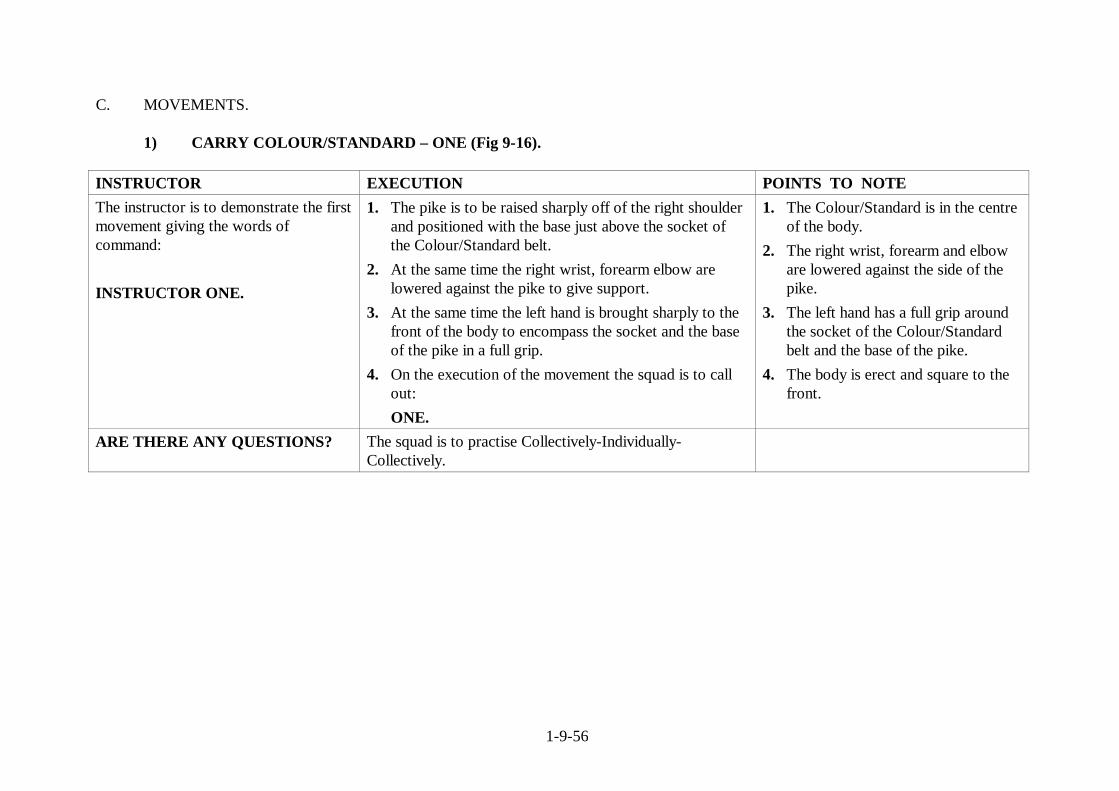
1-9-56
C. MOVEMENTS.
1) CARRY COLOUR/STANDARD – ONE (Fig 9-16). INSTRUCTOR EXECUTION POINTS TO NOTE The instructor is to demonstrate the first movement giving the words of command: INSTRUCTOR ONE.
1. The pike is to be raised sharply off of the right shoulder and positioned with the base just above the socket of the Colour/Standard belt.
2. At the same time the right wrist, forearm elbow are lowered against the pike to give support.
3. At the same time the left hand is brought sharply to the front of the body to encompass the socket and the base of the pike in a full grip.
4. On the execution of the movement the squad is to call out:
ONE.
1. The Colour/Standard is in the centre of the body.
2. The right wrist, forearm and elbow are lowered against the side of the pike.
3. The left hand has a full grip around the socket of the Colour/Standard belt and the base of the pike.
4. The body is erect and square to the front.
ARE THERE ANY QUESTIONS? The squad is to practise Collectively-Individually-Collectively.
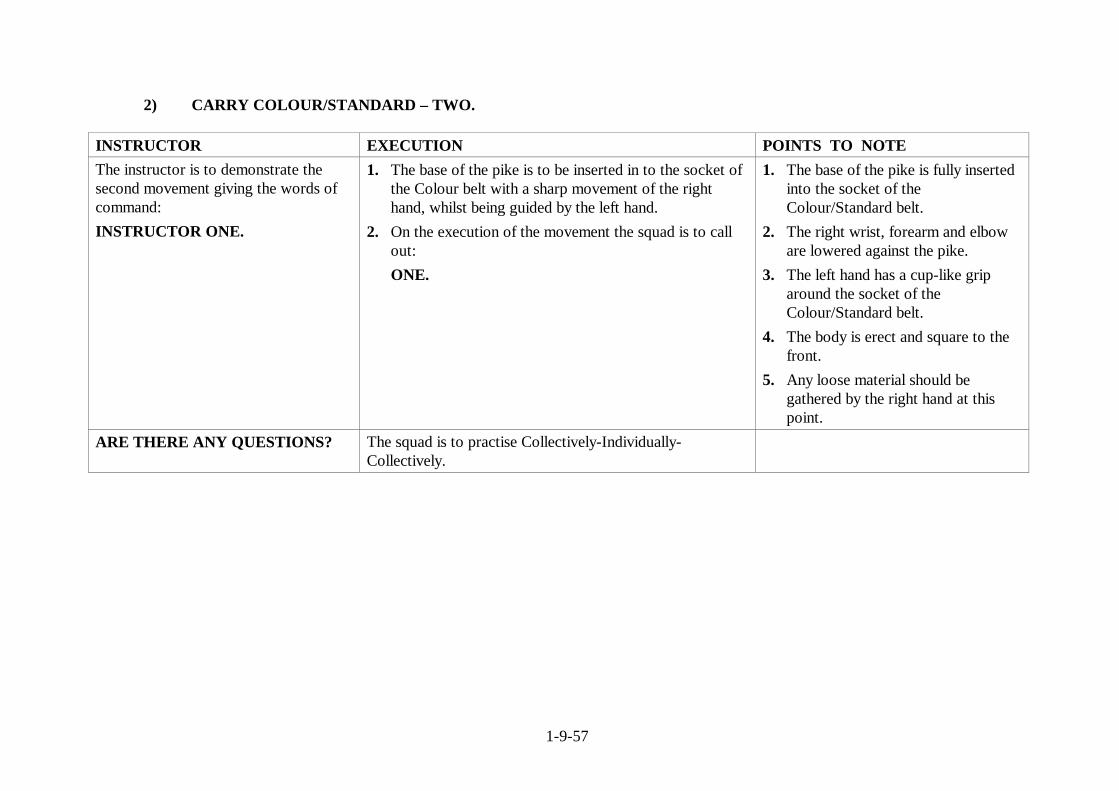
1-9-57
2) CARRY COLOUR/STANDARD – TWO. INSTRUCTOR EXECUTION POINTS TO NOTE The instructor is to demonstrate the second movement giving the words of command: INSTRUCTOR ONE.
1. The base of the pike is to be inserted in to the socket of the Colour belt with a sharp movement of the right hand, whilst being guided by the left hand.
2. On the execution of the movement the squad is to call out:
ONE.
1. The base of the pike is fully inserted into the socket of the Colour/Standard belt.
2. The right wrist, forearm and elbow are lowered against the pike.
3. The left hand has a cup-like grip around the socket of the Colour/Standard belt.
4. The body is erect and square to the front.
5. Any loose material should be gathered by the right hand at this point.
ARE THERE ANY QUESTIONS? The squad is to practise Collectively-Individually-Collectively.

1-9-58
3) CARRY COLOUR/STANDARD – THREE (Fig 9-17). INSTRUCTOR EXECUTION POINTS TO NOTE The instructor is to demonstrate the movement giving the words of command: INSTRUCTOR ONE.
1. The right forearm is to be raised sharply to the horizontal position.
2. At the same time the left arm is cut away sharply to resume the correct position of Attention.
3. On the execution of this movement the squad is to call out:
ONE.
1. The right wrist, forearm and elbow are parallel to the ground.
2. The right thumb is in front of and in line with the mouth.
3. The back of the hand is facing to the front.
4. The Colour/Standard is in a perpendicular position to the front of the body.
5. The body is erect and square to the front.
ARE THERE ANY QUESTIONS? The squad is to practise Collectively-Individually-Collectively.
D. FINAL DEMONSRATION. INSTRUCTOR EXECUTION POINTS TO NOTE The instructor is to give a complete and final demonstration of the movement. COLOUR/STANDARD DRILL JUDGING THE TIME CARRY COLOUR/STANDARD.
On the execution of the movement the instructor is to call out: ONE LEFT – RIGHT/ONE LEFT – RIGHT/ONE.
ARE THERE ANY QUESTIONS? The squad is to practise Collectively-Individually-Collectively.
1-9-59
E. END OF LESSON DRILLS. INSTRUCTOR EXECUTION POINTS TO NOTE Reform the squad in a half circle, or the individual in front of you, and confirm by practise: COLOUR/STANDARD DRILL JUDGING THE TIME CARRY COLOUR/STANDARD.
Students are to execute the movement and call out the timing: ONE LEFT – RIGHT/ ONE LEFT – RIGHT/ONE.
1. The right wrist, forearm and elbow are lowered against the pike on the first and second movement.
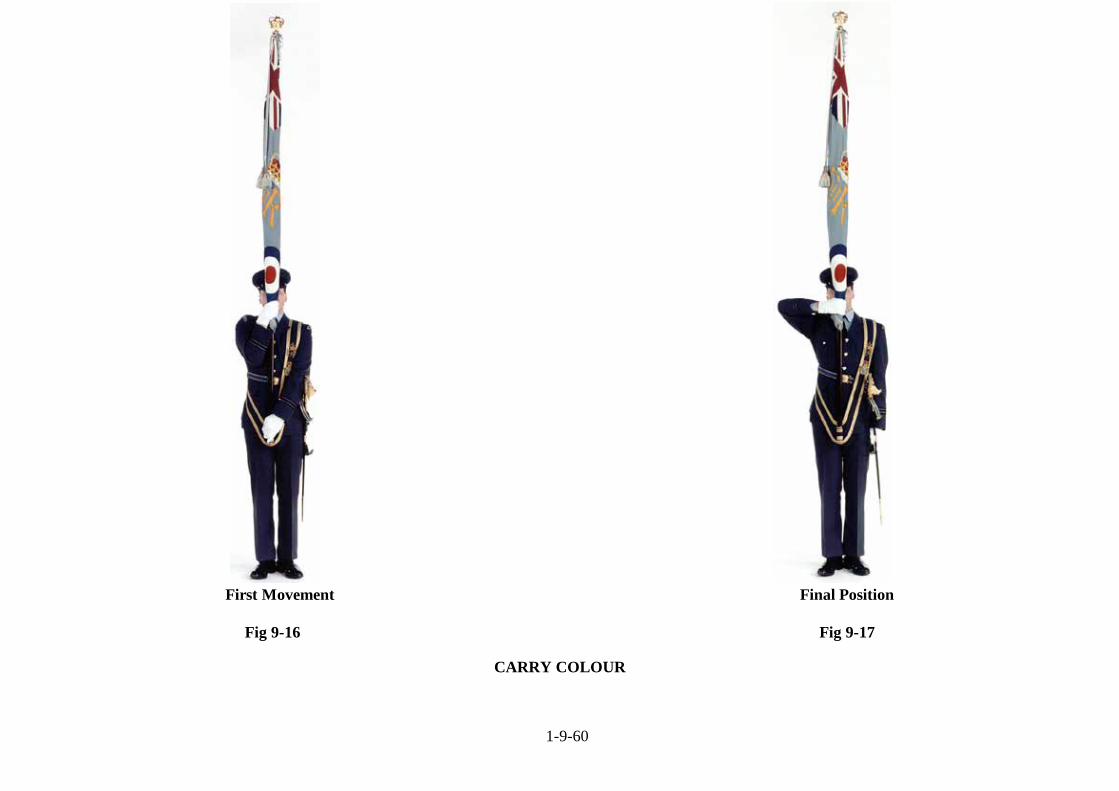
1-9-60
First Movement Final Position
Fig 9-16 Fig 9-17
CARRY COLOUR

1-9-61
LESSON 10 - PORT COLOUR/STANDARD FROM THE CARRY INSTRUCTOR’S NOTES
Aim To teach the Port from the Carry. Timings One 20 minute period. Method A basic outdoor or indoor instructional lesson. Explain the EXECUTION of the movements and emphasise the
POINTS TO NOTE, as under column headings below. Note that this movement may be carried out with the bearers in the kneeling position
Dress & Stores Clean Working Dress. Practise Colour/Standard. Practise Colour/Standard Belt. Preparation Select an area on the parade square or any area of hard ground, or indoor equivalent with sufficient height
clearance. CONDUCT OF LESSON
A. PRELIMINARIES.
Squad Formation The squad stood properly At Ease, in a half circle. Revision Carry from the Slope. Spoken Introduction The next stage in Colour/Standard drill is the Port position from the Carry. The reason this movement is
taught is to enable the Bearer to hand the Colour/Standard over, for dedication or similar ceremonial.
1-9-62
B. COMPLETE DEMONSTRATION.
INSTRUCTOR EXECUTION POINTS TO NOTE The instructor is to give a full demonstration calling out the time as the movement is executed: COLOUR/STANDARD DRILL JUDGING THE TIME PORT COLOUR/STANDARD
On the execution of the movement the instructor is to call out: ONE LEFT – RIGHT/ONE LEFT-RIGHT/ONE.
1. There are three parts to this movement.
FOR THE PURPOSE OF INSTRUCTION THIS MOVEMENT IS BROKEN DOWN INTO THREE PARTS.

1-9-63
C. MOVEMENTS.
1) PORT COLOUR/STANDARD – ONE (Fig 9-18). INSTRUCTOR EXECUTION POINTS TO NOTE The instructor is to demonstrate the first movement giving the words of command: INSTRUCTOR ONE.
1. The right wrist, forearm and elbow are lowered against the pike.
2. At the same time the left hand is brought sharply across the front of the body by the shortest possible route to grasp the socket of the Colour/Standard belt in a full grip.
3. On the execution of the movement the squad is to call out:
ONE.
1. The right wrist, forearm and elbow are lowered against the pike to give support.
2. The left hand has a full grip around the socket of the Colour/Standard belt encompassing the pike.
3. The body is erect and square to the front.
ARE THERE ANY QUESTIONS? The squad is to practise Collectively-Individually-Collectively.
1-9-64
2) PORT COLOUR/STANDARD – TWO.
INSTRUCTOR EXECUTION POINTS TO NOTE The instructor is to demonstrate the second movement giving the words of command: INSTRUCTOR ONE.
1. The base of the pike is raised just clear of the socket of the Colour/Standard belt under the control of the right hand.
2. On the execution of this movement the squad is to call out: ONE.
1. The right wrist, forearm and elbow are held against the pike.
2. The left hand has a full grip around the base of the pike and the socket of the Colour/Standard belt.
3. The pike is perpendicular to the centre of the body.
4. The body is erect and square to the front.
ARE THERE ANY QUESTIONS? The squad is to practise Collectively-Individually-Collectively.

1-9-65
3) PORT COLOUR/STANDARD – THREE (Fig 9-19).
INSTRUCTOR EXECUTION POINTS TO NOTE The instructor is to demonstrate the third movement giving the words of command: INSTRUCTOR ONE.
1. The pike is to be moved to a position across the front of the body, to an angle of 45 degrees under the control of the right hand.
2. At the same time the left hand quits the grip from the socket of the Colour/Standard belt to grasp the silk and the pike in line with the left shoulder.
3. On the execution of this movement the squad is to call out:
ONE.
1. The silk and pike are at an angle of 45 degrees across the front of the body with the head of the pike to the left.
2. The right hand is in line with the sword belt; the left hand is in line with the left shoulder.
3. The base of the pike is to be one foot (300 mm) above the ground.
4. Both elbows are to be pulled in and close to the body.
5. The body is erect and square to the front.
ARE THERE ANY QUESTIONS? The squad is to practise Collectively-Individually-Collectively.
D. FINAL DEMONSTRATION. INSTRUCTOR EXECUTION POINTS TO NOTE The instructor is to give a complete and final demonstration of the movement: COLOUR/STANDARD DRILL JUDGING THE TIME PORT COLOUR/STANDARD.
On the execution of the movement the instructor is to call out: ONE LEFT – RIGHT/ONE LEFT- RIGHT/ONE.
ARE THERE ANY QUESTIONS? The squad is to practise Collectively-Individually-Collectively.
1-9-66
E. END OF LESSON DRILLS. INSTRUCTOR EXECUTION POINTS TO NOTE Reform the squad in a half circle, or the Bearer in front of you, and confirm by practise: COLOUR/STANDARD DRILL JUDGING THE TIME PORT COLOUR/STANDARD.
Students are to execute the movement calling out the timing: ONE LEFT- RIGHT/ONE LEFT- RIGHT/ONE.
1. This movement is often used in church when handing Colours or Standards to the Clergy and is carried out with the Bearer kneeling on the right knee.
2. The student should practise this variation of the movement.
3. The Colour/Standard is usually inserted into the socket of the Colour/Standard belt by the Clergy, on completion of the service.
4. In this instance the Bearer is to gather the silk with the right hand and close the right forearm, wrist and elbow to the pike.
5. At the same time the left hand is brought across the body by the shortest possible route to grasp the socket of the Colour/Standard belt and the pike in a full grip.
6. Once the Bearer has full control of the Colour/Standard he is to adopt the Carry position and continue with the ceremonial.

1-9-67
First Movement Final Position
Fig 9-18 Fig 9-19
PORT COLOUR/STANDARD
1-9-68
LESSON 11 - SALUTE AT THE HALT WITH THE COLOUR/STANDARD INSTRUCTOR’S NOTES
Aim To teach the Salute from the Carry, (Lowering the Colour/Standard) at the Halt. Timings One 45 minute period. Method A basic outdoor or indoor instructional lesson. Explain the EXECUTION of the movements and emphasise the
POINTS TO NOTE, as under column headings below. Note that this movement may be varied to account for wet weather or inclement conditions.
Dress & Stores Clean Working Dress. Practise Colour/Standards. Practise Colour/Standard Belts. Preparation Select an area on the parade square or any area of hard ground, or indoor equivalent with sufficient height
clearance. CONDUCT OF LESSON
A. PRELIMINARIES.
Squad Formation The squad stood properly At Ease in a half circle. Revision The Port from the Carry. Spoken Introduction The next stage in Colour/Standard Drill is the position of the Salute from the Carry. The reason this
movement is taught is to allow the correct compliment to be paid when a Royal Salute is ordered.
1-9-69
B. COMPLETE DEMONSTATION.
INSTRUCTOR EXECUTION POINTS TO NOTE The instructor is to give a full demonstration calling out the time as the movement is executed: COLOUR/STANDARD DRILL JUDGING THE TIME ROYAL SALUTE PRESENT ARMS.
On the execution of the movement the instructor is to call out: ONE LEFT – RIGHT/ONE LEFT – RIGHT/ONE.
1. There are three parts to this movement.
FOR THE PURPOSE OF INSTRUCTION THIS MOVEMENT IS BROKEN DOWN INTO THREE PARTS.

1-9-70
C. MOVEMENTS.
1) SALUTE FROM THE CARRY – ONE (Fig 9-20).
INSTRUCTOR EXECUTION POINTS TO NOTE The instructor is to demonstrate the first movement giving the words of command: INSTRUCTOR ONE.
1. On the command ‘Royal Salute’, the silk is to be released by means of the right hand moving a short distance down and then back up the pike to its original position thus releasing the grip on the silk.
2. Immediately after the third movement of the Present Arms with the rifle the pike is raised just clear of the Colour/Standard belt under the control of the right hand.
3. At the same time the right wrist, forearm and elbow are lowered to the side of the pike to give support.
4. At the same time the left hand is brought smartly across the front of the body to grasp the socket of the Colour/Standard belt in a full grip and guide the base of the pike.
5. On the first part of this movement no timing is to be called. On the second part of the movement the squad is to call out:
ONE.
1. On receipt of the word of command Royal Salute the silk is to be ‘Let Fly’ (this preliminary movement is not illustrated with a figure).
2. After the third movement of the Present Arms, the pike is held just clear of the socket of the Colour/ Standard belt and guided with the left hand.
3. The right wrist, forearm and elbow are lowered to the side of the pike.
4. The pike is held perpendicular in front of the body.
5. The body is erect and square to the front.
ARE THERE ANY QUESTIONS? The squad is to practise Collectively-Individually-Collectively.

1-9-71
2) SALUTE FROM THE CARRY – TWO (Fig 9-21). INSTRUCTOR EXECUTION POINTS TO NOTE The instructor is to demonstrate the second movement giving the words of command: INSTRUCTOR ONE.
1. The pike is to be moved sharply across to the right hand side of the body so that the base is positioned in the hollow of the right shoulder under the control of the right hand.
2. At the same time the left hand quits its grip on the socket of the Colour/Standard belt and moves sharply across the front of the body to steady the base of the pike.
3. On the execution of this movement the squad is to call out:
ONE.
1. The Colour/Standard is held perpendicular in front of the right shoulder with the base of the pike in the hollow of the shoulder.
2. The right wrist, forearm and elbow are lowered against the side of the pike to give support.
3. The left arm is bent at an angle of 90 degrees with the left wrist and forearm across the front of the body and parallel to the ground.
4. The left hand is extended across the pike with the fingers fully extended to steady the base.
5. The body is erect and square to front.
ARE THERE ANY QUESTIONS? The squad is to practise Collectively-Individually-Collectively.

1-9-72
3) SALUTE FROM THE CARRY – THREE (Figs 9-22 and 9-23 and 9-24). INSTRUCTOR EXECUTION POINTS TO NOTE The instructor is to demonstrate the third movement giving the words of command: INSTRUCTOR ONE.
1. The left arm is to be to cut away to resume the correct position of Attention at the left hand side of the body.
2. At the same time the pike is to be forced out well to the right and lowered in a sweeping motion to a position in front of and in line with the right toe, with the head of the pike held just above the ground and the silk spread on the ground to the right of the pike.
3. If a strong wind is blowing from the right the Colour/Standard is to be carried well to the left and then brought to the central position in front of the body with the silk spread to the left of the pike.
4. The pike is then to be pulled sharply rearwards and held under the right armpit with the back of the hand facing towards the ground and the right elbow pulled in to the right side of the body.
5. On the execution of this movement the squad is to call out:
ONE.
1. The head of the pike is just clear of the ground in front of and in line with the right toe, with the silk spread to the right, (or left depending on the wind direction and strength).
2. The Colour/Standard Bearer is to look to the front throughout the execution of this movement; the eyes are not to follow the Colour.
3. If the Colour/Standard is lowered in wet or inclement conditions the pike is held horizontally with the silk hanging vertically whilst moving in the sweeping motion thus it remains clear of the ground to prevent it from becoming soiled.
4. The Lowering of the Colour/ Standard is to last the duration of the particular National Anthem being played, being pulled sharply to the rear and locked in position on the last note of the music.
5. The body is erect and square to the front.
ARE THERE ANY QUESTIONS? The squad is to practise Collectively-Individually-Collectively.
1-9-73
D. FINAL DEMONSTRATION. INSTRUCTOR EXECUTION POINTS TO NOTE The instructor is to give a complete and final demonstration of the movement: COLOUR/STANDARD DRILL JUDGING THE TIME ROYAL SALUTE PRESENT ARMS.
On the execution of the movement the instructor is to call out: ONE LEFT – RIGHT/ONE LEFT – RIGHT/ONE.
1. The instructor is to tap on the ground three times with the pace stick to simulate the movements of the rifle exercise Present Arms.
2. The length of time for the band to play the National Anthem for a Royal Salute is 30 seconds.
ARE THERE ANY QUESTIONS? The Squad is to practise Collectively-Individually-Collectively.
E. END OF LESSON DRILLS. INSTRUCTOR EXECUTION POINTS TO NOTE Reform the squad in a half circle, or the individual in front of you, and confirm by practise: COLOUR/STANDARD DRILL JUDGING THE TIME ROYAL SALUTE PRESENT ARMS.
Students are to execute the movement and call out the timing: ONE LEFT – RIGHT/ONE LEFT – RIGHT/ONE.
1. Practise the Squad for both dry and inclement weather drills.
2. When executing dry weather drills ensure that the pike is held just off of the ground on completion of the third movement.

1-9-74
First Movement Second Movement Third Movement(Forced out)
Fig 9-20 Fig 9-21 Fig 9-22
SALUTE AT THE HALT

1-9-75
Final Position Strong Wind
Fig 9-23 Fig 9-24
SALUTE AT THE HALT

1-9-76
LESSON 12 - CARRY COLOUR/STANDARD FROM THE SALUTE AT THE HALT INSTRUCTOR’S NOTES
Aim To teach the Carry from the Salute at the Halt. Timings One 20 minute period. Method A basic outdoor instructional lesson. Explain the EXECUTION of the movements and emphasise the POINTS
TO NOTE, as under column headings below. Dress & Stores Clean Working Dress. Practise Colour/Standard. Practise Colour/Standard Belt. Preparation Select an area on the parade square or any area of hard ground, or indoor equivalent with sufficient height
clearance. CONDUCT OF LESSON
A. PRELIMINARIES.
Squad Formation The squad stood properly At Ease in a half circle. Revision The Salute from the Carry at the Halt. Spoken Introduction The next stage in Colour/Standard drill is the Carry from the Salute position. The reason this movement
is taught is to enable the Bearer to adopt the Carry from the Salute.

1-9-77
B. COMPLETE DEMONSTATION.
INSTRUCTOR EXECUTION POINTS TO NOTE The instructor is to give a full demonstration calling out the time as the movement is executed: COLOUR/STANDARD DRILL JUDGING THE TIME SLOPE ARMS.
On the execution of the movement the instructor is to call out: ONE LEFT – RIGHT/ONE LEFT – RIGHT/ONE.
1. There are three parts to this movement.
FOR THE PURPOSE OF INSTRUCTION THIS MOVEMENT IS BROKEN DOWN INTO THREE PARTS.

1-9-78
C. MOVEMENTS.
1) CARRY COLOUR/STANDARD – ONE (Fig 9-25). INSTRUCTOR EXECUTION POINTS TO NOTE The instructor is to demonstrate the first movement giving the words of command: INSTRUCTOR ONE.
1. The Colour/Standard is raised to a perpendicular position in front of the body under the control of the right hand so that the base of the pike is just above the socket of the Colour/Standard belt, the pressure of the pike being borne under the right armpit.
2. At the same time the left hand is brought across the front of the body by the shortest possible route to grasp the socket of the Colour/Standard belt and steady the base of the pike in a full grip.
3. On the execution of the movement the squad is to call out:
ONE.
1. The right wrist, forearm and elbow are lowered against the pike.
2. The left hand has a full grip around the base of the socket of the Colour/Standard belt and the base of the pike.
3. The pike is perpendicular in front of the body.
4. The body is erect and square to the front.
ARE THERE ANY QUESTIONS? The squad is to practise Collectively-Individually-Collectively.
1-9-79
2) CARRY COLOUR/STANDARD – TWO. INSTRUCTOR EXECUTION POINTS TO NOTE The instructor is to demonstrate the second movement giving the words of command: INSTRUCTOR ONE.
1. The pike is forced fully home into the socket of the Colour/Standard belt.
2. On the execution of this movement the squad is to call out:
ONE.
1. The base of the pike is fully inserted into the socket of the Colour/Standard belt.
2. The pike is perpendicular to the centre of the body.
3. The right wrist, forearm and elbow are held against the pike.
4. The body is erect and square to the front.
ARE THERE ANY QUESTIONS? The squad is to practise Collectively-Individually-Collectively.
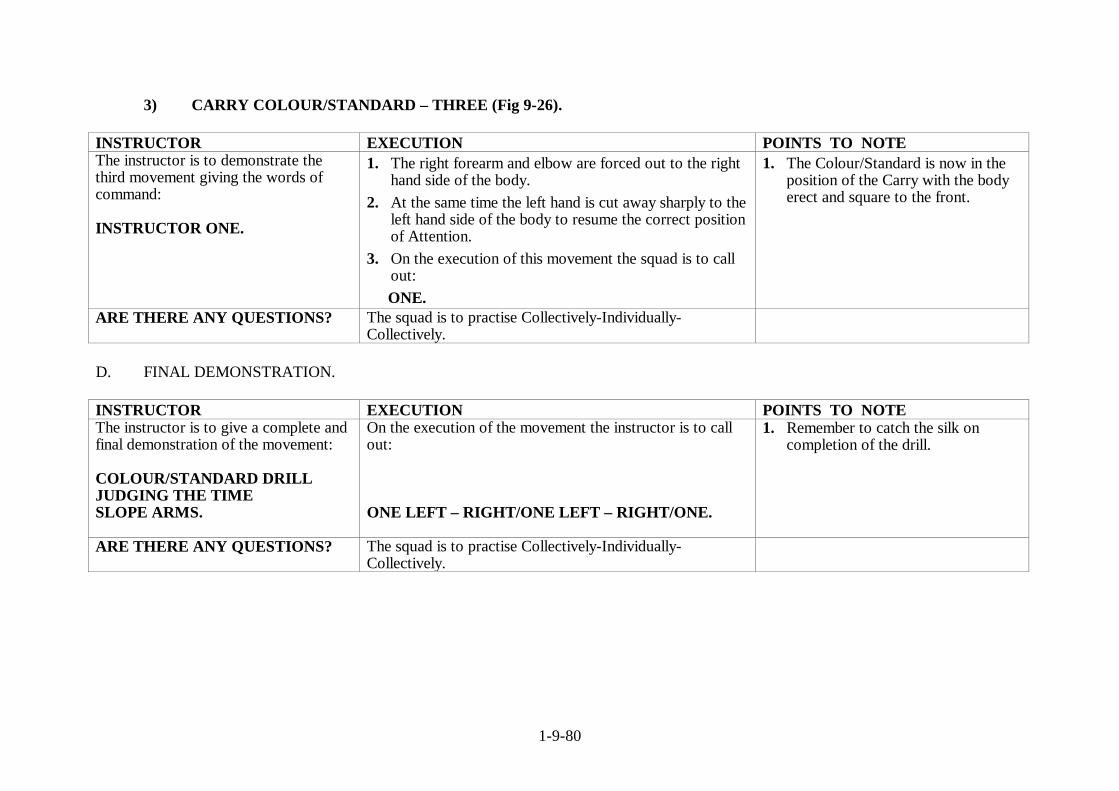
1-9-80
3) CARRY COLOUR/STANDARD – THREE (Fig 9-26). INSTRUCTOR EXECUTION POINTS TO NOTE The instructor is to demonstrate the third movement giving the words of command: INSTRUCTOR ONE.
1. The right forearm and elbow are forced out to the right hand side of the body.
2. At the same time the left hand is cut away sharply to the left hand side of the body to resume the correct position of Attention.
3. On the execution of this movement the squad is to call out:
ONE.
1. The Colour/Standard is now in the position of the Carry with the body erect and square to the front.
ARE THERE ANY QUESTIONS? The squad is to practise Collectively-Individually-Collectively.
D. FINAL DEMONSTRATION. INSTRUCTOR EXECUTION POINTS TO NOTE The instructor is to give a complete and final demonstration of the movement: COLOUR/STANDARD DRILL JUDGING THE TIME SLOPE ARMS.
On the execution of the movement the instructor is to call out: ONE LEFT – RIGHT/ONE LEFT – RIGHT/ONE.
1. Remember to catch the silk on completion of the drill.
ARE THERE ANY QUESTIONS? The squad is to practise Collectively-Individually-Collectively.
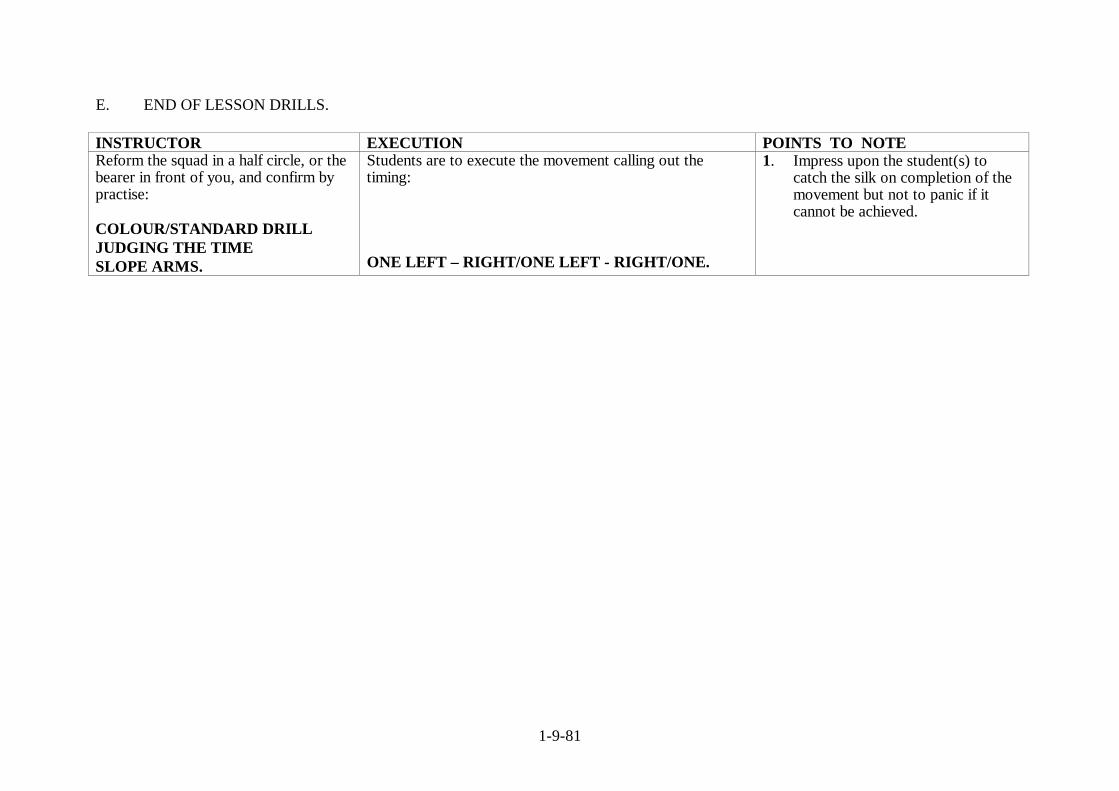
1-9-81
E. END OF LESSON DRILLS. INSTRUCTOR EXECUTION POINTS TO NOTE Reform the squad in a half circle, or the bearer in front of you, and confirm by practise: COLOUR/STANDARD DRILL JUDGING THE TIME SLOPE ARMS.
Students are to execute the movement calling out the timing: ONE LEFT – RIGHT/ONE LEFT - RIGHT/ONE.
1. Impress upon the student(s) to catch the silk on completion of the movement but not to panic if it cannot be achieved.
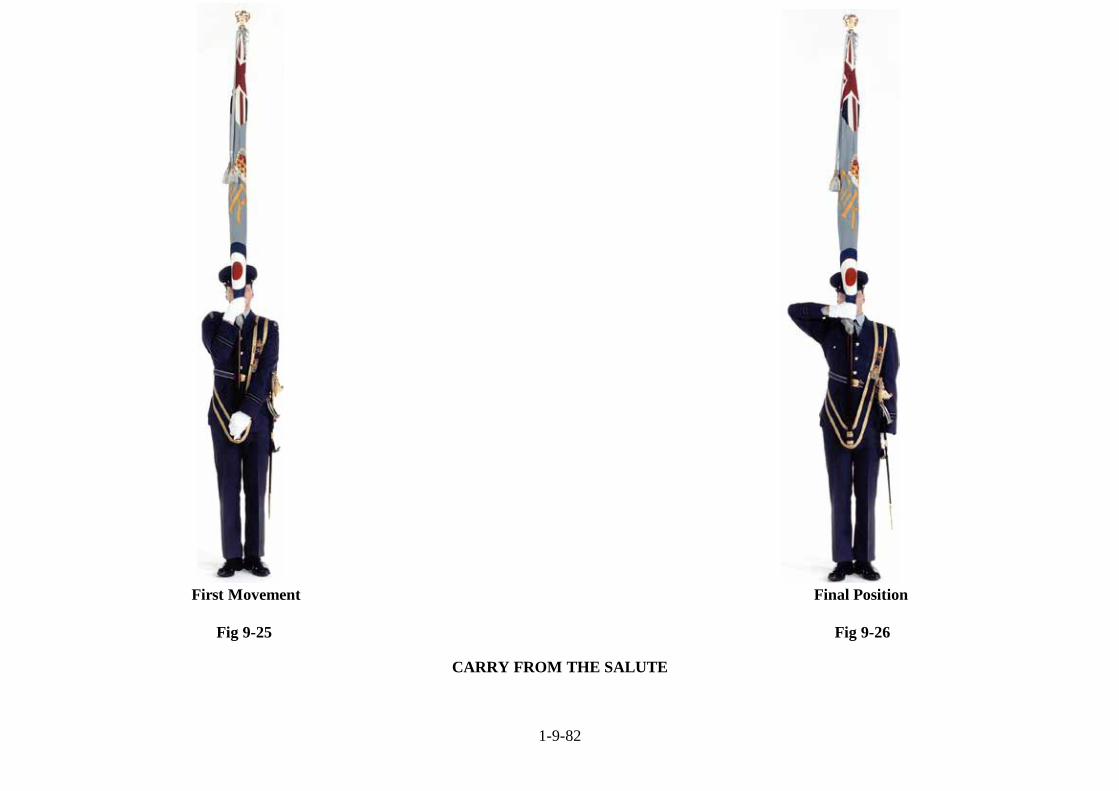
1-9-82
First Movement Final Position
Fig 9-25 Fig 9-26
CARRY FROM THE SALUTE

1-9-83
LESSON 13 - SALUTE WITH THE COLOUR/STANDARD WHEN MARCHING PAST INSTRUCTOR’S NOTES
Aim To teach the Salute with the Colour/Standard when marching past. Timings One 45 minute period. Method A basic outdoor instructional lesson. Explain the EXECUTION of the movements and emphasise the
POINTS TO NOTE, as under column headings below. Dress & Stores Clean Working Dress. Practise Colour/Standard. Practise Colour/Standard Belt. Preparation Select an area on the parade square or any area of hard ground, or indoor equivalent with sufficient height
clearance. CONDUCT OF LESSON
A. PRELIMINARIES.
Squad Formation The squad stood properly At Ease in a half circle. Revision Carry from the Salute at the Halt. Spoken Introduction The next stage in Colour/Standard Drill is the position of the Salute from the Carry when marching
past. The reason this movement is taught is to enable the Colour/Standard Bearer to pay the correct compliment when a Royal Salute is ordered.
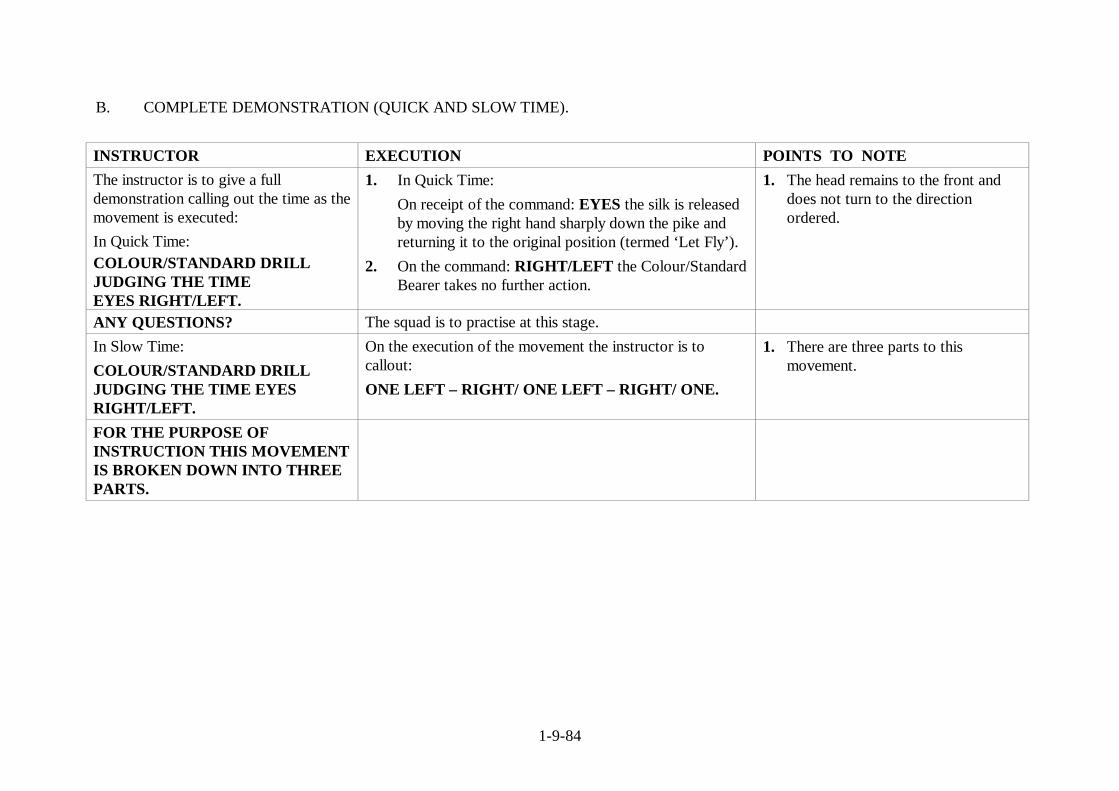
1-9-84
B. COMPLETE DEMONSTRATION (QUICK AND SLOW TIME). INSTRUCTOR EXECUTION POINTS TO NOTE The instructor is to give a full demonstration calling out the time as the movement is executed: In Quick Time: COLOUR/STANDARD DRILL JUDGING THE TIME EYES RIGHT/LEFT.
1. In Quick Time: On receipt of the command: EYES the silk is released
by moving the right hand sharply down the pike and returning it to the original position (termed ‘Let Fly’).
2. On the command: RIGHT/LEFT the Colour/Standard Bearer takes no further action.
1. The head remains to the front and does not turn to the direction ordered.
ANY QUESTIONS? The squad is to practise at this stage. In Slow Time: COLOUR/STANDARD DRILL JUDGING THE TIME EYES RIGHT/LEFT.
On the execution of the movement the instructor is to callout: ONE LEFT – RIGHT/ ONE LEFT – RIGHT/ ONE.
1. There are three parts to this movement.
FOR THE PURPOSE OF INSTRUCTION THIS MOVEMENT IS BROKEN DOWN INTO THREE PARTS.

1-9-85
C. MOVEMENTS.
1) THE SALUTE WHEN MARCHING PAST (IN SLOW TIME) – ONE. INSTRUCTOR EXECUTION POINTS TO NOTE The instructor is to demonstrate the movement giving the words of command: INSTRUCTOR ONE.
1. On the command: EYES the silk is ‘Let Fly’ by moving the right hand sharply down the pike and returning it to the original position.
2. On the command: RIGHT/LEFT, which is received as the right foot strikes the ground a full marching pace of 30 in is taken with the left foot.
3. As the left foot strikes the ground the base of the pike is raised just clear of the socket of the Colour/Standard belt under the control of the right hand.
4. At the same time the right wrist, forearm and elbow are lowered to the side of the pike to give support.
5. At the same time the left hand is brought across the front of the body by the shortest possible route to grasp the socket of the Colour/Standard belt in a full grip and guide the base of the pike.
6. On the execution of this movement the squad is to call out:
ONE.
1. The right wrist, forearm and elbow are lowered to the pike.
2. The left hand has a full grip on the socket of the Colour/Standard belt.
3. The base of the pike is just clear of the socket of the Colour/Standard belt and positioned such so as to guide the pike.
ARE THERE ANY QUESTIONS? The squad is to practise Collectively-Individually-Collectively.
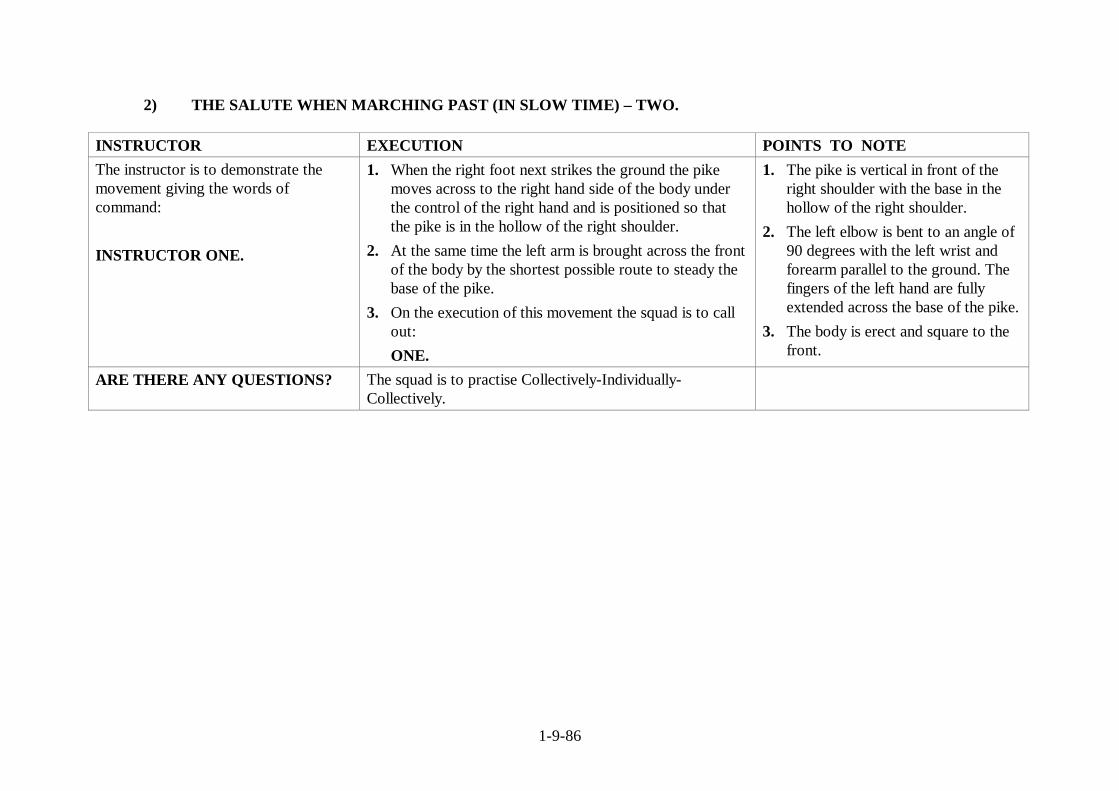
1-9-86
2) THE SALUTE WHEN MARCHING PAST (IN SLOW TIME) – TWO. INSTRUCTOR EXECUTION POINTS TO NOTE The instructor is to demonstrate the movement giving the words of command: INSTRUCTOR ONE.
1. When the right foot next strikes the ground the pike moves across to the right hand side of the body under the control of the right hand and is positioned so that the pike is in the hollow of the right shoulder.
2. At the same time the left arm is brought across the front of the body by the shortest possible route to steady the base of the pike.
3. On the execution of this movement the squad is to call out:
ONE.
1. The pike is vertical in front of the right shoulder with the base in the hollow of the right shoulder.
2. The left elbow is bent to an angle of 90 degrees with the left wrist and forearm parallel to the ground. The fingers of the left hand are fully extended across the base of the pike.
3. The body is erect and square to the front.
ARE THERE ANY QUESTIONS? The squad is to practise Collectively-Individually-Collectively.

1-9-87
3) SALUTE WHEN MARCHING PAST (IN SLOW TIME) – THREE. INSTRUCTOR EXECUTION POINTS TO NOTE The instructor is to demonstrate the movement giving the words of command: INSTRUCTOR ONE.
1. When the left foot next strikes the ground the Colour/Standard is lowered to the front.
2. The pike is locked under the armpit allowing the silk to hang straight down from the pike.
3. At the same time the left arm is cut away sharply to the left-hand side of the body.
4. On the execution of this movement the squad is to call out:
ONE.
1. The pike is locked under the right armpit and is held so that it is horizontal to the ground.
2. The silk is hanging straight down from the pike.
3. The back of the right hand is facing towards the ground.
4. The left arm is pulled well into the side of the body with the thumb in line with the seam of the trousers.
5. Whilst marching in slow time the body is erect and square to the front.
ARE THERE ANY QUESTIONS? The squad is to practise Collectively-Individually-Collectively.

1-9-88
D. FINAL DEMONSTRATION. INSTRUCTOR EXECUTION POINTS TO NOTE The instructor is to give a complete and final demonstration of the movement: COLOUR/STANDARD DRILL JUDGING THE TIME EYES RIGHT/LEFT.
On the execution of the movement the instructor is to call out: ONE LEFT – RIGHT/ONE LEFT – RIGHT/ONE.
ARE THERE ANY QUESTIONS? The squad is to practise Collectively-Individually-Collectively.
E. END OF LESSON DRILLS INSTRUCTOR EXECUTION POINTS TO NOTE Reform the squad in a straight line and confirm by practise: COLOUR/STANDARD DRILL JUDGING THE TIME EYES RIGHT/LEFT.
Students are to execute the movement and call out the timing: ONE LEFT – RIGHT/ONE LEFT – RIGHT/ONE.
1. Ensure the silk hangs straight down from the pike and that the pike is horizontal to the ground.

1-9-89
LESSON 14 – CARRY COLOUR/STANDARD FROM THE SALUTE WHEN MARCHING PAST IN SLOW TIME INSTRUCTOR’S NOTES
Aim To teach the Carry from the Salute when marching past. Timings One 45 minute period. Method A basic outdoor or indoor instructional lesson. Explain the EXECUTION of the movements and emphasise the
POINTS TO NOTE, as under column headings below. Dress & Stores Clean Working Dress. Practise Colour/Standard. Practise Colour/Standard Belt. Preparation Select an area on the parade square or any area of hard ground, or indoor equivalent with sufficient height
clearance. CONDUCT OF LESSON
A. PRELIMINARIES.
Squad Formation The squad stood properly At Ease in a half circle. Revision Salute with Colour or Standard when marching past. Spoken Introduction The next stage in Colour/Standard drill is the Recover of the Colour/Standard to the position of the Carry
from the Salute when marching past.
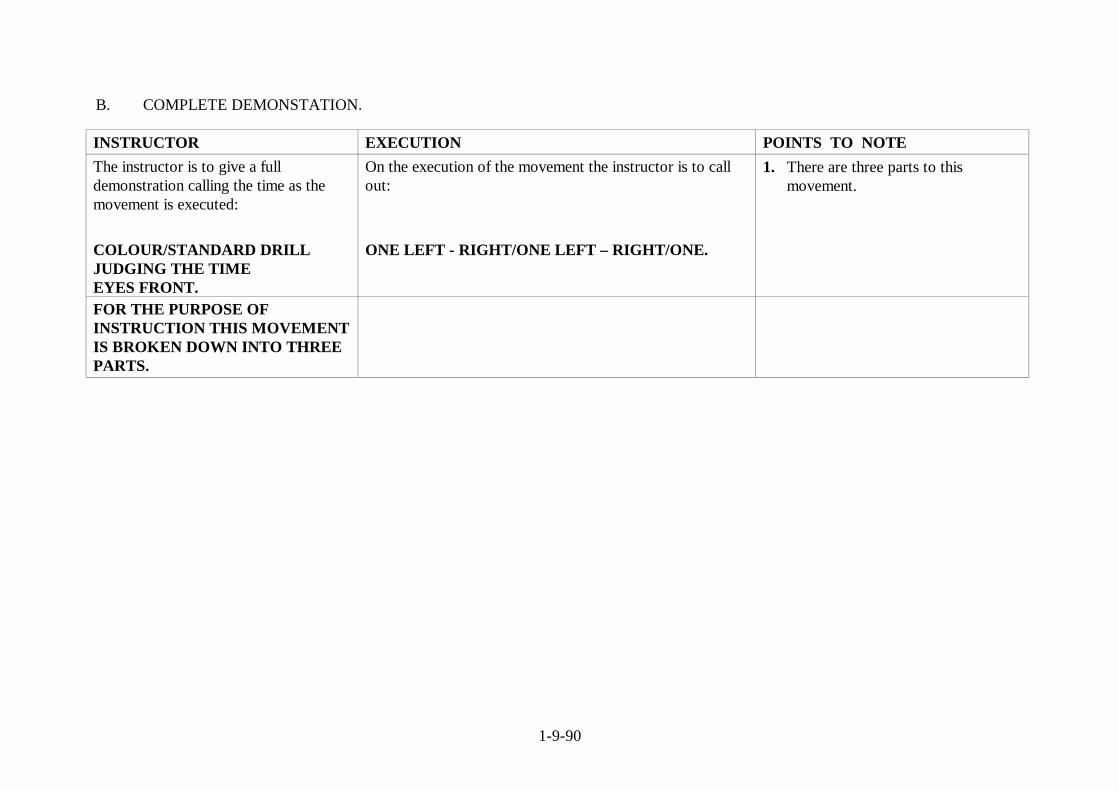
1-9-90
B. COMPLETE DEMONSTATION.
INSTRUCTOR EXECUTION POINTS TO NOTE The instructor is to give a full demonstration calling the time as the movement is executed: COLOUR/STANDARD DRILL JUDGING THE TIME EYES FRONT.
On the execution of the movement the instructor is to call out: ONE LEFT - RIGHT/ONE LEFT – RIGHT/ONE.
1. There are three parts to this movement.
FOR THE PURPOSE OF INSTRUCTION THIS MOVEMENT IS BROKEN DOWN INTO THREE PARTS.

1-9-91
C. MOVEMENTS.
1) CARRY COLOUR/STANDARD – ONE. INSTRUCTOR EXECUTION POINTS TO NOTE The instructor is to give a full demonstration calling out the time as the movement is executed: INSTRUCTOR ONE.
1. The command is given as the right foot strikes the ground. A further full marching pace of 30 inches is taken with the left foot.
2. At the same time raising the Colour/Standard directly in front of the centre of the body and positioning the base of the pike just above the socket of the Colour/Standard belt.
3. At the same time the right wrist, forearm and elbow are lowered against the side of the pike.
4. At the same time the left hand is brought sharply from the left-hand side of the body to grasp the socket of the Colour/Standard belt in a full grip.
5. On the execution of this movement the squad is to call out:
ONE.
1. The Colour/Standard is held perpendicular to the centre of the body.
2. The left hand has a full grip around the socket of the Colour/Standard belt with the left wrist elbow and arm close to the body.
3. The right wrist, forearm and elbow are lowered against the side of the pike.
4. The body is erect and square to the front.
ARE THERE ANY QUESTIONS? The squad is to practise Collectively-Individually-Collectively.

1-9-92
2) CARRY COLOUR/STANDARD – TWO. INSTRUCTOR EXECUTION POINTS TO NOTE The instructor is to demonstrate the movement giving the words of command: INSTRUCTOR ONE.
1. A further full marching pace of 30 in is taken with the right foot and at the same time the base of the pike is forced into the socket of the Colour/Standard belt.
2. On the execution of this movement the squad is to call out:
ONE.
1. The base of the Colour/Standard is inserted into the socket of the Colour/Standard belt.
2. The position of the Colour/Standard does not move throughout the execution of this movement.
3. The body is erect and square to the front.
ARE THERE ANY QUESTIONS? The squad is to practise Collectively-Individually-Collectively.

1-9-93
3) CARRY COLOUR/STANDARD – THREE. INSTRUCTOR EXECUTION POINTS TO NOTE The instructor is to demonstrate the movement giving the words of command: INSTRUCTOR ONE.
1. A further full marching pace of 30 in is taken with the left foot at the same time the right wrist, forearm and elbow, are forced out to the right to the normal position of the Carry.
2. At the same time the grip on the socket of the Colour/Standard belt is released by the left hand and it is forced across to the left hand side of the body as for the position of Attention.
3. Continue marching in Slow Time with the Colour/ Standard in the position of the Carry.
4. One quick attempt is to be made to regain the silk by closing the right wrist, forearm and elbow against the pike and reaching to secure it with the left hand.
5. When completed the normal position of the Carry is to be adopted.
6. On the execution of the movement the squad is to call out:
ONE.
1. The Colour/Standard is in the position of the Carry.
2. Whilst marching in Slow Time the body remains erect and square to the front.
ARE THERE ANY QUESTIONS? The squad is to practise Collectively-Individually-Collectively.

1-9-94
D. FINAL DEMONSTRATION. INSTRUCTOR EXECUTION POINTS TO NOTE The instructor is to give a complete and final demonstration of the movement: COLOUR/STANDARD DRILL JUDGING THE TIME EYES FRONT.
On the execution of the movement the instructor is to call out: ONE LEFT- RIGHT/ONE LEFT – RIGHT/ONE.
ARE THERE ANY QUESTIONS? The squad is to practise Collectively-Individually-Collectively.
E. END OF LESSON DRILLS. INSTRUCTOR EXECUTION POINTS TO NOTE Reform the squad in a half circle, or the student in front of you, and confirm by practise: COLOUR/STANDARD DRILL JUDGING THE TIME EYES FRONT.
Students are to execute the movements and call out the timing: ONE LEFT – RIGHT/ONE LEFT – RIGHT/ONE.
1. Make one quick attempt to regain the silk.

2-1-1
PART 2 - CHAPTER 1
PAYING COMPLIMENTS
REASON FOR SALUTING
1. Saluting is a recognition of the Sovereign's Commission, being indirectly a salute to the Crown through the individual holding the Queen's authority. The Sovereign is paid the highest compliment, the Royal Salute. Because of their link with the Sovereign, the following are also paid some form of compliment:
a. Members of the Royal Family.
b. Governors and Ministers to whom the Sovereign delegates authority.
c. Formed bodies of troops on the Sovereign’s business.
d. All Colours and Standards of the Royal Air Force and their equivalent in the Royal Navy, Royal Marines and Army. e. All Officers, as holders of the Sovereign’s commission.
2. In origin, the salute with the hand, the Present Arms, and the salute with the sword were methods by which the person paying the compliment could show the person to whom that compliment was paid that no offence was meant. They are all gestures symbolic of loyalty and trust. Saluting represents the fundamental values of the Royal Air Force and it is the responsibility of all personnel to ensure that it is carried out correctly. 3. Personnel are to salute with the right hand unless physically unable to do so, in which case they are to salute with the left hand.
OCCASIONS FOR SALUTING SALUTING BY NON-COMMISSIONED PERSONNEL 4. Personnel are to salute commissioned officers of the Royal Air Force, the Royal Navy, the Royal Marines, the Army, Commonwealth and Foreign Services at all times, and at any time when they recognise officers who are dressed in plain clothes. A list of comparative ranks of the 3 services is contained in Annex A. 5. An individual is to salute 3 paces before passing an officer, at the same time turning the head smartly in the direction of the officer. The salute is to be finished on the third pace after passing the officer, by smartly lowering the hand to the side and turning the head to the front. 6. When the individual is not wearing head-dress or is carrying anything other than a weapon, which prevents saluting, the head is to be turned smartly towards the officer being passed. When stationary the individual is to stand to attention as the officer passes.

2-1-2
7. A non-commissioned person when approaching to address an officer is to halt 2 paces from the officer, salute and then address the officer. Personnel take their leave by saluting again before turning to withdraw. No backward step is taken before saluting. 8. On entering a room personnel are to salute entitled officers as usual; they are also to salute before leaving the room. Personnel are to remain standing until given permission to sit by the senior person present. Head-dress is not to be removed until permission is given. However, if the senior person has already uncovered it is appropriate for male personnel to remove their head-dress when permitted to sit. If the senior person remains covered, then all present are to follow suit. Head-dress is to be replaced on rising to leave. 9. An individual carrying a weapon and approaching to address an officer is to halt 2 paces from the officer before saluting with the weapon in accordance with the procedures detailed in Part 1 Chp 5 Lesson 19. Before turning to withdraw the individual is to take leave by saluting for a second time. No backward step is taken before saluting. 10. A stationary individual, on seeing an officer approaching is to stand at Attention, face the officer and salute when the officer is 3 paces away. The salute is to finish and the hand returned to the side after a pause equal to 5 paces. When personnel are sitting or standing together, the senior person present is to stand facing the officer and call the whole party to Attention before saluting. 11. An individual standing with a weapon is to turn towards an officer and salute as detailed in para 9. The actions to be taken when an individual carrying a weapon is passing an officer are detailed in Part 1 Chp 5 Lesson 21. 12. Personnel in a group already being addressed by an officer or NCO are not to take individual action to salute another officer; the responsibility lies with the senior person present who will give orders as appropriate. 13. When a number of personnel are walking together as individuals, they are all to salute when passing an officer; however, when they are being marched in a party it is the responsibility of the senior person to give orders as appropriate. SENTRIES 14. Instructions on saluting by sentries are given in Part 3. CADETS 15. Cadets are subject to the same regulations for saluting as airmen. SALUTING BY OFFICERS 16. Officers using the salute to pay compliments are to salute in the same way as airmen. Officers are to return all salutes made to them.
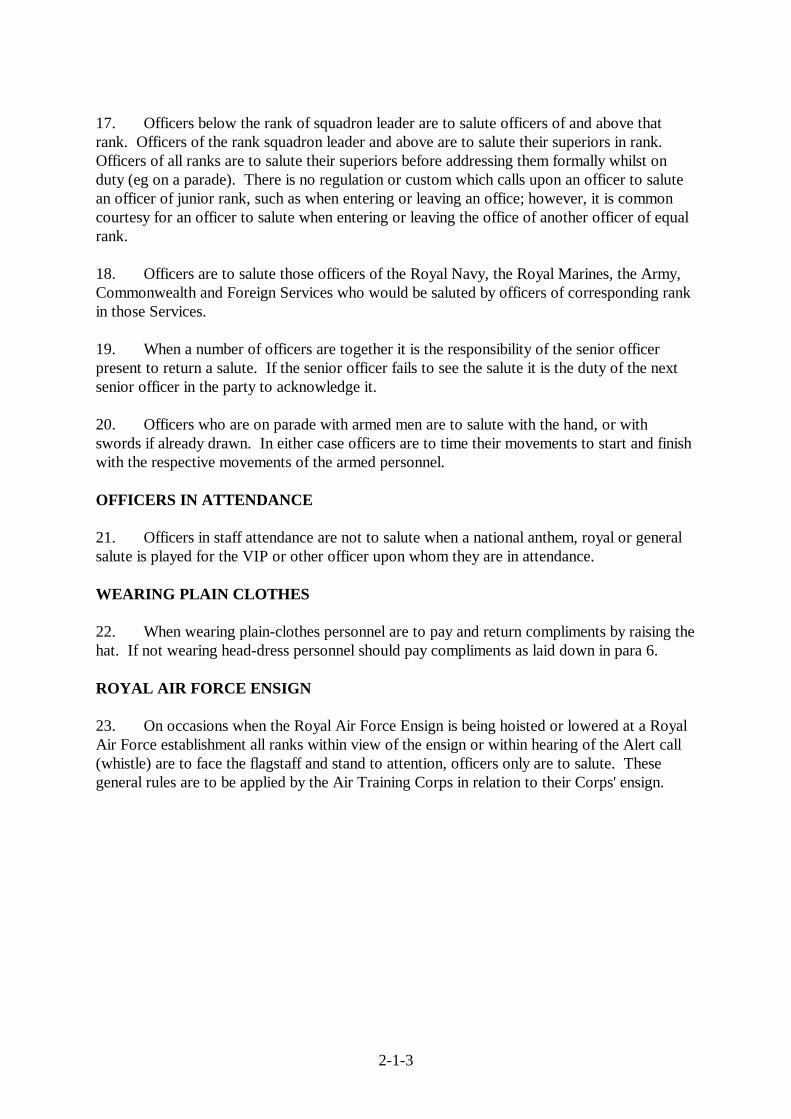
2-1-3
17. Officers below the rank of squadron leader are to salute officers of and above that rank. Officers of the rank squadron leader and above are to salute their superiors in rank. Officers of all ranks are to salute their superiors before addressing them formally whilst on duty (eg on a parade). There is no regulation or custom which calls upon an officer to salute an officer of junior rank, such as when entering or leaving an office; however, it is common courtesy for an officer to salute when entering or leaving the office of another officer of equal rank. 18. Officers are to salute those officers of the Royal Navy, the Royal Marines, the Army, Commonwealth and Foreign Services who would be saluted by officers of corresponding rank in those Services. 19. When a number of officers are together it is the responsibility of the senior officer present to return a salute. If the senior officer fails to see the salute it is the duty of the next senior officer in the party to acknowledge it. 20. Officers who are on parade with armed men are to salute with the hand, or with swords if already drawn. In either case officers are to time their movements to start and finish with the respective movements of the armed personnel. OFFICERS IN ATTENDANCE 21. Officers in staff attendance are not to salute when a national anthem, royal or general salute is played for the VIP or other officer upon whom they are in attendance. WEARING PLAIN CLOTHES 22. When wearing plain-clothes personnel are to pay and return compliments by raising the hat. If not wearing head-dress personnel should pay compliments as laid down in para 6. ROYAL AIR FORCE ENSIGN 23. On occasions when the Royal Air Force Ensign is being hoisted or lowered at a Royal Air Force establishment all ranks within view of the ensign or within hearing of the Alert call (whistle) are to face the flagstaff and stand to attention, officers only are to salute. These general rules are to be applied by the Air Training Corps in relation to their Corps' ensign.

2-1-4
COLOURS AND STANDARDS 24. The colours and standards of all Services are entitled to the highest compliments. Full details of compliments to be paid in respect of colours and standards are given in Part 2 Chp 12. The basic rules to follow are:
a. Formed bodies will Present Arms, or if on the march and passing stationary colours or standards will give: “EYES RIGHT/LEFT”. b. Individuals and groups of personnel who are not formed up for parade, will halt, face passing colours or standards and salute, or if passing will salute to the right/left. c. A cased colour or standard is not saluted; however, the bearer is to be accorded compliments as appropriate.
BANNERS 25. These general rules are to be applied by the Air Training Corps in relation to their Corps' banner. GUARD SALUTES 26. Personnel are to stand to Attention when a guard salute is being played. NATIONAL ANTHEMS 27. When the National Anthem or a foreign national anthem is played formally, compliments are paid as follows:
a. When on Parade in an Organised Party. If on the move, parties should be halted. All ranks will be at Attention, but only officers and warrant officers salute. NCOs will only salute if they are in charge of an organised party. b. When not on Parade but in Uniform. All ranks will stand to Attention facing the required direction and, if wearing uniform head-dress, salute. c. When not on Parade and in Plain-Clothes. All ranks will stand to Attention. Men wearing head-dress are to remove it; women do not. d. Officers with Drawn Swords. They will stand at the Carry. e. Sentries. They will Slope Arms. f. When in a Building. Individuals are to stand to Attention and do not salute unless otherwise ordered.

2-1-5
SALUTING BY OFFICERS IN COMMAND 28. An officer commanding an armed party is to return the salute of an NCO IC of an unarmed party, but is not to call his armed party to Attention. 29. When in command of either an armed or unarmed party officers are to salute superiors under the usual rules. UNARMED PARTY 30. Unarmed parties passing each other are to be called to Attention and the officer or NCO IC then orders the Eyes Left/Right if appropriate. PARTIES ON THE MARCH 31. The commander in charge of a party on the march is to pay compliments by giving the command: “EYES RIGHT/LEFT” and is to salute at the same time. These compliments are also to be paid when the party passes an armed sentry. If the sentry is unarmed, no compliments are to be paid. COMPLIMENTS BY UNITS 32. A unit is to be ordered to Attention by its commander when passing or being passed by: a. Members of the Royal Family. b. Armed parties on the march and commanded by an officer. c. Guards, escorts etc.
d. Officers of air rank and those of equivalent rank in the other 2 Services (see Annex A).
33. When persons who are entitled to a salute approach from the rear, unit compliments are not to be given, but officers are to salute. This procedure does not apply to members of the Royal Family for whom units are to be ordered to stand at Attention and pay the usual compliments. COMPLIMENTS TO MEMBERS OF THE ROYAL FAMILY 34. A unit on the march, meeting a Sovereign when accompanied by an escort on an official or state occasion, is to be halted and turned towards them and when under arms is to be ordered to present arms. 35. A unit on the march is not to halt and present arms to a Sovereign when the personage is travelling in a motor car, unless previous warning has been given of the approach. Instead, the compliments are to be given, with arms carried at the slope, by the Eyes Left/Right. Compliments to other entitled persons are to be given in a similar manner.
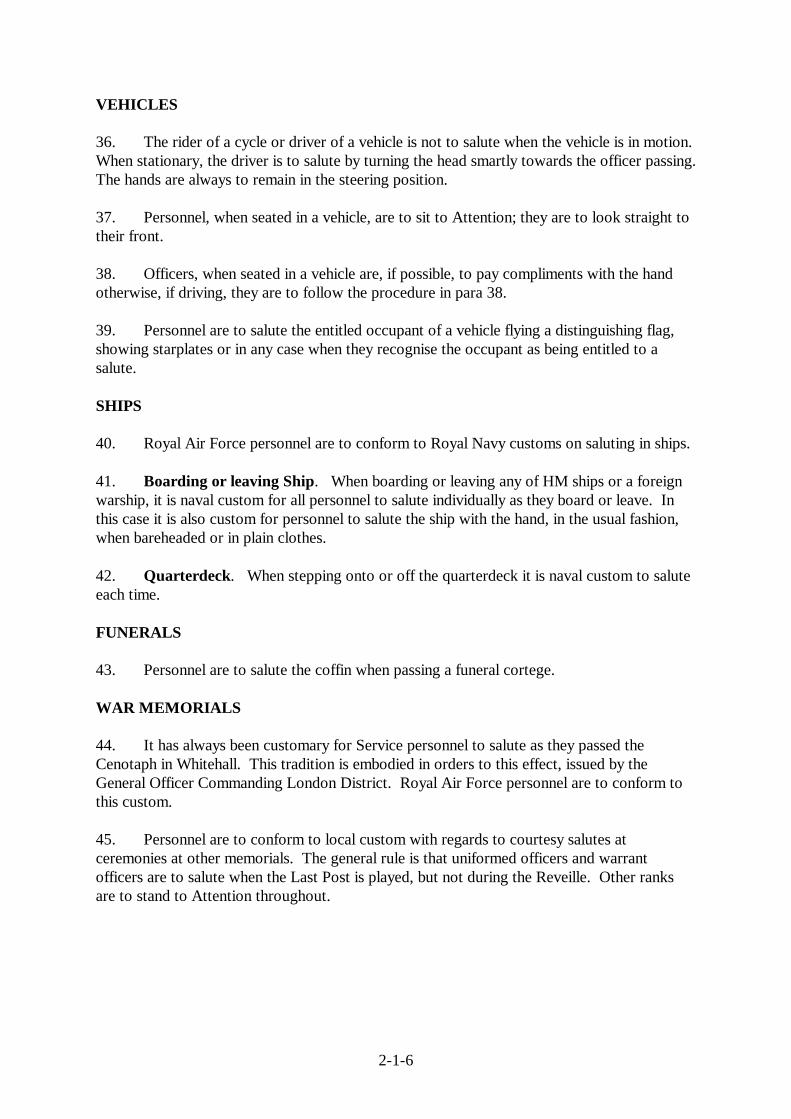
2-1-6
VEHICLES 36. The rider of a cycle or driver of a vehicle is not to salute when the vehicle is in motion. When stationary, the driver is to salute by turning the head smartly towards the officer passing. The hands are always to remain in the steering position. 37. Personnel, when seated in a vehicle, are to sit to Attention; they are to look straight to their front. 38. Officers, when seated in a vehicle are, if possible, to pay compliments with the hand otherwise, if driving, they are to follow the procedure in para 38. 39. Personnel are to salute the entitled occupant of a vehicle flying a distinguishing flag, showing starplates or in any case when they recognise the occupant as being entitled to a salute. SHIPS 40. Royal Air Force personnel are to conform to Royal Navy customs on saluting in ships. 41. Boarding or leaving Ship. When boarding or leaving any of HM ships or a foreign warship, it is naval custom for all personnel to salute individually as they board or leave. In this case it is also custom for personnel to salute the ship with the hand, in the usual fashion, when bareheaded or in plain clothes. 42. Quarterdeck. When stepping onto or off the quarterdeck it is naval custom to salute each time. FUNERALS 43. Personnel are to salute the coffin when passing a funeral cortege. WAR MEMORIALS 44. It has always been customary for Service personnel to salute as they passed the Cenotaph in Whitehall. This tradition is embodied in orders to this effect, issued by the General Officer Commanding London District. Royal Air Force personnel are to conform to this custom. 45. Personnel are to conform to local custom with regards to courtesy salutes at ceremonies at other memorials. The general rule is that uniformed officers and warrant officers are to salute when the Last Post is played, but not during the Reveille. Other ranks are to stand to Attention throughout.

2-1-A-1
AP818 PART 2 CHAPTER 1 ANNEX A
SERVICE OFFICERS’ RANKS
(Reference QRJ126)
NATO CODE
RN MILITARY including RM and QARANC
ROYAL AIR FORCE including PMRAFNS
OF-10 Admiral of the Fleet Field Marshal Marshal of the Royal Air Force OF-9 Admiral General Air Chief Marshal OF-8 Vice-Admiral Lieutenant-General Air Marshal OF-7 Rear Admiral (2) Major-General (3) Air Vice-Marshal OF-6 Commodore Brigadier Air Commodore (4) OF-5 Captain Colonel Group Captain OF-4 Commander Lieutenant-Colonel Wing Commander OF-3 Lieutenant-Commander Major(5) Squadron Leader OF-2 Lieutenant Captain Flight Lieutenant OF-1 Sub-Lieutenant(6) Lieutenant Flying Officer
Midshipman (6) Second Lieutenant Pilot Officer Notes: (1) The first five senior ranks in all these Services are given NATO star ratings (from 5 to 1 in descending order) to assist in identifying rank status. (2) This naval rank and those above are known as flag ranks. (3) This military rank and those above are known as general ranks. (4) This air force rank and those above are known as air ranks. (5) This military rank is known as the field rank. (6) This rank is junior to its military and air force equivalents.

2-3-1
PART 2 - CHAPTER 3
SQUAD DRILL DIRECTING FLANK 1. When a squad moves off, the Directing Flank is to be indicated in the command eg:
“BY THE LEFT/RIGHT, QUICK MARCH”. 2. When a squad is moving diagonally, the Directing Flank is to be that towards which the squad is inclined. 3. When a squad is marching in line by a flank and it is intended to change the direction to the opposite flank, the new flank of direction is to be indicated (before the actual command to change direction) by the command:
“BY THE RIGHT”. The Directing Flank is to be that on which the change of direction is to be made; the forward movement on the completion of the change is to be directed by that flank unless otherwise ordered. 4. When a squad or unit is marching on a road the flank directed is usually that of the offside, according to the local rule of the road. 5. When a squad is required to wheel, the pivot flank is to be the Directing Flank during the wheeling movement. On completion of the wheel, the squad is to revert, without further orders, to marching by the original flank. MOVING WITH ARMS 6. When carrying rifles a squad is to be brought to the Slope Arms position before marching more than five paces in either Quick or Slow Time. 7. The rifle is to be carried at the Shoulder when carrying out moves to Open or Close Order, moving sideways, forwards or backwards for given numbers of paces or for forming two or three ranks. Dressing is usually to be carried out from the Shoulder Arms position; in exceptional circumstances it may be carried out with the rifle in the Slope Arms position. SIZING A SQUAD 8. When sizing a squad, the tallest person of the squad is to be placed as a marker in front of the right-hand person.

2-3-2
9. On the command:
“TALLEST ON THE RIGHT, SHORTEST ON THE LEFT, IN SINGLE RANK – SIZE”
personnel, with the exception of the marker, are to right incline, break ranks and fall in on the left of the marker in a single rank, according to size, and dress off shoulder to shoulder. Individuals can most easily access their correct position by comparing their shoulder height with the person next to them. The NCO IC can make further minor adjustments before the next order is given. 10. Then, on the command:
“SQUAD FROM THE RIGHT NUMBER” all personnel, except the right marker, are to turn their head and eyes smartly to the right. At the same time the right marker is to start the numbering by calling out:
“ONE”. This is to be followed immediately by the next person on the marker’s left turning the head to the front and at the same time calling out:
“TWO” and so on, until all personnel are numbered. Numbering is sometimes necessary while personnel are in three ranks. In this case the procedure is the same, the personnel in each rank taking on the number of the person calling out in the front rank for the file as a whole. Only personnel in the front rank are to turn their heads and call out the numbers; the rest pay attention to hear their numbers called. 11. This is followed by the command:
“ODD NUMBERS, TWO PACES FORWARD, MARCH” whereupon the odd numbered personnel take the paces forward, while even numbers stand fast. On the command:
“NUMBER 1 STAND FAST, RANKS RIGHT AND LEFT TURN” personnel of the front rank (odd numbers), except No 1, are to turn to the right and those of the rear rank (even numbers) are to turn to the left. 12. On the command:
“FORM SQUAD, QUICK MARCH”

2-3-3
personnel, except No 1, who stands fast, are to step off in the direction they are facing. The rear rank is to wheel to the right and follow the last person of the front rank. Personnel are to halt as follows: a. No 3 is to halt one pace to the rear of No 1. b. No 5 is to halt one pace to the rear of No 3 (to form the first file of threes). c. No 7 halts to the left of No 1. d. Those following continue to form files of three until all are assembled. On coming to a halt at their positions, each individual is to pause and then turn to face the front, taking up the dressing by the right and adopting the position of Attention. FORMING TWO RANKS FROM THREE 13. Before forming two ranks from three ranks remember to number off the centre rank. On the command:
“SQUAD, FORM TWO RANKS” a. Odd numbers of the centre rank are to take a pace to the left with the left foot,
a pace forward with the right foot, bend the left knee and bring the left foot to the right to assume the position of Attention, standing in the front rank.
b. At the same time the even numbers of the centre rank are to take a pace to the
left with the left foot, a pace to the rear with the right foot, bend the left knee and bring the left foot to the right to assume the position of Attention, standing in the rear rank.
On completion of the movement, the squad is to be dressed (usually) without intervals. RETURNING TO THREE RANKS FROM TWO 14. On the command:
“SQUAD, FORM THREE RANKS” a. The odd numbers of the original centre rank are to take a pace to the rear with
the left foot, a pace to the right with the right foot, bend the left knee and bring the left foot to the right to resume the position of Attention in the centre rank.
b. At the same time, the even numbers of the original centre rank are to take a
pace forward with the left foot, a pace to the right with the right foot, bend the left knee and bring the left foot to the right to resume the position of Attention in the centre rank.
On completion of the movement the squad is to be dressed.

2-3-4
MOVEMENT OF A SQUAD IN LINE 15. On the command:
“BY THE LEFT/RIGHT, QUICK/SLOW MARCH” the squad is to step off. The front person of the file on the directing flank ordered, is to select a point ahead so that by marching towards the point, direction is maintained. 16. The personnel of each rank, with the exception of the directing file, are (without turning the head) to glance occasionally to the directing flank in order to maintain their dressing. Personnel of the centre and rear ranks are to maintain their correct covering and distance from the rank in front. 17. A blank file consisting of one person is at all times to be with the leading rank. Thus, when a squad is turned about on the march, the single person of the blank file on hearing the cautionary command: “ABOUT” is to mark time for two paces, thus gaining the new correct position before the turn is completed. 18. Similarly, when the squad is turned about at the Halt the single person is without further orders to take two paces forward after turning about. 19. When a squad is required to move to the rear for a short distance before resuming the original direction, the following commands are to be given:
“SQUAD WILL RETIRE, ABOUT TURN” and after completion:
“SQUAD WILL ADVANCE, ABOUT TURN”. The ranks in these instances are not changed and consequently the blank file is not adjusted. MOVEMENT OF A SQUAD IN COLUMN OF THREES 20. When a squad is required to move from one point of assembly to another, they are to march in column of threes. When there is a blank file consisting of one person this person is to be on the directing flank. INCLINED TURNS 21. On the command:
“SQUAD LEFT/RIGHT INCLINE” the squad turns in the direction ordered. While marching, formation and direction are maintained as described in para 16. When the squad is required to face/move in the original direction, a similar order is given.

2-3-5
TURNING TO A FLANK FROM LINE (WHEN HALTED) 22. To turn a squad to a flank, the order is to be given:
“MOVE TO THE LEFT/RIGHT, LEFT/RIGHT TURN”.
FORMING LINE FROM THREES FACING A FLANK (WHEN HALTED) 23. To form Line from threes, the order is to be given:
“INTO LINE, LEFT/RIGHT TURN”. TURNING TO A FLANK FROM LINE (WHEN MARCHING) 24. To turn to a flank when marching, the order is to be given:
“MOVE TO THE LEFT/RIGHT, LEFT/RIGHT TURN”. FORMING LINE FROM THREES (WHEN MARCHING) 25. To Form Line when marching, the order is to be given:
“INTO LINE, LEFT/RIGHT TURN”. CHANGING DIRECTION (THE WHEEL) 26. If a change of direction is required the following command is given:
“LEFT/RIGHT WHEEL” (in this case only, the executive word: “WHEEL” is to be drawn out in length). The Left/Right hand person of the leading line of threes, on the inside of the turn is to move round on the arc of a circle radius 4 ft (120 cms) and step short 1 ft (30 cms) for 6 paces to enable the other 2 persons of the line to wheel in unison. 27. When a squad is ordered to halt or mark time and only part of it has completed a wheel, the command is to be given:
“REAR FILES COVER” whereupon those lines of threes that have not yet wheeled are to cover those that have, by moving by the shortest route. 28. If a squad is required to wheel at an angle less than a complete right or left wheel, the command given when the leading line of threes is facing in the required direction is:
“FOR – WARD”.

2-3-6
FORMING TWO FILES FROM THREE (IN COLUMN) 29. On the command:
“FORM TWO FILES” a. The odd numbered personnel of the centre rank are to disengage to the left rear
and take up their positions behind their respective front rank numbers. b. At the same time the even numbered personnel of the centre rank are to
disengage themselves to the right rear and take up their positions behind their respective rear rank numbers. Personnel are then to adjust their distances in succession from front to rear without further orders.
FORMING SINGLE FILE FROM TWO (IN COLUMN) 30. On the command:
“FORM SINGLE FILE” personnel of the right file are to take up positions behind the personnel immediately on their left. Personnel are then to adjust their distances in succession from front to rear without further orders. RETURNING TO TWO FILES FROM SINGLE 31. On the command:
“FORM TWO FILES” the personnel of the original right hand file are to return to their positions on the right of the number immediately in front of them. During this movement the leading person (of the left file) is to step short. The remainder are then to correct their distance and dressing and are then to step short. When the squad is reformed, the order is to be given:
“QUICK MARCH”. RETURNING TO THREE FILES FROM TWO 32. On the command:
“FORM THREE FILES” a. The odd numbered personnel of the original centre file are to disengage to their
right front. b. The even numbered personnel of the original centre file are to disengage to
their left front and return to their positions abreast of their respective left and right numbers.
2-3-7
c. During this movement, the leading persons of the left and right files are to step short. The remainder are to correct their distance and dressing and are then to step short. When the squad is reformed, the order is to be given:
“QUICK MARCH”.
Notes Forming Files: 1. References above to the left, centre and right files refer to the original front,
centre and rear ranks of the squad whilst in line. 2. The movements detailed above are, for simplicity, given assuming the squad is
moving in column of threes to the right. It follows, therefore, that if the squad is moving to the left, the moves by personnel changing file are to be different.
FALLING OUT 33. On the command:
“SQUAD FALL OUT” personnel are to proceed as described in Part 1 Chp 2. DISMISSING (WITHOUT ARMS) 34. On the command:
“SQUAD DISMISS” personnel are to proceed as described in Part 1 Chp 2. 35. With an officer present: a. If an officer gives the order to Dismiss, all personnel, after having inclined to
the right, are to pause, then salute, pause again on completion of the salute, then leave the parade ground. The officer is to return the salute.
b. If the senior rank taking the parade obtains permission for dismissal, the
command given is:
“OFFICER ON PARADE, DISMISS”. DISMISSING (WITH ARMS) 36. Armed personnel are first to be brought to the Slope position before being ordered to dismiss when an officer is on parade.

2-4-1
PART 2 - CHAPTER 4
FLIGHT DRILL FORMATIONS 1. A flight may be formed up as follows: a. In Line (see Annex A). b. In Column of Route (see Annex B). c. In Column of Threes. APPOINTMENTS 2. The positions of officers and NCOs appointed to executive parade appointments and of officers and NCOs appointed to supernumerary positions are shown at the Appendices to Annexes A and B. Except where specially detailed, officers in front and supernumeraries in the rear move together with the front and rear ranks respectively. Corporals not required as markers or guides are to be in the ranks. Similarly, on formal parades it may be necessary for SNCOs to be in the ranks. In these circumstance NCOs are to carry the same arms as other personnel. PARADE AND INSPECTION 3. On assembling a flight for parade the NCO IC of the flight is to give the command:
“RIGHT MARKER” whereupon the detailed right marker is to come to Attention, Slope Arms and march out in Quick Time, halt facing the NCO IC at a distance of three paces, Shoulder Arms and Stand At Ease. The NCO IC is then to give the order:
“ON PARADE” whereupon the marker and personnel waiting at the side of the parade ground, all come to Attention, Slope Arms, and move out individually in Quick Time and form up on the left of the marker in three ranks. After halting they are to pause, Shoulder Arms, take up their dressing from the right and Stand At Ease to await further orders. 4. The NCO IC is then to call the roll. In response, personnel are to come momentarily to Attention and answer only by calling out the NCO’s rank in acknowledgement. Similarly, if a nominal roll is called by an officer or warrant officer, or if either are present, individuals are to answer: “Sir/Ma’am”.

2-4-2
5. The NCO IC is then to prepare the flight for inspection by giving the commands:
“FLIGHT SHUN OPEN ORDER MARCH
RIGHT DRESS EYES FRONT
FLIGHT WILL FIX BAYONETS FIX BAYONETS
SHUN” 6. On completion of this preparation the NCO IC awaits the arrival of the flight commander. The flight commander is to approach from the front of the flight and halt three paces in front of the NCO IC. When the flight commander has halted, the NCO IC is to salute and make this report:
“FLIGHT PRESENT (OR OTHERWISE) AND READY FOR INSPECTION SIR/MA’AM”.
7. Supernumerary Officers. While the flight is being prepared for inspection, the supernumerary officers are to march up and down in pairs on the right flank of the parade area. When the NCO IC calls the flight to Attention prior to handing over to the flight commander, the supernumerary officers are to prepare to fall in; they are to form up in line, facing the flight at about 20 paces from it, and Stand At Ease. 8. NCO IC Flight. When the NCO IC has handed over the flight, and having been ordered to fall in, the NCO is to salute, turn left and march to parade position at the rear of the flight. 9. Officers Fall In. The flight commander then gives the order:
“FALL IN THE OFFICERS” whereupon the officers are to fall in (see Part 1 Chp 6 Lesson 1) to the positions shown at Annex A. INSPECTION 10. The flight commander is then to inspect the airmen. For the inspection, the NCO IC is to fall out from position and accompany the flight commander. During the inspection the flight commander may instruct the NCO IC to stand the other two ranks At Ease. In this case, the NCO IC is to call to Attention each next rank for inspection as the flight commander is finishing the inspection of the previous rank. The NCO IC is then to Stand At Ease the rank that has just been inspected. As the flight commander finishes inspecting the rear rank, the NCO IC brings the whole flight to Attention before saluting and returning to parade position at the rear of the flight. DRESSING 11. If it is necessary for the flight commander to correct dressing, it is to be carried out with arms at the Shoulder.

2-4-3
12. NCO IC Flight. When the order for the Left/Right Dress is given the NCO IC flight, alone, is to fall out from position and supervise the prompt adjustment of flight dressing from the directed flank. When satisfied the report given is:
“FLIGHT STEADY” whereupon the flight commander gives the order for the Eyes Front and the NCO IC returns to parade position at the rear of the flight. 13. Dressing on the March. When the flight is marching, the marker or guide on the directing flank is responsible for maintaining direction. CHANGING RANKS 14. When ranks are changed, the command is given:
“FLIGHT, ABOUT TURN”. All appointments are to turn with the flight and then after a pause: a. The flight commander is to turn to the right. b. The supernumeraries are to turn to their left. All then march round the flight and gain their new positions where they are to halt individually, pause and turn to face the front. The about-turn and stepping off are carried out in unison; the halt and turning to face the front are carried out individually. Attempts to co-ordinate the latter movements lead to artificial posturing and signals which are unnecessary and are not to be encouraged. 15. When a flight is required only to retire to the rear for a short distance before resuming the original direction, appointments turn about with the ranks, but retain their positions. COMPLIMENTS 16. Stationary. A flight required to pay compliments is to be given the orders:
“NUMBER X FLIGHT, SLOPE ARMS GENERAL SALUTE, PRESENT ARMS
SLOPE ARMS SHOULDER ARMS”.
The flight commander is to salute, with the hand or sword as appropriate, so that the final movements in each case coincide with the final movement of the rifles.

2-4-4
17. On the March. Similarly a flight required to pay compliments on the march is to be given orders:
“NUMBER X FLIGHT, EYES LEFT/RIGHT EYES FRONT”.
The flight commander is to salute, with the hand or sword as appropriate, so that the final movements coincide with the movement of the heads of the flight as a whole. DISMISSING 18. Officers Fall Out. When a flight is to be dismissed, the flight commander is to give the orders:
“FLIGHT SHUN FALL OUT THE OFFICERS”.
The supernumerary officers are to fall out (see Part 1 Chp 6 Lesson 1). The flight commander then Returns Swords and calls for, and hands over to, the NCO IC before leaving the parade area accompanied by the other officers. The NCO IC orders the flight to unfix bayonets before marching off to the place of dismissal. Annexes: A. Flight in Line. B. Flight in Column of Route.

2-4-A-1
AP818 PART 2 CHAPTER 4 ANNEX A
FLIGHT IN LINE
PARADEFRONT
3 paces
1
1
1
2
(Not to scale)
LEGEND
Flight Commander
Supernumerary Officer
NCO IC Flight
Supernumerary NCO
Marker
Guide
Appendix 1. Flight In Line - Positions of Executives and Supernumeraries.
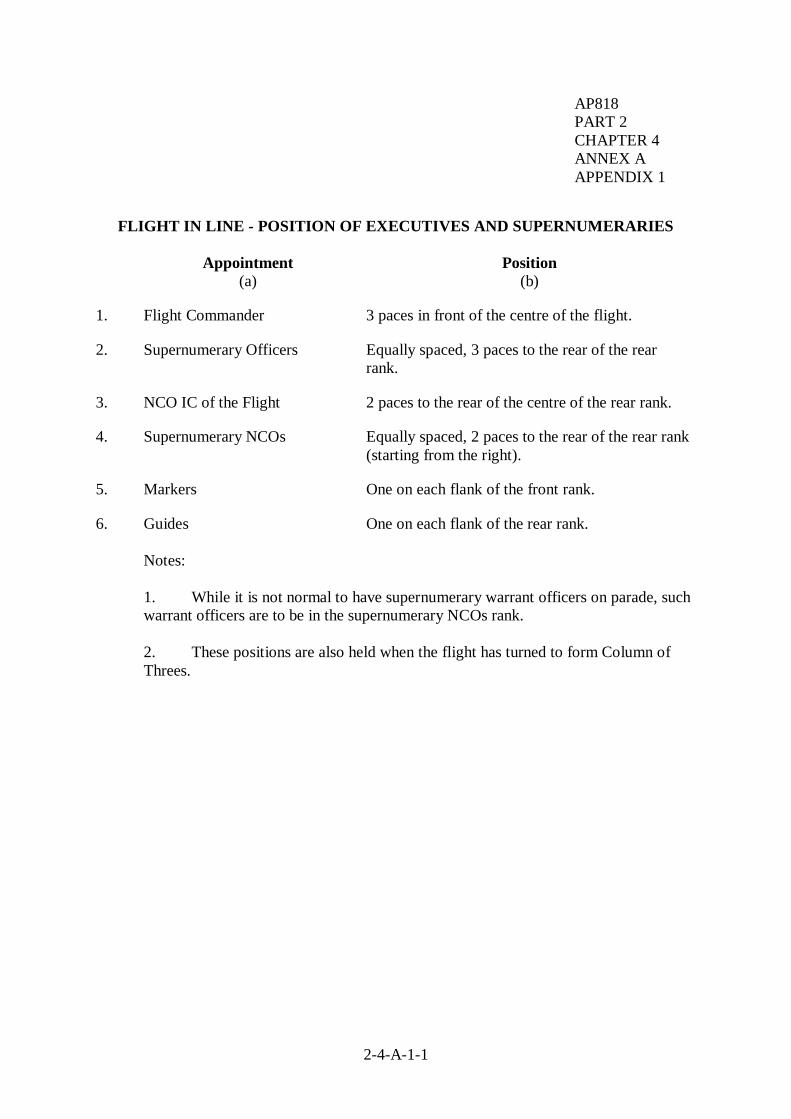
2-4-A-1-1
AP818 PART 2 CHAPTER 4 ANNEX A APPENDIX 1
FLIGHT IN LINE - POSITION OF EXECUTIVES AND SUPERNUMERARIES
Appointment (a)
Position (b)
1. Flight Commander 3 paces in front of the centre of the flight.
2. Supernumerary Officers Equally spaced, 3 paces to the rear of the rear rank.
3. NCO IC of the Flight 2 paces to the rear of the centre of the rear rank.
4. Supernumerary NCOs Equally spaced, 2 paces to the rear of the rear rank (starting from the right).
5. Markers One on each flank of the front rank.
6. Guides One on each flank of the rear rank. Notes: 1. While it is not normal to have supernumerary warrant officers on parade, such
warrant officers are to be in the supernumerary NCOs rank. 2. These positions are also held when the flight has turned to form Column of
Threes.
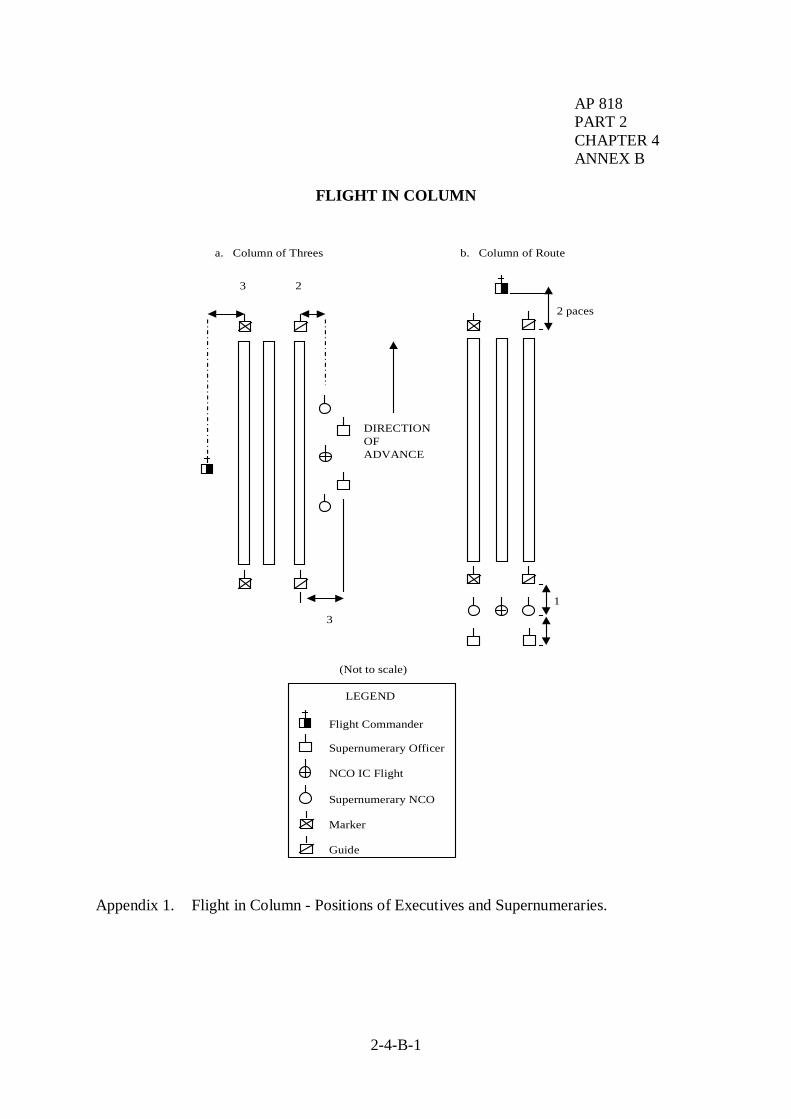
2-4-B-1
AP 818 PART 2 CHAPTER 4 ANNEX B
FLIGHT IN COLUMN
2 paces
(Not to scale)
LEGEND
Flight Commander
Supernumerary Officer
NCO IC Flight
Supernumerary NCO
Marker
Guide
23
3
1
a. Column of Threes b. Column of Route
DIRECTIONOFADVANCE
Appendix 1. Flight in Column - Positions of Executives and Supernumeraries.
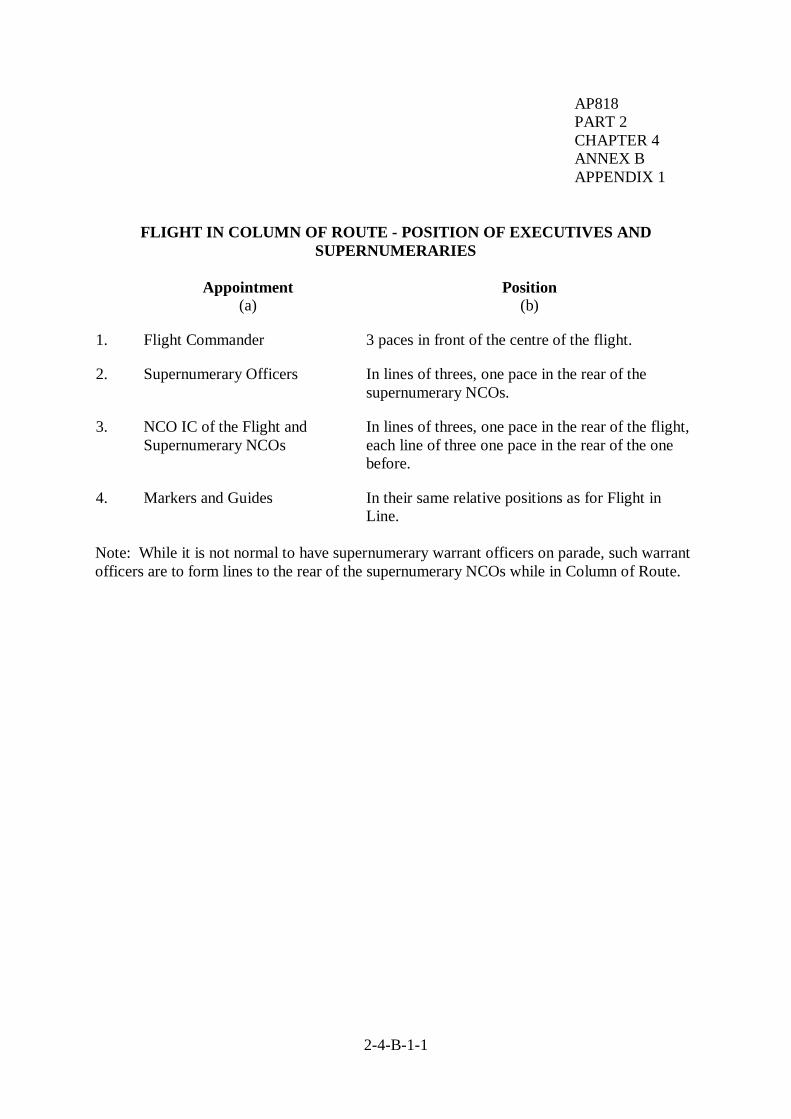
2-4-B-1-1
AP818 PART 2 CHAPTER 4 ANNEX B APPENDIX 1
FLIGHT IN COLUMN OF ROUTE - POSITION OF EXECUTIVES AND SUPERNUMERARIES
Appointment
(a) Position
(b)
1. Flight Commander 3 paces in front of the centre of the flight.
2. Supernumerary Officers In lines of threes, one pace in the rear of the supernumerary NCOs.
3. NCO IC of the Flight and Supernumerary NCOs
In lines of threes, one pace in the rear of the flight, each line of three one pace in the rear of the one before.
4. Markers and Guides In their same relative positions as for Flight in Line.
Note: While it is not normal to have supernumerary warrant officers on parade, such warrant officers are to form lines to the rear of the supernumerary NCOs while in Column of Route.

2-5-1
PART 2 - CHAPTER 5
SQUADRON DRILL FORMATIONS 1. A squadron may consist of two or more flights. The instructions in this Chapter are for such a squadron, but they also apply to a squadron consisting of any other number of flights. 2. A squadron may be formed up in: a. Column of Flights. Flights on parallel and successive lines at a distance
from one another equal to their frontage (see Annex A). If flights are at 14 paces distance, the squadron is said to be in Close Column of Flights.
b. Line. Flights on one alignment at 6 paces interval (see Annex B). c. Column of Route (or Threes). Flights in Column of Route (or Threes) at 6
paces distance between flights (see Annex C). 3. Unless otherwise ordered, a squadron is to be formed up in Close Column of Flights and is to dress by the right flank. APPOINTMENTS 4. When a squadron is formed up, the positions of executives and supernumeraries are to be as shown in the Annexes. 5. The squadron commander is to give the executive commands for movements that are to be carried out simultaneously by flights. DRESSING 6. If it is necessary for the squadron commander or adjutant to correct dressing, it is normally to be done with arms at the Shoulder. 7. Executives. The squadron adjutant and flight commanders are to turn about to face the ranks during the dressing adjustment. When the Eyes Front is given, they are to turn about to the front. 8. Squadron Warrant Officer. When the order for the Left/Right Dress is given, only the squadron warrant officer is to fall out from his position and supervise the prompt adjustment of flights’ dressing from the directed flank. When satisfied, the squadron warrant officer is to give the report:
“SQUADRON STEADY” whereupon the squadron commander gives the order for the Eyes Front and the squadron warrant officer returns to his parade position.
2-5-2
9. In Column of Flights. Each flight is to dress on the markers and guides on the flank of direction; markers and guides cover off those in front. 10. In Line. Each flight is to dress on the marker and guide of the flight furthest on the flank of direction. 11. Dressing on the March. When the squadron is marching, the marker and guide on the directing flank are responsible for maintaining direction. The markers and guides in the rear flights are to be responsible for the covering and correct distancing of their flights. THE PARADE, TELLING OFF AND INSPECTION 12. Prior to parading, the squadron commander will issue any instructions to the adjutant about the parade (sizing, equalizing numbers in flights etc). These requirements will be actioned through the warrant officer at the forming up point. 13. The squadron warrant officer is to call:
“MARKERS” whereupon the right marker of each flight is to march, at the Slope, onto the squadron parade ground. They are to halt individually, in line, facing the warrant officer at 3 paces distance, Shoulder Arms, and Stand At Ease. The marker of No 1 Flight is to be on the right and the remainder in their correct sequence to the left. 14. The warrant officer is to give the commands:
“MARKERS SHOULDER ARMS SHUN
NUMBER”
whereupon the markers (except the right hand one) turn their head and eyes to the right and call out in sequence from the right (see Part 2 Chp 3 para 10), turning head and eyes to the front as they call. 15. The warrant officer then orders: “SLOPE ARMS”.
16. The warrant officer then orders either: a. For Squadron in Column of Flights:
“NUMBER 1 STAND FAST-REMAINDER, ABOUT TURN”. b. For Squadron in Line:
“NUMBER 1 STAND FAST, REMAINDER, LEFT TURN”.

2-5-3
Then, stating the number of paces distance required between markers, the warrant officer is to give the command:
“TO (NUMBER) PACES INTERVALS, QUICK MARCH” whereupon the markers are to step off together for the number of paces ordered. They achieve this by each marker commencing the interval count as the marker behind halts. As they reach their positions they are to halt and turn individually to face the parade front. When all markers are in position, facing the front, they are to be covered off by the warrant officer who is then to give the command:
“MARKERS SHOULDER ARMS”. While the warrant officer is preparing the parade ground the adjutant is to march across the head of the parade ground. When turning about the adjutant is always to turn inwards towards the parade area. When the squadron warrant officer is covering off the markers, the adjutant is to take this as the sign to take over, and is to march onto the parade ground to a position three paces in front of the warrant officer. 17. When the adjutant is in position the warrant officer is to salute and report that the markers have been positioned. The adjutant is to instruct the warrant officer to stand the markers At Ease; whereupon the warrant officer salutes in acknowledgement, turns about, carries out the instruction, turns left and marches to a position approximately 10 paces beyond the first marker (to observe the marching on). The warrant officer, in accordance with custom, remains freelance to supervise the marching on and dressing. 18. The adjutant orders the March On, whereupon the markers come to Attention to await the arrival of their respective flights. 19. Each flight is to be marched on to its marker from the reverse flank by the flight commander. When the flight arrives on its alignment, the flight guide (marching on the directed flank of the flight) is to lead the flight directly on to its squadron marker. At approximately 5 paces from the halt the guide is to move quickly across the path of the following ranks. This is in order to take up parade position ahead of the rear rank and to leave space for the marker in the front rank. 20. The flight commanders halt their flights on their respective markers. Each flight commander then orders the flight to turn to the front, Shoulder Arms and Stand At Ease. The markers work with their flights upon the order to Shoulder Arms. The flight commander then turns about and Stands At Ease. 21. When all flights are in position, the adjutant is to give the commands:
“SQUADRON SHUN OPEN ORDER MARCH
RIGHT DRESS”.

2-5-4
When the squadron is reported steady by the squadron warrant officer, the adjutant orders:
“EYES FRONT SQUADRON WILL FIX BAYONET
FIX BAYONETS SHUN”.
When the squadron commander has instructed that an inspection is not to be carried out, the commands to Open Order and Fix Bayonets are to be omitted at this stage. 22. If officers have not marched on with flights, the adjutant then gives the orders:
“FALL IN THE OFFICERS” whereupon officers are to fall in (see Part 1 Chp 6 Lesson 1). The adjutant is to Draw Swords as the officers are marching on, after having first acknowledged their salutes. If bayonets are not already fixed, officers are not to Draw Swords as they fall in but are to do so if/when Fix Bayonets is subsequently ordered. The officers will Draw Swords on the executive word of command: “BAYONETS”. Followed by:
“TELL OFF BY FLIGHTS” whereupon the flight commanders are to call out the number of their flights in sequence from front to rear (in (Close) Column of Flights) or from right to left (in Line of Flights) as follows:
“NUMBER 1 FLIGHT NUMBER 2
NUMBER 3 FLIGHT”. Only the first and last (of any number of) flight commanders finish with the word “Flight”. The numbers are parade numbers in succession from No 1. Flights retain these numbers throughout the parade. 23. The adjutant is then to give the commands:
“NUMBERS 1 AND 3 FLIGHTS STAND AT EASE NUMBER 2 FLIGHT STAND AT EASE”.
The adjutant then turns about, and Stands At Ease to await the approach of the squadron commander. 24. When the squadron commander approaches, the adjutant is to come to Attention and give the command:
“SQUADRON SHUN”. 25. The squadron commander is to approach from the front of the squadron and halt 3 paces in front of the adjutant who is to salute and report that the squadron is ready for inspection. The following points are to be noted:

2-5-5
a. The report is made with arms at the Shoulder.
b. The report should be concise and not detailed, eg: “Squadron present (or otherwise) and ready for inspection, Sir/Ma’am”. The word: “Sir/Ma’am” indicates the end of the report.
c. If swords are drawn, the squadron commander is to Draw Swords as the adjutant is marching away to parade position after having made the report.
THE INSPECTION 26. When the adjutant has fallen in, the squadron commander may indicate a wish to inspect the squadron by giving the command:
“NUMBER 1 FLIGHT STAND FAST, REMAINDER STAND AT EASE STAND EASY”
whereupon the flight commander of No 1 Flight turns to the right and marches to meet the squadron commander on the right of flight. There, the flight commander faces the squadron commander, salutes, and briefly reports the flight ready for inspection. The squadron adjutant and warrant officer fall out and join the inspection party; they do not salute as they join the inspection party. The NCO IC flight does not accompany the squadron commander’s inspection party. 27. The squadron commander proceeds with the inspection accompanied by the flight commander (they walk side by side with the flight commander furthest from the rank being inspected), the squadron adjutant is immediately behind the squadron commander and the squadron warrant officer is behind the flight commander, (see insert diagram at Annex A). The inspection starts from the right of No 1 Flight. When the flight has been inspected the squadron commander will go to No 2 Flight. 28. As the squadron commander is leaving the first flight, No 2 Flight Commander is to give the command:
“NUMBER 2 FLIGHT SHUN”. The flight commander then turns to meet the squadron commander on the right of the flight. 29. In the meantime the flight commander of the first flight salutes the squadron commander upon departure. The flight commander then returns to parade position, stands the flight At Ease, and Stand Easy (if required), turns to the front and Stands At Ease/Easy. The procedure is carried out by each successive flight until the inspection is over. 30. The squadron commander, adjutant and warrant officer all return to their parade positions (by which time all flights have been stood At Ease/Easy.

2-5-6
ALTERNATIVE PARADE PROCEDURE 31. Because of limitations of parade area, it may sometimes by necessary for the squadron to fall in centrally on parade, rather than march on by flights. In this case the squadron warrant officer places the markers, orders the airmen on parade, checks the parade state, calls the squadron to Attention, reports to the squadron adjutant and hands over. When the squadron warrant officer calls the squadron to Attention prior to handing over to the adjutant , the supernumerary officers are to take this as the sign for their own preparation to fall in; they are to form up in line on the right flank facing their respective flights at about 20 paces from them, and stand At Ease. 32. The adjutant then gives the command:
“SQUADRON STAND AT EASE”. Parade procedures then continue as detailed from para 21. GENERAL MOVEMENTS OF SQUADRON DRILL 33. When arms are carried, the squadron is normally to be exercised in squadron drill without fixed bayonets. The squadron commander would therefore first bring the squadron to Attention and then order bayonets to be unfixed. If the squadron commander orders the unfixing of bayonets and officers are still on parade, the officers are to sheath their swords on the executive word of command: “BAYONETS”, wait, and then resume the position of Attention with the airmen on the command. 34. In exercising squadron drill, the squadron commander is to be positioned to best advantage to control sub-units. 35. During squadron drill manoeuvres where flights are required to take up new alignments etc, the squadron warrant officer may supervise the movement of markers and guides and hence the dressing of flights being guided by them. TURNING ABOUT OR RETIRING 36. The entire squadron is to turn about to take up a new direction on the command:
“SQUADRON ABOUT TURN”.
All appointments are to turn with the squadron and then after a pause: a. Executives in front of flights are to turn to their right. b. Supernumeraries who have been positioned to the rear of flights are to turn to
their left. All then march round the flights and gain their new positions where they are to halt individually, pause and turn to face the front. The turns and stepping off are carried out in

2-5-7
unison; the halt and turning to face front are carried out individually. Attempts to co-ordinate the latter movements lead to artificial posturing and signalling. MOVEMENT OF A SQUADRON IN COLUMN OF FLIGHTS 37. When a squadron is required to move back a short distance as one entity before resuming the original front, the executives and supernumeraries, after turning about, do not move to gain new positions but remain in their positions relative to each flight. In this case the order given is:
“SQUADRON WILL RETIRE, ABOUT TURN”. When the squadron is required to resume the original front the order is given:
“SQUADRON WILL ADVANCE, ABOUT TURN”. 38. Other commands and movements for a squadron in Column of Flights are: a. Advancing:
“SQUADRON, BY THE LEFT/RIGHT, QUICK MARCH”. b. Moving to a Flank with Flights in Threes. Executives and supernumeraries
keep their relative positions. To move the whole squadron as one entity the following commands are given:
“SQUADRON MOVE TO THE LEFT/RIGHT, LEFT/RIGHT TURN
BY THE LEFT/RIGHT, QUICK MARCH”. The following orders may also be given:
“FLIGHTS INTO LINE, LEFT/RIGHT TURN SQUADRON HALT”
c. Forming Column of Three (Moving to a Flank):
“SQUADRON, MOVE TO THE LEFT/RIGHT IN COLUMN OF THREES, LEFT/RIGHT TURN”
whereupon all personnel turn as ordered and then the leading flight commander is to give the command:
“NUMBER X FLIGHT, BY THE LEFT/RIGHT, QUICK MARCH”.

2-5-8
The commander of each successive flight is to give the command:
“NUMBER X FLIGHT, LEFT/RIGHT WHEEL BY THE LEFT/RIGHT, QUICK MARCH”.
This order has to be given in sufficient time to gain the flight’s position in Column of
Threes. The flight is to wheel into line with the rear of the preceding flight. A squadron in Column of Flights is normally to move to the right in Column of Threes from the right of the leading flight and is to move to the left from the left of the rear flight. A squadron may however be moved to a flank in Column of Threes in any order of flights specified by the squadron commander.
d. Forming Column of Route (Moving to a Flank).
“SQUADRON MOVE TO THE LEFT/RIGHT IN COLUMN OF ROUTE
LEFT/RIGHT TURN”. After the turn, executives and supernumeraries themselves turn again and take up
position as for Column of Route (see Annex C). When these persons are steady in position, the flight commander of the leading flight gives the command:
“NUMBER X FLIGHT, BY THE LEFT/RIGHT, QUICK MARCH”
followed by each successive flight in turn. When the flight commander leads the flight it is not necessary to order a Wheel.
e. Forming Line from Column of Flights (Facing the Same Direction). To move a squadron from Column of Flights to Line of Flights the following
commands are given:
“SQUADRON, ON THE LEFT, FORM LINE NUMBER 1 FLIGHT STAND FAST
REMAINDER MOVE TO THE LEFT LEFT TURN” whereupon the leading flight is to stand fast and the remaining flights are to turn as
ordered:
“BY THE LEFT, QUICK MARCH”. Each flight is to be led by the left marker and guide by the shortest way to the position
where it will be on the same alignment as the stationary flight. When each flight has reached its position in line, the flight commander is to give the command:
“NUMBER X FLIGHT HALT INTO LINE RIGHT TURN”.
2-5-9
MOVEMENT OF A SQUADRON IN COLUMN OF ROUTE OR THREES 39. Commands and movements for a squadron in Column of Route or Threes are as follows: a. Halting in Column of Flights. To halt a squadron marching in Column of
Route (or Threes), in Column of Flights, facing a certain direction, the squadron commander gives the order:
“SQUADRON AT THE HALT
FACING LEFT/RIGHT FORM (CLOSE) COLUMN OF FLIGHTS”
whereupon the leading flight commander directs the marker and guide to lead on to
the position of halting; at an appropriate moment, the flight commander turns off sharply to the left to take up parade position in front of the direction to be faced, halts, turns to face the flight and as they come up to the position for halting, gives the commands:
“NUMBER X FLIGHT HALT
INTO LINE LEFT/RIGHT TURN”. The flight commander then turns about to face the front. Each successive flight
commander takes the same action as the flight is guided into position for halting. If the squadron adjutant or warrant officer are marching in the column, they are to continue marching with the movements of the leading flight, halting and turning into line as usual on the flight commander’s words of command, before taking up their parade positions.
b. Halting in Line of Flights. To halt a squadron marching in Column of Route (or Threes), in Line of Flights, facing a certain direction, the squadron commander gives the order:
“SQUADRON AT THE HALT
FACING LEFT/RIGHT FORM LINE OF FLIGHTS” whereupon the flight commanders turn left/right at an appropriate moment to take up
their command position in front of the direction to be faced, halt, and turn to face their flights. As their flights successively come up to the position for halting, they give commands as follows:
“NUMBER X FLIGHT HALT
INTO LINE LEFT/RIGHT TURN”. If the squadron adjutant or warrant officer are marching in the column, they are to
continue marching with the movements of the leading flight, halting and turning into line as usual on the flight commander’s words of command, before taking up their parade positions.

2-5-10
c. Advancing in Column of Flights. When a squadron, marching in Column of Threes, is required to Advance in Column of Flights, the squadron commander is to give the command:
“SQUADRON FACING LEFT/RIGHT ADVANCE IN COLUMN” whereupon the leading flight commander is to give the command:
“NUMBER X FLIGHT INTO LINE LEFT/RIGHT TURN” (see Part 1 Chp 3 Lessons 3/4). When the turn has been completed the new flank of direction is to be indicated by the flight commander giving the following instruction:
“NUMBER X FLIGHT BY THE LEFT/RIGHT”. Each of the following flights, on arrival at the alignment on which the leading flight has turned, is to act in the same way.
MOVEMENT OF A SQUADRON IN LINE OF FLIGHTS 40. To move a squadron from Line of Flights to Column of Flights, the following commands are given:
“SQUADRON ON THE RIGHT FORM (CLOSE) COLUMN OF FLIGHTS NUMBER 1 FLIGHT STAND FAST
REMAINDER RIGHT TURN” whereupon No 1 Flight stands fast while all other flights are to turn as ordered. Executives and supernumeraries retain their relative positions.
“BY THE LEFT QUICK MARCH”. Each of the remaining flights is to be led by its right marker and guide, by the shortest way, to its position in Column of Flights. The flight commanders then give the command:
“NUMBER X FLIGHT HALT INTO LINE LEFT TURN”.
DISMISSING A SQUADRON 41. The squadron commander may dismiss the squadron or call for the squadron adjutant and instruct that the adjutant dismiss the squadron. 42. The squadron may be dismissed centrally or by flights.
2-5-11
43. Officers Fall Out. When a squadron is to be dismissed centrally, the squadron commander is to give the orders:
“SQUADRON SHUN FALL OUT THE OFFICERS”.
All officers are to fall out (see Part 1 Chp 6 Lesson 1). NCOs IC flights are to turn to their left and march to the positions vacated by their flight commanders. The squadron commander then Returns Swords and calls for, and hands over to, the squadron warrant officer before leaving the parade area accompanied by the officers. 44. Warrant Officer’s Action. The warrant officer orders the squadron to unfix bayonets before marching off to the place of dismissal. 45. Dismissal by Flights. When flights are required to dismiss independently the squadron commander is to give the command:
“SQUADRON SHUN FLIGHTS ARE TO MARCH OFF AND DISMISS”
whereupon: a. All flight commanders are to salute in acknowledgement and carry on as
detailed. b. At the same time the squadron adjutant is to turn left and the warrant officer is
to incline to the right, both salute then march off the parade ground. The adjutant Returns Swords once off the parade ground.
c. After acknowledging the salutes the squadron commander Returns Swords and
leaves the parade ground. Annexes: A. Squadron in Column of Flights. B. Squadron in Line. C. Squadron in Column of Route (or Threes).

2-5-A-1
AP818 PART 2 CHAPTER 5 ANNEX A
SQUADRON IN COLUMN OF FLIGHTS
PARADEFRONT
6 paces
(Not to scale)
LEGEND
Squadron Commander
Squadron Adjutant
Squadron Warrant Officer
Note: It is not normal to havesupernumerary warrant officers ona parade; but if this is requiredsuch warrant officers are to standin the supernumeracy NCOs’ line.
Sqn Cdr’sInspection
Party
FRONT RANK
No 1 Flt
No 2 Flt
No 3 Flt etc
3
2
1
14(CloseColumnorFrontage(Column))
LEGEND
Squadron Commander
Squadron Adjutant
Squadron Warrant Officer
Appendix 1. Squadron in Column of Flights - Positions of Executives and Supernumeraries.
LEGEND
Flight Commander
Supernumerary Officer
NCO IC Flight
Supernumerary NCO
Marker
Guide

2-5-A-1-1
AP818 PART 2 CHAPTER 5 ANNEX A APPENDIX 1
SQUADRON IN COLUMN OF FLIGHTS - POSITIONS OF
EXECUTIVES AND SUPERNUMERARIES
Appointment (a)
Position (b)
1. Squadron Commander 6 paces in front of the centre of the leading flight.
2. Squadron Adjutant 3 paces in front of the right file of the leading flight in line with the flight commander.
3. Squadron Warrant Officer 2 paces to the rear of the right file of the leading flight in line with the supernumerary NCOs.
4. Flight Commander 3 paces in front of the centre of the flight.
5. Supernumerary Officers Equally spaced, 3 paces to the rear of the rear rank.
6. NCO IC of the Flight 2 paces to the rear of the centre of the rear rank.
7. Supernumerary NCOs Equally spaced, 2 paces to the rear of the rear rank (starting from the right).
8. Markers One on each flank of the front rank.
9. Guides One on each flank of the rear rank.
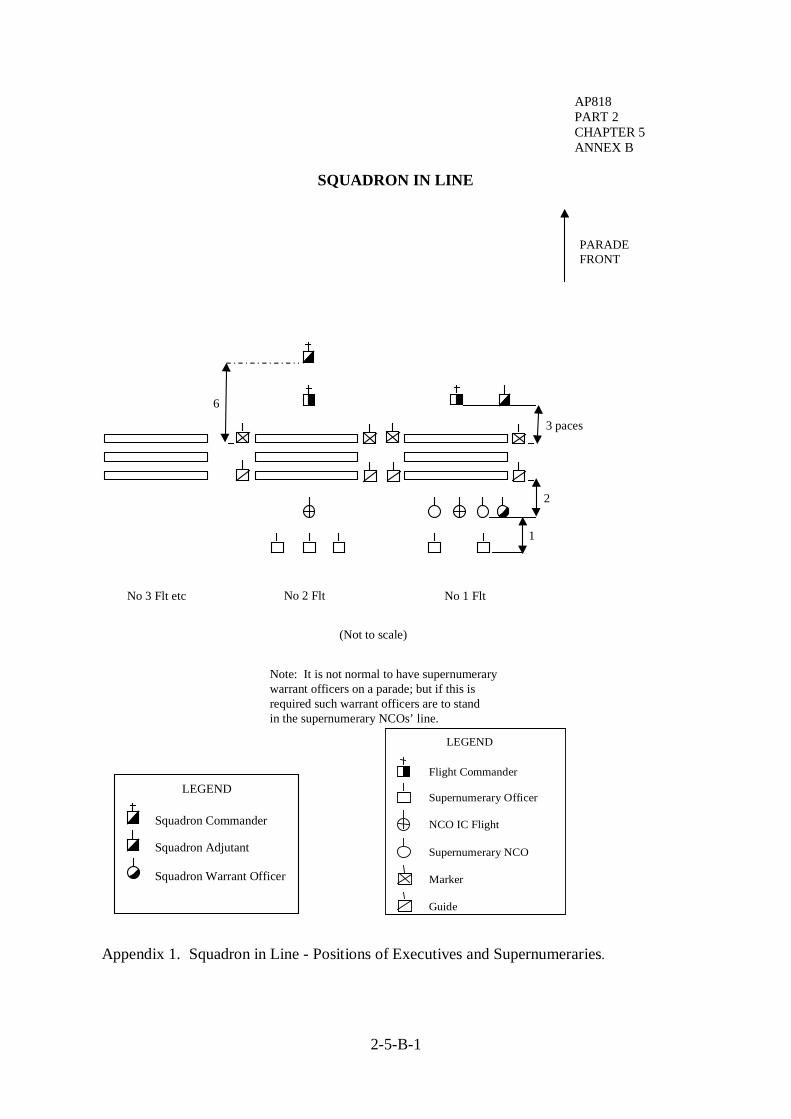
2-5-B-1
AP818 PART 2 CHAPTER 5 ANNEX B
SQUADRON IN LINE
PARADEFRONT
Note: It is not normal to have supernumerarywarrant officers on a parade; but if this isrequired such warrant officers are to standin the supernumerary NCOs’ line.
LEGEND
Squadron Commander
Squadron Adjutant
Squadron Warrant Officer
(Not to scale)
No 3 Flt etc No 2 Flt No 1 Flt
1
2
3 paces
6
Appendix 1. Squadron in Line - Positions of Executives and Supernumeraries.
LEGEND
Flight Commander
Supernumerary Officer
NCO IC Flight
Supernumerary NCO
Marker
Guide

2-5-B-1-1
AP818 PART 2 CHAPTER 5 ANNEX B APPENDIX 1
SQUADRON IN LINE - POSITIONS OF EXECUTIVES AND SUPERNUMERARIES
Appointment (a)
Position (b)
1. Squadron Commander 6 paces in front of the centre of the squadron.
2. Squadron Adjutant 3 paces in front of the right file of the flight on the right of the line, in line with the flight commanders.
3. Squadron Warrant Officer 2 paces to the rear of the right file of the flight on the right of the line, in line with the supernumerary NCOs.
4. Flight Commander 3 paces in front of the centre of the flight.
5. Supernumerary Officers Equally spaced, 3 paces to the rear of the rear rank.
6. NCO IC of the Flight 2 paces to the rear of the centre of the rear rank.
7. Supernumerary NCOs Equally spaced, 2 paces to the rear of the rear rank (starting from the right).
8. Markers One on each flank of the front rank.
9. Guides One on each flank of the rear rank.
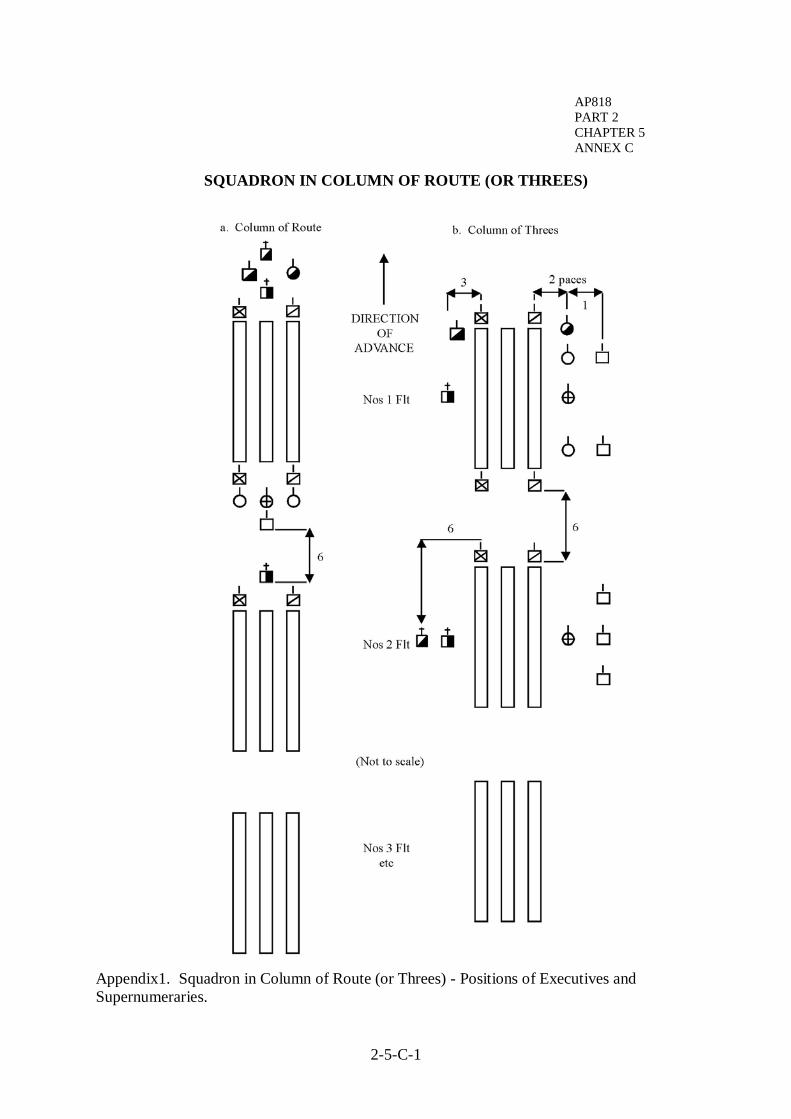
2-5-C-1
AP818 PART 2 CHAPTER 5 ANNEX C
SQUADRON IN COLUMN OF ROUTE (OR THREES)
Appendix1. Squadron in Column of Route (or Threes) - Positions of Executives and Supernumeraries.

2-5-C-1-1
AP818 PART 2 CHAPTER 5 ANNEX C APPENDIX 1
SQUADRON IN COLUMN OF ROUTE (OR THREES) - POSITIONS OF
EXECUTIVES AND SUPERNUMERARIES Column of Route Appointment
(a) Position
(b)
1. Squadron Commander 6 paces centrally in front of the leading guide and marker.
2. Squadron Adjutant 2 paces to the rear and one pace to the left of the squadron commander (directly in front of the marker).
3. Squadron Warrant Officer 2 paces to the rear and one pace to the right of the squadron commander (directly in front of the guide).
4. Flight Commander 3 paces in front of the centre of the flight.
5. Supernumerary Officers In lines of threes, one pace in the rear of the supernumerary NCOs.
6. NCO IC of the Flight and Supernumerary NCOs
In lines of threes, one pace in the rear of the flight, each line of three one pace in the rear of the one before.
7. Markers and Guides In their same relative positions as for Flight in Line.
Note: While it is not normal to have supernumerary warrant officers on a parade, if
this is required such warrant officers are to form the rear lines of supernumerary NCOs while in Column of Route.
Column of Threes Officers and NCOs are to be in the same relative positions as for Squadron in Line of Flights, but facing the required direction.
2-7-1
PART 2 – CHAPTER 7
PARADES - GENERAL INSTRUCTIONS GENERAL 1. The object of ceremonial drill is to enable a reviewing officer to judge the standard of drill and the steadiness of the units on parade. The standard of ceremonial drill indicates to a great degree the efficiency of a unit’s discipline. The ceremonial drill for the review of a flight, squadron, or wing, is dealt with in this section. 2. It is not easy to explain in words the sequence and detail of ceremonial drill. The text is therefore enhanced with the use of diagrams, which are contained in the annexes to the relevant chapters. The key to be used with all such diagrams is shown at Annex A. THE REVIEW PARADE GROUND 3. The parade ground on which the unit receives and marches past the reviewing officer is shown at Annex B. It is normally to be a rectangle of 160 x 30 inch paces in length and 80 x 30 inch paces in width, or such other size as is dictated by the parade formation and the space available. The four corners, numbered 1, 2, 3 and 4, are to be so positioned as to allow all drill movements to be carried out within the limits of the parade ground. 4. The area is to be marked out with continuous or interrupted lines. 5. The point termed the “saluting point” is to be marked in the centre of the side between Points 2 and 3 and set five paces back from the line joining these two points. Two points, A and B, are to be marked 10 x 30 inch paces to the left and right respectively of the saluting point in line with Points 2 and 3. The distance of 20 x 30 inch paces between A and B is termed the “saluting base”. 6. A point is to be marked on the side of the review parade ground opposite the saluting point and between Points 1 and 4 so as to mark the position of the centre of that line. The whole line between Points 1 and 4 is termed the “receiving base”. 7. Points A, B, 1, 2, 3 and 4, are to be marked by the unit commander’s flag on poles 8 ft (2.4 metres) high. The saluting point is to be marked by the Royal Air Force Ensign, 6 ft × 3 ft (1.8 metres by 91 cms) on a pole 12 ft (3.6 metres) high. THE CEREMONIAL OF REVIEW - GENERAL 8. The ceremonial of the review of a flight, squadron or wing consists of: a. The reception of the reviewing officer. b. The inspection by the reviewing officer. c. The march past the reviewing officer. d. The advance in review order.

2-7-2
9. The following drill formations are to be employed for: a. A Flight. When a flight is to be paraded independently, it is to be formed up
in Line and is to carry out the ceremonial in that formation. b. A Squadron. When a squadron is to be paraded independently it is to be
formed up on the receiving base in Line. The Squadron is to march past independently by flights, after which it is to march past in Close Column of Flights. The advance in review order is to be carried out in Line.
c. A Wing. When a wing is to be paraded, it is to be formed up on the receiving
base in Line of Squadrons in Close Column of Flights. The wing is to march past by flights then by squadrons in Close Column of Flights. The advance in review order is to be carried out in Line of Squadrons in Close Column of Flights.
10. Normally squadrons are to march past by flights at column distance, but so that two flights shall not be on the saluting base at the same time a minimum distance of 25 paces is to be maintained between flights when marching past. The distance between squadrons marching past independently is to be 60 paces. 11. When the space for the ceremonial is limited, the march past may exceptionally be carried out in Column of Route. 12. Units are to be in Open Order during the reception and inspection phases. Officers are to take post in Review Order for the reception and inspection phases and for the Advance in Review Order. 13. During the Advance in Review Order, the band is to play the “Advance in Review Order” and the units are to halt after 14 paces (14, 1, 2). This is about 30 paces from the reviewing officer. If necessary the distance may be reduced. 14. The flight, squadron or wing is to be drawn up on the receiving base in the drill formation ordered, with its centre opposite the saluting point. 15. The band is to be formed up in the rear of the centre of the flight, squadron, or wing, at 10 paces distance. 16. Supernumerary officers are to be armed with swords when on parade. Supernumerary NCOs on the other hand, are not armed. 17. The following movements are to be carried out when parading: a. A Flight. (1) Once the flight has received the reviewing officer and been inspected,
it is to wheel round Point 1, halt as its leading guide reaches Point 2, turn into line and march past. The band is to remain in its position and play a quick march while the flight is moving from the receiving base. As the flight turns into Line at Point 2, the drum-major or bandmaster is to signal the band to

2-7-3
move forward and halt with its front rank in line with Points 1 and 4, where it is to continue to play during the march past.
(2) The flight is to march past and halt when the right marker reaches
Point 3. The flight is to be turned about and marched past in Quick Time, and when its rear rank is abreast of Point 2 it is to be halted and turned about. The band is to play in Quick Time during the march past. From Point 2 the flight is to be wheeled round Point 1 and form up in its original position in Line on the receiving base with its centre opposite the saluting point. The band is to counter-march to its original position in rear of the receiving base. The flight is then to Advance in Review Order, the band advancing at the same time playing the “Advance in Review Order”.
b. A Squadron. (1) After the review and inspection a squadron is to wheel round Point 1 in
Column of Threes and advance in column facing left. Each flight is to be turned into Line at the Halt when its leading guide reaches Point 2, and is to march past independently.
(2) After marching past by flights in Column the squadron is to be halted
in its original formation with the right marker of its rear flight abreast of Point 3, after which it is to be turned about. It is then to march past in Quick Time as a squadron in Close Column of Flights, and is to be halted and turned about when its rear flight is abreast of Point 2. The band is to act as detailed for a flight parading independently.
(3) From Point 2 the squadron is to wheel round Point 1 in Column of
Threes, and form up in its original formation on the receiving base with its centre opposite the saluting point for the advance in review order. The band is to act as detailed for a flight parading independently.
(4) The squadron is to advance in review order, the band advancing at the
same time playing the “Advance in Review Order”. c. A Wing. A wing is to act in a similar manner, independently by squadrons.
The band is to act as detailed for a flight parading independently. 18. During the parade of a flight, squadron or wing, flights halt at Point 2 prior to the first March Past (by flights). Where parade personnel are of a sufficiently high standard of training, flights may turn into line on the march. Note that whilst this looks impressive, the dressing of the parade is likely to suffer. The wording of subsequent chapters reflects a Halt at Point 2. 19. When a flight, squadron, or wing, is to march past in Column of Route the band is to be 10 paces in front of the commander and is to change direction when ordered. 20. The term “Band” is used to include pipes, drums and trumpets.
2-7-4
21. The ceremonial of the review may be carried out by any unit or formation organized into flights or squadrons. 22. When an officer of superior rank to that of the formation or unit commander is on parade he is to be 10 paces in front of that commander. DRESSING 23. In ceremonial drill the dressing is to be carried out as laid down for flight, squadron and wing drill. Personnel are to take up their dressing rapidly and correctly. 24. The guides and markers are to be responsible for maintaining the correct direction, covering, and distance, when marching. They are not to turn their heads towards the reviewing officer when the “Eyes Right/Left” is given during the march past. COMPLIMENTS 25. When the reviewing officer is being received, and for the salute at the end of the Advance in Review Order, all officers are to salute with their sword. 26. When a wing marches past by Squadrons in Close Column of Flights, the wing commander and squadron commanders only are to salute. 27. In Column of Route, compliments are to be paid by flights; the wing commander, squadron commander, flight commanders, wing and squadron adjutants, and wing and squadron warrant officers, are to salute. Supernumerary officers are not to salute. 28. When a squadron marches past by flights, compliments are to be paid by flights; the squadron commander, flight commanders, and adjutant, are to salute. Supernumerary officers are not to salute. 29. When a squadron marches past in Close Column of Flights, the commanding officer only is to salute. 30. Non-commissioned officers acting as guides and markers are to carry rifles and bayonets, irrespective of their rank. Warrant officers and non-commissioned officers in command of flights are to salute when marching past. 31. The honours and salutes to be given by air forces on parade are laid down in QR(RAF)J152 and J158.

2-7-5
RULES FOR SPECTATORS AT CEREMONIAL PARADES 31. a. Marching On Colours or Standards.
Whenever a colour/standard is marched on and or/passes directly in front of spectators.
Spectators stand and salute or uncover.
b. Arrival of Reviewing Officer. Spectators stand. (1) Royal Salute. Spectators stand and salute or
uncover. (2) General Salute. Spectators stand and salute or
uncover.
c. Reviewing Officer returns from the Inspection.
Spectators remain seated.
d. Presentation of Colour/Standard.
When the new colour/standard is marched on parade.
Spectators stand and salute or uncover.
e. March Past. (1) With colour/standard. Spectators stand and salute or uncover
as colour/standard passes directly in front of them.
(2) Without colour/standard. Spectators remain seated. f. Advance in Review Order. (1) Royal Salute. Spectators stand and salute or
uncover. (2) General Salute. Spectators stand and salute or
uncover. g. Marching Off Colour/Standard.
Whenever a colour/standard is marched off and/or passed directly in front of spectators.
Spectators stand and salute or uncover.
Annexes: A. Key to Diagrams. B. The Review Parade Ground.

2-7-A-1
AP818 PART 2 CHAPTER 7 ANNEX A
KEY TO DIAGRAMS
NOTE
All measurements indicated in thediagrams are in paces.
.
Wing Commander
Wing Adjutant
Wing Warrant Officer
Squadron Commander
Squadron Adjutant
Squadron Warrant Officer
Flight (or Guard of Honour) Commander
1st Junior Officer (Guard of Honour)
2nd Junior or Supernumerary Officer
Supernumerary NCO
Guide
Marker
Aircraftmen
Flight Sergeant
Colour BearerStandard BearerColour/Standard Party Warrant OfficerColour/Standard Escort
Colour Party
Trumpeter

2-7-B-1
AP818 PART 2 CHAPTER 7 ANNEX B
THE REVIEW PARADE GROUND
REVIEWINGAREA
RECEIVING BASE
POINT 1POINT 4
POINT 3POINT 2
160
SALUTING BASE
80
5
1010 AB
70 70
SALUTING POINT

2-8-1
PART 2 – CHAPTER 8
REVIEW OF A FLIGHT FORMING-UP FOR CEREMONIAL 1. The flight is to be paraded, sized, proved and inspected by the NCO IC the flight before being handed over to the flight commander. The latter is to order the officers to fall in (drawing their swords if appropriate). 2. When the flight commander has inspected the flight, the order to fix bayonets should be given. After this the flight is marched at the Slope Arms to its position on the receiving base, where it is to be drawn up in line facing the saluting point. THE CEREMONIAL OF THE REVIEW 3. The flight commander is to give the commands:
“FLIGHT SHOULDER ARMS OPEN ORDER MARCH
RIGHT DRESS EYES FRONT
OFFICERS TAKE POST IN REVIEW ORDER, LEFT TURN QUICK MARCH”.
The supernumerary officers are to turn to their left, move round the flank of the flight, and take post at equal intervals along its frontage, two paces in front of the front rank. The flight commander is to take post in a central position two paces in front of the supernumerary officers. When all officers have arrived at these positions the flight commander is to give the command:
“OFFICERS LEFT TURN”. 4. The flight is now ready to receive the reviewing officer. The flight commander is to give the commands:
“FLIGHT STAND AT EASE STAND EASY”.
When the reviewing officer has reached a point about 50 yards away from the parade:
“FLIGHT FLIGHT SHUN SLOPE ARMS
and when the reviewing officer has taken up his position in front of the saluting point:
“GENERAL SALUTE PRESENT ARMS”.
2-8-2
Note: If the flight is being reviewed by a royal personage or head of state, the
command is to be:
“ROYAL SALUTE, PRESENT ARMS”. 5. After the band has played the appropriate salute, the flight commander is to give the commands:
“SLOPE ARMS SHOULDER ARMS”.
The flight commander is then to report to the reviewing officer. The reviewing officer is to inspect the flight, accompanied by the flight commander. After inspecting the flight the reviewing officer may wish to inspect the band. At the end of the inspection the reviewing officer is to give orders to the flight commander to carry out the march past. 6. The flight commander is to give the commands:
“OFFICERS TAKE POST, LEFT TURN, QUICK MARCH”
whereupon supernumerary officers are to move round the flank of the flight, resuming their original positions. The flight commander then gives the commands:
“OFFICERS INWARDS TURN CLOSE ORDER MARCH
RIGHT DRESS EYES FRONT
FLIGHT SLOPE ARMS FLIGHT WILL MARCH PAST
MOVE TO THE RIGHT IN COLUMN OF THREES RIGHT TURN BY THE LEFT QUICK MARCH”.
When the right guide reaches Point 1:
“LEFT WHEEL”. As the guide reaches Point 2:
“FLIGHT HALT INTO LINE LEFT TURN
SHOULDER ARMS RIGHT DRESS EYES FRONT
SLOPE ARMS”.
The flight commander is to turn about:
“FLIGHT WILL MARCH PAST BY THE LEFT QUICK MARCH”.

2-8-3
When the flight commander reaches Point A:
“FLIGHT EYES RIGHT”. When the supernumerary rank of officers is abreast of Point B:
“FLIGHT EYES FRONT”. 7. When the marker reaches Point 3, the flight commander is to give the commands:
“FLIGHT HALT ABOUT TURN
SHOULDER ARMS LEFT DRESS EYES FRONT SLOPE ARMS
FLIGHT WILL MARCH PAST BY THE LEFT QUICK MARCH”.
When he arrives abreast of Point B:
“FLIGHT EYES LEFT”. When the supernumerary rank of officers is abreast of Point A:
“EYES FRONT”. When the rear is abreast of Point 2:
“FLIGHT HALT ABOUT TURN
MOVE TO THE LEFT IN COLUMNS OF THREES, LEFT TURN BY THE RIGHT QUICK MARCH”
and when the leading guide arrives at Point 1:
“RIGHT WHEEL”. 8. When the flight reaches its original position on the receiving base, the flight commander is to give the commands:
“FLIGHT HALT INTO LINE RIGHT TURN
SHOULDER ARMS RIGHT DRESS EYES FRONT
OFFICERS TAKE POST IN REVIEW ORDER, LEFT TURN QUICK MARCH
OFFICERS LEFT TURN SLOPE ARMS

2-8-4
FLIGHT ADVANCE IN REVIEW ORDER BY THE CENTRE QUICK MARCH”.
The flight is to halt after 14 paces (14, 1, 2):
“FLIGHT GENERAL (ROYAL) SALUTE, PRESENT ARMS” whereupon the band is to play the appropriate salute. 9. The flight commander is then to give the commands:
“SLOPE ARMS SHOULDER ARMS”
and report to the reviewing officer for orders regarding the parade. He is then to give the commands:
“OFFICERS TAKE POST, LEFT TURN QUICK MARCH
OFFICERS INWARDS TURN”. When the reviewing officer has left the parade ground, the flight is to be marched off and dismissed.
2-9-1
PART 2 – CHAPTER 9
REVIEW OF A SQUADRON FORMING-UP FOR CEREMONIAL 1. The squadron is to be paraded and inspected as for squadron drill. Flights are to be previously sized and proved. After the squadron commander has inspected the squadron, the order to fix bayonets is given. 2. Formation. The squadron is then to be marched to its position on its marker on the receiving base, where it is to be drawn up in Line of Flights facing the saluting point. The squadron may also be drawn up in Close Column of Flights should the shape of the parade ground dictate it. 3. Squadron Standard. If the squadron possesses a standard, it is marched on in accordance with instructions detailed in Part 2 Chp 12. The standard is to be positioned according to the number of flights on parade. When there are an even number of flights on parade the Standard Party would be central and between the flights, with the standard in line with the flight commanders. When there are an odd number of flights then the Standard Party would be in front of the centre flight with the standard 6 paces in front of the front rank. The squadron commander should be 12 paces in front of the left flank of No 1 Flight in either case. THE CEREMONIAL OF THE REVIEW 4. The squadron commander is to give the commands:
“SQUADRON SQUADRON SHUN OPEN ORDER MARCH
RIGHT DRESS EYES FRONT
OFFICERS TAKE POST IN REVIEW ORDER, OUTWARDS TURN QUICK MARCH”.
The squadron adjutant is to turn to the right, and move three paces forward. The flight commanders are to turn to the right and take post in front of the leading markers of their flights. Supernumerary officers are to turn to the left, move around the flank, and take up positions at equal intervals along the frontage of their flights, in line with the flight commander. When all officers have arrived at these positions, the squadron commander is to give the command:
“OFFICERS LEFT TURN”. 5. At this point, if a standard is carried, the squadron commander is to give the commands:
“SQUADRON SLOPE ARMS MARCH ON THE SQUADRON STANDARD, PRESENT ARMS”.

2-9-2
6. The squadron commander is to give the commands:
“SQUADRON SLOPE ARMS SQUADRON SHOULDER ARMS SQUADRON STAND AT EASE”.
The squadron is now ready to receive the reviewing officer. When the reviewing officer has reached a point about 50 yards away from the parade:
“SQUADRON SQUADRON SHUN
SLOPE ARMS” and when the reviewing officer has taken up his position in front of the saluting point:
“GENERAL SALUTE PRESENT ARMS”. Note: If the reviewing officer is a royal personage or a head of state, the command is to be:
“ROYAL SALUTE PRESENT ARMS”. 7. The timing of any flypast should follow the salute. After the band has played the appropriate salute, the squadron commander is to give the commands:
“SQUADRON SLOPE ARMS SQUADRON SHOULDER ARMS”.
The squadron commander is then to report to the reviewing officer and state:
“NUMBER X SQUADRON READY FOR YOUR INSPECTION SIR/MA’AM”. The reviewing officer is to inspect the squadron by flights. Each flight commander is to meet the reviewing officer as he arrives at the right flank and, after saluting, is to accompany him along the ranks during the inspection of the flight. When the flight has been inspected the flight commander is to salute and fall in. At the end of the inspection the squadron commander is to request:
“PERMISSION TO CARRY ON WITH THE CEREMONIAL SIR/MA’AM?” The squadron commander is to move to a position central to and 6 paces in front of the sqn.
Notes: 1. If a squadron standard is on parade, it is to be at the Carry during the inspection,
and brought down to the Order on completion of the inspection. 2. When the reviewing officer has inspected the squadron, he may wish to inspect the band before the march past is carried out.

2-9-3
3. Prior to the March Past and Advance in Review Order the parade may encompass additional ceremonial; such as the Presentation of a Standard/Colour or the Hand Over of a colour or standard (including disbandment ceremonial). See appropriate chapters.
8. The squadron commander is to give the commands:
“SQUADRON SHUN OFFICERS TAKE POST
LEFT TURN QUICK MARCH” whereupon the adjutant, flight commanders and supernumerary officers are to turn to their left and resume their original positions. When all officers have arrived at their positions the squadron commander is to give the command:
“OFFICERS INWARDS TURN”. When the movement is completed the squadron commander is to give the commands:
“SQUADRON CLOSE ORDER MARCH INWARDS DRESS
EYES FRONT SQUADRON SLOPE ARMS
FORM CLOSE COLUMN OF FLIGHTS AT POINT 2 MOVE TO THE RIGHT IN COLUMN OF THREES
RIGHT TURN”. The Standard Party, under the orders of the bearer, is to be positioned between No 1 and No 2 Flights.
“SQUADRON BY THE LEFT QUICK MARCH”. 9. After wheeling around Point 1 and as the leading flight reaches Point 2, the squadron commander is to give the command:
“SQUADRON AT THE HALT FACING LEFT FORM CLOSE COLUMN OF FLIGHTS”
whereupon each flight commander, as the leading guide reaches Point 2, is to give the commands:
“NUMBER X FLIGHT HALT” The squadron commander is to give the commands:
“SQUADRON INTO LINE LEFT TURN”.
2-9-4
The Standard Party, under the orders of the bearer, is to take post.
“SQUADRON SHOULDER ARMS RIGHT DRESS EYES FRONT
SLOPE ARMS” The squadron commander is to turn about.
“SQUADRON MARCH PAST BY FLIGHTS IN COLUMN AT 25 PACES DISTANCE NO 1 FLIGHT LEADING”.
The squadron commander is to lead the squadron. Each flight commander is to give the words of command:
“NO X FLIGHT BY THE RIGHT QUICK MARCH”.
Each flight commander once abreast of Point A is to give the command:
“NUMBER X FLIGHT EYES RIGHT”.
Note: No 1 Flight commander is to give his orders in time so as to include the squadron commander and squadron adjutant.
When the supernumerary rank of officers is abreast of Point B, the flight commander is to give the command:
“NUMBER X FLIGHT EYES FRONT”.
Note: The squadron commander and squadron adjutant complete the salute on their own on reaching Point B.
As No 1 Flight approaches Point 3, the squadron commander is to give the command:
“AT THE HALT FORM CLOSE COLUMN OF FLIGHTS”. When the right marker arrives at a position 28 paces beyond Point 3, the flight commander is to give the command:
“NUMBER 1 FLIGHT HALT”. The remaining flights are to be halted to form Close Column of Flights on the leading flight at Point 3. 10. When all flights have reached their positions in Close Column of Flights, the squadron commander is to give the command:

2-9-5
“SQUADRON ABOUT TURN”. The adjutant, flight commanders and supernumeraries, after turning about, are to move to their new positions in Quick Time. The Standard Party, under the orders of the standard bearer, is to be marched to its position between No 2 and No 3 flights (if 3 flights are on parade). The squadron commander, taking post in the front of the squadron, is to give the commands:
“SQUADRON SHOULDER ARMS
LEFT DRESS EYES FRONT SLOPE ARMS
SQUADRON MARCH PAST IN CLOSE COLUMN OF FLIGHTS NO X FLIGHT LEADING
BY THE LEFT QUICK MARCH”.
When he arrives at Point B:
“SQUADRON EYES LEFT”. When the supernumerary rank of the rear flight reaches Point A:
“EYES FRONT” and when the rear rank of the flight is abreast of Point 2:
“SQUADRON HALT ABOUT TURN”.
The adjutant, flight commanders, supernumeraries (and Standard Party), after turning about, are to move to their new positions in Quick Time. 11. The squadron commander, on taking post in front of the squadron, is to give the commands:
“SQUADRON FORM LINE OF FLIGHTS ON THE RECEIVING BASE NUMBER 3 FLIGHT LEADING
MOVE TO THE LEFT IN COLUMN OF THREES LEFT TURN” whereupon the flights are to act as in squadron drill. The Standard Party is to take post. If the squadron is to be formed up in Line of Flights then No 3 Flight leads, if in Column of Flights then No 1 Flight leads. The squadron wheels around Point 1. As the leading flight approaches its original position on the receiving base, the squadron commander is to move to his position 12 paces in front of the left flank of No 1 Flight. The flights are to act as in squadron drill, halting and turning into line on the command of the flight commanders. The standard party resumes it original position.

2-9-6
12. When the squadron is in position, the squadron commander is to give the commands:
“SQUADRON SHOULDER ARMS, INWARDS DRESS, EYES FRONT OFFICERS TAKE POST IN REVIEW ORDER OUTWARDS TURN
QUICK MARCH”. The squadron adjutant is to turn to the right, and move three paces forward. Flight commanders are to turn to their right and take posts in front of the leading guides of their flights. Supernumerary officers are to turn to the left, move around the flank, and take up positions at equal intervals along the frontage of their flights, in line with the flight commander. The squadron commander is then to give the command:
“OFFICERS LEFT TURN”. 13. On completion of this movement, the squadron commander is to give the commands:
“SQUADRON SLOPE ARMS ADVANCE IN REVIEW ORDER BY THE CENTRE QUICK MARCH”
the squadron is to halt after 14 paces (14, 1, 2):
“SQUADRON GENERAL (ROYAL) SALUTE, PRESENT ARMS” and after the band has played the appropriate salute:
“SLOPE ARMS SHOULDER ARMS”.
The squadron commander is then to report to the reviewing officer. The reviewing officer may give a speech in which case the squadron would be stood At Ease. Upon completion the squadron would be brought to Attention and the reviewing officer may leave the parade ground or the ceremonial may include the squadron marching off parade. 14. If the squadron is to march off the squadron commander is to order:
“OFFICERS TAKE POST LEFT TURN QUICK MARCH INWARDS TURN
NUMBER X SQUADRON SLOPE ARMS MOVE TO THE RIGHT IN COLUMN OF ROUTE RIGHT TURN”.
Executives and supernumeraries turn themselves again and take up position:
“SQUADRON BY THE LEFT QUICK MARCH”.
2-9-7
The squadron then marches off via Points 1, 2, and 3 giving an Eyes Right between Points A and B. The standard is marched off parade in a suitable area. The squadron commander is in position 12 paces in front of the left flank of No1 Flight. Squadron Commander:
“SQUADRON AT THE HALT FACING LEFT/RIGHT FORM LINE OF FLIGHTS”
whereupon the flight commanders turn left/right at an appropriate moment to take up their command position in front of the direction to be faced, halt, and turn to face their flights. As their flights successively come up to the position for halting, they give commands as follows:
“NUMBER X FLIGHT HALT INTO LINE LEFT/RIGHT TURN”.
If the squadron adjutant or warrant officer are marching in the column, they are to continue marching with the movements of the leading flight, halting and turning into line as usual on the flight commander’s words of command, before taking up their parade positions. Squadron Commander:
“SHOULDER ARMS INWARDS DRESS
EYES FRONT OFFICERS TAKE POST IN REVIEW ORDER OUTWARDS TURN
QUICK MARCH LEFT TURN
SQUADRON SLOPE ARMS MARCH OFF THE SQUADRON STANDARD PRESENT ARMS”.
The Standard Party march off under the command of the standard bearer. The band plays Point of War and the Royal Air Force March.
Squadron Commander (when the standard is out of sight of the squadron):
“SQUADRON SLOPE ARMS SHOULDER ARMS
OFFICERS TAKE POST LEFT TURN QUICK MARCH INWARDS TURN
FALL OUT THE OFFICERS”. After the officers have fallen out:
“SQUADRON WARRANT OFFICER”.
2-9-8
The squadron commander then hands the squadron over to the squadron warrant officer, who is to unfix bayonets and dismiss the squadron. 15. If the reviewing officer leaves the parade ground, the squadron commander is to order the standard to be marched off (see above and Part 2 Chp 12). When the Standard Party has marched off, the squadron commander is to give the commands:
“OFFICERS TAKE POST LEFT TURN QUICK MARCH”.
The adjutant, flight commander and supernumerary officers are to turn to the left and resume their original positions. The squadron commander is then to give the command:
“OFFICERS INWARDS TURN OFFICERS FALL OUT (RETURN SWORDS)”.
The squadron is then to be marched to its parade ground for dismissal.