rainbow raindrops baby quilt
TRANSCRIPT
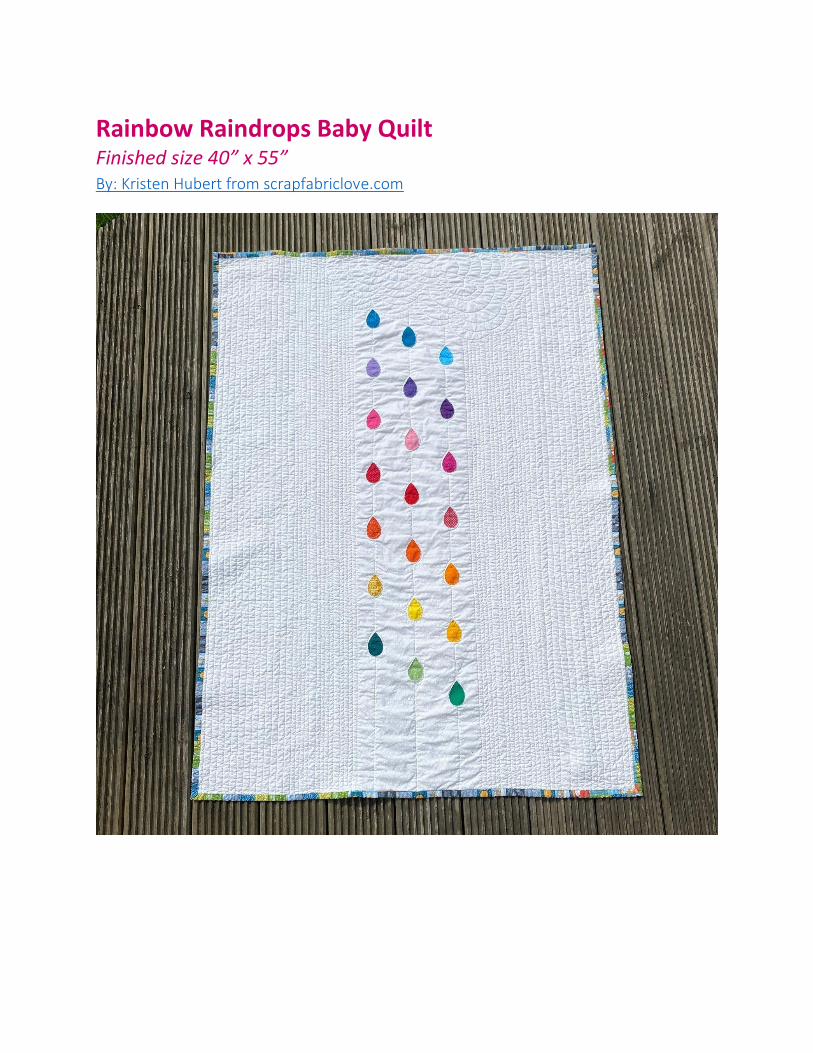
Rainbow Raindrops Baby Quilt Finished size 40” x 55” By: Kristen Hubert from scrapfabriclove.com
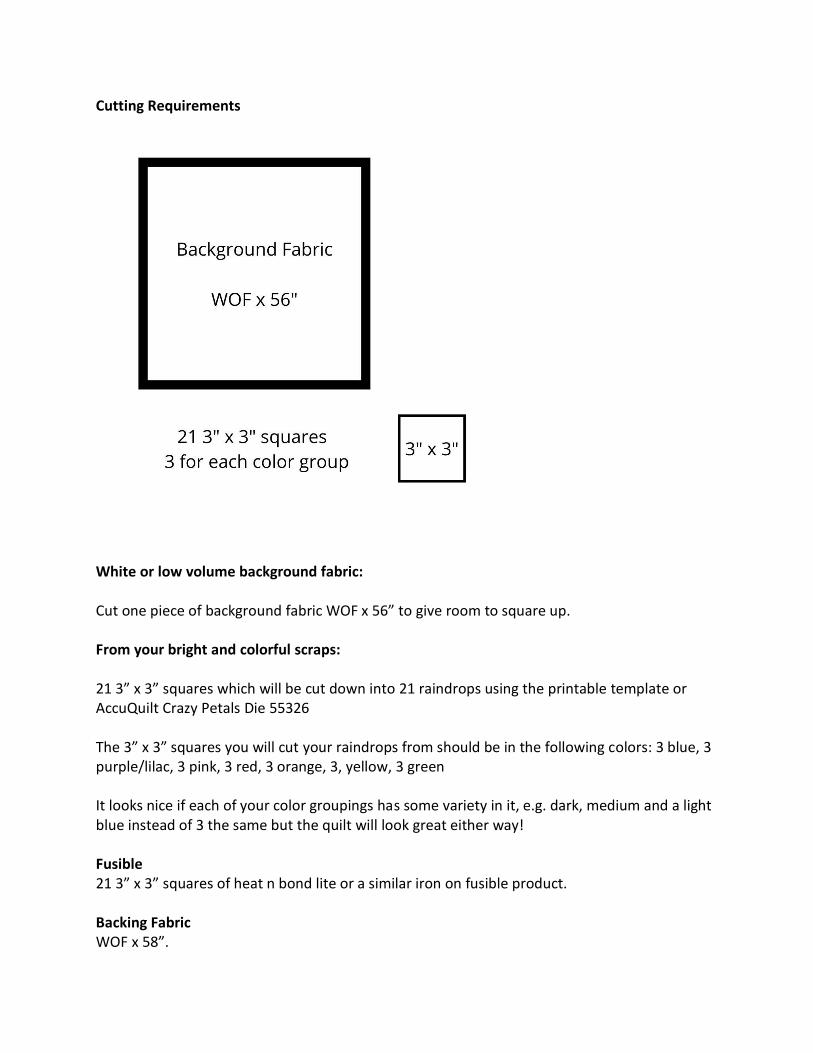
Cutting Requirements
White or low volume background fabric: Cut one piece of background fabric WOF x 56” to give room to square up. From your bright and colorful scraps: 21 3” x 3” squares which will be cut down into 21 raindrops using the printable template or AccuQuilt Crazy Petals Die 55326 The 3” x 3” squares you will cut your raindrops from should be in the following colors: 3 blue, 3 purple/lilac, 3 pink, 3 red, 3 orange, 3, yellow, 3 green It looks nice if each of your color groupings has some variety in it, e.g. dark, medium and a light blue instead of 3 the same but the quilt will look great either way! Fusible 21 3” x 3” squares of heat n bond lite or a similar iron on fusible product. Backing Fabric WOF x 58”.
Step 1: Cut one large piece of background fabric – this can be plain white, white on white print or another low volume print that won’t distract from your colourful rainbow raindrops which are meant to be the star of this quilt. You will trim down after quilting but I recommend initially cutting your background fabric to WOF (44”) x 56” Make a fold down the centre of your background fabric and either press to give you a crease line to follow or mark with a friction pen all the way down the centre of your fabric running lengthwise. Step 2: Iron on whichever fusible product you are using to the back of your 3”X3” squares before cutting them into the raindrop shapes – especially if you are using the raw edge applique method that this pattern was designed with.
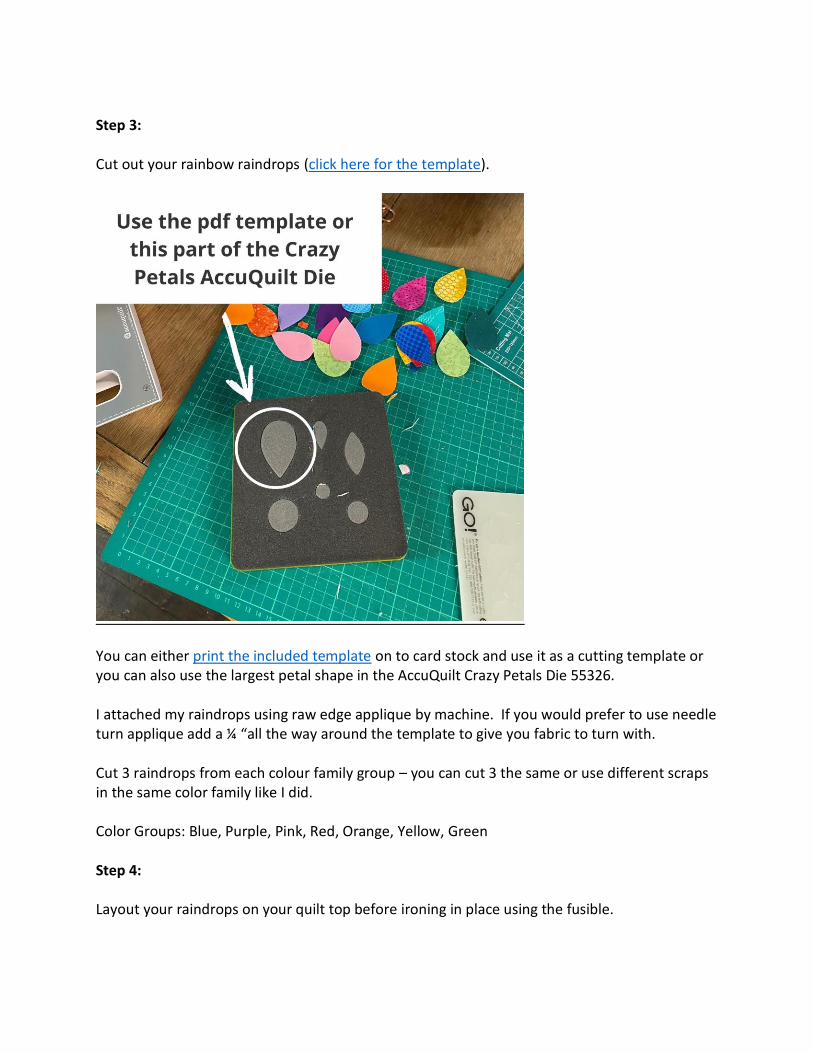
Step 3: Cut out your rainbow raindrops (click here for the template).
You can either print the included template on to card stock and use it as a cutting template or you can also use the largest petal shape in the AccuQuilt Crazy Petals Die 55326. I attached my raindrops using raw edge applique by machine. If you would prefer to use needle turn applique add a ¼ “all the way around the template to give you fabric to turn with. Cut 3 raindrops from each colour family group – you can cut 3 the same or use different scraps in the same color family like I did. Color Groups: Blue, Purple, Pink, Red, Orange, Yellow, Green Step 4: Layout your raindrops on your quilt top before ironing in place using the fusible.
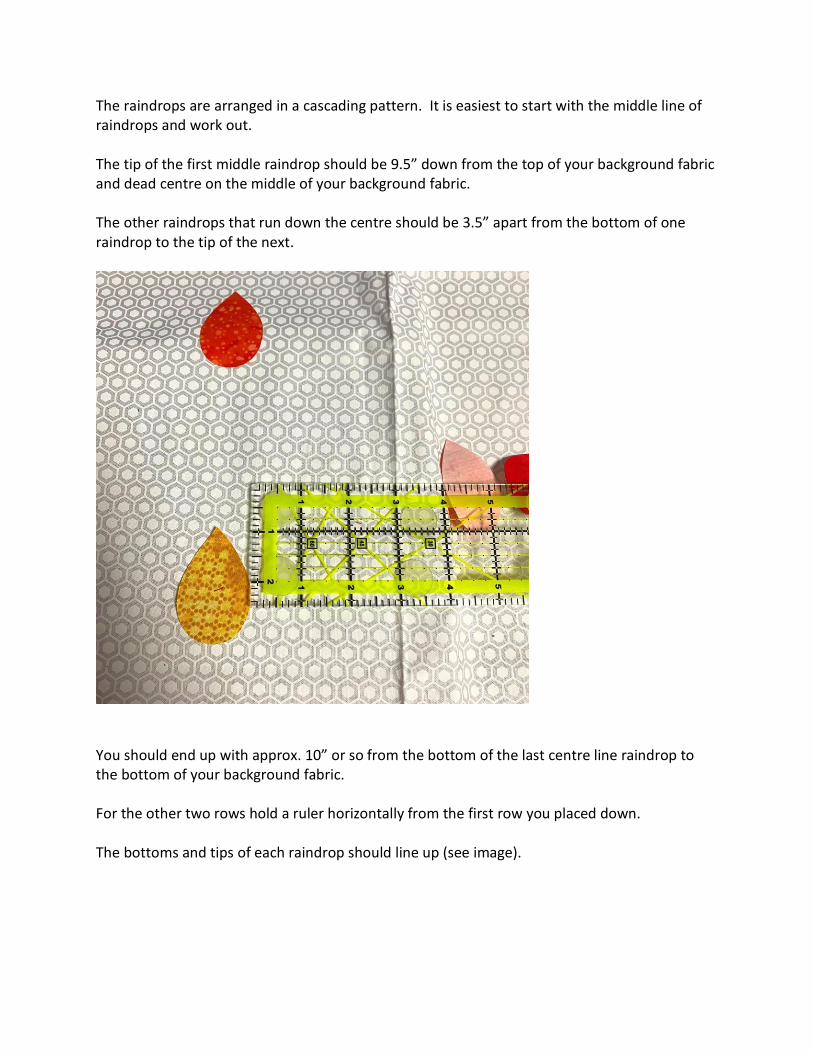
The raindrops are arranged in a cascading pattern. It is easiest to start with the middle line of raindrops and work out. The tip of the first middle raindrop should be 9.5” down from the top of your background fabric and dead centre on the middle of your background fabric. The other raindrops that run down the centre should be 3.5” apart from the bottom of one raindrop to the tip of the next.
You should end up with approx. 10” or so from the bottom of the last centre line raindrop to the bottom of your background fabric. For the other two rows hold a ruler horizontally from the first row you placed down. The bottoms and tips of each raindrop should line up (see image).
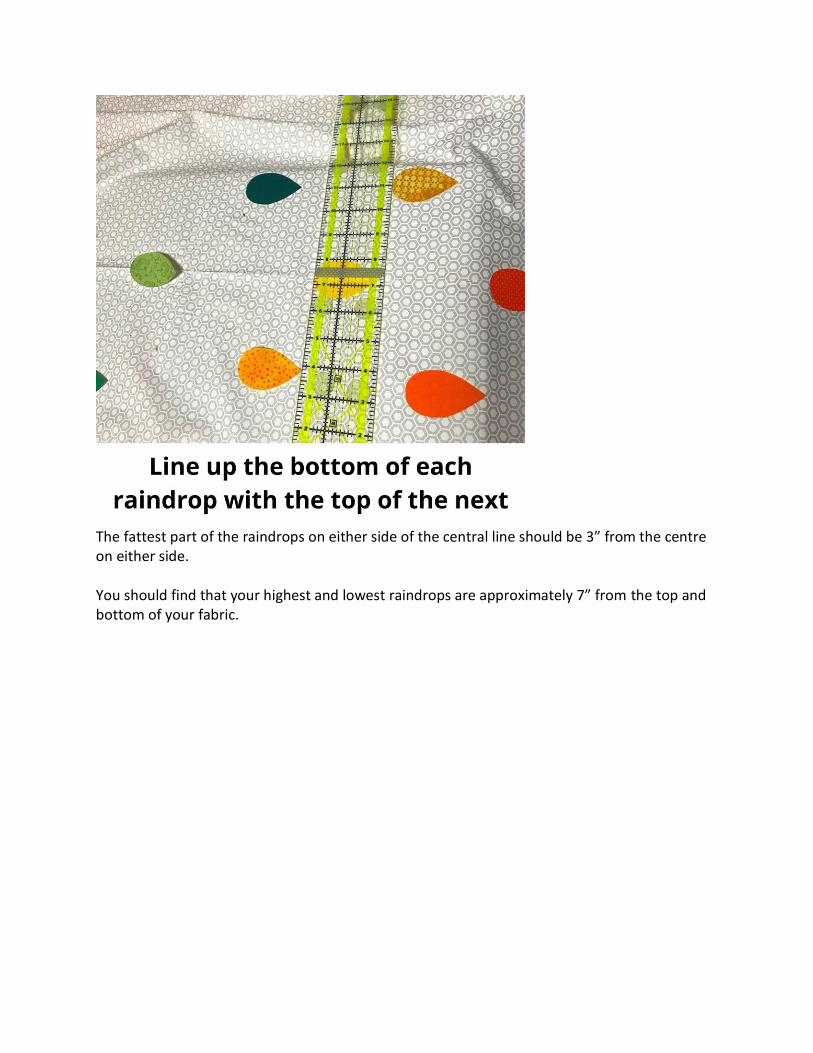
The fattest part of the raindrops on either side of the central line should be 3” from the centre on either side. You should find that your highest and lowest raindrops are approximately 7” from the top and bottom of your fabric.
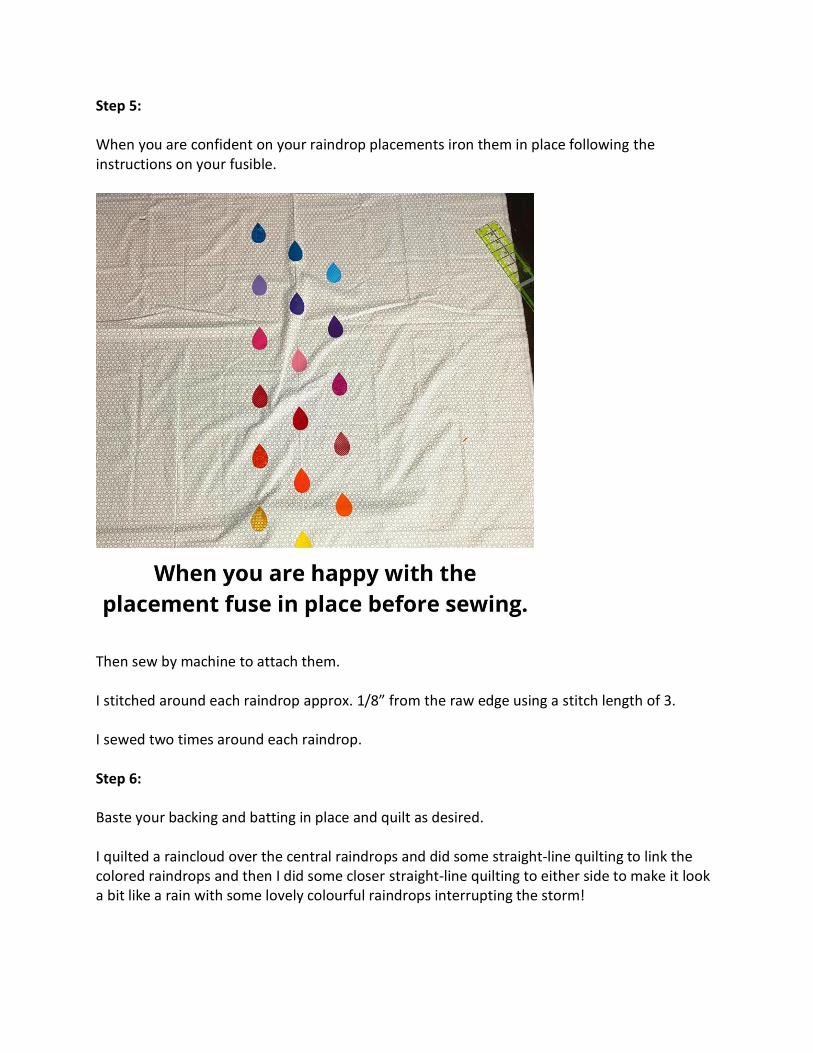
Step 5: When you are confident on your raindrop placements iron them in place following the instructions on your fusible.
Then sew by machine to attach them. I stitched around each raindrop approx. 1/8” from the raw edge using a stitch length of 3. I sewed two times around each raindrop. Step 6: Baste your backing and batting in place and quilt as desired. I quilted a raincloud over the central raindrops and did some straight-line quilting to link the colored raindrops and then I did some closer straight-line quilting to either side to make it look a bit like a rain with some lovely colourful raindrops interrupting the storm!
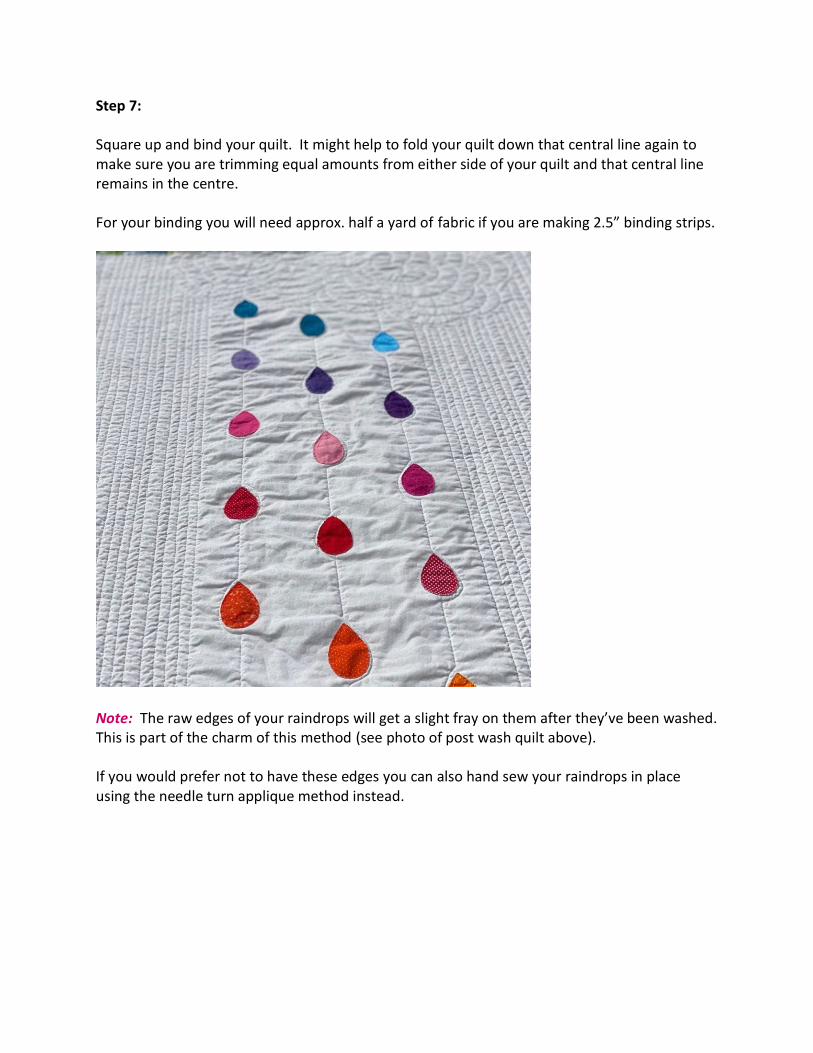
Step 7: Square up and bind your quilt. It might help to fold your quilt down that central line again to make sure you are trimming equal amounts from either side of your quilt and that central line remains in the centre. For your binding you will need approx. half a yard of fabric if you are making 2.5” binding strips.
Note: The raw edges of your raindrops will get a slight fray on them after they’ve been washed. This is part of the charm of this method (see photo of post wash quilt above). If you would prefer not to have these edges you can also hand sew your raindrops in place using the needle turn applique method instead.