read these operating instructions carefully … · ci congratuliamo con voi per l'acquisto di...
TRANSCRIPT

FOR HOUSEHOLD USE ONLY
ISTRUZIONI PER L'USOOPERATING INSTRUCTIONS
MODE D’EMPLOIBEDIENUNGSANLEITUNGINSTRUÇÕES PARA O USO
INSTRUCCIONES PARA EL USOGEBRUIKSAANWIJZING
LEGGERE ATTENTAMENTE QUESTE ISTRUZIONI D'USO PRIMA DI UTILIZZARE LA MACCHINA.READ THESE OPERATING INSTRUCTIONS CAREFULLY BEFORE USING THE MACHINE.
LIRE ATTENTIVEMENT CES INSTRUCTIONS AVANT D’UTILISER LA MACHINE.DIESE BEDIENUNGSANLEITUNG IST VOR DEM ERSTEN GEBRAUCH DER MASCHINE AUFMERKSAM ZU LESEN.
LER ATENTAMENTE ESTAS INSTRUÇÕES PARA O USO ANTES DE USAR A MÁQUINA.LÉANSE ATENTAMENTE LAS SIGUIENTES INSTRUCCIONES DE USO ANTES DE UTILIZAR LA MÁQUINA.
LEES DEZE INSTRUCTIES AANDACHTIG DOOR VOORDAT U HET APPARAAT IN GEBRUIK NEEMT.
Type
SIN
02
4X
4316036000 - SIN024X Rev00.indd 1 10/05/2004 11.56.56
Congratulazioni!Ci congratuliamo con voi per l'acquisto di questa macchina da caffè espres so, di qualità superiore, e vi rin gra zia mo per la fiducia accordataci. Prima di mettere in funzione la mac chi na, vi con si glia mo di leggere at ten ta men te le istru zio ni per l'uso che vi spie ga no come uti liz zar la, pulirla e man te ner la in perfetta efficienza. Se avete altre domande, ri vol ge te vi al ri ven di to re o di ret ta men te al nostro centro assistenza. Sa re mo lieti di darvi tutti i chiarimenti de si de ra ti.
Congratulations!We congratulate you for purchasing this superior quality espresso coffee machine and thank you for placing your confidence in us. Before starting the machine, we recommend that you carefully read these operating instructions, as they explain how to use it, clean it and keep it in perfect working order. If you have any further questions, contact your dealer or our office directly. We will be happy to provide you any information you need.
Félicitations!Nous vous félicitions pour l’achat de cette machine à café expresso, de qualité supérieure et vous remercions pour votre confiance. Avant de mettre votre machine en service, nous vous conseillons de lire attentivement les instructions d’utilisation qui expliquent comment utiliser correctement la machine, la nettoyer et en effectuer la maintenance. Si vous avez des questions, vous êtes priés de vous adresser au revendeur ou directement au fabricant. Nous serons heureux de vous donner toutes les explications nécessaires.
Herzlichen Glückwunsch!Wir gratulieren Ihnen zum Kauf dieser Espressomaschine erstklassiger Qualität und danken Ihnen für das in uns gesetzte Vertrauen. Lesen Sie die mitgelieferte Bedienungsanleitung vor Inbetriebnahme der Maschine sorgfältig durch. Sie erfahren hier wie sie installiert, betrieben und einwandfrei instandgehalten wird. Sollten Sie weitere Fragen haben, wenden Sie sich an Ihren Fachhändler oder direkt n uns. Wir stehen Ihnen gerne zur Verfügung, um Ihnen alle gewünschten Erläuterungen zu geben.
¡Felicitaciones!Nos congratulamos con ustedes por la compra de esta máquina de café expreso de calidad superior, y les agradecemos la confianza que nos han otorgado. Antes de poner en funcionamiento la máquina, lean atentamente las presentes instrucciones de uso en las que se explica cómo utilizarla, limpiarla y mantenerla en perfectas condiciones de funcionamiento. Si desean efectuar alguna consulta, diríjanse al revendedor o directamente a nuestra Empresa. Tendremos mucho gusto en facilitarles todas las aclaraciones que nos soliciten.
Parabéns!Os nossos parabéns por ter comprado esta máquina de café expresso de qualidade superior e um agradecimento pela confiança demonstrada. Antes de colocar a máquina para funcionar aconselhamos ler atentamente o manual de instruções que explica como usá-la, limpá-la e mantê-la funcionando de maneira eficiente. No caso de dúvidas, dirija-se ao revendedor ou diretamente ao fabricante; teremos imenso prazer em lhe fornecer todos os esclarecimentos necessários.
Gefeliciteerd!Wij feliciteren u met de aanschaf van dit koffiezetapparaat voor de bereiding van espressokoffie van hoge kwaliteit en wij danken u voor het in ons gestelde vertrouwen. Voordat u het apparaat in gebruik neemt, raden wij u aan deze gebruiksaanwijzing aandachtig te lezen. Er wordt uitgelegd hoe het apparaat gebruikt en gereinigd moet worden en hoe u de perfecte werking kunt handhaven. Heeft u dan nog vragen dan kunt u zich tot de verkoper of rechtstreeks tot ons bedrijf richten. Wij verstrekken u graag alle gewenste informatie.
4316036000 - SIN024X Rev00.indd 2 10/05/2004 11.56.56

• 3 •
14
16
234
56
7
9
8
12
11
13
1
15
10
17
18
4316036000 - SIN024X Rev00.indd 3 10/05/2004 11.56.59

• 4 •
Fig.1 - Abb.1 - Afb.1 Fig.2 - Abb.2 - Afb.2 Fig.3 - Abb.3 - Afb.3
Fig.4 - Abb.4 - Afb.4 Fig.5 - Abb.5 - Afb.5 Fig.6 - Abb.6 - Afb.6
Fig.7 - Abb.7 - Afb.7 Fig.8 - Abb.8 - Afb.8 Fig.9 - Abb.9 - Afb.9
Fig.10 - Abb.10 - Afb.10 Fig.11 - Abb.11 - Afb.11 Fig.12 - Abb.12 - Afb.12
Fig.8 - Abb.8 - Afb.8
A
B
A
B
BA
4316036000 - SIN024X Rev00.indd 4 10/05/2004 11.57.01

• 5 •
Fig.13 - Abb.13 - Afb.13 Fig.14 - Abb.14 - Afb.14 Fig.15 - Abb.15 - Afb.15
Fig.16 - Abb.16 - Afb.16 Fig.17 - Abb.17 - Afb.17 Fig.18 - Abb.18 - Afb.18
Fig.19 - Abb.19 - Afb.19 Fig.20 - Abb.20 - Afb.20 Fig.21 - Abb.21 - Afb.21
Fig.22 - Abb.22 - Afb.22 Fig.23 - Abb.23 - Afb.23 Fig.24 - Abb.24 - Afb.24
4316036000 - SIN024X Rev00.indd 5 10/05/2004 11.57.03

ITALIANO
• 6 •
INDICE
1 GENERALITÀ ..........................................62 DATI TECNICI ........................................73 NORME DI SICUREZZA ...........................94 INSTALLAZIONE ...................................115 EROGAZIONE DEL CAFFÈ ....................126 SCELTA DEL TIPO DI CAFFÈ - CONSIGLI ...........................................137 EROGAZIONE DELL’ACQUA CALDA .....13
8 EROGAZIONE DEL VAPORE/ PREPARAZIONE DEL CAPPUCCINO ......14
9 PULIZIA ...............................................1410 DECALCIFICAZIONE ............................1411 SERVIZIO AD INTERVALLI REGOLARI .....1512 INFORMAZIONI DI CARATTERE
GIURIDICO ..........................................1513 SMALTIMENTO .....................................16INCONVENIENTI - CAUSE E RIMEDI ..........17
Generalità
1 GENERALITÀ
La macchina per caffè è indicata per la preparazione di 1 o 2 tazze di caffè espresso ed è dotata di un tubo orientabile per l’erogazione del vapore e dell’acqua calda. I comandi sulla parte superiore dell’apparecchio sono contrassegnati con simboli di facile interpretazione. La macchina è stato progettata per uso domestico e non è indicata per un funzionamento continuo di tipo professionale.
Attenzione. Non si assumono responsabilità per eventuali danni in caso di:• Impiego errato e non conforme agli scopi previsti;
• Riparazioni non eseguite presso centri d’assistenza autorizzati;• Manomissione del cavo d'alimentazione;• Manomissione di qualsiasi componente della macchina;• Impiego di pezzi di ricambio e accessori non originali.In questi casi viene a decadere la garanzia.
1.1 Per facilitare la lettura
Il triangolo d’avvertimento indica tutte le istruzioni importanti per la sicurezza dell’utente. Attenersi scrupolosamente a tali indicazioni per evitare ferimenti gravi!
Fig.1Il riferimento ad illustrazioni, parti dell’apparecchio o elementi di comando, ecc. è indicato da numeri o lettere; in questo caso si rimanda all’illustrazione.
Questo simbolo evidenzia le informazioni da tenere in maggiore considerazione, per un migliore utilizzo della macchina.
4316036000 - SIN024X Rev00.indd 6 10/05/2004 11.57.03
ITALIANO
• 7 •
Dati tecnici
Le illustrazioni corrispondenti al testo si trovano nel risvolto di copertina. Tenere questa pagina aperta durante la lettura delle istruzioni per l’uso.
1.2 Impiego di queste istruzioni per l’uso
Conservare queste istruzioni per l’uso in un luogo sicuro e allegarle alla macchina per caffè qualora un’altra persona dovesse utilizzarla.
Per ulteriori informazioni o nel caso di problemi, rivolgetevi agli specialisti competenti.
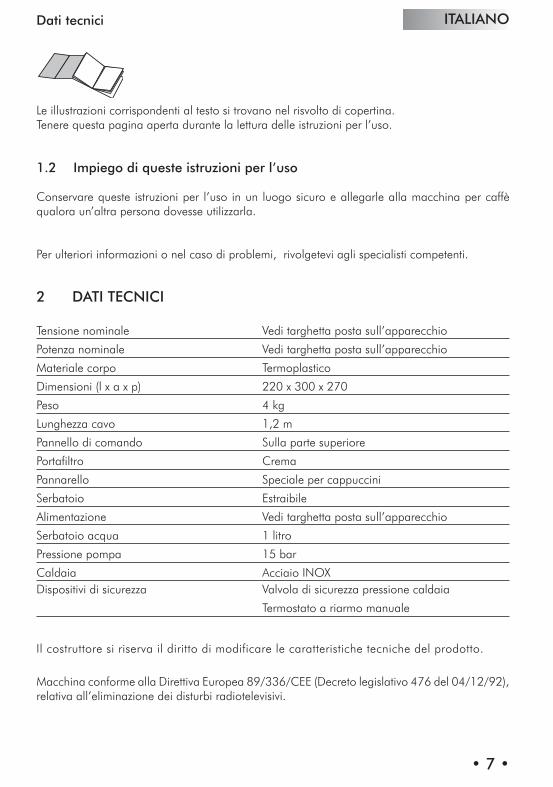
2 DATI TECNICI
Tensione nominale Vedi targhetta posta sull’apparecchio
Potenza nominale Vedi targhetta posta sull’apparecchio
Materiale corpo Termoplastico
Dimensioni (l x a x p) 220 x 300 x 270
Peso 4 kg
Lunghezza cavo 1,2 m
Pannello di comando Sulla parte superiore
Portafiltro Crema
Pannarello Speciale per cappuccini
Serbatoio Estraibile
Alimentazione Vedi targhetta posta sull’apparecchio
Serbatoio acqua 1 litro
Pressione pompa 15 bar
Caldaia Acciaio INOXDispositivi di sicurezza Valvola di sicurezza pressione caldaia
Termostato a riarmo manuale
Il costruttore si riserva il diritto di modificare le caratteristiche tecniche del prodotto.
Macchina conforme alla Direttiva Europea 89/336/CEE (Decreto legislativo 476 del 04/12/92), relativa all’eliminazione dei disturbi radiotelevisivi.
4316036000 - SIN024X Rev00.indd 7 10/05/2004 11.57.03

ITALIANO
• 8 •
� � �
A
B C
D E25
30
1030
10
Norme di sicurezza
misure in mil li me tri
4316036000 - SIN024X Rev00.indd 8 10/05/2004 11.57.09
ITALIANO
• 9 •
Norme di sicurezza
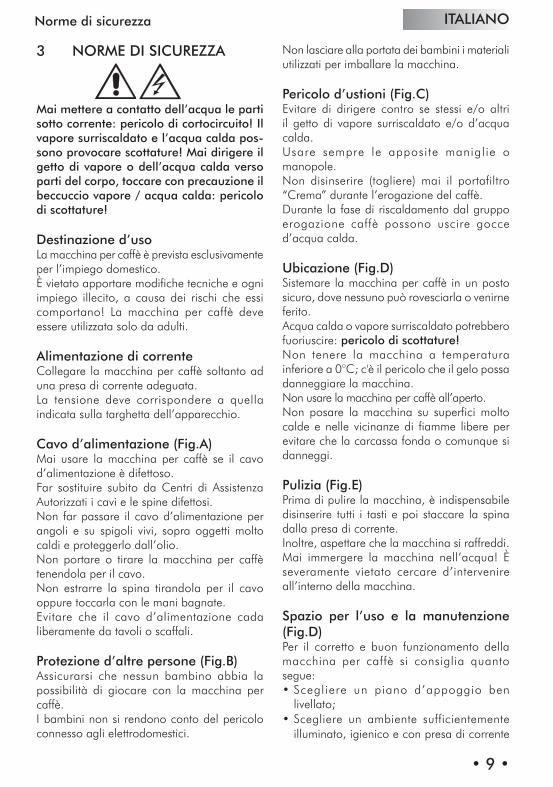
3 NORME DI SICUREZZA
Mai mettere a contatto del l’ac qua le parti sotto corrente: pe ri co lo di cortocircuito! Il vapore sur ri scal da to e l’acqua calda pos-sono pro vo ca re scottature! Mai dirigere il getto di va po re o dell’acqua calda ver so parti del corpo, toccare con pre cau zio ne il beccuccio vapore / ac qua calda: pe ri co lo di scottature!
Destinazione d’usoLa macchina per caffè è prevista esclu si va men te per l’impiego do me sti co. È vietato apportare modifiche tec ni che e ogni impiego illecito, a causa dei rischi che essi com por ta no! La macchina per caffè deve essere utilizzata solo da adulti.
Alimentazione di correnteCollegare la macchina per caffè soltanto ad una presa di corrente adeguata. La tensione deve corrispondere a quella indicata sulla targhetta dell’apparecchio.
Cavo d’alimentazione (Fig.A)Mai usare la macchina per caffè se il cavo d’alimentazione è di fet to so. Far sostituire subito da Centri di As si sten za Autorizzati i cavi e le spine difettosi. Non far passare il cavo d’ali men ta zio ne per angoli e su spigoli vivi, sopra oggetti molto caldi e pro teg ger lo dall’olio. Non portare o tirare la macchina per caf fè tenendola per il cavo. Non estrarre la spina tirandola per il cavo oppure toccarla con le mani bagnate. Evitare che il cavo d’ali men ta zio ne cada liberamente da tavoli o scaffali.
Protezione d’altre persone (Fig.B)Assicurarsi che nessun bambino abbia la possibilità di giocare con la macchina per caffè. I bambini non si rendono conto del pericolo connesso agli elettrodomestici.
Non lasciare alla portata dei bam bi ni i ma te ria li utilizzati per im bal la re la mac chi na.
Pericolo d’ustioni (Fig.C)Evitare di dirigere contro se stessi e/o altri il getto di vapore sur ri scal da to e/o d’acqua calda. Usare sempre le apposite maniglie o ma no po le. Non disinserire (to glie re) mai il portafiltro “Crema” durante l’erogazione del caffè.Durante la fase di riscaldamento dal grup po erogazione caffè pos so no uscire gocce d’acqua calda.
Ubicazione (Fig.D)Sistemare la macchina per caffè in un po sto sicuro, dove nessuno può rovesciarla o venirne ferito. Acqua calda o vapore sur ri scal da to po treb be ro fuoriuscire: pericolo di scottature! Non tenere la macchina a temperatura inferiore a 0°C; c'è il pericolo che il gelo possa danneggiare la macchina.Non usare la macchina per caffè al l’aper to. Non posare la macchina su su per fi ci mol to calde e nelle vicinanze di fiamme libere per evitare che la carcassa fonda o co mun que si danneggi.
Pulizia (Fig.E)Prima di pulire la macchina, è in di spensa bi le disinserire tutti i tasti e poi staccare la spina dalla presa di corrente. Inoltre, aspettare che la macchina si raf fred di. Mai immergere la mac chi na nel l’ac qua! È severamente vietato cercare d’in ter ve ni re all’interno della macchina.
Spazio per l’uso e la ma nu ten zio ne (Fig.D)Per il corretto e buon funzionamento della macchina per caffè si consiglia quanto segue:• Scegliere un piano d’appoggio ben
li vel la to;• Scegliere un ambiente suf fi cien te men te
illuminato, igienico e con presa di cor ren te
4316036000 - SIN024X Rev00.indd 9 10/05/2004 11.57.09

ITALIANO
• 10 •
Norme di sicurezza - Legenda componenti macchina
facilmente accessibile;• Prevedere una distanza minima dalle pareti
della macchina come indicato in figura.
Custodia della macchinaQuando la macchina rimane inutilizzata per un periodo prolungato, disinserire la macchina e staccare la spina dalla presa. Custodirla in luogo asciutto e non accessibile ai bambini.Proteggerla dalla polvere e dallo sporco.
Riparazioni / ManutenzioneNel caso di guasti, difetti o sospetto di difetto
dopo una caduta, staccare subito la spina dalla presa. Mai mettere in funzione una macchina difettosa. Soltanto i Centri di Assistenza Autorizzati possono effettuare interventi e riparazioni. Nel caso di interventi non eseguiti a regola d’arte, si declina ogni responsabilità per eventuali danni.
AntincendioIn caso di incendio utilizzare estintori ad anidride carbonica (CO2). Non utilizzare acqua o estintori a polvere.
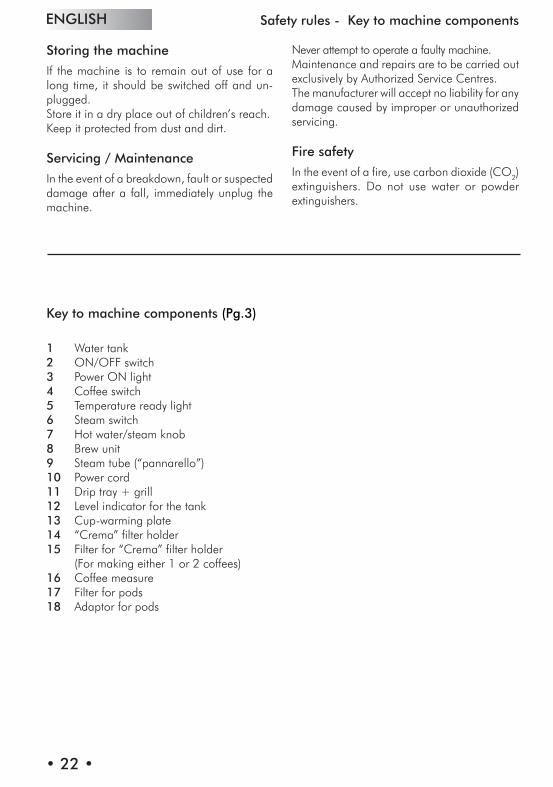
Legenda componenti macchina (Pag.3)
1 Serbatoio acqua2 Interruttore generale3 Spia macchina accesa4 Interruttore caffè5 Spia pronto macchina 6 Interruttore vapore7 Pomello rubinetto acqua calda/vapore8 Gruppo erogatore caffè9 Tubo vapore (pannarello)10 Cavo alimentazione11 Vasca recupero acqua + griglia12 Indicatore vasca piena13 Piastra scaldatazze14 Portafiltro “Crema”15 Filtro per portafiltro “Crema” (Unico per l’erogazione di 1o 2 caffè)16 Misurino per caffè17 Filtro per cialde18 Adattatore per cialde
4316036000 - SIN024X Rev00.indd 10 10/05/2004 11.57.10
ITALIANO
• 11 •
Installazione
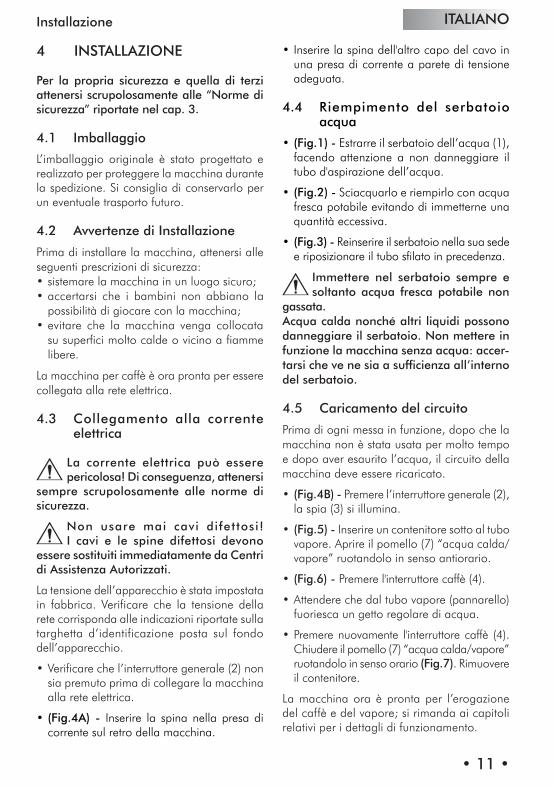
4 INSTALLAZIONE
Per la propria sicurezza e quella di terzi attenersi scrupolosamente alle “Norme di sicurezza” riportate nel cap. 3.
4.1 Imballaggio
L’imballaggio originale è stato progettato e realizzato per proteggere la macchina durante la spedizione. Si consiglia di conservarlo per un eventuale trasporto futuro.
4.2 Avvertenze di Installazione
Prima di installare la macchina, attenersi alle seguenti prescrizioni di sicurezza:• sistemare la macchina in un luogo sicuro;• accertarsi che i bambini non abbiano la
possibilità di giocare con la macchina;• evitare che la macchina venga collocata
su superfici molto calde o vicino a fiamme libere.
La macchina per caffè è ora pronta per essere collegata alla rete elettrica.
4.3 Collegamento alla corrente elettrica
La corrente elettrica può essere pericolosa! Di conseguenza, attenersi
sempre scrupolosamente alle norme di sicurezza.
Non usare mai cavi difettosi! I cavi e le spine difettosi devono
essere sostituiti immediatamente da Centri di Assistenza Autorizzati.
La tensione dell’apparecchio è stata impostata in fabbrica. Verificare che la tensione della rete corrisponda alle indicazioni riportate sulla targhetta d’identificazione posta sul fondo dell’apparecchio.
• Verificare che l’interruttore generale (2) non sia premuto prima di collegare la macchina alla rete elettrica.
• (Fig.4A) - Inserire la spina nella presa di corrente sul retro della macchina.
• Inserire la spina dell'altro capo del cavo in una presa di corrente a parete di tensione adeguata.
4.4 Riempimento del serbatoio acqua
• (Fig.1) - Estrarre il serbatoio dell’acqua (1), facendo attenzione a non danneggiare il tubo d'aspirazione dell’acqua.
• (Fig.2) - Sciacquarlo e riempirlo con acqua fresca potabile evitando di immetterne una quantità eccessiva.
• (Fig.3) - Reinserire il serbatoio nella sua sede e riposizionare il tubo sfilato in precedenza.
Immettere nel serbatoio sempre e soltanto acqua fresca potabile non
gassata. Acqua calda nonché altri liquidi possono danneggiare il serbatoio. Non mettere in funzione la macchina senza acqua: accer-tarsi che ve ne sia a sufficienza all’interno del serbatoio.
4.5 Caricamento del circuito
Prima di ogni messa in funzione, dopo che la macchina non è stata usata per molto tempo e dopo aver esaurito l’acqua, il circuito della macchina deve essere ricaricato.
• (Fig.4B) - Premere l’interruttore generale (2), la spia (3) si illumina.
• (Fig.5) - Inserire un contenitore sotto al tubo vapore. Aprire il pomello (7) “acqua calda/vapore” ruotandolo in senso antiorario.
• (Fig.6) - Premere l'interruttore caffè (4).
• Attendere che dal tubo vapore (pannarello) fuoriesca un getto regolare di acqua.
• Premere nuovamente l'interruttore caffè (4). Chiudere il pomello (7) “acqua calda/vapore” ruotandolo in senso orario (Fig.7). Rimuovere il contenitore.
La macchina ora è pronta per l’erogazione del caffè e del vapore; si rimanda ai capitoli relativi per i dettagli di funzionamento.
4316036000 - SIN024X Rev00.indd 11 10/05/2004 11.57.10

ITALIANO
• 12 •
Erogazione del caffè
5 EROGAZIONE DEL CAFFÈ
Attenzione! Durante l’erogazione del caffè è
vietato disinserire il portafiltro “Crema” ruotandolo manualmente in senso orario. Pericolo d’ustioni.
• Durante questa operazione la spia di pronto macchina (5) può accendersi e spegnersi; tale funzionamento deve essere considerato normale e non un’anomalia.
• Assicurarsi, prima dell’uso, che il pomello (7) acqua calda/vapore sia chiuso e che il serbatoio acqua della macchina contenga una quantità di acqua sufficiente.
• (Fig.4B) - Accendere la macchina, se questa non è attiva, con l’interruttore generale (2), la spia (3) si illumina.
• Attendere che la spia di pronto macchina (5) si accenda, ora la macchina è pronta per l’erogazione del caffè.
5.1 Con caffè macinato
• (Fig.8A) - Inserire il filtro (15) nel portafiltro “Crema” (14).
• (Fig.10) - Inserire dal basso il portafiltro “Crema” nel gruppo erogazione (8).
• (Fig.11) - Ruotare il portafiltro da sinistra verso destra fino al suo bloccaggio.
• Lasciare la presa dal manico del portafiltro “Crema”. Un sistema automatico riporta ora leggermente il manico verso sinistra. Questo movimento garantisce il perfetto funzionamento del portafiltro “Crema”.
• (Fig.13) - Preriscaldare il portafiltro “Crema” premendo l’interruttore caffè (4) l’acqua comincerà ad uscire dal portafiltro “Crema” (questa operazione si rende necessaria solo per il primo caffè).
• Dopo aver fatto scorrere 50cc di acqua premere nuovamente l’interruttore caffè (4) per fermare l’erogazione di acqua calda.
• (Fig.15) - Togliere il portafiltro “Crema”
dalla macchina ruotandolo da destra verso sinistra e vuotare l’acqua residua.
• Con lo speciale portafiltro “Crema” (14) di cui è dotata la macchina, non occorre cambiare filtro per ottenere uno o due caffè.
• (Fig.8B) - Versare 1 o 2 misurini rasi di caffè macinato nel filtro per ottenere uno o due caffè; pulire il bordo del portafiltro dai residui di caffè.
• (Fig.10) - Inserire dal basso il portafiltro “Crema” nel gruppo erogazione (8)
• (Fig.11) - Ruotare il portafiltro da sinistra verso destra fino al suo bloccaggio.
• (Fig.12) - Prelevare 1 o 2 tazzine preri- scaldate e posizionarle sotto al portafiltro “Crema”; verificare che siano correttamente sistemate sotto ai fori di uscita caffè.
• (Fig.13) - Premere il tasto caffè (4).
• Quando è stato raggiunta la quantità di caffè desiderata, premere nuovamente il tasto caffè (4) per fermare l’erogazione del caffè e prelevare le tazzine con il caffè (Fig.14).
• (Fig.15) - Al termine dell’erogazione attendere qualche secondo, estrarre il portafiltro “Crema” e vuotarlo dai fondi residui.
Nota di pulizia: mantenere pulito il filtro del portafiltro “Crema”
estraendolo dalla propria sede e lavandolo con acqua potabile (Fig.16).
5.2 Con caffè in cialde
• (Fig.9) - Inserire l'adattatore per cialde (18) nel portafiltro “Crema” (14), successivamente inserire anche il filtro (17).
• (Fig.10) - Inserire dal basso il portafiltro “Crema” nel gruppo erogazione (8).
• (Fig.11) - Ruotare il portafiltro da sinistra verso destra fino al suo bloccaggio.
• Lasciare la presa dal manico del portafiltro “Crema”. Un sistema automatico riporta
4316036000 - SIN024X Rev00.indd 12 10/05/2004 11.57.10

ITALIANO
• 13 •
Erogazione dell’acqua calda
ora leggermente il manico verso sinistra. Questo movimento garantisce il perfetto funzionamento del portafiltro “Crema”.
• (Fig.13) - Preriscaldare il portafiltro “Crema” premendo l’interruttore caffè (4) l’acqua comincerà ad uscire dal portafiltro “Crema” (questa operazione si rende necessaria solo per il primo caffè).
• Dopo aver fatto scorrere 50cc di acqua premere nuovamente l’interruttore caffè (4) per fermare l’erogazione di acqua calda.
• (Fig.15) - Togliere il portafiltro “Crema” dalla macchina ruotandolo da destra verso sinistra e vuotare l’acqua residua.
• Inserire la cialda nel portafiltro; assicurarsi che la carta della cialda non fuoriesca dal portafiltro.
• (Fig.10) - Inserire dal basso il portafiltro “Crema” nel gruppo erogazione (8).
• (Fig.11) - Ruotare il portafiltro da sinistra verso destra fino al suo bloccaggio.
• (Fig.12) - Prelevare 1 tazzina preriscaldata e posizionarla sotto al portafiltro; verificare che sia correttamente sistemata sotto ai fori di uscita caffè.
• (Fig.13) - Premere il tasto caffè (4).
• Quando è stato raggiunta la quantità di caffè desiderata, premere nuovamente il tasto caffè (4) per fermare l’erogazione del caffè e prelevare la tazzina con il caffè (Fig.14).
• (Fig.15) - Al termine dell’erogazione attendere qualche secondo, estrarre il portafiltro e smaltire la cialda utilizzata.
Nota di pulizia: mantenere pulito il filtro del portafiltro “Crema” estraen-
dolo dalla propria sede e lavandolo con acqua potabile (Fig.16).
6 SCELTA DEL TIPO DI CAFFÈ - CONSIGLI
In linea di massima si possono utilizzare tutti i tipi di caffè esistenti in commercio.
Tuttavia, il caffè è un prodotto naturale ed il suo
gusto cambia in funzione dell’origine e della miscela; è preferibile quindi provarne vari tipi, al fine di trovare quello che meglio si addice ai gusti personali.
Per migliori risultati si consiglia comunque di utilizzare miscele espressamente preparate per macchine espresso.
Il caffè dovrebbe sempre fuoriuscire regolarmente dal portafiltro “Crema” senza gocciolare.
La velocità di fuoriuscita del caffè può essere modificata cambiando leggermente la dose del caffè nel filtro e/o utilizzando caffè con un grado di macinatura differente.
PRIMA DI ESEGUIRE QUALSIASI OPERAZIONE RELATIVA ALL’E-
ROGAZIONE DEL VAPORE O DELL’ACQUA CALDA VERIFICARE CHE IL TUBO VAPORE (PANNARELLO) SIA ORIENTATO SOPRA LA VASCA RECUPERO ACQUA.
7 EROGAZIONE DELL’ACQUA CALDA
Pericolo di scottature! All’inizio del-l’erogazione possono verificarsi brevi
spruzzi di acqua calda. Il tubo d’erogazione può raggiungere temperature elevate: evi-tare di toccarlo direttamente con le mani.
• (Fig.4B) - Accendere la macchina, se questa non è attiva, con l’interruttore generale (2), la spia (3) s'illumina.
• Attendere che la spia di pronto macchina (5) si accenda.
• (Fig.17) - Sistemare un contenitore o un bicchiere da tè sotto al tubo vapore (pannarello).
Aprire il pomello (7) “Acqua calda/vapore” ruotandolo in senso antiorario.
• (Fig.18) - Premere il tasto caffè (4) per la fuoriuscita dell’acqua fino alla quantità desiderata.
• Quando è stata prelevata la quantità desiderata di acqua calda, premere nuovamente il tasto caffè (4).
4316036000 - SIN024X Rev00.indd 13 10/05/2004 11.57.10
ITALIANO
• 14 •
Cappuccino - Pulizia - Decalcificazione
• (Fig.19) - Ruotare il pomello (7) in senso orario per chiudere il rubinetto. Prelevare il contenitore con l'acqua calda.
8 EROGAZIONE DEL VAPORE/ P R E P A R A Z I O N E D E L CAPPUCCINO
Pericolo di scottature! All’inizio dell’erogazione possono verifi-
carsi brevi spruzzi di acqua calda. Il tubo d’erogazione può raggiungere temperature elevate: evitare di toccarlo direttamente con le mani.
• (Fig.4B) - Accendere la macchina, se questa non è attiva, con l’interruttore generale (2), la spia (3) si illumina.
• (Fig.20) - Premere l’interruttore (6) vapo-re. Si spegne la spia di pronto macchi- na (5).
• Attendere che la spia di pronto macchina (5) si riaccenda, a questo punto la macchina è pronta per l’erogazione del vapore.
• (Fig.17) - Inserire un contenitore sotto al tubo vapore e aprire il pomello (7) “Acqua calda/vapore” per qualche istante, in modo da far uscire l’acqua residua dal tubo vapore (pannarello); in breve tempo comincerà ad uscire solo vapore.
• (Fig.19) - Chiudere il pomello (7) e togliere il contentore.
• Riempire con latte freddo 1/3 del contenitore che si desidera utilizzare per preparare il cappuccino.
Per garantire un miglior risultato nella preparazione del cappuccino,
il latte utilizzato deve essere freddo.
• (Fig.21) - Immergere il tubo vapore nel latte da riscaldare e aprire il pomello (7); far ruotare il recipiente con lenti movimenti dal basso verso l’alto per rendere uniforme il riscaldamento.
• (Fig.22) - Dopo aver utilizzato il vapore per il tempo desiderato chiudere il pomello (7); prelevare la tazza con il latte montato.
• (Fig.20) - Premere nuovamente l’interruttore (6) vapore.
• Procedere con il caricamento del circuito descritto nel par.4.5 per rendere operativa la macchina.
Lo stesso sistema può essere utiliz-zato per il riscaldamento di altre
bevande.
• (Fig.23) - Pulire, dopo questa operazione il tubo vapore con un panno umido.
9 PULIZIALa manutenzione e la pulizia possono essere effettuate soltanto quando la macchina è fredda e scollegata dalla rete elettrica.
• Non immergere la macchina nell’acqua e non inserire i componenti nella lavastoviglie.
• Non utilizzare oggetti acuminati o prodotti chimici aggressivi (solventi) per la pulizia.
• Si consiglia di pulire quotidianamente il serbatoio dell’acqua e di riempirlo con acqua fresca.
• (Fig.23) - Dopo aver riscaldato il latte, prelevare una piccola quantità di acqua calda per la pulizia del tubo e pulirlo esternamente con un panno umido.
• (Fig.24) - Giornalmente vuotare e lavare la vasca raccogli gocce.
• Per la pulizia dell’apparecchio utilizzare un panno morbido inumidito d'acqua.
• (Fig.16) - Per la pulizia del portafiltro “Crema” procedere come segue:- Estrarre il filtro, immergerlo in acqua calda e lavarlo con cura.
- Lavare l’interno del portafiltro “Crema”.
• Non asciugare la macchina e/o i suoi componenti utilizzando un forno a microonde e/o un forno convenzionale.
10 DECALCIFICAZIONELa formazione di calcare avviene con l’uso dell’apparecchio; la decalcificazione è neces-
4316036000 - SIN024X Rev00.indd 14 10/05/2004 11.57.10
ITALIANO
• 15 •
Decalcificazione - Informazioni di carattere giuridico
saria ogni 3-4 mesi di utilizzo della macchina e/o quando si osserva una riduzione della portata dell’acqua.
Qualora si voglia eseguirla perso-nalmente, si può utilizzare un
prodotto decalcificante per macchine da caffè di tipo non tossico e/o nocivo, comunemente reperibile in commercio. Si consiglia d'utilizzare il decalcificante Saeco.
Attenzione! Non utilizzare in nessun caso l’aceto come decalcificante.
• Togliere il serbatoio dell’acqua e vuotarlo dall’acqua residua.
• (Fig.2) - Miscelare il decalcificante con acqua come specificato sulla confezione del prodotto decalcificante e riempire il serbatoio dell’acqua; inserire il serbatoio nella macchina.
• (Fig.4B) - Accendere la macchina premen- do l’interruttore generale (2).
• (Fig.5) - Inserire un contenitore sotto al tubo vapore.
• Prelevare ad intervalli (una tazza per volta) l’intero contenuto del serbatoio dell’acqua ruotando il pomello vapore (7) in senso antiorario e premendo l’interruttore caffè (4); per fermare l’erogazione premere nuovamente l’interruttore caffè (4) e ruotare il pomello vapore (7) in senso orario.
• (Fig.4B) - Durante i singoli intervalli si deve lasciare agire il decalcificante per circa 10-15 minuti, scollegando la macchina per mezzo dell’interruttore generale (2). Vuotare il contenitore.
• (Fig.2) - Terminata la soluzione decalcificante, estrarre il serbatoio dell’acqua, sciacquarlo e riempirlo con acqua fresca potabile.
• (Fig.3; Fig.5) - Reinserire il serbatoio nella machina; vuotare 2/3 del contento del serbatoio dell’acqua ruotando il pomello vapore (7) in senso antiorario e premendo l’interruttore caffè (4); per fermare l’erogazione premere nuovamente
l’interruttore caffè (4) e ruotare il pomello vapore (7) in senso orario.
• Lasciare riscaldare la macchina e vuotare il rimanente contenuto del serbatoio dell’acqua ruotando il pomello vapore (7) in senso antiorario e premendo l’interruttore caffè (4); per fermare l’erogazione premere nuovamente l’interruttore caffè (4) e ruotare il pomello vapore (7) in senso orario.
Qualora si utilizzi un prodotto diverso da quello consigliato si raccomanda
di rispettare comunque le istruzioni della casa produttrice riportate sulla confezione del prodotto decalcificante.
11 SERVIZIO AD INTERVALLI REGOLARI
Il servizio ad intervalli regolari da parte di un Centro di Assistenza Autorizzato prolunga la durata e l’affidabilità della macchina.
Conservare l’imballo originale che potrà servire da protezione durante il trasporto.
12 INFORMAZIONI DI CARAT- TERE GIURIDICO
• Le presenti istruzioni per l’uso contengono le informazioni necessarie per l’impiego corretto, per le funzioni operative e la manutenzione accurata dell’apparecchio.
• Queste conoscenze e l’osservanza delle presenti istruzioni, rappresentano la premessa per un uso senza pericolo nel pieno rispetto della sicurezza in caso di funzionamento e manutenzione dell’apparecchio.
• Se si desiderano ulteriori informazioni, o se dovessero subentrare particolari problemi che si ritiene nelle presenti istruzioni d’uso non siano stati spiegati con sufficiente chiarezza, preghiamo di rivolgersi al rivenditore locale o direttamente alla ditta costruttrice.
• Inoltre facciamo notare che il contenuto di queste istruzioni d’uso non è parte di una convenzione precedente o già esistente, di un accordo o di un contratto legale e che non ne cambiano la sostanza.
4316036000 - SIN024X Rev00.indd 15 10/05/2004 11.57.11
ITALIANO
• 16 •
Smaltimento
• Tutti gli obblighi del costruttore si basano sul relativo contratto di compravendita che contiene anche il regolamento completo ed esclusivo riguardo alle prestazioni di garanzia.
• Le norme di garanzia contrattuali non vengono né limitate né estese in base alle presenti spiegazioni.
• Le istruzioni per l’uso contengono informazioni protette dal diritto d’autore.
• Non è permesso fotocopiarle o tradurle in un’altra lingua senza previo accordo scritto da parte del Costruttore.
13 SMALTIMENTO• Rendere inutilizzabili gli apparecchi non più
in uso.
• Staccare la spina dalla presa e togliere il cavo elettrico.
• Consegnare gli apparecchi fuori uso a un centro di raccolta idoneo.
4316036000 - SIN024X Rev00.indd 16 10/05/2004 11.57.11

ITALIANO
• 17 •
Inconvenienti - Cause e rimedi
Guasto Cause possibili Rimedio La macchina non si accende Macchina non collegata alla rete
elettricaCollegare la macchina alla rete elettrica
La pompa è molto rumorosa Manca acqua nel serbatoio Rabboccare con acqua.(par.4.4)
Il caffè é troppo freddo La spia pronto temperatura (5) era spenta quando è stato premuto l’inter-ruttore (4).
Attendere che la spia si accenda.
Portafiltro non inserito per il pre-riscaldamento (cap. 5).
Preriscaldare il portafiltro.
Non si forma la schiuma del latte Latte non adatto. Controllare il tenore del grasso.
Il caffè sgorga troppo velocemente, non si forma la crema
Troppo poco caffè nel portafiltro. A g g i u n g e r e i l c a f f è (cap. 5).
Macinatura troppo grossa. Usare una miscela diversa (cap.6).
Caffè vecchio o non adatto. Usare una miscela diversa (cap.6).
Il caffè non sgorga o sgorga solo a gocce
Mancanza di acqua. Rabboccare con acqua (par.4.4).
Macinatura troppo fine. Usare una miscela diversa (cap.6).
Caffè premuto nel portafiltro. S m u o v e r e i l c a f f è macinato.
Troppo caffè nel portafiltro. Ridurre la quantità di caffè nel portafiltro.
Pomello (7) “Acqua calda/vapore” aperto.
Chiudere il pomello (7).
Macchina calcificata. Decalcificare la macchina (cap.10).
Filtro nel portafiltro otturato. Pulire il filtro (cap.9).
Il caffè sgorga dai bordi Portafiltro inserito male nel gruppo erogazione caffè.
Inserire correttamente il portafiltro (cap.5).
Bordo superiore del portaf i l t ro sporco.
Pulire il bordo del porta-filtro.
Guarnizione della caldaia sporca o usurata.
Pulire o sostituire la guar-nizione.
Troppo caffè nel portafiltro. Ridurre la quantità di caffè utilizzando il misurino
Per i guasti non contemplati dalla suddetta tabella o in caso che i rimedi suggeriti non li risolvano, rivolgersi ad un centro assistenza.
4316036000 - SIN024X Rev00.indd 17 10/05/2004 11.57.11

ENGLISH
• 18 •
1 GENERAL INFORMATION
This coffee machine is ideal for making 1 or 2 cups of espresso coffee and features an adjustable tube for dispensing steam and hot water. All commands on the upper part of the unit are marked with symbols easy to be understood. The machine is designed for household use only. It is not suitable for continuous professional-type use.
Warning. The manufacturer shall accept no liability for damage or injury caused by:
• Improper use or use for other than the intended purposes;• Repairs carried out by anyone other than an authorised service centre;• Tampering with the power cord;• Tampering with any machine component;• Use of spare parts and accessories other than those supplied by the manufacturer.The warranty will be invalidated in such cases.
1.1 To facilitate interpretation
A warning triangle draws attention to the instructions that are important for user safety. Please carefully abide by these instructions to avoid serious injury!
Fig.1Illustrations, parts of the appliance and control functions, etc. are referred to by number or letter; in this case reference is made to the illustration.
This symbol is used to highlight information that is especially important for ensuring optimal use of the machine.
General information
INDEX
1 GENERAL INFORMATION .....................182 TECHNICAL SPECIFICATIONS ..............193 SAFETY RULES ......................................214 INSTALLATION .....................................235 MAKING COFFEE .................................236 CHOOSING THE TYPE OF COFFEE - TIPS 257 DISPENSING HOT WATER ....................25
8 DISPENSING STEAM/ MAKING CAPPUCCINO .......................259 CLEANING ..........................................2610 DESCALING .........................................2611 REGULAR SERVICING ..........................2712 LEGAL INFORMATION .........................2713 DISPOSAL ............................................27TROUBLESHOOTING .................................28
4316036000 - SIN024X Rev00.indd 18 10/05/2004 11.57.11

ENGLISH
• 19 •
The illustrations corresponding to the text may be found on the inside cover flap. Keep this page open while reading the operating instructions.
1.2 How to use these operating instructions
Keep these operating instructions in a safe place and make them available to anyone else who should use the coffee machine.
For further information or in case of problems, contact an authorised service centre.
2 TECHNICAL SPECIFICATIONS
Voltage rating See rating plate on appliancePower rating See rating plate on applianceCasing material Thermoplastic Size (w x h x d) 220 x 300 x 270Weight 4 Kg Cord length 1.2 mControl panel On the upper partFilter holder “Crema”“Pannarello” Special steam tube attachment for cappuccino Water tank Extractible Power supply See rating plate on applianceWater tank capacity 1 litre Pump pressure 15 barsBoiler INOX SteelSafety devices Boiler pressure safety valve Thermostat with manual reset
The producer reserves the right to change the technical characteristics of the product.
Machine in conformity with European Directive 89/336/EEC (Italian Legislative Decree 476 of 04/12/92) concerning electromagnetic compatibility.
Technical specifications
4316036000 - SIN024X Rev00.indd 19 10/05/2004 11.57.11

ENGLISH
• 20 •
Safety rules
� � �
A
B C
D E25
30
1030
10
distances in millimetres
4316036000 - SIN024X Rev00.indd 20 10/05/2004 11.57.17

ENGLISH
• 21 •
3 SAFETY RULES
Never place live parts in contact with wa-ter: danger of short circuit! Hot steam and hot water can cause scalding! Never aim the steam or hot water flow towards parts of your body, use caution when touching the steam / hot water nozzle: danger of scalding!
Intended use
This coffee machine is designed for home use only. Do not make any technical changes or use the machine for purposes other than those stated since this would create serious hazards! The coffee machine may be used only by adults.
Power supply
Plug the coffee machine into a suitable mains socket. The voltage must match the rating on the appliance identification plate.
Power cord (Fig.A)
Never use the coffee machine if the power cord is defective. You should have any defective cords or plugs immediately replaced by an Authorized Service Centre. Do not pass the cord around corners, over sharp edges or over hot objects and keep it away from oil. Do not use the power cord to carry or pull the coffee machine. Do not unplug the appliance by yanking at the power cord or touch the plug with wet hands. Do not let the power cord hang freely from tables or shelves.
Protecting others (Fig.B)
Make sure that children are not allowed to play with the coffee machine.
Children are not aware of the dangers connec-ted with household appliances. Do not leave the materials used to pack the appliance within children’s reach.
Danger of burns (Fig.C)
Avoid aiming a jet of hot steam and/or hot water at yourself and/or at others. Always use the handles or knobs provided. Never attempt to remove the “Crema” filter holder while dispensing coffee.While the machine is heating up, drops of hot water may be discharged from the brewing head.
Siting (Fig.D)
Place the coffee machine in a safe place where no one can tip it over or be injured by it. Hot water or steam could be discharged: danger of scalding! Do not keep the machine at a temperature below 0°C; frost may damage the machine.Do not use the coffee machine outdoors. To prevent the casing from melting or being damaged, avoid resting the machine on very hot surfaces or near open flames.
Cleaning (Fig.E)
Before cleaning the machine, it is indispensable to turn off all the controls and remove the plug from the socket. Then wait for the machine to cool down.Never immerse the machine in water! It is strictly forbidden to attempt to access internal machine parts.
Space for use and maintenance (Fig.D)
To ensure that the coffee machine works properly and efficiently, you are advised to:• Rest it on a perfectly level surface;• Place it an adequately lit, hygienic location
within easy reach of an electric socket;• Ensure a minimum clearance between
the machine and walls as shown in the illustration.
Safety rules
4316036000 - SIN024X Rev00.indd 21 10/05/2004 11.57.17
ENGLISH
• 22 •
Storing the machine
If the machine is to remain out of use for a long time, it should be switched off and un-plugged. Store it in a dry place out of children’s reach.Keep it protected from dust and dirt.
Servicing / Maintenance
In the event of a breakdown, fault or suspected damage after a fall, immediately unplug the machine.
Never attempt to operate a faulty machine. Maintenance and repairs are to be carried out exclusively by Authorized Service Centres. The manufacturer will accept no liability for any damage caused by improper or unauthorized servicing.
Fire safety
In the event of a fire, use carbon dioxide (CO2) extinguishers. Do not use water or powder extinguishers.
Key to machine components (Pg.3)
1 Water tank2 ON/OFF switch 3 Power ON light4 Coffee switch5 Temperature ready light 6 Steam switch7 Hot water/steam knob8 Brew unit9 Steam tube (“pannarello”)10 Power cord11 Drip tray + grill12 Level indicator for the tank13 Cup-warming plate14 “Crema” filter holder15 Filter for “Crema” filter holder (For making either 1 or 2 coffees)16 Coffee measure17 Filter for pods18 Adaptor for pods
Safety rules - Key to machine components
4316036000 - SIN024X Rev00.indd 22 10/05/2004 11.57.17
ENGLISH
• 23 •
4 INSTALLATION
For your own safety and the safety of others, you must strictly comply with the “Safety Rules” described in section 3.
4.1 Packaging
The original packaging was designed and made to protect the machine during shipping. We recommend keeping it for future transport purposes.
4.2 Installation precautions
Before installing the machine, make sure to follow these safety precautions:• put the machine in a safe place;• make sure that children are not allowed to
play with the machine;• avoid placing the machine on very hot
surfaces or near open flames.
Now the coffee machine is ready to be connected to the mains power supply.
4.3 Mains connection
Electricity can be dangerous! There-fore, always strictly abide by the
safety rules.
Never use defective cords!Defective cords and plugs must be
immediately replaced by an Authorised Service Centre.
The coffee machine must be plugged into a suitable electric socket.
The voltage of the appliance is factory set. Check that the mains voltage matches the rating specified on the identification plate on the bottom of the appliance.
• Before plugging in the machine, make sure the ON/OFF switch is not pressed (2).
• (Fig.4A) - Put the socket into the outlet on the rear of the machine.
• Connect the other socket to a wall outlet having the proper voltage.
4.4 Filling the water tank
• (Fig.1) - Remove the water tank (1) taking care not to damage the water suction tube.
• (Fig.2) - Rinse out the tank and fill it with fresh drinking water, taking care not to overfill.
• (Fig.3) - Fit the tank again in its position, and place the tube previously removed.
Always fill the tank with fresh, still drinking water.
Hot water and/or other liquids may dama-ge the tank. Always make sure that there is sufficient water in the tank before starting the machine.
4.5 Loading the circuit
Before starting the machine, if it has been inoperative for a long time and all the water has been used up, you must reload the circuit.
• (Fig.4B) - Press the ON/OFF switch (2). The light (3) will go on.
• (Fig.5) - Place a container beneath the steam tube. Turn the “hot water/steam” knob (7) counterclockwise to open.
• (Fig.6) - Press the coffee switch (4).
• Wait until a steady stream of water flows from the steam tube (“pannarello”).
• Press the coffee switch (4) again. Turn the “hot water/steam” knob (7) clockwise to shut off flow (Fig.7). Remove the container.
The machine is now ready to dispense coffee and steam; for a description of machine functions, see the specific sections.
5 MAKING COFFEEWarning!While the brew unit is operating it
is forbidden to remove the “Crema” filter holder by manually turning it clockwise. Danger of burns!
• During this operation the temperature ready light (5) may go on and off; this is normal and not to be considered a fault.
Installation
4316036000 - SIN024X Rev00.indd 23 10/05/2004 11.57.18

ENGLISH
• 24 •
• Before using the machine, make sure that the hot water/steam knob (7) is closed and that there is a sufficient amount of water in the tank.
• (Fig.4B) - If the machine is off, turn it on by pressing the ON/OFF switch (2); the light (3) will go on.
• Wait until the temperature ready light (5) goes on; now the machine is ready to dispense coffee.
5.1 With ground coffee
• (Fig.8A) - Place the filter (15) inside the “Crema” filter holder (14).
• (Fig.10) - Fit the “Crema” filter holder into the brew unit (8) from below.
• (Fig.11) - Turn the filter holder from left to right until it locks into place.
• Let go of the handle of the “Crema” filter holder. An automatic system will now cause the handle to shift slightly back to the left. This serves to ensure that the “Crema” filter will function perfectly.
• (Fig.13) - Preheat the “Crema” filter holder by pressing the coffee switch (4); water will start to come out of the “Crema” filter holder (this operation is only necessary for the first cup of coffee).
• After allowing 50cc of water to flow out, press the coffee switch (4) again to shut off the flow of hot water.
• (Fig.15) - Remove the “Crema” filter holder from the machine by turning it from right to left and empty out any water inside it.
• Thanks to the special “Crema” filter holder (14) supplied with your machine, you need not change the filter when you switch between one and two cups of coffee.
• (Fig.8B) - Pour 1 or 2 level measures of ground coffee in the filter, depending on whether you want to make one or two cups of coffee; wipe the edge of the filter holder clean of any coffee grounds.
• (Fig.10) - Fit the “Crema” filter holder into the brew unit (8) from below.
• (Fig.11) - Turn the filter holder from left to right until it locks into place.
• (Fig.12) - Place 1 or 2 preheated cups beneath the “Crema” filter; make sure that you position them properly under the coffee outlets.
• (Fig.13) - Press the coffee button (4).
• When you have dispensed the desired amount of coffee, press the coffee button (4) again to stop flow and remove the cups containing the coffee (Fig.14).
• (Fig.15) - After making coffee, wait a few seconds, remove the “Crema” filter holder and empty out the used grounds.
Cleaning note: keep the coffee filter clean by detaching it from the
“Crema” filter holder and washing it with drinking water (Fig.16).
5.2 With coffee pods
• (Fig.9) - Fit the adaptor for pods (18) into the “Crema” filter holder (14), then also put the filter (17).
• (Fig.10) - Fit the “Crema” filter holder into the brew unit (8) from below.
• (Fig.11) - Turn the filter holder from left to right until it locks into place.
• Let go of the handle of the “Crema” filter holder. An automatic system will now cause the handle to shift slightly back to the left. This serves to ensure that the “Crema” filter will function perfectly.
• (Fig.13) - Preheat the “Crema” filter holder by pressing the coffee switch (4); water will start to come out of the “Crema” filter holder (this operation is only necessary for the first cup of coffee).
• After allowing 50cc of water to flow out, press the coffee switch (4) again to shut off the flow of hot water.
Making coffee
4316036000 - SIN024X Rev00.indd 24 10/05/2004 11.57.18
ENGLISH
• 25 •
• (Fig.15) - Remove the “Crema” filter holder from the machine by turning it from right to left and empty out any water inside it.
• Fit the pod into the filter holder; make sure the pod paper does not come out from the filder holder.
• (Fig.10) - Fit the “Crema” filter holder into the brew unit (8) from below.
• (Fig.11) - Turn the filter holder from left to right until it locks into place.
• (Fig.12) - Take 1 pre-warmed cup and put it beneath the filter holder; make sure it is correctly positioned beneath the coffee dispensing nozzles.
• (Fig.13) - Press the coffee button (4).
• When you have dispensed the desired amount of coffee, press the coffee button (4) again to stop flow and remove the cup containing the coffee (Fig.14).
• (Fig.15) - After dispensing, wait some seconds, remove the filter holder, and dispose of the pod used.
Cleaning note: keep the coffee filter clean by detaching it from the
“Crema” filter holder and washing it with drinking water (Fig.16).
6 CHOOSING THE TYPE OF COFFEE - TIPSGenerally speaking, you can use any type of commercially available coffee.
However, coffee is a natural product and its flavour will vary depending on where it comes from and the blend used; it is thus a good idea to try out different types until you find the one that best suits your personal taste.
For best results you should use blends specifically prepared for espresso coffee machines.
Coffee should flow out smoothly from the “Crema” filter holder without dripping.
The speed of flow can be adjusted by slightly changing the amount of coffee in the filter and/or using coffee with a finer or coarser grind.
B E F O R E AT T E M P T I N G A N Y OPERATION INVOLVING THE
RELEASE OF STEAM OR HOT WATER, MAKE SURE THAT THE STEAM TUBE (“PANNARELLO”) IS POSITIONED OVER THE DRIP TRAY.
7 DISPENSING HOT WATERDanger of scalding! Brief sprays of hot water may be discharged at first.
The dispensing tube can reach very high temperatures: avoiding touching it directly with your hands.
• (Fig.4B) - If the machine is off, turn it on by pressing the ON/OFF switch (2); the light (3) will go on.
• Wait until the temperature ready light (5) goes on.
• (Fig.17) - Place a container or mug beneath the steam tube (“pannarello”).
Turn the “Hot water/steam” knob (7) counterclockwise to open.
• (Fig.18) - Press the coffee button (4) to dispense hot water.
• When you have dispensed the desired quantity of hot water, press the coffee button (4) again.
• (Fig.19) - Turn the knob (7) clockwise to close. Remove the container of hot water.
8 D I S P E N S I N G S T E A M / MAKING CAPPUCCINO
Danger of scalding! The steam may be preceded by brief
sprays of hot water. The dispensing tube can reach very high temperatures: avoiding touching it directly with your hands.
• (Fig.4B) - If the machine is off, turn it on by pressing the ON/OFF switch (2); the light (3) will go on.
• (Fig.20) - Press the (6) steam switch. The temperature ready light will go off (5).
• Wait until the temperature ready light (5) goes back on. Now the machine is ready to
Choosing the type of coffee - Making cappuccino
4316036000 - SIN024X Rev00.indd 25 10/05/2004 11.57.18

ENGLISH
• 26 •
dispense steam.
• (Fig.17) - Place a container beneath the steam tube and open the “Hot water/steam” knob (7) for a few seconds to di-scharge residual water from the steam tube (“pannarello”). Shortly only steam will issue from the tube.
• (Fig.19) - Close the knob (7) and remove the container.
• Fill the container you want to use for making cappuccino to 1/3 with cold milk.
For best results, use only cold milk when making cappuccino.
• (Fig.21) - Place the tip of the steam tube in the milk to be heated and turn the knob (7) counterclockwise; move the container slowly up and down and in circles to heat the milk evenly.
• (Fig.22) - After frothing the milk as desired, turn the knob (7) clockwise to shut off steam. Remove the cup with frothed milk.
• (Fig.20) - Press the steam switch (6) again.
• Load the circuit as directed in section 4.5 to prepare the machine for use.
The same method may be used to heat other beverages.
• (Fig.23) - After completing this operation, wipe the steam tube clean with a damp cloth.
9 CLEANINGMaintenance and cleaning jobs may be carried out only when the machine is cold and disconnected from the power supply.
• Do not immerse the machine in water nor place any of its components in a dish-washer.
• Do not use sharp objects or harsh chemical products (solvents) for cleaning.
• It is recommended to clean the water tank daily and refill it with fresh water.
• (Fig.23) - After heating milk, release a small
quantity of hot water to clean out the tube. Wipe the outside of the tube clean with a damp cloth.
• (Fig.24) - Everyday you should empty and wash the drip tray.
• Use a soft cloth dampened with water to clean the machine body.
• (Fig.16) - To clean the “Crema” filter holder: - Remove the filter, immerse it in hot water and wash it thoroughly.
- Wash out the inside of the “Crema” filter holder.
• Never dry the machine and/or its components in a microwave or conventional oven.
10 DESCALINGScale normally forms inside the machine with use; descaling is necessary every 3-4 months or whenever you observe a decrease in water flow.
If you wish to descale the machine yourself, you can use any commercially
available non-toxic, non-harmful descaling product for coffee machines.We recommend using Saeco descaler.
Warning! Never use vinegar as a descaling agent.
• Remove the water tank and empty out any water left inside it.
• (Fig.2) - Mix the descaling agent with water as directed on the package and pour all the solution into the tank. Place the tank inside the machine
• (Fig.4B) - Turn on the machine by pressing the ON/OFF switch (2).
• (Fig.5) - Place a container beneath the steam tube.
• Empty the entire contents from the water tank at intervals (one cup at a time): turn the steam knob (7) counterclockwise and press the coffee switch (4) to activate flow and then press the coffee switch (4) again and turn the
Cleaning - Descaling
4316036000 - SIN024X Rev00.indd 26 10/05/2004 11.57.18
ENGLISH
• 27 •
steam knob (7) clockwise to shut off flow.
• (Fig.4B) - You should allow the descaling agent to act for about 10-15 minutes during each interval; in the meantime, turn off the machine by pressing the ON/OFF switch (2). Empty out the container.
• (Fig.2) - When all the descaling solution has been run through the machine, take out the water tank, rinse it out and refill it with fresh drinking water.
• (Fig.3; Fig.5) - Place the tank back inside the machine. Empty out 2/3 of the water in the tank by turning the steam knob (7) counterclockwise and pressing the coffee switch (4); to shut off flow press the coffee switch (4) again and turn the steam knob (7) clockwise.
• Let the machine heat up and empty out the remaining water in the tank by turning the steam knob (7) counterclockwise and pressing the coffee switch (4); to shut off flow press the coffee switch (4) again and turn the steam knob (7) clockwise.
Should you use a descaling product other than the one recommended,
make sure in any case to follow the manufacturer’s directions on the package.
11 REGULAR SERVICING Having your machine regularly serviced by an Authorised Service Centre will extend its life and keep it performing reliably.
Keep the original packing container to protect the machine during transport.
12 LEGAL INFORMATION• These operating instructions contain all
the necessary information for proper use, operation and upkeep of the appliance.
• The user must be acquainted with these instructions and observe them carefully in order to operate and maintain the appliance safely and avoid hazards.
• If you wish to receive further information
Regular servicing - Legal information
or encounter any particular problems you feel have not been explained with sufficient clarity in these operating instructions, please contact your local dealer or the manufacturer directly.
• You should note, moreover, that the contents herein do not form part of a previous or already existing agreement or legal contract and thus do not affect the substance of the latter.
• All the manufacturer’s obligations are based on the conditions set forth in the contract of sale, which also contains complete and exclusive terms with regard to warranty services.
• The warranty terms specified in the contract are neither limited nor extended by the explanations provided herein.
• These operating instructions contain informa-tion protected by copyright.
• They may not be photocopied or translated into another language without the Manufacturer’s prior written consent.
13 DISPOSAL• Appliances no longer in use should be
rendered unusable.
• Unplug the machine, and remove the electric cable.
• At the end of their life appliances should be taken to a suitable waste collection facility.
4316036000 - SIN024X Rev00.indd 27 10/05/2004 11.57.18

ENGLISH
• 28 •
Troubleshooting
Problem Possible causes Remedy The machine does not turn on The machine is not connected to the
power supplyConnect the machine to the power supply
The pump is very noisy Water level in tank too low Add water (section 4.4)
The coffee is too cold The temperature ready light (5) was off when you pressed the switch (4)
Wait until the light goes on
Filter holder not inserted for pre-heating (section 5).
Pre-heat the filter holder
The milk does not froth properly Wrong kind of milk Check the fat content
The coffee flows out too fast and no creamy froth forms on the surface
Not enough coffee in the filter holder Add some coffee (section 5)
Coffee ground too coarsely Use a different blend (section 6)
Stale or unsuitable coffee. Use a different blend (section 6).
No coffee flows out or it just drips out slowly
Water level in tank too low Add water (section 4.4)
Coffee ground too finely Use a different blend (section 6)
Coffee compressed too firmly in the filter
Loosen the ground coffee
Too much coffee in the filter Reduce the amount of coffee in the filter holder
“Hot water/steam” knob (7) open. Turn the knob (7) clockwise to close
Excessive buildup of scale Descale the machine (section 10)
Filter in filter holder clogged Clean the filter (section 9)
Coffee leaks outside the rim Filter holder not properly fit into brew unit
Fit the filter holder properly in place (section 5)
Upper rim of filter holder dirty Clean the filter holder rim
Boiler gasket dirty or worn Clean or replace gasket
Too much coffee in the filter holder Reduce the amount of coffee.Use the measure for the right amount.
Should any problems occur that are not included in the above table or cannot be re-solved using the remedies suggested contact an authorised service centre.
4316036000 - SIN024X Rev00.indd 28 10/05/2004 11.57.19
ENGLISH
• 29 •
Notes
4316036000 - SIN024X Rev00.indd 29 10/05/2004 11.57.19