realcare baby - realityworks · realcare® baby handbook. ence. road 54701...
TRANSCRIPT

RealCare® BabyOperating HandbookPlease read these instructions before operating Baby.Keep this handbook in a safe place for future reference.
2709 Mondovi RoadEau Claire, Wisconsin USA 54701715.830.2040 • 800.830.1416
Fax 715.830.2050 www.realityworksinc.com
The following are registered trademarks of Realityworks:Baby Think It Over and the Baby Think It Over logo are registered trademarks in Australia, Canada, Japan, United Kingdom, andthe United States only.Baby Talk It Over is registered in the United States only.Some Decisions Last A Lifetime is registered in the United States only.RealCare Baby is registered in Australia, European Community, Mexico, New Zealand, and the United States only.NICoteen is registered in Australia, Japan, Mexico, Singapore, and the United States only.NICoteen logo is registered in Australia, European Community, Japan, Mexico, New Zealand, Singapore, and the United States only.
Copyright © 2003 by Realityworks RCBOpHndbk14.qxd Version 1.4 Rev. 01.29.2003
*D32G6*
D32G6

51
Why do students need to change Baby�’s position during rocking?
It is quite common to rock real infants in one position and then change positions. Do not hold Baby on its sides or tummy.
What is delay time and why would I use it?
You can use delay time if you want to program Baby for a parenting simulation, but do not want the simulation to start immediately.
Is the control unit broken when the screen looks like this?
It is possible that you or someone else accidentally selected Japanese for the control unit�’s display language. Simply press the right arrow button until you reach the end of the screens, press ENTER, and then press the left arrow button until the screen shows English as the language option. Press ENTER. Your control unit should be back to normal.
Are the diapers washable?
Yes, the diapers may be washed.
Are the Student, Babysitter, and Instructor IDs waterproof ?
Yes, all of the IDs are waterproof and may safely be worn in the shower.
Frequently asked questions
2
DrivingBaby may cry while the student is
driving. Please be aware that the cryingmay start unexpectedly, and the student should be prepared.
Do not feed, burp, rock, change diapers, or otherwise care for Baby whiledriving.
The student must bring his or her vehicle to a complete stop in a safe locationbefore caring for Baby, or to retrieve apiece of Baby�’s equipment that falls.
Failure to install Baby in a car seat ina motor vehicle could result in Baby orsupplies becoming projectiles in theevent of a sudden stop or accident.
LocationNever leave Baby unattended in a
public place, given the potential for Baby tobe mistaken for a real infant.
Do not place Baby in or near water.Do not place Baby on or near a
stove, especially while cooking.Baby should sleep somewhere close
to the student�’s sleeping quarters, but notin bed with the student. Baby may fallout of the bed or the student could rollover on it, causing damage to Baby anddiscomfort to the student.
To prevent discoloration and fading,do not store Baby in direct sunlight or inan area of excessive heat.
Interaction with othersLoud crying near people with
potentially serious physical conditions,such as those susceptible to heart attackor stroke, should be avoided.
Do not allow small children to play withBaby. Baby�’s hands and feet are small enoughto be a choking hazard.
Baby�’s crying or other sounds maycause pets to become agitated or aggressive. Keep Baby out of the reachof pets or other animals.
Physical precautionsTo avoid straining your arms, use an
infant car seat or carrier to transportBaby, rather than holding Baby at alltimes. Holding techniques are listed onthe Student Care Card that accompaniesBaby.
Baby weighs 6.5 to 7 pounds andcould cause discomfort for individualswith back pain.
Do not operate any type ofequipment or attempt tasks requiring theuse of both hands while holding Baby.
Simulation rulesThe student must never take his or
her wristband off. Not only will he orshe be deducted points, but the ID maybe lost, or the student may stumblearound in the dark looking for it if Babycries during the night.
The student should make a note inhis or her diary where, because their safety or the safety of others may havebeen compromised, they had to delaycaring for Baby.
Baby�’s clothing is NOT flame retardant and should NOT be worn byreal infants. Instructors should make sureall clothing is returned with Baby.
Batteries Batteries may explode, leak, cause
property damage, or cause personalinjury if disposed of in fire, inserted backwards, inserted forcefully, stored indirect sunlight or an area of excessiveheat, mixed with used batteries, mixedwith a different battery type (types arealkaline, standard [carbon-zinc], orrechargeable [nickel-cadmium]), or if thebattery terminals (ends) touch. Do notSTORE batteries in an inactive Baby.They can leak. Battery leakage can damage or destroy Baby�’s electronics andis NOT covered by warranty.
IMPORTANT SAFETY PRECAUTIONS!! !

Table of ContentsParts identification........................................................4
Part I: Programming optionsGetting started ..............................................................6Battery installation........................................................8Battery information......................................................9Practice ........................................................................10 Auto Program ............................................................14 Custom Program........................................................18 Presentation ................................................................23
Part II: Managing dataGetting data from Baby ............................................26 Ending the parenting simulation ............................28 Viewing parenting simulation data..........................29 Deleting parenting simulation data ........................32 Printing parenting simulation data ..........................34
Additional informationEmergency Start/Stop ..............................................36 Selecting a new language in the control unit ........38 Care, maintenance, and storage ..............................39 Troubleshooting guide ..............................................41 Diagnostic test............................................................43 Returning Baby for repair ........................................47 Frequently asked questions .................................... 49
Note:Control unit screen options and information are shownin a gray LCD screen graphic or in all capital letters.
OR
3
MAIN MENUAuto Program >
AUTO PROGRAM
50
Frequently asked questions
When I print the data, why does the printout have this symbol on it:
The batteries in the printer are low. Replace the batteries and try printing again. (This only applies to the HP82240B printer model.)
I programmed Baby to run four different schedules for each ofthe four days of the parenting simulation. When I use VIEWDATA, why do only two schedules show up?
If you VIEW DATA while a parenting simulation is in progress,the control unit displays only the schedules that are completed or inprogress.
What do I have to do after END SIMULATION to view the datathat was obtained?
The control unit displays the simulation number: write this number down. Press ENTER to go to the Main Menu. Scroll to VIEW DATA or PRINT DATA (if you have the optional printer). Choose the number you wrote down and press ENTER.
When I use VIEW DATA, there is a flashing �“ES�” on the TotalSimulation Time screen. What does this mean?
An emergency stop was done by you or the student. Total Simulation Time was recorded until the stop was performed. See pages 26-27 for an explanation of the Emergency Start/Stop feature.
I programmed Baby to run for four days. Why does the TotalSimulation Time read 4 days, 0 hours, and 45 minutes?
Wrong position, rough handling, head support failure, no diaper,neglect, and shaking can add extra minutes to the Total SimulationTime.

Parts identification
4
Contact point
Battery cover lock
Emergency start/stop opening
Low battery indicator light
Diaper sensor area
Speaker
Instructor key ring
Battery cover keys
Instructor ID
Feeding sensor area
49
Why does Baby beep after I insert the batteries?
Baby makes a loud beep when the fourth battery is installed correctly. If you hear a buzzing sound, the batteries are probably installed incorrectly or are too low.
Why doesn�’t the control unit�’s battery cover snap back on?
Starting at the bottom of the battery compartment, SLIDE the cover on until it clicks into place.
Can I start Baby without a control unit?
Yes. See page 36 about using the Emergency Start feature.
I lost the control unit. Can I use a different control unit to GETDATA or END SIMULATION?
Yes. Baby tells the control unit its number during GET DATA or END SIMULATION. The control unit accepts the simulation number Baby gives it. If there is already data for that simulation number in the control unit, it allows you to overwrite it.
I am trying to program Baby; why doesthe control unit display this screen?
The control unit has data for 99 parenting simulations in it. You must delete some parenting simulation numbers�’ data from the control unit�’s memory before you can program additional parenting simulations.
When I use VIEW DATA, there is a flashing �“LB�” on the TotalSimulation Time screen. What does this mean?
The parenting simulation shut down because the batteries are low in Baby and need to be changed. Data will not be lost.
No Available #Clear Memory
Frequently Asked Questions

Parts identification
5
LCD screen
ContactContact
Battery cover
Diaper
ID
Breastfeeding device Tamperproof wristband
Control unit frontControl unit back
Bottle
Include a method of payment. A purchase order, check, orcredit card with the name of the cardholder, card number,and expiration date will be accepted.
Include a sheet of letterhead with a brief explanation ofwhy the item(s) are being sent for repair. Please referenceeach RealCare® Baby serial number (found on the electronics box in Baby�’s back) and the reason that Baby isbeing returned, as well as your name, organization name,and customer ID number.
Address the package to :Realityworks, Inc.RMA#_______2709 Mondovi RoadEau Claire, WI 54701
Once your Baby is received, it will be repaired and shippedback to you. If you have questions regarding the status ofyour repair, please call the Customer Service Department at800.830.1416.
48
5
Returning Baby for repair
6
7
8

Part I - Programming options
Getting started
Important points - READ THESE FIRST!Baby�’s contact point MUST be touched by an ID threetimes or the parenting simulation does not start.
Baby MUST have a diaper on when you program it.
Each ID is unique. When you touch each ID to Baby and itbeeps during programming, it is programmed with its own code.
Removing the batteries from either the control unit or Babydoes NOT erase the data. Data is stored in the control unituntil you delete it and in Baby until you reprogram it.
Diapers and bottles other than the ones supplied with Babydo NOT work with Baby.
When Baby is crying, the first step is to touch the ID to thecontact point. If Baby beeps, it needs to be fed, burped,rocked, or have its diaper changed. If there is no beep, makesure Baby is placed on its back and the diaper is fastened to thediaper sensor area. If Baby is still crying, it is either fussy (noaction needed) or rough handling has occurred (rocking needed).
To stop Baby from crying after rough handling, Baby must berocked until the crying softens twice and STOPS (about45 seconds). Baby must sense constant, gentle motion or thecrying volume goes back up and Baby cries longer.
The control unit can hold information for up to 99 parentingsimulations at once. Data stays in the control unit until youdelete it. (See page 33 about parenting simulation numbers)
The control unit battery cover SLIDES on. Do not try tosnap it on. Slide the cover on from the bottom until it clicks.
6
1
2
3
4
5
6
7
8
9
If you suspect your RealCare® Baby needs to be returned toRealityworks for repair, please follow these steps:
Complete the Diagnostic Testing on pages 43-46 of thisOperating Handbook.
Call 800.830.1416 for the Customer Service Department atRealityworks. A Customer Service representative will providefurther instructions and troubleshooting assistance. Pleasehave the following items available when you call:�• Baby�• Four NEW C batteries�• Bottle or breastfeeding device�• White patch diaper�• Blue patch diaper�• Paper clip�• Instructor key ring with battery cover key and ID�• Control unit with NEW 9-volt battery�• Printer (optional)
If your Baby needs to be repaired, Customer Service will provide you with a RMA Number for use when returning Baby.
Package RealCare® Baby, undressed, in the plastic bag provided with your purchase and place it in the original box.Do NOT use newspaper for packaging Baby; the inkwill transfer onto Baby�’s vinyl. If the data from the simulation you experienced a problem with is available,please include the printout with Baby. Unless specificallyrequested by Customer Service, do NOT send accessories, batteries, Instructor key ring, or IDs.
1
2
3
4
Returning Baby for repair
47

46
Diagnostic Test
Place the bottle or breastfeeding deviceagainst Baby�’s mouth. A continuous beep will sound if Baby haspassed the Feeding Sensor Test.
Tilt and hold Baby its right side. Beepingwill STOP. Continue holding on its right side.
Touch an ID to the contact point onBaby�’s back. A continuous beep will sound. Tilt and hold Babyon its left side. Beeping should STOP. Continue holding on itsleft side.
Touch an ID to the contact point. Babywill beep once. Tilt Baby on its right side and Baby will startbeeping. Tilt and hold Baby its left side. Beeping should STOP.Continue holding on its left side.
Touch an ID to the contact point. You willhear a continuous beeping sound. Tilt Baby on its right side.Beeping should STOP. Continue holding on its right side.
Touch an ID to the contact point. A loud beepwill sound and Baby will cry for approximately five seconds.
Baby is working correctly if it has passed each step of the test.If Baby has failed, try once more with a new set of batteries. IfBaby still fails, contact the Customer Service Department at800.830.1416. Please have the materials listed on page 43 withyou when you call.
1st Position Test
2nd Position Test
3rd Position Test
4th Position Test
Sounds Test
Gather these supplies:�• Baby�• Four C batteries�• Instructor key ring�• IDs�• Tamperproof wristband�• Bottle or breastfeeding device�• Blue patch diaper�• White patch diaper (on Baby)�• Control unit �• One 9V battery
7
Feeding Sensor Test

Diagnostic test
Touch the control unit to the contact point on Baby�’s back.The control unit screen should read:
DO NOT TOUCH THE ID! Set the control unit aside.
Proceed with the following eleven tests. Baby will beep andthe low battery light will flash after each test to indicateBaby has passed. If any of the tests do not pass, you canproceed to the next test by momentarily touching an ID toBaby�’s back and you will hear one beep. Holding the IDlonger than a moment and hearing more than one beep willcause you to skip one test for each beep heard.
Allow Baby�’s head to fall all the wayback. A beep will sound if Baby has passed the Head Support Test.
Trigger the rough-handling sensor byhitting Baby on its back below the battery compartment. Onebeep will sound if Baby has passed the Rough-Handling Test.
Lightly press theEmergency Start/Stop button with a large paper clip. One beepwill sound if Baby has passed the Emergency Start/Stop ButtonTest.
Put the diaper with the blue patch up tothe hook and loop fastener on Baby�’s back. One beep will soundif Baby has passed the Blue Diaper Test.
Put the diaper with the white patch up tothe hook and loop fastener on Baby�’s back. One beep will soundif Baby has passed the White Diaper Test.
8
Touch Any ID To Start Baby
9
Head Support Test
Rough-Handling Test
Emergency Start/Stop Button Test
Blue Diaper Test
White Diaper Test
45
Battery installation
BabyInsert a battery cover key into thebattery cover lock and turn counterclockwise. Remove the cover. Laythe ribbon across the bottom of the bat-tery compartment as shown below. Ifyou do not use the ribbon, it is very difficult to remove the batteries.
Insert the first two C batteries as indicated by the plus/minus label in thebattery compartment. Lay the rest ofthe ribbon across the top of the twobottom batteries and insert the last twobatteries. Baby beeps loudly when thebatteries are installed correctly.Replace the cover and lock it by insertingthe battery cover key into the lock andturing clockwise.
If you take one battery out for any reason, wait at least 15seconds before reinserting it. Baby�’s electronics need this timeto re-set.
Control unitSlide the battery cover off in the direction ofthe arrow. Lay the ribbon across the bottom of the battery compartment asshown. Insert the 9V battery as indicated bythe plus/minus label in the battery compartment. Slide the cover back on until it clicks.
8
1
2
1

44
Diagnostic test
To administer the diagnostic test, perform the following steps:
Remove Baby�’s t-shirt and diaper.
Install the NEW four C batteries into the battery compartment in Baby�’s back. Follow the steps on page 8 ofthis handbook. When the batteries are installed correctly,you will hear a beep. If you do not hear a beep, remove thebatteries, wait fifteen seconds, and reinsert them. Ensure thebattery removal ribbon is placed properly. This will preventit from getting caught in the lock and between the batteryand battery contacts.
Attach and lock the battery cover. The battery cover mustbe on to prevent the batteries from losing contact.
Place Baby in a sitting position with the battery compartment facing you.
Turn on the control unit by pressing the ON/OFF button.The screen will read:
Press the PREVIOUS SCREEN and MAIN MENUbuttons at the same time.
Release the buttons and the screen should read:
1
2
3
5
4
MAIN MENUAuto Program >
6
7
Touch To BabyContact Point
Low battery information
The low battery indicator light inBaby�’s back starts blinking duringa parenting simulation when thebatteries are low. Instruct students to bring Baby in as soonas possible after they notice thelight. Baby can run for abouttwo days after the low batteryindicator comes on.
Dead batteries corrode thebattery contacts and shortenthe life of Baby�’s components.Damage from battery leakage IS NOT covered by warranty.
If you try to use GET DATA or END SIMULATION on aBaby with low batteries, the control unit reads:
If the control unit�’s batteries are low, the screen goes dim andthe top line of the display blinks between MAIN MENU and:
Neither the control unit nor Baby loses data when the batteries are changed.
Store batteries in a cool, dry place. Wrap a rubber band aroundbundles of four batteries. Do not let battery terminals (ends) touch.
9
Low battery indicator light
PLEASE CHANGEBABY�’S BATTERIES
LOW BATTERY< Custom Program >

Diagnostic test
Gather these items for the diagnostic test:
�• RealCare® Baby�• Four NEW C batteries�• One ID�• One large paper clip�• Both diapers (one with a blue patch and one with a
white patch)�• Bottle or breastfeeding device�• Battery cover key�• Control unit with NEW 9-volt battery
43
Practice
Baby cries for feeding, burping, rocking, and diaper changes inPractice mode, but each session is shortened so students can practice during class. Baby also cries for and records instances ofrough handling, failure to support the head, wrong positioning (onthe stomach or sides), shaking, fussy, and no diaper. Students also getto hear each sound Baby may make during a parenting simulation. Inthis mode, students can practice caring for Baby just as theywill during the actual parenting simulation - the ID and careprocess is identical and each activity and sound is outlined below.Baby follows this order in Practice mode:
1) Feeding (30 seconds) 5) Rocking (30 seconds)2) Burping (30 seconds) 6) Fussy (14 seconds)3) Happy (coos once) 7) Cough (1 cough)4) Diaper change (1 change) Starts over at Feeding
When Baby cries,touch the ID to the contact point,listen for the beep, and then placethe bottle or breastfeeding deviceto Baby�’s lips. Baby makes feedingsounds and coos when done feeding. If Baby is roughly handledor the head is not supported, there is no coo; the feedingsounds stop when Baby is done. (Note: the rubber nipple on the bottlecontains latex, which could cause an allergic reaction in latex-sensitive indi-viduals.)
When Baby cries, touch the IDto the contact point, listen for the beep, andthen pat Baby�’s back gently between theshoulder blades. Baby makes breathing soundsand burps when done. If Baby is roughly handled or the head is not supported, thebreathing sounds stop when Baby is done andthere is no burp.
Baby makes a cooing sound. No action required.
Burping
Happy
Feeding
10

Symptom Cause and/or solution
I used the Emergency Start/Stop The button may be stuck. Please call thebutton to stop Baby, and now the Customer Service Department.control unit does not work.
The control unit does not turn on. The battery could be low. Change it and try the control unit again. No data is lost.
The control unit screen reads I Press ENTER and try to program Baby have the wrong control unit for again. If the same message appears, a my Baby. communication error has occurred.
Please call the Customer Service Department.
When I END SIMULATION The control unit always assigns after using Practice mode, the simulation number 0 for Presentationsimulation number is 0. and Practice modes.
VIEW DATA does not work; the The data has been deleted from the control unit reads there is no data control unit. Also, if you reprogrammed to view. Baby before using GET DATA or END
SIMULATION for the parenting simulation, you have erased that data in Baby.
A student dropped her ID into a The IDs can be completely submergedpool. in water and will still work. Dry the ID
before touching it to Baby�’s back.
I cannot program Baby or end a The Emergency Start/Stop button maysimulation with the control unit. be stuck. Please call the Customer
Service Department.
DON�’T FORGET! If Baby is incorrectly positioned,roughly handled, shaken, or the head is not supported (evenduring feeding, burping, rocking, or a diaper change) Babycries very hard AND THE STUDENT MUST ROCK ITUNTIL BABY COMPLETELY STOPS CRYING. If Babywas being fed, burped, rocked, or having its diaper changed,it stops crying briefly, then starts crying for the care again.
42
Troubleshooting guide
When Baby cries, touch theID to the contact point, wait for the beep,detach and remove Baby�’s diaper, andreplace it with the other diaper. Be sure thehook and loop fastener on the diaper islined up with the diaper sensor area. Whenthe opposite diaper is attached to the diaper sensor on Baby�’s back, Baby coos. If Baby is roughly handled orthe head is not supported, Baby does not coo.
When Baby cries, touch the IDto the contact point, wait for the beep, androck Baby gently. Baby makes breathingsounds and coos when done. If Baby is roughly handled or the head is not supported,the breathing sounds stop when Baby is done and you do nothear a coo.
Do not hold Baby on its sides or stomach - Baby will cryfor wrong position.
Baby makes whimpering sounds. No action required andthe ID does not work.
Baby coughs once. No action required.
If Baby is incorrectly positioned, roughly handled, shaken, orthe head is not supported (even during feeding, burping,rocking, or a diaper change) Baby cries very hard AND THESTUDENT MUST ROCK IT UNTIL BABY COMPLETELYSTOPS CRYING. If Baby was being fed, burped, rocked, orhaving its diaper changed, it stops crying briefly, then startscrying for the care again.
11
Diaper change
Rocking
Fussy
Cough
Practice

Troubleshooting guide
Symptom Cause and/or solution
Baby cried after battery installation. The last parenting simulation was not ended. Use End Simulation and then reprogram Baby.
Baby will not stop crying and the Make sure Baby is on its back and the ID does not beep. diaper is fastened and wait for one
minute. If Baby is still crying, rock Baby for about 45 seconds, being careful not tohold it on its sides or tummy or rock it too hard. The crying should quiet gradually and stop. If Baby is still crying,it may be fussy - this should only last 3 minutes at most.
A red light is on (or blinking) in Baby�’s batteries are low. Change themBaby�’s back. immediately. No data is lost.
Baby did not coo (or burp) at the Baby does not coo if neglect or any kindend of feeding (or burping, of rough handling occurred duringrocking, or diaper changing). feeding (or burping, rocking, or diaper
changing).
The control unit shows a Total The largest number possible for cryingCrying Time of 999 minutes. time is 999 minutes. Crying time
includes all crying for rough handling,wrong position and neglect, as well as scheduled crying for care. The largest number for all other numerical displays,such as neglect or rough handling, is 254.
Baby�’s head fell back (or Baby was The student must rock Baby gently untilroughly handled) while the student the shrill crying gets quieter and thenwas feeding Baby (or burping, stops completely for a moment. Baby rocking, or changing the diaper). then starts crying again for the type ofBaby is crying very loudly. care the student was providing before
the rough handling occurred.
41
Practice
Make sure Baby has a diaper on and is sitting upright.DO NOT SEND BABY HOME IN PRACTICE MODE.
Turn the control unit on. The screen reads:
Use the right arrow button to scroll through the Main Menuuntil the screen reads:
Press the ENTER button. The screen reads:
Touch the contact on the control unit tothe contact point in Baby�’s back and hold itthere until the screen changes.
The control unit screen changes to:
�• Make sure Baby�’s diaper stays in place when you touch the control unit to Baby�’s back.
�• Only one ID is needed in Practice mode.
12
1
MAIN MENUAuto Program >
2
3
4
MAIN MENU< Practice >
Touch To BabyContact Point
Touch Any IDTo Start Baby

Touch any ID to the contact point on Baby�’s back tobegin. Baby beeps and then cries after about one minute.When Baby cries, touch the same ID to the contact point.Baby beeps to recognize the ID, and then you must care forBaby. Baby follows the cycle until you END SIMULATION.
1) Feeding (30 seconds) 5) Rocking (30 seconds)2) Burping (30 seconds) 6) Fussy (14 seconds)3) Happy (coos once) 7) Cough (1 cough)4) Diaper change (1 change) Starts over at Feeding
To stop practicing, turn the control unit on. Press the rightarrow button until the screen reads:
Press ENTER. The screen reads:
Touch the contact on the control unit tothe contact point in Baby�’s back.
The screen reads:
Baby is inactive. For information on viewing Baby�’s data, seepage 29.
13
5
6
MAIN MENU< End Simulation >
7
Touch To BabyContact Point
8
Simulation 0Ended
Practice
Never store the batteries in Baby. If you are not using theinfant simulators for 14 or more days, remove the batteries forstorage. Battery leakage can damage or destroy Baby�’s electronics. Battery leakage is not covered by warranty.
Do not let the battery terminals (ends) touch. Wrap a rubberband around bundles of batteries for organizing or storing them.Store upright in a cool, dry place.
Do not store Baby where excessive heat or cold could affectthe vinyl or electronics.
Baby�’s clothes are NOT flame retardant and should not beworn by real infants.
If you store Baby in its shipping box, place the plastic bagaround its head to prevent paint damage. The cardboard willrub paint off the back of the head. Do not wrap Baby innewsprint. The ink will leave permanent stains on Baby�’s body.
40
Care, maintenance, and storage

Never immerse Baby in water. Never allow water to comein contact with the electronics in Baby�’s back. Baby wipeswork best for simulating a bath.
Baby�’s skin stains easily. It soaks up inks and dyes. Keep Babyaway from:
�• Newsprint and other printed material.�• New, unwashed clothing�—especially jeans, sweatshirts,
and fleece.�• Pens and markers.
There is no cleaner that removes all dirt or stains. Thesecleaners may work:
�• Acne cleansing pads.�• Rubbing alcohol.�• Nail polish remover.�• All-purpose cleaner.�• Ten-percent benzoyl peroxide cream left on Baby while
sitting in the sun.
Do not use any cleaners or abrasives on Baby�’s head. Theseitems will remove the paint. Wipe the head with a baby wipe orwet cloth to remove any surface dirt.
Baby�’s joints have been specially treated and should notdry out. If the joints do become stiff, Joint Lubricant may bepurchased from Realityworks. It lubricates the joints and prevents the tearing that results from dry vinyl. One tube of theJoint Lubricant can be used for up to forty Babies.
39
Care, maintenance, and storage
14
Auto Program
Auto Program is a quick and easy way to program Baby for a parenting simulation. It automatically chooses a parenting simulationnumber, and a random sequence of care schedules (for more information on these features, see page 21-22).
Auto Program also selects two hours of delay time. You can usedelay time to program Baby so it does not cry for care until afterthe student is at home, or finished with an after-school activity.
Baby DOES NOT cry for feeding, burping, rocking, or diaper changes during delay time. Baby DOES cry if it isroughly handled, in a wrong position, if the head is notsupported, or the diaper is left off during delay time. Afterthe programmed hours of delay time have passed, Babycries for care according to the schedule it is following.
Make sure Baby has a diaper on and is sitting upright.If you make an error while programming, use the PREVIOUSSCREEN button to go back.
Turn the control unit on. The screen reads:
Press ENTER. The screen reads:
The control unit selected a random order of the 15 schedules forBaby to follow. Use the right arrow button to scroll through themand write them down if you want. If you want a different order,press the PREVIOUS SCREEN button and then the ENTERbutton again.
1
MAIN MENUAuto Program >
2
Schedule Numbers
4 >

Selecting a new language in the control unit
The control unit screens can be displayed in English, Japanese,French, or Spanish. If you would like to use a different languagethan the one currently displayed, turn the control unit on bypressing the ON/OFF button.
Press the right arrow button until thescreen reads:
Press the ENTER button.The screen will read:
Press the right arrow button until the language you want is displayed.The order is English / Japanese / French / Spanish/German.
When the language you want is displayed, press the ENTERbutton. The control unit screens will be displayed in the new language from that point on, or until you select a different language.
Para seleccionar un nuevo lenguaje, encienda el control presionando el botón deON/OFF. Presione el botón de la flecha derecha que dice �“Select Language.�” Presione elbotón ENTER. La pantalla dirá �“Select Language English.�” Presione el botón de laflecha de la derecha hasta que aparezca en la pantalla el lenguaje que usted desea. Susopciones son Ingleses, Japoneses, Franceses, y Españoles. Cuando el lenguaje queusted desea aparezca en la pantalla, presione el botón ENTER. El lenguaje que ustedhaya seleccionando aparecerá en la pantalla.
Pour sélectionner une nouvelle langue, allumer l'unité de commande en appuyant surle bouton ON/OFF. Appuyer sur la touche flèche droite jusqu'à ce que l'écran affiche�“Select Language.�” Appuyer sur la touche ENTREE. L'écran affichera �“Select LanguageEnglish.�” Appuyer sur la touche flèche droite jusqu'à ce que la langue souhaitée soitaffichée. Vos choix sont les anglais, les japonais, les français, et les espagnols. Lorsquela langue que vous souhaitez est affichée, appuyer sur la touche ENTREE. Les écransde l'unité de commande seront affichés dans la langue que vous avez choisie.
MAIN MENU< Select Language
Select LanguageEnglish >
15
To return the control unit language to English, simply follow thesteps above by pressing the right arrow button until you reach theend of the screens. Press ENTER. Press the left arrow buttonuntil the screen reads English. Press ENTER.
38
When you are satisfied with the schedule order, pressENTER. The screen reads:
Use the right and left arrow buttons to scroll through the timesuntil the hour that is closest to the current time is displayed.This sets Baby�’s internal clock to match real time. You do thisso Baby follows the programmed schedules almost as thereal infant behaved.
Press ENTER. The screen reads:
Touch the contact on the control unit tothe contact point in Baby�’s back and hold itthere until the screen changes.
The control unit screen changes to:
At least one ID must touch the contactpoint on Baby�’s back THREE TIMES or the simulationdoes not start. Baby should beep when each ID is touched.See next page for ID programming instructions.
5
Touch IDs ToStart Simulation
4
Touch To BabyContact Point
3
Current Hour< 6am >
Auto Program
IMPORTANT!

16
EMERGENCY START
Use the battery cover key toopen Baby�’s battery cover.
Remove one battery. WAIT AT LEAST 15 SECONDSand then replace the battery. Baby will beep.
YOU HAVE 5 SECONDS from the time you replace thebattery to use a straightened paper clip to quickly and gentlypress the Emergency Start/Stop button recessed in Baby�’sback THREE TIMES. BABY BEEPS 3 TIMES.
Replace the battery cover and lock it.
Program IDs as normal (page 19).
37
Battery cover lockBattery cover key
1
2
3
4
5
Emergency Start / StopAuto Program
The order in which you touch the IDs to the contact pointdetermines which ID is the Student ID and which is theBabysitter ID. Your Instructor ID can be used for day care.
Touch the same ID three times. The ID is nowthe Student ID. Attach this ID to the student�’swrist with the wristband.
Touch the first ID once and the second ID twicein a row. The first ID is the Student ID and the second ID is the Babysitter ID. A Babysitter ID givesthe student a chance to have someone else care for Baby. Babyreports how many times each ID was used.
Touch the first ID twice in a row and the Instructor ID once. The first ID is the StudentID and the Instructor ID puts Baby into daycare. The instructor can use the Instructor ID ifa student cannot care for Baby for a period of time, perhaps duringan extracurricular activity. When the Instructor ID is touched tothe contact point during a parenting simulation, Baby beepsthree times and is inactive. Touch the Instructor ID againwhen the student is ready to care for Baby -- it beeps threetimes and resumes its schedule at the current hour.
Touch the first ID once, the second IDonce, and the Instructor ID once. The firstID is the Student ID. The second ID is theBabysitter ID. The Instructor ID puts Babyinto day care.
For one student only
For one student and a Babysitter ID only
For one student and the day care option
For one student, a Babysitter ID, and the day care option
1, 2, 3
1
2, 3
1, 2
3
1
2
3

Emergency Start / Stop
This feature can be used to stop Baby if the control unit is notavailable, or if the student needs to stop Baby in an emergency (itis not recommended that you tell students this unless theycontact you in an emergency).
It can also be used to start Baby if an emergency stop was doneand the control unit is not available.
EMERGENCY STOP
Use a straightened paper clip togently press the EmergencyStart/Stop button recessed inBaby�’s back and HOLDUNTIL BABY BEEPS 6TIMES. (You may need to holdit for as long as 15 seconds.)
Baby is inactive.
Use the GET DATA or END SIMULATION control unitoptions to obtain the parenting simulation data before youreprogram Baby or the data will be lost.
36
Emergency Start/Stop opening
1
17
Additional information
The parenting simulation begins when an ID is touched toBaby�’s contact point for the third time. Baby is then readyfor the student.
REMEMBER: Baby is automatically programmed for two(2) hours of delay time. During delay time, Baby cries ifit is roughly handled, in a wrong position, if the headis not supported, or the diaper is left off. Baby DOESNOT cry for feeding, burping, rocking or diaperchanges during delay time. After two hours, Baby criesfor care according to the schedule it is following.
Auto Program

18
Make sure the printer has batteries and paper in it, and thatit is turned on. Position the control unit so the contact pointsdirectly at the infrared window on the printer (as shown). It isnot necessary to touch the contact to the printer.
Press ENTER. The printer should begin printing the parenting simulation data. Be careful not to move the control unit until it has displayed these two screens andis back to the Main Menu:
35
4
Printing DataSimulation X
Data Printed ForSimulation X
Infrared window
Printing parenting simulation information
Custom Program is a more advanced programming mode. It letsyou choose a parenting simulation number, the number of daysyou want the parenting simulation to last, the sequence of careschedules, and hours of delay time.
Parenting simulation number:
Each parenting simulation has itsown number in the control unit.This number allows the controlunit to keep track of each parenting simulation�’s data. AutoProgram automatically assigns this
number; in Custom Program, you can choose which number youwant to assign to the parenting simulation. You use this numberwhen you use VIEW DATA, DELETE DATA, and PRINTDATA (if you have the optional printer).
Days the parenting simulation lasts:
Determine how many days thestudent will have Baby. Forexample, if a student is requiredto take Baby home Friday andreturn it Monday, program Babyto run for four days. CountFriday (1), Saturday (2), Sunday(3) and Monday (4). This makes sure the parenting simulationkeeps running the entire time the student has Baby.
Pick Number ForSimulation X >
Number Of Days1 >
Custom Program

19
Printing parenting simulation data
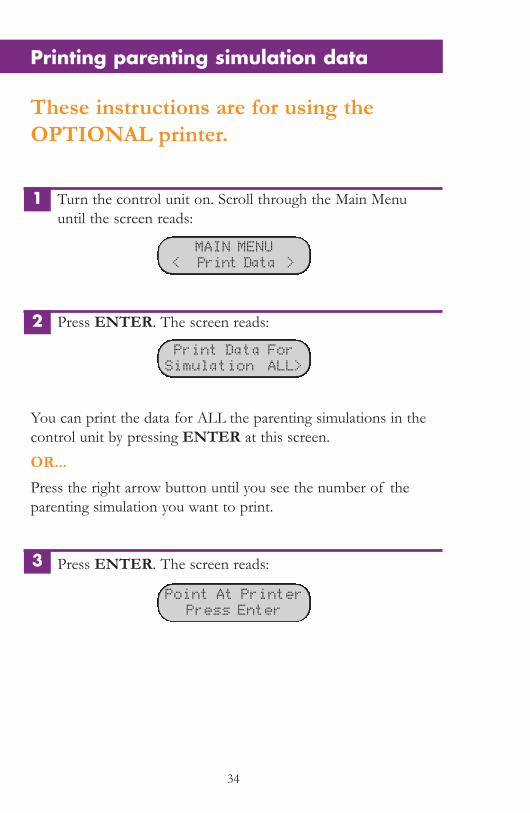
These instructions are for using the OPTIONAL printer.
Turn the control unit on. Scroll through the Main Menuuntil the screen reads:
Press ENTER. The screen reads:
You can print the data for ALL the parenting simulations in thecontrol unit by pressing ENTER at this screen.OR...Press the right arrow button until you see the number of the parenting simulation you want to print.
Press ENTER. The screen reads:
34
1
MAIN MENU< Print Data >
2Print Data For
Simulation ALL>
3
Point At PrinterPress Enter
Custom Program
Sequence of care schedules:
The Schedule Table in theProgram Manual shows the 15different schedules Baby canbe programmed with. InCustom Program, you canchoose which schedule Babyfollows for each day of theparenting simulation. You alsohave the option of letting thecontrol unit select the schedules for you.
Hours of delay time:
Use delay time to programBaby so it does not cry for careuntil after the student is homefrom school, or finished with anafter-school activity. You canalso choose 0 for hours ofdelay time if you want Baby tobegin following its schedule right away.
For Day 1 UseSchedule X )
Delay Time0 >

This screen is your last chance to change your mind!
The word YES flashes - to choose YES press ENTER. Ifyou choose YES, the parenting simulation data is deleted.
To choose NO, press the right arrow button once so NO isflashing and press ENTER. You are then taken back to theMain Menu.
Once data is deleted from the control unit IT IS NOT RETRIEVABLE!
33
4
Deleting XYes No
Deleting parenting simulation data
20
Make sure Baby has a diaper on and is sitting upright.
Turn the control unit on. Scroll through the Main Menuuntil the screen reads:
Press ENTER. The screen reads:
Use the right arrow button to scroll through the available numbers until the one you want is displayed. Write it down.
Press ENTER. The screen reads:
Press the right arrow button until the number of days you wantthe parenting simulation to last is displayed.
Press ENTER. The screen reads:
The word RANDOM flashes - to have the control unit choosethe schedules for you, press ENTER and continue at . Tochoose PICK, press the right arrow button once so the wordPICK is flashing and press ENTER, and continue at .
1
MAIN MENU< Custom Program >
2Pick Number ForSimulation X >
The next available parenting simulation tracking number is
displayed where the X is.
3
Number Of Days1 >
4
Select ScheduleRandom Pick
5
Custom Program
6

21
Deleting parenting simulation data
The DELETE DATA control unit function permanentlydeletes parenting simulation data.
Turn the control unit on. Scroll through the Main Menuuntil the screen reads:
Press ENTER. The screen reads:
You can delete the data for ALL the parenting simulations in thecontrol unit by pressing ENTER at this screen.OR...Press the right arrow button until you see the number of the parenting simulation you want to delete.
Press ENTER. The screen reads:
The word YES flashes. To choose YES, press ENTER.
To choose NO, press the right arrow button once so theword NO flashes, and press ENTER.
32
1
MAIN MENU< Delete Data >
Delete Data ForSimulation ALL>
2
Are You Sure?Yes No
3
Custom Program
The screen reads:
Use the right arrow to scroll through the 15 schedules. You maywrite these down if you wish. Select the schedule numbers youwould like to use. Press ENTER, skip step .
The screen reads:
Use the arrow buttons to scroll through the schedule numbersand choose one for the first day of the parenting simulation. PressENTER. Repeat for each programmed day.
When you are finished programming schedules, the screenreads:
Use the arrow buttons until the number of hours you want Babyto delay before starting the first schedule is displayed.
Press ENTER. The screen reads:
Use the arrow buttons to scroll through the time until the hourthat is closest to the time where you are is displayed.
5
For Day 1 UseSchedule X >
6
Delay Time0 >
7
Schedule Numbers1 >
8
Current Hour< 6 am >
6

22
The number of times Baby was placed on its head for more than five seconds or on its side or tummy for two or more minutes, and how many times Baby was roughly handled.
The number of times Baby�’s head was not supported correctly, and how many times Baby�’s head fell back three or more times within two seconds.
This number includes crying for care,neglect, fussy, no diaper, wrong position, rough handling, no head support, and shaking. The largest number of minutes that is recorded is 999.
For more information on these activities, see �“Operating Features�” in your ProgramManual.
31
Wrong Pos XRough Handlg X
Head Support XShaken Baby X
Minutes Of XCrying Time
Viewing parenting simulation data
This sets Baby�’s internal clock to match real time. You do thisso Baby follows the programmed schedules almost exactlyas the real infant behaved.
Press ENTER. The screen reads:
Touch the contact on the control unit tothe contact point on Baby�’s back and hold itthere until the screen changes to:
The parenting simulation starts whenan ID is touched to Baby�’s contact point for the thirdtime. Baby should beep when each ID is touched.
Attach the student ID to the student�’s wrist with the red tamperproof wristband. Baby is then ready for the student.
Refer to page 19 for the information about programming IDs.
REMEMBER: In delay time, Baby cries if it is roughly han-dled, if the head is not supported, if it is in a wrong posi-tion, or if it does not have a diaper on. Baby DOES NOT cryfor feeding, burping, rocking, or diaper changes duringdelay time. After the programmed hours have passed,Baby cries for care according to the schedule it is following.
9Touch To BabyContact Point
Touch IDs ToStart Simulation
Custom Program
10
IMPORTANT!

23
Viewing parenting simulation data
The number of times Baby cried to be fed, and how many times the student neglected to care for Baby during feeding*.
The number of times Baby cried to be burped, and how many times the student neglected to care for Baby during burping*.
The number of times Baby cried to be changed, and how many times the student neglected to care for Baby during a diaper change*.
The number of times Baby cried to be rocked, and how many times the student neglected to care for Baby during rocking*.
The number of times Baby made fussy or happy sounds.
The number of times Baby coughed,and how many times Baby did not have a diaper on for more than 10 minutes.
*Neglect registers after two minutes of unattended crying. Baby cries harder and the student must care for Baby to stop the crying. At the end of the care, Baby does notcoo. Only one instance of neglect will be recorded per activity.
30
Rock XNeglect X
Fussy XHappy X
Feed XNeglect X
Diaper XNeglect X
Burp XNeglect X
Cough XNo Diaper X
Presentation
The ID is NOT used to identify the caregiver to Baby in this mode. The ID is used
to end an activity if you do not want to do it for the full 3minutes, and then to advance to the next activity or sound.Only one ID is needed.
You can demonstrate Baby by starting andstopping each activity and/or sound at yourown pace in Presentation mode, or you canlet Baby run through an activity at the programmed pace. Baby also cries for andrecords instances of rough handling, failureto support the head, wrong positioning (onthe stomach or sides), shaking, and no diaper. Baby follows this order inPresentation mode:
1) Feeding (3 minutes) 6) No Diaper (3 minutes)2) Burping (3 minutes) 7) Happy (1 coo)3) Diaper change (1 change) 8) Cough (1 cough)4) Rocking (3 minutes) 9) Fussy (14 seconds)5) Wrong Position (3 minutes) Starts over at Feeding
Turn the control unit on. Scroll through the Main Menuuntil the screen reads:
Press ENTER. The screen reads:
1
MAIN MENU< Presentation >
2
Touch To BabyContact Point
IMPORTANT!

24
The VIEW DATA control unit option allows you to go backand see information already stored in the control unit. Youmust know the parenting simulation number for the datayou want to view so you can select it in the control unit.
Turn the control unit on. Scroll through the menu until thescreen reads:
Press ENTER. The screen reads:
Use the right arrow button to scroll through the available parenting simulation numbers until you find the one you want to view.
Press ENTER. The first screen is the total time the simulation was running in days, hours, and minutes. PressENTER to scroll through each screen.
The hours of delay time Baby was programmed for, and how many times the day care option was used, if any.
The number of times the Student and Babysitter IDs were used.
29
1
MAIN MENU< View Data >
2View Data ForSimulation X >
3
Total SimulationTime X X X
The parenting simulation number is displayed where the X is.
Delay Time XDay Care X
Student XBabysitter X
Viewing parenting simulation data
Touch the contact on the control unit tothe contact point on Baby�’s back and holdit there until the screen changes.
The control unit screen changes to:
When you are ready to begin presenting Baby, touch any IDto the contact point. Baby beeps. In a few seconds, Babycries to be fed.
DO NOT TOUCH THE ID WHEN BABY CRIESUNLESS YOU WANT TO END THE ACTIVITY.
Place the bottle or breastfeeding deviceagainst Baby�’s lips andfeeding sounds begin.
Wait until Baby coos to signal the end of the activity (3 minutes) or touch the same ID to Baby�’s back again to endthe feeding yourself. Baby coos and the activity is over.
Baby is in an inactive state until you touch the same IDagain. That makes Baby beep once and start the next activity.
3
Touch Any ID To Start Baby
4
6
5
Presentation

2528
Ending the parenting simulation
The END SIMULATION control unit option stops the parentingsimulation and downloads the final parenting simulation data intothe control unit. Baby no longer responds or needs care after youuse END SIMULATION.
To end the simulation, turn the control unit on. Press theright arrow button until the screen reads:
Press ENTER. The screen reads:
Touch the contact on the control unit to thecontact point on Baby�’s back and hold itthere until the screen changes to:
Baby is inactive and the parenting simulation has ended.
If you have previously used the GETDATA option for this parenting simulation, that data is stillin the control unit unless you deleted it. You will be askedif you want to overwrite that data.
For more information, see the previous page.
1
MAIN MENU< End Simulation >
2
Touch To BabyContact Point
3
Simulation XEnded
The parenting simulation number isdisplayed where the X is. Write this
number down for reference.
IMPORTANT!
Presentation
REMEMBER:Touching the ID while an activity is going on ends the activity.
HOLDING the ID to Baby�’s back WHILE IT ISBETWEEN ACTIVITIES makes Baby beep 3 times (ONELONG, then TWO SHORT) and starts the previous activity (or sound) over again.
Feeding - Touch the ID and Baby beeps once. When Baby cries, holdthe bottle or breastfeeding device to Baby�’s lips. Baby makes feedingsounds. Ends with a coo.
Burping - Touch the ID and Baby beeps once. When Baby cries, patits back gently. Baby makes breathing sounds. Ends with a burp.
Diaper change - Touch the ID and Baby beeps once. When Babycries, detach Baby�’s diaper and replace it with the other diaper. Babycoos when other diaper is attached (no sound when the ID is used toend the activity - touch the ID a second time and a beep lets youknow Rocking has begun).
Rocking - Touch the ID and Baby beeps once. When Baby cries, rockit gently. Baby must sense constant, gentle motion. Baby makes breathing sounds. Ends with a coo.
Wrong Position - Touch the ID and Baby beeps once. Place Baby ina wrong position: on either side, on its tummy, or on its head. Aftertwo seconds Baby will cry until the position is corrected. Ends with acoo.
No Diaper - Touch the ID and Baby beeps once. Pull the diaperloose from Baby�’s back and wait until Baby cries. Replace the diaperand Baby stops crying. Ends with a coo.
Happy - Touch the ID and Baby beeps once. Baby coos once.
Cough - Touch the ID and Baby beeps once. Baby coughs once.
Fussy - Touch the ID and Baby beeps once. Baby cries for 14 seconds.

27
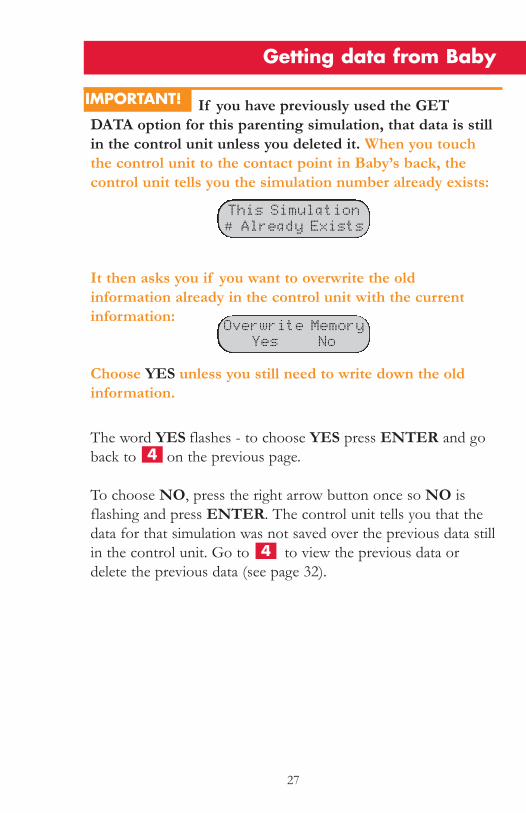
If you have previously used the GETDATA option for this parenting simulation, that data is stillin the control unit unless you deleted it. When you touchthe control unit to the contact point in Baby�’s back, thecontrol unit tells you the simulation number already exists:
It then asks you if you want to overwrite the old information already in the control unit with the current information:
Choose YES unless you still need to write down the oldinformation.
The word YES flashes - to choose YES press ENTER and goback to on the previous page.
To choose NO, press the right arrow button once so NO isflashing and press ENTER. The control unit tells you that thedata for that simulation was not saved over the previous data stillin the control unit. Go to to view the previous data ordelete the previous data (see page 32).
IMPORTANT!
This Simulation# Already Exists
Overwrite MemoryYes No
4
4
Getting data from Baby
26
Getting data from Baby
The GET DATA control unit option allows you to get information from Baby while the simulation is running.Getting data does not interfere with the parenting simulation.
Turn the control unit on. Scroll through the Main Menuuntil the screen reads:
Press ENTER. The screen reads:
Touch the contact on the control unit to the contact pointin Baby�’s back and hold it there until the screen changes.
The screen changes to:
Press ENTER to scroll through each screen of what Babyreports about the parenting simulation. A complete listing ison pages 29-31.
1
MAIN MENU< Get Data >
2
Touch To BabyContact Point
3
Ready To ViewSimulation X
The parenting simulation number is dis-played where the X is. Write down
this number for reference.
Part II: Managing data
4
27
If you have previously used the GETDATA option for this parenting simulation, that data is stillin the control unit unless you deleted it. When you touchthe control unit to the contact point in Baby�’s back, thecontrol unit tells you the simulation number already exists:
It then asks you if you want to overwrite the old information already in the control unit with the current information:
Choose YES unless you still need to write down the oldinformation.
The word YES flashes - to choose YES press ENTER and goback to on the previous page.
To choose NO, press the right arrow button once so NO isflashing and press ENTER. The control unit tells you that thedata for that simulation was not saved over the previous data stillin the control unit. Go to to view the previous data ordelete the previous data (see page 32).
IMPORTANT!
This Simulation# Already Exists
Overwrite MemoryYes No
4
4
Getting data from Baby
26
Getting data from Baby
The GET DATA control unit option allows you to get information from Baby while the simulation is running.Getting data does not interfere with the parenting simulation.
Turn the control unit on. Scroll through the Main Menuuntil the screen reads:
Press ENTER. The screen reads:
Touch the contact on the control unit to the contact pointin Baby�’s back and hold it there until the screen changes.
The screen changes to:
Press ENTER to scroll through each screen of what Babyreports about the parenting simulation. A complete listing ison pages 29-31.
1
MAIN MENU< Get Data >
2
Touch To BabyContact Point
3
Ready To ViewSimulation X
The parenting simulation number is dis-played where the X is. Write down
this number for reference.
Part II: Managing data
4

2528
Ending the parenting simulation
The END SIMULATION control unit option stops the parentingsimulation and downloads the final parenting simulation data intothe control unit. Baby no longer responds or needs care after youuse END SIMULATION.
To end the simulation, turn the control unit on. Press theright arrow button until the screen reads:
Press ENTER. The screen reads:
Touch the contact on the control unit to thecontact point on Baby�’s back and hold itthere until the screen changes to:
Baby is inactive and the parenting simulation has ended.
If you have previously used the GETDATA option for this parenting simulation, that data is stillin the control unit unless you deleted it. You will be askedif you want to overwrite that data.
For more information, see the previous page.
1
MAIN MENU< End Simulation >
2
Touch To BabyContact Point
3
Simulation XEnded
The parenting simulation number isdisplayed where the X is. Write this
number down for reference.
IMPORTANT!
Presentation
REMEMBER:Touching the ID while an activity is going on ends the activity.
HOLDING the ID to Baby�’s back WHILE IT ISBETWEEN ACTIVITIES makes Baby beep 3 times (ONELONG, then TWO SHORT) and starts the previous activity (or sound) over again.
Feeding - Touch the ID and Baby beeps once. When Baby cries, holdthe bottle or breastfeeding device to Baby�’s lips. Baby makes feedingsounds. Ends with a coo.
Burping - Touch the ID and Baby beeps once. When Baby cries, patits back gently. Baby makes breathing sounds. Ends with a burp.
Diaper change - Touch the ID and Baby beeps once. When Babycries, detach Baby�’s diaper and replace it with the other diaper. Babycoos when other diaper is attached (no sound when the ID is used toend the activity - touch the ID a second time and a beep lets youknow Rocking has begun).
Rocking - Touch the ID and Baby beeps once. When Baby cries, rockit gently. Baby must sense constant, gentle motion. Baby makes breathing sounds. Ends with a coo.
Wrong Position - Touch the ID and Baby beeps once. Place Baby ina wrong position: on either side, on its tummy, or on its head. Aftertwo seconds Baby will cry until the position is corrected. Ends with acoo.
No Diaper - Touch the ID and Baby beeps once. Pull the diaperloose from Baby�’s back and wait until Baby cries. Replace the diaperand Baby stops crying. Ends with a coo.
Happy - Touch the ID and Baby beeps once. Baby coos once.
Cough - Touch the ID and Baby beeps once. Baby coughs once.
Fussy - Touch the ID and Baby beeps once. Baby cries for 14 seconds.

24
The VIEW DATA control unit option allows you to go backand see information already stored in the control unit. Youmust know the parenting simulation number for the datayou want to view so you can select it in the control unit.
Turn the control unit on. Scroll through the menu until thescreen reads:
Press ENTER. The screen reads:
Use the right arrow button to scroll through the available parenting simulation numbers until you find the one you want to view.
Press ENTER. The first screen is the total time the simulation was running in days, hours, and minutes. PressENTER to scroll through each screen.
The hours of delay time Baby was programmed for, and how many times the day care option was used, if any.
The number of times the Student and Babysitter IDs were used.
29
1
MAIN MENU< View Data >
2View Data ForSimulation X >
3
Total SimulationTime X X X
The parenting simulation number is displayed where the X is.
Delay Time XDay Care X
Student XBabysitter X
Viewing parenting simulation data
Touch the contact on the control unit tothe contact point on Baby�’s back and holdit there until the screen changes.
The control unit screen changes to:
When you are ready to begin presenting Baby, touch any IDto the contact point. Baby beeps. In a few seconds, Babycries to be fed.
DO NOT TOUCH THE ID WHEN BABY CRIESUNLESS YOU WANT TO END THE ACTIVITY.
Place the bottle or breastfeeding deviceagainst Baby�’s lips andfeeding sounds begin.
Wait until Baby coos to signal the end of the activity (3 minutes) or touch the same ID to Baby�’s back again to endthe feeding yourself. Baby coos and the activity is over.
Baby is in an inactive state until you touch the same IDagain. That makes Baby beep once and start the next activity.
3
Touch Any ID To Start Baby
4
6
5
Presentation

23
Viewing parenting simulation data
The number of times Baby cried to be fed, and how many times the student neglected to care for Baby during feeding*.
The number of times Baby cried to be burped, and how many times the student neglected to care for Baby during burping*.
The number of times Baby cried to be changed, and how many times the student neglected to care for Baby during a diaper change*.
The number of times Baby cried to be rocked, and how many times the student neglected to care for Baby during rocking*.
The number of times Baby made fussy or happy sounds.
The number of times Baby coughed,and how many times Baby did not have a diaper on for more than 10 minutes.
*Neglect registers after two minutes of unattended crying. Baby cries harder and the student must care for Baby to stop the crying. At the end of the care, Baby does notcoo. Only one instance of neglect will be recorded per activity.
30
Rock XNeglect X
Fussy XHappy X
Feed XNeglect X
Diaper XNeglect X
Burp XNeglect X
Cough XNo Diaper X
Presentation
The ID is NOT used to identify the caregiver to Baby in this mode. The ID is used
to end an activity if you do not want to do it for the full 3minutes, and then to advance to the next activity or sound.Only one ID is needed.
You can demonstrate Baby by starting andstopping each activity and/or sound at yourown pace in Presentation mode, or you canlet Baby run through an activity at the programmed pace. Baby also cries for andrecords instances of rough handling, failureto support the head, wrong positioning (onthe stomach or sides), shaking, and no diaper. Baby follows this order inPresentation mode:
1) Feeding (3 minutes) 6) No Diaper (3 minutes)2) Burping (3 minutes) 7) Happy (1 coo)3) Diaper change (1 change) 8) Cough (1 cough)4) Rocking (3 minutes) 9) Fussy (14 seconds)5) Wrong Position (3 minutes) Starts over at Feeding
Turn the control unit on. Scroll through the Main Menuuntil the screen reads:
Press ENTER. The screen reads:
1
MAIN MENU< Presentation >
2
Touch To BabyContact Point
IMPORTANT!

22
The number of times Baby was placed on its head for more than five seconds or on its side or tummy for two or more minutes, and how many times Baby was roughly handled.
The number of times Baby�’s head was not supported correctly, and how many times Baby�’s head fell back three or more times within two seconds.
This number includes crying for care,neglect, fussy, no diaper, wrong position, rough handling, no head support, and shaking. The largest number of minutes that is recorded is 999.
For more information on these activities, see �“Operating Features�” in your ProgramManual.
31
Wrong Pos XRough Handlg X
Head Support XShaken Baby X
Minutes Of XCrying Time
Viewing parenting simulation data
This sets Baby�’s internal clock to match real time. You do thisso Baby follows the programmed schedules almost exactlyas the real infant behaved.
Press ENTER. The screen reads:
Touch the contact on the control unit tothe contact point on Baby�’s back and hold itthere until the screen changes to:
The parenting simulation starts whenan ID is touched to Baby�’s contact point for the thirdtime. Baby should beep when each ID is touched.
Attach the student ID to the student�’s wrist with the red tamperproof wristband. Baby is then ready for the student.
Refer to page 19 for the information about programming IDs.
REMEMBER: In delay time, Baby cries if it is roughly han-dled, if the head is not supported, if it is in a wrong posi-tion, or if it does not have a diaper on. Baby DOES NOT cryfor feeding, burping, rocking, or diaper changes duringdelay time. After the programmed hours have passed,Baby cries for care according to the schedule it is following.
9Touch To BabyContact Point
Touch IDs ToStart Simulation
Custom Program
10
IMPORTANT!

21
Deleting parenting simulation data
The DELETE DATA control unit function permanentlydeletes parenting simulation data.
Turn the control unit on. Scroll through the Main Menuuntil the screen reads:
Press ENTER. The screen reads:
You can delete the data for ALL the parenting simulations in thecontrol unit by pressing ENTER at this screen.OR...Press the right arrow button until you see the number of the parenting simulation you want to delete.
Press ENTER. The screen reads:
The word YES flashes. To choose YES, press ENTER.
To choose NO, press the right arrow button once so theword NO flashes, and press ENTER.
32
1
MAIN MENU< Delete Data >
Delete Data ForSimulation ALL>
2
Are You Sure?Yes No
3
Custom Program
The screen reads:
Use the right arrow to scroll through the 15 schedules. You maywrite these down if you wish. Select the schedule numbers youwould like to use. Press ENTER, skip step .
The screen reads:
Use the arrow buttons to scroll through the schedule numbersand choose one for the first day of the parenting simulation. PressENTER. Repeat for each programmed day.
When you are finished programming schedules, the screenreads:
Use the arrow buttons until the number of hours you want Babyto delay before starting the first schedule is displayed.
Press ENTER. The screen reads:
Use the arrow buttons to scroll through the time until the hourthat is closest to the time where you are is displayed.
5
For Day 1 UseSchedule X >
6
Delay Time0 >
7
Schedule Numbers1 >
8
Current Hour< 6 am >
6

This screen is your last chance to change your mind!
The word YES flashes - to choose YES press ENTER. Ifyou choose YES, the parenting simulation data is deleted.
To choose NO, press the right arrow button once so NO isflashing and press ENTER. You are then taken back to theMain Menu.
Once data is deleted from the control unit IT IS NOT RETRIEVABLE!
33
4
Deleting XYes No
Deleting parenting simulation data
20
Make sure Baby has a diaper on and is sitting upright.
Turn the control unit on. Scroll through the Main Menuuntil the screen reads:
Press ENTER. The screen reads:
Use the right arrow button to scroll through the available numbers until the one you want is displayed. Write it down.
Press ENTER. The screen reads:
Press the right arrow button until the number of days you wantthe parenting simulation to last is displayed.
Press ENTER. The screen reads:
The word RANDOM flashes - to have the control unit choosethe schedules for you, press ENTER and continue at . Tochoose PICK, press the right arrow button once so the wordPICK is flashing and press ENTER, and continue at .
1
MAIN MENU< Custom Program >
2Pick Number ForSimulation X >
The next available parenting simulation tracking number is
displayed where the X is.
3
Number Of Days1 >
4
Select ScheduleRandom Pick
5
Custom Program
6
19
Printing parenting simulation data
These instructions are for using the OPTIONAL printer.
Turn the control unit on. Scroll through the Main Menuuntil the screen reads:
Press ENTER. The screen reads:
You can print the data for ALL the parenting simulations in thecontrol unit by pressing ENTER at this screen.OR...Press the right arrow button until you see the number of the parenting simulation you want to print.
Press ENTER. The screen reads:
34
1
MAIN MENU< Print Data >
2Print Data For
Simulation ALL>
3
Point At PrinterPress Enter
Custom Program
Sequence of care schedules:
The Schedule Table in theProgram Manual shows the 15different schedules Baby canbe programmed with. InCustom Program, you canchoose which schedule Babyfollows for each day of theparenting simulation. You alsohave the option of letting thecontrol unit select the schedules for you.
Hours of delay time:
Use delay time to programBaby so it does not cry for careuntil after the student is homefrom school, or finished with anafter-school activity. You canalso choose 0 for hours ofdelay time if you want Baby tobegin following its schedule right away.
For Day 1 UseSchedule X )
Delay Time0 >

18
Make sure the printer has batteries and paper in it, and thatit is turned on. Position the control unit so the contact pointsdirectly at the infrared window on the printer (as shown). It isnot necessary to touch the contact to the printer.
Press ENTER. The printer should begin printing the parenting simulation data. Be careful not to move the control unit until it has displayed these two screens andis back to the Main Menu:
35
4
Printing DataSimulation X
Data Printed ForSimulation X
Infrared window
Printing parenting simulation information
Custom Program is a more advanced programming mode. It letsyou choose a parenting simulation number, the number of daysyou want the parenting simulation to last, the sequence of careschedules, and hours of delay time.
Parenting simulation number:
Each parenting simulation has itsown number in the control unit.This number allows the controlunit to keep track of each parenting simulation�’s data. AutoProgram automatically assigns this
number; in Custom Program, you can choose which number youwant to assign to the parenting simulation. You use this numberwhen you use VIEW DATA, DELETE DATA, and PRINTDATA (if you have the optional printer).
Days the parenting simulation lasts:
Determine how many days thestudent will have Baby. Forexample, if a student is requiredto take Baby home Friday andreturn it Monday, program Babyto run for four days. CountFriday (1), Saturday (2), Sunday(3) and Monday (4). This makes sure the parenting simulationkeeps running the entire time the student has Baby.
Pick Number ForSimulation X >
Number Of Days1 >
Custom Program

Emergency Start / Stop
This feature can be used to stop Baby if the control unit is notavailable, or if the student needs to stop Baby in an emergency (itis not recommended that you tell students this unless theycontact you in an emergency).
It can also be used to start Baby if an emergency stop was doneand the control unit is not available.
EMERGENCY STOP
Use a straightened paper clip togently press the EmergencyStart/Stop button recessed inBaby�’s back and HOLDUNTIL BABY BEEPS 6TIMES. (You may need to holdit for as long as 15 seconds.)
Baby is inactive.
Use the GET DATA or END SIMULATION control unitoptions to obtain the parenting simulation data before youreprogram Baby or the data will be lost.
36
Emergency Start/Stop opening
1
17
Additional information
The parenting simulation begins when an ID is touched toBaby�’s contact point for the third time. Baby is then readyfor the student.
REMEMBER: Baby is automatically programmed for two(2) hours of delay time. During delay time, Baby cries ifit is roughly handled, in a wrong position, if the headis not supported, or the diaper is left off. Baby DOESNOT cry for feeding, burping, rocking or diaperchanges during delay time. After two hours, Baby criesfor care according to the schedule it is following.
Auto Program

16
EMERGENCY START
Use the battery cover key toopen Baby�’s battery cover.
Remove one battery. WAIT AT LEAST 15 SECONDSand then replace the battery. Baby will beep.
YOU HAVE 5 SECONDS from the time you replace thebattery to use a straightened paper clip to quickly and gentlypress the Emergency Start/Stop button recessed in Baby�’sback THREE TIMES. BABY BEEPS 3 TIMES.
Replace the battery cover and lock it.
Program IDs as normal (page 19).
37
Battery cover lockBattery cover key
1
2
3
4
5
Emergency Start / StopAuto Program
The order in which you touch the IDs to the contact pointdetermines which ID is the Student ID and which is theBabysitter ID. Your Instructor ID can be used for day care.
Touch the same ID three times. The ID is nowthe Student ID. Attach this ID to the student�’swrist with the wristband.
Touch the first ID once and the second ID twicein a row. The first ID is the Student ID and the second ID is the Babysitter ID. A Babysitter ID givesthe student a chance to have someone else care for Baby. Babyreports how many times each ID was used.
Touch the first ID twice in a row and the Instructor ID once. The first ID is the StudentID and the Instructor ID puts Baby into daycare. The instructor can use the Instructor ID ifa student cannot care for Baby for a period of time, perhaps duringan extracurricular activity. When the Instructor ID is touched tothe contact point during a parenting simulation, Baby beepsthree times and is inactive. Touch the Instructor ID againwhen the student is ready to care for Baby -- it beeps threetimes and resumes its schedule at the current hour.
Touch the first ID once, the second IDonce, and the Instructor ID once. The firstID is the Student ID. The second ID is theBabysitter ID. The Instructor ID puts Babyinto day care.
For one student only
For one student and a Babysitter ID only
For one student and the day care option
For one student, a Babysitter ID, and the day care option
1, 2, 3
1
2, 3
1, 2
3
1
2
3

Selecting a new language in the control unit
The control unit screens can be displayed in English, Japanese,French, or Spanish. If you would like to use a different languagethan the one currently displayed, turn the control unit on bypressing the ON/OFF button.
Press the right arrow button until thescreen reads:
Press the ENTER button.The screen will read:
Press the right arrow button until the language you want is displayed.The order is English / Japanese / French / Spanish/German.
When the language you want is displayed, press the ENTERbutton. The control unit screens will be displayed in the new language from that point on, or until you select a different language.
Para seleccionar un nuevo lenguaje, encienda el control presionando el botón deON/OFF. Presione el botón de la flecha derecha que dice �“Select Language.�” Presione elbotón ENTER. La pantalla dirá �“Select Language English.�” Presione el botón de laflecha de la derecha hasta que aparezca en la pantalla el lenguaje que usted desea. Susopciones son Ingleses, Japoneses, Franceses, y Españoles. Cuando el lenguaje queusted desea aparezca en la pantalla, presione el botón ENTER. El lenguaje que ustedhaya seleccionando aparecerá en la pantalla.
Pour sélectionner une nouvelle langue, allumer l'unité de commande en appuyant surle bouton ON/OFF. Appuyer sur la touche flèche droite jusqu'à ce que l'écran affiche�“Select Language.�” Appuyer sur la touche ENTREE. L'écran affichera �“Select LanguageEnglish.�” Appuyer sur la touche flèche droite jusqu'à ce que la langue souhaitée soitaffichée. Vos choix sont les anglais, les japonais, les français, et les espagnols. Lorsquela langue que vous souhaitez est affichée, appuyer sur la touche ENTREE. Les écransde l'unité de commande seront affichés dans la langue que vous avez choisie.
MAIN MENU< Select Language
Select LanguageEnglish >
15
To return the control unit language to English, simply follow thesteps above by pressing the right arrow button until you reach theend of the screens. Press ENTER. Press the left arrow buttonuntil the screen reads English. Press ENTER.
38
When you are satisfied with the schedule order, pressENTER. The screen reads:
Use the right and left arrow buttons to scroll through the timesuntil the hour that is closest to the current time is displayed.This sets Baby�’s internal clock to match real time. You do thisso Baby follows the programmed schedules almost as thereal infant behaved.
Press ENTER. The screen reads:
Touch the contact on the control unit tothe contact point in Baby�’s back and hold itthere until the screen changes.
The control unit screen changes to:
At least one ID must touch the contactpoint on Baby�’s back THREE TIMES or the simulationdoes not start. Baby should beep when each ID is touched.See next page for ID programming instructions.
5
Touch IDs ToStart Simulation
4
Touch To BabyContact Point
3
Current Hour< 6am >
Auto Program
IMPORTANT!

Never immerse Baby in water. Never allow water to comein contact with the electronics in Baby�’s back. Baby wipeswork best for simulating a bath.
Baby�’s skin stains easily. It soaks up inks and dyes. Keep Babyaway from:
�• Newsprint and other printed material.�• New, unwashed clothing�—especially jeans, sweatshirts,
and fleece.�• Pens and markers.
There is no cleaner that removes all dirt or stains. Thesecleaners may work:
�• Acne cleansing pads.�• Rubbing alcohol.�• Nail polish remover.�• All-purpose cleaner.�• Ten-percent benzoyl peroxide cream left on Baby while
sitting in the sun.
Do not use any cleaners or abrasives on Baby�’s head. Theseitems will remove the paint. Wipe the head with a baby wipe orwet cloth to remove any surface dirt.
Baby�’s joints have been specially treated and should notdry out. If the joints do become stiff, Joint Lubricant may bepurchased from Realityworks. It lubricates the joints and prevents the tearing that results from dry vinyl. One tube of theJoint Lubricant can be used for up to forty Babies.
39
Care, maintenance, and storage
14
Auto Program
Auto Program is a quick and easy way to program Baby for a parenting simulation. It automatically chooses a parenting simulationnumber, and a random sequence of care schedules (for more information on these features, see page 21-22).
Auto Program also selects two hours of delay time. You can usedelay time to program Baby so it does not cry for care until afterthe student is at home, or finished with an after-school activity.
Baby DOES NOT cry for feeding, burping, rocking, or diaper changes during delay time. Baby DOES cry if it isroughly handled, in a wrong position, if the head is notsupported, or the diaper is left off during delay time. Afterthe programmed hours of delay time have passed, Babycries for care according to the schedule it is following.
Make sure Baby has a diaper on and is sitting upright.If you make an error while programming, use the PREVIOUSSCREEN button to go back.
Turn the control unit on. The screen reads:
Press ENTER. The screen reads:
The control unit selected a random order of the 15 schedules forBaby to follow. Use the right arrow button to scroll through themand write them down if you want. If you want a different order,press the PREVIOUS SCREEN button and then the ENTERbutton again.
1
MAIN MENUAuto Program >
2
Schedule Numbers
4 >

Touch any ID to the contact point on Baby�’s back tobegin. Baby beeps and then cries after about one minute.When Baby cries, touch the same ID to the contact point.Baby beeps to recognize the ID, and then you must care forBaby. Baby follows the cycle until you END SIMULATION.
1) Feeding (30 seconds) 5) Rocking (30 seconds)2) Burping (30 seconds) 6) Fussy (14 seconds)3) Happy (coos once) 7) Cough (1 cough)4) Diaper change (1 change) Starts over at Feeding
To stop practicing, turn the control unit on. Press the rightarrow button until the screen reads:
Press ENTER. The screen reads:
Touch the contact on the control unit tothe contact point in Baby�’s back.
The screen reads:
Baby is inactive. For information on viewing Baby�’s data, seepage 29.
13
5
6
MAIN MENU< End Simulation >
7
Touch To BabyContact Point
8
Simulation 0Ended
Practice
Never store the batteries in Baby. If you are not using theinfant simulators for 14 or more days, remove the batteries forstorage. Battery leakage can damage or destroy Baby�’s electronics. Battery leakage is not covered by warranty.
Do not let the battery terminals (ends) touch. Wrap a rubberband around bundles of batteries for organizing or storing them.Store upright in a cool, dry place.
Do not store Baby where excessive heat or cold could affectthe vinyl or electronics.
Baby�’s clothes are NOT flame retardant and should not beworn by real infants.
If you store Baby in its shipping box, place the plastic bagaround its head to prevent paint damage. The cardboard willrub paint off the back of the head. Do not wrap Baby innewsprint. The ink will leave permanent stains on Baby�’s body.
40
Care, maintenance, and storage

Troubleshooting guide
Symptom Cause and/or solution
Baby cried after battery installation. The last parenting simulation was not ended. Use End Simulation and then reprogram Baby.
Baby will not stop crying and the Make sure Baby is on its back and the ID does not beep. diaper is fastened and wait for one
minute. If Baby is still crying, rock Baby for about 45 seconds, being careful not tohold it on its sides or tummy or rock it too hard. The crying should quiet gradually and stop. If Baby is still crying,it may be fussy - this should only last 3 minutes at most.
A red light is on (or blinking) in Baby�’s batteries are low. Change themBaby�’s back. immediately. No data is lost.
Baby did not coo (or burp) at the Baby does not coo if neglect or any kindend of feeding (or burping, of rough handling occurred duringrocking, or diaper changing). feeding (or burping, rocking, or diaper
changing).
The control unit shows a Total The largest number possible for cryingCrying Time of 999 minutes. time is 999 minutes. Crying time
includes all crying for rough handling,wrong position and neglect, as well as scheduled crying for care. The largest number for all other numerical displays,such as neglect or rough handling, is 254.
Baby�’s head fell back (or Baby was The student must rock Baby gently untilroughly handled) while the student the shrill crying gets quieter and thenwas feeding Baby (or burping, stops completely for a moment. Baby rocking, or changing the diaper). then starts crying again for the type ofBaby is crying very loudly. care the student was providing before
the rough handling occurred.
41
Practice
Make sure Baby has a diaper on and is sitting upright.DO NOT SEND BABY HOME IN PRACTICE MODE.
Turn the control unit on. The screen reads:
Use the right arrow button to scroll through the Main Menuuntil the screen reads:
Press the ENTER button. The screen reads:
Touch the contact on the control unit tothe contact point in Baby�’s back and hold itthere until the screen changes.
The control unit screen changes to:
�• Make sure Baby�’s diaper stays in place when you touch the control unit to Baby�’s back.
�• Only one ID is needed in Practice mode.
12
1
MAIN MENUAuto Program >
2
3
4
MAIN MENU< Practice >
Touch To BabyContact Point
Touch Any IDTo Start Baby

Symptom Cause and/or solution
I used the Emergency Start/Stop The button may be stuck. Please call thebutton to stop Baby, and now the Customer Service Department.control unit does not work.
The control unit does not turn on. The battery could be low. Change it and try the control unit again. No data is lost.
The control unit screen reads I Press ENTER and try to program Baby have the wrong control unit for again. If the same message appears, a my Baby. communication error has occurred.
Please call the Customer Service Department.
When I END SIMULATION The control unit always assigns after using Practice mode, the simulation number 0 for Presentationsimulation number is 0. and Practice modes.
VIEW DATA does not work; the The data has been deleted from the control unit reads there is no data control unit. Also, if you reprogrammed to view. Baby before using GET DATA or END
SIMULATION for the parenting simulation, you have erased that data in Baby.
A student dropped her ID into a The IDs can be completely submergedpool. in water and will still work. Dry the ID
before touching it to Baby�’s back.
I cannot program Baby or end a The Emergency Start/Stop button maysimulation with the control unit. be stuck. Please call the Customer
Service Department.
DON�’T FORGET! If Baby is incorrectly positioned,roughly handled, shaken, or the head is not supported (evenduring feeding, burping, rocking, or a diaper change) Babycries very hard AND THE STUDENT MUST ROCK ITUNTIL BABY COMPLETELY STOPS CRYING. If Babywas being fed, burped, rocked, or having its diaper changed,it stops crying briefly, then starts crying for the care again.
42
Troubleshooting guide
When Baby cries, touch theID to the contact point, wait for the beep,detach and remove Baby�’s diaper, andreplace it with the other diaper. Be sure thehook and loop fastener on the diaper islined up with the diaper sensor area. Whenthe opposite diaper is attached to the diaper sensor on Baby�’s back, Baby coos. If Baby is roughly handled orthe head is not supported, Baby does not coo.
When Baby cries, touch the IDto the contact point, wait for the beep, androck Baby gently. Baby makes breathingsounds and coos when done. If Baby is roughly handled or the head is not supported,the breathing sounds stop when Baby is done and you do nothear a coo.
Do not hold Baby on its sides or stomach - Baby will cryfor wrong position.
Baby makes whimpering sounds. No action required andthe ID does not work.
Baby coughs once. No action required.
If Baby is incorrectly positioned, roughly handled, shaken, orthe head is not supported (even during feeding, burping,rocking, or a diaper change) Baby cries very hard AND THESTUDENT MUST ROCK IT UNTIL BABY COMPLETELYSTOPS CRYING. If Baby was being fed, burped, rocked, orhaving its diaper changed, it stops crying briefly, then startscrying for the care again.
11
Diaper change
Rocking
Fussy
Cough
Practice

Diagnostic test
Gather these items for the diagnostic test:
�• RealCare® Baby�• Four NEW C batteries�• One ID�• One large paper clip�• Both diapers (one with a blue patch and one with a
white patch)�• Bottle or breastfeeding device�• Battery cover key�• Control unit with NEW 9-volt battery
43
Practice
Baby cries for feeding, burping, rocking, and diaper changes inPractice mode, but each session is shortened so students can practice during class. Baby also cries for and records instances ofrough handling, failure to support the head, wrong positioning (onthe stomach or sides), shaking, fussy, and no diaper. Students also getto hear each sound Baby may make during a parenting simulation. Inthis mode, students can practice caring for Baby just as theywill during the actual parenting simulation - the ID and careprocess is identical and each activity and sound is outlined below.Baby follows this order in Practice mode:
1) Feeding (30 seconds) 5) Rocking (30 seconds)2) Burping (30 seconds) 6) Fussy (14 seconds)3) Happy (coos once) 7) Cough (1 cough)4) Diaper change (1 change) Starts over at Feeding
When Baby cries,touch the ID to the contact point,listen for the beep, and then placethe bottle or breastfeeding deviceto Baby�’s lips. Baby makes feedingsounds and coos when done feeding. If Baby is roughly handledor the head is not supported, there is no coo; the feedingsounds stop when Baby is done. (Note: the rubber nipple on the bottlecontains latex, which could cause an allergic reaction in latex-sensitive indi-viduals.)
When Baby cries, touch the IDto the contact point, listen for the beep, andthen pat Baby�’s back gently between theshoulder blades. Baby makes breathing soundsand burps when done. If Baby is roughly handled or the head is not supported, thebreathing sounds stop when Baby is done andthere is no burp.
Baby makes a cooing sound. No action required.
Burping
Happy
Feeding
10

44
Diagnostic test
To administer the diagnostic test, perform the following steps:
Remove Baby�’s t-shirt and diaper.
Install the NEW four C batteries into the battery compartment in Baby�’s back. Follow the steps on page 8 ofthis handbook. When the batteries are installed correctly,you will hear a beep. If you do not hear a beep, remove thebatteries, wait fifteen seconds, and reinsert them. Ensure thebattery removal ribbon is placed properly. This will preventit from getting caught in the lock and between the batteryand battery contacts.
Attach and lock the battery cover. The battery cover mustbe on to prevent the batteries from losing contact.
Place Baby in a sitting position with the battery compartment facing you.
Turn on the control unit by pressing the ON/OFF button.The screen will read:
Press the PREVIOUS SCREEN and MAIN MENUbuttons at the same time.
Release the buttons and the screen should read:
1
2
3
5
4
MAIN MENUAuto Program >
6
7
Touch To BabyContact Point
Low battery information
The low battery indicator light inBaby�’s back starts blinking duringa parenting simulation when thebatteries are low. Instruct students to bring Baby in as soonas possible after they notice thelight. Baby can run for abouttwo days after the low batteryindicator comes on.
Dead batteries corrode thebattery contacts and shortenthe life of Baby�’s components.Damage from battery leakage IS NOT covered by warranty.
If you try to use GET DATA or END SIMULATION on aBaby with low batteries, the control unit reads:
If the control unit�’s batteries are low, the screen goes dim andthe top line of the display blinks between MAIN MENU and:
Neither the control unit nor Baby loses data when the batteries are changed.
Store batteries in a cool, dry place. Wrap a rubber band aroundbundles of four batteries. Do not let battery terminals (ends) touch.
9
Low battery indicator light
PLEASE CHANGEBABY�’S BATTERIES
LOW BATTERY< Custom Program >
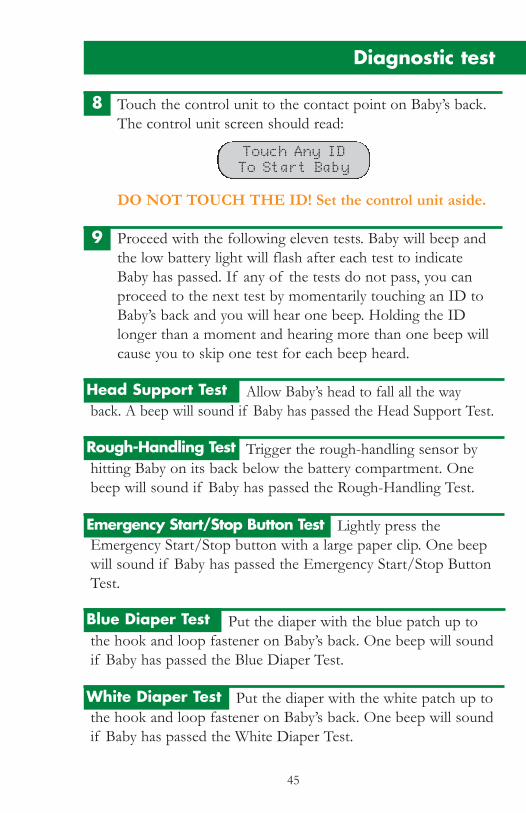
Diagnostic test
Touch the control unit to the contact point on Baby�’s back.The control unit screen should read:
DO NOT TOUCH THE ID! Set the control unit aside.
Proceed with the following eleven tests. Baby will beep andthe low battery light will flash after each test to indicateBaby has passed. If any of the tests do not pass, you canproceed to the next test by momentarily touching an ID toBaby�’s back and you will hear one beep. Holding the IDlonger than a moment and hearing more than one beep willcause you to skip one test for each beep heard.
Allow Baby�’s head to fall all the wayback. A beep will sound if Baby has passed the Head Support Test.
Trigger the rough-handling sensor byhitting Baby on its back below the battery compartment. Onebeep will sound if Baby has passed the Rough-Handling Test.
Lightly press theEmergency Start/Stop button with a large paper clip. One beepwill sound if Baby has passed the Emergency Start/Stop ButtonTest.
Put the diaper with the blue patch up tothe hook and loop fastener on Baby�’s back. One beep will soundif Baby has passed the Blue Diaper Test.
Put the diaper with the white patch up tothe hook and loop fastener on Baby�’s back. One beep will soundif Baby has passed the White Diaper Test.
8
Touch Any ID To Start Baby
9
Head Support Test
Rough-Handling Test
Emergency Start/Stop Button Test
Blue Diaper Test
White Diaper Test
45
Battery installation
BabyInsert a battery cover key into thebattery cover lock and turn counterclockwise. Remove the cover. Laythe ribbon across the bottom of the bat-tery compartment as shown below. Ifyou do not use the ribbon, it is very difficult to remove the batteries.
Insert the first two C batteries as indicated by the plus/minus label in thebattery compartment. Lay the rest ofthe ribbon across the top of the twobottom batteries and insert the last twobatteries. Baby beeps loudly when thebatteries are installed correctly.Replace the cover and lock it by insertingthe battery cover key into the lock andturing clockwise.
If you take one battery out for any reason, wait at least 15seconds before reinserting it. Baby�’s electronics need this timeto re-set.
Control unitSlide the battery cover off in the direction ofthe arrow. Lay the ribbon across the bottom of the battery compartment asshown. Insert the 9V battery as indicated bythe plus/minus label in the battery compartment. Slide the cover back on until it clicks.
8
1
2
1

46
Diagnostic Test
Place the bottle or breastfeeding deviceagainst Baby�’s mouth. A continuous beep will sound if Baby haspassed the Feeding Sensor Test.
Tilt and hold Baby its right side. Beepingwill STOP. Continue holding on its right side.
Touch an ID to the contact point onBaby�’s back. A continuous beep will sound. Tilt and hold Babyon its left side. Beeping should STOP. Continue holding on itsleft side.
Touch an ID to the contact point. Babywill beep once. Tilt Baby on its right side and Baby will startbeeping. Tilt and hold Baby its left side. Beeping should STOP.Continue holding on its left side.
Touch an ID to the contact point. You willhear a continuous beeping sound. Tilt Baby on its right side.Beeping should STOP. Continue holding on its right side.
Touch an ID to the contact point. A loud beepwill sound and Baby will cry for approximately five seconds.
Baby is working correctly if it has passed each step of the test.If Baby has failed, try once more with a new set of batteries. IfBaby still fails, contact the Customer Service Department at800.830.1416. Please have the materials listed on page 43 withyou when you call.
1st Position Test
2nd Position Test
3rd Position Test
4th Position Test
Sounds Test
Gather these supplies:�• Baby�• Four C batteries�• Instructor key ring�• IDs�• Tamperproof wristband�• Bottle or breastfeeding device�• Blue patch diaper�• White patch diaper (on Baby)�• Control unit �• One 9V battery
7
Feeding Sensor Test

Part I - Programming options
Getting started
Important points - READ THESE FIRST!Baby�’s contact point MUST be touched by an ID threetimes or the parenting simulation does not start.
Baby MUST have a diaper on when you program it.
Each ID is unique. When you touch each ID to Baby and itbeeps during programming, it is programmed with its own code.
Removing the batteries from either the control unit or Babydoes NOT erase the data. Data is stored in the control unituntil you delete it and in Baby until you reprogram it.
Diapers and bottles other than the ones supplied with Babydo NOT work with Baby.
When Baby is crying, the first step is to touch the ID to thecontact point. If Baby beeps, it needs to be fed, burped,rocked, or have its diaper changed. If there is no beep, makesure Baby is placed on its back and the diaper is fastened to thediaper sensor area. If Baby is still crying, it is either fussy (noaction needed) or rough handling has occurred (rocking needed).
To stop Baby from crying after rough handling, Baby must berocked until the crying softens twice and STOPS (about45 seconds). Baby must sense constant, gentle motion or thecrying volume goes back up and Baby cries longer.
The control unit can hold information for up to 99 parentingsimulations at once. Data stays in the control unit until youdelete it. (See page 33 about parenting simulation numbers)
The control unit battery cover SLIDES on. Do not try tosnap it on. Slide the cover on from the bottom until it clicks.
6
1
2
3
4
5
6
7
8
9
If you suspect your RealCare® Baby needs to be returned toRealityworks for repair, please follow these steps:
Complete the Diagnostic Testing on pages 43-46 of thisOperating Handbook.
Call 800.830.1416 for the Customer Service Department atRealityworks. A Customer Service representative will providefurther instructions and troubleshooting assistance. Pleasehave the following items available when you call:�• Baby�• Four NEW C batteries�• Bottle or breastfeeding device�• White patch diaper�• Blue patch diaper�• Paper clip�• Instructor key ring with battery cover key and ID�• Control unit with NEW 9-volt battery�• Printer (optional)
If your Baby needs to be repaired, Customer Service will provide you with a RMA Number for use when returning Baby.
Package RealCare® Baby, undressed, in the plastic bag provided with your purchase and place it in the original box.Do NOT use newspaper for packaging Baby; the inkwill transfer onto Baby�’s vinyl. If the data from the simulation you experienced a problem with is available,please include the printout with Baby. Unless specificallyrequested by Customer Service, do NOT send accessories, batteries, Instructor key ring, or IDs.
1
2
3
4
Returning Baby for repair
47

Parts identification
5
LCD screen
ContactContact
Battery cover
Diaper
ID
Breastfeeding device Tamperproof wristband
Control unit frontControl unit back
Bottle
Include a method of payment. A purchase order, check, orcredit card with the name of the cardholder, card number,and expiration date will be accepted.
Include a sheet of letterhead with a brief explanation ofwhy the item(s) are being sent for repair. Please referenceeach RealCare® Baby serial number (found on the electronics box in Baby�’s back) and the reason that Baby isbeing returned, as well as your name, organization name,and customer ID number.
Address the package to :Realityworks, Inc.RMA#_______2709 Mondovi RoadEau Claire, WI 54701
Once your Baby is received, it will be repaired and shippedback to you. If you have questions regarding the status ofyour repair, please call the Customer Service Department at800.830.1416.
48
5
Returning Baby for repair
6
7
8

Parts identification
4
Contact point
Battery cover lock
Emergency start/stop opening
Low battery indicator light
Diaper sensor area
Speaker
Instructor key ring
Battery cover keys
Instructor ID
Feeding sensor area
49
Why does Baby beep after I insert the batteries?
Baby makes a loud beep when the fourth battery is installed correctly. If you hear a buzzing sound, the batteries are probably installed incorrectly or are too low.
Why doesn�’t the control unit�’s battery cover snap back on?
Starting at the bottom of the battery compartment, SLIDE the cover on until it clicks into place.
Can I start Baby without a control unit?
Yes. See page 36 about using the Emergency Start feature.
I lost the control unit. Can I use a different control unit to GETDATA or END SIMULATION?
Yes. Baby tells the control unit its number during GET DATA or END SIMULATION. The control unit accepts the simulation number Baby gives it. If there is already data for that simulation number in the control unit, it allows you to overwrite it.
I am trying to program Baby; why doesthe control unit display this screen?
The control unit has data for 99 parenting simulations in it. You must delete some parenting simulation numbers�’ data from the control unit�’s memory before you can program additional parenting simulations.
When I use VIEW DATA, there is a flashing �“LB�” on the TotalSimulation Time screen. What does this mean?
The parenting simulation shut down because the batteries are low in Baby and need to be changed. Data will not be lost.
No Available #Clear Memory
Frequently Asked Questions

Table of ContentsParts identification........................................................4
Part I: Programming optionsGetting started ..............................................................6Battery installation........................................................8Battery information......................................................9Practice ........................................................................10 Auto Program ............................................................14 Custom Program........................................................18 Presentation ................................................................23
Part II: Managing dataGetting data from Baby ............................................26 Ending the parenting simulation ............................28 Viewing parenting simulation data..........................29 Deleting parenting simulation data ........................32 Printing parenting simulation data ..........................34
Additional informationEmergency Start/Stop ..............................................36 Selecting a new language in the control unit ........38 Care, maintenance, and storage ..............................39 Troubleshooting guide ..............................................41 Diagnostic test............................................................43 Returning Baby for repair ........................................47 Frequently asked questions .................................... 49
Note:Control unit screen options and information are shownin a gray LCD screen graphic or in all capital letters.
OR
3
MAIN MENUAuto Program >
AUTO PROGRAM
50
Frequently asked questions
When I print the data, why does the printout have this symbol on it:
The batteries in the printer are low. Replace the batteries and try printing again. (This only applies to the HP82240B printer model.)
I programmed Baby to run four different schedules for each ofthe four days of the parenting simulation. When I use VIEWDATA, why do only two schedules show up?
If you VIEW DATA while a parenting simulation is in progress,the control unit displays only the schedules that are completed or inprogress.
What do I have to do after END SIMULATION to view the datathat was obtained?
The control unit displays the simulation number: write this number down. Press ENTER to go to the Main Menu. Scroll to VIEW DATA or PRINT DATA (if you have the optional printer). Choose the number you wrote down and press ENTER.
When I use VIEW DATA, there is a flashing �“ES�” on the TotalSimulation Time screen. What does this mean?
An emergency stop was done by you or the student. Total Simulation Time was recorded until the stop was performed. See pages 26-27 for an explanation of the Emergency Start/Stop feature.
I programmed Baby to run for four days. Why does the TotalSimulation Time read 4 days, 0 hours, and 45 minutes?
Wrong position, rough handling, head support failure, no diaper,neglect, and shaking can add extra minutes to the Total SimulationTime.

51
Why do students need to change Baby�’s position during rocking?
It is quite common to rock real infants in one position and then change positions. Do not hold Baby on its sides or tummy.
What is delay time and why would I use it?
You can use delay time if you want to program Baby for a parenting simulation, but do not want the simulation to start immediately.
Is the control unit broken when the screen looks like this?
It is possible that you or someone else accidentally selected Japanese for the control unit�’s display language. Simply press the right arrow button until you reach the end of the screens, press ENTER, and then press the left arrow button until the screen shows English as the language option. Press ENTER. Your control unit should be back to normal.
Are the diapers washable?
Yes, the diapers may be washed.
Are the Student, Babysitter, and Instructor IDs waterproof ?
Yes, all of the IDs are waterproof and may safely be worn in the shower.
Frequently asked questions
2
DrivingBaby may cry while the student is
driving. Please be aware that the cryingmay start unexpectedly, and the student should be prepared.
Do not feed, burp, rock, change diapers, or otherwise care for Baby whiledriving.
The student must bring his or her vehicle to a complete stop in a safe locationbefore caring for Baby, or to retrieve apiece of Baby�’s equipment that falls.
Failure to install Baby in a car seat ina motor vehicle could result in Baby orsupplies becoming projectiles in theevent of a sudden stop or accident.
LocationNever leave Baby unattended in a
public place, given the potential for Baby tobe mistaken for a real infant.
Do not place Baby in or near water.Do not place Baby on or near a
stove, especially while cooking.Baby should sleep somewhere close
to the student�’s sleeping quarters, but notin bed with the student. Baby may fallout of the bed or the student could rollover on it, causing damage to Baby anddiscomfort to the student.
To prevent discoloration and fading,do not store Baby in direct sunlight or inan area of excessive heat.
Interaction with othersLoud crying near people with
potentially serious physical conditions,such as those susceptible to heart attackor stroke, should be avoided.
Do not allow small children to play withBaby. Baby�’s hands and feet are small enoughto be a choking hazard.
Baby�’s crying or other sounds maycause pets to become agitated or aggressive. Keep Baby out of the reachof pets or other animals.
Physical precautionsTo avoid straining your arms, use an
infant car seat or carrier to transportBaby, rather than holding Baby at alltimes. Holding techniques are listed onthe Student Care Card that accompaniesBaby.
Baby weighs 6.5 to 7 pounds andcould cause discomfort for individualswith back pain.
Do not operate any type ofequipment or attempt tasks requiring theuse of both hands while holding Baby.
Simulation rulesThe student must never take his or
her wristband off. Not only will he orshe be deducted points, but the ID maybe lost, or the student may stumblearound in the dark looking for it if Babycries during the night.
The student should make a note inhis or her diary where, because their safety or the safety of others may havebeen compromised, they had to delaycaring for Baby.
Baby�’s clothing is NOT flame retardant and should NOT be worn byreal infants. Instructors should make sureall clothing is returned with Baby.
Batteries Batteries may explode, leak, cause
property damage, or cause personalinjury if disposed of in fire, inserted backwards, inserted forcefully, stored indirect sunlight or an area of excessiveheat, mixed with used batteries, mixedwith a different battery type (types arealkaline, standard [carbon-zinc], orrechargeable [nickel-cadmium]), or if thebattery terminals (ends) touch. Do notSTORE batteries in an inactive Baby.They can leak. Battery leakage can damage or destroy Baby�’s electronics andis NOT covered by warranty.
IMPORTANT SAFETY PRECAUTIONS!! !