red hat enterprise virtualization 3.5 installation guide
TRANSCRIPT

Red Hat Enterprise Virtualization Documentation Team
Red Hat Enterprise Virtualization3.6Installation Guide
Installing Red Hat Enterprise Virtualization


Red Hat Enterprise Virtualization 3.6 Installation Guide
Installing Red Hat Enterprise Virtualization
Red Hat Enterprise Virtualization Documentation TeamRed Hat Customer Content [email protected]

Legal Notice
Copyright © 2016 Red Hat.
This document is licensed by Red Hat under the Creative Commons Attribution-ShareAlike 3.0Unported License. If you distribute this document, or a modified version of it, you must provideattribution to Red Hat, Inc. and provide a link to the original. If the document is modified, all Red Hattrademarks must be removed.
Red Hat, as the licensor of this document, waives the right to enforce, and agrees not to assert,Section 4d of CC-BY-SA to the fullest extent permitted by applicable law.
Red Hat, Red Hat Enterprise Linux, the Shadowman logo, JBoss, OpenShift, Fedora, the Infinitylogo, and RHCE are trademarks of Red Hat, Inc., registered in the United States and othercountries.
Linux ® is the registered trademark of Linus Torvalds in the United States and other countries.
Java ® is a registered trademark of Oracle and/or its affiliates.
XFS ® is a trademark of Silicon Graphics International Corp. or its subsidiaries in the United Statesand/or other countries.
MySQL ® is a registered trademark of MySQL AB in the United States, the European Union andother countries.
Node.js ® is an official trademark of Joyent. Red Hat Software Collections is not formally related toor endorsed by the official Joyent Node.js open source or commercial project.
The OpenStack ® Word Mark and OpenStack logo are either registered trademarks/service marksor trademarks/service marks of the OpenStack Foundation, in the United States and other countriesand are used with the OpenStack Foundation's permission. We are not affiliated with, endorsed orsponsored by the OpenStack Foundation, or the OpenStack community.
All other trademarks are the property of their respective owners.
AbstractA comprehensive guide to installing Red Hat Enterprise Virtualization.
. . . . . . . . . . . . . . . . . . . . . . . . . . . . . . . . . . . . . . . . . . . . . . . . . . . . . . . . . . . . . . . . . . . . . . . . . . . . . . . . . . . . . . . . . . . . . . . . . . . . . . . . . . . . . . . . . . . . . . . . . . . . . . . . . . . . . . . . . . . . . . . . . . . . . . . . . . . . . . . . . . . . . . . . . . . . . . . . . . . . . . . . . . . . . . . . . . . . . . . . . . . . . . . . . . . . . . . . . . . . . . . . . . . . . . . . . . . . . . . . . . . . . . . . . . . . . . . . . . . . . . . . . . . . . . . . . . . . . . . .
. . . . . . . . . . . . . . . . . . . . . . . . . . . . . . . . . . . . . . . . . . . . . . . . . . . . . . . . . . . . . . . . . . . . . . . . . . . . . . . . . . . . . . . . . . . . . . . . . . . . . . . . . . . . . . . . . . . . . . . . . . . . . . . . . . . . . . . . . . . . . . . . . . . . . . . . . . . . . . . . . . . . . . . . . . . . . . . . . . . . . . . . . . . . . . . . . . . . . . . . . . . . . . . . . . . . . . . . . . . . . . . . . . . . . . . . . . . . . . . . . . . . . . . . . . . . . . . . . . . . . . . . . . . . . . . . . . . . . . . .
. . . . . . . . . . . . . . . . . . . . . . . . . . . . . . . . . . . . . . . . . . . . . . . . . . . . . . . . . . . . . . . . . . . . . . . . . . . . . . . . . . . . . . . . . . . . . . . . . . . . . . . . . . . . . . . . . . . . . . . . . . . . . . . . . . . . . . . . . . . . . . . . . . . . . . . . . . . . . . . . . . . . . . . . . . . . . . . . . . . . . . . . . . . . . . . . . . . . . . . . . . . . . . . . . . . . . . . . . . . . . . . . . . . . . . . . . . . . . . . . . . . . . . . . . . . . . . . . . . . . . . . . . . . . . . . . . . . . . . . .
. . . . . . . . . . . . . . . . . . . . . . . . . . . . . . . . . . . . . . . . . . . . . . . . . . . . . . . . . . . . . . . . . . . . . . . . . . . . . . . . . . . . . . . . . . . . . . . . . . . . . . . . . . . . . . . . . . . . . . . . . . . . . . . . . . . . . . . . . . . . . . . . . . . . . . . . . . . . . . . . . . . . . . . . . . . . . . . . . . . . . . . . . . . . . . . . . . . . . . . . . . . . . . . . . . . . . . . . . . . . . . . . . . . . . . . . . . . . . . . . . . . . . . . . . . . . . . . . . . . . . . . . . . . . . . . . . . . . . . . .
. . . . . . . . . . . . . . . . . . . . . . . . . . . . . . . . . . . . . . . . . . . . . . . . . . . . . . . . . . . . . . . . . . . . . . . . . . . . . . . . . . . . . . . . . . . . . . . . . . . . . . . . . . . . . . . . . . . . . . . . . . . . . . . . . . . . . . . . . . . . . . . . . . . . . . . . . . . . . . . . . . . . . . . . . . . . . . . . . . . . . . . . . . . . . . . . . . . . . . . . . . . . . . . . . . . . . . . . . . . . . . . . . . . . . . . . . . . . . . . . . . . . . . . . . . . . . . . . . . . . . . . . . . . . . . . . . . . . . . . .
. . . . . . . . . . . . . . . . . . . . . . . . . . . . . . . . . . . . . . . . . . . . . . . . . . . . . . . . . . . . . . . . . . . . . . . . . . . . . . . . . . . . . . . . . . . . . . . . . . . . . . . . . . . . . . . . . . . . . . . . . . . . . . . . . . . . . . . . . . . . . . . . . . . . . . . . . . . . . . . . . . . . . . . . . . . . . . . . . . . . . . . . . . . . . . . . . . . . . . . . . . . . . . . . . . . . . . . . . . . . . . . . . . . . . . . . . . . . . . . . . . . . . . . . . . . . . . . . . . . . . . . . . . . . . . . . . . . . . . . .
. . . . . . . . . . . . . . . . . . . . . . . . . . . . . . . . . . . . . . . . . . . . . . . . . . . . . . . . . . . . . . . . . . . . . . . . . . . . . . . . . . . . . . . . . . . . . . . . . . . . . . . . . . . . . . . . . . . . . . . . . . . . . . . . . . . . . . . . . . . . . . . . . . . . . . . . . . . . . . . . . . . . . . . . . . . . . . . . . . . . . . . . . . . . . . . . . . . . . . . . . . . . . . . . . . . . . . . . . . . . . . . . . . . . . . . . . . . . . . . . . . . . . . . . . . . . . . . . . . . . . . . . . . . . . . . . . . . . . . . .
. . . . . . . . . . . . . . . . . . . . . . . . . . . . . . . . . . . . . . . . . . . . . . . . . . . . . . . . . . . . . . . . . . . . . . . . . . . . . . . . . . . . . . . . . . . . . . . . . . . . . . . . . . . . . . . . . . . . . . . . . . . . . . . . . . . . . . . . . . . . . . . . . . . . . . . . . . . . . . . . . . . . . . . . . . . . . . . . . . . . . . . . . . . . . . . . . . . . . . . . . . . . . . . . . . . . . . . . . . . . . . . . . . . . . . . . . . . . . . . . . . . . . . . . . . . . . . . . . . . . . . . . . . . . . . . . . . . . . . . .
. . . . . . . . . . . . . . . . . . . . . . . . . . . . . . . . . . . . . . . . . . . . . . . . . . . . . . . . . . . . . . . . . . . . . . . . . . . . . . . . . . . . . . . . . . . . . . . . . . . . . . . . . . . . . . . . . . . . . . . . . . . . . . . . . . . . . . . . . . . . . . . . . . . . . . . . . . . . . . . . . . . . . . . . . . . . . . . . . . . . . . . . . . . . . . . . . . . . . . . . . . . . . . . . . . . . . . . . . . . . . . . . . . . . . . . . . . . . . . . . . . . . . . . . . . . . . . . . . . . . . . . . . . . . . . . . . . . . . . . .
. . . . . . . . . . . . . . . . . . . . . . . . . . . . . . . . . . . . . . . . . . . . . . . . . . . . . . . . . . . . . . . . . . . . . . . . . . . . . . . . . . . . . . . . . . . . . . . . . . . . . . . . . . . . . . . . . . . . . . . . . . . . . . . . . . . . . . . . . . . . . . . . . . . . . . . . . . . . . . . . . . . . . . . . . . . . . . . . . . . . . . . . . . . . . . . . . . . . . . . . . . . . . . . . . . . . . . . . . . . . . . . . . . . . . . . . . . . . . . . . . . . . . . . . . . . . . . . . . . . . . . . . . . . . . . . . . . . . . . . .
. . . . . . . . . . . . . . . . . . . . . . . . . . . . . . . . . . . . . . . . . . . . . . . . . . . . . . . . . . . . . . . . . . . . . . . . . . . . . . . . . . . . . . . . . . . . . . . . . . . . . . . . . . . . . . . . . . . . . . . . . . . . . . . . . . . . . . . . . . . . . . . . . . . . . . . . . . . . . . . . . . . . . . . . . . . . . . . . . . . . . . . . . . . . . . . . . . . . . . . . . . . . . . . . . . . . . . . . . . . . . . . . . . . . . . . . . . . . . . . . . . . . . . . . . . . . . . . . . . . . . . . . . . . . . . . . . . . . . . . .
. . . . . . . . . . . . . . . . . . . . . . . . . . . . . . . . . . . . . . . . . . . . . . . . . . . . . . . . . . . . . . . . . . . . . . . . . . . . . . . . . . . . . . . . . . . . . . . . . . . . . . . . . . . . . . . . . . . . . . . . . . . . . . . . . . . . . . . . . . . . . . . . . . . . . . . . . . . . . . . . . . . . . . . . . . . . . . . . . . . . . . . . . . . . . . . . . . . . . . . . . . . . . . . . . . . . . . . . . . . . . . . . . . . . . . . . . . . . . . . . . . . . . . . . . . . . . . . . . . . . . . . . . . . . . . . . . . . . . . . .
. . . . . . . . . . . . . . . . . . . . . . . . . . . . . . . . . . . . . . . . . . . . . . . . . . . . . . . . . . . . . . . . . . . . . . . . . . . . . . . . . . . . . . . . . . . . . . . . . . . . . . . . . . . . . . . . . . . . . . . . . . . . . . . . . . . . . . . . . . . . . . . . . . . . . . . . . . . . . . . . . . . . . . . . . . . . . . . . . . . . . . . . . . . . . . . . . . . . . . . . . . . . . . . . . . . . . . . . . . . . . . . . . . . . . . . . . . . . . . . . . . . . . . . . . . . . . . . . . . . . . . . . . . . . . . . . . . . . . . . .
. . . . . . . . . . . . . . . . . . . . . . . . . . . . . . . . . . . . . . . . . . . . . . . . . . . . . . . . . . . . . . . . . . . . . . . . . . . . . . . . . . . . . . . . . . . . . . . . . . . . . . . . . . . . . . . . . . . . . . . . . . . . . . . . . . . . . . . . . . . . . . . . . . . . . . . . . . . . . . . . . . . . . . . . . . . . . . . . . . . . . . . . . . . . . . . . . . . . . . . . . . . . . . . . . . . . . . . . . . . . . . . . . . . . . . . . . . . . . . . . . . . . . . . . . . . . . . . . . . . . . . . . . . . . . . . . . . . . . . . .
. . . . . . . . . . . . . . . . . . . . . . . . . . . . . . . . . . . . . . . . . . . . . . . . . . . . . . . . . . . . . . . . . . . . . . . . . . . . . . . . . . . . . . . . . . . . . . . . . . . . . . . . . . . . . . . . . . . . . . . . . . . . . . . . . . . . . . . . . . . . . . . . . . . . . . . . . . . . . . . . . . . . . . . . . . . . . . . . . . . . . . . . . . . . . . . . . . . . . . . . . . . . . . . . . . . . . . . . . . . . . . . . . . . . . . . . . . . . . . . . . . . . . . . . . . . . . . . . . . . . . . . . . . . . . . . . . . . . . . . .
. . . . . . . . . . . . . . . . . . . . . . . . . . . . . . . . . . . . . . . . . . . . . . . . . . . . . . . . . . . . . . . . . . . . . . . . . . . . . . . . . . . . . . . . . . . . . . . . . . . . . . . . . . . . . . . . . . . . . . . . . . . . . . . . . . . . . . . . . . . . . . . . . . . . . . . . . . . . . . . . . . . . . . . . . . . . . . . . . . . . . . . . . . . . . . . . . . . . . . . . . . . . . . . . . . . . . . . . . . . . . . . . . . . . . . . . . . . . . . . . . . . . . . . . . . . . . . . . . . . . . . . . . . . . . . . . . . . . . . . .
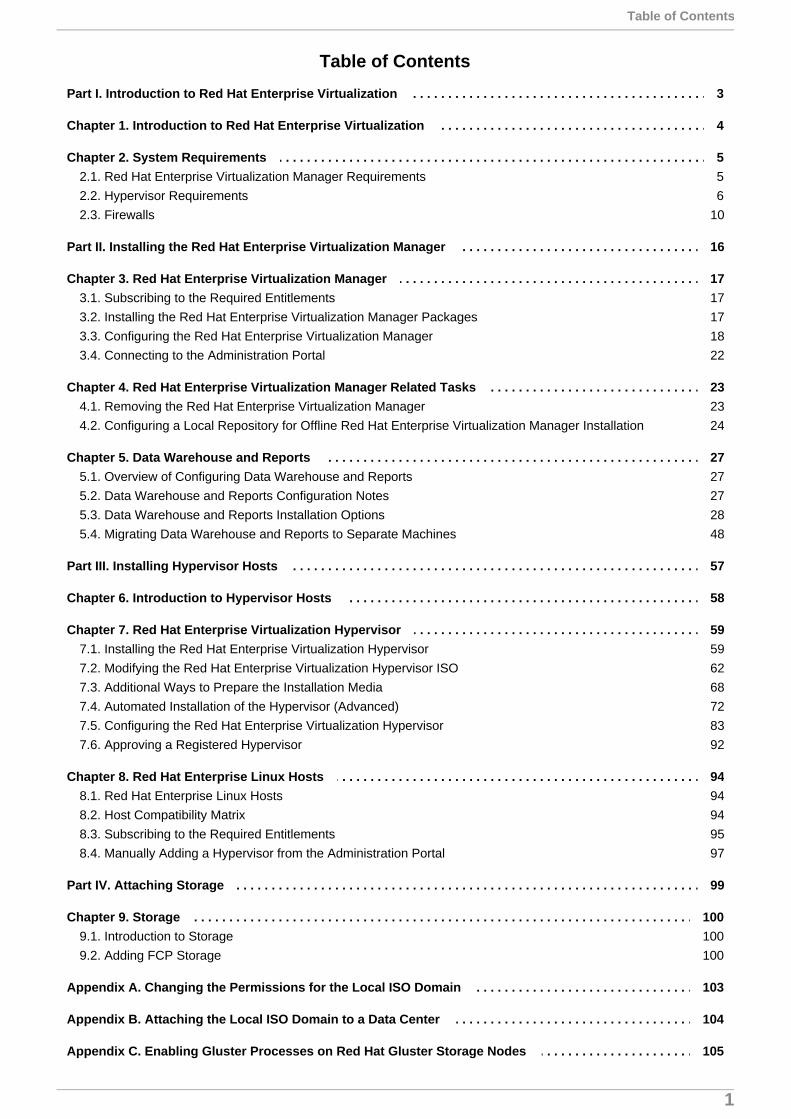
Table of Contents
Part I. Introduction to Red Hat Enterprise Virtualization
Chapter 1. Introduction to Red Hat Enterprise Virtualization
Chapter 2. System Requirements2.1. Red Hat Enterprise Virtualization Manager Requirements2.2. Hypervisor Requirements2.3. Firewalls
Part II. Installing the Red Hat Enterprise Virtualization Manager
Chapter 3. Red Hat Enterprise Virtualization Manager3.1. Subscribing to the Required Entitlements3.2. Installing the Red Hat Enterprise Virtualization Manager Packages3.3. Configuring the Red Hat Enterprise Virtualization Manager3.4. Connecting to the Administration Portal
Chapter 4. Red Hat Enterprise Virtualization Manager Related Tasks4.1. Removing the Red Hat Enterprise Virtualization Manager4.2. Configuring a Local Repository for Offline Red Hat Enterprise Virtualization Manager Installation
Chapter 5. Data Warehouse and Reports5.1. Overview of Configuring Data Warehouse and Reports5.2. Data Warehouse and Reports Configuration Notes5.3. Data Warehouse and Reports Installation Options5.4. Migrating Data Warehouse and Reports to Separate Machines
Part III. Installing Hypervisor Hosts
Chapter 6. Introduction to Hypervisor Hosts
Chapter 7. Red Hat Enterprise Virtualization Hypervisor7.1. Installing the Red Hat Enterprise Virtualization Hypervisor7.2. Modifying the Red Hat Enterprise Virtualization Hypervisor ISO7.3. Additional Ways to Prepare the Installation Media7.4. Automated Installation of the Hypervisor (Advanced)7.5. Configuring the Red Hat Enterprise Virtualization Hypervisor7.6. Approving a Registered Hypervisor
Chapter 8. Red Hat Enterprise Linux Hosts8.1. Red Hat Enterprise Linux Hosts8.2. Host Compatibility Matrix8.3. Subscribing to the Required Entitlements8.4. Manually Adding a Hypervisor from the Administration Portal
Part IV. Attaching Storage
Chapter 9. Storage9.1. Introduction to Storage9.2. Adding FCP Storage
Appendix A. Changing the Permissions for the Local ISO Domain
Appendix B. Attaching the Local ISO Domain to a Data Center
Appendix C. Enabling Gluster Processes on Red Hat Gluster Storage Nodes
3
4
556
10
16
1717171822
232324
2727272848
57
58
59596268728392
9494949597
99
100100100
103
104
105
Table of Contents
1

. . . . . . . . . . . . . . . . . . . . . . . . . . . . . . . . . . . . . . . . . . . . . . . . . . . . . . . . . . . . . . . . . . . . . . . . . . . . . . . . . . . . . . . . . . . . . . . . . . . . . . . . . . . . . . . . . . . . . . . . . . . . . . . . . . . . . . . . . . . . . . . . . . . . . . . . . . . . . . . . . . . . . . . . . . . . . . . . . . . . . . . . . . . . . . . . . . . . . . . . . . . . . . . . . . . . . . . . . . . . . . . . . . . . . . . . . . . . . . . . . . . . . . . . . . . . . . . . . . . . . . . . . . . . . . . . . . . . . . . .
. . . . . . . . . . . . . . . . . . . . . . . . . . . . . . . . . . . . . . . . . . . . . . . . . . . . . . . . . . . . . . . . . . . . . . . . . . . . . . . . . . . . . . . . . . . . . . . . . . . . . . . . . . . . . . . . . . . . . . . . . . . . . . . . . . . . . . . . . . . . . . . . . . . . . . . . . . . . . . . . . . . . . . . . . . . . . . . . . . . . . . . . . . . . . . . . . . . . . . . . . . . . . . . . . . . . . . . . . . . . . . . . . . . . . . . . . . . . . . . . . . . . . . . . . . . . . . . . . . . . . . . . . . . . . . . . . . . . . . . .
. . . . . . . . . . . . . . . . . . . . . . . . . . . . . . . . . . . . . . . . . . . . . . . . . . . . . . . . . . . . . . . . . . . . . . . . . . . . . . . . . . . . . . . . . . . . . . . . . . . . . . . . . . . . . . . . . . . . . . . . . . . . . . . . . . . . . . . . . . . . . . . . . . . . . . . . . . . . . . . . . . . . . . . . . . . . . . . . . . . . . . . . . . . . . . . . . . . . . . . . . . . . . . . . . . . . . . . . . . . . . . . . . . . . . . . . . . . . . . . . . . . . . . . . . . . . . . . . . . . . . . . . . . . . . . . . . . . . . . . .
. . . . . . . . . . . . . . . . . . . . . . . . . . . . . . . . . . . . . . . . . . . . . . . . . . . . . . . . . . . . . . . . . . . . . . . . . . . . . . . . . . . . . . . . . . . . . . . . . . . . . . . . . . . . . . . . . . . . . . . . . . . . . . . . . . . . . . . . . . . . . . . . . . . . . . . . . . . . . . . . . . . . . . . . . . . . . . . . . . . . . . . . . . . . . . . . . . . . . . . . . . . . . . . . . . . . . . . . . . . . . . . . . . . . . . . . . . . . . . . . . . . . . . . . . . . . . . . . . . . . . . . . . . . . . . . . . . . . . . . .
. . . . . . . . . . . . . . . . . . . . . . . . . . . . . . . . . . . . . . . . . . . . . . . . . . . . . . . . . . . . . . . . . . . . . . . . . . . . . . . . . . . . . . . . . . . . . . . . . . . . . . . . . . . . . . . . . . . . . . . . . . . . . . . . . . . . . . . . . . . . . . . . . . . . . . . . . . . . . . . . . . . . . . . . . . . . . . . . . . . . . . . . . . . . . . . . . . . . . . . . . . . . . . . . . . . . . . . . . . . . . . . . . . . . . . . . . . . . . . . . . . . . . . . . . . . . . . . . . . . . . . . . . . . . . . . . . . . . . . . .
Appendix D. Preparing a Remote PostgreSQL Database for Use with the Red Hat Enterprise VirtualizationManager
Appendix E. Preparing a Local Manually-Configured PostgreSQL Database for Use with the Red HatEnterprise Virtualization Manager
Appendix F. Installing a Websocket Proxy on a Separate Machine
Appendix G. Configuring a Hypervisor Host for PCI Passthrough
Appendix H. Revision History
106
108
110
113
116
Installation Guide
2

Part I. Introduction to Red Hat Enterprise Virtualization
Part I. Introduction to Red Hat Enterprise Virtualization
3

Chapter 1. Introduction to Red Hat Enterprise Virtualization
Red Hat Enterprise Virtualization is an enterprise-grade server and desktop virtualization platform built onRed Hat Enterprise Linux. This guide covers:
The installation and configuration of a Red Hat Enterprise Virtualization Manager.
The installation and configuration of hypervisor hosts, either RHEL-based hypervisors or Red HatEnterprise Virtualization Hypervisor (RHEV-H).
Attach existing FCP storage to your Red Hat Enterprise Virtualization environment. More storage optionscan be found in the Administration Guide.
Table 1.1. Red Hat Enterprise Virtualization Key Components
Component Name DescriptionRed Hat Enterprise Virtualization Manager A server that manages and provides access to the
resources in the environment.Hosts Hosts are servers that provide the processing
capabilities and memory resources used to runvirtual machines.
Storage Storage is used to store the data associated withvirtual machines.
Important
It is important to synchronize the system clocks of the hosts, Manager, and other servers in theenvironment to avoid potential timing or authentication issues. To do this, configure the Network TimeProtocol (NTP) on each system to synchronize with the same NTP server.
Installation Guide
4

Chapter 2. System Requirements
2.1. Red Hat Enterprise Virtualization Manager Requirements
2.1.1. Hardware Requirements
The minimum and recommended hardware requirements outlined here are based on a typical small tomedium sized installation. The exact requirements vary between deployments based on sizing and load.
The Red Hat Enterprise Virtualization Manager runs on Red Hat Enterprise Linux. To confirm whether or notspecific hardware items are certified for use with Red Hat Enterprise Linux, seehttps://access.redhat.com/ecosystem/#certifiedHardware.
Table 2.1. Red Hat Enterprise Virtualization Manager Hardware Requirements
Resource Minimum RecommendedCPU A dual core CPU. A quad core CPU or multiple dual
core CPUs.Memory 4 GB of available system RAM if
Data Warehouse is not installedand if memory is not beingconsumed by existing processes.
16 GB of system RAM.
Hard Disk 25 GB of locally accessible,writable, disk space.
50 GB of locally accessible,writable, disk space.
Network Interface 1 Network Interface Card (NIC)with bandwidth of at least 1 Gbps.
1 Network Interface Card (NIC)with bandwidth of at least 1 Gbps.
2.1.2. Browser Requirements
The following browser versions and operating systems can be used to access the Administration Portal andthe User Portal.
Browser support is divided into tiers:
Tier 1: Browser and operating system combinations that are fully tested and fully supported. Red HatEngineering is committed to fixing issues with browsers on this tier.
Tier 2: Browser and operating system combinations that are partially tested, and are likely to work. Limitedsupport is provided for this tier. Red Hat Engineering will attempt to fix issues with browsers on this tier.
Tier 3: Browser and operating system combinations that are not tested, but may work. Minimal support isprovided for this tier. Red Hat Engineering will attempt to fix only minor issues with browsers on this tier.
Table 2.2. Browser Requirements
Support Tier Operating SystemFamily
Browser Portal Access
Tier 1 Red Hat Enterprise Linux Mozilla Firefox ExtendedSupport Release (ESR)version
Administration Portal andUser Portal
Tier 2 Windows Internet Explorer 10 orlater
Administration Portal andUser Portal
Chapter 2. System Requirements
5

Any Most recent version ofGoogle Chrome orMozilla Firefox
Administration Portal andUser Portal
Tier 3 Any Earlier versions ofGoogle Chrome orMozilla Firefox
Administration Portal andUser Portal
Any Other browsers Administration Portal andUser Portal
Support Tier Operating SystemFamily
Browser Portal Access
2.1.3. Client Requirements
Virtual machine consoles can only be accessed using supported Remote Viewer (virt-viewer) clients on RedHat Enterprise Linux and Windows. To install virt-viewer, see Installing Supported Components in the VirtualMachine Management Guide. Installing virt-viewer requires Administrator privileges.
SPICE console access is only available on other operating systems, such as OS X, through the unsupportedSPICE HTML5 browser client.
Supported QXL drivers are available on Red Hat Enterprise Linux, Windows XP, and Windows 7.
SPICE support is divided into tiers:
Tier 1: Operating systems on which remote-viewer has been fully tested and is supported.
Tier 2: Operating systems on which remote-viewer is partially tested and is likely to work. Limited supportis provided for this tier. Red Hat Engineering will attempt to fix issues with remote-viewer on this tier.
Table 2.3. Client Operating System SPICE Support
Support Tier Operating System SPICE SupportTier 1 Red Hat Enterprise Linux 6 Fully supported on Red Hat
Enterprise Linux 6.8 and aboveTier 1 Red Hat Enterprise Linux 7 Fully supported on Red Hat
Enterprise Linux 7.2 and above Microsoft Windows 7 Fully supported on Microsoft
Windows 7Tier 2 Microsoft Windows 8 Supported when spice-vdagent is
running on these guest operatingsystems
Microsoft Windows 10 Supported when spice-vdagent isrunning on these guest operatingsystems
2.1.4. Operating System Requirements
The Red Hat Enterprise Virtualization Manager must be installed on a base installation of Red Hat EnterpriseLinux 6.6 or later versions of Red Hat Enterprise Linux 6. Do not install any additional packages after the baseinstallation because they may cause dependency issues when attempting to install the packages required bythe Manager.
2.2. Hypervisor Requirements
Installation Guide
6

2.2.1. CPU Requirements
All CPUs must have support for the Intel® 64 or AMD64 CPU extensions, and the AMD-V™ or Intel VT®hardware virtualization extensions enabled. Support for the No eXecute flag (NX) is also required.
Table 2.4. Supported Hypervisor CPU Models
AMD Intel IBMAMD Opteron G1 Intel Conroe IBM POWER8AMD Opteron G2 Intel PenrynAMD Opteron G3 Intel NehalemAMD Opteron G4 Intel WestmereAMD Opteron G5 Intel Sandybridge
Intel Haswell
Procedure 2.1. Checking if a Processor Supports the Required Flags
You must enable Virtualization in the BIOS. Power off and reboot the host after this change to ensure that thechange is applied.
1. At the Red Hat Enterprise Linux or Red Hat Enterprise Virtualization Hypervisor boot screen, pressany key and select the Boot or Boot with serial console entry from the list.
2. Press Tab to edit the kernel parameters for the selected option.
3. Ensure there is a Space after the last kernel parameter listed, and append the rescue parameter.
4. Press Enter to boot into rescue mode.
5. At the prompt which appears, determine that your processor has the required extensions and thatthey are enabled by running this command:
# grep -E 'svm|vmx' /proc/cpuinfo | grep nx
If any output is shown, then the processor is hardware virtualization capable. If no output is shown,then it is still possible that your processor supports hardware virtualization. In some circumstancesmanufacturers disable the virtualization extensions in the BIOS. If you believe this to be the case,consult the system's BIOS and the motherboard manual provided by the manufacturer.
2.2.2. Memory Requirements
The amount of RAM required varies depending on guest operating system requirements, guest applicationrequirements, and memory activity and usage of guests. You also need to take into account that KVM is ableto overcommit physical RAM for virtualized guests. This allows for provisioning of guests with RAMrequirements greater than what is physically present, on the basis that the guests are not all concurrently atpeak load. KVM does this by only allocating RAM for guests as required and shifting underutilized guests intoswap.
Table 2.5. Memory Requirements
Minimum Maximum2 GB of RAM 2 TB of RAM
2.2.3. Storage Requirements
Chapter 2. System Requirements
7

2.2.3. Storage Requirements
Hypervisor hosts require local storage to store configuration, logs, kernel dumps, and for use as swap space.The minimum storage requirements of the Red Hat Enterprise Virtualization Hypervisor are documented inthis section. The storage requirements for Red Hat Enterprise Linux hosts vary based on the amount of diskspace used by their existing configuration but are expected to be greater than those of the Red Hat EnterpriseVirtualization Hypervisor.
For Red Hat Enterprise Virtualization Hypervisor requirements, see the following table for the minimumsupported internal storage for each version of the Hypervisor:
Table 2.6. Red Hat Enterprise Virtualization Hypervisor Minimum Storage Requirements
Version Root andRootBackupPartitions
Configuration Partition
LoggingPartition
DataPartition
SwapPartition
MinimumTotal
Red HatEnterpriseVirtualizationHypervisor 6
512 MB 8 MB 2048 MB 512 MB 8 MB 3.5 GB
Red HatEnterpriseVirtualizationHypervisor 7
8600 MB 8 MB 2048 MB 10240 MB 8 MB 20.4 GB
The logging partition requires a minimum of 2048 MB storage. However, it is recommended to allocate morestorage to the logging partition if resources permit.
The data partition requires a minimum of 512 MB storage for Red Hat Enterprise Virtualization Hypervisor 6,and 10240 MB for Red Hat Enterprise Virtualization Hypervisor 7. If you are also installing the RHEV-MVirtual Appliance, the minimum data partition is 60 GB. The recommended size is at least 1.5 times as largeas the RAM on the host system plus an additional 512 MB. Use of a smaller data partition may prevent futureupgrades of the Hypervisor from the Red Hat Enterprise Virtualization Manager. By default, all disk spaceremaining after allocation of swap space will be allocated to the data partition.
The swap partition requires at least 8 MB of storage. The recommended size of the swap partition variesdepending on both the system the Hypervisor is being installed upon and the anticipated level of overcommitfor the environment. Overcommit allows the Red Hat Enterprise Virtualization environment to present moreRAM to guests than is actually physically present. The default overcommit ratio is 0.5.
The recommended size of the swap partition can be determined by:
Multiplying the amount of system RAM by the expected overcommit ratio, and adding
2 GB of swap space for systems with 4 GB of RAM or less, or
4 GB of swap space for systems with between 4 GB and 16 GB of RAM, or
8 GB of swap space for systems with between 16 GB and 64 GB of RAM, or
16 GB of swap space for systems with between 64 GB and 256 GB of RAM.
Example 2.1. Calculating Swap Partition Size
For a system with 8 GB of RAM this means the formula for determining the amount of swap space toallocate is:
(8 GB x 0.5) + 4 GB = 8 GB
Installation Guide
8

Important
By default the Red Hat Enterprise Virtualization Hypervisor defines a swap partition sized using therecommended formula. An overcommit ratio of 0.5 is used for this calculation. For some systems theresult of this calculation may be a swap partition that requires more free disk space than is available atinstallation. Where this is the case Hypervisor installation will fail.
If you encounter this issue, manually set the sizes for the Hypervisor disk partitions using the storage_vol boot parameter.
Example 2.2. Manually Setting Swap Partition Size
In this example the storage_vol boot parameter is used to set a swap partition size of 4096 MB.Note that no sizes are specified for the other partitions, allowing the Hypervisor to use the defaultsizes.
storage_vol=:4096::::
Important
The Red Hat Enterprise Virtualization Hypervisor does not support installation on fakeraid devices.Where a fakeraid device is present it must be reconfigured such that it no longer runs in RAIDmode.
1. Access the RAID controller's BIOS and remove all logical drives from it.2. Change controller mode to be non-RAID. This may be referred to as compatibility or JBOD
mode.
Access the manufacturer provided documentation for further information related to the specific devicein use.
2.2.4. PCI Device Requirements
Virtualization hosts must have at least one network interface with a minimum bandwidth of 1 Gbps. It isrecommended that each virtualization host have two network interfaces with one dedicated to supportnetwork intensive activities such as virtual machine migration. The performance of such operations are limitedby the bandwidth available.
2.2.5. Hardware Considerations For Device Assignment
If you plan to implement device assignment and PCI passthrough so that a virtual machine can use a specificPCIe device from a host, ensure the following requirements are met:
CPU must support IOMMU (for example, VT-d or AMD-Vi). IBM POWER8 supports IOMMU by default.
Firmware must support IOMMU.
Chapter 2. System Requirements
9

CPU root ports used must support ACS or ACS-equivalent capability.
PCIe device must support ACS or ACS-equivalent capability.
It is recommended that all PCIe switches and bridges between the PCIe device and the root port shouldsupport ACS. For example, if a switch does not support ACS, all devices behind that switch share thesame IOMMU group, and can only be assigned to the same virtual machine.
For GPU support, Red Hat Enterprise Linux 7 supports PCI device assignment of NVIDIA K-SeriesQuadro (model 2000 series or higher), GRID, and Tesla as non-VGA graphics devices. Currently up totwo GPUs may be attached to a virtual machine in addition to one of the standard, emulated VGAinterfaces. The emulated VGA is used for pre-boot and installation and the NVIDIA GPU takes over whenthe NVIDIA graphics drivers are loaded. Note that the NVIDIA Quadro 2000 is not supported, nor is theQuadro K420 card.
Refer to vendor specification and datasheets to confirm that hardware meets these requirements. After youhave installed a hypervisor host, see Appendix G, Configuring a Hypervisor Host for PCI Passthrough formore information on how to enable the hypervisor hardware and software for device passthrough.
To implement SR-IOV, see Hardware Considerations for Implementing SR-IOV for more information.
The lspci -v command can be used to print information for PCI devices already installed on a system.
2.3. Firewalls
2.3.1. Red Hat Enterprise Virtualization Manager Firewall Requirements
The Red Hat Enterprise Virtualization Manager requires that a number of ports be opened to allow networktraffic through the system's firewall. The engine-setup script can configure the firewall automatically, butthis overwrites any pre-existing firewall configuration.
Where an existing firewall configuration exists, you must manually insert the firewall rules required by theManager instead. The engine-setup command saves a list of the iptables rules required in the /usr/share/ovirt-engine/conf/iptables.example file.
The firewall configuration documented here assumes a default configuration. Where non-default HTTP andHTTPS ports are chosen during installation, adjust the firewall rules to allow network traffic on the ports thatwere selected - not the default ports (80 and 443) listed here.
Table 2.7. Red Hat Enterprise Virtualization Manager Firewall Requirements
Port(s) Protocol Source Destination Purpose- ICMP Red Hat Enterprise
VirtualizationHypervisor(s)
Red Hat EnterpriseLinux host(s)
Red Hat EnterpriseVirtualizationManager
When registering tothe Red HatEnterpriseVirtualizationManager,virtualization hostssend an ICMP pingrequest to theManager to confirmthat it is online.
Installation Guide
10

22 TCP System(s) used formaintenance of theManager includingbackendconfiguration, andsoftware upgrades.
Red Hat EnterpriseVirtualizationManager
Secure Shell (SSH)access.
Optional.
2222 TCP Clients accessingvirtual machineserial consoles.
Red Hat EnterpriseVirtualizationManager
Secure Shell (SSH)access to enableconnection tovirtual machineserial consoles.
80, 443 TCP AdministrationPortal clients
User Portal clients
Red Hat EnterpriseVirtualizationHypervisor(s)
Red Hat EnterpriseLinux host(s)
REST API clients
Red Hat EnterpriseVirtualizationManager
Provides HTTP andHTTPS access tothe Manager.
6100 TCP AdministrationPortal clients
User Portal clients
Red Hat EnterpriseVirtualizationManager
Provideswebsocket proxyaccess for web-based consoleclients (noVNC and spice-html5)when thewebsocket proxy isrunning on theManager. If thewebsocket proxy isrunning on adifferent host,however, this portis not used.
7410 UDP Red Hat EnterpriseVirtualizationHypervisor(s)
Red Hat EnterpriseLinux host(s)
Red Hat EnterpriseVirtualizationManager
Must be open forthe Manager toreceive Kdumpnotifications.
Port(s) Protocol Source Destination Purpose
Chapter 2. System Requirements
11

Important
In environments where the Red Hat Enterprise Virtualization Manager is also required to export NFSstorage, such as an ISO Storage Domain, additional ports must be allowed through the firewall. Grantfirewall exceptions for the ports applicable to the version of NFS in use:NFSv4
TCP port 2049 for NFS.
NFSv3
TCP and UDP port 2049 for NFS.TCP and UDP port 111 (rpcbind/sunrpc).TCP and UDP port specified with MOUNTD_PORT="port"TCP and UDP port specified with STATD_PORT="port"TCP port specified with LOCKD_TCPPORT="port"UDP port specified with LOCKD_UDPPORT="port"
The MOUNTD_PORT, STATD_PORT, LOCKD_TCPPORT, and LOCKD_UDPPORT ports are configured inthe /etc/sysconfig/nfs file.
2.3.2. Hypervisor Firewall Requirements
Red Hat Enterprise Linux hosts and Red Hat Enterprise Virtualization Hypervisors require a number of portsto be opened to allow network traffic through the system's firewall. In the case of the Red Hat EnterpriseVirtualization Hypervisor these firewall rules are configured automatically. For Red Hat Enterprise Linux hostshowever it is necessary to manually configure the firewall.
Table 2.8. Virtualization Host Firewall Requirements
Port(s) Protocol Source Destination Purpose22 TCP Red Hat Enterprise
VirtualizationManager
Red Hat EnterpriseVirtualizationHypervisor(s)
Red Hat EnterpriseLinux host(s)
Secure Shell (SSH)access.
Optional.
2223 TCP Red Hat EnterpriseVirtualizationManager
Red Hat EnterpriseVirtualizationHypervisor(s)
Red Hat EnterpriseLinux host(s)
Secure Shell (SSH)access to enableconnection tovirtual machineserial consoles.
Installation Guide
12

161 UDP Red Hat EnterpriseVirtualizationHypervisor(s)
Red Hat EnterpriseLinux host(s)
Red Hat EnterpriseVirtualizationManager
Simple networkmanagementprotocol (SNMP).Only required if youwant SimpleNetworkManagementProtocol traps sentfrom the hypervisorto one or moreexternal SNMPmanagers.
Optional.
5900 - 6923 TCP AdministrationPortal clients
User Portal clients
Red Hat EnterpriseVirtualizationHypervisor(s)
Red Hat EnterpriseLinux host(s)
Remote guestconsole access viaVNC and SPICE.These ports mustbe open to facilitateclient access tovirtual machines.
5989 TCP, UDP CommonInformation ModelObject Manager(CIMOM)
Red Hat EnterpriseVirtualizationHypervisor(s)
Red Hat EnterpriseLinux host(s)
Used by CommonInformation ModelObject Managers(CIMOM) tomonitor virtualmachines runningon the hypervisor.Only required if youwant to use aCIMOM to monitorthe virtualmachines in yourvirtualizationenvironment.
Optional.
16514 TCP Red Hat EnterpriseVirtualizationHypervisor(s)
Red Hat EnterpriseLinux host(s)
Red Hat EnterpriseVirtualizationHypervisor(s)
Red Hat EnterpriseLinux host(s)
Virtual machinemigration using libvirt.
Port(s) Protocol Source Destination Purpose
Chapter 2. System Requirements
13

49152 - 49216 TCP Red Hat EnterpriseVirtualizationHypervisor(s)
Red Hat EnterpriseLinux host(s)
Red Hat EnterpriseVirtualizationHypervisor(s)
Red Hat EnterpriseLinux host(s)
Virtual machinemigration andfencing usingVDSM. These portsmust be openfacilitate bothautomated andmanually initiatedmigration of virtualmachines.
54321 TCP Red Hat EnterpriseVirtualizationManager
Red Hat EnterpriseVirtualizationHypervisor(s)
Red Hat EnterpriseLinux host(s)
Red Hat EnterpriseVirtualizationHypervisor(s)
Red Hat EnterpriseLinux host(s)
VDSMcommunicationswith the Managerand othervirtualization hosts.
Port(s) Protocol Source Destination Purpose
2.3.3. Directory Server Firewall Requirements
Red Hat Enterprise Virtualization requires a directory server to support user authentication. A number of portsmust be opened in the directory server's firewall to support GSS-API authentication as used by the Red HatEnterprise Virtualization Manager.
Table 2.9. Host Firewall Requirements
Port(s) Protocol Source Destination Purpose88, 464 TCP, UDP Red Hat Enterprise
VirtualizationManager
Directory server Kerberosauthentication.
389, 636 TCP Red Hat EnterpriseVirtualizationManager
Directory server LightweightDirectory AccessProtocol (LDAP)and LDAP overSSL.
2.3.4. Database Server Firewall Requirements
Red Hat Enterprise Virtualization supports the use of a remote database server. If you plan to use a remotedatabase server with Red Hat Enterprise Virtualization then you must ensure that the remote database serverallows connections from the Manager.
Table 2.10. Host Firewall Requirements
Port(s) Protocol Source Destination Purpose5432 TCP, UDP Red Hat Enterprise
VirtualizationManager
PostgreSQLdatabase server
Default port forPostgreSQLdatabaseconnections.
Installation Guide
14

If you plan to use a local database server on the Manager itself, which is the default option provided duringinstallation, then no additional firewall rules are required.
Chapter 2. System Requirements
15

Part II. Installing the Red Hat Enterprise Virtualization Manager
Installation Guide
16
Chapter 3. Red Hat Enterprise Virtualization Manager
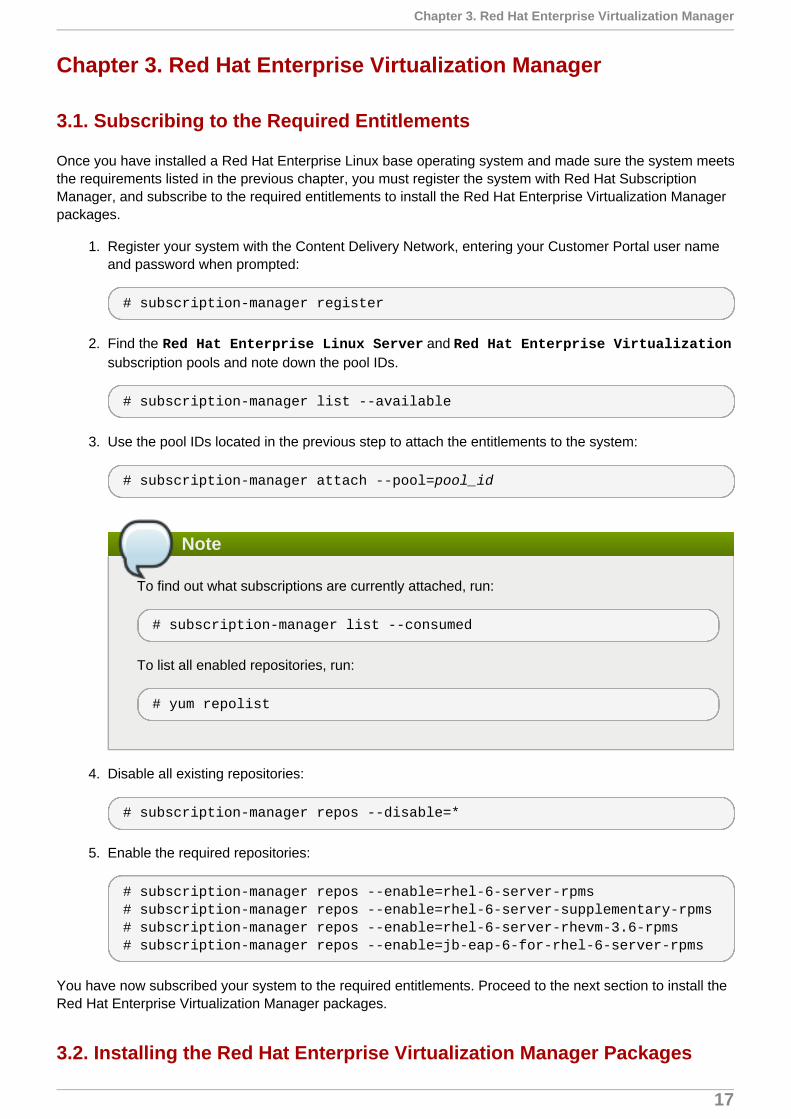
3.1. Subscribing to the Required Entitlements
Once you have installed a Red Hat Enterprise Linux base operating system and made sure the system meetsthe requirements listed in the previous chapter, you must register the system with Red Hat SubscriptionManager, and subscribe to the required entitlements to install the Red Hat Enterprise Virtualization Managerpackages.
1. Register your system with the Content Delivery Network, entering your Customer Portal user nameand password when prompted:
# subscription-manager register
2. Find the Red Hat Enterprise Linux Server and Red Hat Enterprise Virtualizationsubscription pools and note down the pool IDs.
# subscription-manager list --available
3. Use the pool IDs located in the previous step to attach the entitlements to the system:
# subscription-manager attach --pool=pool_id
Note
To find out what subscriptions are currently attached, run:
# subscription-manager list --consumed
To list all enabled repositories, run:
# yum repolist
4. Disable all existing repositories:
# subscription-manager repos --disable=*
5. Enable the required repositories:
# subscription-manager repos --enable=rhel-6-server-rpms# subscription-manager repos --enable=rhel-6-server-supplementary-rpms# subscription-manager repos --enable=rhel-6-server-rhevm-3.6-rpms# subscription-manager repos --enable=jb-eap-6-for-rhel-6-server-rpms
You have now subscribed your system to the required entitlements. Proceed to the next section to install theRed Hat Enterprise Virtualization Manager packages.
3.2. Installing the Red Hat Enterprise Virtualization Manager Packages
Chapter 3. Red Hat Enterprise Virtualization Manager
17

Before you can configure and use the Red Hat Enterprise Virtualization Manager, you must install the rhevmpackage and dependencies.
Procedure 3.1. Installing the Red Hat Enterprise Virtualization Manager Packages
1. To ensure all packages are up to date, run the following command on the machine where you areinstalling the Red Hat Enterprise Virtualization Manager:
# yum update
2. Run the following command to install the rhevm package and dependencies.
# yum install rhevm
Proceed to the next step to configure your Red Hat Enterprise Virtualization Manager.
3.3. Configuring the Red Hat Enterprise Virtualization Manager
After you have installed the rhevm package and dependencies, you must configure the Red Hat EnterpriseVirtualization Manager using the engine-setup command. This command asks you a series of questionsand, after you provide the required values for all questions, applies that configuration and starts the ovirt-engine service.
By default, engine-setup creates and configures the Manager database locally on the Manager machine.Alternatively, you can configure the Manager to use a remote database or a manually-configured localdatabase; however, you must set up that database before running engine-setup. To set up a remotedatabase see Appendix D, Preparing a Remote PostgreSQL Database for Use with the Red Hat EnterpriseVirtualization Manager. To set up a manually-configured local database, see Appendix E, Preparing a LocalManually-Configured PostgreSQL Database for Use with the Red Hat Enterprise Virtualization Manager.
By default, engine-setup will configure a websocket proxy on the Manager. However, for security andperformance reasons, the user can choose to configure it on a separate host. See Appendix F, Installing aWebsocket Proxy on a Separate Machine for instructions.
Note
The engine-setup command guides you through several distinct configuration stages, eachcomprising several steps that require user input. Suggested configuration defaults are provided insquare brackets; if the suggested value is acceptable for a given step, press Enter to accept thatvalue.
Procedure 3.2. Configuring the Red Hat Enterprise Virtualization Manager
1. Run the engine-setup command to begin configuration of the Red Hat Enterprise VirtualizationManager:
# engine-setup
2. Press Enter to configure the Manager:
Configure Engine on this host (Yes, No) [Yes]:
Installation Guide
18

3. Optionally allow access to a virtual machines's serial console from the command line.
Configure VM Console Proxy on this host (Yes, No) [Yes]:
Additional configuration is required on the client machine to use this feature. See Opening a SerialConsole to a Virtual Machine in the Virtual Machine Management Guide.
4. Optionally allow engine-setup to configure a websocket proxy server for allowing users to connectto virtual machines via the noVNC or HTML 5 consoles:
Configure WebSocket Proxy on this machine? (Yes, No) [Yes]:
To configure the websocket proxy on a separate machine, select No and refer to Appendix F,Installing a Websocket Proxy on a Separate Machine for configuration instructions.
5. Press Enter to accept the automatically detected hostname, or enter an alternative hostname andpress Enter. Note that the automatically detected hostname may be incorrect if you are using virtualhosts:
Host fully qualified DNS name of this server [autodetected host name]:
6. The engine-setup command checks your firewall configuration and offers to modify thatconfiguration to open the ports used by the Manager for external communication such as TCP ports80 and 443. If you do not allow engine-setup to modify your firewall configuration, then you mustmanually open the ports used by the Manager.
Setup can automatically configure the firewall on this system.Note: automatic configuration of the firewall may overwrite current settings.Do you want Setup to configure the firewall? (Yes, No) [Yes]:
If you choose to automatically configure the firewall, and no firewall managers are active, you areprompted to select your chosen firewall manager from a list of supported options. Type the name ofthe firewall manager and press Enter. This applies even in cases where only one option is listed.
7. Choose to use either a local or remote PostgreSQL database as the Manager database:
Where is the Engine database located? (Local, Remote) [Local]:
A. If you select Local, the engine-setup command can configure your database automatically(including adding a user and a database), or it can connect to a preconfigured local database:
Setup can configure the local postgresql server automatically for the engine to run. This may conflict with existing applications.Would you like Setup to automatically configure postgresql and create Engine database, or prefer to perform that manually? (Automatic, Manual) [Automatic]:
a. If you select Automatic by pressing Enter, no further action is required here.
b. If you select Manual, input the following values for the manually-configured localdatabase:
Engine database secured connection (Yes, No) [No]:
Chapter 3. Red Hat Enterprise Virtualization Manager
19

Engine database name [engine]: Engine database user [engine]: Engine database password:
B. If you select Remote, input the following values for the preconfigured remote database host:
Engine database host [localhost]:Engine database port [5432]:Engine database secured connection (Yes, No) [No]: Engine database name [engine]: Engine database user [engine]: Engine database password:
8. Select Gluster, Virt, or Both:
Application mode (Both, Virt, Gluster) [Both]:
Both offers the greatest flexibility. In most cases, select Both. Virt application mode allows you torun virtual machines in the environment; Gluster application mode only allows you to manageGlusterFS from the Administration Portal.
9. Set a password for the automatically created administrative user of the Red Hat EnterpriseVirtualization Manager:
Engine admin password:Confirm engine admin password:
10. Set the default value for the wipe_after_delete flag, which wipes the blocks of a virtual disk whenthe disk is deleted.
Default SAN wipe after delete (Yes, No) [No]:
11. The Manager uses certificates to communicate securely with its hosts. This certificate can alsooptionally be used to secure HTTPS communications with the Manager. Provide the organizationname for the certificate:
Organization name for certificate [autodetected domain-based name]:
12. By default, external SSL (HTTPS) communication with the Manager is secured with the self-signedcertificate created earlier in the configuration to securely communicate with hosts. Alternatively,choose another certificate for external HTTPS connections; this does not affect how the Managercommunicates with hosts:
Setup can configure apache to use SSL using a certificate issued from the internal CA.Do you wish Setup to configure that, or prefer to perform that manually? (Automatic, Manual) [Automatic]:
13. Optionally allow engine-setup to make the landing page of the Manager the default pagepresented by the Apache web server:
Installation Guide
20

Setup can configure the default page of the web server to present the application home page. This may conflict with existing applications.Do you wish to set the application as the default web page of the server? (Yes, No) [Yes]:
14. Optionally create an NFS share on the Manager to use as an ISO storage domain. The local ISOdomain provides a selection of images that can be used in the initial setup of virtual machines:
a. Configure an NFS share on this server to be used as an ISO Domain? (Yes, No) [Yes]:
b. Specify the path for the ISO domain:
Local ISO domain path [/var/lib/exports/iso]:
c. Specify the networks or hosts that require access to the ISO domain:
Local ISO domain ACL: 10.1.2.0/255.255.255.0(rw) host01.example.com(rw) host02.example.com(rw)
The example above allows access to a single /24 network and two specific hosts. See the exports(5) man page for further formatting options.
d. Specify a display name for the ISO domain:
Local ISO domain name [ISO_DOMAIN]:
15. Optionally, use the engine-setup command to allow a proxy server to broker transactions from theRed Hat Access plug-in:
Would you like transactions from the Red Hat Access Plugin sent from the RHEV Manager to be brokered through a proxy server? (Yes, No) [No]:
16. Review the installation settings, and press Enter to accept the values and proceed with theinstallation:
Please confirm installation settings (OK, Cancel) [OK]:
17. If you intend to link your Red Hat Enterprise Virtualization environment with a directory server,configure the date and time to synchronize with the system clock used by the directory server toavoid unexpected account expiry issues. See Network Time Protocol Setup in the Red Hat EnterpriseLinux Deployment Guide for more information.
When your environment has been configured, the engine-setup command displays details about how toaccess your environment. If you chose to manually configure the firewall, engine-setup provides a customlist of ports that need to be opened, based on the options selected during setup. The engine-setupcommand also saves your answers to a file that can be used to reconfigure the Manager using the samevalues, and outputs the location of the log file for the Red Hat Enterprise Virtualization Manager configurationprocess.
Proceed to the next section to see how to connect to the Administration Portal as the admin@internaluser. Then, proceed with setting up hypervisor hosts, and attaching storage.
Chapter 3. Red Hat Enterprise Virtualization Manager
21

3.4. Connecting to the Administration Portal
Access the Administration Portal using a web browser.
1. In a web browser, navigate to https://your-manager-fqdn/ovirt-engine, replacing your-manager-fqdn with the fully qualified domain name that you provided during installation.
Important
The first time that you connect to the Administration Portal, you are prompted to trust thecertificate being used to secure communications between your browser and the web server.You must accept this certificate.
2. Click Administration Portal.
3. Enter your User Name and Password. If you are logging in for the first time, use the user name admin in conjunction with the password that you specified during installation.
4. Select the domain against which to authenticate from the Domain list. If you are logging in using theinternal admin user name, select the internal domain.
5. You can view the Administration Portal in multiple languages. The default selection will be chosenbased on the locale settings of your web browser. If you would like to view the Administration Portalin a language other than the default, select your preferred language from the list.
6. Click Login.
The next chapter contains additional Manager related tasks which are optional. If the tasks are not applicableto your environment, proceed to Part III, “Installing Hypervisor Hosts”.
Installation Guide
22

Chapter 4. Red Hat Enterprise Virtualization Manager RelatedTasks
4.1. Removing the Red Hat Enterprise Virtualization Manager
You can use the engine-cleanup command to remove specific components or all components of the RedHat Enterprise Virtualization Manager.
Note
A backup of the engine database and a compressed archive of the PKI keys and configuration arealways automatically created. These files are saved under /var/lib/ovirt-engine/backups/,and include the date and engine- and engine-pki- in their file names respectively.
Procedure 4.1. Removing the Red Hat Enterprise Virtualization Manager
1. Run the following command on the machine on which the Red Hat Enterprise Virtualization Manageris installed:
# engine-cleanup
2. You are prompted whether to remove all Red Hat Enterprise Virtualization Manager components:
A. Type Yes and press Enter to remove all components:
Do you want to remove all components? (Yes, No) [Yes]:
B. Type No and press Enter to select the components to remove. You can select whether to retainor remove each component individually:
Do you want to remove Engine database content? All data will be lost (Yes, No) [No]: Do you want to remove PKI keys? (Yes, No) [No]: Do you want to remove PKI configuration? (Yes, No) [No]: Do you want to remove Apache SSL configuration? (Yes, No) [No]:
3. You are given another opportunity to change your mind and cancel the removal of the Red HatEnterprise Virtualization Manager. If you choose to proceed, the ovirt-engine service is stopped,and your environment's configuration is removed in accordance with the options you selected.
During execution engine service will be stopped (OK, Cancel) [OK]:ovirt-engine is about to be removed, data will be lost (OK, Cancel) [Cancel]:OK
4. Remove the Red Hat Enterprise Virtualization packages:
# yum remove rhevm* vdsm-bootstrap
Chapter 4. Red Hat Enterprise Virtualization Manager Related Tasks
23

4.2. Configuring a Local Repository for Offline Red Hat EnterpriseVirtualization Manager Installation
To install Red Hat Enterprise Virtualization Manager on a system that does not have a direct connection tothe Content Delivery Network, download the required packages on a system that has Internet access, thencreate a repository that can be shared with the offline Manager machine. The system hosting the repositorymust be connected to the same network as the client systems where the packages are to be installed.
1. Install Red Hat Enterprise Linux 6 Server on a system that has access to the Content DeliveryNetwork. This system downloads all the required packages, and distributes them to your offlinesystem(s).
Important
Ensure that the system used in this procedure has a large amount of free disk spaceavailable. This procedure downloads a large number of packages, and requires up to 50 GBof free disk space.
2. Register your system with the Content Delivery Network, entering your Customer Portal user nameand password when prompted:
# subscription-manager register
3. Subscribe the system to all required entitlements:
a. Find the Red Hat Enterprise Linux Server and Red Hat Enterprise Virtualization subscription pools and note down the pool IDs.
# subscription-manager list --available
b. Use the pool IDs located in the previous step to attach the entitlements to the system:
# subscription-manager attach --pool=pool_id
c. Disable all existing repositories:
# subscription-manager repos --disable=*
d. Enable the required repositories:
# subscription-manager repos --enable=rhel-6-server-rpms# subscription-manager repos --enable=rhel-6-server-supplementary-rpms# subscription-manager repos --enable=rhel-6-server-rhevm-3.6-rpms# subscription-manager repos --enable=jb-eap-6-for-rhel-6-server-rpms
e. Ensure that all packages currently installed are up to date:
# yum update
Installation Guide
24

4. Servers that are not connected to the Internet can access software repositories on other systemsusing File Transfer Protocol (FTP). To create the FTP repository, install and configure vsftpd:
a. Install the vsftpd package:
# yum install vsftpd
b. Start the vsftpd service, and ensure the service starts on boot:
# service vsftpd start# chkconfig vsftpd on
c. Create a sub-directory inside the /var/ftp/pub/ directory. This is where the downloadedpackages will be made available:
# mkdir /var/ftp/pub/rhevrepo
5. Download packages from all configured software repositories to the rhevrepo directory. Thisincludes repositories for all Content Delivery Network subscription pools the system is subscribed to,and any locally configured repositories:
# reposync -l -p /var/ftp/pub/rhevrepo
This command downloads a large number of packages, and takes a long time to complete. The -loption enables yum plug-in support.
6. Install the createrepo package:
# yum install createrepo
7. Create repository metadata for each of the sub-directories where packages were downloaded under /var/ftp/pub/rhevrepo:
# for DIR in `find /var/ftp/pub/rhevrepo -maxdepth 1 -mindepth 1 -type d`; do createrepo $DIR; done;
8. Create a repository file, and copy it to the /etc/yum.repos.d/ directory on the offline machine onwhich you will install the Manager.
The configuration file can be created manually or with a script. Run the script below on the systemhosting the repository, replacing ADDRESS in the baseurl with the IP address or fully qualifieddomain name of the system hosting the repository:
#!/bin/sh
REPOFILE="/etc/yum.repos.d/rhev.repo"
for DIR in `find /var/ftp/pub/rhevrepo -maxdepth 1 -mindepth 1 -type d`; do echo -e "[`basename $DIR`]" > $REPOFILE echo -e "name=`basename $DIR`" >> $REPOFILE echo -e "baseurl=ftp://ADDRESS/pub/rhevrepo/`basename $DIR`" >>
Chapter 4. Red Hat Enterprise Virtualization Manager Related Tasks
25

$REPOFILE echo -e "enabled=1" >> $REPOFILE echo -e "gpgcheck=0" >> $REPOFILE echo -e "\n" >> $REPOFILEdone;
9. Install the Manager packages on the offline system. See Section 3.2, “Installing the Red HatEnterprise Virtualization Manager Packages” for instructions. Packages are installed from the localrepository, instead of from the Content Delivery Network.
10. Configure the Manager. See Section 3.3, “Configuring the Red Hat Enterprise VirtualizationManager” for initial configuration instructions.
11. Continue with host, storage, and virtual machine configuration.
Installation Guide
26

Chapter 5. Data Warehouse and Reports
5.1. Overview of Configuring Data Warehouse and Reports
The Red Hat Enterprise Virtualization Manager includes a comprehensive management history database,which can be utilized by any application to extract a range of information at the data center, cluster, and hostlevels. Installing Data Warehouse creates the ovirt_engine_history database, to which the Manager isconfigured to log information for reporting purposes. Red Hat Enterprise Virtualization Manager Reportsfunctionality is also available as an optional component. Reports provides a customized implementation ofJasperServer and JasperReports, an open source reporting tool capable of being embedded in Java-basedapplications. It produces reports that can be built and accessed via a web user interface, and then rendered toscreen, printed, or exported to a variety of formats including PDF, Excel, CSV, Word, RTF, Flash, ODT andODS. The Data Warehouse and Reports components are optional, and must be installed and configured inaddition to the Manager setup.
Before proceeding with Data Warehouse and Reports installation you must first have installed and configuredthe Red Hat Enterprise Virtualization Manager. The Reports functionality depends on the presence of theData Warehouse; Data Warehouse must be installed and configured before Reports.
It is recommended that you set the system time zone for all machines in your Data Warehouse/Reportsdeployment to UTC. This ensures that data collection is not interrupted by variations in your local time zone:for example, a change from summer time to winter time.
To calculate an estimate of the space and resources the ovirt_engine_history database will use, usethe RHEV Manager History Database Size Calculator tool. The estimate is based on the number of entitiesand the length of time you have chosen to retain the history records.
5.2. Data Warehouse and Reports Configuration Notes
Behavior
The following behavior is expected in engine-setup:
Install the Data Warehouse package and the Reports package, run engine-setup, and answer No toconfiguring Data Warehouse and Reports:
Configure Data Warehouse on this host (Yes, No) [Yes]: NoConfigure Reports on this host (Yes, No) [Yes]: No
Run engine-setup again; setup no longer presents the option to configure those services.
Workaround
To force engine-setup to present both options again, run engine-setup --reconfigure-optional-components.
Note
To configure only the currently installed Data Warehouse and Reports packages, and prevent setupfrom applying package updates found in enabled repositories, add the --offline option .
Chapter 5. Data Warehouse and Reports
27

5.3. Data Warehouse and Reports Installation Options
Data Warehouse and Reports installation requires between one and three machines, and can be configuredin one of the following ways:
1. Install and configure both Data Warehouse and Reports on the machine on which theManager is installed.
This configuration hosts the Data Warehouse and Reports services on your Manager machine. Thisrequires only a single registered machine, and is the simplest to configure; however, it also requiresthat the services share CPU and memory, and increases the demand on the host machine. Userswho require access to the Data Warehouse service or the Reports service will require access to theManager machine itself.
2. Install and configure both Data Warehouse and Reports on one separate machine.
This configuration hosts Data Warehouse and Reports on a single, separate machine. This requirestwo registered machines; however, it reduces the load on the Manager machine, and avoids potentialCPU and memory-sharing conflicts on that machine. Administrators can also allow user access to theData Warehouse-Reports machine, without the need to grant access to the Manager machine. Notethat the Data Warehouse and Reports services will still compete for resources on their single host.
3. Install and configure Data Warehouse on a separate machine, then install and configureReports on a separate machine.
This configuration separates each service onto its own dedicated host. This requires three registeredmachines; however, it reduces the load on each individual machine, and allows each service to avoidpotential conflicts caused by sharing CPU and memory with other processes. Administrators can alsoallow user access to one particular machine, without the need to grant access to either of the twoother machines.
4. Install and configure Data Warehouse on the Manager machine, then install and configureReports on a separate machine.
This configuration hosts Data Warehouse on the Manager machine, and Reports on a separate host.This requires two registered machines; however, it reduces the load on the Manager machine, andavoids some memory-sharing conflicts. Administrators can allow user access to the Reportsmachine, without the need to grant access to the Manager machine.
5. Install and configure Data Warehouse on a separate machine, then install and configureReports on the Manager machine.
This configuration hosts Data Warehouse on a separate machine, and Reports on the Managermachine. This requires two registered machines; however, it reduces the load on the Managermachine, and avoids some memory-sharing conflicts. Administrators can allow user access to theData Warehouse machine, without the need to grant access to the Manager machine.
If you choose to host the Data Warehouse database on a machine that is separate from the machine onwhich the Data Warehouse service is installed, you will require an additional machine for that purpose. Thesame is true if you choose to host the Reports database remotely.
Installation Guide
28

Note
Detailed user, administration, and installation guides for JasperReports are available in /usr/share/jasperreports-server-pro/docs/
5.3.1. Installing and Configuring Data Warehouse and Reports on the Red HatEnterprise Virtualization Manager
Overview
Install and configure Data Warehouse and Red Hat Enterprise Virtualization Manager Reports on the samemachine as the Red Hat Enterprise Virtualization Manager.
Prerequisites
Ensure that you have completed the following prerequisites:
1. You must have installed and configured the Manager on this machine.
2. If you choose to use a remote Data Warehouse database or Reports database, you must set up eachdatabase before installing the Data Warehouse and Reports services. You must have the followinginformation about each database host:
The fully qualified domain name of the host
The port through which the database can be reached (5432 by default)
The database name
The database user
The database password
3. If you are using the self-hosted engine, you must move it to maintenance mode:
# hosted-engine --set-maintenance --mode=global
Procedure 5.1. Installing and Configuring Data Warehouse and Reports on the Red Hat EnterpriseVirtualization Manager
1. Install the rhevm-dwh package and the rhevm-reports package on the system where the Red HatEnterprise Virtualization Manager is installed:
# yum install rhevm-dwh rhevm-reports
2. Run the engine-setup command to begin configuration of Data Warehouse and Reports on themachine:
# engine-setup
3. Follow the prompts to configure Data Warehouse and Reports:
Configure Data Warehouse on this host (Yes, No) [Yes]: Configure Reports on this host (Yes, No) [Yes]:
Chapter 5. Data Warehouse and Reports
29

4. Press Enter to automatically configure the firewall, or type No and press Enter to maintain existingsettings:
Setup can automatically configure the firewall on this system.Note: automatic configuration of the firewall may overwrite current settings.Do you want Setup to configure the firewall? (Yes, No) [Yes]:
If you choose to automatically configure the firewall, and no firewall managers are active, you areprompted to select your chosen firewall manager from a list of supported options. Type the name ofthe firewall manager and press Enter. This applies even in cases where only one option is listed.
5. Answer the following questions about the Data Warehouse database and the Reports database:
Where is the DWH database located? (Local, Remote) [Local]: Setup can configure the local postgresql server automatically for the DWH to run. This may conflict with existing applications.Would you like Setup to automatically configure postgresql and create DWH database, or prefer to perform that manually? (Automatic, Manual) [Automatic]: Where is the Reports database located? (Local, Remote) [Local]: Setup can configure the local postgresql server automatically for the Reports to run. This may conflict with existing applications.Would you like Setup to automatically configure postgresql and create Reports database, or prefer to perform that manually? (Automatic, Manual) [Automatic]:
Press Enter to choose the highlighted defaults, or type your alternative preference and then press Enter. If you select Remote, you are prompted to provide details about each remote database host.
6. Set a password for the Reports administrative users (admin and superuser). Note that the reportssystem maintains its own set of credentials that are separate to those used for the Manager:
Reports power users password:
You are prompted to enter the password a second time to confirm it.
7. For the configuration to take effect, the ovirt-engine service must be restarted. The engine-setup command prompts you:
During execution engine service will be stopped (OK, Cancel) [OK]:
Press Enter to proceed. The ovirt-engine service restarts automatically later in the command.
8. Confirm your installation settings:
Please confirm installation settings (OK, Cancel) [OK]:
Next Steps
Access the Reports Portal at http://demo.redhat.com/ovirt-engine-reports, replacing demo.redhat.com withthe fully qualified domain name of the Manager. If during the Manager installation you selected a non-defaultHTTP port then append :port to the URL, replacing :port with the port that you chose.
Installation Guide
30
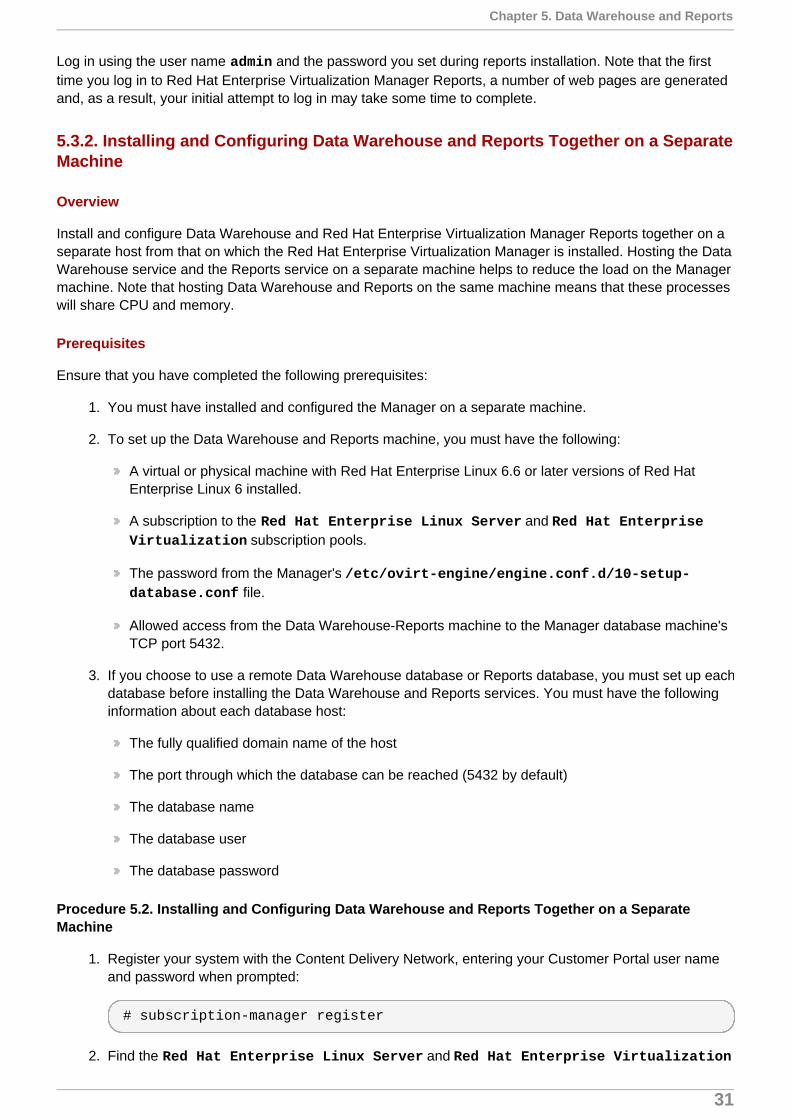
Log in using the user name admin and the password you set during reports installation. Note that the firsttime you log in to Red Hat Enterprise Virtualization Manager Reports, a number of web pages are generatedand, as a result, your initial attempt to log in may take some time to complete.
5.3.2. Installing and Configuring Data Warehouse and Reports Together on a SeparateMachine
Overview
Install and configure Data Warehouse and Red Hat Enterprise Virtualization Manager Reports together on aseparate host from that on which the Red Hat Enterprise Virtualization Manager is installed. Hosting the DataWarehouse service and the Reports service on a separate machine helps to reduce the load on the Managermachine. Note that hosting Data Warehouse and Reports on the same machine means that these processeswill share CPU and memory.
Prerequisites
Ensure that you have completed the following prerequisites:
1. You must have installed and configured the Manager on a separate machine.
2. To set up the Data Warehouse and Reports machine, you must have the following:
A virtual or physical machine with Red Hat Enterprise Linux 6.6 or later versions of Red HatEnterprise Linux 6 installed.
A subscription to the Red Hat Enterprise Linux Server and Red Hat Enterprise Virtualization subscription pools.
The password from the Manager's /etc/ovirt-engine/engine.conf.d/10-setup-database.conf file.
Allowed access from the Data Warehouse-Reports machine to the Manager database machine'sTCP port 5432.
3. If you choose to use a remote Data Warehouse database or Reports database, you must set up eachdatabase before installing the Data Warehouse and Reports services. You must have the followinginformation about each database host:
The fully qualified domain name of the host
The port through which the database can be reached (5432 by default)
The database name
The database user
The database password
Procedure 5.2. Installing and Configuring Data Warehouse and Reports Together on a SeparateMachine
1. Register your system with the Content Delivery Network, entering your Customer Portal user nameand password when prompted:
# subscription-manager register
2. Find the Red Hat Enterprise Linux Server and Red Hat Enterprise Virtualization
Chapter 5. Data Warehouse and Reports
31

subscription pools and note down the pool IDs.
# subscription-manager list --available
3. Use the pool IDs located in the previous step to attach the entitlements to the system:
# subscription-manager attach --pool=pool_id
4. Disable all existing repositories:
# subscription-manager repos --disable=*
5. Enable the required repositories:
# subscription-manager repos --enable=rhel-6-server-rpms# subscription-manager repos --enable=rhel-6-server-supplementary-rpms# subscription-manager repos --enable=rhel-6-server-rhevm-3.6-rpms# subscription-manager repos --enable=jb-eap-6-for-rhel-6-server-rpms
6. Ensure that all packages currently installed are up to date:
# yum update
7. Install the rhevm-dwh-setup and rhevm-reports-setup packages:
# yum install rhevm-dwh-setup rhevm-reports-setup
8. Run the engine-setup command to begin configuration of Data Warehouse and Reports on themachine:
# engine-setup
9. Follow the prompts to configure Data Warehouse and Reports:
Configure Data Warehouse on this host (Yes, No) [Yes]: Configure Reports on this host (Yes, No) [Yes]:
10. Press Enter to automatically configure the firewall, or type No and press Enter to maintain existingsettings:
Setup can automatically configure the firewall on this system.Note: automatic configuration of the firewall may overwrite current settings.Do you want Setup to configure the firewall? (Yes, No) [Yes]:
If you choose to automatically configure the firewall, and no firewall managers are active, you areprompted to select your chosen firewall manager from a list of supported options. Type the name ofthe firewall manager and press Enter. This applies even in cases where only one option is listed.
11. Press Enter to accept the automatically detected hostname, or enter an alternative hostname andpress Enter:
Installation Guide
32

Host fully qualified DNS name of this server [autodetected hostname]:
12. Enter the fully qualified domain name of the Manager machine, and then press Enter:
Host fully qualified DNS name of the engine server []:
13. Answer the following questions about the Data Warehouse database and the Reports database:
Where is the DWH database located? (Local, Remote) [Local]: Setup can configure the local postgresql server automatically for the DWH to run. This may conflict with existing applications.Would you like Setup to automatically configure postgresql and create DWH database, or prefer to perform that manually? (Automatic, Manual) [Automatic]: Where is the Reports database located? (Local, Remote) [Local]: Setup can configure the local postgresql server automatically for the Reports to run. This may conflict with existing applications.Would you like Setup to automatically configure postgresql and create Reports database, or prefer to perform that manually? (Automatic, Manual) [Automatic]:
Press Enter to choose the highlighted defaults, or type your alternative preference and then press Enter. If you select Remote, you are prompted to provide details about each remote database host.
14. Enter the fully qualified domain name and password for the Manager database machine. Press Enter to accept the default values in each other field:
Engine database host []: engine-db-fqdnEngine database port [5432]: Engine database secured connection (Yes, No) [No]: Engine database name [engine]: Engine database user [engine]: Engine database password: password
15. Press Enter to allow setup to sign the Reports certificate and Apache certificate on the Manager viaSSH:
Setup will need to do some actions on the remote engine server. Either automatically, using ssh as root to access it, or you will be prompted to manually perform each such action.Please choose one of the following:1 - Access remote engine server using ssh as root2 - Perform each action manually, use files to copy content around(1, 2) [1]:
16. Press Enter to accept the default SSH port, or enter an alternative port number and then press Enter:
ssh port on remote engine server [22]:
17. Enter the root password for the Manager machine:
root password on remote engine server manager-fqdn.com:
Chapter 5. Data Warehouse and Reports
33

18. Press Enter to allow automatic configuration of SSL on Apache:
Setup can configure apache to use SSL using a certificate issued from the internal CA.Do you wish Setup to configure that, or prefer to perform that manually? (Automatic, Manual) [Automatic]:
19. Set a password for the Reports administrative users (admin and superuser). Note that the reportssystem maintains its own set of credentials that are separate to those used for the Manager:
Reports power users password:
You are prompted to enter the password a second time to confirm it.
20. Confirm your installation settings:
Please confirm installation settings (OK, Cancel) [OK]:
Next Steps
Access the Reports Portal at http://demo.redhat.com/ovirt-engine-reports, replacing demo.redhat.com withthe fully qualified domain name of the Manager. If during the Manager installation you selected a non-defaultHTTP port then append :port to the URL, replacing :port with the port that you chose.
Log in using the user name admin and the password you set during reports installation. Note that the firsttime you log in to Red Hat Enterprise Virtualization Manager Reports, a number of web pages are generatedand, as a result, your initial attempt to log in may take some time to complete.
5.3.3. Installing and Configuring Data Warehouse and Reports on Separate Machines
Overview
Install and configure Data Warehouse on a separate host from that on which the Red Hat EnterpriseVirtualization Manager is installed, then install and configure Red Hat Enterprise Virtualization ManagerReports on a third machine. Hosting the Data Warehouse and Reports services on separate machines helpsto reduce the load on the Manager machine. Separating Data Warehouse and Reports onto individualmachines further reduces the demand each service places on its host machine, and avoids any conflictscaused by sharing CPU and memory with other processes.
Installing this scenario involves two key steps:
1. Install and configure Data Warehouse on a separate machine.
2. Install and configure Reports on a separate machine.
Prerequisites
Ensure that you have completed the following prerequisites:
1. You must have installed and configured the Manager on a separate machine.
2. To set up the Data Warehouse machine, you must have the following:
A virtual or physical machine with Red Hat Enterprise Linux 6.6 or later versions of Red HatEnterprise Linux 6 installed.
Installation Guide
34
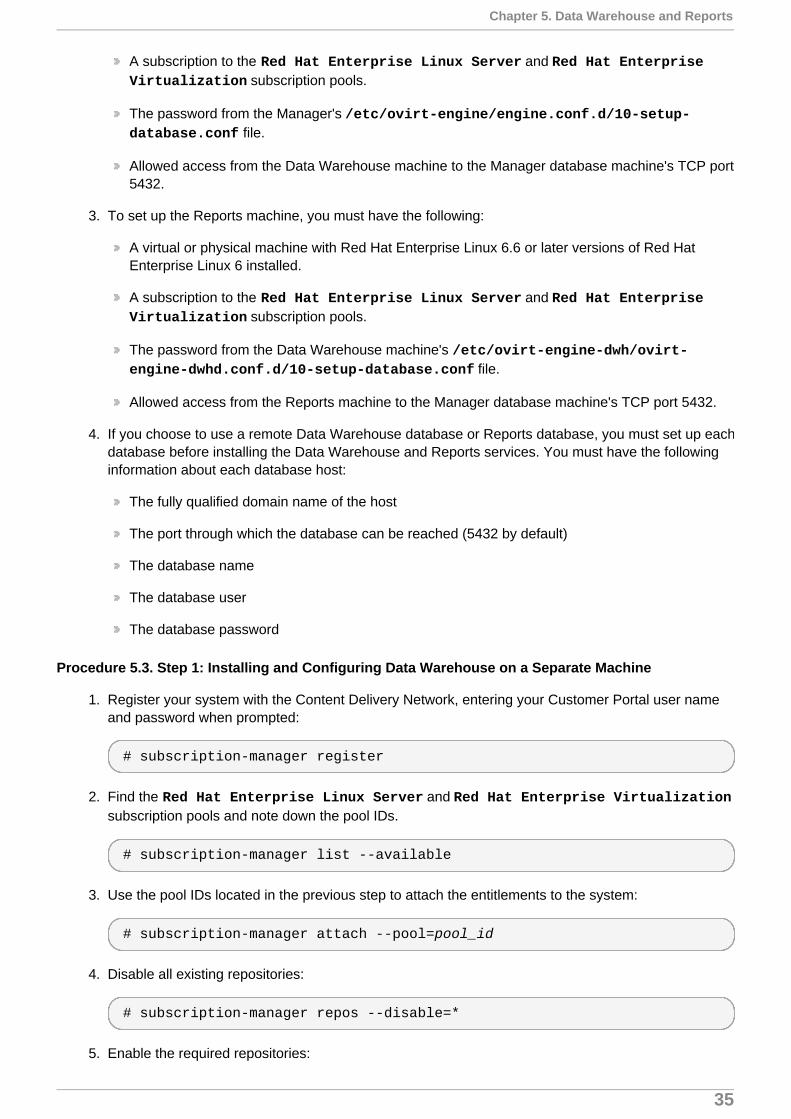
A subscription to the Red Hat Enterprise Linux Server and Red Hat Enterprise Virtualization subscription pools.
The password from the Manager's /etc/ovirt-engine/engine.conf.d/10-setup-database.conf file.
Allowed access from the Data Warehouse machine to the Manager database machine's TCP port5432.
3. To set up the Reports machine, you must have the following:
A virtual or physical machine with Red Hat Enterprise Linux 6.6 or later versions of Red HatEnterprise Linux 6 installed.
A subscription to the Red Hat Enterprise Linux Server and Red Hat Enterprise Virtualization subscription pools.
The password from the Data Warehouse machine's /etc/ovirt-engine-dwh/ovirt-engine-dwhd.conf.d/10-setup-database.conf file.
Allowed access from the Reports machine to the Manager database machine's TCP port 5432.
4. If you choose to use a remote Data Warehouse database or Reports database, you must set up eachdatabase before installing the Data Warehouse and Reports services. You must have the followinginformation about each database host:
The fully qualified domain name of the host
The port through which the database can be reached (5432 by default)
The database name
The database user
The database password
Procedure 5.3. Step 1: Installing and Configuring Data Warehouse on a Separate Machine
1. Register your system with the Content Delivery Network, entering your Customer Portal user nameand password when prompted:
# subscription-manager register
2. Find the Red Hat Enterprise Linux Server and Red Hat Enterprise Virtualizationsubscription pools and note down the pool IDs.
# subscription-manager list --available
3. Use the pool IDs located in the previous step to attach the entitlements to the system:
# subscription-manager attach --pool=pool_id
4. Disable all existing repositories:
# subscription-manager repos --disable=*
5. Enable the required repositories:
Chapter 5. Data Warehouse and Reports
35

# subscription-manager repos --enable=rhel-6-server-rpms# subscription-manager repos --enable=rhel-6-server-supplementary-rpms# subscription-manager repos --enable=rhel-6-server-rhevm-3.6-rpms# subscription-manager repos --enable=jb-eap-6-for-rhel-6-server-rpms
6. Ensure that all packages currently installed are up to date:
# yum update
7. Install the rhevm-dwh-setup package:
# yum install rhevm-dwh-setup
8. Run the engine-setup command to begin configuration of Data Warehouse on the machine:
# engine-setup
9. Press Enter to configure Data Warehouse:
Configure Data Warehouse on this host (Yes, No) [Yes]:
10. Press Enter to automatically configure the firewall, or type No and press Enter to maintain existingsettings:
Setup can automatically configure the firewall on this system.Note: automatic configuration of the firewall may overwrite current settings.Do you want Setup to configure the firewall? (Yes, No) [Yes]:
If you choose to automatically configure the firewall, and no firewall managers are active, you areprompted to select your chosen firewall manager from a list of supported options. Type the name ofthe firewall manager and press Enter. This applies even in cases where only one option is listed.
11. Press Enter to accept the automatically detected hostname, or enter an alternative hostname andpress Enter:
Host fully qualified DNS name of this server [autodetected host name]:
12. Answer the following questions about the Data Warehouse database:
Where is the DWH database located? (Local, Remote) [Local]: Setup can configure the local postgresql server automatically for the DWH to run. This may conflict with existing applications.Would you like Setup to automatically configure postgresql and create DWH database, or prefer to perform that manually? (Automatic, Manual) [Automatic]:
Press Enter to choose the highlighted defaults, or type your alternative preference and then press Enter. If you select Remote, you are prompted to provide details about the remote database host.
13. Enter the fully qualified domain name and password for the Manager database machine. Press Enter to accept the default values in each other field:
Installation Guide
36

Engine database host []: engine-db-fqdnEngine database port [5432]: Engine database secured connection (Yes, No) [No]: Engine database name [engine]: Engine database user [engine]: Engine database password: password
14. Confirm your installation settings:
Please confirm installation settings (OK, Cancel) [OK]:
Procedure 5.4. Step 2: Installing and Configuring Reports on a Separate Machine
1. Register your system with the Content Delivery Network, entering your Customer Portal user nameand password when prompted:
# subscription-manager register
2. Find subscription pools containing the repositories required to install Reports:
# subscription-manager list --available | grep -A8 "Red Hat Enterprise Linux Server"# subscription-manager list --available | grep -A8 "Red Hat Enterprise Virtualization"
3. Use the pool identifiers located in the previous step to attach the Red Hat Enterprise Linux Server and Red Hat Enterprise Virtualization entitlements to the system:
# subscription-manager attach --pool=pool_id
4. Disable all existing repositories:
# subscription-manager repos --disable=*
5. Enable the required repositories:
# subscription-manager repos --enable=rhel-6-server-rpms# subscription-manager repos --enable=rhel-6-server-supplementary-rpms# subscription-manager repos --enable=rhel-6-server-rhevm-3.6-rpms# subscription-manager repos --enable=jb-eap-6-for-rhel-6-server-rpms
6. Ensure that all packages currently installed are up to date:
# yum update
7. Install the rhevm-reports-setup package:
# yum install rhevm-reports-setup
8. Run the engine-setup command to begin configuration of Reports on the machine:
# engine-setup
Chapter 5. Data Warehouse and Reports
37

9. Press Enter to configure Reports:
Configure Reports on this host (Yes, No) [Yes]:
10. Press Enter to automatically configure the firewall, or type No and press Enter to maintain existingsettings:
Setup can automatically configure the firewall on this system.Note: automatic configuration of the firewall may overwrite current settings.Do you want Setup to configure the firewall? (Yes, No) [Yes]:
If you choose to automatically configure the firewall, and no firewall managers are active, you areprompted to select your chosen firewall manager from a list of supported options. Type the name ofthe firewall manager and press Enter. This applies even in cases where only one option is listed.
11. Press Enter to accept the automatically detected hostname, or enter an alternative hostname andpress Enter:
Host fully qualified DNS name of this server [autodetected host name]:
12. Enter the fully qualified domain name of the Manager machine, and then press Enter:
Host fully qualified DNS name of the engine server []:
13. Answer the following questions about the Reports database:
Where is the Reports database located? (Local, Remote) [Local]: Setup can configure the local postgresql server automatically for the Reports to run. This may conflict with existing applications.Would you like Setup to automatically configure postgresql and create Reports database, or prefer to perform that manually? (Automatic, Manual) [Automatic]:
Press Enter to choose the highlighted defaults, or type your alternative preference and then press Enter. If you select Remote, you are prompted to provide details about the remote database host.
14. Enter the fully qualified domain name and password for your Data Warehouse database host. Press Enter to accept the default values in each other field:
DWH database host []: dwh-db-fqdnDWH database port [5432]: DWH database secured connection (Yes, No) [No]: DWH database name [ovirt_engine_history]: DWH database user [ovirt_engine_history]: DWH database password: password
15. Press Enter to allow setup to sign the Reports certificate and Apache certificate on the Manager viaSSH:
Setup will need to do some actions on the remote engine server. Either automatically, using ssh as root to access it, or you will be prompted
Installation Guide
38

to manually perform each such action.Please choose one of the following:1 - Access remote engine server using ssh as root2 - Perform each action manually, use files to copy content around(1, 2) [1]:
16. Press Enter to accept the default SSH port, or enter an alternative port number and then press Enter:
ssh port on remote engine server [22]:
17. Enter the root password for the Manager machine:
root password on remote engine server manager-fqdn.com:
18. Press Enter to allow automatic configuration of SSL on Apache:
Setup can configure apache to use SSL using a certificate issued from the internal CA.Do you wish Setup to configure that, or prefer to perform that manually? (Automatic, Manual) [Automatic]:
19. Set a password for the Reports administrative users (admin and superuser). Note that the reportssystem maintains its own set of credentials that are separate to those used for the Manager:
Reports power users password:
You are prompted to enter the password a second time to confirm it.
20. Confirm your installation settings:
Please confirm installation settings (OK, Cancel) [OK]:
Next Steps
Access the Reports Portal at http://demo.redhat.com/ovirt-engine-reports, replacing demo.redhat.com withthe fully qualified domain name of the Manager. If during the Manager installation you selected a non-defaultHTTP port then append :port to the URL, replacing :port with the port that you chose.
Log in using the user name admin and the password you set during reports installation. Note that the firsttime you log in to Red Hat Enterprise Virtualization Manager Reports, a number of web pages are generatedand, as a result, your initial attempt to log in may take some time to complete.
5.3.4. Installing and Configuring Data Warehouse on the Red Hat EnterpriseVirtualization Manager and Reports on a Separate Machine
Overview
Install and configure Data Warehouse on the same system as the Red Hat Enterprise Virtualization Manager,then install and configure Red Hat Enterprise Virtualization Manager Reports on a separate machine. Hostingthe Reports service on a separate machine helps to reduce the load on the Manager machine.
Installing this scenario involves two key steps:
Chapter 5. Data Warehouse and Reports
39

1. Install and configure Data Warehouse on the Manager machine.
2. Install and configure Reports on a separate machine.
Prerequisites
Ensure that you have completed the following prerequisites:
1. You must have installed and configured the Manager on one machine. This is the machine on whichyou are installing Data Warehouse.
2. To set up the Reports machine, you must have the following:
A virtual or physical machine with Red Hat Enterprise Linux 6.6 or later versions of Red HatEnterprise Linux 6 installed.
A subscription to the Red Hat Enterprise Linux Server and Red Hat Enterprise Virtualization entitlement pools.
The password from the Data Warehouse machine's /etc/ovirt-engine-dwh/ovirt-engine-dwhd.conf.d/10-setup-database.conf file.
Allowed access from the Reports machine to the Manager database machine's TCP port 5432.
3. If you choose to use a remote Data Warehouse database or Reports database, you must set up eachdatabase before installing the Data Warehouse and Reports services. You must have the followinginformation about each database host:
The fully qualified domain name of the host
The port through which the database can be reached (5432 by default)
The database name
The database user
The database password
4. If you are using the self-hosted engine, you must move it to maintenance mode:
# hosted-engine --set-maintenance --mode=global
Procedure 5.5. Step 1: Installing and Configuring Data Warehouse on the Manager Machine
1. Install the rhevm-dwh package:
# yum install rhevm-dwh
2. Run the engine-setup command to begin configuration of Data Warehouse on the machine:
# engine-setup
3. Press Enter to configure Data Warehouse:
Configure Data Warehouse on this host (Yes, No) [Yes]:
Installation Guide
40

4. Press Enter to automatically configure the firewall, or type No and press Enter to maintain existingsettings:
Setup can automatically configure the firewall on this system.Note: automatic configuration of the firewall may overwrite current settings.Do you want Setup to configure the firewall? (Yes, No) [Yes]:
If you choose to automatically configure the firewall, and no firewall managers are active, you areprompted to select your chosen firewall manager from a list of supported options. Type the name ofthe firewall manager and press Enter. This applies even in cases where only one option is listed.
5. Answer the following questions about the Data Warehouse database:
Where is the DWH database located? (Local, Remote) [Local]: Setup can configure the local postgresql server automatically for the DWH to run. This may conflict with existing applications.Would you like Setup to automatically configure postgresql and create DWH database, or prefer to perform that manually? (Automatic, Manual) [Automatic]:
Press Enter to choose the highlighted defaults, or type your alternative preference and then press Enter. If you select Remote, you are prompted to provide details about the remote database host.
6. For the configuration to take effect, the ovirt-engine service must be restarted. The engine-setup command prompts you:
During execution engine service will be stopped (OK, Cancel) [OK]:
Press Enter to proceed. The ovirt-engine service restarts automatically later in the command.
7. Confirm your installation settings:
Please confirm installation settings (OK, Cancel) [OK]:
Procedure 5.6. Step 2: Installing and Configuring Reports on a Separate Machine
1. Register your system with the Content Delivery Network, entering your Customer Portal user nameand password when prompted:
# subscription-manager register
2. Find the Red Hat Enterprise Linux Server and Red Hat Enterprise Virtualizationsubscription pools and note down the pool IDs.
# subscription-manager list --available
3. Use the pool IDs located in the previous step to attach the entitlements to the system:
# subscription-manager attach --pool=pool_id
4. Disable all existing repositories:
Chapter 5. Data Warehouse and Reports
41

# subscription-manager repos --disable=*
5. Enable the required channels:
# subscription-manager repos --enable=rhel-6-server-rpms# subscription-manager repos --enable=rhel-6-server-supplementary-rpms# subscription-manager repos --enable=rhel-6-server-rhevm-3.6-rpms# subscription-manager repos --enable=jb-eap-6-for-rhel-6-server-rpms
6. Ensure that all packages currently installed are up to date:
# yum update
7. Install the rhevm-reports-setup package:
# yum install rhevm-reports-setup
8. Run the engine-setup command to begin configuration of Reports on the machine:
# engine-setup
9. Press Enter to configure Reports:
Configure Reports on this host (Yes, No) [Yes]:
10. Press Enter to automatically configure the firewall, or type No and press Enter to maintain existingsettings:
Setup can automatically configure the firewall on this system.Note: automatic configuration of the firewall may overwrite current settings.Do you want Setup to configure the firewall? (Yes, No) [Yes]:
If you choose to automatically configure the firewall, and no firewall managers are active, you areprompted to select your chosen firewall manager from a list of supported options. Type the name ofthe firewall manager and press Enter. This applies even in cases where only one option is listed.
11. Press Enter to accept the automatically detected hostname, or enter an alternative hostname andpress Enter:
Host fully qualified DNS name of this server [autodetected host name]:
12. Enter the fully qualified domain name of the Manager machine, and then press Enter:
Host fully qualified DNS name of the engine server []:
13. Answer the following questions about the Reports database:
Where is the Reports database located? (Local, Remote) [Local]: Setup can configure the local postgresql server automatically for the Reports to run. This may conflict with existing applications.Would you like Setup to automatically configure postgresql and create
Installation Guide
42

Reports database, or prefer to perform that manually? (Automatic, Manual) [Automatic]:
Press Enter to choose the highlighted defaults, or type your alternative preference and then press Enter. If you select Remote, you are prompted to provide details about the remote database host.
14. Enter the fully qualified domain name and password for your Data Warehouse database host. Press Enter to accept the default values in each other field:
DWH database host []: dwh-db-fqdnDWH database port [5432]: DWH database secured connection (Yes, No) [No]: DWH database name [ovirt_engine_history]: DWH database user [ovirt_engine_history]: DWH database password: password
15. Press Enter to allow setup to sign the Reports certificate and Apache certificate on the Manager viaSSH:
Setup will need to do some actions on the remote engine server. Either automatically, using ssh as root to access it, or you will be prompted to manually perform each such action.Please choose one of the following:1 - Access remote engine server using ssh as root2 - Perform each action manually, use files to copy content around(1, 2) [1]:
16. Press Enter to accept the default SSH port, or enter an alternative port number and then press Enter:
ssh port on remote engine server [22]:
17. Enter the root password for the Manager machine:
root password on remote engine server manager-fqdn.com:
18. Press Enter to allow automatic configuration of SSL on Apache:
Setup can configure apache to use SSL using a certificate issued from the internal CA.Do you wish Setup to configure that, or prefer to perform that manually? (Automatic, Manual) [Automatic]:
19. Set a password for the Reports administrative users (admin and superuser). Note that the reportssystem maintains its own set of credentials that are separate to those used for the Manager:
Reports power users password:
You are prompted to enter the password a second time to confirm it.
20. Confirm your installation settings:
Please confirm installation settings (OK, Cancel) [OK]:
Chapter 5. Data Warehouse and Reports
43

Next Steps
Access the Reports Portal at http://demo.redhat.com/ovirt-engine-reports, replacing demo.redhat.com withthe fully qualified domain name of the Manager. If during the Manager installation you selected a non-defaultHTTP port then append :port to the URL, replacing :port with the port that you chose.
Log in using the user name admin and the password you set during reports installation. Note that the firsttime you log in to Red Hat Enterprise Virtualization Manager Reports, a number of web pages are generatedand, as a result, your initial attempt to log in may take some time to complete.
5.3.5. Installing and Configuring Data Warehouse on a Separate Machine and Reportson the Red Hat Enterprise Virtualization Manager
Overview
Install and configure Data Warehouse on a separate host from that on which the Red Hat EnterpriseVirtualization Manager is installed, then install and configure Red Hat Enterprise Virtualization ManagerReports on the Manager machine. Hosting the Data Warehouse service on a separate machine helps toreduce the load on the Manager machine. Note that hosting the Manager and Reports on the same machinemeans that these processes will share CPU and memory.
Installing this scenario involves two key steps:
1. Install and configure Data Warehouse on a separate machine.
2. Install and configure Reports on the Manager machine.
Prerequisites
Ensure that you have completed the following prerequisites:
1. You must have installed and configured the Manager on a separate machine.
2. To set up the Data Warehouse machine, you must have the following:
A virtual or physical machine with Red Hat Enterprise Linux 6.6 or later versions of Red HatEnterprise Linux 6 installed.
A subscription to the Red Hat Enterprise Linux Server and Red Hat Enterprise Virtualization entitlement pools.
The password from the Manager's /etc/ovirt-engine/engine.conf.d/10-setup-database.conf file.
Allowed access from the Data Warehouse machine to the Manager database machine's TCP port5432.
3. To set up the Reports machine, you must have the following:
The password from the Data Warehouse machine's /etc/ovirt-engine-dwh/ovirt-engine-dwhd.conf.d/10-setup-database.conf file.
4. If you choose to use a remote Data Warehouse database or Reports database, you must set up eachdatabase before installing the Data Warehouse and Reports services. You must have the followinginformation about each database host:
The fully qualified domain name of the host
The port through which the database can be reached (5432 by default)
Installation Guide
44

The database name
The database user
The database password
5. If you are using the self-hosted engine, you must move it to maintenance mode:
# hosted-engine --set-maintenance --mode=global
Procedure 5.7. Step 1: Installing and Configuring Data Warehouse on a Separate Machine
1. Register your system with the Content Delivery Network, entering your Customer Portal user nameand password when prompted:
# subscription-manager register
2. Find the Red Hat Enterprise Linux Server and Red Hat Enterprise Virtualizationsubscription pools and note down the pool IDs.
# subscription-manager list --available
3. Use the pool IDs located in the previous step to attach the entitlements to the system:
# subscription-manager attach --pool=pool_id
4. Disable all existing repositories:
# subscription-manager repos --disable=*
5. Enable the required channels:
# subscription-manager repos --enable=rhel-6-server-rpms# subscription-manager repos --enable=rhel-6-server-supplementary-rpms# subscription-manager repos --enable=rhel-6-server-rhevm-3.6-rpms# subscription-manager repos --enable=jb-eap-6-for-rhel-6-server-rpms
6. Ensure that all packages currently installed are up to date:
# yum update
7. Install the rhevm-dwh-setup package:
# yum install rhevm-dwh-setup
8. Run the engine-setup command to begin configuration of Data Warehouse on the machine:
# engine-setup
9. Press Enter to configure Data Warehouse:
Configure Data Warehouse on this host (Yes, No) [Yes]:
Chapter 5. Data Warehouse and Reports
45

10. Press Enter to automatically configure the firewall, or type No and press Enter to maintain existingsettings:
Setup can automatically configure the firewall on this system.Note: automatic configuration of the firewall may overwrite current settings.Do you want Setup to configure the firewall? (Yes, No) [Yes]:
If you choose to automatically configure the firewall, and no firewall managers are active, you areprompted to select your chosen firewall manager from a list of supported options. Type the name ofthe firewall manager and press Enter. This applies even in cases where only one option is listed.
11. Press Enter to accept the automatically detected hostname, or enter an alternative hostname andpress Enter:
Host fully qualified DNS name of this server [autodetected host name]:
12. Answer the following questions about the Data Warehouse database:
Where is the DWH database located? (Local, Remote) [Local]: Setup can configure the local postgresql server automatically for the DWH to run. This may conflict with existing applications.Would you like Setup to automatically configure postgresql and create DWH database, or prefer to perform that manually? (Automatic, Manual) [Automatic]:
Press Enter to choose the highlighted defaults, or type your alternative preference and then press Enter. If you select Remote, you are prompted to provide details about the remote database host.
13. Enter the fully qualified domain name and password for the Manager database machine. Press Enter to accept the default values in each other field:
Engine database host []: engine-db-fqdnEngine database port [5432]: Engine database secured connection (Yes, No) [No]: Engine database name [engine]: Engine database user [engine]: Engine database password: password
14. Confirm your installation settings:
Please confirm installation settings (OK, Cancel) [OK]:
Procedure 5.8. Step 2: Installing and Configuring Reports on the Manager Machine
1. Install the rhevm-reports package:
# yum install rhevm-reports
2. Run the engine-setup command to begin configuration of Reports on the machine:
# engine-setup
Installation Guide
46
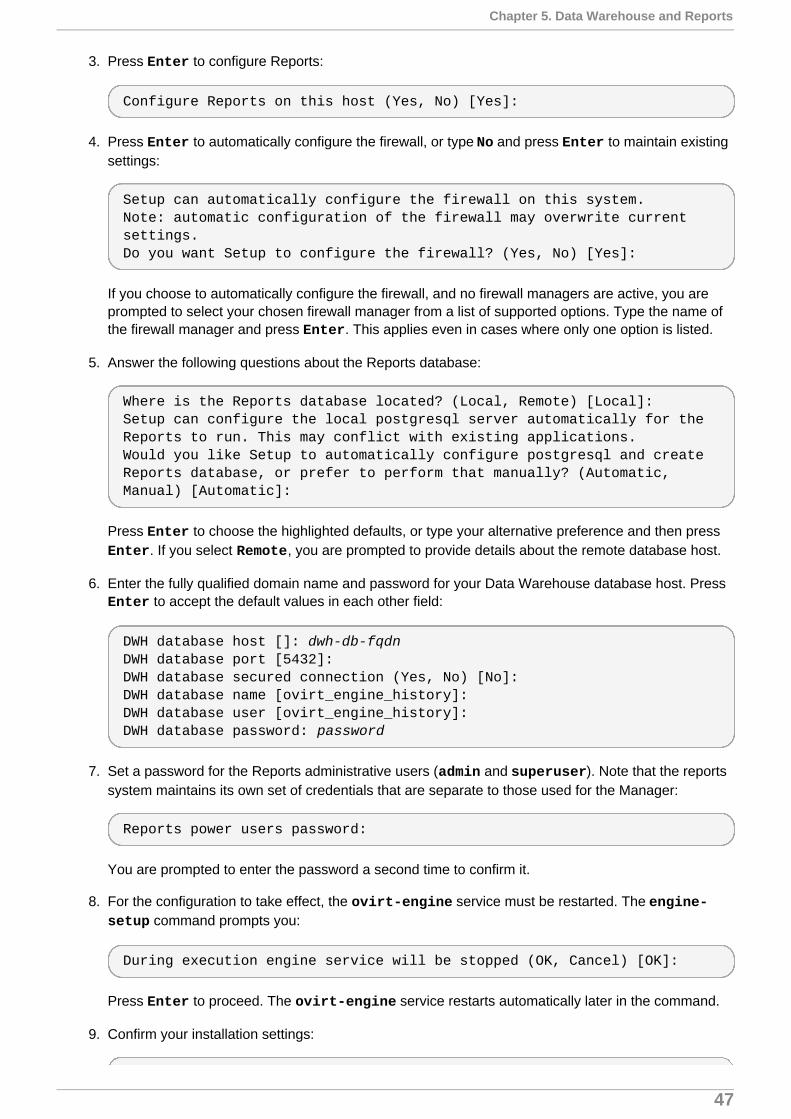
3. Press Enter to configure Reports:
Configure Reports on this host (Yes, No) [Yes]:
4. Press Enter to automatically configure the firewall, or type No and press Enter to maintain existingsettings:
Setup can automatically configure the firewall on this system.Note: automatic configuration of the firewall may overwrite current settings.Do you want Setup to configure the firewall? (Yes, No) [Yes]:
If you choose to automatically configure the firewall, and no firewall managers are active, you areprompted to select your chosen firewall manager from a list of supported options. Type the name ofthe firewall manager and press Enter. This applies even in cases where only one option is listed.
5. Answer the following questions about the Reports database:
Where is the Reports database located? (Local, Remote) [Local]: Setup can configure the local postgresql server automatically for the Reports to run. This may conflict with existing applications.Would you like Setup to automatically configure postgresql and create Reports database, or prefer to perform that manually? (Automatic, Manual) [Automatic]:
Press Enter to choose the highlighted defaults, or type your alternative preference and then press Enter. If you select Remote, you are prompted to provide details about the remote database host.
6. Enter the fully qualified domain name and password for your Data Warehouse database host. Press Enter to accept the default values in each other field:
DWH database host []: dwh-db-fqdnDWH database port [5432]: DWH database secured connection (Yes, No) [No]: DWH database name [ovirt_engine_history]: DWH database user [ovirt_engine_history]: DWH database password: password
7. Set a password for the Reports administrative users (admin and superuser). Note that the reportssystem maintains its own set of credentials that are separate to those used for the Manager:
Reports power users password:
You are prompted to enter the password a second time to confirm it.
8. For the configuration to take effect, the ovirt-engine service must be restarted. The engine-setup command prompts you:
During execution engine service will be stopped (OK, Cancel) [OK]:
Press Enter to proceed. The ovirt-engine service restarts automatically later in the command.
9. Confirm your installation settings:
Chapter 5. Data Warehouse and Reports
47

Please confirm installation settings (OK, Cancel) [OK]:
Next Steps
Access the Reports Portal at http://demo.redhat.com/ovirt-engine-reports, replacing demo.redhat.com withthe fully qualified domain name of the Manager. If during the Manager installation you selected a non-defaultHTTP port then append :port to the URL, replacing :port with the port that you chose.
Log in using the user name admin and the password you set during reports installation. Note that the firsttime you log in to Red Hat Enterprise Virtualization Manager Reports, a number of web pages are generatedand, as a result, your initial attempt to log in may take some time to complete.
5.4. Migrating Data Warehouse and Reports to Separate Machines
Migrate the Data Warehouse service, the Reports service, or both from the Red Hat Enterprise VirtualizationManager to separate machines. Hosting the Data Warehouse service and the Reports service on separatemachines reduces the load on each individual machine, and allows each service to avoid potential conflictscaused by sharing CPU and memory with other processes.
Migrate the Data Warehouse service and connect it with the existing ovirt_engine_history database, oroptionally migrate the ovirt_engine_history database to a new database machine before migrating theData Warehouse service. If the ovirt_engine_history database is hosted on the Manager, migrating thedatabase in addition to the Data Warehouse service further reduces the competition for resources on theManager machine. You can migrate the database to the same machine onto which you will migrate the DataWarehouse service, or to a machine that is separate from both the Manager machine and the new DataWarehouse service machine.
5.4.1. Migrating the Data Warehouse Database to a Separate Machine
Optionally migrate the ovirt_engine_history database before you migrate the Data Warehouse service.This procedure uses pg_dump to create a database backup, and psql to restore the backup on the newdatabase machine. The pg_dump command provides flexible options for backing up and restoring databases;for more information on options that may be suitable for your system, see the pg_dump manual page.
The following procedure assumes that a PostgreSQL database has already been configured on the newmachine. To migrate the Data Warehouse service only, see Section 5.4.2, “Migrating the Data WarehouseService to a Separate Machine”.
Important
If the existing Data Warehouse database is connected to an existing Reports service, you mustreconfigure that service by running engine-setup and entering the details of the new DataWarehouse database when prompted. If you do not do this, the Reports service is still connected tothe old database, and does not receive any new data.
Procedure 5.9. Migrating the Data Warehouse Database to a Separate Machine
1. On the existing database machine, dump the ovirt_engine_history database into a SQL scriptfile:
# pg_dump ovirt_engine_history > ovirt_engine_history.sql
Installation Guide
48

2. Copy the script file from the existing database machine to the new database machine.
3. Restore the ovirt_engine_history database on the new database machine:
# psql -d ovirt_engine_history -f ovirt_engine_history.sql
The command above assumes that the database on the new machine is also named ovirt_engine_history.
5.4.2. Migrating the Data Warehouse Service to a Separate Machine
Migrate a Data Warehouse service that was installed and configured on the Red Hat Enterprise VirtualizationManager to a dedicated host machine. Hosting the Data Warehouse service on a separate machine helps toreduce the load on the Manager machine. Note that this procedure migrates the Data Warehouse serviceonly; to migrate the Data Warehouse database (also known as the ovirt_engine_history database)prior to migrating the Data Warehouse service, see Section 5.4.1, “Migrating the Data Warehouse Databaseto a Separate Machine”.
Installing this scenario involves four key steps:
1. Set up the new Data Warehouse machine.
2. Stop the Data Warehouse service on the Manager machine.
3. Configure the new Data Warehouse machine.
4. Remove the Data Warehouse package from the Manager machine.
Prerequisites
Ensure that you have completed the following prerequisites:
1. You must have installed and configured the Manager and Data Warehouse on the same machine.
2. To set up the new Data Warehouse machine, you must have the following:
A virtual or physical machine with Red Hat Enterprise Linux 6.6 or later versions of Red HatEnterprise Linux 6 installed.
A subscription to the Red Hat Enterprise Linux Server and Red Hat Enterprise Virtualization entitlement pools.
The password from the Manager's /etc/ovirt-engine/engine.conf.d/10-setup-database.conf file.
Allowed access from the Data Warehouse machine to the Manager database machine's TCP port5432.
The ovirt_engine_history database credentials from the Manager's /etc/ovirt-engine-dwh/ovirt-engine-dwhd.conf.d/10-setup-database.conf file. If youmigrated the ovirt_engine_history database using Section 5.4.1, “Migrating the DataWarehouse Database to a Separate Machine”, retrieve the credentials you defined during thedatabase setup on that machine.
Procedure 5.10. Step 1: Setting up the New Data Warehouse Machine
1. Register your system with the Content Delivery Network, entering your Customer Portal user nameand password when prompted:
Chapter 5. Data Warehouse and Reports
49

# subscription-manager register
2. Find the Red Hat Enterprise Linux Server and Red Hat Enterprise Virtualizationsubscription pools and note down the pool IDs.
# subscription-manager list --available
3. Use the pool IDs located in the previous step to attach the entitlements to the system:
# subscription-manager attach --pool=pool_id
4. Disable all existing repositories:
# subscription-manager repos --disable=*
5. Enable the required channels:
# subscription-manager repos --enable=rhel-6-server-rpms# subscription-manager repos --enable=rhel-6-server-supplementary-rpms# subscription-manager repos --enable=rhel-6-server-rhevm-3.6-rpms# subscription-manager repos --enable=jb-eap-6-for-rhel-6-server-rpms
6. Ensure that all packages currently installed are up to date:
# yum update
7. Install the rhevm-dwh-setup package:
# yum install rhevm-dwh-setup
Procedure 5.11. Step 2: Stopping the Data Warehouse Service on the Manager Machine
1. Stop the Data Warehouse service:
# service ovirt-engine-dwhd stop
2. If the ovirt_engine_history database, the Manager database, or both are hosted on theManager machine and were configured by a previous version (Red Hat Enterprise Virtualization 3.4or prior) that was then upgraded, you must allow the new Data Warehouse machine to access them.Edit the /var/lib/pgsql/data/postgresql.conf file and modify the listen_addresses lineso that it matches the following:
listen_addresses = '*'
If the line does not exist or has been commented out, add it manually.
If one or both databases are hosted on a remote machine, you must manually grant access byediting the postgres.conf file on each machine, and adding the listen_addresses line, asabove. If both databases are hosted on the Manager machine and were configured during a cleansetup of Red Hat Enterprise Virtualization Manager 3.5, access is granted by default.
3. Restart the postgresql service:
Installation Guide
50

# service postgresql restart
Procedure 5.12. Step 3: Configuring the New Data Warehouse Machine
1. Run the engine-setup command to begin configuration of Data Warehouse on the machine:
# engine-setup
2. Press Enter to configure Data Warehouse:
Configure Data Warehouse on this host (Yes, No) [Yes]:
3. Press Enter to automatically configure the firewall, or type No and press Enter to maintain existingsettings:
Setup can automatically configure the firewall on this system.Note: automatic configuration of the firewall may overwrite current settings.Do you want Setup to configure the firewall? (Yes, No) [Yes]:
If you choose to automatically configure the firewall, and no firewall managers are active, you areprompted to select your chosen firewall manager from a list of supported options. Type the name ofthe firewall manager and press Enter. This applies even in cases where only one option is listed.
4. Press Enter to accept the automatically detected hostname, or enter an alternative hostname andpress Enter:
Host fully qualified DNS name of this server [autodetected host name]:
5. Answer the following question about the location of the ovirt_engine_history database:
Where is the DWH database located? (Local, Remote) [Local]: Remote
Type the alternative option as shown above and then press Enter.
6. Enter the fully qualified domain name and password for your ovirt_engine_history databasehost. Press Enter to accept the default values in each other field:
DWH database host []: dwh-db-fqdnDWH database port [5432]: DWH database secured connection (Yes, No) [No]: DWH database name [ovirt_engine_history]: DWH database user [ovirt_engine_history]: DWH database password: password
7. Enter the fully qualified domain name and password for the Manager database machine. Press Enter to accept the default values in each other field:
Engine database host []: engine-db-fqdnEngine database port [5432]: Engine database secured connection (Yes, No) [No]: Engine database name [engine]:
Chapter 5. Data Warehouse and Reports
51

Engine database user [engine]: Engine database password: password
8. Press Enter to create a backup of the existing Data Warehouse database:
Would you like to backup the existing database before upgrading it? (Yes, No) [Yes]:
The time and space required for the database backup depends on the size of the database. It maytake several hours to complete. If you choose not to back up the database here, and engine-setupfails for any reason, you will not be able to restore the database or any of the data within it. Thelocation of the backup file appears at the end of the setup script.
9. Confirm that you want to permanently disconnect the existing Data Warehouse service from theManager:
Do you want to permanently disconnect this DWH from the engine? (Yes, No) [No]:
10. Confirm your installation settings:
Please confirm installation settings (OK, Cancel) [OK]:
Procedure 5.13. Step 4: Removing the Data Warehouse Package from the Manager Machine
1. Remove the Data Warehouse package:
# yum remove rhevm-dwh
This step prevents the Data Warehouse service from attempting to automatically restart after an hour.
2. Remove the Data Warehouse files:
# rm -rf /etc/ovirt-engine-dwh /var/lib/ovirt-engine-dwh
The Data Warehouse service is now hosted on a separate machine from that on which the Manager ishosted.
5.4.3. Migrating the Reports Service to a Separate Machine
Migrate a Reports service that was installed and configured on the Red Hat Enterprise Virtualization Managerto a dedicated host machine. Hosting the Reports service on a separate machine helps to reduce the load onthe Manager machine. Note that this procedure migrates the Reports service only. The Reports database(also known as the ovirt_engine_reports database) cannot be migrated; you must create a new ovirt_engine_reports database when you configure Reports on the new machine. Saved ad hoc reportscan be migrated from the Manager machine to the new Reports machine. Migrate the Reports service onlyafter the Manager and Data Warehouse have been configured.
Installing this scenario involves three key steps:
1. Configure the new Reports machine.
2. Migrate any saved reports to the new Reports machine.
Installation Guide
52

3. Remove the Reports service from the Manager machine.
Prerequisites
Ensure that you have completed the following prerequisites:
1. You must have installed and configured the Manager and Reports on the same machine.
2. You must have installed and configured Data Warehouse, either on the Manager machine or on aseparate machine.
3. To set up the new Reports machine, you must have the following:
A virtual or physical machine with Red Hat Enterprise Linux 6.6 or later versions of Red HatEnterprise Linux 6 installed
A subscription to the Red Hat Enterprise Linux Server and Red Hat Enterprise Virtualization entitlement pools
The password from the Data Warehouse machine's /etc/ovirt-engine-dwh/ovirt-engine-dwhd.conf.d/10-setup-database.conf file
Allowed access from the Reports machine to the Manager database machine's TCP port 5432
Procedure 5.14. Step 1: Configuring the New Reports Machine
1. Register your system with the Content Delivery Network, entering your Customer Portal user nameand password when prompted:
# subscription-manager register
2. Find the Red Hat Enterprise Linux Server and Red Hat Enterprise Virtualizationsubscription pools and note down the pool IDs.
# subscription-manager list --available
3. Use the pool IDs located in the previous step to attach the entitlements to the system:
# subscription-manager attach --pool=pool_id
4. Disable all existing repositories:
# subscription-manager repos --disable=*
5. Enable the required channels:
# subscription-manager repos --enable=rhel-6-server-rpms# subscription-manager repos --enable=rhel-6-server-supplementary-rpms# subscription-manager repos --enable=rhel-6-server-rhevm-3.6-rpms# subscription-manager repos --enable=jb-eap-6-for-rhel-6-server-rpms
6. Ensure that all packages currently installed are up to date:
# yum update
Chapter 5. Data Warehouse and Reports
53

7. Install the rhevm-reports-setup package:
# yum install rhevm-reports-setup
8. Run the engine-setup command to begin configuration of Reports on the machine:
# engine-setup
9. Press Enter to configure Reports:
Configure Reports on this host (Yes, No) [Yes]:
10. Press Enter to automatically configure the firewall, or type No and press Enter to maintain existingsettings:
Setup can automatically configure the firewall on this system.Note: automatic configuration of the firewall may overwrite current settings.Do you want Setup to configure the firewall? (Yes, No) [Yes]:
If you choose to automatically configure the firewall, and no firewall managers are active, you areprompted to select your chosen firewall manager from a list of supported options. Type the name ofthe firewall manager and press Enter. This applies even in cases where only one option is listed.
11. Press Enter to accept the automatically detected hostname, or enter an alternative hostname andpress Enter:
Host fully qualified DNS name of this server [autodetected host name]:
12. Enter the fully qualified domain name of the Manager machine, and then press Enter:
Host fully qualified DNS name of the engine server []:
13. Answer the following questions about the ovirt_engine_reports database. Press Enter toallow setup to create and configure a local database:
Where is the Reports database located? (Local, Remote) [Local]:Setup can configure the local postgresql server automatically for the Reports to run. This may conflict with existing applications.Would you like Setup to automatically configure postgresql and create Reports database, or prefer to perform that manually? (Automatic, Manual) [Automatic]:
14. Enter the fully qualified domain name and password for your ovirt_engine_history databasehost. Press Enter to accept the default values in each other field:
DWH database host []: dwh-db-fqdnDWH database port [5432]: DWH database secured connection (Yes, No) [No]: DWH database name [ovirt_engine_history]: DWH database user [ovirt_engine_history]: DWH database password: password
Installation Guide
54

15. Press Enter to allow setup to sign the Reports certificate and Apache certificate on the Manager viaSSH:
Setup will need to do some actions on the remote engine server. Either automatically, using ssh as root to access it, or you will be prompted to manually perform each such action.Please choose one of the following:1 - Access remote engine server using ssh as root2 - Perform each action manually, use files to copy content around(1, 2) [1]:
16. Press Enter to accept the default SSH port, or enter an alternative port number and then press Enter:
ssh port on remote engine server [22]:
17. Enter the root password for the Manager machine:
root password on remote engine server manager-fqdn.com:
18. Press Enter to allow automatic configuration of SSL on Apache:
Setup can configure apache to use SSL using a certificate issued from the internal CA.Do you wish Setup to configure that, or prefer to perform that manually? (Automatic, Manual) [Automatic]:
19. Set a password for the Reports administrative users (admin and superuser). Note that the reportssystem maintains its own set of credentials that are separate to those used for the Manager:
Reports power users password:
You are prompted to enter the password a second time to confirm it.
20. Confirm your installation settings:
Please confirm installation settings (OK, Cancel) [OK]:
Procedure 5.15. Step 2: Migrating Saved Reports to the New Reports Machine
1. On the Manager machine, run the ovirt-engine-reports-tool command:
# ovirt-engine-reports-tool
2. Enter the number that corresponds to the export option, and press Enter:
(2) Export Jasperreports saved reports to a zip file(1, 2, 3) []: 2
3. Enter the absolute path for the zip file to export saved reports to, and press Enter:
Filename to export saved reports to: /tmp/saved-reports.zip
Chapter 5. Data Warehouse and Reports
55

4. Copy the zip file to the new Reports machine:
# scp /tmp/saved-reports.zip reports-machine-fqdn:/tmp/
5. On the new Reports machine, run the ovirt-engine-reports-tool command:
# ovirt-engine-reports-tool
6. Enter the number that corresponds to the import option, and press Enter:
(3) Import a saved reports zip file to Jasperreports(1, 2, 3) []: 3
7. Enter the absolute path of the zip file from which to import, and press Enter:
Filename to import saved reports from: /tmp/saved-reports.zip
When the command completes, the saved reports are visible in the Reports Portal of the new Reportsmachine.
Procedure 5.16. Step 3: Removing the Reports Service from the Manager Machine
1. Stop the Reports service:
# service ovirt-engine-reportsd stop
2. Remove the Reports package:
# yum remove rhevm-reports
3. Remove the Reports files:
# rm -rf /etc/ovirt-engine-reports /var/lib/ovirt-engine-reports
4. Remove the Reports database and user. The default name for both is ovirt_engine_reports:
# su - postgres$ psqlpostgres=# drop database ovirt_engine_reports;postgres=# drop user ovirt_engine_reports;
Note
You can configure more than one working Reports instance, and continue to log in and view reportsfrom an older instance; however, the Manager will directly connect to and have SSO with only the lastReports instance that was configured using engine-setup. This means that the AdministrationPortal includes dashboards from and direct links to only the most recent Reports installation.
Installation Guide
56

Part III. Installing Hypervisor Hosts
Part III. Installing Hypervisor Hosts
57

Chapter 6. Introduction to Hypervisor Hosts
Red Hat Enterprise Virtualization supports two types of hypervisor hosts: Red Hat Enterprise VirtualizationHypervisor and Red Hat Enterprise Linux host. Depending on your environment requirement, you may wantto use one type only or both in your Red Hat Enterprise Virtualization environment.
Table 6.1. Hypervisor Hosts
Host Type Other Names DescriptionRed Hat Enterprise Virtualization Hypervisor
RHEV-H, thin host This is a minimal operatingsystem based on Red HatEnterprise Linux. It is distributedas an ISO file and is a closedsystem. Filesystem access androot access are limited. Yum isdisabled.
Red Hat Enterprise Linux Host
RHEL-based hypervisor, thickhost
Red Hat Enterprise Linux hostssubscribed to the appropriatechannels can be used ashypervisor hosts. It provides youthe full access to the operatingsystem.
Important
It is recommended that you install at least two hypervisor hosts and attach them to the Red HatEnterprise Virtualization environment. Where you attach only one virtualization host you will be unableto access features such as migration and high availability.
Installation Guide
58
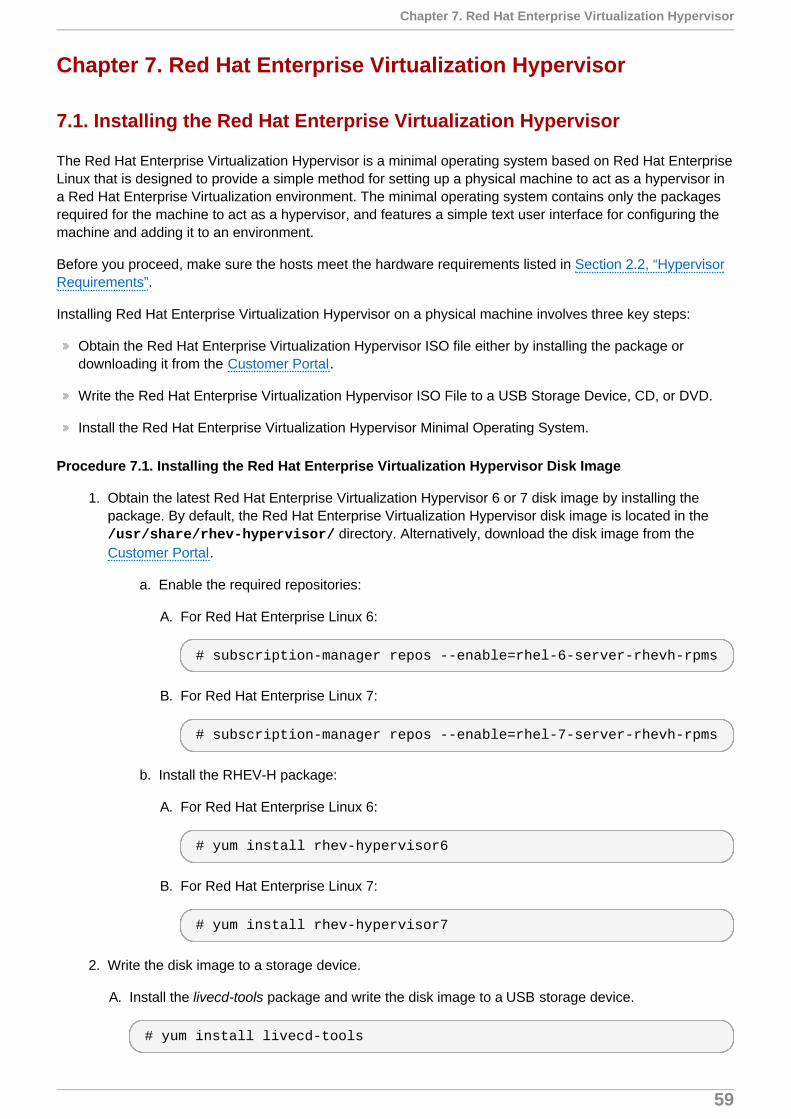
Chapter 7. Red Hat Enterprise Virtualization Hypervisor
7.1. Installing the Red Hat Enterprise Virtualization Hypervisor
The Red Hat Enterprise Virtualization Hypervisor is a minimal operating system based on Red Hat EnterpriseLinux that is designed to provide a simple method for setting up a physical machine to act as a hypervisor ina Red Hat Enterprise Virtualization environment. The minimal operating system contains only the packagesrequired for the machine to act as a hypervisor, and features a simple text user interface for configuring themachine and adding it to an environment.
Before you proceed, make sure the hosts meet the hardware requirements listed in Section 2.2, “HypervisorRequirements”.
Installing Red Hat Enterprise Virtualization Hypervisor on a physical machine involves three key steps:
Obtain the Red Hat Enterprise Virtualization Hypervisor ISO file either by installing the package ordownloading it from the Customer Portal.
Write the Red Hat Enterprise Virtualization Hypervisor ISO File to a USB Storage Device, CD, or DVD.
Install the Red Hat Enterprise Virtualization Hypervisor Minimal Operating System.
Procedure 7.1. Installing the Red Hat Enterprise Virtualization Hypervisor Disk Image
1. Obtain the latest Red Hat Enterprise Virtualization Hypervisor 6 or 7 disk image by installing thepackage. By default, the Red Hat Enterprise Virtualization Hypervisor disk image is located in the /usr/share/rhev-hypervisor/ directory. Alternatively, download the disk image from theCustomer Portal.
a. Enable the required repositories:
A. For Red Hat Enterprise Linux 6:
# subscription-manager repos --enable=rhel-6-server-rhevh-rpms
B. For Red Hat Enterprise Linux 7:
# subscription-manager repos --enable=rhel-7-server-rhevh-rpms
b. Install the RHEV-H package:
A. For Red Hat Enterprise Linux 6:
# yum install rhev-hypervisor6
B. For Red Hat Enterprise Linux 7:
# yum install rhev-hypervisor7
2. Write the disk image to a storage device.
A. Install the livecd-tools package and write the disk image to a USB storage device.
# yum install livecd-tools
Chapter 7. Red Hat Enterprise Virtualization Hypervisor
59

# livecd-iso-to-disk --format --reset-mbr /usr/share/rhev-hypervisor/rhev-hypervisor.iso /dev/[sdb]
B. Install the wodim package, insert a blank CD-ROM or DVD, and write the disk image to disc.
# yum install wodim
wodim dev=[device] [image]
Note
To find out the name of your writer device, run the following command:
# less /proc/sys/dev/cdrom/info
Example 7.1. Use of the wodim Utility
This example uses the first CD-RW (/dev/sr0) device available and the default Hypervisorimage location.
# wodim dev=/dev/sr0 /usr/share/rhev-hypervisor/rhev-hypervisor.iso
3. Start the machine on which to install the Hypervisor minimal operating system using the preparedinstallation media.
4. From the boot menu, select Start RHEV Hypervisor, and press Enter.
Installation Guide
60

Important
If reinstalling Red Hat Enterprise Virtualization Hypervisor over an existing instance on amultipathed iSCSI machine, remove the rd_NO_MULTIPATH kernel argument by pressing theTab button after selecting the option to reinstall the Hypervisor. This will help avoid potentialinstallation errors.
5. Select a keyboard layout, and press Enter.
6. Select the device on which to install the boot loader for the Red Hat Enterprise VirtualizationHypervisor.
7. Select the device on which to install the Red Hat Enterprise Virtualization Hypervisor.
8. Select the Fill disk with Data partition check box. Clearing this text box displays a fieldshowing the remaining space on the drive and allows you to specify the amount of space to beallocated to data storage.
9. From the Confirm disk selection screen, press Enter to confirm the boot device and storagedevice selection, or select Back and press Enter to revise your selection.
10. Set a password for the admin user, confirm the password, and press Enter to commenceinstallation.
Chapter 7. Red Hat Enterprise Virtualization Hypervisor
61

Note
From the boot menu, you can also press the Tab key to edit the kernel parameters. Kernelparameters must be separated by a space, and you can boot the system using the specified kernelparameters by pressing the Enter key. Press the Esc key to clear any changes to the kernelparameters and return to the boot menu.
Once installation is complete, the machine reboots. Log in as the admin user and configure the networkingoptions. You can then add the Hypervisor to a standard Red Hat Enterprise Virtualization environment or usethe Hosted Engine screen to configure a self-hosted engine environment. See Appendix G, Configuring aHypervisor Host for PCI Passthrough for more information on how to enable the hypervisor hardware andsoftware for device passthrough.
Warning
Red Hat strongly recommends not creating untrusted users on Red Hat Enterprise VirtualizationHypervisor, as this can lead to exploitation of local security vulnerabilities.
7.2. Modifying the Red Hat Enterprise Virtualization Hypervisor ISO
7.2.1. Introduction to Modifying the Red Hat Enterprise Virtualization Hypervisor ISO
While the Red Hat Enterprise Virtualization Hypervisor is designed as a closed, minimal operating system,you can use the edit-node tool to make specific changes to the Red Hat Enterprise Virtualization HypervisorISO file to address specific requirements. The tool extracts the file system from a livecd-based ISO file andmodifies aspects of the image, such as user passwords, SSH keys, and the packages included.
Important
Any modifications must be repeated each time prior to upgrading a Hypervisor to a new version of theRed Hat Enterprise Virtualization Hypervisor ISO file.
Warning
In the event of an issue with a Red Hat Enterprise Virtualization Hypervisor that has been modifiedusing the edit-node tool, you may be required to reproduce the issue in an unmodified version of theRed Hat Enterprise Virtualization Hypervisor as part of the troubleshooting process.
7.2.2. Installing the edit-node Tool
The edit-node tool is included in the ovirt-node-tools package provided by the Red Hat EnterpriseVirtualization Hypervisor repository.
Procedure 7.2. Installing the edit-node Tool
1. Log in to the system on which to modify the Red Hat Enterprise Virtualization Hypervisor ISO file.
Installation Guide
62

2. Enable the required repository:
A. For Red Hat Enterprise Linux 6:
# subscription-manager repos --enable=rhel-6-server-rhevh-rpms
B. For Red Hat Enterprise Linux 7:
# subscription-manager repos --enable=rhel-7-server-rhevh-rpms
3. Install the ovirt-node-tools package:
# yum install ovirt-node-tools
You have installed the edit-node tool required for modifying the Red Hat Enterprise Virtualization HypervisorISO file. Proceed to the next section to see how to use the tool.
7.2.3. Syntax of the edit-node Tool
The basic options for the edit-node tool are as follows:
Options for the edit-node Tool
--name=image_name
Specifies the name of the modified image.
--output=directory
Specifies the directory to which the edited ISO is saved.
--kickstart=kickstart_file
Specifies the path or URL to and name of a kickstart configuration file.
--script=script
Specifies the path to and name of a script to run in the image.
--shell
Opens an interactive shell with which to edit the image.
--passwd=user,encrypted_password
Defines a password for the specified user. This option accepts MD5-encrypted password values.The --password parameter can be specified multiple times to modify multiple users. If no user isspecified, the default user is admin.
--sshkey=user,public_key_file
Specifies the public key for the specified user. This option can be specified multiple times to specifykeys for multiple users. If no user is specified, the default user is admin.
--uidmod=user,uid
Chapter 7. Red Hat Enterprise Virtualization Hypervisor
63

Specifies the user ID for the specified user. This option can be specified multiple times to specifyIDs for multiple users.
--gidmod=group,gid
Specifies the group ID for the specified group. This option can be specified multiple times to specifyIDs for multiple groups.
--tmpdir=temporary_directory
Specifies the temporary directory on the local file system to use. By default, this value is set to /var/tmp
--releasefile=release_file
Specifies the path to and name of a release file to use for branding.
--builder=builder
Specifies the builder of a remix.
--install-plugin=plugin
Specifies a list of plug-ins to install in the image. You can specify multiple plug-ins by separatingthe plug-in names using a comma.
--install=package
Specifies a list of packages to install in the image. You can specify multiple packages byseparating the package names using a comma.
--install-kmod=package_name
Installs the specified driver update package from a yum repository or specified .rpm file. Specified .rpm files are valid only if in whitelisted locations (kmod-specific areas).
--repo=repository
Specifies the yum repository to be used in conjunction with the --install-* options. The valuespecified can be a local directory, a yum repository file (.repo), or a driver disk .iso file.
--nogpgcheck
Skips GPG key verification during the yum install stage. This option allows you to installunsigned packages.
Manifest Options for the edit-node Tool
--list-plugins
Prints a list of plug-ins added to the image.
--print-version
Prints current version information from /etc/system-release.
--print-manifests
Prints a list of manifest files in the ISO file.
Installation Guide
64

--print-manifest=manifest
Prints the specified manifest file.
--get-manifests=manifest
Creates a .tar file of manifest files in the ISO file.
--print-file-manifest
Prints the contents of rootfs on the ISO file.
--print-rpm-manifest
Prints a list of installed packages in rootfs on the ISO file.
Debugging Options for the edit-node Tool
--debug
Prints debugging information when the edit-node command is run.
--verbose
Prints verbose information regarding the progress of the edit-node command.
--logfile=logfile
Specifies the path to and name of a file in which to print debugging information.
7.2.4. Adding and Updating Packages
You can use the edit-node tool to add new packages to or update existing packages in the Red HatEnterprise Virtualization Hypervisor ISO file. To add or update a single package, you must either set up alocal directory to act as a repository for the required package and its dependencies or point the edit-nodetool to the location of a repository definition file that defines one or more repositories that provide the packageand its dependencies. To add or update multiple packages, you must point the edit-node tool to the locationof a repository definition file that defines one or more repositories that provide the packages and theirdependencies.
Note
If you include a definition for a local repository in a repository definition file, the directory that acts asthe source for that repository must be exposed via a web server or an FTP server. For example, itmust be possible to access the repository via a link such as http://localhost/myrepo/ or ftp://localhost/myrepo/.
Important
The edit-node tool cannot download packages from repositories that use SSL. Instead, you mustmanually download each package and its dependencies and create a local repository that containsthose packages.
7.2.4.1. Creating a Local Repository
Chapter 7. Red Hat Enterprise Virtualization Hypervisor
65
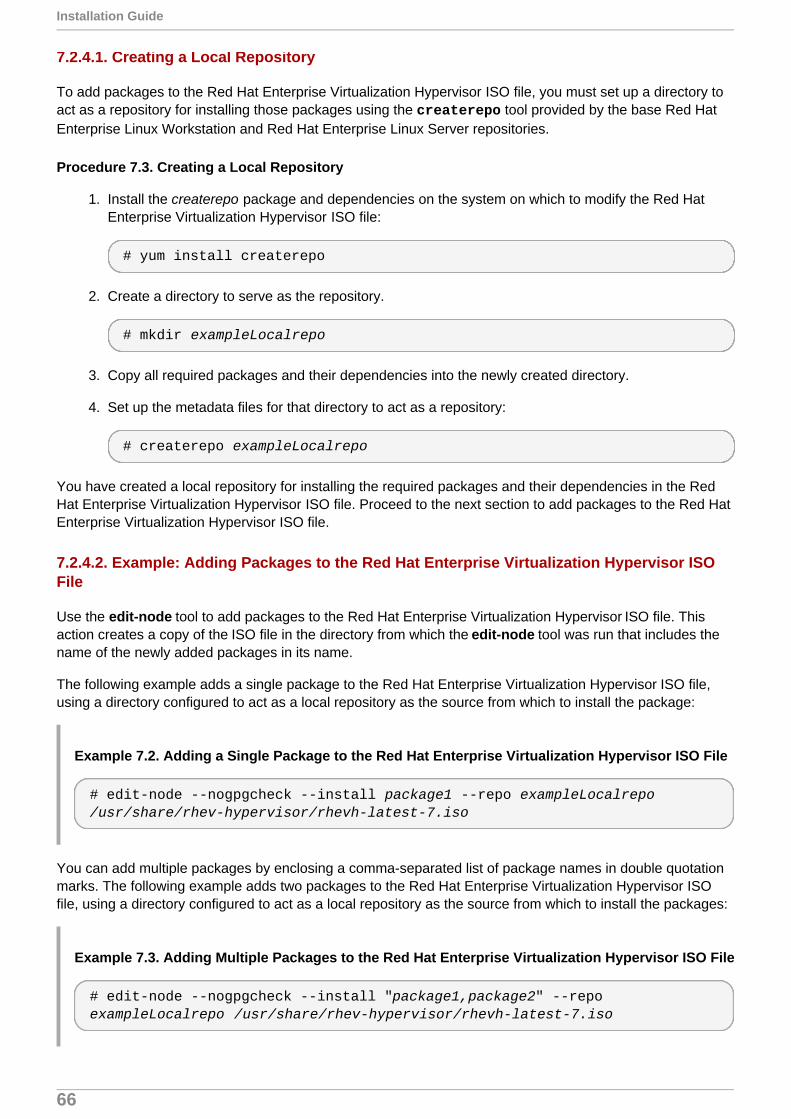
7.2.4.1. Creating a Local Repository
To add packages to the Red Hat Enterprise Virtualization Hypervisor ISO file, you must set up a directory toact as a repository for installing those packages using the createrepo tool provided by the base Red HatEnterprise Linux Workstation and Red Hat Enterprise Linux Server repositories.
Procedure 7.3. Creating a Local Repository
1. Install the createrepo package and dependencies on the system on which to modify the Red HatEnterprise Virtualization Hypervisor ISO file:
# yum install createrepo
2. Create a directory to serve as the repository.
# mkdir exampleLocalrepo
3. Copy all required packages and their dependencies into the newly created directory.
4. Set up the metadata files for that directory to act as a repository:
# createrepo exampleLocalrepo
You have created a local repository for installing the required packages and their dependencies in the RedHat Enterprise Virtualization Hypervisor ISO file. Proceed to the next section to add packages to the Red HatEnterprise Virtualization Hypervisor ISO file.
7.2.4.2. Example: Adding Packages to the Red Hat Enterprise Virtualization Hypervisor ISOFile
Use the edit-node tool to add packages to the Red Hat Enterprise Virtualization Hypervisor ISO file. Thisaction creates a copy of the ISO file in the directory from which the edit-node tool was run that includes thename of the newly added packages in its name.
The following example adds a single package to the Red Hat Enterprise Virtualization Hypervisor ISO file,using a directory configured to act as a local repository as the source from which to install the package:
Example 7.2. Adding a Single Package to the Red Hat Enterprise Virtualization Hypervisor ISO File
# edit-node --nogpgcheck --install package1 --repo exampleLocalrepo /usr/share/rhev-hypervisor/rhevh-latest-7.iso
You can add multiple packages by enclosing a comma-separated list of package names in double quotationmarks. The following example adds two packages to the Red Hat Enterprise Virtualization Hypervisor ISOfile, using a directory configured to act as a local repository as the source from which to install the packages:
Example 7.3. Adding Multiple Packages to the Red Hat Enterprise Virtualization Hypervisor ISO File
# edit-node --nogpgcheck --install "package1,package2" --repo exampleLocalrepo /usr/share/rhev-hypervisor/rhevh-latest-7.iso
Installation Guide
66

7.2.4.3. Example: Updating Packages in the Red Hat Enterprise Virtualization Hypervisor ISOFile
You can use the edit-node tool to update existing packages in the Red Hat Enterprise VirtualizationHypervisor ISO file. This action creates a copy of the ISO file in the directory from which the edit-node toolwas run that includes the names of the updated packages in its name.
The following example updates the vdsm package in the Red Hat Enterprise Virtualization Hypervisor ISOfile, using a repository file containing the details of the Red Hat Enterprise Virtualization Hypervisor repository:
Example 7.4. Updating a Single Package in the Red Hat Enterprise Virtualization Hypervisor ISOFile
# edit-node --nogpgcheck --install vdsm --repo /etc/yum.repos.d/rhevh.repo /usr/share/rhev-hypervisor/rhevh-latest-7.iso
You can update multiple packages by enclosing a comma-separated list of package names in doublequotation marks. The following example updates the vdsm and libvirt packages in the Red Hat EnterpriseVirtualization Hypervisor ISO file, using a repository file containing the details of the Red Hat EnterpriseVirtualization Hypervisor repository:
Example 7.5. Updating Multiple Packages in the Red Hat Enterprise Virtualization Hypervisor ISOFile
# edit-node --nogpgcheck --install "vdsm,libvirt" --repo /etc/yum.repos.d/rhevh.repo /usr/share/rhev-hypervisor/rhevh-latest-7.iso
7.2.5. Modifying the Default ID of Users and Groups
7.2.5.1. Example: Modifying the Default ID of a User
You can use the edit-node tool to modify the default ID of a user in the Red Hat Enterprise VirtualizationHypervisor ISO file.
The following example changes the default ID of the user user1 to 60:
Example 7.6. Modifying the Default ID of a Single User
# edit-node --uidmod=user1,60
You can modify the default ID of multiple users by specifying the --uidmod option multiple times in thesame command. The following example changes the default ID of the user user1 to 60 and the default ID ofthe user user2 to 70.
Example 7.7. Modifying the Default ID of Multiple Users
# edit-node --uidmod=user1,60 --uidmod=user2,70
Chapter 7. Red Hat Enterprise Virtualization Hypervisor
67

7.2.5.2. Example: Modifying the Default ID of a Group
You can use the edit-node tool to modify the default ID of a group in the Red Hat Enterprise VirtualizationHypervisor ISO file.
The following example changes the default ID of the group group1 to 60:
Example 7.8. Modifying the Default ID of a Single Group
# edit-node --gidmod=group1,60
You can modify the default ID of multiple groups by specifying the --gidmod option multiple times in thesame command. The following example changes the default ID of the group group1 to 60 and the default IDof the group group2 to 70.
Example 7.9. Modifying the Default ID of Multiple Groups
# edit-node --gidmod=group1,60 --gidmod=group2,70
7.3. Additional Ways to Prepare the Installation Media
7.3.1. Preparing USB Installation Media Using dd
The dd utility can also be used to write a Red Hat Enterprise Virtualization Hypervisor disk image to a USBstorage device. The dd utility is available from the coreutils package, and versions of the dd utility areavailable on a wide variety of Linux and Unix operating systems. Windows users can obtain the dd utility byinstalling Red Hat Cygwin, a free Linux-like environment for Windows.
The basic syntax for the dd utility is as follows:
# dd if=[image] of=[device]
The [device] parameter is the path to the USB storage device on which the disk image will be written. The[image] parameter is the path and file name of the disk image to write to the USB storage device. By default,the Red Hat Enterprise Virtualization Hypervisor disk image is located at /usr/share/rhev-hypervisor/rhev-hypervisor.iso on the machine on which the rhev-hypervisor7 package is installed.The dd command does not make assumptions as to the format of the device because it performs a low-levelcopy of the raw data in the selected image.
7.3.2. Preparing USB Installation Media Using dd on Linux Systems
You can use the dd utility to write a Red Hat Enterprise Virtualization Hypervisor disk image to a USBstorage device.
Procedure 7.4. Preparing USB Installation Media using dd on Linux Systems
1. Run the following command to ensure you have the latest version of the Red Hat EnterpriseVirtualization Hypervisor disk image:
Installation Guide
68

A. For Red Hat Enterprise Linux 6:
# yum update rhev-hypervisor6
B. For Red Hat Enterprise Linux 7:
# yum update rhev-hypervisor7
2. Use the dd utility to write the disk image to a USB storage device.
Example 7.10. Use of dd
This example uses a USB storage device named /dev/sdc.
# dd if=/usr/share/rhev-hypervisor/rhev-hypervisor.iso of=/dev/sdc243712+0 records in243712+0 records out124780544 bytes (125 MB) copied, 56.3009 s, 2.2 MB/s
Warning
The dd utility will overwrite all data on the device specified by the of parameter. Ensure youhave specified the correct device and that the device contains no valuable data before usingthe dd utility.
7.3.3. Preparing USB Installation Media Using dd on Windows Systems
You can use the dd utility to write a Red Hat Enterprise Virtualization Hypervisor disk image to a USBstorage device. To use this utility in Windows, you must download and install Red Hat Cygwin.
Procedure 7.5. Preparing USB Installation Media using dd on Windows Systems
1. Open http://www.redhat.com/services/custom/cygwin/ in a web browser and click 32-bit Cygwinto download the 32-bit version of Red Hat Cygwin, or 64-bit Cygwin to download the 64-bitversion of Red Hat Cygwin.
2. Run the downloaded executable as a user with administrator privileges to open the Red Hat Cygwininstallation program.
3. Follow the prompts to install Red Hat Cygwin. The Coreutils package in the Base package groupprovides the dd utility. This package is automatically selected for installation.
4. Copy the rhev-hypervisor.iso file downloaded from the Content Delivery Network to C:\rhev-hypervisor.iso.
5. Run the Red Hat Cygwin application from the desktop as a user with administrative privileges.
Chapter 7. Red Hat Enterprise Virtualization Hypervisor
69

Important
On the Windows 7 and Windows Server 2008, you must right-click the Red Hat Cygwin iconand select the Run as Administrator option to ensure the application runs with thecorrect permissions.
6. In the terminal, run the following command to view the drives and partitions currently visible to thesystem:
$ cat /proc/partitions
Example 7.11. View of Disk Partitions Attached to System
Administrator@test /$ cat /proc/partitionsmajor minor #blocks name 8 0 15728640 sda 8 1 102400 sda1 8 2 15624192 sda2
7. Attach the USB storage device to which the Red Hat Enterprise Virtualization Hypervisor disk imagewill be written to the system. Run the cat /proc/partitions command again and compare theoutput to that of the previous output. A new entry will appear that designates the USB storage device.
Example 7.12. View of Disk Partitions Attached to System
Administrator@test /$ cat /proc/partitionsmajor minor #blocks name 8 0 15728640 sda 8 1 102400 sda1 8 2 15624192 sda2 8 16 524288 sdb
8. Use the dd utility to write the rhev-hypervisor.iso file to the USB storage device. The followingexample uses a USB storage device named /dev/sdb. Replace sdb with the correct device namefor the USB storage device to be used.
Example 7.13. Use of dd Utility Under Red Hat Cygwin
Administrator@test /$ dd if=/cygdrive/c/rhev-hypervisor.iso of=/dev/sdb& pid=$!
Installation Guide
70

Warning
The dd utility will overwrite all data on the device specified by the of parameter. Ensure youhave specified the correct device and that the device contains no valuable data before usingthe dd utility.
Note
Writing disk images to USB storage devices with the version of the dd utility included with RedHat Cygwin can take significantly longer than the equivalent on other platforms. You can runthe following command to view the progress of the operation:
$ kill -USR1 $pid
7.3.4. Preparing Optical Hypervisor Installation Media
You can write a Red Hat Enterprise Virtualization Hypervisor disk image to a CD-ROM or DVD with thewodim utility. The wodim utility is provided by the wodim package.
Procedure 7.6. Preparing Optical Hypervisor Installation Media
1. Install the wodim package and dependencies:
# yum install wodim
2. Insert a blank CD-ROM or DVD into your CD or DVD writer.
3. Write the disk image to the disc:
wodim dev=[device] [image]
Note
To find out the name of your writer device, run the following command:
# less /proc/sys/dev/cdrom/info
Example 7.14. Use of the wodim Utility
This example uses the first CD-RW (/dev/sr0) device available and an example unified installerdisk image location.
# wodim dev=/dev/sr0 /usr/share/rhev-hypervisor/rhev-hypervisor.iso
Chapter 7. Red Hat Enterprise Virtualization Hypervisor
71

Important
The Hypervisor uses a program (isomd5sum) to verify the integrity of the installation media everytime the Hypervisor is booted. If media errors are reported in the boot sequence you have a bad CD-ROM. Follow the procedure above to create a new CD-ROM or DVD.
You have written a Red Hat Enterprise Virtualization Hypervisor disk image to a CD-ROM or DVD.
7.4. Automated Installation of the Hypervisor (Advanced)
This section covers the kernel command line parameters for Red Hat Enterprise Virtualization Hypervisors.These parameters can be used to automate installation. The parameters are described in detail and anexample parameter string for an automated installation is provided.
This installation method is an alternative to the interactive installation. Using the method covered in thischapter with a PXE server can, with some configuration, deploy multiple Hypervisors without manuallyaccessing the systems.
It is important to understand how the parameters work and what effects they have before attemptingautomated deployments. These parameters can delete data from existing systems if the system is configuredto automatically boot with PXE.
7.4.1. How the Kernel Arguments Work
Below is a description of the Red Hat Enterprise Virtualization Hypervisor start up sequence. This may beuseful for debugging issues with automated installation.
1. The ovirt-early service sets storage, network and management parameters in the /etc/default/ovirt file. These parameters are determined from the kernel arguments passed tothe Hypervisor during the boot sequence.
2. The /etc/init.d/ovirt-firstboot script determines the type of installation to perform basedon the parameters set on the kernel command line or the TUI installation.
7.4.2. Required Parameters
At a minimum, the following parameters are required for an installation:
1. One of the following parameters, depending on the type of installation or reinstallation that you wishto perform:
a. install, to begin an installation (even if it detects an existing installation).
b. reinstall, to remove a current installation and begin a completely clean reinstall.
c. upgrade, to upgrade an existing installation.
2. The storage_init parameter, to initialize a local storage device.
3. The BOOTIF parameter, to specify the network interface which the Hypervisor uses to connect to theManager. When using PXE boot, BOOTIF may be automatically supplied by pxelinux.
These parameters are discussed in further detail in the sections that follow.
If you want to use Red Hat Enterprise Virtualization Hypervisor with Red Hat Enterprise Virtualization
Installation Guide
72

Manager, you must also provide at least one of the following parameters:
adminpw
Allows you to log in with administrative privileges to configure Red Hat Enterprise VirtualizationHypervisor.
management_server
Specifies the Red Hat Enterprise Virtualization Manager to be used.
rhevm_admin_password
Specifies the password to be used during the process of adding a host in Red Hat EnterpriseVirtualization Manager.
7.4.3. Storage Parameters
The following parameters configure local storage devices for installing a Hypervisor.
storage_init
The storage_init parameter is required for an automated installation; it initializes a localstorage device.
Hypervisors use one storage device for local installation. There are several methods for definingwhich disk to initialize and install on.
For USB storage devices, use the usb parameter to select the disk type. For example:
storage_init=usb
For SCSI hard drives, use the scsi parameter to select the disk type. For example:
storage_init=scsi
For hard drives on the ATA bus, including SATA hard drives that may also appear on the SCSIbus, use the ata parameter to select the disk type. For example:
storage_init=ata
Alternatively, the storage device can be specified by using the Linux device name as the storage_init parameter. Using device names in the format /dev/disk/by-id is notsupported. storage_init must use the format /dev/mapper/disk or /dev/disk. In thisexample the /dev/sda device is specified:
storage_init=/dev/sda
When specifying a storage_init value of usb, scsi, or ata you can also append a serialnumber to explicitly set which device to use. Determine the serial numbers for all disks attached tothe system by running the command in the example below:
Example 7.15. Finding udev Serial Numbers
Chapter 7. Red Hat Enterprise Virtualization Hypervisor
73

$ for d in /dev/sd?; do echo $d `udevadm info -q env -n $d | egrep 'ID_BUS=|ID_SERIAL='`; done /dev/sda ID_SERIAL=ST9500325AS_6VE867X1
When providing both a storage type and the serial number, ensure that the two values areseparated by a colon (:). For example:
storage_init=ata:3600508b100104a3953545233304c0003
Important
If reinstalling Red Hat Enterprise Virtualization Hypervisor over an existing instance on amultipathed iSCSI machine, specify the storage type and serial number to avoid installationerrors.
Note
Consistency of devices names following a system restart is not guaranteed. Device namesare liable to change.
storage_vol
The storage_vol parameter is used to partition the storage device set by the storage_initparameter. After storage_vol=, you can specify the size in megabytes of the following partitions:Boot, Swap, Root, Config, Logging, and Data.
The Boot partition is always 50 MB and cannot be reconfigured. The Root partition for Red HatEnterprise Virtualization Hypervisor 7 is always 8600 MB and cannot be reconfigured. Theremaining partitions are described in more detail below:
Partitions defined by the storage_vol parameter
Swap
The swap partition is used for swapping pages of memory that are not frequentlyaccessed to the hard drive. This frees pages of memory in RAM that are in turn used forpages which are accessed more frequently, increasing performance. The default size ofthe swap partition is calculated based on the amount of RAM installed in the system andover-commit ratio (default is 0.5). Hypervisors must have a swap partition and the swappartition cannot be disabled by setting its size to 0. The minimum size for the swappartition is 8 MB.
To determine the size of the swap partition, seehttps://access.redhat.com/knowledge/solutions/15244.
Use the formula from the Red Hat Knowledgebase solution above and add storage forthe over-commit ratio (RAM multiplied by the over-commit ratio).
Recommended swap + (RAM * over-commit) = swap partition size
Installation Guide
74

Leaving the value empty allows the system to sets the recommended value for the swappartition.
Config
The config partition stores configuration files for the Hypervisor. The default andminimum size for the configuration partition is 8 MB.
Logging
The logging partition stores all logs for the Hypervisor. The logging partition requires aminimum of 2048 MB storage. However, it is recommended to allocate more storage tothe logging partition if resources permit.
Data
The data partition must be large enough to hold core files for KVM. Core files depend onthe RAM size for the guests. The data partition must also be large enough to store kerneldump files, also known as kdumps. A kdump file is usually the same size as the host'ssystem RAM. The data partition also stores the Hypervisor ISO file for Hypervisorupgrades.
The data partition requires a minimum of 512 MB storage. The recommended size is atleast 1.5 times as large as the RAM on the host system plus an additional 512 MB. It canbe configured to take up all remaining space by giving it a size value of -1, or disabledby giving it a size value of 0.
Partitions can be specified in any order. The syntax for specifying each partition is size,type.Each partition specified is separated by a colon (:). To specify a 256MB Swap partition, and a4096MB Logging partition, the whole parameter is storage_vol=256,Swap:4096,Logging.
Note
The old method of specifying partition sizes is still valid. In the old method, the partitionsizes must be given in a particular order, as shown here:
storage_vol=BOOT:SWAP:ROOT:CONFIG:LOGGING:DATA
However, since the Boot and Root partitions cannot be reconfigured, sizes for thesepartitions can be omitted, like so:
storage_vol=:SWAP::CONFIG:LOGGING:DATA
If you fail to specify a size, the partition will be created at its default size. To specify a256MB Swap partition, and a 4096MB Logging partition, the correct syntax is:
storage_vol=:256:::4096:
The following is the standard format of the storage_vol parameter:
storage_vol=256,EFI:256,Root:4096,Swap
iscsi_name
Chapter 7. Red Hat Enterprise Virtualization Hypervisor
75
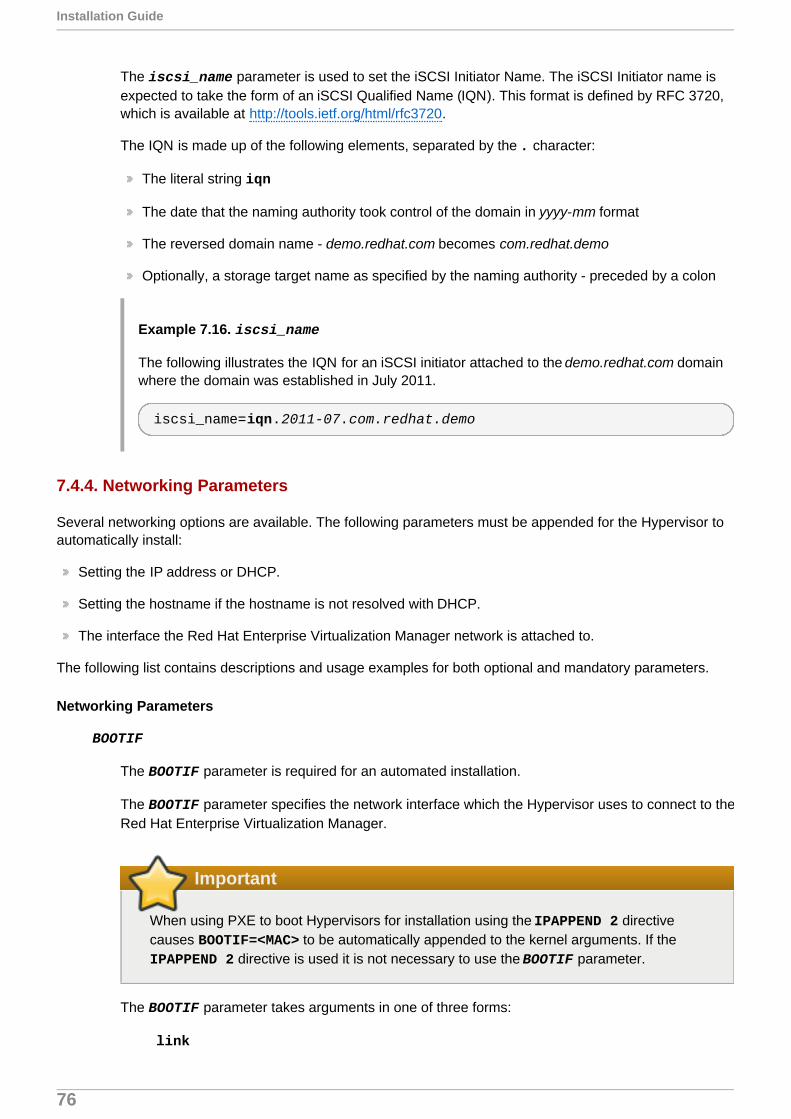
The iscsi_name parameter is used to set the iSCSI Initiator Name. The iSCSI Initiator name isexpected to take the form of an iSCSI Qualified Name (IQN). This format is defined by RFC 3720,which is available at http://tools.ietf.org/html/rfc3720.
The IQN is made up of the following elements, separated by the . character:
The literal string iqn
The date that the naming authority took control of the domain in yyyy-mm format
The reversed domain name - demo.redhat.com becomes com.redhat.demo
Optionally, a storage target name as specified by the naming authority - preceded by a colon
Example 7.16. iscsi_name
The following illustrates the IQN for an iSCSI initiator attached to the demo.redhat.com domainwhere the domain was established in July 2011.
iscsi_name=iqn.2011-07.com.redhat.demo
7.4.4. Networking Parameters
Several networking options are available. The following parameters must be appended for the Hypervisor toautomatically install:
Setting the IP address or DHCP.
Setting the hostname if the hostname is not resolved with DHCP.
The interface the Red Hat Enterprise Virtualization Manager network is attached to.
The following list contains descriptions and usage examples for both optional and mandatory parameters.
Networking Parameters
BOOTIF
The BOOTIF parameter is required for an automated installation.
The BOOTIF parameter specifies the network interface which the Hypervisor uses to connect to theRed Hat Enterprise Virtualization Manager.
Important
When using PXE to boot Hypervisors for installation using the IPAPPEND 2 directivecauses BOOTIF=<MAC> to be automatically appended to the kernel arguments. If the IPAPPEND 2 directive is used it is not necessary to use the BOOTIF parameter.
The BOOTIF parameter takes arguments in one of three forms:
link
Installation Guide
76

Indicates to use the first interface (as enumerated by the kernel) with an active link. Thisis useful for systems with multiple network interface controllers but only one plugged in.
eth#
Indicates to use the NIC as determined by the kernel driver initialization order (where #is the number of the NIC). To determine the number boot the Hypervisor and select Shell from the Hypervisor Configuration Menu. Use ifconfig | grep eth* to listthe network interfaces attached to the system. There is no guarantee that on the nextreboot the network interface controller will have the same eth# mapping.
BOOTIF=eth0
<MAC>
Indicates to use the MAC address explicitly defined inside the brackets.
ip
The ip parameter sets the IP address for the network interface controller defined by the BOOTIFparameter. The ip parameter accepts either an IP address (in the form 0.0.0.0) or dhcp.
ip=192.168.1.1
ip=dhcp
ipv6
The ipv6 parameter is an alias for the ip parameter. It accepts either dhcp or auto.
netmask
The netmask parameter sets the subnet mask for the IP address defined with the ip parameter.
netmask=255.255.255.0
gateway
The gateway parameter sets the Internet gateway.
gateway=192.168.1.246
dns
The dns parameter sets the address of up to two DNS servers. Each DNS server address must beseparated by a comma.
dns=192.168.1.243,192.168.1.244
hostname
The hostname parameter sets the hostname. The hostname must be a fully-qualified andresolvable domain name.
Chapter 7. Red Hat Enterprise Virtualization Hypervisor
77

hostname=rhev1.example.com
ntp
The ntp parameter sets the address of one or more Network Time Protocol servers. Each NTPserver address must be separated by a comma.
ntp=192.168.2.253,192.168.2.254
vlan
The vlan parameter sets the VLAN identifier for the network connected to the Red Hat EnterpriseVirtualization Manager. This parameter should be set where VLANs are in use.
vlan=vlan-id:
For example:
vlan=36:
bond
The bond parameter configures a bond. Each interface name must be separated by a comma.
BOOTIF=bond01 bond=bond01:nic1,nic2
7.4.5. Red Hat Network (RHN) Parameters
These parameters are used to automatically register the hypervisor host with the Red Hat Network (RHN). Ata minimum, either the rhn_activationkey or both the rhn_username and rhn_password parametersmust be provided. Where registration is to occur against a satellite server, the rhn_url parameter must beprovided.
rhn_type
Sets the RHN entitlement method for this machine. sam sets the entitlement method to Certificate-based RHN, which integrates the Customer Portal, content delivery network, and subscriptionservice (subscription management). classic sets the entitlement method to RHN Classic, whichuses the traditional channel entitlement model (channel access) to provides a global view ofcontent access but does not provide insight into system-level subscription uses. The default valueis sam.
rhn_username
The rhn_username parameter sets the username used to connect to RHN.
rhn_username=testuser
rhn_password
The rhn_password parameter sets the password used to connect to RHN.
rhn_password=testpassword
Installation Guide
78

rhn_activationkey
The rhn_activationkey parameter sets the activation key used to connect to RHN. Activationkeys are used to register systems, entitle them to an RHN service level, and subscribe them tospecific channels and system groups, all in one action. If both rhn_activationkey and rhn_username are provided, the rhn_activationkey value will be used.
rhn_activationkey=7202f3b7d218cf59b764f9f6e9fa281b
rhn_org
This parameter is used only with SAM. Registers the system to SAM in the same way as --org org_name --activationkey key_value when combined with the rhn_activationkeyparameter on the kernel command line.
rhn_org=org_name
rhn_url
The rhn_url parameter sets the URL of the satellite server used to register the host.
rhn_url=https://satellite.example.com
rhn_ca_cert
The rhn_ca_cert parameter sets the URL of the CA certificate used to connect to the satelliteserver. If it is not provided, the default value is rhn_url/pub/RHN-ORG-TRUSTED-SSL-CERT.
rhn_ca_cert=https://satellite.example.com/pub/RHN-ORG-TRUSTED-SSL-CERT
rhn_profile
The rhn_profile parameter sets the name of the profile to be registered with RHN for this host.The default value is the system hostname.
rhn_profile=testhost
7.4.6. Authentication Parameters
adminpw
The adminpw parameter is used to set the password for the admin user. The value provided mustalready be hashed. All hashing schemes supported by the shadow password mechanism aresupported. The recommended way to hash a password for use with this parameter is to run thefollowing command:
# openssl passwd -1
The openssl command will prompt for the password to use. A hashed representation of thepassword will be returned which can be used as the adminpw value.
rootpw
Chapter 7. Red Hat Enterprise Virtualization Hypervisor
79

The rootpw parameter is used to set a temporary root password. A password change is forcedthe first time root logs on to the system. The value provided must already be hashed. All hashingschemes supported by the shadow password mechanism are supported. The recommended wayto hash a password for use with this parameter is to run the following command:
# openssl passwd -1
The openssl command will prompt for the password to use. A hashed representation of thepassword will be returned which can be used as the rootpw value.
Important
The root password is not set by default and is not supported unless enabled at the requestof Red Hat support.
rhevm_admin_password
The rhevm_admin_password parameter sets a root password and enables SSH passwordauthentication. The value provided must already be hashed. All hashing schemes supported by theshadow password mechanism are supported. The recommended way to hash a password for usewith this parameter is to run the following command:
# openssl passwd -1
The openssl command will prompt for the password to use. A hashed representation of thepassword will be returned which can be used as the rhevm_admin_password value.
Important
Setting this parameter has the side-effect of enabling SSH password authentication, whichis unsupported unless enabled at the request of Red Hat support. We recommend disablingSSH password authentication after initial configuration is complete.
ssh_pwauth
The ssh_pwauth parameter is used to select whether or not password authentication is enabledfor SSH connections. Possible values are 0 (disabled) and 1 (enabled). The default value is 0.
ssh_pwauth=1
Important
SSH password authentication is disabled by default and is not supported unless enabled atthe request of Red Hat support.
7.4.7. Other Parameters
Installation Guide
80

firstboot
The firstboot parameter indicates that the system should be treated as if there is no existinginstallation.
The reinstall parameter is a direct alias of the firstboot parameter, and can be usedinterchangeably with firstboot.
Warning
Using the firstboot parameter erases existing data if a disk on the system has a VolumeGroup named HostVG. Combining the firstboot parameter with the storage_initparameter also erases data on any disks specified with storage_init.
install
The install parameter indicates that the system should be treated as if there is no existinginstallation. The install parameter is intended to be used when booting from CD-ROM, DVD,USB, or PXE media.
cim_enabled
Enables the use of Common Information Model (CIM) management infrastructure.
cim_passwd
Configures a password for your Common Information Model (CIM) management infrastructure.
disable_aes_ni
Disables the AES-NI encryption instruction set. Possible values are y or n.
kdump_nfs
This parameter configures an NFS server for kdump. The syntax for this parameter is kdump_nfs=hostname:nfs_share_path, for example, kdump_nfs=nfshost.redhat.com:/path/to/nfs/share.
local_boot
The local_boot parameter is an alias for the upgrade parameter.
local_boot_trigger
Sets a target URL to check and disables PXE when installation completes successfully, so that thesystem boots from disk on subsequent boots.
netconsole
The netconsole parameter sets the address of a server to which kernel messages should belogged. The netconsole parameter takes an IP address or fully qualified domain name and,optionally, a port (the default port is 6666).
netconsole=rhev.example.com:6666
nfsv4_domain
Chapter 7. Red Hat Enterprise Virtualization Hypervisor
81

The nfsv4_domain parameter specifies a domain to use for NFSv4.
nocheck
The nocheck parameter will skip the MD5 check of the installation ISO, which might be timeconsuming if the media is remote or slow.
management_server
The management_server parameter sets the address of the Red Hat Enterprise VirtualizationManager. The management_server parameter takes an IP address or fully qualified domainname and, optionally, a port (the default port is 443).
management_server=rhev.example.com:443
mem_overcommit
The mem_overcommit parameter specifies the multiplier to use for adding extra swap to supportmemory over-commit. The default over-commit value is 0.5.
mem_overcommit=0.7
qemu_pxe
The qemu_pxe parameter is used to select which network boot loader is used in virtual machines.Possible values are gpxe and etherboot. .
qemu_pxe=gpxe
reinstall
The reinstall parameter indicates that the system should be treated as if there is no existinginstallation.
The firstboot parameter is a direct alias of the reinstall parameter, and can be usedinterchangeably with reinstall.
Warning
Using the reinstall parameter erases existing data if a disk on the system has a VolumeGroup named HostVG. Combining the reinstall parameter with the storage_initparameter also erases data on any disks specified with storage_init.
snmp_password
Enables and configures a password for the Simple Network Management Protocol.
syslog
Configures an rsyslog server at the address specified. You can also specify a port. The syntax is syslog=hostname[:port].
upgrade
Installation Guide
82

The upgrade parameter will upgrade the existing hypervisor image to the version provided by theboot media. The hypervisor will be automatically upgraded and rebooted once complete. If ahypervisor image is not yet installed, the image will be installed to the device selected with the storage_init parameter. When performing an upgrade, the previous boot entry is saved asBACKUP in grub.conf. If the reboot following the upgrade procedure fails, the BACKUP bootentry will be automatically selected as the new default.
uninstall
The uninstall parameter removes an existing Red Hat Enterprise Virtualization installation. Thehost volume group will be removed and the system rebooted.
7.4.8. An Automated Hypervisor Installation Example
This example uses the kernel command line parameters for an automated Hypervisor installation.
Important
This example may not work accurately on all systems. The parameter descriptions above should bereviewed and the example modified as appropriate for the systems on which deployment is to occur.
The following is a typical example for installing a Hypervisor with the kernel command line parameters.
In this example, the Manager is located at the hostname: rhevm.example.com, and the netconsole serveris located on the same machine.
:linux storage_init=/dev/sda storage_vol=::::: local_boot BOOTIF=eth0 management_server=rhevm.example.com netconsole=rhevm.example.com
Note
The kernel parameters can be automatically appended to guests booting over a network with PXE.Automatically installing from PXE is not covered by this guide.
7.5. Configuring the Red Hat Enterprise Virtualization Hypervisor
7.5.1. Configuring Networking on the Hypervisor
The Network screen is used to configure the host name of the Hypervisor and the DNS servers, NTPservers, and network interfaces that the Hypervisor will use.
<Ping>: Allows you to ping a given IP address by specifying the address to ping and the number of times toping that address.
<Create Bond>: Allows you to create bonds between network interfaces.
Procedure 7.7. Configuring the Host Name, DNS, and NTP
1. In the text user interface, select the Network screen, press the right arrow key and enter a new hostname in the Hostname field.
Chapter 7. Red Hat Enterprise Virtualization Hypervisor
83

2. Select the DNS Server 1 field and enter the IP address of the primary DNS server. Optionally set asecondary DNS server.
3. Select the NTP Server 1 field and enter the IP address or host name of the primary NTP server.Optionally set a secondary NTP server.
4. Select <Save> and press Enter to save the changes. You must save before you proceed to edit thenetwork interfaces.
All network interface cards attached to the Hypervisor are initially in an unconfigured state. You mustconfigure at least one network interface to connect it to a Red Hat Enterprise Virtualization environment.
Procedure 7.8. Configuring Network Interfaces
1. Select a network interface from the list beneath Available System NICs and press Enter toconfigure that network interface.
Note
To identify the physical network interface card associated with the selected network interface,select <Flash Lights to Identify> and press Enter.
2. Choose to configure IPv4 or IPv6.
A. Configure a dynamic or static IP address for IPv4:
Select DHCP under IPv4 Settings and press the space bar to configure a dynamic IPaddress.
Select Static under IPv4 Settings, press the space bar, and input the IP Address, Netmask, and Gateway that the Hypervisor will use to configure a static IP address.
Example 7.17. Static IPv4 Networking Configuration
IPv4 Settings( ) Disabled ( ) DHCP (*) StaticIP Address: 192.168.122.100_ Netmask: 255.255.255.0___Gateway 192.168.1.1_____
B. Configure a stateless, dynamic, or static IP for IPv6:
Select Auto under IPv6 Settings and press the space bar to configure stateless autoconfiguration.
Select DHCP under IPv6 Settings and press the space bar to configure a dynamic IPaddress.
Select Static under IPv6 Settings, press the space bar, and input the IP Address, Prefix Length, and Gateway that the Hypervisor will use to configure a static IP address.
Example 7.18. Static IPv6 Networking Configuration
Installation Guide
84

IPv6 Settings( ) Disabled ( ) Auto ( ) DHCP (*) StaticIP Address: 2001:db8:1::ab9:C0A8:103_ Prefix Length: 64______Gateway 2001:db8:1::ab9:1________
3. Enter a VLAN identifier in the VLAN ID field to configure a VLAN for the device.
4. Select the <Save> button and press Enter to save the network configuration.
7.5.2. Configuring Remote Storage
Use the Remote Storage screen to specify a remote iSCSI initiator or NFS share to use as storage.
Procedure 7.9. Configuring Remote Storage
1. Enter an initiator name in the iSCSI Initiator Name field or the path to the NFS share in the NFSv4 Domain (example.redhat.com) field.
Example 7.19. iSCSI Initiator Name
iSCSI Initiator Name:iqn.1994-05.com.redhat:5189835eeb40_____
Example 7.20. NFS Path
NFSv4 Domain (example.redhat.com):example.redhat.com_____________________
2. Select <Save> and press Enter.
7.5.3. Connecting the Hypervisor to the Red Hat Enterprise Virtualization Manager
You can attach the Hypervisor to the Red Hat Enterprise Virtualization Manager immediately if the address ofthe Manager is available. If the Manager has not yet been installed, you must instead set a password. Thisallows the Hypervisor to be added from the Administration Portal once the Manager has been installed. Bothmodes of configuration are supported from the RHEV-M screen in the Hypervisor user interface. However,adding the Hypervisor from the Administration Portal is the recommended option.
Important
Setting a password on the RHEV-M configuration screen sets the root password on the Hypervisorand enables SSH password authentication. Once the Hypervisor has successfully been added to theManager, disabling SSH password authentication is recommended.
Chapter 7. Red Hat Enterprise Virtualization Hypervisor
85

Important
If you are configuring the Hypervisor to use a bond or bridge device, add it manually from the Red HatEnterprise Virtualization Manager instead of registering it with the Manager during setup to avoidunexpected errors.
Procedure 7.10. Configuring a Hypervisor Management Server
A. Configure the Hypervisor Management Server using the address of the Manager.
a. Enter the IP address or fully qualified domain name of the Manager in the Management Server field.
b. Enter the management server port in the Management Server Port field. The defaultvalue is 443. If a different port was selected during Red Hat Enterprise Virtualization Managerinstallation, specify it here, replacing the default value.
c. Leave the Password and Confirm Password fields blank. These fields are not required ifthe address of the management server is known.
d. Select <Save & Register> and press Enter.
After a few minutes, the Hypervisor is displayed under the Hosts tab in the Administration Portal. Youmust approve it to use the Hypervisor in your Red Hat Enterprise Virtualization environment. SeeSection 7.6, “Approving a Registered Hypervisor” for more information.
B. Configure the Hypervisor Management Server using a password.
a. Enter a password in the Password field. Although the Hypervisor will accept a weakpassword, it is recommended that you use a strong password. Strong passwords contain amix of uppercase, lowercase, numeric and punctuation characters. They are six or morecharacters long and do not contain dictionary words.
b. Re-enter the password in the Confirm Password field.
c. Leave the Management Server and Management Server Port fields blank. As long as apassword is set, allowing the Hypervisor to be added to the Manager later, these fields are notrequired.
d. Select <Save & Register> and press Enter.
After the password is set, manually add the Hypervisor from the Administration Portal. SeeSection 8.4, “Manually Adding a Hypervisor from the Administration Portal” for more information.
7.5.4. Registering the Hypervisor
Registration is only required if virtual machines running on the Hypervisor may need to consume Red HatEnterprise Linux virtualization entitlements. You can choose to register the Hypervisor to the Red Hat ContentDelivery Network, a Satellite server, or Subscription Asset Manager. The Hypervisor can also connect tothese services via a proxy server.
You do not need to register the Hypervisor to receive updates to the Hypervisor image itself; new versions ofthe Hypervisor image are made available through the Red Hat Enterprise Virtualization Manager.
Procedure 7.11. Registering the Hypervisor
Installation Guide
86

1. Enter your Customer Portal user name in the Login field.
2. Enter your Customer Portal password in the Password field.
3. Enter a profile name to be used for the system in the Profile Name (optional) field. This is thename under which the system will appear when viewed in the Customer Portal.
4. Select the method by which to register the Hypervisor:
A. The Red Hat Content Delivery Network
a. Select the RHN option and press the space bar.
b. You do not need to enter values in the URL and CA URL fields.
c. Optionally enter an organization name in the Organization field.
Example 7.21. Red Hat Network Configuration
(X) RHN ( ) Satellite ( ) SAMURL: _________________________________________________________CA URL: _________________________________________________________Organization: Your_Organization________________________________________
B. Satellite
a. Select the Satellite option and press the space bar.
b. Enter the URL of the Satellite server in the URL field.
c. Enter the URL of the certificate authority for the Satellite server in the CA URL field.
d. Enter an organization name in the Organization field.
Example 7.22. Satellite Configuration
( ) RHN (X) Satellite ( ) SAMRHN URL: https://your-sat.example.com_____________________________CA URL: http://your-sat.example.com/pub/candlepin-local.pemOrganization: Your_Organization________________________________________
C. Subscription Asset Manager
a. Select the Subscription Asset Manager option and press the space bar.
b. Enter the URL of the Subscription Asset Manager server in the URL field.
Chapter 7. Red Hat Enterprise Virtualization Hypervisor
87

c. Enter the URL of the certificate authority for the Subscription Asset Manager server in theCA URL field.
d. Optionally enter an organization name in the Organization field.
Example 7.23. Subscription Asset Manager Configuration
( ) RHN ( ) Satellite (X) SAMURL: https://your-sam.example.com_____________________________CA URL: http://your-sam.example.com/sam/candlepin-local.pemOrganization: Your_Organization________________________________________
5. If you are using a proxy server, you must also specify the details of that server:
a. Enter the IP address or fully qualified domain name of the proxy server in the Server field.
b. Enter the port by which to attempt a connection to the proxy server in the Port field.
c. Enter the user name by which to attempt a connection to the proxy server in the Usernamefield.
d. Enter the password by which to authenticate the user name specified above in the Password field.
6. Select <Save> and press Enter.
7.5.5. Changing the Admin User Password and Other Security-Related Tasks
You can configure security-related options for the Hypervisor such as SSH password authentication, AES-NIencryption, and the password of the admin user.
Procedure 7.12. Configuring Security-Related Tasks
1. To enable SSH authentication, select the Enable SSH password authentication option andpress the space bar. SSH authentication can also be enabled in the RHEV-M screen. Leave theoption disabled if the function is not required.
2. AES-NI encryption is enabled by default.
A. If you need to disable it, select the Disable AES-NI option and press the space bar.
B. If AES-NI encryption is enabled, you can optionally set the number of bytes by which to padblocks in AES-NI encryption
3. Enter a new password for the admin user in the Password field and Confirm Password to changethe password used to log into the Hypervisor console.
4. Select <Save> and press Enter.
7.5.6. Changing the Keyboard Layout on the Hypervisor
The Keyboard screen allows you to configure the keyboard layout used inside the Hypervisor console.
Installation Guide
88
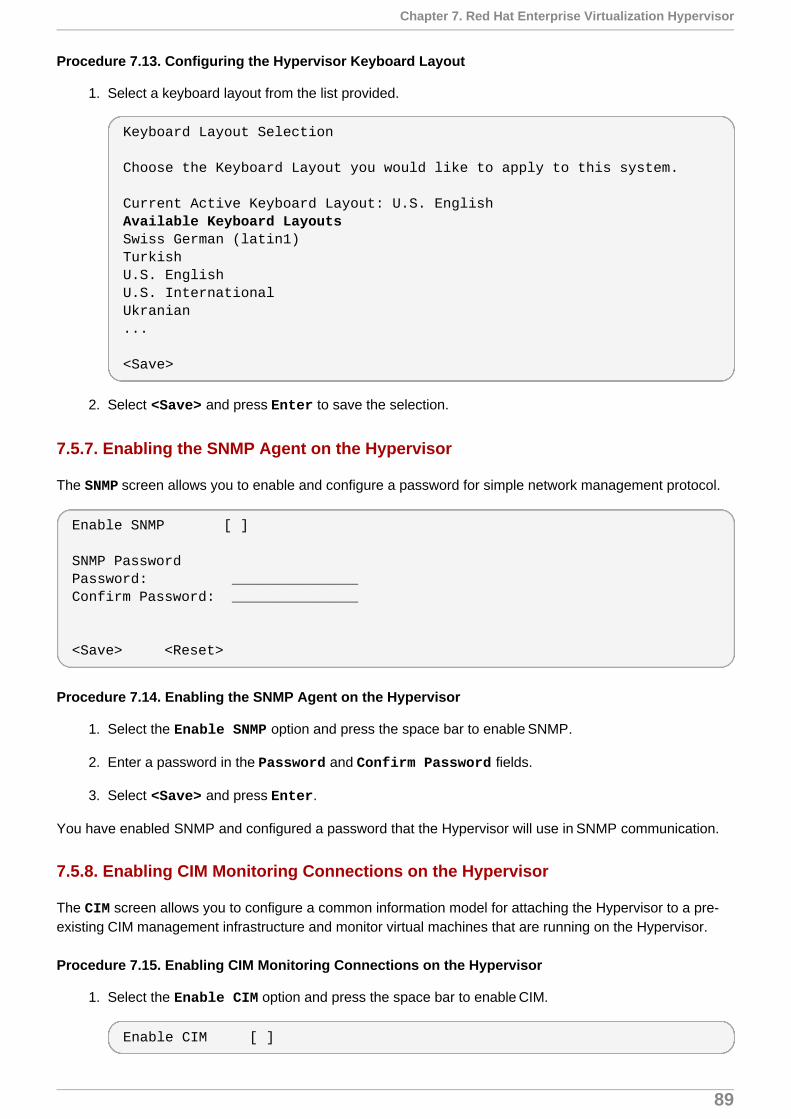
Procedure 7.13. Configuring the Hypervisor Keyboard Layout
1. Select a keyboard layout from the list provided.
Keyboard Layout Selection Choose the Keyboard Layout you would like to apply to this system.
Current Active Keyboard Layout: U.S. EnglishAvailable Keyboard LayoutsSwiss German (latin1)TurkishU.S. EnglishU.S. InternationalUkranian...
<Save>
2. Select <Save> and press Enter to save the selection.
7.5.7. Enabling the SNMP Agent on the Hypervisor
The SNMP screen allows you to enable and configure a password for simple network management protocol.
Enable SNMP [ ]
SNMP PasswordPassword: _______________Confirm Password: _______________
<Save> <Reset>
Procedure 7.14. Enabling the SNMP Agent on the Hypervisor
1. Select the Enable SNMP option and press the space bar to enable SNMP.
2. Enter a password in the Password and Confirm Password fields.
3. Select <Save> and press Enter.
You have enabled SNMP and configured a password that the Hypervisor will use in SNMP communication.
7.5.8. Enabling CIM Monitoring Connections on the Hypervisor
The CIM screen allows you to configure a common information model for attaching the Hypervisor to a pre-existing CIM management infrastructure and monitor virtual machines that are running on the Hypervisor.
Procedure 7.15. Enabling CIM Monitoring Connections on the Hypervisor
1. Select the Enable CIM option and press the space bar to enable CIM.
Enable CIM [ ]
Chapter 7. Red Hat Enterprise Virtualization Hypervisor
89

2. Enter a password in the Password field and Confirm Password field.
3. Select <Save> and press Enter.
You have configured the Hypervisor to accept CIM connections authenticated using a password. Use thispassword when adding the Hypervisor to your common information model object manager.
7.5.9. Configuring Logging
The Logging screen allows you to configure logging-related options such as a daemon for automaticallyexporting log files generated by the Hypervisor to a remote server.
Press F8 to see the available log files. To view the content of a log file, press the right arrow key, select a logfile and press Enter.
/var/log/ovirt.log
/var/log/ovirt-node.log
/var/log/audit/audit.log
/var/log/messages
dmesg
Procedure 7.16. Configuring Logging using the Logging Screen
1. In the Logrotate Max Log Size field, enter the maximum size in kilobytes that log files canreach before they are rotated by logrotate. The default value is 1024.
2. Select an Interval to configure logrotate to run Daily, Weekly, or Monthly. The default value isDaily.
3. Optionally configure rsyslog to transmit log files to a remote syslog daemon:
a. Enter the remote rsyslog server address in the Server Address field.
b. Enter the remote rsyslog server port in the Server Port field. The default port is 514.
4. Optionally configure netconsole to transmit kernel messages to a remote destination:
a. Enter the Server Address.
b. Enter the Server Port. The default port is 6666.
5. Select <Save> and press Enter.
7.5.10. Configuring Kernel Dumps
The Kdump screen allows you to specify a location in which kernel dumps will be stored in the event of asystem failure.
Table 7.1. The Kdump Screen
Kdump Options DescriptionDisable Disables kernel dumping.
Local Stores kernel dumps on the local system.
Installation Guide
90
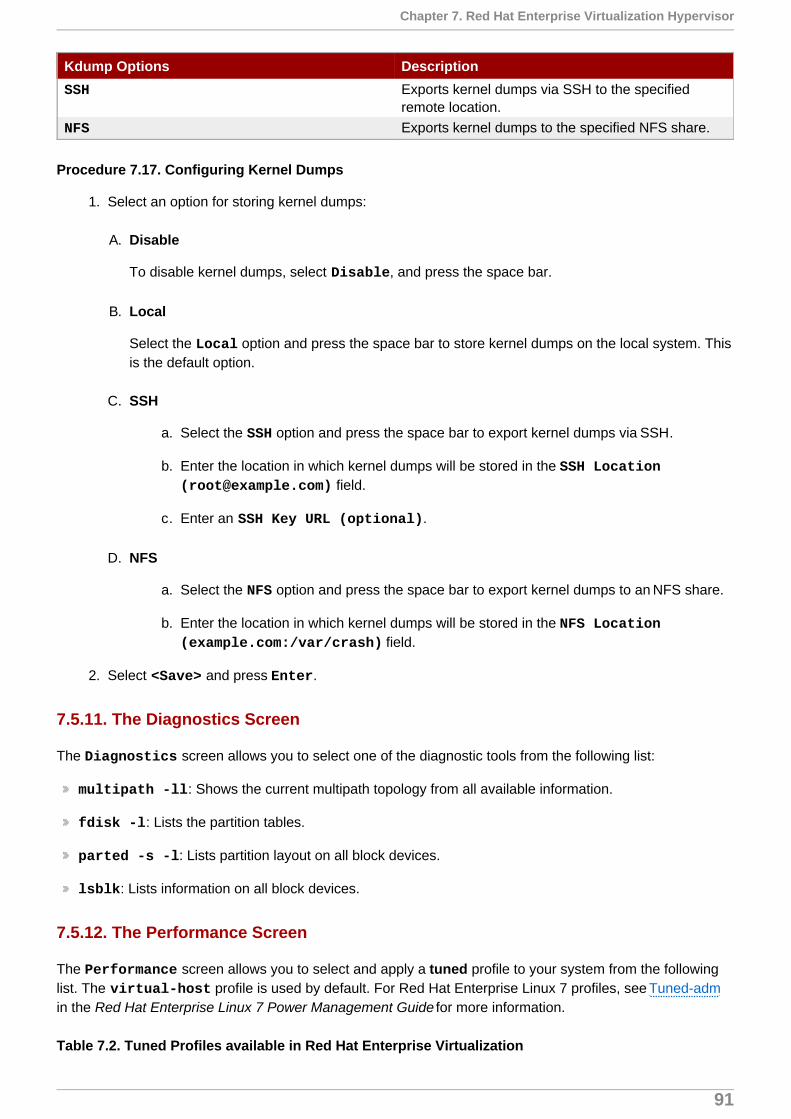
SSH Exports kernel dumps via SSH to the specifiedremote location.
NFS Exports kernel dumps to the specified NFS share.
Kdump Options Description
Procedure 7.17. Configuring Kernel Dumps
1. Select an option for storing kernel dumps:
A. Disable
To disable kernel dumps, select Disable, and press the space bar.
B. Local
Select the Local option and press the space bar to store kernel dumps on the local system. Thisis the default option.
C. SSH
a. Select the SSH option and press the space bar to export kernel dumps via SSH.
b. Enter the location in which kernel dumps will be stored in the SSH Location ([email protected]) field.
c. Enter an SSH Key URL (optional).
D. NFS
a. Select the NFS option and press the space bar to export kernel dumps to an NFS share.
b. Enter the location in which kernel dumps will be stored in the NFS Location (example.com:/var/crash) field.
2. Select <Save> and press Enter.
7.5.11. The Diagnostics Screen
The Diagnostics screen allows you to select one of the diagnostic tools from the following list:
multipath -ll: Shows the current multipath topology from all available information.
fdisk -l: Lists the partition tables.
parted -s -l: Lists partition layout on all block devices.
lsblk: Lists information on all block devices.
7.5.12. The Performance Screen
The Performance screen allows you to select and apply a tuned profile to your system from the followinglist. The virtual-host profile is used by default. For Red Hat Enterprise Linux 7 profiles, see Tuned-admin the Red Hat Enterprise Linux 7 Power Management Guide for more information.
Table 7.2. Tuned Profiles available in Red Hat Enterprise Virtualization
Chapter 7. Red Hat Enterprise Virtualization Hypervisor
91
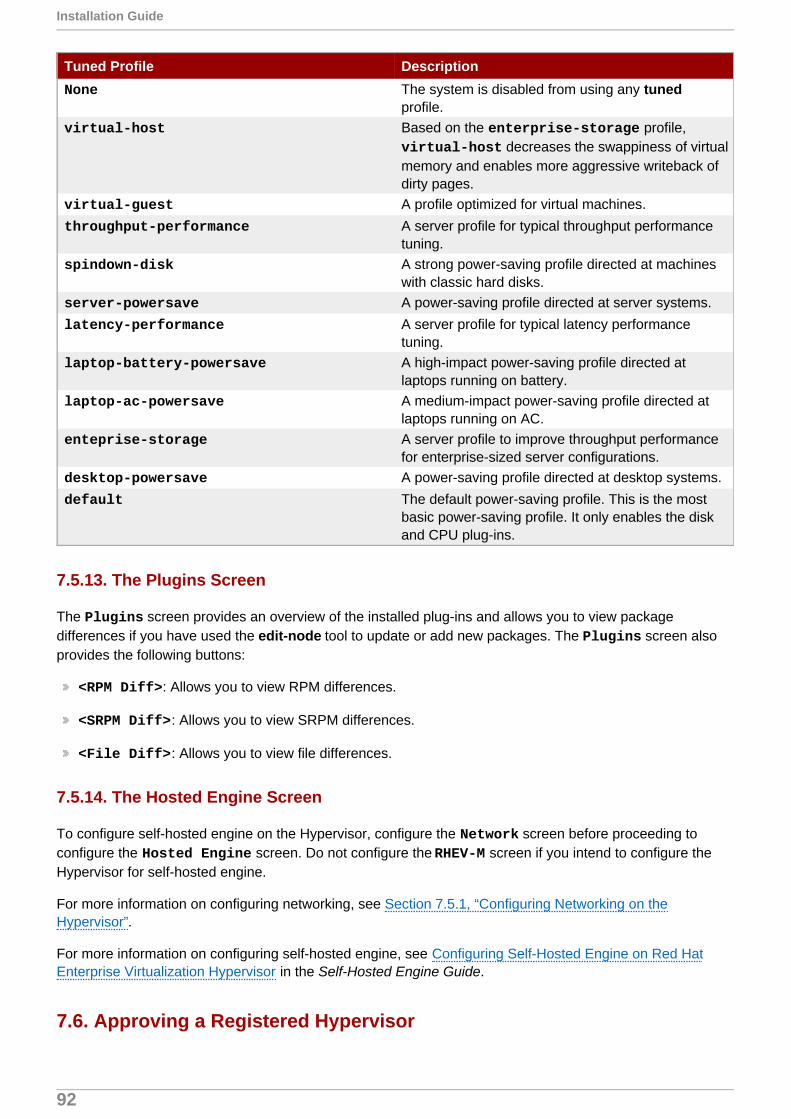
Tuned Profile DescriptionNone The system is disabled from using any tuned
profile.virtual-host Based on the enterprise-storage profile,
virtual-host decreases the swappiness of virtualmemory and enables more aggressive writeback ofdirty pages.
virtual-guest A profile optimized for virtual machines.
throughput-performance A server profile for typical throughput performancetuning.
spindown-disk A strong power-saving profile directed at machineswith classic hard disks.
server-powersave A power-saving profile directed at server systems.
latency-performance A server profile for typical latency performancetuning.
laptop-battery-powersave A high-impact power-saving profile directed atlaptops running on battery.
laptop-ac-powersave A medium-impact power-saving profile directed atlaptops running on AC.
enteprise-storage A server profile to improve throughput performancefor enterprise-sized server configurations.
desktop-powersave A power-saving profile directed at desktop systems.
default The default power-saving profile. This is the mostbasic power-saving profile. It only enables the diskand CPU plug-ins.
7.5.13. The Plugins Screen
The Plugins screen provides an overview of the installed plug-ins and allows you to view packagedifferences if you have used the edit-node tool to update or add new packages. The Plugins screen alsoprovides the following buttons:
<RPM Diff>: Allows you to view RPM differences.
<SRPM Diff>: Allows you to view SRPM differences.
<File Diff>: Allows you to view file differences.
7.5.14. The Hosted Engine Screen
To configure self-hosted engine on the Hypervisor, configure the Network screen before proceeding toconfigure the Hosted Engine screen. Do not configure the RHEV-M screen if you intend to configure theHypervisor for self-hosted engine.
For more information on configuring networking, see Section 7.5.1, “Configuring Networking on theHypervisor”.
For more information on configuring self-hosted engine, see Configuring Self-Hosted Engine on Red HatEnterprise Virtualization Hypervisor in the Self-Hosted Engine Guide.
7.6. Approving a Registered Hypervisor
Installation Guide
92

Approve a Hypervisor that has been registered using the details of the Manager.
Procedure 7.18. Approving a Registered Hypervisor
1. From the Administration Portal, click the Hosts tab, and then click the host to be approved. The hostis currently listed with the status of Pending Approval.
2. Click Approve to open the Edit and Approve Hosts window. You can use the window tospecify a name for the Hypervisor, fetch its SSH fingerprint before approving it, and configure powermanagement. For information on power management configuration, see Host Power ManagementSettings Explained in the Administration Guide.
3. Click OK. If you have not configured power management, you are prompted to confirm whether toproceed without doing so; click OK.
Chapter 7. Red Hat Enterprise Virtualization Hypervisor
93

Chapter 8. Red Hat Enterprise Linux Hosts
8.1. Red Hat Enterprise Linux Hosts
A Red Hat Enterprise Linux host, also known as a RHEL-based hypervisor is based on a standard basicinstallation of Red Hat Enterprise Linux on a physical server, with Red Hat Enterprise Linux Serverand the Red Hat Enterprise Virtualization entitlements enabled. For detailed installationinstructions, see Red Hat Enterprise Linux 7 Installation Guide.
See Appendix G, Configuring a Hypervisor Host for PCI Passthrough for more information on how to enablethe hypervisor hardware and software for device passthrough.
Important
By default, SELinux is in enforcing mode upon installation. To verify, run getenforce. While it ishighly recommended to have SELinux in enforcing mode, it is not required for Red Hat EnterpriseVirtualization to host virtual machines. Disabling SELinux eliminates a core security feature of Red HatEnterprise Linux. Problems also occur when migrating virtual machines between hypervisors that havedifferent SELinux modes. For more information, see Red Hat Enterprise Linux 7 Virtualization SecurityGuide.
If you need to live migrate virtual machines from a hypervisor that has SELinux disabled to ahypervisor that has SELinux enabled, see the workaround inhttps://access.redhat.com/solutions/1982023.
Important
Virtualization must be enabled in your host's BIOS settings. For information on changing your host'sBIOS settings, refer to your host's hardware documentation.
Important
Third-party watchdogs should not be installed on Red Hat Enterprise Linux hosts, as they can interferewith the watchdog daemon provided by VDSM.
8.2. Host Compatibility Matrix
The following table outlines the supported hypervisor host versions in each compatibility version of Red HatEnterprise Virtualization. For the 3.6 compatibility version, only Red Hat Enterprise Linux 7 hosts aresupported.
Installation Guide
94

Note
The latest version of VDSM is backwards compatible with all previous versions of Red Hat EnterpriseVirtualization.
Table 8.1.
SupportedRHEL orRHEV-HVersion
3.0 3.1 3.2 3.3 3.4 3.5 3.6
6.2 ✓6.3 ✓ ✓6.4 ✓ ✓ ✓6.5 ✓ ✓ ✓ ✓ ✓6.6 ✓6.7 ✓7.0 ✓ ✓7.1 ✓ ✓7.2 ✓ ✓
When you create a new data center, you can set the compatibility version. Select the compatibility versionthat suits all the hosts in the data center. Once set, version regression is not allowed. For a fresh Red HatEnterprise Virtualization installation, the latest compatibility version is set in the Default Data Center andDefault Cluster; to use an older compatibility version, you must create additional data centers and clusters.
8.3. Subscribing to the Required Entitlements
To be used as a hypervisor host, make sure the Red Hat Enterprise Linux host meets the hardwarerequirements listed in Chapter 2. The host must also be registered and subscribed to a number ofentitlements using Subscription Manager. Follow this procedure to register with the Content Delivery Network
Chapter 8. Red Hat Enterprise Linux Hosts
95

and attach the Red Hat Enterprise Linux Server and Red Hat Enterprise Virtualizationentitlements to the host.
Procedure 8.1. Subscribing to Required Entitlements using Subscription Manager
1. Register your system with the Content Delivery Network, entering your Customer Portal Usernameand Password when prompted:
# subscription-manager register
2. Find the Red Hat Enterprise Linux Server and Red Hat Enterprise Virtualizationsubscription pools and note down the pool IDs.
# subscription-manager list --available
3. Use the pool IDs located in the previous step to attach the entitlements to the system:
# subscription-manager attach --pool=poolid
Note
To find out what subscriptions are currently attached, run:
# subscription-manager list --consumed
To list all enabled repositories, run:
# yum repolist
4. Disable all existing repositories:
# subscription-manager repos --disable=*
5. Enable the required repositories:
# subscription-manager repos --enable=rhel-7-server-rpms# subscription-manager repos --enable=rhel-7-server-rhev-mgmt-agent-rpms
Installation Guide
96

Note
In Red Hat Enterprise Virtualization 3.6, only version 7 hosts are supported. If you use version6 hosts, you can only set the cluster and data center compatibility version to 3.5 or below. Toenable the required repositories for Red Hat Enterprise Linux 6, run:
# subscription-manager repos --enable=rhel-6-server-rpms# subscription-manager repos --enable=rhel-6-server-optional-rpms# subscription-manager repos --enable=rhel-6-server-rhev-mgmt-agent-rpms
6. Ensure that all packages currently installed are up to date:
# yum update
Once you have subscribed the host to the required entitlements, proceed to the next section to attach yourhost to your Red Hat Enterprise Virtualization environment.
8.4. Manually Adding a Hypervisor from the Administration Portal
Adding a host to your Red Hat Enterprise Virtualization environment can take some time, as the followingsteps are completed by the platform: virtualization checks, installation of packages, creation of bridge, and areboot of the host. Use the details pane to monitor the process as the host and the Manager establish aconnection.
Procedure 8.2. Adding a Red Hat Enterprise Linux Host
1. From the Administration Portal, click the Hosts resource tab.
2. Click New to open the New Host window.
3. Use the drop-down menu to select the Data Center and Host Cluster for the new host.
Important
Red Hat recommends to keep Red Hat Enterprise Linux 6 and Red Hat Enterprise Linux 7hosts in different clusters.
4. Enter the Name and the Address of the new host. The standard SSH port, port 22, is auto-filled inthe SSH Port field.
5. Select an authentication method to use for the Manager to access the host.
A. Enter the root user's password to use password authentication.
Chapter 8. Red Hat Enterprise Linux Hosts
97

Note
For Red Hat Enterprise Virtualization Hypervisors (RHEV-H), this is the password set inthe RHEV-M screen.
B. Alternatively, copy the key displayed in the SSH PublicKey field to /root/.ssh/authorized_keys on the host to use public key authentication.
6. You have now completed the mandatory steps to add a Red Hat Enterprise Linux host. Click the Advanced Parameters button to expand the advanced host settings.
a. Optionally disable automatic firewall configuration.
b. Optionally disable use of JSON protocol.
Note
In Red Hat Enterprise Virtualization 3.5 and above, the communication modelbetween the Manager and VDSM now uses JSON protocol, which reduces parsingtime. As a result, the communication message format has changed from XML formatto JSON format. Web requests have changed from synchronous HTTP requests toasynchronous TCP requests.
c. Optionally add a host SSH fingerprint to increase security. You can add it manually, or fetchit automatically.
7. You can configure power management, where the host has a supported power management card.For information on power management configuration, see Host Power Management SettingsExplained in the Administration Guide.
8. Click OK.
The new host displays in the list of hosts with a status of Installing, and you can view the progress of theinstallation in the details pane. After a brief delay the host status changes to Up.
Installation Guide
98

Part IV. Attaching Storage
Part IV. Attaching Storage
99

Chapter 9. Storage
9.1. Introduction to Storage
A storage domain is a collection of images that have a common storage interface. A storage domain containscomplete images of templates and virtual machines (including snapshots), ISO files, and metadata aboutthemselves. A storage domain can be made of either block devices (SAN - iSCSI or FCP) or a file system(NAS - NFS, GlusterFS, or other POSIX compliant file systems).
There are three types of storage domain:
Data Domain: A data domain holds the virtual hard disks and OVF files of all the virtual machines andtemplates in a data center, and cannot be shared across data centers. Data domains of multiple types(iSCSI, NFS, FC, POSIX, and Gluster) can be added to the same data center, provided they are allshared, rather than local, domains.
Important
You must have one hypervisor host with the status of Up and have attached a data domain to adata center before you can attach an ISO domain and an export domain.
ISO Domain: ISO domains store ISO files (or logical CDs) used to install and boot operating systems andapplications for the virtual machines, and can be shared across different data centers. An ISO domainremoves the data center's need for physical media. ISO domains can only be NFS-based. Only one ISOdomain can be added to a data center.
Export Domain: Export domains are temporary storage repositories that are used to copy and moveimages between data centers and Red Hat Enterprise Virtualization environments. Export domains can beused to backup virtual machines. An export domain can be moved between data centers, however, it canonly be active in one data center at a time. Export domains can only be NFS-based. Only one exportdomain can be added to a data center.
See the next section to attach existing FCP storage as a data domain. More storage options are available inthe Administration Guide
9.2. Adding FCP Storage
Red Hat Enterprise Virtualization platform supports SAN storage by creating a storage domain from a volumegroup made of pre-existing LUNs. Neither volume groups nor LUNs can be attached to more than onestorage domain at a time.
Red Hat Enterprise Virtualization system administrators need a working knowledge of Storage Area Networks(SAN) concepts. SAN usually uses Fibre Channel Protocol (FCP) for traffic between hosts and sharedexternal storage. For this reason, SAN may occasionally be referred to as FCP storage.
For information regarding the setup and configuration of FCP or multipathing on Red Hat Enterprise Linux,see the Storage Administration Guide and DM Multipath Guide.
The following procedure shows you how to attach existing FCP storage to your Red Hat EnterpriseVirtualization environment as a data domain. For more information on other supported storage types, seeStorage in the Administration Guide.
Procedure 9.1. Adding FCP Storage
Installation Guide
100
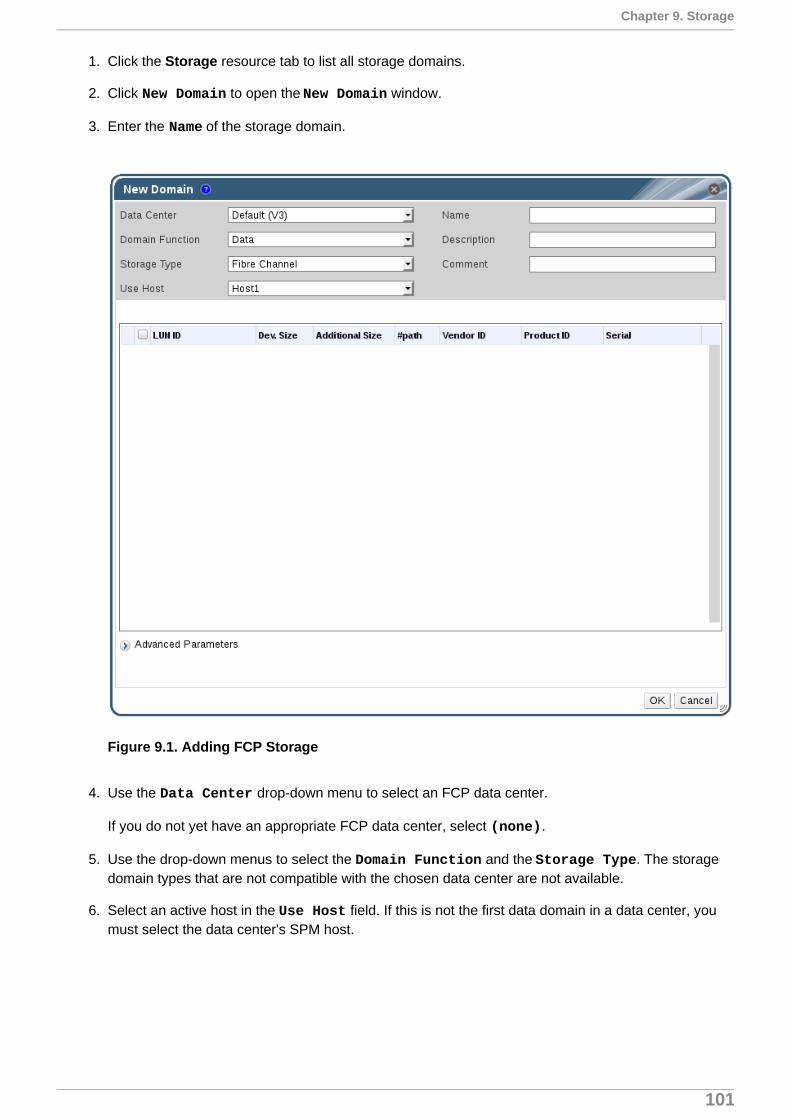
1. Click the Storage resource tab to list all storage domains.
2. Click New Domain to open the New Domain window.
3. Enter the Name of the storage domain.
Figure 9.1. Adding FCP Storage
4. Use the Data Center drop-down menu to select an FCP data center.
If you do not yet have an appropriate FCP data center, select (none).
5. Use the drop-down menus to select the Domain Function and the Storage Type. The storagedomain types that are not compatible with the chosen data center are not available.
6. Select an active host in the Use Host field. If this is not the first data domain in a data center, youmust select the data center's SPM host.
Chapter 9. Storage
101

Important
All communication to the storage domain is through the selected host and not directly from theRed Hat Enterprise Virtualization Manager. At least one active host must exist in the systemand be attached to the chosen data center. All hosts must have access to the storage devicebefore the storage domain can be configured.
7. The New Domain window automatically displays known targets with unused LUNs when Data / Fibre Channel is selected as the storage type. Select the LUN ID check box to select all of theavailable LUNs.
8. Optionally, you can configure the advanced parameters.
a. Click Advanced Parameters.
b. Enter a percentage value into the Warning Low Space Indicator field. If the free spaceavailable on the storage domain is below this percentage, warning messages are displayedto the user and logged.
c. Enter a GB value into the Critical Space Action Blocker field. If the free spaceavailable on the storage domain is below this value, error messages are displayed to the userand logged, and any new action that consumes space, even temporarily, will be blocked.
d. Select the Wipe After Delete check box to enable the wipe after delete option. Thisoption can be edited after the domain is created, but doing so will not change the wipe afterdelete property of disks that already exist.
9. Click OK to create the storage domain and close the window.
The new FCP data domain displays on the Storage tab. It will remain with a Locked status while it is beingprepared for use. When ready, it is automatically attached to the data center.
Installation Guide
102
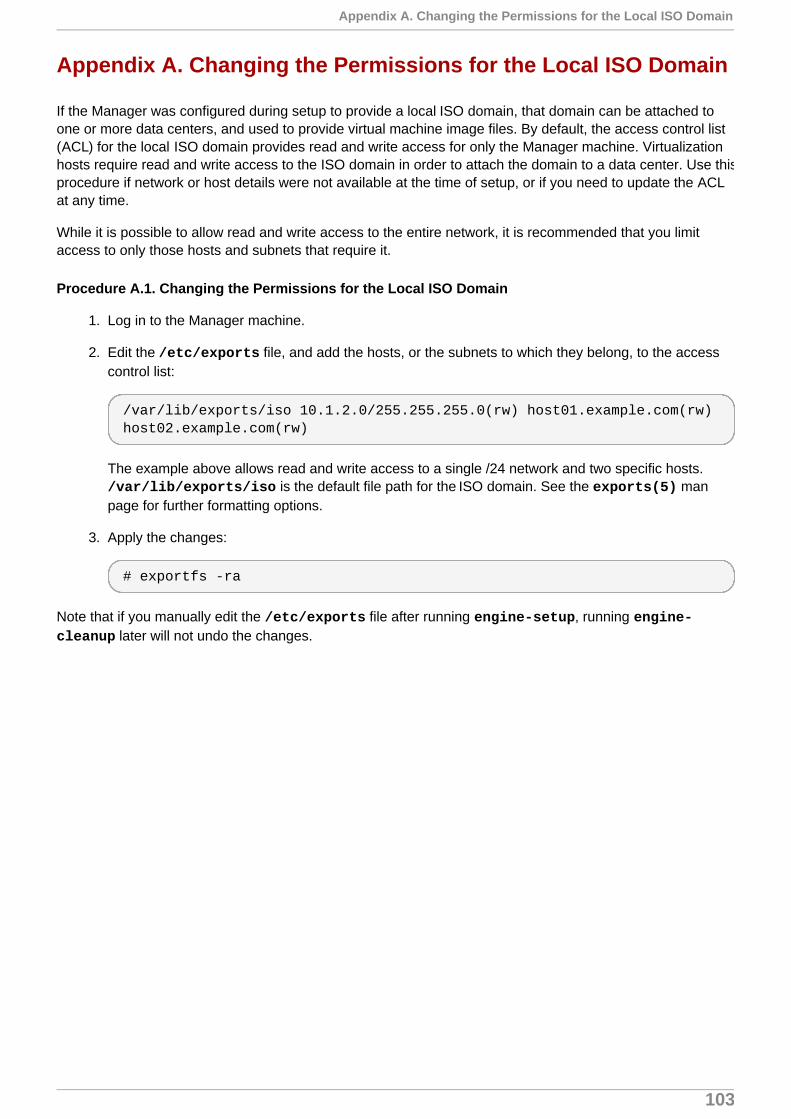
Appendix A. Changing the Permissions for the Local ISO Domain
If the Manager was configured during setup to provide a local ISO domain, that domain can be attached toone or more data centers, and used to provide virtual machine image files. By default, the access control list(ACL) for the local ISO domain provides read and write access for only the Manager machine. Virtualizationhosts require read and write access to the ISO domain in order to attach the domain to a data center. Use thisprocedure if network or host details were not available at the time of setup, or if you need to update the ACLat any time.
While it is possible to allow read and write access to the entire network, it is recommended that you limitaccess to only those hosts and subnets that require it.
Procedure A.1. Changing the Permissions for the Local ISO Domain
1. Log in to the Manager machine.
2. Edit the /etc/exports file, and add the hosts, or the subnets to which they belong, to the accesscontrol list:
/var/lib/exports/iso 10.1.2.0/255.255.255.0(rw) host01.example.com(rw) host02.example.com(rw)
The example above allows read and write access to a single /24 network and two specific hosts. /var/lib/exports/iso is the default file path for the ISO domain. See the exports(5) manpage for further formatting options.
3. Apply the changes:
# exportfs -ra
Note that if you manually edit the /etc/exports file after running engine-setup, running engine-cleanup later will not undo the changes.
Appendix A. Changing the Permissions for the Local ISO Domain
103

Appendix B. Attaching the Local ISO Domain to a Data Center
The local ISO domain, created during the Manager installation, appears in the Administration Portal as Unattached. To use it, attach it to a data center. The ISO domain must be of the same Storage Type asthe data center. Each host in the data center must have read and write access to the ISO domain. Inparticular, ensure that the Storage Pool Manager has access.
Only one ISO domain can be attached to a data center.
Procedure B.1. Attaching the Local ISO Domain to a Data Center
1. In the Administration Portal, click the Data Centers resource tab and select the appropriate datacenter.
2. Select the Storage tab in the details pane to list the storage domains already attached to the datacenter.
3. Click Attach ISO to open the Attach ISO Library window.
4. Click the radio button for the local ISO domain.
5. Click OK.
The ISO domain is now attached to the data center and is automatically activated.
Installation Guide
104

Appendix C. Enabling Gluster Processes on Red Hat GlusterStorage Nodes
1. In the Navigation Pane, select the Clusters tab.
2. Select New.
3. Select the "Enable Gluster Service" radio button. Provide the address, SSH fingerprint, and passwordas necessary. The address and password fields can be filled in only when the Import existing Gluster configuration check box is selected.
Figure C.1. Selecting the "Enable Gluster Service" Radio Button
4. Click OK.
It is now possible to add Red Hat Gluster Storage nodes to the Gluster cluster, and to mount Gluster volumesas storage domains. iptables rules no longer block storage domains from being added to the cluster.
Appendix C. Enabling Gluster Processes on Red Hat Gluster Storage Nodes
105

Appendix D. Preparing a Remote PostgreSQL Database for Usewith the Red Hat Enterprise Virtualization Manager
Optionally configure a PostgreSQL database on a remote Red Hat Enterprise Linux 6.6 or later versions ofRed Hat Enterprise Linux 6 machine to use as the Manager database. By default, the Red Hat EnterpriseVirtualization Manager's configuration script, engine-setup, creates and configures the Manager databaselocally on the Manager machine. For automatic database configuration, see Section 3.3, “Configuring theRed Hat Enterprise Virtualization Manager”. To set up the Manager database with custom values on theManager machine, see Appendix E, Preparing a Local Manually-Configured PostgreSQL Database for Usewith the Red Hat Enterprise Virtualization Manager.
Use this procedure to configure the database on a machine that is separate from the machine where theManager is installed. Set up this database before you configure the Manager; you must supply the databasecredentials during engine-setup.
Note
The engine-setup and engine-backup --mode=restore commands only support system errormessages in the en_US.UTF8 locale, even if the system locale is different.
The locale settings in the postgresql.conf file must be set to en_US.UTF8.
Important
The database name must contain only numbers, underscores, and lowercase letters.
Procedure D.1. Preparing a Remote PostgreSQL Database for use with the Red Hat EnterpriseVirtualization Manager
1. Install the PostgreSQL server package:
# yum install postgresql-server
2. Initialize the PostgreSQL database, start the postgresql service, and ensure that this service startson boot:
# su -l postgres -c "/usr/bin/initdb --locale=en_US.UTF8 --auth='ident' --pgdata=/var/lib/pgsql/data/"# service postgresql start# chkconfig postgresql on
3. Connect to the psql command line interface as the postgres user:
# su - postgres$ psql
4. Create a user for the Manager to use when it writes to and reads from the database. The default username on the Manager is engine:
Installation Guide
106
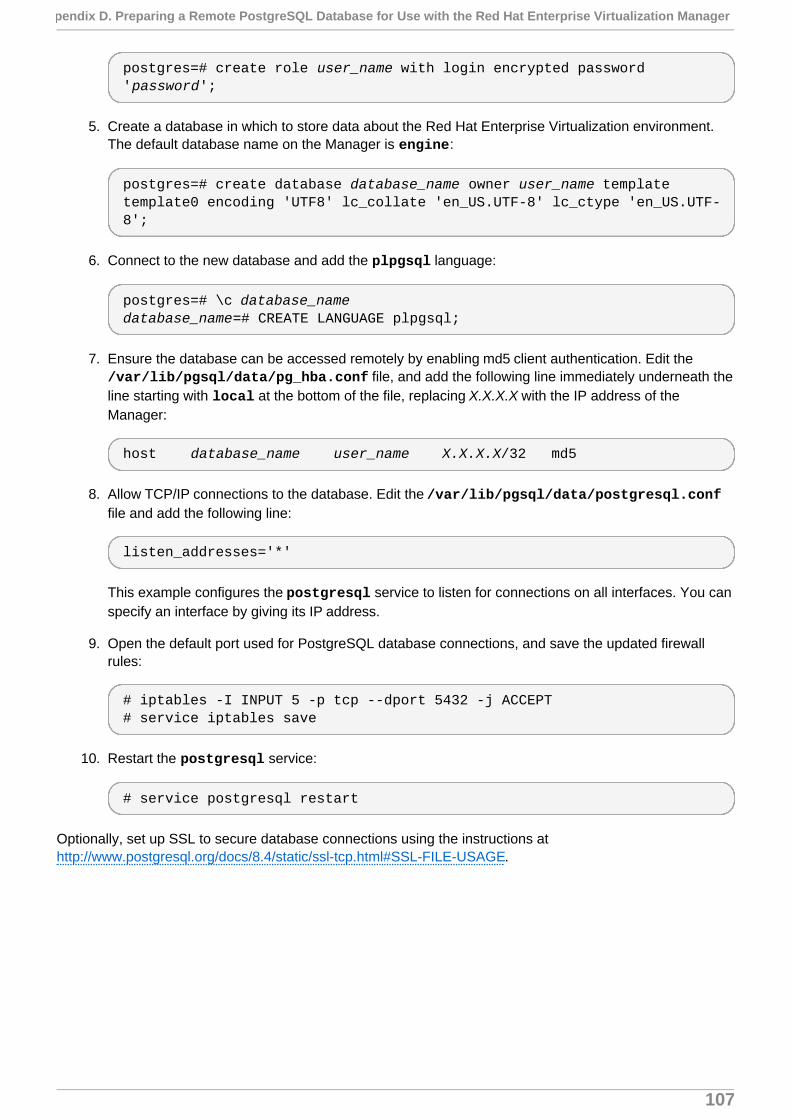
postgres=# create role user_name with login encrypted password 'password';
5. Create a database in which to store data about the Red Hat Enterprise Virtualization environment.The default database name on the Manager is engine:
postgres=# create database database_name owner user_name template template0 encoding 'UTF8' lc_collate 'en_US.UTF-8' lc_ctype 'en_US.UTF-8';
6. Connect to the new database and add the plpgsql language:
postgres=# \c database_namedatabase_name=# CREATE LANGUAGE plpgsql;
7. Ensure the database can be accessed remotely by enabling md5 client authentication. Edit the /var/lib/pgsql/data/pg_hba.conf file, and add the following line immediately underneath theline starting with local at the bottom of the file, replacing X.X.X.X with the IP address of theManager:
host database_name user_name X.X.X.X/32 md5
8. Allow TCP/IP connections to the database. Edit the /var/lib/pgsql/data/postgresql.conffile and add the following line:
listen_addresses='*'
This example configures the postgresql service to listen for connections on all interfaces. You canspecify an interface by giving its IP address.
9. Open the default port used for PostgreSQL database connections, and save the updated firewallrules:
# iptables -I INPUT 5 -p tcp --dport 5432 -j ACCEPT# service iptables save
10. Restart the postgresql service:
# service postgresql restart
Optionally, set up SSL to secure database connections using the instructions athttp://www.postgresql.org/docs/8.4/static/ssl-tcp.html#SSL-FILE-USAGE.
Appendix D. Preparing a Remote PostgreSQL Database for Use with the Red Hat Enterprise Virtualization Manager
107

Appendix E. Preparing a Local Manually-Configured PostgreSQLDatabase for Use with the Red Hat Enterprise VirtualizationManager
Optionally configure a local PostgreSQL database on the Manager machine to use as the Manager database.By default, the Red Hat Enterprise Virtualization Manager's configuration script, engine-setup, creates andconfigures the Manager database locally on the Manager machine. For automatic database configuration,see Section 3.3, “Configuring the Red Hat Enterprise Virtualization Manager”. To configure the Managerdatabase on a machine that is separate from the machine where the Manager is installed, see Appendix D,Preparing a Remote PostgreSQL Database for Use with the Red Hat Enterprise Virtualization Manager.
Use this procedure to set up the Manager database with custom values. Set up this database before youconfigure the Manager; you must supply the database credentials during engine-setup. To set up thedatabase, you must first install the rhevm package on the Manager machine; the postgresql-server packageis installed as a dependency.
Note
The engine-setup and engine-backup --mode=restore commands only support system errormessages in the en_US.UTF8 locale, even if the system locale is different.
The locale settings in the postgresql.conf file must be set to en_US.UTF8.
Important
The database name must contain only numbers, underscores, and lowercase letters.
Procedure E.1. Preparing a Local Manually-Configured PostgreSQL Database for use with the RedHat Enterprise Virtualization Manager
1. Initialize the PostgreSQL database, start the postgresql service, and ensure that this service startson boot:
# su -l postgres -c "/usr/bin/initdb --locale=en_US.UTF8 --auth='ident' --pgdata=/var/lib/pgsql/data/"# service postgresql start# chkconfig postgresql on
2. Connect to the psql command line interface as the postgres user:
# su - postgres$ psql
3. Create a user for the Manager to use when it writes to and reads from the database. The default username on the Manager is engine:
postgres=# create role user_name with login encrypted password 'password';
Installation Guide
108

4. Create a database in which to store data about the Red Hat Enterprise Virtualization environment.The default database name on the Manager is engine:
postgres=# create database database_name owner user_name template template0 encoding 'UTF8' lc_collate 'en_US.UTF-8' lc_ctype 'en_US.UTF-8';
5. Connect to the new database and add the plpgsql language:
postgres=# \c database_namedatabase_name=# CREATE LANGUAGE plpgsql;
6. Ensure the database can be accessed remotely by enabling md5 client authentication. Edit the /var/lib/pgsql/data/pg_hba.conf file, and add the following line immediately underneath theline starting with local at the bottom of the file:
host [database name] [user name] 0.0.0.0/0 md5host [database name] [user name] ::0/0 md5
7. Restart the postgresql service:
# service postgresql restart
Optionally, set up SSL to secure database connections using the instructions athttp://www.postgresql.org/docs/8.4/static/ssl-tcp.html#SSL-FILE-USAGE.
Appendix E. Preparing a Local Manually-Configured PostgreSQL Database for Use with the Red Hat Enterprise Virtualization Manager
109

Appendix F. Installing a Websocket Proxy on a Separate Machine
The websocket proxy allows users to connect to virtual machines via noVNC and SPICE HTML5 consoles.The noVNC client uses websockets to pass VNC data. However, the VNC server in QEMU does not providewebsocket support, therefore a websocket proxy must be placed between the client and the VNC server. Theproxy can run on any machine that has access to the network, including the the Manager machine.
For security and performance reasons, users may want to configure the websocket proxy on a separatemachine.
Note
SPICE HTML5 support is a Technology Preview feature. Technology Preview features are not fullysupported under Red Hat Subscription Service Level Agreements (SLAs), may not be functionallycomplete, and are not intended for production use. However, these features provide early access toupcoming product innovations, enabling customers to test functionality and provide feedback duringthe development process.
This section describes how to install and configure the websocket proxy on a separate machine that does notrun the Manager. See Section 3.3, “Configuring the Red Hat Enterprise Virtualization Manager” forinstructions on how to configure the websocket proxy on the Manager.
Procedure F.1. Installing and Configuring a Websocket Proxy on a Separate Machine
1. Install the websocket proxy:
# yum install rhevm-websocket-proxy
2. Run the engine-setup command to configure the websocket proxy.
# engine-setup
Note
If the rhevm package has also been installed, choose No when asked to configure the engineon this host.
3. Press Enter to allow engine-setup to configure a websocket proxy server on the machine.
Configure WebSocket Proxy on this machine? (Yes, No) [Yes]:
4. Press Enter to accept the automatically detected hostname, or enter an alternative hostname andpress Enter. Note that the automatically detected hostname may be incorrect if you are using virtualhosts:
Host fully qualified DNS name of this server [host.example.com]:
Installation Guide
110
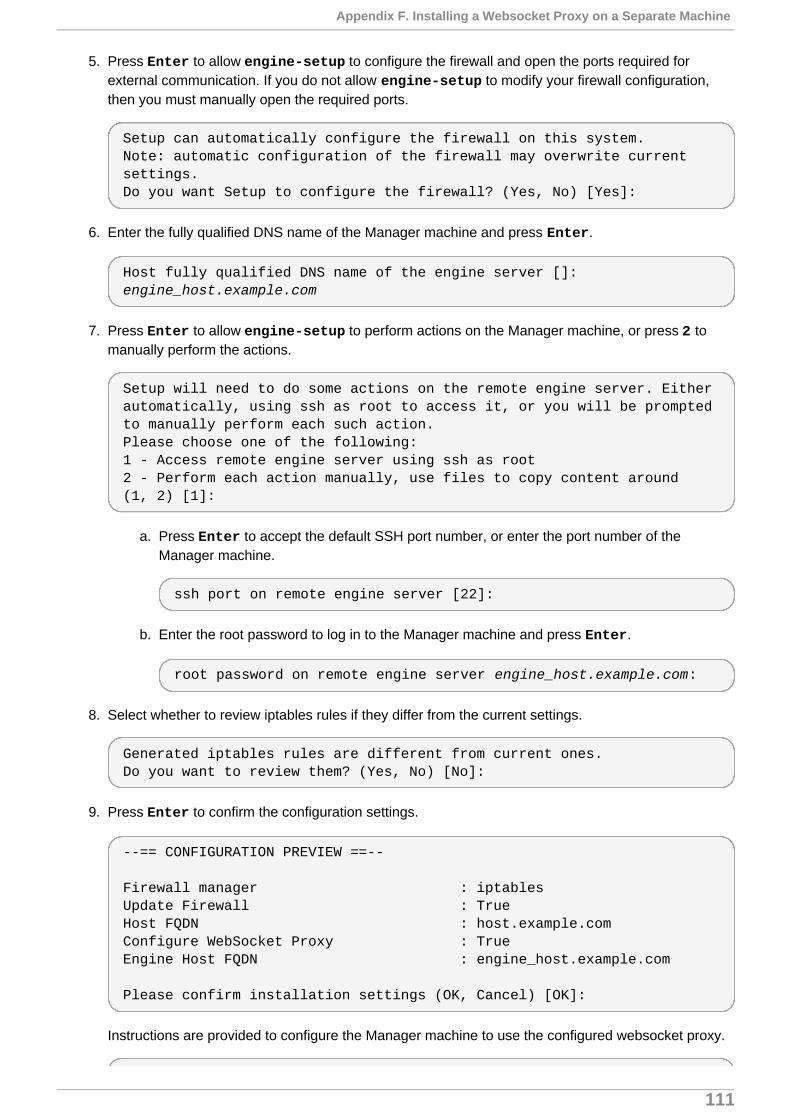
5. Press Enter to allow engine-setup to configure the firewall and open the ports required forexternal communication. If you do not allow engine-setup to modify your firewall configuration,then you must manually open the required ports.
Setup can automatically configure the firewall on this system.Note: automatic configuration of the firewall may overwrite current settings.Do you want Setup to configure the firewall? (Yes, No) [Yes]:
6. Enter the fully qualified DNS name of the Manager machine and press Enter.
Host fully qualified DNS name of the engine server []: engine_host.example.com
7. Press Enter to allow engine-setup to perform actions on the Manager machine, or press 2 tomanually perform the actions.
Setup will need to do some actions on the remote engine server. Either automatically, using ssh as root to access it, or you will be prompted to manually perform each such action.Please choose one of the following:1 - Access remote engine server using ssh as root2 - Perform each action manually, use files to copy content around(1, 2) [1]:
a. Press Enter to accept the default SSH port number, or enter the port number of theManager machine.
ssh port on remote engine server [22]:
b. Enter the root password to log in to the Manager machine and press Enter.
root password on remote engine server engine_host.example.com:
8. Select whether to review iptables rules if they differ from the current settings.
Generated iptables rules are different from current ones.Do you want to review them? (Yes, No) [No]:
9. Press Enter to confirm the configuration settings.
--== CONFIGURATION PREVIEW ==-- Firewall manager : iptablesUpdate Firewall : TrueHost FQDN : host.example.comConfigure WebSocket Proxy : TrueEngine Host FQDN : engine_host.example.com Please confirm installation settings (OK, Cancel) [OK]:
Instructions are provided to configure the Manager machine to use the configured websocket proxy.
Appendix F. Installing a Websocket Proxy on a Separate Machine
111

Manual actions are required on the engine hostin order to enroll certs for this host and configure the engine about it. Please execute this command on the engine host: engine-config -s WebSocketProxy=host.example.com:6100and than restart the engine service to make it effective
10. Log in to the Manager machine and execute the provided instructions.
# engine-config -s WebSocketProxy=host.example.com:6100# service ovirt-engine restart
Installation Guide
112
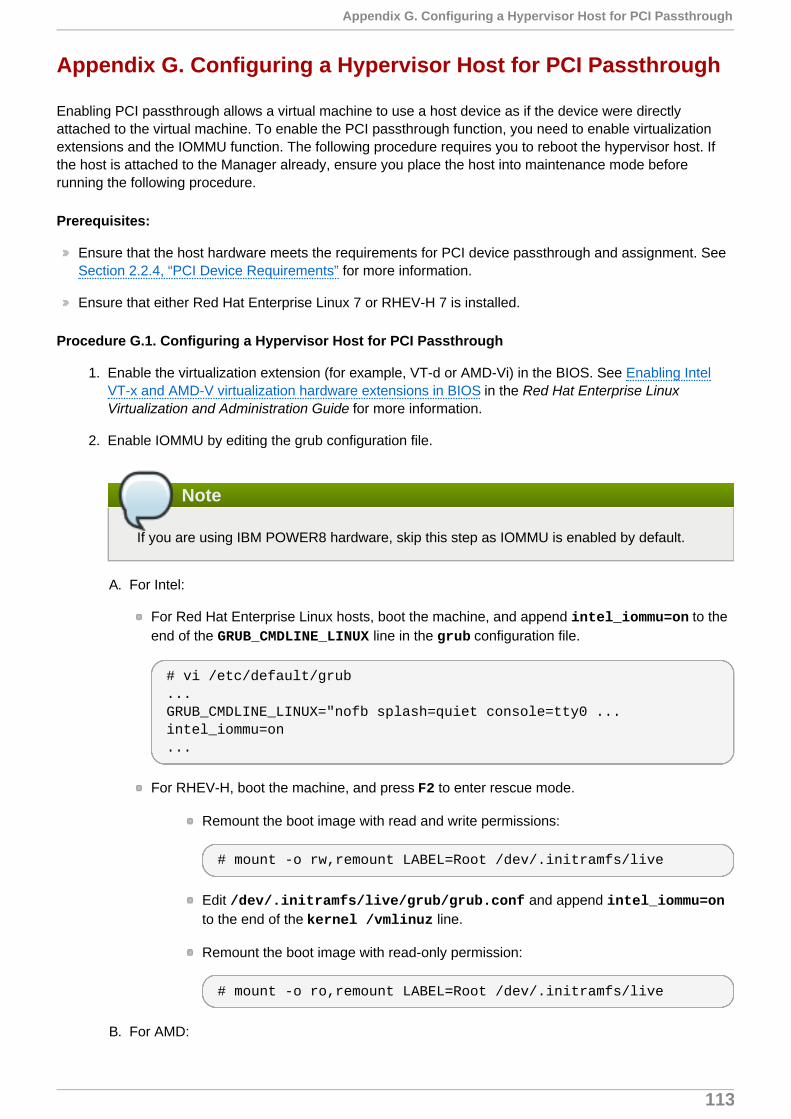
Appendix G. Configuring a Hypervisor Host for PCI Passthrough
Enabling PCI passthrough allows a virtual machine to use a host device as if the device were directlyattached to the virtual machine. To enable the PCI passthrough function, you need to enable virtualizationextensions and the IOMMU function. The following procedure requires you to reboot the hypervisor host. Ifthe host is attached to the Manager already, ensure you place the host into maintenance mode beforerunning the following procedure.
Prerequisites:
Ensure that the host hardware meets the requirements for PCI device passthrough and assignment. SeeSection 2.2.4, “PCI Device Requirements” for more information.
Ensure that either Red Hat Enterprise Linux 7 or RHEV-H 7 is installed.
Procedure G.1. Configuring a Hypervisor Host for PCI Passthrough
1. Enable the virtualization extension (for example, VT-d or AMD-Vi) in the BIOS. See Enabling IntelVT-x and AMD-V virtualization hardware extensions in BIOS in the Red Hat Enterprise LinuxVirtualization and Administration Guide for more information.
2. Enable IOMMU by editing the grub configuration file.
Note
If you are using IBM POWER8 hardware, skip this step as IOMMU is enabled by default.
A. For Intel:
For Red Hat Enterprise Linux hosts, boot the machine, and append intel_iommu=on to theend of the GRUB_CMDLINE_LINUX line in the grub configuration file.
# vi /etc/default/grub...GRUB_CMDLINE_LINUX="nofb splash=quiet console=tty0 ... intel_iommu=on...
For RHEV-H, boot the machine, and press F2 to enter rescue mode.
Remount the boot image with read and write permissions:
# mount -o rw,remount LABEL=Root /dev/.initramfs/live
Edit /dev/.initramfs/live/grub/grub.conf and append intel_iommu=onto the end of the kernel /vmlinuz line.
Remount the boot image with read-only permission:
# mount -o ro,remount LABEL=Root /dev/.initramfs/live
B. For AMD:
Appendix G. Configuring a Hypervisor Host for PCI Passthrough
113

For Red Hat Enterprise Linux hosts, boot the machine, and append amd_iommu=on to the endof the GRUB_CMDLINE_LINUX line in the grub configuration file.
# vi /etc/default/grub...GRUB_CMDLINE_LINUX="nofb splash=quiet console=tty0 ... amd_iommu=on...
For RHEV-H, boot the machine, and press F2 to enter rescue mode.
Remount the boot image with read and write permissions:
# mount -o rw,remount LABEL=Root /dev/.initramfs/live
Edit /dev/.initramfs/live/grub/grub.conf and append amd_iommu=on tothe end of the kernel /vmlinuz line.
Remount the boot image with read-only permission:
# mount -o ro,remount LABEL=Root /dev/.initramfs/live
Note
If intel_iommu=on or amd_iommu=on works, you can try replacing them with intel_iommu=pt or amd_iommu=pt. The pt option only enables IOMMU for devices usedin passthrough and will provide better host performance. However, the option may not besupported on all hardware. Revert to previous option if the pt option doesn't work for yourhost.
If the passthrough fails because the hardware does not support interrupt remapping, you canconsider enabling the allow_unsafe_interrupts option if the virtual machines aretrusted. The allow_unsafe_interrupts is not enabled by default because enabling itpotentially exposes the host to MSI attacks from virtual machines. To enable the option:
# vi /etc/modprobe.doptions vfio_iommu_type1 allow_unsafe_interrupts=1
For RHEV-H, also run persist /etc/modprobe.d so the file change persists over systemreboots.
3. Refresh the grub.cfg file and reboot the host for these changes to take effect:
# grub2-mkconfig -o /boot/grub2/grub.cfg
# reboot
4. Run cat /proc/cmdline to verify the changes. Your system is now capable of PCI devicepassthrough and assignment.
Installation Guide
114

For GPU passthrough, you need to run additional configuration steps on both the host and the guest system.See Preparing Host and Guest Systems for GPU Passthrough in the Administration Guide for moreinformation.
For enabling SR-IOV and assigning dedicated virtual NICs to virtual machines, seehttps://access.redhat.com/articles/2335291 for more information.
Appendix G. Configuring a Hypervisor Host for PCI Passthrough
115

Appendix H. Revision History
Revision 3.6-20 Thu 27 Oct 2016 Red Hat Enterprise VirtualizationDocumentation Team
BZ#1389135 - Added a warning about the security risks of untrusted users on RHEV-H.
Revision 3.6-19 Fri 07 Oct 2016 Red Hat Enterprise VirtualizationDocumentation Team
BZ#1331634 - Updated browser and client requirements.
Revision 3.6-18 Mon 22 Aug 2016 Red Hat Enterprise VirtualizationDocumentation Team
BZ#1322343 - Added more information on direct device assigment.
Revision 3.6-17 Wed 27 Jul 2016 Red Hat Enterprise VirtualizationDocumentation Team
BZ#1353824 - Updated the Manager OS requirements to 6.6 or later versions of Red Hat Enterprise Linux 6.BZ#1359544 - Updated the links to the Storage Administration Guide and DM Multipath Guide.
Revision 3.6-16 Wed 29 Jun 2016 Red Hat Enterprise VirtualizationDocumentation Team
BZ#1276197 - Added a link to the RHEL7 tuned profiles.BZ#1335315 - Added a note on the importance of synchronizing system clocks.
Revision 3.6-15 Wed 25 May 2016 Red Hat Enterprise VirtualizationDocumentation Team
BZ#1241041 - Added an admonition about how to prevent RHEV-H reinstallation errors on a multipathediSCSI machine.
Revision 3.6-14 Mon 18 Apr 2016 Red Hat Enterprise VirtualizationDocumentation Team
BZ#1259625 - Added an admonition about third-party watchdogs.BZ#1302066 - Added a note and updated the command to initialize a remote PostgreSQL database.
Revision 3.6-13 Mon 14 Mar 2016 Red Hat Enterprise VirtualizationDocumentation Team
BZ#1121840 - Added instructions for installing the websocket proxy on a separate machine.BZ#1309766 - Clarified a confusing section title.
Revision 3.6-12 Wed 09 Mar 2016 Red Hat Enterprise VirtualizationDocumentation Team
Updated the subscriptions topic for Red Hat Enterprise Linux hosts so that it is clear that Red Hat EnterpriseLinux 7 should be used.
Revision 3.6-11 Mon 22 Feb 2016 Red Hat Enterprise VirtualizationDocumentation Team
Initial revision for Red Hat Enterprise Virtualization 3.6 general availability.
Revision 3.6-10 Fri 19 Feb 2016 Red Hat Enterprise VirtualizationDocumentation Team
BZ#1299326 - Updated the output of engine-setup.
Installation Guide
116
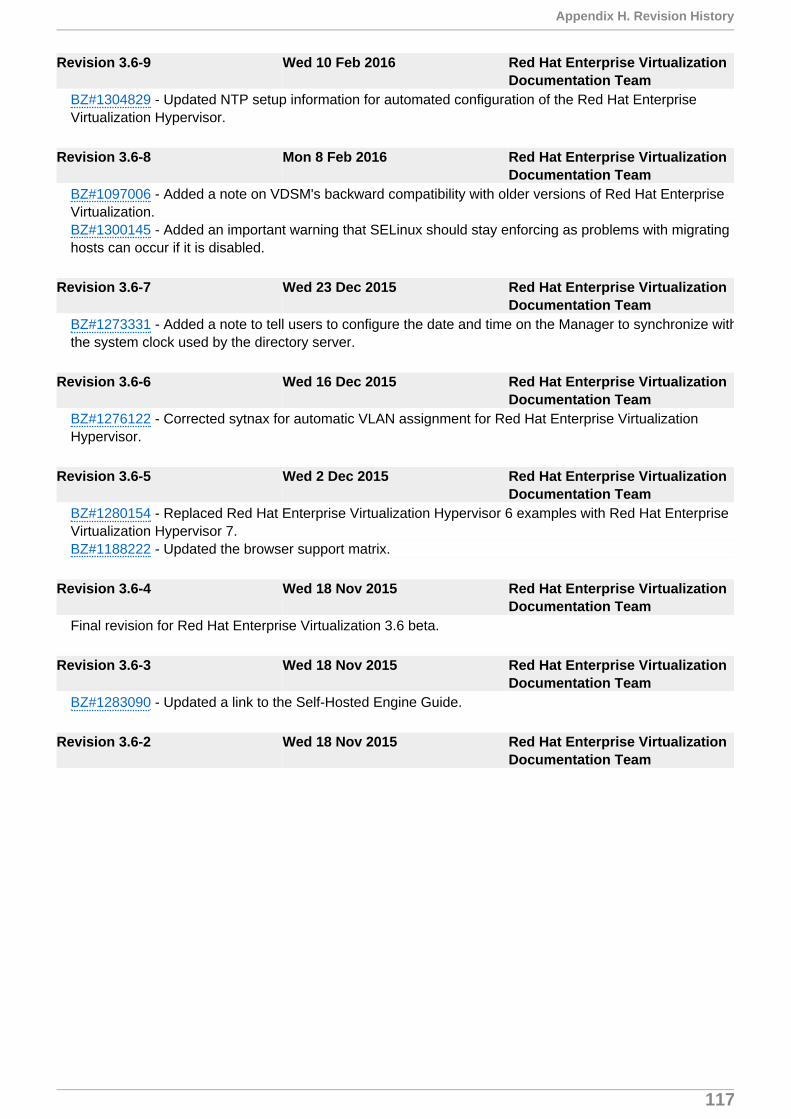
Revision 3.6-9 Wed 10 Feb 2016 Red Hat Enterprise VirtualizationDocumentation Team
BZ#1304829 - Updated NTP setup information for automated configuration of the Red Hat EnterpriseVirtualization Hypervisor.
Revision 3.6-8 Mon 8 Feb 2016 Red Hat Enterprise VirtualizationDocumentation Team
BZ#1097006 - Added a note on VDSM's backward compatibility with older versions of Red Hat EnterpriseVirtualization.BZ#1300145 - Added an important warning that SELinux should stay enforcing as problems with migratinghosts can occur if it is disabled.
Revision 3.6-7 Wed 23 Dec 2015 Red Hat Enterprise VirtualizationDocumentation Team
BZ#1273331 - Added a note to tell users to configure the date and time on the Manager to synchronize withthe system clock used by the directory server.
Revision 3.6-6 Wed 16 Dec 2015 Red Hat Enterprise VirtualizationDocumentation Team
BZ#1276122 - Corrected sytnax for automatic VLAN assignment for Red Hat Enterprise VirtualizationHypervisor.
Revision 3.6-5 Wed 2 Dec 2015 Red Hat Enterprise VirtualizationDocumentation Team
BZ#1280154 - Replaced Red Hat Enterprise Virtualization Hypervisor 6 examples with Red Hat EnterpriseVirtualization Hypervisor 7.BZ#1188222 - Updated the browser support matrix.
Revision 3.6-4 Wed 18 Nov 2015 Red Hat Enterprise VirtualizationDocumentation Team
Final revision for Red Hat Enterprise Virtualization 3.6 beta.
Revision 3.6-3 Wed 18 Nov 2015 Red Hat Enterprise VirtualizationDocumentation Team
BZ#1283090 - Updated a link to the Self-Hosted Engine Guide.
Revision 3.6-2 Wed 18 Nov 2015 Red Hat Enterprise VirtualizationDocumentation Team
Appendix H. Revision History
117

BZ#1280148 - Updated Data Partition minimum storage requirements for RHEV-H 7, and 60GB if using theengine appliance.BZ#1247509 - Updated the content for configuring networking on a Hypervisor.BZ#1224935 - Updated the procedure for configuring an offline repository.BZ#1249163 - Added the word optional to the SNMP and CIM port descriptions.BZ#1273715 - Removed documentation for an unsupported feature.BZ#1270140 - Removed duplicate networking content.BZ#1281396 - Updated the Satellite CA URL example for registering a hypervisor.BZ#1281392 - Updated the Subscription Asset Manager CA URL example for registering a Hypervisor.BZ#1281402 - Removed the RHEV-M Fingerprint screen step from the Connecting the Hypervisor to the RedHat Enterprise Virtualization Manager section.BZ#1281400 - Removed the word 'Optionally' from the Registering the Hypervisor section for the Satelliteoption.BZ#1281642 - Added a step to disable all repositories after attaching to a pool id.BZ#1281399 - Updated vlan=vlan-id to vlan=vlan-id:nic-name.BZ#1281367 - Updated the bond setup example in Network Parameters.BZ#1281387 - Added 'Auto' to the IPv6 option of the Configuring Networking on the Hypervisor section.BZ#1255222 - Added firewall ports for serial console access.BZ#1280152 - Updated the Red Hat Enterpriser Virtualization Hypervisor installation screenshot.BZ#1280156 - Updated the storage requirements for Red Hat Enterprise Virtualization Hypervisors.
Revision 3.6-1 Fri 10 Jul 2015 Red Hat Enterprise VirtualizationDocumentation Team
Initial creation for the Red Hat Enterprise Virtualization 3.6 release.
Installation Guide
118