red hat network satellite 5 · chapter 2. client applications in order to utilize most...
TRANSCRIPT
Red Hat Network Satellite 5.5
Client Configuration Guide
Red Hat Network SatelliteEdition 3
Last Updated: 2017-09-26

Red Hat Network Satellite 5.5 Client Configuration Guide
Red Hat Network SatelliteEdition 3

Legal Notice
Copyright © 2010 Red Hat, Inc.
This document is licensed by Red Hat under the Creative Commons Attribution-ShareAlike 3.0Unported License. If you distribute this document, or a modified version of it, you must provideattribution to Red Hat, Inc. and provide a link to the original. If the document is modified, all Red Hattrademarks must be removed.
Red Hat, as the licensor of this document, waives the right to enforce, and agrees not to assert,Section 4d of CC-BY-SA to the fullest extent permitted by applicable law.
Red Hat, Red Hat Enterprise Linux, the Shadowman logo, JBoss, OpenShift, Fedora, the Infinitylogo, and RHCE are trademarks of Red Hat, Inc., registered in the United States and othercountries.
Linux ® is the registered trademark of Linus Torvalds in the United States and other countries.
Java ® is a registered trademark of Oracle and/or its affiliates.
XFS ® is a trademark of Silicon Graphics International Corp. or its subsidiaries in the United Statesand/or other countries.
MySQL ® is a registered trademark of MySQL AB in the United States, the European Union andother countries.
Node.js ® is an official trademark of Joyent. Red Hat Software Collections is not formally related toor endorsed by the official Joyent Node.js open source or commercial project.
The OpenStack ® Word Mark and OpenStack logo are either registered trademarks/service marksor trademarks/service marks of the OpenStack Foundation, in the United States and other countriesand are used with the OpenStack Foundation's permission. We are not affiliated with, endorsed orsponsored by the OpenStack Foundation, or the OpenStack community.
All other trademarks are the property of their respective owners.
Abstract
Welcome to the Red Hat Network Satellite Client Configuration Guide.

. . . . . . . . . . . . . . . . . . . . . . . . . . . . . . . . . . . . . . . . . . . . . . . . . . . . . . . . . . . . . . . . . . . . . . . . . . . . . . . . . . . . . . . . . . . . . . . . . . . . . . . . . . . . . . . . . . . . . . . . . . . . . . . . . . . . . . . . . . . . . . . . . . . . . . . . . . . . . . . . . . . . . . . . . . . . . . . . . . . . . . . . . . . . . . . . . . . . . . . . . . . . . . . . . . . . . . . . . . . . . . . . . . . . . . . . . . . . . . . . . . . . . . . . . . . . . . . . . . . . . . . . . . . . . . . . . . . . . . . .
. . . . . . . . . . . . . . . . . . . . . . . . . . . . . . . . . . . . . . . . . . . . . . . . . . . . . . . . . . . . . . . . . . . . . . . . . . . . . . . . . . . . . . . . . . . . . . . . . . . . . . . . . . . . . . . . . . . . . . . . . . . . . . . . . . . . . . . . . . . . . . . . . . . . . . . . . . . . . . . . . . . . . . . . . . . . . . . . . . . . . . . . . . . . . . . . . . . . . . . . . . . . . . . . . . . . . . . . . . . . . . . . . . . . . . . . . . . . . . . . . . . . . . . . . . . . . . . . . . . . . . . . . . . . . . . . . . . . . . . .
. . . . . . . . . . . . . . . . . . . . . . . . . . . . . . . . . . . . . . . . . . . . . . . . . . . . . . . . . . . . . . . . . . . . . . . . . . . . . . . . . . . . . . . . . . . . . . . . . . . . . . . . . . . . . . . . . . . . . . . . . . . . . . . . . . . . . . . . . . . . . . . . . . . . . . . . . . . . . . . . . . . . . . . . . . . . . . . . . . . . . . . . . . . . . . . . . . . . . . . . . . . . . . . . . . . . . . . . . . . . . . . . . . . . . . . . . . . . . . . . . . . . . . . . . . . . . . . . . . . . . . . . . . . . . . . . . . . . . . . .
. . . . . . . . . . . . . . . . . . . . . . . . . . . . . . . . . . . . . . . . . . . . . . . . . . . . . . . . . . . . . . . . . . . . . . . . . . . . . . . . . . . . . . . . . . . . . . . . . . . . . . . . . . . . . . . . . . . . . . . . . . . . . . . . . . . . . . . . . . . . . . . . . . . . . . . . . . . . . . . . . . . . . . . . . . . . . . . . . . . . . . . . . . . . . . . . . . . . . . . . . . . . . . . . . . . . . . . . . . . . . . . . . . . . . . . . . . . . . . . . . . . . . . . . . . . . . . . . . . . . . . . . . . . . . . . . . . . . . . . .
. . . . . . . . . . . . . . . . . . . . . . . . . . . . . . . . . . . . . . . . . . . . . . . . . . . . . . . . . . . . . . . . . . . . . . . . . . . . . . . . . . . . . . . . . . . . . . . . . . . . . . . . . . . . . . . . . . . . . . . . . . . . . . . . . . . . . . . . . . . . . . . . . . . . . . . . . . . . . . . . . . . . . . . . . . . . . . . . . . . . . . . . . . . . . . . . . . . . . . . . . . . . . . . . . . . . . . . . . . . . . . . . . . . . . . . . . . . . . . . . . . . . . . . . . . . . . . . . . . . . . . . . . . . . . . . . . . . . . . . .
. . . . . . . . . . . . . . . . . . . . . . . . . . . . . . . . . . . . . . . . . . . . . . . . . . . . . . . . . . . . . . . . . . . . . . . . . . . . . . . . . . . . . . . . . . . . . . . . . . . . . . . . . . . . . . . . . . . . . . . . . . . . . . . . . . . . . . . . . . . . . . . . . . . . . . . . . . . . . . . . . . . . . . . . . . . . . . . . . . . . . . . . . . . . . . . . . . . . . . . . . . . . . . . . . . . . . . . . . . . . . . . . . . . . . . . . . . . . . . . . . . . . . . . . . . . . . . . . . . . . . . . . . . . . . . . . . . . . . . . .
. . . . . . . . . . . . . . . . . . . . . . . . . . . . . . . . . . . . . . . . . . . . . . . . . . . . . . . . . . . . . . . . . . . . . . . . . . . . . . . . . . . . . . . . . . . . . . . . . . . . . . . . . . . . . . . . . . . . . . . . . . . . . . . . . . . . . . . . . . . . . . . . . . . . . . . . . . . . . . . . . . . . . . . . . . . . . . . . . . . . . . . . . . . . . . . . . . . . . . . . . . . . . . . . . . . . . . . . . . . . . . . . . . . . . . . . . . . . . . . . . . . . . . . . . . . . . . . . . . . . . . . . . . . . . . . . . . . . . . . .
. . . . . . . . . . . . . . . . . . . . . . . . . . . . . . . . . . . . . . . . . . . . . . . . . . . . . . . . . . . . . . . . . . . . . . . . . . . . . . . . . . . . . . . . . . . . . . . . . . . . . . . . . . . . . . . . . . . . . . . . . . . . . . . . . . . . . . . . . . . . . . . . . . . . . . . . . . . . . . . . . . . . . . . . . . . . . . . . . . . . . . . . . . . . . . . . . . . . . . . . . . . . . . . . . . . . . . . . . . . . . . . . . . . . . . . . . . . . . . . . . . . . . . . . . . . . . . . . . . . . . . . . . . . . . . . . . . . . . . . .
. . . . . . . . . . . . . . . . . . . . . . . . . . . . . . . . . . . . . . . . . . . . . . . . . . . . . . . . . . . . . . . . . . . . . . . . . . . . . . . . . . . . . . . . . . . . . . . . . . . . . . . . . . . . . . . . . . . . . . . . . . . . . . . . . . . . . . . . . . . . . . . . . . . . . . . . . . . . . . . . . . . . . . . . . . . . . . . . . . . . . . . . . . . . . . . . . . . . . . . . . . . . . . . . . . . . . . . . . . . . . . . . . . . . . . . . . . . . . . . . . . . . . . . . . . . . . . . . . . . . . . . . . . . . . . . . . . . . . . . .
. . . . . . . . . . . . . . . . . . . . . . . . . . . . . . . . . . . . . . . . . . . . . . . . . . . . . . . . . . . . . . . . . . . . . . . . . . . . . . . . . . . . . . . . . . . . . . . . . . . . . . . . . . . . . . . . . . . . . . . . . . . . . . . . . . . . . . . . . . . . . . . . . . . . . . . . . . . . . . . . . . . . . . . . . . . . . . . . . . . . . . . . . . . . . . . . . . . . . . . . . . . . . . . . . . . . . . . . . . . . . . . . . . . . . . . . . . . . . . . . . . . . . . . . . . . . . . . . . . . . . . . . . . . . . . . . . . . . . . . .
Table of Contents
CHAPTER 1. INTRODUCTION
CHAPTER 2. CLIENT APPLICATIONS2.1. DEPLOYING THE LATEST RED HAT NETWORK CLIENT RPMS2.2. CONFIGURING THE CLIENT APPLICATIONS
2.2.1. Registering Clients to Red Hat Network RHN Satellite Server2.2.2. Registering with Activation Keys2.2.3. The up2date --configure Option2.2.4. Updating the Configuration Files Manually2.2.5. Implementing Server Failover
2.3. THE PACKAGE UPDATER APPLET
CHAPTER 3. SSL INFRASTRUCTURE3.1. A BRIEF INTRODUCTION TO SSL3.2. THE RHN SSL MAINTENANCE TOOL
3.2.1. Generating SSL Certificates3.2.2. RHN SSL Maintenance Tool Options3.2.3. Generating the Certificate Authority SSL Key Pair3.2.4. Generating Web Server SSL Key Sets
3.3. DEPLOYING THE CA SSL PUBLIC CERTIFICATE TO CLIENTS3.4. CONFIGURING CLIENT SYSTEMS
CHAPTER 4. IMPORTING CUSTOM GPG KEYS
CHAPTER 5. USING RHN BOOTSTRAP5.1. PREPARING FOR RHN BOOTSTRAP INSTALLATION5.2. GENERATING RHN BOOTSTRAP SCRIPTS5.3. USING THE RHN BOOTSTRAP SCRIPT5.4. CONFIGURING RHN BOOTSTRAP OPTIONS
CHAPTER 6. MANUALLY SCRIPTING THE RHN BOOTSTRAP CONFIGURATION
CHAPTER 7. IMPLEMENTING KICKSTART
APPENDIX A. SAMPLE BOOTSTRAP SCRIPT
APPENDIX B. REVISION HISTORY
INDEX
3
445556788
101011121216171818
20
2121222223
26
28
30
35
36
Table of Contents
1

Client Configuration Guide
2

CHAPTER 1. INTRODUCTIONThis best practices guide is intended to help customers of RHN Satellite Server and RHN Proxy Serverconfigure their client systems.
By default, all Red Hat Network client applications are configured to communicate with central Red HatNetwork Servers. When clients connect to the RHN Satellite Server or RHN Proxy server instead, thedefault settings change. This document is intended to assist by offering mass reconfiguration stepswhich will help large enterprise environments, containing hundreds or thousands of systems, address thedefault setting changes.
Due to the complexity of this undertaking, customers may utilize a pre-populated script that automatesmany of the tasks necessary to access their Satellite or Proxy server; refer to Chapter 5, Using RHNBootstrap for details. Red Hat believes that understanding the implications of these changes is helpfuland therefore describes the manual steps for reconfiguration in the opening chapters. Use your bestjudgement in determining the ideal solution for your organization.
Although many of the commands provided within this guide can be applied as they appear, it isimpossible to predict all potential network configurations adopted by customers. Therefore, Red Hatencourages you to use these commands as references that must take into account your organization'sindividual settings.
NOTE
Unix client configuration information may be found in the RHN Satellite Server ReferenceGuide in the Unix Support chapter.
CHAPTER 1. INTRODUCTION
3
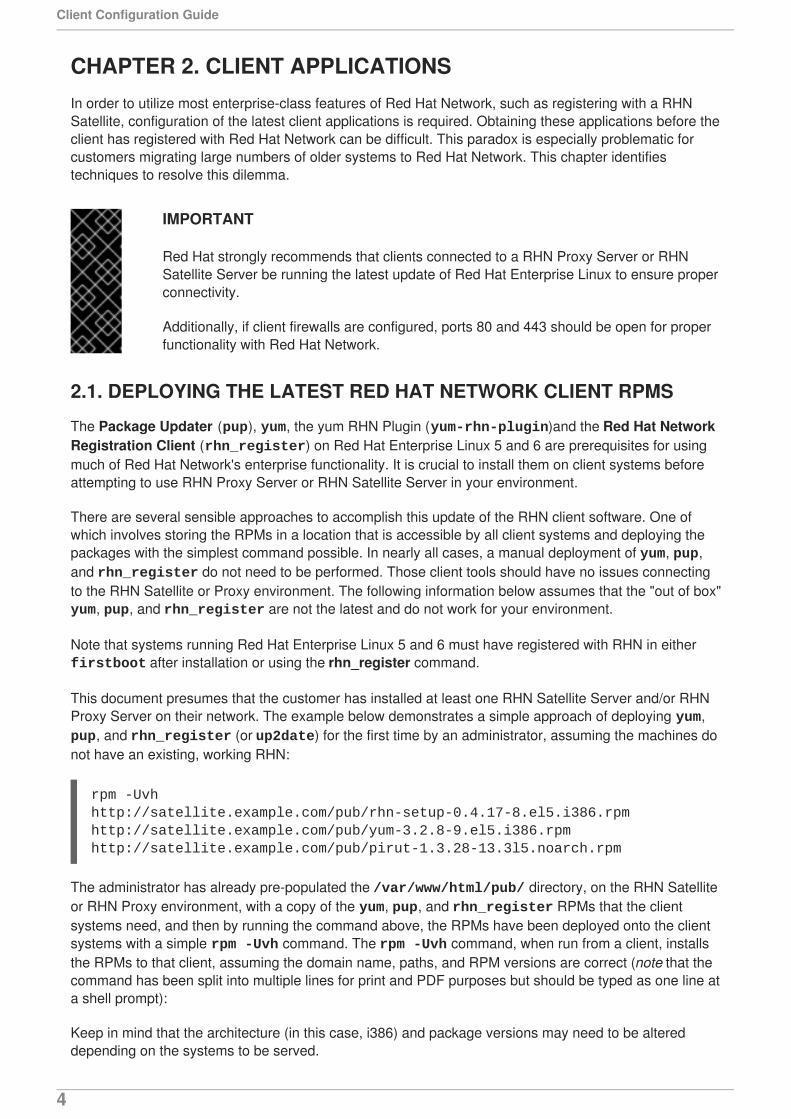
CHAPTER 2. CLIENT APPLICATIONSIn order to utilize most enterprise-class features of Red Hat Network, such as registering with a RHNSatellite, configuration of the latest client applications is required. Obtaining these applications before theclient has registered with Red Hat Network can be difficult. This paradox is especially problematic forcustomers migrating large numbers of older systems to Red Hat Network. This chapter identifiestechniques to resolve this dilemma.
IMPORTANT
Red Hat strongly recommends that clients connected to a RHN Proxy Server or RHNSatellite Server be running the latest update of Red Hat Enterprise Linux to ensure properconnectivity.
Additionally, if client firewalls are configured, ports 80 and 443 should be open for properfunctionality with Red Hat Network.
2.1. DEPLOYING THE LATEST RED HAT NETWORK CLIENT RPMS
The Package Updater (pup), yum, the yum RHN Plugin (yum-rhn-plugin)and the Red Hat NetworkRegistration Client (rhn_register) on Red Hat Enterprise Linux 5 and 6 are prerequisites for usingmuch of Red Hat Network's enterprise functionality. It is crucial to install them on client systems beforeattempting to use RHN Proxy Server or RHN Satellite Server in your environment.
There are several sensible approaches to accomplish this update of the RHN client software. One ofwhich involves storing the RPMs in a location that is accessible by all client systems and deploying thepackages with the simplest command possible. In nearly all cases, a manual deployment of yum, pup,and rhn_register do not need to be performed. Those client tools should have no issues connectingto the RHN Satellite or Proxy environment. The following information below assumes that the "out of box"yum, pup, and rhn_register are not the latest and do not work for your environment.
Note that systems running Red Hat Enterprise Linux 5 and 6 must have registered with RHN in either firstboot after installation or using the rhn_register command.
This document presumes that the customer has installed at least one RHN Satellite Server and/or RHNProxy Server on their network. The example below demonstrates a simple approach of deploying yum, pup, and rhn_register (or up2date) for the first time by an administrator, assuming the machines donot have an existing, working RHN:
rpm -Uvhhttp://satellite.example.com/pub/rhn-setup-0.4.17-8.el5.i386.rpmhttp://satellite.example.com/pub/yum-3.2.8-9.el5.i386.rpmhttp://satellite.example.com/pub/pirut-1.3.28-13.3l5.noarch.rpm
The administrator has already pre-populated the /var/www/html/pub/ directory, on the RHN Satelliteor RHN Proxy environment, with a copy of the yum, pup, and rhn_register RPMs that the clientsystems need, and then by running the command above, the RPMs have been deployed onto the clientsystems with a simple rpm -Uvh command. The rpm -Uvh command, when run from a client, installsthe RPMs to that client, assuming the domain name, paths, and RPM versions are correct (note that thecommand has been split into multiple lines for print and PDF purposes but should be typed as one line ata shell prompt):
Keep in mind that the architecture (in this case, i386) and package versions may need to be altereddepending on the systems to be served.
Client Configuration Guide
4
2.2. CONFIGURING THE CLIENT APPLICATIONS
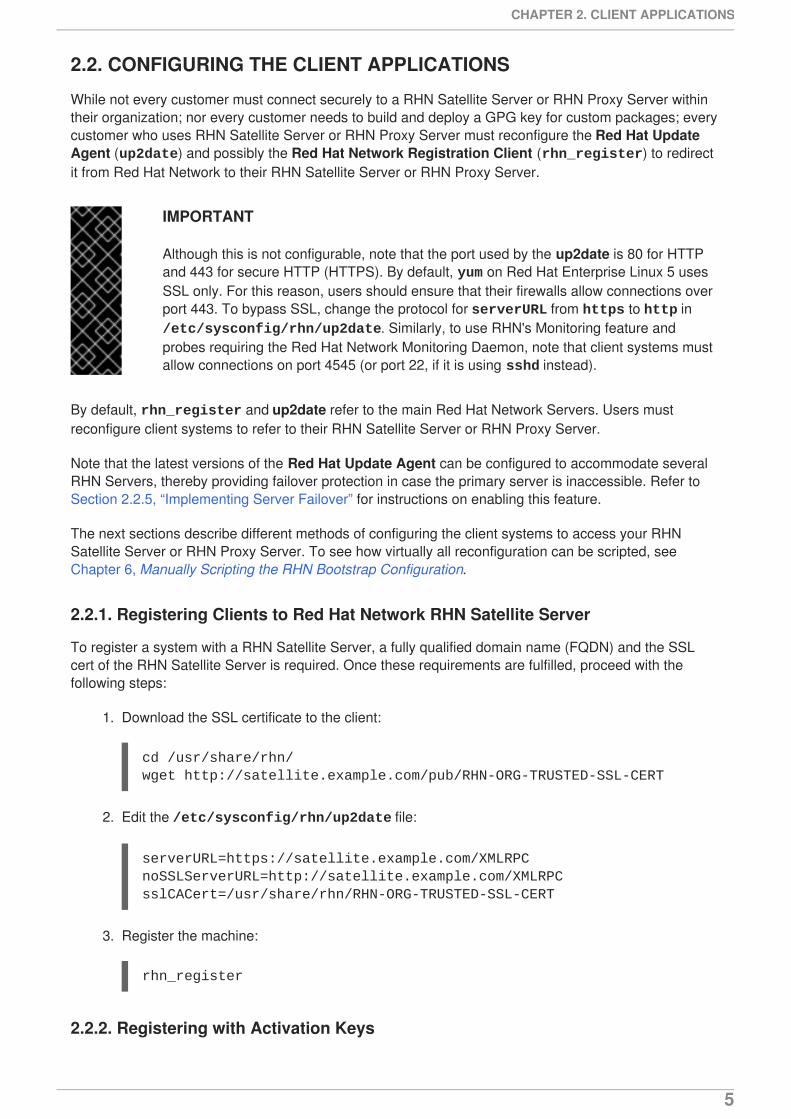
While not every customer must connect securely to a RHN Satellite Server or RHN Proxy Server withintheir organization; nor every customer needs to build and deploy a GPG key for custom packages; everycustomer who uses RHN Satellite Server or RHN Proxy Server must reconfigure the Red Hat UpdateAgent (up2date) and possibly the Red Hat Network Registration Client (rhn_register) to redirectit from Red Hat Network to their RHN Satellite Server or RHN Proxy Server.
IMPORTANT
Although this is not configurable, note that the port used by the up2date is 80 for HTTPand 443 for secure HTTP (HTTPS). By default, yum on Red Hat Enterprise Linux 5 usesSSL only. For this reason, users should ensure that their firewalls allow connections overport 443. To bypass SSL, change the protocol for serverURL from https to http in /etc/sysconfig/rhn/up2date. Similarly, to use RHN's Monitoring feature andprobes requiring the Red Hat Network Monitoring Daemon, note that client systems mustallow connections on port 4545 (or port 22, if it is using sshd instead).
By default, rhn_register and up2date refer to the main Red Hat Network Servers. Users mustreconfigure client systems to refer to their RHN Satellite Server or RHN Proxy Server.
Note that the latest versions of the Red Hat Update Agent can be configured to accommodate severalRHN Servers, thereby providing failover protection in case the primary server is inaccessible. Refer toSection 2.2.5, “Implementing Server Failover” for instructions on enabling this feature.
The next sections describe different methods of configuring the client systems to access your RHNSatellite Server or RHN Proxy Server. To see how virtually all reconfiguration can be scripted, seeChapter 6, Manually Scripting the RHN Bootstrap Configuration.
2.2.1. Registering Clients to Red Hat Network RHN Satellite Server
To register a system with a RHN Satellite Server, a fully qualified domain name (FQDN) and the SSLcert of the RHN Satellite Server is required. Once these requirements are fulfilled, proceed with thefollowing steps:
1. Download the SSL certificate to the client:
cd /usr/share/rhn/wget http://satellite.example.com/pub/RHN-ORG-TRUSTED-SSL-CERT
2. Edit the /etc/sysconfig/rhn/up2date file:
serverURL=https://satellite.example.com/XMLRPCnoSSLServerURL=http://satellite.example.com/XMLRPCsslCACert=/usr/share/rhn/RHN-ORG-TRUSTED-SSL-CERT
3. Register the machine:
rhn_register
2.2.2. Registering with Activation Keys
CHAPTER 2. CLIENT APPLICATIONS
5

Red Hat recommends using activation keys for registering and configuring client systems that accessRHN Proxy Server or RHN Satellite Server. Activation keys can be used to register, entitle, andsubscribe systems in a batch. Refer to the section "Activation Keys" in the RHN Satellite ServerReference Guide for more information on activation keys.
When registering with an activation key:
1. Generate an Activation Key. (Refer to the section "Activation Keys" in the RHN Satellite ServerReference Guide)
2. Import custom GPG keys.
3. Download and install the SSL Certificate RPM from the /pub/ directory of the RHN Proxy Serveror RHN Satellite Server. The command for this step could look something like this:
rpm -Uvh http://satellite.example.com/pub/rhn-org-trusted-ssl-cert-1.0-1.noarch.rpm
4. Register the system with the RHN Proxy Server or RHN Satellite Server::
rhnreg_ks --activationkey mykey --serverUrl https://satellite.example.com/XMLRPC
Alternatively, most of the above steps can be combined in a shell script that includes the following lines:
wget -0 - http://satellite.example.com/pub/bootstrap.sh | bash&& rhnreg_ks --activation-key my_key --serverUrlhttps://satellite.example.com/XMLRPC
Note that the command has been split into multiple lines for print and PDF purposes but should be typedas one line at a shell prompt.
The bootstrap script, generated at installation and available for both RHN Satellite Server and RHNProxy Server, is such a script. The script and the RHN Bootstrap that generates it are discussed in detailin Chapter 5, Using RHN Bootstrap.
2.2.3. The up2date --configure Option
The Red Hat Update Agent in Red Hat Enterprise Linux 3 and 4 provides an interface for configuringvarious settings. For full listings of these settings, refer to the up2date manual page (man up2date ata command line).
To reconfigure the Red Hat Update Agent, issue the following command as root:
up2date --configure
A dialogue box offering various settings that can be reconfigured will appear.In the General tab, under Select a Red Hat Network Server to use replace the default value with the fully qualifieddomain name (FQDN) of the RHN Satellite Server or RHN Proxy Server, such as https://satellite.example.com/XMLRPC. Retain the /XMLRPC at the end. When finished, click OK.
Client Configuration Guide
6
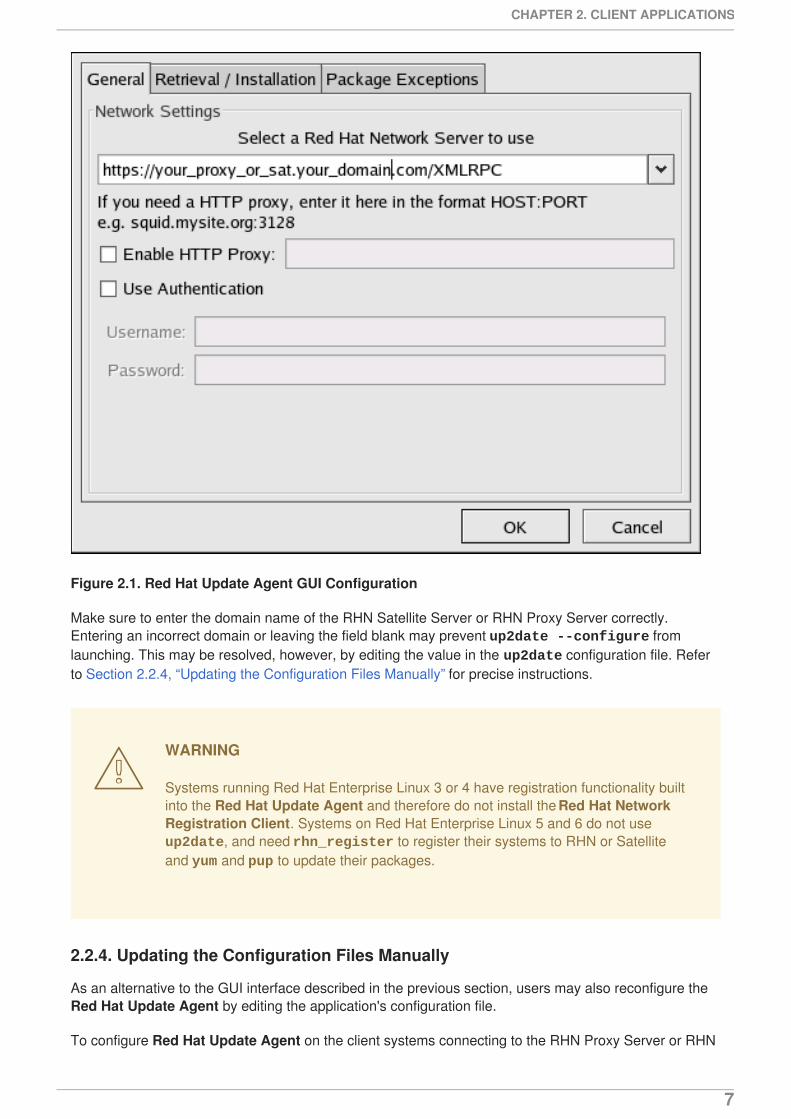
Figure 2.1. Red Hat Update Agent GUI Configuration
Make sure to enter the domain name of the RHN Satellite Server or RHN Proxy Server correctly.Entering an incorrect domain or leaving the field blank may prevent up2date --configure fromlaunching. This may be resolved, however, by editing the value in the up2date configuration file. Referto Section 2.2.4, “Updating the Configuration Files Manually” for precise instructions.
WARNING
Systems running Red Hat Enterprise Linux 3 or 4 have registration functionality builtinto the Red Hat Update Agent and therefore do not install the Red Hat NetworkRegistration Client. Systems on Red Hat Enterprise Linux 5 and 6 do not use up2date, and need rhn_register to register their systems to RHN or Satelliteand yum and pup to update their packages.
2.2.4. Updating the Configuration Files Manually
As an alternative to the GUI interface described in the previous section, users may also reconfigure theRed Hat Update Agent by editing the application's configuration file.
To configure Red Hat Update Agent on the client systems connecting to the RHN Proxy Server or RHN
CHAPTER 2. CLIENT APPLICATIONS
7
Satellite Server, edit the values of the serverURL and noSSLServerURL settings in the /etc/sysconfig/rhn/up2date configuration file (as root). Replace the default Red Hat Network URLwith the fully qualified domain name (FQDN) for the RHN Proxy Server or RHN Satellite Server. Forexample:
serverURL[comment]=Remote server URLserverURL=https://your_primary.your_domain.com/XMLRPC
noSSLServerURL[comment]=Remote server URL without SSLnoSSLServerURL=http://your_primary.your_domain.com/XMLRPC
WARNING
The httpProxy setting in /etc/sysconfig/rhn/up2date does not refer to theRHN Proxy Server. It is used to configure an optional HTTP proxy for the client. Withan RHN Proxy Server in place, the httpProxy setting must be blank (not set to anyvalue).
2.2.5. Implementing Server Failover
Beginning with up2date-4.2.38, the Red Hat Update Agent can be configured to seek updates froma series of RHN Servers. This can be especially helpful in sustaining constant updates if the primaryRHN Proxy Server or RHN Satellite Server may be taken offline.
To use this feature:
1. Ensure that you are running the required version or newer of up2date as well as running RedHat Enterprise Linux 5 or 6.
2. Manually add the secondary servers to the serverURL and noSSLServerURL settings in the /etc/sysconfig/rhn/up2date configuration file (as root).
3. Add the fully qualified domain names (FQDN) for the Proxy or Satellite immediately after theprimary server, separated by a semicolon (;). For example:
serverURL[comment]=Remote server URLserverURL=https://satellite.example.com/XMLRPC; https://your_secondary.your_domain.com/XMLRPC;
noSSLServerURL[comment]=Remote server URL without SSLnoSSLServerURL=http://satellite.example.com/XMLRPC; http://your_secondary.your_domain.com/XMLRPC;
Connection to the servers is attempted in the order provided here. Include as many servers asnecessary.
2.3. THE PACKAGE UPDATER APPLET
Client Configuration Guide
8
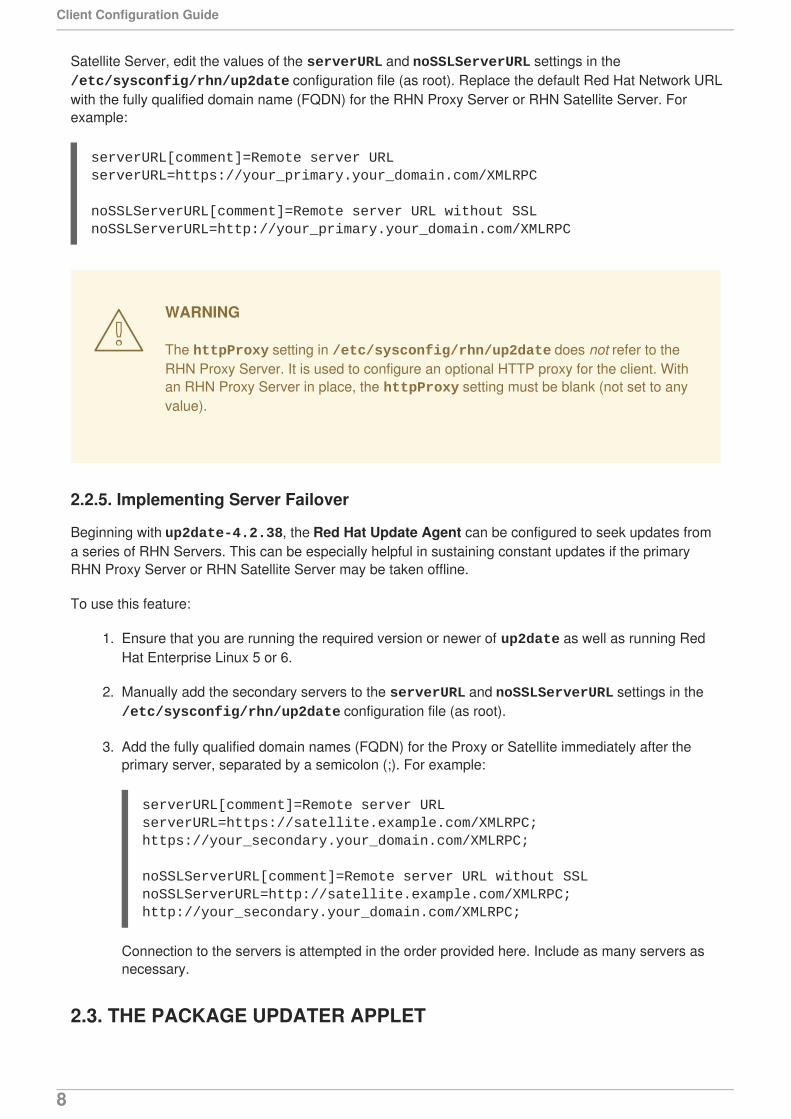
Red Hat Enterprise Linux 5 features a running program on the graphical desktop panel that periodicallychecks for updates from the RHN or Satellite server and will alert users when a new update is available.
Figure 2.2. Package Updater Applet
The Package Updater Applet stays in the notification tray of the desktop panel and checks for newupdates periodically. The applet also allows users to perform a few package maintenance tasks from theapplet by clicking the notification icon and choosing from the following actions:
Refresh — Check RHN or the Satellite for new updates
View Updates — launches the Package Updater application so users can see any availableupdates in more detail and configure the updates to specifications.
Apply Updates — Download and Install all updated packages.
Quit — close the applet
CHAPTER 2. CLIENT APPLICATIONS
9
CHAPTER 3. SSL INFRASTRUCTUREFor Red Hat Network customers, security concerns are of the utmost importance. One of the strengths ofRed Hat Network is its ability to process every single request over Secure Sockets Layer, or SSL. Tomaintain this level of security, customers installing Red Hat Network within their infrastructures mustgenerate custom SSL keys and certificates.
Manual creation and deployment of SSL keys and certificates can be quite involved. Both the RHN ProxyServer and the RHN Satellite Server allows users to build their own SSL keys and certificates based ontheir own private Certificate Authority (CA) during installation. In addition, a separate command lineutility, the RHN SSL Maintenance Tool, exists for this purpose. Regardless, these keys and certificatesmust then be deployed to all systems within the managed infrastructure. In many cases, deployment ofthese SSL keys and certificates is automated. This chapter describes efficient methods for conducting allof these tasks.
Please note that this chapter does not explain SSL in depth. The RHN SSL Maintenance Tool wasdesigned to hide much of the complexity involved in setting up and maintaining this public-keyinfrastructure (PKI). For more information, please consult some of the many good references available atyour nearest bookstore.
3.1. A BRIEF INTRODUCTION TO SSL
SSL, or Secure Sockets Layer, is a protocol that enables client-server applications to pass informationsecurely. SSL uses a system of public and private key pairs to encrypt communication passed betweenclients and servers. Public certificates can be left accessible, while private keys must be secured. It's themathematical relationship (a digital signature) between a private key and its paired public certificate thatmakes this system work. Through this relationship, a connection of trust is established.
NOTE
SSL private keys and public certificates will be discussed throughout this document. Bothcan be referred to as keys, one public and one private. However, when discussing SSL, itis the convention to refer to the public half of an SSL key pair (or key set) as the SSLpublic certificate.
An organization's SSL infrastructure is generally made up of these SSL keys and certificates:
Certificate Authority (CA) SSL private key and public certificate — only one set per organizationgenerally generated. The public certificate is digitally signed by its private key. The publiccertificate is distributed to every system.
Web server SSL private key and public certificate — one set per application server. The publiccertificate is digitally signed by both its private key and the CA SSL private key. It is oftenreferred to as a Web server's key set; this is because there is an intermediary SSL certificaterequest that is generated. The details of what this is used for are not important to this discussion.All three are deployed to an RHN Server.
The following is a scenario to help visualize the concept: An organization with one RHN Satellite Serverand five RHN Proxy Servers will need to generate one CA SSL key pair and six Web server SSL keysets. A CA SSL public certificate is distributed to all systems and used by all clients to establish aconnection to their respective upstream servers. Each server has its own SSL key set that is specificallytied to that server's hostname and generated using its own SSL private key and the CA SSL private keyin combination. This establishes a digitally verifiable association between the Web server's SSL publiccertificate and the CA SSL key pair and server's private key. The Web server's key set cannot be sharedwith other web servers.
Client Configuration Guide
10

IMPORTANT
The most critical portion of this system is the CA SSL key pair. From that private key andpublic certificate an administrator can regenerate any Web server's SSL key set. This CASSL key pair must be secured. It is highly recommended that once the entire RHNinfrastructure of servers is set up and running, archive the SSL build directory generatedby this tool and/or the installers onto separate media, write down the CA password, andsecure the media and password in a safe place.
3.2. THE RHN SSL MAINTENANCE TOOL
Red Hat Network provides a command line tool to ease the management of the organization' s secureinfrastructure: the RHN SSL Tool, commonly known by its command rhn-ssl-tool. This tool isavailable as part of the spacewalk-certs-tools package. This package can be found within thesoftware channels for the latest RHN Proxy Server and RHN Satellite Server (as well as the RHNSatellite Server ISO). The RHN SSL Tool enables organizations to generate their own CertificateAuthority SSL key pair, as well as Web server SSL key sets (sometimes called key pairs).
This tool is only a build tool. It generates all of the SSL keys and certificates that are required. It alsopackages the files in RPM format for quick distribution and installation on all client machines. It does notdeploy them. That is left to the administrator, or in many cases, automated by the RHN Satellite Server.
NOTE
The spacewalk-certs-tools, which contains rhn-ssl-tool, can be installed andrun on any current Red Hat Enterprise Linux system with minimal requirements. This isoffered as a convenience for administrators who wish to manage their SSL infrastructurefrom their workstation or another system other than their RHN Server(s).
Here are the cases in which the tool is required:
When updating the Certificate Authority (CA) public certificate
When installing an RHN Proxy Server version 3.6 or later that connects to the central RHNServers as its top-level service - the hosted service, for security reasons, cannot be a repositoryfor the CA SSL key and certificate, which is private to the organization.
When reconfiguring the RHN infrastructure to use SSL where it previously did not.
When adding multiple RHN Satellite Servers to the RHN infrastructure - consult with a Red Hatrepresentative for instructions regarding this.
Here are the cases in which the tool is not required:
During installation of an RHN Satellite Server - all SSL settings are configured during theinstallation process. The SSL keys and certificate are built and deployed automatically.
During installation of an RHN Proxy Server version 3.6 or later if connected to an RHN SatelliteServer version 3.6 or later as its top-level service - the RHN Satellite Server contains all of theSSL information needed to configure, build and deploy the RHN Proxy Server's SSL keys andcertificates.
The installation procedures of both the RHN Satellite Server and the RHN Proxy Server ensure the CASSL public certificate is deployed to the /pub directory of each server. This public certificate is used bythe client systems to connect to the RHN Server. Refer to Section 3.3, “Deploying the CA SSL Public
CHAPTER 3. SSL INFRASTRUCTURE
11

Certificate to Clients” for more information.
In short, if the organization's RHN infrastructure deploys the latest version of RHN Satellite Server as itstop-level service, there should be little need to use the tool.
3.2.1. Generating SSL Certificates
The primary benefits of using the RHN SSL Maintenance Tool are security, flexibility, and portability.Security is achieved through the creation of distinct Web server SSL keys and certificates for each RHNserver, all signed by a single Certificate Authority SSL key pair created by the organization. Flexibility issupplied by the tool's ability to work on any machine that has the spacewalk-certs-tools packageinstalled. Portability exists in a build structure that can be stored anywhere for safe keeping and theninstalled whenever the need arises.
Again, if the organization infrastructure's top-level RHN Server is the most current RHN Satellite Server,the most that may be required is to restore the ssl-build tree from an archive to the /root directoryand utilize the configuration tools provided within the RHN Satellite Server's website.
To make the best use of the RHN SSL Maintenance Tool, complete the following high-level tasks inroughly this order. Refer to the remaining sections for the required details:
1. Install the spacewalk-certs-tools package on a system within the organization, perhapsbut not necessarily the RHN Satellite Server or RHN Proxy Server.
2. Create a single Certificate Authority SSL key pair for the organization and install the resultingRPM or public certificate on all client systems. Refer to Section 3.2.3, “Generating the CertificateAuthority SSL Key Pair” for more information.
3. Create a Web server SSL key set for each of the Proxies and Satellites to be deployed andinstall the resulting RPMs on the RHN Servers
4. Restart the httpd service:
/sbin/service httpd restart
5. Back up the SSL build tree - consisting of the primary build directory and all subdirectories andfiles - to removable media, such as a CD or DVD. (Disk space requirements are insignificant.)
6. Verify and then store that archive in a safe location, such as the one described for backups in theAdditional Requirements sections of either the Proxy or Satellite installation guide.
7. Record and secure the CA password for future use.
8. Delete the build tree from the build system for security purposes, but only once the entire RHNinfrastructure is in place and configured.
NOTE
When additional Web server SSL key sets are needed, restore the build tree on asystem running the RHN SSL Maintenance Tool and repeat steps 3 through 7.
3.2.2. RHN SSL Maintenance Tool Options
The RHN SSL Maintenance Tool offers a multitude of command line options for generating CertificateAuthority SSL key pair and managing your server SSL certificates and keys. The tool offers essentially
Client Configuration Guide
12
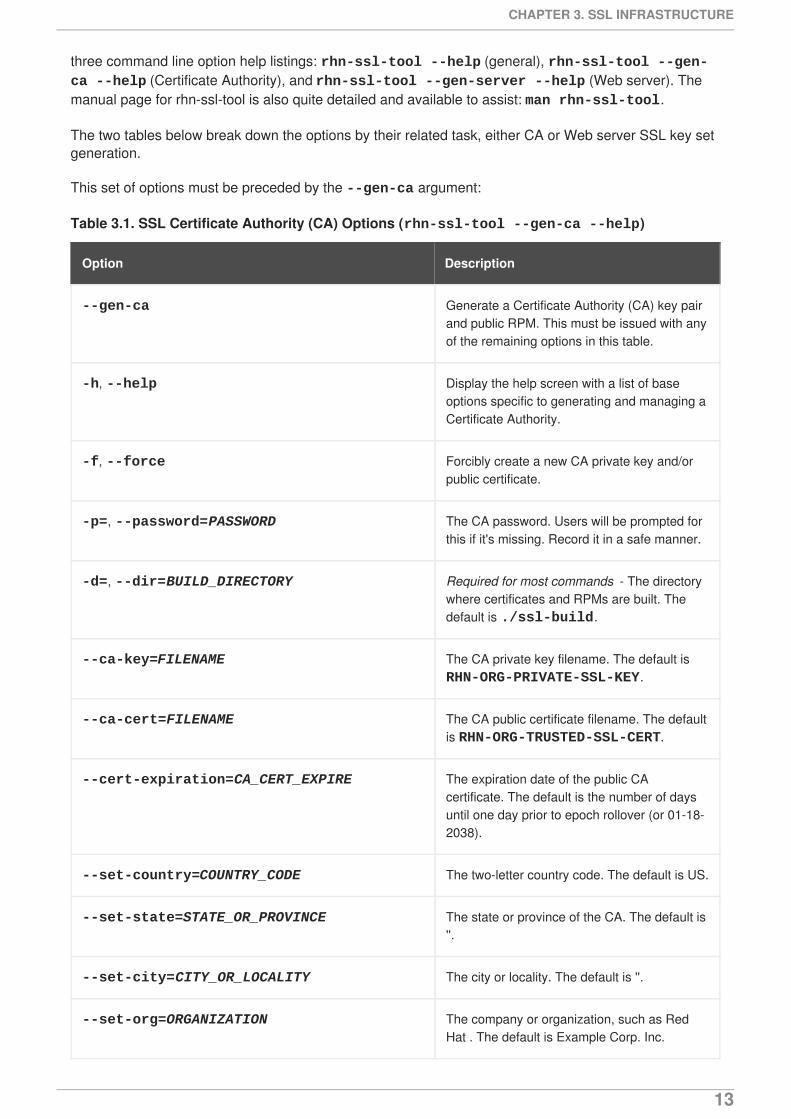
three command line option help listings: rhn-ssl-tool --help (general), rhn-ssl-tool --gen-ca --help (Certificate Authority), and rhn-ssl-tool --gen-server --help (Web server). Themanual page for rhn-ssl-tool is also quite detailed and available to assist: man rhn-ssl-tool.
The two tables below break down the options by their related task, either CA or Web server SSL key setgeneration.
This set of options must be preceded by the --gen-ca argument:
Table 3.1. SSL Certificate Authority (CA) Options (rhn-ssl-tool --gen-ca --help)
Option Description
--gen-ca Generate a Certificate Authority (CA) key pairand public RPM. This must be issued with anyof the remaining options in this table.
-h, --help Display the help screen with a list of baseoptions specific to generating and managing aCertificate Authority.
-f, --force Forcibly create a new CA private key and/orpublic certificate.
-p=, --password=PASSWORD The CA password. Users will be prompted forthis if it's missing. Record it in a safe manner.
-d=, --dir=BUILD_DIRECTORY Required for most commands - The directorywhere certificates and RPMs are built. Thedefault is ./ssl-build.
--ca-key=FILENAME The CA private key filename. The default is RHN-ORG-PRIVATE-SSL-KEY.
--ca-cert=FILENAME The CA public certificate filename. The defaultis RHN-ORG-TRUSTED-SSL-CERT.
--cert-expiration=CA_CERT_EXPIRE The expiration date of the public CAcertificate. The default is the number of daysuntil one day prior to epoch rollover (or 01-18-2038).
--set-country=COUNTRY_CODE The two-letter country code. The default is US.
--set-state=STATE_OR_PROVINCE The state or province of the CA. The default is''.
--set-city=CITY_OR_LOCALITY The city or locality. The default is ''.
--set-org=ORGANIZATION The company or organization, such as RedHat . The default is Example Corp. Inc.
CHAPTER 3. SSL INFRASTRUCTURE
13
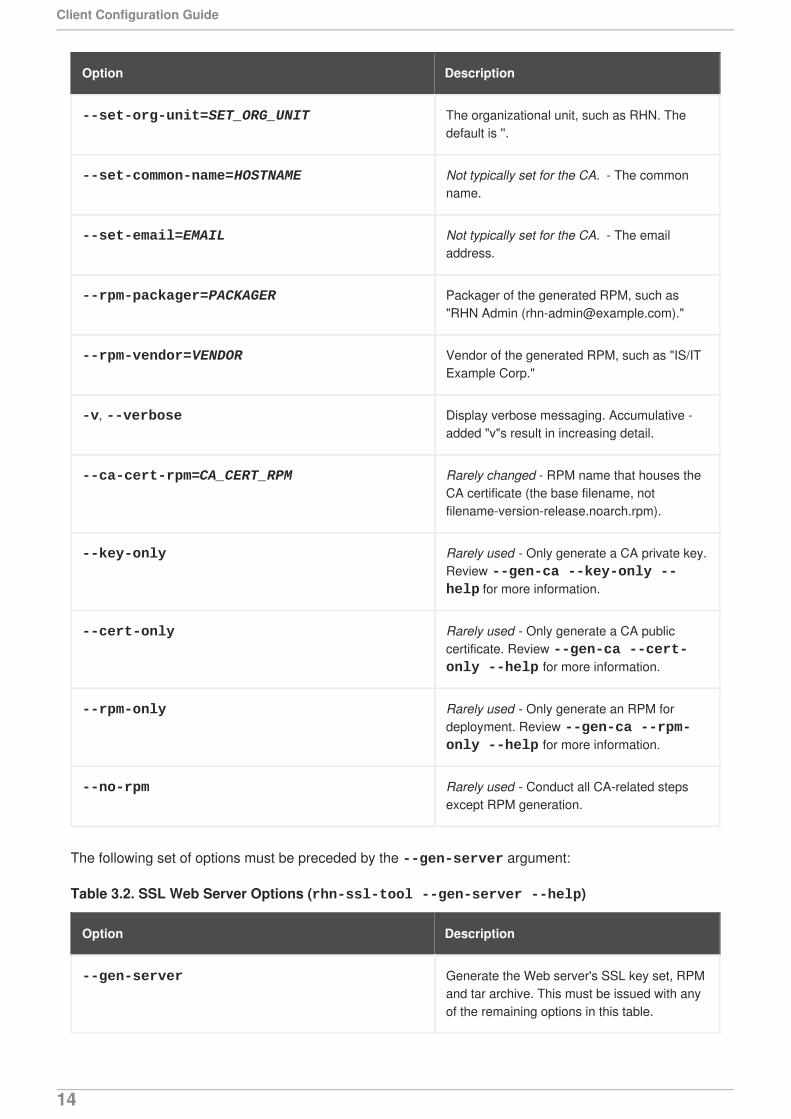
--set-org-unit=SET_ORG_UNIT The organizational unit, such as RHN. Thedefault is ''.
--set-common-name=HOSTNAME Not typically set for the CA. - The commonname.
--set-email=EMAIL Not typically set for the CA. - The emailaddress.
--rpm-packager=PACKAGER Packager of the generated RPM, such as"RHN Admin ([email protected])."
--rpm-vendor=VENDOR Vendor of the generated RPM, such as "IS/ITExample Corp."
-v, --verbose Display verbose messaging. Accumulative -added "v"s result in increasing detail.
--ca-cert-rpm=CA_CERT_RPM Rarely changed - RPM name that houses theCA certificate (the base filename, notfilename-version-release.noarch.rpm).
--key-only Rarely used - Only generate a CA private key.Review --gen-ca --key-only --help for more information.
--cert-only Rarely used - Only generate a CA publiccertificate. Review --gen-ca --cert-only --help for more information.
--rpm-only Rarely used - Only generate an RPM fordeployment. Review --gen-ca --rpm-only --help for more information.
--no-rpm Rarely used - Conduct all CA-related stepsexcept RPM generation.
Option Description
The following set of options must be preceded by the --gen-server argument:
Table 3.2. SSL Web Server Options (rhn-ssl-tool --gen-server --help)
Option Description
--gen-server Generate the Web server's SSL key set, RPMand tar archive. This must be issued with anyof the remaining options in this table.
Client Configuration Guide
14

-h, --help Display the help screen with a list of baseoptions specific to generating and managing aserver key-pair.
-p=, --password=PASSWORD The CA password. Users will be prompted forthis if it's missing. Record it in a safe manner.
-d=, --dir=BUILD_DIRECTORY Required for most commands - The directorywhere certificates and RPMs are built. Thedefault is ./ssl-build.
--server-key=FILENAME The Web server's SSL private key filename.The default is server.key.
--server-cert-req=FILENAME The Web server's SSL certificate requestfilename. The default is server.csr.
--server-cert=FILENAME The Web server's SSL certificate filename.The default is server.crt.
--startdate=YYMMDDHHMMSSZ The start date for server certificate validity inthe example format: year, month, date, hour,minute, second (two characters per value). Zstands for Zulu and is required. The default isone week before generation.
--cert-expiration=SERVER_CERT_EXPIRE The expiration date of the server certificate.The default is the number of days until oneday prior to epoch rollover (or 01-18-2038).
--set-country=COUNTRY_CODE The two-letter country code. The default is US.
--set-state=STATE_OR_PROVINCE The state or province. The default is NorthCarolina.
--set-city=CITY_OR_LOCALITY The city or locality. The default is Raleigh.
--set-org=ORGANIZATION The company or organization, such as RedHat. The default is Example Corp. Inc.
--set-org-unit=SET_ORG_UNIT The organizational unit, such as RHN. Thedefault is unit.
--set-hostname=HOSTNAME The hostname of the RHN Server to receivethe key. The default is dynamically set to thebuild machine's hostname.
Option Description
CHAPTER 3. SSL INFRASTRUCTURE
15

--set-email=EMAIL The email address of the certificate contact.The default is [email protected].
--rpm-packager=PACKAGER Packager of the generated RPM, such as"RHN Admin ([email protected])."
--rpm-vendor=VENDOR Vendor of the generated RPM, such as "IS/ITExample Corp."
-v, --verbose Display verbose messaging. Accumulative -added "v"s result in increasing detail.
--key-only Rarely used - Only generate a server privatekey. Review --gen-server --key-only --help for more information.
--cert-req-only Rarely used - Only generate a servercertificate request. Review --gen-server --cert-req-only --help for moreinformation.
--cert-only Rarely used - Only generate a servercertificate. Review --gen-server --cert-only --help for more information.
--rpm-only Rarely used - Only generate a RPM fordeployment. Review --gen-server --rpm-only --help for more information.
--no-rpm Rarely used - Conduct all server-related stepsexcept RPM generation.
--server-rpm=SERVER_RPM Rarely changed - RPM name that houses theWeb server's SSL key set (the base filename,not filename-version-release.noarch.rpm).
--server-tar=SERVER_TAR Rarely changed - Name of .tar archive of theWeb server's SSL key set and CA publiccertificate that is used solely by the hostedRHN Proxy Server installation routines (thebase filename, not filename-version-release.tar).
Option Description
3.2.3. Generating the Certificate Authority SSL Key Pair
Before creating the SSL key set required by the Web server, generate a Certificate Authority (CA) SSLkey pair. A CA SSL public certificate is distributed to client systems of the Satellite or Proxy. The RHNSSL Maintenance Tool allows you to generate a CA SSL key pair if needed and re-use it for all
Client Configuration Guide
16

subsequent RHN server deployments.
The build process automatically creates the key pair and public RPM for distribution to clients. All CAcomponents end up in the build directory specified at the command line, typically /root/ssl-build (or/etc/sysconfig/rhn/ssl for older Satellites and Proxies). To generate a CA SSL key pair, issue acommand like this:
rhn-ssl-tool --gen-ca --password=MY_CA_PASSWORD --dir="/root/ssl-build" \ --set-state="North Carolina" --set-city="Raleigh" --set-org="Example Inc." \--set-org-unit="SSL CA Unit"
Replace the example values with those appropriate for your organization. This will result in the followingrelevant files in the specified build directory:
RHN-ORG-PRIVATE-SSL-KEY — the CA SSL private key
RHN-ORG-TRUSTED-SSL-CERT — the CA SSL public certificate
rhn-org-trusted-ssl-cert-VER-REL.noarch.rpm — the RPM prepared for distributionto client systems. It contains the CA SSL public certificate (above) and installs it in this location: /usr/share/rhn/RHN-ORG-TRUSTED-SSL-CERT
rhn-ca-openssl.cnf — the SSL CA configuration file
latest.txt — always lists the latest versions of the relevant files.
Once the steps are completed, distribute the RPM to the client systems. Refer to Section 3.3, “Deployingthe CA SSL Public Certificate to Clients” for more information.
3.2.4. Generating Web Server SSL Key Sets
At this point, a CA SSL key pair should already be generated. However there is a likelihood of generatingweb server SSL key sets more frequently, especially if more than one Proxy or Satellite is deployed. Adistinct set of SSL keys and certificates must be generated and installed for every distinct RHN serverhostname therefore note that the value for --set-hostname is different for each server.
The server certificate build process works much like CA SSL key pair generation with one exception: Allserver components end up in subdirectories of the build directory that reflect the build system's machinename, such as /root/ssl-build/MACHINE_NAME. To generate server certificates, issue a commandlike this:
rhn-ssl-tool --gen-server --password=MY_CA_PASSWORD --dir="/root/ssl-build" \ --set-state="North Carolina" --set-city="Raleigh" --set-org="Example Inc." \--set-org-unit="IS/IT" --set-email="[email protected]" \--set-hostname="rhnbox1.example.com
Replace the example values with those appropriate for the organization. This will result in the followingrelevant files in a machine-specific subdirectory of the build directory:
server.key — the Web server's SSL private server key
server.csr — the Web server's SSL certificate request
CHAPTER 3. SSL INFRASTRUCTURE
17
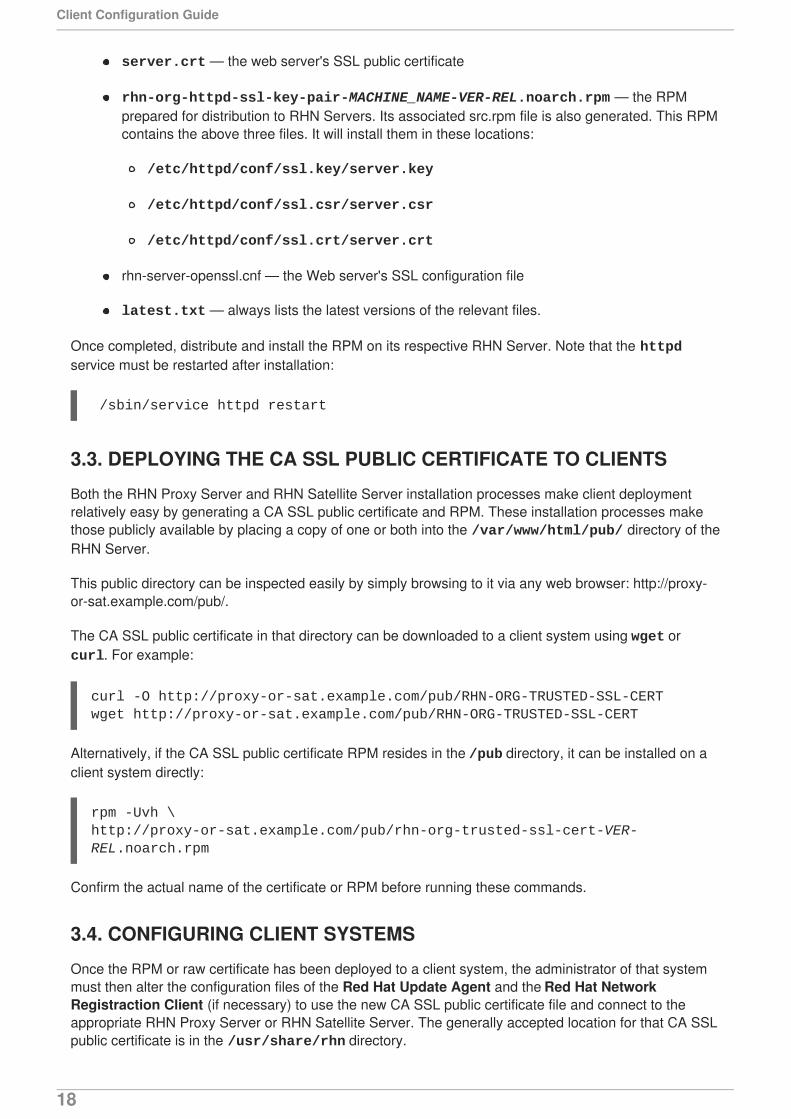
server.crt — the web server's SSL public certificate
rhn-org-httpd-ssl-key-pair-MACHINE_NAME-VER-REL.noarch.rpm — the RPMprepared for distribution to RHN Servers. Its associated src.rpm file is also generated. This RPMcontains the above three files. It will install them in these locations:
/etc/httpd/conf/ssl.key/server.key
/etc/httpd/conf/ssl.csr/server.csr
/etc/httpd/conf/ssl.crt/server.crt
rhn-server-openssl.cnf — the Web server's SSL configuration file
latest.txt — always lists the latest versions of the relevant files.
Once completed, distribute and install the RPM on its respective RHN Server. Note that the httpdservice must be restarted after installation:
/sbin/service httpd restart
3.3. DEPLOYING THE CA SSL PUBLIC CERTIFICATE TO CLIENTS
Both the RHN Proxy Server and RHN Satellite Server installation processes make client deploymentrelatively easy by generating a CA SSL public certificate and RPM. These installation processes makethose publicly available by placing a copy of one or both into the /var/www/html/pub/ directory of theRHN Server.
This public directory can be inspected easily by simply browsing to it via any web browser: http://proxy-or-sat.example.com/pub/.
The CA SSL public certificate in that directory can be downloaded to a client system using wget or curl. For example:
curl -O http://proxy-or-sat.example.com/pub/RHN-ORG-TRUSTED-SSL-CERTwget http://proxy-or-sat.example.com/pub/RHN-ORG-TRUSTED-SSL-CERT
Alternatively, if the CA SSL public certificate RPM resides in the /pub directory, it can be installed on aclient system directly:
rpm -Uvh \http://proxy-or-sat.example.com/pub/rhn-org-trusted-ssl-cert-VER-REL.noarch.rpm
Confirm the actual name of the certificate or RPM before running these commands.
3.4. CONFIGURING CLIENT SYSTEMS
Once the RPM or raw certificate has been deployed to a client system, the administrator of that systemmust then alter the configuration files of the Red Hat Update Agent and the Red Hat NetworkRegistraction Client (if necessary) to use the new CA SSL public certificate file and connect to theappropriate RHN Proxy Server or RHN Satellite Server. The generally accepted location for that CA SSLpublic certificate is in the /usr/share/rhn directory.
Client Configuration Guide
18

The RHN Proxy Server and RHN Satellite Server both have RHN Bootstrap installed by default, whichcan greatly reduce these repetitive steps and simplify the process of registering and configuring clientsystems. Please refer to Chapter 5, Using RHN Bootstrap for details.
CHAPTER 3. SSL INFRASTRUCTURE
19

CHAPTER 4. IMPORTING CUSTOM GPG KEYSFor customers who plan to build and distribute their own RPMs securely, it is strongly recommended thatall custom RPMs are signed using GNU Privacy Guard (GPG). Generating GPG keys and building GPG-signed packages are covered in the Red Hat Network Channel Management Guide.
Once the packages are signed, the public key must be deployed on all systems importing these RPMs.This task has two steps: first, create a central location for the public key so that clients may retrieve it,and second, adding the key to the local GPG keyring for each system.
The first step is common and may be handled using the website approach recommended for deployingRHN client applications. (Refer to Section 2.1, “Deploying the Latest Red Hat Network Client RPMs”.) Todo this, create a public directory on the Web server and place the GPG public signature in it:
cp /some/path/YOUR-RPM-GPG-KEY /var/www/html/pub/
The key can then be downloaded by client systems using Wget:
wget -O- -q http://your_proxy_or_sat.your_domain.com/pub/YOUR-RPM-GPG-KEY
The -O- option sends results to standard output while the -q option sets Wget to run in quiet mode.Remember to replace the YOUR-RPM-GPG-KEY variable with the filename of your key.
Once the key is available on the client file system, import it into the local GPG keyring. Differentoperating systems require different methods.
For Red Hat Enterprise Linux 3 or newer, use the following command:
rpm --import /path/to/YOUR-RPM-GPG-KEY
Once the GPG key has been successfully added to the client, the system should be able to validatecustom RPMs signed with the corresponding key.
NOTE
When using custom RPMs and channels, always create a custom GPG key for thesepackages. The location of the GPG key also needs to be added to the Kickstart profile.
The custom GPG key needs to be added to the client systems or the Kickstart installationmay fail.
Client Configuration Guide
20
CHAPTER 5. USING RHN BOOTSTRAPRed Hat Network provides a tool that automates much of the manual reconfiguration described inprevious chapters, this tool is called RHN Bootstrap. RHN Bootstrap plays an integral role in the RHNSatellite Server Installation Program, enabling generation of the bootstrap script during installation.
RHN Proxy Server customers and customers with updated Satellite settings require a bootstrap tool thatcan be used independently. RHN Bootstrap, invoked with the command /usr/bin/rhn-bootstrap,serves that purpose and comes installed by default on both RHN Satellite Server and RHN Proxy Server.
If used correctly, the script this tool generates can be run from any client system to conduct the followingtasks:
Redirect client applications to the RHN Proxy or Satellite
Import custom GPG keys
Install SSL certificates
Register the system to RHN and particular system groups and channels with the help ofactivation keys
Perform miscellaneous post-configuration activities, including updating packages, performingreboots, and altering RHN configuration
Customers should note, however, the inherent risks of using a script to conduct configuration. Securitytools such as SSL certificates are installed by the script itself; therefore they do not yet exist on thesystems and cannot be used to process transactions. This allows for the possibility of someoneimpersonating the Satellite and transmitting bad data. This is mitigated by the fact that virtually allSatellites and client systems operate behind customer firewalls and are restricted from outside traffic.Registration is conducted via SSL and is therefore protected.
The bootstrap script bootstrap.sh is automatically placed in the /var/www/html/pub/bootstrap/ directory of the RHN Server. From there it can be downloadedand run on all client systems. Note that some preparation and post-generation editing is required, asidentified in the following sections. Refer to Section 5.4, “Configuring RHN Bootstrap Options” for thetool's complete list of options. Finally, refer to the Appendix A, Sample Bootstrap Script for an examplescript.
5.1. PREPARING FOR RHN BOOTSTRAP INSTALLATION
Since RHN Bootstrap (rhn-bootstrap) depends on other components of the Red Hat Networkinfrastructure to properly configure client systems, those components must be prepared before scriptgeneration. The following list identifies suggested initial measures:
Generate activation keys to be called by the script(s). Activation keys can be used to registerRed Hat Enterprise Linux systems, entitle them to an RHN service level, and subscribe them tospecific channels and system groups, all in one action. Note that the organizational accountmust have Management entitlements available to use an activation key, while inclusion ofmultiple activation keys at once requires Provisioning entitlements. Generate activation keysthrough the Activation Keys page within the Systems category of the RHN website (eitherthe central RHN Servers for Proxy or the fully qualified domain name of the Satellite). Refer tothe Red Hat Update Agent and RHN Website chapters of the RHN Reference Guide forinstructions on creation and use.
Red Hat recommends RPMs be signed by a custom GNU Privacy Guard (GPG) key. Make the
CHAPTER 5. USING RHN BOOTSTRAP
21
key available so that it can be referred to from the script. Generate the key as described in theRHN Channel Management Guide and place the key in the /var/www/html/pub/ directory ofthe RHN Server, per Chapter 4, Importing Custom GPG Keys.
To deploy the CA SSL public certificate through the script, have the certificate or the package(RPM) containing that certificate available on that RHN Server and include it during scriptgeneration with the --ssl-cert option. Refer to Chapter 3, SSL Infrastructure for details.
Have the values ready to develop one or many bootstrap scripts, depending on the variety ofsystems to be reconfigured. Since RHN Bootstrap provides a full set of reconfiguration options,use it to generate different bootstrap scripts to accommodate each type of system. For instance,bootstrap-web-servers.sh might be used to reconfigure the Web servers, while bootstrap-app-servers.sh can handle the application servers. Consult Section 5.4,“Configuring RHN Bootstrap Options” for the complete list.
5.2. GENERATING RHN BOOTSTRAP SCRIPTS
Now that all of the necessary components are in place, use RHN Bootstrap to generate the requiredscripts. Log into your RHN Satellite Server or RHN Proxy Server as root and issue the rhn-bootstrapcommand followed by the desired options and values. If no options are included, a bootstrap.sh file iscreated in the bootstrap/ subdirectory that contains the essential values derived from the server,including hostname, the SSL certificate, it if exists, SSL and GPG settings, and a call for the client-config-overrides.txt file.
At a minimum, Red Hat strongly recommends the scripts also accommodate activation keys, GPG keys,and advanced configuration options in the following manner:
Use the --activation-keys option to include keys, taking into account the entitlementrequirements identified in Section 5.1, “Preparing for RHN Bootstrap Installation”.
Use the --gpg-key option to identify the key path and filename during script generation.Otherwise, use the --no-gpg option to turn off this verification on client systems. Red Hatrecommends retaining this security measure.
Include the --allow-config-actions flag to enable remote configuration management onall client systems touched by the script. This feature is useful in reconfiguring multiple systemssimultaneously.
Include the --allow-remote-commands flag to enable remote script use on all client systems.Like configuration management, this feature aids in reconfiguring multiple systems.
When done, the command will look something like this:
rhn-bootstrap --activation-keys KEY1,KEY2 \ --gpg-key /var/www/html/pub/MY_CORPORATE_PUBLIC_KEY \ --allow-config-actions \ --allow-remote-commands
Remember to include the actual key names. Refer to Section 5.4, “Configuring RHN Bootstrap Options”for the complete list of options.
5.3. USING THE RHN BOOTSTRAP SCRIPT
Client Configuration Guide
22

Once the script has been prepared for use, it is now ready to be run. Log into the RHN Satellite Server orRHN Proxy Server, navigate to the /var/www/html/pub/bootstrap/ directory and run the followingcommand, altering the hostname and name of the script as needed to suit the system type:
cat bootstrap-EDITED-NAME.sh | ssh root@CLIENT_MACHINE1 /bin/bash
A less secure alternative is to use either wget or curl to retrieve and run the script from every clientsystem. Log into each client machine and issue the following command, altering script and hostnameaccordingly:
wget -qO - \https://your-satellite.example.com/pub/bootstrap/bootstrap-EDITED-NAME.sh \| /bin/bash
Or with, curl:
curl -Sks \https://your-satellite.example.com/pub/bootstrap/bootstrap-EDITED-NAME.sh \| /bin/bash
When this script has been run on each client system, all should be configured to use the RHN Server.
5.4. CONFIGURING RHN BOOTSTRAP OPTIONS
The RHN Bootstrap offers many command line options for creating client boostrap scripts. Althoughdescriptions of these options can be found within the following table, ensure that they are available in theversion of the tool installed on the RHN Server by issuing the command rhn-bootstrap --help orreviewing its man page.
Table 5.1. RHN Bootstrap Options
Option Description
-h, --help Display the help screen with a list ofoptions specific to generating thebootstrap script.
--activation-keys=ACTIVATION_KEYS activation key(s) as defined in the RHNwebsite with multiple entries separated bya comma and no space
--overrides=OVERRIDES Configuration overrides filename. Thedefault is client-config-overrides.txt.
--script=SCRIPT The bootstrap script filename. The defaultis bootstrap.sh.
--hostname=HOSTNAME The fully qualified domain name (FQDN)of the server to which client systems willconnect.
CHAPTER 5. USING RHN BOOTSTRAP
23

--ssl-cert=SSL_CERT The path to the organization's public SSLcertificate, either a package or a rawcertificate. It will be copied to the --pub-tree option. A value of "" willforce a search of --pub-tree.
--gpg-key=GPG_KEY The path to the organization's public GPGkey, if used. It will be copied to thelocation specified by the --pub-treeoption.
--http-proxy=HTTP_PROXY The HTTP proxy setting for the clientsystems in the form hostname:port.A value of "" disables this setting.
--http-proxy-username=HTTP_PROXY_USERNAME If using an authenticating HTTP proxy,specify a username. A value of ""disables this setting.
--http-proxy-password=HTTP_PROXY_PASSWORD If using an authenticating HTTP proxy,specify a password.
--allow-config-actions Boolean; including this option sets thesystem to allow all configuration actionsvia RHN. This requires installing certainrhncfg-* packages, possibly through anactivation key.
--allow-remote-commands Boolean; including this option sets thesystem to allow arbitrary remotecommands via RHN. This requiresinstalling certain rhncfg-* packages,possibly through an activation key.
--no-ssl Not recommended - Boolean; includingthis option turns SSL off on the clientsystem.
--no-gpg Not recommended - Boolean; includingthis option turns GPG checking off on theclient system.
--no-up2date Not recommended - Boolean; includingthis option ensures up2date will not runonce the system has been bootstrapped.
Option Description
Client Configuration Guide
24
--pub-tree=PUB_TREE Change not recommended - The publicdirectory tree where the CA SSLcertificate and package will land; thebootstrap directory and scripts. Thedefault is /var/www/html/pub/.
--force Not recommended - Boolean; includingthis option forces bootstrap scriptgeneration despite warnings.
-v, --verbose Display verbose messaging.Accumulative; -vvv causes extremelyverbose messaging.
Option Description
CHAPTER 5. USING RHN BOOTSTRAP
25
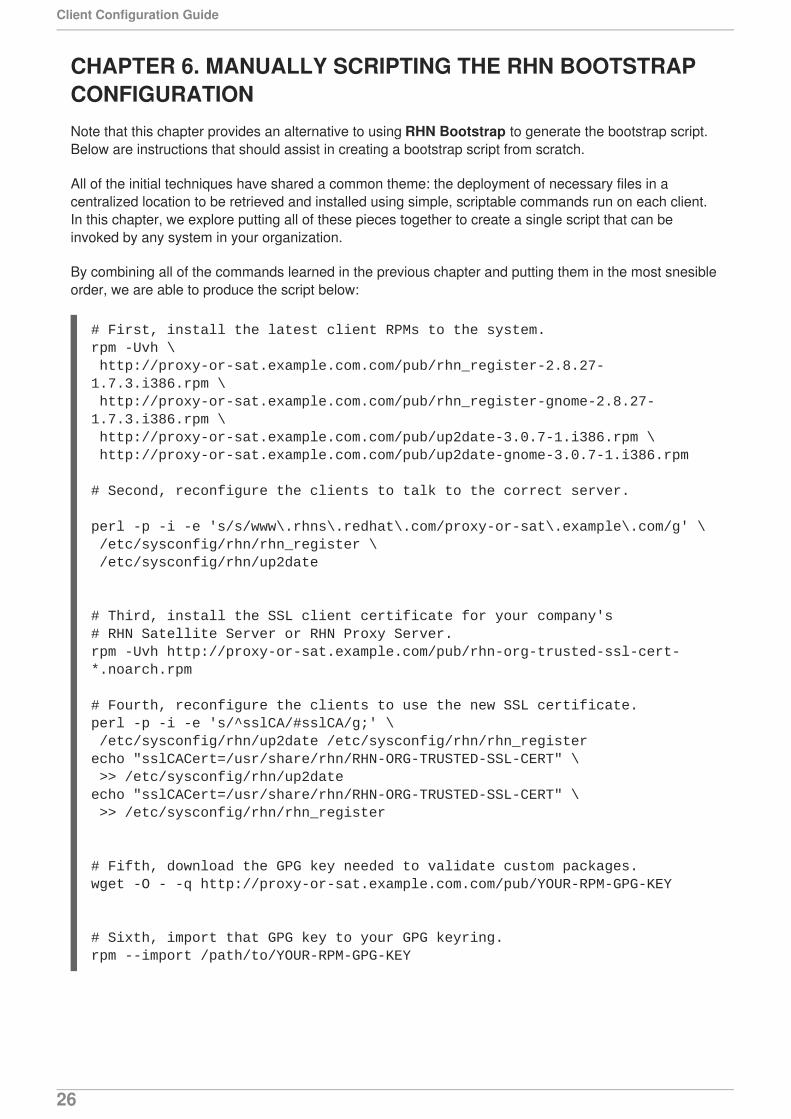
CHAPTER 6. MANUALLY SCRIPTING THE RHN BOOTSTRAPCONFIGURATIONNote that this chapter provides an alternative to using RHN Bootstrap to generate the bootstrap script.Below are instructions that should assist in creating a bootstrap script from scratch.
All of the initial techniques have shared a common theme: the deployment of necessary files in acentralized location to be retrieved and installed using simple, scriptable commands run on each client.In this chapter, we explore putting all of these pieces together to create a single script that can beinvoked by any system in your organization.
By combining all of the commands learned in the previous chapter and putting them in the most snesibleorder, we are able to produce the script below:
# First, install the latest client RPMs to the system.rpm -Uvh \ http://proxy-or-sat.example.com.com/pub/rhn_register-2.8.27-1.7.3.i386.rpm \ http://proxy-or-sat.example.com.com/pub/rhn_register-gnome-2.8.27-1.7.3.i386.rpm \ http://proxy-or-sat.example.com.com/pub/up2date-3.0.7-1.i386.rpm \ http://proxy-or-sat.example.com.com/pub/up2date-gnome-3.0.7-1.i386.rpm
# Second, reconfigure the clients to talk to the correct server.
perl -p -i -e 's/s/www\.rhns\.redhat\.com/proxy-or-sat\.example\.com/g' \ /etc/sysconfig/rhn/rhn_register \ /etc/sysconfig/rhn/up2date
# Third, install the SSL client certificate for your company's # RHN Satellite Server or RHN Proxy Server.rpm -Uvh http://proxy-or-sat.example.com/pub/rhn-org-trusted-ssl-cert-*.noarch.rpm
# Fourth, reconfigure the clients to use the new SSL certificate.perl -p -i -e 's/^sslCA/#sslCA/g;' \ /etc/sysconfig/rhn/up2date /etc/sysconfig/rhn/rhn_registerecho "sslCACert=/usr/share/rhn/RHN-ORG-TRUSTED-SSL-CERT" \ >> /etc/sysconfig/rhn/up2dateecho "sslCACert=/usr/share/rhn/RHN-ORG-TRUSTED-SSL-CERT" \ >> /etc/sysconfig/rhn/rhn_register
# Fifth, download the GPG key needed to validate custom packages.wget -O - -q http://proxy-or-sat.example.com.com/pub/YOUR-RPM-GPG-KEY
# Sixth, import that GPG key to your GPG keyring.rpm --import /path/to/YOUR-RPM-GPG-KEY
Client Configuration Guide
26
NOTE
Remember, the sixth step is documented here as it pertains to systems running Red HatEnterprise Linux 3 or newer.
This script comprises a clean and repeatable process that should fully configure any potential Red HatNetwork client in preparation for registration to an RHN Proxy Server or RHN Satellite Server.Remember, key values, such as the URL of the RHN Server, its public directory, and the actual GPG keymust be inserted into the placeholders listed within the script. Also, depending on the environment,additional modifications may be required. Although this script may work nearly verbatim, it should beused as a guide.
Like its' components, this script may be centrally located. By placing this script in the /pub/ directory ofthe server, running wget -O- on it, and piping the output to a shell session, one may run the entirebootstrap process with a single command from each client:
wget -O - http://proxy-or-sat.example.com.com/pub/bootstrap_script | bash
WARNING
Running a shell script directly from input piped in over a Web connection obviouslyhas some inherent security risks. Therefore, it is vital to ensure the security of thesource server in this instance.
This one-line command may then be invoked across all of the systems on a network. If the administratorhas SSH access to all of the systems in question, it would be a simple task to iterate over a list of thesesystems and run the command remotely on all of them. This script would also be a good addition to the%post section of an existing kickstart script.
CHAPTER 6. MANUALLY SCRIPTING THE RHN BOOTSTRAP CONFIGURATION
27

CHAPTER 7. IMPLEMENTING KICKSTARTThe best time to make configuration changes to a system is when that system is first being built. Forcustomers who already use kickstart effectively, the bootstrapping script is an ideal addition to thatprocess.
Once all of the configuration issues have been resolved, a system may also register with the local RedHat Network Servers using the rhnreg_ks utility that comes with the up2date and rhn_registerRPMs. This chapter discusses the proper use of rhnreg_ks to register systems.
The rhnreg_ks utility uses activation keys to register, entitle, and subscribe systems to specifiedchannels in one swift motion. To find out more about activation keys, refer to the Red Hat Update Agentand RHN Website chapters of the Red Hat Network Management Reference Guide.
The following commented kickstart file is an ideal example of how a system can be configured from startto finish using Red Hat Network.
# Generic 7.2 kickstart for laptops in the Widget Corporation (widgetco)
# Standard kickstart options for a network-based install. For an# explanation of these options, consult the Red Hat Linux Customization # Guide.
lang en_USlangsupport --default en_US en_USkeyboard defkeymapnetwork --bootproto dhcpinstallurl --url ftp://ftp.widgetco.com/pub/redhat/linux/7.2/en/os/i386zerombr yesclearpart --allpart /boot --size 128 --fstype ext3 --ondisk hdapart / --size 2048 --grow --fstype ext3 --ondisk hdapart /backup --size 1024 --fstype ext3 --ondisk hdapart swap --size 512 --ondisk hdabootloader --location mbrtimezone America/New_Yorkrootpw --iscrypted $1$78Jnap82Hnd0PsjnC8j3sd2Lna/Hx4.auth --useshadow --enablemd5 --krb5realm .COM --krb5kdc auth.widgetco.com \ --krb5adminserver auth.widgetco.commouse --emulthree genericps/2xconfig --card "S3 Savage/MX" --videoram 8192 --resolution 1024x768 \ --depth 16 --defaultdesktop=GNOME --startxonboot --noprobe \ --hsync 31.5-48.5 --vsync 40-70
reboot
# Define a standard set of packages. Note: Red Hat Network client # packages are found in Base. This is quite a minimal set of packages;# your mileage may vary.
%packages@ Base@ Utilities@ GNOME
Client Configuration Guide
28

@ Laptop Support@ Dialup Support@ Software Development@ Graphics and Image Manipulation@ Games and Entertainment@ Sound and Multimedia Support
# Now for the interesting part.
%post( # Note that we run the entire %post section as a subshell for logging.
# Remember that nifty one-line command for the bootstrap script that we# went through? This is an ideal place for it. And assuming that the# script has been properly configured, it should prepare the system# fully for usage of local Red Hat Network Servers.
wget -O- http://proxy-or-sat.example.com/pub/bootstrap_script | /bin/bash
# The following is an example of the usage of rhnreg_ks, the kickstart# utility for rhn_register. This demonstrates the usage of the # --activationkey flag, which describes an activation key. For example,# this activation key could be set up in the Web interface to join this # system to the "Laptops" group and the local Widgetco "Laptop Software" # channel. Note that this section applies only to Proxy users, as this # step is handled by the Satellite bootstrap script. ## For more information about activation keys, consult the Red Hat Network# Management Reference Guide.
/usr/sbin/rhnreg_ks --activationkey=6c933ea74b9b002f3ac7eb99619d3374
# End the subshell and capture any output to a post-install log file.) 1>/root/post_install.log 2>&1
CHAPTER 7. IMPLEMENTING KICKSTART
29
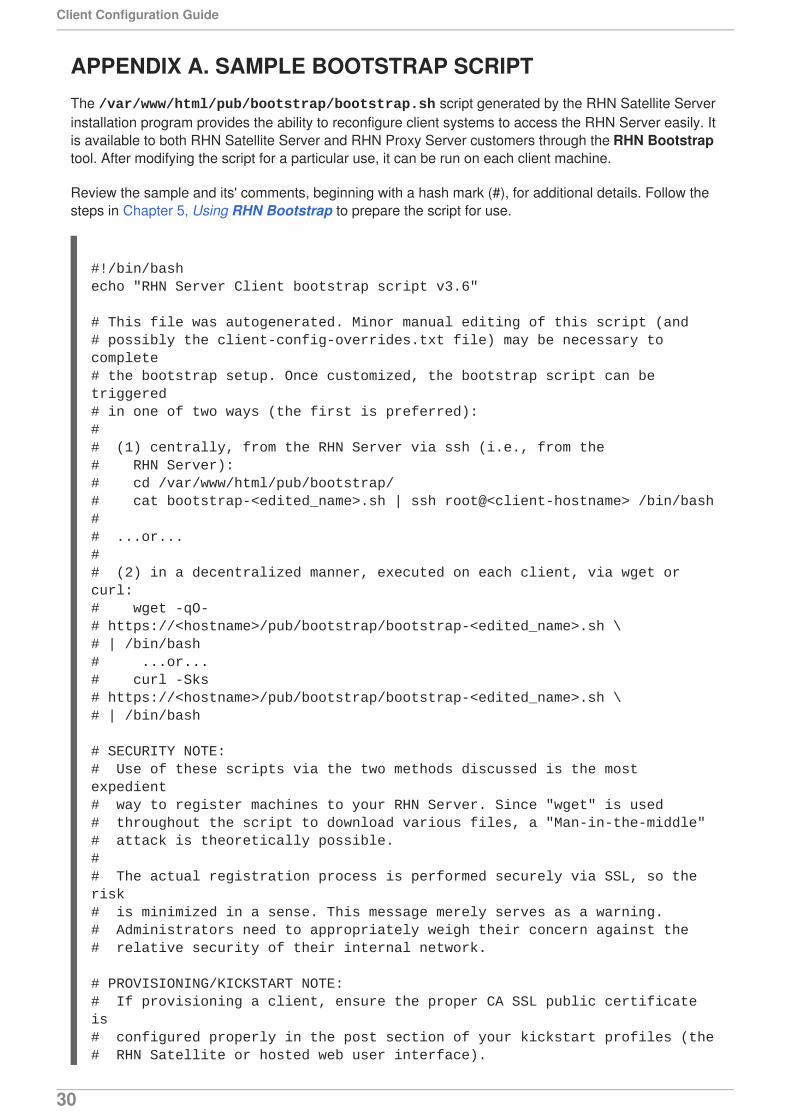
APPENDIX A. SAMPLE BOOTSTRAP SCRIPTThe /var/www/html/pub/bootstrap/bootstrap.sh script generated by the RHN Satellite Serverinstallation program provides the ability to reconfigure client systems to access the RHN Server easily. Itis available to both RHN Satellite Server and RHN Proxy Server customers through the RHN Bootstraptool. After modifying the script for a particular use, it can be run on each client machine.
Review the sample and its' comments, beginning with a hash mark (#), for additional details. Follow thesteps in Chapter 5, Using RHN Bootstrap to prepare the script for use.
#!/bin/bashecho "RHN Server Client bootstrap script v3.6"
# This file was autogenerated. Minor manual editing of this script (and# possibly the client-config-overrides.txt file) may be necessary to complete# the bootstrap setup. Once customized, the bootstrap script can be triggered# in one of two ways (the first is preferred):## (1) centrally, from the RHN Server via ssh (i.e., from the# RHN Server):# cd /var/www/html/pub/bootstrap/# cat bootstrap-<edited_name>.sh | ssh root@<client-hostname> /bin/bash## ...or...## (2) in a decentralized manner, executed on each client, via wget or curl:# wget -qO-# https://<hostname>/pub/bootstrap/bootstrap-<edited_name>.sh \# | /bin/bash# ...or...# curl -Sks# https://<hostname>/pub/bootstrap/bootstrap-<edited_name>.sh \# | /bin/bash
# SECURITY NOTE:# Use of these scripts via the two methods discussed is the most expedient# way to register machines to your RHN Server. Since "wget" is used# throughout the script to download various files, a "Man-in-the-middle"# attack is theoretically possible.## The actual registration process is performed securely via SSL, so the risk# is minimized in a sense. This message merely serves as a warning.# Administrators need to appropriately weigh their concern against the# relative security of their internal network.
# PROVISIONING/KICKSTART NOTE:# If provisioning a client, ensure the proper CA SSL public certificate is# configured properly in the post section of your kickstart profiles (the# RHN Satellite or hosted web user interface).
Client Configuration Guide
30
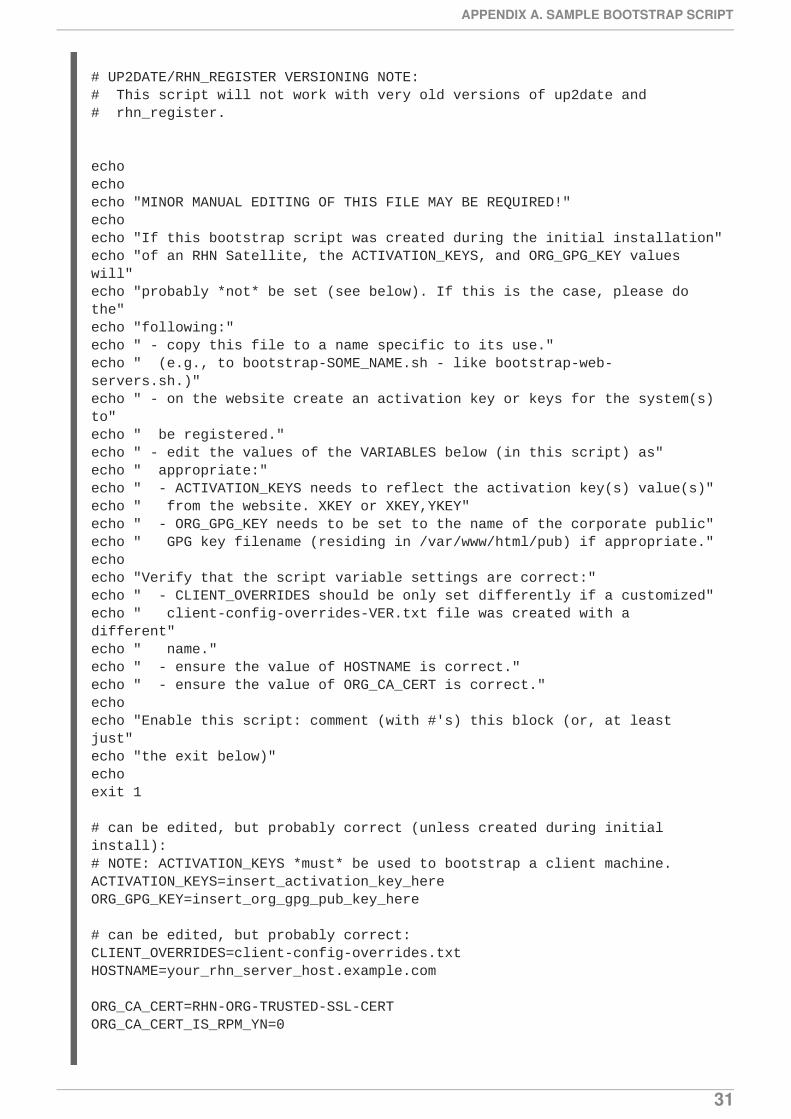
# UP2DATE/RHN_REGISTER VERSIONING NOTE:# This script will not work with very old versions of up2date and# rhn_register.
echoechoecho "MINOR MANUAL EDITING OF THIS FILE MAY BE REQUIRED!"echoecho "If this bootstrap script was created during the initial installation"echo "of an RHN Satellite, the ACTIVATION_KEYS, and ORG_GPG_KEY values will"echo "probably *not* be set (see below). If this is the case, please do the"echo "following:"echo " - copy this file to a name specific to its use."echo " (e.g., to bootstrap-SOME_NAME.sh - like bootstrap-web-servers.sh.)"echo " - on the website create an activation key or keys for the system(s) to"echo " be registered."echo " - edit the values of the VARIABLES below (in this script) as"echo " appropriate:"echo " - ACTIVATION_KEYS needs to reflect the activation key(s) value(s)"echo " from the website. XKEY or XKEY,YKEY"echo " - ORG_GPG_KEY needs to be set to the name of the corporate public"echo " GPG key filename (residing in /var/www/html/pub) if appropriate."echoecho "Verify that the script variable settings are correct:"echo " - CLIENT_OVERRIDES should be only set differently if a customized"echo " client-config-overrides-VER.txt file was created with a different"echo " name."echo " - ensure the value of HOSTNAME is correct."echo " - ensure the value of ORG_CA_CERT is correct."echoecho "Enable this script: comment (with #'s) this block (or, at least just"echo "the exit below)"echoexit 1
# can be edited, but probably correct (unless created during initial install):# NOTE: ACTIVATION_KEYS *must* be used to bootstrap a client machine.ACTIVATION_KEYS=insert_activation_key_hereORG_GPG_KEY=insert_org_gpg_pub_key_here
# can be edited, but probably correct:CLIENT_OVERRIDES=client-config-overrides.txtHOSTNAME=your_rhn_server_host.example.com
ORG_CA_CERT=RHN-ORG-TRUSTED-SSL-CERTORG_CA_CERT_IS_RPM_YN=0
APPENDIX A. SAMPLE BOOTSTRAP SCRIPT
31

USING_SSL=1USING_GPG=1
REGISTER_THIS_BOX=1
ALLOW_CONFIG_ACTIONS=0ALLOW_REMOTE_COMMANDS=0
FULLY_UPDATE_THIS_BOX=1
## -----------------------------------------------------------------------------# DO NOT EDIT BEYOND THIS POINT -----------------------------------------------# -----------------------------------------------------------------------------#
# an idea from Erich Morisse (of Red Hat).# use either wget *or* curl# Also check to see if the version on the # machine supports the insecure mode and format# command accordingly.if [ -x /usr/bin/wget ] ; then output=`/usr/bin/wget --no-check-certificate 2>&1` error=`echo $output | grep "unrecognized option"` if [ -z "$error" ] ; then FETCH="/usr/bin/wget -q -r -nd --no-check-certificate" else FETCH="/usr/bin/wget -q -r -nd" fi else if [ -x /usr/bin/curl ] ; then output=`/usr/bin/curl -k 2>&1` error=`echo $output | grep "is unknown"` if [ -z "$error" ] ; then FETCH="/usr/bin/curl -SksO" else FETCH="/usr/bin/curl -SsO" fi fifi
HTTP_PUB_DIRECTORY=http://${HOSTNAME}/pubHTTPS_PUB_DIRECTORY=https://${HOSTNAME}/pubif [ $USING_SSL -eq 0 ] ; then HTTPS_PUB_DIRECTORY=${HTTP_PUB_DIRECTORY}fiechoecho "UPDATING RHN_REGISTER/UP2DATE CONFIGURATION FILES"echo "-------------------------------------------------"echo "* downloading necessary files"echo " client_config_update.py..."rm -f client_config_update.py
Client Configuration Guide
32

$FETCH ${HTTPS_PUB_DIRECTORY}/bootstrap/client_config_update.pyecho " ${CLIENT_OVERRIDES}..."rm -f ${CLIENT_OVERRIDES}$FETCH ${HTTPS_PUB_DIRECTORY}/bootstrap/${CLIENT_OVERRIDES}
if [ ! -f "client_config_update.py" ] ; then echo "ERROR: client_config_update.py was not downloaded" exit 1fiif [ ! -f "${CLIENT_OVERRIDES}" ] ; then echo "ERROR: ${CLIENT_OVERRIDES} was not downloaded" exit 1fi
echo "* running the update scripts"if [ -f "/etc/sysconfig/rhn/rhn_register" ] ; then echo " . rhn_register config file" /usr/bin/python -u client_config_update.py /etc/sysconfig/rhn/rhn_register \ ${CLIENT_OVERRIDES}fiecho " . up2date config file"/usr/bin/python -u client_config_update.py /etc/sysconfig/rhn/up2date \ ${CLIENT_OVERRIDES}
if [ ! -z "$ORG_GPG_KEY" ] ; then echo echo "* importing organizational GPG key" rm -f ${ORG_GPG_KEY} $FETCH ${HTTPS_PUB_DIRECTORY}/${ORG_GPG_KEY} # get the major version of up2date res=$(rpm -q --queryformat '%{version}' up2date | sed -e 's/\..*//g') if [ $res -eq 2 ] ; then gpg $(up2date --gpg-flags) --import $ORG_GPG_KEY else rpm --import $ORG_GPG_KEY fifi
echoecho "* attempting to install corporate public CA cert"if [ $USING_SSL -eq 1 ] ; then if [ $ORG_CA_CERT_IS_RPM_YN -eq 1 ] ; then rpm -Uvh ${HTTP_PUB_DIRECTORY}/${ORG_CA_CERT} else rm -f ${ORG_CA_CERT} $FETCH ${HTTP_PUB_DIRECTORY}/${ORG_CA_CERT} mv ${ORG_CA_CERT} /usr/share/rhn/ fifi
echoecho "REGISTRATION"echo "------------"# Should have created an activation key or keys on the RHN Server's# website and edited the value of ACTIVATION_KEYS above.
APPENDIX A. SAMPLE BOOTSTRAP SCRIPT
33

## If you require use of several different activation keys, copy this file and# change the string as needed.#if [ -z "$ACTIVATION_KEYS" ] ; then echo "*** ERROR: in order to bootstrap RHN clients, an activation key or keys" echo " must be created in the RHN web user interface, and the" echo " corresponding key or keys string (XKEY,YKEY,...) must be mapped to" echo " the ACTIVATION_KEYS variable of this script." exit 1fi
if [ $REGISTER_THIS_BOX -eq 1 ] ; then echo "* registering" /usr/sbin/rhnreg_ks --force --activationkey "$ACTIVATION_KEYS" echo echo "*** this system should now be registered, please verify ***" echoelse echo "* explicitely not registering"fi
echoecho "OTHER ACTIONS"echo "------------------------------------------------------"if [ $FULLY_UPDATE_THIS_BOX -eq 1 ] ; then echo "up2date up2date; up2date -p; up2date -uf (conditional)"else echo "up2date up2date; up2date -p"fiecho "but any post configuration action can be added here. "echo "------------------------------------------------------"if [ $FULLY_UPDATE_THIS_BOX -eq 1 ] ; then echo "* completely updating the box"else echo "* ensuring up2date itself is updated"fi/usr/sbin/up2date up2date/usr/sbin/up2date -pif [ $FULLY_UPDATE_THIS_BOX -eq 1 ] ; then /usr/sbin/up2date -uffiecho "-bootstrap complete-"
Client Configuration Guide
34
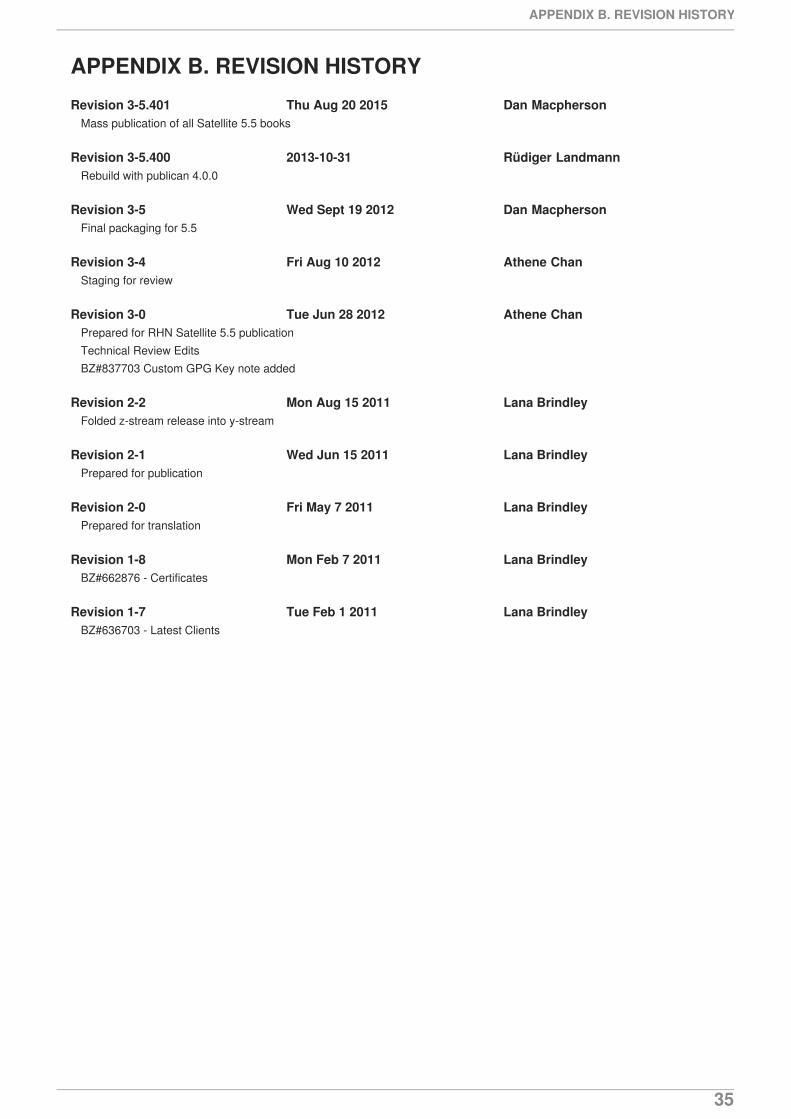
APPENDIX B. REVISION HISTORY
Revision 3-5.401 Thu Aug 20 2015 Dan MacphersonMass publication of all Satellite 5.5 books
Revision 3-5.400 2013-10-31 Rüdiger LandmannRebuild with publican 4.0.0
Revision 3-5 Wed Sept 19 2012 Dan MacphersonFinal packaging for 5.5
Revision 3-4 Fri Aug 10 2012 Athene ChanStaging for review
Revision 3-0 Tue Jun 28 2012 Athene ChanPrepared for RHN Satellite 5.5 publication
Technical Review Edits
BZ#837703 Custom GPG Key note added
Revision 2-2 Mon Aug 15 2011 Lana BrindleyFolded z-stream release into y-stream
Revision 2-1 Wed Jun 15 2011 Lana BrindleyPrepared for publication
Revision 2-0 Fri May 7 2011 Lana BrindleyPrepared for translation
Revision 1-8 Mon Feb 7 2011 Lana BrindleyBZ#662876 - Certificates
Revision 1-7 Tue Feb 1 2011 Lana BrindleyBZ#636703 - Latest Clients
APPENDIX B. REVISION HISTORY
35
INDEX
Symbols
--configure
use of, The up2date --configure Option
A
activation keys
registering with, Registering with Activation Keys
B
bootstrap.sh
preparation and use, Using RHN Bootstrap
sample file, Sample Bootstrap Script
C
client applications
configuration of, Configuring the Client Applications
installation of, Deploying the Latest Red Hat Network Client RPMs
client configuration
Red Hat Update Agent , The up2date --configure Option
configuration
manual, Updating the Configuration Files Manually
scripting completely, Manually Scripting the RHN Bootstrap Configuration
server failover, Implementing Server Failover
G
GPG keys
importing of, Importing Custom GPG Keys
K
kickstart
use of, Implementing Kickstart
R
Red Hat Update Agent
configuring to use RHN Proxy Server or RHN Satellite Server, Updating the Configuration FilesManually
Client Configuration Guide
36
registering , Registering Clients to Red Hat Network RHN Satellite Server
RHN Bootstrap
command line options, Configuring RHN Bootstrap Options
generating the script, Generating RHN Bootstrap Scripts
preparing, Preparing for RHN Bootstrap Installation
using, Using RHN Bootstrap
using the script, Using the RHN Bootstrap Script
RHN SSL Maintenance Tool
generating the CA, Generating the Certificate Authority SSL Key Pair
generating the server certificate, Generating Web Server SSL Key Sets
generation explained, Generating SSL Certificates
options, RHN SSL Maintenance Tool Options
rhn-ssl-tool , The RHN SSL Maintenance Tool
rhn-ssl-tool
generating the CA, Generating the Certificate Authority SSL Key Pair
generating the server certificate, Generating Web Server SSL Key Sets
generation explained, Generating SSL Certificates
options, RHN SSL Maintenance Tool Options
RHN SSL Maintenance Tool , The RHN SSL Maintenance Tool
S
SSL (Secure Sockets Layer)
introduction, A Brief Introduction To SSL
SSL certificates
configuration of, Configuring Client Systems
generating, The RHN SSL Maintenance Tool
installation of, Deploying the CA SSL Public Certificate to Clients
INDEX
37