replace images with visual composer - … images with visual composer ... the files from your...
TRANSCRIPT

REPLACE IMAGES WITH VISUAL COMPOSER
Changing a picture is really common thing to do on a website. You might just want to freshen up the
look of your website, you might have a new product, or you’ve taken a bit of photo.
BACKEND EDITOR OF VISUAL COMPOSER
Step 1: Click Edit Page
To edit your page, click Edit Page.
Step 2: Click the green pencil
As you can see in the image above, we’ve got two elements. Hover your mouse over the Single
Image one and click on the little pencil on the green bar.
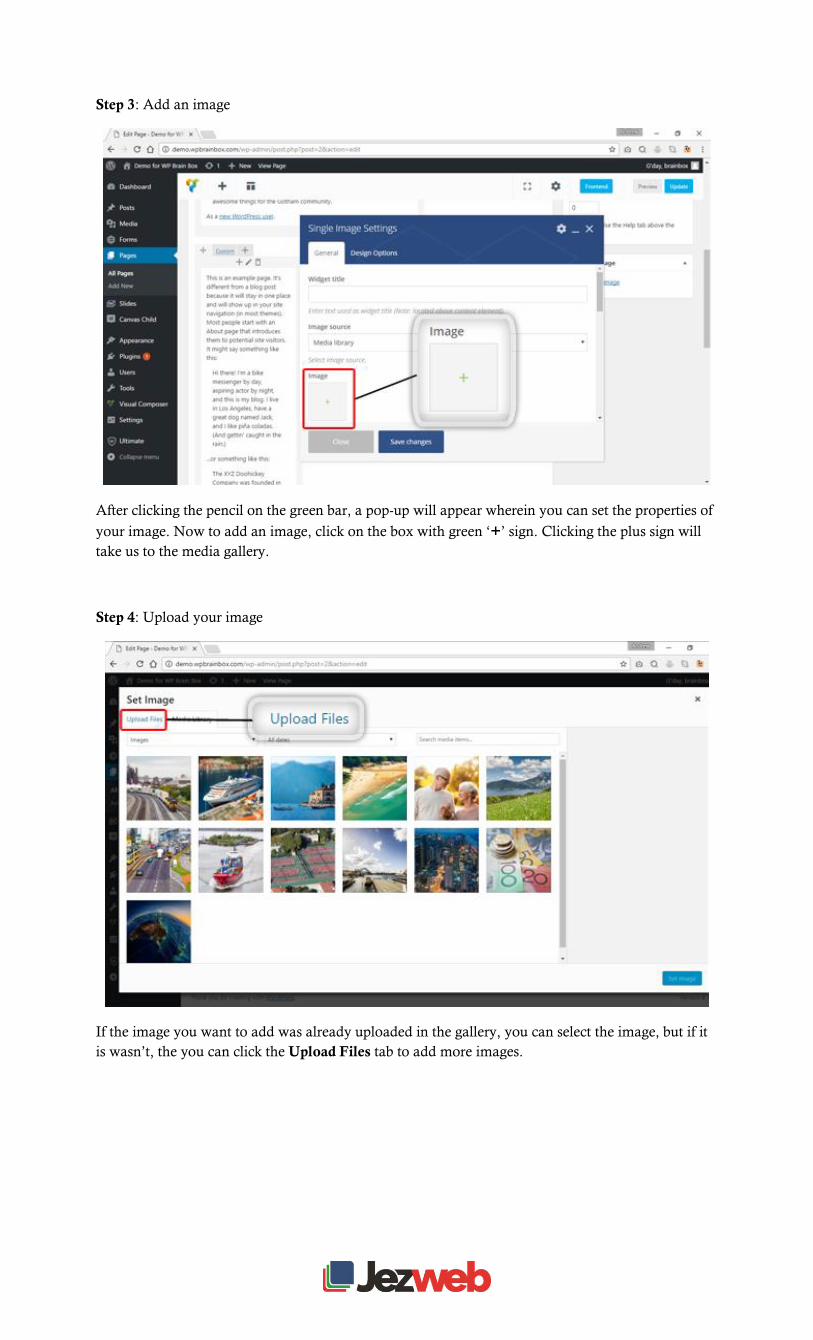
Step 3: Add an image
After clicking the pencil on the green bar, a pop-up will appear wherein you can set the properties of
your image. Now to add an image, click on the box with green ‘+’ sign. Clicking the plus sign will
take us to the media gallery.
Step 4: Upload your image
If the image you want to add was already uploaded in the gallery, you can select the image, but if it
is wasn’t, the you can click the Upload Files tab to add more images.

Step 5: Upload Files tab
In the Upload Files tab, you have two ways in uploading your images. You can either drag and drop
the files from your computer directly to WordPress or you can click Select Files and file selector will
pop up.
Step 6: Select Files pop up
Select the images that you want to upload. You can select one image or multiple images at the same
time. After selecting the images, click Open to upload.
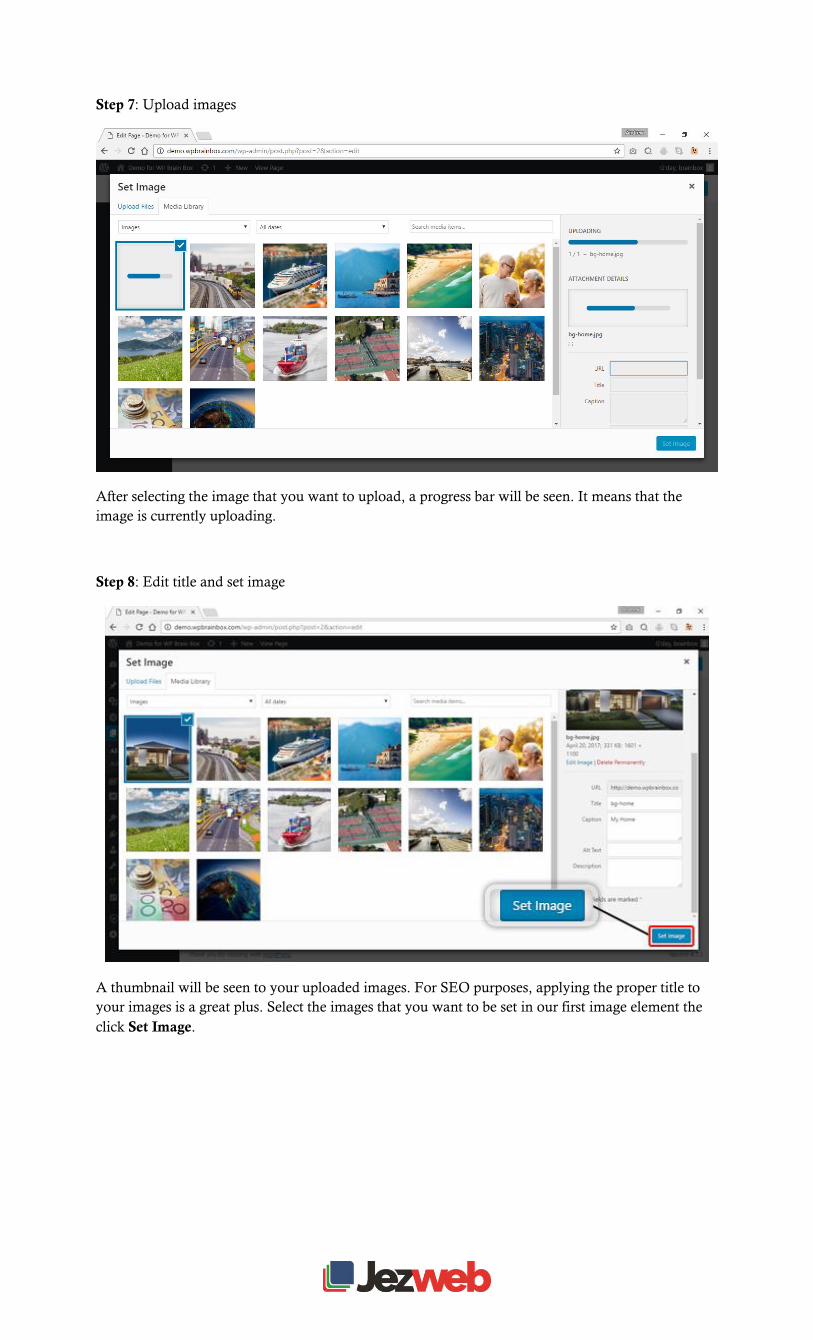
Step 7: Upload images
After selecting the image that you want to upload, a progress bar will be seen. It means that the
image is currently uploading.
Step 8: Edit title and set image
A thumbnail will be seen to your uploaded images. For SEO purposes, applying the proper title to
your images is a great plus. Select the images that you want to be set in our first image element the
click Set Image.

Step 9: Save Changes
You can see now the thumbnail of your selected image. Click Save Changes.
Step 10: Update page
To update our page, click on the Update button.

OUTPUT
FRONTEND EDITOR OF VISUAL COMPOSER
Step 1: Replace image using Visual Composer
The other way to edit is with the front-end editor for Visual Composer. To edit the page using Visual
Composer, click on the Edit the Visual Composer menu.

Step 2: Replace existing image
Clicking the green pencil will bring you to the setting of the element wherein you are able to add
new image. Same process with the backend editor, just click the green ‘+’ sign and choose image
you want to set. If you already selected the image that you want to set, click Save Changes.
Step 3: Update page and close
Now, you are able to change the image of the page. If you’re contented with it, click Update button
and that commits the changes of your page. Now, to close the Visual Composer front-end editor,
just click X.

OUTPUT
Page successfully edited