road king custom hard leather bags - crowitiscrowitis.com/images/road king custom hard leather...
TRANSCRIPT

Road King Custom Hard Leather Bags, Mounted on a 99’ Suzuki Intruder 1500LC
The front mounting hole is in a good position no mods needed there. The rear hole is set too low and
makes the bags not follow the contour of the fenders. Below are some pictures of how I mounted the
bags. I used about a 1” spacer in the rear and about a .5” spacer in the front after the OEM mounting
brackets. I had the OEM bags previously mounted using Mocc’s Easy Off mounting kit, which includes
studs and wing nuts. That’s an easy way to continue.
The spacers are PVC pipe cut to the desired length then painted flat black.
To attach the bottom of the bag to the OEM bracket I just used a U-bolt . The HD mounts had a bar
running under the bags to support them from the bottom but I don’t load my bags up with that much
stuff so I don’t need them to carry much weight. You can put another u-bolt up front but will need
another spacer to fill the gap. Pics of the inside will show this better.

If you look closely you can see where I had to trim the PVC to fit the contour of the bag molding. I did
this on both sides.
The following pics show the inside of the bags and the position of the mounts and holes drilled. I left the
HD OEM rubber grommet in the back mounting hole so you can see the position of the new hole I had to
drill to get them positioned right. You can see where the U-bolt attaches on the inside. (I need some
washers here!)
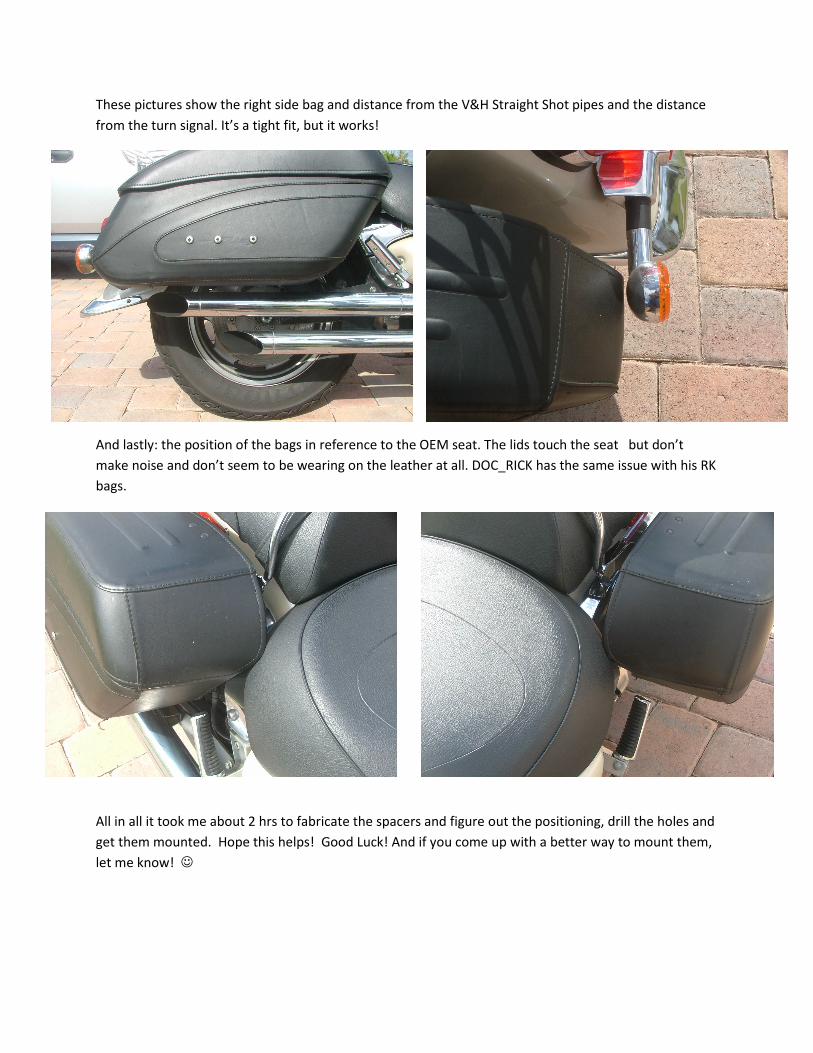
These pictures show the right side bag and distance from the V&H Straight Shot pipes and the distance
from the turn signal. It’s a tight fit, but it works!
And lastly: the position of the bags in reference to the OEM seat. The lids touch the seat but don’t
make noise and don’t seem to be wearing on the leather at all. DOC_RICK has the same issue with his RK
bags.
All in all it took me about 2 hrs to fabricate the spacers and figure out the positioning, drill the holes and
get them mounted. Hope this helps! Good Luck! And if you come up with a better way to mount them,
let me know! ☺

On the bike!