rolling thunder - worcester polytechnic institute
TRANSCRIPT

This report represents the work done at Sun Microsystems by our team (WPI undergraduate students) and Derek
White (Staff Engineer at Sun Labs) submitted to the faculty as an evidence of a completion of a degree requirement.
Rolling Thunder
SUN Labs
Burlington, MA A Major Qualifying Project
Submitted to the Faculty of
WORCESTER POLYTECHNIC INSTITUTE
In conjunction with SUN Microsystems
In partial fulfillment of the requirements for the
Degree of Bachelor of Science
By
____________________________
Marouane Afiri
_______________________________
Albedith Diaz
_______________________________
Brian O'keefe
Date: January16, 2009 Project Number: SMJ A081
Approved:
_________________________________ Professor Susan Jarvis, Major Advisor
_________________________________ Mr. Derek White, SUN Labs Liaison
ii
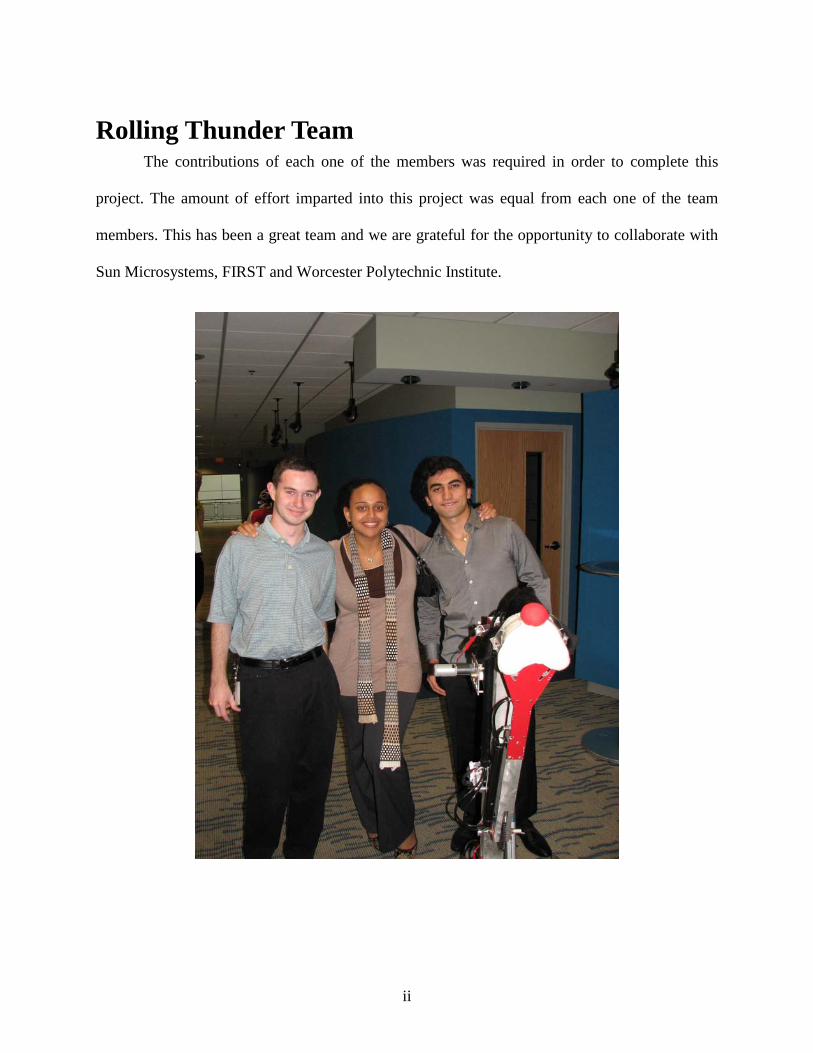
Rolling Thunder Team The contributions of each one of the members was required in order to complete this
project. The amount of effort imparted into this project was equal from each one of the team
members. This has been a great team and we are grateful for the opportunity to collaborate with
Sun Microsystems, FIRST and Worcester Polytechnic Institute.

iii
Abstract
The purpose of this Major Qualifying Project is to assist SUN Microsystems with their
current research project, called Rolling Thunder. The aim of this project is to integrate a JAVA
platform inside an embedded control platform, the CompactRIO, which will be used as a robot
controller in the next FIRST Robotic Competition. The CompactRIO, or CRIO, is a
control/acquisition system containing a real-time processor that allows for rapid software
development and an FPGA chip that can be programmed by the user for different applications.
The main objective of the project is to be able to deploy a JAVA virtual machine, called Squawk,
onto the CRIO, and use it to access the CRIO’s various peripherals including sensors, servos and
actuators.

iv
Acknowledgements
We would like to extend our gratitude to the great team that made our Major Qualifying
Project a positive and meaningful experience.
Professor Susan Jarvis, our advisor who gave us moral support and guidance throughout
the project. Our weekly meetings with her led to great team organization and communication.
Her contributions to this project led us to deliver an excellent and concise final presentation and
written document.
Mr. Derek White, our Sun Liaison who introduced us to Sun Microsystems, The Squawk
Project and our project objectives. Derek White has been the person that made this MQP possible
in seven weeks. He helped us to understand the Squawk virtual machine and the defaults of its
current stage, guided us in our daily work and pointed us in the correct direction to successfully
accomplish our task.
Brad Miller, the Associate Director for the Robotics Resource Center at Worcester
Polytechnic Institute, who assisted us with information regarding WPILib directions and
supplied us hardware. Brad Miller provided us the CRIO system on which we implemented the
Java virtual machine, helped us with the test and analysis of our test robot and arranged our final
meeting with FIRST where we presented our final results.
Sun Microsystems, our corporate sponsor who in collaboration with Worcester
polytechnic Institute gave us the opportunity to complete this project and provided us with the
resources necessary.

v
Table of Contents Rolling Thunder Team .................................................................................................................... ii
Abstract .......................................................................................................................................... iii
Acknowledgements ........................................................................................................................ iv
Table of Contents .............................................................................................................................v
List of Figures ............................................................................................................................... vii
List of Tables ............................................................................................................................... viii
1. Introduction ..............................................................................................................................9
2. Project Background ................................................................................................................12
3. CompactRIO Overview .........................................................................................................15
3.1 Analog Input Module: ..........................................................................................................16
3.2 Digital I/O Module: ..............................................................................................................16
3.3 Solenoid Module: .................................................................................................................16
4. The CompactRIO Sensors......................................................................................................18
4.1 Dual-Axis Accelerometer:....................................................................................................18
4.2 Yaw Rate Gyro (GYRO) ......................................................................................................18
4.3 The Differential Peak-Detecting Gear Tooth Sensor .......................................................19
5. Squawk ...................................................................................................................................21
6. WPILib ...................................................................................................................................23
6.1 The Library ...........................................................................................................................23
7. Design Implementation ..........................................................................................................27
7.1 Goals.....................................................................................................................................31
8. Implementing WPILib ...........................................................................................................32
8.1 Implementation Challenges ..................................................................................................34
9. Porting Squawk to the CRIO .................................................................................................36

vi
9.1 Building Squawk on Windows .............................................................................................37
9.2 Moving to the CRIO .............................................................................................................38
10. Test and Analysis .............................................................................................................40
11. Suggestions ......................................................................................................................43
Conclusion .....................................................................................................................................44
Works Cited ...................................................................................................................................46
Appendixes ....................................................................................................................................48
Appendix 1: PHP Code for ChipObject Generator ........................................................................48
File One of Three: “genchipwrapper.php” .................................................................................48
File Two of Three: “gencwrapper.inc.php” ...............................................................................55
File Three of Three: “genjwrapper.inc.php” ..............................................................................59
Appendix 2: Test and Analysis Code.............................................................................................65
1. C++ Code to test some WPILib Functionalities ..............................................................65
2. Servo Test Code ...............................................................................................................68
3. Analog Module Input Test ...............................................................................................71
4. Digital Sidecar and Associates Hardware C++ Code. .....................................................71
Appendix 3: Test and Analysis Code.............................................................................................74
Analog Module Input Test .........................................................................................................84
Digital Sidecar and Associates Hardware C++ Code. ...............................................................84
Robot JoyStick Java Programming ............................................................................................88

vii
List of Figures Figure 1: Analog Input Module and Bumper ................................................................................17
Figure 2: Digital I/O Module ........................................................................................................17
Figure 3: Dual Axis Accelerometer ...............................................................................................20
Figure 4: Yaw Rate Gyro .............................................................................................................20
Figure 5: The Differential Peak- Detecting Gear Tooth Sensor ...............................................…20
Figure 6: the Standard Java Virtual Machine vs. the Squawk Virtual Machine ............................22
viii
List of Tables Table 1: Rolling Thunder Initial Goals ..........................................................................................14
Table 2: Dual Axis Accelerometer Table .....................................................................................18
Table 3: Rolling Thunder Initial Goals ..........................................................................................28
Table 4: Rolling Thunder Goals ...................................................................................................30
Table 5: WPILibJ Captions and Line Counts ...............................................................................33

9
1. Introduction
The evolution of robotics has rapidly progressed to the point where “our robot creations
are evolving similar to how life in earth evolved” [1]. Through robotics, engineers and scientist
interested in mechanics, software and electronics get the chance to bring to the professional
world their curiosities, making it the spark of science. Inspiring high school students in science
and technology has been a common goal between schools and companies. This goal has been
furthered by developing robotics competitions where the knowledge of those high school
students in fields like software programming, electronics and mechanics is challenged.
FIRST, For Inspiration and Recognition of Science and Technology, is an association that
was founded in 1989 by Dean Kamen, the inventor of the Segway Personal Transporter. The
mission of FIRST is “to inspire young people to be science and technology leaders, by engaging
them in exciting mentor-based programs that build science, engineering and technology skills,
that inspire innovation, and that foster well-rounded life capabilities including self-confidence,
communication, and leadership” [2]. Each year, the FIRST association organizes a robotic
competition in which teams of high school students from around the world are challenged to
develop robots which performs specific tasks. The teams are advised and mentored by
professional engineers and institutions which sponsor them through these competitions. The
Massachusetts Academy of Math Science and Worcester Polytechnic Institute are two
institutions that in unison sponsor the FIRST team 190. This team is known for having some of
the most innovative ideas in the league. Including students from MASS Academy, WPI and other
regional high schools, this team is active all year offering over fifty demonstrations and hosting
four tournaments every year [3].

10
FIRST has decided to use an acquisition and control platform called CompactRIO
(CRIO) as its next-generation FIRST Robotics Competition (FRC) controller. This control
platform will be used to program the target robot giving the students access to advanced control
capabilities and superior performance [4]. Since the competition’s rule is to build and program a
robot in a time frame of six weeks using a standard “kit of parts”, the students use a general
purpose programming language which is suitable for rapidly developing application software.
Historically, C has been the most common language used by FIRST participants. “C is a general
purpose programming language which features economy of expression, modern control flow and
data structures, and a rich set of operators” [5]. However as more powerful languages derivates
of C have develop, FIRST directors are interested in providing the students with the possibility
of using a simpler, more versatile, and more powerful language that is also a better match for the
computer science curriculum in high schools. The Java programming language was an obvious
candidate for this approach. Features of the Java programming language such as its virtual
machine controlled environment, wide standard library and applications would be of great use
when programming FRC robots [6].
Therefore, with the goal of making a transition from the C programming language to
Java, Sun Microsystems, the developers of the Java programming language, sponsored and
guided this Major Qualifying Project. To enable this transition for FIRST, our team wrote a code
framework for the CRIO in the Java programming language. In order to use the Java
programming language on the CRIO to control the target robot, a Java virtual machine, called
Squawk, had to be ported. “Squawk is an open source research virtual machine for the Java
language that examines better ways of building virtual machines”[7]. It is the virtual machine
that will run the compiled Java code on the target robot.

11
During the seven weeks of research and work towards this project, our team received
much guidance from the Squawk Project team members at Sun. This guidance helped us to
further understand the functionalities of the Squawk virtual machine and the default behavior of
its current stage. In the same manner, the WPI robotics resource center provided us the hardware
required for this project and assisted us in the test and analysis of the Java implementation in the
CRIO. Further explanations of how the Squawk Virtual Machine was ported to the CRIO and
implementation details of how our team accomplished this goal are enclosed in this document.

12
2. Project Background
Sun Microsystems is a company that drives network participation through shared
innovation, community development and open source leadership [7]. Since 1982 Sun has been
providing a diversity of software, systems, services, and microelectronics that power everything
from consumer electronics, to developer tools and the world's most powerful datacenters. One of
Sun’s core brands is the Java technology platform which is widely used in embedded devices,
mobile phones and web servers. Since 1995 the Java technology revolution has been enabling
developers to write applications once to run in any computer [8]. Subsequently the great success
obtained by the Java platform consisting of three major parts: the Java programming language,
the Java Virtual Machine (JVM), and several Java Application Programming Interfaces (APIs)
induced Sun to license Java technology to all major hardware and software companies. For
instance software operating systems like Microsoft Windows, Linux and Solaris use the Java
Standard Edition platform for their implementations [9].
To foster the growth of Java, Sun Microsystems, a technology powerhouse, regularly
provides students with resources like open source software, the Solaris platform, training and
internships that help them to advance in their careers. Through Worcester Polytechnic Institute,
Sun Microsystems this year (2008) sponsored and guided several Major Qualifying Project
including our team. The purpose of the MQP is to combine the previous studies of each one of
the team members, in order to solve problems or perform tasks similar to those encountered in
professional life [12]. Our team consisting of Electrical and Computer Engineers students, had
the opportunity to collaborate with Sun in their goal of making the transition from the C
13
programming language to Java, helping those students in the FIRST Robotics Competition
(FRC).
After the decision by FIRST to use the CompactRIO as their embedded control platform
for the coming FRC, our team began researching and organizing our strategies to implement the
Java programming language in the CRIO. The National Instruments CRIO, is an advanced
embedded control and data acquisition system designed for applications that require high
performance and reliability. It combines an embedded real-time processor, a high-performance
FPGA, and hot-swappable I/O modules.
The CRIO can be adapted to solve a wide variety of industry and application challenges.
With its features such as its low cost and reliability, as well as with its suitability for real time
embedded measurement and control application, the CRIO will give the students the opportunity
to access advanced control capabilities and reach superior performance [4].
In order to start this project, the initial goals required to implement the Java programming
language in the CRIO were determined by our Sun liaison. In the table below we show the list of
the initial goals and further in section 6 we detail each goal and what changes were made through
the project.
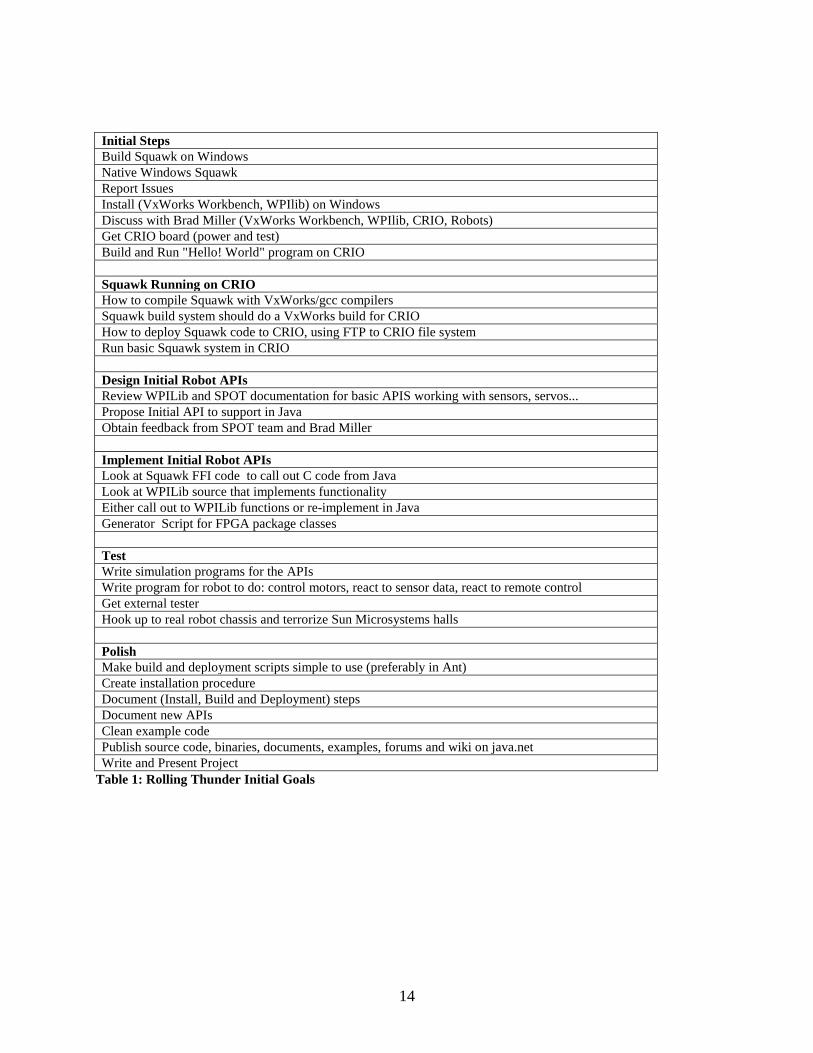
14
Initial Steps Build Squawk on Windows Native Windows Squawk Report Issues Install (VxWorks Workbench, WPIlib) on Windows Discuss with Brad Miller (VxWorks Workbench, WPIlib, CRIO, Robots) Get CRIO board (power and test) Build and Run "Hello! World" program on CRIO Squawk Running on CRIO How to compile Squawk with VxWorks/gcc compilers Squawk build system should do a VxWorks build for CRIO How to deploy Squawk code to CRIO, using FTP to CRIO file system Run basic Squawk system in CRIO Design Initial Robot APIs Review WPILib and SPOT documentation for basic APIS working with sensors, servos... Propose Initial API to support in Java Obtain feedback from SPOT team and Brad Miller Implement Initial Robot APIs Look at Squawk FFI code to call out C code from Java Look at WPILib source that implements functionality Either call out to WPILib functions or re-implement in Java Generator Script for FPGA package classes Test Write simulation programs for the APIs Write program for robot to do: control motors, react to sensor data, react to remote control Get external tester Hook up to real robot chassis and terrorize Sun Microsystems halls Polish Make build and deployment scripts simple to use (preferably in Ant) Create installation procedure Document (Install, Build and Deployment) steps Document new APIs Clean example code Publish source code, binaries, documents, examples, forums and wiki on java.net Write and Present Project
Table 1: Rolling Thunder Initial Goals
15
3. CompactRIO Overview
The FIRST Robotics Competition (FRC) plans to use a control/data acquisition system,
called CompactRIO (CRIO), for its next generation competitions. The CRIO was created by
National Instruments, a company which has been a major sponsoring body of the FRC providing
funding for its creation and success. By supporting the students who are interested in technology
and engineering, National Instrument hopes to help raise a future generation of engineers [4].
The control/data acquisition system, CRIO, is currently programmed using LabView,
which is a data acquisition platform and development environment, or C programming language.
The CRIO has a 400 MHz PowerPC processor power, 64MB of DRAM, and 128MB of non-
volatile flash memory. It is relatively easy to program as the code can be debugged remotely
from a workstation. Additionally it contains an industrial 400 MHz Freescale MPC5200
processor that executes the LabVIEW Real-Time applications using the Wind River VxWorks
real-time operating system. It also has an FPGA programmable logic device that permits the
implementation of custom timing, triggering, synchronization, control, and signal processing for
the analog and digital I/O [4].
In order to provide a wireless networking configuration, an IEEE 802.11 ethernet bridge
is available. The CRIO is also designed in such a way that it has a flexible input and output, with
plug-ins for various sensors and I/O lines. “Digital sidecars”, which connect the digital I/O
module in the CRIO, are also there to link the CRIO to devices like motor controllers that can be
incorporated. In the same manner a driver station, which is the device that collects the position of
Human Interface Devices (joysticks, switches, game pads, etc.) and sends them to the robot

16
controller, can be connected to the CRIO. This connection provide the user with a control
interface that has ethernet ports for a router, USB ports for joystick devices, and an LCD display.
Furthermore the CRIO contains integrated plug-in and controller modules inside a metal chassis,
which can be divided into three categories: the analog input module, the digital I/O module and
the solenoid module.
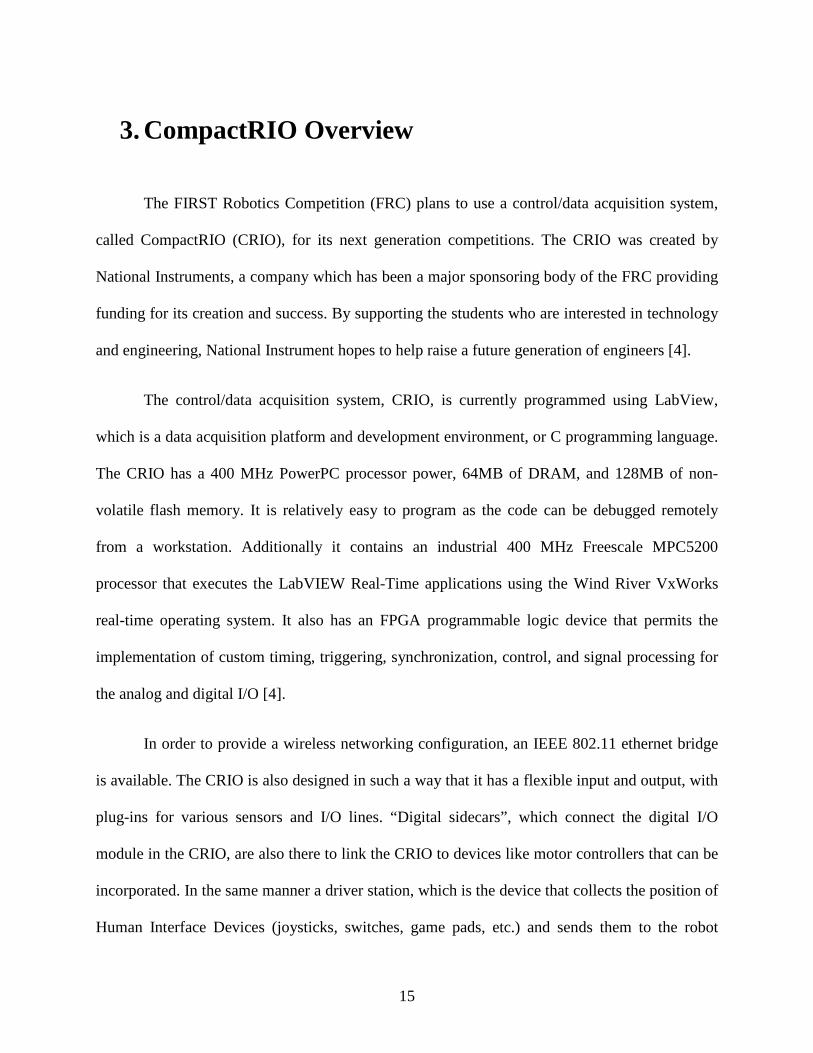
3.1 Analog Input Module:
The analog bumper is the interface that plugs in to the Analog Input Module to provide
analog inputs for the sensors. It is powered by a 12V input and 1A 5V switching power supply.
The analog input module has 8 channels and a 12-bit resolution and accepts a +/- 10V input
range. (See Figure-1).
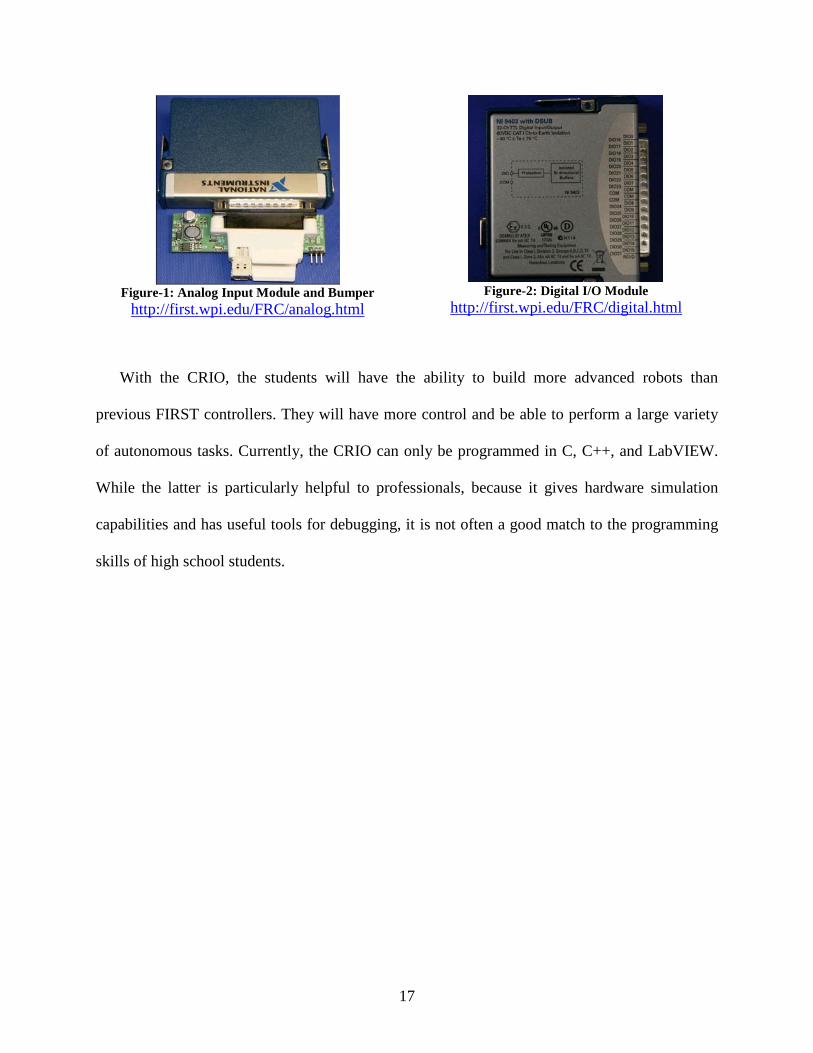
3.2 Digital I/O Module:
The digital module has 32 channels of general purpose digital I/O. It operates on a 5V
transistor logic level and can take up to 1A of current. A 37-pin connector contains all the I/O of
the digital I/O module. (See Figure-2).
3.3 Solenoid Module:
The solenoid module contains eight 1A 12V solenoid outputs. A pneumatic bumper plugs
into it making it able to control devices such as solenoids and pneumatics. It takes 12V and has
two pin outputs.
17
Figure-1: Analog Input Module and Bumper
http://first.wpi.edu/FRC/analog.html
Figure-2: Digital I/O Module
http://first.wpi.edu/FRC/digital.html
With the CRIO, the students will have the ability to build more advanced robots than
previous FIRST controllers. They will have more control and be able to perform a large variety
of autonomous tasks. Currently, the CRIO can only be programmed in C, C++, and LabVIEW.
While the latter is particularly helpful to professionals, because it gives hardware simulation
capabilities and has useful tools for debugging, it is not often a good match to the programming
skills of high school students.

18
4. The CompactRIO Sensors
The CRIO that was used in the recent First Robotic Competition of 2008 came with
several sensors. Three important sensors worth noting are: the dual-axis accelerometer, the yaw
rate gyro, and the peak-detecting gear-tooth sensor. These sensors in particular are necessary to
implement basic robotic motion control.
4.1 Dual-Axis Accelerometer:
The DAA measures static motion (i.e. gravity) and dynamic motion (i.e. vibration), providing
2-axis information. This sensor is used by robots in order to measure their acceleration by
converting the mechanical motion into a relative electrical signal that can be used to control their
velocity. The accelerometer is connected to two analog inputs in order to measure the
acceleration in both the X-axis and Y-axis. This device draws approximately 3mA of current and
has a resolution of 1,000 mV/g when fed with a 5V supply. (See Figure-3).
Table-2: Dual Axis Accelerometer Table http://www.usfirst.org/uploadedFiles/Community/FRC/FRC_Documents_and_Updates/2008_Assets/Manual/2008_Sensor_Manual.pdf
4.2 Yaw Rate Gyro (GYRO)
Applications that have a gyro sensor typically use this device to detect rotation and return a
value in degrees per second of rotation. The yaw rate gyro detects angular changes in the device

19
it is attached to. This device is usually mounted on the robot’s frame and has a driver that is
programmed to resist any sudden changes in direction. Its function is mainly that of stabilizing
the robot while it's being operated. The angle is measured from the top surface axis of the device
when it is stable. A voltage is produced by the YRG that is proportional to the change in angular
rate. This output can be used to control the robot platform and stabilize it. It operates under a 5V
supply and is connected to two analog inputs in the robot. The sensor generates two outputs. The
T output provides the “rotational velocity” and is measured in millivolts per degrees per second
of rotation. The R output gives the relative temperature in millivolts per degree Kelvin (see
Figure-4).
4.3 The Differential Peak-Detecting Gear Tooth Sensor
The gear tooth sensor is very important because it allows a direct calculation of the speed of
the robot as it moves. This IC uses 12 DC volts and draws about 16mA in order to calculate and
control the robot speed. When each ferrous tooth passes through the sensor, a pulse is generated
and the sensor outputs a Pulse-Width Modulation signal with a distinct duty cycle, which is the
ratio between the pulse duration and the pulse period. The speed of the robot can then be
calculated and the result can be output through a port to the CRIO controller (see Figure-5).

20
Figure-3: Dual Axis Accelerometer
http://www.usfirst.org/uploadedFiles/Community/FRC/FRC_Documents_and_Updates/2008_Assets/Manual/2008_Sensor_Manual.pdf
Figure-4: Yaw Rate Gyro
http://www.usfirst.org/uploadedFiles/Community/FRC/FRC_Documents_and_Updates/2008_Assets/Manual/2008_Sensor_Manual.pdf
Figure-5: The Differential Peak- Detecting Gear Tooth Sensor
http://www.usfirst.org/uploadedFiles/Community/FRC/FRC_Documents_and_Updates/2008_Assets/Manual/2008_Sensor_Manual.pdf

21
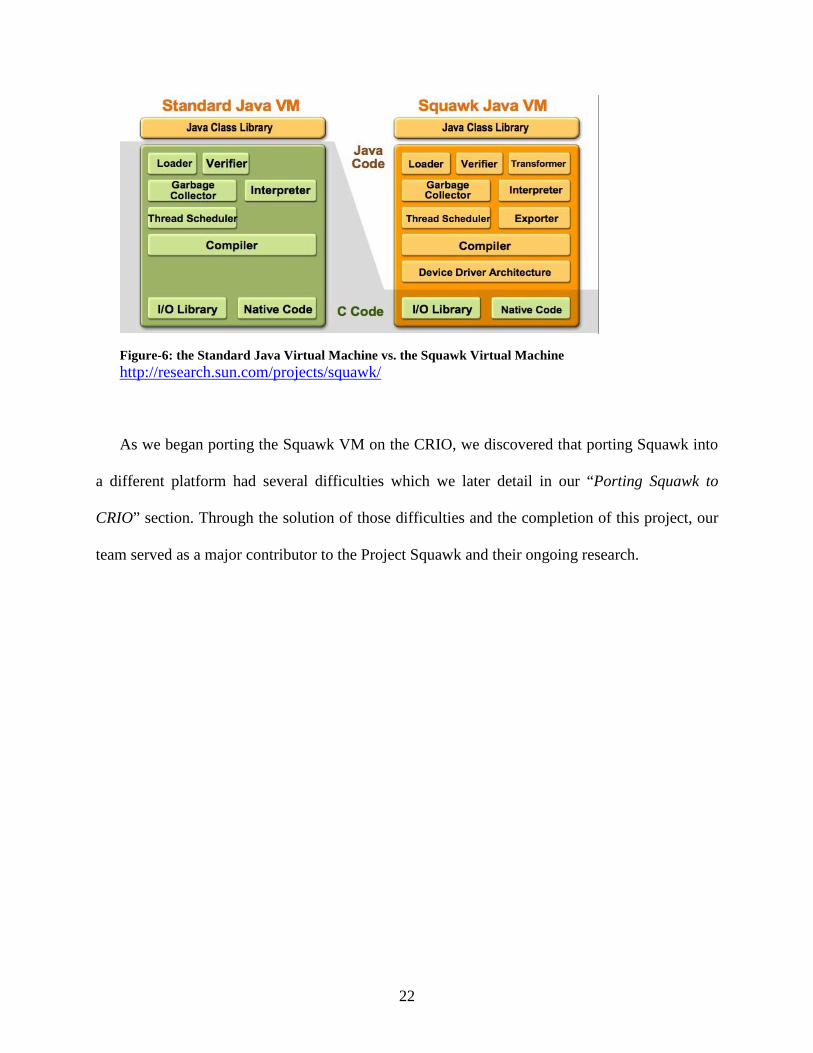
5. Squawk
Sun Microsystems virtual machine, Squawk, is an open source virtual machine written in
Java language for embedded systems and small devices. With its core mostly written in Java,
Squawk provides ease of portability and seamless integration of virtual machine and application
resources. As part of an ongoing research on Sun Microsystems Laboratories, Project Squawk’s
goals are to write as much of the virtual machine (VM) in Java as possible (Figure 6), targeting
small resource constrained devices and enable Java for micro-embedded development.
In order to accomplish our task of implementing Java on the CRIO we made use of the
Squawk virtual machine. It was an intriguing challenge at first while we tried to understand the
Squawk architecture and its implementation. The Squawk architecture is mostly implemented in
the language that it executes (Java). As illustrated in Figure-6: the Standard Java Virtual
Machine vs. the Squawk Virtual Machine the objective behind the Squawk VM is to create a
sufficiently small VM that can be store in embedded devices permitting faster start up time for
the embedded application. This objective is to be accomplished by having a compact byte code
instruction set, suites (collection of classes), a split VM architecture, isolates (mechanism by
which an application is represented as an object) and several VM components.
22
Figure-6: the Standard Java Virtual Machine vs. the Squawk Virtual Machine http://research.sun.com/projects/squawk/
As we began porting the Squawk VM on the CRIO, we discovered that porting Squawk into
a different platform had several difficulties which we later detail in our “Porting Squawk to
CRIO” section. Through the solution of those difficulties and the completion of this project, our
team served as a major contributor to the Project Squawk and their ongoing research.

23
6. WPILib 6.1 The Library
WPILib is a framework for programming FRC Robots which highly simplifies the
programming task for the FRC teams. By using the WPILib the FIRST teams obtain support for
common devices such as gyros, accelerometers and optical encoders and have the possibility of
extending the framework with drivers of their own creation without modifying any program that
uses WPILib. The WPILib framework is available for free to all FIRST teams and can be easily
downloaded.
Another advantage to using WPILib is that it does not require the user to generate of all the
complex math and calculations involved in devices like wheel encoders. This default code can be
called whenever the user needs to access any of the peripherals or devices through simple
function calls with variables that are passed as arguments. Additionally, WPILib is portable,
meaning that it can be used on many controllers without the need to make any changes to it. It is
compatible with FRC controllers that were used in the 2005 and 2006 competitions, as well as
other controllers like the VEX, Robovation, or the CRIO. WPILib is structured so that it is
modular, and therefore any type of devices can be added to it without modifying the existent
source code. Additional advantages that the library gives are its simplicity and its extensibility.
As complex as robotic may seem, any inexperienced user can program his/her robot by simply
calling the desired modules which are are already programmed and this manipulating simple
variables like direction, angle, or speed for instance and passing them through function calls as
parameters. One last benefit that the library has is its broad-spectrum of capabilities. It contains
all the common devices that one would see in a typical robots; things like gyros, encoders,

24
counters, accelerometers, and cameras. All of these modules have their drivers written in
separate classes so that the user can request them at his or her convenience.
Currently, the students participating in the competitions have a graphical development
environment called easyC that they use in order to program the robots in C code and through
which all of the WPILib classes are linked. For our project, we made use of the WPILib
framework for the implementation of our robot. However, since we needed to program the CRIO
in Java, we proceeded to translating and implementing the code of the library from C++ to Java.
Further details of this implementation can be found in our “WPILib Implementation” section.
6.2 Architecture
The CRIO contains two microcontrollers. The first is basically a read-only device, and it
stores the code written by FIRST that runs when the user program is linked to the manual
controller. This master microcontroller deals mainly with communication issues with the CRIO
and controls the main motors when not operated by the user interface. For example, it makes sure
that all the motors are running at start-up and are disabled when the reset switch is triggered.
The second microcontroller is a user processor that processes the code that is implemented by
the student programmers. It is connected to the master processor via a serial bus so that the speed
of the motors is communicated from the user processor through the PWM outputs to the master
processor periodically, at very short intervals. Also, information about the state of all the IO
ports is transmitted but this time from the master processor back to the user processor in order
for the user to have enough information to program the output port properly.
The architecture of the WPILib library can be broken down into several layers:
25
• IFI base code – the code developed by FIRST that runs on the master processor at
startup.
• WPILib timer and interrupt handling – drivers in the library that handle complex
functions for things such as timers for the controller and the interrupt service routine.
• WPILib device drivers - the classes mentioned above, containing code for important
device drivers. A list of some of these drivers is presented below.
• User written drivers - files added by the user to control new devices and modules added
to the robot.
• User applications – the program written by the user in order to run the robot and make it
perform desired tasks.
The order of these four layers matches the order with which each one is executed by the
master and user processor after the programs are compiled and linked to the CRIO.
6.3 Common devices included in WPILib
A list of common devices enclosed in the library is shown below:
Gear Tooth Sensor – Refer to “The CompactRIO Sensors” section of the report.
Ultrasonic Rangefinder – Made of two transducers, a speaker that sends ultrasonic pings and a
microphone that received the echoed ping. The driver measures the time it takes for the ping to
travel from the transmitter to the receiver and converts this to distance (in different units).
Accelerometer - Refer to “The CompactRIO Sensors” section of the report.
Gyro - Refer to “The CompactRIO Sensors” section of the report.

26
Compass – a device that returns a measurement in degrees, from 0 to 360°. It helps navigate the
robot by showing the direction that it's facing with a magnetic field sensor that can detect the
Earth's magnetic field.
Compressor and Pressure Switch – The pressure switch is connected to the pressure side of the
circuit designed for the pneumatics and controls the pressure of the system through a polling
algorithm. When this one is low, the switch is closed and a relay port is turned on indicating the
state of the system pressure.
Camera – this device is initialized with the necessary parameters to indicate what object is to be
tracked. It's then used to track this object down as it moved by following it and returning data
packets showing its position and size.
Encoders – These devices measures the rotation of the shafts that are spinning when the robot is
moving. Usually, these devices are called when the distance the robot travels need to be
calculated. The device measures the number of rotations of the shafts to calculate the distance
that the wheels have traveled. This distance is then divided by the period to give us the speed.
In conclusion, WPILib will be used as a backbone to our project. The different drivers
mentioned above will be used, but this time, some of them will be rewritten in Java so that our
end product is a system that is mostly written in the Java language. In the next section, a detailed
report of all the steps that have been taken to complete the project are listed and explained. In
this section, the reader will learn how we have designed the robot APIs to support Java and how
these were implemented.

27
7. Design Implementation
In order to assure an organized and concise implementation of tasks, at the beginning of
our project we developed a design approach implementation plan. The design implementation
plan was a compilation of the initial goals specified by our sponsor liaison, the requirements
specified by our advisor and the team’s personal objectives.
Our first steps towards this plan were to analyze the initial goals specified by our sponsor
liaison (See Table-2) and to make a SourceForge account. SourceForge is a source code
repository where large amount of source code can be kept. In our SourceForge account we kept
track of the project goals, saved the project documents and created a wiki (a collection of
webpages) with resources used during the project implementation. As we started implementing
our project tasks and subsequently populating our SourceForge account, we realized that some of
the initial goals specified by our sponsor liasion either needed to be modified or were not going
to be possible to accomplish. Within the limited time frame of the project, alternative approaches
sometimes permitted us to save time and deliver a better result. For instance, for the goals
specified in Initial Steps in Table-2, we decided to eliminate the Native Windows Squawk goal,
which consisted in making Squawk run on windows without using another JVM as a proxy for
network and file I/O, due to its complexity and lack of specific value towards the end product of
this project. For the Implement Initial Robot APIs section, we couldn’t accomplish the Generator
Script for FPGA package classes goal due to time constraint. In the same manner for the Polish
section we couldn’t accomplish the following goals: publish source code, binaries, documents,
examples, forums and wiki on java.net and make build and deployment scripts simple to use
(preferably in Ant) due to time constraints.

28
Initial Steps Build Squawk on Windows Native Windows Squawk Report Issues Install (VxWorks Workbench, WPIlib) on Windows Discuss with Brad Miller (VxWorks Workbench, WPIlib, CRIO, Robots) Get CRIO board (power and test) Build and Run "Hello! World" program on CRIO Squawk Running on CRIO How to compile Squawk with VxWorks/gcc compilers Squawk build system should do a VxWorks build for CRIO How to deploy Squawk code to CRIO, using FTP to CRIO file system Run basic Squawk system in CRIO Design Initial Robot APIs Review WPILib and SPOT documentation for basic APIS working with sensors, servos... Propose Initial API to support in Java Obtain feedback from SPOT team and Brad Miller Implement Initial Robot APIs Look at Squawk FFI code to call out C code from Java Look at WPILib source that implements functionality Either call out to WPILib functions or re-implement in Java Generator Script for FPGA package classes Test Write simulation programs for the APIs Write program for robot to do: control motors, react to sensor data, react to remote control Get external tester Hook up to real robot chassis and terrorize Sun Microsystems halls Polish Make build and deployment scripts simple to use (preferably in Ant) Create installation procedure Document (Install, Build and Deployment) steps Document new APIs Clean example code Publish source code, binaries, documents, examples, forums and wiki on java.net Write and Present Project
Table 3: Rolling Thunder Initial Goals
After we realized what goals were going to be accomplish under our time constraint and
capabilities we created Table-3. In Table-3 we documented the alternatives, like the order of
implementation, and the additional steps that were required to deliver a better result.

29
Besides the project initial goals specified by our sponsor liaison we also had to achieve
our advisor’s requirements, which assured the successful completion of this Major Qualifying
Project. Our advisor’s requirements included: weekly meetings, where revisions and final
documentations of the project needed to be made. These requirements were added to our design
implementation plan and managed trough our SourceForge account. During the weekly meeting
held by our advisor we discussed the current state of the project and the team perspectives,
toward the project, sponsor liaison and each team member. In the same manner a revision of the
project documentation was sent by e-mail to the advisor and the team members; this was
followed by feedback that help us towards the completion of this document.
Finally our design approach was complete after the team personal objectives were
included. Our team objectives consisted in permanent communication, active and positive
collaboration and consistent focus on final goals. To assure that these objectives were met, we:
maintained consistent meetings with our sponsor liaison, scheduled lunch meetings for the team
members outside of the work environment, discussed topics or addressed questions related to the
project as a group exercise towards the end of the week and avoided project work during
weekends. The structure of our design approach implementation plan was respected and
followed by each one of the team members. Accordingly our project had a successful outcome
representing a positive experience for each one of the team members.

30
Initial Steps Build Squawk on Windows Report Issues Discuss with Brad Miller (VxWorks Workbench, WPIlib, CRIO, Robots) Get CRIO board (power and test) Build and Run "Hello! World" program on CRIO Install (VxWorks Workbench, WPIlib) on Windows Squawk Running on CRIO How to compile Squawk with VxWorks/gcc compilers Squawk build system should do a VxWorks build for CRIO
1. Add VxWorks compiler 2. Fix VxWorks Platform Specifics
How to deploy Squawk code to CRIO, using FTP to CRIO file system 1. Using WindRiver Workbench 2. Via FTP
Run basic Squawk system in CRIO Design Initial Robot APIs Obtain feedback from SPOT team and Brad Miller Propose Initial API to support in Java
1. Verbatim copy from C++ code Review WPILib and SPOT documentation for basic APIS working with sensors, servos... Implement Initial Robot APIs Port WPILib Look at Squawk FFI code to call out C code from Java Update WPILIbJ code to match WPILibC code ChipObject Java Components Test Get external tester Get SimpleRobot to Run Get InteractiveRobot to run Write simulation programs for the APIs Write program for robot to do: control motors, react to sensor data, react to remote control Hook up to real robot chassis and terrorize Sun Microsystems halls Polish Clean example code Create installation procedure Document new APIs OTA Deployment Document (Install, Build and Deployment) steps Write and Present Project
Table 4: Rolling Thunder Revised Goals

31
7.1 Goals
Understanding the concepts of each goal was the most important part of our design
implementation plan. This guaranteed a correct implementation and helped us when explaining
to others the detailed purpose of our project.
The Initial Step section of our goals table 3 was summarized into: Run Java Connected
Limited Device (CLDC) and Information Module Profile (IMP) on CRIO. Through this goal we
provided Java 2 Platform Mobile Edition application environment for the CRIO, which is a
device that does not provide rich graphical display capabilities and is limited in other ways.
Subsequently we summarized the other sections of our goals table into: Port WPILib into Java,
Obtain access to sensors and servos, Remote Debugging of Java code and OTA deployment and
Documentation.
Port WPILib into Java, purpose was to translate the C++ WPILib code into Java code.
For this goal we copied the code of the WPILib classes without changes and followed by
correcting problems encountered, such as the concept of pointers in Java and C++.
Obtain access to sensors and servos, consisted on writing some test code and was
accomplished after we port Squawk on the CRIO and fixed some WPIlib functions.
Remote Debugging of Java code and OTA deployment consisted on writing test code for our
target robot and was accomplished when we could command the robot wireless.
Documentation, consisted on documenting our research and implementation procedures
during this project. This final goal was accomplished after the completion of this document and
the presentation given to Sun Microsystems, in their location at Burlington, MA and FIRST, in
their headquarters at Manchester, NH.
32
8. Implementing WPILib
In order to ease the startup time for FIRST robot development, WPI provides a library of
common robot features, dubbed WPILib. This library, written in C++, consists of two key
sections. First, WPILib contains a set of classes representing the base functionality of a robot for
a FIRST competition. These classes provide the interface with the competition field controllers,
which indicate to the robot whether it should be disabled, running autonomously, or running with
team control. Second, the library provides a suite of classes for common devices attached to a
robot. These devices include servos, analog and digital sensors, such as potentiometers and
switches, and motors. With these components provided, teams are not required to reproduce the
common code that controls these devices, allowing them more time to write the code for their
robot’s functionality.
Following the same methodology, we wanted to provide an equivalent library of common
code in Java, which we call WPILibJ (appending the ‘J’ for Java). In order to simplify the C++
to Java transition, we opted to exactly mirror the class structure. This means that all of our
library’s classes, and the functions they provide, have exactly the same names and parameters as
the functions in the C++ library. The justification for this decision was two-fold: first, teams
using the C++ version of WPILib can switch to Java with almost no changes to their code; and
second, our team was able to simplify development of our new library.
The actual implementation process was simple, yet time consuming. Since C++ and Java
have a similar syntax, the majority of the code could be copied without changes. Our choice of
common function names simplified matters further: we were relieved of the task of renaming the

33
functions that the existing C++ code called after we copied it. The copied code provided the
skeleton for our updated code, requiring only minor changes, instead of a full rewrite. With
nearly 10,000 lines of code, this was an immense time saver. Table-4 contains the full list of
converted classes and their individual line counts.
Class Name Line Count Class Name Line Count Accelerometer 91 HiTechnicCompass 60 AnalogChannel 190 I2C 134 AnalogModule 452 ICounter 74 AnalogTrigger 144 InterruptableSensorBase 69 AnalogTriggerOutput 113 IterativeRobot 283 communication/FRCControl 61 Jaguar 66 communication/FRCControlData 146 Joystick 224 Compressor 126 Module 26 Counter 350 Notifiable 5 DigitalInput 148 Notifier 225 DigitalModule 266 PID 93 DigitalOutput 75 PIDController 219 DigitalSource 16 PIDOutput 10 DriverStation 325 PIDSource 10 Encoder 189 PWM 261 fpga/tAI 258 Relay 148 fpga/tAlarm 56 Resource 102 fpga/tAnalogTrigger 163 RobotBase 116 fpga/tCounter 350 RobotDrive 382 fpga/tDIO 382 SensorBase 221 fpga/tDMA 307 Servo 108 fpga/tDMAChannelDescriptor 23 SimpleRobot 83 fpga/tDMAManager 59 Solenoid 88 fpga/tEncoder 285 SpeedController 7 fpga/tGlobal 71 tests/AITest 25 fpga/tInterrupt 132 tests/DIOTest 109 fpga/tInterruptHandler 6 tests/JoyTest 69 fpga/tInterruptManager 63 tests/RobotTest 50 fpga/tSolenoid 43 Timer 127 fpga/tSPI 337 TimerEventHandler 6 fpga/tSystem 57 Ultrasonic 246 fpga/tWatchdog 135 util/UncleanStatusException 35 GearTooth 89 Utility 43 GenericHID 52 Victor 83 Gyro 128 Watchdog 128 Total 9623
Table 5: WPILibJ Captions and Line Counts

34
8.1 Implementation Challenges
Our implementation of the WPILibJ code was not without its difficulties. Although Java
and C++ share syntax, they vary greatly in semantics. A key omission from Java is the concept
of a pointer. Both C++ and Java create instances of classes by allocating a block of data on the
heap, though they differ in how that instance is accessed. In C++, this data is always in the same
location in memory, so a pointer containing the address of the data is used. In Java, the garbage
collector is free to move the object around to optimize memory, and is accessed with an
equivalent object that hides this relocation. Also of note is that C++ allows pointers to the
primitive data types, such as integers and doubles, whereas Java does not.
The complication here was caused by the original C++ code which made extensive use of
pointers. We had to track down each of these pointers and replace them with the appropriate
Java code. For usages within the code, there was usually a way to simply remove the pointer
concept and use the objects directly. More complex was the use of pointers as function
parameters. A major reason for this in C++ is to allow a function to modify the values of its
parameters, especially if it needs to return multiple values (for instance, a string and its length).
Java has no support for this feature, greatly complicating the conversion from C++.
The other major impediment was the Chip Object classes used in C++. These classes
represented external devices that were implemented using LabView. Only the interfaces to these
classes were available to us, so our first attempt at dealing with these was to use Java Native
Access (JNA) code to directly call the C++ functions. Initially, this seemed to work fine. We
were able to call the constructor of a class, and access some static functions it exposed. This
model was shattered once we tried to use instance functions. Without an easy way to use classes
in the JNA code, we were simply treating the pointer to the class instance we received from the

35
C++ code as an integer. This was fine for referencing the instance itself, but was unsuited for
calling instance functions. C++ uses a different mechanism for calling instance functions than
we expected. We believed that the C++ compiler would rewrite the function call so that a hidden
first parameter would be the instance of the class on which the function was invoked.
Unfortunately, this was not the case; we were unable to determine the correct calling convention,
and were forced to try an alternate solution.
The solution we decided on worked, if inelegantly. Since we were unable to call instance
functions from JNA, and could not use the functions
directly, we needed an interoperability layer. Our choice
for this was C code: C functions are easily callable from
JNA and can be made to work with C++ classes. Before
the arduous process of creating a “glue” layer, we coded a
few of the functions we expected to need as a trial. We
created a wrapper for the constructor, returning an integer to represent the new instance, and
created a mirror of the function we wanted to access in C using the calling convention we
described above (passing the class object as the first parameter to the function). The C function
is responsible for converting the variable types and rewriting the calling convention to match
C++. Our JNA code then invokes the C function in the standard fashion. Our first attempts
worked correctly, meaning we could continue making our glue layer. For 17 different classes
with several functions each, doing this by hand would be a waste of our time. We opted to
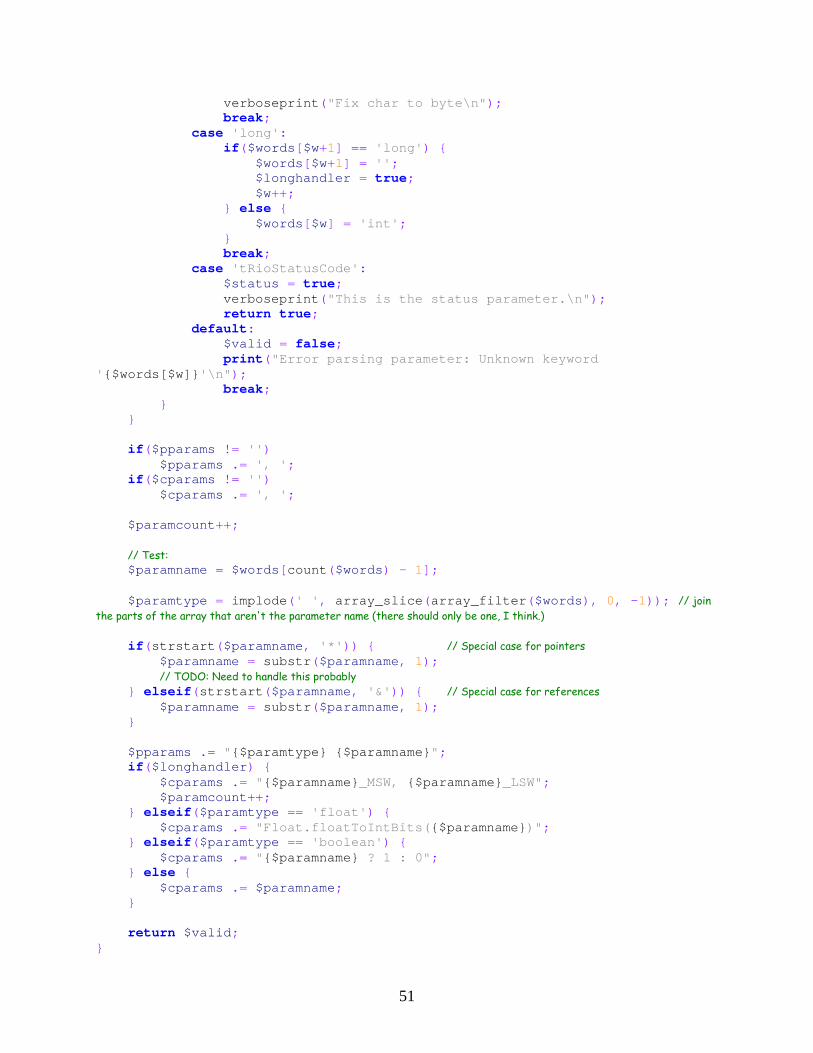
optimize the process by creating a PHP script that could read the C++ class interfaces and
generate the matching C and Java code (see Appendix 1 for the script).
Techno-babble: Our C functions are
technically not C functions. In
actuality, they are C++ functions
that have been declared with extern
“C”, making them accessible from
pure C code. Although we didn’t
need pure C code to call them, this
simplified access from our JNA
calls.
36
9. Porting Squawk to the CRIO
Porting Squawk to the CRIO was the primary objective of this project. As the
implementation progressed, VxWorks, the operating system of the CRIO, presented increasingly
complicated problems. Beginning this task, we knew that VxWorks is POSIX compliant, and
Squawk had existing, though limited, support for POSIX systems.
VxWorks is a real-time operating system designed for use in embedded systems. For this
project, we used VxWorks version 5.5. For development, we used the Wind River Workbench,
which is built on the Eclipse IDE for portability. Most VxWorks programs are developed in
C++, which is not supported in Eclipse, hence the need for Wind River Workbench.
VxWorks complies with the POSIX (Portable Operating System Interface) standards
produced by IEEE and recognized by ISO and ANSI. These standards are used in order to define
a common Application Programming Interface (API) for any operating system. Since 1988,
POSIX, also known as IEEE 1003, standards have been representing the Single UNIX
Specification group of standards for computer operating systems. POSIX compliance generally
simplifies the task of porting applications to other platforms, since covered functionality can be
assumed to be equivalent. For example, the POSIX standards cover memory allocation, time
functions, and multi-threading (although other techniques exist).
GCC, the GNU Compiler Collection, is a set of compilers for various programming
languages. GCC is commonly used as the standard compiler for all UNIX-like operating
systems. The GCC tool chain also includes utilities, such as GDB, the GNU Debugger, and
cross-compilers. GCC is also the name used for the GNU C Compiler. Although GCC is

37
typically intended to compile an application for the same platform as the one hosting the tools,
our variant would also build applications for VxWorks under a Windows or UNIX host.
The first step was to build Squawk natively on Windows. Accordingly to the instructions
on the java.net (Sun Microsystems) webpage, we proceeded by first installing the specific
software needed, continued by getting Squawk and building it on Windows.
9.1 Building Squawk on Windows
Before we could build Squawk on Windows, we needed several tools to be installed.
First, we needed a Subversion client, in order to retrieve the Squawk source from the repository.
The recommended client for Windows is TortoiseSVN, which is both freely available and well
supported. We also needed to install a version of Microsoft Visual C++. Visual C++ is an IDE
provided by Microsoft for the development of Windows applications. We had several choices
for the version we would install: Microsoft Visual Studio 2005 (or later), Microsoft Visual C++
2005 (or later), or Microsoft Visual C++ 2005 Express Edition (or later). The only parts of
Visual C++ required were the compilers and the header files, so the free Express Edition was
sufficient. Finally, we needed a version of the Java 2 Standard Edition Development Kit 5.0.
The Java Runtime Environment (JRE) was required to run the build tools provided with Squawk,
which are written in Java, while the Java Development Kit (JDK) was required to compile the
Java portions of Squawk. One vital note here is that the JDK must be version 5.0; 1.4 and
earlier, or 6.0 and later, do not work (which we learned from experience).
After the installation of the software required, we could begin building the Windows
version of Squawk. There are actually two versions of Squawk for Windows: a “hosted”
version, which uses the existing JRE as a proxy for file and network operations, and a “native”

38
version, which is responsible for its own. Native Squawk on Windows was incomplete, and it
was decided that our effort was better utilized elsewhere. We were able to build the hosted
version easily, following the directions provided on java.net. We used the hosted version of
Squawk for Windows throughout the project.
9.2 Moving to the CRIO
Beginning the development for the CRIO was less complicated. The only software we
needed to add was the Wind River Workbench, which provided the compilers we would use.
Continuing from here, the development process should have been simple: add information to the
Squawk builder for VxWorks, compile the code, and run. Unfortunately, the process was not
nearly this easy.
The first obstacle to implementation was the Squawk builder. In order to compile for
VxWorks, we needed to make changes to the builder. Some research into the builder revealed
that we would need to add two classes: a Platform class, providing the paths to the tools and
information about file formats (such as the executable extension), and a Compiler class,
containing the specific instructions to compile the code. These classes were a simple addition;
from here, things became more complex. We needed a way to hijack the platform detection code
to force a build for VxWorks. The builder normally detects the host operating system and
compiles for the same platform; we added a command line option to build for VxWorks. In
order to save a step in the build process, we also specified that VxWorks uses a big endian file
format (the default is little endian).
With the updates to the Squawk builder, we moved on to the compilation step. We
expected this process to have several errors, indicating which files would need updates for

39
VxWorks. With the expectation of failure, we initiated the build, and were stunned at the result.
Instead of the few errors we were expecting, the build process failed on the first step; GCC had
failed to locate any of the header files for the POSIX-compliant functions. At this point, we very
nearly panicked. The missing headers included the one for memory allocation, and without that,
it would be nearly impossible to get Squawk working. The solution (and the cause) was simple:
VxWorks may provide POSIX-compliant functions, but its authors had no desire to follow the
naming conventions for the header files. As a result, we spent multiple days locating the correct
header files for functions that should have existed elsewhere.
With the missing header files resolved, we attempted the build again, which, again,
failed. This time, we were missing functions entirely. Some of these were hidden away in
different headers, some were just unavailable, and some were, considerately, defined in header
files and never implemented, making them useless. In the first case, we had to track down more
rogue header files. In the second and third, we had to implement these functions by hand,
typically using VxWorks specific functions. These took nearly as long to resolve as the missing
headers, despite being far fewer. With these fixed, we could try the build again.
This time, much to our surprise, the build succeeded. From here, we took the executable
and the Squawk libraries and deployed them to the CRIO. Using the Wind River Workbench,
we were able to launch Squawk on the CRIO. Rather miraculously, the code ran, so we
attempted the built-in test suite for Squawk. This required a small change to our startup code,
and after recompiling, nothing was working anymore. We spent two days stepping through lines
of code in the debugger looking for the source of the problem. We finally discovered the source,
which was a common beginner mistake: there was a pointer to uninitialized memory in the code
we had written. After that was corrected, we successfully ran the Squawk test suite.

40
10. Test and Analysis
After we ported Squawk to the CRIO and had a fully functioning JVM to execute our Java
code, the next step was to carry out a set of tests in order to make sure that the CRIO was
working harmoniously with our new WPILibJ. Since we didn't have a robot at the time we
reached this step in our project, we borrowed a digital sidecar from Professor Brad Miller. With
our limited knowledge of its interface, we opted to perform some basic tests with this hardware
alone. We wanted to reduce the glitches before we had access to an actual robot from the
Robotics department at WPI. The digital sidecar had several capabilities that allowed us to test
parts of our code. For example, it had general purpose I/O pins that we could program using the
DigitalModule class from WPILib. In the same way, we were able to control other peripherals
like the Pulse Width Modulator (PWM) and relay pins, as we will explain later.
Since we were lacking actual robot hardware, we combined a servo from Professor Miller
and a few Lego bricks that belonged to Derek White's son. We assembled this handful of parts
into a makeshift test apparatus. We attached a motor to one of the relay ports, a push-button to a
digital input port, and a servo to one of the PWM ports.
After we set up the hardware, we created a test framework in C++ containing a set of tests on
the C++ implementation of WPILib. These tests allowed us to see how the classes in the library
interacted with each other, since the C++ library was already functional. This gave us the
baseline results which we would later compare to our Java library tests. In Appendix 2-1 we have
attached the C++ code that we wrote in order to test some of the functionalities that WPILib
provided.

41
The C++ tests for the WPILib functionalities showed that our digital I/O and relay pins were
working, but our PWM pins (and the attached servo) were not. To make the PWM work, we had
to disable both the system timer and user Watchdog timers. These timers are generally used to
halt the system when no driver station is connected to the CRIO. This would not be a problem in
a real robot, because the driver station would be provided. We instantiated a servo object in our
test code and called the appropriate functions to rotate our servo from one side (0°) to the
opposite (180°). The code for our servo tests is included in Appendix 2-2.
In our servo test code we first, tested to see what would happen if we set the angle to a value
above the maximum angle or below the minimum one with two new methods,
ServoTest_MoveAboveMax(void) and ServoTest_MoveBelowMin(void). After that, the angle
was set to the middle position with the function ServoTest_MoveMid(void). We found a bug in
WPILib here. The servos were only programmed to move either to the maximum or to the
minimum angle. We modified the library and test it again. This enabled our mid-range test to
pass.
After gathering results from our C++ tests, the test suite was re-implemented in Java and,
excitingly, our results were the same. In addition to all these tests, the analog input module was
tested to make sure that the Java Analog Module class was also working. The code we wrote for
this purpose is contained in Appendix 2-3.
Our test simply creates an analog module and reads the voltage on channel 1. We
simulated an actual input by attaching a spare line from our power supply. We ran this test, and
the same voltage appeared in the console output. This was the only hardware change we made;
the digital sidecar and its associated test hardware remained exactly the same as with the C++

42
test code attached in Appendix 2-4. The code checked operation of the digital I/O pins by
toggling pin one and reading it from pin two (an external wire connected these). We monitored
the output pin with an oscilloscope as well, partially for visual confirmation and partially to
verify that the code wasn’t caching the input values.

43
11. Suggestions Since our project has been an innovation of the Java language in the CRIO platform, many
challenges were encounter with unknown solutions. As we worked on this project we collected a
set of solutions for these problems that subsequently became suggestions for future developers.
Our first suggestion is to implement the Java debugger on the CRIO platform. After
translating the C++ code into Java, we obtained an enormous amount of code with several errors.
Due to the fact that we didn’t have the Java debugger implemented locally on the CRIO we had
to use numerous System.out.println() calls to implement debugging print-outs, which was very
time consuming. Another suggestion that ties along to this problem is the need to improve
WPILib. Translating the C++ code in the WPILib to Java was one of our hardest tasks. The
reason was WPILib lack of flexibility for translation. Finally in order to save time and assure
efficiency the Java programs should be run at startup instead of having to use WindRiver to start
Java. Using the WindRiver interface to start Java creates unnecessary delay in the process.
44
Conclusion
Over the course of this project, we gained a considerable amount of knowledge about Java
and its virtual machine Squawk, the acquisition and control system CRIO, interfacing to the
hardware components provided (oscilloscope, digital sidecar, driver station, joystick, wireless
routers, etc.) and using multiple software applications. By the end of the seven week period that
we had to complete our Major Qualifying Project, we were able to implement a fully functioning
robot that was completely programmed in Java. This accomplishment is likely to have a large
influence on the FIRST robotic competitions starting from 2010. The organization seemed very
interested in our end product after a meeting we held with several of its members in Manchester,
New Hampshire in October 2008. The impression at the end of the meeting was that FIRST was
interested in possibly making a shift from C++ to Java for their 2010 competitions. With this
movement, the high school students who learn Java in their computer science curriculum will
have a chance to expand their programming skills even further outside of their classes and use
them in debugging and building a more versatile and easier to control robot. With a simpler and
more user-friendly environment like Squawk, the students' interest in such a youth-serving
organization like FIRST might increase, especially for those who could be held back because of
their lack of knowledge in C++.
In fact, the satisfaction we felt after observing our test robot perform simple test programs
that we wrote could not be described. A dusty FIRST robot from the 2005 FRC was taken from
one of the corners in the Robotics laboratory of WPI and reanimated in Java. We exhausted
virtually all the possible tasks it could perform through Java test functions that we created to
make sure it was operational. We made its arm move from the bottom up and rotated it shoulders

45
using a “voodoo arm” that was attached to the driver station. We also made it move in all
possible directions thanks to its omni-directional wheels using a joystick that was part of the
driver station. The whole floor shook in excitement at the sight of the WPI 2k5 running in Java.
The joy of seeing this baby run down the floor and terrorize everybody near it was shared by all
team members.

46
Works Cited 1. Sato, Rebecca. The Daily News from Planet Earth and Beyong Galaxy. 26 March 2008.
15 November 2008 <http://www.dailygalaxy.com/my_weblog/2008/03/is-robot-
evolut.html>.
2. Kamen, Dean. FIRST: For Inspirational and Recognition of Science and Technology. 15
November 2008 <http://www.usfirst.org/who/default.aspx?id=34>.
3. Team, 190. FIRST Robotics Team 190 at Worcester Polytechnic Institute. 2005. 15
November 2008.
4. National Instruments. National Instruments. 17 April 2008. 15 November 2008
<http://digital.ni.com/worldwide/bwcontent.nsf/web/all/F70C10117567BBF18625742B0
0737DF5>.
5. Ritchie, Brian W. Kernighan and Dennis M. "The C programming Language." Ritchie,
Brian W. Kernighan and Dennis M. The C programming Language. New Jersey: Prentice
Hall. Inc, 1988. xi.
6. Savitch, Walter. "Absolute Java." Savitch, Walter. Absolute Java. California, San Diego:
Pearson Education, 2006.
7. Sun Microsystems. Company Info. <http://www.sun.com/aboutsun/company/index.jsp>.
8. Sun Microsystems. java
9. Wikipedia. Wikipedia. 15 November 2008
<http://en.wikipedia.org/wiki/Java_(programming_language)>.
.net The Source for Java Technology Collaboration. 09 07 08.
<http://wiki.java.net/bin/view/Mobileandembedded/OnWindows>.
10. Collabnet, Inc. tigris.org Open Source Software Engineering Tools.
<http://tortoisesvn.tigris.org/>.
11. FRC. FRC: unefficial Wiki. 16 November 2008 <http://tom-
tech.com/first/wiki/index.php/Driver_Station>.

47
12. Worcester Polytechnic Institute. Projects Program. 15 November 2008
<http://www.wpi.edu/Academics/Projects/>.
13. Microsoft Corporation. Visual C++ Developer Center. 2008.
<http://msdn.microsoft.com/en-us/visualc/default.aspx>.
14. —. New Features and Enhancements J2SE 5.0. 04.
<http://java.sun.com/j2se/1.5.0/docs/relnotes/features.html>.

48
Appendixes
Appendix 1: PHP Code for ChipObject Generator File One of Three: “genchipwrapper.php”
<?php // TODO: Should probably allow these as command line parameters $CODIR = './ChipObject/'; $WRAPDIR = './'; $JAVADIR = './fpga/'; define('DEBUG', false); define('VERBOSE', false); function debugprint($str) { if(DEBUG) echo "$str"; } function verboseprint($str) { if(VERBOSE) echo "$str"; } // Useful string helpers: function strstart($str, $start) { return substr($str, 0, strlen($start)) == $start; } function strend($str, $end) { return substr($str, -strlen($end)) == $end; } // Constants (using them as enums) define('VIS_PUBLIC', 1); define('VIS_PROTECTED', 2); define('VIS_PRIVATE', 3); // being lazy: function visibility() { global $visibility; // Never mind that $visibility isn't defined until later. switch($visibility) { case VIS_PUBLIC: return 'public'; case VIS_PROTECTED: return 'protected'; case VIS_PRIVATE: return 'private'; } } function FixNITypes($string) { $niTypes = array( 'tNIRIO_i64' => 'long', 'tNIRIO_i32' => 'int', 'tNIRIO_i16' => 'short', 'NIRIO_i8' => 'char',

49
'tNIRIO_u64' => 'unsigned long', 'tNIRIO_u32' => 'unsigned int', 'tNIRIO_u16' => 'unsigned short', 'tNIRIO_u8' => 'unsigned char', ); return str_replace(array_keys($niTypes), array_values($niTypes), $string); } function CParamAction($param) { global $pparams, $cparams, $longhandler, $paramname; if($pparams != '') $pparams .= ', '; if($cparams != '') $cparams .= ', '; verboseprint("For parameter $param:\n"); $valid = true; $status = false; $cast = ''; $words = split(' ', $param); for($w = 0; $w < count($words) - 1; $w++) { switch($words[$w]) { case 'const': case 'unsigned': case 'signed': case 'char': case 'short': case 'int': case 'float': case 'bool': $cast .= $words[$w] . ' '; verboseprint("Appending {$words[$w]} to cast\n"); break; case 'long': if($words[$w+1] == 'long') { $longhandler = true; $cast .= 'long long '; $w++; } else { $cast .= 'long '; } break; case 'tRioStatusCode': $status = true; verboseprint("This is the status parameter.\n"); break; default: $valid = false; $cast .= $words[$w] . ' '; print("Error parsing parameter: Unknown keyword '{$words[$w]}'\n"); break; }

50
} $cast = trim($cast); $paramname = $status ? 'status' : $words[count($words) - 1]; if(strstart($paramname, '*')) { // Special case for pointers $paramname = substr($paramname, 1); $cast .= '*'; } elseif(strstart($paramname, '&')) { // Special case for references $paramname = substr($paramname, 1); } if($longhandler) { $pparams .= "int {$paramname}_MSW, int {$paramname}_LSW"; $cparams .= $paramname; } else { $pparams .= ($status ? 'int* ' : 'int ') . $paramname; $cparams .= ($cast == '' ? '' : "($cast)") . $paramname; } return $valid; } function JParamAction($param) { global $pparams, $cparams, $longhandler, $paramname, $paramcount; verboseprint("For parameter $param:\n"); $valid = true; $status = false; $cast = ''; $words = split(' ', $param); for($w = 0; $w < count($words) - 1; $w++) { switch($words[$w]) { case 'const': $words[$w] = 'final'; break; case 'unsigned': case 'signed': if($w < count($words) - 2) { verboseprint("Removing unneeded '{$words[$w]}'\n"); $words[$w] = ''; break; } else { $words[$w] = 'int'; } // NOTE: Intended fallthrough here. case 'short': case 'int': case 'float': verboseprint("Type {$words[$w]} okay as-is\n"); break; case 'bool': $words[$w] = 'boolean'; verboseprint("Fix bool to boolean\n"); break; case 'char': $words[$w] = 'byte';
51
verboseprint("Fix char to byte\n"); break; case 'long': if($words[$w+1] == 'long') { $words[$w+1] = ''; $longhandler = true; $w++; } else { $words[$w] = 'int'; } break; case 'tRioStatusCode': $status = true; verboseprint("This is the status parameter.\n"); return true; default: $valid = false; print("Error parsing parameter: Unknown keyword '{$words[$w]}'\n"); break; } } if($pparams != '') $pparams .= ', '; if($cparams != '') $cparams .= ', '; $paramcount++; // Test: $paramname = $words[count($words) - 1]; $paramtype = implode(' ', array_slice(array_filter($words), 0, -1)); // join the parts of the array that aren't the parameter name (there should only be one, I think.) if(strstart($paramname, '*')) { // Special case for pointers $paramname = substr($paramname, 1); // TODO: Need to handle this probably } elseif(strstart($paramname, '&')) { // Special case for references $paramname = substr($paramname, 1); } $pparams .= "{$paramtype} {$paramname}"; if($longhandler) { $cparams .= "{$paramname}_MSW, {$paramname}_LSW"; $paramcount++; } elseif($paramtype == 'float') { $cparams .= "Float.floatToIntBits({$paramname})"; } elseif($paramtype == 'boolean') { $cparams .= "{$paramname} ? 1 : 0"; } else { $cparams .= $paramname; } return $valid; }

52
// Step 0: Setup: if(!strend($CODIR, '/') && !strend($CODIR, '\\')) $CODIR .= '/'; if(!is_dir($CODIR)) die("Can't read sources from {$CODIR}: No directory with this name exists."); if(!strend($WRAPDIR, '/') && !strend($WRAPDIR, '\\')) $WRAPDIR .= '/'; if(!file_exists($WRAPDIR)) mkdir($WRAPDIR); elseif(!is_dir($WRAPDIR)) die("Can't put generated C objects in {$WRAPDIR}: There is a file with this name, but it is not a directory."); if(!strend($JAVADIR, '/') && !strend($JAVADIR, '\\')) $JAVADIR .= '/'; if(!file_exists($JAVADIR)) mkdir($JAVADIR); elseif(!is_dir($JAVADIR)) die("Can't put generated Java objects in {$JAVADIR}: There is a file with this name, but it is not a directory."); // Step 1: Get the listing of C++ Header Files echo "I'm going to read in the available ChipObject C++ classes.\n"; echo "I'll assume they live in ./ChipObject/\n"; $dir = dir('ChipObject'); $files = array(); while(($file = $dir->read()) !== false) { debugprint("Examining file {$file}"); // tSystem is special. Skip it. if(is_file($CODIR . $file) && strstart($file, 't') && strend($file, '.h') && $file != 'tSystem.h') { $files[] = $file; debugprint(" - valid!\n"); } else { debugprint(" - not valid.\n"); } } echo "Okay, I have your list. I found " . count($files) . " files that look like proper C++ headers.\n"; foreach($files as $file) { // Step 2: Extract class name, full namespace, constructor, methods (and visibility) echo "===========================================\n"; echo "Analyzing $file...\n"; $fp = fopen($CODIR . $file, 'r'); $classname = substr($file, 0, -2); $linenum = 1; // Mostly for debugging and/or errors // Things to load from the parsing nightmare loop $namespace = '';

53
$visibility = VIS_PUBLIC; $ctors = array(); $protos = array(); // like public void DoSomething(int param1, char* param2); $vars = array(); // like public static const char kNumSystems; $supressingBlock = 0; while(!feof($fp)) { $line = trim(fgets($fp)); // I don't care about whitespace here. if($supressingBlock > 0 && strstart($line, '}')) { $supressingBlock--; } // COMMENTS if(strstart($line, '//')) { verboseprint("Line $linenum is a comment -- skipping\n"); } elseif(strstart($line, '/*')) { verboseprint("Line $linenum is a block comment -- skipping\n"); // PREPROCESSOR INSTRUCTIONS } elseif(strstart($line, '#include')) { verboseprint("Line $linenum is an include -- skipping\n"); } elseif(strstart($line, '#define')) { verboseprint("Line $linenum is a macro definition -- do I need this?\n"); } elseif(strstart($line, '#if') || strstart($line, '#endif')) { verboseprint("Line $linenum is a conditional compilation line -- skipping\n"); // NAMESPACES } elseif(strstart($line, 'namespace')) { verboseprint("Line $linenum is a namespace directive -- recording namespace\n"); if($namespace != '') $namespace .= '::'; $namespace .= substr($line, 10); // WHITESPACE } elseif($line == '') { verboseprint("Line $linenum is blank\n"); // BLOCKS } elseif(strstart($line, '{')) { verboseprint("Line $linenum begins a block\n"); } elseif(strstart($line, '}')) { verboseprint("Line $linenum ends a block\n"); } elseif(strstart($line, 'class')) { // TODO: need to figure out base classes. verboseprint("Line $linenum is the class definition.\n"); } elseif(strstart($line, 'union')) { verboseprint("Line $linenum begins a union -- I'm going to skip over this.\n"); $supressingBlock++; } elseif(strstart($line, 'struct')) { verboseprint("Line $linenum begins a struct -- I'm going to skip over this.\n"); $supressingBlock++; } elseif(strstart($line, 'typedef')) { verboseprint("Line $linenum begins a typedef -- I'm not going to copy this for you.\n"); // VISIBILITY

54
} elseif(strstart($line, 'public:') && !$supressingBlock) { verboseprint("Line $linenum -- switching visibility to PUBLIC\n"); $visibility = VIS_PUBLIC; } elseif(strstart($line, 'protected:') && !$supressingBlock) { verboseprint("Line $linenum -- switching visibility to PROTECTED\n"); $visibility = VIS_PROTECTED; } elseif(strstart($line, 'private:') && !$supressingBlock) { verboseprint("Line $linenum -- switching visibility to PRIVATE\n"); $visibility = VIS_PRIVATE; // FUNCTIONS } elseif (strend($line, ');') && !$supressingBlock) { if(strstart($line, "$classname(")) { verboseprint("Line $linenum declares a constructor.\n"); $ctors[] = visibility() . ' ' . $line; } elseif($line == "~$classname();") { verboseprint("Line $linenum declares the destructor.\n"); } else { verboseprint("Line $linenum declares a function.\n"); $protos[] = visibility() . ' ' . $line; } // VARIABLES } elseif(strend($line, '[];') && !$supressingBlock) { verboseprint("Line $linenum declares an array -- I'm going to skip this.\n"); //$vars[] = visibility() . ' ' . $line; } elseif(strend($line, ';') && !$supressingBlock) { verboseprint("Line $linenum declares a variable.\n"); $vars[] = visibility() . ' ' . $line; // DEFAULT } else { if(!$supressingBlock) print("Error parsing $file:$linenum: $line\n"); } $linenum++; } debugprint("Okay, I've determined that I'm looking at $namespace::$classname, \n"); debugprint("which contains " . count($ctors) . " constructors, "); debugprint(count($protos) . " functions, and " . count($vars) . " variables\n"); fclose($fp); // Step 3: Produce the C wrapper file (classname.c) > classname_method(int parameters) { invoke with real parameters } require('gencwrapper.inc.php'); // Step 4: Produce the Java peer class (classname.java) > class containing methods with java-ized real parameters require('genjwrapper.inc.php'); }

55
echo "===========================================\n"; echo "I'm done processing your files. I mirrored " . count($files) . " files for you:\n"; echo "You can find the C wrappers in $WRAPDIR\n"; echo "You can find the Java peers in $JAVADIR\n"; ?>
File Two of Three: “gencwrapper.inc.php”
<?php $header = <<<EOF // This file is auto-generated. DO NOT EDIT! #include "ChipObject/{$file}" typedef {$namespace}::{$classname} {$classname}; #ifdef __cplusplus extern "C" { #endif EOF; $trailer = <<<EOF #ifdef __cplusplus } #endif EOF; echo "-------------------------------------------\n"; echo "Generating wrapper code for $classname\n"; $fp = fopen($WRAPDIR . $classname . '.cpp', 'w'); fputs($fp, $header); foreach($vars as $var) { $var = FixNITypes($var); $words = explode(' ', trim($var, ';')); $varname = $words[count($words)-1]; if($words[0] == 'private') { verboseprint("Skipping private variable $varname\n"); continue; } for($w = 1; $w < count($words) - 1; $w++) { if($words[$w] == 'static' || $words[$w] == 'const') $words[$w] = ''; } $words[0] = ''; $words[count($words)-1] = "{$classname}_{$varname}";

56
$newvar = trim(implode(' ', $words)); fputs($fp, "$newvar = {$classname}::{$varname};\r\n"); } fputs($fp, "\r\n"); foreach($ctors as $ctor) { $ctor = FixNITypes($ctor); $count = count($ctors) > 1 ? count($ctors) : ''; $paramStart = strpos($ctor, '(') + 1; $paramEnd = strrpos($ctor, ')'); $paramPart = substr($ctor, $paramStart, $paramEnd - $paramStart); verboseprint("Constructor arguments: $paramPart\n"); $params = split(', ', $paramPart); $pparams = ''; $cparams = ''; $longhelpers = array(); foreach($params as $p) { $longhandler = false; CParamAction($p); if($longhandler) $longhelpers[] = $paramname; } $fnproto = "int {$classname}_Constructor{$count}($pparams) {\r\n"; foreach($longhelpers as $lh) { $fnproto .= "\tlong long {$lh} = (((long long){$lh}_MSW) << 32) | ({$lh}_LSW);\r\n"; } $fnproto .= "\treturn (int)(new {$classname}($cparams));\r\n}\r\n\r\n"; fputs($fp, $fnproto); } $fnproto = <<<EOF void {$classname}_Destructor(int instance) { delete (({$classname}*)instance); } EOF; fputs($fp, $fnproto); foreach($protos as $proto) { $returntype = ''; $longreturn = false; $fnname = '';

57
$static = false; $valid = true; $args = ''; $proto = FixNITypes($proto); $words = explode(' ', $proto); for($i = 0; $i < count($words); $i++) { if(($argstart = strpos($words[$i], '(')) !== false) { $fnname = substr($words[$i], 0, $argstart); $words[$i] = substr($words[$i], $argstart); $args = implode(' ', array_slice($words, $i)); break; } switch($words[$i]) { case 'private': verboseprint("Private function. I should probably skip this.\n"); break; case 'public': case 'protected': verboseprint("Visibility: {$words[$i]}.\n"); break; case 'signed': case 'unsigned': if(!in_array($words[$i+1], array('char', 'short', 'int', 'long', 'float'))) { $words[$i] = int; $i--; // HACK: rather than do something intelligent here, we just back up so we re-process the word. } else { verboseprint("Function is explicitly {$words[$i]} -- not important.\n"); } break; case 'const': verboseprint("Function doesn't modify the instance -- not important.\n"); break; case 'static': verboseprint("Function is static.\n"); $static = true; break; case 'char': case 'short': case 'int': case 'float': case 'void': case 'bool': $returntype = $words[$i]; verboseprint("Function return type: $returntype\n"); break; case 'long': if($words[$i+1] == 'long') { $longreturn = true; $returntype = 'long long';

58
$i++; } else { $returntype = 'long'; } verboseprint("Function return type: $returntype\n"); break; default: $valid = false; print("Parsing error for Function:\n"); print("$proto\n"); print("Unrecognized symbol {$words[$i]}. I'll keep going and ignore the error.\n"); } } if($words[0] == 'private') { verboseprint("Skipping private function {$fnname}\n"); continue; } $params = split(', ', trim($args, '();')); $pparams = $static ? '' : 'int instance'; $cparams = ''; $longhelpers = array(); foreach($params as $p) { $longhandler = false; $valid &= CParamAction($p); if($longhandler) $longhelpers[] = $paramname; } $fnproto = $valid ? '' : "/* -- Error durring parsing --\r\n"; if($longreturn) { $fnproto .= "long long _{$classname}_{$fnname}_lastValue = 0;\r\n"; } if($returntype == 'void') $fnproto .= 'void'; else $fnproto .= 'int'; $fnproto .= " {$classname}_{$fnname}($pparams) {\r\n"; foreach($longhelpers as $lh) { $fnproto .= "\tlong long {$lh} = (((long long){$lh}_MSW) << 32) | ({$lh}_LSW);\r\n"; } if($longreturn) { $fnproto .= <<<EOF _{$classname}_{$fnname}_lastValue = (({$classname}*)instance)->{$fnname}($cparams);

59
return (0xFFFFFFFF & _{$classname}_{$fnname}_lastValue); } int {$classname}_{$fnname}_MSW() { return (0xFFFFFFFF & (_{$classname}_{$fnname}_lastValue >> 32)); } EOF; } else { $fnproto .= "\t"; if($returntype != 'void') $fnproto .= 'return '; if($static) $fnproto .= "{$classname}::{$fnname}($cparams)"; else $fnproto .= "(({$classname}*)instance)->{$fnname}($cparams)"; if($returntype == 'bool') $fnproto .= ' ? 1 : 0'; $fnproto .= ";\r\n}"; } $fnproto .= ($valid ? '' : "\r\n*/") . "\r\n\r\n"; fputs($fp, $fnproto); } fputs($fp, $trailer); fclose($fp); ?>
File Three of Three: “genjwrapper.inc.php”
<?php $header = <<<EOF // This file is auto-generated. DO NOT EDIT! package edu.wpi.first.wpilibj.fpga; import com.sun.cldc.jna.*; public class {$classname} extends tSystem { EOF; $trailer = <<<EOF } EOF; echo "-------------------------------------------\n"; echo "Generating Java peer class for $classname\n"; $fp = fopen($JAVADIR . $classname . '.java', 'w'); fputs($fp, $header);

60
foreach($vars as $var) { $var = FixNITypes($var); $words = explode(' ', trim($var, ';')); $varname = $words[count($words)-1]; $varsize = 1; $sizefn = 'Int'; if($words[0] == 'private') { verboseprint("Skipping private variable $varname\n"); continue; } for($w = 1; $w < count($words) - 1; $w++) { switch($words[$w]) { case 'const': $words[$w] = 'final'; break; case 'bool': $words[$w] = 'boolean'; $sizefn = 'Byte'; break; case 'char': $words[$w] = 'byte'; $sizefn = 'Byte'; break; case 'unsigned': case 'signed': if($w < count($words) - 2) { $words[$w] = ''; } else { $words[$w] = 'int'; } break; case 'long': if($words[$w+1] == 'long') { $words[$w+1] = ''; $w++; $varsize = 2; $sizefn = 'Long'; } else { $words[$w] = 'int'; } break; case 'float': $sizefn = 'Float'; break; case 'short': $sizefn = 'Short'; break; } } $words[count($words)-1] = ''; $vartype = implode(' ', array_filter($words));

61
fputs($fp, "\t$vartype $varname = VarPointer.lookup(\"{$classname}_{$varname}\", {$varsize}).get{$sizefn}(0);\r\n"); } fputs($fp, "\r\n"); foreach($ctors as $ctor) { $ctor = FixNITypes($ctor); $count = count($ctors) > 1 ? count($ctors) : ''; $paramStart = strpos($ctor, '(') + 1; $paramEnd = strrpos($ctor, ')'); $paramPart = substr($ctor, $paramStart, $paramEnd - $paramStart); verboseprint("Constructor arguments: $paramPart\n"); $params = split(', ', $paramPart); $pparams = ''; $cparams = ''; $paramcount = 1; // status $longhelpers = array(); foreach($params as $p) { $longhandler = false; JParamAction($p); if($longhandler) $longhelpers[] = $paramname; } if($cparams != '') $cparams .= ', '; $cparams .= 'pStatus.getPointer()'; $fnproto = <<<EOF private static final Function ctor{$count}Fn = Function.getFunction("{$classname}_Constructor{$count}"); public {$classname}({$pparams}) { EOF; foreach($longhelpers as $lh) { $fnproto .= <<<EOF int {$lh}_MSW = (int)(0xFFFFFFFF & ({$lh} >> 32)); int {$lh}_LSW = (int)(0xFFFFFFFF & ({$lh}); EOF; } $fnproto .= <<<EOF thisC = ctor{$count}Fn.call{$paramcount}({$cparams}); assertCleanStatus("{$classname}"); } EOF;

62
fputs($fp, $fnproto); } $fnproto = <<<EOF private static final Function deleteFn = Function.getFunction("{$classname}_Destructor"); /** * Releases the native C++ resources held by the {$classname} instance. */ public void Release() { if(thisC != 0) deleteFn.call1(thisC); } protected void finalize() { Release(); } EOF; fputs($fp, $fnproto); foreach($protos as $proto) { $returntype = ''; $longreturn = false; $fnname = ''; $static = false; $valid = true; $visibility = 'public'; $args = ''; $paramcount = 2; $proto = FixNITypes($proto); $words = explode(' ', $proto); for($i = 0; $i < count($words); $i++) { if(($argstart = strpos($words[$i], '(')) !== false) { $fnname = substr($words[$i], 0, $argstart); $words[$i] = substr($words[$i], $argstart); $args = implode(' ', array_slice($words, $i)); break; } switch($words[$i]) { case 'private': verboseprint("Private function. I should probably skip this.\n"); break; case 'public': case 'protected': verboseprint("Visibility: {$words[$i]}.\n"); $visibility = $words[$i]; break; case 'signed':

63
case 'unsigned': if(!in_array($words[$i+1], array('char', 'short', 'int', 'long', 'float'))) { $words[$i] = int; $i--; // HACK: rather than do something intelligent here, we just back up so we re-process the word. } else { verboseprint("Function is explicitly {$words[$i]} -- not important.\n"); } break; case 'const': verboseprint("Function doesn't modify the instance -- not important.\n"); break; case 'static': verboseprint("Function is static.\n"); $static = true; break; case 'char': $returntype = 'byte'; verboseprint("Function return type: $returntype\n"); break; case 'bool': $returntype = 'boolean'; verboseprint("Function return type: $returntype\n"); break; case 'short': case 'int': case 'float': case 'void': $returntype = $words[$i]; verboseprint("Function return type: $returntype\n"); break; case 'long': if($words[$i+1] == 'long') { $longreturn = true; $returntype = 'long'; $i++; } else { $returntype = 'int'; } verboseprint("Function return type: $returntype\n"); break; default: if ($returntype == '') $returntype = $words[$i]; $valid = false; print("Parsing error for Function:\n"); print("$proto\n"); print("Unrecognized symbol {$words[$i]}. I'll keep going and ignore the error.\n"); } } if($words[0] == 'private') {
64
verboseprint("Skipping private function {$fnname}\n"); continue; } $params = split(', ', trim($args, '();')); $pparams = ''; $cparams = $static ? '' : 'thisC'; if($static) $paramcount--; // don't need the 'this' parameter $longhelpers = array(); foreach($params as $p) { $longhandler = false; $valid &= JParamAction($p); if($longhandler) $longhelpers[] = $paramname; } if($cparams != '') $cparams .= ', '; $cparams .= 'pStatus.getPointer()'; $fnproto = $valid ? '' : "/* -- Error during parsing --\r\n"; $static = $static ? ' static' : ''; $fnproto .= <<<EOF private static final Function {$fnname}Fn = Function.getFunction("{$classname}_{$fnname}"); EOF; if($longreturn) { $fnproto .= <<<EOF private static final Function {$fnname}_MSWFn = Function.getFunction("{$classname}_{$fnname}_MSW"); EOF; } $fnproto .= <<<EOF {$visibility}{$static} {$returntype} {$fnname}($pparams) { EOF; foreach($longhelpers as $lh) { $fnproto .= <<<EOF long {$lh}_MSW = (0xFFFFFFFF & ({$fh} >> 32)); //(((long long){$lh}_MSW) << 32) | ({$lh}_LSW); long {$lh}_LSW = (0xFFFFFFFF & {$fh}); EOF; } if($longreturn) { $fnproto .= <<<EOF int res_LSW = {$fnname}Fn.call{$paramcount}($cparams); int res_MSW = {$fnname}_MSWFn.call0();

65
assertCleanStatus("{$classname}.{$fnname}"); return (0xFFFFFFFF & (((long)res_MSW) << 32)) | (0xFFFFFFFF & ((long)res_LSW)); } EOF; } else { $fnproto .= "\t\t"; if($returntype != 'void') $fnproto .= 'int res = '; $fnproto .= "{$fnname}Fn.call{$paramcount}($cparams)"; $fnproto .= ";\r\n\t\tassertCleanStatus(\"{$classname}.{$fnname}\");\r\n"; if($returntype == 'boolean') $fnproto .= "\t\treturn res == 1;\r\n"; elseif($returntype == 'int') $fnproto .= "\t\treturn res;\r\n"; elseif($returntype != 'void') $fnproto .= "\t\treturn ($returntype)res;\r\n"; $fnproto .= "\t}\r\n"; } $fnproto .= ($valid ? '' : "*/\r\n") . "\r\n"; fputs($fp, $fnproto); } fputs($fp, $trailer); fclose($fp); ?>
Appendix 2: Test and Analysis Code 1. C++ Code to test some WPILib Functionalities
Harness.cpp
#include "harness.h"
#include "testsuite.h"
#include "ChipObject/tDIO.h"
#include "ChipObject/tWatchdog.h"
#include <stdio.h>
void ExecTest(int (*fn)(void), const char* name) {
printf("Running %s...\n", name);
int res = fn();
printf("%s...%s\n\n", name, (res == 0 ? "PASS" : "FAIL"));
}
void WPILibTestHarnessMain(void) {

66
printf("--------------------------------------------\n");
printf("Running WPILib Tests\n");
printf("--------------------------------------------\n");
printf("[Digital Systems: %d]\n\n", tDIO::kNumSystems);
ServoTestHarness_Execute();
printf("--------------------------------------------\n");
}
void PWMTest(void) {
int status;
nFPGA::n0BA6BBDC5CE760BA2A9A95D92CEA342A::tWatchdog rex(&status);
bool userEn, sysEn;
printf("System Status: %s\n", rex.readSystemActive(&status) ? "Active" :
"Inactive");
sysEn = rex.readEnabled(&status);
userEn = rex.readUserEnabled(&status);
printf("System Watchdog: %s\n", sysEn ? "Enabled" : "Disabled");
printf("User Watchdog: %s\n", userEn ? "Enabled" : "Disabled");
rex.writeEnabled(true, &status);
rex.writeUserEnabled(true, &status);
sysEn = rex.readEnabled(&status);
userEn = rex.readUserEnabled(&status);
printf("System Watchdog: %s\n", sysEn ? "Enabled" : "Disabled");
printf("User Watchdog: %s\n", userEn ? "Enabled" : "Disabled");
Servo s(4, 1);
s.SetAngle(180);
Wait(20);
s.SetAngle(0);
// s.SetPeriodMultiplier(PWM::kPeriodMultiplier_4X);
// do {
// s.SetRaw(255);
// Wait(20);
// s.SetRaw(1);
// Wait(20);
// } while(0);
67
}
void RelayTest(void) {
Relay r(4, 1);
r.Set(Relay::kForward);
while(1);
}
void DIOTest(void) {
DigitalModule* dm = DigitalModule::GetInstance(4);
bool b = dm->AllocateDIO(1, false);
printf("AllocateDIO: %s\n", b ? "OK!" : "NO!");
while(1) {
dm->SetDIO(1, 1);
Wait(20);
dm->SetDIO(1, 0);
Wait(20);
}
}
void SlowPrint(const char* s) {
int len = strlen(s);
for(int i = 0; i < len; i++)
{
fputc(s[i], stdout);
fflush(stdout);
}
}
void SlowPrint(const long l) {
fprintf(stdout, "%ld", l);
fflush(stdout);
}
void DotPrinterTest() {
for(long l = 0; l < 50000; l++) {
SlowPrint("[WPILibC] Iteration #");
SlowPrint(l);
SlowPrint("\n");
SlowPrint(".................\n");
}
}

68
void TestHelper(void) {
//DotPrinterTest();
//DIOTest();
PWMTest();
}
Note: The header file for harness.cpp can be found in Appendix 2.
2. Servo Test Code servo_tests.cpp
/******************************************************************************
* WPILib Tests for Servo Operation *
******************************************************************************/
#include "harness.h"
#include "servo_tests.h"
#include <stdio.h>
#define SERVO_SLOT 4
#define SERVO_CHAN 1
#define kMaxServoAngle 170
#define kMinServoAngle 0
void busywait(void) {
long l = 0;
while(l < 100000000L)
l++;
}
/**
* Moves the servo arm to a specified position.
*
* @param sv The servo to move.
* @param angle The angle to which to set the servo.
*
* @return 0 if the servo moved correctly.
*/
int ServoTestHelper_MoveToAngle(Servo* sv, const int angle) {
printf("Moving servo arm to %d degrees.\n", angle);
sv->SetAngle(angle);
busywait();

69
float newAngle = sv->GetAngle();
printf("Servo arm is at %f degrees.\n", newAngle);
AssertEqual(angle, newAngle);
return 0;
}
/**
* Tests the motion of a servo to its maximum position
*
* @return 0 on sucess, non-zero on failure.
*/
int ServoTest_MoveMax(void) {
Servo sv(SERVO_SLOT, SERVO_CHAN);
int angle = kMaxServoAngle;
return ServoTestHelper_MoveToAngle(&sv, angle);
}
/**
* Tests the motion of a servo to its minimum position
*
* @return 0 on sucess, non-zero on failure.
*/
int ServoTest_MoveMin(void) {
Servo sv(SERVO_SLOT, SERVO_CHAN);
int angle = kMinServoAngle;
return ServoTestHelper_MoveToAngle(&sv, angle);
}
/**
* Tests the motion of a servo to its middle position
*
* @return 0 on sucess, non-zero on failure.
*/
int ServoTest_MoveMid(void) {
Servo sv(SERVO_SLOT, SERVO_CHAN);
int angle = 85;
return ServoTestHelper_MoveToAngle(&sv, angle);
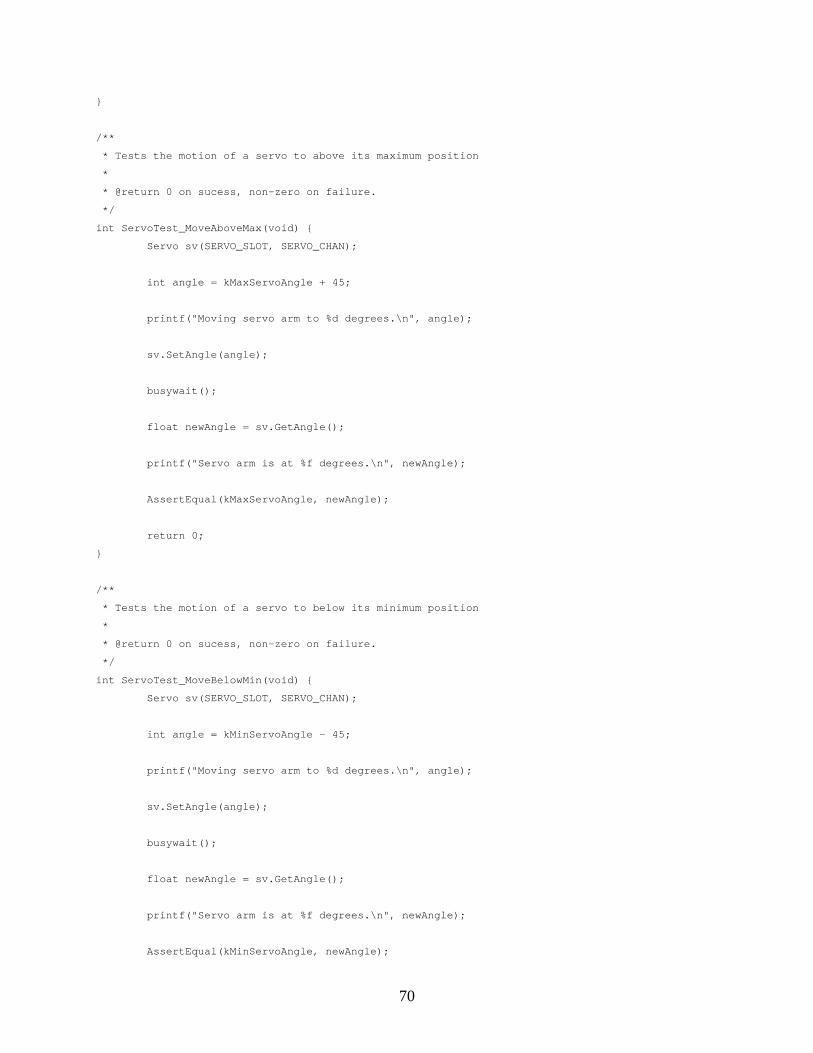
70
}
/**
* Tests the motion of a servo to above its maximum position
*
* @return 0 on sucess, non-zero on failure.
*/
int ServoTest_MoveAboveMax(void) {
Servo sv(SERVO_SLOT, SERVO_CHAN);
int angle = kMaxServoAngle + 45;
printf("Moving servo arm to %d degrees.\n", angle);
sv.SetAngle(angle);
busywait();
float newAngle = sv.GetAngle();
printf("Servo arm is at %f degrees.\n", newAngle);
AssertEqual(kMaxServoAngle, newAngle);
return 0;
}
/**
* Tests the motion of a servo to below its minimum position
*
* @return 0 on sucess, non-zero on failure.
*/
int ServoTest_MoveBelowMin(void) {
Servo sv(SERVO_SLOT, SERVO_CHAN);
int angle = kMinServoAngle - 45;
printf("Moving servo arm to %d degrees.\n", angle);
sv.SetAngle(angle);
busywait();
float newAngle = sv.GetAngle();
printf("Servo arm is at %f degrees.\n", newAngle);
AssertEqual(kMinServoAngle, newAngle);
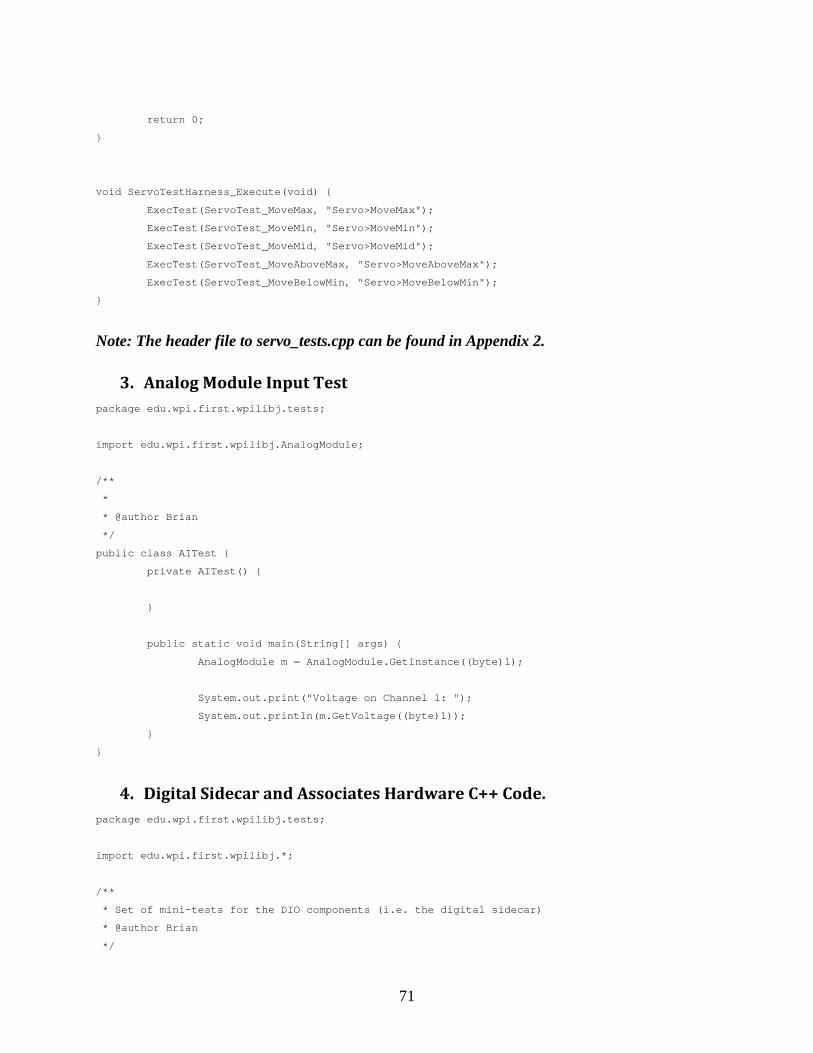
71
return 0;
}
void ServoTestHarness_Execute(void) {
ExecTest(ServoTest_MoveMax, "Servo>MoveMax");
ExecTest(ServoTest_MoveMin, "Servo>MoveMin");
ExecTest(ServoTest_MoveMid, "Servo>MoveMid");
ExecTest(ServoTest_MoveAboveMax, "Servo>MoveAboveMax");
ExecTest(ServoTest_MoveBelowMin, "Servo>MoveBelowMin");
}
Note: The header file to servo_tests.cpp can be found in Appendix 2.
3. Analog Module Input Test package edu.wpi.first.wpilibj.tests;
import edu.wpi.first.wpilibj.AnalogModule;
/**
*
* @author Brian
*/
public class AITest {
private AITest() {
}
public static void main(String[] args) {
AnalogModule m = AnalogModule.GetInstance((byte)1);
System.out.print("Voltage on Channel 1: ");
System.out.println(m.GetVoltage((byte)1));
}
}
4. Digital Sidecar and Associates Hardware C++ Code. package edu.wpi.first.wpilibj.tests;
import edu.wpi.first.wpilibj.*;
/**
* Set of mini-tests for the DIO components (i.e. the digital sidecar)
* @author Brian
*/

72
public class DIOTest {
private static final boolean DEBUG = true;
private DIOTest() {
}
private static void TestPin(DigitalModule dm) throws InterruptedException {
dm.SetDIO((byte)1, true);
Thread.sleep(10);
if(DEBUG) {
System.out.print("[WPILibJ] DIO #1 value is ");
System.out.println(dm.GetDIO((byte)2));
}
dm.SetDIO((byte)1, false);
Thread.sleep(10);
if(DEBUG) {
System.out.print("[WPILibJ] DIO #1 value is ");
System.out.println(dm.GetDIO((byte)2));
}
Thread.sleep(10);
}
private static void TestServo(Servo s) throws InterruptedException {
s.SetAngle(0);
SensorBase.Wait(500);
System.out.print("[WPILibJ] Moved servo to ");
System.out.println(s.GetAngle());
s.SetAngle(170);
SensorBase.Wait(500);
System.out.print("[WPILibJ] Moved servo to ");
System.out.println(s.GetAngle());
s.SetAngle(85);
SensorBase.Wait(500);
System.out.print("[WPILibJ] Moved servo to ");
System.out.println(s.GetAngle());
}
public static void main(String[] args) {
final byte SLOT_4 = 4;
final byte CH_1 = 1;
final byte CH_2 = 2;
final byte CH_3 = 3;
final byte CH_RST = 14;

73
DigitalModule dm = DigitalModule.GetInstance(SLOT_4);
Servo s = new Servo(CH_1);
dm.AllocateDIO(CH_1, false);
dm.AllocateDIO(CH_2, true);
for (long l = 0; l < 3; l++) {
if(DEBUG) {
System.out.print("[WPILibJ] Iteration #");
System.out.println(l);
}
try {
TestPin(dm);
TestServo(s);
SensorBase.Wait(1000);
} catch (InterruptedException ex) {
System.err.println("[WPILibJ] Someone interrupted my beauty
sleep!");
}
}
dm.AllocateDIO(CH_3, true);
DigitalInput reset = new DigitalInput(CH_RST);
Relay r = new Relay(CH_1, Relay.DIRECTION_FORWARDONLY);
// New Switch gadget!
while(true) {
try {
if(dm.GetDIO(CH_3)) {
s.SetAngle(180);
r.Set(Relay.VALUE_ON);
} else {
s.SetAngle(0);
r.Set(Relay.VALUE_OFF);
}
Thread.sleep(250);
if(reset.Get())
break;
} catch (InterruptedException ex) {
System.err.println("[WPILibJ] Someone interrupted my beauty
sleep!");
}
}
74
}
}
Appendix 3: Test and Analysis Code 1. C++ Code to test some WPILib Functionalities
Harness.h
/******************************************************************************
* WPILib Test Harness *
* *
* This harness provides the share test execution methods for running tests *
* against the C++ implementation of WPILib. These tests will provided the *
* baseline results for running tests against the Java implementation *
******************************************************************************/
#ifndef __HARNESS_H__
#define __HARNESS_H__
#define AssertEqual(x,y) if(x != y) return -1; else (void)0
void ExecTest(int (*)(void), const char*);
#endif //__HARNESS_H__
------------------------------------------------------------------------------
Harness.cpp
#include "harness.h"
#include "testsuite.h"
#include "ChipObject/tDIO.h"
#include "ChipObject/tWatchdog.h"
#include <stdio.h>

75
void ExecTest(int (*fn)(void), const char* name) {
printf("Running %s...\n", name);
int res = fn();
printf("%s...%s\n\n", name, (res == 0 ? "PASS" : "FAIL"));
}
void WPILibTestHarnessMain(void) {
printf("--------------------------------------------\n");
printf("Running WPILib Tests\n");
printf("--------------------------------------------\n");
printf("[Digital Systems: %d]\n\n", tDIO::kNumSystems);
ServoTestHarness_Execute();
printf("--------------------------------------------\n");
}
void PWMTest(void) {
int status;
nFPGA::n0BA6BBDC5CE760BA2A9A95D92CEA342A::tWatchdog rex(&status);
bool userEn, sysEn;
printf("System Status: %s\n", rex.readSystemActive(&status) ? "Active" : "Inactive");
sysEn = rex.readEnabled(&status);
userEn = rex.readUserEnabled(&status);

76
printf("System Watchdog: %s\n", sysEn ? "Enabled" : "Disabled");
printf("User Watchdog: %s\n", userEn ? "Enabled" : "Disabled");
rex.writeEnabled(true, &status);
rex.writeUserEnabled(true, &status);
sysEn = rex.readEnabled(&status);
userEn = rex.readUserEnabled(&status);
printf("System Watchdog: %s\n", sysEn ? "Enabled" : "Disabled");
printf("User Watchdog: %s\n", userEn ? "Enabled" : "Disabled");
Servo s(4, 1);
s.SetAngle(180);
Wait(20);
s.SetAngle(0);
// s.SetPeriodMultiplier(PWM::kPeriodMultiplier_4X);
// do {
// s.SetRaw(255);
// Wait(20);
// s.SetRaw(1);
// Wait(20);
// } while(0);
}
void RelayTest(void) {
Relay r(4, 1);
77
r.Set(Relay::kForward);
while(1);
}
void DIOTest(void) {
DigitalModule* dm = DigitalModule::GetInstance(4);
bool b = dm->AllocateDIO(1, false);
printf("AllocateDIO: %s\n", b ? "OK!" : "NO!");
while(1) {
dm->SetDIO(1, 1);
Wait(20);
dm->SetDIO(1, 0);
Wait(20);
}
}
void SlowPrint(const char* s) {
int len = strlen(s);
for(int i = 0; i < len; i++)
{
fputc(s[i], stdout);
fflush(stdout);
}
}
void SlowPrint(const long l) {
78
fprintf(stdout, "%ld", l);
fflush(stdout);
}
void DotPrinterTest() {
for(long l = 0; l < 50000; l++) {
SlowPrint("[WPILibC] Iteration #");
SlowPrint(l);
SlowPrint("\n");
SlowPrint(".................\n");
}
}
void TestHelper(void) {
//DotPrinterTest();
//DIOTest();
PWMTest();
}
Servo Test Code
servo_tests.h /******************************************************************************
* WPILib Tests for Servo Operation *
* *
* These tests are designed to provide a range of execution conditions for *
* servos under WPILib. They should provide a sufficient range of tests *
* conditions, but may not be exhaustive. See test headers for details. *
******************************************************************************/
#ifndef __SERVO_TESTS__
#define __SERVO_TESTS__
79
#include <wpilib.h>
// Helpers:
int ServoTestHelper_MoveToAngle(Servo*, const int);
// Tests:
int ServoTest_MoveMax(void);
int ServoTest_MoveMin(void);
int ServoTest_MoveMid(void);
int ServoTest_MoveAboveMax(void);
int ServoTest_MoveBelowMin(void);
// Test Harness:
void ServoTestHarness_Execute(void);
#endif
------------------------------------------------------------------------------
servo_tests.cpp
/******************************************************************************
* WPILib Tests for Servo Operation *
******************************************************************************/
#include "harness.h"
#include "servo_tests.h"
#include <stdio.h>
#define SERVO_SLOT 4
#define SERVO_CHAN 1
#define kMaxServoAngle 170
#define kMinServoAngle 0
void busywait(void) {
long l = 0;

80
while(l < 100000000L)
l++;
}
/**
* Moves the servo arm to a specified position.
*
* @param sv The servo to move.
* @param angle The angle to which to set the servo.
*
* @return 0 if the servo moved correctly.
*/
int ServoTestHelper_MoveToAngle(Servo* sv, const int angle) {
printf("Moving servo arm to %d degrees.\n", angle);
sv->SetAngle(angle);
busywait();
float newAngle = sv->GetAngle();
printf("Servo arm is at %f degrees.\n", newAngle);
AssertEqual(angle, newAngle);
return 0;
}
/**

81
* Tests the motion of a servo to its maximum position
*
* @return 0 on sucess, non-zero on failure.
*/
int ServoTest_MoveMax(void) {
Servo sv(SERVO_SLOT, SERVO_CHAN);
int angle = kMaxServoAngle;
return ServoTestHelper_MoveToAngle(&sv, angle);
}
/**
* Tests the motion of a servo to its minimum position
*
* @return 0 on sucess, non-zero on failure.
*/
int ServoTest_MoveMin(void) {
Servo sv(SERVO_SLOT, SERVO_CHAN);
int angle = kMinServoAngle;
return ServoTestHelper_MoveToAngle(&sv, angle);
}
/**
* Tests the motion of a servo to its middle position
*
* @return 0 on sucess, non-zero on failure.
*/
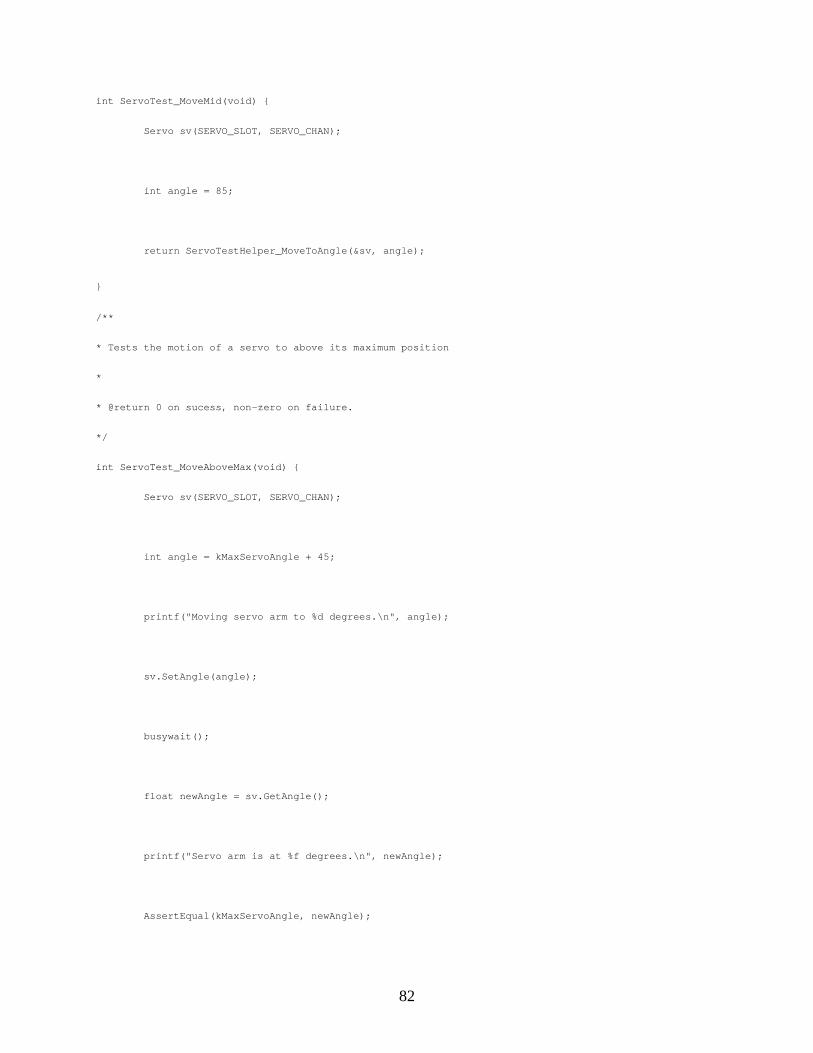
82
int ServoTest_MoveMid(void) {
Servo sv(SERVO_SLOT, SERVO_CHAN);
int angle = 85;
return ServoTestHelper_MoveToAngle(&sv, angle);
}
/**
* Tests the motion of a servo to above its maximum position
*
* @return 0 on sucess, non-zero on failure.
*/
int ServoTest_MoveAboveMax(void) {
Servo sv(SERVO_SLOT, SERVO_CHAN);
int angle = kMaxServoAngle + 45;
printf("Moving servo arm to %d degrees.\n", angle);
sv.SetAngle(angle);
busywait();
float newAngle = sv.GetAngle();
printf("Servo arm is at %f degrees.\n", newAngle);
AssertEqual(kMaxServoAngle, newAngle);

83
return 0;
}
/**
* Tests the motion of a servo to below its minimum position
*
* @return 0 on sucess, non-zero on failure.
*/
int ServoTest_MoveBelowMin(void) {
Servo sv(SERVO_SLOT, SERVO_CHAN);
int angle = kMinServoAngle - 45;
printf("Moving servo arm to %d degrees.\n", angle);
sv.SetAngle(angle);
busywait();
float newAngle = sv.GetAngle();
printf("Servo arm is at %f degrees.\n", newAngle);
AssertEqual(kMinServoAngle, newAngle);
return 0;
}
void ServoTestHarness_Execute(void) {
ExecTest(ServoTest_MoveMax, "Servo>MoveMax");

84
ExecTest(ServoTest_MoveMin, "Servo>MoveMin");
ExecTest(ServoTest_MoveMid, "Servo>MoveMid");
ExecTest(ServoTest_MoveAboveMax, "Servo>MoveAboveMax");
ExecTest(ServoTest_MoveBelowMin, "Servo>MoveBelowMin");
}
Analog Module Input Test
AITest.java package edu.wpi.first.wpilibj.tests;
import edu.wpi.first.wpilibj.AnalogModule;
/**
*
* @author Brian
*/
public class AITest {
private AITest() {
}
public static void main(String[] args) {
AnalogModule m = AnalogModule.GetInstance((byte)1);
System.out.print("Voltage on Channel 1: ");
System.out.println(m.GetVoltage((byte)1));
}
}
Digital Sidecar and Associates Hardware C++ Code.
DIOTest.java package edu.wpi.first.wpilibj.tests;

85
import edu.wpi.first.wpilibj.*;
/**
* Set of mini-tests for the DIO components (i.e. the digital sidecar)
* @author Brian
*/
public class DIOTest {
private static final boolean DEBUG = true;
private DIOTest() {
}
private static void TestPin(DigitalModule dm) throws InterruptedException {
dm.SetDIO((byte)1, true);
Thread.sleep(10);
if(DEBUG) {
System.out.print("[WPILibJ] DIO #1 value is ");
System.out.println(dm.GetDIO((byte)2));
}
dm.SetDIO((byte)1, false);
Thread.sleep(10);
if(DEBUG) {
System.out.print("[WPILibJ] DIO #1 value is ");
System.out.println(dm.GetDIO((byte)2));
}
Thread.sleep(10);
}
private static void TestServo(Servo s) throws InterruptedException {
s.SetAngle(0);

86
SensorBase.Wait(500);
System.out.print("[WPILibJ] Moved servo to ");
System.out.println(s.GetAngle());
s.SetAngle(170);
SensorBase.Wait(500);
System.out.print("[WPILibJ] Moved servo to ");
System.out.println(s.GetAngle());
s.SetAngle(85);
SensorBase.Wait(500);
System.out.print("[WPILibJ] Moved servo to ");
System.out.println(s.GetAngle());
}
public static void main(String[] args) {
final byte SLOT_4 = 4;
final byte CH_1 = 1;
final byte CH_2 = 2;
final byte CH_3 = 3;
final byte CH_RST = 14;
DigitalModule dm = DigitalModule.GetInstance(SLOT_4);
Servo s = new Servo(CH_1);
dm.AllocateDIO(CH_1, false);
dm.AllocateDIO(CH_2, true);
for (long l = 0; l < 3; l++) {
if(DEBUG) {
System.out.print("[WPILibJ] Iteration #");
System.out.println(l);

87
}
try {
TestPin(dm);
TestServo(s);
SensorBase.Wait(1000);
} catch (InterruptedException ex) {
System.err.println("[WPILibJ] Someone interrupted my beauty sleep!");
}
}
dm.AllocateDIO(CH_3, true);
DigitalInput reset = new DigitalInput(CH_RST);
Relay r = new Relay(CH_1, Relay.DIRECTION_FORWARDONLY);
// New Switch gadget!
while(true) {
try {
if(dm.GetDIO(CH_3)) {
s.SetAngle(180);
r.Set(Relay.VALUE_ON);
} else {
s.SetAngle(0);
r.Set(Relay.VALUE_OFF);
}
Thread.sleep(250);
if(reset.Get())
break;
} catch (InterruptedException ex) {

88
System.err.println("[WPILibJ] Someone interrupted my beauty sleep!");
}
}
}
}
Robot JoyStick Java Programming
JoyTest.java package edu.wpi.first.wpilibj.tests;
import edu.wpi.first.wpilibj.*;
/**
*
* @author Brian
*/
public class JoyTest {
private JoyTest() { }
public static void main(String[] args) {
Joystick stick = new Joystick(1);
float lastX = 0, lastY = 0, lastZ = 0, lastT = 0, lastH = 0;
boolean[] lastBtn = new boolean[] { false, false, false, false, false, false, false,
false, false, false, false, false };
while(!stick.GetRawButton(8)) {
float x = stick.GetX();
float y = stick.GetY();
float z = stick.GetZ();
float t = stick.GetTwist();
float h = stick.GetThrottle();
boolean[] buttons = new boolean[12];
for(int i = 0; i < buttons.length; i++)

89
buttons[i] = stick.GetRawButton(i+1);
if(Math.abs(x - lastX) > 0.005) {
System.out.print("Moved stick X axis to ");
System.out.println(x);
lastX = x;
}
if(Math.abs(y - lastY) > 0.005) {
System.out.print("Moved stick Y axis to ");
System.out.println(y);
lastY = y;
}
if(Math.abs(z - lastZ) > 0.005) {
System.out.print("Moved stick Z axis to ");
System.out.println(z);
lastZ = z;
}
if(Math.abs(t - lastT) > 0.005) {
System.out.print("Moved stick twist axis to ");
System.out.println(t);
lastT = t;
}
if(Math.abs(h - lastH) > 0.005) {
System.out.print("Moved stick throttle to ");
System.out.println(h);
lastH = h;
}
for(int i = 0; i < buttons.length; i++) {
if(buttons[i] != lastBtn[i]) {

90
System.out.print(buttons[i] ? "Pressed button " : "Released button ");
System.out.println(i);
lastBtn[i] = buttons[i];
}
}
SensorBase.Wait(20);
}
}
}
Video References 1. C++ Test Code :Working servo with 3 point reference (minimum, middle, and maximum
angle).
<http://hosted.filefront.com/mafiri/2335409> LINK 3
2. Java Test Code: Working servo with 3 point reference (minimum, middle, and maximum angle).
<http://hosted.filefront.com/mafiri/2335409> LINK 2
3. Java Test Code: Working servo with 3 point reference, motor in Relay Port, and button.
<http://hosted.filefront.com/mafiri/2335409> LINK 4
4. WPI 2k5 Robot Programmed in Java (with Joystick and wireless drive).
<http://hosted.filefront.com/mafiri/2335409> LINK 1