royal ezvue instruction manual - qvc.com · 3 display (dsply) contrast in order to enter the screen...
TRANSCRIPT
1
Royal EZVue Instruction Manual
Thank you for purchasing the Royal EZVue PDA. Please read this manual carefully to familiarize yourself with the PDA’s many features, and to ensure years of reliable operation. NOTICE We assume no responsibility for any damage or loss resulting from the use of this manual. We strongly recommend that separate, permanent printed records be kept of all data. Under certain circumstances, such as exposure to an electrostatic discharge, data may be lost or altered, or the unit may become inoperative until reset. Therefore, we assume no responsibility for data lost or otherwise rendered unusable, whether as a result of improper use, repair, battery replacement, or use after the specified battery life has expired from similar causes.
We assume no responsibility, directly or indirectly, for financial losses or claims from third persons resulting from the use of this product and all of its functions, such as stolen credit card numbers, the loss or alteration of stored data, etc.
This product was not designed to bend or survive extreme temperatures. Do not carry it in your trouser pockets. When in a bag or briefcase, make sure that it is stationary and well padded and protected.
Do not apply harsh chemicals or water to the display. Do not store the product in environments where temperature ranges can be extreme.
The information provided in this manual is subject to change without notice. FEDERAL COMMUNICATIONS COMMISSION (FCC) RADIO FREQUENCY INTERFERENCE STATEMENT INFORMATION TO THE USER:
This device complies with Part 15 of the FCC Rules. Operation is subject to the following two conditions: (1) This device may not cause harmful interference, and (2) This device must accept any interference received, including interference that may cause undesired operation.
Warning: Changes or modifications to this unit not expressly approved by the party responsible for compliance could void the user’s authority to operate the equipment.
NOTE: This equipment has been tested and found to comply with the limits for a Class B digital device, pursuant to Part 15 of the FCC Rules. These limits are designed to provide reasonable protection against harmful interference in a residential installation. This equipment generates uses and can radiate radio frequency energy and, if not installed and used in accordance with the instructions, may cause harmful interference to radio communications.
However, there is no guarantee that interference will not occur in a particular installation. If this equipment does cause harmful interference to radio or television reception, which can be determined by turning the equipment off and on, the user is encouraged to try to correct the interference by one or more of the following measures: • Reorient or relocate the receiving antenna. • Increase the separation between the equipment and receiver. • Connect the equipment into an outlet on a circuit different from that to which the
receiver is needed. • Consult the dealer or an experienced radio/TV technician for help.
Notes: Shielded cables must be used with this unit to ensure compliance with the Class B FCC limits.
2
The Responsible party information: Royal Consumer Information Products, Inc. – 379 Campus Drive, 2nd Floor, Somerset, NJ 08875, USA TEL: 732-627-9977
IN CANADA: This digital apparatus does not exceed the Class B limits for radio noise emissions from digital apparatus as set forth in the radio interference regulations of the Canadian Department of Communications.
AU CANADA: Cet appareil digital respecte les normes de la Classe B pour les émissions de fréquences radio telles qu´indiquées dans la loi sur les interférences radio et mises en application par le département canadien des communications. SAFETY TIPS • Be careful not to scratch the screen • The EZVue should be protected from rain and moisture. Treat the EZVue
as you would other electronic devices. • Do not drop your EZVue or subject it to strong impacts. • Protect your EZVue from extreme temperatures. • The touch screen can be cleaned with a soft cloth lightly moistened with a
window cleaning solution. Commercial cleaners are sold separately.
PRODUCT SUPPORT HOTLINE:
For questions on use of this product or this warranty call 1-800-272-6229 (in Canada call 1-888-266-9380 or in Mexico call 01-800-849-4826, Monday through Friday during normal business hours. You can also e-mail Royal at [email protected]. BATTERY INSTALLATION Before you start using the EZVue, you must install the two AAA batteries into the battery compartment. Check the back of the organizer. You will see the battery compartment door. Remove the battery compartment door and install the batteries. After you have installed the batteries, put the battery compartment door back on the unit.
IMPORTANT INFORMATION - USING YOUR PDA FOR THE FIRST TIME YOU MUST RESET YOUR PDA BEFORE USING IT FOR THE FIRST TIME! You must reset your organizer before using it for the first time. After installing the batteries, you should see a message in the screen that says “Full Reset” and “Refresh”. YOU MUST SELECT “FULL RESET” TO FULLY RESET THE UNIT.
If you do not see the “Reset ?” screen, insert a pointed object, such as a pencil point or the open end of a paperclip into the RESET hole located on the back of the unit. Press lightly until the organizer displays “Full Reset” and “Refresh”. Scroll to “Full Reset” and touch OK to reset the organizer. Note: Battery voltages are constantly monitored; a low battery warning message will show when the power level gets too low. Replace the batteries when this message is displayed. You can change the battery without losing any information. Do not try to operate or synchronize the EZVue with a low battery; data can be corrupted or lost.
3
DISPLAY (DSPLY) CONTRAST In order to enter the screen contrast mode, touch the MENU key. Use the round cursor pad to scroll to the DSPLY icon and press OK. To adjust the screen contrast, touch the right or left side of the cursor pad and touch OK to finalize your preference. SYSTEM PREFERENCES - SETUP
Before you start to use the unit you may want to adjust the factory settings. To do this touch the MENU key and use the cursor pad to scroll to the SETUP icon. Scroll thorough the setup options by touching the top or bottom of the cursor pad. Touch the OK key to select the option you wish to change. Touch the right or left side of the cursor pad to scroll through the choices. Touch OK to finalize your choice. A list of setup option is provided below.
System Preferences define the general settings of EZVue. The settings are as follows: • Language – selects the prompt language. The options are:
Options are: ENGLISH, ITALIANO, DEUTSCH, FRANCIS, ESPANOL,
PORTUGUES, DUTCH • Date and Time formats – select your desired format. • Key Tone – touch off to cancel the key click tones. • Auto Shut-off – select from 1,2,3,4 or 5 minutes. TIME
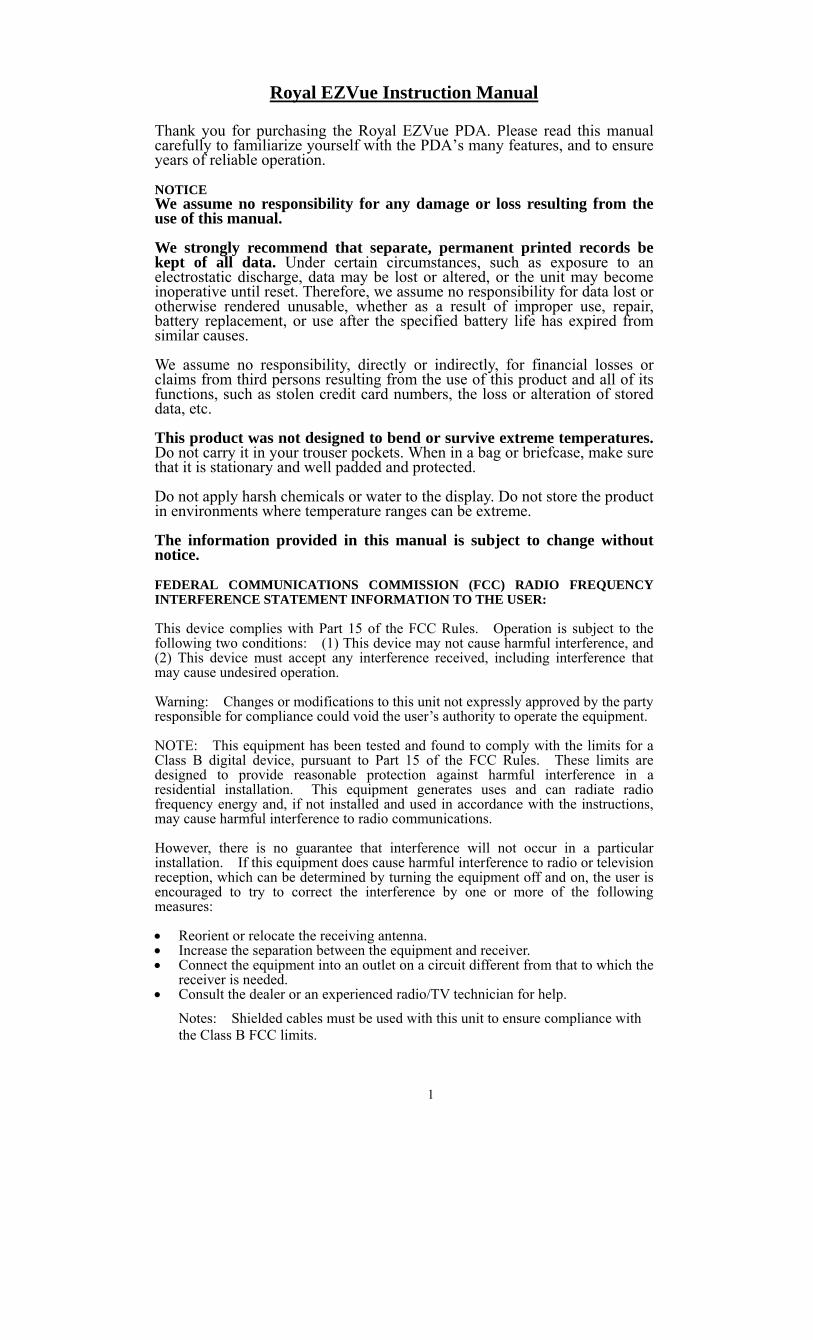
Touch the Time key to enter time mode.
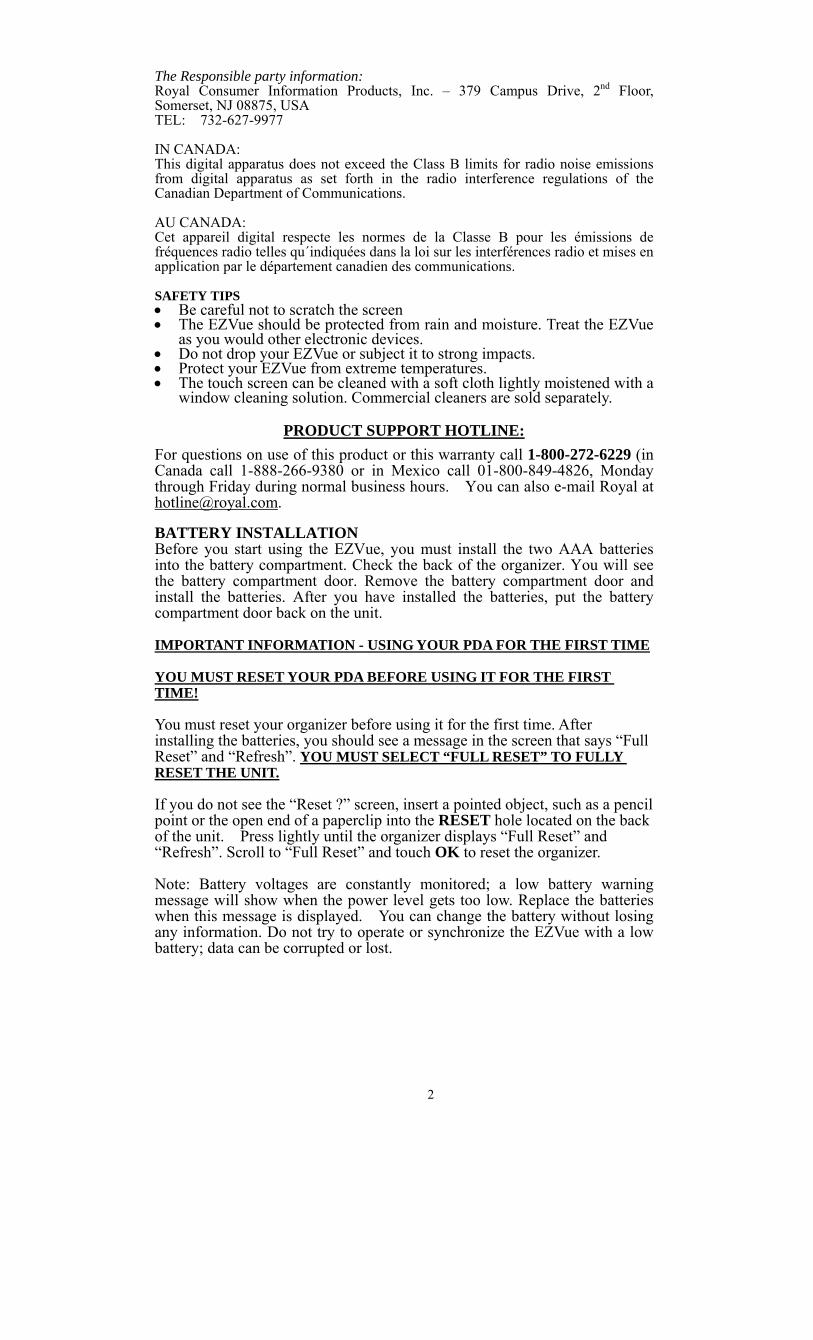
SETTING DATE AND TIME Touch the TIME key to enter the time mode. Select CLOCK and touch OK. Next touch the EDIT key. The date will be highlighted. Touch OK. Use the cursor pad to move to the correct date. Touch OK. Cursor to the Time field. Touch OK. Enter the correct time. To switch between AM and PM, touch the B key. Touch to OK. Touch the ESC key and then touch any function key to continue. MENU The MENU key gives you access to the follow application areas. SCHEDULE, CALCULATOR, ABC INFO, DSPLYY, SYNC and SETUP. Each of these options will display a submenu of different related applications. These applications include: LCD contrast control, Planner, Todo list, memo, expense, anniversary, calendar, clock, alarm, count down timer, stop watch, speller, translator, thesaurus, information feature, calculator, metric convertor, currency convertor, euro convertor, mortgage calculator, mileage
Jan-05-2008 Sat 12:25:48 AM
Set
Jan-05-2008 Sat
12:25:48 AM .

4
calculator, future value calculator, games, memory optimization, memory usage, PC Sync, password, and system preferences. To select any of these applications simply highlight the desired application and touch the OK key. These applications will be described in greater detail throughout this manual. ADDRESS BOOK Touch the PHONE key to access the Address Book application. This application allows you to keep names, addresses, phone numbers, email address and other information about your contacts.
Each record consists of the following fields. Please note you do not have to store information in all of the fields. Simply touch the OK key at any time to save the record with the information you have entered.
Last name First name Company Title TEL (H) TEL (W) Fax Mobile Pager Email Address City State Zip Note
Phone list view shows the list of names, sorted alphabetically according to each name “Last Name, First Name” stored in the record’s name field. CREATING, EDITING AND DELETING ADDRESS BOOK RECORDS ADDING A NEW RECORD 1. Touch the NEW key to add a new record. 2. The cursor is ready for you to start entering characters in the last name
field. • As soon as data is entered into a field, the field name disappears
leaving the field icon on the beginning of the line. • Use the cursor pad to move down to each new field. • Touch the Page Up/Page Down keys next to the SPACE key to see
more fields. • Touch OK to save the information and return to the List mode. When a
record is saved, a green LED light is on for a short moment. • Please note that when any record is saved, a green LED flashes to
confirm the record is saved. FINDING ADDRESS BOOK RECORDS There are several ways to find address book records. They are as follows: • Touch the alphabet key on the keyboard to quickly move to the beginning
of that group of letters. • Touch the top or bottom of the cursor pad to scroll through a long list of
contacts. • Touch the Page up/Page down key to scroll through the list page by page.
5
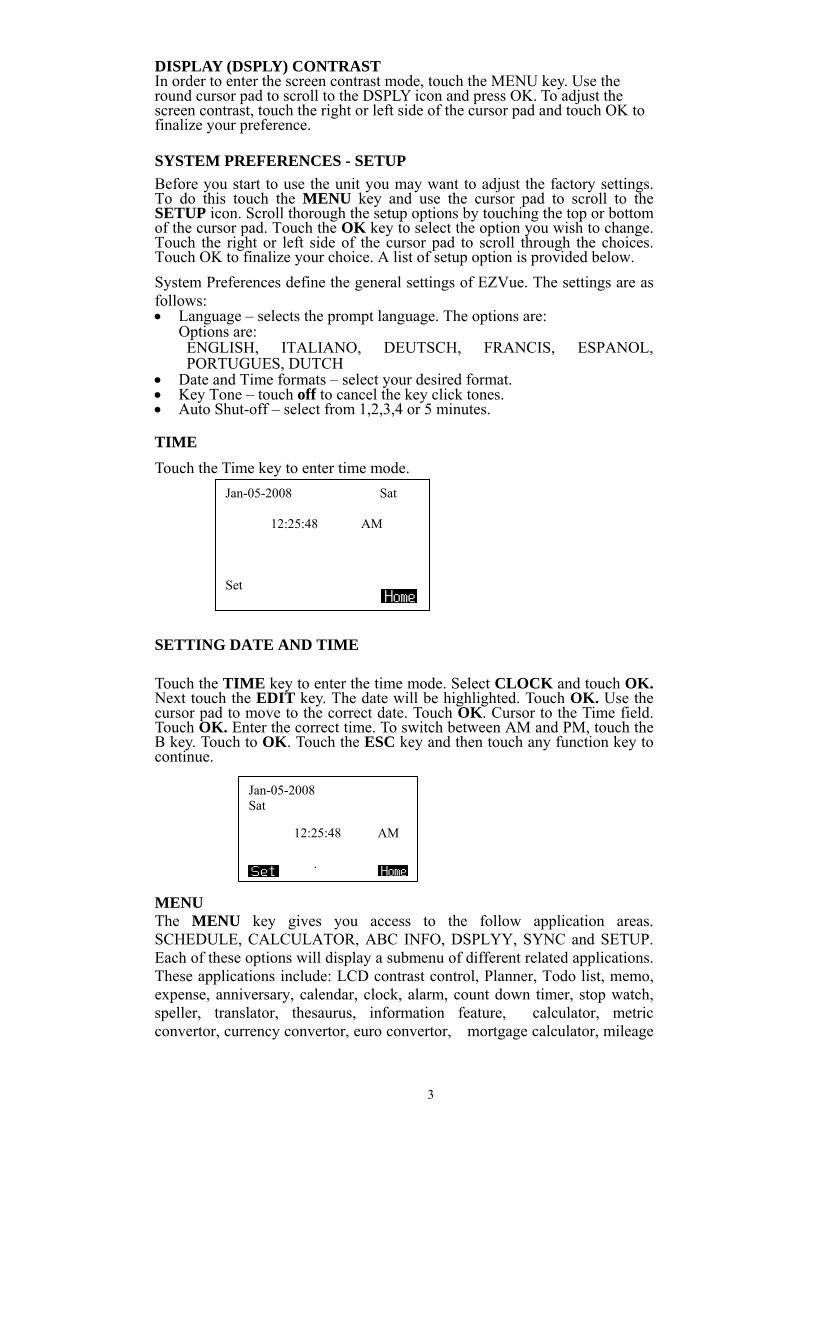
VIEWING ADDRESS BOOK RECORDS Switch from Address Book phone list view to an individual record view by highlighting the desired record and touching the OK key. EDITING RECORDS 1. To edit a specific record, display the full record and touch the EDIT key. 2. Cursor down to the field you wish to change. 3. Delete the existing information or enter new information. 4. Touch OK to save the information.
DELETING RECORDS 1. To delete a record, highlight the record and touch the DEL key. 2. Touch OK to remove the record. ABC - SPELL CHECK, TRANSLATOR and THESAURUS
SPELL CHECK
To enter spelling mode, touch ABC. Enter the word and touch OK to start checking. If the word is correct, a message “CORRECT” shown. If the word is incorrect, related words and the corresponding number of words found are shown. The following screen message is displayed FOUND XX ????? XX-the number of corresponding words found ?????-the related word TRANSLATOR
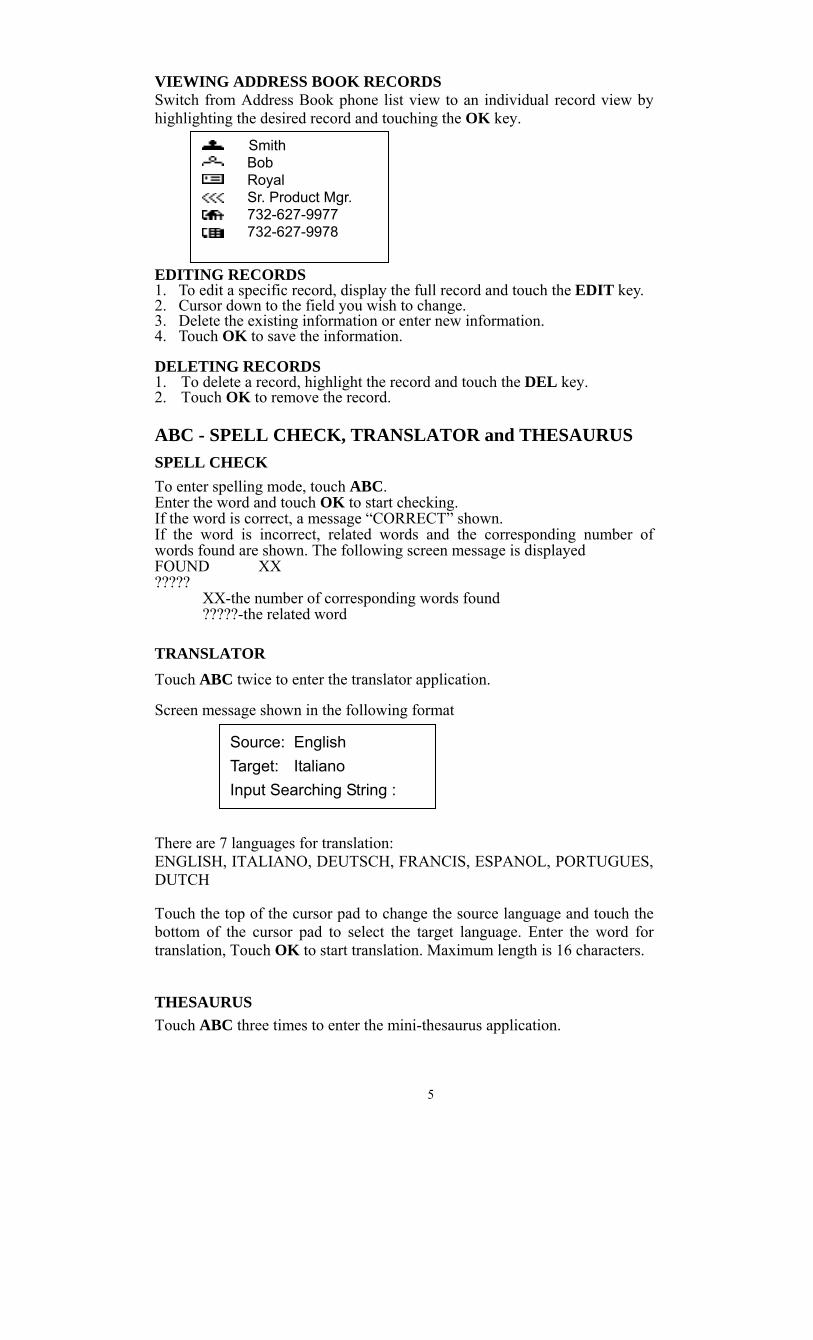
Touch ABC twice to enter the translator application. Screen message shown in the following format
There are 7 languages for translation: ENGLISH, ITALIANO, DEUTSCH, FRANCIS, ESPANOL, PORTUGUES, DUTCH Touch the top of the cursor pad to change the source language and touch the bottom of the cursor pad to select the target language. Enter the word for translation, Touch OK to start translation. Maximum length is 16 characters. THESAURUS
Touch ABC three times to enter the mini-thesaurus application.
Smith Bob
Royal Sr. Product Mgr. 732-627-9977 732-627-9978
Source: English Target: Italiano Input Searching String :
6
Screen message shown in the following format
Input the word and touch OK to start searching. DIGITAL VOICE NOTES The EZVue stores up to 32 voice notes or 8 seconds each. 1. Touch the REC key to access the Voice Note Function. 2. Touch the top or bottom of the cursor pad to scroll through the different
voice note storage areas. 3. When you are at the desired voice note storage area (1-32), touch the REC
key and speak your message of up to 8 seconds. 4. There is no need for a stop key. The EZVue will stop recording
automatically after 8 seconds. 5. Touch the PLAY key to play your 8 second Voice Note. 6. To play back previously stored voice notes, use the cursor pad to scroll to
the specific Voice Note number and then touch the PLAY key. 7. There is no need to delete a voice note. Simply access that area and record
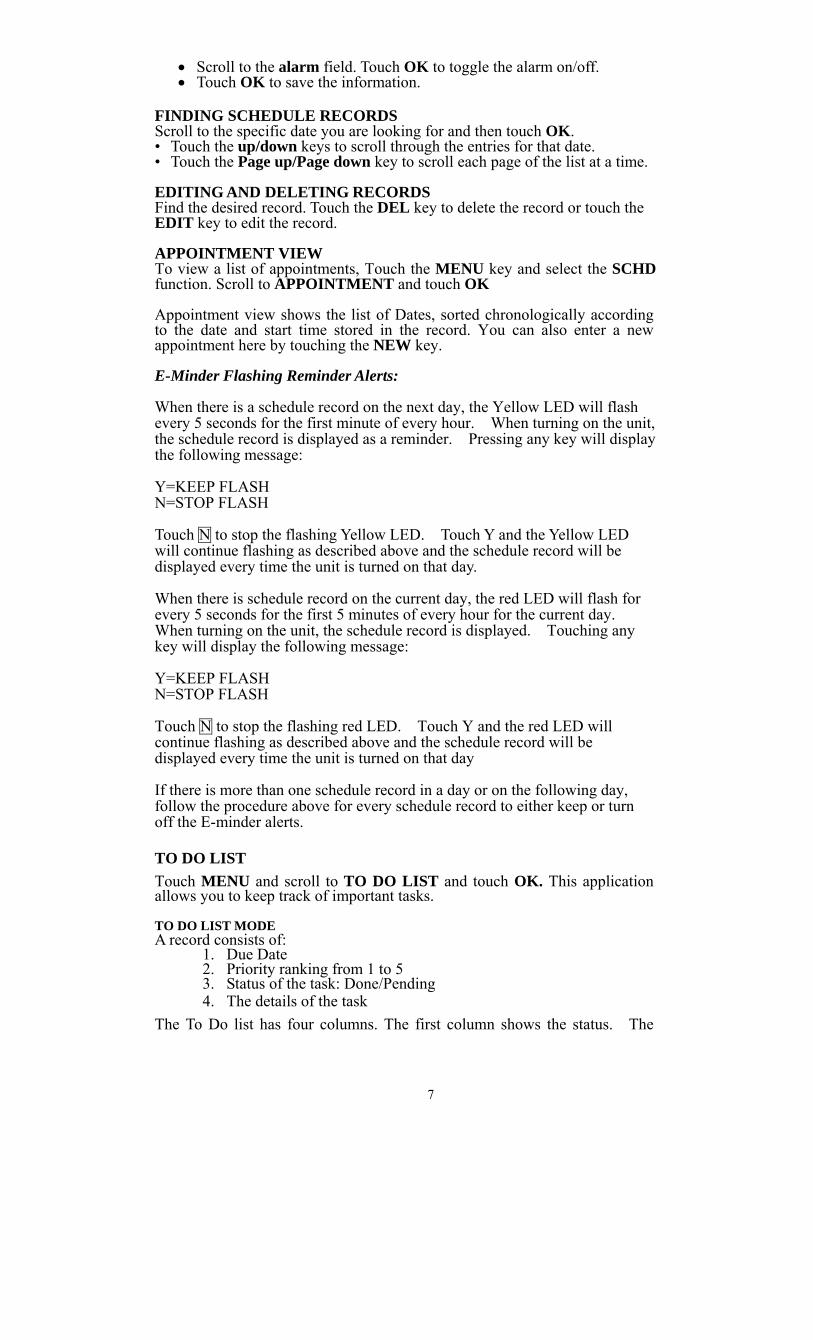
over the existing voice note. SCHEDULE /CALENDAR FUNCTIONS Touch the MENU key. The Schedule icon should be highlighted. Touch OK. You will be presented with the following options: Calendar, Appointments, To-Do List, Anniversary and Memo Scroll to Calendar and touch OK to enter calendar mode.
The monthly planner is used to view one month of planner, anniversary and to do activities. Icons next to a specific date indicate the type of events specified for that date. A dot on the upper indicates anniversary event. A dot in the middle indicates to do event. A dot on the lower indicates scheduler event.
FINDING THE DESIRED DATE IN THE CALCULATOR Touch page up / page down to scroll one month at a time. Touch the top of bottom of the cursor pad to scroll one week at a time. Touch the left or right side of the cursor pad to scroll one day at a time.
CREATING, EDITING AND DELETING SCHEDULE RECORDS ADD A NEW SCHEDULE RECORD 1. Touch the Schedule and scroll to the desired date. Touch the NEW key to add a new record. Three options are provided. Select the option you wish to use and touch OK.
Add appointment Add todo Task Add anniversary
2. The cursor is ready for you to start entering characters in the note field. • Scroll to the date field if you need to change the date. • Scroll to the Start/End time fields to change the start/end time.
◄2005► ◄ Jan ► 2 3 4 5 6 7 8 9 10 11 12 13 14 15 16 17 18 19 20 21 22 23 24 25 26 27 28 29 30 31
Thesaurus :
7
• Scroll to the alarm field. Touch OK to toggle the alarm on/off. • Touch OK to save the information.
FINDING SCHEDULE RECORDS Scroll to the specific date you are looking for and then touch OK. • Touch the up/down keys to scroll through the entries for that date. • Touch the Page up/Page down key to scroll each page of the list at a time. EDITING AND DELETING RECORDS Find the desired record. Touch the DEL key to delete the record or touch the EDIT key to edit the record. APPOINTMENT VIEW To view a list of appointments, Touch the MENU key and select the SCHD function. Scroll to APPOINTMENT and touch OK
Appointment view shows the list of Dates, sorted chronologically according to the date and start time stored in the record. You can also enter a new appointment here by touching the NEW key. E-Minder Flashing Reminder Alerts: When there is a schedule record on the next day, the Yellow LED will flash every 5 seconds for the first minute of every hour. When turning on the unit, the schedule record is displayed as a reminder. Pressing any key will display the following message: Y=KEEP FLASH N=STOP FLASH Touch N to stop the flashing Yellow LED. Touch Y and the Yellow LED will continue flashing as described above and the schedule record will be displayed every time the unit is turned on that day. When there is schedule record on the current day, the red LED will flash for every 5 seconds for the first 5 minutes of every hour for the current day. When turning on the unit, the schedule record is displayed. Touching any key will display the following message: Y=KEEP FLASH N=STOP FLASH Touch N to stop the flashing red LED. Touch Y and the red LED will continue flashing as described above and the schedule record will be displayed every time the unit is turned on that day If there is more than one schedule record in a day or on the following day, follow the procedure above for every schedule record to either keep or turn off the E-minder alerts. TO DO LIST
Touch MENU and scroll to TO DO LIST and touch OK. This application allows you to keep track of important tasks. TO DO LIST MODE A record consists of:
1. Due Date 2. Priority ranking from 1 to 5 3. Status of the task: Done/Pending 4. The details of the task
The To Do list has four columns. The first column shows the status. The

8
second column shows the due date. The third column shows the priority ranking and the last column contains note of tasks.
CREATING, EDITING AND DELETING TO DO RECORDS Follow the procedures outlined in creating, editing, deleting schedule records. FINDING AND VIEWING TO DO LIST RECORDS Follow the procedures outlined in finding and viewing schedule records. There is no alphabetical search in todo.
ANNIVERSARY An anniversary record consists of:
1. Date 2. Alarm 3. The details of the anniversary
Anniversary list view shows the list of Date, sorted chronologically according to the date (day and month only) stored in the record. . CREATING, EDITING AND DELETING ANNIVERSARY RECORDS Follow the procedures outlined in creating, editing, deleting schedule records FINDING AND VIEWING ANNIVERSARY RECORDS Follow the procedures outlined in finding and viewing scheduler records. MEMOS MEMO LIST MODE A note or memo record consists of:
1. Date (non-editable) 2. Time (non-editable) 3. Subject 4. Note
Notes list shows the list of text memos, sorted by entry date. CREATING, EDITING AND DELETING MEMOS Follow the procedure used in creating, editing and deleting schedule records FINDING AND VIEWING MEMOS Follow the procedures outlined in finding and viewing scheduler records. .
S Date P Note 16-Dec-2001 3 Meeting 01-Feb-2003 1 Dinner
9
CALCULATOR FUNCTIONS Scroll to the Calculator icon and touch OK. The following options are available: Calculator, Mortgage/Loans, Auto Mileage, Future Values, Metric Conversion, Currency Conversion and Euro Conversion. Scroll to the desired option and touch the OK key.
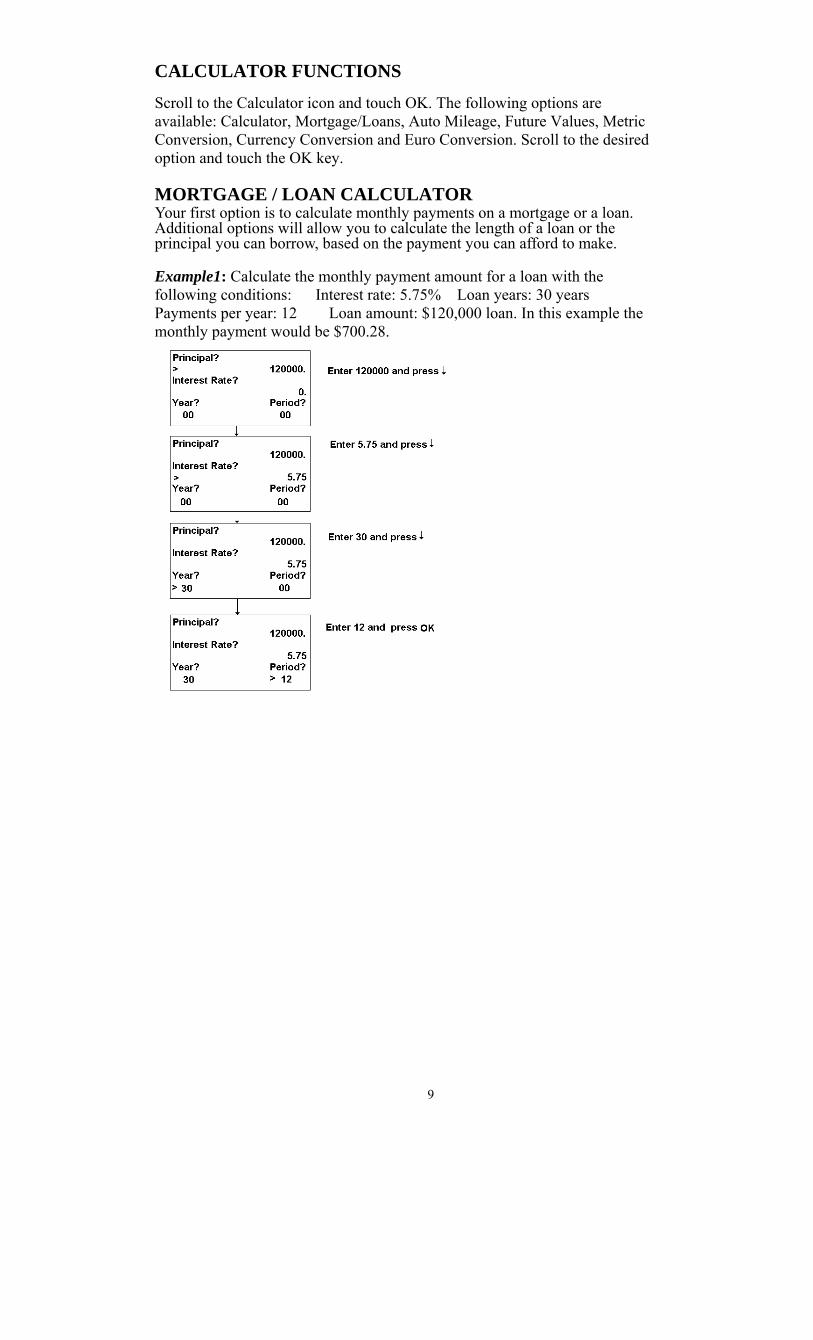
MORTGAGE / LOAN CALCULATOR Your first option is to calculate monthly payments on a mortgage or a loan. Additional options will allow you to calculate the length of a loan or the principal you can borrow, based on the payment you can afford to make. Example1: Calculate the monthly payment amount for a loan with the following conditions: Interest rate: 5.75% Loan years: 30 years Payments per year: 12 Loan amount: $120,000 loan. In this example the monthly payment would be $700.28.

10
Example 2: Calculate the number of years to pay off a loan given: Interest rate:5.75%, Monthly Payment: $800, Amount borrowed: $120,000, Payments per year: 12

11
Example 3: Calculate the amount you can borrow given: Interest rate:5.75%, Monthly Payment:$800, Loan period: 30 years, Payments per year: 12
AUTO MILEAGE CALCULATOR
The first time you use this feature, you must enter the vehicle’s starting odometer reading. The following screen will be displayed:
Using the numeric keys, enter the odometer reading on the first tank fill-up and touch “OK”. The following screen will be displayed:
This screen simply advises you that this is the
START MILES?
FIRST DATA

12
COST?
first information input and a mileage report cannot be generated until the next time you fill up.
On your next visit to fill up the gas tank the following screen will be displayed:
Using the numeric keys, enter the odometer reading when filling up the tank and touch “OK”.
Using the numeric keys, enter the number of gallons of fuel used to fill the tank up and touch “OK”.
Using the numeric keys, enter the cost of fuel used to fill the tank up and touch “OK”.
Once all of the above information has been entered, a report will be generated. You can view:
• Total number of miles driven since the previous tank fill up • Fuel efficiency in MILES/GALLON • Fuel cost performance in COST/MILE
To view these three results, use the cursor pad.
ODOMETER?
GALLONS?
13
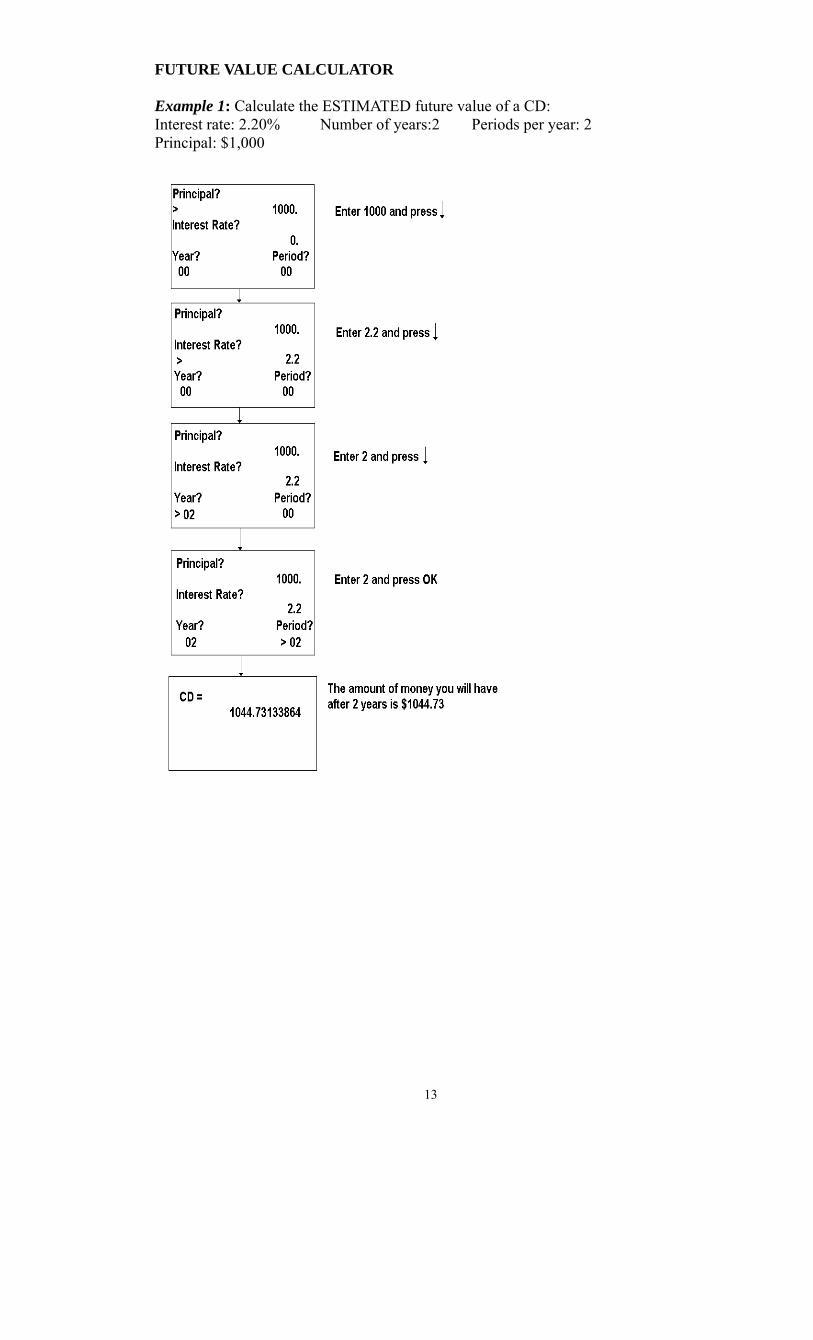
FUTURE VALUE CALCULATOR Example 1: Calculate the ESTIMATED future value of a CD: Interest rate: 2.20% Number of years:2 Periods per year: 2 Principal: $1,000
14
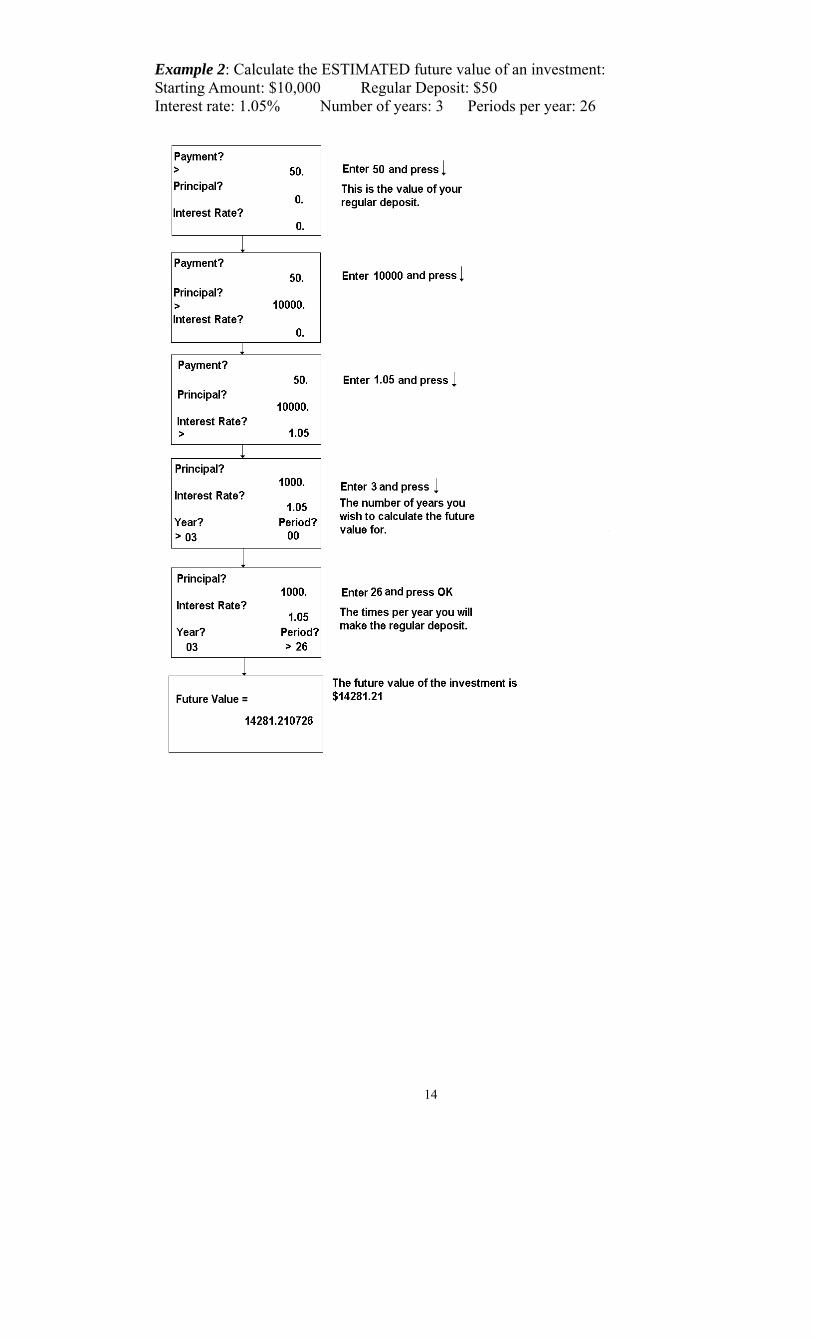
Example 2: Calculate the ESTIMATED future value of an investment: Starting Amount: $10,000 Regular Deposit: $50 Interest rate: 1.05% Number of years: 3 Periods per year: 26
15
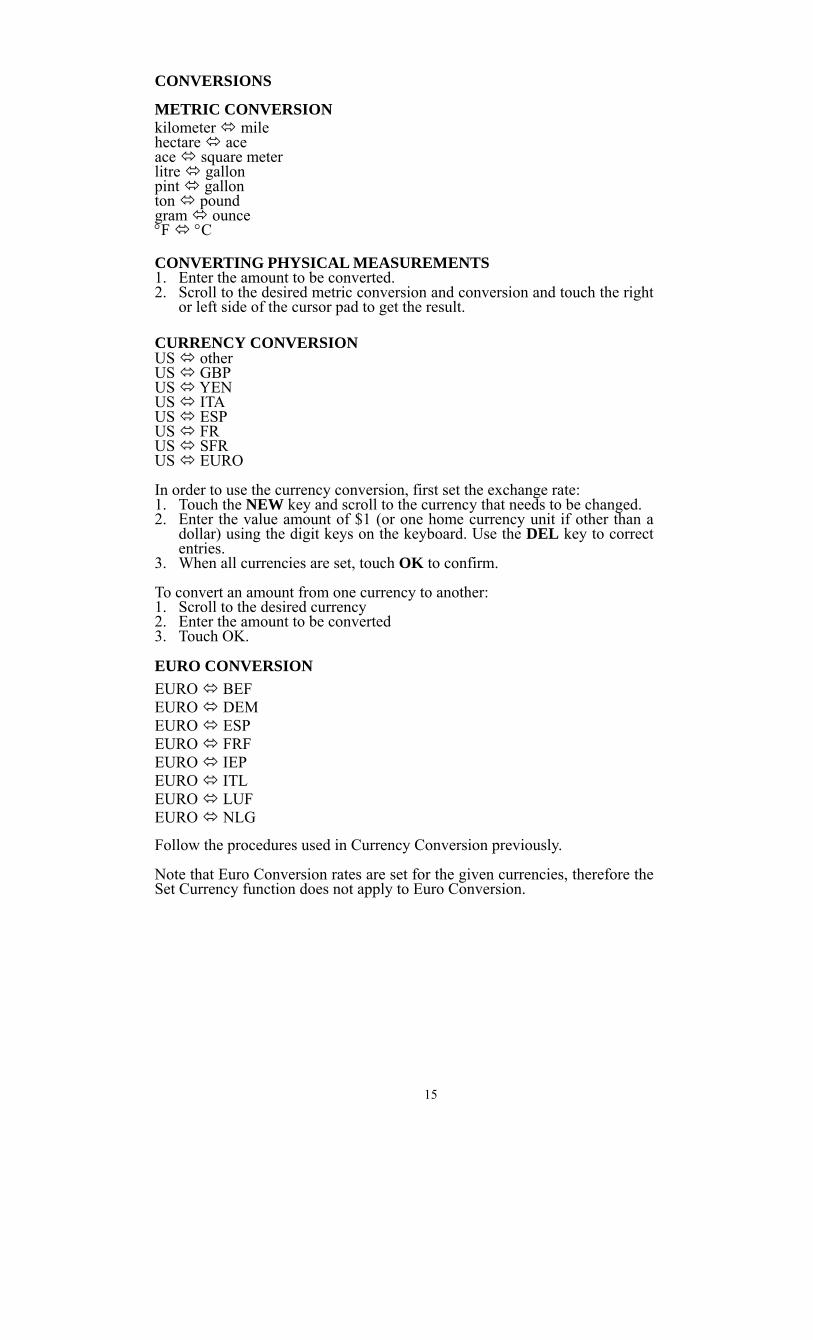
CONVERSIONS
METRIC CONVERSION kilometer mile hectare ace ace square meter litre gallon pint gallon ton pound gram ounce °F °C CONVERTING PHYSICAL MEASUREMENTS 1. Enter the amount to be converted. 2. Scroll to the desired metric conversion and conversion and touch the right
or left side of the cursor pad to get the result. CURRENCY CONVERSION US other US GBP US YEN US ITA US ESP US FR US SFR US EURO In order to use the currency conversion, first set the exchange rate: 1. Touch the NEW key and scroll to the currency that needs to be changed. 2. Enter the value amount of $1 (or one home currency unit if other than a
dollar) using the digit keys on the keyboard. Use the DEL key to correct entries.
3. When all currencies are set, touch OK to confirm. To convert an amount from one currency to another: 1. Scroll to the desired currency 2. Enter the amount to be converted 3. Touch OK. EURO CONVERSION
EURO BEF EURO DEM EURO ESP EURO FRF EURO IEP EURO ITL EURO LUF EURO NLG Follow the procedures used in Currency Conversion previously.
Note that Euro Conversion rates are set for the given currencies, therefore the Set Currency function does not apply to Euro Conversion.
16
ABC INFO FUNCTIONS The following options are available under the ABC INFO function: Speller, Translator, Thesaurus, Toll-Free Numbers, Carbs/Calories, Games, Weights and Measures and World Airport Codes. To access any of these functions, touch the MENU key and scroll to the ABC INFO icon and touch OK. The operations of the Speller, Translator and Thesaurus have been explained previously. TOLL-FREE NUMBERS In this directory you will find three sub directories:
• Hotels • Airlines • Car Rentals
Touch the top or bottom of the cursor pad to select which of the three sub directories you would like to access. Touch OK to conform. CARBOHYDRATES AND CALORIES In this directory you will find several sub directories that have different food categories, such as BEVERAGES, DAIRY PRODUCTS, EGGS, FATS AND OILS, FISHAND SHELLFISH, etc. To view the carbohydrate and calories within a food category, use the cursor pad to select the desired category and touch OK to confirm. BRAIN GAMES There are three types of Brain Games as follows:
1. Hangman game 2. Matching game 3. Word Matching Games
HANGMAN GAME The user is required to guess the word with only the length of the word given initially. Enter letters which may be contained within the word. If the guess is correct, the letter will be shown on the screen in its appropriate position(s) within the word. The user will win the game if the entire word is guessed correctly within 9 attempts. WORD MATCH GAME Scroll to the desired Words Match game and touch OK to start the Word Match Brain Game. You will be automatically presented with a list of words from a specified category or a random list of words. Try to remember the words as they are displayed. After the words have been displayed, the unit will display words from that same category. These words may, or may not be words that were originally displayed. If you have seen a specific word, enter the letter Y. If you have not seen that word, enter N. When the listing of words is finished you will be given a score. There are several variations of these games, including a game that requires you to remember the words listed and then asks you to retype the words. There are several variations of this game including a game which requires you to remember the words listed and then retype those words. TIME FUNCTIONS DAILY ALARM Touch the TIME key and select ALARM. To set the daily alarm:

17
Set the alarm time by touching the EDIT key. Touch OK. When the time reaches the time set for the daily alarm, the alarm tone will beep for 30 seconds. Touch any key to stop the sound. COUNTDOWN Touch the TIME key and select COUNTDOWN.
To set countdown time: 1. Touch the EDIT key to select a count down value. 2. The maximum time for counting down is 99:59. 3. Touch the cursor pad to select On/ Off. 4. A beep tone will turn on automatically for 30 seconds when the time is
counting down to 00:00 and count down is enabled. STOPWATCH Touch the TIME key and select STOPWATCH. Touch OK to start or stop.
PASSWORD Touch the MENU key and scroll to SETUP. Touch OK. Select Password.
ASSIGNING A PASSWORD 1. The EZVue will prompt you to enter a new password. 2. Use the keyboard to enter the password.
The characters will be shown as * during entry. 3. Touch OK 4. The EZVue will ask you to confirm the new password by reentering it. 5. After entering password again, touch OK. Password is now assigned.
Entering the password is now required every time the EZVue is turned on.
DELETING A PASSWORD Touch the MENU key and scroll to SETUP. Touch OK. Select Password. 1. The EZVue will prompt you to enter your existing password. 2. Use the keyboard to enter the password. 3. Touch OK. 4. If correct password is entered, the screen message “Enter a new
password” appears, touch OK to confirm deletion. CHANGING A PASSWORD Touch the MENU key and scroll to SETUP. Touch OK. Select Password. 1. The EZVue will prompt you to enter your existing password. 2. Use the keyboard to enter the password. 3. Touch OK. 4. The EZVue will prompt you to enter a new password. You can assign a password to the EZVue. For security purposes, the entire unit can be locked from normal view or use unless the proper password is entered. Keep a record of your password!
Count down 00:00:00 Set
18
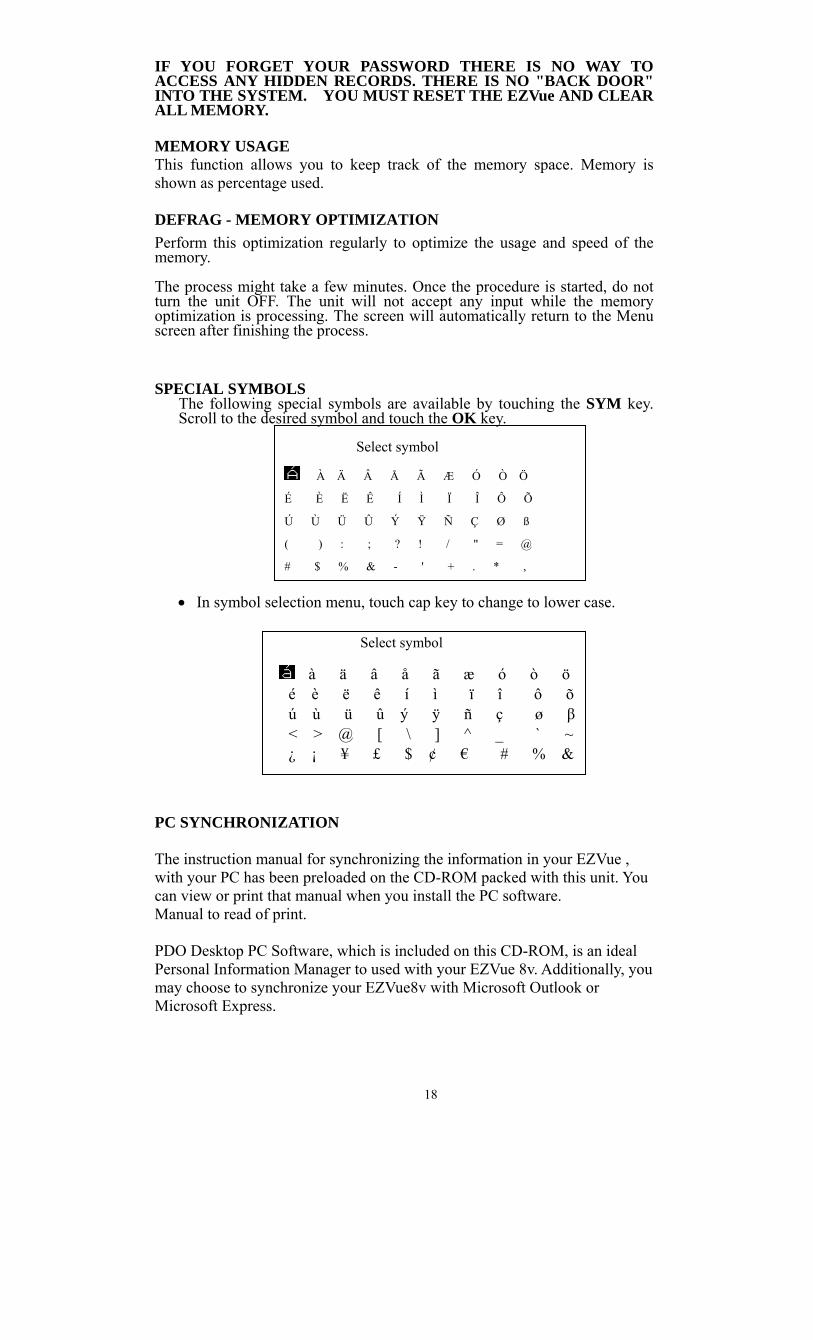
IF YOU FORGET YOUR PASSWORD THERE IS NO WAY TO ACCESS ANY HIDDEN RECORDS. THERE IS NO "BACK DOOR" INTO THE SYSTEM. YOU MUST RESET THE EZVue AND CLEAR ALL MEMORY. MEMORY USAGE This function allows you to keep track of the memory space. Memory is shown as percentage used. DEFRAG - MEMORY OPTIMIZATION
Perform this optimization regularly to optimize the usage and speed of the memory. The process might take a few minutes. Once the procedure is started, do not turn the unit OFF. The unit will not accept any input while the memory optimization is processing. The screen will automatically return to the Menu screen after finishing the process. SPECIAL SYMBOLS
The following special symbols are available by touching the SYM key. Scroll to the desired symbol and touch the OK key.
• In symbol selection menu, touch cap key to change to lower case.
PC SYNCHRONIZATION The instruction manual for synchronizing the information in your EZVue , with your PC has been preloaded on the CD-ROM packed with this unit. You can view or print that manual when you install the PC software. Manual to read of print. PDO Desktop PC Software, which is included on this CD-ROM, is an ideal Personal Information Manager to used with your EZVue 8v. Additionally, you may choose to synchronize your EZVue8v with Microsoft Outlook or Microsoft Express.
Select symbol
À Ä Â Å Ã Æ Ó Ò Ö
É È Ë Ê Í Ì Ï Î Ô Õ
Ú Ù Ü Û Ý Ÿ Ñ Ç Ø ß
( ) : ; ? ! / " = @
# $ % & - ' + . * ,
Select symbol
à ä â å ã æ ó ò ö é è ë ê í ì ï î ô õ ú ù ü û ý ÿ ñ ç ø β < > @ [ \ ] ^ _ ` ~ ¿ ¡ ¥ £ $ ¢ € # % &
19
You have 3 different ways to synchronize data. 1. You can download data from your PC to your EZVue. This downloads every record stored on your PC to your EZVue. In the process all records that had been stored on your EZVue are overwritten. 2. You can upload data from your EZVue to your PC. In this case records uploaded from the EZVue overwrite the records stored on your PC. 3. You can also synchronize your EZVue with your PC. In that case, the EZVue and the PC compare records and transfer individual records to or from each device. Records that are more recent override older records. For example, if you have changed a phone number on an individual record stored on your EZVue, when you synchronize with your PC, the record you modified on your EZVue will overwrite that record stored on your PC. Records that haven’t changed since your last synchronization do not get transferred. IMPORTANT SYNCHRONIZATION INFORMATION DO NOT CONNECT THE CABLE SUPPLIED WITH THE EZVUE TO YOUR PC UNTIL YOU HAVE INSTALLED THE PC SOFTWARE ON THE INCLUDED CD-ROM.
VIEWING OR PRINTING THE PC SOFTWARE MANUAL AFTER INSTALLATION OF THE PC SOFTWARE. To view or print the PC software manual at any time, insert the CD-ROM into your PC. After the installation process starts, click on English, and then EZVue as the model. You will see a prompt that asks if you want to continue installing the software. Click on NO if the PC software has already been installed on your PC. You can then click on the Software Manual to view or print the manual.

20
Manual de Instrucciones para Royal EZVue7 Le agradecemos la adquisición de este equipo EZVue7 PDA. Lea este manual cuidadosamente para que se familiarice con las numerosas opciones de la unidad PDA y para asegurar muchos años de confiabilidad operacional. ADVERTENCIA No se asumirá ninguna responsabilidad por daños o pérdidas resultantes del uso de este equipo. Recomendamos enfáticamente mantener aparte respaldos impresos permanentes de toda la información. Bajo ciertas circunstancias, tales como la exposición a una descarga electroestática, se puede perder o alterar la información, o bien, la unidad puede quedar no operativa hasta que la programen (reset) de nuevo. Por lo tanto, no se asume ninguna responsabilidad por la pérdida o alteración de información, ya sea como resultado del uso inapropiado, reparaciones, cambio de baterías o uso posterior si la vida útil especificada de la batería ha expirado por causas similares. No se asume responsabilidad, directa o indirectamente, por pérdidas financieras o reclamos de terceras personas como resultado del uso de este equipo, como números de tarjetas de crédito robados, la pérdida o alteración de la información almacenada, etc. Este producto no está diseñado para ser doblado ni para soportar presión o temperaturas extremas. No lo transporte en el bolsillo de sus pantalones. Cuando lo lleve en una bolsa o en un maletín, asegúrese que va inmóvil y bien protegido. A fin de asegurar una vida más larga al producto, se incluye una cubierta móvil con el equipo EZVue. Así evitará que se dañe la pantalla. No aplique sustancias químicas abrasivas o agua a la pantalla. No deje el equipo en lugares donde la temperatura alcance rangos extremos. La información que se entrega en este manual queda sujeta a cambios sin previo aviso. CONSEJOS DE SEGURIDAD • Sea cuidadoso y trate de no rayar la pantalla. Utilice sólo el puntero
suministrado con el equipo o bien otro tipo de puntero con punta plástica, diseñado para el uso en este tipo de pantalla. Nunca utilice un lápiz o lapicero, la uña u otro objeto filudo en la superficie de la pantalla de tacto.
• Proteja su EZVue de la lluvia y de la humedad. Déle al EZVue el mismo tratamiento que a cualquier otro aparato electrónico.
• No deje caer su EZVue ni lo someta a impactos severos. • Proteja su EZVue de las temperaturas extremas • Se puede limpiar la pantalla con un paño suave y líquido limpiavidrios.
La solución especial para limpiar la pantalla se vende aparte. Soporte Técnico: Si tiene preguntas sobre el uso de esta unidad, por favor llame al 1-800-272-6229 (en Canada llame a 1-888-266-9380 o en México a 01-800-849-4826, de lunes a viernes durante horario normal de oficina. También puede contactarse con Royal vía e-mail a [email protected].
INSTALACIÓN DE LAS BATERÍAS Antes de usar su EZVu debe instalar las tres baterías de litio AAA que se incluyen con el PDA. Revise la parte posterior del aparato. Encuentre la tapa del compartimiento de baterías Deslice el seguro hasta la posición "unlock" (abierto). Retire la tapa del compartimiento de baterías. Instale las baterías con el signo + hacia usted. Una vez que las baterías estén instaladas, reponga la tapa del compartimiento en el organizador. Nota: el voltaje de las baterías se monitoriza constantemente; aparecerá un mensaje indicando que las baterías están bajas cuando la energía disminuya demasiado. Reemplace las baterías cuando aparezca dicho mensaje. No trate de operar o sincronizar el EZVue con baterías bajas, ya que la información se puede alterar o perder.

21
REPROGRAMACION (RESET) DE INICIO - ¡IMPORTANTE! ¡LEASE POR FAVOR! Para asegurar un buen funcionamiento, deberá reprogramar(reset) la unidad PDA. Tras instalar las baterías, verá un mensaje en la pantalla que diga “Full Reset” y “Refresh”. DEBE PRESIONAR “Full Reset” la primera vez que utiliza la unidad. Si no ve la pantalla anterior, inserte un objeto puntiagudo, como la punta de un lápiz o el extremo de un clip estirado, en el orificio RESET ubicado en la parte de atrás de la unidad. Presione suavemente hasta que la unidad PDA muestre las opciones “Full Reset” (borrar datos) y “Refresh” (mantener datos). Presione “Full Reset” (borrar datos) para reprogramar (reset) o bien presione “Refresh” (mantener datos) para retener la información. ILUMINACION DE RESPALDO Toque el icono para encender o apagar la luz. PREFERENCIAS DEL SISTEMA Las Preferencias del Sistema (System Preferences) definen la programación general de EZVue. Las opciones son las siguientes: • Lenguaje (Language) – selecciona el cursor de idiomas. Las opciones
son: INGLES, ITALIANO, ALEMAN, FRANCES, ESPAÑOL, PORTUGUES, HOLANDES.
• Contraste LCD – selecciona el valor apropiado de contraste para una mejor imagen en pantalla.
• Formatos de Fecha y Hora (Date and Time formats) – Presione en el formato de su preferencia.
• Sonido de Tecla(Key Tone)–toque off para desconectar el sonido de las teclas.
• Apagar (Shut-off) – seleccione una de las opciones de 1, 2 ,3 , 4 o 5 minutos.
HORA LOCAL E INTERNACIONAL
Esta pantalla se utiliza para seleccionar y programar la ciudad de origen (Home City), la hora local (Home Time) y la ciudad extranjera (World City). Obtenga esta información en pantalla
cuando lo desee presionando la tecla de hora (time) o la tecla de menú y luego presione el icono de la izquierda.
Nota: El indicador Home (origen) en la parte inferior derecha de la pantalla indica el modo de Hora local. PARA CONFIGURAR LA FECHA Y LA HORA Para ingresar la hora correcta en el modo de hora local o Home Time, presione el cursor set ubicado en la parte inferior izquierda de la pantalla. Presione los campos de fecha (date), hora (time) y ciudad (city) para editar dichos datos.
01-Jan-2003 Wed
12:25:48 AM
New York U.S.A. Set DST
01-Jan-2003 Wed
12:25:48 AM New York U.S.A.
22
Para editar la fecha 1. En el modo Home Time, presione para seleccionar la fecha en la pantalla. 2. Cambie el año tocando la flecha izquierda o derecha junto al año. 3. Cambie el mes tocando la flecha izquierda o derecha junto al mes. 4. Seleccione la fecha deseada desde el calendario adjunto. 5. Presione ok para confirmar. Para editar la hora 1. En el modo Home Time, presione la hora que desea seleccionar para la
pantalla. 2. Seleccione la hora y los minutos en la lista que aparece en pantalla. Si
desea la hora en el modo de 12 horas, presione AM o PM según lo prefiera. En el campo de los minutos presione la flecha ascendente o descendente para incrementar o disminuir los minutos de a uno.
3. Verifique que la hora que aparece en la parte superior de la pantalla sea la correcta.
4. Presione ok para confirmar. Para seleccionar la ciudad local. Seleccione el país y la ciudad para el modo de ciudad de origen (Home time): 1. Presione sobre el nombre de la ciudad, New York U.S.A., para ingresar a
la selección de ciudad y país. 2. Presione cualquier tecla en el teclado para acceder rápidamente al listado.
Utilice las flechas ascendente o descendente para recorrer la lista. Presione Place / city arriba a la derecha, para ordenar alfabéticamente el listado lugar / ciudad.
3. Presione sobre el nombre de la ciudad seleccionada en la lista para que ésta aparezca en el modo de hora local (Home time).
4. Presione ok nuevamente para confirmar la información, incluyendo la fecha, hora y ciudad.
Para ajustar el cambio de horario estacional (DST) En la pantalla de tiempo local (home time), presione DST para activar o desactivar el horario de ahorro de energía estacional. Al activar DST se adelantará una hora. Para seleccionar la ciudad internacional 1. En la pantalla de hora internacional World time, presione set para
seleccionar una ciudad. 2. Siga el mismo procedimiento utilizado para seleccionar la ciudad de
origen. Para ver la hora local y la hora internacional Desde cualquier función presione la tecla de menú y luego presione el icono de tiempo Time. Presione local / internacional o home / world en el extremo inferior derecho de la pantalla para cambiarse de la hora local a la internacional y viceversa.
Menu Las funciones del EZVue se activan presionando la tecla apropiada en el teclado. Una lista completa de las funciones aparece al presionar la tecla de
Menú. Estas funciones son: Guía de teléfonos, Agenda, Todo, reloj, traductor, calculadora, memo, gastos, aniversarios, libreta web, alarma, cuenta regresiva, juegos, optimización de memoria, uso de la memoria, sincronizador para PC, clave, y preferencias del sistema. Para seleccionar cualquiera de estas funciones simplemente presione el icono apropiado en la pantalla mientras ve el menú.
Guía de Direcciones Presione la tecla de teléfono en el teclado o toque el icono de teléfono en el menú para acceder a esta
función. Esta aplicación le permite almacenar nombres, direcciones, números de teléfono, correos electrónicos y otra información acerca de sus contactos. MODO DE GUIA DE DIRECCIONES
Un archivo en esta guía consiste de los siguientes campos. Por favor note que no tiene que llenar todos los campos. Simplemente toque la tecla OK en cualquier momento para almacenar la información que ha

23
ingresado. Apellido Nombre Empresa Cargo Teléfono particular o TEL (H) Teléfono del trabajo o TEL (W) Fax Celular Correo electrónico o e-mail Dirección Ciudad Estado Código de área postal Notas
El listado de teléfonos (Phone list) muestra la lista de los nombres, ordenados por orden alfabético de acuerdo a “apellido, nombre”, ingresados en el campo de registro de nombres. Para ver el listado de teléfonos ordenado por Nombre de la Empresa (Company name) presione “Nombre” (Name) en la primera línea de la pantalla. PARA CREAR, EDITAR Y BORRAR REGISTROS DE TELÉFONOS Para ingresar un nuevo registro 1. Toque la tecla new para agregar un nuevo registro 2. El cursor está listo para que comience a ingresar los caracteres en el
campos de los apellidos. • Tan pronto como ingrese la información en el campo, el nombre del
mismo desaparece, dejando sólo el icono al comienzo de la línea. • Utilice el puntero para presionar en el nuevo lugar de ingreso de
información. • Utilice las teclas Up/Down para mover el cursor hacia otra línea. • Toque las teclas Up/Page Down en el lado izquierdo superior de la
unidad para ver más campos. • Presione ok para guardar la información y volver a modo de
Lista (List). Note que cuando algún registro es almacenado, una luz verde parpadea para confirmar que el registro fue almacenado.
PARA LOCALIZAR LOS REGISTROS DE TELÉFONOS Hay varias maneras de encontrar los registros de teléfonos. Dichas maneras son las siguientes: • Toque la tecla de alfabeto en el teclado para moverse rápidamente al inicio
de ese grupo de letras. • Toque las teclas up/down para recorrer una lista extensa de contactos. • Presione la tecla Page up/Page down para recorrer la lista página por
página. PARA VER LOS REGISTROS DE TELEFONOS Para cambiarse desde el listado de teléfonos a un registro individual presione dos veces el registro correspondiente.
• Presione en el campo elegido para ver los detalles. • Toque las flechas Up/Down para ver mas campos. • Toque la línea para extender el contenido de la línea. • Para regresar al listado, presione Esc.
Martínez Kathy
Royal Sr. Product Mgr. 732-627-9977 732-627-9978
Business

24
Para editar los registros 1. Para editar un registro específico, presione la tecla edit. 2. Toque el campo que desea editar. 3. Ingrese la nueva información. 4. Presione ok para guardar la información. Para borrar registros 1. Para borrar un registro, toque el registro y luego la tecla del. 2. Toque la tecla ok para eliminar el registro. PLANIFICADOR
Presione la tecla CALENDAR o presione el menú y luego el ícono CALEN para ingresar al modo de calendario. Presione la tecla CALENDAR o el ícono CALEN nuevamente para cambiar entre las vistas mensual, semanal o planificador diario. La función de planificador mensual se utiliza para visualizar un mes completo en pantalla más las actividades de Aniversario y de ToDo. Los iconos ubicados al lado de una fecha en particular indican el tipo de eventos específicos para esa fecha. Un punto en la parte superior indica un evento de Aniversario. Un punto en el medio indica un evento ToDo. Un punto en la parte inferior es indicativo de un evento del Planificador / agenda. Para encontrar una fecha específica en el planificador Toque page up/page down(página superior/página inferior)para recorrer mes a mes. Toque up / down (arriba / abajo) para recorrer semana a semana. Toque left / right (izquierda / derecha) para recorrer día a día. La función de planificador semanal se utiliza para ver una semana completa de agenda en pantalla, más las actividades de Aniversario y de Todo. Toque page up / page down (página superior / página inferior) para recorrer la barra de horario de veinticuatro horas. Presione up / down (arriba / abajo) para recorrer mes a mes. Toque left / right (izquierda / derecha) para recorrer día a día. La función de planificación diaria se utiliza para ver el registro de un día, ordenados de la siguiente manera:
1. Aniversario 2. ToDo o cosas por hacer 3. Planificador
Para crear un nuevo registro en el planificador Presione la tecla Calendar y luego la tecla new . Tiene tres opciones. Seleccione la que desee y presione ok.
Agregue una nueva cita o reunión Agregue una tarea de ToDo Agregue una actividad de Aniversario
Para agregar un nuevo registro: 1. Toque la tecla new para agregar un nuevo registro. 2. El cursor queda listo para que comience a ingresar los caracteres en el
campo de notas.
◄2003► 2 3 4 ◄ Jan ► 5 6 7 8 9 10 11 ene 12 13 14 15 16 17 18 19 20 21 22 23 24 25 26 27 28 29 30 31 All/Todos
25
• Toque date para editar la fecha del programador. • Toque start / end time para modificar el tiempo de inicio y de
finalización • Presione alarm para activar o desactivar la alarma de este registro. • Use el puntero para ubicarse en un nuevo lugar de ingreso. • Toque la tecla sym para seleccionar algún símbolo especial. • Toque ok para guardar la información.
Para localizar registros en el planificador Vaya a la fecha específica que desea buscar y luego presione sobre esa fecha en la pantalla. • Toque las teclas up / down para recorrer la lista de entradas para esa fecha. • Toque la tecla Page up / Page down para recorrer la lista página por
página. Para localizar y ver registros en el planificador Siga los procedimientos para localizar y ver registros en el Programador/Agenda. Para editar y borrar registros Siga el procedimiento para editar y borrar registros en el Programador/Agenda.
PROGRAMADOR / AGENDA (scheduler) Presione la tecla Scheduler en el teclado, o toque el icono Scheduler en el menú para activar esta aplicación.
Modo de listado del programador Un registro del listado del programador consiste en:
1. Fecha 2. Fecha de inicio 3. Fecha de finalización 4. Alarma 5. Notas
La lista del Programador muestra el listado de Citas / reuniones, ordenados cronológicamente de acuerdo a la fecha y la hora de inicio ingresada en el registro. Para ver el listado ordenado por Notas, toque “Note” (Notas) en la primera línea de la pantalla. PARA CREAR, EDITAR Y BORRAR REGISTROS DEL PROGRAMADOR / AGENDA Para agregar un nuevo registro: 1. Toque la tecla new para agregar un nuevo registro. 2. El cursor queda listo para que comience a ingresar los caracteres en el
campo de notas. • Toque date para editar la fecha del programador. • Toque start / end time para modificar el tiempo de inicio y de
finalización • Presione alarm para activar o desactivar la alarma de este registro. • Use el puntero para ubicarse en un nuevo lugar de ingreso. • Toque la tecla sym para seleccionar algún símbolo especial. • Toque ok para guardar la información.
PARA LOCALIZAR REGISTROS EN EL PROGRAMADOR. Existen varias maneras de localizar los registros en la aplicación del programador. Estas maneras son las siguientes: • Toque la tecla del alfabeto en el teclado para trasladarse rápidamente al
comienzo de ese grupo de letras específico. • Toque las teclas up / down para recorrer una lista de registros extensa. • Toque la tecla Page up / Page down para recorrer la lista página por
página. PARA VER LOS REGISTROS DEL PROGRAMADOR Para cambiar la pantalla por listado a la pantalla por registros individuales, toque el registro que desea ver.
26
Toque el campo Note para ver los detalles de las anotaciones. Toque las flechas Up / Down para ver más información de la anotación, si es que existe. Presione en la línea para extender el contenido de la misma (sólo en el campo de las anotaciones). Para regresar a la pantalla por listado, presione Esc. Para editar un registro Para editar un registro específico, presione en el registro y luego toque la tecla de editar Edit. Toque el campo que desea modificar. Ingrese la nueva información. Presione ok para guardar la información y volver al modo de listado en pantalla. Para borrar un registro Para borrar, toque el registro y luego presione la tecla del (borrar). Presione la tecla ok para eliminar el registro. Parpadeo de las Alertas E-Minder: Cuando existe un registro programado para el día siguiente, el LED amarillo parpadeara por 5 segundos el primer minuto de cada hora. Cuando se enciende la unidad, el registro es desplegado como un recordatorio. Presionando cualquier tecla mostrara el siguiente mensaje: Y=Sigue parpadeando N=deja de parpadear Presione N para detener el parpadeo del LED Amarillo. Presione Y y el parpadeo Amarillo continuara de la misma forma, y el registro programado será desplegado cada vez que encienda la unidad durante ese día. Cuando hay un registro programado el mismo día, el LED rojo parpadeara cada 5 segundos durante los primeros 5 minutos de cada hora del día en cuestión. Cuando se enciende la unidad, el registro programado es desplegado. Presionando cualquier tecla mostrara el siguiente mensaje: Y=Sigue parpadeando N=deja de parpadear Presione N para detener el parpadeo del LED Rojo. Presione Y y el parpadeo Rojo continuara de la misma forma, y el registro programado será desplegado cada vez que encienda la unidad durante ese día. Si hay más de un registro programado en un día, o el día siguiente, siga el procedimiento anterior para cada uno de los registros, dejando o quitando las alertas del E-minder.
CHEQUERA Presione $ para ingresar al mode de chequera. Existen 3 cuentas. Éstas son: CHK cuenta corriente, CH1 cuenta de débito 1 y CH2 cuenta de débito 2. Para comenzar, todas las cuentas deben ser reconciliadas a valor cero. Cuenta CHK Después de inicializar la cuenta de checking, ingrese el monto inicial y presione DEP para guardarlo en la memoria de la cuenta CHK. Para cada depósito, ingrese el monto depositado y luego presione la tecla DEP. Por cada cheque emitido, ingrese el monto y luego presione CHK. Cuando el monto total de los cheques emitidos supere el valor total de los depósitos, el balance en la memoria se verá con un signo negativo. Cuenta CH1 y CH2 Estas cuentas son para mantener el estado de sus cuentas de crédito. El lado débito (menos) está representado por CHG y el lado crédito (más) está representado por PMT (pago). Después de haber inicializado la cuente charge, ingrese el monto que se deba

27
en la cuenta charge, presionando CHG de la cuente CH1 ó CH2. Un sigo negativo se verá cuando el monto de los cobros exceda los pagos para indicar un balance negativo. Cuando de haga pagos a la cuenta,ingrese el monto y luego presione la tecla PMT. Cada transacción desplegará un nuevo balance de la cuenta. Presione BAL para ver el balance de las cuentas CHK, CH1 ó CH2. Presione GT y se verá el balance total de las 3 cuentas. Presione AC para borrar un error cuando haya un error de sobre carga durante el cálculo. En el teclado, presionar Q, W, E tiene el mismo efecto que presionar DEP y PMT en la pantalla. En el teclado, presionar A, S, D tiene el mismo efecto que presionar CHK y CHG en la pantalla. En el teclado, presionar cap, Z, X tiene el mismo efecto que presionar BAL en la pantalla.
Calculadora Toque la tecla de calculadora o el icono de la calculadora en el menú para acceder a la calculadora de 12 dígitos.
Las funciones incluyen: las operaciones aritméticas (+, -, x, ÷ and %). Las operaciones de almacenaje de Memoria tales como MR, MC, M+, M- también se encuentran disponibles ibreta de red web Calculadora financiera para hipoteca y kilometraje Por favor referirse a la sección “Mortgage calculador” en el manual en ingles, para obtener instrucciones y tablas sobre esta funcionalidad.
Toque el icono web book en el menú para activar esta opción. Listado del modo de red o web book Un archivo o registro de web book consiste de:
1. URL 2. Notas
Este listado muestra los registros ordenados por URL. Para ver el listado en orden alfabético por Notas, presione “Note” en la primera línea de la pantalla Para encontrar y ver registros de la Libreta de red Siga el mismo procedimiento utilizado para encontrar y ver registros en el Planificador. Para crear y borrar registros de la libreta Web Siga el mismo procedimiento utilizado para crear, editar y borrar registros en el Planificador.
Gastos Toque el icono expense (gastos) en el menú para seleccionar esta opción.
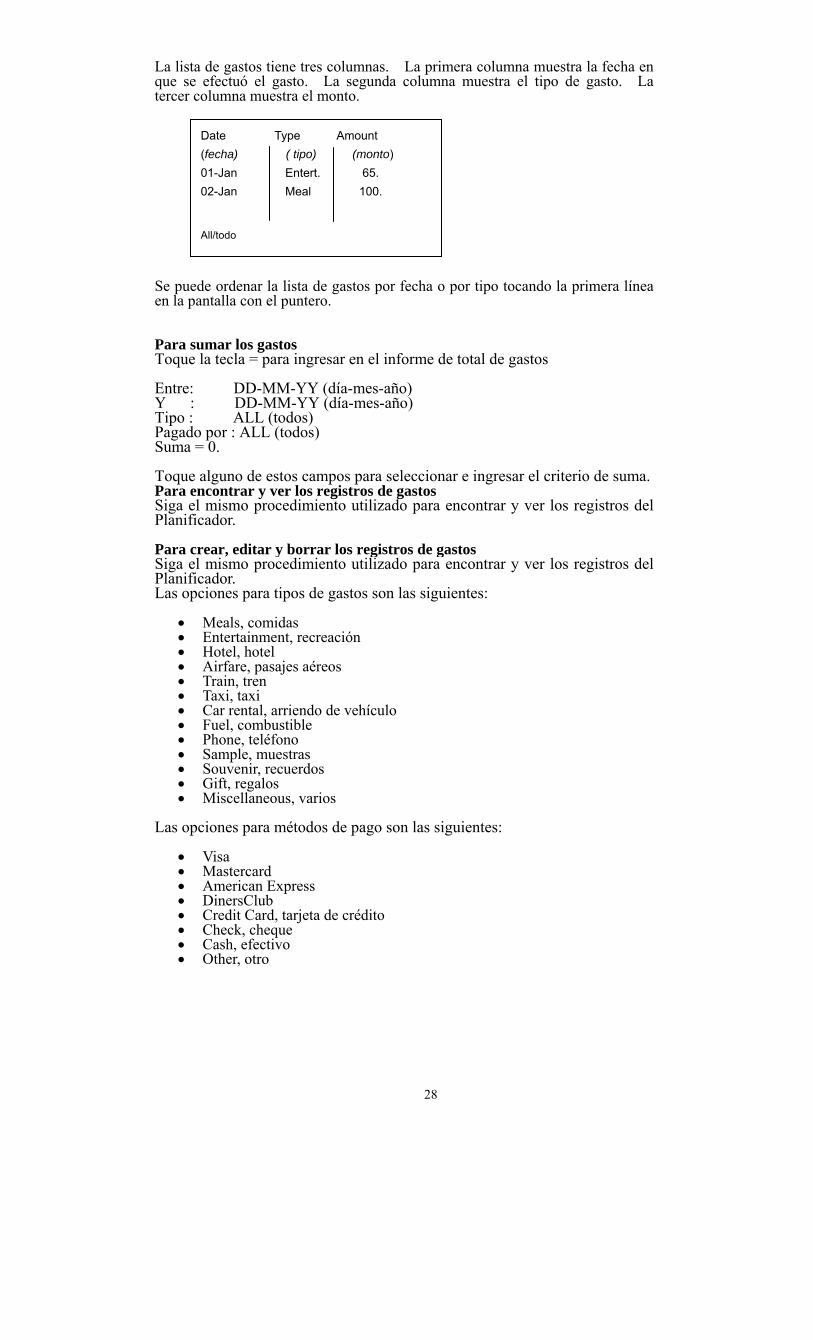
Modo de lista de gastos Un registro de gastos consiste de:
1. Fecha 2. Tipo 3. Pago 4. Monto 5. Notas
28
La lista de gastos tiene tres columnas. La primera columna muestra la fecha en que se efectuó el gasto. La segunda columna muestra el tipo de gasto. La tercer columna muestra el monto. Se puede ordenar la lista de gastos por fecha o por tipo tocando la primera línea en la pantalla con el puntero. Para sumar los gastos Toque la tecla = para ingresar en el informe de total de gastos Entre: DD-MM-YY (día-mes-año) Y : DD-MM-YY (día-mes-año) Tipo : ALL (todos) Pagado por : ALL (todos) Suma = 0. Toque alguno de estos campos para seleccionar e ingresar el criterio de suma. Para encontrar y ver los registros de gastos Siga el mismo procedimiento utilizado para encontrar y ver los registros del Planificador. Para crear, editar y borrar los registros de gastos Siga el mismo procedimiento utilizado para encontrar y ver los registros del Planificador. Las opciones para tipos de gastos son las siguientes:
• Meals, comidas • Entertainment, recreación • Hotel, hotel • Airfare, pasajes aéreos • Train, tren • Taxi, taxi • Car rental, arriendo de vehículo • Fuel, combustible • Phone, teléfono • Sample, muestras • Souvenir, recuerdos • Gift, regalos • Miscellaneous, varios
Las opciones para métodos de pago son las siguientes:
• Visa • Mastercard • American Express • DinersClub • Credit Card, tarjeta de crédito • Check, cheque • Cash, efectivo • Other, otro
Date Type Amount (fecha) ( tipo) (monto) 01-Jan Entert. 65. 02-Jan Meal 100.
All/todo
29
Conversiones Toque el icono de Calculadora para acceder a este modo. La conversión al sistema métrico y la conversión de
monedas están disponibles en este modo. Las conversiones o cambio de monedas funcionan como operaciones de la calculadora. El monto debe ser ingresado en el modo Calculadora antes de seleccionar la función de conversión de monedas.
CORRECTOR ORTOGRÁFICO Para ingresar al modo de ortografía, toque ABC. Ingrese la palabra y toque ok para comenzar la revisión. Si la palabra está correcta, aparecerá el mensaje “CORRECT” en pantalla. Si la palabra es incorrecta, se mostrarán otras palabras relacionadas y la cantidad de palabras encontradas aparecen en pantalla. El siguiente mensaje aparece en pantalla: FOUND (encontradas) XX ????? XX- es la cantidad de palabras encontradas
?????- la palabra relacionada TRADUCTOR Presione ABC dos veces o toque el icono del traductor en el menú para ingresar a la opción Traductor.
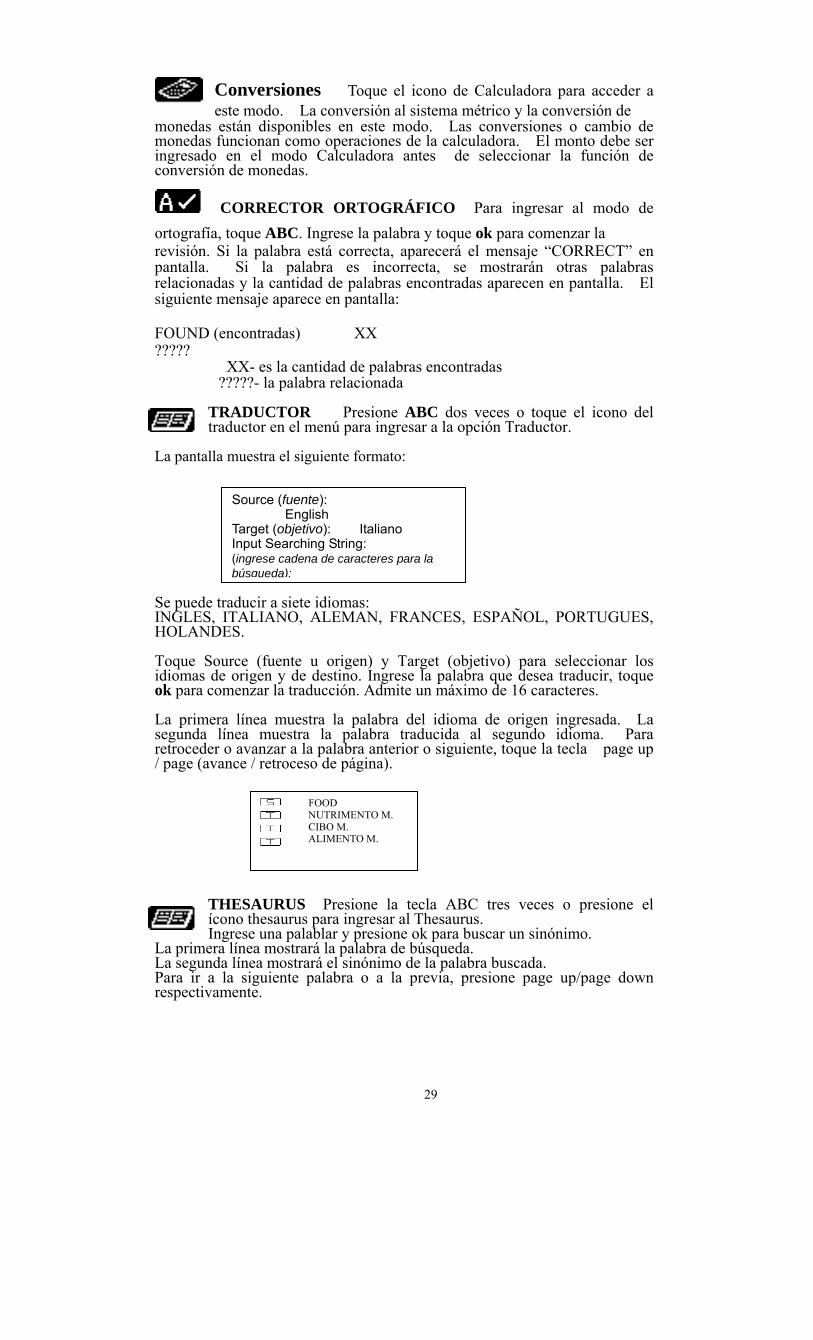
La pantalla muestra el siguiente formato: Se puede traducir a siete idiomas: INGLES, ITALIANO, ALEMAN, FRANCES, ESPAÑOL, PORTUGUES, HOLANDES. Toque Source (fuente u origen) y Target (objetivo) para seleccionar los idiomas de origen y de destino. Ingrese la palabra que desea traducir, toque ok para comenzar la traducción. Admite un máximo de 16 caracteres. La primera línea muestra la palabra del idioma de origen ingresada. La segunda línea muestra la palabra traducida al segundo idioma. Para retroceder o avanzar a la palabra anterior o siguiente, toque la tecla page up / page (avance / retroceso de página).
THESAURUS Presione la tecla ABC tres veces o presione el ícono thesaurus para ingresar al Thesaurus. Ingrese una palablar y presione ok para buscar un sinónimo.
La primera línea mostrará la palabra de búsqueda. La segunda línea mostrará el sinónimo de la palabra buscada. Para ir a la siguiente palabra o a la previa, presione page up/page down respectivamente.
Source (fuente):English
Target (objetivo): Italiano Input Searching String: (ingrese cadena de caracteres para la búsqueda):
FOOD NUTRIMENTO M. CIBO M. ALIMENTO M.

30
JUEGOS Toque el icono de juegos (game) para ingresar a esta opción. Hay dos juegos:
1. hangman game (el juego del ahorcado) 2. matching game (el juego de las coincidencias) Juego del Ahorcado - Hangman Game El jugador debe adivinar la palabra completa sólo con las letras que se le dan inicialmente. Ingrese las letras que podrían ser parte de la palabra. Si adivina, la letra aparecerá en pantalla ubicada en su posición correcta dentro de la palabra que debe adivinar. El usuario ganará el juego si adivina la palabra correcta con solo 9 intentos. Juego de las Coincidencias - Matching Game Busque el par escondido de cada símbolo para ganar: 1. Seleccione el nivel del juego tocando la tecla del nivel adecuado. 2. Toque un cuadrado para ver el símbolo escondido, toque un segundo
cuadrado para ver si el segundo símbolo escondido coincide con el primero. 3. El juego termina al encontrar el par escondido de todos los símbolos. Juego de las Cajas Presione ↑↓ para seleccionar el nivel de dificultad y presione ok para comenzar a jugar. Se debe mover las cajas de tal manera que todas las “x” quedan con una caja. Utilice COSAS POR HACER
Presione la tecla ToDo en el teclado o bien toque el icono todo en el menú para activar la aplicación ToDo (cosas por hacer). Esta aplicación le permite seguirle la pista a las tareas importantes.
MODO DE LISTADO DE COSAS POR HACER Estos registros consisten en:
1. Fecha límite o plazo 2. Prioridad en un rango de 1 a 5 3. Estado de avance de la tarea: Hecha / Pendiente (Done / Pending) 4. Detalles de la tarea
La lista de cosas por hacer (To Do list) tiene cuatro columnas. La primera columna muestra el estado de avance. La segunda columna muestra la fecha límite o plazo. La tercera columna muestra el rango de prioridad y la última columna contiene anotaciones sobre la tarea. Los ítemes de la lista de cosas pendientes (To Do item list) se pueden ordenar tocando la primera línea en la pantalla.
Ordenar por fecha límite o plazo Ordenar por rango de prioridad
Para encontrar y ver los registros de cosas por hacer (To Do) Siga los procedimientos indicados para encontrar y ver los registros del Planificador. No hay orden alfabético en todo.
S Date P Note (estado Fecha Prioridad Notas)
16-Dec-2002 3 Meeting 01-Feb-2003 1 Dinner

31
Para crear, editar y borrar registro de cosas por hacer (TO DO) Siga el mismo procedimiento indicado para crear, editar y borrar los registros del Planificador. GUÍA DE INFORMACIÓN DE UTILIDAD
Presione la tecla “ ” para acceder a la guía de información. Los siguientes directorios están disponibles:
• Toll-Free Numbers (Números sin Cobro) • Carbohydrates and Calories (Carbohidratos y Calorías) • Measures (Medidas) • World Airport Codes (Códigos de Aeropuertos) • World Capitals (Ciudades Capitales del Mundo)
Presione las teclas ↓↑ para seleccionar cuál de los dos directorios desea consultar. Presione OK para confirmar. Números sin cobro En este directorio encontrará tres subcategorías:
• Hotels (Hoteles) • Airlines (Aerolíneas) • Car Rentals (Arriendo de vehículos)
Presione las teclas ↓↑ para seleccionar el directorio deseado. Presione OK para confirmar. Carbohidratos y Calorías En este directorio existen varios sub directorios con categorías de alimentos tales como BEVERAGES, DAIRY PRODUCTS, EGGS, FATS AND OILS, FISH AND SHELLFISH, etc. Para ver los carbohidratos y calorías dentro de una categoría de alimentos, utilice las teclas ↓↑ para navegar. Presione OK para confirmar. Peso y Medidas En este directorio podrá consultar conversiones útiles de pesos y medidas. Para buscar una conversión determinada, utilice las teclas ↓↑ y presione OK para confirmar. Códigos de Aeropuertos En este directorio encontrará los códigos de aeropuertos Internacionales y de Estados Unidos. Para buscar un código, oprima la primera letra de la ciudad para la cual busca el código. Para navegar la lista de códigos, utilice las teclas ↓↑. Ciudades Capitales del Mundo En este directorio encontrará un listado de las ciudades capitales del mundo. Para buscar una ciudad capital, oprima la primera letra del país cuya ciudad capital desee consultar. Para navegar por el listado, utilice las teclas ↓↑. ANIVERSARIO
Toque el icono de aniversario (anniversary) en el menú para activar esta opción.
MODO DE LISTA DE ANIVERSARIO Un registro en esta lista consiste en: 1. La fecha 1. La alarma 2. Los detalles del evento El listado de Aniversario muestra la lista de Fechas, ordenadas cronológicamente (sólo día y mes) archivados en el registro. Para ver el listado ordenado por Notas, toque “Notes” en la primera línea de la pantalla. Para encontrar y ver registros de Aniversario Siga el mismo procedimiento indicado para encontrar y ver los archivos del Planificador.

32
Para crear, editar y borrar los registros en Aniversario Siga el mismo procedimiento indicado para crear, editar y borrar los registros del Planificador. NOTAS - (MEMOS)
Presione el icono memo en el menú para activar esta opción. Notes List Mode Una nota o memo consiste en: 1. La fecha (no se puede modificar) 2. La hora (no se puede modificar) 3. Para / De (To / From) 4. Referencia 5. Notas La lista de Notas figura en el listado de memos de texto, ordenados por fecha de ingreso. Para ver el listado por orden alfabético, toque ‘Note’ en la primera línea en la pantalla. Para encontrar y ver registros de Notas Siga el mismo procedimiento utilizado para encontrar y ver los registros del Planificador. Para crear, editar y borrar registros en Notas. Siga el mismo procedimiento utilizado para crear, editar y eliminar registros en el Planificador. CONVERSION a / desde el SISTEMA METRICO kilómetro milla hectárea acre acre metro cuadrado litro galón pinta galón tonelada libra gramo onza °F °C Para convertir medidas físicas: 1. Ingrese la cantidad que desea convertir. 2. Presione la flecha correspondiente a la conversión métrica y en la dirección
que desea calcular. CONVERSION DE MONEDAS US otro US GBP (libra esterlina) US YEN (yen japonés) US ITA (lira italiana) US ESP (peseta española) US FR (franco francés) US SFR (franco suizo) US EURO Para usar esta opción, primero fije la tasa de cambio: 1. Presione la casilla Rate (cambio) en el modo Calculadora (el último icono
hacia abajo en la columna de conversión). 2. Toque la línea del tipo de cambio que se hará. 3. Ingrese el monto de 1 dólar (o la unidad monetaria local) utilizando las
teclas de digitación en el teclado. Utilice la tecla del (borrar) para corregir las cantidades.
4. Cuando los tipos de moneda estén seleccionados, toque ok para confirmar.
33
Para convertir un monto en una moneda a otra distinta: 1. Ingrese el monto que será convertido. 2. Toque la flecha correspondiente a la moneda y a la dirección de conversión
deseados. CONVERSION A/DE EUROS EURO BEF (francos belgas) EURO DEM (marcos alemanes) EURO ESP (pesetas españolas) EURO FRF (francos franceses) EURO ITL (liras italianas) EURO LUF (francos de Luxemburgo) EURO NLG (florines holandeses) Siga el mismo procedimiento utilizado previamente para Conversión de Monedas. Nótese que las tasas de conversión a Euros están programadas para cada moneda, por lo tanto no se aplican a la conversión a Euros. ALARMA DIARIA
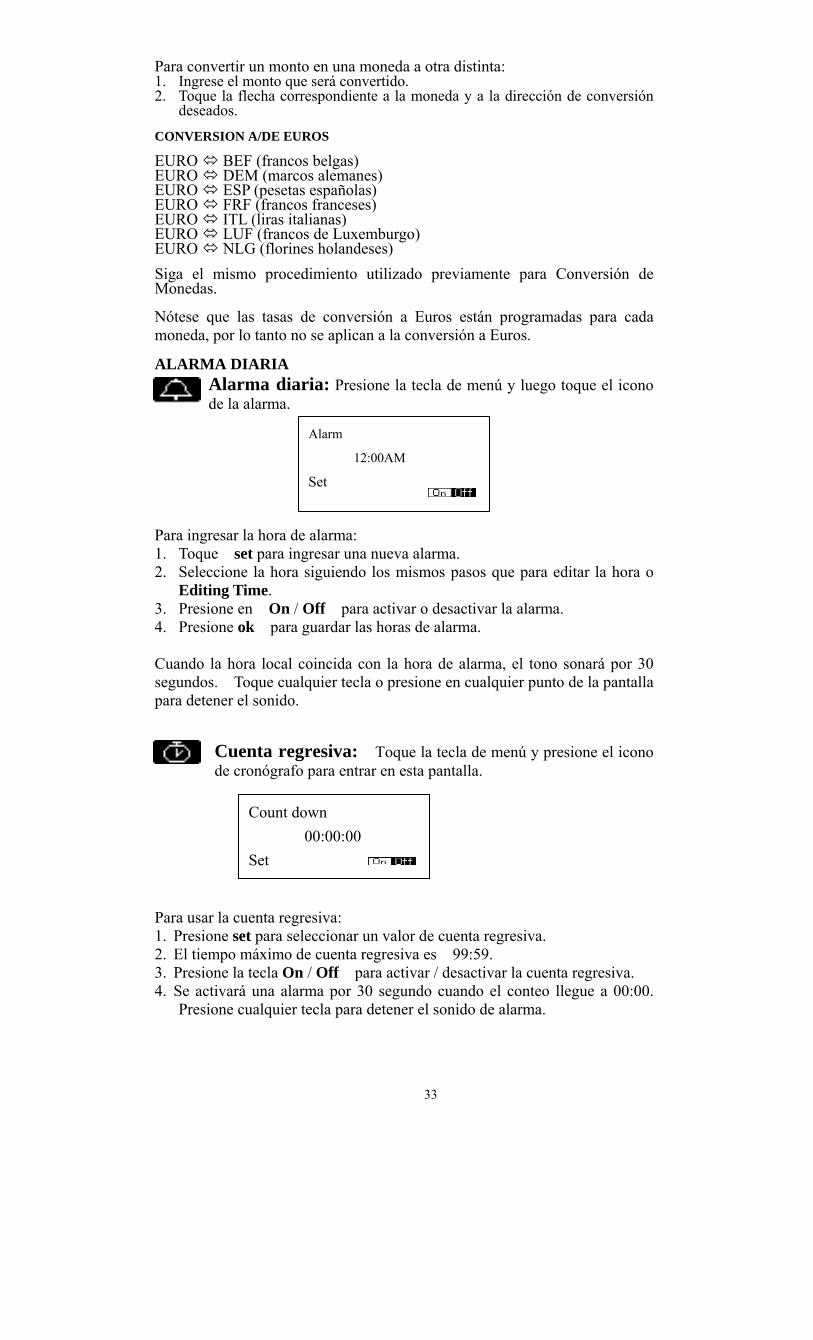
Alarma diaria: Presione la tecla de menú y luego toque el icono de la alarma.
Para ingresar la hora de alarma: 1. Toque set para ingresar una nueva alarma. 2. Seleccione la hora siguiendo los mismos pasos que para editar la hora o
Editing Time. 3. Presione en On / Off para activar o desactivar la alarma. 4. Presione ok para guardar las horas de alarma. Cuando la hora local coincida con la hora de alarma, el tono sonará por 30 segundos. Toque cualquier tecla o presione en cualquier punto de la pantalla para detener el sonido.
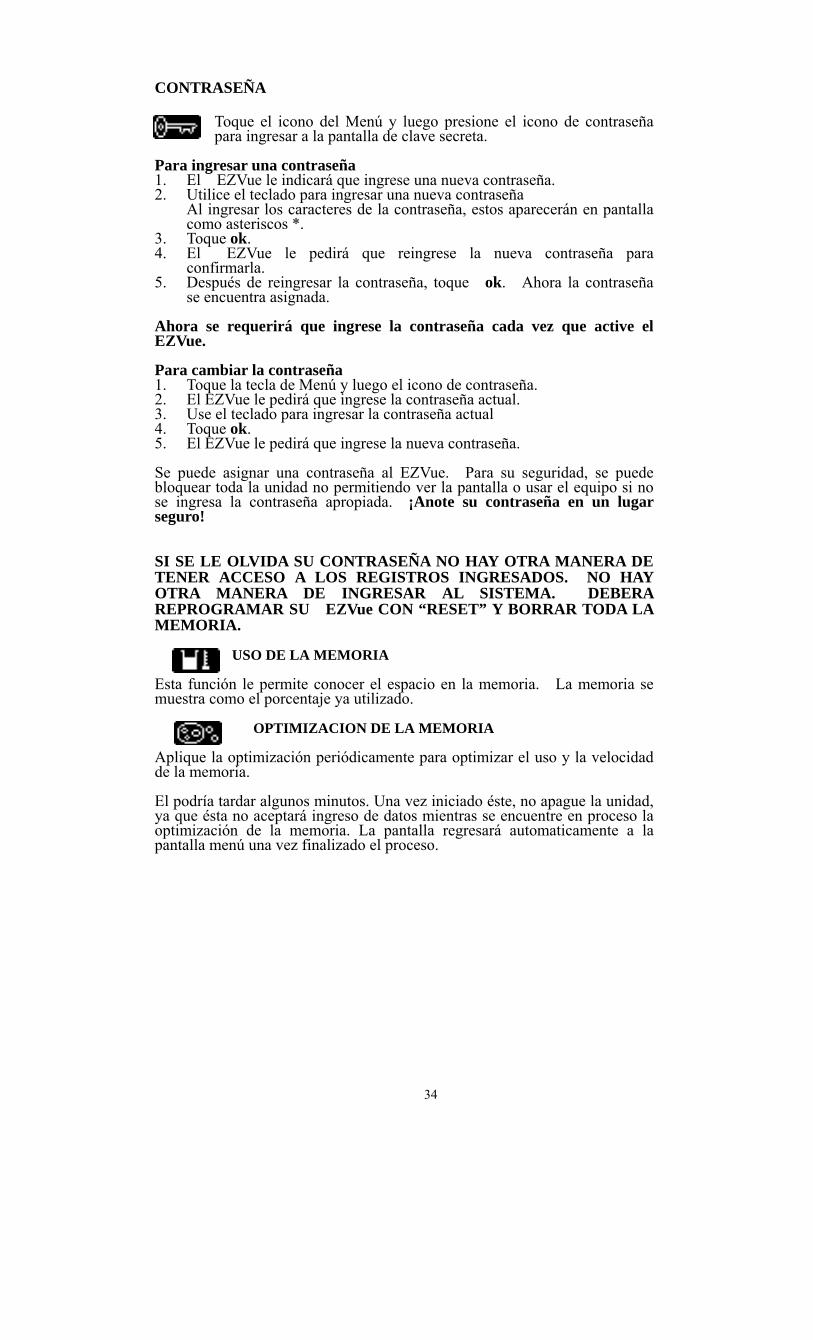
Cuenta regresiva: Toque la tecla de menú y presione el icono de cronógrafo para entrar en esta pantalla.
Para usar la cuenta regresiva: 1. Presione set para seleccionar un valor de cuenta regresiva. 2. El tiempo máximo de cuenta regresiva es 99:59. 3. Presione la tecla On / Off para activar / desactivar la cuenta regresiva. 4. Se activará una alarma por 30 segundo cuando el conteo llegue a 00:00.
Presione cualquier tecla para detener el sonido de alarma.
Alarm
12:00AM
Set
Count down 00:00:00 Set
34
CONTRASEÑA
Toque el icono del Menú y luego presione el icono de contraseña para ingresar a la pantalla de clave secreta.
Para ingresar una contraseña 1. El EZVue le indicará que ingrese una nueva contraseña. 2. Utilice el teclado para ingresar una nueva contraseña
Al ingresar los caracteres de la contraseña, estos aparecerán en pantalla como asteriscos *.
3. Toque ok. 4. El EZVue le pedirá que reingrese la nueva contraseña para
confirmarla. 5. Después de reingresar la contraseña, toque ok. Ahora la contraseña
se encuentra asignada. Ahora se requerirá que ingrese la contraseña cada vez que active el EZVue. Para cambiar la contraseña 1. Toque la tecla de Menú y luego el icono de contraseña. 2. El EZVue le pedirá que ingrese la contraseña actual. 3. Use el teclado para ingresar la contraseña actual 4. Toque ok. 5. El EZVue le pedirá que ingrese la nueva contraseña. Se puede asignar una contraseña al EZVue. Para su seguridad, se puede bloquear toda la unidad no permitiendo ver la pantalla o usar el equipo si no se ingresa la contraseña apropiada. ¡Anote su contraseña en un lugar seguro! SI SE LE OLVIDA SU CONTRASEÑA NO HAY OTRA MANERA DE TENER ACCESO A LOS REGISTROS INGRESADOS. NO HAY OTRA MANERA DE INGRESAR AL SISTEMA. DEBERA REPROGRAMAR SU EZVue CON “RESET” Y BORRAR TODA LA MEMORIA. USO DE LA MEMORIA Esta función le permite conocer el espacio en la memoria. La memoria se muestra como el porcentaje ya utilizado. OPTIMIZACION DE LA MEMORIA Aplique la optimización periódicamente para optimizar el uso y la velocidad de la memoria. El podría tardar algunos minutos. Una vez iniciado éste, no apague la unidad, ya que ésta no aceptará ingreso de datos mientras se encuentre en proceso la optimización de la memoria. La pantalla regresará automaticamente a la pantalla menú una vez finalizado el proceso.
35
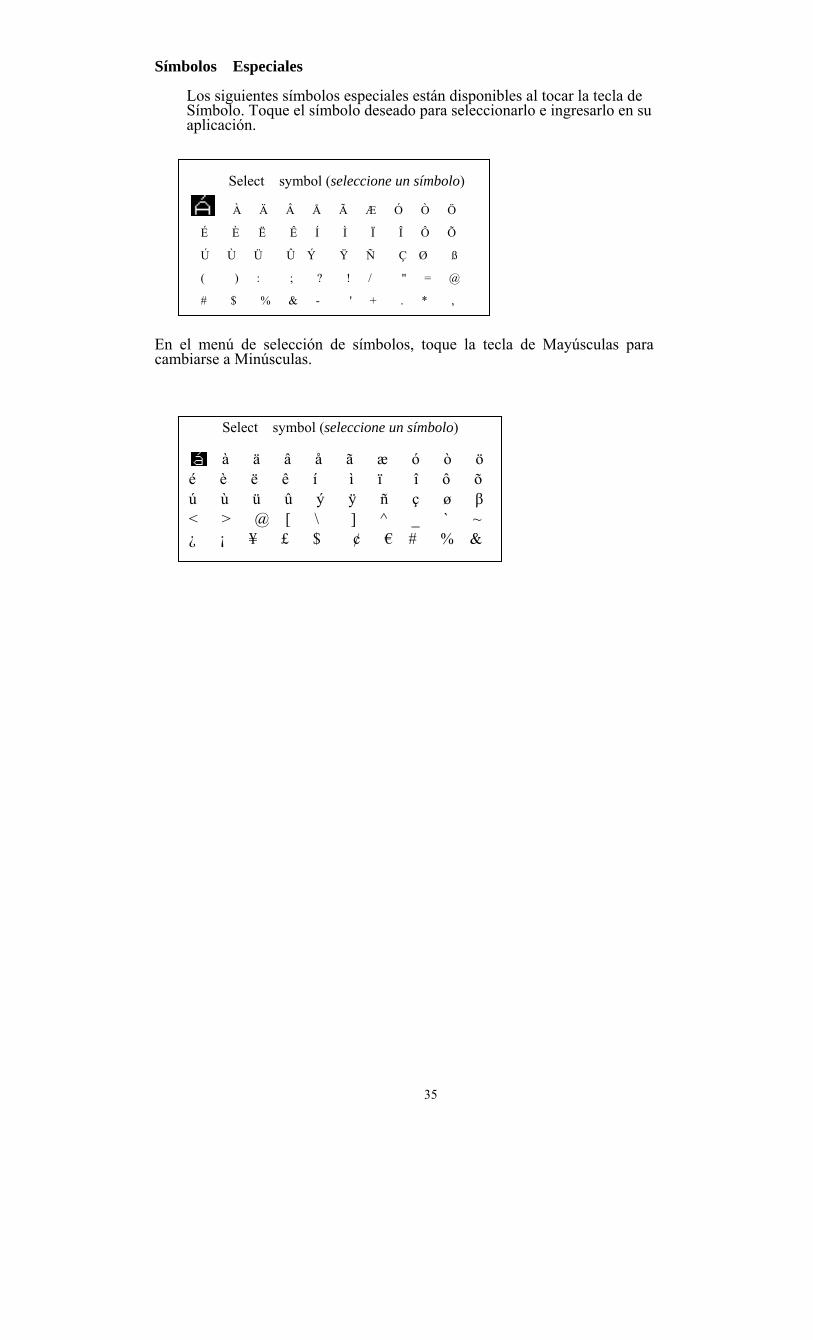
Símbolos Especiales
Los siguientes símbolos especiales están disponibles al tocar la tecla de Símbolo. Toque el símbolo deseado para seleccionarlo e ingresarlo en su aplicación.
En el menú de selección de símbolos, toque la tecla de Mayúsculas para cambiarse a Minúsculas.
Select symbol (seleccione un símbolo)
À Ä Â Å Ã Æ Ó Ò Ö
É È Ë Ê Í Ì Ï Î Ô Õ
Ú Ù Ü Û Ý Ÿ Ñ Ç Ø ß
( ) : ; ? ! / " = @
# $ % & - ' + . * ,
Select symbol (seleccione un símbolo)
à ä â å ã æ ó ò ö é è ë ê í ì ï î ô õ ú ù ü û ý ÿ ñ ç ø β < > @ [ \ ] ^ _ ` ~ ¿ ¡ ¥ £ $ ¢ € # % &