rss page 1 pos one page 10 - usps · rss - cleaning the ncr 7167 receipt printer v1.2 november 2015...
TRANSCRIPT
V1.2
November 2015 Always follow instructions to ensure the protection of personnel, devices, and data Page 1 of 17
LIMITED RIGHTS NOTICE
Cleaning Instructions for the NCR 7167 Multifunctional Receipt Printer
RSS…………………………………………………Page 1
POS ONE…………………………………………..Page 10
LIMITED RIGHTS NOTICE This technical data, the installing instructions and hardware diagrams, is submitted with LIMITED RIGHTS under Postal Service Contract No. 1BITRT-09-B-0001. The data may be reproduced and used by the Postal Service with the express
limitation that the data will not, without written permission of NCR Government Systems LLC, be used for purposes of manufacture or disclosed outside the Postal Service; except that the Postal Service may disclose this data outside the Postal Service for purposes identified under the Contract.
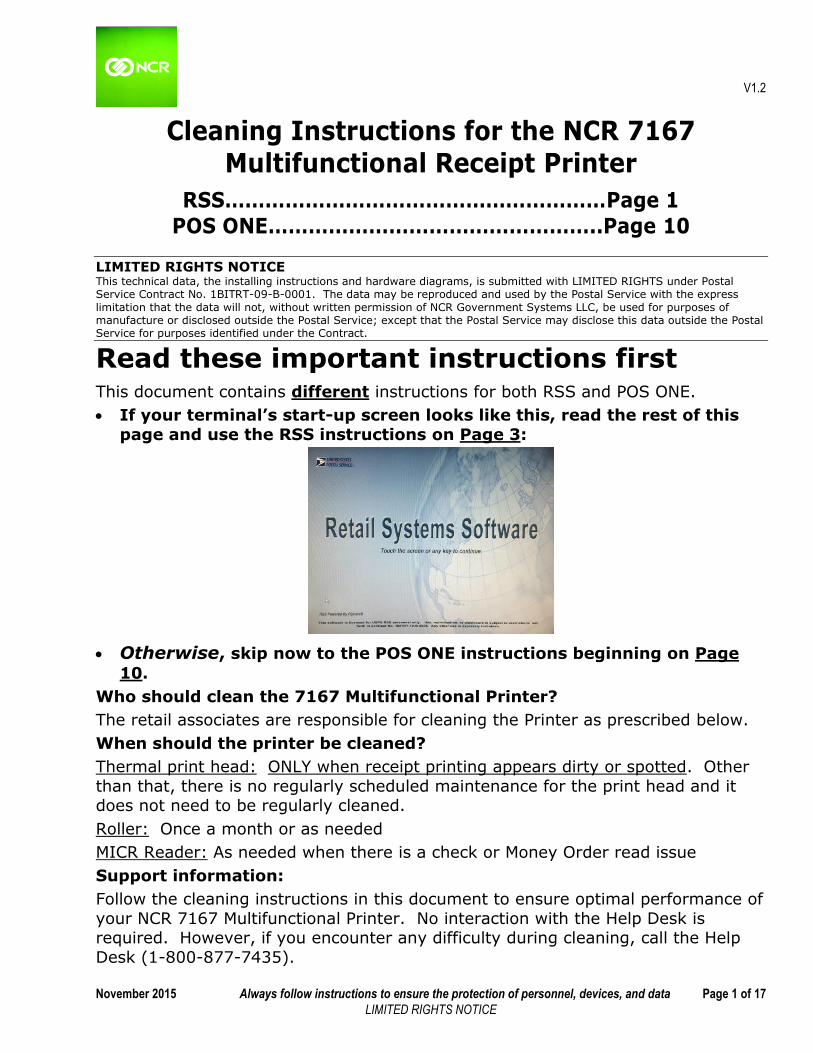
Read these important instructions first This document contains different instructions for both RSS and POS ONE.
If your terminal’s start-up screen looks like this, read the rest of this
page and use the RSS instructions on Page 3:
Otherwise, skip now to the POS ONE instructions beginning on Page
10.
Who should clean the 7167 Multifunctional Printer?
The retail associates are responsible for cleaning the Printer as prescribed below.
When should the printer be cleaned?
Thermal print head: ONLY when receipt printing appears dirty or spotted. Other
than that, there is no regularly scheduled maintenance for the print head and it does not need to be regularly cleaned.
Roller: Once a month or as needed
MICR Reader: As needed when there is a check or Money Order read issue
Support information:
Follow the cleaning instructions in this document to ensure optimal performance of
your NCR 7167 Multifunctional Printer. No interaction with the Help Desk is required. However, if you encounter any difficulty during cleaning, call the Help
Desk (1-800-877-7435).
Cleaning the NCR 7167 Receipt Printer V1.2
November 2015 Always follow instructions to ensure the protection of personnel, devices, and data Page 2 of 17
LIMITED RIGHTS NOTICE
This page intentionally blank.
RSS - Cleaning the NCR 7167 Receipt Printer V1.2
November 2015 Always follow instructions to ensure the protection of personnel, devices, and data Page 3 of 17
LIMITED RIGHTS NOTICE
Instructions for RSS
These instructions are specific for the NCR 7167 Receipt Printer and NCR XRT Terminals running RSS.
RSS Step 1 — Power Off the RSS Terminal
IMPORTANT: The power button on the NCR XRT 80 or 82 should never be used
to shut down an RSS terminal, unless directed by a Helpdesk representative. To perform a standard (also known as “proper”) RSS shut down, the shut down or
“power off” must be performed using the RSS software.
1. Touch the Retail Systems Software screen.
2. Acknowledge the privacy warning screen by selecting Ok.
3. At the logon screen select the Off/End button at the top right of the screen.
4. Select Shutdown.
5. Confirm the shutdown by selecting Ok.
6. The terminal will power down and turn off.
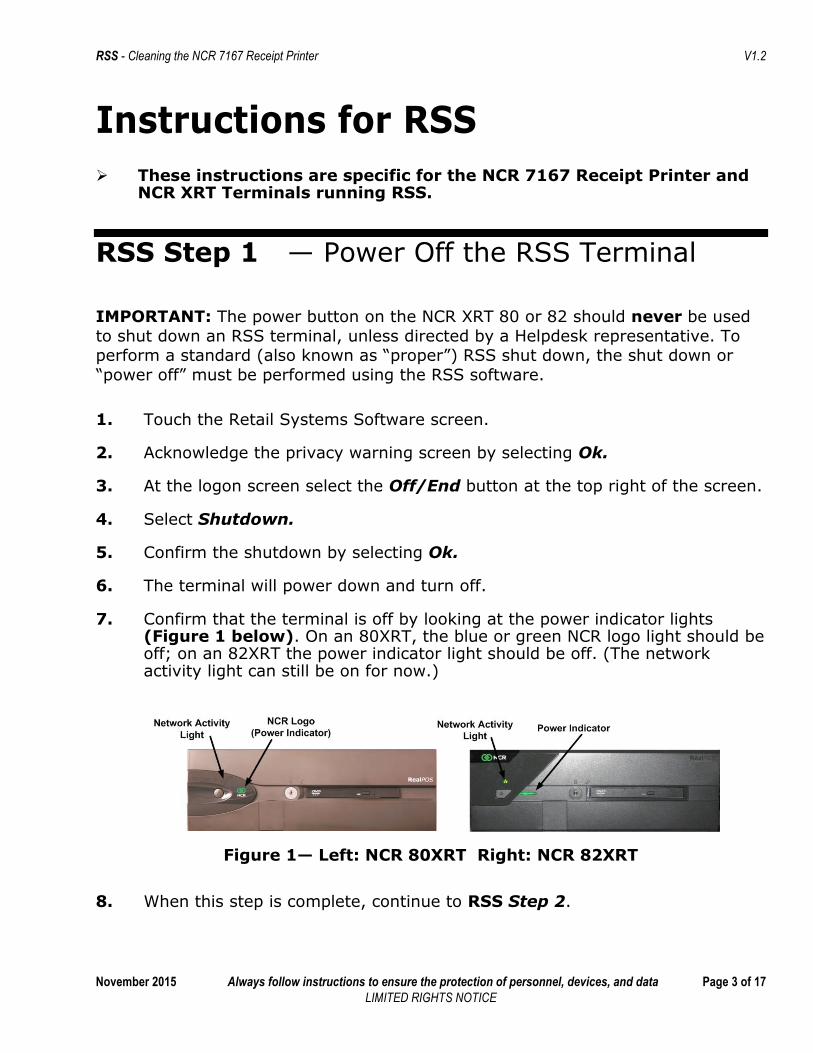
7. Confirm that the terminal is off by looking at the power indicator lights (Figure 1 below). On an 80XRT, the blue or green NCR logo light should be off; on an 82XRT the power indicator light should be off. (The network activity light can still be on for now.)
Figure 1— Left: NCR 80XRT Right: NCR 82XRT
8. When this step is complete, continue to RSS Step 2.

RSS - Cleaning the NCR 7167 Receipt Printer V1.2
November 2015 Always follow instructions to ensure the protection of personnel, devices, and data Page 4 of 17
LIMITED RIGHTS NOTICE
RSS Step 2 — Power Off Terminal’s UPS (Battery Backup)
1. Identify your terminal’s UPS from the photos below, then turn power off to your terminal’s UPS using the instructions to the right of the photo. Note: If it is not clear which UPS belongs to your terminal, follow the terminal’s power cord to its UPS.
Current UPS models How to turn each model off
Power off the APC UPS by pressing-and-holding the
On/Off button for approximately 2 seconds.
Result: The green light directly
above the On button and the computer icon will turn off.
Two models of the Eaton Powerware UPS are shown.
Power off the newer model on the left by
pressing and holding its On/Off button until you
hear a beep
Power off the older model on the right by pressing
its On/Off button
Figure 2 – Turning off the UPS
2. Reconfirm that the power indicator lights on your terminal are off (see Figure 1). If the lights are still lit, then identify your UPS and turn the power off (Figure 2).
3. When this step is complete, continue to RSS Step 3.

RSS - Cleaning the NCR 7167 Receipt Printer V1.2
November 2015 Always follow instructions to ensure the protection of personnel, devices, and data Page 5 of 17
LIMITED RIGHTS NOTICE
RSS Step 3 — Cleaning Instructions
Cleaning supplies needed: You will use the following items below to clean different parts of the printer.
Figure 3 – MICR Cleaning Card, Silicone Cleaning Pen - the color of the pens may vary
Thermal Print Head
The thermal printer head does not normally require cleaning if the Note:
recommended paper is used. If non-recommended paper has been used for an extended period of time, cleaning the print head will not be of much benefit.
CAUTION: Do not spray or try to clean either the print head or the inside of the printer with any kind of cleaner. Doing so may damage the print head and electronics. Follow the instructions below.

RSS - Cleaning the NCR 7167 Receipt Printer V1.2
November 2015 Always follow instructions to ensure the protection of personnel, devices, and data Page 6 of 17
LIMITED RIGHTS NOTICE
1. Firmly grasp the two deep grooves on either side of the printer’s top cover and gently pull up to open.
Figure 4 – Top cover open
2. The Thermal Print Head is located inside the printer, opposite the open top cover.
Figure 5 – Thermal Print Head (indicated by the white oval)

RSS - Cleaning the NCR 7167 Receipt Printer V1.2
November 2015 Always follow instructions to ensure the protection of personnel, devices, and data Page 7 of 17
LIMITED RIGHTS NOTICE
3. Clean the Thermal Print Head using any one of the following approved methods (see Figure 3 for the supplies used for A and B):
A. Rub the Thermal Print Head with the Silicone Cleaning Pen or
B. Rub the Thermal Print Head with the surface of the MICR/Check Reader cleaning card, or
C. If neither the Silicone pen nor the MICR card is available, you can rub the Thermal Print Head with cotton swabs and isopropyl alcohol. Be careful not to touch other printer parts with the alcohol.
4. After cleaning, close the top cover.
5. If you are also going on to clean either the receipt roller or MICR reader, skip to their sections below. If not and you are done cleaning for now, continue to RSS Step 4.

RSS - Cleaning the NCR 7167 Receipt Printer V1.2
November 2015 Always follow instructions to ensure the protection of personnel, devices, and data Page 8 of 17
LIMITED RIGHTS NOTICE
Receipt Roller
1. Open the top cover.
2. Use the Silicone cleaning pen to clean the roller (Figure 6).
Figure 6 – Cleaning the receipt roller
3. If you are also going on to clean either the thermal print head or MICR reader, see those sections in this document. If not and you are done cleaning for now, continue to RSS Step 4.
MICR Reader
1. If the MICR reader needs to be cleaned, use the MICR/Check Reader Cleaning Card (shown in Figure 3).
2. Insert and remove the Cleaning Card as though it was a check so that it passes the MICR reader to clean it. Note: Read and follow any additional manufacturer instructions for the card.
3. If you are also going on to clean either the receipt roller or the thermal print head, see those sections in this document. If not and you are done cleaning for now, continue to RSS Step 4.
Roller

RSS - Cleaning the NCR 7167 Receipt Printer V1.2
November 2015 Always follow instructions to ensure the protection of personnel, devices, and data Page 9 of 17
LIMITED RIGHTS NOTICE
RSS Step 4 — Power On Your RSS System
1. Turn power on to the UPS that is attached to your terminal (if necessary, refer to Step 2).
2. Turn the terminal on by pressing the power button. The green or blue power indicator light will be lit if the power button has been pressed.
Figure 7—ON/OFF Button (Left: NCR 80XRT Right: NCR 82XRT)
3. Wait while the system automatically goes through the RSS boot up process.
4. Once the Retail Systems Software screen appears, touch the screen.
5. Acknowledge the privacy warning screen by selecting OK.
6. Using your keyboard and NOT the touch screen, enter your ACE ID and Password at the logon.
ON/OFF Button
V1.2
November 2015 Always follow instructions to ensure the protection of personnel, devices, and data Page 10 of 17
LIMITED RIGHTS NOTICE
NCR Proprietary and Confidential
Cleaning Instructions for the NCR 7167
Multifunctional Receipt Printer
LIMITED RIGHTS NOTICE This technical data, the installing instructions and hardware diagrams, is submitted with LIMITED RIGHTS under Postal Service Contract No.
1BITRT-09-B-0001. The data may be reproduced and used by the Postal Service with the express limitation that the data will not, without
written permission of NCR Government Systems LLC, be used for purposes of manufacture or disclosed outside the Postal Service; except that
the Postal Service may disclose this data outside the Postal Service for purposes identified under the Contract.
Read these important instructions first
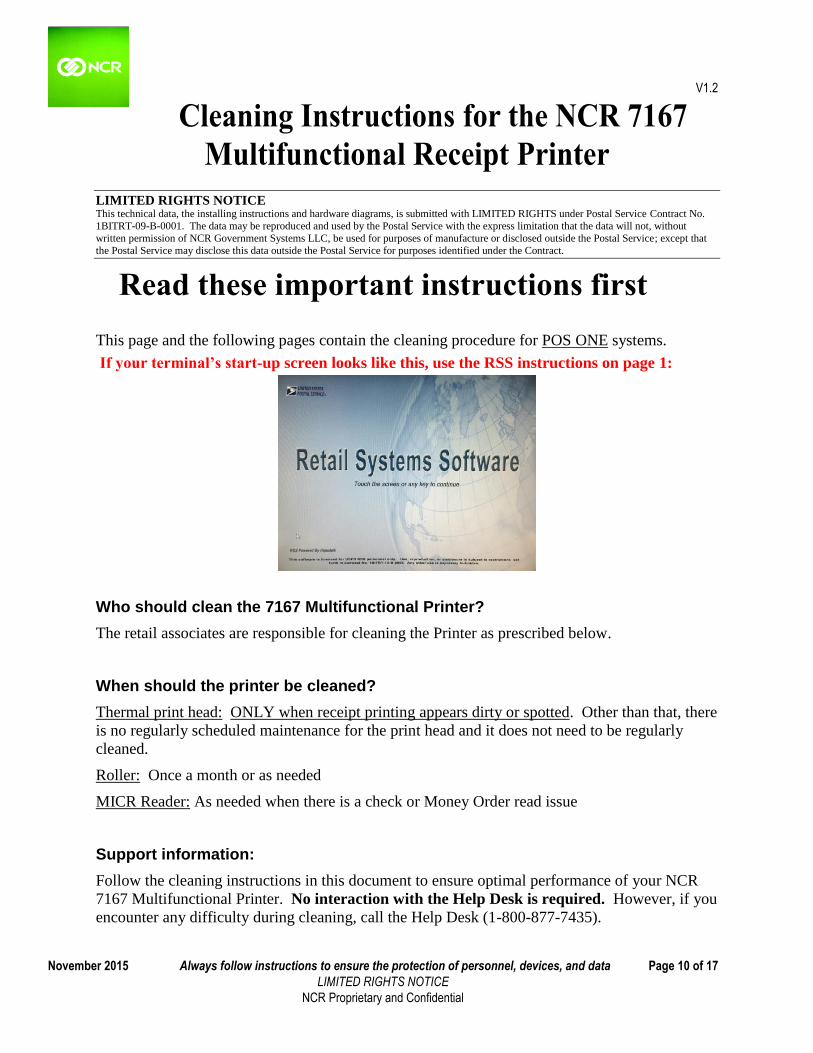
This page and the following pages contain the cleaning procedure for POS ONE systems.
If your terminal’s start-up screen looks like this, use the RSS instructions on page 1:
Who should clean the 7167 Multifunctional Printer?
The retail associates are responsible for cleaning the Printer as prescribed below.
When should the printer be cleaned?
Thermal print head: ONLY when receipt printing appears dirty or spotted. Other than that, there
is no regularly scheduled maintenance for the print head and it does not need to be regularly
cleaned.
Roller: Once a month or as needed
MICR Reader: As needed when there is a check or Money Order read issue
Support information:
Follow the cleaning instructions in this document to ensure optimal performance of your NCR
7167 Multifunctional Printer. No interaction with the Help Desk is required. However, if you
encounter any difficulty during cleaning, call the Help Desk (1-800-877-7435).

Cleaning the NCR 7167 Receipt Printer V1.2
November 2015 Always follow instructions to ensure the protection of personnel, devices, and data Page 11 of 17
LIMITED RIGHTS NOTICE
NCR Proprietary and Confidential
This page intentionally blank.

POS ONE - Cleaning the NCR 7167 Receipt Printer V1.2
November 2015 Always follow instructions to ensure the protection of personnel, devices, and data Page 12 of 17
LIMITED RIGHTS NOTICE
NCR Proprietary and Confidential
Instructions for POS ONE
These instructions are specific for the NCR 7167 Receipt Printer and NCR XRT Terminals running POS ONE.
POS ONE Step 1 — Power Off the POS ONE Terminal
IMPORTANT: The power button on the NCR XRT 80 or 82 should never be used to shut down a POS terminal, unless directed by a Helpdesk representative. To perform a standard (also known as “proper”) POS shut down, the shut down or “power off” must be performed using the POS software.
1. Log on to the receipt printer’s terminal.
2. Select <Non-Retail Roles>.
3. Select <Shut Down>>>.
4. Select <Shut Down & Power Off Terminal>.
5. Select <Yes> to confirm the operation to shut down and power off the terminal.
6. Confirm that the terminal is off by looking at the power indicator lights (Figure 1 below). On an 80XRT, the blue or green NCR logo light should be off; on an 82XRT the power indicator light should be off. (The network activity light can still be on for now.)
Figure 1— Left: NCR 80XRT Right: NCR 82XRT
7. When this step is complete, continue to POS ONE Step 2.
POS ONE - Cleaning the NCR 7167 Receipt Printer V1.2
November 2015 Always follow instructions to ensure the protection of personnel, devices, and data Page 13 of 17
LIMITED RIGHTS NOTICE
NCR Proprietary and Confidential
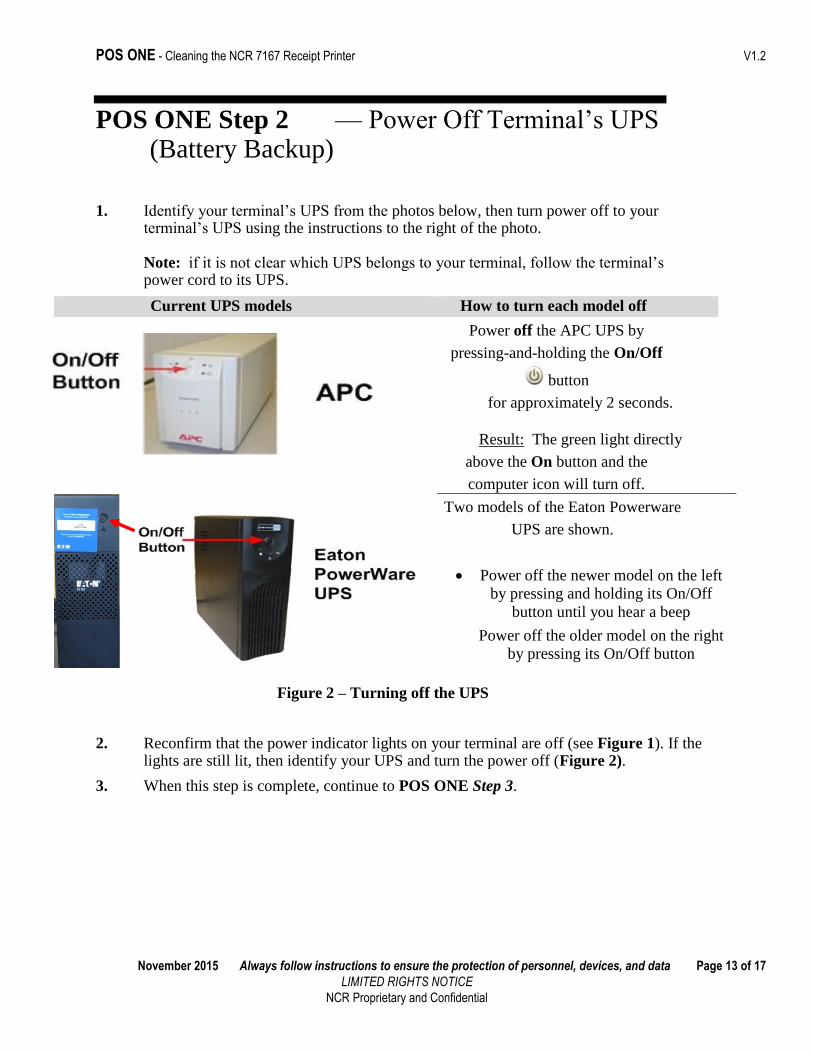
POS ONE Step 2 — Power Off Terminal’s UPS (Battery Backup)
1. Identify your terminal’s UPS from the photos below, then turn power off to your terminal’s UPS using the instructions to the right of the photo. Note: if it is not clear which UPS belongs to your terminal, follow the terminal’s power cord to its UPS.
Current UPS models How to turn each model off
Power off the APC UPS by
pressing-and-holding the On/Off
button
for approximately 2 seconds.
Result: The green light directly
above the On button and the
computer icon will turn off.
Two models of the Eaton Powerware
UPS are shown.
Power off the newer model on the left
by pressing and holding its On/Off
button until you hear a beep
Power off the older model on the right
by pressing its On/Off button
Figure 2 – Turning off the UPS
2. Reconfirm that the power indicator lights on your terminal are off (see Figure 1). If the lights are still lit, then identify your UPS and turn the power off (Figure 2).
3. When this step is complete, continue to POS ONE Step 3.
POS ONE - Cleaning the NCR 7167 Receipt Printer V1.2
November 2015 Always follow instructions to ensure the protection of personnel, devices, and data Page 14 of 17
LIMITED RIGHTS NOTICE
NCR Proprietary and Confidential
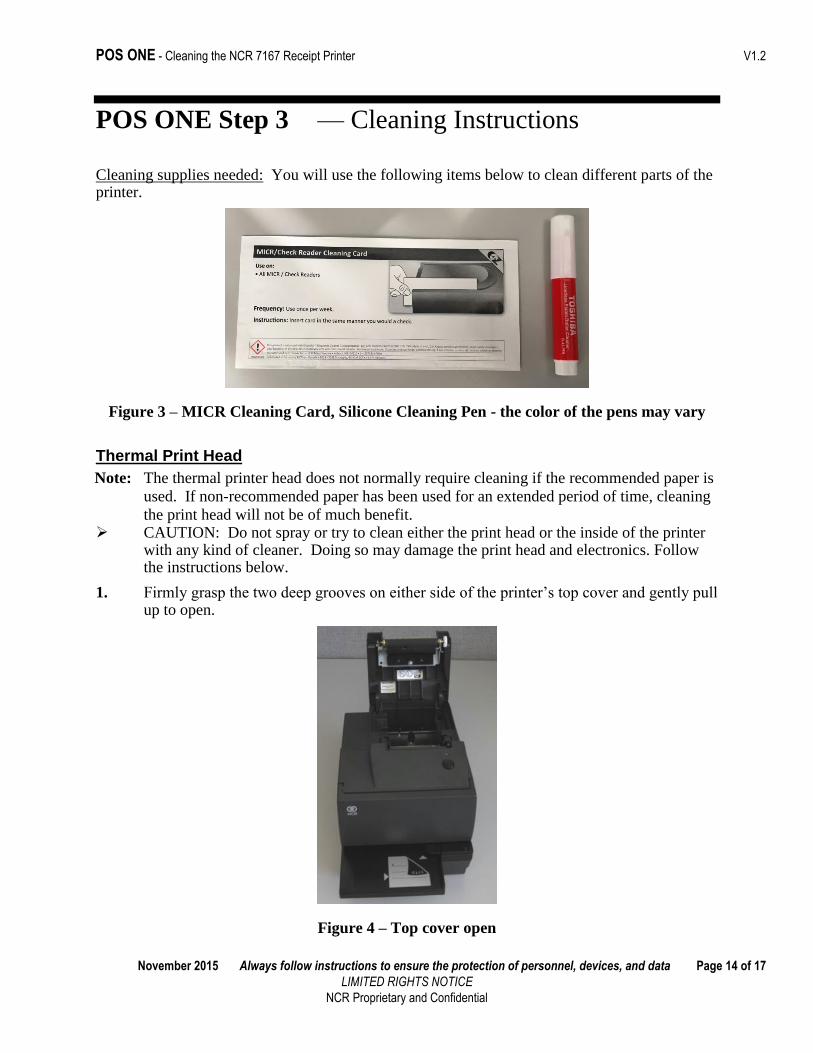
POS ONE Step 3 — Cleaning Instructions
Cleaning supplies needed: You will use the following items below to clean different parts of the printer.
Figure 3 – MICR Cleaning Card, Silicone Cleaning Pen - the color of the pens may vary
Thermal Print Head
The thermal printer head does not normally require cleaning if the recommended paper is Note:
used. If non-recommended paper has been used for an extended period of time, cleaning
the print head will not be of much benefit. CAUTION: Do not spray or try to clean either the print head or the inside of the printer
with any kind of cleaner. Doing so may damage the print head and electronics. Follow the instructions below.
1. Firmly grasp the two deep grooves on either side of the printer’s top cover and gently pull up to open.
Figure 4 – Top cover open

POS ONE - Cleaning the NCR 7167 Receipt Printer V1.2
November 2015 Always follow instructions to ensure the protection of personnel, devices, and data Page 15 of 17
LIMITED RIGHTS NOTICE
NCR Proprietary and Confidential
2. The Thermal Print Head is located inside the printer, opposite the open top cover.
Figure 5 – Thermal Print Head (indicated by the white oval)
3. Clean the Thermal Print Head using any one of the following approved methods (see Figure 3 for the supplies used for A and B):
A. Rub the Thermal Print Head with the Silicone Cleaning Pen or
B. Rub the Thermal Print Head with the surface of the MICR/Check Reader cleaning card, or
C. If neither the Silicone pen nor the MICR card is available, you can rub the Thermal Print Head with cotton swabs and isopropyl alcohol. Be careful not to touch other printer parts with the alcohol.
4. After cleaning, close the top cover.
5. If you are also going on to clean either the receipt roller or MICR reader, skip to their sections below. If not and you are done cleaning for now, continue to POS ONE Step 4.

POS ONE - Cleaning the NCR 7167 Receipt Printer V1.2
November 2015 Always follow instructions to ensure the protection of personnel, devices, and data Page 16 of 17
LIMITED RIGHTS NOTICE
NCR Proprietary and Confidential
Receipt Roller
1. Open the top cover.
2. Use the Silicone cleaning pen to clean the roller (Figure 6).
Figure 6 – Cleaning the receipt roller
3. If you are also going on to clean either the thermal print head or MICR reader, see their sections in this document. If not and you are done cleaning for now, continue to POS ONE Step 4.
MICR Reader
1. If the MICR reader needs to be cleaned, use the MICR/Check Reader Cleaning Card (shown in Figure 3).
2. Insert and remove the Cleaning Card as though it was a check so that it passes the MICR reader to clean it. Note: Read and follow any additional manufacturer instructions for the card.
3. If you are also going on to clean either the receipt roller or the thermal print head, see their sections in this document. If not and you are done cleaning for now, continue to POS ONE Step 4.
Roller
POS ONE - Cleaning the NCR 7167 Receipt Printer V1.2
November 2015 Always follow instructions to ensure the protection of personnel, devices, and data Page 17 of 17
LIMITED RIGHTS NOTICE
NCR Proprietary and Confidential
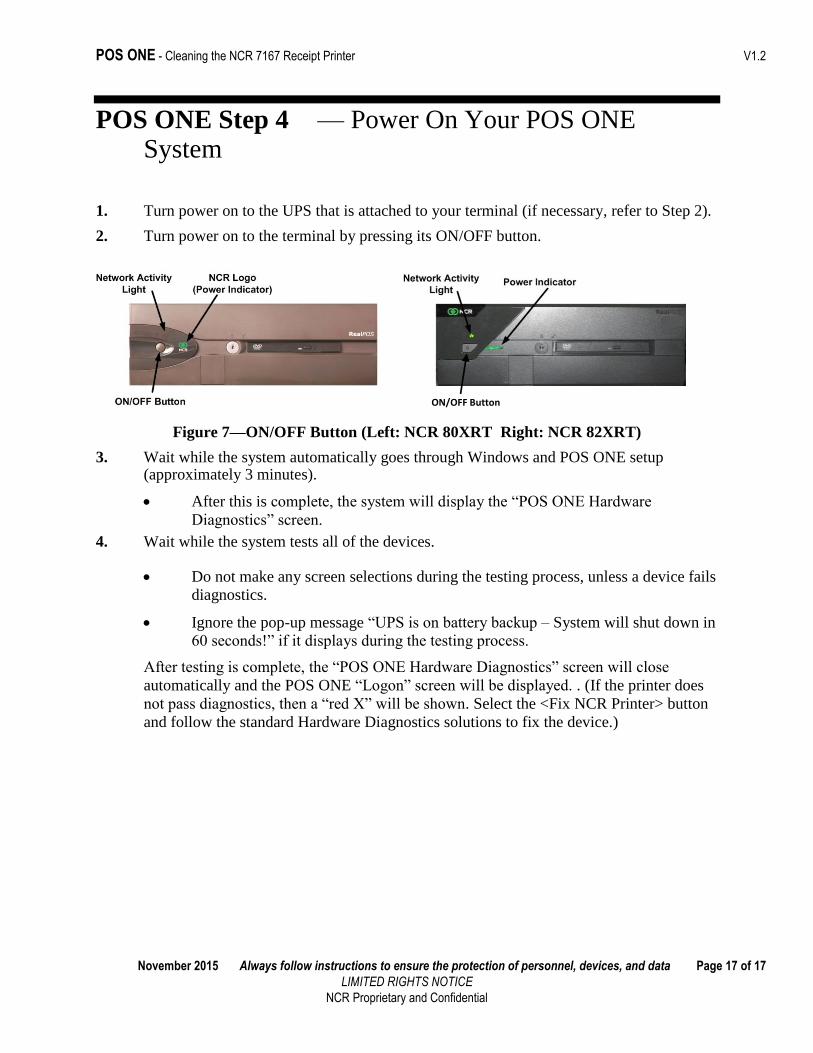
POS ONE Step 4 — Power On Your POS ONE System
1. Turn power on to the UPS that is attached to your terminal (if necessary, refer to Step 2).
2. Turn power on to the terminal by pressing its ON/OFF button.
Figure 7—ON/OFF Button (Left: NCR 80XRT Right: NCR 82XRT)
3. Wait while the system automatically goes through Windows and POS ONE setup (approximately 3 minutes).
After this is complete, the system will display the “POS ONE Hardware
Diagnostics” screen.
4. Wait while the system tests all of the devices.
Do not make any screen selections during the testing process, unless a device fails
diagnostics.
Ignore the pop-up message “UPS is on battery backup – System will shut down in
60 seconds!” if it displays during the testing process.
After testing is complete, the “POS ONE Hardware Diagnostics” screen will close
automatically and the POS ONE “Logon” screen will be displayed. . (If the printer does
not pass diagnostics, then a “red X” will be shown. Select the <Fix NCR Printer> button
and follow the standard Hardware Diagnostics solutions to fix the device.)
ON/OFF Button