safety first - weebly
TRANSCRIPT
General Safety Rules
In a technology course, you have many opportunities to
design and build products. You can apply your creativity and
problem-solving skills. It’s very important that you also apply
common sense and practice safe work habits.
Develop a Safe Attitude
• Read and follow all posted safety rules.
• Take the time to do the job right.
• Consider each person’s safety to be your
responsibility. Avoid putting others in
danger.
• Stay alert. Be aware of your surroundings.
• Work quietly and give your full attention to
the task at hand. Never indulge in horseplay
or other foolish actions.
• Stay out of danger zones as
much as possible. These are
usually marked with black
and yellow striped tape.
• Put up warning signs on things that are hot
and could cause burns.
• If you bend down to pick up an object, use
your legs, not your back, to lift up. Keep
your back straight. To keep better control,
get help to lift or move long or heavy items.
• Handle materials with sharp edges and
pointed objects carefully.
• Report accidents to your teacher at once.
Safety First
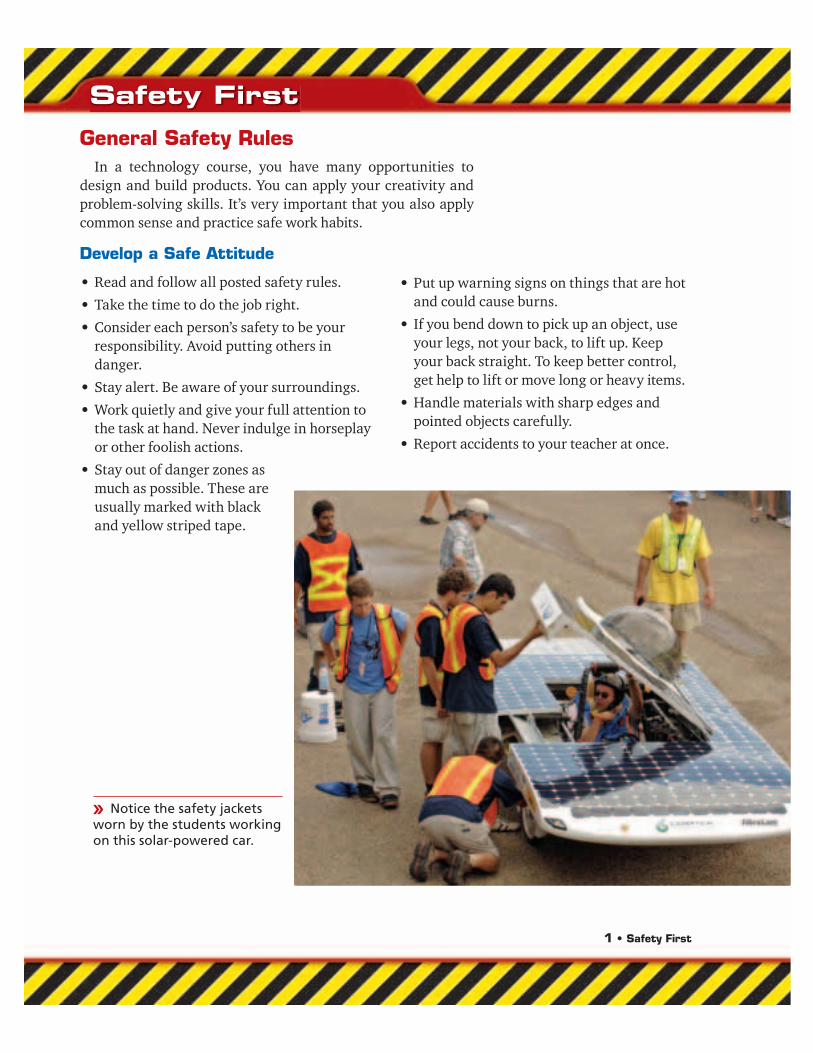
Notice the safety jackets worn by the students working on this solar-powered car.
1 • Safety First

Wear Appropriate Clothing and
Protective Equipment
• Always wear eye protection. Special eye
protection may be needed for some activi-
ties, such as using a laser, welding, or using
chemicals.
• Wear hard shoes or boots with rubber soles.
• Use ear protection near loud equipment.
• Do not wear loose clothing, jewelry, or other
items that could get caught in machinery.
Tie back long hair.
• Do not wear gloves
while operating
power tools.
Have Respect for Tools and
Equipment
• Never use any tool or machine until the
teacher has shown you how to use it and has
checked the setup.
• Before using any tool or machine, make sure
you know the safety rules and make sure
you get your teacher’s permission.
• Use equipment only when the teacher is in
the lab.
• Do not let others distract you while working.
• Do not use electrical tools or equipment if
the cord or plug is damaged.
• Always use the right tool for the job. The
wrong tool could injure you or damage the
part you are working on.
• To avoid injury, use the right machine guard
for the job. Check with your teacher for the
appropriate guard.
• Keep hands and fingers away from all mov-
ing parts.
• Before you leave a machine, turn it off and
wait until it stops. If you are finished, clean
the machine and the area around it.
• When you have finished working, return all
tools and unused supplies to their proper
places.
Prevent and
Control Fires
• Store oily rags in a
closed metal container
to prevent fire.
• Know where the nearest
fire extinguisher is and
how to use it, if that is
your school’s policy.
Safety First • 2

Have Respect for Hazardous
Materials and Waste
• Products with major health risks should
have a Material Safety Data Sheet
(MSDS) available. Ask your teacher
about the MSDS before you use
materials that may be hazardous.
Know how to read the
MSDS. You can find more
information about Mate-
rial Safety Data Sheets
on page 559.
• Other common chemi-
cals will have safety
information on the labels. Check the
labels of materials before you use them.
• Wear appropriate personal protective equip-
ment (PPE) when working with hazardous
materials.
• Work in a well-ventilated area.
• Follow your teacher’s instructions for
disposal of hazardous materials and waste.
Maintain the Lab
• Keep the work area clean. Keep
the floor and aisles clean at all
times.
• If a liquid is spilled, clean it up
immediately as instructed by
the teacher.
• Always use a brush, not your
hands, to clean dry materi-
als from a table or piece of
equipment.
• Store all materials properly.
Safety First
3 • Safety First
Safe Use of Hand Tools
Misuse and improper maintenance pose the greatest hazards in using
hand tools. Observe the following rules when using hand tools.
• Keep all hand tools clean and in good
condition.
• Wipe tools clean before and after use.
• Use only tools that are in good condition. If
a tool is damaged, tell your teacher about it.
• Use a hand tool only for the purpose for
which it was designed.
• Hold and use the tool in the proper way,
following manufacturer’s instructions.
• Always wear safety glasses or goggles.
• Cutting tools should be sharp.
• Do not use a screwdriver on a part that is
being hand-held. The screwdriver can slip
and hit your hand.
• Carry sharp or pointed tools with the point
down and away from your body.
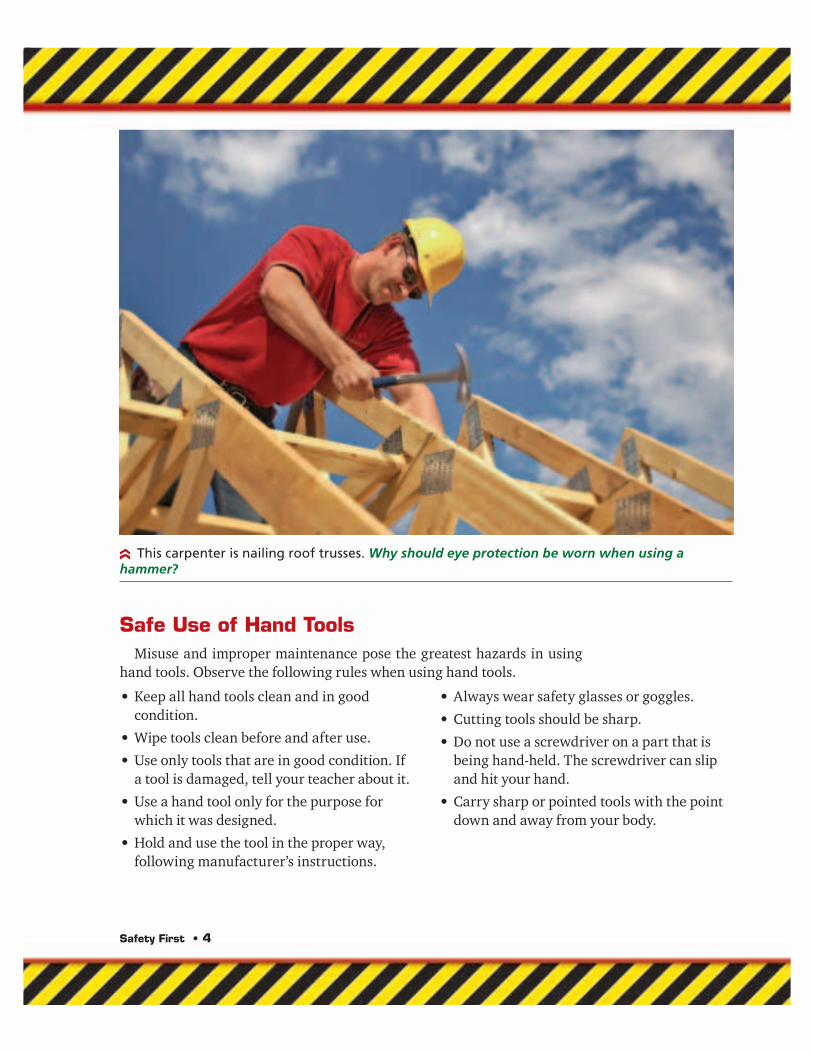
This carpenter is nailing roof trusses. Why should eye protection be worn when using a hammer?
Safety First • 4

Safe Use of Electric Power Tools
Use care and common sense when working with electric power
tools. Observe the following safety practices.
Prevent Electric Shock
• Do not stand in water while working on
equipment.
• Make sure that all electrical cords are free of
frays and breaks in the insulation.
• Pull the plug, not the cord, when you unplug
a tool or machine. Damaging a cord may
cause an electric shock.
• Keep electrical cords away from sharp
edges.
• Use only power tools that have been prop-
erly grounded or double insulated.
• Make sure that all extension cords are the
three-wire grounded type.
• Make sure the three-pronged plug is used in
a grounded receptacle.
Work Safely
• Do not wear loose clothing, ties, or jewelry
that can become caught in moving parts of
machinery. Be sure to tie back long hair.
• Do not wear gloves while operating power
tools.
• Wear the appropriate personal protective
equipment (PPE), such as safety glasses or a
face shield.
• Never set a hand-held power tool down
while it is running or coasting.
• Avoid accidental startups by keeping fingers
off the START switch when carrying a tool.
• When you approach a machine, be sure it is
off and that it is not coasting.
• Secure the work piece with clamps or a vise.
This will free both hands to operate the tool.
• Disconnect the power source before chang-
ing accessories such as bits, belts, and
blades.
• Keep tools as sharp and clean as possible for
best performance.
• Tell the teacher immediately if the machine
doesn’t sound right or if you can see that
something is wrong.
Safety First
5 • Safety First
Safe Use of Cutting Tools
Observe the following safety practices when using electric
power tools to cut materials.
• Allow machines to reach full speed before
starting to cut.
• Before working on stock (wood or other
workpieces), check it for cracks, loose knots,
and nails.
• The shortest piece of lumber that can safely
be run through most equipment is 12 inches
long.
• Keep your balance; don’t overreach.
• Support ends of long stock before cutting.
• Wait until the blade stops completely before
removing any scraps. Use a brush, not your
fingers.
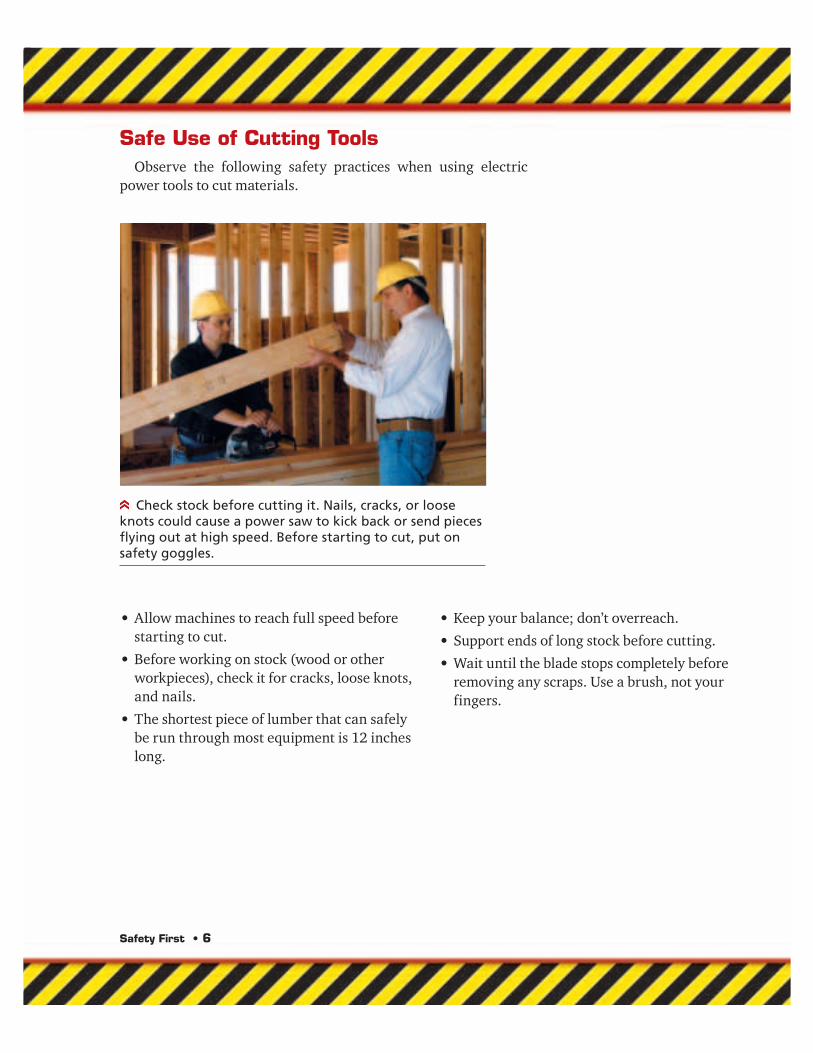
Check stock before cutting it. Nails, cracks, or loose knots could cause a power saw to kick back or send pieces flying out at high speed. Before starting to cut, put on safety goggles.
Safety First • 6

Safe Use of Pneumatic Tools
Pneumatic tools are powered by compressed air. The air is fed to the tool
through a high-pressure hose connected to an air compressor.
• When using a compressed-air gun, always
wear the correct personal protective equip-
ment (PPE). For example, wear safety
glasses or goggles and a face shield. Always
direct the airflow away from you.
• Always carry a pneumatic tool by its frame
or handle, not by the air hose.
• Make sure all pneumatic tools are securely
attached to the compressed-air line.
• Never use a pneumatic tool, such as a
compressed-air gun, to remove debris
from your clothing or body.
• Securely position a pneumatic tool before
operating it. These tools operate at high
speeds or under high pressure.
The main parts of an air compressor are shown here.
Safety First
Air PumpBelt Drive
Electric Motor
Pressure Gauge
Belt Guard
Handle
Regulator
Tank
Hose Fittings
7 • Safety First

Tool and Machine Maintenance
Tools and machines that are well maintained do a better, faster
job and are safer to use.
Hand Tool Maintenance
• Keep sharp tools properly sharpened.
• Check edges, sharp points, and other work-
ing surfaces for cracks and other defects.
• Keep working surfaces and handles clean
and free of dirt and rust.
• Check that any moving parts or mechanisms
are working properly.
• Check for loose handles and other loose parts.
• Check wood handles for splinters and other
damage.
• Clean the tool following use each day.
• Inspect the tool for damage at least once
each day before use.
• Lubricate any tool parts that require it.
• Preserve wood handles regularly with
special oils made for that purpose.
• Store tools in their proper places in an
organized way.
• Store sharp tools in a safe place with the
cutting edge protected.
Power Tool and
Machine Maintenance
• Keep sharp tools properly sharpened.
• Check edges, sharp points, hoses, and other
working parts for cracks and other defects.
• Keep working surfaces, handles, and hoses
clean and free of dirt and rust.
• Check that any moving parts or mechanisms
are working properly.
• Check for loose handles and other loose
parts.
• Check for broken plugs or lugs removed
from grounding plugs.
• Check for split insulation or damaged
electrical cords.
• Disconnect and clean the tool following use
each day.
• Disconnect and inspect the tool for damage
at least once each day before use.
• Lubricate any tool parts that require it.
• Store tools in their proper places in an
organized way.
• Store sharp tools in a safe place with the
cutting edge protected.
Clean brushes after each use to keep the bristles soft and in good condition.
Blades of band saws and other cutting tools should be cleaned regularly to remove resin, pitch, and other debris. A clean blade will cut straighter and smoother.
Safety First • 8
Safe Use of Chemicals
Follow these rules when working with paints, stains, varnishes, paint
thinners, adhesives, or other chemicals.
• Read and follow all label precautions.
• Always wear protective clothing and
approved eye protection. Use appropriate
gloves or tongs when needed.
• Many chemicals produce harmful fumes.
Work only in well-ventilated areas. Use a
respirator whenever it is required.
• Know where the eyewash station is and how
to use it.
• Know where the Material Safety Data Sheets
(MSDS) are located.
• Know where the poison-control phone
number is located.
• Mix chemicals only as directed. If you need
to mix acid and water, get the water first.
Then carefully add the acid to it.
• Pay attention to others around you when
working with chemicals and report any
unusual reactions.
• Clean up spills immediately.
• Clean all tools and equipment properly after
using.
• Avoid skin contact with chemicals. Wash
thoroughly before leaving the area.
• Many chemicals need to be stored away
from heat or away from moisture. Follow
label directions.
• Never store chemicals in an unlabeled or
incorrectly labeled container.
• Store chemical-soaked rags in an approved
container.
• Dispose of chemicals properly.
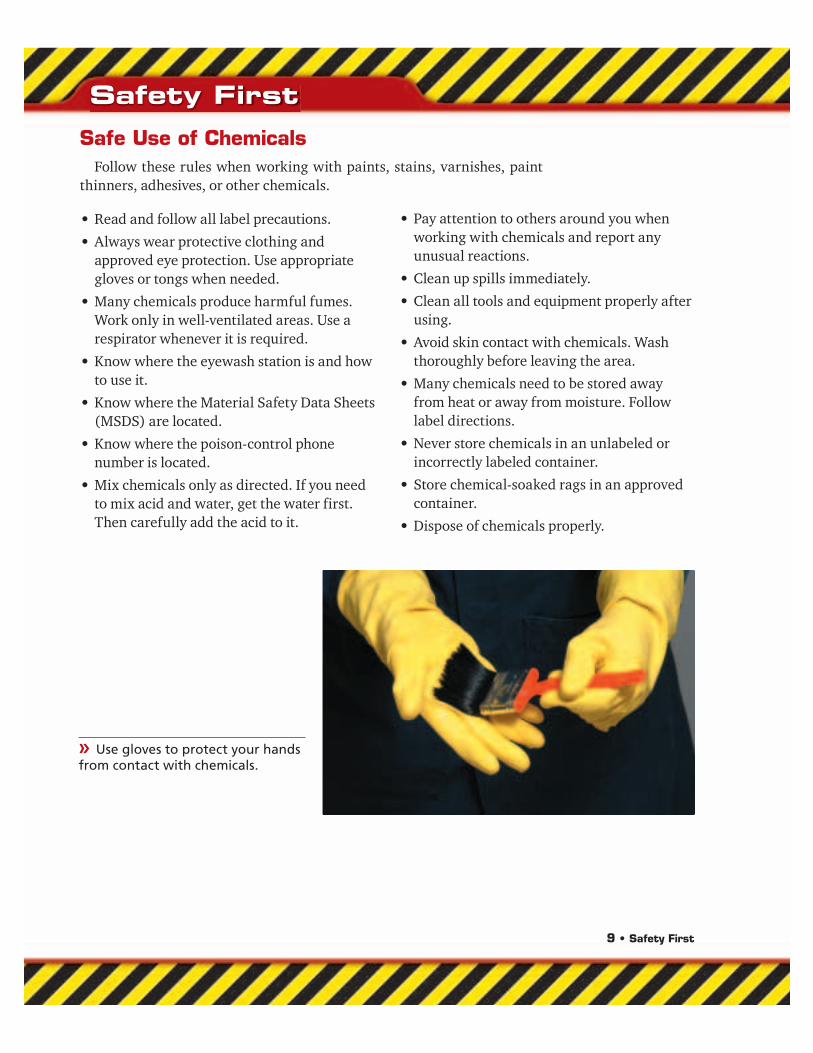
Use gloves to protect your hands from contact with chemicals.
Safety First
9 • Safety First
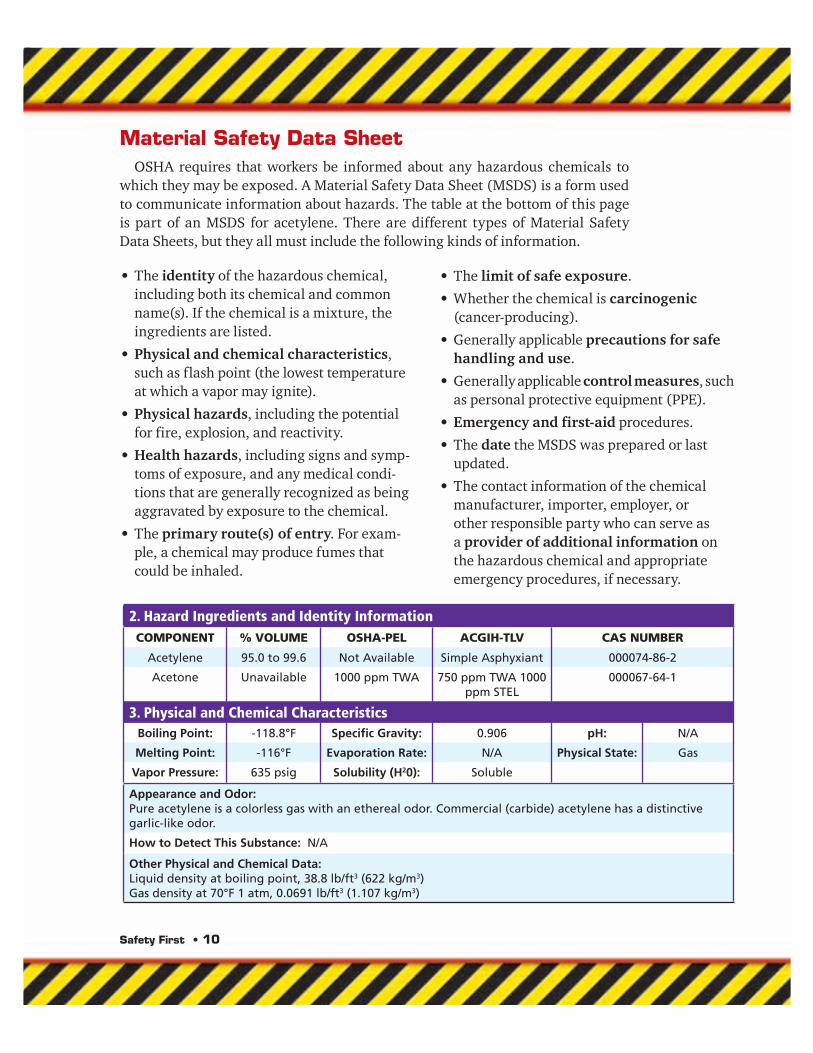
Material Safety Data Sheet
OSHA requires that workers be informed about any hazardous chemicals to
which they may be exposed. A Material Safety Data Sheet (MSDS) is a form used
to communicate information about hazards. The table at the bottom of this page
is part of an MSDS for acetylene. There are different types of Material Safety
Data Sheets, but they all must include the following kinds of information.
• The identity of the hazardous chemical,
including both its chemical and common
name(s). If the chemical is a mixture, the
ingredients are listed.
• Physical and chemical characteristics,
such as flash point (the lowest temperature
at which a vapor may ignite).
• Physical hazards, including the potential
for fire, explosion, and reactivity.
• Health hazards, including signs and symp-
toms of exposure, and any medical condi-
tions that are generally recognized as being
aggravated by exposure to the chemical.
• The primary route(s) of entry. For exam-
ple, a chemical may produce fumes that
could be inhaled.
2. Hazard Ingredients and Identity Information
COMPONENT % VOLUME OSHA-PEL ACGIH-TLV CAS NUMBER
Acetylene 95.0 to 99.6 Not Available Simple Asphyxiant 000074-86-2
Acetone Unavailable 1000 ppm TWA 750 ppm TWA 1000 ppm STEL
000067-64-1
3. Physical and Chemical Characteristics
Boiling Point: -118.8°F Specifi c Gravity: 0.906 pH: N/A
Melting Point: -116°F Evaporation Rate: N/A Physical State: Gas
Vapor Pressure: 635 psig Solubility (H20): Soluble
Appearance and Odor:Pure acetylene is a colorless gas with an ethereal odor. Commercial (carbide) acetylene has a distinctive garlic-like odor.
How to Detect This Substance: N/A
Other Physical and Chemical Data:Liquid density at boiling point, 38.8 lb/ft3 (622 kg/m3)Gas density at 70°F 1 atm, 0.0691 lb/ft3 (1.107 kg/m3)
• The limit of safe exposure.
• Whether the chemical is carcinogenic
(cancer-producing).
• Generally applicable precautions for safe
handling and use.
• Generally applicable control measures, such
as personal protective equipment (PPE).
• Emergency and first-aid procedures.
• The date the MSDS was prepared or last
updated.
• The contact information of the chemical
manufacturer, importer, employer, or
other responsible party who can serve as
a provider of additional information on
the hazardous chemical and appropriate
emergency procedures, if necessary.
Safety First • 10

Safety Color Codes
Safety signs and labels are color-coded to signify hazards or to identify
the location of safety-related equipment.
Color Meaning Examples
Red Danger, stop, or emergency • Fire-protection equipment• Flammable-liquid container• Emergency stop bars and switches
Orange Be on guard • Hazardous parts of equipment or machines that might injure
• Safety starter buttons on equipment or machines
Yellow Caution • Physical hazards, such as steps and low beams
• Waste containers for combustible materials
White Storage • Housekeeping equipment
Green First aid • Location of safety equipment, such as fi rst-aid kit
Blue Information or caution • Out-of-order signs on equipment• Cautions against using out-of-order
equipment
Safety First
11 • Safety First
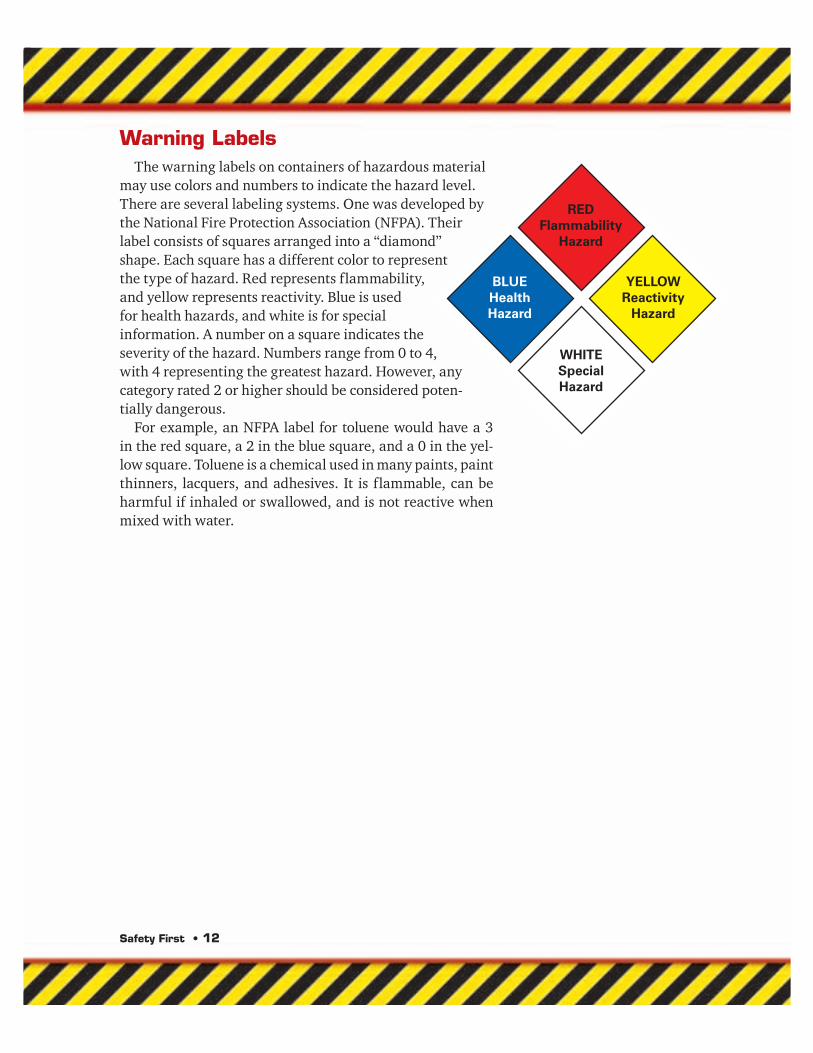
Warning Labels
The warning labels on containers of hazardous material
may use colors and numbers to indicate the hazard level.
There are several labeling systems. One was developed by
the National Fire Protection Association (NFPA). Their
label consists of squares arranged into a “diamond”
shape. Each square has a different color to represent
the type of hazard. Red represents flammability,
and yellow represents reactivity. Blue is used
for health hazards, and white is for special
information. A number on a square indicates the
severity of the hazard. Numbers range from 0 to 4,
with 4 representing the greatest hazard. However, any
category rated 2 or higher should be considered poten-
tially dangerous.
For example, an NFPA label for toluene would have a 3
in the red square, a 2 in the blue square, and a 0 in the yel-
low square. Toluene is a chemical used in many paints, paint
thinners, lacquers, and adhesives. It is flammable, can be
harmful if inhaled or swallowed, and is not reactive when
mixed with water.
RED
Flammability
Hazard
BLUE
Health
Hazard
WHITE
Special
Hazard
YELLOW
Reactivity
Hazard
Safety First • 12

Fire Safety
In order for a fire to burn, three basic things must be present.
• A source of heat
• Oxygen
• Fuel
For example, what if a piece of paper comes in contact with a hot wire
and the paper burns? The hot wire provides heat, the paper is the fuel, and
oxygen is present in the air.
Most fires can be extinguished by
Reducing the heat The most common way to
reduce the heat of a fire is to throw water on
it. This has cooling action and also produces
steam. The steam helps to exclude oxygen.
However, water should not be used to extin-
guish some fires, such as grease or electrical
fires.
Preventing oxygen from reaching the fire A
fire can be deprived of oxygen by spraying it
with an inert gas, such as carbon dioxide. Carbon
dioxide is contained in many fire extinguish-
ers. Keeping oxygen away is also the method
used when a person’s clothing catches fire. The
person is wrapped in a blanket, which smoth-
ers the fire.
Removing the source of fuel If a gas or liquid,
such as gasoline, is feeding a fire, it can often be
turned off in some way. That removes the fuel.
In some cases, the fuel may be allowed to burn
until it is used up and the fire goes out.
Class of Fire Type of Flammable Material Type of Fire Extinguisher to Use
Class A Wood, paper, cloth, plastic Class A
Class A:B
Class B Grease, oil, chemicals Class A:B
Class A:B:C
Class C Electrical cords, switches, wiring Class A:C
Class B:C
Class D Combustible switches, wiring, metals, iron Class D
Class K Fires in cooking appliances involving combustible vegetable or animal oils and fats
Class K
Safety First
13 • Safety First
Developing a Fire Emergency Plan
Your lab should have a plan for use in a fire
emergency. If your teacher has not explained it
to you, ask about it. Be sure you know where all
the exits are, where the fire extinguishers are
kept, and what your responsibilities are in case
a fire occurs. Then follow these steps to record
the fire emergency plan.
1. Draw a floor plan of the lab.
2. Locate all the fire exits and label them on
the floor plan. If the lab has no direct exit
to the outside, draw a map of your section
of the school. Show the location of the lab,
and draw arrows from the doors in the lab
to the nearest fire exits.
3. Locate and label any windows that could
also be used for escape. (Check to be sure
the opening will be large enough for an
adult to pass through.)
4. Locate all the fire extinguishers and label
them on the floor plan. Indicate on the plan
the class of fire for which each extinguisher
can be used.
5. Locate places where flammable or explo-
sive materials should be stored and label
them. Be sure they are in a location far
away from any source of heat and that their
cabinet is fireproof.
6. Determine where you and your classmates
should meet after you have left the build-
ing. This is important so that someone can
check to be sure everyone has escaped
safely.
7. Ask your teacher for procedures to follow
if a fire occurs. If time allows, this may
include such things as closing windows,
turning off equipment, and grabbing the
first-aid kit. Someone should be responsi-
ble for reporting the fire. However, human
safety is the most important consideration.
Fires can spread quickly, and smoke can be
just as deadly as flames. Your most impor-
tant responsibility is to get out alive.
8. Be sure everyone has a chance to study the
emergency plan. Then, with your teacher’s
approval, post it in a prominent place
where it can be seen easily.
9. Be sure that you and your classmates are
informed as to housekeeping duties that
help prevent fires, proper handling of any
materials that could catch fire, how to treat
burns, and where to report a fire.
Safety First • 14
Troubleshooting
To “troubleshoot” means to follow a systematic method to find the cause
of a problem and fix it. Owner’s manuals often contain troubleshooting
charts to help users find and correct problems.
Troubleshooting begins by looking for the most likely causes. Often, the
problem is a simple one that can easily be fixed. If that turns out not to
be the case, then the troubleshooter looks for more unusual causes. It is
also a good idea to look at a system’s parts and test each part one by one.
For example, when your computer is unable to read a new CD, you might
follow a procedure like the one outlined in this table.
Symptom Possible Cause How to Check
Computer cannot read CD. 1. CD is not formatted for your computer system.
1. Read label of CD for hardware and software requirements.
2. CD is not properly inserted in drive.
2. Reinsert CD into drive, being careful to place it correctly.
3. CD is damaged. 3. Insert a different CD into the drive to see whether it will work.
4. CD drive damaged. 4. Replace or repair CD drive.
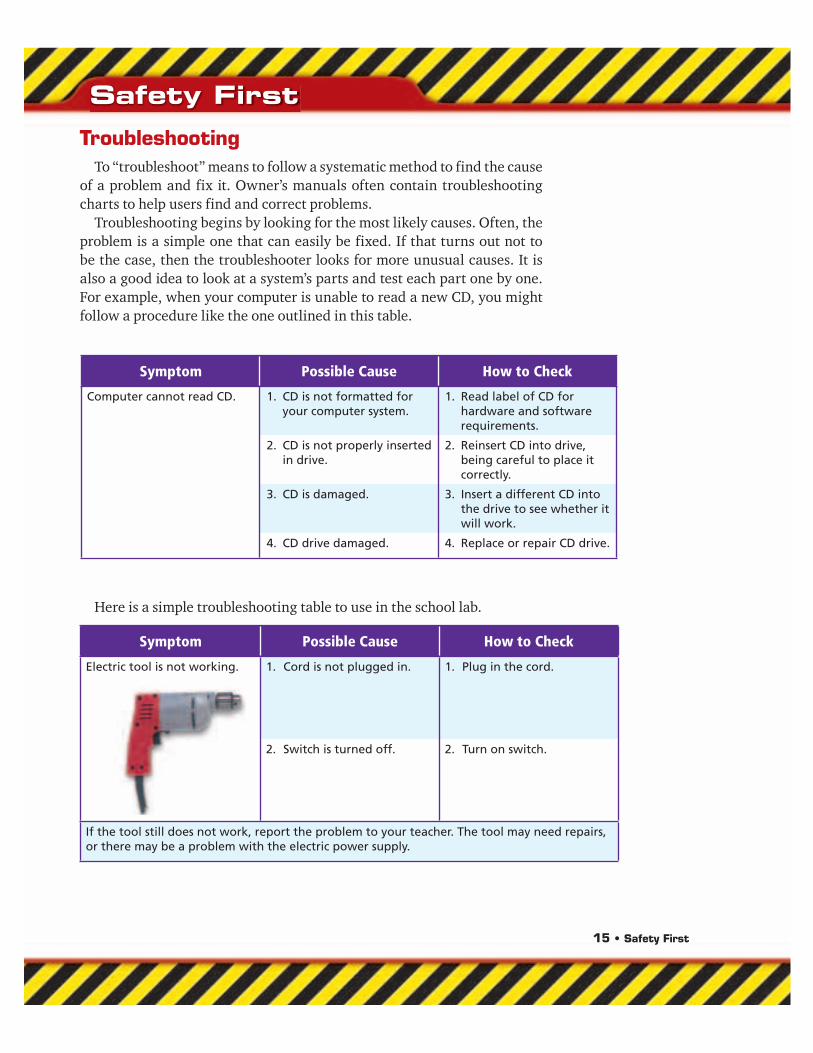
Symptom Possible Cause How to Check
Electric tool is not working. 1. Cord is not plugged in. 1. Plug in the cord.
2. Switch is turned off. 2. Turn on switch.
If the tool still does not work, report the problem to your teacher. The tool may need repairs, or there may be a problem with the electric power supply.
Here is a simple troubleshooting table to use in the school lab.
Safety First
15 • Safety First