sage abra sql hrms/media/category/employer solutions... · if you are using abra workforce...
TRANSCRIPT
Sage Abra SQL HRMS Employee Pages User Guide

© 2010 Sage Software, Inc. All rights reserved. Sage, the Sage logos, and the Sage product and service names mentioned herein are registered trademarks or trademarks of Sage Software, Inc., or its affiliated entities. Business Objects, the Business Objects logo, and Crystal Reports are registered trademarks of SAP France in the United States and in other countries. NetLib is a registered trademark of Communication Horizons. OrgPlus is a trademark of HumanConcepts, LLC. TextBridge is a registered trademark of ScanSoft, Inc. Microsoft, Outlook, Windows, Windows NT, Windows Server, the .NET logo, Windows Vista and the Windows logo are trademarks or registered trademarks of Microsoft Corporation in the United States and /or other countries. The names of all other products and services are the property of their respective holders.
Sage has made every effort to ensure this documentation is correct and accurate but reserves the right to make changes without notice at its sole discretion. Use, duplication, modification, or transfer of the product described in this publication, except as expressly permitted by the Sage License Agreement is strictly prohibited. Individuals who make any unauthorized use of this product may be subject to civil and criminal penalties.
For additional assistance on this and other Sage products and services, visit our Web site at: http://www.sageabra.com

Employee Pages i
Table of Contents Employee Detail Pages ................................................................................................ 1
Current Job............................................................................................................................................................ 1 Current Pay........................................................................................................................................................... 4 Demographics....................................................................................................................................................... 7 Dependents and Beneficiaries ............................................................................................................................ 9 Benefit History.................................................................................................................................................... 11 Demographics..................................................................................................................................................... 11 Dependents and Beneficiaries .......................................................................................................................... 13 Education ............................................................................................................................................................ 15 Emergency Contacts .......................................................................................................................................... 15 Employee Attachments ..................................................................................................................................... 16 Employee Notes ................................................................................................................................................. 18 Events .................................................................................................................................................................. 19 HR Status............................................................................................................................................................. 19 Insurance Benefits .............................................................................................................................................. 21 Job History .......................................................................................................................................................... 25 Leave of Absence ............................................................................................................................................... 27 OSHA................................................................................................................................................................... 30 Personal Information......................................................................................................................................... 34 Previous Employer ............................................................................................................................................ 34 Savings Benefits.................................................................................................................................................. 35 Skills..................................................................................................................................................................... 37 Termination ........................................................................................................................................................ 38 Wellness .............................................................................................................................................................. 39
Employee Tasks .......................................................................................................... 43
Add New Employee .......................................................................................................................................... 43 Change Job .......................................................................................................................................................... 45 Change Employee ID......................................................................................................................................... 46 Change Personal Status..................................................................................................................................... 46 Delete Employee Record................................................................................................................................... 48 Change Job and Pay........................................................................................................................................... 49 Pay and Performance Review .......................................................................................................................... 50

ii Sage Abra SQL HRMS
Rehire Employee ................................................................................................................................................ 52 Terminate Employee.......................................................................................................................................... 55
Employment Processes .............................................................................................. 59
Import Calculations ........................................................................................................................................... 59 Mass Update Pay Step Rate.............................................................................................................................. 61 Mass Update Step Rate Service ........................................................................................................................ 62 Mass Update ....................................................................................................................................................... 64 Mass Update Pay Rates..................................................................................................................................... 66 Select Specific Employees ................................................................................................................................. 68 Update Benefits .................................................................................................................................................. 69 Update E‐mail Addresses ................................................................................................................................. 69
Employee Analyses .................................................................................................... 71
OSHA Incidents ................................................................................................................................................. 71 Performance vs. Longevity ............................................................................................................................... 71 Salary ................................................................................................................................................................... 72 Turnover.............................................................................................................................................................. 73
Standard Reports ........................................................................................................ 75
Define Custom Criteria ..................................................................................................................................... 75 Define Report Criteria ....................................................................................................................................... 77 Print, Preview, or Export a Report .................................................................................................................. 81
Employee Reports....................................................................................................... 85
Benefit Reports ................................................................................................................................................... 85 Code Table Reports............................................................................................................................................ 86 Compensation Reports...................................................................................................................................... 88 EEO Reports........................................................................................................................................................ 90 Employee and Organization Reports .............................................................................................................. 92 Leave Reports ..................................................................................................................................................... 93 OSHA Reports .................................................................................................................................................... 94 Pay Equity Reports ............................................................................................................................................ 95 Personal Information Reports .......................................................................................................................... 95 Skill and Education Reports ............................................................................................................................. 96 Wellness Reports................................................................................................................................................ 97

Employee Pages iii
Index ............................................................................................................................ 99

iv Sage Abra SQL HRMS

Employee Pages 1
Employee Detail Pages Current Job The Current Job page contains information about the employeeʹs status, current job, secondary job, job group, job classification, pay equity, organization levels, exempt status, and the dates of any changes to the information regarding the employee’s current job.
Job Field Label Field Description
Job Title Enter the description of the current job.
Job Code This is an abbreviated code of the job description.
EEO Job Group This is the breakdown of the job within EEO Class. If Job Code Validation is enabled, you cannot change this field.
Pay Equity Job Group
This is used to group jobs together for comparison purposes. Job groups are used in Pay Equity reporting. If Job Code Validation is enabled, you cannot change this field
Job Classification Standard job classifications used only if your organization files Employment Equity Reports.
Salary Grade This is the salary grade for the current job. If Job Code validation is enabled, you cannot change this field.
Direct / Indirect Indicates if the employee is direct or indirect. Direct employees typically allocate their time to projects; indirect employees do not allocate. If Job Code validation is enabled, you cannot change this field.
Exempt Status Indicate whether the position is exempt or nonexempt. If Job Code validation is enabled, you cannot change this field.
Overtime Eligible
Indicate whether the position is overtime eligible or noneligible. If Job Code validation is enabled, you cannot change this field.
Employee Status The Status field determines which employees appear on Active and Terminated reports. The list includes Active, Terminated, LOA, Dependent (COBRA),and Not Employee.
Employee Type This is the category of employee (such as part time, full time, temporary, seasonal) that is used in Employment Equity and Equal Employment Opportunity reports.
For Canadian employees: if you see RFT ‐ Not in Code Table in the list, do the following steps:
1. Add Regular Full Time to the employee type code table for the employer or enterprise (Add RFT for the code and Regular Full Time for the description.
Current Job
2 Sage Abra SQL HRMS
Field Label Field Description
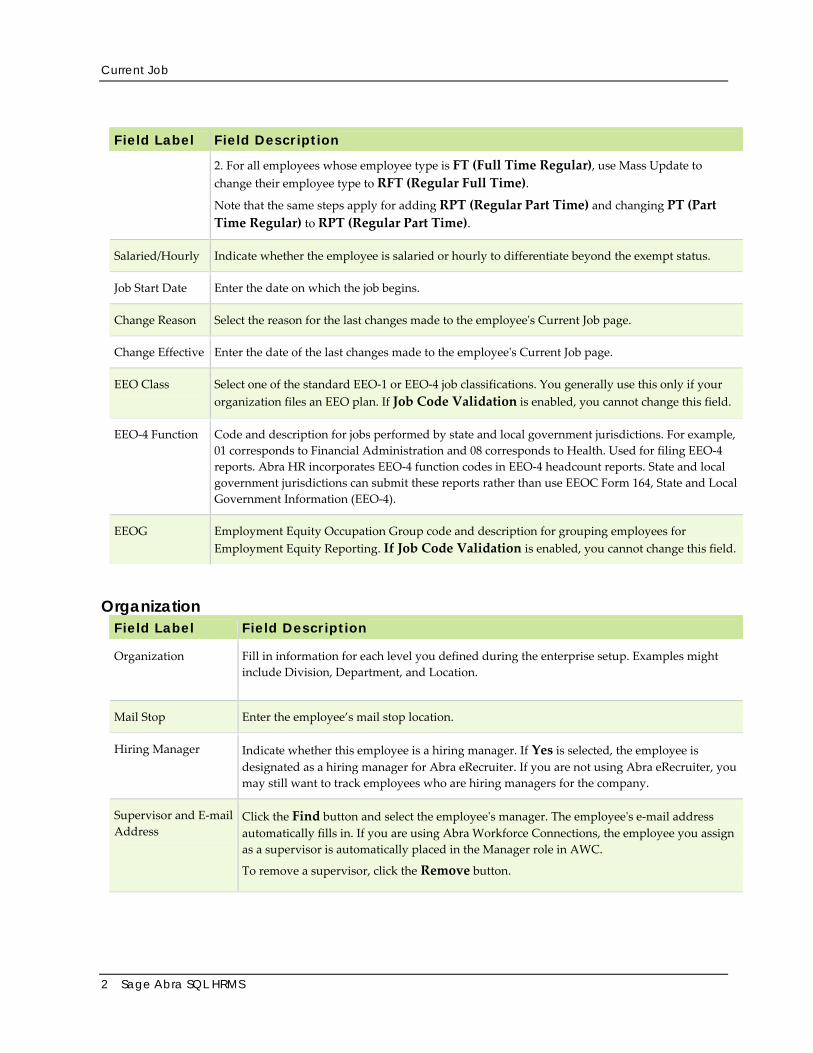
2. For all employees whose employee type is FT (Full Time Regular), use Mass Update to change their employee type to RFT (Regular Full Time). Note that the same steps apply for adding RPT (Regular Part Time) and changing PT (Part Time Regular) to RPT (Regular Part Time).
Salaried/Hourly Indicate whether the employee is salaried or hourly to differentiate beyond the exempt status.
Job Start Date Enter the date on which the job begins.
Change Reason Select the reason for the last changes made to the employeeʹs Current Job page.
Change Effective Enter the date of the last changes made to the employeeʹs Current Job page.
EEO Class Select one of the standard EEO‐1 or EEO‐4 job classifications. You generally use this only if your organization files an EEO plan. If Job Code Validation is enabled, you cannot change this field.
EEO‐4 Function Code and description for jobs performed by state and local government jurisdictions. For example, 01 corresponds to Financial Administration and 08 corresponds to Health. Used for filing EEO‐4 reports. Abra HR incorporates EEO‐4 function codes in EEO‐4 headcount reports. State and local government jurisdictions can submit these reports rather than use EEOC Form 164, State and Local Government Information (EEO‐4).
EEOG Employment Equity Occupation Group code and description for grouping employees for Employment Equity Reporting. If Job Code Validation is enabled, you cannot change this field.
Organization Field Label Field Description
Organization Fill in information for each level you defined during the enterprise setup. Examples might include Division, Department, and Location.
Mail Stop Enter the employee’s mail stop location.
Hiring Manager Indicate whether this employee is a hiring manager. If Yes is selected, the employee is designated as a hiring manager for Abra eRecruiter. If you are not using Abra eRecruiter, you may still want to track employees who are hiring managers for the company.
Supervisor and E‐mail Address
Click the Find button and select the employeeʹs manager. The employeeʹs e‐mail address automatically fills in. If you are using Abra Workforce Connections, the employee you assign as a supervisor is automatically placed in the Manager role in AWC.
To remove a supervisor, click the Remove button.

Current Job
Employee Pages 3
Field Label Field Description
Secondary Supervisor and E‐mail Address
If you are using Abra Workforce Connections , you can assign a secondary supervisor, for example, a line supervisor to act on the employeeʹs approval requests and receive notifications and e‐mails when the employee updates personal information.
Click the Find button and select a secondary supervisor for the employee (can be the same as the Supervisor). The employeeʹs e‐mail address automatically fills in.
To remove a supervisor, click the Remove button.
Secondary Job The Secondary Job tab of the Current Job page lets you enter and maintain information about jobs other than the employeeʹs main job. When you add or edit a Secondary Job record, the employeeʹs Secondary Job page opens.
Field Label
Field Description
Effective Enter the effective date of the secondary job.
End End the end date of the secondary job.
Job Title Select a description of the secondary job.
Job Code This is an abbreviated version of the job description. The secondary job code must differ from the current job code. If you enabled Job Code Validation, Sage Abra SQL HRMS fills in this field after you complete the Job Title field.
Salary Grade
Select the salary grade for the secondary job. If you enabled Job Code Validation, Abra HR fills in this field after you complete the Job Title field.
Direct / Indirect
Indicates if the employee is direct or indirect. Direct employees typically allocate their time to projects; indirect employees do not allocate.
Period Salary
Enter an amount or use the arrows to select a number to indicate what the employee earns during one pay period.
Note: If you are using Sage Abra SQL HRMS Payroll and you edit this field, Pay fields will not be updated.
Frequency Designate how often the employer pays the employee.

Current Pay
4 Sage Abra SQL HRMS
Field Label
Field Description
Annual Pay Abra HR automatically calculates the total annual pay for the secondary job according to the Period Salary and Frequency.
Current Pay The Current Pay page provides information about an employeeʹs pay rate and frequency, annual pay, and pay and performance reviews. The page also provides four user‐defined fields where you can record selected information for your employer.
Current Pay The fields marked with an asterisk (*) are closely related. When you change one of these fields, the others are automatically recalculated.
Field Label
Field Description
Pay Effective This is the date this pay became effective. This date also indicates a new hireʹs start date.
Unit Pay Rate*
This is the amount the employee earns for each unit worked.If you are using Sage Abra SQL HRMS Payroll, updating this field will not update information on Payroll Wage/Rate fields.
Pay Period Salary*
This is the total amount the employee earns for each pay period.If you are using Sage Abra SQL HRMS Payroll, updating this field will not update information on Payroll Wage/Rate fields.
Hours/Units Enter the normal number of hours worked per payroll period. If the employee is paid by piece or by job, this field reflects the average number of units per payroll period.
Pay Frequency
Select the payroll frequency for this employee.
Annual Pay* Sage Abra SQL HRMS calculates this field based on the information entered into the above fields. If you are using Sage Abra SQL HRMS Payroll, updating this field will not update information on Payroll Wage/Rate fields.
Payroll Status Select the employee’s payroll status; Active, Inactive, or Terminated. This field displays only if you are using Sage Abra SQL HRMS Payroll. If the status here is Active, the employee status in Sage Abra SQL HRMS Payroll is also active. This allows for payroll processing after an employee is terminated.
Shift Select the shift the employee works. This field does not apply if you are using Sage Abra SQL HRMS Payroll. Shift differential information will be entered on the Employee Payroll page.
Shift If you select a shift that has a premium, Sage Abra SQL HRMS fills in this field. This field does not

Current Pay
Employee Pages 5
Field Label
Field Description
Premium (%) apply if you are using Sage Abra SQL HRMS Payroll. Shift differential information will be entered on the Employee Payroll page.
Comparatio Sage Abra SQL HRMS calculates the comparatio statistic.
The comparatio is the employee’s percent‐of‐midpoint within a salary range. The formula for calculating comparatio is:
comparatio = employee’s salary / midpoint for salary grade * 100
Bonus Amount
Enter the bonus amount the employee receives.
Currency Type
Select the currency in which the employee is paid.
Pay and Performance Field Label Field Description
Previous Pay Change
The pay effective date from the most recent history record.
Amount The calculated dollar amount of the last pay increase.
Percent The calculated percentage of the last pay increase.
Next Pay Review Date scheduled for the employeeʹs next pay review.
Performance Review
Date of the employeeʹs last performance review.
Rating Rating the employee received at the last performance review.
Next Review Date scheduled for the employee’s next performance review.
Change Effective Date when the pay change is effective.
Reason Reason for this pay change.
Notes:
For the New Hire reports to work correctly, new employees must have a Reason code of NEW HIRE or REHIRE.
FOr the EEO Promotions report to work correctly, all promotions must have a Reason code of PROMO.

Current Pay
6 Sage Abra SQL HRMS
Field Label Field Description
User Defined The User Defined tab contains four user‐defined pay fields. You or your system administrator set up these fields on the HR Setup page to suit the special needs of your organization. Examples of field possibilities include uniform size, parking space allotment, or outside community involvement. You might also use these fields to record information about driverʹs licenses, security clearances, or drug screening results.
Step Rate Field Label
Field Description
Job Code This is the job code from the Current Job page.
Salary Grade This is the salary grade from the Current Job page.
Job Start Date This is the job start date from the Current Job page.
Job Service The employeeʹs length of service in months. The number is the result of running the Mass Update Step Rate Service process. This process calculates job service using the employeeʹs job start date and the job service date.
If you make a change to Job Service
• If you increase the job service amount, the next time you run the Mass Update Pay Step Rate process, it remains at that increased amount and is not updated by the process.
• If you decrease the job service amount, the next time you run the Mass Update Pay Step Rate process, it changes back to the pre‐defined calculated amount.
• Any time you override the calculated Job Service amount, you must manually enter applicable salary changes for the employee.
Job Service Date
This is the effective date that was used during the Mass Update Step Rate Service process to calculate job service.
Step The salary grade level attained by the employee. The number is the result of running Mass Update Pay Step Rate process. This process calculates the step using the employeeʹs job service and salary grade information. If you make a change to Step
• If you increase the step value, the next time you run the Mass Update Pay Step Rate process, it remains at that increased value and is not updated by the process.
• If you decrease the step value, the next time you run the Mass Update Pay Step Rate process,

Demographics
Employee Pages 7
Field Label
Field Description
the step changes back to the pre‐defined calculated value.
• Any time you override the calculated Step value, you must manually enter applicable salary changes for the employee.
Pay information
Pay Effective, Unit Pay Rate, Pay Period Salary, and Annual Pay are display only fields. If you need to update them, click the Current Pay tab.
Demographics Use the Demographics page to enter basic employee information, including the employee’s name, address, telephone number, and personal data. The Demographics page also enables you to attach a photo of the employee.
Actions that use the Demographics page include Record New Hire, Rehire Employee, and Change Personal Status.
The Demographics page contains the following tabs:
Address and Phone The Address and Phone tab contains the following fields.
Field Label Field Description
Street 1 Enter the employee’s home street address.
Street 2 Enter the second line of the address.
City Enter the employee’s home city.
State Select the employee’s state. Note This field will not update payroll when using Sage Abra SQL HRMS Payroll.
Zip Code Enter the employee’s zip code.
County Enter the employee’s home county.
Country Enter the employee’s home country.
Home Enter the employee’s home phone.
Business Enter the employee’s business phone.
Extension Enter the employee’s business extension.

Demographics
8 Sage Abra SQL HRMS
Field Label Field Description
Cellular Enter the employee’s cell phone number
Pager Enter the employee’s electronic pager number
E‐mail Enter the employee’s e‐mail address.
If you are using Abra Workforce Connections, this is the From address for notification e‐mails.
Personal The following fields appear on the Personal tab.
Field Label
Field Description
First Enter the employee’s first name.
Middle Enter the employee’s middle name.
Last Enter the employee’s last name.
Nickname Enter the employee’s nickname. If you do not enter a nickname, Abra HR enters the first name and uses it in the Work Telephone Directory and the greeting on the Employee Benefits Statement.
Salutation Enter a title such as Dr., Mr., or Ms.
SSN Enter the employeeʹs Social Security Number.
Language Select the language spoken by the employee.
Birth Date and Age
Enter the employee’s birth date. Abra HR fills in the Age field after you enter the date.
Marital Status Select the employee’s marital status. This is a required field.
Note This field will not update payroll when using Sage Abra U.S. Payroll (SQL).
Gender Select either Male or Female.
Smoker Indicate whether or not the employee smokes. Select Yes or No.
Disability Indicate whether or not the employee is disabled. This field applies only when EEO Reporting is selected.
Ethnic Origin Enter the ethnic ID, which Abra HR uses in EEO reports. This field applies only when EEO Reporting is selected.

Dependents and Beneficiaries
Employee Pages 9
Photo Use the Photo tab to attach a photograph in the form of a bitmap, jpeg, or gif file to an employeeʹs record. Whenever you open the Demographics page for the employee, you can view the employeeʹs photograph.
Before you select a photo, Sage Abra SQL HRMS must be able to access it as a bitmap, jpeg, or gif file, that is, a file with the .BMP, .JPG, or .GIF extension. Bitmaps, jpegs, and gifs are simply a collection of picture elements arranged in a pattern that resemble a picture.
Tip: You can scan your photos and save them as bitmap, jpeg, or gif files.
To Select a Photo
1. Open the Demographics page for the employee to whom you want to attach a photo.
2. Click the Photo tab. The Photo tab opens and is blank if you did not yet select a bitmap, jpeg, or gif file.
3. Click Select. The Select a Photo File dialog box opens.
4. Choose the correct path and name of your photoʹs bitmap, jpeg, or gif file.
5. Select the correct file and click Open. The photo appears in the Photo tab.
To Remove a Photo
You can remove a photograph from an employeeʹs record whenever necessary. From the Photo tab, click Remove. When you remove a photograph, you do not remove the file from your disk. You can select the photo again any time you want.
Dependents and Beneficiaries The Dependents and Beneficiaries page shows every dependent an employee declares. If the page appears blank, the employee has no declared dependents.
Actions that open the Dependents and Beneficiaries page are the Record New Hire, Change Personal Status, and Rehire Employee.
This page stores data about an employeeʹs dependents and certain insurance information. Sage Abra SQL HRMS stores an unlimited number of dependent records per employee.
Dependents and Beneficiaries The following fields appear on the Dependents and Beneficiaries tab.
Field Label
Field Description
Relationship Select the dependentʹs relationship to employee from the list.
Type Indicate whether the individual is a dependent only, a beneficiary only, or both a dependent and a beneficiary. If you are using Abra Workforce Connections, you should never change the dependent

Dependents and Beneficiaries
10 Sage Abra SQL HRMS
Field Label
Field Description
type if dependents or beneficiaries are in use for an open enrollment or life event.
First Name Enter the dependent’s first name.
MI Enter the dependent’s middle initial.
Last Name Enter the dependent’s last name. The name defaults to employee’s last name, which you can change.
Address Enter the dependentʹs complete address. The address fields automatically default to the employeeʹs home address. You can change the default address if necessary. Use the upper two address fields for the full street address, including apartment numbers. On the third line include the city, state, and zip code.
Birth Date You can leave this blank, but you usually need the birth date for COBRA and insurance purposes.
Age Age is automatically calculated and displayed after you enter the birth date.
SSN Enter the dependentʹs Social Security Number. You can leave this blank, but you usually need it for insurance and COBRA purposes.
Gender Select Male or Female.
Smoker Select Yes or No to indicate whether the dependent smokes.
Other You can use this field any way you want. For example, you can indicate the dependent has other insurance for the purpose of the coordination of benefits (COB).
Benefit Enrollments The Benefit Enrollments tab shows all the insurance benefit plans in which the dependent is enrolled, including the plan name, effective and expiration dates.
Tip: To enroll the dependent in another plan or change the effective or expiration date, use the Covered Dependents tab of the Insurance Benefits page.
Beneficiary Elections The Beneficiary Elections tab shows all insurance and savings plans for which the dependent is assigned as a beneficiary.
Tip: To assign this dependent as a beneficiary to another plan or change the primary and contingent indicator or percent distribution, use the Assign Beneficiaries tab of the Insurance Benefits or Savings Benefits page.

Benefit History
Employee Pages 11
Benefit History
A Note on Benefit History Records
When you change an amount for an employee benefit, the system opens the Benefit History dialog box and asks if you want to create a history record for the change. If you do want to save a history record, enter the date that the new amount takes effect and enter a reason for the change. If you changed an amount in error and do not want to create a history record, click Cancel.
Note: You cannot create multiple history records on the same day.
Demographics Use the Demographics page to enter basic employee information, including the employee’s name, address, telephone number, and personal data. The Demographics page also enables you to attach a photo of the employee.
Actions that use the Demographics page include Record New Hire, Rehire Employee, and Change Personal Status.
The Demographics page contains the following tabs:
Address and Phone The Address and Phone tab contains the following fields.
Field Label Field Description
Street 1 Enter the employee’s home street address.
Street 2 Enter the second line of the address.
City Enter the employee’s home city.
State Select the employee’s state. Note This field will not update payroll when using Sage Abra SQL HRMS Payroll.
Zip Code Enter the employee’s zip code.
County Enter the employee’s home county.
Country Enter the employee’s home country.
Home Enter the employee’s home phone.
Business Enter the employee’s business phone.

Demographics
12 Sage Abra SQL HRMS
Field Label Field Description
Extension Enter the employee’s business extension.
Cellular Enter the employee’s cell phone number
Pager Enter the employee’s electronic pager number
E‐mail Enter the employee’s e‐mail address.
If you are using Abra Workforce Connections, this is the From address for notification e‐mails.
Personal The following fields appear on the Personal tab.
Field Label
Field Description
First Enter the employee’s first name.
Middle Enter the employee’s middle name.
Last Enter the employee’s last name.
Nickname Enter the employee’s nickname. If you do not enter a nickname, Abra HR enters the first name and uses it in the Work Telephone Directory and the greeting on the Employee Benefits Statement.
Salutation Enter a title such as Dr., Mr., or Ms.
SSN Enter the employeeʹs Social Security Number.
Language Select the language spoken by the employee.
Birth Date and Age
Enter the employee’s birth date. Abra HR fills in the Age field after you enter the date.
Marital Status Select the employee’s marital status. This is a required field.
Note This field will not update payroll when using Sage Abra U.S. Payroll (SQL).
Gender Select either Male or Female.
Smoker Indicate whether or not the employee smokes. Select Yes or No.
Disability Indicate whether or not the employee is disabled. This field applies only when EEO Reporting is selected.
Ethnic Origin Enter the ethnic ID, which Abra HR uses in EEO reports. This field applies only when EEO Reporting

Dependents and Beneficiaries
Employee Pages 13
Field Label
Field Description
is selected.
Photo Use the Photo tab to attach a photograph in the form of a bitmap, jpeg, or gif file to an employeeʹs record. Whenever you open the Demographics page for the employee, you can view the employeeʹs photograph.
Before you select a photo, Sage Abra SQL HRMS must be able to access it as a bitmap, jpeg, or gif file, that is, a file with the .BMP, .JPG, or .GIF extension. Bitmaps, jpegs, and gifs are simply a collection of picture elements arranged in a pattern that resemble a picture.
Tip: You can scan your photos and save them as bitmap, jpeg, or gif files.
To Select a Photo
1. Open the Demographics page for the employee to whom you want to attach a photo.
2. Click the Photo tab. The Photo tab opens and is blank if you did not yet select a bitmap, jpeg, or gif file.
3. Click Select. The Select a Photo File dialog box opens.
4. Choose the correct path and name of your photoʹs bitmap, jpeg, or gif file.
5. Select the correct file and click Open. The photo appears in the Photo tab.
To Remove a Photo
You can remove a photograph from an employeeʹs record whenever necessary. From the Photo tab, click Remove. When you remove a photograph, you do not remove the file from your disk. You can select the photo again any time you want.
Dependents and Beneficiaries The Dependents and Beneficiaries page shows every dependent an employee declares. If the page appears blank, the employee has no declared dependents.
Actions that open the Dependents and Beneficiaries page are the Record New Hire, Change Personal Status, and Rehire Employee.
This page stores data about an employeeʹs dependents and certain insurance information. Sage Abra SQL HRMS stores an unlimited number of dependent records per employee.

Dependents and Beneficiaries
14 Sage Abra SQL HRMS
Dependents and Beneficiaries The following fields appear on the Dependents and Beneficiaries tab.
Field Label
Field Description
Relationship Select the dependentʹs relationship to employee from the list.
Type Indicate whether the individual is a dependent only, a beneficiary only, or both a dependent and a beneficiary. If you are using Abra Workforce Connections, you should never change the dependent type if dependents or beneficiaries are in use for an open enrollment or life event.
First Name Enter the dependent’s first name.
MI Enter the dependent’s middle initial.
Last Name Enter the dependent’s last name. The name defaults to employee’s last name, which you can change.
Address Enter the dependentʹs complete address. The address fields automatically default to the employeeʹs home address. You can change the default address if necessary. Use the upper two address fields for the full street address, including apartment numbers. On the third line include the city, state, and zip code.
Birth Date You can leave this blank, but you usually need the birth date for COBRA and insurance purposes.
Age Age is automatically calculated and displayed after you enter the birth date.
SSN Enter the dependentʹs Social Security Number. You can leave this blank, but you usually need it for insurance and COBRA purposes.
Gender Select Male or Female.
Smoker Select Yes or No to indicate whether the dependent smokes.
Other You can use this field any way you want. For example, you can indicate the dependent has other insurance for the purpose of the coordination of benefits (COB).
Benefit Enrollments The Benefit Enrollments tab shows all the insurance benefit plans in which the dependent is enrolled, including the plan name, effective and expiration dates.
Tip: To enroll the dependent in another plan or change the effective or expiration date, use the Covered Dependents tab of the Insurance Benefits page.
Beneficiary Elections The Beneficiary Elections tab shows all insurance and savings plans for which the dependent is assigned as a beneficiary.

Education
Employee Pages 15
Tip: To assign this dependent as a beneficiary to another plan or change the primary and contingent indicator or percent distribution, use the Assign Beneficiaries tab of the Insurance Benefits or Savings Benefits page.
Education The Education page contains information about an employeeʹs education history. Each record shows a school the employee attended, degree earned, major course of study, years attended, whether or not the employee graduated, and the year of graduation.
The following fields appear on the Education detail page.
Field Label Field Description
School Enter the name of the employeeʹs high school or college.
Degree Enter the type of degree the employee received at the school. Examples are: Associate of Science, Bachelor of Arts, etc.
Major Indicate the employeeʹs major course of study at the school. Examples are: Liberal Arts, Mechanical Engineering, etc.
Years Enter the number of years the employee attended the school.
Graduate Indicate whether the employee graduated from the school.
Year Enter the year the employee graduated from school.
GPA Enter the employeeʹs grade point average at the school. A decimal point is automatically inserted between the first digit and the last two digits. For example, if you type 352, it appears as 3.52.
Note: This page allows duplicate records to be entered. If you are also using Abra Workforce Connections, duplicate education records (both the original and the duplicate) will not display on the Education page. If duplicate records exist, the employee receives a message on their Education page to contact the Human Resources department for assistance.
Emergency Contacts The Emergency Contacts page opens when you select Employees > View/Edit Employee > (select an employee using the Employee Find) > Personal Tab > Emergency Contacts on the Navigation Pane. This page shows you the individuals to contact in case of an emergency. You can enter information for up to two contacts.

Employee Attachments
16 Sage Abra SQL HRMS
Note: Emergency contact phone information is not automatically linked to the Emergency Contact Name and Phone in Sage Abra SQL HRMS Payroll. However, you can map these fields to equivalent Sage Abra SQL HRMS Payroll fields by using Employer Configuration (from the Navigation Pane, select Setup > Payroll > Database Setup > Employer Configuration ).
The following fields appear on both the First Contact and Second Contact tabs.
Field Label Field Description
Name Enter the name of the person to contact during an emergency.
Relation Indicate the relationship this contact has to the employee.
Address Enter the contactʹs address.
Home Enter the area code and number for the contactʹs home phone number.
Business Enter the area code and number for the contactʹs work phone number.
Extension Enter the extension for the business number.
Cellular Enter the contact’s cell phone number.
Pager Enter the contact’s electronic pager number.
Employee Attachments If you want to attach a file created in another application, you can use the Employee Attachments page. Examples of attachments include text documents, graphics programs, scanned resumés, photographs, signatures, charts, and faxes.
Object Linking and Embedding Microsoft Windows supports OLE (Object Linking and Embedding), which enables Sage Abra SQL HRMS to attach a file or object to your employee.
When you attach an object, it is ʺcarried alongʺ with the employee, so you can see it whenever you select the employee. You can also delete the attachment at any time.
You can attach any file associated with an employee supporting OLE. You do not have to know which applications fit this description. Sage Abra SQL HRMS automatically identifies all OLE applications residing on your computer and lists them for you when you attach an object.
Working With Attachments Open the Employee Attachments page. Select the employee to which you want to include the attachment. The Attachments list shows all files attached to the employee.

Employee Attachments
Employee Pages 17
Adding Attachments To create a new object or to select an existing file as an attachment, click Add from the Employee Attachments page. A blank Employee Attachments Detail page opens.
Type a title for the attachment and click Insert to open the Insert Object dialog box.
You can create a new file or access an OLE application from all the applications Sage Abra SQL HRMS detects on your computer.
To Attach a New Object File
If you want to create a new object, select the Create New radio button and highlight the appropriate application from the Object Type list.
Note: If you want to display an icon for the object instead of the object itself, select the Display As Icon check box.
Click OK to open the application you selected. Work inside the application just as you normally would. When you are ready to attach the object, select Exit from the application’s File menu. The system automatically updates the object and returns you to the Attachments page.
To Attach an Existing Object File
If you want to attach an existing object, select the Create from File radio button and enter the appropriate path and file name in the File field.
You can also click Browse to locate the file you want to attach. If you want to ensure that the attachment is current, select the Link check box. The system establishes a link to the object so that if the object changes, as a worksheet or letter might change, the system updates your attachment.
Displaying an Icon or an Object
Instead of displaying the object itself, you can select to display an icon instead.
When adding an attachment, select the Display As Icon check box on the Insert Object page. The system displays the default icon as determined by the type of object you are inserting.
You can also click the Change Icon button to select a different icon or to change the label associated with the icon.
Viewing or Editing Attachments After you attach an object, you can access it to view it. From the Employee Attachments page, scroll through the list, clicking the attachment you want to edit. The Employee Attachments Detail page opens and displays the title and either the contents of the object or its related icon.
Note: The Copy button does not copy the object to the Windows clipboard.
Employee Notes
18 Sage Abra SQL HRMS
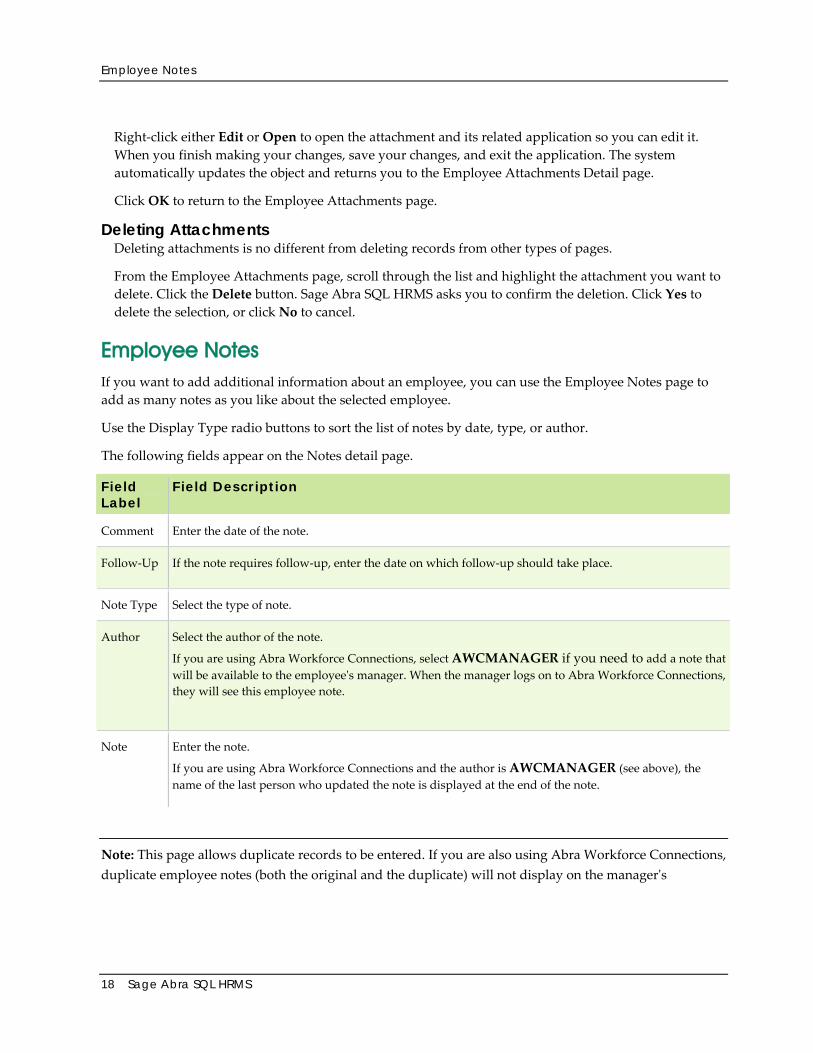
Right‐click either Edit or Open to open the attachment and its related application so you can edit it. When you finish making your changes, save your changes, and exit the application. The system automatically updates the object and returns you to the Employee Attachments Detail page.
Click OK to return to the Employee Attachments page.
Deleting Attachments Deleting attachments is no different from deleting records from other types of pages.
From the Employee Attachments page, scroll through the list and highlight the attachment you want to delete. Click the Delete button. Sage Abra SQL HRMS asks you to confirm the deletion. Click Yes to delete the selection, or click No to cancel.
Employee Notes If you want to add additional information about an employee, you can use the Employee Notes page to add as many notes as you like about the selected employee.
Use the Display Type radio buttons to sort the list of notes by date, type, or author.
The following fields appear on the Notes detail page.
Field Label
Field Description
Comment Enter the date of the note.
Follow‐Up If the note requires follow‐up, enter the date on which follow‐up should take place.
Note Type Select the type of note.
Author Select the author of the note.
If you are using Abra Workforce Connections, select AWCMANAGER if you need to add a note that will be available to the employeeʹs manager. When the manager logs on to Abra Workforce Connections, they will see this employee note.
Note Enter the note.
If you are using Abra Workforce Connections and the author is AWCMANAGER (see above), the name of the last person who updated the note is displayed at the end of the note.
Note: This page allows duplicate records to be entered. If you are also using Abra Workforce Connections, duplicate employee notes (both the original and the duplicate) will not display on the managerʹs

Events
Employee Pages 19
Employee Notes page. If duplicate records exist, the manager receives a message on their Employee Notes page to contact the Human Resources department for assistance.
Events Use the Events page to keep records of significant information about the employee. For example, you might want to keep track of the training courses the employee attended or list all professional organizations of which the employee is a member. Other examples are stock options, test scores, company credit cards, certificates, and patents.
The following fields appear on the Events detail page.
Field Label
Field Description
Planned Event
Indicates the planned event. The list originates from the Events code table.
Description Enter a more detailed description of the event.
Effective Date Enter the effective date of the event.
Next Due This is an optional date specifying when you should renew the event or take further action. Enter a date or leave it blank.
Comments Enter additional comments about the event.
Note: This page allows duplicate records to be entered. If you are also using Abra Workforce Connections, duplicate event records (both the original and the duplicate) will not display on the Events page. If duplicate records exist, the employee receives a message on their Events page to contact the Human Resources department for assistance.
HR Status The HR Status page asks you for information about the employee’s seniority, employment eligibility, military history, and union affiliation. This page also provides four user‐defined fields.
Actions that use the HR Status page include Record New Hire and Rehire Employee.
HR Status
20 Sage Abra SQL HRMS
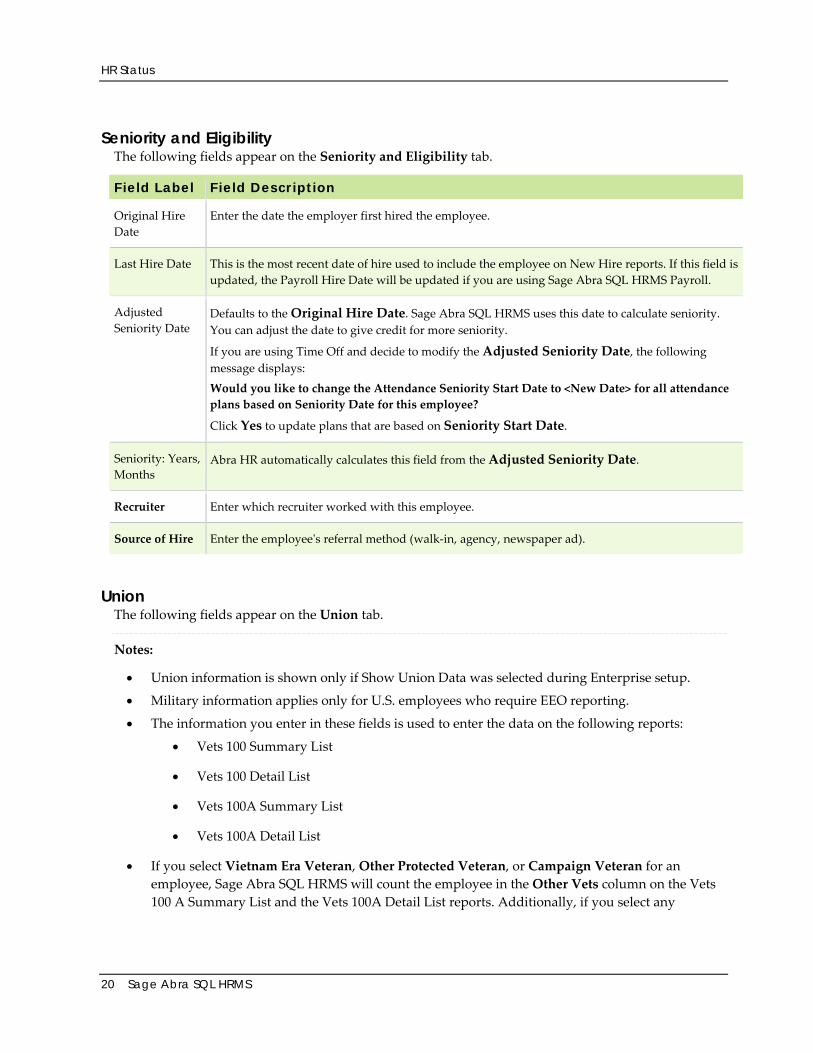
Seniority and Eligibility The following fields appear on the Seniority and Eligibility tab.
Field Label Field Description
Original Hire Date
Enter the date the employer first hired the employee.
Last Hire Date This is the most recent date of hire used to include the employee on New Hire reports. If this field is updated, the Payroll Hire Date will be updated if you are using Sage Abra SQL HRMS Payroll.
Adjusted Seniority Date
Defaults to the Original Hire Date. Sage Abra SQL HRMS uses this date to calculate seniority. You can adjust the date to give credit for more seniority.
If you are using Time Off and decide to modify the Adjusted Seniority Date, the following message displays:
Would you like to change the Attendance Seniority Start Date to <New Date> for all attendance plans based on Seniority Date for this employee?
Click Yes to update plans that are based on Seniority Start Date.
Seniority: Years, Months
Abra HR automatically calculates this field from the Adjusted Seniority Date.
Recruiter Enter which recruiter worked with this employee.
Source of Hire Enter the employeeʹs referral method (walk‐in, agency, newspaper ad).
Union The following fields appear on the Union tab.
Notes:
• Union information is shown only if Show Union Data was selected during Enterprise setup.
• Military information applies only for U.S. employees who require EEO reporting.
• The information you enter in these fields is used to enter the data on the following reports:
• Vets 100 Summary List
• Vets 100 Detail List
• Vets 100A Summary List
• Vets 100A Detail List
• If you select Vietnam Era Veteran, Other Protected Veteran, or Campaign Veteran for an employee, Sage Abra SQL HRMS will count the employee in the Other Vets column on the Vets 100 A Summary List and the Vets 100A Detail List reports. Additionally, if you select any
Insurance Benefits
Employee Pages 21
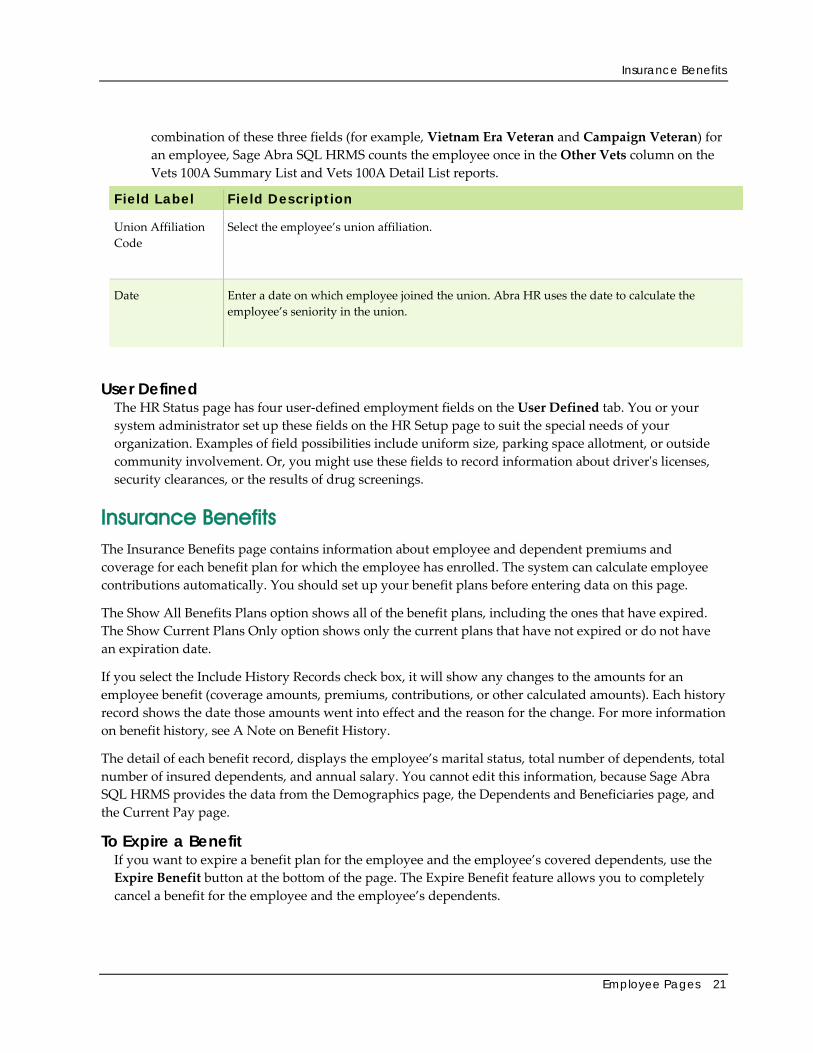
combination of these three fields (for example, Vietnam Era Veteran and Campaign Veteran) for an employee, Sage Abra SQL HRMS counts the employee once in the Other Vets column on the Vets 100A Summary List and Vets 100A Detail List reports.
Field Label Field Description
Union Affiliation Code
Select the employee’s union affiliation.
Date
Enter a date on which employee joined the union. Abra HR uses the date to calculate the employee’s seniority in the union.
User Defined The HR Status page has four user‐defined employment fields on the User Defined tab. You or your system administrator set up these fields on the HR Setup page to suit the special needs of your organization. Examples of field possibilities include uniform size, parking space allotment, or outside community involvement. Or, you might use these fields to record information about driverʹs licenses, security clearances, or the results of drug screenings.
Insurance Benefits The Insurance Benefits page contains information about employee and dependent premiums and coverage for each benefit plan for which the employee has enrolled. The system can calculate employee contributions automatically. You should set up your benefit plans before entering data on this page.
The Show All Benefits Plans option shows all of the benefit plans, including the ones that have expired. The Show Current Plans Only option shows only the current plans that have not expired or do not have an expiration date.
If you select the Include History Records check box, it will show any changes to the amounts for an employee benefit (coverage amounts, premiums, contributions, or other calculated amounts). Each history record shows the date those amounts went into effect and the reason for the change. For more information on benefit history, see A Note on Benefit History.
The detail of each benefit record, displays the employee’s marital status, total number of dependents, total number of insured dependents, and annual salary. You cannot edit this information, because Sage Abra SQL HRMS provides the data from the Demographics page, the Dependents and Beneficiaries page, and the Current Pay page.
To Expire a Benefit If you want to expire a benefit plan for the employee and the employee’s covered dependents, use the Expire Benefit button at the bottom of the page. The Expire Benefit feature allows you to completely cancel a benefit for the employee and the employee’s dependents.

Insurance Benefits
22 Sage Abra SQL HRMS
1. Click Expire Benefit to open the Expire Benefit dialog box.
2. In the Coverage Expiration Date field, enter the date to expire the benefit.
3. Click OK.
4. To reactivate the benefit, clear the date in the Coverage Expiration Date field of the Expire Benefit dialog box.
Notes:
• The Expire Benefit button is available only on existing benefit plans for which the employee has enrolled. The button is not present when you add a plan.
• To expire the benefit plan for the employee only, enter the expirationd ate in the Employee Coverage Ends field on the Benefit Plan tab.
• To expire the benefit plan for the employee’s dependents only, enter the expiration date in the Dependent Coverage Ends field on the Covered Dependents Detail page.
Benefit Plan The following fields appear on the Benefit Plan tab.
Field Label
Field Description
Insurance Benefit Plan
Abra links the benefit code to the code on the Benefit Insurance Plans setup page.
Benefit Type This is the benefit type entered on the Benefit Insurance Plans setup page when you set up this benefit. Abra HR automatically enters the Benefit Type when it enters the description.
Employee Coverage Begins
Enter the date the employee’s coverage begins. This is the same as the plan effective date. Regardless of the date you enter, Sage Abra SQL HRMS will start calculating the benefit at the time you add the enrollment. This means that even if you enter a date in the past or a date in the future (before or after the system date), the calculation will begin on the day you add the enrollment.
Employee Coverage Ends
Enter the date the employee’s coverage expires. Leave this date blank to show ongoing coverage. If only dependents are covered under this plan, enter the same date for both Employee Coverage Begins and Employee Coverage Ends.
Latest Change to Amounts
The date the most recent changes to the amounts occurred. This field is automatically updated whenever a change is made to a plan’s amounts. For example, if you add a new plan with the effective date of 1/1/2009 and then you add the plan to an employee on 1/3/2009, the latest change to the amounts date will be 1/3/2009.
Reason for Change
The reason for the most recent changes to the amounts. This field is automatically populated from the benefit plan’s history record.
If you are using Abra Workforce Connections for benefits enrollment, the reason defaults to the description for the open enrollment period in which the employee enrolled in this plan, for example

Insurance Benefits
Employee Pages 23
Field Label
Field Description
Open Enrollment Spring 2009.
Date Eligible Enter the date the employee is eligible for this benefit.
Date Waived Enter the date the employee waived coverage, if applicable. When you enter a waive date, the employee and employer contributions are blank. When you execute the Update Benefits process, Abra HR does not calculate eligibility for employees who waived coverage.
Costs and Coverage The following fields appear on the Costs and Coverage tab.
Field Label Field Description
Calculate From Plan Rules
Select Yes if you want the system to calculate participation and contributions automatically from information you provide on the Benefit Insurance Plans setup page. Select No if you do not want the system to automatically update this benefit for this employee.
Coverage Amount This field contains the face value of the coverage, if applicable. For more information, see Set Up Benefits.
Coverage Amount Is For
This field indicates if the coverage amount applies to both the employees and their dependents, or to just the employee.
Total Dependent Coverage
The total coverage amount for all dependents covered by the plan.
Monthly Employee Premium
This field contains the monthly premium cost (including the employeeʹs contribution) the employer pays for the employeeʹs coverage under this benefit. This figure should reconcile with your insurance billing statement. For more information, see Set Up Benefits.
Monthly Dependent Premium
This field contains the monthly premium cost (including the employee’s contribution) paid for the dependents covered under this benefit. This figure should reconcile with your insurance billing statement.
The Covered Dependents tab lists the dependents covered under this benefit.
Employee Contribution
This field contains the employeeʹs contribution. This is the actual ʺout of pocketʺ amount the employee pays for this benefit. This field is not automatically linked to any Sage Abra SQL HRMS Payroll deductions.
Per This is the period for the Employee Contribution (payroll deduction) toward dependent premium.
Other Calculated This field contains a user‐defined calculated field originating from the insurance plan setup. For example, this field can be used to calculate the taxable wage amount for Excess Life Insurance.

Insurance Benefits
24 Sage Abra SQL HRMS
Field Label Field Description
Amount For more information, see Set Up Benefits.
Coverage Type Use this field to indicate information for which Abra HR should look when calculating rates of coverage. For more information, see Set Up Benefits.
Certificate Enter the insurance certificate or policy numbers.
Beneficiary Enter the employeeʹs beneficiary for this plan.
User Defined The User Defined tab provides four miscellaneous fields. Use these fields to indicate information for which Abra HR should look when calculating rates or coverage.
For more information, see Set Up Benefits.
For example, you could indicate seniority level, employee group or wellness evaluation categories (for employers that discount benefits for employees who have taken various risk assessments). You could also indicate seat belt usage or many other types of information not stored elsewhere in Abra HR that can make the insurance coverage, premium, or contribution vary. When you set up rate tables, they can refer to the contents of these fields.
Covered Dependents The Covered Dependents tab provides information about the dependents covered by the specific plan. Click Add to add a dependent to this benefit plan. A list of dependents will appear. These are the dependents you entered on the employee’s Dependents and Beneficiaries page who are not currently enrolled in the plan.
Note You can only add one dependent at a time to an insurance benefits plan.
When you add a dependent to the benefit plan, the dependent’s coverage will start and expire on the same dates as the employee’s coverage. However, you can specify a different coverage period for each dependent by clicking the More… button.
The Covered Dependents grid contains the following columns: Relation, Dependent Name, Age, Effective Date, Expiration Date, Coverage Amount, and Premium Amount.
Assign Beneficiaries The Assign Beneficiaries tab provides information about the beneficiaries that the employee has designated for this insurance plan.
1. Click Add. A list of dependents and beneficiaries opens. These are the dependents and beneficiaries you added on the Dependents and Beneficiaries page who are not currently assigned to this plan.
2. Select the dependent or beneficiary you want to assign and click OK. The first assigned beneficiary is automatically set as the primary with 100% distribution. All other beneficiaries are assigned as contingent. Click the More... button to make necessary changes.

Job History
Employee Pages 25
Job History Sage Abra SQL HRMS maintains an unlimited history of job, pay and performance, and leave of absence information for each employee in the enterprise.
Each time you terminate or rehire an employee or you change an employeeʹs job, pay, or leave of absence status, Sage Abra SQL HRMSrecords the change in the database. You can view these changes from the Job History page.
Note: Changes made to Sage Abra SQL HRMS will not affect Job History details.
Job The Job tab contains the following fields.
Field Label Field Description
Job Title Select a description of the current job.
Job Code Sage Abra SQL HRMS provides an abbreviated version of the job description after you enter the job title.
EEO Class Select a code for the standard EEO‐1 or EEO‐4 job classifications, generally used only if your organization files an EEO plan.
Job Group This is a breakdown of jobs within EEO Class.
Salary Grade This is the salary grade for the current job.
Exempt Status This field indicates whether the position is exempt or nonexempt.
Employee Status Select the employee status: Active, Terminated, LOA, Dependent (COBRA), or Not Employee.
Employee Type Select the employee type. For example, Regular Full Time, Regular Part Time, Seasonal, etc.
Salaried/Hourly This field indicates whether the employee is salaried or hourly to allow for differentiation beyond the exempt status.
Job Start Date Enter the date the job begins.
Change Reason Select the reason the employee is changing jobs.
Change Effective
Enter the date the job change date is effective.

Job History
26 Sage Abra SQL HRMS
Organization The following fields appear on the Organization tab of the Job History detail page.
Field Label Field Description
Organization Levels
These fields describe the organization levels of the employee. The field names appear as you defined them when you set up Organization Titles in the enterprise setup.
Supervisor Click the Find button and select the employeeʹs manager.
To remove a supervisor, click the Remove button.
Secondary Supervisor
If you are using Abra Workforce Connections, you can assign a secondary supervisor, for example, a line supervisor, to act on the employeeʹs approval requests and receive notifications and e‐mails when the employee updates personal information.
Click the Find button and select a secondary supervisor for the employee (can be the same as the Supervisor).
To remove a supervisor, click the Remove button.
Mail Stop Enter the employeeʹs mail stop location.
Pay and Performance The following fields appear on the Pay and Performance tab.
Field Label Field Description
Pay Effective Enter the date this pay became effective.
Unit Pay Rate Enter the amount the employee earns for each unit worked.
Pay Period Salary
Enter the total amount the employee earns for each pay period.
Hours/Units Enter the normal number of hours worked per payroll period. If the employer pays the employee by piece or by job, this field reflects the average number of units per payroll period.
Pay Frequency Select the payroll frequency for this employee.
Annual Pay Sage Abra SQL HRMScalculates this field based on the information you entered into the above fields.
Shift Indicate which shift the employee works. This field is optional.
Shift Premium Enter the pay premium for shift work.

Leave of Absence
Employee Pages 27
Field Label Field Description
Compa‐ratio
Sage Abra SQL HRMS calculates the compa‐ratio statistic.
The compa‐ratio is the employee’s percent‐of‐midpoint within a salary range. The formula for calculating compa‐ratio is:
compa‐ratio = employee’s salary / midpoint for salary grade * 100
Bonus Amount
Enter the bonus amount the employee receives, if applicable.
Last Review Enter the date of the last performance review.
Rating Enter the rating this employee received in the last review.
User Defined The User Defined tab has four user‐defined fields. You or your system administrator set up these fields on the HR Setup page to suit the special needs of your organization. Examples of field possibilities include uniform size, parking space allotment, or outside community involvement. Or, you might use these fields to record information about driverʹs licenses, security clearances, or the results of drug screenings.
Leave of Absence The Leave of Absence page contains all the necessary information to record employee leave information. If you also use Time Off, you can suspend benefit accruals while the employee is out on leave and then resume accruals when the employee returns to work.
Use the Assign Leave of Absence action to place an employee on leave. Similarly, use the Return From Leave of Absence action to return an employee from leave. Using the action maintains the history information and creates the appropriate absence transactions.
The Leave of Absence page shows all the leaves of absence entered for the employee. The Leave of Absence page contains the following tabs: Leave and FMLA Event.
Sage Abra SQL HRMS records the Employee Status and Employee Type information you enter here on the employee’s Current Job page. When you change these fields, the system also enables you to add a job history record to the employee’s Job History page.

Leave of Absence
28 Sage Abra SQL HRMS
Leave The following fields appear on the Leave tab.
Field Label
Field Description
Request Date Enter the date the employee requested the leave of absence. Todayʹs date is the default.
Start Date Enter the date the leave of absence begins. Todayʹs date is the default.
Scheduled Return
Enter the date the employee expects to return from the leave of absence.
Actual Return
Enter the actual date the employee returned from the leave of absence. Leave this field blank until the employeeʹs actual return.
Hours Away
Enter the number of hours (days) the employee remained on leave of absence.
Employee Status
This indicates the current status of the employee. The status changes to LOA when you place an employee on leave, but you can change it as necessary. Sage Abra SQL HRMS records this on the employee’s Current Job page.
Employee Type
Enter the current job type for the employee you place on leave. Sage Abra SQL HRMS records the type on the employee’s Current Job page.
Leave Reason
Enter the reason the employee is taking a leave of absence. If you view the Change Reason on the Job History page, the code will not necessarily match the Leave Reason. For the codes to match, select Add New Code in the Change Reason drop‐down list, to add the appropriate code on the Job History page.
Continued Seniority
Indicate whether or not the employeeʹs seniority continues to accrue during the leave of absence. Select Yes or No.
Leave Type Select the leave of absence category. Choose Regular, FMLA‐F (Family), or FMLA‐M (Medical).
COBRA Coverage
Select the employee’s COBRA benefits during the leave of absence. COBRA Coverage applies to Regular leave only.

Leave of Absence
Employee Pages 29
FMLA Event The Family Medical Leave Act (FMLA) requires employers to provide and administer up to 12 unpaid work weeks during any 12 month period for qualifying events and eligible employees. For eligible employees that request and receive an FMLA leave of absence, Abra HR enables you to record and track the leave information.
The FMLA Event tab of the Leave of Absence page contains the FMLA fields. These fields do not apply if you select Regular as the Leave Type.
Field Label Field Description
Reason Select the reason for the FMLA leave.
Event Date Enter the date the event occurred that caused the FMLA leave. Today’s date is the default.
Medical Certification
For FMLA‐Medical leave, enter the date the employee provided the original medical certification to go on leave. This field applies to FMLA‐Medical leave only.
Medical Recertification
For FMLA‐Medical leave, enter the date the employee provided the medical re‐certification to continue on leave. This field applies to FMLA‐Medical leave only.
Person Name For FMLA‐Family leave, enter the name of the family member for whom the employee requests an FMLA leave. This field applies to FMLA‐Family leave only.
Relationship For FMLA‐Family leave, enter the family member’s relationship to the employee. Select from the list. This field applies to FMLA‐Family leave only.
Notes Enter any comments you have about this employee’s leave of absence.
To Record Partial FMLA Leave Normally, an employee is on FMLA leave for a specific period of time from the Leave Start date to the Actual Return date. However, there might be situations when an employee needs FMLA leave time for staggered absences. For example, an employee must accompany a relative for physical therapy treatment two hours a day, three days a week. In this case, the employee requests FMLA leave while maintaining an Active status within the company.
In the Employee Status field on the Leave of Absence page, ensure the selection is Active and not LOA (Leave Of Absence). Also, do not change the Employee Type field to Leave of Absence. This ensures the employee is still active and the leave does not affect the employee’s job history.

OSHA
30 Sage Abra SQL HRMS
OSHA You can use the Occupational Safety and Health Act (OSHA) page to track and maintain any workplace accidents or injuries for OSHA regulations and reporting. You can also maintain information for filing workersʹ compensation claims for related incidents.
Note: It is your responsibility to comply with state and national regulations for OSHA reporting and workersʹ compensation requirements.
For each incident, the OSHA page shows the applicable date, case number, type of injury, whether this incident is reportable, whether this incident is a privacy case and description of the injury.
The OSHA detail page has five tabs:
Case The Case tab contains the following fields.
Field Label Field Description
Case When you add an incident, Sage Abra SQL HRMS automatically assigns the next available case number in the Case field. If necessary, you can change the default.
Type Select the type of injury.
Injury Description Select a description for the injury.
Reportable Indicate whether or not this incident is considered reportable to OHSA.
Privacy Case Indicate whether or not this incident is a privacy case.
Classification Select a classification for the injury.
Severity Select the severity of the injury.
Fatal / Date of Death
Indicate whether or not the injury was fatal. If the employee died as a result of the incident, enter the date of death.
Incident Date / Time
Enter the date and time the incident occurred.
Notified Date / Time
Enter the date and time the employee notified your employer about the incident.
OSHA
Employee Pages 31
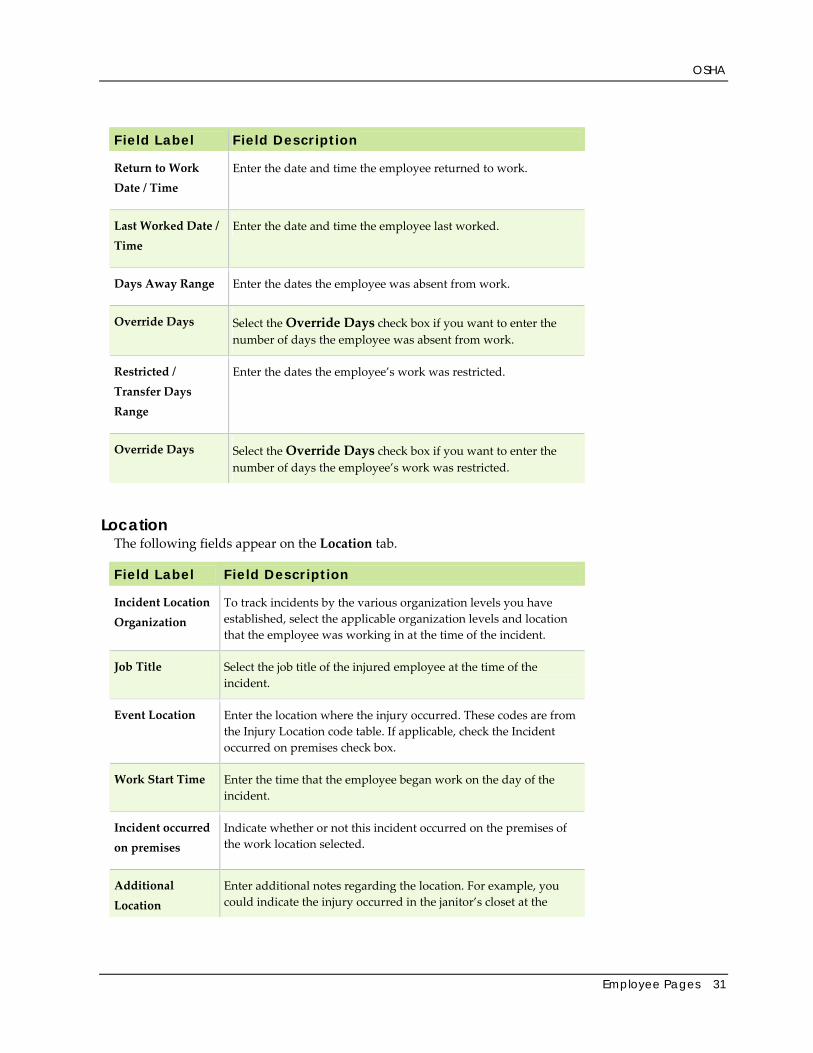
Field Label Field Description
Return to Work Date / Time
Enter the date and time the employee returned to work.
Last Worked Date / Time
Enter the date and time the employee last worked.
Days Away Range Enter the dates the employee was absent from work.
Override Days Select the Override Days check box if you want to enter the number of days the employee was absent from work.
Restricted / Transfer Days Range
Enter the dates the employee’s work was restricted.
Override Days Select the Override Days check box if you want to enter the number of days the employee’s work was restricted.
Location The following fields appear on the Location tab.
Field Label Field Description
Incident Location Organization
To track incidents by the various organization levels you have established, select the applicable organization levels and location that the employee was working in at the time of the incident.
Job Title Select the job title of the injured employee at the time of the incident.
Event Location Enter the location where the injury occurred. These codes are from the Injury Location code table. If applicable, check the Incident occurred on premises check box.
Work Start Time Enter the time that the employee began work on the day of the incident.
Incident occurred on premises
Indicate whether or not this incident occurred on the premises of the work location selected.
Additional Location
Enter additional notes regarding the location. For example, you could indicate the injury occurred in the janitor’s closet at the
OSHA
32 Sage Abra SQL HRMS
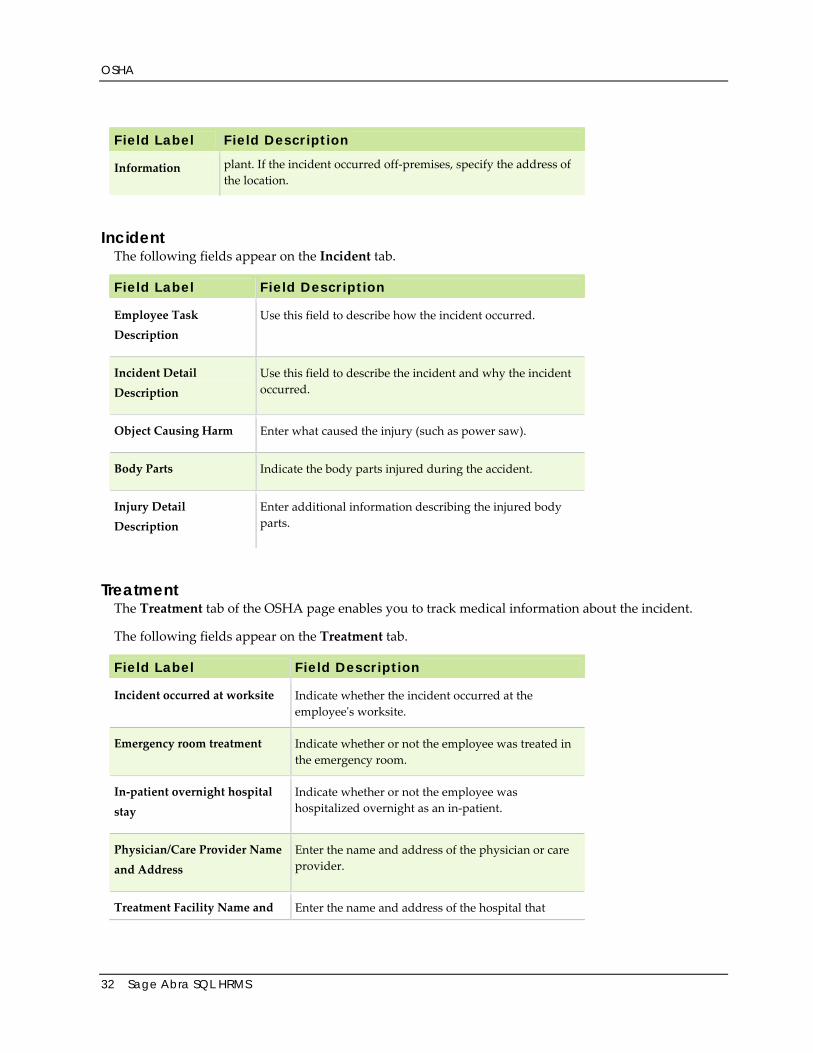
Field Label Field Description
Information plant. If the incident occurred off‐premises, specify the address of the location.
Incident The following fields appear on the Incident tab.
Field Label Field Description
Employee Task Description
Use this field to describe how the incident occurred.
Incident Detail Description
Use this field to describe the incident and why the incident occurred.
Object Causing Harm Enter what caused the injury (such as power saw).
Body Parts Indicate the body parts injured during the accident.
Injury Detail Description
Enter additional information describing the injured body parts.
Treatment The Treatment tab of the OSHA page enables you to track medical information about the incident.
The following fields appear on the Treatment tab.
Field Label Field Description
Incident occurred at worksite Indicate whether the incident occurred at the employeeʹs worksite.
Emergency room treatment Indicate whether or not the employee was treated in the emergency room.
In‐patient overnight hospital stay
Indicate whether or not the employee was hospitalized overnight as an in‐patient.
Physician/Care Provider Name and Address
Enter the name and address of the physician or care provider.
Treatment Facility Name and Enter the name and address of the hospital that

OSHA
Employee Pages 33
Field Label Field Description
Address provided care.
Facility Phone Enter the treatment facility telephone number.
Report Date Enter a report date for the OSHA report.
Filed By Enter the person who filed and prepared the report.
Position Enter the position of the person who prepared the report.
Phone Enter the phone number of the person who prepared the report.
Physician Notes Use the field to enter additional information about the incident.
Treatment Facility Notes Use the field to enter additional information about the incident.
Workers' Compensation The following fields appear on the Workersʹ Compensation tab.
Field Label Field Description
Claim Number Enter the workersʹ compensation claim number.
Filed Enter the date the workersʹ compensation claim is filed.
Closed Enter the date the workersʹ compensation claim is closed.
Lost Time Cost Use this field to track the costs associated with time lost.
Medical Costs Use this field to track medical costs.
Personal Information
34 Sage Abra SQL HRMS
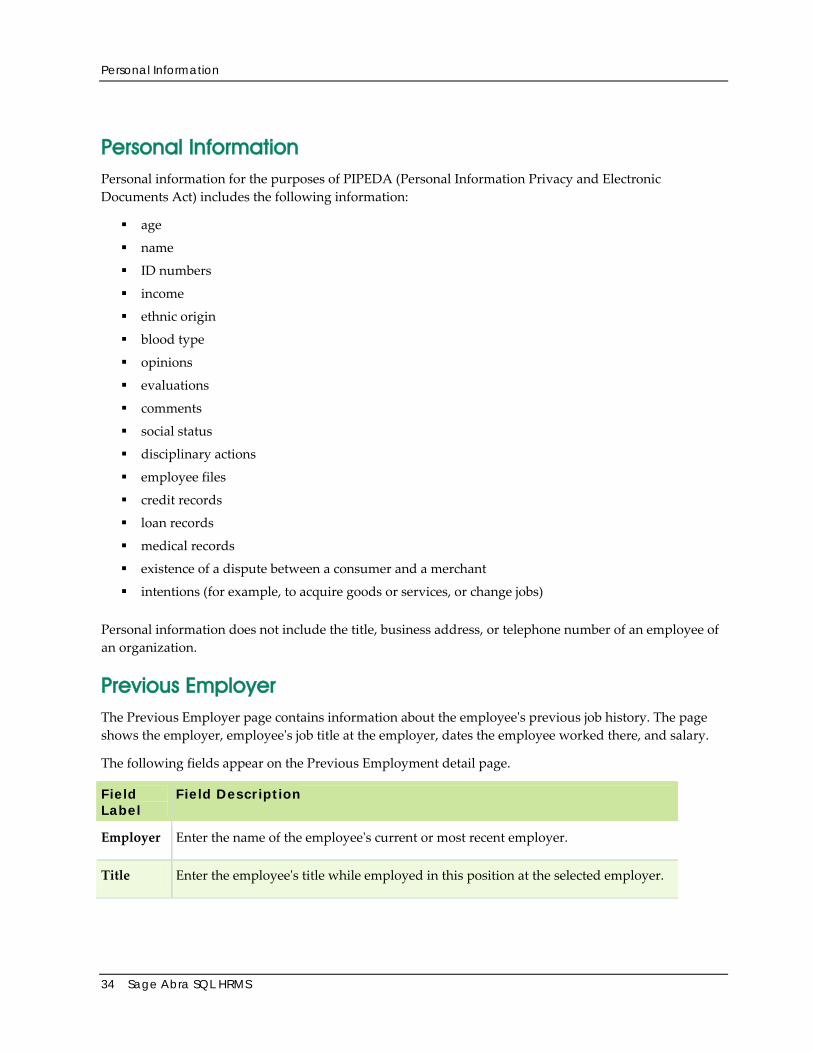
Personal Information Personal information for the purposes of PIPEDA (Personal Information Privacy and Electronic Documents Act) includes the following information:
age
name
ID numbers
income
ethnic origin
blood type
opinions
evaluations
comments
social status
disciplinary actions
employee files
credit records
loan records
medical records
existence of a dispute between a consumer and a merchant
intentions (for example, to acquire goods or services, or change jobs)
Personal information does not include the title, business address, or telephone number of an employee of an organization.
Previous Employer The Previous Employer page contains information about the employeeʹs previous job history. The page shows the employer, employeeʹs job title at the employer, dates the employee worked there, and salary.
The following fields appear on the Previous Employment detail page.
Field Label
Field Description
Employer Enter the name of the employeeʹs current or most recent employer.
Title Enter the employeeʹs title while employed in this position at the selected employer.
Savings Benefits
Employee Pages 35
Field Label
Field Description
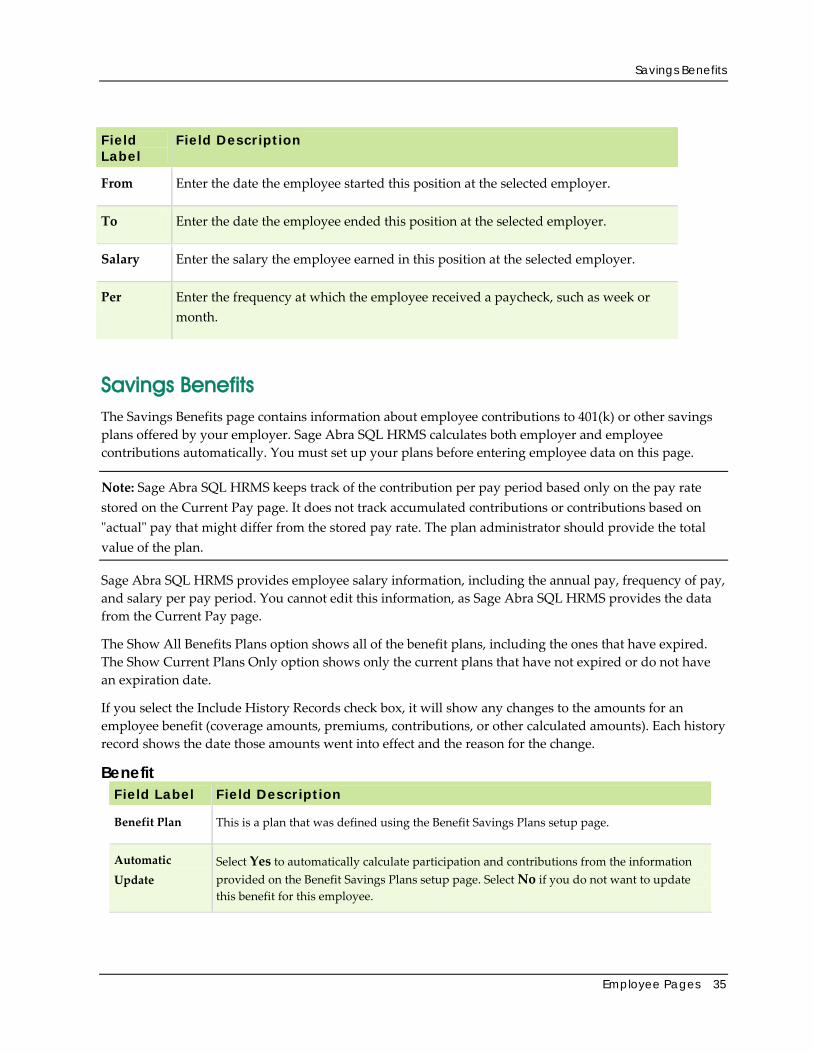
From Enter the date the employee started this position at the selected employer.
To Enter the date the employee ended this position at the selected employer.
Salary Enter the salary the employee earned in this position at the selected employer.
Per Enter the frequency at which the employee received a paycheck, such as week or month.
Savings Benefits The Savings Benefits page contains information about employee contributions to 401(k) or other savings plans offered by your employer. Sage Abra SQL HRMS calculates both employer and employee contributions automatically. You must set up your plans before entering employee data on this page.
Note: Sage Abra SQL HRMS keeps track of the contribution per pay period based only on the pay rate stored on the Current Pay page. It does not track accumulated contributions or contributions based on ʺactualʺ pay that might differ from the stored pay rate. The plan administrator should provide the total value of the plan.
Sage Abra SQL HRMS provides employee salary information, including the annual pay, frequency of pay, and salary per pay period. You cannot edit this information, as Sage Abra SQL HRMS provides the data from the Current Pay page.
The Show All Benefits Plans option shows all of the benefit plans, including the ones that have expired. The Show Current Plans Only option shows only the current plans that have not expired or do not have an expiration date.
If you select the Include History Records check box, it will show any changes to the amounts for an employee benefit (coverage amounts, premiums, contributions, or other calculated amounts). Each history record shows the date those amounts went into effect and the reason for the change.
Benefit Field Label Field Description
Benefit Plan This is a plan that was defined using the Benefit Savings Plans setup page.
Automatic Update
Select Yes to automatically calculate participation and contributions from the information provided on the Benefit Savings Plans setup page. Select No if you do not want to update this benefit for this employee.
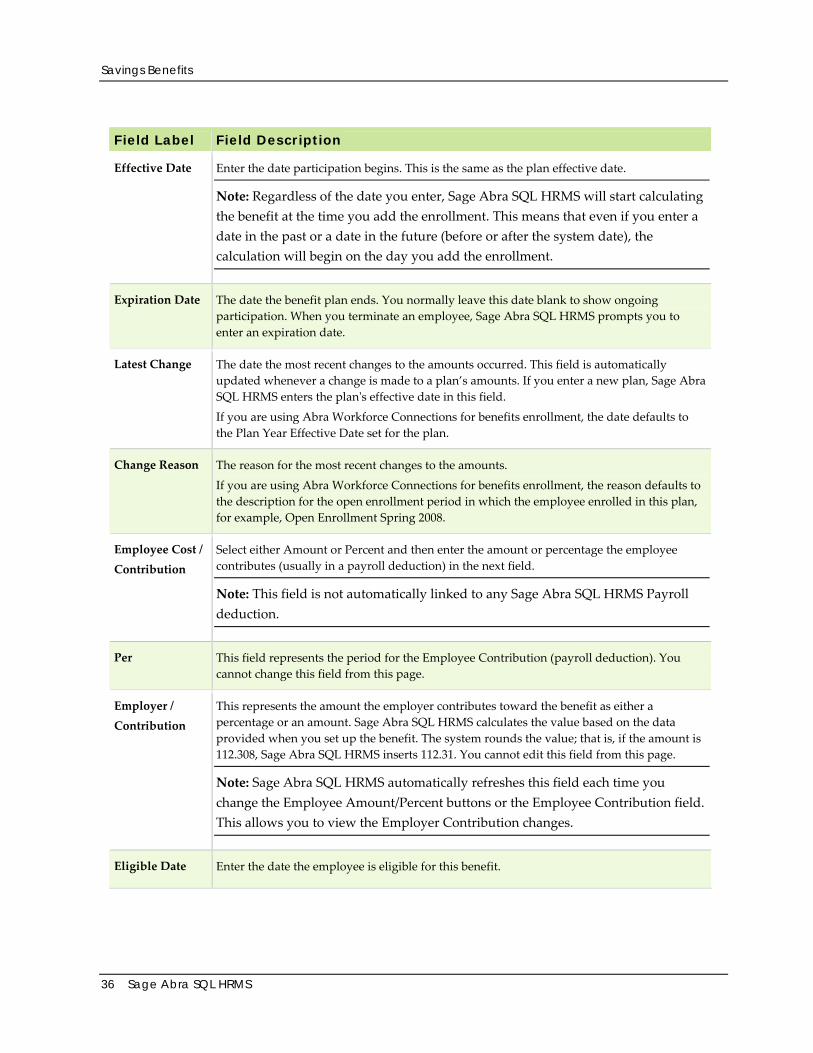
Savings Benefits
36 Sage Abra SQL HRMS
Field Label Field Description
Effective Date Enter the date participation begins. This is the same as the plan effective date.
Note: Regardless of the date you enter, Sage Abra SQL HRMS will start calculating the benefit at the time you add the enrollment. This means that even if you enter a date in the past or a date in the future (before or after the system date), the calculation will begin on the day you add the enrollment.
Expiration Date The date the benefit plan ends. You normally leave this date blank to show ongoing participation. When you terminate an employee, Sage Abra SQL HRMS prompts you to enter an expiration date.
Latest Change The date the most recent changes to the amounts occurred. This field is automatically updated whenever a change is made to a plan’s amounts. If you enter a new plan, Sage Abra SQL HRMS enters the planʹs effective date in this field.
If you are using Abra Workforce Connections for benefits enrollment, the date defaults to the Plan Year Effective Date set for the plan.
Change Reason The reason for the most recent changes to the amounts.
If you are using Abra Workforce Connections for benefits enrollment, the reason defaults to the description for the open enrollment period in which the employee enrolled in this plan, for example, Open Enrollment Spring 2008.
Employee Cost / Contribution
Select either Amount or Percent and then enter the amount or percentage the employee contributes (usually in a payroll deduction) in the next field.
Note: This field is not automatically linked to any Sage Abra SQL HRMS Payroll deduction.
Per This field represents the period for the Employee Contribution (payroll deduction). You cannot change this field from this page.
Employer / Contribution
This represents the amount the employer contributes toward the benefit as either a percentage or an amount. Sage Abra SQL HRMS calculates the value based on the data provided when you set up the benefit. The system rounds the value; that is, if the amount is 112.308, Sage Abra SQL HRMS inserts 112.31. You cannot edit this field from this page.
Note: Sage Abra SQL HRMS automatically refreshes this field each time you change the Employee Amount/Percent buttons or the Employee Contribution field. This allows you to view the Employer Contribution changes.
Eligible Date Enter the date the employee is eligible for this benefit.

Skills
Employee Pages 37
Field Label Field Description
Waive Date Enter the date the employee waived coverage for this benefit, if applicable. When you enter a waive date, the employee and employer contributions are blank. When you run the Update Benefit Calculations process, Sage Abra SQL HRMS does not calculate eligibility for employees who waived coverage.
User Defined The User Defined tab of the Savings Benefits page provides four miscellaneous fields. Use these fields to indicate information for which Sage Abra SQL HRMS should look when calculating percentages, rates or coverage.
For example, for savings plans, you could indicate matching percentage by contribution or other types of information not stored elsewhere in Sage Abra SQL HRMS. When you set up Rate Tables, they can refer to the contents of these fields.
Assign Beneficiaries The Assign Beneficiaries tab provides information about the beneficiaries that the employee has designated for this savings plan.
To assign a beneficiary:
1. Click Add. A list of dependents and beneficiaries opens. These are the dependents and beneficiaries you added on the Dependents and Beneficiaries page who are not currently assigned to this plan.
2. Select the dependent/beneficiary you want to assign and click OK. The first assigned beneficiary is automatically set as the primary with 100% distribution. All other beneficiaries are assigned as contingent. Click the More... button to make necessary changes.
Skills The Skills page lists the skills and number of years experience for an employee.
Field Label Field Description
Skill Description
Select a skill description or click Add New Code to enter a full description of the skill.
Code This is the code for an employeeʹs skill. You can only view this field; you cannot change it.
Years Experience
This is the years of experience in the skill.
Comments Enter any comments.

Termination
38 Sage Abra SQL HRMS
Note: This page allows duplicate records to be entered. If you are also using Abra Workforce Connections, duplicate skill records (both the original and the duplicate) will not display on the Skills page. If duplicate records exist, the employee receives a message on their Skills page to contact the Human Resources department for assistance.
Termination The Termination page contains data pertaining to the employeeʹs termination from the company, including termination date and reason, forwarding address, and COBRA indicator.
Termination Data Field Label Field Description
Termination Date Enter the date you terminated the employee.
Employee Type Select the category of employee.
Termination Type Select the type of termination.
Termination Reason Select the reason for the termination.
COBRA Code Indicate whether employee is receiving COBRA benefits.
Rehire Indicate whether employee is eligible for rehire.
Notes Enter any comments you might have about the employeeʹs termination.
Forwarding Address Use the fields on this tab to enter the employee’s forwarding address, including street, city, state, ZIP code, county, and country.
Note: If changes to the Termination Forwarding Address fields are made, they are automatically updated in the Alternative Address fields in Sage Abra SQL HRMS.
Field Label Field Description
Street 1 First line of address to send employee correspondence.
Note: You must enter a Street 1 address to satisfy W‐2 file requirements. If you do not, your W‐2 magnetic media file will contain a blank record (on the 1W line) which will
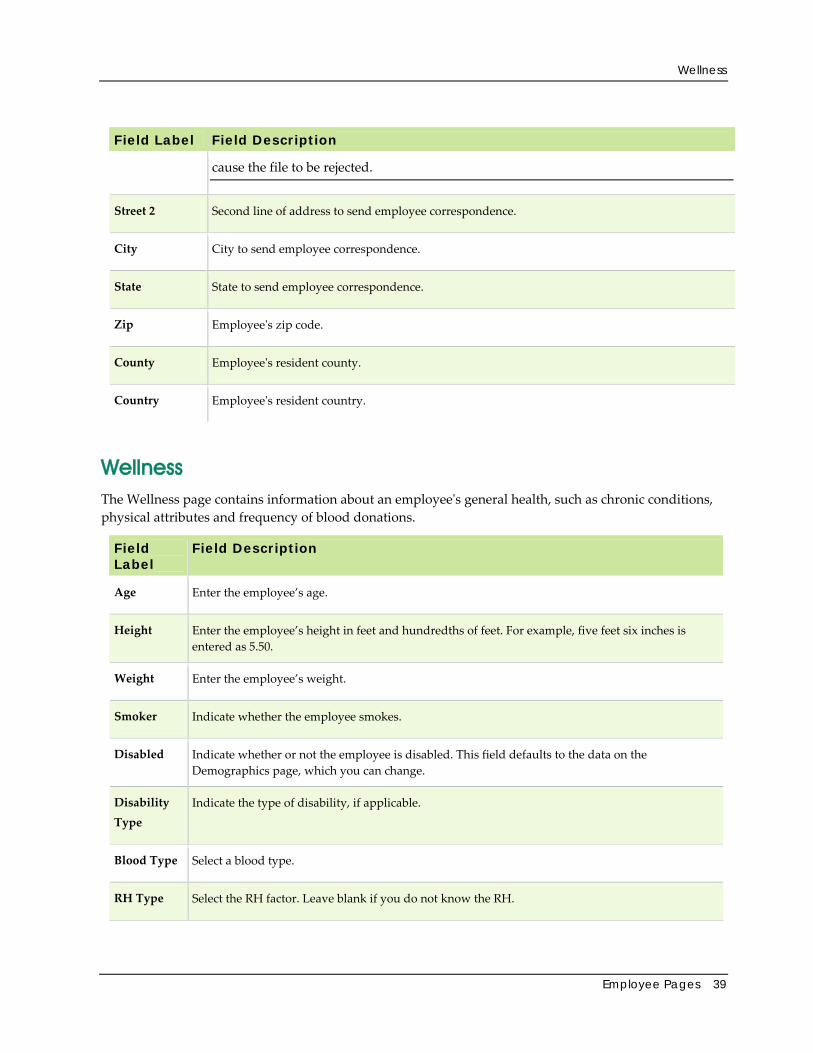
Wellness
Employee Pages 39
Field Label Field Description
cause the file to be rejected.
Street 2 Second line of address to send employee correspondence.
City City to send employee correspondence.
State State to send employee correspondence.
Zip Employeeʹs zip code.
County Employeeʹs resident county.
Country Employeeʹs resident country.
Wellness The Wellness page contains information about an employeeʹs general health, such as chronic conditions, physical attributes and frequency of blood donations.
Field Label
Field Description
Age Enter the employee’s age.
Height Enter the employee’s height in feet and hundredths of feet. For example, five feet six inches is entered as 5.50.
Weight Enter the employee’s weight.
Smoker Indicate whether the employee smokes.
Disabled Indicate whether or not the employee is disabled. This field defaults to the data on the Demographics page, which you can change.
Disability Type
Indicate the type of disability, if applicable.
Blood Type Select a blood type.
RH Type Select the RH factor. Leave blank if you do not know the RH.

Wellness
40 Sage Abra SQL HRMS
Field Label
Field Description
Last Donation
Enter the date of the last blood donation.
Next Eligible
Indicates the next date the employee can donate blood. Sage Abra SQL HRMS calculates the date as 56 days from the last donation date.
Conditions Use the fields on the Conditions tab to enter up to three chronic conditions, three allergies and three types of wellness programs in which the employee participates.
Physical Exam The Physical Exam tab of the Wellness page helps you track information about an employee’s pre‐employment and subsequent physicals.
The following fields appear on the Physical Exam tab.
Field Label Field Description
Post‐Offer Physical
Enter the date the employee received the pre‐employment physical.
Comments Indicate any comments or information about the physical.
Restrictions If the employee has any physical restrictions as a result of this physical, enter these in the restrictions field.
Last Physical Enter the date of the last physical exam.
Type Enter the type of the last physical exam.
Reason Indicate the reason for the last physical exam.
Result Enter the result of the last physical exam.
Next Physical Enter the date for the next physical exam.
Type Enter the type of the scheduled exam.
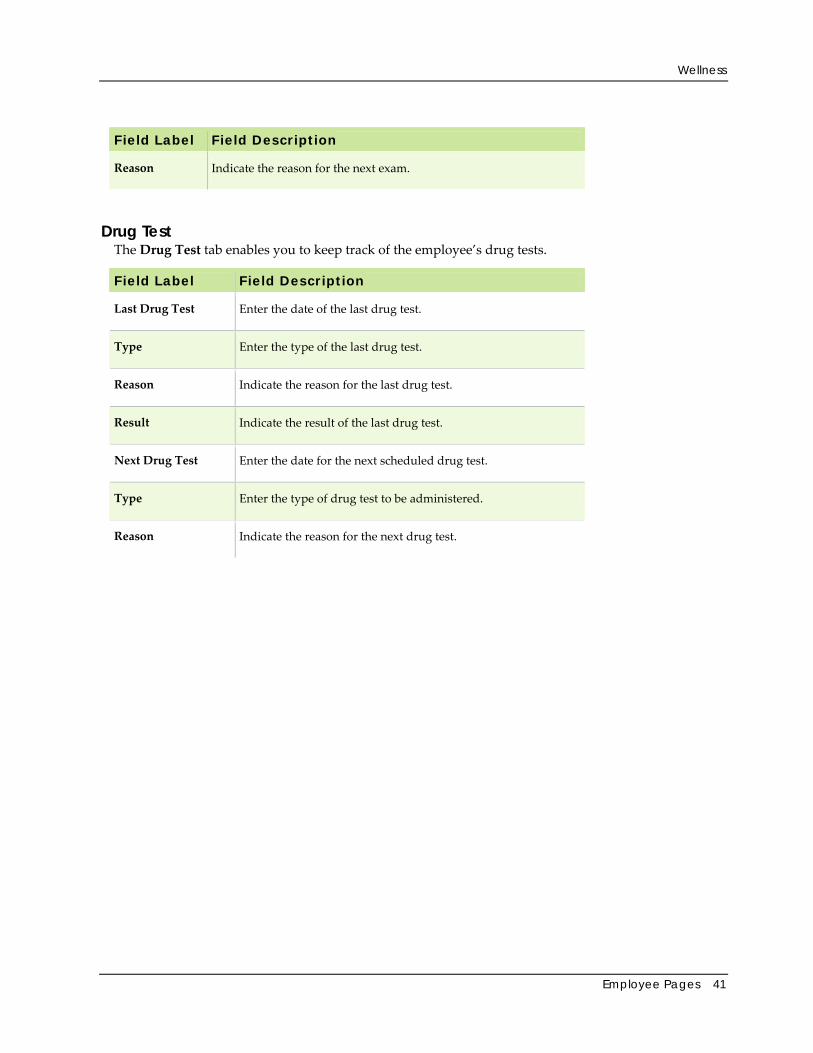
Wellness
Employee Pages 41
Field Label Field Description
Reason Indicate the reason for the next exam.
Drug Test The Drug Test tab enables you to keep track of the employee’s drug tests.
Field Label Field Description
Last Drug Test Enter the date of the last drug test.
Type Enter the type of the last drug test.
Reason Indicate the reason for the last drug test.
Result Indicate the result of the last drug test.
Next Drug Test Enter the date for the next scheduled drug test.
Type Enter the type of drug test to be administered.
Reason Indicate the reason for the next drug test.

Wellness
42 Sage Abra SQL HRMS

Add New Employee
Employee Pages 43
Employee Tasks Add New Employee When you finish entering information for the new employee, you can click Add to add the employee to the database. If you have forgotten to enter information in any required fields, Sage Abra SQL HRMS will notify you and automatically highlight the field so you can add the information. After the system has successfully added the employee to the database, the fields clear in the Add New Employee page so you can add another employee.
Use Add if you want to quickly add the employee to the database and bypass the steps normally presented when you use the Record New Hire action.
If you want to stop the Record New Hire action while you are entering information on the Add New Employee page, click Cancel. When the system asks whether or not you want to save your changes, click No. All your changes will be discarded and you will be returned to the Activity Center.
The Add New Employee page contains two tabs on which to enter employee information:
New Employee Tab The following table describes the fields on the New Employee tab.
Field Label Field Description
First, Middle, Last Name
Enter the employee’s name using upper and lower‐case letters. If the name includes a suffix, such as ʺJones, Jr.ʺ or ʺCarrington, III,ʺ include the appropriate punctuation in the Last Name field. The Last Name is required.
Social Security Enter the employee’s Social Security Number (SSN). If you begin the number with 8 or 9, Abra HR reminds you that it might not be valid.
The SSN is required. If you do not know the employeeʹs SSN, enter 000‐00‐0000 in order to add the employee. When you get the correct SSN, enter the number on the Personal tab of the employeeʹs Demographics page.
Employer Name
The name of the employer. The list includes all the employers you have set up in your Enterprise.
The Employer Name is a required field.
Employee ID The employee’s ID number. If you set up Abra HR to automatically provide the next available numeric employee ID, the next available numeric ID is assigned. You can accept the default or enter a new one. The Employee ID is required. Note If you are also using Payroll, you must only use numeric or alphanumeric IDs. Special characters in Employee IDs are not permitted.
Street 1 and The first and second line of the employee’s home street address.

Add New Employee
44 Sage Abra SQL HRMS
Field Label Field Description
Street 2
City The employee’s home city.
State The employee’s home state. The State is required. Note The list of states is available only after you select the Employer Name.
Zip The employee’s zip code.
County The employee’s home county.
Country The employee’s home country.
Job and Pay Tab The following table describes the fields on the Job and Pay tab.
Field Label Field Description
Hire Date The date the employee was hired. It defaults to today’s date.
Start Date The date the employee started employment. It defaults to today’s date.
Job Title A description of the job. If you enabled job code validation during setup, select from the list of job titles. Otherwise, enter a job title.
Job Code The code that corresponds to the selected Job Title. If you enabled job code validation during setup, Abra HR automatically provides the job code when you select the job title.
Supervisor Click the Find button and select the employeeʹs manager.
To remove a supervisor, click the Remove button.
Secondary Supervisor
If you are using Abra Workforce Connections, you can assign a secondary supervisor, for example, a line supervisor, to act on the employeeʹs approval requests and receive notifications and e‐mails when the employee updates personal information.
Click the Find button and select a secondary supervisor for the employee (can be the same as the Supervisor).
To remove a supervisor, click the Remove button.
Unit Pay Rate The amount the employee earns for each unit worked. This could be an amount per hour or per unit (piece or job).

Change Job
Employee Pages 45
Field Label Field Description
Pay Period Salary The total amount the employee earns for each pay period. It is automatically calculated from the Unit Pay Rate and the Pay Frequency.
Hours/Units The normal number of hours worked per payroll period. If the employee is paid by piece or by job, this field reflects the average number of units (pieces or jobs) per payroll period. This defaults from the information you provided when you set up the employer.
Pay Frequency How often the employee is paid. This defaults from the information you provided when you set up the employer.
Annual Pay The total annual pay for the employee. It is automatically calculated.
Payroll Status Select the employee’s payroll status; Active, Inactive, or Terminated.
Salaried/Hourly Choose from the drop‐down list if the new employee is salaried or hourly.
If you are using Abra eRecruiter, click the Applicant Search button to search for an external applicant by name or ID. When you select an applicant, the system automatically transfers all available information, from personal information to previous employers. If you are working with internal applicants, you must enter updated personal and job information manually if the employee is selected for another job.
Change Job Sage Abra SQL HRMS lets you transfer an employee from one organization level to another within a selected employer. The organization can consist of up to five levels or groups of employees. You or your system administrator initially set up your employerʹs organization levels when you first set up your system.
For example, an employee might be transferring from the sales department to the marketing department within the same employer. The Change Job action gives you the ability to move the employee from sales to marketing.
To Change an Employee's Organization
1. From the Navigation Pane, select Employees > Tasks > Change Job .
2. Select the employee.
3. On the Job tab select the reason for the change from the Change Reason drop‐down list. The Change Effective Date defaults to todayʹs date. If necessary, make any other changes.
4. Click the Organization tab to view the organization levels. Use the drop‐down lists to select the correct levels. If applicable, enter the new Mail Stop and Supervisor Name.
5. Click the Secondary Job tab to view the employeeʹs secondary job information.

Change Employee ID
46 Sage Abra SQL HRMS
6. When you finish changing information on the Review Job Information page, click OK to save the changes.
7. If you are using Abra HR, you will receive a message. Click Yes to create a Job History record to document the change.
Change Employee ID Sage Abra SQL HRMS lets you assign a new identification number (ID) to an employee. Use the Change Employee ID action to perform this task.
Note: After you change an employee ID, you can re‐use the former ID for a different employee.
If you are also using Abra Workforce Connections:
You should never change the ID for an employee who is currently working in an open enrollment or life event, or if they are associated with an open enrollment or life event that has not yet been transferred to Abra HR.
If the employee has an existing logon to Abra Workforce Connections, you must delete the employeeʹs logon before you change the employeeʹs ID.
If employee IDs are in alphanumeric format and you change them to numeric format, existing logons in Abra Workforce Connections will no longer be available. You must either change the employee IDs back to their original format or, in Abra Workforce Connections, create new logons for the employees and reassign them to their administrator roles, if applicable.
If you are also using Payroll
The Change Employee ID task is not available when Payroll (U.S. or Canadian) is installed on the system.
To Change an Employee ID
1. From the Navigation Pane, select Employees > Tasks > Change Employee ID.
2. Find the employee whose ID you want to change then click OK to open the Change ID dialog box.
3. Enter the new employee ID and click OK. The system verifies the number is not already in use. If the system finds no duplicate number, Sage Abra SQL HRMS changes the employeeʹs ID. Otherwise, the system asks that you choose another employee ID.
Change Personal Status Many different circumstances can cause a change in an employee’s personal status, such as a marriage, a divorce, an address change, or a new dependent. These circumstances require you to change an employee’s record using the Change Personal Status action.

Change Personal Status
Employee Pages 47
To Change an Employee's Personal Status
1. From the Navigation Pane, select Employees > Tasks > Change Personal Status.
2. Select the employee whose status you are changing. The steps page opens and lists the steps for changing an employeeʹs personal status.
3. Check the steps you want to complete. Complete each step now or schedule steps for yourself or another user to do later.
4. Click OK to start moving through the steps.
The degree of an employee’s personal status changes depends on the nature of the change. For example, if only the employee’s address changed, the only step you must complete is the Marital Status/Address Change step. However, if an employee gets married (which normally requires a benefit update), you must complete the Marital Status/Address Change and Update Benefit Selection steps.
Steps for Changing an Employee's Personal Status
Marital Status/Address Change The information on the Marital Status/Address Change page is identical to the information on the Demographics page.
Review the employeeʹs address and make changes as necessary. Locate the Marital Status field on the Personal tab and select Divorced, Domestic Partnership, Married, Other, Single, or Widowed. Click Continue to move to your next scheduled step.
Dependents The Dependents and Beneficiaries page stores information about an employeeʹs dependents and beneficiaries and their benefit information. Sage Abra SQL HRMS lists all of the employee’s dependents on the Dependents and Beneficiaries page.
Add, edit, or delete dependentsʹ information as necessary. When you finish viewing the employee’s dependents, click Continue to move to the next step.
Note: To prevent you from deleting a dependent or beneficiary when an open enrollment or life event is active in AWC an in use flag (Hrpersnl.p_awcinuse) was created in the hrpersnl database . If you try to delete a dependent or beneficiary with an open enrollment or life event an error message will appear.
Tax Withholding The Tax Withholding page contains information about the employeeʹs tax status, W‐2 information, and tax codes. You can also indicate whether to withhold taxes in several withholding categories. To change the priority in which the employee’s taxes are withheld, click the Withholding Priorities button and change the order of the withholdings or deductions.
Add, edit, or delete information as necessary. Click Continue to move to your next scheduled step.
Update Benefit Selection
Delete Employee Record
48 Sage Abra SQL HRMS
The Update Benefit Selection step enables you update the savings plans and insurance plans in which the employee participates. The Savings Benefits page is the first page in the Update Benefit Selection step.
When you finish working with the employeeʹs savings plans, click Continue to access the Insurance Benefits page. This page lists all the insurance plans in which the employee participates.
When you finish reviewing and updating the employeeʹs insurance plans, click Continue.
Delete Employee Record You can remove an employee from the Sage Abra SQL HRMS databases, including all information associated with the employee. Because employee deletion is irreversible, use extreme care when you perform this action.
We suggest you remove active employees from your database only if you make a serious error. For example, perhaps you entered the same employee information into the system twice under different employee numbers. Use the Delete Employee Record to remove the duplicate record.
Instead of deleting an employee record, you might want to terminate and then archive the employee instead.
Points to Consider Before Deleting an Employee
When you delete an employee, all information in the employee’s record is deleted and cannot be retrieved.
You cannot delete an employee if they are defined as being eligible for an employer‐sponsored retirement plan. If you need to delete an employee in this situation, go to the employee’s Tax Withholdings page and select No for the Pension Plan field. Then proceed with this action.
If you are using Abra HR, you will receive a warning if the employee you are deleting has unexpired benefits. You might want to run the Benefit Coverage by Employee report, to review the employeeʹs benefit enrollments before deleting the employeeʹs record.
If you are using Abra Workforce Connections and the employee has an existing logon to Abra Workforce Connections, you must delete the employeeʹs logon before you delete the employeeʹs record.
If you are using Abra Workforce Connections, you should never delete an employee who is currently enrolling in open enrollment or a life event, or who is associated with an open enrollment or life event that has not yet been transferred to Abra HR.
To Delete an Employee's Record
1. From the Navigation Pane, select Employees > Tasks > Delete Employee Record.
2. Find the employee you want to delete. The Delete Employee Record dialog box opens and shows you the employeeʹs name, employer, employee ID, and status.

Change Job and Pay
Employee Pages 49
3. Click OK to confirm this is the employee you want to delete. Otherwise, click Cancel. Sage Abra SQL HRMS warns you if the employee has unexpired benefits and asks you to confirm the deletion.
4. Click Yes to confirm the deletion, or click No to stop the action. As the action proceeds, Sage Abra SQL HRMS shows you the records as the system deletes them. When all records are deleted, the action ends. If you are also using Abra Workforce Connections and the employee has an existing logon, you will receive a warning that you must delete the logon before you can change the employeeʹs ID.
Change Job and Pay Abra HR provides the Change Job and Pay action for you to record employee job promotions. When you record an employee’s job promotion, you must record information such as the date and the reason for the promotion, the new salary, the increase in salary and any applicable organization level and employment status changes.
To Record a Job Promotion
1. From the Navigation Pane, select Employees > Tasks > Change Job and Pay.
Note: If you are promoting an employee who applied to the position in Abra eRecruiter, select the Applicant check box. This will show only those employees who have accepted offers in their current employer.
2. Select the employee (or applicant) you want to promote. The steps page opens and lists the steps for recording a job promotion.
3. Check the steps you want to complete. Complete each step now or schedule steps for yourself or another user to do later. Note that Pay andPerformance Review is a required step.
4. Click OK to start moving through the steps.
Steps for recording a job promotion
Pay and Performance Review The Pay and Performance Review page stores the employeeʹs current pay, the pay change, the performance, and any miscellaneous information.
When you finish entering information on this page, click OK to proceed to the next step in this action.

Pay and Performance Review
50 Sage Abra SQL HRMS
Job Change The Job Change page enables you to record the changes in the employeeʹs employment status, current job, and organization levels. You can also enter the effective date and reason for the job change. This page is identical to the Current Job page.
Review the information on this page. Select a job change reason from the drop‐down list. If any information about a secondary job applies to this employee, click the Secondary Job tab and make the applicable changes.
Click OK to close the page and complete the action.
Pay and Performance Review From time to time you conduct pay and performance reviews of employees. The Pay and Performance Review action enables you record the outcome of your employeesʹ performance reviews. You might also want to record a job change if that is the reason for the review.
To Record a Pay and Performance Review
1. From the Navigation Pane, select Employees > Tasks > Change Pay.
2. Select the employee whose information you are entering and click OK to open the Pay and Performance Review page.
3. Enter or edit the current pay and performance review information, as described in the following tables. When you finish, click OK to close the page and complete the action.
Pay Change Tab The following fields appear on the Pay Change tab of the Pay and Performance Review page. The fields marked with an asterisk (*) are closely related. When you change one of these fields, the others are automatically recalculated.
Field Label Field Description
Unit Pay Rate* This is the amount the employee earns for each unit worked.
Note: Unit Pay Rate cannot exceed 100,000.00. If it does, you will receive a message. Also, if any other related field (pay period salary, annual pay) results in the Unit Pay Rate exceeding 100,000.00, you will also receive a message.
Pay Period Salary*
This is the total amount the employee earns for each pay period.
Hours/Units Enter the normal number of hours worked per payroll period. If the you pay the employee by piece or by job, this field reflects the average number of units per payroll period.

Pay and Performance Review
Employee Pages 51
Field Label Field Description
Pay Frequency Select the payroll frequency for this employee.
Annual Pay* Abra HR calculates this field based on the information entered into the above fields.
Bonus Amount Enter the bonus amount the employee receives.
Pay Change Amount*
Amount of money by which the employeeʹs salary is changing.You can enter either a Change Amount or a Percent Change. When you change one field, Abra HR recalculates the other.
Period The time period on which the pay change is based. The default is the employee’s pay frequency.
Percent Change*
Percentage amount the employeeʹs salary is changing.
Compa‐ratio Abra HR calculates the compa‐ratio statistic.
The compa‐ratio is the employee’s percent‐of‐midpoint within a salary range. The formula for calculating compa‐ratio is:
compa‐ratio = employee’s salary / midpoint for salary grade * 100
Shift Indicate which shift the employee works.
Shift Premium If you select a shift that has a premium, Abra HR fills in this field.
Additional Review Information Tab The following fields appear on the Additional Review Information tab of the Pay and Performance Review page.
Field Label Field Description
Pay Effective This is the date this pay became effective. This date also indicates a new hireʹs start date.
Next Pay Review Enter the date scheduled for the employeeʹs next pay review.
Performance Review Indicate the date of the employeeʹs last performance review.
Rating Indicate the rating the employee received at the last performance review.
Next Review Indicate the date scheduled for the employee’s next performance review.

Rehire Employee
52 Sage Abra SQL HRMS
Field Label Field Description
Change Effective Indicate the effective date of the latest change to any current pay data.
Reason Indicate the reason for this pay change.
If you have set up user‐defined fields, click the User Defined tab and enter the appropriate information. Click OK when you are finished.
Rehire Employee If you want to rehire a previously terminated employee, use the Rehire Employee action. Because you originally entered the employee into Sage Abra SQL HRMS, you can recover and access that employee’s information. Sage Abra SQL HRMS automatically searches the current system files for the employee.
To Rehire an Employee
1. From the Navigation Pane, select Employees > Tasks > Rehire Employee.
2. Select the employee you want to rehire and click OK. The steps page opens and lists the steps for rehiring an employee.
3. Check the steps you want to complete. Complete each step now or schedule steps for yourself or another user to do later. Note that Rehire Information is a required step.
4. Click OK to start moving through the steps.
You might not have to complete other steps if they are not applicable to the employee you are rehiring. For example, if the employee has no dependents, you do not have to complete the Dependents step.
Rehire Information On the Rehire Information page, enter the Rehire Date. Sage Abra automatically fills in the name fields. The Adjusted Seniority Date defaults to the employee’s original hire date. The information in the Pay Frequency, Pay Rate, and Job Title fields defaults to the last values set when you terminated the employee.
The following table contains field descriptions for the Rehire Information page.
Field Label Field Description
First Name The employee’s first name.
Middle Name The employee’s middle name.
Last Name The employee’s last name.
Nickname The employee’s nickname.

Rehire Employee
Employee Pages 53
Field Label Field Description
Rehire Date Enter the date you rehired the employee.
Pay Frequency Select from the list the frequency with which your employer pays the employee.
Adjusted Seniority
Enter the date from which you calculate seniority.
Unit Pay Rate Enter the pay rate.
Job Title
If you enabled Job Code Validation, Abra HR provides a list of job titles from which you can choose. Otherwise, manually enter a job title.
Change the information on this page as necessary and click Continue to move to the next step.
Note: After you change information on the Rehire page, the employee status automatically becomes active. The status change date becomes todayʹs date. The Current Job and Job History pages contain the employee status.
Demographics The Demographics page contains basic personal information such as the name, address, gender, and telephone number. The fields on this page contain data entered prior to the employee’s termination. If the employeeʹs personal information has changed since the termination, change it as necessary. Click Continue to move to your next scheduled step.
HR Status The HR Status page contains information about the employee’s seniority, employment eligibility, military history, and union affiliation. This page also includes four user‐defined fields. Click Continue to move to the next step.
Current Pay The Current Pay step enables you to change the employeeʹs payroll status before rehiring the employee. Click Complete to open the Current Pay tab of the Current Pay page, where you can change the employeeʹs payroll status.
Current Job The Current Job page contains information about the employment status, current job, organization levels, and change effective date and reason. You set up the organization levels when you set up the Enterprise. The Organization Codes in the drop‐down lists originate from the Organization Codes table.
The employee’s status is Active and the value in the Change Reason field is the same value entered upon the employee’s termination.

Rehire Employee
54 Sage Abra SQL HRMS
Click the Secondary Job tab to view the employee’s secondary jobs. Click Continue to move to your next scheduled step.
Dependents and Beneficiaries The Dependents and Beneficiaries page contains information about an employeeʹs dependents and their benefit information. Sage Abra SQL HRMS lists all of the employee’s dependents and beneficiaries on this page.
You can add, edit, or delete dependents from this page. When you finish viewing the employee’s dependents, click Continue to move to the next step.
Benefits Enrollment The Benefit Enrollment step enables you add, edit, or delete the savings plans and insurance plans in which the employee participates. The Savings Benefits page is the first page in the Benefits Enrollment step.
When you finish working with the employeeʹs savings plans, click Continue to access the Insurance Benefits page. This page lists all the insurance plans in which the employee participates.
When you finish reviewing and updating the employeeʹs insurance plans, click Continue to move to the next step.
Emergency Contacts Use the Emergency Contacts page to enter up to two emergency contacts for the employee. For each contact, enter the name, relationship, home and business phone, and address. Click OK to move to the next step.
Review Attendance Enrollment The Attendance Summary page enables you to review the details of each attendance plan in which the employee used to be enrolled prior to the termination.
• Determine which plans you want to delete and which plans you want to keep for the employee. To delete a plan, highlight it and click Delete.
Note: On the Attendance Summary page, you can enroll the employee in new attendance plans just as if you were hiring the employee for the first time. Click Add to add an attendance plan.
• Open each plan in which the employee remains enrolled. If a plan shows a balance (either positive or negative) for Hours (or Days) Available, you should edit the employeeʹs Absence Transactions page to zero out the balance. For example, an employee’s standard illness plan shows a balance of three available illness days. Using the Absence Transactions page, create an absence transaction for three days with an Absence Reason of Illness. The attendance plan detail reflects your change and the Days Available equal zero.
• To complete this step, you should change the Seniority Start Date to the date of the rehire.
• When you are finished reviewing attendance enrollment information, click Continue to move to your next scheduled step.

Terminate Employee
Employee Pages 55
Skills Use the Skills page to enter information about the employee’s skills. You can add, edit, or delete skills from this page. When you finish viewing the skills, click Continue to move to the next step.
Required Courses TheRequired Courses page enables you enter information on each course the employee needs to complete. When you finish entering information on the Required Courses page, click Continue to move to the next step.
Certifications TheCertifications page enables you enter information about each certification an employee has received. It also lists certifications required for the employee’s job that might not have been received yet. When you finish entering information on the Certifications page, click Continue to move to the next step.
Training Programs Use theTraining Programs page to enter information on each training program the employee needs to complete. When you finish entering information on the Training Programs page, click Continue to move to the next step.
Terminate Employee Perform an employee termination when an employee no longer works for your organization. There can be many reasons for termination, including termination due to a layoff, a voluntary resignation, or a retirement. Whatever the reason is for termination, you must change the employee’s file to reflect the termination.
Points to Consider Before Terminating an Employee
If you use Time Off, the system automatically closes all attendance plans in which the employee is currently enrolled. Additionally, when the system closes a plan, Time Off accrues all available time for each attendance plan.
If you terminate an employee who is on an FMLA leave, you should first return the employee from leave of absence before you perform the termination. When you return the employee from leave of absence, you can charge the FMLA leave time to the employee’s vacation and illness plans.
To Terminate an Employee
Before you begin the termination action, gather all the necessary information to enter for the employee. Some information relates to which benefits your employer offers the employee after termination, the employee’s eligibility for rehire, whether you need to create an on demand check, and the reason for the termination.
1. From the Navigation Pane, select Employees > Tasks > Terminate Employee.
2. Find the employee you want to terminate. The steps page opens and lists the steps for terminating an employee.

Terminate Employee
56 Sage Abra SQL HRMS
3. Select the steps you want to complete. Complete each step now or schedule steps for yourself or another user to do later. Note that Exit Interview is a required step.
4. Click OK to start moving through the steps.
Exit Interview Use the Exit Interview page to enter data pertaining to the employeeʹs termination from the company including the termination date, type and reason, the employeeʹs eligibility for rehire, and COBRA benefits, if any. If you select No for COBRA benefits, you terminate the employee without insurance benefits.
Abra HR updates employee benefits and then prompts you to enter expiration dates for Non‐COBRA benefits and COBRA benefits. This page is identical to the Termination page.
• If you also use Abra Attendance, all attendance plans the employee is enrolled in are automatically suspended.
• If you are also using Abra HR, the system updates employee benefits and asks you to enter expiration dates for Non‐COBRA and COBRA benefits. Accept the defaults or enter new dates
• Does your organization need to pay the employee you are terminating? If you change an employeeʹs status to Terminated, a message dialog box will open asking if you want to terminate the employee from payroll processing.
If you click Yes, the Payroll Status field on the Current Pay tab of the Current Pay page is automatically set to Terminated, excluding the employee from payroll processing.
If you click No, the employee will be included in the next payroll. It is important to note that the coverage end dates for the employeeʹs benefit/savings plans are changed to the termination date, and in turn, the end date for the payroll deductions associated with the plans is also updated. The end date must be on or after the check date in order for the deduction to be included in the payroll. It is important to review the employeeʹs coverage end dates during the termination action and then update as necessary.
Note: If you change the COBRA Benefits expiration date, make sure it is a date after the end of the termination month. If it is a date that occurs before the end of the termination month, the employee will not be included when you run COBRA notification letters for employees whose coverage expires at the end of the termination month. This is because the COBRA benefit would already have expired before the termination month ended.
Review Benefits Remember that the end dates for the employeeʹs benefit deductions are changed to the termination date. If you want the employee to be included in the next payroll, the end date must be on or after the check date in order for the deduction to be included in the payroll. It is important to review the employeeʹs coverage end dates during the termination action and then update as necessary.
The Review Benefits step enables you to review the savings plans and insurance plans in which the employee participates before you terminate the employee. The Savings Benefits page is the first page in the Review Benefits step.

Terminate Employee
Employee Pages 57
When you finish working with the employeeʹs savings plans, click Continue to access the Insurance Benefits page. This page lists all the insurance plans in which the employee participates.
When you finish reviewing and updating the employeeʹs insurance plans, click Continue to move to the next step.

Terminate Employee
58 Sage Abra SQL HRMS

Employee Pages 59
Employment Processes Import Calculations The Import Calculations process ensures the information in several job and training related fields of the database are current and up‐to‐date. You should use this process when you:
Perform a Mass Update.
Import information from another application.
Change information with an application other than your Abra system, such as using another database application.
Information Updated by the Import Calculations Process
Abra HR automatically updates and references the current values for the following fields:
Annual salary
Compa‐ratio
Last pay change information (such as date, amount, and percent)
Total dependents and total insured dependents
Supervisor Name
If you are running a new installation of Sage Abra: Import Calculations will update the supervisor name (pe.p_supervis) after a mass update only if you have mass updated boththe supervisor company (pe.p_superco) and the supervisor ID (pe.p_superno).
Secondary Supervisor Name
If you are running a new installation of Sage Abra: Import Calculations will update the secondary supervisor name (pe.p_sup2vis) after a mass update only if you have mass updated boththe secondary supervisor company (pe.p_sup2co) and the secondary supervisor ID (pe.p_sup2no).
If you are also validating Job codes (determined in the employer setup information) the Import Calculations process also updates the following:
Job title
Job group
Salary grade
EEO class
Exempt status

Import Calculations
60 Sage Abra SQL HRMS
Training updates the following information. • Ensures the class information on employees’ Courses Taken page is consistent with the class
information on the Class Information page.
• Updates job requirements for all employees, ensuring that all employees have been assigned the training programs, certifications, and courses that have been established as job requirements for their job codes.
• On the Required Courses page the following information is updated.
• Removes the employeesʹ completed courses from the Required Courses page, unless it is associated with a certification that has a renewal period.
• If a course on an employee’s Courses Taken page has a status of Enrolled or In Progress, the status of the corresponding course on the Required Courses page is updated.
• Any courses in the curriculum of programs on an employee’s Training Programs page that have not been completed are added to the Required Courses page.
• Re‐calculates the Courses, Hours, Credits, and CEUs completed and remaining for all programs on an employee’s Training Programs page with a status of In Progress. If all courses are completed, the program status is changed to Completed and the Program End Date is updated.
• On the Certifications page the following information is updated.
• Any completed courses on an employee’s Courses Taken page that are associated with a certification, Abra Train makes sure that certification is entered on the employee’s Certifications page.
• If a certification has an Originally Received Date and no Last Received Date, Abra Train sets the Last Received Date to the Originally Received Date.
• Abra Train totals the Courses, Credits, and CEUs for all courses completed for each certification. After the Initial Course, Credit, and CEU requirements for a certification have been reached, the Originally Received and Last Received dates are updated. Any subsequent courses are compared to the Renewal Course, Credit and CEU requirements for the certification, and the Last Received Date is updated each time the requirements are met.
• Training calculates the Expiration Date for each certification that has a Renewal Period and a Last Received Date.
To Import Calculations
1. From the Navigation Pane, select Training > Processes > Import Calculations. Sage Abra SQL HRMS begins the process immediately and displays the number of employees updated.
2. Click OK when the process is complete.

Mass Update Pay Step Rate
Employee Pages 61
Mass Update Pay Step Rate
Note: You only need to run this process if you are using salary grade steps and job service for your employees. Click here to read about salary grade steps, step rates, and job service.
The Mass Update Pay Step Rate process is run in conjunction with the Mass Update Step Rate Service process. These two processes enable you to update your employeesʹ months of service in their job and initiate a pay increase according to the level (step) they have attained in the salary grade for their job.
Run the processes in the following order:
1. Mass Update Step Rate Service. This process uses an employeeʹs job start date to calculate her months of job service. The calculated number of months is displayed on the Step Rate tab of the employeeʹs Current Pay Details page.
2. Mass Update Pay Step Rate. This process uses the employeeʹs months of job service and the setup information for the jobʹs salary grade to determine the step the employee has attained for the job. The process then updates the pay rate according to the employeeʹs step.
To Mass Update Pay Step Rates
1. Back up your data to ensure you can restore the original data and repeat the process if necessary.
2. From the Navigation Pane, select Employees > Processes > Mass Update Pay Step Rate.
3. Specify the employees to be included in the process. The following fields and check boxes allow you to identify the employer, employees, and organization levels affected by the change.
Field Label Field Description
Employer Select Enterprise or the individual employer to be affected by the change. Select Multiple if you need to select more than one employer.
Organization Levels 1‐5
The organization level that contains the employees for whom you want to change the pay step rate. If you leave an organization level field blank, all the organizations within that level will be included in the pay step rate update.
Changed Since Enables you to change only employees whose pay step rates have changed since a specified date.
Active Selects active employees.
LOA Selects employees on leave of absence.
Terminated Selects terminated employees.

Mass Update Step Rate Service
62 Sage Abra SQL HRMS
Field Label Field Description
Employee Selects a specific employee or group. Click here for more information
Custom Criteria Additional selection criteria, entered from the Criteria Code Table, the Criteria Builder or the FoxPro Expression Builder. These features allow you to define criteria beyond the standard selection criteria provided by the Mass Update Pay Step Rate process.
Click here for more information.
Exempt Selects exempt or nonexempt employees.
Overtime Eligible Selects employees by whether or not they are eligible to work overtime.
4. Click OK when you are finished selecting criteria. The Pay Rate Update Selections dialog box opens.
5. Enter the date when the pay change is to be effective. The default is the system date.
Note: Job Service is always calculated based on the system date. This means that even if you enter a date earlier than the system date, the pay change is still based on the months of service as of the system date. The Mass Update Pay Step Rate process never decreases a step rate or a pay rate.
6. Select a reason for the change.
7. For the Print Report Only field, do one of the following:
8. To see only a preview report of the employees selected, select Yes for Print Report Only. When you close the report, click Yes to print the report.
9. To proceed with the pay step rate update, click No.
10. The process shows you how many employees will be processed. If you have not backed up your data, click No to stop the process and back up your data before you proceed.
11. If you have already backed up your data, click Yes to start the process. Because this process initiates a pay change, the system adds the pay step rate change to the employeesʹ job history files. Employee benefits are also updated, for which the system creates history records (no history records are created for savings plans because the flat and percentage savings amounts do not change).
12. When the process is complete, the system shows you how many employees were updated. Click OK to display the report. After reviewing the report, close the report and choose whether or not to print it.
Mass Update Step Rate Service

Mass Update Step Rate Service
Employee Pages 63
Note: You only need to run this process if you are using salary grade steps and job service for your employees. Click here to read about salary grade steps, step rates, and job service.
The Mass Update Step Rate Service process is run in conjunction with the Mass Update Pay Step Rate process. These two processes enable you to update your employeesʹ months of service in their job and initiate a pay increase according to the level (step) they have attained in the salary grade for their job.
Run the processes in the following order:
1. Mass Update Step Rate Service. This process uses the employeesʹ job start date to calculate their months of job service. The calculated number of months is displayed on the Step Rate tab of the updated employeesʹ Current Pay Details page.
2. Mass Update Pay Step Rate. This process uses the employeeʹs months of job service and the setup information for the jobʹs salary grade to determine the step the employee has attained for the job. The process then updates the pay rate according to the employeeʹs step.
To Mass Update Step Rate Service
1. Back up your data to ensure you can restore the original data and repeat the process if necessary.
2. From the Navigation Pane, select Employees > Processes > Mass Update Step Rate Service.
3. Specify the employees to be included in the process. The following fields and check boxes allow you to identify the employer, employees, and organization levels affected by the change.
Field Label Field Description
Employer Select Enterprise or the individual employer to be affected by the change. Select Multiple if you need to select more than one employer.
Organization Levels 1‐5
The organization level that contains the employees whose job service you want to update. If you leave an organization level field blank, all the organizations within that level will be included in the step rate service update.
Changed Since Enables you to change only employees whose pay step rates have changed since a specified date.
Active Selects active employees.
LOA Selects employees on leave of absence.
Terminated Selects terminated employees.
Employee Selects a specific employee or group. Click here for more information
Custom Criteria Additional selection criteria, entered from the Criteria Code Table, the Criteria Builder, or the
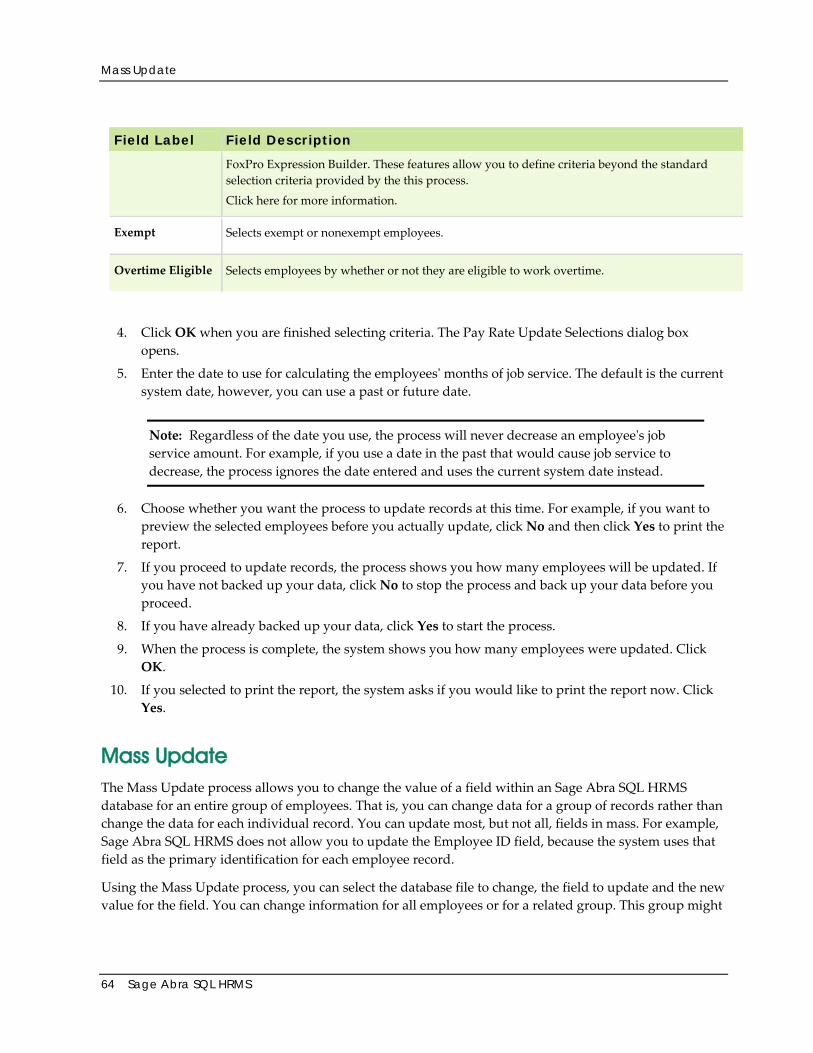
Mass Update
64 Sage Abra SQL HRMS
Field Label Field Description
FoxPro Expression Builder. These features allow you to define criteria beyond the standard selection criteria provided by the this process.
Click here for more information.
Exempt Selects exempt or nonexempt employees.
Overtime Eligible Selects employees by whether or not they are eligible to work overtime.
4. Click OK when you are finished selecting criteria. The Pay Rate Update Selections dialog box opens.
5. Enter the date to use for calculating the employeesʹ months of job service. The default is the current system date, however, you can use a past or future date.
Note: Regardless of the date you use, the process will never decrease an employeeʹs job service amount. For example, if you use a date in the past that would cause job service to decrease, the process ignores the date entered and uses the current system date instead.
6. Choose whether you want the process to update records at this time. For example, if you want to preview the selected employees before you actually update, click No and then click Yes to print the report.
7. If you proceed to update records, the process shows you how many employees will be updated. If you have not backed up your data, click No to stop the process and back up your data before you proceed.
8. If you have already backed up your data, click Yes to start the process.
9. When the process is complete, the system shows you how many employees were updated. Click OK.
10. If you selected to print the report, the system asks if you would like to print the report now. Click Yes.
Mass Update The Mass Update process allows you to change the value of a field within an Sage Abra SQL HRMS database for an entire group of employees. That is, you can change data for a group of records rather than change the data for each individual record. You can update most, but not all, fields in mass. For example, Sage Abra SQL HRMS does not allow you to update the Employee ID field, because the system uses that field as the primary identification for each employee record.
Using the Mass Update process, you can select the database file to change, the field to update and the new value for the field. You can change information for all employees or for a related group. This group might
Mass Update
Employee Pages 65
include, for instance, employees employed for a certain length of time or employees with a certain job skill.
Warning! The Mass Update process can change a significant amount of information. We strongly recommend you back up your data before mass updating employee information. Backing up your data before you change it ensures you can always restore the original data and repeat the process.
If you are running a new installation of Sage Abra SQL HRMSand you want to update the Supervisor field, you must first mass update the supervisor company (pe.p_superco) and then mass update the supervisor ID number (pe.p_superno). Then run the Import Calculations process to update the supervisor name (pe.p_supervis). Similarly, if you want to update the Secondary Supervisor field, you must first mass update the secondary supervisor company (pe.p_sup2co) and then mass update the secondary supervisor ID number (pe.p_sup2no). Then run the Import Calculations process to update the secondary supervisor name (pe.p_sup2vis).
To Mass Update Information
1. From the Navigation Pane, select Employees, Time Off, or Training > Processes > Mass Update.
2. The Update File and Update Field drop‐down lists allow you to designate the file and the field you want to update.
3. The Records to Update field allows you to specify which records within the database to update.
4. The New Value field allows you to specify the value you want to substitute in the field you identified.
5. The OK button remains disabled until you select a file to update.
To change the bonus amount to $500 for all employees whose initial hire date is prior to June 1, 2007, the following sections demonstrate how you should use the Mass Update dialog box to accomplish this task.
File and Field To Update 1. Click the Update File drop‐down list to view the Sage Abra SQL HRMS files for which you can
perform a mass update.
2. Click the desired file. For the example, select Employee Personnel.
3. Click the Update Field drop‐down list to view the field descriptions for the file you selected. Click the field to select it. If necessary, use the scroll bar to reveal other field descriptions. For this example, select Bonus Amount. For more information about database files and fields, refer to Data Dictionary.
Records to Update If you leave this field blank, the Mass Update process updates every record in the database. If you only want to update certain records, you must identify the records by establishing a criteria expression for Sage Abra SQL HRMS to use when performing the Mass Update process. For more information about expressions, refer to Expressions and Functions.

Mass Update Pay Rates
66 Sage Abra SQL HRMS
To continue the example, update only those employees whose original hire date falls prior to June 1, 2007. You can enter the expression using one of two methods: enter the expression directly, or access the Expression Builder to help you build the expression. If you are familiar with the database field names and syntax, you can enter the following expression directly:
P_ORIGHIRE < {06/01/2007}
New Value The New Value field allows you to instruct Sage Abra SQL HRMS what the new field value should be. In the example, the new bonus amount is 500, so select the New Value box and type: 500
Note: Do not include a dollar sign or comma when you enter a new value.
The new value might be a complex value involving other fields in the database, such as P_SALARY + 500. This value indicates the bonus amount is equal to the employeeʹs salary amount plus $500. If necessary, you can use the Expression Builder to help create the entry for the new value.
Complete the Process 1. Click OK to perform the Mass Update process. Sage Abra SQL HRMS displays a message box
indicating the number of records the system should update and asks whether you want to proceed. If you want to back up your database before the system performs the mass update, click No and back up your data before you proceed. If you click Yes, Sage Abra SQL HRMS performs the mass update and indicates the number of records updated upon completion.
2. Run the Import Calculations process to ensure that all updated information is current and up‐to‐date.
Mass Update Pay Rates The Mass Update Pay Rate process allows you to change the pay rate for an entire group of employees at one time. You select the group or groups of employees whose rates or amounts are to be changed as well as the new rate.
To Mass Update Pay Rates From the Navigation Pane, select Employees > Processes > Mass Update Pay Rate.
This page allows you to specify the employees to be included in the process as well as which records you want to update. After you select the employee records to update, you are ready to choose a pay change date, reason, and the new pay rate.
The following fields and check boxes allow you to identify the employer, employees, and organization levels affected by the change.
Field Label Field Description
Employer Your selection of Enterprise or the individual employers to be affected by the change. If you select Multiple, a two‐list chooser opens, allowing you to select the employers to include.
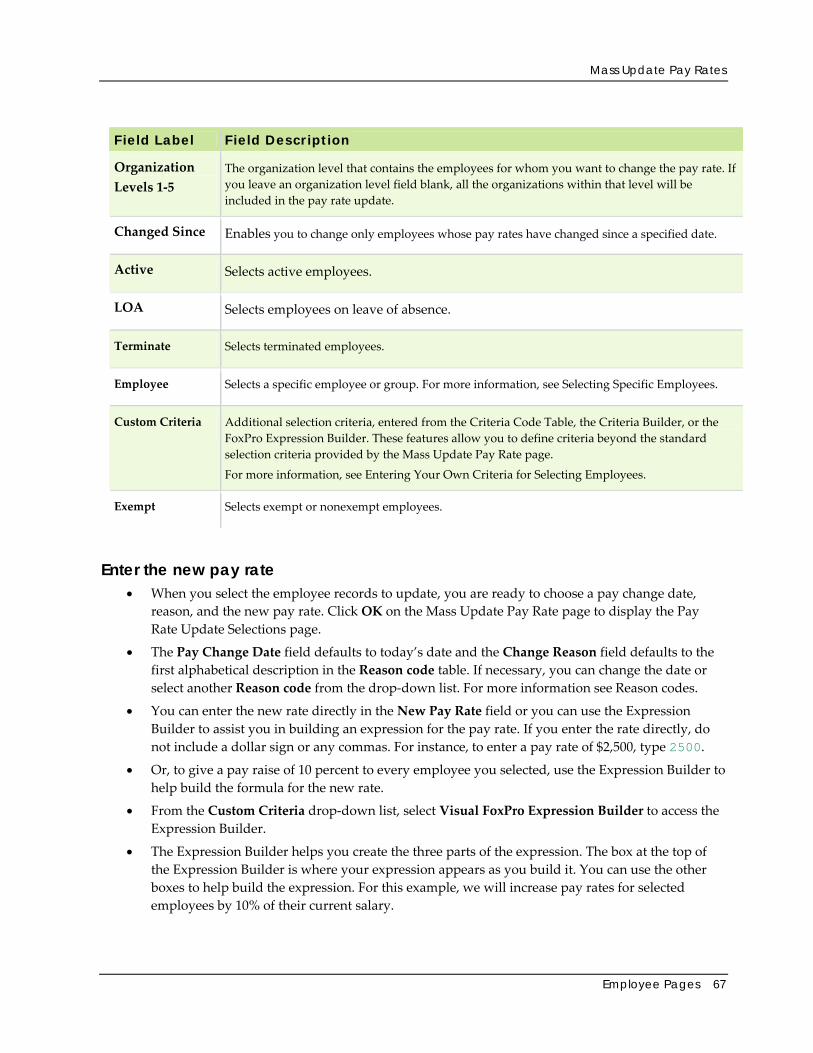
Mass Update Pay Rates
Employee Pages 67
Field Label Field Description
Organization Levels 1‐5
The organization level that contains the employees for whom you want to change the pay rate. If you leave an organization level field blank, all the organizations within that level will be included in the pay rate update.
Changed Since Enables you to change only employees whose pay rates have changed since a specified date.
Active Selects active employees.
LOA Selects employees on leave of absence.
Terminate Selects terminated employees.
Employee Selects a specific employee or group. For more information, see Selecting Specific Employees.
Custom Criteria Additional selection criteria, entered from the Criteria Code Table, the Criteria Builder, or the FoxPro Expression Builder. These features allow you to define criteria beyond the standard selection criteria provided by the Mass Update Pay Rate page.
For more information, see Entering Your Own Criteria for Selecting Employees.
Exempt Selects exempt or nonexempt employees.
Enter the new pay rate • When you select the employee records to update, you are ready to choose a pay change date,
reason, and the new pay rate. Click OK on the Mass Update Pay Rate page to display the Pay Rate Update Selections page.
• The Pay Change Date field defaults to today’s date and the Change Reason field defaults to the first alphabetical description in the Reason code table. If necessary, you can change the date or select another Reason code from the drop‐down list. For more information see Reason codes.
• You can enter the new rate directly in the New Pay Rate field or you can use the Expression Builder to assist you in building an expression for the pay rate. If you enter the rate directly, do not include a dollar sign or any commas. For instance, to enter a pay rate of $2,500, type 2500.
• Or, to give a pay raise of 10 percent to every employee you selected, use the Expression Builder to help build the formula for the new rate.
• From the Custom Criteria drop‐down list, select Visual FoxPro Expression Builder to access the Expression Builder.
• The Expression Builder helps you create the three parts of the expression. The box at the top of the Expression Builder is where your expression appears as you build it. You can use the other boxes to help build the expression. For this example, we will increase pay rates for selected employees by 10% of their current salary.

Select Specific Employees
68 Sage Abra SQL HRMS
1. In the Fields list, scroll down to and double‐click the field identified as ʺp_salary.ʺ Note that the Expression Builder inserts the field name in the expression box as ʺPe.p_salary.ʺ
2. Click the Math drop‐down list to choose a mathematical operator. Click * to indicate multiplication. The Expression Builder inserts the asterisk in the expression box.
3. Enter 1.1 directly in the expression box. The completed expression should look like this: Pe.p_salary * 1.1
4. Click OK to close the Expression Builder and save the expression in the Custom Criteria field.
Complete the process • Click OK to perform the Mass Update Pay Rate process. Sage Abra displays a message box telling
you how many records will be updated and prompts you to proceed.
• If you want to back up your database before the system mass updates the pay rate, click No and back up your data before you proceed. If you click Yes, Sage Abra performs the pay rate update and indicates the number of records updated upon completion.
Tip: We recommend backing up your databefore beginning the Mass Update Pay Rate process. Backing up your data before you change it ensures you can always restore the original data and repeat the process.
Notes:
1. If you use Abra HR, the Mass Update Pay Rate process adds the pay rate increases to the employeesʹ job history files.
2. This process will not generate a history record for savings plans because the flat amounts or percentage amounts are not changed as a result of this rate change.
Select Specific Employees Sage Abra SQL HRMS enables you to select specific employees within the employers you selected to further tailor your process results. Use the buttons adjacent to Employee, to specify which employees you want to select.
The Update button clears your selections, allowing you to begin a new selection process.
Select a Single Employee
1. Click the Find button to select one employee. The Employee Find dialog box opens so you can find and select the employee you want to include.
2. After you find the employee, Sage Abra SQL HRMS returns you to the dialog box and shows the selected employee’s name.

Update Benefits
Employee Pages 69
Select Multiple Employees
1. Click the Multiplebutton to select multiple employees. The Employee Selection page opens so you can select the employees you want to include. If you have already selected a single employee, it automatically appears in the list of selected employees.
2. The Available list includes all employees in the employers you selected and displays the employee’s name, number, and employer ID. Double‐click to select an employee name and move it to the Selected list. Similarly, double‐click an employee name in the Selected list to move it back to the Available list.
3. After you select the employees, Sage Abra SQL HRMS returns you to the dialog box and indicates you have selected multiple employees.
Update Benefits The Update Benefits process allows you to calculate information pertaining to benefit premiums and coverage. You must perform this process in the following situations:
• After youʹve downloaded benefit‐related information from another system
• Periodically, if you base benefit plan eligibility requirements and rates on information that changes over time (such as employee age or seniority)
• If you also use Abra Workforce Connections, run the process after youʹve run the Update Open Enrollment process to update employeesʹ benefit plans in Sage Abra SQL HRMS
Abra HR keeps track of employees who previously waived coverage; Sage Abra SQL HRMS does not update the employee records of the plans for which employees waived coverage.
Note: Sage Abra SQL HRMS calculates all active (not expired) benefit enrollments regardless of the enrollment effective date.
From the Navigation Pane, select Employees > Processes > Update Benefits. When you perform this process, Sage Abra SQL HRMS displays a message and asks for confirmation to continue.
Note: After you begin the Updating Benefits process, you cannot cancel the process.
Click Yes to begin the process. Sage Abra SQL HRMS displays each employee name and ID as it updates the benefits. Click OK when Sage Abra SQL HRMS completes the process.
Update E-mail Addresses If your employees currently do not have e‐mail addresses assigned to them, use the Update E‐mail Addresses process to create them.

Update E-mail Addresses
70 Sage Abra SQL HRMS
To Update E-mail Addresses
1. From the Navigation Pane, select Employees > Processes > Update E‐mail Addresses.
2. This page shows the format types available to you. To add a new format type, click Add or to update e‐mail addresses, select the format type to use and click More.
3. Select an employer or the enterprise (***) from the drop‐down list.
4. Enter the domain in the Domain field. This is the piece of the e‐mail address that follows the @ sign.
5. Select which set of e‐mail addresses you want to update: employee, supervisor, or both employee and supervisor. Updating supervisorsʹ e‐mail addresses also updates secondary supervisorʹs e‐mail addresses.
• Select Employee to update the employeeʹs e‐mail address located on the Demographics/Address and Phone page.
• Select Supervisor to update the employeeʹs supervisorʹs e‐mail address. The employee must have a supervisor assigned on their Current Job/Organization page for this option.
• Select Both to update the employeeʹs and the employeeʹs supervisorʹs e‐mail address.
6. Select the Update only if field is blank check box if you want to update only those employees who currently do not have e‐mail addresses.
7. Select the case for the address: lower case, upper case, or no change (upper and lower).
8. Specify the name length. The maximum length is 99 characters.
9. The Expression field shows you the expression that will be used to create the e‐mail format. You can change the expression if necessary.
10. The Name and E‐mail fields are read‐only and show you an address for Sample data. Click the Previous Sample and Next Sample buttons to scroll through the sample e‐mail addresses in a fixed order.
11. Click Update E‐mail Addresses.
12. Click OK when you are finished.

Employee Pages 71
Employee Analyses OSHA Incidents The OSHA Incidents analysis enables you to summarize and view accidents, illnesses and injuries reported during a specific time period. The analysis counts all employees whose incident date falls within the date range you specify. You enter the incident date for an employee when you complete the information on the OSHA Incident page.
To Use the OSHA Incidents Analysis
1. From the Main Menu, select Analysis > HR > OSHA Incidents. The data list box displays summary information for the enterprise since the Enterprise Employees branch is automatically selected. The incident types First Aid, Illness, and Injury are listed along with pertinent OSHA incident information for each of the types.
2. To see employee information for the organization codes within an employer, click the plus signs (+) to expand the tree.
3. Click to highlight the selection for which you want to view more detailed information. For example, if you want to see information for organization level 1, highlight Level 1.
4. To view the detailed employee information for each incident type, select the Show Details check box. The data list box shows more detailed analysis information for each employee incident.
5. Click the More Columns button to expand the data list box.
Performance vs. Longevity The Performance vs. Longevity analysis enables you to compare employee performance based upon length of employment. In other words, you can analyze how well newly hired employees are performing versus employees with more seniority.
In this analysis, the performance rating is the tool used to measure performance. You can establish a rating code for an employee during the Pay and Performance Review action. Abra HR uses the Rating code table to determine the number of rating codes you can use. The Abra HR enterprise level provides six rating codes (codes 1 through 6); however, you can define a different number of rating codes for each employer.
The analysis divides the length of employment into four categories: less than six months, six months to one year, one year to five years, and over five years. The basis for determining the length of employment for an employee is the original hire date, which you provide when you record a new hire.

Salary
72 Sage Abra SQL HRMS
To Use the Performance vs. Longevity Analysis
1. From the Main Menu, select Analysis > HR > Performance vs. Longevity. The data list box displays summary information for the enterprise because the Enterprise Employees branch is automatically selected. The data list box displays a row for each rating code. Each row shows how many employees within a rating remained employed in each of the four longevity categories.
2. To see information at the various organization levels within an employer, click the plus signs (+) to expand the tree.
3. Click to highlight the selection for which you want to view more detailed information. For example, if you want to see information for your employer’s organization level 2, highlight Level 2. The data list box shows detailed information for each of the organization codes in Level 2.
4. To view detailed enterprise information, select the Show Details check box. The data list box shows more detailed analysis information for each employee in the enterprise.
5. Click the More Columns button to expand the data list box.
Salary The Salary analysis enables you to view the total salary and average salary at various organizational levels. It also shows how many employeesʹ salaries are over or under the salary ranges specified in the Salary Grade code table. The Salary Grade code table allows you to enter maximum and minimum salaries for various grades. You assign a salary grade and salary amount to an employee when you perform the Add New Hire action.
To Use the Salary Analysis
1. From the Main Menu, select Analysis > HR > Salary. The data list box displays summary information for the enterprise since the Enterprise Employees branch is automatically selected. The data list box displays the number of employees whose salaries are above their salary grade range and the number of employees whose salaries are below their salary grade range.
2. To see employee information for the organization codes within an employer, click the plus signs (+) to expand the tree.
3. Click to highlight the selection for which you want to view more detailed information. For example, if you want to see information for organization level 1, highlight Level 1.
4. To view the enterprise information at a more detailed level, select the Show Details check box. The data list box shows more detailed analysis information for each employee in the enterprise.
5. Click the More Columns button to expand the data list box.
Turnover
Employee Pages 73
Turnover The Turnover analysis enables you to see summary and detailed information for employees who were terminated during a specified time period. The analysis counts all employees whose termination date falls within a specified date range. You establish the termination date for an employee when you complete the Exit Interview page as part of the Terminate Employee action.
To Use the Turnover Analysis
1. From the Main Menu, select Analysis > HR > Turnover. The data list box displays summary information for the enterprise because the Enterprise Employees branch is automatically selected.
2. To see employee information for the organization codes within an employer, click the plus signs (+) to expand the tree.
3. Click to highlight the selection for which you want to view more detailed information. For example, if you want to see employee information for an organization code in Level 2, highlight the code below Level 2. The data list box shows detailed information for the organization code you selected.
4. To view the enterprise information at a more detailed level, select the Show Details check box.
5. Click the More Columns button to expand the data list box.

Turnover
74 Sage Abra SQL HRMS

Employee Pages 75
Standard Reports Sage Abra SQL HRMS provides dozens of preformatted reports designed to meet virtually any reporting need. With the standard reports, you can:
Preview reports on your monitor.
Print reports to your printer.
Export reports to a disk file for use by other software applications.
Note: You can also create your own original reports using Crystal Reports® for Sage. Refer to the Crystal Reports online Help for detailed instructions on how to use Crystal Reports.
Select Reports
Before you start working with the standard reports, you must first select a report. The first step in selecting a report is accessing the report group.
To Select a Report
1. From the Navigation Pane, select Reports> Employees, Time Off, Payroll, or Training > the report you want to work with. The Reports dialog box opens and lists the reports in the selected group.
2. Scroll through the list and highlight the report you want to run. Sage Abra SQL HRMS enables all buttons and tabs and displays the name of the report selected at the bottom of the dialog box.
3. Define the criteria for your report.
4. Print, preview, or export the report.
Define Custom Criteria The Custom Criteria function enables you to generate reports using criteria other than what is already provided in Sage Abra SQL HRMS standard selection criteria.
Note: When you use any custom criteria, Abra HR disables all other selection criteria. To clear your custom criteria selection, select the blank option from the list.
Use the Custom Criteria Table
In Sage Abra SQL HRMS, you can create expressions that define specific criteria for selecting employees. Sage Abra SQL HRMS stores these expressions in the Criteria Code table. When you set up options for

Define Custom Criteria
76 Sage Abra SQL HRMS
your reports, you can choose a criteria code from (or add a new one to) the Criteria code table. Sage Abra then generates the report according to the expression set up for the criteria code you selected.
Tip: If the expression you want to create is one you will be using more than once, it is a good idea to add it to your Criteria code table. Then, it will be available for you to select any time you need it. Follow the steps below to add a new criteria code.
Select Custom Criteria Table from the Custom Criteria list. The Criteria Table dialog box opens and lists the criteria codes you defined in your Criteria Code table.
Note: If you did not define any criteria codes, only the selection Add New Code appears in the list.
To Select an Existing Criteria Code 1. From the Criteria Table dialog box, highlight the code.
2. Click OK. The expression appears in the Custom Criteria field.
To Add a New Criteria Code 3. From the Criteria Table dialog box, click Add New Code.
4. Click OK to open the Criteria Table dialog box.
5. Enter a description for your criteria.
6. Click OK. The Visual FoxPro Expression Builder opens. For detailed instructions for using the Expression Builder, refer to Expressions and Functions.
7. Create an expression. The preceding figure shows an expression to generate a report for only seasonal workers. We selected the field P_SEASONAL from the Employee Personnel database and set it equal to (Y)es.
8. When you complete the expression, click OK. The expression displays in the Custom Criteria field. Abra HR uses this expression to generate a report that includes only seasonal employees.
Use the Custom Criteria Builder
You can use the Sage Abra Criteria Builder to build expressions for your selection criteria and save them to your criteria code table.
Note: The Criteria Builder enables you to create an expression with fields only from the Employee Personnel (HRPERSNL) database. If you need to build an expression with fields from a database other than HRPERSNL, you must use the Expression Builder.
The following steps build an expression you would use to produce a report that includes Production Managers who started their jobs on or after January 1, 2002. Building this expression requires you to define two selection criteria: employees whose Job Title is Production Managers and of those Production Managers, those who started their job on or after 01/01/02.

Define Report Criteria
Employee Pages 77
To Create an Expression with the Criteria Builder 1. Select the Criteria Builder option from the Custom Criteria list. The Criteria Builder dialog box
opens.
2. From the Field list, select Job Title.
3. From the Relationship list, select Equal To.
4. In the Value field, type Production Managers.
5. Since we need to define another criteria, click the And button. The first part of the expression appears in the dialog box and we’re ready to enter the second criteria.
6. From the Field list, select Job Start Date.
7. From the Relationship list, select Greater Than or Equal To.
8. In the Value field, type 01/01/02.
9. Click the Done button. The dialog box now shows the complete expression.
10. To save the Expression to your criteria code table, click the Save To Criteria Table button. The Criteria Table dialog box opens.
11. Type a description for your new expression.
12. Click OK.
Note: If you want to delete all the criteria you defined and start over, click Reset. If you want to delete one criteria at a time (from the last to the first), click Undo.
Use the Expression Builder
You can access the Visual FoxPro Expression Builder any time you need to create an expression for your custom criteria. Select Visual FoxPro Expression Builder from the Custom Criteria field. The Expression Builder opens for you to start building your expression. When you have completed it, click OK. Your expression is available from the Custom Criteria field list when you generate reports within the selected report category. Refer to Expressions and Functions, for detailed instructions on using the Expression Builder.
Tip: If you only need to use fields from the Employee Personnel database (HRPERSNL) in your expression, consider using the Criteria Builder rather than the Expression Builder. The Criteria Builder is somewhat easier to use than the Expression Builder. However, if you need to build an expression with fields from any database other than HRPERSNL, you must use the Expression Builder.
Define Report Criteria When you select a report, Sage Abra SQL HRMS provides various criteria by which to generate the report. For example, if you want to sort the Employee Profile report by employee number rather than employee
Define Report Criteria
78 Sage Abra SQL HRMS
name, you can choose employee number as one of your sort criteria. The Reports dialog box lets you limit the data appearing on a report. If you do not limit the data, the report includes all the records. Make selections to indicate only those records meeting your specific criteria.
The information on the tabs of the Reports dialog box enable you to tailor the output of your report. Using sorting options and selection criteria, you can produce a variety of different reports to meet your specific needs. You can:
Use standard selection criteria such as employer, organization levels, and exempt status.
Enter your own criteria to select information to include in the report.
Select specific employees to include in the report.
Select report‐specific options including (among others) the effective date or date range, a grouping by organization level, a sort order by employee name or ID, or form alignment options.
Save default report options for the next time you use the same report.
Note: After you generate a report by printing, previewing, or exporting it, Sage Abra SQL HRMS saves your selection criteria. The next time you select that report, the saved options appear in the fields. Change the selection criteria as necessary for your new report.
Report List Tab
The Report List tab enables you to select a report, set the number of copies to print and save the current report options as your defaults.
Select a Report From the list of reports, find the report you want and highlight it (click once). Sage Abra SQL HRMS enables all buttons and tabs to start defining the report options.
Specify a Print Range The Print Range enables you to print all the pages of the report or only a specific range of pages.
To print the whole report, click the All radio button. To print a specified page range, click the Page radio button and enter the first and last page numbers.
Save Report Options The Save Defaults button lets you save report options that you regularly use. Then the next time you generate the report, the settings are already defined for you. This feature comes in handy when you frequently generate a particular report.
If you have entered new settings for a report and want to return to the last settings you saved, click Restore Defaults.

Define Report Criteria
Employee Pages 79
Standard Criteria Tab
The Standard Criteria tab lists the general selection criteria that apply to all reports in a report group. You use these selection criteria to determine which employees will be selected for inclusion in the report.
Select the Employer
Using the Employer field, you can choose to include in your report employees in the Enterprise, in an individual employer or in multiple employers.
Do one of the following:
Select Enterprise to include all the employees in all the employers you have set up in Sage Abra.
Select an individual employer to include only the employees in that employer.
Select Multiple to include the employees in more than one employer. When you select Multiple, a two‐list chooser opens for you to select employers.
For each employer you want to include in your report, double‐click the employer name to move it to the Selected list. Click OK.
Select Organization Levels After you select the Enterprise or one or more employers, select the specific organization levels on which to report. The names of the organization levels are the same as the titles defined when you set up the Enterprise (up to five levels).
The organization descriptions included in each list depend on two factors: the employer selection and how you set up your organization codes. For example, if you select Enterprise as your employer and all your employers are using Enterprise level organization codes, the lists contain the organization descriptions you set up for the Enterprise.
Alternately, if you select Enterprise as your employer and you set up organization codes for each employer at the employer level (that is, you set up different codes for each employer), the lists include every employer’s organization descriptions.
Note: If you see duplicate entries in the list, this means you set up different organization codes at the employer level, but the descriptions you set up for the codes are the same.
Note: If you change your employer selection, Sage Abra SQL HRMS clears all organization levels. You can then reselect your organization levels.
Select Employees
If you want to further limit your report results, you can select specific employees within the employers you selected. Using the buttons adjacent to Employee, specify which employees you want to select.

Define Report Criteria
80 Sage Abra SQL HRMS
If you are using Training, you can also use the buttons to specify which courses or classes you want to include, depending on the type of training report you are running. For example, you can select classes for Class Administration reports and courses for most Training Analysis reports.
Select One Employee Click the Find button to select one employee. The Employee Find dialog box opens so you can find and select the employee you want to include. For more information, see Finding an Employee.
After you find the employee, Sage Abra SQL HRMS displays the selected employee’s name, employee number, and employer ID.
Note: When you select one employee, Sage Abra SQL HRMS disables all other selection criteria. If you want to cancel your employee selection, click the Update button. This re‐enables all selection criteria.
Select Multiple Employees To select multiple employees, click the Multiple button. The Employee Selection page opens. Select the employees you want to include. If you have already selected a single employee, it automatically appears in the list of selected employees.
The Available list includes all employees in the employers selected and displays the employee’s name, number, and employer ID. Double‐click to select an employee name and move it to the Selected list. Similarly, double‐click an employee name in the Selected list to move it back to the Available list.
After selecting, click OK to return to the dialog box.
Note: When you select multiple employees, Sage Abra SQL HRMS disables all other selection criteria. To cancel your multiple employee selection, click the Update button. This re‐enables all selection criteria.
Points to Consider When Selecting Specific Employees When you are defining your report selection criteria by selecting employers, organization codes, and specific employees, note that if you have already selected the employer or organization codes and then attempt to select a specific employee, you might receive a message that there are no employees matching your selection. This is because the employee you tried to select does not belong to the employer or the selected organization codes.
If you want to run the report for a specific employee, select blank for all your organization codes and then select the employee.
Select Employees by Employee Status Each employee you enter in Sage Abra SQL HRMS has an employee status.
When you generate a report, you can include employees who have an employee status of Active, Leave of Absence, or Terminated. Use the check boxes to select one or more employee statuses.
When you run reports in Training, you can select employees who are Active, Terminated, on Leave of Absence (LOA) and Non‐employees.

Print, Preview, or Export a Report
Employee Pages 81
Select Employees by Exempt Status When you run reports in Abra HR or Time Off, use the Exempt field to generate a report to include employees by their overtime exempt status. Select Exempt or Nonexempt from the list. If you leave the field blank, the report includes both exempt and nonexempt employees.
Select Employees by a Changed Since Date When you run reports in Abra HR or Time Off, you can choose to include in your report only those employees whose information has changed since a specific date. Enter the date in the Changed Since field.
Select Classes by Status When you run reports in Training, you can select classes that are Open, In Progress, Completed, and Canceled.
Define Custom Criteria To generate reports using criteria other than what is already provided in Sage Abra SQL HRMS’s standard selection criteria, use the Custom Criteria function.
Specific Criteria Tab
The Specific Criteria tab presents options you can set for the report you selected. Sage Abra SQL HRMS generates the report using these settings and the selection criteria you defined on the Standard Criteria tab.
The options on this tab vary from report to report within the report category you selected. Some examples of options specific to a report are date range, sort order, and effective date.
Print, Preview, or Export a Report After you determine your standard and specific selection criteria, generate your report by choosing whether to send it to your printer, preview it on the monitor, or export it to a file on the server.
Preview a Report To preview a report on the monitor, click Preview. The system opens a preview window and presents the report.
You can identify each report by its title. The title is at the top of each page of the report. The date and time the report was generated appear at the bottom of each page, along with a sequential page number. Report totals and other control numbers also appear at the end of most reports.
Reports are formatted for standard 8 1/2‐by‐11‐inch paper with a half‐inch margin on all sides.
Page Preview Toolbar When you preview a report, the page preview toolbar enables you to enlarge your view, scroll through the report, and print the report. You can see the button’s description as you position your cursor over the button.

Print, Preview, or Export a Report
82 Sage Abra SQL HRMS
The following table describes the buttons on the page preview toolbar.
Button Description
The First Page button displays the first page of the report. This button is disabled if you are previewing the first page of the report.
The Previous Page button displays the previous page of the report. This button is disabled if you are previewing the first page of the report.
The Go To Page button lets you select a specific report page to display.
The Next Page button displays the next page of the report. This button is disabled if you are previewing the last page of the report.
The Last Page button displays the last page of the report. This button is disabled if you are previewing the last page of the report.
The Zoom control lets you choose six different magnifications. You can also click your cursor anywhere in the preview window to zoom in or out on a particular area of the report. When you zoom, your cursor changes to a magnifying glass.
The Close Preview button closes the preview window and returns to the Reports dialog box. You can also click in the report title bar to close the preview window.
Click the Print Report button to print the report.
Print a Report From the reports dialog box, click Print to open the Print Options dialog box. Select the appropriate options such as page range, number of copies, and name of printer. Note that if you have a PDF driver installed, you can create a PDF version of the report and then send it as an email attachment.
Export a Report to a File Sage Abra SQL HRMS enables you to export or save your report to a file so you can use it in a variety of different applications, such as Lotus 1‐2‐3 or Microsoft Excel.
1. Click Export to export a report to a file. The File Export Options dialog box opens.
Note: If working with Veterans Employment report, when you click Export, the File Type defaults to Electronic Submission format.

Print, Preview, or Export a Report
Employee Pages 83
2. Select the file format to use from the File Type list. The extension in the File Name field automatically fills in according to the File Type you select.
3. Enter up to eight characters for the file name in the File Name field. Then, click Export.
4. Click OK. Sage Abra SQL HRMS exports the file to the ..\Sage\SageAbraSQLHRMSServer\Data\Export directory on the server.
Note: If you are using Windows 2008, Windows 7, or Windows Vista, you must reset the View properties on the C drive so that you can see the \ProgramData folder to where the reports are exported. Open Windows Explorer and do the following:
a. Go to Organize > Folder and Search Options.
b. Click the View tab.
c. Select the Show hidden files and folders button and click OK.

Print, Preview, or Export a Report
84 Sage Abra SQL HRMS

Employee Pages 85
Employee Reports Benefit Reports All benefits reports have a selection option for COBRA recipients. Most benefits reports prompt for the effective date. In this way, benefits that have expired or have yet to begin are not included.
These are the Benefit reports:
Report Name Report Description
Benefit Coverage by Employee
This detail report lists personal and salary information about each employee, his or her benefits, the effective and expiration dates, the total cost of the monthly premiums for the employee, and the employee’s dependents and the amount the employee pays for coverage. You can run the report to either include or exclude waived benefit plans, as well as to include or exclude history records.
Note: This report will only display Marital Status and Total Dependents information if the
effective date used to generate the report is the current system date. If an effective date other than the current system date is used, such as a date in the past or future, this information will not appear on the report.
Benefit Enrollment by Plan
This report totals benefits by plan. For insurance plans, the report totals employee monthly premium, dependent monthly premium, employee monthly contribution, and monthly net cost. For savings plans, the report totals monthly projected employee contribution and monthly employer match. You can run the report to either include or exclude waived benefit plans, as well as to include or exclude history records.
Note: You must enter an effective date for the report. Otherwise, if the date is left blank, the report might not include all the appropriate enrollment information.
Benefit Letter This report is a letter showing the employee which benefits are set up for the employee.
Benefit Premium Totals by Plan
This report provides a summary headcount of each benefit plan. The report lists the plan, number of enrollees, coverage amount, employee monthly premium, dependent monthly premium, employee monthly contribution, and monthly net cost. You can select whether to include insurance or savings plans in the report as well as include or exclude history records.
Census Report This report provides information most insurance companies require when calculating the cost of providing insurance. You might want to send this report directly to the insurance company.
The Dependents column on the report indicates the number of insured as specified on the Dependents and Beneficiaries page. An insured spouse counts as one dependent.
Certificate of Coverage
This report shows proof of previous health insurance coverage for the employee. If the Date of Certificate (entered on the Specific Criteria tab) is greater than the date the employee’s

Code Table Reports
86 Sage Abra SQL HRMS
Report Name Report Description
coverage ended, the certificate will print the employee’s name, the date the coverage began (item #10), and the date the coverage ended (item #11). Otherwise, if coverage has not ended (as of the Date of Certificate), the report will display an X in item #11.
COBRA Billing Statement
Abra HR can track different types of COBRA at different rates. Abra HR prompts you to select which COBRA codes (or all) you want to use to create a report. Knowing COBRA law and how to administer it is your responsibility. We provide you with the tools to help manage COBRA but assume no liability. COBRA laws change and are subject to interpretation. The penalty for not following COBRA law is severe. If you are not well versed in COBRA requirements, please seek professional counsel.
COBRA Mailing Labels
This report prepares mailing labels for COBRA recipients in three‐column label format (30 labels per page). You can select the COBRA codes you want to have labels. If sheets of labels don’t move smoothly through your printer, try printing the labels on regular paper, then use your copier.
COBRA Notification Letter
This report prints a standard COBRA notification letter. You can select employees terminated within a specific date range. You can also specify a markup factor.
COBRA Recipient Report
This report lists people receiving COBRA benefits and how long they have received these benefits. The report lists the recipientʹs name, division and department, termination reason, date of termination, number of months the individual has received COBRA, and the number of total dependents, including the insured.
Employee Benefit Changes
This report shows changes in employee benefits. You can select whether to include or exclude history records.
Insurance Coverage Detail
This report contains detailed information about each employee’s insurance benefit plans. It lists the dependents covered under each plan, shows when their coverage was in effect, and also shows the individual coverage and premium amounts for each dependent, when applicable. The report also contains insurance plan information that is currently not available on any other standard reports. You can run the report to either include or exclude waived benefit plans, as well as to include or exclude history records.
Code Table Reports Review all the defined codes in your code tables by printing your code table reports. Use these reports as a reference before or after updating your code tables for the enterprise or each employer.
Sage Abra SQL HRMS provides the following code table reports:
Aboriginal Codes
Attachment Codes
Benefit Insurance Plans

Code Table Reports
Employee Pages 87
Benefit Rate Tables
Benefit Savings Plans
Benefit Type Codes
Census Metro Area Codes
Consent Types
Dependent Relationship Codes
Direct/Indirect Codes
Disability Codes
EE Category Codes
EE Occupational Group Codes
EEO Classification Codes
EEO Job Group Codes
EEO‐4 Job Function Codes
Employee Note Author Codes
Employee Note Type Codes
Employee Type Codes
Ethnic ID Codes
Event Codes
FMLA Event Reason Codes
Industrial Sector Codes
Job Classification Codes
Job Codes
Job Family Codes
Job Status Codes
Language Codes
NOC Occupation Group Codes
OHS Body Part Codes
OHS Injury Codes
OHS Injury Location Codes
OSHA Body Part Codes
OSHA Injury Codes
OSHA Injury Location Codes
Organization Codes
Pay Equity Job Group Codes
Rating Codes

Compensation Reports
88 Sage Abra SQL HRMS
Reason Codes
Salary Grades
Shift Differential Codes
Skill Codes
State/Province Codes
Step Rate Codes
Union Codes
User‐Defined Codes
Visible Minority Codes
Sage Abra SQL HRMS also provides the following code table reports for Time Off:
Absence Reason Codes
FMLA Event Reason Codes
Compensation Reports These reports track reviews, new hires and terminations, a variety of salary analyses and job code statistics.
Many compensation reports include the compa‐ratio statistic. The compa‐ratio is the employee’s percent‐of‐midpoint within a salary range. This is the formula for calculating compa‐ratio:
Compa‐ratio = Employee’s salary / Midpoint for Salary Grade * 100
Note: Compa‐ratio calculations do not print unless you enable the Salary Grade Table Validation during employer setup.
Report Name Report Description
Ranked Salary List This report ranks, in descending order, the annual salaries of all your employees. The report includes annual salaries, unit rate, employees, employee titles, and organization level. You can select to include all, exempt or nonexempt employees.
Reviews Due This report provides a list of performance and salary reviews by month. You can include performance or salary reviews and sort by organization level or supervisor.
If you request open reviews, Sage Abra SQL HRMS includes reviews with a Next Review Date that is earlier than the one specified. The system considers reviews open until the Next Review Date field is updated.
Review Forms for Reviews Due
This report lets you view employee job and salary history. It also provides a section of requested changes for the reviewer to fill out and management to sign. The options are identical to those for the Reviews Due report. When the form is completed, it is intended for use in updating the

Compensation Reports
Employee Pages 89
Report Name Report Description
employee information affected by the review.
Salary Analysis by Employee Name
The Salary Analysis by Employee Name report lets you evaluate salaries categorized by individual employees, job title, all employees, or your own search criteria. This report includes pay rates, hours, annual salaries, longevity, and compa‐ratio.
Salary Analysis by Job Code
The Salary Analysis by Job Code Report lets you evaluate salaries by job code, individual employee, all employees, or your own search criteria. This report includes job titles, salary grades, pay rates, annual salaries, and other data. It is sorted by exempt and nonexempt employees.
Salary Analysis by Job Title
The Salary Analysis by Job Title Report lets you evaluate salaries by job title, job code, individual employee, all employees, or your own search criteria. This report includes pay rates, hours, annual salaries, longevity, compa‐ratio, and other data.
Salary Analysis by Organization
This report lists employees’ salaries by organization level. The employee’s pay rate, hours, annual salary, years of service, rating, and compa‐ratio are listed. The employees’ average annual salary, total annual salary, and number of employees are totaled for the organization level as well as for the entire employer at the end of the report.
Salary Analysis by Salary Grade
The Salary Analysis by Salary Grade Report lets you evaluate salaries by salary grade, individual employee, all employees, or your own search criteria. This report includes job titles, salary grades, pay rates, annual salaries, and other data. The report averages and totals the annual salaries for each salary grade.
Salary As Of Use this report to view a list of employees and their respective salaries at a given point in time. The report lists the employee name, job title, unit pay rate, and annual salary as of the selected date, the total of the salaries displayed and a calculated salary average. You can select individual employees, all employees, or define your own search criteria.
Salary Grade Range Exceptions
Use this report to generate a list of employees whose rate of pay is different (more or less) from their assigned salary grade range. This report works only if Salary Grade Validation is enabled during setup of Sage Abra SQL HRMS. Grouped by organization levels, the report lists employee, title, salary, normal salary grade range (minimum and maximum), and the difference in dollar amount between the salary grade range and what the employee is paid.
Salary History Use this report to produce an employee compensation history. It lists employees, effective dates, reasons for change, salary rates, and annual salaries.
Salary Increase Analysis by Job Code
The Salary Increase Analysis by Job Code report lets you evaluate salary increases by job code. This report includes previous versus current salaries, effective dates, reasons for adjustments, and actual and percentage amounts of increases.
Salary Increase Analysis by Organization
Use this report to analyze employee salary increases by organization level. The report includes previous versus current salaries, effective dates, reasons for adjustments, and actual and percentage amounts of increases.
EEO Reports
90 Sage Abra SQL HRMS
Report Name Report Description
Salary Increase Analysis by Reason
Use this report to analyze employee salary increases by reason. The report includes previous versus current salaries, effective dates, reasons for adjustments, and actual and percentage amounts of increases.
Statistics by Job Code
This report groups statistical data into exempt and nonexempt employee categories. For each job code, the report shows titles, number of employees in each category, average unit rate, and average and total salaries.
Terminated Employee Log
This report lists terminated employees for a specified date range. It searches the Employee Status field for all employee records tagged as terminated. The report provides dates of hire and termination, name, employee number, reason for termination, title, organization levels, employee type, longevity, pay rate and frequency, and annual salary. It sorts the records by termination date, gives a headcount and calculates average and total terminated salaries.
Turnover Performance vs. Longevity Matrix
This report provides information about turnover rate within your organization. It might indicate a problem if employees with a high performance rating consistently leave your company, while poor performers have remained with the company a long time. The matrix lists performance ratings vs. length of time employed for terminated employees.
Turnover Statistics This report lets you view turnover statistics and calculates service length by Adjusted Seniority Date, Original Hire Date, or Last Hire Date. For each terminated employee, this report includes termination type, termination date, employee name, title, service length, salary grade, and termination reason.
EEO Reports EEO reports help you track an employer’s compliance in its hiring practices.
Report Name Report Description
EEO‐1 Headcount Summary
This report is a table showing EEO classifications and the number of employees in each classification. The table is broken down by gender and ethnic origin. Each column is totaled.
On the Specific Criteria tab for this report, you can enter the previously reported totals you want to appear in Section D, line 11. After you print or preview the report, the system asks if you want to save the new totals as the previous totals. Click Yes if you want the totals on the current report to be saved as the Previous Reported Totals on the Specific Criteria tab for the next time you run the report.
EEO‐1 Headcount Detail
The EEO‐1 Headcount Detail report gives you a list of employees grouped by EEO classification, which enables you to reconcile the information generated in the EEO Headcount Summary report.
EEO‐4 Headcount Summary
This report is a table showing EEO classification, annual salaries, and the number of employees in each classification. The table is broken down by gender and ethnic origin. Each
EEO Reports
Employee Pages 91
Report Name Report Description
column is totaled.
EEO‐4 Headcount Detail
This report lists employees grouped by EEO classification, which lets you reconcile with the information generated in the EEO Headcount Summary. This EEO‐4 report consists of multiple pages.
EEO Job Group Age Analysis
This matrix indicates the number of employees from specific age groups falling within each EEO job group. In addition to assisting you with ADEA compliance, this report also helps you analyze your work force and helps you plan for groups of employees who are approaching retirement.
EEO Job Group Headcount
This report indicates the number and percentage of employees in each gender and ethnic group who fall within specific EEO job groups.
EEO New Hire Headcount Summary
This summary provides a table showing EEO classifications and the number of new hire employees in each. The summary is broken down by gender and ethnic origin.
EEO New Hire Headcount Detail
This report gives you a list of new hire employees grouped by EEO classification.
EEO Termination Summary
This summary provides a table of EEO classifications and the number of terminated employees in each classification. The summary is broken down by gender and ethnic origins.
EEO Termination Detail
This report provides a list of terminated employees grouped by EEO classification.
I‐9 Citizenship Verification
This report provides a list of employees and their I‐9 citizenship status and renew dates.
Promotions Report The Promotions report includes the EEO class codes, genders, and ethnic backgrounds of employees promoted within a specific time.
Veterans Employment
This table shows EEO classifications (job categories) and the number of employees and new hires in each classification. The table is broken down by veteran status. Abra SQL HRMS adds the number of employees in EEO Class 1.1 (Executive/Senior Level Officials and Managers) with the number of employees in EEO Class 1.2 (First/Mid Level Officials and Managers). The total is displayed on the report as EEO Classification Code 1 (Officials and Managers).
Vets 100 Detail List This report provides employee names and IDs by job category for each VETS‐100 category. The report includes newly hired veterans by category and total new hires for the twelve (12) month period specified.
Vets 100 Summary List
This report provides the number of employees by job category for each VETS‐100 category. The report includes newly hired veterans by category and total new hires for the 12 month period specified.

Employee and Organization Reports
92 Sage Abra SQL HRMS
Report Name Report Description
Vets 100A Detail List This report provides employee names and IDs by job category for each VETS‐100A category. The report includes newly hired veterans by category and total new hires for the twelve (12) month period specified. It displays a detailed list of the required report data in the Information on Employees section of the VETS‐100A form.
Vets 100A Summary List
This report provides the number of employees by job category for each VETS‐100A category. The report includes newly hired veterans by category and total new hires for the 12 month period specified. It displays a summarized list of the required report data in the Information on Employees section of the VETS‐100A form.
Employee and Organization Reports Employee and organization reports include lists of anniversary dates, personnel events, organizational structure, years of service, business telephone directory, and recruiting and union activity.
Report Name
Report Description
Anniversary List The Anniversary List indicates hire dates and seniority rankings for individual employees, all employees or your own reporting criteria during one month or all months, as of the effective date you specify. You can base the anniversary date on the last hire date, original hire date, or seniority date. Sort the report by anniversary date, employee name, anniversary date by organization level, and employee name by organization level.
Event Report Use this report to print a list of employee events. Events are training, licenses, bonuses, professional memberships, company cars, or anything defined in the Events code table. You can select a specific event or report all events, as well as specify a date range for next due (renewal) dates. The report lists employee, title, organization levels, event code, effective date, event description, next due date, and comments.
New Hire Log This report lists all employees hired during the date range you specify. You can select to include or exclude rehires, and you can choose to sort by employee name or date hired.
Organizational Report
This report is a list of employees grouped by organizational levels and supervisors. Each group includes employee name, ID number, title, job code, seniority date, and employee type (such as RFT or RPT). An employee count is subtotaled by organization levels. An employee total ends the report.
Recruiter Activity
Select this report to review recruiter activity during a specified time period. For each recruiter, the report identifies new recruits, their current jobs, organization levels, and dates of hire.
Service List This report provides a list of employees based on years of service. This list includes years of service, seniority dates, employee names, titles, and organization levels. It gives the employee headcount from which it calculates the average length of service.

Leave Reports
Employee Pages 93
Report Name
Report Description
Source‐of‐Hire Activity
This report indicates the sources of new hires during the time period you specify. The report pinpoints new employees referred by personnel agencies, classifieds, recruiters, and all other sources.
Telephone Directory
This report provides a telephone directory for all employees and organization levels. You can also build your own reporting criteria. Select to display the full ten‐digit number, an extension number, or both numbers. You can even include employees without phone numbers. This report uses the Nickname field from the Demographics page as the employee’s first name; if this field is blank, the report uses the First Name field; if this field is blank, the report prints the Last Name but leaves the Nickname/First Name blank on the report.
Union Report This report lists employees who belong to unions. The report provides an alphabetical listing of employees sorted by name and includes employee titles, longevity, salaries, and union sign‐up dates. You can include or omit employee salaries.
Leave Reports Sage Abra SQL HRMS includes reports to help you track and monitor employees’ leaves of absence.
Report Name Report Description
Employees Currently on FMLA
This report indicates all employees currently on FMLA leave. The report includes the FMLA event and the starting and ending dates. You can include selected employees, selected organization levels, or a particular exempt status.
Employees Currently on LOA
This report indicates all employees currently on leave. The report includes the leave reason and the starting and ending dates. You can include selected employees, selected organization levels, or a particular exempt status.
FMLA Due to Return
This report indicates all employees scheduled to return from FMLA leave. The report includes the FMLA event and the starting and ending dates. You can include selected employees, selected organization levels, or selected exempt status.
LOA History This report displays employees whose LOA start date is within the date range you select. It is grouped and sorted by employee name and displays status, leave reason, and the start and actual return dates.
Medical Recertification
This report lists employees due for medical recertification prior to returning from FMLA leave. The report includes the FMLA event and the starting and recertification dates. You can include selected employees, organization levels, or exempt status.

OSHA Reports
94 Sage Abra SQL HRMS
OSHA Reports The information in Occupational Safety and Health Act (OSHA) reports comes from the information provided on the OSHA page.
Report Name Report Description
Accident Analysis by Injury
This report shows the number of work‐related injuries or illnesses and the impact of related medical costs and lost productivity on the organization due to these incidents. Events are sorted by injury.
Accident Analysis by Location
This report lists the number of work‐related injuries or illnesses and the impact of related medical costs and lost productivity on the organization due to these incidents. These events are sorted by location.
Accident Analysis by Organization Level
This report shows the number of work‐related injuries or illnesses and the impact of related medical costs and lost productivity on the organization due to these incidents. Events are sorted by organization level.
Accidents Not Filed This report indicates work‐related injuries or illnesses not filed during the time period you specify. Like the Accidents by Employee Report, this report can be printed for individual employees, for all employees, or with your own reporting criteria.
Accidents by Date Use this report to view by date the number and nature of work‐related injuries, illnesses or first aid administered within the time period you specify. You can print this report for individual employees, for all employees, or with your own reporting criteria. You can also include or exclude information regarding unfiled accidents and closed accidents.
Accidents by Employee You can print this report to view the number and the nature of work‐related injuries or illnesses within the time period you specify, sorted by employee. You can print this report for individual employees, for all employees, or with your own reporting criteria.
OSHA 101 Accident Profile
Displays detailed information about employeesʹ work‐related accidents. This report includes other information such as hospital details.
OSHA 200 Log Displays a log and summary of occupational injuries and illness. This report does not include a total.
OSHA 300 Incident Log Displays a log of the number of work‐related illnesses and injuries sustained by employees within a given time period.
OSHA 300A Summary of Work‐Related Injuries and Illnesses
The OSHA 300A report indicates the number of work‐related illnesses and injuries sustained by employees within a given time period. You can sort data according to incident type and print either summary or detail reports. Summary reports contain those totals you must post by law. Detail reports contain information to help you reconcile totals in the summary reports.
OSHA 301 Incident This report summarizes work‐related injuries and illnesses, including company and home

Pay Equity Reports
Employee Pages 95
Report Name Report Description
Report contact information, incident information, and other details.
Workersʹ Compensation Open Claims
Use this report to view the number of open Workersʹ Compensation claims. The report includes the number and the nature of open cases, the dates claims were filed and closed, the case numbers and claim IDs, and the number of work days the employee lost or experienced restricted duty.
Pay Equity Reports The information on these reports comes from the information provided on the Pay Equity page. These reports assist with the process of determining male and female dominated jobs within an organization.
Report Name
Report Description
Job Groups by Gender
This report lists employees by gender within a job and job group. This information assists with the process of company jobs for pay equity purposes.
Jobs by Gender This report lists the employees by gender within a job. This information assists with the process of determining male and female dominated jobs within an organization.
Personal Information Reports Personal information includes lists of birthdays, addresses and telephone numbers, mailing labels, headcounts, and detailed employee profiles.
Report Name
Report Description
Age List This report lets you view a list of employees sorted by age. The report includes employee birth dates, titles, divisions, and departments.
Birthday List Select this report to view a list of employee birthdays. You can sort the list by date, name, by date for each division and department, and by name for each division and department. You can print the list for any or all months and you can choose whether or not to include address information.
Employee Attachments
Use this report to list the attachment records for a selected group of employees. An option is also available to show which employees are missing required attachments.
Employee Count
This report is a count of all employees within your organization. By defining the appropriate selection options, you can count all the employees within your company, within a division, and within a department.

Skill and Education Reports
96 Sage Abra SQL HRMS
Report Name
Report Description
Employee List The Employee List lists employee information by last name, first name, and middle initial. It contains employee IDs, titles, and organization levels.
Employee Notes
Use this report to print notes for the employees you specify. You can choose to print all notes or only those of a particular type or by a particular author. You can sort by employee name, note type, author, comment date, or follow‐up date.
Employee Profile
The Employee Profile report compiles employee information. Use this report to print a profile for an individual, all employees, or your own criteria. Customize your profile by selecting the employee pages from which the system pulls information.
Home Mailing Labels
This report provides employees’ names and addresses printed in three‐column label format (30 labels per page). You can sort these by employee name, employee ID, or zip code and employee name. If sheets of labels don’t move easily through your printer, try printing the labels on regular paper, then use your copier.
Work Phone List
This report lists employeesʹ names and work telephone numbers. It displays the standard ten‐digit phone number (including the area code), the extension number and the organization levels for each employee.
Skill and Education Reports These reports help you track and record the skill sets and educational background of your employees.
Report Name Report Description
Education Report Lists education information for all employees in the selected employer.
License/Certificate Lists all licensed and certified employees in the selected employer, including effective dates and due dates.
Membership List Lists all employee memberships, including effective dates and due dates.
Previous Experience
Allows you to review each employeeʹs previous work experience, including from and to dates and previous salaries.
Skill Retrieval Report
This report lets you view a list of employees who have a specific skill set for which you are looking. For the skill you specify, the report includes each employeeʹs title, organization level, and date of hire.
Skill and Education List
This report provides an alphabetized list of individual employees, all employees or the reporting criteria you specify. The report includes each employee’s skills, years of experience in each skill and a comment area that provides short details about each skill. In addition, the report indicates schools attended, attendance duration, grade point averages, and scholastic degrees earned.

Wellness Reports
Employee Pages 97
Report Name Report Description
Skills Report Lists skills for all employees in the selected employer, including specialized skills such as foreign languages.
Wellness Reports The information on these reports comes from the information provided on the Wellness page.
Report Name
Report Description
Blood Donor List
This report lists each employeeʹs department and division, blood type, RH factor, and last donation date. It also provides the employee’s telephone extension. You can select to print specific blood types or all records as of a specified date.
Drug Tests Due
The information on this report includes the employeeʹs name, date of the most recent drug test, its result, the date of the next test, the number of years since the last test and the telephone extension.
Emergency Contacts
This report provides a list of employees and their emergency contacts.
Health Profile This profile provides an overall view of the employeeʹs health. Some examples of the type of information provided include allergies, chronic conditions, wellness programs, blood type and eligibility for donation date, height, and weight.
Physical Exams Due
The Physical Exams Due report provides the date of the employeeʹs last physical exam, the result of that physical, the date of the next physical, the number of years since the last physical and the telephone extension.

Wellness Reports
98 Sage Abra SQL HRMS
Employee Pages 99
Index A
Absence Reason code table report, 86
Accident Analysis by Injury report, 94
Accident Analysis by Location report, 94
Accident Analysis by Organization Level report, 94
Accidents by Date report, 94
Accidents by Employee report, 94
Accidents Not Filed report, 94
actions
Change Employee ID, 46
Change Employee Organization, 45
Change Personal Status, 46
Delete Employee Record, 48
Job Promotion, 49
Pay and Performance Review, 50
Rehire Employee, 52
Terminate Employee, 55
address information, 46
changing, 47
Age List report, 95
analyses
OSHA Incidents, 71
Performance and Longevity, 71
Salary, 72
Turnover, 73
Anniversary List report, 92
applicant search, 43
B
beneficiaries, 9, 13
Benefit Coverage by Employee report, 85
Benefit Enrollment by Plan report, 85
benefit history, 11
Benefit Insurance Plans code table report, 86
Benefit Letter report, 85
benefit plan setup
Insurance Benefits, 21
Savings Benefits, 35
benefit plans
updating selections, 46
Benefit Premium Totals by Plan report, 85
Benefit Savings Plans code table report, 86
Birthday List report, 95
Blood Donor List report, 97
C
Census report, 85
Certificate of Coverage report, 85
Change Employee ID action, 46
Change Employee Organization action, 45
Change Personal Status action, 46
COBRA Billing Statement report, 85

Index
100 Sage Abra SQL HRMS
COBRA Mailing Labels report, 85
COBRA Notification Letter report, 85
COBRA Recipient report, 85
code table reports
Absence Reason, 88
Benefit Insurance Plans, 86
Benefit Type, 87
Dependent Relationship, 87
EEO Classification, 87
Employee Note Type, 87
Employee Type, 87
Event, 87
FMLA Event Reason, 87
Organization, 87
OSHA Injury, 87
Rating, 87
Reason, 87
Salary Grades, 88
User‐Defined, 88
compa‐ratio in reports, 88
Criteria Builder, 76
Current Job, 1
Current Pay, 4
Custom Criteria Table, 75
D
defining custom criteria for reports
Criteria Builder, 76
Criteria Table, 75
Delete Employee Record action, 48
Dependent Relationship code table report, 86
Dependents, 9, 13
adding, 9, 13, 52
changing, 47
details
Current Job, 1
Current Pay, 4
Demographics, 7, 11
Dependents, 9, 13
Education, 15
Emergency Contacts, 15
Employee Attachments, 16
Employee Notes, 18
Events, 19
HR Status, 19
Insurance Benefits, 21
Job History, 25
Leave of Absence, 27
OSHA, 30
Previous Employer, 34
Savings Benefits, 35
Skills, 37
Termination, 38
Wellness, 39
Drug Tests Due report, 97
E
EEO Classification code table report, 86

Index
Employee Pages 101
EEO Job Group Age Analysis report, 90
EEO Job Group code table report, 86
EEO Job Group Headcount report, 90
EEO New Hire Headcount Detail report, 90
EEO New Hire Headcount Summary report, 90
EEO Termination Detail report, 90
EEO Termination Summary report, 90
EEO‐1 Headcount Summary report, 90
EEO‐4 Headcount Detail report, 90
EEO‐4 Headcount Summary report, 90
EEO‐4 Job Function code table report, 86
email addresses
updating, 70
emailing
reports, 81
Emergency Contacts, 15
Emergency Contacts report, 97
employee
adding a photo, 7, 11
adding an attachment, 17
adding benefit plans, 52
adding dependents, 9, 13
adding emergency contacts, 15
adding: editing and deleting photos, 7, 11
assigning employee ID, 43
changing employee ID, 46
changing employee organization, 45
changing personal status, 46
editing or deleting a photo, 7, 11
entering deductions, 52
entering earnings, 52
entering tax withholdings, 52
performance review, 50
promoting, 49
rehiring, 52
selecting for processes, 68
seniority information, 19
terminating, 55
veteran information, 19
Employee Attachments, 16
Employee Attachments report, 95
Employee Benefit Changes report, 85
Employee Count report, 95
Employee List report, 95
Employee Note Type code table report, 86
Employee Notes, 18
Employee Notes report, 95
employee organization, 45
changing, 46
employee records, 7, 11
adding a photograph, 7, 11
adding an attachment, 17
Employees Currently on FMLA report, 93
Event code table report, 86
Event report, 92
Events, 19

Index
102 Sage Abra SQL HRMS
exit interview, 56
exporting
reports, 81
F
FMLA Due to Return report, 93
FMLA Event Reason code table report, 86
H
Health Profile report, 97
hire an applicant, 43
Home Mailing Labels report, 95
I
I‐9 Citizenship Verification report, 90
Import Calculations process, 59
Insurance Benefits, 21
Insurance Coverage Detail report, 85
J
Job History, 25
Job Promotion action, 49
L
Leave of Absence, 27
Leave of Absence, 27
M
Mass Update Pay Rate process, 66
Mass Update process, 64
mass updating
information, 64
pay rates, 66
selecting information to update, 64
Medical Recertification report, 93
N
New Hire Log report, 92
O
Organization code table report, 86
Organizational report, 92
OSHA, 30, 71
incidents analysis, 71
reports, 94
OSHA 300 Log report, 94
OSHA 301 Incident report, 94
OSHA Body Part code table report, 86
OSHA Incidents analysis, 71
OSHA Injury code table report, 86
P
Page Preview toolbar, 81
Pay and Performance Review action, 50
pay rates
mass updating, 66
Performance and Longevity analysis, 71
performance reviews, 50
personal status, 46

Index
Employee Pages 103
changing, 47
photograph, 9, 13
adding to employee record, 7, 11
previewing reports, 81
Previous Employer, 34
printing reports, 81
processes
Import Calculations, 59
Mass Update, 64
Mass Update Pay Rate, 66
Update Benefits, 69
Update Email Addresses, 69
promoting an employee, 49
promotions, 49
R
Ranked Salary List report, 88
Rating code table report, 86
Reason code table report, 86
Rehire Employee action, 52
rehiring an employee, 52
report options
classes and courses to include, 77
custom criteria, 75
employees to include, 77
employers to include, 77
organization levels to include, 77
report list, 78
selecting classes and courses, 77
selecting employees by status, 77
selecting organization levels, 77
selecting the employers, 77
specific criteria, 77
specific status selections, 77
standard criteria, 79
Review Forms for Reviews Due report, 88
S
Salary analysis, 72
Salary Analysis by Employee Name report, 88
Salary Analysis by Organization report, 88
Salary Analysis by Salary Grade report, 88
Salary As Of report, 88
Salary Grade Range Exceptions report, 88
Salary History report, 88
Salary Increase Analysis by Job Code report, 88
Salary Increase Analysis by Organization report, 88
Salary Increase Analysis by Reason report, 88
Savings Benefits, 35
secondary supervisor, 3, 65
selecting report options
classes to include, 77
courses to include, 77
employees to include, 77
employers to include, 77
organization levels to include, 77
report list, 78
specific criteria, 75

Index
104 Sage Abra SQL HRMS
standard criteria, 79
sending reports, 81
Service List report, 92
Shift Differential code table report, 86
Skill and Education List report, 96
Skill code table report, 86
Skill Retrieval report, 96
Source‐of‐Hire Activity report, 92
State code table report, 86
Statistics by Job Code report, 88
supervisor, 2, 65
T
Tax Withholdings
changing, 47
Telephone Directory report, 92
Terminated Employee Log report, 88
terminating an employee, 55
Exit Interview, 56
Termination, 38
Termination, 38
toolbars
Page Preview toolbar, 81
Turnover analysis, 73
Turnover Performance vs Longevity report, 88
Turnover Statistics report, 88
U
Union report, 92
Update Benefits process, 69
Update Email Addresses process, 69
updating email addresses, 69
User Defined code table report, 86
user defined fields
Current Pay, 4
HR Status, 19
Insurance Benefits, 21
Job History, 25
Savings Benefits, 35
user‐defined fields
Current Pay, 4
HR Status, 19
Insurance Benefits, 21
Job History, 25
Savings Benefits, 35
V
Veterans Employment report, 90
W
Wellness, 39
Work Phone List report, 95
Workersʹ Compensation Open Claims report, 94