samon onion topper · h1 - [email protected] v1-2011-en 1. introduction. this manual is intended for...
TRANSCRIPT

Dealer:
Ploegstraat 4 8308 AA Nagele The Netherlands Tel (+31) 527 – 652 500
Fax (+31) 527 – 652 916 www.samon.nl [email protected]
SAMON
ONION TOPPER
Manual & Parts list Type: SU15AO ■ SU18AO ■ SU15FOB ■ SU18FOB
Version: Open Serial no.: 2711771 - >>> V1-2017-EN

Index
1. Introduction ...................................................................................................................................................... H1 2. Warranty and liability ...................................................................................................................................... H2 2.1 Warranty ........................................................................................................................................... H2 2.2 Liability .............................................................................................................................................. H2 3. Safety and environment ................................................................................................................................... H3 3.1 General safety ................................................................................................................................... H3 3.2 Environment ...................................................................................................................................... H3 3.3 Warning stickers and pictograms ...................................................................................................... H4 4. Inspections before and during use ................................................................................................................... H5 4.1 Necessary inspections before use ..................................................................................................... H5 4.2 Shortening the PTO shaft .................................................................................................................. H5 4.3 Connecting the SAMON Onion Topper ............................................................................................. H6 4.4 Checks after +/- 5 meters .................................................................................................................. H6 4.5 Checks and maintenance after +/- 5 ha ............................................................................................ H6 5. Maintenance ..................................................................................................................................................... H7 5.1 Lubrication schedule ......................................................................................................................... H7 5.2 Adjusting drive belts ......................................................................................................................... H8 5.3 Maintenance gearbox ....................................................................................................................... H9 5.3.1 Filling up the gearbox ....................................................................................................... H9 5.3.2 Changing gearbox oil ........................................................................................................ H9 5.4 Equate wheelsets without Automatic Depth Control .................................................................... H10 5.5 Equate wheelsets with Automatic Depth Control .......................................................................... H10 5.6 Automatic Depth Control ................................................................................................................ H11 5.6.1 Adjusting cutting-height Automatic Depth Control ....................................................... H11 5.6.2 Width adjustment probes Automatic Depth Control .................................................... H11 5.6.3 Settings and adjusting the Automatic Depth Control valve-block ................................. H12 5.6.4 Adjusting and setting the sensors after maintenance ................................................... H13 6. Transport and storage .................................................................................................................................... H14 6.1 Transport on a carrier ..................................................................................................................... H14 6.2 Transport on the tractor ................................................................................................................. H14 6.3 Storage ............................................................................................................................................ H14 7. Technical data ................................................................................................................................................. H15 8. Technical diagrams ......................................................................................................................................... H16 8.1 Hydraulic diagram for Automatic Depth Control ............................................................................ H16 8.2 Electric diagram for Automatic Depth Control ............................................................................... H17 9. Ordering spare parts ...................................................................................................................................... H18 10. Troubleshooting ........................................................................................................................................... H19 11. EG-Declaration of conformity ...................................................................................................................... H20

H1
www.samon.nl - [email protected]
V1-2011-EN
1. Introduction. This manual is intended for the recipient of the SAMON Onion Topper. It contains information regarding the use and maintenance of the SAMON Onion Topper. This manual has been created with the utmost care, illustrations and technical data are current until the print of this manual. Ellens Agricultural Technology BV advises the users before using the SAMON Onion Topper to carefully read this manual and follow up safety instructions, directions and comments. Reference to the left- or right side will be determent by the direction in which the SAMON Onion Topper will be driven, seen from behind. Ellens Agricultural Technology BV has the right to change the contents of this manual without notice. The SAMON Onion Topper has been designed according the conditions of the machine directives 89/392/EEG + alterations.

H2
www.samon.nl - [email protected]
V1-2011-EN
2. Warranty and Liability. 2.1 Warranty. SAMON Agricultural Machines are guaranteed for the period of one season. The SAMON Onion Topper has been designed for cutting the haulm of onions, chicory and carrots.* Using the SAMON Onion Topper otherwise than it has been designed for will be deemed as improper use. * When using the SAMON Onion Topper for other crops and plants please check with your SAMON distributor. The guarantee will be given to construction errors by normal use of the SAMON Onion Topper. The guarantee does not cover wear parts, for example:
Drive wheels, drive belts, deflector rolls
bearings,
Shares and bearers,
Coulter disks,
Other wear parts. The guarantee covers hydraulic components, PTO shafts and gearboxes only when these components prematurely fail and after inspection by the manufacturer. The inspection report of the manufacturer will decide if guarantee will be granted. Guarantee will be void if:
Constructive adaptations and additions to the SAMON Onion Topper without permission of Ellens Agricultural Technology BV
Installing and use of components to and on the SAMON Onion Topper which will influence the rigidity of the construction.
Failure of components due to improper use of the SAMON Onion Topper.
Changing and ignoring specific settings and adjustments, therefore resulting in failure. For information help and guidance our distributors and employees are at your service. 2.2 Liability. Ellens Agricultural Technology BV are not liable for damage to SAMON Agricultural machines; tractors; machines from third parties; Injury to people and animals; damage to properties and products due to:
Improper use .
Not following the instructions and directions described in the manual.
ATTENTION!!!
The SAMON Onion Topper must be operated, maintained and repaired by persons whom are familiar with the machine and it’s safety procedures.

H3
www.samon.nl - [email protected]
V1-2011-EN
3. Safety and Environment. 3.1 General safety.
WARNING!!!
Make sure that everyone who works and maintains the SAMON Onion Topper, has read the manual and fully understands the personal safety procedures and the safety procedures for others while working with the SAMON Onion Topper.
Always maintain the following precautions while working with the SAMON Onion Topper.
When inspecting and maintaining the SAMON Onion Topper always turn of the engine of the tractor and remove the key from the ignition.
The SAMON Onion Topper is equipped with rotating knives, these rotate with approximately 2000 rpm and are extremely dangerous.
Be aware that the knives will not immediately stop spinning after shutting down the SAMON Onion Topper.
Always wait until the rotating knives are fully stopped before approaching the SAMON Onion Topper.
Make sure, before using the SAMON Onion Topper, stones and other objects are being removed of the terrain. These object can be a hazard for the SAMON Onion Topper, people, animals and other objects.
Do NOT approach a working SAMON Onion Topper.
If an object has been hit; always turn off the SAMON Onion Topper and check for damage.
The SAMON Onion Topper is equipped with parts which have safety chains, wires and locking pins. Make sure that these safety parts are always mounted.
Always replace damaged and broken safety equipment.
Protection covers and rubber flaps must always be undamaged. If torn or damaged always replace with new ones.
Always use original SAMON spare parts, these are specifically designed for the SAMON Onion Topper.
3.2 Environment. From ecological point of view, when cleaning and maintaining the SAMON Onion Topper use an solid and liquid proof floor.
ATTENTION!!!
The disposal of used lubricants should be on a environmentally friendly manner. We recommend to deliver the used lubricants in a closed container to a recycle center of collection station. Never drain used lubricants into a dustbin, ditch, sewer, cleanage drain or onto the ground.

H4
www.samon.nl - [email protected]
V1-2011-EN
3.3 Warning stickers and pictograms. Every SAMON Onion Topper has been equipped with the following stickers and warning labels:
Description: Size.: (bxh) Order nr.
A: Sticker “Samon” 24,8 x 7,8 TL6304
B: Sticker “Height adjustment” 42,7 x 4,9 TL6300
C: Sticker “Spinning knives” 18,4 x 19,8 TL6314
D: Sticker “Note of exclamation” 8,5 x 7,2 TL6306
E: Sticker “Attention Hand/Foot” 19,3 x 6,4 TL6309
F: Sticker “Attention Foot” 13,3 x 6,4 TL6308
G: Sticker “Attention Manual” 13,3 x 6,4 TL6310
H: Sticker “Max 30 l/min” 6,0 x 5,0 TL6320
I: Sticker “RPM knives” 9,8 x 7,8 TL6312
Labels SAMON Onion Topper type: Rear Labels SAMON Onion Topper type: Front If one of the labels is missing or damaged, it can be ordered at the SAMON distributor.

H5
www.samon.nl - [email protected]
V1-2011-EN
4. Inspections before and during use.
ATTENTION!!!
When inspecting and maintaining the SAMON Onion Topper always turn of the engine of the tractor and remove the key from the ignition. Be aware that the knives will not immediately stop spinning after shutting down the SAMON Onion Topper.
4.1 Necessary inspections before use.
Check the gearbox for leakage.
Check the tire pressure. (4,5 Atm.)
Check the length of the PTO shaft.
Check the protective cover of the PTO shaft for damage.
Check if the safety chain of the PTO shaft is mounted .
Check if safety clips, chains and wires are mounted.
Check the drive belts for cracks and tears.
Check the tension of the drive belts, also check this regularly during use.
Check the hydraulic system for damages and leaks.
Check the electrical system for damages.
Check knives and mounting bolts for wear.
4.2 Shortening the PTO shaft. If during the pre-check the PTO shaft turns out to long, use the following directive for shortening the PTO shaft.
Connect the SAMON Onion Topper to the tractor.
Position the PTO axles as close as possible towards each other.
Measure distance “A” of the PTO axles.
Measure distance “B” of the PTO. (See drawing for measure points)
Subtract length “A” from length “B”
Shorten the PTO with the solution. (See example)
Example:
A=400 mm B=450 mm
B(450) - A(400) = 50 + 10 mm
Shorten length = 60 mm

H6
www.samon.nl - [email protected]
V1-2011-EN
4.3 Connecting the SAMON Onion Topper.
Connect the SAMON Onion Topper to the tractor.
Connect the top and lower link pins and connect the Linch pins
Check if the top link pin has clearance.
Mount the PTO. (Rear Topper 540 PTO, Front Topper 750 PTO)
Connect the safety chains of the protective sleeve of the PTO.
Mount the hydraulic hoses (Max. 30 L/Min)
Check all the functions of the (Automatic) Depth Control.
ATTENTION!!!
Use only a pressureless hydraulic return.
4.4 Checks after ± 5 Meters.
Check if the SAMON Onion Topper has the correct height adjustment
Check if the top link pin has clearance.
4.5 Checks and maintenance after ± 5 ha.
Check the knives and connection nuts and bolts for wear and damage.
Check the drive belts for cracks and tears.
Check the tension of the drive belts, also check this regularly during use.

H7
www.samon.nl - [email protected]
V1-2011-EN
5. Maintenance.
WARNING!!!
When inspecting and maintaining the SAMON Onion Topper always turn of the engine of the tractor and remove the key from the ignition. Be aware that the knives will not immediately stop spinning after shutting down the SAMON Onion Topper!
5.1 Lubrication schedule. Lubricate the SAMON Onion Topper according the following lubrication schedule.
Lubrication schedule Samon Onion Topper.
Point: Interval: Description:
A 8 hrs Upper bearings rotary axle, Automatic Depth Control.
B 16 hrs Lower bearing rotary axle, Wheel supports, Wheels.
C 50 hrs PTO shaft.

H8
www.samon.nl - [email protected]
V1-2011-EN
5.2 Adjusting drive belts. When the drive belts need adjusting use the following directives.
Open the hoods and fix the supports.
Unscrew nuts “A”.
Unscrew bolts “C”.
Adjust the tension of the belts with bolts “B”.
Keep a slack of about 2cm.
Tighten nuts “A”.
Tighten bolts “C”.
ATTENTION!!!
Worn or hardened drive belts should be replaced.

H9
www.samon.nl - [email protected]
V1-2011-EN
5.3 Maintenance Gearbox. The gearbox has been filled in the factory with gearbox oil. (SAE 90)
ATTENTION!!!
Gearbox oil needs to be changed every 2 years.
5.3.1 Filling up the gearbox oil.
Make sure the SAMON Onion Topper is on a flat, liquid proof floor.
Disconnect the PTO shaft.
Unscrew the breather plug(A) on the top of the gearbox.
Unscrew plug (C) .
Fill the gearbox with gearbox oil (SAE 90) until the oil runs out of plughole (C).
Install plug (C) and breather plug (A).
Mount the PTO shaft.
5.3.2 Changing gearbox oil.
Disconnect the PTO shaft.
Disconnect the drive belts.
Remove the gearbox out of the SAMON Onion Topper.
Unscrew the breather plug(A) on the top of the gearbox.
Unscrew plug (B) on the bottom of the gearbox.
Drain the oil out of the gearbox in a container and make sure it is disposed on a ecological friendly manner.
Install plug (B) and mount the gearbox back in the bracket.
Unscrew plug (C) .
Fill the gearbox with gearbox oil (SAE 90) until the oil runs out of plughole (C).
Install plug (C) and breather plug (A).
Install the drive belts with the correct tension.
Install the PTO shaft.

H10
www.samon.nl - [email protected]
V1-2011-EN
5.4 Equate wheelsets without Automatic Depth Control. When the height adjusting isn’t working properly because the wheelsets aren’t level use the following directions to solve this.
Connect the two supplied connection hoses to the color coded connection.
Raise the SAMON Onion Topper until the wheels can’t touch the ground.
Move the wheelsets up and down with the maximum stroke and repeat this a few times.
Lower the wheelsets completely to its maximum position and remove the connection hoses.
Install the protective covers on the connections.
Check if all the wheels are level by raising and lowering the wheelsets.
Repeat the above instructions if the wheelsets aren’t level.
Connection red: Long hose
Connection green: Short hose
5.5 Equate wheelsets with Automatic Depth Control.
When the height adjusting isn’t working properly because the wheelsets aren’t level use the following directions to solve this.
Connect the two supplied connection hoses to the color coded connection.
Raise the SAMON Onion Topper until the wheels can’t touch the ground.
Turn on the Automatic Depth Control.
Move the wheelsets up and down with the maximum stroke by moving the probe of the Automatic Depth Control up and down and repeat this a few times.
Lower the wheelsets completely to its maximum position and remove the connection hoses.
Install the protective covers on the connections.
Check if all wheels are level by raising and lowering the wheelsets.
Repeat the above instructions if the wheelsets aren’t level.
Connection red: Long hose
Connection green: Short hose

H11
www.samon.nl - [email protected]
V1-2011-EN
5.6 Automatic Depth Control. If the SAMON Onion Topper has been equipped with the Automatic Depth Control the cutting-height and width of the probes must be set before using the SAMON Onion Topper.
Cutting-height adjustment 5.6.1
Width adjustment probes 5.6.2
5.6.1 Adjusting cutting-height Automatic Depth Control.
Raise the SAMON Onion topper into the floating position.
Make sure the Automatic Depth Control is turned on.
Release the retainer bolts of the height adjustment.
Remove the locking bracket from the rotating levers.
Check if both reaction plates are situated between the two sensors.
Rotate the levers to adjust cutting-height.
Lock the rotating levers with the bracket.
Tighten the retainer bolts.
5.6.2 Width adjustment probes Automatic Depth Control. For an optimal working Automatic Depth Control the probes must be running in the right tracks therefore the probes have the possibility to adjust the width.
Release the retainer bolts of the width adjustment.
Slide the legs to the left or right to the desired position.
Tighten the retainer bolts.

H12
www.samon.nl - [email protected]
V1-2011-EN
5.6.3 Settings and adjusting the Automatic Depth Control Valve-block.
ATTENTION!!!
The Valve block has been preset at the factory.
WARNING!!!
Make sure during maintenance to the hydraulic system of the SAMON Onion Topper there is no pressure on the system. Always disconnect hydraulic hoses during maintenance.
Adjusting pressure
Adjusting flow
After repairing the valve block, for an optimal operation of the Automatic depth Control, use the following settings.
Value: Adjustment:
Flow: Max 30 L/min Close the flow-valve completely by turning the knob , turn the
knob 1¼ stroke to open the valve then fix the knob with the locking pin.
Pressure: Max 120 bar. Connect the pressure-gauge on the Yellow connection. Unlock the retain nut on the adjustment screw. Adjust the pressure by turning the adjustment screw of the valve. Lock the adjustment screw with the nut.

H13
www.samon.nl - [email protected]
V1-2011-EN
5.6.4 Adjusting and setting the sensors after maintenance.
Adjusting the sensors and probes is only necessary when the Automatic Depth Control has been taken apart for
maintenance.
Raise the SAMON Onion Topper until the wheels can’t touch the ground.
Screw in the adjustment-bolt until the distance between screw head and probe is approximately 4 cm.
Tighten the retainer nut.
Lower the probe until the adjustment-bolt meets the stop.
Place the reaction-plate just below the sensors and tighten the locking bolt.
Mount the spring and check if the Automatic Depth Control is working.
Adjustment-bolt in the probe. Location reaction-plate below sensors
ATTENTION!!!
For simple operation check: The sensors and magnetic coil plugs are fitted with LED lights. If operated the LED will light up.
ATTENTION!!!
Minimal distance sensor <–> reaction plate is 1,5 mm, this is for optimal working conditions of the Automatic Depth Control.

H14
www.samon.nl - [email protected]
V1-2011-EN
6. Transport and Storage. 6.1 Transport on a carrier.
Make sure that the SAMON Onion Topper has been firmly strapped with proper lashing straps.
Block the wheels with wheel chocks. 6.2 Transport on a tractor.
Maintain the traffic regulation if you transport the SAMON Onion Topper on the public road.
Before lifting the SAMON Onion Topper always make sure the machine is turned off and the knives don’t rotate anymore.
Cutting knives aren’t protected when the SAMON Onion Topper is lifted.
Keep in mind that there is an reduced visibility during the transport of the SAMON Onion Topper. 6.3 Storage.
Clean the SAMON Topper thoroughly.
ATTENTION!!!
If using a high pressure cleaner, don’t spray directly into bearings and electronics.
Check tires for damage and pressure . (4,5 Atm.)
Check the drive belts for cracks and tears.
Relieve the tension of the drive belts.
Check all bearings and replace these if they have too much clearance.
ATTENTION!!!
Let the lower bearings of the rotary axles be replaced by an authorized SAMON dealer. These bearings require precise adjustment to minimize wear.
Check knives and mounting bolts of the knives for wear and replace when necessary.
Lubricate every lubrication point of the machine.
Check the oil level in the gearbox if necessary fill it up.
Check the cross-bearing and the slide parts of the PTO for wear.
Check the PTO protective covers for damage and wear.
Check the safety wires of the PTO
Lubricate the whole PTO shaft
ATTENTION!!!
If the SAMON Topper isn’t used, even for a short period, and the PTO shaft is still mounted. Always connect the safety chain of the PTO to the designated bracket to prevent damage to de PTO shaft and its components.
Check safety wires and retainer clips for damage and wear.
Check the hydraulic system for damages and leaks.
Check the electrical system for damages.
Store the SAMON Topper when it is fully dry.

H15
www.samon.nl - [email protected]
V1-2011-EN
7. Technical Data.
SAMON Topper “Open version”
Working Width: 1,5 Meters 1,8 Meters
Use: Rear Front Rear Front
Type: SU15AO SU15FO SU18AO SU18FO
PTO: 540 PTO 750 PTO 540 PTO 750 PTO
Oil Gearbox: SAE.90EP / 2,5 ltr SAE.90EP / 2,5 ltr SAE.90EP / 2,5 ltr SAE.90EP / 2,5 ltr
Dimensions: (LxBxH) 200x205x130 cm 200x205x130 cm 215x215x130 cm 215x215x130 cm
Knives: 6 6 6 6
Weight: 680 - 715 kg * 660 – 695 kg * 695 - 730 kg * 725 – 760 kg *
* Depending on options and accessories

H16
www.samon.nl - [email protected]
V1-2011-EN
8. Technical diagrams. 8.1 Hydraulic diagram Automatic depth control.


H18
www.samon.nl - [email protected]
V1-2011-EN
9. Ordering spare parts. When ordering spare parts use the instructions below, then you will be assured for a quick and accurate delivery.
1. Order your spare parts at an official SAMON dealer.
2. Discribe type, year en serialnumber of the machine, as described on the ID-tag. The ID-tag is located on the frame near the PTO.
3. Always specify the part number and full description.

H19
www.samon.nl - [email protected]
V1-2011-EN
10. Troubleshooting. Troubleshooting in general.
Malfunction: Cause: Solution:
Drive belts skid. Drive belts have too much clearance.
Tension the drive belts.
Drive belts are hardened or worn. Replace drive belts
Pulley’s are worn. Replace pulleys
Onion Topper vibrates. Knife holder not aligned. Realign knife holder.
Object hit. Turn of machine and check for damage.
Knife-bolts are loose. Tighten the knife-bolts. If worn replace the bolts.
Knives worn or damaged. Replace knives.
Bearings rotary axle are worn. Replace bearings.
Wheelsets aren’t level Leakage hydraulic hoses, cylinders or couplings.
Detect leakage repair and equate wheelsets.
Troubleshooting with Automatic Depth Control.
Malfunction: Cause: Solution:
Automatic Depth Control doesn’t work
No oil flow. Check oil flow.
No power supply electronics. Check power supply.
Faulty or damaged wiring. Check wiring and replace faulty wiring.
Bypass solenoid doesn’t work. Check electronic signal.
Automatic Depth Control works only on one side.
Relay defective. Replace faulty relay.
Sensor defective. Replace faulty sensor.
Faulty or damaged wiring. Check wiring and replace faulty wiring.
Defective non-return valve Check by measuring and replace.
Automatic Depth Control response very slowly
Low hydraulic pressure. Check by measuring and adjust pressure. (See chapter 5.6.3)
Low hydraulic flow. Reset the flow-valve. (see chapter 5.6.3)
H20
www.samon.nl - [email protected]
V1-2011-EN
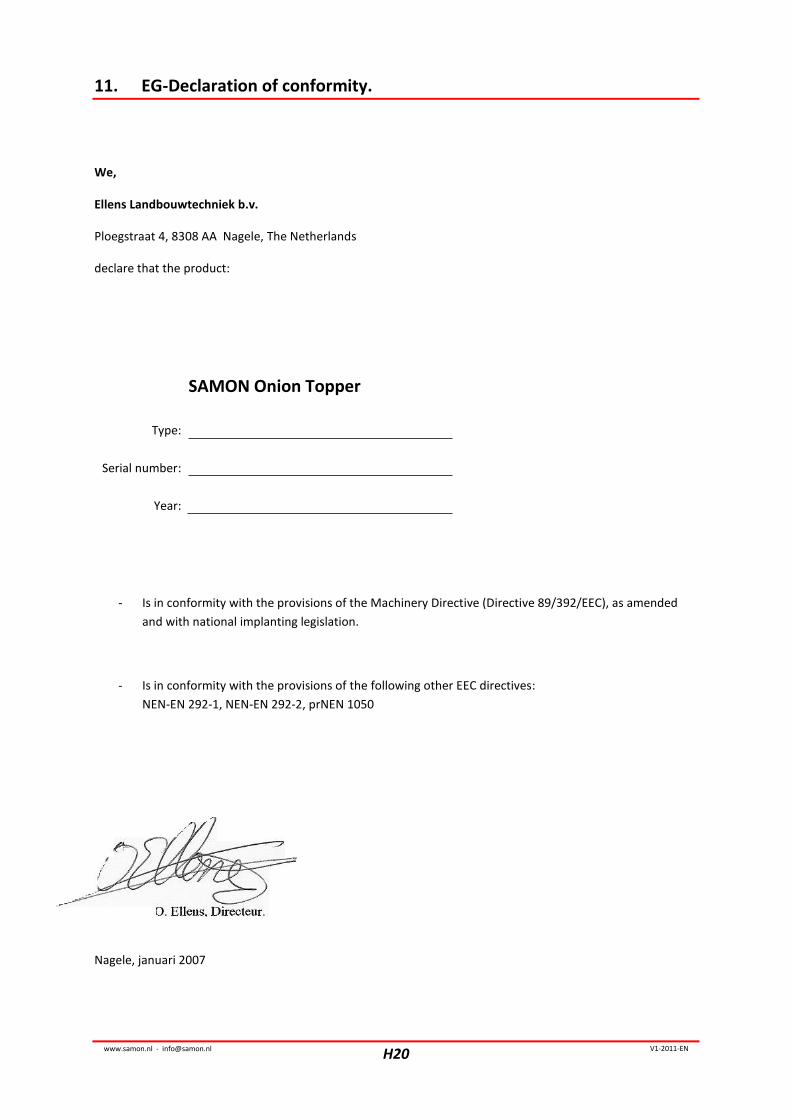
11. EG-Declaration of conformity.
We,
Ellens Landbouwtechniek b.v.
Ploegstraat 4, 8308 AA Nagele, The Netherlands
declare that the product:
SAMON Onion Topper
Type:
Serial number:
Year:
- Is in conformity with the provisions of the Machinery Directive (Directive 89/392/EEC), as amended
and with national implanting legislation.
- Is in conformity with the provisions of the following other EEC directives:
NEN-EN 292-1, NEN-EN 292-2, prNEN 1050
Nagele, januari 2007

Spare Parts List

Index parts list
Front-mount: Index. Description. Page:
A. Locking pins and Drive-unit. S-1
B. Wheelsets and Cylinders. S-3
C. Gearbox. S-5
D. Rotary axles, Knife holders and Knives. S-7
E. Hoods, Guards and Rubber flaps. S-9
Rear-mount: Index. Description. Page:
A. Locking pins and Drive-unit. S-11
B. Wheelsets and Cylinders. S-13
C. Gearbox. S-15
D. Rotary axles, Knife holders and Knives. S-17
E. Hoods, Guards and Rubber flaps. S-19
Front- and rear-mount: Index. Description. Page:
F. Automatic Depth Control. S-21
G. Valve block Automatic Depth Control. S-23
H. Electronics Automatic Depth Control. S-25
I. Coulter disc. S-27

S-1
Modifications for technical improvements reserved .
V1-2011-EN
2111409 >>>
211
www.samon.nl - [email protected]
A. Locking pins and Drive-unit. Front-mount

S-2
Modifications for technical improvements reserved .
V1-2011-EN
2111409 >>>
211
www.samon.nl - [email protected]
A. Locking pins and Drive-unit. Front-mount
Pos: Order no.: Description:
Type:
1.5 mtr 1.8 mtr
01 PE205 Toplink pin 1 1
02 TL860 Linch pin 1 1
03 PE208 Lower link pin 2 2
04 TL880 Linch pin 2 2
05 TL1086 Safety wire 3 3
06 TL321 Holder 2 2
07 TL2610 Pipe clamp 2 2
08 PE2509 Hood support 1 1
09 TL2449 PTO 1 1
10 TL323 Cross bearing 2 2
11 TL2507 Protective cover PTO 1 1
12 PE3558 Gearbox bracket 1 1
13 TL3566 Gearbox 1 1
14 TL256 Pulley 1 1
15 TL255 Bush 1 1
16 TL2482 Drive belt 2 X
TL2483 Drive belt X 2
17 TL2479 Drive belt 2 X
TL2484 Drive belt X 2
18 TL2485 Drive belt 2 2
19 TL266 Bearing 3 3
20 TL262 Pulley 3 3
21 TL2450 Bush 3 3

S-3
Modifications for technical improvements reserved .
V1-2011-EN
2111409 >>>
211
www.samon.nl - [email protected]
B. Wheelsets and Cylinders. Front-mount

S-4
Modifications for technical improvements reserved .
V1-2011-EN
2111409 >>>
211
www.samon.nl - [email protected]
B. Wheelsets and Cylinders. Front-mount
Pos: Order no.: Description:
Type:
1.5 mtr 1.8 mtr
01 PE2407 Outer wheel support (L) 1 1
02 PE3610 Inner wheel support (L) 1 1
03 PE3685 Outer wheel support (RV) 1 1
04 PE2416 Inner wheel support (RV) 1 1
05 PE3604 Outer wheel support (RA) 1 1
06 PE3687 Inner wheel support (RA) 1 1
07 TL2500 Wheel complete 3 3
08 TL535 Lamella seal 3 3
09 TL684 Bearing 6 6
10 TL891 Retainer ring 3 3
11 TL897 Wheel cap 3 3
12 TL2419 Cylinder 2 2
12a TL3672 Seal kit for TL2419 1 1
13 TL3670 Cylinder 1 1
13a TL3671 Seal kit for TL3670 1 1
14 PE2417 Mount pin 6 6
15 PE3695 Breather hoses topper 1 1

S-5
Modifications for technical improvements reserved .
V1-2011-EN
2111409 >>>
211
www.samon.nl - [email protected]
C. Gearbox. Front-mount

S-6
Modifications for technical improvements reserved .
V1-2011-EN
2111409 >>>
211
www.samon.nl - [email protected]
C. Gearbox. Front-mount
Pos: Order no.: Description:
Type:
1.5 mtr 1.8 mtr
01 TL3597 Shaft 1 1
02 TL3579 Seal 1 1
03 TL3580 Retainer ring 2 2
04 TL3581 Spacer 2 2
05 TL3582 Bearing 2 2
06 TL3583 Plug 4 4
07 TL3584 Housing 1 1
08 TL3585 Nut 1 1
09 TL3598 Gear 1 1
10 TL3599 Gear 1 1
11 TL3588 Spacer 1 1
12 TL3589 Bearing 2 2
13 TL3590 Filler cap 1 1
14 TL3591 Flange 1 1
15 TL3592 Seal 1 1
16 TL3593 Shaft 1 1
17 TL3594 Bolt 10 10
18 TL3595 Spacer 1 1
19 TL3578 Lid 1 1
20 TL3596 Plug 1 1

S-7
Modifications for technical improvements reserved .
V1-2011-EN
2111409 >>>
211
www.samon.nl - [email protected]
D. Rotary axles, Knife holders and Knives. Front-mount

S-8
Modifications for technical improvements reserved .
V1-2011-EN
2111409 >>>
211
www.samon.nl - [email protected]
D. Rotary axles, Knife holders and Knives. Front-mount
Pos: Order no.: Description:
Type:
1.5 mtr 1.8 mtr
01 TL267 Bearing 3 3
02 TL264 Bush 3 3
03 PE3556 Housing 3 3
04 TL269 Seal 3 3
05 TL343 Key 3 3
06 PE2460 Rotary axle L=690 1 1
07 PE2459 Rotary axle L=730 1 1
08 PE2461 Rotary axle L=770 1 1
09 PE2468 Knife holder 3 3
10 PE2464 End boss 3 3
11 PE2463 Knife 6 6
12 TL2511 Bolt set knife 18 18

S-9
Modifications for technical improvements reserved .
V1-2011-EN
2111409 >>>
211
www.samon.nl - [email protected]
E. Hoods, Guards and Rubber flaps. Front-mount

S-10
Modifications for technical improvements reserved .
V1-2011-EN
2111409 >>>
211
www.samon.nl - [email protected]
E. Hoods, Guards and Rubber flaps. Front-mount
Pos: Order no.: Description:
Type:
1.5 mtr 1.8 mtr
01
TL3702
Rubber seal 1 X
TL3679 Rubber X 1
02 TL3661 Rubber 1 1
03 TL3630 Rubber 1 1
04 TL3642 Rubber 1 1
05 TL3681 Rubber 1 X
TL3684 Rubber X 1
06 PE3617 Guard 1 1
07 PE3697 Guard 1 X
PE3698 Guard X 1
08 PE3699 Guard 1 1
09 PE3703 Guard 1 X
PE3704 Guard X 1
10 PE3665 Guard 1 1
11 TL3615 Guard 1205 1 1
12 TL3666 Guard 1 1

S-11
Modifications for technical improvements reserved .
V1-2011-EN
2111409 >>>
211
www.samon.nl - [email protected]
A. Locking pins and Drive-unit. Rear-mount

S-12
Modifications for technical improvements reserved .
V1-2011-EN
2111409 >>>
211
www.samon.nl - [email protected]
A. Locking pins and Drive-unit Rear-mount
Pos: Order no.: Description:
Type:
1.5 mtr 1.8 mtr
01 PE205 Top link pin 1 1
02 TL860 Linch pin 1 1
03 PE208 Lower link pin 2 2
04 TL880 Linch pin 2 2
05 TL1086 Safety wire 3 3
06 TL321 Holder 2 2
07 TL322 Pipe clamp 1 1
08 TL2610 Pipe clamp 2 2
09 TL210 Pipe clamp 1 1
10 PE2509 Hood support 1 1
11 TL273 PTO 1 1
12 TL323 Cross bearing 2 2
13 TL2507 Protective cover PTO 1 1
14 PE3558 Gearbox bracket 1 1
15 TL3565 Gearbox 1 1
16 TL256 Pulley 1 1
17 TL255 Bush 1 1
18 TL346 Drive belt 2 X
TL3574 Drive belt X 2
19 TL2597 Drive belt 2 2
20 TL346 Drive belt 2 X
TL3574 Drive Belt X 2
21 TL266 Bearing 3 3
22 TL262 Pulley 3 3
23 TL2450 Bush 3 3

S-13
Modifications for technical improvements reserved .
V1-2011-EN
2111409 >>>
211
www.samon.nl - [email protected]
B. Wheelsets and Cylinders Rear-mount

S-14
Modifications for technical improvements reserved .
V1-2011-EN
2111409 >>>
211
www.samon.nl - [email protected]
B. Wheelsets and Cylinders Rear-mount
Pos: Order no.: Description:
Type:
1.5 mtr 1.8 mtr
01 PE3604 Outer wheel support (L) 1 1
02 PE3607 Inner wheel support (L) 1 1
03 PE2407 Outer wheel support (RV) 1 1
04 PE3688 Inner wheel support (RV) 1 1
05 PE3686 Outer wheel support (RA) 1 1
06 PE2410 Inner wheel support (RA) 1 1
07 TL2500 Wheel complete 1 1
08 TL535 Lamella seal 3 3
09 TL684 Bearing 6 6
10 TL891 Retainer ring 3 3
11 TL897 Wheel cap 3 3
12 TL2419 Cylinder 1 1
12a TL3672 Seal kit Cylinder TL2419 1 1
13 TL3670 Cylinder 1 1
13a TL3671 Seal kit Cylinder TL3670 1 1
14 TL2417 Mounting pin 6 6
15 PE3695 Breather hoses topper 1 1

S-15
Modifications for technical improvements reserved .
V1-2011-EN
2111409 >>>
211
www.samon.nl - [email protected]
C. Gearbox. Rear-mount

S-16
Modifications for technical improvements reserved .
V1-2011-EN
2111409 >>>
211
www.samon.nl - [email protected]
C. Gearbox. Rear-mount
Pos: Order no.: Description:
Type:
1.5 mtr 1.8 mtr
01 TL3578 Lid 1 1
02 TL3579 Seal 1 1
03 TL3580 Retainer ring 2 2
04 TL3581 Spacer 2 2
05 TL3582 Bearing 2 2
06 TL3583 Plug 4 4
07 TL3584 Housing 1 1
08 TL3585 Nut 1 1
09 TL3586 Shaft with gear 1 1
10 TL3587 Gear 1 1
11 TL3588 Spacer 1 1
12 TL3589 Bearing 2 2
13 TL3590 Filler cap 1 1
14 TL3591 Flange 1 1
15 TL3592 Seal 1 1
16 TL3593 Shaft 1 1
17 TL3594 Bolt 10 10
18 TL3595 Spacer 1 1
19 TL3596 Plug 1 1

S-17
Modifications for technical improvements reserved .
V1-2011-EN
2111409 >>>
211
www.samon.nl - [email protected]
D. Rotary axles, Knife holders and Knives. Rear-mount

S-18
Modifications for technical improvements reserved .
V1-2011-EN
2111409 >>>
211
www.samon.nl - [email protected]
D. Rotary axles, Knife holders and Knives. Rear-mount
Pos: Order no.: Description:
Type: *
1.5 mtr 1.8 mtr
01 TL267 Bearing 3 3
02 TL264 Bush 3 3
03 PE3556 Housing 3 3
04 TL269 Seal 3 3
05 TL343 Key 3 3
06 PE2460 Rotary axle L=730 1 1
07 PE2459 Rotary axle L=690 1 1
08 PE2461 Rotary axle L=770 1 1
09 PE2462 Knife holder 3 3
10 PE2464 End boss 3 3
11 PE2463 Knife 6 6
12 TL2511 Bolt set knife 18 18

S-19
Modifications for technical improvements reserved .
V1-2011-EN
2111409 >>>
211
www.samon.nl - [email protected]
E. Hoods, Guards and Rubber flaps. Rear-mount

S-20
Modifications for technical improvements reserved .
V1-2011-EN
2111409 >>>
211
www.samon.nl - [email protected]
E. Hoods, Guards and Rubber flaps. Rear-mount
Pos: Order no.: Description:
Type:
1.5 mtr 1.8 mtr
01 TL3568 Rubber 1 X
PE3571 Rubber X 1
02 TL3661 Rubber seal 1 1
03 TL3642 Rubber 1 1
04 TL3640 Rubber 1 1
05 TL3641 Rubber 1 1
06 TL3652 Rubber 1 X
TL3682 Rubber X 1
07 PE3615 Guard 1 1
08 PE3618 Guard 1 X
PE3619 Guard X 1
09 PE3620 Guard 1 1
10 PE3616 Guard 1 1

S-21
Modifications for technical improvements reserved .
V1-2011-EN
2111409 >>>
211
www.samon.nl - [email protected]
F. Automatic Depth Control. Front- / Rear-mount

S-22
Modifications for technical improvements reserved .
V1-2011-EN
2111409 >>>
211
www.samon.nl - [email protected]
F. Automatic Depth Control. Front- / Rear-mount
Pos: Order no.: Description:
Type:
1.5 mtr 1.8 mtr
01 PE6503 Spindle (Round Linch pin) 1 1
01a PE6522 Spindle (Square Linch pin) 1 1
02 PE6504 Spindle (Round Linch pin) 1 1
02a PE6523 Spindle (Square Linch pin) 1 1
03 PE6520 Linch pin (Round) 2 2
03a PE6524
Linch pin (Square) 2 2
04 PE6506 Connection bar 1 1
05 PE6507 Bracket 1 1
06 PE6508 Bracket 1 1
07 PE6505 Support 2 2
08 PE6511 Arm 1 1
09 PE6510 Arm 1 1
10 PE6514 Arm reaction plat 2 2
11 PE6513 Reaction plate 1 1
12 PE6512 Reaction plate 1 1
13 PE6516 Probe bracket 1 1
14 PE6515 Probe bracket 1 1
15 TL6517 Spring 2 2
16 PE6518 Bolt 2 2
17 PE6509 Probe 2 2
18 TL6502 Sensor 4 4

S-23
Modifications for technical improvements reserved .
V1-2011-EN
2111409 >>>
211
www.samon.nl - [email protected]
G. Valve block Automatic Depth Control. Front- / Rear-mount

S-24
Modifications for technical improvements reserved .
V1-2011-EN
2111409 >>>
211
www.samon.nl - [email protected]
G. Valve block Automatic Depth Control. Front- / Rear-mount
Pos: Order no.: Description:
Type:
1.5 mtr 1.8 mtr
01 TL8047 Valve block complete 1 1
02 TL8090 Pilot operated check valve 2 2
03 TL8091 Valve 2 2
04 TL8092 Coil 12V 4 4
05 TL8093 Bolt set 2 2
06 TL8094 2/2 valve 1 1
07 TL8095 Flow control valve 1 1
08 TL8096 Pressure relief valve 1 1
09 TL8097 Seal kit 1 1

S-25
Modifications for technical improvements reserved .
V1-2011-EN
2111409 >>>
211
www.samon.nl - [email protected]
H. Electronic Automatic Depth Control. Front- / Rear-mount

S-26
Modifications for technical improvements reserved .
V1-2011-EN
2111409 >>>
211
www.samon.nl - [email protected]
H. Electronic Automatic Depth Control. Front- / Rear-mount
Pos: Order no.: Description:
Type:
1.5 mtr 1.8 mtr
01 TL6501 Electrical box complete 1 1
02 TL8048 Relay 4 4
03 TL6521 Fuse 10A 1 1

S-27
Modifications for technical improvements reserved .
V1-2011-EN
2111409 >>>
211
www.samon.nl - [email protected]
I. Coulter disc. Front- / Rear-mount

S-28
Modifications for technical improvements reserved .
V1-2011-EN
2111409 >>>
211
www.samon.nl - [email protected]
I. Coulter disc. Front- / Rear-disc
Pos: Order no.: Description:
Type:
1.5 mtr 1.8 mtr
01 PE2599 Mounting bracket 1 1
02 PE2558 Spring tensioner 1 1
03 PE2556 Height adjustment 1 1
04 PE2555 Arm 1 1
05 TL237 Fixing collar 1 1
06 TL2010 Grease nipple 1 1
07 TL2559 Spring 1 1
08 TL815 Retainer ring 2 2
09 TL816 Retainer ring 1 1
10 TL817 Bearing 2 2
11 PE2554 Bolt set 1 1
12 PE2553 Hub 1 1
13 TL2512 Coulter disc 1 1