schedule management user guide - oracle...schedule management user guide 10 complete the following...
TRANSCRIPT
Oracle Primavera Cloud Schedule Management User Guide
Version 20 May 2020


3
Contents
About This Guide ............................................................................................................................... 9
Schedule Overview ........................................................................................................................... 9
Get Started with Schedule ................................................................................................................ 9
Dictionaries ........................................................................................................................................... 12
Calendars Overview.................................................................................................................... 13Add a Holiday List ............................................................................................................... 13
Add a Calendar ................................................................................................................... 14
Set a Calendar Exception Time .......................................................................................... 15
Assign Calendar Availability ............................................................................................... 16
Set Number of Work Hours Per Time Period .................................................................... 16
Set the Default Calendar ................................................................................................... 17
Codes Overview .......................................................................................................................... 18
Add a Code .......................................................................................................................... 19
Add a Value to a Code ........................................................................................................ 20
Update the Owning Workspace of a Code ........................................................................ 21
Curve Profiles Overview ............................................................................................................. 22
Define a Curve Profile ........................................................................................................ 22
Defaults & Options ............................................................................................................................... 23
Field Labels Overview ................................................................................................................ 23Access a Standard Field Description ................................................................................. 24
Change a Standard Field Label ......................................................................................... 24
Configured Fields Overview ....................................................................................................... 25Change a Configured Field Label ...................................................................................... 26
Add a Formula-Based Configured Field: Example ............................................................ 27
Update the Owning Workspace of a Configured Field ...................................................... 28
Activity ......................................................................................................................................... 28Configure Default Activity Settings for a Workspace ........................................................ 29
Configure Auto Numbering Defaults for an Activity .......................................................... 31
Configure Default Activity Calculation Settings for a Workspace .................................... 31
Add an Activity Field ........................................................................................................... 32
Activity Relationship ................................................................................................................... 34
Project ......................................................................................................................................... 34
Set the Default Calendar ................................................................................................... 34
Set the Default My Activities Settings ............................................................................... 35
Add a Project Field.............................................................................................................. 36
Resource/Role ........................................................................................................................... 38
Resource Assignment ................................................................................................................ 38
Add a Resource Assignment Field ..................................................................................... 39
WBS ............................................................................................................................................. 40Add a WBS Field ................................................................................................................. 40

Schedule Management User Guide
4
Permissions .......................................................................................................................................... 41
Security Permissions for Schedule ........................................................................................... 42
Create a Workspace Permission Set ......................................................................................... 42
Create a Project Permission Set ................................................................................................ 43
Project Settings .................................................................................................................................... 44
Assign a Manager to a Project ................................................................................................... 44
Assign a Project Calendar .......................................................................................................... 45
Set the Data Date for a Project ................................................................................................. 45
Configure Schedule Settings for a Project ................................................................................ 46
Configure Activity Defaults for a Project ................................................................................... 47
Configure Calculation Settings for a Project ............................................................................. 48
Configure My Activities Settings for a Project ........................................................................... 50
Configure the Auto Numbering Defaults for a Project ............................................................. 51
Configure Schedule Health Score Settings ............................................................................... 51
Additional Settings ............................................................................................................................... 52
Enable Feature Previews ........................................................................................................... 52
WBS Overview ................................................................................................................................. 53
Create a WBS ........................................................................................................................................ 53
Add a WBS ............................................................................................................................................ 53
Add a WBS from a Template or Other Project .................................................................................... 54
Create a WBS by Import ....................................................................................................................... 55
Download an Import Template for Importing a WBS ............................................................... 55
Import a WBS from Microsoft Excel .......................................................................................... 55
Assign a Manager to a WBS ................................................................................................................. 55
Add a File in a Files Detail Window ..................................................................................................... 56
Copy and Paste a WBS Node ............................................................................................................... 57
Activities Overview .......................................................................................................................... 58
Working With the Activities Page ......................................................................................................... 58
Configure the Activities Page Table ........................................................................................... 60
Use Find and Replace on the Activities Page ........................................................................... 61
Auto Reorganize Activities ......................................................................................................... 62
View the Activities Grid ............................................................................................................... 62
View the Activities Gantt Chart .................................................................................................. 62
View the Progress Spotlight ....................................................................................................... 63
View the Activity Network ........................................................................................................... 64
Undo Changes in Primavera Cloud ........................................................................................... 64
Using Touch-Screen Gestures in Primavera Cloud ................................................................... 65
Create an Activity .................................................................................................................................. 67
Add an Activity ............................................................................................................................ 67
Create an Activity by Import ....................................................................................................... 68Download an Import Template for Importing Activities .................................................... 68
Import Activities from Microsoft Excel ............................................................................... 69

Contents
5
Cut or Copy and Paste an Activity.............................................................................................. 69
Modify Activity Details .......................................................................................................................... 70
Assign an Owner to an Activity................................................................................................... 72
Assign an Activity to a WBS ....................................................................................................... 72
Assign a Calendar to an Activity ................................................................................................ 73
Assign an Activity Type to an Activity ......................................................................................... 73
Assign a Duration Type to an Activity ........................................................................................ 74
Assign a Percent Complete Type to Activity .............................................................................. 74
Enter Activity Status Information ............................................................................................... 75
Enter Activity Duration Information ........................................................................................... 75
Enter the Activity Unit Information ............................................................................................ 76
Add a Constraint to an Activity .................................................................................................. 76
Assign a Role to an Activity ........................................................................................................ 78
Staff a Role Assignment ............................................................................................................ 78
Assign a Resource to an Activity ................................................................................................ 79
Assign a Curve to a Resource or a Role Assignment ............................................................... 79
Working with Activity Files .......................................................................................................... 80Add a File in a Files Detail Window ................................................................................... 80
Link a File to an Object ...................................................................................................... 81
Preview a File ...................................................................................................................... 82
Check Out a File ................................................................................................................. 82
Check In a File .................................................................................................................... 82
Add a Relationship to an Activity ............................................................................................... 83
View Relationships Using Trace Logic ....................................................................................... 84
Assign a Risk to an Activity ........................................................................................................ 85
Apply Activity Uncertainty ........................................................................................................... 85
Add a Task to an Activity ............................................................................................................ 86
Associating Activities with Scope Assignments and Work Packages for Scope Management Overview...................................................................................................................................... 87
Link a Work Package to an Activity .................................................................................... 88
Link a Scope Assignment to an Activity ............................................................................. 88
Assign a Code to an Activity ....................................................................................................... 89
Modify Activity Details in the Gantt Chart ................................................................................. 89
Renumber Activity IDs ................................................................................................................ 90
Dissolve an Activity ..................................................................................................................... 91
Delete an Activity ........................................................................................................................ 91
Add a Discussion ........................................................................................................................ 92
Activities Page Tools ............................................................................................................................. 92
Scheduling Overview .................................................................................................................. 93
Schedule a Project ............................................................................................................. 93
Baselines Overview .................................................................................................................... 95Add a Baseline .................................................................................................................... 97
Open a Baseline ................................................................................................................. 98
Add an Activity from the Current Schedule to a Baseline ................................................ 99
Schedule Management User Guide
6
Set a Baseline as the Current Schedule ........................................................................... 99
Set User Baseline Preferences ........................................................................................ 100
Schedule Scenarios Overview ................................................................................................. 101
Add a Scenario ................................................................................................................. 101
Open a Scenario ............................................................................................................... 102
Add an Activity from the Current Schedule to a Scenario .............................................. 102
Manage a Scenario .......................................................................................................... 103
Set a Scenario as the Current Schedule ......................................................................... 104
Resource and Role Usage Overview ....................................................................................... 104View the Resource and Role Histograms and Spreadsheets ........................................ 105
Configure Resource and Role Usage Settings ................................................................ 106
Leveling Overview ..................................................................................................................... 107Configure the Leveling Priority ......................................................................................... 107
Level a Resource or Role ................................................................................................. 108
Schedule Health Score Overview ............................................................................................ 109Configure Schedule Health Score Settings ..................................................................... 109
View the Schedule Health Score Results ........................................................................ 110
Schedule Health Score Reference .................................................................................. 111
Global Change Overview .......................................................................................................... 116Add a Global Change ........................................................................................................ 117
Run a Global Change ....................................................................................................... 118
Program Milestones Overview ........................................................................................................... 119
View Program Milestones on the Activities Page ................................................................... 119
Activities Fields ................................................................................................................................... 120
Schedule Comparison Overview ................................................................................................... 131
Working with the Schedule Comparison Page .................................................................................. 132
Compare Two Versions of a Project Schedule .................................................................................. 133
Alerts and Thresholds Overview.................................................................................................... 134
Add an Alert ........................................................................................................................................ 135
Add a Threshold to an Alert ............................................................................................................... 135
Set an Alert Delivery Option ............................................................................................................... 136
Creating Alerts: Example .................................................................................................................... 136
Monitor Service Status ................................................................................................................. 137
Configure Recurring Services ....................................................................................................... 138
Manage Services Filters ............................................................................................................... 139
Configure View Settings ................................................................................................................ 140
Views Overview ................................................................................................................................... 140
Add a View........................................................................................................................................... 141
Apply a View ........................................................................................................................................ 142
Configure a Column ............................................................................................................................ 142
Configure a Saved Filter ..................................................................................................................... 143
Apply a Saved Filter ............................................................................................................................ 144
Contents
7
Configure and Apply Filtering ............................................................................................................. 145
Configure Grouping Options............................................................................................................... 146
Configure Sorting Options .................................................................................................................. 147
Configure Gantt Bars .......................................................................................................................... 148
Configure Gantt Chart Settings .......................................................................................................... 149
Configure Network Settings ............................................................................................................... 150
Configure Quick Filters ....................................................................................................................... 150
Apply a Quick Filter ............................................................................................................................. 151
Configure Task Counts ....................................................................................................................... 151
Configure a Timescale ........................................................................................................................ 152
Configure Spreadsheet Rows ............................................................................................................ 153
Configure Currency Settings .............................................................................................................. 153
Configure Formatting ......................................................................................................................... 154
Appendix of Referenced Navigation Steps ................................................................................... 157
Navigate to the WBS page ................................................................................................................. 157
Navigate to the Activities page .......................................................................................................... 157
Navigate to the project Activities page.............................................................................................. 157
Navigate to the project or project collections Activities page .......................................................... 157
Navigate to the Baselines page ......................................................................................................... 158
Navigate to the Schedule Comparison page .................................................................................... 158
Navigate to the workspace resource page ....................................................................................... 158
Navigate to the project resources page ............................................................................................ 158
Navigate to the workspace or project resources page .................................................................... 159
Navigate to the workspace roles page .............................................................................................. 159
Navigate to the project roles page .................................................................................................... 159
Navigate to the workspace or project roles page ............................................................................. 160
Navigate to the workspace resource assignments page ................................................................. 160
Navigate to the project, program, or project collection resource assignments page .................... 160
Navigate to the workspace resource analysis page ......................................................................... 160
Navigate to the project, program, or project collection resource analysis page ............................ 161
Navigate to the files page .................................................................................................................. 161
Navigate to the project files page ..................................................................................................... 161
Navigate to the project or portfolio files page .................................................................................. 161
Navigate to the project Details page ................................................................................................. 162
Navigate to the project codes page .................................................................................................. 162
Navigate to the project settings page ............................................................................................... 162
Navigate to the program settings page ............................................................................................. 163
Navigate to the program codes page ................................................................................................ 163
Navigate to a dictionary page ............................................................................................................ 163
Navigate to the Calendars dictionary page ....................................................................................... 163
Navigate to the Codes dictionary page ............................................................................................. 164
Navigate to the Curve Profiles dictionary page ................................................................................ 164

Schedule Management User Guide
8
Navigate to the Units of Measure dictionary page ........................................................................... 164
Navigate to the Locations dictionary page ....................................................................................... 165
Navigate to the Currencies dictionaries page .................................................................................. 165
Navigate to an object configuration page ......................................................................................... 165
Navigate to the Activity configuration page ...................................................................................... 166
Navigate to the Project configuration page ...................................................................................... 166
Navigate to the Program configuration page .................................................................................... 166
Navigate to the Resource Assignment configuration page.............................................................. 166
Navigate to the Resource/Role configuration page ......................................................................... 167
Navigate to the WBS configuration page .......................................................................................... 167
Navigate to the Manage Services page ............................................................................................ 167
Navigate to the Preferences page ..................................................................................................... 168
Copyright ....................................................................................................................................... 169

9
About This Guide
This guide explains how to use the Schedule app in Oracle Primavera Cloud to develop and manage a project schedule.
Project managers and project schedulers should read this guide.
Schedule Overview
Oracle Primavera Cloud combines established schedule management principles with a set of collaboration tools to provide a comprehensive solution to organize and manage a schedule of activities required to complete a project. Using the Schedule app, you can define a list of activities, specify relationships and constraints, and assign required resources. You can then use the data to logically sequence the activities into a project schedule using the Critical Path Method. Activity statusing capabilities enable project team members to communicate the status of project activities to the project team. Using programs, you can simultaneously manage the activities from a group of related projects.
Key Features
Create a list of activities that must be performed to complete your project objectives.
Set relationships and constraints for enhanced activity scheduling.
Schedule projects, programs, or project collections using the Critical Path Method to establish activity dates and identify the activities critical to the success of each project.
Establish baselines to measure project performance.
Create what-if schedule scenarios to anticipate and evaluate alternative scheduling solutions.
Use histograms and usage spreadsheets to track availability and overallocation values for the resource and role assignments in your project.
Level projects by role or resource to eliminate overallocations.
Monitor and evaluate the quality of your schedule using the Schedule Health Score tool.
Compare two versions of your schedule to ensure accurate progress is being recorded.
Create views to configure table and Gantt chart display options for the Activities page.
Assign users to activities to communicate the status and progression of activity work.
Get Started with Schedule
This section details the basic configuration of settings you will need before using the Schedule app. Depending on how you plan to use Schedule, some of the settings below may be optional, and most settings can be configured in any order. For a comprehensive list of the actions you can perform in Oracle Primavera Cloud, consult the Oracle Primavera Cloud Help.

Schedule Management User Guide
10
Complete the following steps to get started with Schedule:
Create a Workspace
Workspaces function as the hierarchical structure of your organization's projects, portfolios, programs, and ideas. Settings configured at the workspace level are inherited by the objects created within the workspace.
Before you can use the Schedule app, you should create a workspace to contain your organization's projects.
Configure Workspace-Level Dictionaries
Dictionaries are repositories of items that can be used across the application, without having to create the same items for each object. Stored at the workspace level, dictionary items can be used by the objects within the workspace.
The following dictionaries are relevant to objects used in the Schedule app:
Calendars: Define available workdays, work hours, nonwork days, holidays, and exception time. Separate calendars can be applied to projects, resources, and roles. Days on which an activity can be scheduled are determined by an activity's type and assigned calendar. See Calendars Overview (on page 13) for more information.
Codes: Develop hierarchical structures for grouping objects in the Schedule app, including activities, resources, roles, and WBSs. Use the Codes dictionary to enable a code and its values for objects. See Codes Overview (on page 18) for more information.
Curve Profiles: Control how a resource or role's hours are spread over the duration of an assigned activity. See Curve Profiles Overview (on page 22) for more information.
Configure Workspace-Level Defaults & Options
The default configuration of settings for each object is set at the workspace level. Each new instance of a particular object in the workspace will inherit the attributes set in Defaults & Options.
Select an object in the Defaults & Options section of the application to view its configuration options. Available options vary by object. The following options are relevant to objects used in the Schedule app:
Get Started with Schedule
11
Defaults: Set object defaults, including activity type and calculation settings, auto numbering defaults, and project calendars.
Field Labels: View definitions for the fields relevant to each object, updating the names of the fields to suit your organization's standards.
Configured Fields: Create configured fields to capture user-defined data.
Codes: Add codes to an object for additional classification. Assign codes from a parent workspace or codes that belong to other objects.
The objects below should be configured before using the Schedule app.
Defaults & Options Settings
Objects Configuration Options Link
Activity Default, Field Labels, Configured Fields, Codes
See Activity (on page 28) for more information.
Activity Relationship Field Labels See Activity Relationship(on page 34) for more information.
Project Default, Field Labels, Configured Fields, Codes
See Project (on page 34) for more information.
Resource/Role Field Labels, Codes See Resource/Role (on page 38) for more information.
Resource Assignment Field Labels, Configured Fields
See Resource Assignment (on page 38) for more information.
WBS Field Labels, Configured Fields, Codes
See WBS (on page 40) for more information.
Some help topics, such as Field Labels and Configured Fields, can be performed on a wide range of objects and are separate from each object section. Topics specific to a particular object are found within the object's section.
Create Permission Sets
Permission sets are collections of permissions that can be assigned to individual users or user groups, granting them access to objects and functionality across Primavera Cloud. Created at the workspace level, permission sets determine the level of access within the workspace, including the workspace itself. Configure permission sets to grant users the ability to add, edit, delete, view, or enable objects and functionality. See Security Permissions for Schedule (on page 42) for more information on the permissions specific to the Schedule app.
Create a Project
A project is a formalized plan undertaken to create a service, product, or result. You must create a project before you can use the Schedule app.

Schedule Management User Guide
12
Configure Project-Level Settings
Project-level settings include project-specific configuration options and defaults inherited from the workspace. New projects inherit the default settings configured at the workspace level, but these can be updated at the project level. Settings updated at the project level only apply to that project.
Before using the Schedule app, you should:
Assign a manager (see "Assign a Manager to a Project" on page 44) to designate the person responsible for managing the project.
Assign a calendar (see "Assign a Project Calendar" on page 45) that defines the workdays, nonwork days, holidays, and exception time for your project. New activities inherit the assigned project calendar.
Set the Data Date (see "Set the Data Date for a Project" on page 45) to establish the progress point of the project.
Configure the start and finish dates (see "Configure Schedule Settings for a Project" on page 46) of your project.
Configure the default behavior (see "Configure Activity Defaults for a Project" on page 47) of new activities and resource assignments.
Configure the calculation settings (see "Configure Calculation Settings for a Project" on page 48) of your project's activities and units.
Configure the My Activities settings (see "Configure My Activities Settings for a Project" on page 50), which control how users update the progress of their activity assignments on the My Activities page.
Set auto numbering defaults (see "Configure the Auto Numbering Defaults for a Project" on page 51) for the activities in your project if the numbering system your activities use should differ from the settings inherited from the workspace.
Configure the settings (see "Configure Schedule Health Score Settings" on page 51) for the Schedule Health Check tool.
Configure Additional Settings
Enable feature previews (on page 52) in the user preferences to turn on upcoming features, such as enhanced printing functionality.
After configuring the settings discussed in this topic, you can begin using the Schedule app. If you need to add or change settings, consult the topics contained in this section.
Dictionaries
Dictionaries are repositories of items that can be used across the application, without having to create the same items for each object. Stored at the workspace level, dictionary items can be used in the projects, portfolios, programs, ideas, and child workspaces within the workspace. Dictionaries provide for efficient reuse of organizational data. For example, you can create multiple calendars or codes in a workspace and then apply them across activities in multiple projects in that workspace.

Get Started with Schedule
13
Calendars Overview
Calendars enable you to define available workdays and work hours in a day. You can also specify national and recognized holidays and exceptions to the standard work time. Separate calendars can be made available to projects, resources, and roles. Each project, resource, and role must have a calendar assigned. Assign calendars to each resource, role, and activity to determine time constraints in a uniform way. For example, based on its calendar, a resource might not be available; or, if the resource is available, the activity might not fit the calendar requirements. The application uses the calendar assignments for scheduling and leveling resources and roles, and scheduling and tracking activities.
There is one default calendar per workspace. The default calendar is automatically assigned to all resources, roles, and projects in the workspace. Any calendar in the workspace can be assigned as the default calendar.
You can establish an unlimited number of calendars to accommodate different work patterns. For example, if some activities require a five day workweek, while others are performed part-time (such as Monday, Wednesday, and Friday), you can create different calendars and assign them to the activities and resources in your projects. An activity’s Type field value determines whether the activity uses the calendar of an assigned resource, role, or its activity calendar.
Add a Holiday List
Add a holiday list to include any public or company holidays observed by the organization that should be reflected in project and resource schedules. One holiday list can be added per calendar.
To add a holiday list:
1) Navigate to the Calendars dictionary page (see page 163).
2) Select Holidays.
3) In the Manage Holiday Lists dialog box, enter a name for the holiday list.
4) Select Edit Holiday List.
5) Enter a holiday name.
6) Choose when the holiday occurs.
Once on: Select if this holiday is a onetime occurrence.
Repeat every: Choose if a holiday occurs on the same date every year.
Note: You can select on a calendar when holidays are recognized as part of the standard work week.
Repeat the: Choose if a holiday occurs on a different date each year, but always occurs on the same day and week each year.
7) Continue to enter dates as needed.
8) Save your changes:
In Primavera Cloud:
a. Select Save.

Schedule Management User Guide
14
b. In the Summary & Settings panel, select Close.
In Primavera Professional:
Select Save.
This setting is used in the following apps:
Contracts and Commitments
Cost and Funds
Lean
Resources
Risk
Schedule
Scope
Add a Calendar
Add calendars to a workspace to assign to projects, resources, and roles to determine work and nonwork time on a project.
To add a calendar:
1) Navigate to the Calendars dictionary page (see page 163).
2) Select Add.
3) In the Add Calendar wizard, on the Name step, enter a Name and ID for the calendar. Select Next.
4) On the Create Work Week step, specify the number of work hours per day by manually entering the number of hours or by selecting the time period on the calendar. Change the time periods on the calendar by dragging the entire block of time or by expanding or reducing the block of time. Select Next.
5) On the Add Holidays step, choose a holiday list to apply.
6) Select the If a holiday falls on unavailable time, move option if your calendar has holidays that fall on standard nonwork time and should be marked as holiday time during standard work time. Select where on the calendar the holiday should be reflected.
7) Select Finish.
8) Save your changes:
In Primavera Cloud:
a. Select Save.
b. In the Summary & Settings panel, select Close.
In Primavera Professional:
Select Save.
Tips
You can also create a calendar by duplicating an existing calendar. Select the Contextmenu next to the calendar, and select Duplicate. Be sure to change the Name and ID for the calendar.

Get Started with Schedule
15
This setting is used in the following apps:
Contracts and Commitments
Cost and Funds
Lean
Resources
Risk
Schedule
Scope
Set a Calendar Exception Time
Exception time is used when there are differences in the standard work hours for particular time periods. An entire day, or specific hours during the day, can be marked as an exception.
For example, the organization may decide to give employees a half day of vacation time the day before a scheduled holiday. In this case, the work hours would be adjusted for that work day to reflect the exception.
To set exception time:
1) Navigate to the Calendars dictionary page (see page 163).
2) Select a calendar.
3) Select the Calendar tab.
4) Make the necessary adjustments to the calendar.
To change the work hours for a day, select a period of time on a specific day. Change the exception time on the calendar by dragging the entire block of time or by expanding or reducing the block of time. The block of time indicates the new work hours for the day.
To mark an entire work day as a nonwork day, select the date menu, and select Unavailable.
To mark a holiday as a work day, select the date menu, and select Available. Adjust the exception time for the new work day by dragging, expanding, and reducing the block of time.
Note: To revert any changes you made to a day, select the date menu, and select Set to Standard.
5) Save your changes:
In Primavera Cloud:
a. Select Save.
b. In the Summary & Settings panel, select Close.
In Primavera Professional:
Select Save.
This setting is used in the following apps:
Contracts and Commitments
Cost and Funds

Schedule Management User Guide
16
Lean
Resources
Risk
Schedule
Scope
Assign Calendar Availability
Calendars can be assigned to projects, resources and roles, or both. By default, a calendar is assigned to both.
Note: The default calendar must be available to both projects and resources and roles.
To assign calendar availability:
1) Navigate to the Calendars dictionary page (see page 163).
2) Select a calendar.
3) Select the Summary tab.
4) In the Available To section, adjust values as needed.
5) Save your changes:
In Primavera Cloud:
a. Select Save.
b. In the Summary & Settings panel, select Close.
In Primavera Professional:
Select Save.
This setting is used in the following apps:
Contracts and Commitments
Cost and Funds
Lean
Resources
Risk
Schedule
Scope
Set Number of Work Hours Per Time Period
Configure the work hours per time period settings to specify the default number of hours in a work period for a calendar if different from the standard time periods defined in Application Settings. These settings display by default.
The application calculates and stores time unit values in hourly increments, but you can set preferences to display time units in other increments, such as days or weeks. The values specified for Time Periods are used to convert hours to other time increments for display, and to convert all non-hourly time increments to hours for storage in the database.

Get Started with Schedule
17
To set the number of work hours for each time period:
1) Navigate to the Calendars dictionary page (see page 163).
2) Select a calendar.
3) Select the Summary tab.
4) In the Time Periods section, adjust values as needed.
5) Save your changes:
In Primavera Cloud:
a. Select Save.
b. In the Summary & Settings panel, select Close.
In Primavera Professional:
Select Save.
This setting is used in the following apps:
Contracts and Commitments
Cost and Funds
Lean
Resources
Risk
Schedule
Scope
Set the Default Calendar
The default calendar is set in the workspace-level Calendars dictionary and is available to projects, resources, and roles within that workspace. One calendar must always be defined as the default.
Notes:
The application has a built-in default calendar. The settings in this calendar cannot be changed. After another calendar has been assigned as the default, this calendar can be deleted.
You can also set the default calendar on the Project page in Defaults & Options. You can choose from a list of calendars that are available to the Project object.
To set the default calendar:
1) Navigate to the Calendars dictionary page (see page 163).
2) In the list of calendars, select the Default option for the calendar.
3) Save your changes:
In Primavera Cloud:
a. Select Save.
b. In the Summary & Settings panel, select Close.
Schedule Management User Guide
18
In Primavera Professional:
Select Save.
Tips
If the calendar you selected was only available to Project or Resource/Role, then both options are automatically selected when you select a new default calendar.
This setting is used in the following apps:
Contracts and Commitments
Cost and Funds
Lean
Resources
Risk
Schedule
Scope
Codes Overview
Codes help you categorize your data objects based on characteristics that they share. If you have many instances of an object, codes help you group and filter potentially vast amounts of information spanning different areas of the organization. You can also use codes to arrange objects hierarchically. The application supports an almost unlimited number of codes and values; therefore, you can establish as many as you need to meet the filtering, sorting, and reporting requirements of your organization.
Codes are configured at the workspace level and can be created for the following objects:
Activities
Commitments
Contracts
Custom Logs
Files
Funds
Ideas
Portfolios
Programs
Projects
RFIs
Reports
Resources/Roles
Risks
Scope Assignments
Scope Items
Strategies
Submittals
Get Started with Schedule
19
Tasks
WBSs
Work Packages
Add a Code
Create codes to help categorize and track objects based on attributes they share.
You can apply codes to one or more of the following objects: Activities, Commitments, Contracts, Custom Logs, Files, Funds, Ideas, Portfolios, Programs, Projects, RFIs, Reports, Resources/Roles, Risks, Scope Assignments, Scope Items, Strategies, Submittals, Tasks, WBSs, and Work Packages.
To add a code to one or more objects:
1) Navigate to the Codes dictionary page (see page 164).
2) In the table, select Add.
3) In the new row, in the Name and ID columns, enter a name and ID for the new code.
4) In the Applies to panel, select one or more objects to apply the code.
5) Save your changes:
In Primavera Cloud:
a. Select Save.
b. In the Summary & Settings panel, select Close.
In Primavera Professional:
Select Save.
You can also perform this task on a single object from the Summary & Settings panel inPrimavera Cloud:
1) In the object selector, select a workspace.
2) In the sidebar, select Summary & Settings.
3) On the Summary & Settings menu, select Defaults & Options.
4) Select the object, and then select the Codes tab.
Note: To add a code to this object that exists in the current or parent workspace, select Assign. Codes that display for the current workspace are the codes assigned to other objects in the workspace. Codes that display from the parent workspace are only the codes that are assigned to the same object type.
This setting is used in the following apps:
Contracts and Commitments
Cost and Funds
Dashboards
Field
Files
Lean

Schedule Management User Guide
20
Portfolio Analysis
Reports
Resources
Risk
Schedule
Scope
Strategic Alignment
Submittals
Workflows and Forms
Add a Value to a Code
Add values to a code to group, sort, and filter data.
To add a code value:
1) Navigate to the Codes dictionary page (see page 164).
2) Select a code.
3) Select the Context menu, and select Add Code Value.
4) In the Name and ID columns, enter a name and ID for the code value.
5) Save your changes:
In Primavera Cloud:
a. Select Save.
b. In the Summary & Settings panel, select Close.
In Primavera Professional:
Select Save.
You can also perform this task on a single object from the Summary & Settings panel inPrimavera Cloud:
1) In the object selector, select a workspace.
2) In the sidebar, select Summary & Settings.
3) On the Summary & Settings menu, select Defaults & Options.
4) Select the object, and then select the Codes tab.
This setting is used in the following apps:
Contracts and Commitments
Cost and Funds
Dashboards
Field
Files
Lean
Portfolio Analysis
Reports

Get Started with Schedule
21
Resources
Risk
Schedule
Scope
Strategic Alignment
Submittals
Workflows and Forms
Update the Owning Workspace of a Code
Update the owning workspace of a code to move it to another workspace that you are assigned. If you move the code to a workspace that is higher in the workspace hierarchy, it will be available to more workspaces.
To update the owning workspace of a code:
1) Navigate to an object configuration page (see page 165).
2) On the object page, select the Codes tab.
3) On the Codes tab, select a code.
4) Select the Context menu, and then select Change Owning Workspace.
5) In the Select Workspace dialog box, select the new owning workspace, and select Select.
6) Save your changes:
In Primavera Cloud:
a. Select Save.
b. In the Summary & Settings panel, select Close.
In Primavera Professional:
Select Save.
This setting is used in the following apps:
Contracts and Commitments
Cost and Funds
Dashboards
Field
Lean
Portfolio Analysis
Reports
Resources
Risk
Schedule
Scope
Strategic Alignment
Submittals
Workflows and Forms

Schedule Management User Guide
22
Curve Profiles Overview
Curve profiles enable you to specify the allocation of scope assignment costs, quantities, and hours over the duration of an activity; resource or role hours spread over the duration of an activity; and budget quantities over their durations.
Amounts are distributed evenly throughout an activity unless a nonlinear distribution is specified using a curve profile. Scope assignments can use curve profiles regardless of whether they are linked to activities.
Interpreting Curve Profiles
After you navigate to the Curve Profiles dictionary page, you can view all of the default and custom curve profiles available to you. Select a curve profile to view a graph that represents how it works. The x-axis, labeled at the top of the graph, represents the percentage of the object's duration. The y-axis, labeled along the left side of the graph, represents the percentage of the object that has been allocated to th e duration percentages. The numbers along the bottom of the graph indicate what percentage of the is allocated at each increment of the duration.
Among the simplest built-in curve profiles is the Linear profile. Select it to view its graph. By default, the Linear curve profile evenly distributes 5.00% of the total quantity to every 5% increment in the item's duration, rounding as necessary.
Here is a list of all the built-in curve profiles:
Bell
Double Bell
Delayed Double Bell
Offset Triangular
Triangular Decrease
Triangular Increase
Front Loaded
Three Step
Linear
Back Loaded
Trapezoidal
Triangular
Define a Curve Profile
Define curve profiles to specify how scope assignment costs, quantities, and hours spread over the duration of an activity; resource or role hours spread over the duration of an activity; and budget quantities over budget durations. There are some default curve profiles defined in the application. You can add a new curve, which is based on the default linear curve, or copy and modify one of the existing curves.
To define a curve profile:
1) Navigate to the Curve Profiles dictionary page (see page 164).
Get Started with Schedule
23
2) To copy an existing curve, select the Context menu next to the curve to copy, and select Duplicate.
To create a curve, select the Context menu for a curve, and select Add.
3) Enter a Curve Name.
4) Modify the curve value percentages to create a curve that indicates how your costs and quantities should distribute over time. Curves are defined by 21 points (5% intervals from 0 to 100 is the default for a new curve).
5) Select Prorate to make the total of the distribution values equal to 100% while maintaining the shape you specified.
6) Save your changes:
In Primavera Cloud:
a. Select Save.
b. In the Summary & Settings panel, select Close.
In Primavera Professional:
Select Save.
This setting is used in the following apps:
Cost and Funds
Resources
Risk
Schedule
Scope
Defaults & Options
The Defaults & Options section specifies the default configuration of settings for each object in a workspace. Each new instance of a particular object in the workspace will inherit the attributes set in Defaults & Options. Settings for each object include autonumbering defaults, standard and configured fields, object codes, custom workflows, custom forms, and any other default settings applicable to the object. The available configuration options vary by object.
Field Labels Overview
Standard fields are the default fields found in Oracle Primavera Cloud. Fields can be used to store data, provide details, and accept user input. On many pages, fields can be added as columns in a table, used to sort or group data, or used as filters to reduce the number of items displayed on a page. They can also be found in dialog boxes, detail windows, and settings pages. Fields may be associated with a specific object. For example, the activity object is associated with various activity-related fields, such as Start, Finish, and Duration. These fields can be used on pages that support activities.

Schedule Management User Guide
24
The Field Labels tab in the Defaults & Options section of the workspace Summary & Settings provides the default column name, column label, data type, and description of each field associated with an object. Labels are the field names displayed throughout the application. Default field labels may not reflect the terminology of your organization or industry. You can customize labels to meet the needs of your organization in any of the twelve supported languages.
Oracle Primavera Cloud and Primavera Professional documentation uses default field labels. If you change a field label in the application, it will no longer match the label used in documentation. Modified field labels can be reset back to their defaults.
Access a Standard Field Description
You can view the default column name, column label, data type, and description of any standard field in the application. The column label of each field can be modified to match the terminology used by your organization. Fields are associated with objects and can be used in pages that support that object.
To view the details of a standard field:
1) Navigate to an object configuration page (see page 165).
2) On the object page, select the Field Labels tab, and view the Column Name, Column Label, Data Type, and Description columns.
This setting is used in the following apps:
Contracts and Commitments
Cost and Funds
Field
Files
Lean
Portfolio Analysis
Resources
Risk
Schedule
Scope
Strategic Alignment
Change a Standard Field Label
You can update standard field labels in your native language or update labels in the Localization detail window to customize the field label in other languages. In the table of standard fields, the Column Name field specifies the original field name. The Column Label field specifies the custom label, entered by the user. By default it matches the original field name.
Get Started with Schedule
25
Note: Oracle Primavera Cloud documentation uses default field labels. If you follow these steps to change a field label in the application, it will no longer match the label used in documentation.
To change a standard field label:
1) Navigate to an object configuration page (see page 165).
2) On the object page, select the Field Labels tab.
3) In the table, select a field.
4) In the Column Label field, enter a new label.
5) In the Localization detail window, select the Column Label field of the language, and enter a new label.
6) Save your changes:
In Primavera Cloud:
a. Select Save.
b. In the Summary & Settings panel, select Close.
In Primavera Professional:
Select Save.
Tips
You can restore the default label of a standard field by selecting the Context menu and then selecting Reset Label.
New child workspaces inherit the field labels set in the parent workspace. To apply field labels to all existing child workspaces, select one or more fields, select the Contextmenu, and then select Apply Label to Child Workspace.
This setting is used in the following apps:
Contracts and Commitments
Cost and Funds
Field
Lean
Portfolio Analysis
Resources
Risk
Schedule
Scope
Strategic Alignment
Configured Fields Overview
Configured fields are user-created fields that allow you to define and maintain data specific to your organization. For example, you can track information such as Strategic Importance or Main Stakeholder.

Schedule Management User Guide
26
Configured fields are created in the context of an object and can be used in views on pages that support that object. For example, you can create an Activity configured field and use it on the Activities page as a column, grouping band, sorting option, or filter criterion. Configured fields are global, so they can be used across all workspaces, projects, portfolios, programs, project collections, and ideas.
Oracle Primavera Cloud fields are categorized by data type, including: Boolean, cost, date, integer, list, number, or text. For some types of data, you can define a formula or statement to calculate values for a field. For more information on creating or using custom formulas, consult the Oracle Primavera Cloud Expression Language Guide on Oracle Help Center.
Documentation on adding a configured field to a specific object can be found under that object.
Change a Configured Field Label
You can update configured field labels in your native language or update labels in the Localization detail window to customize the field label in other languages. In the table of configured fields, the View Column Name field specifies the original field name. The Column Label field specifies the custom label, entered by the user. By default it matches the original field name.
To change a configured field label:
1) Navigate to an object configuration page (see page 165).
2) On the object page, select the Configured Fields tab.
3) In the table, select a field.
4) In the Column Label field, enter a new label.
5) In the Localization section, select the Column Label field of the language, and enter a new label.
6) Save your changes:
In Primavera Cloud:
a. Select Save.
b. In the Summary & Settings panel, select Close.
In Primavera Professional:
Select Save.
Tips
You can restore the default label of a configured field by selecting the Context menu and then selecting Reset Label.
New child workspaces inherit the field labels set in the parent workspace. To apply field labels to all existing child workspaces, select one or more fields, select the Contextmenu, and then select Apply Label to Child Workspace.
This setting is used in the following apps:
Contracts and Commitments
Cost and Funds
Field

Get Started with Schedule
27
Files
Lean
Portfolio Analysis
Resources
Risk
Schedule
Scope
Submittals
Add a Formula-Based Configured Field: Example
This example demonstrates how to create a configured field to calculate and store the Estimated Final Cost of a project.
Let us assume that you will define the Estimated Final Cost of a project as Approved Budget plus Proposed Budget.
Creating a Configured Field
1) Navigate to the Project configuration page (see page 166).
2) On the Project page, select Configured Fields.
3) In the table, complete the following fields:
a. In the Column Label column, enter Estimated Final Cost.
b. In the View Column Name column, enter EST_FINAL_COST.
c. In the Data Type column, select Cost.
d. In the Type column, select Formula.
e. In the Summary Calculation column, select Sum.
Defining a Formula
1) In the Formula detail window, in the Field list, select Approved Budget, and select Insert Field.
2) Select +.
3) In the Field list, select Proposed Budget, and select Insert Field.
4) Select Validate Formula.
5) In the Formula validation passed dialog box, select OK.
6) Save your changes:
In Primavera Cloud:
a. Select Save.
b. In the Summary & Settings panel, select Close.
In Primavera Professional:
Select Save.

Schedule Management User Guide
28
Tips
To delete a configured field, select the field, select Context, and then select Delete. You cannot delete a configured field if it is used in a form, workflow, or field mapping.
Update the Owning Workspace of a Configured Field
Update the owning workspace of a configured field to move it to another workspace that you are assigned. If you move the field to a workspace that is higher in the workspace hierarchy, it will be available to more workspaces.
To update the owning workspace of a configured field:
1) Navigate to an object configuration page (see page 165).
2) On the object page, select the Configured Fields tab.
3) On the Configured Fields tab, select Manage Shared Data.
4) Select the Context menu, and then select Change Owning Workspace.
5) In the Select Workspace dialog box, select the new owning workspace, and select Select.
6) Save your changes:
In Primavera Cloud:
a. Select Save.
b. In the Summary & Settings panel, select Close.
In Primavera Professional:
Select Save.
This setting is used in the following apps:
Contracts and Commitments
Cost and Funds
Field
Files
Lean
Portfolio Analysis
Resources
Risk
Schedule
Scope
Strategic Alignment
Submittals
Activity
Create and customize field labels, set activity defaults, and create codes to assign to activities and other objects.
Defaults

Get Started with Schedule
29
Configure Default Activity Settings for a Workspace (on page 29) Configure Auto Numbering Defaults for an Activity (on page 31) Configure Default Activity Calculation Settings for a Workspace (on page 31)
Field Labels
Access a Standard Field Description (on page 24) Change a Standard Field Label (on page 24)
Configured Fields
Add an Activity Field (on page 32) Add a Formula-Based Configured Field: Example (on page 27) Update the Owning Workspace of a Configured Field (on page 28) Change a Configured Field Label (on page 26)
Codes
Add a Code (on page 19) Add a Value to a Code (on page 20) Update the Owning Workspace of a Code (on page 21)
Configure Default Activity Settings for a Workspace
You can configure default system behavior for activities in a workspace.
To configure default activity settings for a workspace:
1) Navigate to the Activity configuration page (see page 166).
2) Select the Defaults tab.
3) In the New Activities section, configure default behavior for new activities:
Duration Type: Determines how remaining duration, units, and units/time are calculated when you update an activity that has resources assigned.
Fixed Units/Time: The resource units per time are constant when the activity duration or units are changed. Use this duration type when an activity has fixed resources with fixed productivity output per time period.
Fixed Units: The activity units are constant when the duration or resource units per time are changed. Use this duration type when the total amount of work is fixed, and increasing the resources can decrease the activity duration.
Fixed Duration & Units: The duration and units remain constant as the units/time is changed. Use this duration type when the activity must be completed within a fixed time period and the total amount of work is fixed.
Fixed Duration & Units/Time: The activity duration is constant as the units or resource units per time are changed. Use this duration type when the activity must be completed within a fixed time period regardless of the resources assigned.
Percent Complete Type: Determines the way in which the application calculates the percent complete for the activity. The type can be Physical, Duration, Units, or Scope.
Physical: The user will enter the percent complete for the activity.
Duration: The percent complete is calculated from the actual and remaining duration.
Units: The percent complete is calculated from the actual and remaining units.

Schedule Management User Guide
30
Scope: The percent complete for the activity is derived from the scope percent complete of the linked scope assignment.
Activity Type: Determines how duration and schedule dates are calculated for the activity.
Activity Dependent: This type of activity indicates that assigned resources should be scheduled based on the activity's calendar, rather than the calendars of the resources.
Resource Dependent: This type of activity indicates that resources should be scheduled based on their assigned calendars. Use this type when the activity duration may be affected by resource availability.
Level of Effort: This type of activity indicates that it is ongoing with a duration determined by its dependent activities. The duration is calculated based on the schedule dates of its predecessors and successors. Administrative activities are typically designated as Level of Effort.
Start Milestone: This type of activity indicates the beginning of an important project phase. Activities of this type have a duration of zero (0) with no resource assignments.
Finish Milestone: This type of activity indicates the end of an important project phase. Activities of this type have a duration of zero (0) with no resource assignments.
Default duration for new activities: Enter the default time duration, in hours, for new activities.
Increment Activity ID based on selected activity: When disabled, new activity IDs follow the activity auto numbering rules set in the project settings. When enabled, new activity IDs are numbered based on the ID of the activities selected when the new activities are added. See Add an Activity (on page 67) for more information.
4) In the New Assignments section, configure default behavior for new activity assignments:
Drive activity dates by default: Determines whether new resource or role assignments drive activity dates by default.
Resource can be assigned to same activity more than once: Determines whether activities can be assigned to the same resource multiple times.
When adding or removing multiple resource assignments on activities: Select an option to determine application behavior when activity resource assignments are adjusted:
Preserve the Units, Duration and Units/Time for existing assignments: Select this option for units, durations, and units/time to remain constant when additional resources are assigned to any activity.
Recalculate the Units, Duration and Units/Time for existing assignments based on the activity Duration Type: Select this option to calculate a resource assignment’s remaining values based on the activity’s duration type.
5) Save your changes:
In Primavera Cloud:
a. Select Save.
b. In the Summary & Settings panel, select Close.
Get Started with Schedule
31
In Primavera Professional:
Select Save.
This setting is used in the following apps:
Resources
Risk
Schedule
Scope
Configure Auto Numbering Defaults for an Activity
Unique IDs are required for objects in the application. The IDs are automatically generated based on the default values set for prefix, starting number, and increment. You can use the defaults set in the application or enter values that represent your numbering system. Setting these at the workspace level will apply the defaults to all projects or programs within the workspace. Defaults can be updated at the project or program level.
To set the auto numbering defaults:
1) Navigate to the Activity configuration page (see page 166).
2) Select the Defaults tab.
3) In the Activities section, define the auto numbering default values.
4) Save your changes:
In Primavera Cloud:
a. Select Save.
b. In the Summary & Settings panel, select Close.
In Primavera Professional:
Select Save.
This setting is used in the following apps:
Resources
Risk
Schedule
Scope
Configure Default Activity Calculation Settings for a Workspace
You can configure default activity calculation settings for workspaces to specify how the application computes values for activities within that workspace.
To configure default activity calculation settings for workspaces:
1) Navigate to the Activity configuration page (see page 166).
2) Select the Defaults tab.
3) In the Calculations section, under Activities, configure calculation settings for project activities:

Schedule Management User Guide
32
When changing an activity to not started: Determines how units and duration are handled if activity progress is removed.
Reset planned duration and units to remaining: Select this option to reset planned unit spreads to match the remaining units.
Reset remaining duration and units to planned: Select this option to reset remaining unit spreads to match the planned units.
Link planned and remaining/at completion for not started activities: Determines whether to recalculate all of the planned unit and cost values using the remaining costs and units for activities that have not started.
Define critical activities as: Select a method to identify critical activities:
Total Float less than or equal to: Select this option to identify critical activities based on the lack of flexibility in their scheduled dates. Enter a minimum float duration. When the project is scheduled, activities with total float values less than or equal to this value are marked critical.
Longest Path: Select this option to define critical activities based on the sequence of driving activities that determine the project end date.
4) In the Units section, configure calculation settings for units:
When updating units: Determines how the application handles changes to units.
Add actual to remaining: Select this option to calculate a new at completion value when the remaining units or actual units change.
Subtract actual from at completion: Select this option to calculate a new remaining units value when the at completion or actual units change.
Recalculate actual units when Duration % Complete changes: Select this option to recalculate actual units when the duration percent complete is updated.
5) In the Scope Items section, select a default method for calculating scope completion percentages. Scope completion percentage can be calculated using cost, quantity, hours, or manually entered values.
6) Save your changes:
In Primavera Cloud:
a. Select Save.
b. In the Summary & Settings panel, select Close.
In Primavera Professional:
Select Save.
This setting is used in the following apps:
Resources
Risk
Schedule
Scope
Add an Activity Field
Add custom activity fields to enable users to enter or view information which is important to your organization.

Get Started with Schedule
33
Note: On pages that support auto-save, configured field formulas will be automatically recalculated when a change is made that impacts the value of a configured field formula. However, there may be times where the recalculation is not updated in the user interface. When this occurs, refresh the page to see the recalculated value.
To add an activity field:
1) Navigate to the Activity configuration page (see page 166).
2) Select the Configured Fields tab.
3) In the table, select Add.
a. In the Column Label column, enter a name for the new field.
b. In the View Column Name column, enter a name for the field as it will be seen in the database when creating reports.
c. In the Data Type column, select the type for the new field. The choices are: Boolean, Cost, Date, Integer, List, Number, or Text.
d. In the Type column, select Manual if this field will hold data entered by a user or Formula if the data it holds will be calculated on the basis of a formula.
e. (Optional) In the Summary Calculation field, specify how the app calculates summary rollup values for the field.
In most tables where you can view a list of similar objects, you can also view the totals for the various values of these objects. For example, on the Activities table for a project, you can view rollup totals for numerical values like Planned Duration and Planned Labor Units at the top of the table.
The Summary Calculation field enables you to specify how totals are determined for configured fields.
If you selected Cost, Date, Integer, or Number as the Data Type, in the Summary Calculation column, select a simple calculation like Sum or Average, if applicable.
Alternatively, if you set the Type field to Formula, you can set the Summary Calculationfield to Use Formula. With this option selected, the app will use the formula defined in the Formula field to determine how the total rollup value is calculated for the field.
f. (Optional) If you selected Text as the Data Type, in the Field Length column, enter the maximum number of characters that can be used in the field.
g. If you selected Formula, configure the Formula section.
4) Save your changes:
In Primavera Cloud:
a. Select Save.
b. In the Summary & Settings panel, select Close.
In Primavera Professional:
Select Save.
Tips
To delete a configured field, select the field, select Context, and then select Delete. You cannot delete a configured field if it is used in a form, workflow, or field mapping.

Schedule Management User Guide
34
This setting is used in the following apps:
Resources
Risk
Schedule
Scope
Activity Relationship
Create new configured fields and relabel standard fields to meet the needs of your organization. Localize names and column labels for supported languages.
Field Labels
Access a Standard Field Description (on page 24)
Change a Standard Field Label (on page 24)
Project
Create and customize field labels, create new codes, and set project defaults including calendars, update progress, and auto numbering.
Defaults
Set the Default Calendar (on page 17) Set the Default My Activities Settings (on page 35)
Field Labels
Access a Standard Field Description (on page 24) Change a Standard Field Label (on page 24)
Configured Fields
Add a Project Field (on page 36) Add a Formula-Based Configured Field: Example (on page 27) Update the Owning Workspace of a Configured Field (on page 28) Change a Configured Field Label (on page 26)
Codes
Add a Code (on page 19) Add a Value to a Code (on page 20) Update the Owning Workspace of a Code (on page 21)
Set the Default Calendar
The default calendar is set in the workspace-level Calendars dictionary and is available to projects, resources, and roles within that workspace. One calendar must always be defined as the default.
Get Started with Schedule
35
Notes:
The application has a built-in default calendar. The settings in this calendar cannot be changed. After another calendar has been assigned as the default, this calendar can be deleted.
You can also set the default calendar on the Project page in Defaults & Options. You can choose from a list of calendars that are available to the Project object.
To set the default calendar:
1) Navigate to the Calendars dictionary page (see page 163).
2) In the list of calendars, select the Default option for the calendar.
3) Save your changes:
In Primavera Cloud:
a. Select Save.
b. In the Summary & Settings panel, select Close.
In Primavera Professional:
Select Save.
Tips
If the calendar you selected was only available to Project or Resource/Role, then both options are automatically selected when you select a new default calendar.
This setting is used in the following apps:
Contracts and Commitments
Cost and Funds
Lean
Resources
Risk
Schedule
Scope
Set the Default My Activities Settings
You can configure default My Activities settings for a workspace to determine how users update their project activities for any project in that workspace by default.
To configure default My Activities settings for a workspace:
1) Navigate to the Project configuration page (see page 166).
2) Select the Defaults tab.
3) In the Team members are assigned to activities as section, select a method for how team members are assigned to activities.
Resource Assignments: Each user who is assigned a resource assignment can view that assignment and update its progress.

Schedule Management User Guide
36
Activity Owners: Each user who is assigned to an activity as its Owner can view the activity and update its progress.
Both: Resource assignments can view and update their assignments, and activity owners can view and update their activities. Users who have activities and resource assignments will see entries for both.
4) In the Select the fields team members can update section, add the fields you want team members to view and use to update their progress.
Assignment Fields: Add the fields you want team members assigned as resource assignments to use to status their activities.
Activity Fields: Add the fields you want team members assigned as activity owners to use to status their activities. If a team member who owns an activity also has a resource assignment for that activity, then the team member will be able to view and update both the assignment and the activity.
Codes and Configured Fields: Add codes and configured fields that you want activity owners or resource assignment performers to view or use to update their activities. To make any code or configured field read-only, select Read Only by the field. In order for a user to update Cost-type codes or configured fields, the user needs the Project Costs/Financials privilege on the project.
(Optional) Select Team member can update progress of other resource assignments on activity if you want activity owners to be able to update the progress of all resource assignments for their activities.
5) Save your changes:
In Primavera Cloud:
a. Select Save.
b. In the Summary & Settings panel, select Close.
In Primavera Professional:
Select Save.
This setting is used in the following apps:
Cost and Funds
Lean
Resources
Risk
Schedule
Scope
Add a Project Field
Add custom project fields to enable users to enter or view information which is important to your organization.
Note: On pages that support auto-save, configured field formulas will be automatically recalculated when a change is made that impacts the value of a configured field formula. However, there may be times where

Get Started with Schedule
37
the recalculation is not updated in the user interface. When this occurs, refresh the page to see the recalculated value.
To add a project field:
1) Navigate to the Project configuration page (see page 166).
2) Select the Configured Fields tab.
3) In the table, select Add.
a. In the Column Label column, enter a name for the new field.
b. In the View Column Name column, enter a name for the field as it will be seen in the database when creating reports.
c. In the Data Type column, select the type for the new field. The choices are: Boolean, Cost, Date, Integer, List, Number, or Text.
d. In the Type column, select Manual if this field will hold data entered by a user or Formula if the data it holds will be calculated on the basis of a formula.
e. (Optional) In the Summary Calculation field, specify how the app calculates summary rollup values for the field.
In most tables where you can view a list of similar objects, you can also view the totals for the various values of these objects. For example, on the Activities table for a project, you can view rollup totals for numerical values like Planned Duration and Planned Labor Units at the top of the table.
The Summary Calculation field enables you to specify how totals are determined for configured fields.
If you selected Cost, Date, Integer, or Number as the Data Type, in the Summary Calculation column, select a simple calculation like Sum or Average, if applicable.
Alternatively, if you set the Type field to Formula, you can set the Summary Calculationfield to Use Formula. With this option selected, the app will use the formula defined in the Formula field to determine how the total rollup value is calculated for the field.
f. (Optional) If you selected Text as the Data Type, in the Field Length column, enter the maximum number of characters that can be used in the field.
g. If you selected Formula, configure the Formula section.
4) Save your changes:
In Primavera Cloud:
a. Select Save.
b. In the Summary & Settings panel, select Close.
In Primavera Professional:
Select Save.
Tips
To delete a configured field, select the field, select Context, and then select Delete. You cannot delete a configured field if it is used in a form, workflow, or field mapping.
You can select up to five fields to use in the Field app from the root workspace.
Schedule Management User Guide
38
This setting is used in the following apps:
Contracts and Commitments
Cost and Funds
Field
Files
Lean
Portfolio Analysis
Resources
Risk
Schedule
Scope
Strategic Alignment
Submittals
Resource/Role
Relabel standard fields to meet the needs of your organization, localize names and column labels for supported languages, and create new codes.
Field Labels
Access a Standard Field Description (on page 24) Change a Standard Field Label (on page 24)
Codes
Add a Code (on page 19) Add a Value to a Code (on page 20) Update the Owning Workspace of a Code (on page 21)
Resource Assignment
Create new configured fields and relabel standard fields to meet the needs of your organization. Localize names and column labels for supported languages.
Field Labels
Access a Standard Field Description (on page 24) Change a Standard Field Label (on page 24)
Configured Fields
Add a Resource Assignment Field (on page 39) Add a Formula-Based Configured Field: Example (on page 27) Update the Owning Workspace of a Configured Field (on page 28) Change a Configured Field Label (on page 26)

Get Started with Schedule
39
Add a Resource Assignment Field
Add custom resource assignment fields to enable users to enter or view information which is important to your organization.
Note: On pages that support auto-save, configured field formulas will be automatically recalculated when a change is made that impacts the value of a configured field formula. However, there may be times where the recalculation is not updated in the user interface. When this occurs, refresh the page to see the recalculated value.
To add a resource assignment field:
1) Navigate to the Resource Assignment configuration page (see page 166).
2) Select the Configured Fields tab.
3) In the table, select Add.
a. In the Column Label column, enter a name for the new field.
b. In the View Column Name column, enter a name for the field as it will be seen in the database when creating reports.
c. In the Data Type column, select the type for the new field. The choices are: Boolean, Cost, Date, Integer, List, Number, or Text.
d. In the Type column, select Manual if this field will hold data entered by a user or Formula if the data it holds will be calculated on the basis of a formula.
e. (Optional) In the Summary Calculation field, specify how the app calculates summary rollup values for the field.
In most tables where you can view a list of similar objects, you can also view the totals for the various values of these objects. For example, on the Activities table for a project, you can view rollup totals for numerical values like Planned Duration and Planned Labor Units at the top of the table.
The Summary Calculation field enables you to specify how totals are determined for configured fields.
If you selected Cost, Date, Integer, or Number as the Data Type, in the Summary Calculation column, select a simple calculation like Sum or Average, if applicable.
Alternatively, if you set the Type field to Formula, you can set the Summary Calculationfield to Use Formula. With this option selected, the app will use the formula defined in the Formula field to determine how the total rollup value is calculated for the field.
f. (Optional) If you selected Text as the Data Type, in the Field Length column, enter the maximum number of characters that can be used in the field.
g. If you selected Formula, configure the Formula section.
4) Save your changes:
In Primavera Cloud:
a. Select Save.
b. In the Summary & Settings panel, select Close.
In Primavera Professional:
Select Save.

Schedule Management User Guide
40
Tips
To delete a configured field, select the field, select Context, and then select Delete. You cannot delete a configured field if it is used in a form, workflow, or field mapping.
This setting is used in the following apps:
Resources
Risk
Schedule
WBS
Create new configured fields and relabel standard fields to meet the needs of your organization, localize names and column labels for supported languages, and create new codes.
Field Labels
Access a Standard Field Description (on page 24) Change a Standard Field Label (on page 24)
Configured Fields
Add a WBS Field (on page 40) Add a Formula-Based Configured Field: Example (on page 27) Update the Owning Workspace of a Configured Field (on page 28) Change a Configured Field Label (on page 26)
Codes
Add a Code (on page 19) Add a Value to a Code (on page 20) Update the Owning Workspace of a Code (on page 21)
Add a WBS Field
Add custom WBS fields to enable users to enter or view information which is important to your organization.
Note: On pages that support auto-save, configured field formulas will be automatically recalculated when a change is made that impacts the value of a configured field formula. However, there may be times where the recalculation is not updated in the user interface. When this occurs, refresh the page to see the recalculated value.
To add a WBS field:
1) Navigate to the WBS configuration page (see page 167).
2) Select the Configured Fields tab.
3) In the table, select Add.
a. In the Column Label column, enter a name for the new field.
Get Started with Schedule
41
b. In the View Column Name column, enter a name for the field as it will be seen in the database when creating reports.
c. In the Data Type column, select the type for the new field. The choices are: Boolean, Cost, Date, Integer, List, Number, or Text.
d. In the Type column, select Manual if this field will hold data entered by a user or Formula if the data it holds will be calculated on the basis of a formula.
e. (Optional) In the Summary Calculation field, specify how the app calculates summary rollup values for the field.
In most tables where you can view a list of similar objects, you can also view the totals for the various values of these objects. For example, on the Activities table for a project, you can view rollup totals for numerical values like Planned Duration and Planned Labor Units at the top of the table.
The Summary Calculation field enables you to specify how totals are determined for configured fields.
If you selected Cost, Date, Integer, or Number as the Data Type, in the Summary Calculation column, select a simple calculation like Sum or Average, if applicable.
Alternatively, if you set the Type field to Formula, you can set the Summary Calculationfield to Use Formula. With this option selected, the app will use the formula defined in the Formula field to determine how the total rollup value is calculated for the field.
f. (Optional) If you selected Text as the Data Type, in the Field Length column, enter the maximum number of characters that can be used in the field.
g. If you selected Formula, configure the Formula section.
4) Save your changes:
In Primavera Cloud:
a. Select Save.
b. In the Summary & Settings panel, select Close.
In Primavera Professional:
Select Save.
Tips
To delete a configured field, select the field, select Context, and then select Delete. You cannot delete a configured field if it is used in a form, workflow, or field mapping.
This setting is used in the following apps:
Resources
Risk
Schedule
Scope
Permissions
Permission sets determine the level of access to objects and functionality. Configure permission sets to grant users or user groups access to view or complete actions on a variety of objects.
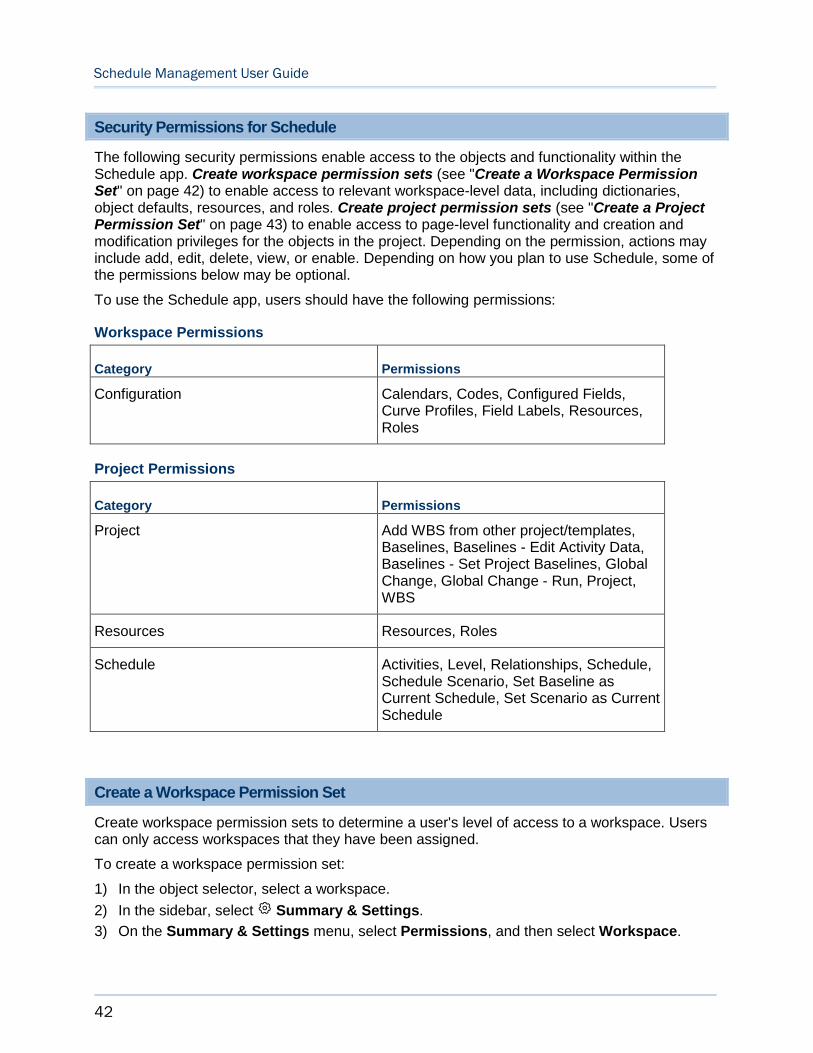
Schedule Management User Guide
42
Security Permissions for Schedule
The following security permissions enable access to the objects and functionality within the Schedule app. Create workspace permission sets (see "Create a Workspace Permission Set" on page 42) to enable access to relevant workspace-level data, including dictionaries, object defaults, resources, and roles. Create project permission sets (see "Create a Project Permission Set" on page 43) to enable access to page-level functionality and creation and modification privileges for the objects in the project. Depending on the permission, actions may include add, edit, delete, view, or enable. Depending on how you plan to use Schedule, some of the permissions below may be optional.
To use the Schedule app, users should have the following permissions:
Workspace Permissions
Category Permissions
Configuration Calendars, Codes, Configured Fields, Curve Profiles, Field Labels, Resources, Roles
Project Permissions
Category Permissions
Project Add WBS from other project/templates, Baselines, Baselines - Edit Activity Data, Baselines - Set Project Baselines, Global Change, Global Change - Run, Project, WBS
Resources Resources, Roles
Schedule Activities, Level, Relationships, Schedule, Schedule Scenario, Set Baseline as Current Schedule, Set Scenario as Current Schedule
Create a Workspace Permission Set
Create workspace permission sets to determine a user's level of access to a workspace. Users can only access workspaces that they have been assigned.
To create a workspace permission set:
1) In the object selector, select a workspace.
2) In the sidebar, select Summary & Settings.
3) On the Summary & Settings menu, select Permissions, and then select Workspace.
Get Started with Schedule
43
4) On the Workspace permission sets page, select Add.
5) In the Name field, enter a unique name.
6) In the Description field, enter a description of the permission set.
7) In the Privileges section, expand each category to assign privileges.
8) Select Save.
9) In the Summary & Settings panel, select Close.
Notes:
To assign users to a workspace permission set, use the Securitypage in the Workspace Summary & Settings panel.
To assign a default workspace permission set to a user group, use the Default Permissions tab of the User Groups page.
Tips
You can duplicate existing permission sets by selecting the Add menu and selecting Duplicate.
Provide clear permission set names and descriptions to help you manage permissions.
You can delete a permission set by selecting the profile and selecting Delete. You can only delete permission sets that are not currently in use.
Create a Project Permission Set
Create project permission sets to determine a user's level of access to each project. Users can only access projects that they have been assigned.
To create a project permission set:
1) In the object selector, select a workspace.
2) In the sidebar, select Summary & Settings.
3) On the Summary & Settings menu, select Permissions, and then select Project.
4) On the Project permission sets page, select Add.
5) In the Name field, enter a unique name.
6) In the Description field, enter a description of the permission set.
7) In the Privileges section, expand each category to assign privileges.
8) Select Save.
9) In the Summary & Settings panel, select Close.
Schedule Management User Guide
44
Notes:
To assign users to a project permission set, use the Security page in the Project Team app.
To assign a default project permission set to a user group, use the Default Permissions tab of the User Groups page.
Tips
You can duplicate existing permission sets by selecting the Add menu and selecting Duplicate.
Provide clear permission set names and descriptions to help you manage permissions.
You can delete a permission set by selecting the profile and selecting Delete. You can only delete permission sets that are not currently in use.
Project Settings
Configure settings at the project level.
Assign a Manager to a Project
Assign managers to projects to identify the project manager or person responsible for managing the project.
The user who created the project is automatically assigned as the manager.
To assign a manager to a project:
1) Navigate to the project Details page (see page 162).
2) In the Details section, in the Manager field, select a manager.
3) Save your changes:
In Primavera Cloud:
a. Select Save.
b. In the Summary & Settings panel, select Close.
In Primavera Professional:
Select Save.
You can also do this in the Projects inventory panel.
1) In Primavera Cloud:
In the object selector, select Projects, and then select View All Projects.
In Primavera Professional:
a. On the File menu, select Open.
b. In the Open dialog box, select the Projects or Programs tab, select a project or program, and then select Open.
c. On the Workspace menu, select Projects.
2) In the table, select a project, and then add a manger in the Manager field.

Get Started with Schedule
45
This setting is used in the following apps:
Contracts and Commitments
Cost and Funds
Field
Lean
Resources
Risk
Schedule
Scope
Strategic Alignment
Assign a Project Calendar
Each project must have a calendar assigned. The default calendar in the workspace will automatically be assigned as the project calendar. The calendar can be changed to suit the needs of the project.
To assign a project calendar:
1) Navigate to the project Details page (see page 162).
2) In the Details section, in the Calendar field, select a calendar.
3) Save your changes:
In Primavera Cloud:
a. Select Save.
b. In the Summary & Settings panel, select Close.
In Primavera Professional:
Select Save.
Set the Data Date for a Project
The data date is the progress point, or "as-of date," for activities in the project. Project status is up-to-date as of the data date.
The data date is also used for updating the dates of scope assignments and work packages when they are not linked to activities.
Note: Dates will not change after the Data Date is updated for activities or scope assignments unless you run the Scheduler or Modify Dates feature, respectively.
To set the project data date:
1) Navigate to the project Details page (see page 162).
2) In the Details section, in the Data Date field, select the date.
3) Save your changes:
In Primavera Cloud:
Schedule Management User Guide
46
a. Select Save.
b. In the Summary & Settings panel, select Close.
In Primavera Professional:
Select Save.
This setting is used in the following apps:
Contracts and Commitments
Cost and Funds
Dashboards
Lean
Reports
Resources
Risk
Schedule
Scope
Submittals
Configure Schedule Settings for a Project
Configure project schedule settings to set planned project start and finish dates, as well as a date by which the project must finish. These dates are also used to drive the project scheduler during the scheduling process.
To configure schedule settings for your project:
1) Navigate to the project Details page (see page 162).
2) In the Schedule section, in the Project Planned Start field, select the start date.
3) In the Project Planned Finish field, select a planned finish date.
4) In the Schedule Must Finish By Date field, select the date the project must finish by.
5) Save your changes:
In Primavera Cloud:
a. Select Save.
b. In the Summary & Settings panel, select Close.
In Primavera Professional:
Select Save.
This setting is used in the following apps:
Lean
Resources
Risk
Schedule
Scope
Get Started with Schedule
47
Configure Activity Defaults for a Project
You can configure default system behavior for new activities and resource assignments for your project.
Note: Although you can configure default values for activity type, duration type, and percent complete type, you can also manually adjust these values for individual activities.
To configure default settings for new activities and resource assignments:
1) Navigate to the project settings page (see page 162).
2) Select the Activity Defaults tab.
3) In the New Activities section, configure default behavior for new activities:
Duration Type: Determines how remaining duration, units, and units/time are calculated when you update an activity that has resources assigned.
Fixed Units/Time: The resource units per time are constant when the activity duration or units are changed. Use this duration type when an activity has fixed resources with fixed productivity output per time period.
Fixed Units: The activity units are constant when the duration or resource units per time are changed. Use this duration type when the total amount of work is fixed, and increasing the resources can decrease the activity duration.
Fixed Duration & Units: The duration and units remain constant as the units/time is changed. Use this duration type when the activity must be completed within a fixed time period and the total amount of work is fixed.
Fixed Duration & Units/Time: The activity duration is constant as the units or resource units per time are changed. Use this duration type when the activity must be completed within a fixed time period regardless of the resources assigned.
Percent Complete Type: Determines the way in which the application calculates the percent complete for the activity. The type can be Physical, Duration, Units, or Scope.
Physical: The user will enter the percent complete for the activity.
Duration: The percent complete is calculated from the actual and remaining duration.
Units: The percent complete is calculated from the actual and remaining units.
Scope: The percent complete for the activity is derived from the scope percent complete of the linked scope assignment.
Activity Type: Determines how duration and schedule dates are calculated for the activity.
Activity Dependent: This type of activity indicates that assigned resources should be scheduled based on the activity's calendar, rather than the calendars of the resources.
Resource Dependent: This type of activity indicates that resources should be scheduled based on their assigned calendars. Use this type when the activity duration may be affected by resource availability.

Schedule Management User Guide
48
Level of Effort: This type of activity indicates that it is ongoing with a duration determined by its dependent activities. The duration is calculated based on the schedule dates of its predecessors and successors. Administrative activities are typically designated as Level of Effort.
Start Milestone: This type of activity indicates the beginning of an important project phase. Activities of this type have a duration of zero (0) with no resource assignments.
Finish Milestone: This type of activity indicates the end of an important project phase. Activities of this type have a duration of zero (0) with no resource assignments.
Default duration for new activities: Enter the default time duration, in hours, for new activities.
Increment Activity ID based on selected activity: When disabled, new activity IDs follow the activity auto numbering rules set in the project settings. When enabled, new activity IDs are numbered based on the ID of the activities selected when the new activities are added. See Add an Activity (on page 67) for more information.
4) In the New Assignments section, configure default behavior for new activity assignments:
Drive activity dates by default: Determines whether new resource or role assignments drive activity dates by default.
Resource can be assigned to same activity more than once: Determines whether activities can be assigned to the same resource multiple times.
When adding or removing multiple resource assignments on activities: Select an option to determine application behavior when activity resource assignments are adjusted:
Preserve the Units, Duration and Units/Time for existing assignments: Select this option for units, durations, and units/time to remain constant when additional resources are assigned to any activity.
Recalculate the Units, Duration and Units/Time for existing assignments based on the activity Duration Type: Select this option to calculate a resource assignment’s remaining values based on the activity’s duration type.
5) Save your changes:
In Primavera Cloud:
a. Select Save.
b. In the Summary & Settings panel, select Close.
In Primavera Professional:
Select Save.
This setting is used in the following apps:
Schedule
Configure Calculation Settings for a Project
Configure project calculation settings to define how the application computes values concerning activities and units at the project level.

Get Started with Schedule
49
To configure project calculation settings:
1) Navigate to the project settings page (see page 162).
2) Select the Calculations tab.
3) In the Calculations section, under Activities, configure calculation settings for project activities:
When changing an activity to not started: Determines how units and duration are handled if activity progress is removed.
Reset planned duration and units to remaining: Select this option to reset planned unit spreads to match the remaining units.
Reset remaining duration and units to planned: Select this option to reset remaining unit spreads to match the planned units.
Link planned and remaining/at completion for not started activities: Determines whether to recalculate all of the planned unit and cost values using the remaining costs and units for activities that have not started.
Define critical activities as: Select a method to identify critical activities:
Total Float less than or equal to: Select this option to identify critical activities based on the lack of flexibility in their scheduled dates. Enter a minimum float duration. When the project is scheduled, activities with total float values less than or equal to this value are marked critical.
Longest Path: Select this option to define critical activities based on the sequence of driving activities that determine the project end date.
4) In the Units section, configure calculation settings for units:
When updating units: Determines how the application handles changes to units.
Add actual to remaining: Select this option to calculate a new at completion value when the remaining units or actual units change.
Subtract actual from at completion: Select this option to calculate a new remaining units value when the at completion or actual units change.
Recalculate actual units when Duration % Complete changes: Select this option to recalculate actual units when the duration percent complete is updated.
5) Save your changes:
In Primavera Cloud:
a. Select Save.
b. In the Summary & Settings panel, select Close.
In Primavera Professional:
Select Save.
This setting is used in the following apps:
Risk
Schedule

Schedule Management User Guide
50
Configure My Activities Settings for a Project
Configure My Activities settings for your project to enable users to view and edit the fields required for updating activities using the My Activities page or the Primavera Cloud apps.
To configure My Activities settings:
1) Navigate to the project settings page (see page 162).
2) Select the My Activities tab.
3) In the Team members are assigned to activities as section, select a method for how team members are assigned to activities.
Resource Assignments: Each user who is assigned a resource assignment can view that assignment and update its progress.
Activity Owners: Each user who is assigned to an activity as its Owner can view the activity and update its progress.
Both: Resource assignments can view and update their assignments, and activity owners can view and update their activities. Users who have activities and resource assignments will see entries for both.
4) In the Select the fields team members can update section, add the fields you want team members to view and use to update their progress.
Assignment Fields: Add the fields you want team members assigned as resource assignments to use to status their activities.
Activity Fields: Add the fields you want team members assigned as activity owners to use to status their activities. If a team member who owns an activity also has a resource assignment for that activity, then the team member will be able to view and update both the assignment and the activity.
Codes and Configured Fields: Add codes and configured fields that you want activity owners or resource assignment performers to view or use to update their activities. To make any code or configured field read-only, select Read Only by the field. In order for a user to update Cost-type codes or configured fields, the user needs the Project Costs/Financials privilege on the project.
(Optional) Select Team member can update progress of other resource assignments on activity if you want activity owners to be able to update the progress of all resource assignments for their activities.
5) Save your changes:
In Primavera Cloud:
a. Select Save.
b. In the Summary & Settings panel, select Close.
In Primavera Professional:
Select Save.
This setting is used in the following apps:
Schedule
Get Started with Schedule
51
Configure the Auto Numbering Defaults for a Project
Unique IDs are required for a number of objects in the application. For example, in the Scope app, auto numbering defaults can be set for scope items, work packages, scope assignments, change requests, and change items. The IDs are automatically generated for each new object based on the default values set at the workspace level for prefix, suffix, and increment. You can use the defaults or enter values that represent the numbering system used for your project.
To set the auto numbering defaults:
1) Navigate to the project settings page (see page 162).
2) Select the Auto Numbering tab.
3) Define the auto numbering defaults for the objects used in the following areas.
Contracts: Changes, Change Order, Commitment, Contract, Payment Application, Potential Change Order
Cost: Actuals, Budget Change, and Budget Transfer
Documents: RFI and Submittal
Ideas: Idea
Lean: Tasks
Resources: Resources
Risk: Risk
Schedule: Activity, WBS
Scope: Scope Item, Work Package, Scope Assignment, Change Request, Change Item, and WBS
4) Save your changes:
In Primavera Cloud:
a. Select Save.
b. In the Summary & Settings panel, select Close.
In Primavera Professional:
Select Save.
Tips
Users can manually overwrite the default values when adding these objects in the application.
When importing scope items or scope assignments, if the ID column in the import template is left blank, the Scope Item ID or Scope Assignment ID columns are populated with the auto numbering defaults.
Configure Schedule Health Score Settings
Schedule Health Score metrics have default descriptions, target threshold values, and weight calculation values that can be modified in the project settings. You can also modify additional check criteria where applicable. Individual checks can be enabled or disabled according to your organization's needs.
To configure settings for the Schedule Health Score tool:
Schedule Management User Guide
52
1) Navigate to the project settings page (see page 162).
2) Select the Schedule Health Check tab.
3) Select Ignore Completed Activities if you want to exclude completed activities from the analysis.
4) In the table, select a check, and then configure the following settings:
Description: Modify the description of the check depending on your organization's needs.
Active: Include the selected check in the Schedule Health Score panel. Only active checks are used in the schedule health score calculation.
Target: Set the target threshold percentage value for the check. Typically, a check that exceeds the threshold value is marked red in the Schedule Health Score panel.
Weighting: Set the numerical weighting of the check. This value is used when determining the overall schedule health score.
5) In the General detail window, you can view or modify the same check details as in the table. Some checks have additional metrics that you can modify in the Criteria section of the detail window.
6) Save your changes:
In Primavera Cloud:
a. Select Save.
b. In the Summary & Settings panel, select Close.
In Primavera Professional:
Select Save.
This setting is used in the following apps:
Schedule
Additional Settings
Some settings that impact app functionality can be configured in other areas of the application.
Enable Feature Previews
Oracle Primavera Cloud enables you to turn on upcoming features via User Preferences. Functionality listed in the Preview Features section is fully functional, but is not yet turned on permanently in the application. These features are turned off by default.
To enable feature previews:
1) Navigate to the Preferences page (see page 168).
2) On the Preferences page, select the Settings tab.
3) In the Preview Features section, select any of the following:
Enhanced Printing: Enables improved printing functionality on all pages in the application with a Print icon in the page toolbar. When this option is disabled, standard browser printing functionality is used. On pages with Gantt charts, Gantt printing functionality is used.
WBS Overview
53
4) Save your changes:
In Primavera Cloud:
a. Select Save.
b. In the Preferences panel, select Close.
In Primavera Professional:
a. Select Save.
b. On the Preferences page, select Close.
WBS Overview
A WBS, or work breakdown structure, is a hierarchical arrangement of work activities that divides a project into discrete levels, phases, or layers. The WBS is structured in levels of work detail, beginning with the deliverable and separated into identifiable work elements.
Create a WBS
Create a work breakdown structure (WBS) to define a hierarchical arrangement of work.
To create a WBS:
1) Add a WBS
Add a WBS (on page 53)
Add a WBS from a Template or Other Project (on page 54)
Create a WBS by Import (on page 55)
2) Assign a Manager to a WBS (on page 55)
3) Add a File in a Files Detail Window (on page 56)
4) Copy and Paste a WBS Node (on page 57)
Add a WBS
Add a work breakdown structure (WBS) to represent a hierarchical arrangement of work. You can create sibling WBSs to represent WBSs that are hierarchically equal, or child WBSs to represent WBSs that are subordinate to other WBSs.
The WBS structure is pre-populated with one top-level node that is the name of the project. It cannot be deleted. The top-level WBS can only have child nodes.
Each level in the WBS hierarchy is separated by a period. When entering a new WBS node, the parent hierarchy is automatically prefixed, and the current node is incremented with the next number in the sequence. For example, a new sibling of WBS 1.1 will be automatically named WBS 1.2, and a child will automatically be named WBS 1.1.1. These values can be changed at any time. When updating a WBS Code or Name field, only the current level needs to be entered.
To add a WBS:
1) Navigate to the WBS page (see page 157).
Schedule Management User Guide
54
2) On the WBS page, select a WBS row.
3) To add a sibling WBS node, select Add or select the Context menu, and then select Add Sibling WBS. To add a child WBS node, select the Context menu, and then select Add Child WBS.
The new WBS node will automatically be assigned a name based on its sequence in the WBS, but it can be changed at any time.
4) All changes made to this page are saved automatically.
Tips
To add a WBS from a project template or project, select a WBS row, select the Contextmenu, and then select Add WBS from project. Use the Add WBS from Projects dialog box to select a WBS node and the specific activity data that you want to copy. The new WBSs are added as children of the selected row.
To make an existing WBS node a child of the node above it, select the Context menu, and then select Move Right. Select Move Left to change a child node to a sibling node. The name of the node is automatically updated based on its new sequence in the WBS.
Primavera Cloud supports WBS hierarchies up to 50 levels.
Add a WBS from a Template or Other Project
If your organization uses templates or a standardized structure across projects, you can save time when adding WBSs by copying them from a project template or another project in your workspace or parent workspaces. You can choose objects within the WBS that you would like to copy into your project, including activities, relationships, codes, configured fields, and assignments. The chosen WBS and any child WBSs are copied as children of the WBS you selected on the page.
You can perform this task from the Activities page or WBS page. To do so, the page must be grouped by WBS. You must have the required security privileges to add a WBS from a template or other project.
To add a WBS from a template or other project:
1) Navigate to the WBS page (see page 157).
2) In the table, select a WBS row, select the Context menu, and then select Add WBS from Project.
3) In the Add WBS from Projects dialog box, in the Filter By field, filter the display of WBSs by templates or projects.
4) Expand the hierarchy of project templates or projects, and then select a WBS.
5) Select Show Activity Details to view a list of activities associated with the selected WBS.
6) Select Add WBS to add the selected WBS immediately, or select Next to choose the items you would like to copy, and then select Add WBS.
7) All changes made to this page are saved automatically.

WBS Overview
55
Create a WBS by Import
Creating a WBS using Microsoft Excel enables you to use data from an outside system which can save you time from manual entry.
To create a WBS:
1) Download an Import Template for Importing a WBS (on page 55)
2) Import a WBS from Microsoft Excel (on page 55)
Download an Import Template for Importing a WBS
Download a Microsoft Excel template to use when importing a WBS and related data, such as WBS codes and configured fields.
To download an import template:
1) Navigate to the WBS page (see page 157).
2) Select Actions, select Download Import Template, and then select one of the following:
Empty Template: Use this template to create data.
Template with Data: Use this template to update the data that exists in the table.
Tips
The top two rows of the worksheet are required when importing a WBS from a spreadsheet. You can delete unused columns, but do not change the data in these rows.
Review the Instructions worksheet for helpful tips on populating the import template.
Import a WBS from Microsoft Excel
You can import a WBS and WBS data into the application from a Microsoft Excel (.xls or .xlsx) file. After downloading the import template, follow the instructions to create or update a WBS in the spreadsheet. The import will fail if there are any invalid values in the spreadsheet. You can download the spreadsheet file to view and fix the errors indicated in the error column at the end of each worksheet, and then import the file again.
You must have sufficient privileges to perform this task.
To import a WBS from Microsoft Excel:
1) Navigate to the WBS page (see page 157).
2) On the WBS page, select the Actions menu, and then select Import.
3) In the Import WBS dialog box, select Browse, select a file, and select Import.
Assign a Manager to a WBS
Assign managers to WBS elements to identify the project manager or person responsible for managing the WBS.
Schedule Management User Guide
56
The person who created the project is automatically assigned as the manager. The person who is assigned to a parent WBS node is automatically assigned as the manager to child WBS nodes.
To assign a manager to a WBS:
1) Navigate to the WBS page (see page 157).
2) In the table, select a WBS, and then select the General detail window.
3) In the Manager field, select a manager.
4) All changes made to this page are saved automatically.
Add a File in a Files Detail Window
Use the Files detail window to add relevant files that support your data. For example, you might add architectural drawings, pictures, or product specifications to activities on the Activities page.
The following objects support the Files detail window:
Activities
Inspections
Issues
Logs
PBSs
Portfolio Funds
Project Funds
Risks
Scope Assignments
Scope Items
Strategies
Submittals
WBSs
Work Packages
To add a file in a Files detail window:
1) Navigate to a page whose object supports files.
2) In the table, select an object row, and then select the Files detail window.
3) In the Files detail window, select Add.
4) In the Add File dialog box, in the Select Folder section, select a folder in the project library.
5) In the File field, select Browse, and then select one or more files.
6) Select Upload.
Tips
Files that you add in the Files detail window can also be accessed from the project File List page.

WBS Overview
57
Copy and Paste a WBS Node
You can save time when building the work breakdown structure by copying existing WBS nodes. Copy one or more nodes to duplicate their hierarchical structure. You can also copy all of the activities assigned to the selected WBS and their associated activity data. This is useful if your project repeats the same type of work, such as constructing each floor of a building.
If you include activities in the copied WBS nodes, you can configure the renumbering options for the activity IDs that are copied. If the pattern you choose results in duplicate activity IDs, you will be prompted to enter a new activity ID for each conflicting activity.
To copy and paste WBS nodes:
1) Navigate to the WBS page (see page 157).
2) In the table, select one or more WBS nodes, select the Context menu, and then select Copy.
3) Select the row in the table where you want to paste the node, select the Context menu, and then select Paste.
4) In the Paste WBS Options dialog box, select Include Activities if you want to also copy the activities in the selected nodes. Choose what activity data you want to copy.
5) (If Include Activities is selected) In the Renumbering Options section, in the Renumber Activity IDs list, select one of the following options, and then configure the option's settings:
Increment Activity ID based on selected activities: Enter a value that each pasted activity will be incremented by.
Each pasted activity ID is incremented with an ID that begins after the largest existing ID with a matching prefix. For example, in a project with activity IDs A10, A30, and B50, copying all three activities and pasting them with an increment value of 10 will result in new activities with IDs A40, A50, and B60 because A30 and B50 were the largest existing IDs with matching prefixes.
Auto-number: Enter a prefix value, starting number, and increment value. The pasted activities will be numbered in the order that the copied activities appeared in the table.
Each pasted activity ID is incremented with an ID that begins after the largest existing ID with a matching prefix. For example, in a project with activity IDs A10, A30, and B50, copying all three activities and pasting them with a prefix value of A, starting number of 1, and increment value of 1 will result in new activities with IDs A31, A32, and A33 because A30 was the largest existing ID with a matching prefix.
Replace beginning characters: Enter the number of characters to replace starting from the beginning of the ID, and then enter the value that will replace the characters.
For example, in a project with activity IDs A10, A30, and B50, copying all three activities and pasting them with the first character replaced by the letter C will result in new activities with IDs C10, C30, and C50.
6) Select Paste.
7) All changes made to this page are saved automatically.
Tips
Your security privileges control which activity data objects you can copy over to new activities.
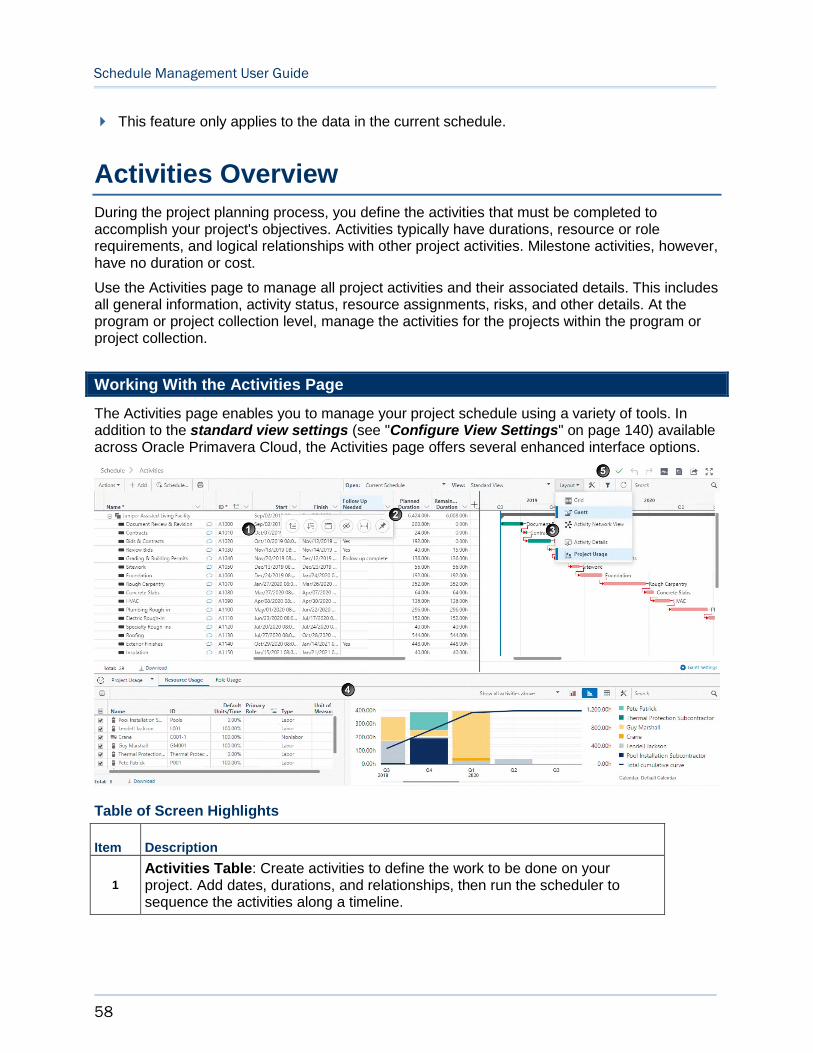
Schedule Management User Guide
58
This feature only applies to the data in the current schedule.
Activities Overview
During the project planning process, you define the activities that must be completed to accomplish your project's objectives. Activities typically have durations, resource or role requirements, and logical relationships with other project activities. Milestone activities, however, have no duration or cost.
Use the Activities page to manage all project activities and their associated details. This includes all general information, activity status, resource assignments, risks, and other details. At the program or project collection level, manage the activities for the projects within the program or project collection.
Working With the Activities Page
The Activities page enables you to manage your project schedule using a variety of tools. In addition to the standard view settings (see "Configure View Settings" on page 140) available across Oracle Primavera Cloud, the Activities page offers several enhanced interface options.
Table of Screen Highlights
Item Description
1
Activities Table: Create activities to define the work to be done on your project. Add dates, durations, and relationships, then run the scheduler to sequence the activities along a timeline.
Activities Overview
59
Item Description
2
Column Options: You can modify column options (see "Configure the Activities Page Table" on page 60) directly from the Activities table without opening the view settings. From the menu, add, hide, or pin columns, sort and group data, and adjust column widths.
You can also rename string field values in the table using find and replace(see "Use Find and Replace on the Activities Page" on page 61). Search for a string in a column and replace a single instance or all instances with a new string. Find and replace enables you to rename many values at the same time, such as activity names, code values, or configured field values.
3
Layout Menu: Toggle between three layout options depending on your project management needs:
Grid: The Activities table extends the full width of the page, enabling you to display a large number of columns of activity data.
Gantt: The Gantt chart is synchronized with the Activities table to show your activities as horizontal bars along a timescale. With the Gantt view enabled, use the Progress Spotlight to highlight activities that fall within a specific update period.
Activity Network: Activity tiles are grouped by their WBS nodes, providing a high-level look at your activities, their most important details, and the relationships between them.
You can also use the Layout menu to toggle between activity-related detail windows and project resource and role usage histograms.
4
Detail Windows: Modify details for the selected activity, including dates, durations, resource assignments, associated files, risks, tasks, and codes. View resource and role usage across your project's timeline using histograms and data spreadsheets.
5
Save: Changes made on the Activities page are saved automatically.
Undo and Redo: Revert certain actions or fields to a previous value.
Refresh: Reload the data on the page without reloading the entire page, which may take longer. This button is also useful when multiple users are modifying the same project and you want to see the most current data.
Schedule Health Score: Evaluate the quality of your project schedule using predefined metrics. For more information on this and other tools, see Activities Page Tools (on page 92).

Schedule Management User Guide
60
Configure the Activities Page Table
You can add, remove, pin, sort, and group by columns directly from the Activities table without opening the view settings. Each column in the table supports a menu with several options. Any column can be sorted, hidden, expanded to fit its content, or pinned. Pinned columns are located in a section at the beginning of the Activities table. They do not move when the rest of the table is scrolled horizontally. This makes it easier to see the most important activity fields, such as Name or ID, when a large number of columns are displayed.
Columns that support grouping can be grouped from the menu. Additional grouping options, such as grouping interval and sort order, must be modified from the Manage Views panel. Changes made in the column header are automatically saved to the current view.
The column menu also supports find and replace functionality, which is described in Use Find and Replace on the Activities Page (on page 61).
To configure the Activities page table:
1) Navigate to the Activities page (see page 157).
2) To add columns to the table:
a. Select the Open Column Selector icon.
b. In the column dropdown, next to a column name, select Show or Hide to add or remove the column from the table.
3) To configure an existing column, right-click a column title or select Open Column Menu, and then select any of the following:
Ascending: Sort activities by the selected column in ascending order. Use Ctrl + click to add the column to an existing sort sequence.
Descending: Sort activities by the selected column in descending order. Use Ctrl + click to add the column to an existing sort sequence.
Group By: Group activities by the selected column. You can also group by multiple columns or turn off a column grouping. This option is only available for fields that support grouping.
Hide column: Remove the column from the table.
Adjust to fit content: Expand or shrink the width of the column to fit its contents. You can also double-click a column's right edge to adjust it.
Find and Replace: Displays the Find and Replace popover. If the column is read-only, the Find icon is displayed. This option is only available for string fields.
Pin Column: Adds the column to the pinned section of the Activities table. You can also click and drag columns between the pinned and unpinned sections.
4) All changes made to this page are saved automatically.
Tips
Select Settings to manage all Activities page view settings. See Configure View Settings (on page 140) for more information.
The Name and ID fields can be unpinned, but they cannot be hidden.
Click and drag a column title to change the column order.
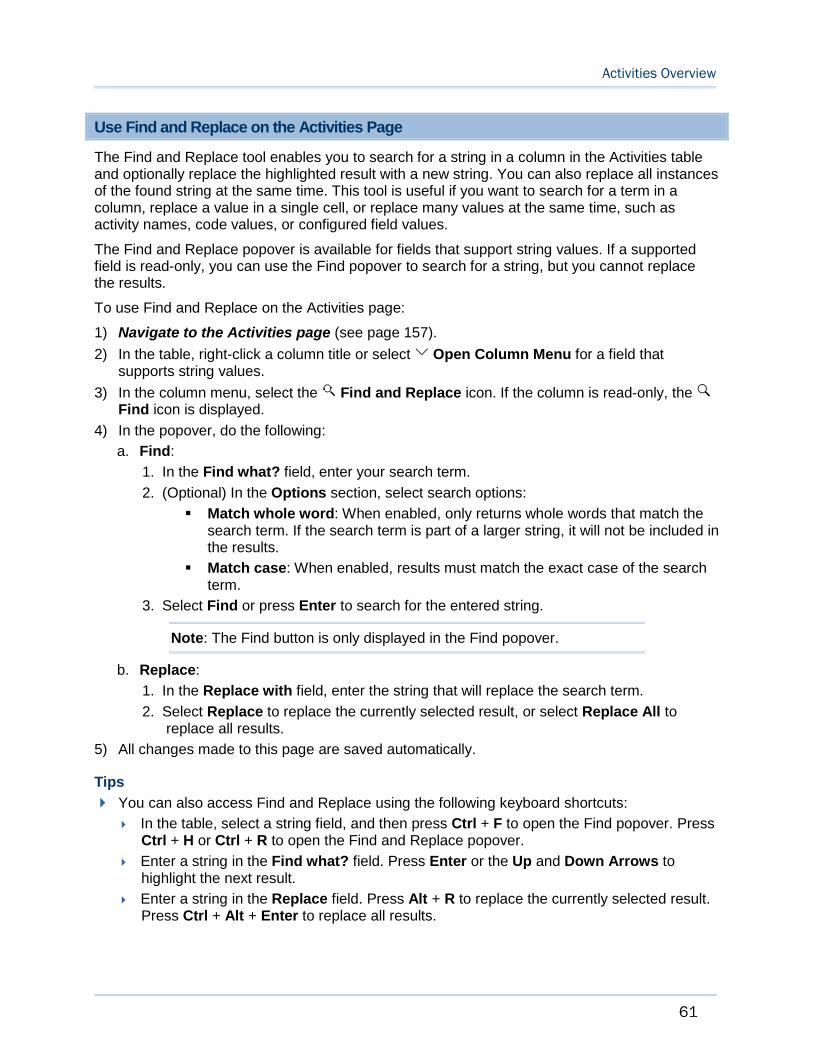
Activities Overview
61
Use Find and Replace on the Activities Page
The Find and Replace tool enables you to search for a string in a column in the Activities table and optionally replace the highlighted result with a new string. You can also replace all instances of the found string at the same time. This tool is useful if you want to search for a term in a column, replace a value in a single cell, or replace many values at the same time, such as activity names, code values, or configured field values.
The Find and Replace popover is available for fields that support string values. If a supported field is read-only, you can use the Find popover to search for a string, but you cannot replace the results.
To use Find and Replace on the Activities page:
1) Navigate to the Activities page (see page 157).
2) In the table, right-click a column title or select Open Column Menu for a field that supports string values.
3) In the column menu, select the Find and Replace icon. If the column is read-only, the Find icon is displayed.
4) In the popover, do the following:
a. Find:
1. In the Find what? field, enter your search term.
2. (Optional) In the Options section, select search options:
Match whole word: When enabled, only returns whole words that match the search term. If the search term is part of a larger string, it will not be included in the results.
Match case: When enabled, results must match the exact case of the search term.
3. Select Find or press Enter to search for the entered string.
Note: The Find button is only displayed in the Find popover.
b. Replace:
1. In the Replace with field, enter the string that will replace the search term.
2. Select Replace to replace the currently selected result, or select Replace All to replace all results.
5) All changes made to this page are saved automatically.
Tips
You can also access Find and Replace using the following keyboard shortcuts:
In the table, select a string field, and then press Ctrl + F to open the Find popover. Press Ctrl + H or Ctrl + R to open the Find and Replace popover.
Enter a string in the Find what? field. Press Enter or the Up and Down Arrows to highlight the next result.
Enter a string in the Replace field. Press Alt + R to replace the currently selected result. Press Ctrl + Alt + Enter to replace all results.

Schedule Management User Guide
62
Press Esc to close the popover.
Auto Reorganize Activities
Use the Auto Reorganize feature on the Activities page to automatically organize new and modified activities according to the page's current grouping and sorting settings.
By default, new and modified activities remain in the table on the row they were added until you refresh the page, schedule the project, or modify the view settings. When enabled, Auto Reorganize groups and sorts the activity as soon as the value in the grouped or sorted field is entered. This applies to the main table as well as tables in the detail windows.
You can enable or disable Auto Reorganize from the Actions menu. The setting is saved per user and is disabled by default.
To enable or disable Auto Reorganize functionality:
1) Navigate to the Activities page (see page 157).
2) Select the Actions menu, and then select Auto Reorganize.
Note: A ✓ check mark icon next to the menu item indicates that Auto Reorganize is enabled. If there is no icon, the feature is disabled.
Tips
You can also toggle Auto Reorganize on and off by pressing Shift + F12.
View the Activities Grid
The Grid view on the Activities page provides the largest possible view of the Activities table. Use the Grid view to display a large number of columns of activities data. Save multiple views of column, grouping, and filtering configurations depending on your needs. For example, you might want separate views to focus on activity scheduling, resource assignments, configured fields, or associated tasks.
To view the Activities grid:
1) Navigate to the Activities page (see page 157).
2) On the Layout menu, select the Grid icon.
Tips
The view option you select on the Layout menu can be saved as part of a view.
View the Activities Gantt Chart
The Gantt chart on the Activities page provides a graphical representation of the duration and sequence of activities across a timeline. When you view the Gantt chart, the Activities page is divided into two regions, one displaying the Gantt chart data in a table, and the other displaying the Gantt chart data graphically with a resizable divider between the two regions. The table and chart regions share the same data and selection model, supporting and synchronizing scrolling, and expanding and collapsing of rows between the two regions.

Activities Overview
63
You can hover your cursor over activity bars to view tooltip information about each activity. Hover your cursor over relationship lines to view tooltip information about predecessor and successor activities.
To view the Gantt chart:
1) Navigate to the Activities page (see page 157).
2) On the Layout menu, select the Gantt icon.
3) In the Gantt chart, select Gantt Settings to toggle a variety of Gantt chart settings without opening the Manage Views panel.
Tips
You can edit a variety of activity details directly from the Gantt chart. See Modify Activity Details in the Gantt Chart (on page 89) for more information.
Double-click an activity row in the Gantt chart to move the timescale display to the beginning of that activity.
The view option you select on the Layout menu can be saved as part of a view.
View the Progress Spotlight
The Progress Spotlight tool is useful when you are progressing your activities and need to know which activities fall within your update period. When enabled, the spotlight highlights a time period in the Gantt chart. Any activity whose start or finish date falls within the period is also highlighted in the table.
The default spotlight interval is determined by the current timescale interval. For example, if the timescale is set to weekly intervals, the default spotlight interval highlights one week from the data date. If a monthly timescale is selected, then the spotlight highlights one month from the data date. You can drag the edge of the spotlight to highlight any period of time after the data date. Disable and then enable the spotlight to view the default interval.
To view the Progress Spotlight:
1) Navigate to the Activities page (see page 157).
2) On the Layout menu, select the Gantt icon, and then select Gantt Settings.
3) On the menu, select Progress Spotlight.
4) Click and drag the edge of the spotlight to highlight a custom time period.
Tips
You can also enable the spotlight by selecting the data date and dragging it to a future date. Turn off the spotlight by dragging it back to the data date.
If the spotlight is enabled while scheduling your project, the spotlight start date will change to reflect the new data date and the spotlight end date will remain the same. If the new data date is later than the spotlight end date, the spotlight is turned off.
Your Progress Spotlight configuration can be saved as part of a view.

Schedule Management User Guide
64
View the Activity Network
The Activity Network on the Activities page is a view that displays a full diagram of the activities and relationships in your project, organized by their WBS nodes. Use the Activity Network to view activity and relationship information, track the sequence of activities in your project, and focus on driving relationships and critical activities. Select individual WBS nodes to break down the Activity Network into smaller segments.
To view the Activity Network:
1) Navigate to the Activities page (see page 157).
2) On the Layout menu, select the Activity Network View icon.
3) In the Activity Network, select an activity or relationship line to view its details. Select the project name or an individual WBS node in the table to view its associated activities in the view.
4) Use the following tools to configure the Activity Network display:
Zoom In: Zoom in on the displayed sequence of activities.
Zoom Out: Zoom out of the displayed sequence of activities.
Zoom to Fit: Reset the display to the default magnification.
Show Driving Relationships: Toggle the display of non-driving relationship lines.
Show Critical Activities: Dim non-critical activities and relationship lines so critical activities are displayed more prominently.
Tips
Select Settings to configure the Activity Network settings.
The following indicators are used in the Activity Network view:
Critical activities and relationships are represented using red tiles, red borders, and red lines. Activity tiles on the critical path display an exclamation point icon.
Non-critical activity tiles are white, and non-critical relationship lines are black.
Solid lines indicate a driving relationship, while dotted lines indicate a non-driving relationship.
Completed activities display a completed icon in their tiles. Start or finish milestones display a diamond in their tiles.
Select Download beneath the diagram to download the displayed sequence as a .png file.
The view option you select on the Layout menu can be saved as part of a view.
Undo Changes in Primavera Cloud
Primavera Cloud supports Undo and Redo functionality on several pages throughout the application. Undo is a powerful tool that enables you to revert certain actions and field values to a pre-modified state. For example, if you entered a new duration value for an activity, you can use Undo to revert to the previous value. To reinstate an action or value that was undone, you can use Redo. Up to 50 items are stored in the Undo history. The Undo history is unique to each page that supports Undo.
Activities Overview
65
The following pages support Undo functionality in Primavera Cloud:
Activities
WBS
Workspace and Project Resource List
Workspace and Project Role List
To use Undo or Redo:
1) After modifying a value for an object on a page, you can do either of the following:
Select Undo or Redo.
Use the keyboard shortcuts Ctrl + Z to undo an action and Ctrl + Y to redo an action.
Note: If an action is not supported by Undo or Redo, the icons on the toolbar will be disabled. A confirmation message appears if a proposed action cannot be undone.
2) All changes made to this page are saved automatically.
Certain actions will clear the Undo history in Primavera Cloud, including:
Refreshing the page
Adding or navigating to a scenario
Applying view settings on a page
Assigning or promoting a resource or role
Importing templates
Scheduling or leveling the project
Setting a scenario as the current schedule
Unlinking a file
Certain actions are not stored in the Undo history, including:
Deleting an activity
Deleting an activity assignment
Deleting a resource or role
Dissolving an activity relationship
Using Touch-Screen Gestures in Primavera Cloud
You can use touch-screen devices to navigate pages, open menus, select items, and enter data in the Primavera Cloud web application. The gestures required to perform actions in the application are described below.
Note: Touch-screen functionality is not officially supported for Primavera Cloud and has not been fully tested. Some gestures may not work with all devices or specific device browsers.
The following actions can be performed using touch-screen gestures:
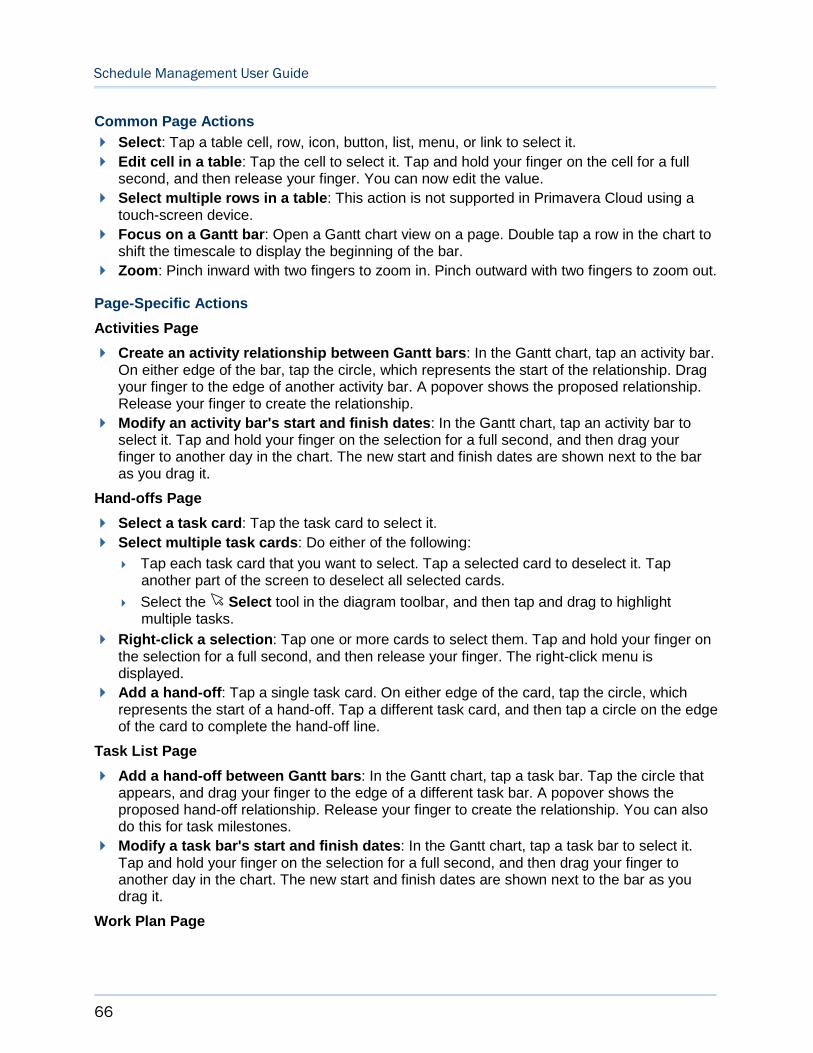
Schedule Management User Guide
66
Common Page Actions
Select: Tap a table cell, row, icon, button, list, menu, or link to select it.
Edit cell in a table: Tap the cell to select it. Tap and hold your finger on the cell for a full second, and then release your finger. You can now edit the value.
Select multiple rows in a table: This action is not supported in Primavera Cloud using a touch-screen device.
Focus on a Gantt bar: Open a Gantt chart view on a page. Double tap a row in the chart to shift the timescale to display the beginning of the bar.
Zoom: Pinch inward with two fingers to zoom in. Pinch outward with two fingers to zoom out.
Page-Specific Actions
Activities Page
Create an activity relationship between Gantt bars: In the Gantt chart, tap an activity bar. On either edge of the bar, tap the circle, which represents the start of the relationship. Drag your finger to the edge of another activity bar. A popover shows the proposed relationship. Release your finger to create the relationship.
Modify an activity bar's start and finish dates: In the Gantt chart, tap an activity bar to select it. Tap and hold your finger on the selection for a full second, and then drag your finger to another day in the chart. The new start and finish dates are shown next to the bar as you drag it.
Hand-offs Page
Select a task card: Tap the task card to select it.
Select multiple task cards: Do either of the following:
Tap each task card that you want to select. Tap a selected card to deselect it. Tap another part of the screen to deselect all selected cards.
Select the Select tool in the diagram toolbar, and then tap and drag to highlight multiple tasks.
Right-click a selection: Tap one or more cards to select them. Tap and hold your finger on the selection for a full second, and then release your finger. The right-click menu is displayed.
Add a hand-off: Tap a single task card. On either edge of the card, tap the circle, which represents the start of a hand-off. Tap a different task card, and then tap a circle on the edge of the card to complete the hand-off line.
Task List Page
Add a hand-off between Gantt bars: In the Gantt chart, tap a task bar. Tap the circle that appears, and drag your finger to the edge of a different task bar. A popover shows the proposed hand-off relationship. Release your finger to create the relationship. You can also do this for task milestones.
Modify a task bar's start and finish dates: In the Gantt chart, tap a task bar to select it. Tap and hold your finger on the selection for a full second, and then drag your finger to another day in the chart. The new start and finish dates are shown next to the bar as you drag it.
Work Plan Page
Activities Overview
67
Select a task card: Tap the task card to select it.
Select multiple task cards: Tap each task card that you want to select. Tap a selected card to deselect it. Tap another part of the screen to deselect all selected cards.
Right-click a selection: Tap one or more cards to select them. Tap and hold your finger on the selection for a full second, and then release your finger. The right-click menu is displayed.
Move a selection of cards: Tap one or more cards to select them. Tap and hold your finger on the selection for a full second, and then drag your finger to another day, activity band, or planning bucket. As you drag your selection, the longest duration in the selection is highlighted.
Modify task duration: Tap one or more cards to select them. Tap and hold your finger for a full second on the left edge or right edge of a card in your selection, and then drag it to another day on the planning board. As you drag your selection, the new duration is highlighted.
Modify the planning board timescale: Tap and drag a column header on the planning board to change the size of all columns. This enables you to zoom in or out of the timescale. If the column size is decreased enough, smaller cards are used to represent tasks. This enables the application to display more tasks on the planning board. You can still move a card to change its due date, drag its edge to change its duration, and view status icons displayed on the card. Increase the column widths to return the task cards to their normal appearance.
Create an Activity
Create activities to define the work to be accomplished for a project.
To create an activity, do any of the following:
Add an Activity (on page 67)
Create an Activity by Import (on page 68)
Cut or Copy and Paste an Activity (on page 69)
Add an Activity
Use the Activities page to add activities to a project. New activities are added with the default values configured in the project settings.
An option (see "Configure Activity Defaults for a Project" on page 47) in the project settings controls the numbering of new activity IDs. When this setting is disabled, new activity IDs follow the activity auto numbering rules set in the project settings. When this setting is enabled, new activity IDs are numbered based on the following:
New IDs are given the same prefix as the activities selected when the new activities are added.
The starting number for new IDs begins after the largest existing ID with a matching prefix.
The increment value of new IDs is the value set for activities in the project auto numbering settings.
Schedule Management User Guide
68
For example, in a project with activity IDs A10, A30, and B50, and an auto numbering increment value of 10, a new activity added under A10 will result in an activity ID of A40 because A30 was the largest existing ID with a matching prefix. If no activity is selected, the new ID will follow the auto numbering rules. The setting is disabled by default.
You cannot add an activity in an open baseline.
To add an activity to a project:
1) Navigate to the Activities page (see page 157).
2) You can add an activity using any of the following methods:
On the toolbar, select Add.
Note: If one or more activities are selected, an equal number of new activities are added. If no activities are selected, one new activity is added.
In the table, right-click a selection of one or more activities or select the Context menu next to an activity in your selection, and then select Add Above or Add Below. This is useful if you want to add activities to a specific group.
Copy and paste existing activities. See Cut or Copy and Paste an Activity (on page 69) for more information.
3) For each new activity, enter Name and ID values.
4) All changes made to this page are saved automatically.
Tips
To add an activity to a project at the program or project collection level, you must set the grouping settings to Not Grouped.
Create an Activity by Import
Creating activities using Microsoft Excel enables you to use data from an outside system which can save you time from manual entry.
To create or update an activity:
1) Download an Import Template for Importing Activities (on page 68)
2) Import Activities from Microsoft Excel (on page 69)
Download an Import Template for Importing Activities
Download a Microsoft Excel template to use when importing activities and related data, such as activity relationships and resource assignments.
To download an import template:
1) Navigate to the project Activities page (see page 157).
2) Select Actions, select Download Import Template, and then select one of the following:
Empty Template: Use this template to create data.
Template with Data: Use this template to update the data that exists in the table.

Activities Overview
69
Tips
Import functionality is only available for the current schedule.
The top two rows of the worksheet are required when importing activities from a spreadsheet. You can delete unused columns, but do not change the data in these rows.
Review the Instructions worksheet for helpful tips on populating the import template.
Import Activities from Microsoft Excel
You can import activities and activity data into the application from a Microsoft Excel (.xls or .xlsx) file. After downloading the import template, follow the instructions to create or update activities in the spreadsheet. The import will fail if there are any invalid values in the spreadsheet. You can download the spreadsheet file to view and fix the errors indicated in the error column at the end of each worksheet, and then import the file again.
You must have sufficient privileges to perform this task.
To import activities from Microsoft Excel:
1) Navigate to the project Activities page (see page 157).
2) On the Activities page, select the Actions menu, and then select Import.
3) In the Import Activities dialog box, select Browse, select a file, and select Import.
Tips
Import functionality is only available for the current schedule.
Cut or Copy and Paste an Activity
To save time entering activity data, the Activities table supports cut, copy, and paste operations. The cut operation enables you to easily move activities around in the table. This is useful for moving activities from one group to another, such as WBS or Code. Use the copy operation to duplicate activities in the table. You can cut or copy one or more activities at a time.
When you copy and paste activities, you can select the types of data to copy over to the new activities. You can also choose to renumber IDs of the pasted activities based on a configurable pattern. If the pattern you choose results in duplicate activity IDs, you will be prompted to enter a new activity ID for each conflicting activity.
To cut or copy and paste activities:
1) Navigate to the project Activities page (see page 157).
2) In the table, select one or more activity rows, select the Context menu, and then select Cut or Copy.
3) Select the row in the table where you want to paste the activity, select the Context menu, and then select Paste.
If you cut activities, they will be pasted immediately. If you copied activities, the Paste Activity Options dialog box will open.
4) In the Paste Activity Options dialog box, select the activity data to be pasted.
5) In the Renumbering Options section, in the Renumber Activity IDs list, select one of the following options, and then configure the option's settings:

Schedule Management User Guide
70
Increment Activity ID based on selected activities: Enter a value that each pasted activity will be incremented by.
Each pasted activity ID is incremented with an ID that begins after the largest existing ID with a matching prefix. For example, in a project with activity IDs A10, A30, and B50, copying all three activities and pasting them with an increment value of 10 will result in new activities with IDs A40, A50, and B60 because A30 and B50 were the largest existing IDs with matching prefixes.
Auto-number: Enter a prefix value, starting number, and increment value. The pasted activities will be numbered in the order that the copied activities appeared in the table.
Each pasted activity ID is incremented with an ID that begins after the largest existing ID with a matching prefix. For example, in a project with activity IDs A10, A30, and B50, copying all three activities and pasting them with a prefix value of A, starting number of 1, and increment value of 1 will result in new activities with IDs A31, A32, and A33 because A30 was the largest existing ID with a matching prefix.
Replace beginning characters: Enter the number of characters to replace starting from the beginning of the ID, and then enter the value that will replace the characters.
For example, in a project with activity IDs A10, A30, and B50, copying all three activities and pasting them with the first character replaced by the letter C will result in new activities with IDs C10, C30, and C50.
6) Select Paste.
7) All changes made to this page are saved automatically.
Tips
Copy functionality is disabled while in a baseline.
When pasting activities across group bands in a view, the new activity will assume the attribute of the group band into which it is pasted. For example, if an activity is copied or cut from a WBS1 grouping and pasted in a WBS2 grouping, the WBS attribute of the new activity will be changed to WBS2.
To enter the same value in more than one field, select multiple fields in the same column, select the Context menu, and then select Fill Down. Every field is filled with the first selected field value.
Your security privileges control which attributes you can copy over to new activities.
You can copy and paste up to 500 activities at the same time.
Modify Activity Details
Activities represent the work to be performed in a project's schedule, but they also can be associated with many of the other objects that belong to the project, including files, resources, risks, roles, scope assignments, tasks, and work packages. In addition to the standard details that characterize an activity, you can modify details for the objects connected to the activity.
Activity details can be modified in a variety of areas on the Activities page, including the Activity table, detail windows, the Actions menu, the Gantt chart, and the context menu.
Many of the topics below are optional depending on your needs. The topics are grouped by subject area.
General
Activities Overview
71
Assign an Owner to an Activity (on page 72)
Assign an Activity to a WBS (on page 72)
Assign a Calendar to an Activity (on page 73)
Assign an Activity Type to an Activity (on page 73)
Assign a Duration Type to an Activity (on page 74)
Assign a Percent Complete Type to Activity (on page 74)
Status
Enter Activity Status Information (on page 75)
Enter Activity Duration Information (on page 75)
Enter the Activity Unit Information (on page 76)
Add a Constraint to an Activity (on page 76)
Resource Assignments
Assign a Role to an Activity (on page 78)
Staff a Role Assignment (on page 78)
Assign a Resource to an Activity (on page 79)
Assign a Curve to a Resource or a Role Assignment (on page 79)
Files
Add a File in a Files Detail Window (on page 56)
Link a File to an Object (on page 81)
Relationships
Add a Relationship to an Activity (on page 83)
View Relationships Using Trace Logic (on page 84)
Risks
Assign a Risk to an Activity (on page 85)
Apply Activity Uncertainty (on page 85)
Tasks
Add a Task to an Activity (on page 86)
Scope
Associating Activities with Scope Assignments and Work Packages for Scope Management Overview (on page 87)
Link a Work Package to an Activity (on page 88)
Link a Scope Assignment to an Activity (on page 88)
Codes
Assign a Code to an Activity (on page 89)
Gantt Chart
Modify Activity Details in the Gantt Chart (on page 89)
Renumber Activity IDs

Schedule Management User Guide
72
Renumber Activity IDs (on page 90)
Activity Deletion
Dissolve an Activity (on page 91)
Delete an Activity (on page 91)
Assign an Owner to an Activity
You can assign an owner to an activity to designate the user responsible for the activity.
The user who created the activity is automatically assigned as the owner.
To assign an owner to an activity:
1) Navigate to the Activities page (see page 157).
2) In the table, select the activity.
3) On the Layout menu, select Activity Details, and then select the General detail window.
4) In the Owner field, select a user to designate as the activity owner.
5) All changes made to this page are saved automatically.
Tips
If your project is configured to enable status updates by activity owners, users who are assigned as owners to in-progress activities can use the My Activities page to update the status of activities.
Assign an Activity to a WBS
All activities must be assigned to a WBS. Assign activities to a WBS to group work by level, phase, or layer. In scope management, you cannot assign activities to work packages or scope assignments unless the activity is assigned to the WBS that contains the component. If a specific WBS node is not selected when an activity is created, the activity is assigned to the project-level WBS node by default.
To assign an activity to a WBS:
1) Navigate to the Activities page (see page 157).
2) In the table, select the activity.
3) On the Layout menu, select Activity Details, and then select the General detail window.
4) In the WBS Name field, select a WBS.
5) All changes made to this page are saved automatically.
Tips
From the Activities page or WBS page, you can copy WBS nodes from a project template or another project to your current project. See Add a WBS from a Template or Other Project (on page 54) for more information.
An alternative method of assigning activities to a WBS is by applying a view to the page that groups activities by WBS and entering activity data under the appropriate grouping. All activities entered under a WBS grouping are automatically assigned to the WBS.
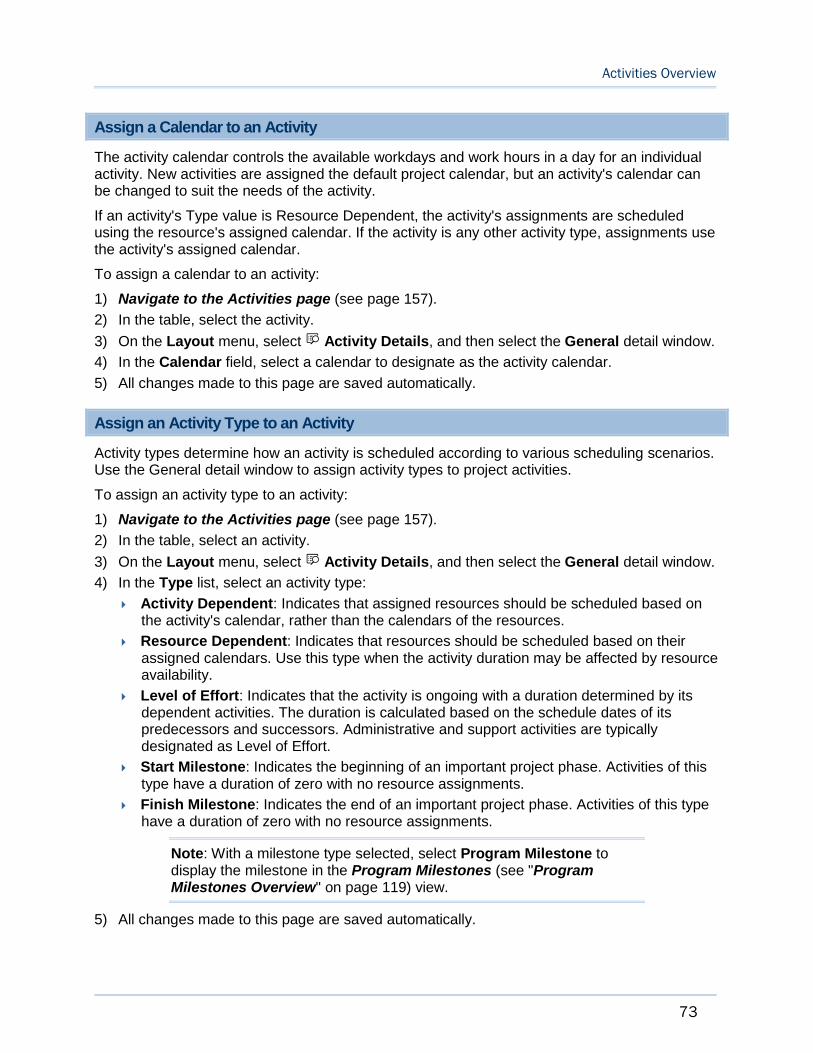
Activities Overview
73
Assign a Calendar to an Activity
The activity calendar controls the available workdays and work hours in a day for an individual activity. New activities are assigned the default project calendar, but an activity's calendar can be changed to suit the needs of the activity.
If an activity's Type value is Resource Dependent, the activity's assignments are scheduled using the resource's assigned calendar. If the activity is any other activity type, assignments use the activity's assigned calendar.
To assign a calendar to an activity:
1) Navigate to the Activities page (see page 157).
2) In the table, select the activity.
3) On the Layout menu, select Activity Details, and then select the General detail window.
4) In the Calendar field, select a calendar to designate as the activity calendar.
5) All changes made to this page are saved automatically.
Assign an Activity Type to an Activity
Activity types determine how an activity is scheduled according to various scheduling scenarios. Use the General detail window to assign activity types to project activities.
To assign an activity type to an activity:
1) Navigate to the Activities page (see page 157).
2) In the table, select an activity.
3) On the Layout menu, select Activity Details, and then select the General detail window.
4) In the Type list, select an activity type:
Activity Dependent: Indicates that assigned resources should be scheduled based on the activity's calendar, rather than the calendars of the resources.
Resource Dependent: Indicates that resources should be scheduled based on their assigned calendars. Use this type when the activity duration may be affected by resource availability.
Level of Effort: Indicates that the activity is ongoing with a duration determined by its dependent activities. The duration is calculated based on the schedule dates of its predecessors and successors. Administrative and support activities are typically designated as Level of Effort.
Start Milestone: Indicates the beginning of an important project phase. Activities of this type have a duration of zero with no resource assignments.
Finish Milestone: Indicates the end of an important project phase. Activities of this type have a duration of zero with no resource assignments.
Note: With a milestone type selected, select Program Milestone to display the milestone in the Program Milestones (see "Program Milestones Overview" on page 119) view.
5) All changes made to this page are saved automatically.
Schedule Management User Guide
74
Assign a Duration Type to an Activity
Activity duration types determine how remaining duration, units, and units/time are calculated when an activity that has resources assigned is updated. Use the General detail window to assign duration types to activities.
To assign a duration type to an activity:
1) Navigate to the Activities page (see page 157).
2) In the table, select the activity.
3) On the Layout menu, select Activity Details, and then select the General detail window.
4) In the Duration Type list, select an option:
Fixed Units/Time: The resource units per time are constant when the activity duration or units are changed. Use this duration type when an activity has fixed resources with fixed productivity output per time period.
Fixed Units: The activity units are constant when the duration or resource units per time are changed. Use this duration type when the total amount of work is fixed, and increasing the resources can decrease the activity duration.
Fixed Duration & Units: The duration and units remain constant as the units/time is changed. Use this duration type when the activity must be completed within a fixed time period and the total amount of work is fixed.
Fixed Duration & Units/Time: The activity duration is constant as the units or resource units per time are changed. Use this duration type when the activity must be completed within a fixed time period regardless of the resources assigned.
5) All changes made to this page are saved automatically.
Tips
Resource or role curves are not supported by activities with the Fixed Units or Fixed Units/Time duration type. If you choose either of these duration types on an activity with curves, the curves will be automatically removed from the activity's assignments.
Assign a Percent Complete Type to Activity
The percent complete type determines the way in which the application calculates the percent complete for an activity. Use the General detail window to assign percent complete types to activities.
To assign a percent complete type to an activity:
1) Navigate to the Activities page (see page 157).
2) In the table, select the activity.
3) On the Layout menu, select Activity Details, and then select the General detail window.
4) In the Percent Complete Type list, select an option:
Physical: Percent complete is manually entered by a user based on the amount of physical work completed on the activity.
Duration: Percent complete is calculated from the actual and remaining duration.
Units: Percent complete is calculated from the actual and remaining units.

Activities Overview
75
Scope: The percent complete for the activity is derived from the scope percent complete of the linked scope assignments.
5) All changes made to this page are saved automatically.
Enter Activity Status Information
Use the Status detail window to designate activities as in progress or completed, update start and finish dates, and update an activity's expected finish date.
To configure activity status information:
1) Navigate to the Activities page (see page 157).
2) In the table, select the activity.
3) On the Layout menu, select Activity Details, and then select the Status detail window.
4) In the Activity Status section, complete the following fields:
Start: To enter or update the activity's start date, enter a date. To designate the activity as in progress, select the check box. The start date is now considered the actual start date, and the activity status is In Progress.
Finish: To enter the activity's finish date, enter a date. To designate the activity as completed, select the check box. The finish date is now considered the actual finish date, and the activity status is Completed. If an activity is marked complete, you cannot update the activity percent complete or expected finish fields.
Activity Percent Complete: Enter the percentage of work performed on the activity. If the activity's percent complete type is Duration, Units, or Scope, updating this field will also modify the corresponding duration, unit, or scope values. If the type is Physical, the percent complete can only be modified using this field.
Expected Finish: Set the date on which you anticipate work on the activity will finish.
5) All changes made to this page are saved automatically.
Enter Activity Duration Information
Activity durations are automatically calculated using the activity start and end dates and the project calendar. You can also manually enter activity duration information using the Status detail window.
To configure activity duration information:
1) Navigate to the Activities page (see page 157).
2) In the table, select the activity.
3) On the Layout menu, select Activity Details, and then select the Status detail window.
4) Set the activity durations by completing the following fields:
Planned Duration: The expected amount of time required to complete the activity.
Remaining Duration: The total working time from the activity remaining start date to the remaining finish date.
At Completion Duration: The total working time from the activity's current start date to the current finish date.
5) All changes made to this page are saved automatically.

Schedule Management User Guide
76
Tips
The Actual Duration is automatically computed and cannot be manually adjusted. It is calculated as the total working time from the Start date to the current date for in-progress activities. For completed activities, it is calculated as the total working time from the activity Start date to the Finish date.
If the activity's percent complete type is Duration and the activity is in progress, modifying the duration information will also change the Activity Percent Complete value.
Enter the Activity Unit Information
Enter labor and non-labor units to specify the effort of work required to complete project activities.
To enter activity labor and non-labor units information:
1) Navigate to the Activities page (see page 157).
2) In the table, select the activity.
3) On the Layout menu, select Activity Details, and then select the Status detail window.
4) Do one of the following:
To enter labor units information, select Labor Units in the header of the units column.
To enter non-labor units information, select Non-Labor Units in the header of the units column.
5) Update the units information by completing the following fields:
Planned Units: The planned number of units for all labor and non-labor resources assigned to the activity.
Actual Units: The actual number of units worked by all labor and non-labor resources assigned to the activity.
Remaining Units: The remaining units for all labor and non-labor resources assigned to the activity.
At Completion Units: The sum of the actual plus remaining units for all labor and non-labor resources assigned to the activity.
6) All changes made to this page are saved automatically.
Tips
If the activity's percent complete type is Units and the activity is in progress, modifying the unit information will also change the Activity Percent Complete value.
Add a Constraint to an Activity
Constraints are used to impose external restrictions on project activities. They are used in the scheduling process when calculating activity start and finish dates. You can use constraints for situations where activity relationships are not adequate to provide the logic necessary to properly schedule an activity. Constraints can also be used for an activity without a natural predecessor or successor.

Activities Overview
77
You can add up to two constraints to an activity — a primary constraint and a secondary constraint. After a primary constraint is set on an activity, it determines the list of available secondary constraints that you can set on the activity.
Note: You cannot set a secondary constraint on an activity if the primary constraint is Start On, Finish On, Mandatory Start, or Mandatory Finish.
To add constraints to an activity:
1) Navigate to the Activities page (see page 157).
2) In the table, select the activity.
3) On the Layout menu, select Activity Details, and then select the Status detail window.
4) In the Primary Constraint list, select a primary constraint:
Start On: Imposes the specific start date you select. The Start On constraint can delay an activity's early start or move forward an activity's late start to satisfy the constraint date.
Start On or Before: Defines the latest date an activity can start. This constraint only affects late dates and can decrease total float. When calculating a schedule, the application imposes the start on or before constraint in the backward pass only if the calculated late start date will be later than the imposed date.
Start On or After: Defines the earliest date an activity can begin. This constraint affects only early dates. When calculating a schedule, the application imposes the start on or after constraint in the forward pass only if the calculated early start date will be earlier than the imposed date.
Finish On: Imposes the specific finish date you select. The Finish On constraint can delay an activity's early finish or move forward an activity's late finish to satisfy the constraint date.
Finish On or Before: Defines the latest time an activity can finish. The finish on or before constraint affects only late dates.
Finish On or After: Defines the earliest date an activity can finish. The finish on or after constraint reduces float to coordinate parallel activities, ensuring that the finish of an activity is not scheduled before the specified date. It is usually applied to activities with few predecessors that must finish before the next phase of a project.
As Late As Possible: Imposes a restriction on an activity with positive float to enable it to start as late as possible without delaying its successors. When calculating a schedule, the application sets the activity's early dates as late as possible without affecting successor activities. This option disables the calendar icon.
Mandatory Start: Imposes the early and late start dates you select. A mandatory early start date could affect the late dates for all activities that lead to the constrained activity and all early dates for the activities that lead from the constrained activity.
Mandatory Finish: Imposes the early and late finish dates you select. This constraint affects the late dates for all activities that lead to the constrained activity and all early dates for the activities that lead from the constrained activity.
5) In the Primary Constraint Date field, enter a date for the primary constraint.
6) If your primary constraint selection allows for a secondary constraint, do the following to set a secondary constraint:

Schedule Management User Guide
78
a. In the Secondary Constraint list, select a secondary constraint.
b. In the Secondary Constraint Date field, enter a date for the secondary constraint.
7) All changes made to this page are saved automatically.
Assign a Role to an Activity
Roles represent personnel job titles or skills needed to execute project activities. You can assign one or more roles to an activity to designate the responsibilities that are required to complete the activity.
When assigning roles to activities, you can view the allocation for a role to analyze the role's usage for the project. When viewing a role's allocation, it is displayed as a histogram, enabling you to easily identify the role's allocation requirements and see when the role is overallocated.
To assign a role to an activity:
1) Navigate to the Activities page (see page 157).
2) In the table, select the activity.
3) On the Layout menu, select Activity Details, and then select the Resource Assignments detail window.
4) In the Role Name column, select a role.
5) In the Assign Roles dialog box, in the Filter By field, select whether to view workspace or project roles.
6) Select a role.
7) To view the role's current allocation for the project, select Show Details.
8) Select Assign.
9) All changes made to this page are saved automatically.
Tips
You can assign roles to multiple activities at the same time. Select multiple activities, select the Context menu, and then select Assign, Roles.
After you identify the project resources that will perform the roles assigned to an activity, you can staff the roles with resources who have been assigned the role in your project.
Staff a Role Assignment
After you have identified the roles required to complete project activities, you can staff the role with a resource who has been assigned the role in your project.
To staff role assignments:
1) Navigate to the Activities page (see page 157).
2) In the table, select the activity.
3) On the Layout menu, select Activity Details, and then select the Resource Assignments detail window.
4) In the Resource Assignments detail window, select the Context menu for a role, and then select Staff Role.

Activities Overview
79
5) In the Staff Role dialog box, select a resource, and select Select.
6) All changes made to this page are saved automatically.
Assign a Resource to an Activity
A resource is any quantifiable item in limited supply and of sufficient value to justify tracking and assigning to specific activities for a project. Resources include labor, non-labor items such as equipment, and material items such as bricks. Assign resources to activities to indicate which resources are required to complete an activity. Because resources can be quantified in units of measure, assigning resources to activities enable you to track how your resources are spread across project activities.
When assigning resources to activities, you can view the allocation for a resource to analyze how the resource is being used across the project. When viewing a resource's allocation, it is displayed as a histogram, enabling you to easily identify the resource's allocation requirements and see when the resource is overallocated.
To assign a resource to an activity:
1) Navigate to the Activities page (see page 157).
2) In the table, select the activity.
3) On the Layout menu, select Activity Details, and then select the Resource Assignments detail window.
4) Select Assign.
5) In the Assign Resources dialog box, in the View By list, select a method to view the list of resources.
6) In the Filter By field, select whether to view workspace or project resources.
7) To view the resource allocation for a resource for the current project, select the resource, and then select Show Details.
8) Select the resource to assign the activity to and select Assign.
9) All changes made to this page are saved automatically.
Tips
You can assign resources to multiple activities at the same time. Select multiple activities, select the Context menu, and then select Assign, Resources.
In long-range planning, it may be advisable to first identify and assign the roles required to work on the activity and then staff the roles with the appropriate project resources at a later time.
If your project is configured to enable status updates by resource assignments, users who are assigned as resources to in-progress activities can use the My Activities page or Timesheets page to update the status of their resource assignment.
Assign a Curve to a Resource or a Role Assignment
A curve profile can be selected per activity assignment to allocate resource or role units over the duration of an activity according to a specific curve. Units spread are Planned Units, Actual Units, Remaining Units, and At Completion Units.

Schedule Management User Guide
80
A curve profile can be assigned to any resource or role assignment on activities with a duration type of either:
Fixed Duration & Units/Time
Fixed Duration & Units
To specify a curve profile:
1) Navigate to the Activities page (see page 157).
2) In the table, select the activity.
3) On the Layout menu, select Activity Details, and then select the Resource Assignments detail window.
4) In the Curve column for the resource assignment, select a curve.
5) All changes made to this page are saved automatically.
Working with Activity Files
You can link files from the project library to project activities to provide team members with access to relevant documentation to aid in the completion of activities. You can also upload new files to add to the project library and link to activities.
Members of your project team can add, delete, and edit activity files based on their assigned security privileges.
Add a File in a Files Detail Window
Use the Files detail window to add relevant files that support your data. For example, you might add architectural drawings, pictures, or product specifications to activities on the Activities page.
The following objects support the Files detail window:
Activities
Inspections
Issues
Logs
PBSs
Portfolio Funds
Project Funds
Risks
Scope Assignments
Scope Items
Strategies
Submittals
WBSs
Work Packages
To add a file in a Files detail window:
1) Navigate to a page whose object supports files.

Activities Overview
81
2) In the table, select an object row, and then select the Files detail window.
3) In the Files detail window, select Add.
4) In the Add File dialog box, in the Select Folder section, select a folder in the project library.
5) In the File field, select Browse, and then select one or more files.
6) Select Upload.
Tips
Files that you add in the Files detail window can also be accessed from the project File List page.
Link a File to an Object
You can link existing files to objects contained within a project instead of adding them to each object. Linking ensures the same version of a file is used everywhere that it is linked. The application enables you to associate files in the Files detail window of the object. The files are still available from the File List page at the project level.
The following objects support the Files detail window:
Activities
Inspections
Issues
Logs
PBSs
Portfolio Funds
Project Funds
Risks
Scope Assignments
Scope Items
Strategies
Submittals
WBSs
Work Packages
To link a file to an object:
1) Navigate to a page whose object supports files.
2) In the table, select an object row, and then select the Files detail window.
3) In the Files detail window, select Link.
4) In the Link File dialog box, select a file, and select Add from Available.
You can select one or more files to link.
5) Select OK.
Tips
To remove a linked file, select the file, select the Context menu, and select Unlink.

Schedule Management User Guide
82
Preview a File
Preview a file in the application before deciding if you want to check out and edit the file. You can preview a file from anywhere in the application by selecting the name of the file.
Tips
Oracle Primavera Cloud supports the preview of .mp4 and .ogg video file types and .mp3 and .wav audio file types. You must download other video and audio file types to preview them.
Check Out a File
Because files are shared, you are required to check them out and in to make updates to them. Checking out a file enables you to download it to your local machine where you can make edits and create a new version of the file. When you are finished updating the file, you can check it in so the new version of the file is saved to the project, portfolio, program, or idea library and available to other team members. You can check out a file from the File List page or a Files detail window.
To check out a file:
In a file row, select the Context menu, and then select Check Out.
Tips
Files are downloaded or opened depending on the file opening procedures of your browser.
All users may view a checked out file, but only the user who has checked out the file may modify it until it is either checked in or check out is canceled.
When files are checked out, Checked Out displays next to the filename.
The person who checked out a file or the project-level File Administrator can cancel a check out. When a check out is canceled, the file will reflect no changes. To cancel a file check out, select the Context menu and select Cancel Check Out.
Check In a File
After you have finished editing a checked out file, you must check it in to save the new version of the file to the project, portfolio, program, or idea library. You can check in a file from the File List page or a Files detail window.
To check in a file:
1) In a file row, select the Context menu, and then select Check In.
2) In the Check In dialog box, select Browse, select the file, and then select Upload.
Tips
You can add comments about the file in the Check In dialog box from the File List page. For example, you may want to record the changes you made to the file.
After you check in a file, you can view previous versions of it in the Versions detail window on the File List page.

Activities Overview
83
Add a Relationship to an Activity
To specify that the activities in a project occur in a certain order, you must define relationships between activities. Relationships define how an activity relates to the start or finish of another activity. Activity relationships indicate whether activities are sequential or can be done in parallel. Activity relationships are used together with activity durations by the project scheduler to calculate schedule dates.
An activity can have as many relationships as necessary to model the work that must be done. Activities that are dependent on one another are known as predecessors and successors, where the first activity is the predecessor and the second is the successor.
When working with a program or project collection, you can define cross-project relationships between activities in different projects. These are also called external relationships.
To add relationships to an activity:
1) Navigate to the Activities page (see page 157).
2) In the table, select the activity.
3) On the Layout menu, select Activity Details, and then select the Relationships detail window.
4) To add activity predecessors, do the following:
a. In the Predecessors section, select Assign.
b. In the Select Activity dialog box, search or browse for an activity, select the activity, and then select Select.
5) To add activity successors, do the following:
a. In the Successors section, select Assign.
b. In the Select Activity dialog box, search or browse for an activity, select the activity, and then select Select.
6) In the Relationship Type field, choose the option that best defines how the selected activity relates to the start or finish of the predecessor or successor activity.
7) In the Lag field, enter the amount of lag time needed between the two activities. Values can be positive or negative.
8) All changes made to this page are saved automatically.
Tips
In the Relationships detail window, in the Predecessors or Successors section, select an activity name. This will select the activity in the table and display that activity's predecessors and successors in the detail window. If an activity is hidden by a filter, select the Help icon next to an activity in the detail window, and then select Clear All Filters.
You can quickly create a sequence of activities by adding relationships to multiple activities at one time. In the table, select multiple activities, select the Context menu, and then select Link Activities. Finish to Start relationships are created between selected activities in the order that the activities were selected. To remove all relationships between activities, select the activities, select the Context menu, and then select Unlink Activities.

Schedule Management User Guide
84
You can assign the same predecessors or successors to multiple activities at the same time. Select multiple activities, select the Context menu, and then select Assign, Predecessors or Successors.
Select the Trace Logic detail window to trace the relationship paths of individual activities.
View Relationships Using Trace Logic
In projects with complex sequences of activity relationships, you can use the Trace Logic detail window to trace the path of relationships and view activity predecessor, successor, and other relationship details. In the detail window, adjust the zoom and fit of the display, as well as the number of activities shown. Select different activities in the detail window to trace the path of their relationships.
To view relationships using Trace Logic:
1) Navigate to the Activities page (see page 157).
2) In the table, select an activity.
3) On the Layout menu, select Activity Details, and then select the Trace Logic detail window.
4) In the Trace Logic detail window, configure the following settings:
Pan: Depending on your predecessor and successor settings, selecting an activity can change the trace logic display. Use Pan to move the display in any direction without selecting an activity.
Zoom Out: Zoom out of the displayed sequence of activities.
Zoom In: Zoom in on the displayed sequence of activities.
Zoom to Fit: Adjusts the view to display all activities in the sequence. Hover over an activity to view it at normal size.
Print: Displays the trace logic sequence in a browser print preview window.
Predecessor Levels: The maximum number of predecessor levels to display before the selected activity.
Successor Levels: The maximum number of successor levels to display after the selected activity.
5) Select activities to view their relationship sequences. Activities selected in the detail window are also selected in the table. Select a relationship line to view its details.
Tips
The following indicators are used in the Trace Logic detail window:
Critical activities and relationships are represented using red tiles, red borders, and red lines. Activity tiles on the critical path display an exclamation point icon.
Non-critical activity tiles are white, and non-critical relationship lines are black.
Solid lines indicate a driving relationship, while dotted lines indicate a non-driving relationship.
Completed activities display a completed icon in their tiles. Start or finish milestones display a diamond in their tiles.

Activities Overview
85
Select Download beneath the diagram to download the displayed sequence as a .png file.
Assign a Risk to an Activity
If your project team has identified risks in the project risk register, you can use the Risks detail window to assign risks to an activity. Assigning risks to an activity enables you to indicate where in the project schedule a risk can potentially impact.
This information is also used during the risk analysis process to simulate the impact of risk on project activities during the simulation runs. The risk analysis generates risk-related data for each activity that is saved in the system. Risk data that are calculated for activities during the analysis include pre-response and post-response activity dates and durations, as well as a criticality index, which measures the probability that an activity will be part of the critical path. This data can be displayed in the Activities view as fields or as bars in the Gantt chart to identify activities that require special attention.
To assign risks to an activity:
1) Navigate to the project Activities page (see page 157).
2) In the table, select the activity.
3) On the Layout menu, select Activity Details, and then select the Risks detail window.
4) Select Assign.
5) In the Select Risk dialog box, search or browse for the risk, select it, and then select Select.
6) All changes made to this page are saved automatically.
Tips
You can assign risks to multiple activities at the same time. Select multiple activities, select the Context menu, and then select Assign, Risks.
Apply Activity Uncertainty
The application enables you to convey information about general uncertainty for each project activity by defining three-point estimates. On the project Activities page, you can set the minimum, most likely, and maximum durations for activities. You can also set a distribution shape that expresses the relative likelihood of outcomes within the range of your three-point estimates.
This data is used during the risk analysis process to analyze the effect of general uncertainty on individual project activities and the project schedule as a whole. The application uses the three-point estimates and the assigned distribution shape to vary the duration of each activity during the risk analysis.
You can also do this from the project Risk Register page. You cannot assign activities to program risks.
To apply activity uncertainty to project activities:
1) Navigate to the project or project collections Activities page (see page 157).
2) Select the Actionsmenu, and then select Apply Activity Uncertainty.

Schedule Management User Guide
86
3) In the Apply Activity Uncertainty dialog box, in the Uncertainty Distribution list, select the shape of the distribution that best models the estimates for activity durations:
None: Select to remove activity uncertainty values on all activities.
Triangle: Select to enter uncertainty values for Minimum, Most Likely, and Maximumdurations.
Uniform: Select to enter uncertainty values for Minimum and Maximum durations.
4) In the Percent of Remaining Duration section, complete the following fields:
Minimum Duration: The percentage of the activity remaining duration that represents the minimum duration for the activity.
Most Likely Duration: The percentage of the activity remaining duration that represents the most likely duration for the activity. If this is set to 100%, then the most likely duration will be equal to the remaining duration.
Note: If you selected a uniform uncertainty distribution, this field is not available.
Maximum Duration: The percentage of the activity remaining duration that represents the maximum duration for the activity.
5) Select the Overwrite any existing values option to overwrite three-point estimate values that currently exist for project activities.
6) Select Apply.
Tips
The risk analysis process uses activity data from the current schedule. Although you can apply activity uncertainty to activities in baselines and scenarios, this data is not used in the risk analysis. The activity uncertainty values set in a baseline or scenario would be used if you choose to set the baseline or scenario as the current schedule.
You can manually enter or overwrite three-point estimates from the Activities page by applying a view which displays the Distribution Shape, Minimum Duration, Most Likely Duration, and Maximum Duration columns and entering values for each column.
Entering three-point estimates can be helpful for modeling general uncertainty for project activities. However, it only plays a small part in assessing project uncertainty, as project risks can be more impactful to the project schedule. Therefore, your project team should develop an effective risk management strategy for assessing and controlling the risks for your project.
Add a Task to an Activity
Add tasks and task milestones to your activities to further enhance the level of detail of work required to complete your project. Add tasks to activities with an Activity Type of Activity Dependent or Resource Dependent and assign the company responsible for completing work on the task. Optionally, assign a task duration, due date, proposed due date, completed date, and a user responsible for performing the task. Tasks added to your activities on the Activities page will also appear on pages in the Lean app, where you can choose to commit to work on the task or mark the task complete. When tasks are added, indicators show if task dates fall outside of activity date ranges, if tasks are completed before their assigned activity, or if an activity is completed before all of its assigned tasks.

Activities Overview
87
To add a task to an activity:
1) Navigate to the Activities page (see page 157).
2) In the table, select the activity.
3) On the Layout menu, select Activity Details, and then select the Tasks detail window.
4) In the Tasks detail window, select Add.
5) In the new row, complete the following required fields:
Task Name: Enter a task name.
Type: Select Task or Task Milestone.
Company: Select a company.
Duration: Enter a task duration.
6) All changes made to this page are saved automatically.
Tips
Data in the Tasks detail window can only be edited in the current schedule.
Associating Activities with Scope Assignments and Work Packages for Scope Management Overview
If you use the application to manage your schedule and manage scope assignments, you can link your activities to scope assignments and work packages.
The activity and the work package must be associated with the same WBS. An activity can only be assigned to one work package, but it can be assigned to multiple scope assignments within the work package.
Scope assignments and work packages inherit dates from their associated activities. When activities are linked to a work package or its associated scope assignments, the Original Start and Original Finish dates are set to reflect the activity's Planned Start and Planned Finish dates before the baseline is set. After the baseline is set, the Original Start and Original Finish dates are set to read-only and the Planned Start and Planned Finish dates for the work package and scope assignments are updated with the activity's Planned Start and Planned Finish dates. For work packages that have scope assignments with activity links, this is the earliest start and finish dates set for all scope assignments within the work package.
Note: The following dates do not inherit values from activities: Revised Start/Finish, Effective Start/Finish, and Installed Start/Finish.
Unlinking activities from scope assignments or work packages will do the following:
Reset the Original Start and Planned Start dates with the Data Date before the baseline is set. Reset the Planned Start dates with the Data Date after the baseline is set.
Reset the Original Finish and Planned Finish dates with the Data Date plus 4 days, excluding holidays, before the baseline is set. Reset the Planned Finish dates with the Data Date plus 4 days, excluding holidays, after the baseline is set.
Unlinking a scope assignment will not unlink its work package from the activity.

Schedule Management User Guide
88
Link a Work Package to an Activity
Link work packages to activities when you want to manage work package dates using activity dates.
To link an activity to a work package:
1) Navigate to the Activities page (see page 157).
2) In the table, select the activity.
3) On the Layout menu, select Activity Details, and then select the General detail window.
4) In the Work Package Name field, select a work package.
Note: You can only link an activity to a work package that belong to the same WBS that is associated with the activity.
5) All changes made to this page are saved automatically.
Link a Scope Assignment to an Activity
Link scope assignments to activities when you want to manage scope assignment dates using activity dates. This enables you to more accurately manage the time phased distribution of scope data for scope assignments.
To link an activity to a scope assignment:
1) Navigate to the Activities page (see page 157).
2) In the table, select the activity.
3) On the Layout menu, select Activity Details, and then select the Scope Assignments detail window.
4) Select Link.
5) In the Select Scope Assignments dialog box, select a scope assignment and select Link.
6) In the Scope Percent Complete Weight Method list, select a method to use to calculate the scope percentage completion for scope assignments. The weight is calculated using cost, quantity, hours, or manually entered values.
Cost, Quantity, and Hours are represented as n in the equations that follow:
The n weight is first calculated for each scope assignment linked to the activity as Revised nmultiplied by the scope assignment Scope Percent Complete.
Scope Percent Complete is calculated as Installed Quantity divided by At Completion Quantity.
The sum of the scope assignments Revised n and the sum of the scope assignments nWeight for all scope assignments linked to the activity are then used to compute the activity Scope Percent Complete. This is calculated as the n Weight divided by Revised n.
Weight for the Manual option is calculated as Manual Weight Factor multiplied by Scope Percent Complete.
Scope Percent Complete at the work package level for the manual option is calculated as the sum of Manual Weight divided by the sum of Manual Weight Factors for all scope assignments in the work package.
7) All changes made to this page are saved automatically.

Activities Overview
89
Tips
You can link multiple scope assignments to a single activity. However, a scope assignment can only be linked to a single activity.
You can set a default scope percent complete method by configuring it in the project settings.
Assign a Code to an Activity
Assign codes to activities to help track them based on attributes they share. When managing a large number of activities, you can use views to filter and group activities by code.
To assign a code to an activity:
1) Navigate to the Activities page (see page 157).
2) In the table, select the activity.
3) On the Layout menu, select Activity Details, and then select the Codes detail window.
4) Select Assign.
5) In the Select Code dialog box, in the Available section, select codes and select Add from Available to add them to the Selected section.
6) Select Select.
7) All changes made to this page are saved automatically.
Tips
You can assign codes to multiple activities at the same time. Select multiple activities, select the Context menu, and then select Assign, Codes.
Modify Activity Details in the Gantt Chart
You can modify a variety of activities and relationship details directly in the Activities page Gantt chart. Create activities, adjust durations and dates, and establish relationships between activities. Add lag to relationships, or modify the relationship type. Hover over an activity or relationship line to view its details.
To modify activity details in the Gantt chart:
1) Navigate to the Activities page (see page 157).
2) Select the Gantt icon.
3) In the Gantt chart, you can make the following changes:
To create an activity, right-click a row, and select Add Above or Add Below. Enter an activity name.
To modify an activity's start or finish date and its duration, select the left edge or right edge of an activity bar and drag it to a new date. The new date and duration are shown next to the bar as you drag it.
To modify an activity's start and finish dates without changing its duration, select the middle of the bar and drag it to a new date. The new start and finish dates are shown next to the bar as you drag it.
To delete an activity, right-click an activity bar, and select Delete Activity.

Schedule Management User Guide
90
To create a relationship, hover over the left edge or right edge of an activity bar. Select the circle that appears and drag it to an edge of a different activity bar. A popover shows the proposed relationship and its type.
To edit an existing relationship, select a relationship line, and then select Edit Relationship. In the popover, edit the relationship type and lag, and then select Apply.
To delete an existing relationship, right-click a relationship line, and then select Delete Relationship.
Drag any activity bar past the data date line to set a Start On or After constraint.
4) All changes made to this page are saved automatically.
Tips
You cannot add an activity while in a baseline.
You can select multiple activity bars and edit their durations or dates at the same time.
Milestone start or finish dates cannot be modified in the Gantt chart.
Renumber Activity IDs
You can quickly renumber a group of activity IDs based on a repeatable pattern. Choose to increment individual IDs by a specific numeric value, auto-number IDs in sequence based on a prefix and number pattern, or replace the beginning characters of all selected IDs with the same value.
If the option you choose causes duplicate activity IDs, you will be prompted to enter a new activity ID for each conflicting activity. You can also cancel the process and try again with a different pattern that does not cause duplicates.
To maintain consistent activity IDs across baselines, you can choose to renumber the selected IDs in the current schedule and all of your project's baselines. If renumbering the IDs will cause duplicates in any baselines, you can either cancel the renumbering process or update the current schedule and any baselines where duplicates will not occur.
To renumber activity IDs:
1) Navigate to the Activities page (see page 157).
2) Select one or more activities, select the Context menu, and then select Renumber Activity IDs.
3) In the Renumber Activity IDs dialog box, choose one of the following options:
Increment Activity ID based on selected activities: Enter a value that each selected activity ID will be incremented by.
Auto-number: Enter a prefix value, starting number, and increment value. The selected activities will be updated in the order that they were selected.
Replace beginning characters: Enter the number of characters to replace starting from the beginning of the ID, and then enter the value that will replace the characters.
4) Select Renumber selected activities in baselines if you want to also renumber the selected IDs in any baselines where they appear. This option is only displayed if your project has at least one baseline.

Activities Overview
91
5) Select OK.
6) All changes made to this page are saved automatically.
Tips
In the context of a project collection or program, you can renumber a selection of activity IDs that belong to a single project.
You can also renumber activity IDs in a scenario.
You can renumber up to 500 activity IDs at the same time.
Dissolve an Activity
Dissolving an activity enables you to delete the activity from your project schedule while maintaining the activity's predecessor and successor relationships.
When you dissolve an activity, the following changes occur:
The activity is deleted.
Relationships are created from each of the activity's predecessors to each of the activity's successors.
The resulting relationship type consists of the first part of the predecessor relationship and the second part of the successor relationship.
Lag from the combined relationships is added together.
For example: Activity A forms a Finish to Start relationship with Activity B, with 1 day of lag. Activity B forms a Finish to Finish relationship with Activity C, with 2 days of lag. If Activity B is dissolved, then Activity A will form a Finish to Finish relationship with Activity C, with 3 days of lag.
To dissolve an activity:
1) Navigate to the Activities page (see page 157).
2) Select an activity, select the Context menu, and then select Dissolve.
3) All changes made to this page are saved automatically.
Tips
To dissolve an activity, it must have at least one predecessor and one successor relationship.
To delete an activity and its relationships, see Delete an Activity (on page 91).
Delete an Activity
Delete an activity to remove it from your project schedule.
To delete an activity:
1) Navigate to the Activities page (see page 157).
2) Select an activity, select the Context menu, and then select Delete.
3) All changes made to this page are saved automatically.

Schedule Management User Guide
92
Tips
Deleting an activity also deletes any predecessor or successor activity relationships. To delete an activity while retaining its surrounding relationships, you can dissolve the activity. See Dissolve an Activity (on page 91) for more information.
Add a Discussion
Discussions provide a way for team members to communicate and exchange information on a wide variety of objects including activities, costs, resources, risks, scope assignments, tasks, and more. Comments are saved with the object and are available to all team members with the required security privileges. You can use the Discussion feature to collaborate throughout the application.
To add a discussion:
Select Discuss to open the Discussion panel.
Note: If no comments have been posted to the Discussion panel, the Discuss icon is empty.
To post a new comment:
In the Post a comment field, enter a comment, and select Post.
To reply to a comment:
Select Comment.
In the Post a reply field, enter a reply, and select Reply.
Tips
A user mention sends a notification to the user inviting them to join the discussion. To mention a user, enter @<FirstNameLastName> or @<username> and select the user.
You cannot edit or delete a posted comment.
Select Like to show that you approve or support a comment. Select Unlike to remove your Like.
You can choose to show or hide the discussion icon in a table. Select the Settings icon and, in the Standard Column Options section, select the Show Discussion Indicatoroption.
Activities Page Tools
The Activities page contains a collection of tools for monitoring, analyzing, and scheduling your project.
Scheduling: Sequence your project's activities along a timeline based on their constraints, relationships, and date types. The Scheduler uses the Critical Path Method scheduling algorithm.
Baselines: Capture your project schedule at given points in time, evaluating performance at different phases of the project lifecycle.
Schedule Scenarios: Create what-if versions of your project schedule to evaluate different outcomes without making permanent changes to the actual schedule.

Activities Overview
93
Resource and Role Usage: View resource and role usage across your project's timeline using histograms and data spreadsheets.
Leveling: Resolve resource and role assignment overallocations.
Schedule Health Score: Evaluate the quality of your project schedule using common schedule analysis metrics.
Global Change: Create If/Then statements that identify and update matching project activity values. This tool enables quicker updates than modifying activities individually.
Scheduling Overview
Scheduling a project, program, or project collection aligns all the activities of each project on a common timeline based on the constraints, relationships, and the date types to which each activity must adhere. When the scheduler is run, the application applies the Critical Path Method algorithm to assign activity dates, calculate total float, and determine the project critical path.
Critical Path Method Overview
When you schedule a project, program, or project collection, the Critical Path Method conducts a forward pass that calculates the earliest start and finish dates for each activity, based on the start or finish dates of predecessor activities as well as the duration of the activity itself. It then conducts a backward pass to calculate the latest start and finish dates for each activity, based on the start or finish dates of successor activities as well as the duration of the activity itself. From these dates, the total float is calculated for each activity to determine how much scheduling flexibility each activity has. Activities that have zero float must start on time to prevent the schedule from slipping. These are the activities that define the critical path. Identifying the critical path helps the project management team know where to focus their efforts by knowing which activities are critical to overall project success.
Schedule a Project
Schedule your project to sequence your activities into a logical order of execution by assigning dates to all activities. Scheduling your project also determines the project's critical path. You can schedule a program or project collection to schedule all of the projects in the program or collection using their own data date or a specific date.
Note: When project data is imported into Oracle Primavera Cloud from P6 EPPM, it is recommended that you reschedule the project before making any project updates.
To schedule a project:
1) Navigate to the Activities page (see page 157).
2) Select Schedule.
3) In the Schedule dialog box, on the Schedule Project tab, configure your data date options:
Select one of the following:
All projects use their own data date: Select this option to use the individual data date for each open project.
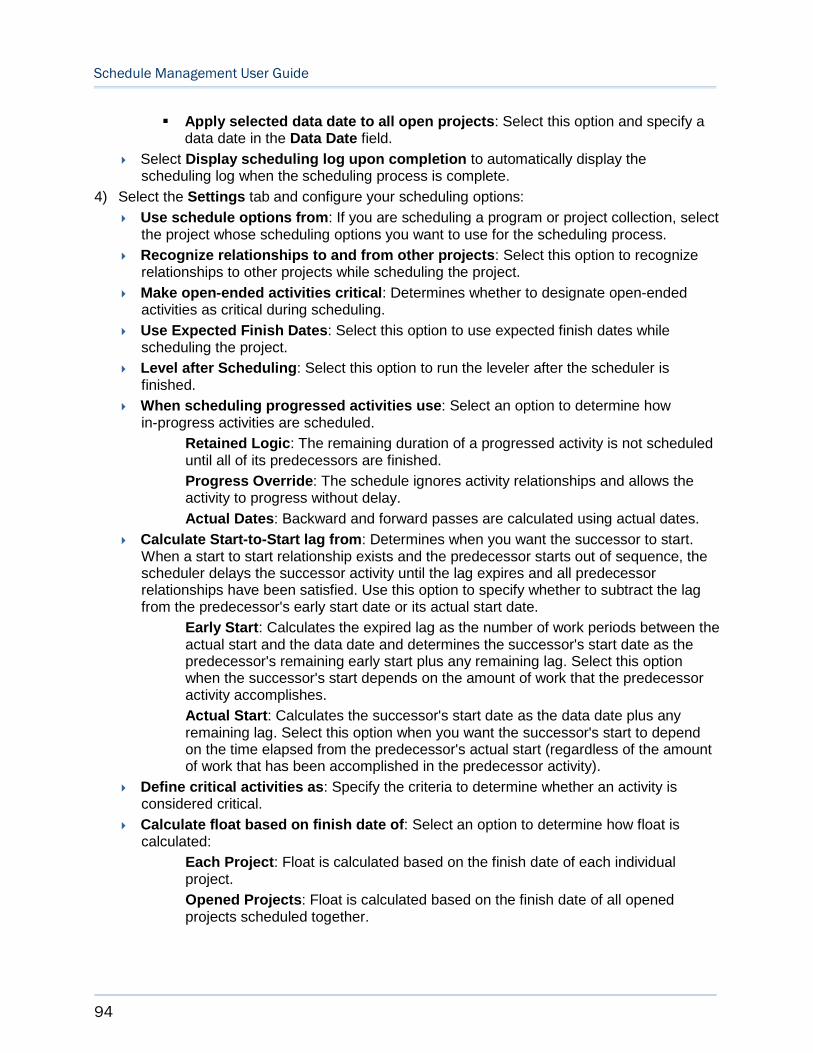
Schedule Management User Guide
94
Apply selected data date to all open projects: Select this option and specify a data date in the Data Date field.
Select Display scheduling log upon completion to automatically display the scheduling log when the scheduling process is complete.
4) Select the Settings tab and configure your scheduling options:
Use schedule options from: If you are scheduling a program or project collection, select the project whose scheduling options you want to use for the scheduling process.
Recognize relationships to and from other projects: Select this option to recognize relationships to other projects while scheduling the project.
Make open-ended activities critical: Determines whether to designate open-ended activities as critical during scheduling.
Use Expected Finish Dates: Select this option to use expected finish dates while scheduling the project.
Level after Scheduling: Select this option to run the leveler after the scheduler is finished.
When scheduling progressed activities use: Select an option to determine how in-progress activities are scheduled.
Retained Logic: The remaining duration of a progressed activity is not scheduled until all of its predecessors are finished.
Progress Override: The schedule ignores activity relationships and allows the activity to progress without delay.
Actual Dates: Backward and forward passes are calculated using actual dates.
Calculate Start-to-Start lag from: Determines when you want the successor to start. When a start to start relationship exists and the predecessor starts out of sequence, the scheduler delays the successor activity until the lag expires and all predecessor relationships have been satisfied. Use this option to specify whether to subtract the lag from the predecessor's early start date or its actual start date.
Early Start: Calculates the expired lag as the number of work periods between the actual start and the data date and determines the successor's start date as the predecessor's remaining early start plus any remaining lag. Select this option when the successor's start depends on the amount of work that the predecessor activity accomplishes.
Actual Start: Calculates the successor's start date as the data date plus any remaining lag. Select this option when you want the successor's start to depend on the time elapsed from the predecessor's actual start (regardless of the amount of work that has been accomplished in the predecessor activity).
Define critical activities as: Specify the criteria to determine whether an activity is considered critical.
Calculate float based on finish date of: Select an option to determine how float is calculated:
Each Project: Float is calculated based on the finish date of each individual project.
Opened Projects: Float is calculated based on the finish date of all opened projects scheduled together.
Activities Overview
95
Compute total float as: Select the method to use to calculate total float for activities.
Calendar for scheduling relationship lag: Select the calendar to use for calculating relationship lag.
5) Select Schedule Now.
Tips
The scheduler calculates the project schedule using activity requirements only. Consequently, activities requiring the same roles or resources can be scheduled simultaneously, creating overallocations. Use the leveling (see "Leveling Overview" on page 107) feature to resolve role or resource overallocations in your project by adjusting activity dates according to the availability of all assigned roles or resources.
If you choose to run the leveler, the project is automatically scheduled before the leveler is run, according to the last scheduling settings.
After you schedule the project, you can review the log to view data and statistics about the scheduling process. You can access the log from the Schedule dialog box by selecting View Log, from the system notification you receive when the scheduling process is complete, or from the Manage Services page.
Baselines Overview
A baseline is a copy of a project's schedule data at a given point in time. As a static representation of the project plan, it can be used as a benchmark against which to measure performance as the project progresses. Create multiple baselines to evaluate performance at different phases of the project lifecycle.
When you create a baseline, you can set the baseline date to capture project data at any point between the project creation date and the current date. This is useful if you want to add a baseline for project data as it existed on a specific date in the past. If you forgot to add a baseline on a specific date, select a past baseline date to use the data from that date.
Baselines can be opened on the Activities page to view the project data represented by the baseline. When a baseline is open, baseline values are used to populate the standard schedule fields. When the current schedule or a scenario is open, a baseline's values are used to populate corresponding baseline fields. Baseline fields are used for comparison with the current schedule or scenario fields. For example, if the original baseline is open, the baseline's start values populate Start date fields. If the current schedule or a scenario is open, Start date fields are populated with current schedule or current scenario values, and Original BL Start date fields are populated with original baseline values. The baseline fields used for comparison in the current schedule are empty when any baseline is open.

Schedule Management User Guide
96
Baselines can also be opened so that they can be updated. While updating baseline data is not a typical project management practice, there may be situations where minor adjustments to a baseline need to be made by the project manager or scheduler. You can modify most of the data in a baseline as you would the data in the current schedule. The data stored by a baseline is unique to that baseline. For example, actions such as updating activity data, scheduling activities, leveling resources and roles, and using the schedule health check tool do not affect the current schedule, other baselines, or schedule scenarios. You cannot manually add new activities to a baseline, but you can add existing activities from the current schedule to a baseline and update the data for existing baseline activities. If you need to replace your current schedule with the data from a baseline, you can set the baseline as the current schedule. If the changes you make to a baseline need to be undone, you can revert the baseline back to its original state. The baseline must be open before it can be updated or reverted. See Open a Baseline (on page 98) for more information.
There are four types of baselines in the application: original, current, supplementary, and unofficial:
An original baseline is an official baseline that is typically set when the project has been approved. It may also be referred to as the Performance Measurement Baseline (PMB). Setting an original baseline captures values in all original baseline fields. Original scope values cannot be updated after the original baseline is set.
A current baseline, also referred to as the active baseline, is an official baseline used to measure differences between current project values and the original values. You can only set a current baseline after an original baseline has been set.
The supplementary baseline is an official baseline that can be used for any purpose. A supplementary baseline might be created before a major schedule update to capture the state of the project before the update.
Unofficial baselines can be created to capture how the project is progressing or they can come from previous official baselines. For example, a baseline that was previously set as your official current baseline is not removed when you set a new current baseline. It instead becomes an unofficial baseline that is retained for future reference.
At any point in time, you can have one original baseline, one current baseline, one supplementary baseline, and an unlimited number of unofficial baselines. You can change the types of existing baselines or remove a baseline's type to make it an unofficial baseline. Any baseline can be opened for viewing or updating.
The distinction between official baselines and unofficial baselines is that official baselines—original, current, and supplementary—have corresponding baseline fields while unofficial baselines do not. To view the field values stored in an unofficial baseline, you can either change its type to an official baseline or set it as a user baseline preference. You can set up to three existing baselines as user baseline preferences, which typically indicate the baselines that are most important to you. The baselines set as your preferences are used to populate the values in user baseline fields. This is useful when you want to measure project performance against baselines other than the official project baselines. Set on the Activities page, user baseline preferences apply only to the user who set them. Official or unofficial baselines can be set as user baselines.

Activities Overview
97
Schedule Management
For schedule management, each baseline captures a complete set of data about the project schedule, including activity dates, durations, float, percentages, and labor and non-labor units. After the project schedule is developed, an original baseline should be set to establish points of reference to monitor your schedule against as it changes over time. When the current baseline is created, all of the current baseline fields are updated to reflect the current project values.
To measure schedule performance, configure views that show baseline variance fields to identify activities that are not progressing as planned. Baseline variance fields measure the differences between your current project values and your baseline values. You can view variances for your original, current, supplementary, and user baselines. Variances are useful in identifying the activities with the greatest impact to your original project plan.
Official and user baselines can also be configured as bars to be displayed in the Gantt chart and used to monitor activity progress visually on the project timeline.
Scope Management
For scope management, a current baseline is created to capture all approved changes since the original baseline was created. When the current baseline is created, all the baseline fields are updated to reflect the current values and are in turn used in certain calculations to measure progress. The original values are not changed.
For a work package, there are four baseline attributes that the user can refer to after a baseline has been set: Baseline Cost, Baseline Hours, Baseline Start, and Baseline Finish. For each scope assignment, there are five baseline attributes: Baseline Start, Baseline Finish, Baseline Cost, Baseline Hours, and Baseline Quantity. When the original baseline is set, these fields are populated with the original values. After the original baseline is set, all changes needed for scope items, work packages, and scope assignments must go through a review process, which is initiated by submitting change and transfer requests.
Add a Baseline
Adding project baselines enables you to track progress throughout the project lifecycle. If no baseline exists for a project, the first baseline must be an original or unofficial baseline. Any subsequent baselines can be original, current, supplementary, or unofficial baselines. You can also change the type of existing baselines.
You can add, edit, and delete project baselines from the Baselines page or Activities page.
To add a project baseline:
1) Navigate to the Baselines page (see page 158).
2) Select Add Baseline.
3) In the Add Baseline dialog box, enter the following information:
Name: The name of the baseline.
Type: The type of baseline. Select Original, Current, Supplementary, or leave the value blank.
Schedule Management User Guide
98
Note: Unofficial baselines do not have a Type. Select the blank row in the list to add an unofficial baseline.
Baseline Date: The date of the project data captured by the baseline. Select a date in the past to use project data from that date. The default value is the current date and time.
Description: Additional information about the baseline.
4) Select Add.
5) All changes made to this page are saved automatically.
Tips
To access your baselines from the Activities page, select the Actions menu, and then select Manage Baselines.
The Data Date field shows the data date value as of the Baseline Date. This is useful when determining the progress point of your project at the time represented by the baseline.
To delete a baseline, on the Baselines page or in the Manage Baselines dialog box, select the Context menu, and then select Delete. You cannot delete an original baseline if a current or supplementary baseline exists.
You cannot remove or change the original baseline if you have any scope changes, installed or actual scope quantities, or at least one closed reporting period.
Open a Baseline
Open a baseline if you need to view or update the activity data stored by the baseline. When a baseline is open, baseline values are used to populate the standard schedule fields, and the designated baseline fields are empty.
While updating a baseline is not a typical project management practice, there may be situations where minor adjustments to a baseline need to be made by the project manager or scheduler. You cannot manually add activities in a baseline, but you can update existing activity data. If the changes you make to a baseline need to be undone, you can revert the baseline back to its original state. The baseline must be open before it can be updated or reverted.
Use the Open menu in the page toolbar to switch between your current schedule, schedule scenarios, and schedule baselines. The list contains your official baselines, any baselines set as a user baseline preference, and the open baseline. Each official baseline in the list displays the name of the baseline and its baseline type.
When a baseline is open, a banner appears above the page toolbar to inform you that you are currently making changes to a baseline. This message is to remind you of the object in which you are currently working and that any changes made to the baseline do not directly impact your current schedule, but are reflected in the corresponding baseline fields visible in your current schedule. The banner can be dismissed for your current session and will reappear when you reload the page.
To open a baseline:
1) Navigate to the project Activities page (see page 157).
2) In the Open menu, in the Baselines section, select a baseline to open.
Activities Overview
99
Tips
The Open menu also contains the following items:
Current Schedule: Select to open the project's current schedule.
Scenarios section: Select View All to open the Manage Scenarios dialog box.
Baselines section: Select View All to open the Manage Baselines dialog box.
You can open any available baseline from the Manage Baselines dialog box, including those not listed in the Open menu.
To revert a baseline, select the Actions menu, and then select Revert Baseline. This action cannot be undone.
Add an Activity from the Current Schedule to a Baseline
As your project progresses, new activities may need to be added to the project. These new activities will not automatically appear in existing baselines. However, if a baseline requires these activities, you can add them from the current schedule to the baseline. This feature enables you to update an existing baseline with new activities without having to create a new baseline that would reflect current progress.
The Get Activities dialog box displays activities that exist in your current schedule but do not exist in the baseline. The activities that you select in the dialog box will be added to your baseline. All of an activity's data will also be added, including dates, durations, relationships, resource and scope assignments, risks, codes, and configured fields. Activities in the selection with the same ID as an activity already in the baseline will not be added.
You can add up to 100 activities from the current schedule to a baseline at one time. You must have the required security privileges to edit activity data for a baseline.
To add activities from the current schedule to a baseline:
1) Navigate to the project Activities page (see page 157).
2) On the Activities page, open a baseline.
3) Select Actions, and then select Get Activities.
4) In the Get Activities dialog box, select one or more activities to add to your baseline.
5) Select Get.
Tips
In the Get Activities dialog box, select Display log upon completion to view details from the Get Activity process.
Set a Baseline as the Current Schedule
Baselines capture the progress of your project at a specific point in time. Baselines are created for a number of reasons, including at the beginning of the project or before a major schedule update. If you need to replace your current schedule with the data from a baseline, you can set the baseline as the current schedule. When a baseline is set as the new current schedule, baseline details such as dates, durations, assignments, and relationships overwrite the details in the previous current schedule, including any progress updates made to the current schedule.

Schedule Management User Guide
100
Note: Setting a baseline as the current schedule overwrites the current schedule data. This action cannot be undone. The process runs in the background, and you will receive a notification when the process completes. It is recommended that all users not make changes to the schedule until the process is complete.
You must have the required security privileges to set a baseline as the current schedule.
To set a baseline as the current schedule:
1) Navigate to the project Activities page (see page 157).
2) On the Activities page, open a baseline.
3) Select Actions, and then select Set as Current Schedule.
4) In the Set as Current Schedule dialog box, select Set.
Tips
When a baseline is set as the current schedule, the previous current schedule is converted to a retired schedule scenario. If needed, you can make the previous schedule visible as a scenario in the Manage Scenarios dialog box.
Use the Open menu in the Activities page toolbar to switch between baselines. Select View All in the list to open the Manage Baselines dialog box.
Set User Baseline Preferences
Set up to three baselines as user baseline preferences on the Activities page. User baseline preferences are typically the baselines that are most important to you. They can be official or unofficial baselines and can be changed at any time. User baseline fields are populated with the values stored in the corresponding baseline and can be used as part of your view settings, including columns, filtering, grouping, and Gantt bars.
Baseline preferences are specific to each user. The baseline preferences you set are only visible to you. The same baselines can be set as preferences by multiple users.
To set user baseline preferences:
1) Navigate to the project Activities page (see page 157).
2) Select the Actions menu, and then select Set User Baseline Preferences.
3) In the Set User Baseline Preferences dialog box, do the following to set your user baselines:
a. Select Project Baselines to view which baselines are currently set as the current, original, and supplementary baselines.
b. In the Baseline 1, Baseline 2, and Baseline 3 lists, select the baselines that you want to set as your user baselines.
c. Select Save.
4) Your user baseline fields are updated with your selections.
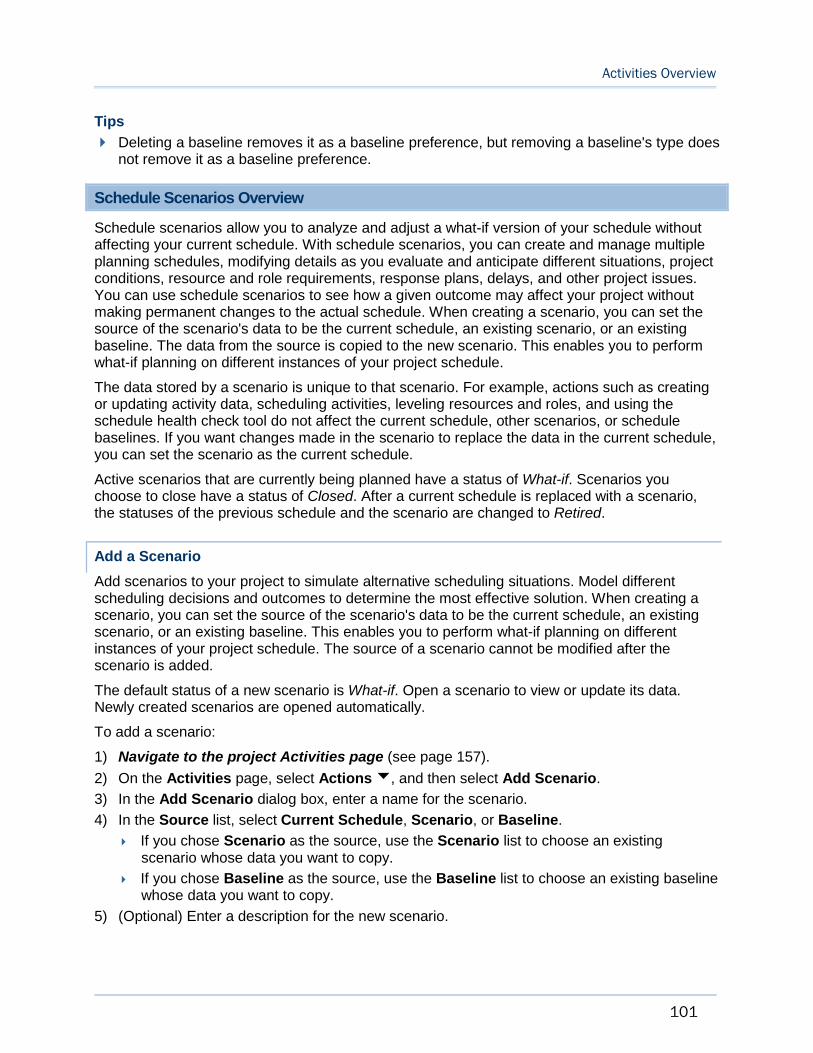
Activities Overview
101
Tips
Deleting a baseline removes it as a baseline preference, but removing a baseline's type does not remove it as a baseline preference.
Schedule Scenarios Overview
Schedule scenarios allow you to analyze and adjust a what-if version of your schedule without affecting your current schedule. With schedule scenarios, you can create and manage multiple planning schedules, modifying details as you evaluate and anticipate different situations, project conditions, resource and role requirements, response plans, delays, and other project issues. You can use schedule scenarios to see how a given outcome may affect your project without making permanent changes to the actual schedule. When creating a scenario, you can set the source of the scenario's data to be the current schedule, an existing scenario, or an existing baseline. The data from the source is copied to the new scenario. This enables you to perform what-if planning on different instances of your project schedule.
The data stored by a scenario is unique to that scenario. For example, actions such as creating or updating activity data, scheduling activities, leveling resources and roles, and using the schedule health check tool do not affect the current schedule, other scenarios, or schedule baselines. If you want changes made in the scenario to replace the data in the current schedule, you can set the scenario as the current schedule.
Active scenarios that are currently being planned have a status of What-if. Scenarios you choose to close have a status of Closed. After a current schedule is replaced with a scenario, the statuses of the previous schedule and the scenario are changed to Retired.
Add a Scenario
Add scenarios to your project to simulate alternative scheduling situations. Model different scheduling decisions and outcomes to determine the most effective solution. When creating a scenario, you can set the source of the scenario's data to be the current schedule, an existing scenario, or an existing baseline. This enables you to perform what-if planning on different instances of your project schedule. The source of a scenario cannot be modified after the scenario is added.
The default status of a new scenario is What-if. Open a scenario to view or update its data. Newly created scenarios are opened automatically.
To add a scenario:
1) Navigate to the project Activities page (see page 157).
2) On the Activities page, select Actions, and then select Add Scenario.
3) In the Add Scenario dialog box, enter a name for the scenario.
4) In the Source list, select Current Schedule, Scenario, or Baseline.
If you chose Scenario as the source, use the Scenario list to choose an existing scenario whose data you want to copy.
If you chose Baseline as the source, use the Baseline list to choose an existing baseline whose data you want to copy.
5) (Optional) Enter a description for the new scenario.

Schedule Management User Guide
102
6) Select Add.
7) All changes made to this page are saved automatically.
Tips
You can also add scenarios from the Manage Scenarios dialog box. Scenarios added in this manner automatically set the current schedule as the scenario source.
Use the Open menu in the Activities page toolbar to switch between scenarios. Select View All in the list to open the Manage Scenarios dialog box.
Open a Scenario
Open a scenario to perform project management tasks on a what-if version of your current schedule. You can modify the data in a scenario as you would the data in the current schedule. If you want to replace the data in your current schedule with the data from a scenario, you can set the scenario as the current schedule. See Set a Scenario as the Current Schedule (on page 104) for more information.
Use the Open menu in the page toolbar to switch between your current schedule, available scenarios, and available baselines. The list contains scenarios that are set to Visible in the Manage Scenarios dialog box.
When a scenario is open, a banner appears above the page toolbar to inform you that you are currently making changes to a scenario. This message is to remind you of the object in which you are currently working and that any changes made to the scenario are not reflected in your current schedule. The banner can be dismissed for your current session and will reappear when you reload the page.
To open a scenario:
1) Navigate to the project Activities page (see page 157).
2) In the Open menu, in the Scenarios section, select a scenario to open.
Tips
The Open menu also contains the following items:
Current Schedule: Select to open the project's current schedule.
Scenarios section: Select View All to open the Manage Scenarios dialog box.
Baselines section: Select View All to open the Manage Baselines dialog box.
Newly created scenarios are opened automatically.
Add an Activity from the Current Schedule to a Scenario
As your project progresses, new activities may need to be added to the project. These new activities will not automatically appear in existing scenarios. However, if a scenario requires these activities, you can add them from the current schedule to the scenario. This feature enables you to update an existing scenario with new activities without having to create a new scenario that would reflect current progress.
Activities Overview
103
The Get Activities dialog box displays activities that exist in your current schedule but do not exist in the scenario. The activities that you select in the dialog box will be added to your scenario. All of an activity's data will also be added, including dates, durations, relationships, resource and scope assignments, risks, codes, and configured fields. Activities in the selection with the same ID as activities already in the scenario will not be added.
You can add up to 100 activities from the current schedule to a scenario at one time. You must have the required security privileges to add an activity to a scenario.
To add activities from the current schedule to a scenario:
1) Navigate to the project Activities page (see page 157).
2) On the Activities page, open a scenario.
3) Select Actions, and then select Get Activities.
4) In the Get Activities dialog box, select one or more activities to add to your scenario.
5) Select Get.
Tips
In the Get Activities dialog box, select Display log upon completion to view details from the Get Activity process.
Manage a Scenario
Use the Manage Scenarios dialog box to add, duplicate, rename, and delete schedule scenarios. Toggle the visibility of scenarios on the Activities page, and choose a scenario status of What-if or Closed. The Source column indicates the source of a scenario, which could be the current schedule, another scenario, or a specific baseline. Retired scenarios are read-only.
To manage scenarios:
1) Navigate to the project Activities page (see page 157).
2) On the Activities page, select Actions, and then select Manage Scenarios.
3) In the Manage Scenarios dialog box, you can do any the following:
In the Filter By list, select which scenario statuses you want to display in the table.
Select Settings to format the display of columns in the table.
In the table, select the Context menu next to a scenario, and then select Add, Duplicate, or Delete.
In the Visible column, select the icon to make a scenario visible or hidden in the Open menu on the Activities page.
In the Status column, change the status of a scenario between What-if and Closed. Closed scenarios are automatically hidden.
4) Select Save.
Schedule Management User Guide
104
Set a Scenario as the Current Schedule
If you determine that a specific scenario should become the new project schedule, you can set the scenario as the current schedule. When a scenario is set as the new current schedule, scenario details such as dates, durations, assignments, and relationships overwrite the details in the previous current schedule, including any progress updates made to the current schedule.
Note: Setting a scenario as the current schedule overwrites the current schedule data. This action cannot be undone. The process runs in the background, and you will receive a notification when the process completes. It is recommended that all users not make changes to the schedule until the process is complete.
To set a scenario as the current schedule:
1) Navigate to the project Activities page (see page 157).
2) On the Activities page, open a scenario.
3) Select Actions, and then select Set as Current Schedule.
4) In the Set as Current Schedule dialog box, select Set.
Tips
When a scenario is set as the current schedule, the scenario is hidden and its status is changed to Retired. The previous current schedule is also hidden and its status is changed to Retired. You can make these scenarios visible in the Manage Scenarios dialog box.
Use the Open menu in the Activities page toolbar to switch between scenarios. Select View All in the list to open the Manage Scenarios dialog box.
Resource and Role Usage Overview
The Activities page provides time-phased views of resource and role usage for the activities in your project in the form of histograms and spreadsheets. Resource and role usage is displayed in separate histograms and spreadsheets. Each histogram has two distinct views. In the Not Stacked histogram view, usage can be broken down into planned, actual, and remaining unit values. For each field, enable aggregated spreads of units, in the form of bars and cumulative curves, for the resources or roles selected in the accompanying resource or role tree. Toggle overallocation bars to see where schedule adjustments or additional resource assignments may be necessary. In the Stacked histogram view, at completion spread values are shown as stacked bars, with each bar representing a different resource or role scheduled during that time period. You can also stack the bars by a specific resource/role code. Additional options, such as chart legends, max availability lines, and bar colors, are available in the histogram settings.
The usage spreadsheets display resource or role unit data distributed across a timescale. Each selected resource or role shows time-phased activity assignment units grouped by a summary band containing unit totals. In the settings, you can select incremental and cumulative unit fields to display as rows in the spreadsheet. You can also configure grouping bands to more easily view each resource or role grouping.

Activities Overview
105
The Gantt chart, histogram, and spreadsheet are synchronized, so that scrolling or timescale changes in the Gantt are automatically reflected in the histogram and spreadsheet. To further aid in analyzing resource and role usage, you can filter the display of activities in the activities table. Choose to show all activities, only activities scheduled to occur during the time period you select in the histogram, or only activities with resource or role assignments selected in the resource or role tree.
The histograms and spreadsheets display the usage of the activity assignments in your current schedule. Usage data in an open baseline or schedule scenario is not reflected. At the program or project collection level, view resource and role usage on activities in each of the projects within the program or project collection.
View the Resource and Role Histograms and Spreadsheets
The histograms and spreadsheets on the Activities page enable you to view time-phased usage data for the resources and roles assigned to activities in your project. Select resources or roles from the trees in the Project Usage detail window to display their data in the histogram or spreadsheet, including availability and overallocation values by time period.
Each histogram supports two views. The unstacked histogram view shows aggregated planned, actual, and remaining unit values based on the resources or roles you have selected in the tree. The stacked histogram view shows at completion values for each selected resource or role. The stacked histogram can also be set to stack by a specific resource/role code. The spreadsheet for the selected resources or roles can be configured to display a variety of incremental and cumulative field data. See Configure Resource and Role Usage Settings (on page 106) for more information.
You can limit the display of activities in the activities table based on a selection of resources or a specific time period.
To view the resource or role histogram or spreadsheet:
1) Navigate to the Activities page (see page 157).
2) On the Activities page, select Layout, and then select Project Usage.
Note: At the program level, this option is named Program Usage. At the project collection level, this option is named Project Collection Usage.
3) In the detail window, select Resource Usage or Role Usage, and then select one or more resources or roles whose data you want to display.
4) In the detail window toolbar, select Not Stacked Histogram or Stacked Histogram to switch between histogram views.
Select Spreadsheet Rows to view the spreadsheet data for your selection.
5) To limit the display of activities in the activities table, in the detail window toolbar list, select one of the following:
Show all activities above: Show all activities regardless of the current selection. This does not include activities hidden by filters.
Show activities for selected time period: Only show activities whose dates fall within the time period configured in the From: and To: date fields displayed in the detail window toolbar. For each field, select Select Date to configure the date.
Schedule Management User Guide
106
Show activities for selected resources: Only show activities that have assignments for any of the selected resources or roles.
6) Hover over a histogram bar or curve to view its details.
View spreadsheet data, including unit values summarized for each resource or role and broken down by individual activity assignments.
Tips
Timescale changes made in the Gantt chart are automatically reflected in the histogram and spreadsheet.
Histogram and spreadsheet configuration settings are saved with the view.
The histograms and spreadsheets display the usage of the activity assignments in your current schedule. Usage data in an open baseline or schedule scenario is not reflected.
Configure Resource and Role Usage Settings
Configure settings for the usage histograms and spreadsheets on the Activities page. Set stacked and unstacked histogram view options, as well as settings that apply to both views. Resource and role histogram settings are configured separately by default, but you can enable an option to synchronize them so that the same configuration of settings is used for both histograms. For the resource and role usage spreadsheets, you can select the incremental and cumulative unit fields that will be used as spreadsheet rows. You can also configure grouping bands for the spreadsheet. The resource and role spreadsheets are configured separately.
Histogram and spreadsheet configuration settings are saved with the view.
To configure usage settings:
1) Navigate to the Activities page (see page 157).
2) On the Activities page, select Layout, and then select Project Usage.
Note: At the program level, this option is named Program Usage. At the project collection level, this option is named Project Collection Usage.
3) In the Resource Usage or Role Usage detail window, select Settings.
4) In the Settings dialog box, on the Histogram tab, configure the following sections:
Not Stacked: Configure settings for the Not Stacked Histogram view.
Overallocation: Displays overallocated hours as a red bar.
Max Availability: A line representing the maximum availability of the selected resources or roles.
In the Bars & Curves section, select graph bars and cumulative curves to display for each unit field. Choose a color for each field's bar and curve. You can configure bars and curves for the following unit fields:
Resource Usage: Planned, Actual, Remaining Early, Remaining Late
Role Usage: Planned, Actual, Remaining Early, Remaining Late, Staffed Remaining Early, Staffed Remaining Late, Unstaffed Remaining Early, Unstaffed Remaining Late
Graph: Toggle options that apply to the unstacked and stacked histogram views.

Activities Overview
107
Legend: A legend for the histograms' bars and curves.
Horizontal Sight Lines: A line for each Y-axis interval.
Vertical Sight Lines: A line for each X-axis interval.
Values on Bars: The value of each bar is displayed on the bar.
Stacked: Configure settings for the Stacked Histogram view.
By default, stacked histogram bars are grouped by individual resources or roles. To group stacked bars according to a specific assigned resource/role code, select Stack by Resource/Role Code, and then choose a code.
To display cumulative curves for the stacked histogram, select Show Cumulative Curves, and then choose Individual cumulative curves or a single Total cumulative curve.
In the Resource Usage settings, select Use Role Usage Settings to synchronize the settings between the two histograms. In the Role Usage settings, this option is called Use Resource Usage Settings. When enabled, settings changes made in one histogram will be updated in the other. When disabled, you can configure independent settings for each histogram.
5) On the Spreadsheet Rows tab, select the incremental and cumulative unit fields that you want to apply to the selected resource usage or role usage spreadsheet.
6) On the Spreadsheet Grouping tab, select the grouping style and color theme that you want to apply to the selected resource usage or role usage spreadsheet.
7) Select Apply.
Leveling Overview
When you schedule a project, the schedule is calculated based upon the activity requirements, not resource or role availability. Consequently, two activities requiring the same role or resource may be scheduled to occur simultaneously in the project schedule. To resolve this overallocation, you can level the project. Leveling ensures that roles or resources are not overallocated for projects by reducing or eliminating overloads for assignments to more than one activity within a project. During leveling, the role or resource assignments for all scheduled activities are compared to the role or resource availability at the time of leveling, and an activity is only scheduled to occur when its resource or role demands can be met. To achieve this, the system delays activities so that the overallocated roles or resources work on activities consecutively, instead of simultaneously.
Configure the Leveling Priority
To handle scheduling conflicts that may occur during leveling, you can configure priorities that specify the order in which activities are delayed in the schedule. Use the Leveling Priority field to assign a priority to the activities in your project. When you level your project, you can establish a sort order for the activities based upon their assigned leveling priority. The priority rankings can be sorted in ascending or descending order, and are used to guide the leveler as to which activities it should move or not move. The sort order controls which activities are moved around first in the project schedule during the leveling process.
To configure leveling priorities for project activities:

Schedule Management User Guide
108
1) Navigate to the Activities page (see page 157).
2) Apply a view that displays the Leveling Priority column, or add the column to the current view.
3) In the Leveling Priority list, select a priority value.
4) All changes made to this page are saved automatically.
Tips
You can also establish leveling priorities using various other project activity fields. When this is done, the leveling order is created based upon the values assigned to the selected field and the chosen sort order. For instance, you can sort activities by remaining duration in descending order so that those activities with the longest remaining duration are the first to be moved around in the project schedule during the leveling process.
Level a Resource or Role
Leveling is a process that helps you ensure that sufficient roles or resources are available to perform the activities in your project according to the schedule.
To level a project:
1) Navigate to the project Activities page (see page 157).
2) Select the Actions menu, and then select Level.
3) In the Level dialog box, do the following:
Select a leveling method: Resources or Roles.
Select Preserve scheduled early and late dates to preserve activity early and late dates as scheduled rather than adjust them during the leveling process.
Select Display leveling log upon completion to automatically display the leveling log when the leveling process is complete.
4) Choose whether to level all resources or roles, or specify the ones you want to level by moving them to the Selected list.
5) To configure leveling priority settings, select the Prioritization tab, and select fields and a sort order to prioritize activities. Your priorities are used to handle scheduling conflicts that might occur during leveling, and determine which activity is leveled first.
Field: Select a field to be considered a leveling priority.
Sort Order: Specify the order how the field is prioritized.
6) Do one of the following:
Select Save to save your leveling settings.
Select Level Now to run the leveler.
Tips
The resulting dates represent the optimum positioning for the activities based on current resource and role assignments. However, if you reschedule the project without using the leveling option, the dates will return to their original position.
When you run the leveler, the project is automatically scheduled according to the last scheduling settings.
Activities Overview
109
After you level the resources or roles for a project, you can review the log to view data and statistics about the leveling process. Because the scheduler is also run during the process, schedule information is included in the log. You can access the log from the Level dialog box by selecting View Log, from the system notification you receive when the leveling process is complete, or from the Manage Services page.
Schedule Health Score Overview
The Schedule Health Score tool enables you to evaluate the quality of your project schedule against a set of criteria. Using common schedule analysis metrics, the tool can help to ensure compliance with corporate or industry standards. Use the tool to identify problem areas in your schedule, and then consider methods to correct the issues that arise. Issues might include missing relationship logic or unrealistic date constraints that could negatively impact your project schedule.
The tool evaluates your project schedule using calculated metrics known as checks. Each time you run the scheduler on your current schedule or a schedule scenario, the tool automatically analyzes your activities and produces a score for each check. The check score indicates the level to which your activities are meeting the check's defined criteria. Typically, checks with a higher score require more immediate attention. Individual check scores contribute to an overall schedule health score. A higher schedule health score indicates a higher quality schedule.
Use the tool results to identify activities that meet each check's criteria, and then adjust those activities to generate a more favorable score. Check details, including target values, weighting values, and check descriptions, can be modified in the project settings. Individual checks can be enabled or disabled according to your organization's needs.
Configure Schedule Health Score Settings
Schedule Health Score metrics have default descriptions, target threshold values, and weight calculation values that can be modified in the project settings. You can also modify additional check criteria where applicable. Individual checks can be enabled or disabled according to your organization's needs.
To configure settings for the Schedule Health Score tool:
1) Navigate to the project settings page (see page 162).
2) Select the Schedule Health Check tab.
3) Select Ignore Completed Activities if you want to exclude completed activities from the analysis.
4) In the table, select a check, and then configure the following settings:
Description: Modify the description of the check depending on your organization's needs.
Active: Include the selected check in the Schedule Health Score panel. Only active checks are used in the schedule health score calculation.
Target: Set the target threshold percentage value for the check. Typically, a check that exceeds the threshold value is marked red in the Schedule Health Score panel.
Weighting: Set the numerical weighting of the check. This value is used when determining the overall schedule health score.

Schedule Management User Guide
110
5) In the General detail window, you can view or modify the same check details as in the table. Some checks have additional metrics that you can modify in the Criteria section of the detail window.
6) Save your changes:
In Primavera Cloud:
a. Select Save.
b. In the Summary & Settings panel, select Close.
In Primavera Professional:
Select Save.
This setting is used in the following apps:
Schedule
View the Schedule Health Score Results
Use the results of the Schedule Health Score tool to identify activities that could negatively impact the outlook of your project schedule.
Each check provides the following information:
A count of the number of activities that do not meet its criteria
The number of activities as a percentage of the whole project
A red indication if the actual percentage exceeds the target defined in the settings and a green indication if it is at or below the target
A list of activities that do not meet the check's criteria
A description of what should be modified to improve the check score
Typically, checks with higher percentage scores require more immediate attention. Individual check scores contribute to an overall schedule health score. A higher schedule health score indicates a higher quality schedule. Schedule checks are run against the current schedule or a schedule scenario.
Note: Some check scores are calculated after saving your data, while other scores are calculated after scheduling the project. Before using the Schedule Health Score tool, you should schedule the project to ensure you are viewing all the latest results.
To view the schedule health check results:
1) Navigate to the project Activities page (see page 157).
2) Select Schedule Health Score.
3) In the panel, select a check to view the activities that do not meet the check metric's criteria. Select an activity to highlight it in the grid.
4) Modify the activity details that relate to the check, and then schedule your project to view updated check scores.

Activities Overview
111
Tips
Filtered activities that do not meet a check's criteria are still included in the check score. Select a check, select More Info next to any filtered activity, and then select Clear All Filters to clear all filters applied to the view.
Select a check and then select Description to view a description of the check. Descriptions can be modified in the project settings.
Schedule Health Score Reference
The Schedule Health Score tool uses descriptions, target threshold values, and weight calculation values that can be modified in the project settings. Use this topic to refer to the default values for each check. This topic also describes the formulas used to calculate the Schedule Health Score value.
Schedule Health Scores
The objective of most of the tool's checks is to minimize the number of activities that meet a check's criteria. Unless noted, a lower check score is more favorable to the overall Schedule Health Score value. When a check does not exceed its specified Target value, it is marked green in the Schedule Health Score panel. If it exceeds the Target value, it is marked red.
Check Name Default Target Value Check Description
Open Ends 0% An activity without a predecessor or successor relationship may negatively affect the quality of your schedule and should be avoided.
No Predecessors 0% An activity with no predecessors could be scheduled to start immediately. This can negatively impact your project schedule and should be avoided.
No Successors 0% An activity with no successor relationships could be delayed indefinitely without affecting project completion. Ensure all activities have at least one successor.

Schedule Management User Guide
112
Dangling Start 0% An activity with a dangling start has only SF or FF predecessors and therefore could have an unrealistic start date. To avoid dangling starts, ensure each activity has at least one FS or SS relationship as its predecessor.
Dangling Finish 0% An activity with a dangling finish has only SF or SS successors and therefore could have an unrealistic finish date. To avoid dangling finishes, ensure each activity has at least one FS or SS relationship as its successor.
Predecessor Negative Lag 0% The use of negative lags to overlap activities or adjust successor dates can affect the critical path and distort total float. It can also cause a successor to start before a predecessor. Negative lags can cause activities to be scheduled in unrealistic ways and generally should not be used.
If an event in the predecessor activity is the "trigger" to begin the successor activity, consider breaking the predecessor into two activities. For example, two activities "Design" and "Build" would become "Draft Design", "Finalize Design", and "Build". "Draft Design" would then precede both other activities.

Activities Overview
113
Predecessor Lag 5% or less Lag time between activities should not be used to control float or constrain dates. Consider representing the delay between two activities by adding another activity.
If a lag represents some effort or activity, consider replacing it with an activity. For example, two activities "Pour Concrete" and "Build Wall" could have a lag replaced with an activity "Concrete Set".
FS Predecessor 90% or greater Finish-to-Start (FS) relationships are the easiest to trace and understand. The majority of your relationships should be FS.
Note: The FS Predecessor check is unique in that its objective is to maximize the number of activities that meet its criteria. The objective of all other checks is to minimize the number of activities that meet the check's criteria. When the FS Predecessor score exceeds its Target value, the check is marked green. The FS Predecessor check uses a different formula when calculating the overall Schedule Health Score.
SS Predecessor 10% or less Start-to-Start (SS) relationships are acceptable to use in moderation.
FF Predecessor 10% or less Finish-to-Finish (FF) relationships are acceptable to use in moderation.
Schedule Management User Guide
114
SF Predecessor 0% Start-to-Finish (SF) relationship logic says the successor occurs before the predecessor. SF relationships are a poor practice and generally should not be used.
Hard Constraint 0% Mandatory Start and Mandatory Finish are hard constraints that prevent activities from being scheduled according to logic and prevent delays from impacting succeeding activities. The effects of hard constraints become more noticeable as the schedule is progressed, and they generally should not be used.
Soft Constraint 5% or less Soft constraints allow the schedule to be logic driven but can distort float and create negative float.
The following constraints are considered soft constraints:
As Late As Possible
Start On
Start On Or Before
Start On Or After
Finish On
Finish On Or Before
Finish On Or After
Activities Overview
115
Invalid Progress Date 0% Progress should be recorded before the Data Date, and planned work should be recorded after. Activities with invalid dates can affect the accuracy of the project schedule.
This check score is calculated after scheduling your project.
Late Activity 5% or less Late activities indicate how well the project is performing against the original baseline.
Large Float 0% Large float values may indicate missing activity relationships. Provide activities with reasonable logic to ensure a more stable project plan.
Negative Float 0% Negative float usually indicates an activity constraint that cannot be met with the current schedule or progress has been made out of sequence. Corrective action should be taken to ensure activity dates are accurate and achievable.
Large Duration 5% or less Large duration activities are harder to manage and may lack sufficient detail. Consider dividing these activities into shorter, more discrete activities, which provide better insight into cost and schedule.

Schedule Management User Guide
116
No Role or Resource 0% Roles and resources detail the cost and labor of the work to be performed. An activity without roles or resources may be insufficiently planned.
Calculating the Schedule Health Score
The Schedule Health Score represents the overall quality of your project schedule according to the score of the individual checks that are included in the analysis. A higher schedule health score indicates a higher quality schedule. The weighting value that is set in the project settings enables you to place higher priority on specific checks during the calculations. Only checks marked as Active in the project settings are included in the Schedule Health Score.
The following formula is used to calculate the overall Schedule Health Score:
Schedule Health Score = 100% - (Sum of all active [Check Adjusted Percentage * Check Weighting] values / Sum of all active check weighting values)
In most cases, the Check Adjusted Percentage value is the same as the percentage value of an individual check score. However, the Check Adjusted Percentage value of the FS Predecessorcheck, whose characteristics are the inverse of the other checks, is calculated using the following formula:
Check Adjusted Percentage = 100% - Check Percentage
The Schedule Health Score color is calculated independently of its percentage value. The Schedule Health Score color is set to red if one or more of the active checks in the calculation are red. If all active checks are green, the Schedule Health Score color is green. Weighting value does not impact the score color.
Global Change Overview
The Global Change tool enables you to make changes to a selection of activities in a project at the same time. It is similar to find and replace functionality in other software applications but with more powerful capabilities. The global change process is quicker than manually updating many individual activities with the same data, especially in larger projects. The ability to save global change configurations enables you to repeat the processes as necessary.
First, add a global change and define the specific values that you want to identify on activity fields such as codes, configured fields, dates, or durations. Depending on the field, you can choose to identify static values, rolling values, or a specific range of values. You can identify values for multiple fields. Next, specify the actions that should be taken when any or all of those field values are found. This might be changing all activities of a certain type to another type, modifying activity calendar assignments, or increasing the duration of activities whose durations fall within a specific range. Changes are only made to activities that meet your specified conditions. Multiple actions can be taken from a single global change. Global change functionality is supported by activities in the current schedule, baselines, and what-if scenarios.
Activities Overview
117
Global changes and their parameters are saved to the project and can be run at any time. By default, individual global changes are only visible to the user who created them, but they can be made publicly accessible to all users who have access to the project. You must have the required security privileges to configure and run global changes. You must also have the required privileges to edit the activities to which you want to make global changes. If your security privileges do not enable you to edit the activities, you will not be able to commit the changes you make.
After a global change process completes, the Activities page automatically updates with any new values. A global change log is generated, containing the change's parameters, a list of updated fields and values, and any errors that were encountered. You can access the log from the system notification you receive when the process is complete, from the Inbox, or from the Manage Services page.
Add a Global Change
Add as many global changes as necessary to define different activity update scenarios in your project. Global changes are automatically saved to your project and can be run at any time. By default, new global changes are only visible to the user who created them, but they can be made publicly accessible to all users who have access to the project.
Global change parameters consist of If and Then statements. If statements define the field values that you want to identify on an activity. When a global change is run, each activity in the project is evaluated against the conditions in the If statement. Then statements specify the changes to be made when any or all of the field values are found for the activity. Changes are only made to activities for which the conditions of the If statement are true. Multiple If and Then conditions can be defined for a global change.
You must have the required security privileges to add, edit, or delete global changes.
After a global change is added, it can be run on demand at any time. For more information, see Run a Global Change (on page 118).
To add a global change:
1) Navigate to the project Activities page (see page 157).
2) On the Actions menu, select Global Change.
3) In the Global Changes panel, select Add.
Note: If an existing global change is similar to the one you want to create, you can select the Context menu next to the global change, select Duplicate, and then edit the duplicated global change.
4) For the new global change, complete the following fields:
Name: Enter a name for the new global change.
Type: Select Private if you want the global change to only be available to you. Select Public if you want the global change to be available to all project users.
5) In the Parameters panel, configure the following global change parameters:
a. In the If section:
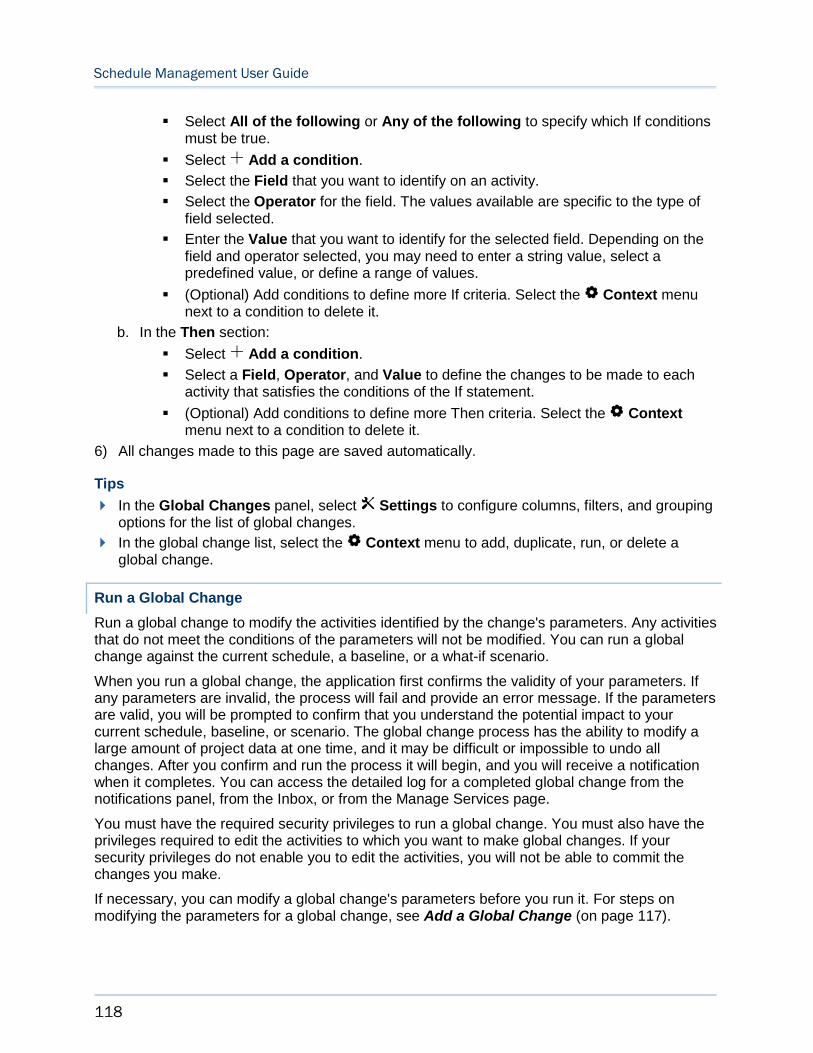
Schedule Management User Guide
118
Select All of the following or Any of the following to specify which If conditions must be true.
Select Add a condition.
Select the Field that you want to identify on an activity.
Select the Operator for the field. The values available are specific to the type of field selected.
Enter the Value that you want to identify for the selected field. Depending on the field and operator selected, you may need to enter a string value, select a predefined value, or define a range of values.
(Optional) Add conditions to define more If criteria. Select the Context menu next to a condition to delete it.
b. In the Then section:
Select Add a condition.
Select a Field, Operator, and Value to define the changes to be made to each activity that satisfies the conditions of the If statement.
(Optional) Add conditions to define more Then criteria. Select the Contextmenu next to a condition to delete it.
6) All changes made to this page are saved automatically.
Tips
In the Global Changes panel, select Settings to configure columns, filters, and grouping options for the list of global changes.
In the global change list, select the Context menu to add, duplicate, run, or delete a global change.
Run a Global Change
Run a global change to modify the activities identified by the change's parameters. Any activities that do not meet the conditions of the parameters will not be modified. You can run a global change against the current schedule, a baseline, or a what-if scenario.
When you run a global change, the application first confirms the validity of your parameters. If any parameters are invalid, the process will fail and provide an error message. If the parameters are valid, you will be prompted to confirm that you understand the potential impact to your current schedule, baseline, or scenario. The global change process has the ability to modify a large amount of project data at one time, and it may be difficult or impossible to undo all changes. After you confirm and run the process it will begin, and you will receive a notification when it completes. You can access the detailed log for a completed global change from the notifications panel, from the Inbox, or from the Manage Services page.
You must have the required security privileges to run a global change. You must also have the privileges required to edit the activities to which you want to make global changes. If your security privileges do not enable you to edit the activities, you will not be able to commit the changes you make.
If necessary, you can modify a global change's parameters before you run it. For steps on modifying the parameters for a global change, see Add a Global Change (on page 117).

Activities Overview
119
To run a global change:
1) Navigate to the project Activities page (see page 157).
2) On the Actions menu, select Global Change.
3) In the Global Changes panel, select a global change from the list, and then select Run.
4) If the global change parameters are valid, you will be prompted to confirm that you want to run the global change. Select the check box, and then select Run. The global change process will begin. You will receive a notification upon its completion.
Tips
You can only run one global change at a time.
In the Global Changes panel, select Settings configure columns, filters, and grouping options for the list of global changes.
Program Milestones Overview
Program Milestones is a standard view found on the Activities page. This view enables you to see a high-level picture of how the projects within your program are progressing based on their project milestones.
You can enable the view by selecting it from the View menu on the Activities page, setting it as active from the Manage Views panel, or by selecting the Milestone Summary page in the sidebar.
View Program Milestones on the Activities Page
Use the Program Milestones view on the Activities page to track the milestone progress of your program's projects. Milestones mark significant events in a project, such as the beginning of the project, the start or end of a new phase, and the completion of the project. The status of these milestones can give a high-level look at how each of your projects is progressing. Milestone details are shown and can be edited in the grid and detail windows of the Activities page. Enable the Gantt view to show milestone markers along a timeline.
Program Milestones is a standard view type. Standard views are preconfigured views that come with Primavera Cloud. You cannot add, edit, or delete standard view options, but you can modify the view and save the changes as a new view of another type. The Program Milestones view displays only those project milestones that you have selected to display at the program level. The view contains columns that pertain to milestones and groups the page by project. A standard filter, also called Program Milestones, is automatically applied. It displays activities whose Program Milestone option is selected. See Assign an Activity Type to an Activity (on page 73) for more information.
If it is applied at the project level, the Program Milestones view will only show the milestones from a single project. At the program or project collection level, the view will show milestones from all of the projects within the program or project collection.
To view program milestones on the Activities page:
1) Navigate to the Activities page (see page 157).
2) Enable the Program Milestones view by doing either of the following:

Schedule Management User Guide
120
Select the View menu, and then select Program Milestones under the Standard grouping.
Select Settings. In the Manage Views panel, select the Program Milestones view, select the Context menu, and then select Set Active.
3) To display the Gantt view, select Layout, and then select Gantt. Markers are displayed for each project's milestones.
Tips
If you want to modify the Program Milestones view:
Modify the view directly on the Activities page. You will be prompted to save your changes as a new personal or workspace view.
Modify the view in the Manage Views panel. Apply your changes, and then save them as a new personal or workspace view.
Copy the view in the Manage Views panel, and then paste it under the Workspace or Personal grouping. You can now make changes to the new view.
Selecting Milestone Summary from the program-level Schedule app in the sidebar will redirect you to the programs Activities page. The Program Milestones view will be automatically applied.
Activities Fields
Depending on your settings, the following fields might appear on the page as table columns, spreadsheet rows, or in detail windows. Fields that are generic across the application, such as Name, may not be included here.
Date Fields
Actual Finish
The date when the activity was completed.
Actual Start
The date work on the activity began.
BL Actual Finish
The completion date of the activity in the baseline.
The following baselines have unique names and values for this field: Current, Original, Supplementary, User 1, User 2, User 3.
BL Actual Start
The start date of the activity in the baseline.
The following baselines have unique names and values for this field: Current, Original, Supplementary, User 1, User 2, User 3.
BL Early Finish
The earliest possible finish date of the activity in the baseline.

Activities Overview
121
This date is calculated based on network logic, schedule constraints, and resource availability.
The following baselines have unique names and values for this field: Current, Original, Supplementary, User 1, User 2, User 3.
BL Early Start
The earliest possible start date of the remaining work for the activity in the baseline.
This date is calculated based on network logic, schedule constraints, and resource availability.
The following baselines have unique names and values for this field: Current, Original, Supplementary, User 1, User 2, User 3.
BL Finish
The current finish date for the activity in the baseline.
The following baselines have unique names and values for this field: Current, Original, Supplementary, User 1, User 2, User 3.
BL Late Finish
In the baseline, the latest possible date the activity can finish without delaying the project finish date.
This date is calculated based on activity relationships, schedule constraints, and resource availability.
The following baselines have unique names and values for this field: Current, Original, Supplementary, User 1, User 2, User 3.
BL Late Start
In the baseline, the latest possible date the remaining work for the activity can begin without delaying the project finish date.
This date is calculated based on activity relationships, schedule constraints, and resource availability.
The following baselines have unique names and values for this field: Current, Original, Supplementary, User 1, User 2, User 3.
BL Start
The current start date of the activity in the baseline.
For started activities, this is the actual start date. For not started activities, this is the planned start date until the project is scheduled. When scheduled, the start date field is set to the remaining early start date.
The following baselines have unique names and values for this field: Current, Original, Supplementary, User 1, User 2, User 3.
Early Finish
The earliest possible date the activity can finish.
This date is calculated based on network logic, schedule constraints, and resource availability.
Early Start

Schedule Management User Guide
122
The earliest possible date the remaining work for the activity can begin.
This date is calculated based on network logic, schedule constraints, and resource availability.
Expected Finish
The date you expect work on the activity to finish.
Finish
The current finish date for the activity.
Late Finish
The latest possible date the activity can finish without delaying the project finish date.
This date is calculated based on activity relationships, schedule constraints, and resource availability.
Late Start
The latest possible date the remaining work for the activity can begin without delaying the project finish date.
This date is calculated based on activity relationships, schedule constraints, and resource availability.
Planned Finish
The date the activity is scheduled to finish if the activity has not started.
This date is calculated by the project scheduler but can be updated manually by the project manager. This date is not changed by the project scheduler after the activity has started.
Planned Start
The date the activity is scheduled to start.
This date the activity is scheduled to begin is calculated by the project scheduler but can be updated manually by the project manager. This date cannot be changed by the project scheduler after the activity has started.
Pre-Response Optimistic Finish
The calculated activity finish date that corresponds to the defined optimistic percentile on the risk analysis histogram.
Pre-Response Optimistic Start
The calculated activity start date that corresponds to the defined optimistic percentile on the risk analysis histogram.
Pre-Response P50 Finish
The calculated activity finish date that corresponds to the median percentile on the risk analysis histogram.
Pre-Response P50 Start
The calculated activity start date that corresponds to the median percentile on the risk analysis histogram.
Pre-Response Pessimistic Finish

Activities Overview
123
The calculated project finish date that corresponds to the defined pessimistic percentile.
Pre-Response Pessimistic Start
The calculated activity start date that corresponds to the defined pessimistic percentile on the risk analysis histogram.
Primary Constraint Date
The constraint date for the activity, if the activity has a constraint.
Remaining Early Finish
The date the remaining work for the activity is scheduled to finish.
If this activity is not started, this date is the planned finish. This date can be updated manually by the user, but it is overwritten when you schedule the project.
Remaining Early Start
The date the remaining work for the activity is scheduled to begin.
This date can be updated manually by the user. Before the activity is started, this date is the same as the planned start.
Remaining Late Finish
The latest possible date the activity must finish without delaying the project finish date.
This date is calculated by the project scheduler based on activity relationships, schedule constraints, and resource availability. When the activity is complete, this field is blank.
Remaining Late Start
The latest possible date the remaining work for the activity must begin without delaying the project finish date.
This date is calculated by the project scheduler based on activity relationship, schedule constraints, and resource availability.
Resume Date
The date when a suspended task or activity is resumed.
Secondary Constraint Date
The date for the activity's secondary constraint, if the activity has a secondary constraint.
Start
The current start date of the activity.
For started activities, this is the actual start date. For not started activities, this is the planned start date until the project is scheduled. When scheduled, the start date field is set to the remaining early start date.
Suspend Date
The date work has temporarily stopped on a given activity.
Duration Fields
Actual Duration

Schedule Management User Guide
124
The total working time from the activity Actual Start date to the Actual Finish date for completed activities, or the total working time from the Actual Start date to the data date for in-progress activities.
The actual working time is computed using the activity's calendar.
At Completion Duration
The total working time from the activity's current start date to the current finish date.
The current start date is the planned start date until the activity is started, and then it is the actual start date. The current finish date is the activity planned finish date while the activity is not started, the remaining finish date while the activity is in progress, and the actual finish date once the activity is completed. The total working time is calculated using the activity's calendar.
BL Actual Duration
In the baseline, the total working time from the activity BL Actual Start date to the BL Actual Finish date for completed activities, or the total working time from the BL Actual Start date to the data date for in-progress activities.
The actual working time is computed using the activity's calendar.
The following baselines have unique names and values for this field: Current, Original, Supplementary, User 1, User 2, User 3.
BL Free Float
The amount of time the activity in the baseline can be delayed before delaying the start date of any successor activity.
The following baselines have unique names and values for this field: Current, Original, Supplementary, User 1, User 2, User 3.
BL Planned Duration
The expected amount of time required to complete the activity in the baseline.
The planned working time is calculated using the activity's calendar. The duration is measured from the activity's planned start date to its planned finish date.
The following baselines have unique names and values for this field: Current, Original, Supplementary, User 1, User 2, User 3.
BL Remaining Duration
In the baseline, the total working time from the activity remaining start date to the remaining finish date.
The following baselines have unique names and values for this field: Current, Original, Supplementary, User 1, User 2, User 3.
BL Total Float
In the baseline, the amount of time the activity can be delayed before delaying the project finish date. Calculated as BL Late Start minus BL Early Start or as BL Late Finish minus BL Early Finish.
The following baselines have unique names and values for this field: Current, Original, Supplementary, User 1, User 2, User 3.

Activities Overview
125
BL Variance - Duration
The duration difference between the activity At Completion Duration and BL Duration.
The following baselines have unique names and values for this field: Current, Original, Supplementary, User 1, User 2, User 3.
BL Variance - Finish
The duration difference between the activity Finish date and BL Finish date.
The following baselines have unique names and values for this field: Current, Original, Supplementary, User 1, User 2, User 3.
BL Variance - Start
The duration difference between the activity Start date and BL Start date.
The following baselines have unique names and values for this field: Current, Original, Supplementary, User 1, User 2, User 3.
Free Float
The amount of time the activity can be delayed before delaying the start date of any successor activity.
Maximum Duration
The estimated maximum amount of time required to complete the activity. This field is used for three-point estimation to indicate activity uncertainty.
Minimum Duration
The estimated least amount of time required to complete the activity. This field is used for three-point estimation to indicate activity uncertainty.
Most Likely Duration
The estimated most likely amount of time required to complete the activity. This field is used for three-point estimation to indicate activity uncertainty.
Planned Duration
The expected amount of time required to complete an activity.
The planned working time is calculated using the activity's calendar. The duration is measured from the activity's planned start date to its planned finish date.
Remaining Duration
The total working time from the activity remaining start date to the remaining finish date.
Remaining Float
The amount of time remaining in which the activity can be delayed before delaying the project finish date. Calculated as Late Finish minus Remaining Finish.
Total Float
The amount of time the activity can be delayed before delaying the project finish date. Calculated as Late Start minus Early Start or as Late Finish minus Early Finish.

Schedule Management User Guide
126
General Fields
Activity Status
Determines the status of the activity. Valid values are Not Started, In Progress, and Completed.
BL Activity Status
Determines the status of the activity in the baseline. Valid values are Not Started, In Progress, and Completed.
The following baselines have unique names and values for this field: Current, Original, Supplementary, User 1, User 2, User 3.
Calendar
The calendar assigned to the activity.
Critical
Designates an activity as critical. An activity is defined as critical based upon the project settings configured for the project.
Duration Type
Determines how remaining duration, units, and units/time are calculated when you update an activity that has resources assigned. The valid values are Fixed Units/Time, Fixed Units, Fixed Duration & Units, and Fixed Duration & Units/Time.
Leveling Priority
Determines the priority of the activity when performing role leveling.
Longest Path
The sequence of project activities from start to finish where the Total Duration is longer than any other path.
Owner
The user responsible for the activity.
Primary Constraint
The main restriction impacting the activity start or finish date.
Scope Percent Complete Weight Method
The weight is calculated using cost, quantity, hours, or manually entered values. Cost, Quantity, and Hours are represented as n in the equations that follow.
The n weight is first calculated for each scope assignment in the work package as Revised n multiplied by the scope assignment Scope Percent Complete.
Scope Percent Complete is calculated as Installed Quantity divided by At Completion Quantity.
The sum of the scope assignments Revised n and the sum of the scope assignments n Weight for all scope assignments in the work package are then used to compute the work package Scope Percent Complete. This is calculated as the n Weight divided by Revised n.
Activities Overview
127
Completed Weight for the Manual option is calculated as Manual Weight multiplied by Scope Percent Complete.
Scope Percent Complete at the work package level for the manual option is calculated as the sum of Manual Completed Weight divided by the sum of Manual Weight for all scope assignments in the work package.
Secondary Constraint
The secondary restriction impacting the activity start or finish date.
Task Count
The number of tasks assigned to an activity.
This is a read-only field.
Task Status - Completion
The current status of the task assigned to the activity. Valid values are New, Pending, Committed, and Completed.
This is a read-only field.
Task Status - Dates
Indicates the overall date status of the activity's assigned tasks.
Outside Activity: A task's dates are outside of the activity's Start and Finish dates.
Inside Activity: All of the tasks' dates are within the activity's Start and Finish dates.
No Tasks Assigned: No tasks are assigned to the activity.
This is a read-only field.
Task Status - Indicator
Indicates whether any of the activity's assigned tasks have dates or completion statuses that requires attention.
This is a read-only field.
Type
The type of activity. Valid values are Activity Dependent, Resource Dependent, Level of Effort, Start Milestone, and Finish Milestone.
Uncertainty Distribution
The probability distribution that best models the three-point estimate durations. The valid values are Triangular and Uniform.
Percentage Fields
Activity Percent Complete
The percentage of the activity that has been completed.
This value is based on the formula for the selected Percent Complete Type. The Percent Complete Type can be Physical, Duration, Units, or Scope.
Physical: The user records the percent complete manually.
Duration: Calculated as (Planned Duration minus Remaining Duration) divided by Planned Duration, multiplied by 100.
Schedule Management User Guide
128
Units: Calculated as (Actual Labor Units plus Actual Nonlabor Units) divided by (Actual Labor Units plus Actual Nonlabor Units plus Remaining Labor Units plus Remaining Nonlabor Units), multiplied by 100.
Scope: Calculated as Installed Quantity divided by At Completion Quantity, multiplied by 100.
BL Activity Percent Complete
In the baseline, the activity percent complete, manually entered by a user.
The following baselines have unique names and values for this field: Current, Original, Supplementary, User 1, User 2, User 3.
BL Duration Percent Complete
The duration percent complete for the activity in the baseline. Calculated as Planned Duration minus Remaining Duration divided by Planned Duration multiplied by 100.
The following baselines have unique names and values for this field: Current, Original, Supplementary, User 1, User 2, User 3.
BL Percent Complete Type
Determines the way in which the application calculates the percent complete for the activity in the baseline. Valid values are Physical, Duration, and Units.
The following baselines have unique names and values for this field: Current, Original, Supplementary, User 1, User 2, User 3.
BL Units Percent Complete
The percent complete of units for all labor and nonlabor resources assigned to the activity in the baseline. Calculated as Actual Units divided by At Completion Units multiplied by 100.
The following baselines have unique names and values for this field: Current, Original, Supplementary, User 1, User 2, User 3.
Duration Percent Complete
The duration percent complete for the activity. Calculated as Planned Duration minus Remaining Duration divided by Planned Duration multiplied by 100.
Duration Percent of Planned
The actual duration percent of planned duration for the activity. Calculated as Actual Duration divided by Original BL Duration multiplied by 100.
Labor Units Percent Complete
The percent complete of units for all labor resources for the activity. Calculated as Actual Labor Units divided by At Completion Labor Units multiplied by 100.
Nonlabor Units Percent Complete
The percent complete of units for all nonlabor resources for the activity. Calculated as Actual Nonlabor Units divided by At Completion Nonlabor Units multiplied by 100.
Percent Complete Type
Determines the way in which the application calculates the percent complete for the activity.
Physical: Percent complete is manually entered by a user based on the amount of physical work completed on the activity.

Activities Overview
129
Duration: Percent complete is calculated from the actual and remaining duration.
Units: Percent complete is calculated from the actual and remaining units.
Scope: The percent complete for the activity is derived from the scope percent complete of the linked scope assignments.
Physical Percent Complete
The activity percent complete, manually entered by a user.
Pre-Response Criticality Index
During risk analysis, tasks can join or leave the critical path. The criticality index expresses as a percentage, how often a particular task was on the critical path during the analysis.
Schedule Percent Complete
The activity schedule percent complete, which specifies how much of the activity's project baseline duration is complete so far.
Calculated as Data Date minus Baseline Start divided by Baseline Finish minus Baseline Start.
If the data date is earlier than the baseline start, the schedule percent complete is 0. If the data date is later than the baseline finish, the schedule percent complete is 100. The schedule percent complete indicates how much of the activity duration should currently be complete, relative to the selected project baseline.
Scope Percent Complete
The percentage completion of the scope assignments linked to the activity.
Calculated as Installed Quantity divided by At Completion Quantity.
Units Percent Complete
The percent complete of units for all labor and nonlabor resources assigned to the activity. Calculated as Actual Units divided by At Completion Units multiplied by 100.
Unit Fields
Actual Labor Units
The number of units expended for all labor resources assigned to the activity.
Actual Nonlabor Units
The number of nonlabor units that have been expended on the activity.
At Completion Labor Units
The sum of the actual plus remaining units for all labor resources assigned to the activity.
It is the same as the planned labor units if the activity is not started, and the actual labor units after the activity is completed.
Calculated as Actual Labor Units plus Remaining Labor Units.
At Completion Nonlabor Units
The sum of the actual plus remaining units for all nonlabor resources assigned to the activity.
Schedule Management User Guide
130
It is the same as the planned nonlabor units if the activity is not started, and the actual nonlabor units after the activity is completed.
Calculated as Actual Nonlabor Units plus Remaining Nonlabor Units.
BL Actual Labor Units
The number of units expended for all labor resources assigned to the activity in the baseline.
The following baselines have unique names and values for this field: Current, Original, Supplementary, User 1, User 2, User 3.
BL Actual Nonlabor Units
The number of nonlabor units expended for all nonlabor resources assigned to the activity in the baseline.
The following baselines have unique names and values for this field: Current, Original, Supplementary, User 1, User 2, User 3.
BL Planned Labor Units
The planned units for all labor resources assigned to the activity in the baseline.
The following baselines have unique names and values for this field: Current, Original, Supplementary, User 1, User 2, User 3.
BL Planned Nonlabor Units
The planned units for all nonlabor resources assigned to the activity in the baseline.
The following baselines have unique names and values for this field: Current, Original, Supplementary, User 1, User 2, User 3.
BL Variance - Labor Units
The difference between the activity At Completion Labor Units and the BL Planned Labor Units.
The following baselines have unique names and values for this field: Current, Original, Supplementary, User 1, User 2, User 3.
BL Variance - Nonlabor Units
The difference between the activity At Completion Nonlabor Units and the BL Planned Nonlabor Units.
The following baselines have unique names and values for this field: Current, Original, Supplementary, User 1, User 2, User 3.
Planned Labor Units
The planned number of units for all labor resources assigned to the activity.
Planned Nonlabor Units
The planned units for all nonlabor resources assigned to the activities in the project.
Remaining Labor Units
The remaining units for all labor resources assigned to the activity.

Schedule Comparison Overview
131
The Remaining Labor Units reflect the work remaining to be done for the activity. Before the activity is started, the remaining units are the same as the planned units. After the activity is completed, the remaining units are zero.
Remaining Nonlabor Units
The remaining units for all nonlabor resources assigned to the activity.
The remaining units reflect the work remaining to be done for the activity. Before the activity is started, the remaining units are the same as the planned units. After the activity is completed, there are zero remaining units.
Schedule Comparison Overview
The Schedule Comparison page enables you to perform schedule variance analysis, a process of comparing one version of your project schedule to another and reviewing any changes between the two. As your project progresses, different stakeholders may add, delete, or edit information. Not only does this process modify the structure of the original project plan, but each update increases the potential for accidental errors or incorrect changes to be introduced into the schedule. Schedule variance analysis enables the schedule owner to ensure the validity and accuracy of all changes to the project schedule.
The two versions of the schedule being compared can be a baseline, a scenario, the current schedule, or a specific point in time since the project's creation. Typically, the first schedule chosen should be an original or earlier version of the project schedule. The second schedule should be a revised or later version. After running the comparison process, you can view variance values on items in the project that have been added, deleted, or edited. Items that may show variances include project fields, activities and activity details, relationships, resource assignments, and risks. The application uses the internal database ID when comparing two versions of an activity and its accompanying details. Even if the activity name or ID is changed on the Activities page, the application will compare the activity versions using the internal database ID. When calculating the variance between two project or two activity dates, the application uses the project calendar.
Schedule variance data is displayed in several areas of the page, each with a distinct purpose. In the table, you can compare original, revised, and variance values for the field columns you choose to display. In the detail windows, all available variances for a selected activity are broken down into categories. In the Gantt chart, activity bars for both schedules are displayed along a timeline. Finally, a Schedule Variance Analysis panel offers a comprehensive view of all items in the schedule that have been added, deleted, or changed. Some items provide editable thresholds so you can focus on more significant changes to the schedule.
Except for the configuration of view settings, all data on the Schedule Comparison page is read-only. The data that is visible depends on your user permissions. If you do not have the required permissions to view certain data, it will not be displayed.

Schedule Management User Guide
132
Working with the Schedule Comparison Page
Use the Schedule Comparison page to compare the variances between two different versions of a project schedule. Variance information is displayed in several areas of the page, each with a distinct configuration and purpose.
Table of Screen Highlights
Item Description
1
Comparison Toolbar: Select two versions of the schedule to compare. The first is typically an original or earlier version of the schedule. The second is typically a revised or later version of the schedule. For either schedule, you can select the current schedule, a baseline, a scenario, or a previous point in time since the project was created.
2 Activity Table: Each row in the table contains an activity from the two schedules being compared. Activities that do not exist in the original schedule but exist in the revised schedule are considered new and are displayed in green text with an asterisk. Activities that exist in the original schedule but do not exist in the revised schedule are considered deleted and are displayed with struck-through text.
Each column you choose to add to the table is separated into three values: the original value, the revised value, and the variance between the two. Variances for numerical fields show numerical values. If there is no variance, the cell value is zero. Variances for non-numerical fields show a check mark. If there is no variance, the cell is blank. Variance cell values for new or deleted activities are also blank.

Schedule Comparison Overview
133
Item Description
3 Gantt Chart: The Gantt chart shows activity bars for the two schedules being compared. Each bar represents an activity's start date, finish date, and duration. Relationship lines are shown for the revised schedule's activities.
4 Schedule Variance Analysis panel: Configure and display added, deleted, or changed values for all fields across the project. Categories in the panel include activities, activity-related objects, activity values, project values, and scheduler settings. The number displayed for each category in the panel represents the total number of items that meet that category's criteria. Drill down into a category to view data for individual items. Some items provide editable thresholds so you can focus on more significant changes to the schedule.
5 Detail Windows: View all modified field values for the selected activity. If a value in the schedule is not new, deleted, or changed, it will not appear in a detail window. Detail windows that contain updated values are displayed with an asterisk in the tab title.
The detail windows are separated into the following categories:
Entered Values: Values that are manually entered by the user.
Calculated Values: Values that are calculated based on changes made to entered values or by tools such as the scheduler or leveler.
Relationships: Predecessor and successor activity relationships.
Resource Assignments: Resources assigned to the selected activity.
Risk Mappings: Risks assigned to the selected activity.
Compare Two Versions of a Project Schedule
Compare an original or earlier version of your project schedule to a revised or later version. A schedule version can be a baseline, scenario, the current schedule, or a specific point in time since the project's creation.
The schedule comparison process calculates variances between the original and revised versions of your schedule and displays the variance data in several areas of the page, each with a distinct purpose. You can view variances in the table, detail windows, Gantt chart, and Schedule Variance Analysis panel.
All data on the Schedule Comparison page is read-only. The data that is visible depends on your user permissions. If you do not have the required permissions to view certain data, it will not be displayed.
To run a schedule comparison analysis:
1) Navigate to the Schedule Comparison page (see page 158).
2) In the Original list and Revised list, select two versions of the project schedule that you want to compare.
3) Select Compare to run the comparison analysis.

Schedule Management User Guide
134
Note: The selected schedules are not automatically scheduled before the comparison process is run. For the most accurate comparison of calculated values, it is recommended that you schedule both schedules before running the process.
4) After the schedule comparison process completes, the results are displayed on the following areas of the page:
Activity Table: Displays activities from both schedules, including added and deleted activities. Each column in the table contains original, revised, and variance values. Column options are configured in the page settings.
Gantt Chart: Displays activity bars for the two schedules being compared. Select the Gantt icon to display the chart.
Schedule Variance Analysis: Displays added, deleted, and changed values for all fields across the project. Drill down into a category to view data for individual items. Analysis options are configured in the page settings. Select the Schedule Variance Analysisicon to display the panel.
Detail Windows: Displays categorized variances for the selected activity. If a value in the schedule is not new, deleted, or changed, it will not appear in a detail window.
Note: For more information about each area, see Working with the Schedule Comparison Page (on page 132).
Tips
Use quick filters to refine the number of activities displayed on the page. In the Quick Filters list, select values on which to filter, and then select Apply. Quick filter selections apply to activities in either schedule. Apply multiple quick filters to further reduce how many activities are displayed. Clear a single filter to show more results. Select Clear to clear all filters.
Grouping options, configured in the page settings, apply to the revised schedule.
Alerts and Thresholds Overview
The Alerts feature enables you to create custom system and email notifications to alert users or user groups when a threshold is met. You can create alerts on the rolled up values of specific project-level fields for activities, projects, scope assignments, and work packages. The values for the threshold depend on the type of field you select. For example, if you chose Remaining Hours, the value will be in hours whereas if you chose Approved Budget, the value will be in the base currency. Threshold operators allow you to set options, such as whether the field should equal, not equal, or exceed the value.
Alerts and Thresholds Overview
135
Add an Alert
You can create project-level alerts to send a notification or email when a specific threshold is met.
To add an alert:
1) In the object selector, select a project.
2) In the sidebar, select Summary & Settings.
3) On the Summary & Settings menu, select Alerts.
4) On the Alerts page, select Add.
5) In the Select Project Field dialog box, select a project level field under Activity, Project, Scope Assignment, or Work Package, and then select Select.
6) Select Save.
7) In the Summary & Settings panel, select Close.
This setting is used in the following apps:
Cost and Funds
Schedule
Scope
Add a Threshold to an Alert
Add thresholds to alerts to define when notifications should be sent.
To add a threshold to an alert:
1) In the object selector, select a project.
2) In the sidebar, select Summary & Settings.
3) On the Summary & Settings menu, select Alerts.
4) On the Alerts page, select an alert.
5) In the Threshold and Alerts settings pane, under the Threshold section, configure the Operator and Value fields.
6) Select Save.
7) In the Summary & Settings panel, select Close.
This setting is used in the following apps:
Cost and Funds
Schedule
Scope

Schedule Management User Guide
136
Set an Alert Delivery Option
You can assign users and groups to alerts and specify the method of delivery of the message. You can also enter a custom message to the user or keep the default message. The message should be appropriate to all recipients. You cannot specify a different message for different recipients. You can, however, specify different methods of delivery for different users and groups.
When a threshold is met, only one alert will be sent. For example, if you set a threshold to alert users when the Proposed Budget of a project exceeds a certain amount, one alert will be sent. If the Proposed Budget value continues to increase, additional alerts will not be sent.
You do not need security privileges to subscribe or unsubscribe yourself to an alert, provided you have access to the project.
To add a threshold to an alert:
1) In the object selector, select a project.
2) In the sidebar, select Summary & Settings.
3) On the Summary & Settings menu, select Alerts.
4) In the Threshold and Alerts settings pane, under the Alerts section, select Assign and then select User or Group.
5) In the Select User or Select Group dialog box:
a. Enter part or all of the username, personal name, or group name into the Search field.
b. Select the name and select Select.
6) In the name row, select what type of message should be sent from the following options:
Notification: Sends a system notification to the user's Notifications panel.
Email: Sends an email to the user's email address stored in the LDAP.
7) (Optional) In the Message field, enter a message that will be sent to the selected users and groups.
8) Select Save.
9) In the Summary & Settings panel, select Close.
This setting is used in the following apps:
Cost and Funds
Schedule
Scope
Creating Alerts: Example
Imagine that you want to create an alert that sends you a system notification when a project cost threshold is met. As a cost manager overseeing multiple projects, you want to be alerted when the proposed budget of a project exceeds $800,000. You can configure an alert from the Alerts page of any project to send a custom message when the threshold is met.
Creating an Alert
1) In the object selector, select a project.
Monitor Service Status
137
2) In the sidebar, select Summary & Settings.
3) On the Summary & Settings menu, select Alerts.
4) On the Alerts page, select Add.
5) In the Select Project Field dialog box, select Project, select Proposed Budget, and then select Select.
6) Select Save.
Defining the Threshold
1) In the Threshold and Alerts settings pane, in the Threshold section, in the Operator list, select is greater than.
2) In the Value field, enter $800,000.
3) Select Save.
Setting Alert Delivery Options
1) In the Threshold and Alerts settings pane, in the Alert section, select Assign and then select User.
2) In the Select User dialog box:
a. Enter part or all of your username or personal name into the Search field.
b. Select your username and select Select.
3) In the username row, select the Notification check box.
4) In the Message field, enter The project proposed budget has exceeded $800,000.
5) Select Save.
Monitor Service Status
The Service Status tab on the Manage Services page provides a summary of the progress and completion of background services initiated by the users. It also provides the summary of recurring services configured to run automatically in the background. Background services include schedule, level, risk analysis, global change, set as current schedule, import, export, measures, recalculate cost, and integration service types. You can filter for a service type using the pre-defined filters in the filter panel or specify additional filtering criteria in the Filter By section. View a quick summary of the selected service type, context, start and end date, and the status in the grid. Use the preview panel to view additional details about the service, such as its frequency, or to terminate a running service.
To monitor the service status:
1) Navigate to the Manage Services page (see page 167).
2) Select the Service Status tab, and then select a service.
Schedule Management User Guide
138
Note: You can apply filters to reduce the number of services displayed on the page. For more information, see Manage Services Filters (on page 139).
Tips
To terminate a service while it is still running, select a service that is in progress, select Terminate in the preview panel, and then select Yes in the confirmation dialog box. You can terminate the following services: import, export, level, risk analysis, and schedule.
Application administrators can view all background services that all users have initiated. Users who are not application administrators can only view the background services they have initiated.
Many background services that are complete include a log you can view to see additional details about the service. Select View Log or View Details in the preview panel to view the details of the completed service.
Select Set up recurring schedule in the Schedule field in the preview panel to quickly set up a recurring service. Or, select Edit to edit the recurring service schedule if it was scheduled already.
Configure Recurring Services
Select the Recurring Services tab on the Manage Services page to configure recurring services that need to run at regular intervals for schedule, level, and risk analysis. You can configure schedule recurring services for projects or project collections and level and risk analysis services for projects. You can define the frequency of the service and view the run history and log on this page.
You can also view recurring service details for measures on the Recurring Services tab, including general service information and job history. The configuration of measure recurring services must be done in the workspace Measures dictionary.
To configure a recurring service:
1) Navigate to the Manage Services page (see page 167).
2) Select the Recurring Services tab.
3) Select Add.
4) In the Add Recurring Service wizard, complete the following steps:
In the General step, enter general information for the service type, such as name and frequency, including the day and time of recurrence, and then select Next.
In the Assign Projects step, select the projects or project collections on which the service is scheduled to run, and then select Next.
In the Options step:
For schedule service type, specify the Schedule Settings and Data Date options, and then select Add.
For level service type, specify the Schedule Settings, and then select Add.
Manage Services Filters
139
Note: The Options step is only available for schedule and level service types.
Tips
Use the preview panel to view the details for the selected recurring service. The following tabs are available:
General: Use this tab to view general information about the service, such as its schedule and recurrence settings.
Projects: Use this tab to view the project on which the service type is scheduled to run.
Service Details: Use this tab to view the service details, such as the Schedule Settingsand the Data Date of the scheduled service type.
Job History: Use this tab to view the run history and log of the service type.
To terminate a recurring service while it is still running, navigate to the Job History tab of the preview panel, select the Context menu for a service that is in progress, select Terminate, and then select Yes in the confirmation dialog box. You can terminate the following services: import, export, level, risk analysis, and schedule.
You can apply filters to reduce the number of recurring services displayed on the page. For more information, see Manage Services Filters (on page 139).
Manage Services Filters
Filter for a service type on the Manage Services page using the filter panel on the Service Status or Recurring Services tabs. You can use a pre-defined filter or specify additional filtering criteria in the Filter By section.
Filtering options for Service Status:
a) Pre-defined filters:
All: Shows all the available services. This is selected by default.
In Progress: Shows the services that are currently running.
Completed: Shows the services that are completed.
Global Change: Shows all global change services.
Export: Shows all project export services.
Import: Shows all import services for a project or other objects.
Integration: Provides a list of running, complete, or failed integration jobs for each integration type, such as P6 EPPM or Microsoft Project.
Level: Shows all level services.
Measures: Shows all measure services.
Recalculate Cost: Shows all recalculate cost services.
Risk Analysis: Shows all the risk analysis services.
Schedule: Shows all schedule services.
Set as Current Schedule: Shows all the set as current schedule services.
b) Filter By options:

Schedule Management User Guide
140
Project: Applies to the services in the project context and shows all projects to which the user has access.
Portfolio: Applies to the services that have the context field value of a portfolio and shows all portfolios to which the user has access.
Subject Area: Applies to imports. Shows all entities that support Microsoft Excel and P6 XML import.
Business Flow: Applies to integration jobs. Shows all business flows available for P6 EPPM or Microsoft Project integrations.
Integration: Applies to integration type services. Choose either P6 EPPM or Microsoft Project.
Filtering options for Recurring Services:
a) Pre-defined filters:
All: Shows all services that are configured to occur periodically. This is selected by default.
Enabled: Shows all the enabled services.
Schedule: Shows all schedule services.
Level: Shows all level services.
Risk Analysis: Shows all risk analysis services.
Measures: Shows all measure services.
b) Filter By options:
Project: Shows all projects to which the user has access.
Added By: Shows all users who added the services.
Configure View Settings
A view is a configured visual layout of a page.
The following section contains view options common throughout Oracle Primavera Cloud. Available options will vary by page.
Note: Certain page view settings are not maintained when the page is refreshed using the Safari browser.
Views Overview
A view is a configured visual layout of a page. Views allow you to customize content and layout choices such as column selection, filtering, grouping, and sorting. Some pages support additional view options, such as Gantt charts, Gantt bars, and spreadsheet rows. Selecting the best view for your needs can facilitate the process of managing data in Primavera Cloud and Primavera Professional.

Configure View Settings
141
Some pages support the ability to save named views. Named views can be saved as one of the three following types: personal, project, and workspace. Personal views are private and only accessible to the user who created them. Project views are saved at the project level and can be accessed by other members of the project. Likewise, workspace views are saved at the workspace level and are available to all users in the workspace. Available view types may vary by page. A fourth named view type, standard, can be found on the Activities page. Standard views are views that come with Primavera Cloud and contain pre-configured view options. They are read-only, but you can modify the view options and save the modifications as a new view.
On pages that support named views, you can create any number of views necessary to display your layouts. Personal, project, and workspace named views can be added, modified, and deleted in the Manage Views panel on a page. On pages without named views, available view options are configured in the Settings panel and are applied and saved to the page.
Available view options will vary by page. The title of the Settings icon may be specific to the grid or detail window that the icon pertains to. For example, the title of the icon for the Activities grid is Activities Grid Settings.
Add a View
Some pages support the ability to add and save named views. Named views can be configured and applied at any time. Add multiple views to display different layouts.
There are four types of named views:
Personal: Only accessible to the user who created them.
Project: Accessible by other members of the project.
Workspace: Accessible by all members of the workspace.
Standard: Accessible by all users. Only available on the Activities page. Cannot be added, edited, or deleted.
Notes:
Your security privileges determine your ability to create project and workspace views.
View options may vary per page.
To add a view:
1) Navigate to a page, and then select the Settings icon.
2) In the Manage Views panel, select a view type, select the Context menu, and then select Add.
3) Enter a name for the new view.
4) Select Save.
5) In the Manage Views panel, select Close.

Schedule Management User Guide
142
Tips
On the Context menu next to an existing view, you can cut, copy, and paste the view into any of the view types. Select Delete to delete the view. Select Set Active to apply the view to the page.
Apply a View
Select a view to apply its display settings to a page.
Note: You can only apply a view on pages that support named views.
To apply a view:
1) Navigate to a page, and then select the Settings icon.
2) In the Manage Views panel, select a view.
3) Select the Context menu, and then select Set Active.
Tips
For quicker selection, the View list displays a list of the five most recently applied views. Select a view to apply it.
Configure a Column
Configure columns to select and position the columns of data that appear on a page.
Note: View options may vary per page. The title of the Settings icon may be specific to the grid or detail window that the icon pertains to.
To configure a column:
1) Navigate to a page, and then select the Settings icon.
2) In the Manage Views or Settings panel, select the Columns tab.
3) In the Available Columns section, select columns and select Add Column to Selected Columns to add them to the Selected Columns section.
4) Use the up and down arrows to change the positioning of the columns in the Selected Columns section.
5) Apply the view:
In the Manage Views panel:
1. Select Save.
2. Select Close.
In the Settings panel:
Select Apply.
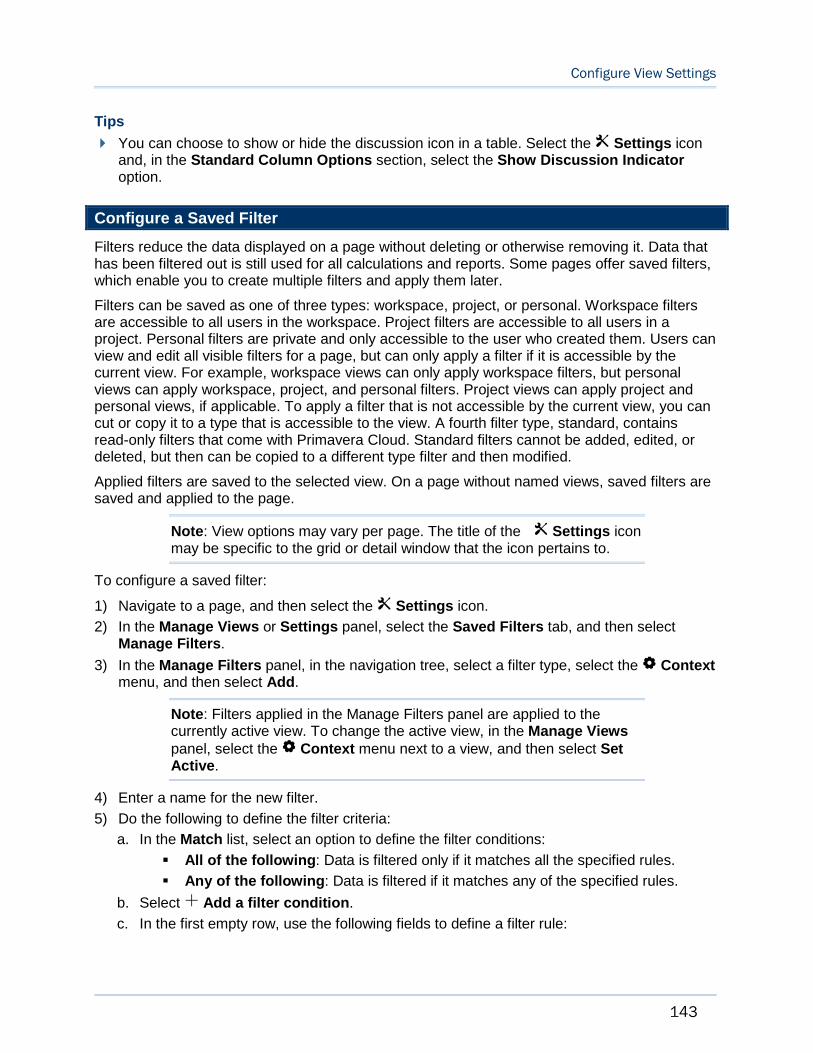
Configure View Settings
143
Tips
You can choose to show or hide the discussion icon in a table. Select the Settings icon and, in the Standard Column Options section, select the Show Discussion Indicatoroption.
Configure a Saved Filter
Filters reduce the data displayed on a page without deleting or otherwise removing it. Data that has been filtered out is still used for all calculations and reports. Some pages offer saved filters, which enable you to create multiple filters and apply them later.
Filters can be saved as one of three types: workspace, project, or personal. Workspace filters are accessible to all users in the workspace. Project filters are accessible to all users in a project. Personal filters are private and only accessible to the user who created them. Users can view and edit all visible filters for a page, but can only apply a filter if it is accessible by the current view. For example, workspace views can only apply workspace filters, but personal views can apply workspace, project, and personal filters. Project views can apply project and personal views, if applicable. To apply a filter that is not accessible by the current view, you can cut or copy it to a type that is accessible to the view. A fourth filter type, standard, contains read-only filters that come with Primavera Cloud. Standard filters cannot be added, edited, or deleted, but then can be copied to a different type filter and then modified.
Applied filters are saved to the selected view. On a page without named views, saved filters are saved and applied to the page.
Note: View options may vary per page. The title of the Settings icon may be specific to the grid or detail window that the icon pertains to.
To configure a saved filter:
1) Navigate to a page, and then select the Settings icon.
2) In the Manage Views or Settings panel, select the Saved Filters tab, and then select Manage Filters.
3) In the Manage Filters panel, in the navigation tree, select a filter type, select the Contextmenu, and then select Add.
Note: Filters applied in the Manage Filters panel are applied to the currently active view. To change the active view, in the Manage Viewspanel, select the Context menu next to a view, and then select Set Active.
4) Enter a name for the new filter.
5) Do the following to define the filter criteria:
a. In the Match list, select an option to define the filter conditions:
All of the following: Data is filtered only if it matches all the specified rules.
Any of the following: Data is filtered if it matches any of the specified rules.
b. Select Add a filter condition.
c. In the first empty row, use the following fields to define a filter rule:
Schedule Management User Guide
144
Field: The data field to which the rule is applied.
Operator: The comparison operation for the rule.
Value: The value against which the rule compares the data field.
d. Add rows for each filter rule you want to define.
e. Add filter groups to define additional sets of conditions.
6) Select Save.
Tips
On the page, select Filters to open the Manage Filters panel, apply a recently used filter, or clear filters currently in use.
For information on applying a saved filter, see Apply a Saved Filter (on page 144).
Apply a Saved Filter
Apply a filter to reduce the data displayed on a page without deleting or otherwise removing it. Data that has been filtered out is still used for all calculations and reports. Saved filters enable you to create multiple filters and apply them later.
Applied filters are saved to the selected view. On a page without named views, applied filters are saved to the page. For information on configuring a saved filter, see Configure a Saved Filter(on page 143).
Note: View options may vary per page. The title of the Settings icon may be specific to the grid or detail window that the icon pertains to.
To apply a saved filter:
1) Navigate to a page, and then select the Settings icon.
2) In the Manage Views or Settings panel, select the Saved Filters tab.
3) In the Manage Views panel, select the view to which you want to apply the filter.
Note: In the Settings panel, applied filters are saved directly to the page.
4) In the Match field, select an option to define the filter application conditions:
All applied: Data is filtered only if it matches all of the selected filters.
Any applied: Data is filtered if it matches any of the selected filters.
5) In the filters tree, select the filters to apply to the view.
Note: If you want to edit a filter before you apply it, select Manage Filters. Any filter in the Manage Filters panel can be edited, but you can only apply a filter if it is accessible by the currently active view. To change the active view, in the Manage Views panel, select the Context menu next to a view, and then select Set Active.
6) Apply the view:
In the Manage Views panel:
Configure View Settings
145
1. Select Save.
2. Select Close.
In the Settings panel:
Select Apply.
Tips
Some pages include several standard filters, preconfigured for your use. You can apply them to your view at any time.
On the page, select Filters to open the Manage Filters panel, apply a recently used filter, or clear filters currently in use.
When you apply a filter to a view, the filter icon changes to indicate that the data on the page has a filter applied.
Configure and Apply Filtering
On pages without saved filters, you can configure and apply filtering options as part of the current view. Filters reduce the data displayed on a page without deleting or otherwise removing it. Data that has been filtered out is still used for all calculations and reports.
On pages with named views, you can configure a different set of filtering options for each view. On pages without named views, filtering options are applied to the page.
Notes:
For information on configuring a saved filter, see Configure a Saved Filter (on page 143).
View options may vary per page.
To configure and apply filtering options:
1) Navigate to a page, and then select the Settings icon.
2) In the Manage Views or Settings panel, select the Filtering tab.
3) In the Manage Views panel, select the view to which you want to apply the filter.
Note: In the Settings panel, filtering options are configured and applied directly to the page.
4) Add a filter:
a. In the Match list, select an option to define the filter conditions:
All of the following: Data is filtered only if it matches all the specified rules.
Any of the following: Data is filtered if it matches any of the specified rules.
b. Select Add a filter condition.
c. In the first row, use the following fields to define a filter rule:
Field: The data field to which the rule is applied.
Operator: The comparison operation for the rule.
Value: The value against which the rule compares the data field.

Schedule Management User Guide
146
d. Add rows for each filter rule you want to define.
e. Add filter groups to define additional sets of conditions.
5) Apply the view:
In the Manage Views panel:
1. Select Save.
2. Select Close.
In the Settings panel:
Select Apply.
You can also configure and apply planning period options from the Filtering tab on the Work Plan, Hand-offs, and Task List pages in the Lean app.
To configure planning period filtering options:
1) In the Planning Period section, select one of the following:
All Weeks: Select to display tasks regardless of their start or finish dates.
Custom Rolling Time Frame: Select to filter tasks according to a planning period:
Weeks Before: Display tasks whose start or finish date occurs within the specified number of weeks before the current date.
Weeks After: Display tasks whose start or finish date occurs within the specified number of weeks after the current date.
Tips
Tasks that fall outside the planning period may still be visible if any of the following are true:
Any of its dates occur within the period.
Assigned activity dates occur within the period.
It is part of a hand-off chain that occurs within the period.
Configure Grouping Options
Configure grouping options for views to specify how data is grouped on a page.
Note: View options may vary per page. The title of the Settings icon may be specific to the grid or detail window that the icon pertains to.
To configure grouping:
1) Navigate to a page, and then select the Settings icon.
2) In the Manage Views or Settings panel, select the Grouping tab.
3) To configure the grouping options, select the Configure tab and do the following:
a. In the Group By section, select your grouping options:
Group By: Defines how data is grouped together on the page.
Sort Order: Defines how data is sorted within groupings.
Grouping Interval: Specifies an interval by which to separate your groupings. This field is only available when grouping by hierarchical fields.

Configure View Settings
147
Note: To add grouping rows, select the Context menu, and select Add Above or Add Below.
b. In the Band Options section, select view options:
Show field title: Displays the title of the field by which data is grouped in a band.
Show field rollups: Displays the calculated total of all data in a grouping band.
Hide if empty: Hides grouping bands that do not contain any data.
In the Display text in band using field, select an option to specify the text to appear in the band.
Note: This field only applies to group by fields that have both an ID and name.
4) To configure theme options, select the Theme tab and do the following:
a. In the Style list, select a grouping style.
b. In the Colors list, select a color theme.
5) Apply the view:
In the Manage Views panel:
1. Select Save.
2. Select Close.
In the Settings panel:
Select Apply.
Configure Sorting Options
Configure sorting options to specify how data is arranged on a page.
Note: View options may vary per page. The title of the Settings icon may be specific to the grid or detail window that the icon pertains to.
To configure sorting options on a page:
1) Navigate to a page, and then select the Settings icon.
2) In the Manage Views or Settings panel, select the Sorting tab.
3) Complete the following fields to define a sort order:
Sort By: Select a column by which to order the data.
Order: Select a direction in which to arrange the sorted data.
4) To define additional levels of sorting, select the Context menu, and then select Add Above or Add Below.
5) Apply the view:
In the Manage Views panel:
1. Select Save.
2. Select Close.

Schedule Management User Guide
148
In the Settings panel:
Select Apply.
Configure Gantt Bars
To visually distinguish the different bars displayed in the Gantt chart, you can configure bar settings for the Gantt chart view on a page.
You can configure Gantt bars on the following pages:
Activities
To configure Gantt chart bars:
1) Navigate to a page, and then select the Settings icon.
2) In the Manage Views or Settings panel, select the Bars tab.
3) To add a new bar, do the following:
a. Select Add, and then select Bar.
b. In the Bar Type list, select one of the available bar types.
c. In the Height list, specify a bar height.
d. In the Bar Color list, use the color picker to select a color for the bar. Optionally you can select a theme from the Theme list to apply a pre-configured color theme for all bars in the Gantt chart.
4) To configure options for the Current bar, select the bar and do the following:
a. To chart progress along the current bar, select Show Progress and do the following:
1. In the Progress Color list, use the color picker to select a color.
2. Select the Swap Colors icon to switch the positions of the bar and progress colors.
3. In the Progress Style list, select a progress style.
b. Select Show Critical to represent critical activities with a red bar instead of the color selected for the Current bar.
5) To configure labels for a bar, do the following:
a. Select the bar, select Add, and then select Label.
b. In the Label Field list, select a label for the bar.
c. In the Color list, use the color selector to select a font color.
d. In the Height list, select a font height.
6) Apply the view:
In the Manage Views panel:
1. Select Save.
2. Select Close.
In the Settings panel:
Select Apply.
Configure View Settings
149
Tips
Select the Summary Bar. Enable Show Expanded Summary Bars to show summary bars for each expanded and collapsed grouping band in the Gantt view. When this option is disabled, a summary bar will only be displayed if its corresponding grouping band is collapsed.
To preview how your Gantt chart bars will look, select Preview.
To reset your Gantt chart settings to the default configuration, select Reset.
Configure Gantt Chart Settings
Configure Gantt chart settings to determine how the chart will display.
You can configure Gantt chart settings on the following pages:
Activities
Task List
Note: View options may vary per page. The title of the Settings icon may be specific to the grid or detail window that the icon pertains to.
To configure Gantt chart settings:
1) Navigate to a page, and then select the Settings icon.
2) In the Manage Views or Settings panel, select the Gantt tab.
3) In the Show section, define your chart display options:
Data date line: Determines whether to show the project data date in the Gantt chart.
Relationship lines: Determines whether to show activity relationship lines in the Gantt chart.
Critical relationships: Determines whether to show relationships for activities that must start or finish on time to ensure the project completes on schedule.
Non-driving relationships: Determines whether to show relationships for activities not on the longest path to project completion.
Sight Lines: Determines whether to show lines of demarcation for the selected timescale.
Non-working time shading: Determines whether to gray out time periods in which no work will be performed, as defined by the project calendar.
Progress Spotlight: Enables the Progress Spotlight highlighting feature in the Gantt chart.
4) In the Timescale list, select a timescale for the Gantt chart:
Week/Day: The Gantt chart is divided into weeks which are then divided into days.
Month/Week: The Gantt chart is divided into months which are then divided into weeks.
Quarter/Month: The Gantt chart is divided into quarters which are then divided into months.
Year/Month: The Gantt chart is divided into years which are then divided into months.

Schedule Management User Guide
150
Year/Quarter: The Gantt chart is divided into years which are then divided into quarters.
5) Apply the view:
In the Manage Views panel:
1. Select Save.
2. Select Close.
In the Settings panel:
Select Apply.
Tips
You can also enable some or all of these options by selecting Gantt Settings under the Gantt chart.
Configure Network Settings
The Activity Network is a view that displays a full diagram of the activities and relationships in your project. Configure the number of activity-related fields to display in each activity box.
You can configure network settings on the following pages:
Activities
To configure Activity Network settings:
1) Navigate to a page, and then select the Settings icon.
2) In the Manage Views or Settings panel, select the view to configure.
3) Select the Network Setting tab.
4) In the Customize Activity Box Fields section, display up to eight additional fields across two columns. Select One field per line to limit the display to a single column of four fields.
5) In the Preview section, you can preview the display of an activity box based on your selected fields.
6) Apply the view:
In the Manage Views panel:
1. Select Save.
2. Select Close.
In the Settings panel:
Select Apply.
Configure Quick Filters
You can use quick filters to reduce the number of visible items on a page.

Configure View Settings
151
Notes:
View options may vary per page.
Due to slight differences in functionality, some pages in the application have their own set of help topics for quick filters.
To configure quick filters:
1) Navigate to a page, and then select the Settings icon.
2) In the Manage Views or Settings panel, select the Quick Filters tab.
3) In the Show section, select up to three quick filters to apply to the view.
4) Apply the view:
In the Manage Views panel:
1. Select Save.
2. Select Close.
In the Settings panel:
Select Apply.
Apply a Quick Filter
You can use quick filters to refine the data displayed on a page. In a filter list, select one or more values on which to filter. Use multiple quick filters to further reduce how much data is displayed. Clear a filter to show more results. Quick filter selections are not saved with the view.
Notes:
View options may vary per page.
Due to slight differences in functionality, some pages in the application have their own set of help topics for quick filters.
To apply a quick filter to a page:
1) In the Quick Filters list, select applicable filter values.
2) To remove a filter, expand a filter list, and select Clear Filter.
Configure Task Counts
Task counts display the number of tasks of a specific status that are assigned to an activity. Use the Task Counts tab to configure which task counts are displayed in the activity details popover. Activity details provide additional information about the activities in your project, including associated WBS, start and finish dates, and activity percent complete. All task counts are enabled by default. Task counts are for public tasks only and do not include private tasks.
You can configure task counts on the following pages:
Work Plan
Hand-offs
Task List

Schedule Management User Guide
152
Note: View options may vary per page. The title of the Settings icon may be specific to the grid or detail window that the icon pertains to.
To configure task counts:
1) Navigate to a page, and then select the Settings icon.
2) In the Manage Views or Settings panel, select the Task Counts tab.
3) Select the task counts that you want to display:
Total Tasks: The total number of tasks assigned to the activity.
Unplanned tasks: Tasks without a due date.
Planned tasks, not completed: Tasks with a due date or committed date that are not complete.
Planned tasks, completed: Tasks with a due date or committed date that are marked as complete.
Planned tasks outside of activity dates: Tasks with a due date before the activity start date or after the activity finish date.
Tasks hidden by filters and security: Tasks that are not visible due to the planning period, enabled task filters or quick filters, or due to the current user's security settings. Tasks with assigned activities that occur within the planning period dates are visible.
Note: The Unplanned tasks; Planned tasks, not completed; and Planned tasks, completed task counts contain the total number of tasks associated with the selected activity. The Planned tasks outside of activity dates and Tasks hidden by filters and security task counts contain tasks already counted in the other categories.
4) Apply the view:
In the Manage Views panel:
1. Select Save.
2. Select Close.
In the Settings panel:
Select Apply.
Configure a Timescale
Configure the timescale interval for a page.
Note: View options may vary per page. The title of the Settings icon may be specific to the grid or detail window that the icon pertains to.
To configure a timescale:
1) Navigate to a page, and then select the Settings icon.
2) On the Manage Views or Settings panel, select Timescale.

Configure View Settings
153
3) In the Timescale Standards Settings section, select a timescale interval.
4) Apply the view:
In the Manage Views panel:
1. Select Save.
2. Select Close.
In the Settings panel:
Select Apply.
Tips
You can also change the timescale interval by right-clicking on the timescale on a page and selecting an option.
Configure Spreadsheet Rows
Configure spreadsheet rows to show summary and spread values for each item in a table. For example, a resource spreadsheet lists all of the available resources in a project. Each resource may display separate rows for demand hours, commitment hours, demand costs, and commitment costs. Each field row can show values across a timescale and rolled up to a summary level.
Note: View options may vary per page. The title of the Settings icon may be specific to the grid or detail window that the icon pertains to.
To configure a spreadsheet row:
1) Navigate to a page, and then select the Settings icon.
2) In the Manage Views or Settings panel, select the Spreadsheet Rows tab.
3) In the Available Spreadsheet Rows section, select rows and select Add Row to Selected Rows to add them to the Selected Spreadsheet Rows section.
4) Use the up and down arrows to change the positioning of the columns in the Selected Spreadsheet Rows section.
5) Apply the view:
In the Manage Views panel:
1. Select Save.
2. Select Close.
In the Settings panel:
Select Apply.
Configure Currency Settings
Configure the currency display settings on a page. Currency settings are user-specific and are saved with the view.
Schedule Management User Guide
154
Note: View options may vary per page. The title of the Settings icon may be specific to the grid or detail window that the icon pertains to.
To configure a currency view:
1) Navigate to a page, and then select the Settings icon.
2) On the Manage Views or Settings panel, select Currency.
3) Select the currency settings you want to display:
Select Show currency symbols to display the symbol of the currency.
Note: You must also enable Show currency symbol in Preferences to view it on a page.
Select Show currency banner to display the chosen currency above the table on the page.
4) In the View Costs in section, select the currency to view on the page.
5) Apply the view:
In the Manage Views panel:
1. Select Save.
2. Select Close.
In the Settings panel:
Select Apply.
Configure Formatting
Configure the formatting on a page.
The Work Plan page in the Lean app contains additional formatting options.
Note: View options may vary per page. The title of the Settings icon may be specific to the grid or detail window that the icon pertains to.
To configure the formatting:
1) Navigate to a page, and then select the Settings icon.
2) In the Manage Views or Settings panel, select the Formatting tab.
3) In the Read-only Styling section, select Highlight Read-only cells to highlight read-only cells on the page.
4) (Work Plan page only) In the Band Options section, select Hide if empty on Hopper orHide if empty on Planning Board to hide empty grouping bands in the hopper or planning board for activities that have not been assigned any tasks.
5) (Work Plan page only) In the Planning Board Options section:
Select Show Task Icons to display icons on task cards on the planning board.
Select Wrap Text on Tasks to wrap long task names to the next line of a task card.
Select Show Info Bar to display details for the selected task or activity below the planning board.

Configure View Settings
155
6) Apply the view:
In the Manage Views panel:
1. Select Save.
2. Select Close.
In the Settings panel:
Select Apply.


157
Appendix of Referenced Navigation Steps
Navigate to the WBS page
In Primavera Cloud:
a) In the object selector, select a project.
b) In the sidebar, hover over Schedule or Scope, and select WBS.
In Primavera Professional:
a) On the File menu, select Open.
b) In the Open dialog box, select the Projects tab, select a project, and then select Open.
c) On the Project menu, select WBS.
Navigate to the Activities page
In Primavera Cloud:
a) In the object selector, select a project, program, or project collection.
b) In the sidebar, hover over Schedule, and select Activities.
In Primavera Professional:
a) On the File menu, select Open.
b) In the Open dialog box, select the Projects or Programs tab, select a project or program, and then select Open.
c) On the Project or Program menu, select Activities.
Navigate to the project Activities page
In Primavera Cloud:
a) In the object selector, select a project.
b) In the sidebar, hover over Schedule, and select Activities.
In Primavera Professional:
a) On the File menu, select Open.
b) In the Open dialog box, select the Projects tab, select a project, and then select Open.
c) On the Project menu, select Activities.
Navigate to the project or project collections Activities page
In Primavera Cloud:
a) In the object selector, select a project or project collection.
b) In the sidebar, hover over Schedule, and select Activities.

Schedule Management User Guide
158
In Primavera Professional:
a) On the File menu, select Open.
b) In the Open dialog box, select the Projects tab, select a project, and then select Open.
c) On the Project menu, select Activities.
Navigate to the Baselines page
In Primavera Cloud:
a) In the object selector, select a project.
b) In the sidebar, hover over Scope or Schedule, and select Baselines.
In Primavera Professional:
a) On the File menu, select Open.
b) In the Open dialog box, select the Projects tab, select a project, and then select Open.
c) On the Project menu, select Baselines.
Navigate to the Schedule Comparison page
In Primavera Cloud:
a) In the object selector, select a project.
b) In the sidebar, hover over Schedule, and select Schedule Comparison.
In Primavera Professional:
a) On the File menu, select Open.
b) In the Open dialog box, select the Projects tab, select a project, and then select Open.
c) On the Project menu, select Schedule Comparison.
Navigate to the workspace resource page
In Primavera Cloud:
a) In the object selector, select a workspace.
b) In the sidebar, hover over Resources, and select Resource List.
In Primavera Professional:
a) On the File menu, select Open.
b) In the Open dialog box, select the Projects or Programs tab, select a project or program, and then select Open.
c) On the Workspace menu, select Resources.
Navigate to the project resources page
In Primavera Cloud:
a) In the object selector, select a project.
Appendix of Referenced Navigation Steps
159
b) In the sidebar, hover over Resources, and select Resource List.
In Primavera Professional:
a) On the File menu, select Open.
b) In the Open dialog box, select the Projects tab, select a project, and then select Open.
c) On the Project menu, select Resources.
Navigate to the workspace or project resources page
In Primavera Cloud:
a) In the object selector, select a workspace or project.
b) In the sidebar, hover over Resources, and select Resource List.
In Primavera Professional:
a) On the File menu, select Open.
b) In the Open dialog box, select the Projects or Programs tab, select a project or program, and then select Open.
c) On the Workspace or Project menu, select Resources.
Navigate to the workspace roles page
In Primavera Cloud:
a) In the object selector, select a workspace.
b) In the sidebar, hover over Resources, and select Role List.
In Primavera Professional:
a) On the File menu, select Open.
b) In the Open dialog box, select the Projects or Programs tab, select a project or program, and then select Open.
c) On the Workspace menu, select Roles.
Navigate to the project roles page
In Primavera Cloud:
a) In the object selector, select a project.
b) In the sidebar, hover over Resources, and select Role List.
In Primavera Professional:
a) On the File menu, select Open.
b) In the Open dialog box, select the Projects tab, select a project, and then select Open.
c) On the Project menu, select Roles.
Schedule Management User Guide
160
Navigate to the workspace or project roles page
In Primavera Cloud:
a) In the object selector, select a workspace or project.
b) In the sidebar, hover over Resources, and select Role List.
In Primavera Professional:
a) On the File menu, select Open.
b) In the Open dialog box, select the Projects or Programs tab, select a project or program, and then select Open.
c) On the Workspace or Project menu, select Roles.
Navigate to the workspace resource assignments page
In Primavera Cloud:
a) In the object selector, select a workspace.
b) In the sidebar, hover over Resources, and select Assignment List.
In Primavera Professional:
a) On the File menu, select Open.
b) In the Open dialog box, select the Projects or Programs tab, select a project or program, and then select Open.
c) On the Workspace menu, select Resource Assignments.
Navigate to the project, program, or project collection resource assignments page
In Primavera Cloud:
a) In the object selector, select a project, program, or project collection.
b) In the sidebar, hover over Resources or Schedule, and select Assignment List.
In Primavera Professional:
a) On the File menu, select Open.
b) In the Open dialog box, select the Projects or Programs tab, select a project or program, and then select Open.
c) On the Project or Program menu, select Resource Assignments.
Navigate to the workspace resource analysis page
In Primavera Cloud:
a) In the object selector, select a workspace.
b) In the sidebar, hover over Resources, and select Analysis.
In Primavera Professional:
a) On the File menu, select Open.

Appendix of Referenced Navigation Steps
161
b) In the Open dialog box, select the Projects or Programs tab, select a project or program, and then select Open.
c) In the Workspace menu, select Resource Analysis.
Navigate to the project, program, or project collection resource analysis page
In Primavera Cloud:
a) In the object selector, select a project, program, or project collection.
b) In the sidebar, hover over Resources, and select Analysis.
In Primavera Professional:
a) On the File menu, select Open.
b) In the Open dialog box, select the Projects or Programs tab, select a project or program, and then select Open.
c) On the Project or Program menu, select Resource Analysis.
Navigate to the files page
In Primavera Cloud:
a) In the object selector, select a project, portfolio, program, or idea.
b) In the sidebar, hover over Files, and select File List.
In Primavera Professional:
a) On the File menu, select Open.
b) In the Open dialog box, select the Projects or Programs tab, select a project or program, and then select Open.
c) On the Project or Program menu, select Files.
Navigate to the project files page
In Primavera Cloud:
a) In the object selector, select a project.
b) In the sidebar, hover over Files, and select File List.
In Primavera Professional:
a) On the File menu, select Open.
b) In the Open dialog box, select the Projects tab, select a project, and then select Open.
c) On the Project menu, select Files.
Navigate to the project or portfolio files page
In Primavera Cloud:
a) In the object selector, select a project or portfolio.
Schedule Management User Guide
162
b) In the sidebar, hover over Files, and select File List.
In Primavera Professional:
a) On the File menu, select Open.
b) In the Open dialog box, select the Projects tab, select a project, and then select Open.
c) On the Project menu, select Files.
Navigate to the project Details page
In Primavera Cloud:
a) In the object selector, select a project.
b) In the sidebar, select Summary & Settings.
c) On the Summary & Settings menu, select Details.
In Primavera Professional:
a) On the File menu, select Open.
b) In the Open dialog box, select the Projects tab, select a project, and then select Open.
c) On the Project menu, select Details.
Navigate to the project codes page
In Primavera Cloud:
a) In the object selector, select a project.
b) In the sidebar, select Summary & Settings.
c) On the Summary & Settings menu, select Codes.
In Primavera Professional:
a) On the File menu, select Open.
b) In the Open dialog box, select the Projects tab, select a project, and then select Open.
c) On the Project menu, select Project Codes.
Navigate to the project settings page
In Primavera Cloud:
a) In the object selector, select a project.
b) In the sidebar, select Summary & Settings.
c) On the Summary & Settings menu, select Settings.
In Primavera Professional:
a) On the File menu, select Open.
b) In the Open dialog box, select the Projects tab, select a project, and then select Open.
c) On the Project menu, select Project Settings.
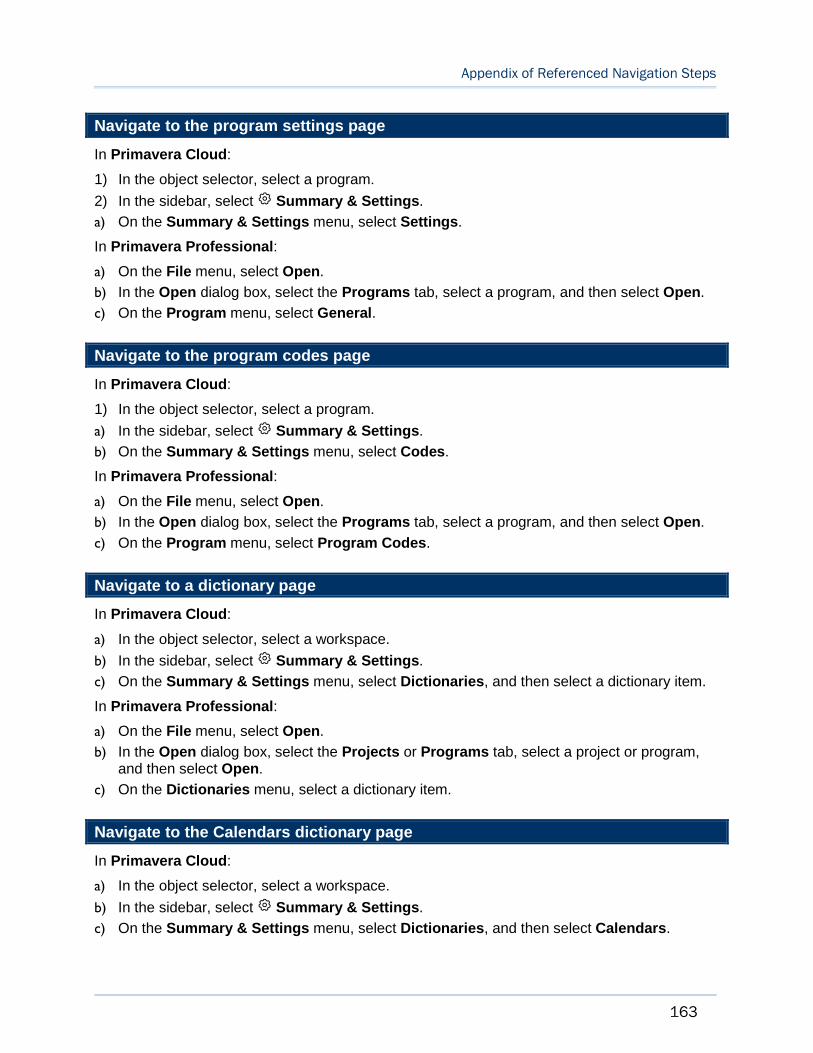
Appendix of Referenced Navigation Steps
163
Navigate to the program settings page
In Primavera Cloud:
1) In the object selector, select a program.
2) In the sidebar, select Summary & Settings.
a) On the Summary & Settings menu, select Settings.
In Primavera Professional:
a) On the File menu, select Open.
b) In the Open dialog box, select the Programs tab, select a program, and then select Open.
c) On the Program menu, select General.
Navigate to the program codes page
In Primavera Cloud:
1) In the object selector, select a program.
a) In the sidebar, select Summary & Settings.
b) On the Summary & Settings menu, select Codes.
In Primavera Professional:
a) On the File menu, select Open.
b) In the Open dialog box, select the Programs tab, select a program, and then select Open.
c) On the Program menu, select Program Codes.
Navigate to a dictionary page
In Primavera Cloud:
a) In the object selector, select a workspace.
b) In the sidebar, select Summary & Settings.
c) On the Summary & Settings menu, select Dictionaries, and then select a dictionary item.
In Primavera Professional:
a) On the File menu, select Open.
b) In the Open dialog box, select the Projects or Programs tab, select a project or program, and then select Open.
c) On the Dictionaries menu, select a dictionary item.
Navigate to the Calendars dictionary page
In Primavera Cloud:
a) In the object selector, select a workspace.
b) In the sidebar, select Summary & Settings.
c) On the Summary & Settings menu, select Dictionaries, and then select Calendars.

Schedule Management User Guide
164
In Primavera Professional:
a) On the File menu, select Open.
b) In the Open dialog box, select the Projects or Programs tab, select a project or program, and then select Open.
c) On the Dictionaries menu, select Calendars.
Navigate to the Codes dictionary page
In Primavera Cloud:
a) In the object selector, select a workspace.
b) In the sidebar, select Summary & Settings.
c) On the Summary & Settings menu, select Dictionaries, and then select Codes.
In Primavera Professional:
a) On the File menu, select Open.
b) In the Open dialog box, select the Projects or Programs tab, select a project or program, and then select Open.
c) On the Dictionaries menu, select Codes.
Navigate to the Curve Profiles dictionary page
In Primavera Cloud:
1) In the object selector, select a workspace.
2) In the sidebar, select Summary & Settings.
a) On the Summary & Settings menu, select Dictionaries, and then select Curve Profiles.
In Primavera Professional:
a) On the File menu, select Open.
b) In the Open dialog box, select the Projects or Programs tab, select a project or program, and then select Open.
c) On the Dictionaries menu, select Curve Profiles.
Navigate to the Units of Measure dictionary page
In Primavera Cloud:
a) In the object selector, select a workspace.
b) In the sidebar, select Summary & Settings.
c) On the Summary & Settings menu, select Dictionaries, and then select Units of Measure.
In Primavera Professional:
a) On the File menu, select Open.
b) In the Open dialog box, select the Projects or Programs tab, select a project or program, and then select Open.
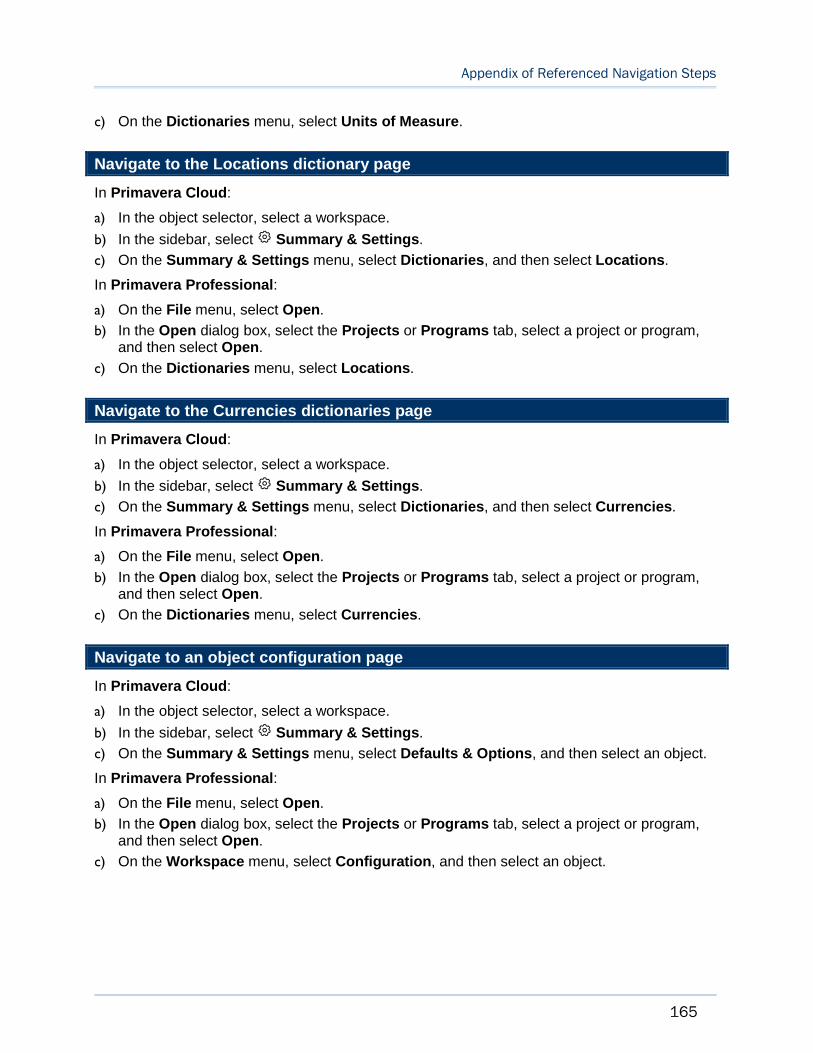
Appendix of Referenced Navigation Steps
165
c) On the Dictionaries menu, select Units of Measure.
Navigate to the Locations dictionary page
In Primavera Cloud:
a) In the object selector, select a workspace.
b) In the sidebar, select Summary & Settings.
c) On the Summary & Settings menu, select Dictionaries, and then select Locations.
In Primavera Professional:
a) On the File menu, select Open.
b) In the Open dialog box, select the Projects or Programs tab, select a project or program, and then select Open.
c) On the Dictionaries menu, select Locations.
Navigate to the Currencies dictionaries page
In Primavera Cloud:
a) In the object selector, select a workspace.
b) In the sidebar, select Summary & Settings.
c) On the Summary & Settings menu, select Dictionaries, and then select Currencies.
In Primavera Professional:
a) On the File menu, select Open.
b) In the Open dialog box, select the Projects or Programs tab, select a project or program, and then select Open.
c) On the Dictionaries menu, select Currencies.
Navigate to an object configuration page
In Primavera Cloud:
a) In the object selector, select a workspace.
b) In the sidebar, select Summary & Settings.
c) On the Summary & Settings menu, select Defaults & Options, and then select an object.
In Primavera Professional:
a) On the File menu, select Open.
b) In the Open dialog box, select the Projects or Programs tab, select a project or program, and then select Open.
c) On the Workspace menu, select Configuration, and then select an object.

Schedule Management User Guide
166
Navigate to the Activity configuration page
In Primavera Cloud:
a) In the object selector, select a workspace.
b) In the sidebar, select Summary & Settings.
c) On the Summary & Settings menu, select Defaults & Options, and then select Activity.
In Primavera Professional:
a) On the File menu, select Open.
b) In the Open dialog box, select the Projects or Programs tab, select a project or program, and then select Open.
c) On the Workspace menu, select Configuration, and then select Activity.
Navigate to the Project configuration page
In Primavera Cloud:
a) In the object selector, select a workspace.
b) In the sidebar, select Summary & Settings.
c) On the Summary & Settings menu, select Defaults & Options, and then select Project.
In Primavera Professional:
a) On the File menu, select Open.
b) In the Open dialog box, select the Projects or Programs tab, select a project or program, and then select Open.
c) On the Workspace menu, select Configuration, and then select Project.
Navigate to the Program configuration page
In Primavera Cloud:
a) In the object selector, select a workspace.
b) In the sidebar, select Summary & Settings.
c) On the Summary & Settings menu, select Defaults & Options, and then select Program.
In Primavera Professional:
a) On the File menu, select Open.
b) In the Open dialog box, select the Projects or Programs tab, select a project or program, and then select Open.
c) On the Workspace menu, select Configuration, and then select Program.
Navigate to the Resource Assignment configuration page
In Primavera Cloud:
a) In the object selector, select a workspace.
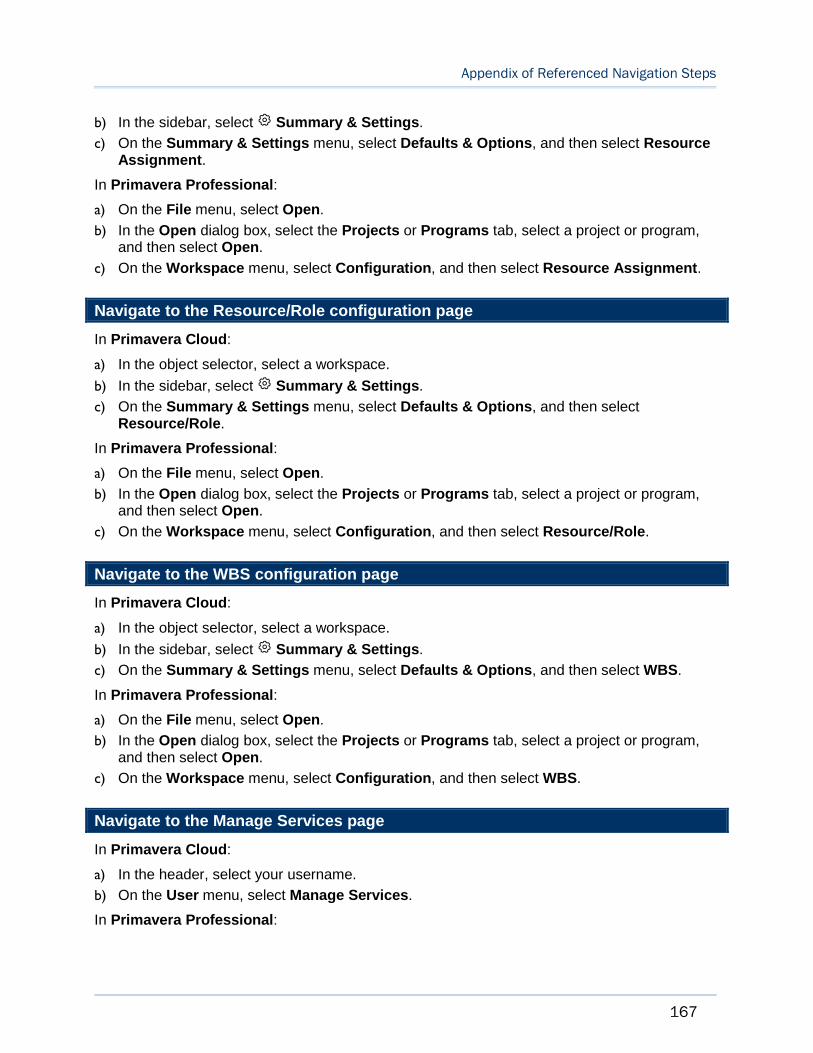
Appendix of Referenced Navigation Steps
167
b) In the sidebar, select Summary & Settings.
c) On the Summary & Settings menu, select Defaults & Options, and then select Resource Assignment.
In Primavera Professional:
a) On the File menu, select Open.
b) In the Open dialog box, select the Projects or Programs tab, select a project or program, and then select Open.
c) On the Workspace menu, select Configuration, and then select Resource Assignment.
Navigate to the Resource/Role configuration page
In Primavera Cloud:
a) In the object selector, select a workspace.
b) In the sidebar, select Summary & Settings.
c) On the Summary & Settings menu, select Defaults & Options, and then select Resource/Role.
In Primavera Professional:
a) On the File menu, select Open.
b) In the Open dialog box, select the Projects or Programs tab, select a project or program, and then select Open.
c) On the Workspace menu, select Configuration, and then select Resource/Role.
Navigate to the WBS configuration page
In Primavera Cloud:
a) In the object selector, select a workspace.
b) In the sidebar, select Summary & Settings.
c) On the Summary & Settings menu, select Defaults & Options, and then select WBS.
In Primavera Professional:
a) On the File menu, select Open.
b) In the Open dialog box, select the Projects or Programs tab, select a project or program, and then select Open.
c) On the Workspace menu, select Configuration, and then select WBS.
Navigate to the Manage Services page
In Primavera Cloud:
a) In the header, select your username.
b) On the User menu, select Manage Services.
In Primavera Professional:

Schedule Management User Guide
168
On the User menu, select Manage Services.
Navigate to the Preferences page
In Primavera Cloud:
a) In the header, select your username.
b) On the User menu, select Preferences.
In Primavera Professional:
On the User menu, select Preferences.

169
Oracle Primavera Cloud Schedule Management User Guide
Copyright © 2014, 2020, Oracle and/or its affiliates. All rights reserved. Oracle and Java are registered trademarks of Oracle and/or its affiliates. Other names may be trademarks of their respective owners.
Intel and Intel Xeon are trademarks or registered trademarks of Intel Corporation. All SPARC trademarks are used under license and are trademarks or registered trademarks of SPARC International, Inc. AMD, Opteron, the AMD logo, and the AMD Opteron logo are trademarks or registered trademarks of Advanced Micro Devices. UNIX is a registered trademark of The Open Group.
This software and related documentation are provided under a license agreement containing restrictions on use and disclosure and are protected by intellectual property laws. Except as expressly permitted in your license agreement or allowed by law, you may not use, copy, reproduce, translate, broadcast, modify, license, transmit, distribute, exhibit, perform, publish or display any part, in any form, or by any means. Reverse engineering, disassembly, or decompilation of this software, unless required by law for interoperability, is prohibited.
The information contained herein is subject to change without notice and is not warranted to be error-free. If you find any errors, please report them to us in writing.
If this is software or related documentation that is delivered to the U.S. Government or anyone licensing it on behalf of the U.S. Government, the following notice is applicable:
U.S. GOVERNMENT END USERS: Oracle programs, including any operating system, integrated software, any programs installed on the hardware, and/or documentation, delivered to U.S. Government end users are “commercial computer software" pursuant to the applicable Federal Acquisition Regulation and agency-specific supplemental regulations. As such, use, duplication, disclosure, modification, and adaptation of the programs, including any operating system, integrated software, any programs installed on the hardware, and/or documentation, shall be subject to license terms and license restrictions applicable to the programs. No other rights are granted to the U.S. Government.
This software or hardware is developed for general use in a variety of information management applications. It is not developed or intended for use in any inherently dangerous applications, including applications that may create a risk of personal injury. If you use this software or hardware in dangerous applications, then you shall be responsible to take all appropriate failsafe, backup, redundancy, and other measures to ensure its safe use. Oracle Corporation and its affiliates disclaim any liability for any damages caused by use of this software or hardware in dangerous applications.
This software or hardware and documentation may provide access to or information on content, products and services from third-parties. Oracle Corporation and its affiliates are not responsible for and expressly disclaim all warranties of any kind with respect to third-party content, products, and services. Oracle Corporation and its affiliates will not be responsible for any loss, costs, or damages incurred due to your access to or use of third-party content, products, or services.
Copyright