schoolnet instructional management suite - … instructional management suite . released march 4,...
TRANSCRIPT

Assessment Admin
Schoolnet Instructional Management Suite

Released March 4, 2013
Document Owner: Curriculum
This edition applies to Release 14.3 of the Schoolnet software and to all subsequent releases and modifications until otherwise indicated in new editions or updates.
The data and names used to illustrate the reports and screen images may include names of individuals, companies, brands, and products. All of the data and names are fictitious; any similarities to actual names are entirely coincidental.
Schoolnet is a trademark, in the U.S. and/or other countries, of Pearson Education, Inc. or its affiliate(s).
Copyright © 2013 Pearson Education, Inc. or its affiliates. All rights reserved. All trademarks are either owned or licensed by Pearson Education, Inc. or its affiliates. Other brands and names are the property of their respective owners.
Please send comments, suggestions, or requests for this document to [email protected]. Your feedback is appreciated.
Assessment Admin
Contents 3
Contents Assessment Admin ................................................................................................. 5
Sign in to Access Schoolnet through ISEE Portal .................................................... 6
Assessment Admin Dashboard ............................................................................... 7
Planning ................................................................................................................. 8
Assessment Naming Conventions .......................................................................... 8
Test Items .............................................................................................................. 9
Question Types ................................................................................................... 9
Item Alerts ......................................................................................................... 9
Creating a Multiple Choice Question for the Item Bank ............................................. 9
Sharing Items .................................................................................................. 11
Associating Passages ......................................................................................... 12
Creating a Rubric .............................................................................................. 13
Including Open Response Questions..................................................................... 14
Including Gridded Response Questions ................................................................. 15
Using the Text Editor ............................................................................................ 16
Adding Math Equations to Test Items ................................................................... 18
Add Images to Test Items .................................................................................. 18
Best Practices for Test Items on Online Tests ........................................................ 19
Submitting an Item for Approval .......................................................................... 20
Locating Test Items, Passages and Rubrics .......................................................... 21
Understanding Test Stages .................................................................................. 21
Creating a Test ..................................................................................................... 22
Option 1A: Create an Express Test ...................................................................... 23
Option 2A: Create a Test Manually ....................................................................... 24
Additional Test Settings: Reorder Questions, Numbering, and More .......................... 28
Locate an Existing Test ...................................................................................... 29
Make a Test Public ............................................................................................ 29
Editing in the “Ready to Schedule” Stage .............................................................. 29
Scheduling a Test ................................................................................................. 29
Printing Tests ....................................................................................................... 32
Access Print Options .......................................................................................... 32
What You Can Print ........................................................................................... 32
Printing Paper Answer Sheets ............................................................................. 34
Printer Settings ................................................................................................. 35

Assessment Admin
Contents 4
Administering a Paper Test .................................................................................. 36
Administering an Online Test ............................................................................... 36
Test Day Checklist............................................................................................. 38
Troubleshooting Internet Connectivity .................................................................. 38
Monitoring Test Progress Using the Proctor Dashboard ....................................... 39
Using the Proctor Dashboard .............................................................................. 39
Using the Score Page to Clear Responses or Reset Access ....................................... 40
Monitoring Test Progress as an Administrator ........................................................ 41
To monitor data collection: ................................................................................. 41
Scanning Test Results .......................................................................................... 42
Preparing for Scanning....................................................................................... 42
Loading Documents for Scantron and Paper Scanners ............................................ 43
Scanning Documents ......................................................................................... 43
Correcting Scanning Issues ................................................................................ 44
Uploading Scanned Answers to Schoolnet ............................................................. 45
Online Scoring ...................................................................................................... 45
Scoring as a Test Administrator ........................................................................... 45
Online Scoring as a Teacher ............................................................................... 46
Force Scoring for Pending Online Tests ................................................................. 46
How Teachers Access Test Features in Assessment Admin .................................. 47
How do Students Login? ....................................................................................... 48
Accessing Student Login Information ................................................................... 48
Resetting a Student’s Password ........................................................................... 48
Where Can You Find Benchmark Results? ............................................................ 50
Assessment Admin
Assessment Admin 5
Assessment Admin Use the Assessment Admin module to create and administer assessments at all levels. Add test items, rubrics, and passages to an Item Bank to share, or reserve for use with specific tests. Administer tests using plain-paper answer sheets, off-the-shelf OMR scan forms with designated scanners, student response ‘clicker’ systems, iPads or online – or any of these options in combination.
Use this document to learn processes and best practices for creating, scheduling, and administering benchmark tests, including:
• Creating multiple types of test items (e.g., true/false, multiple choice, open response, and gridded response)
• Understanding the different stages of building a benchmark test:
o Creating, modifying, and deleting tests
o Scheduling tests
o Administering tests
o Scoring open response question online using Schoolnet Assessment Admin
Note: The term “benchmark” is used as a generic term for a short-term assessment administered via Assessment Admin. Your terminology may vary (e.g., interim assessment, checkpoint).
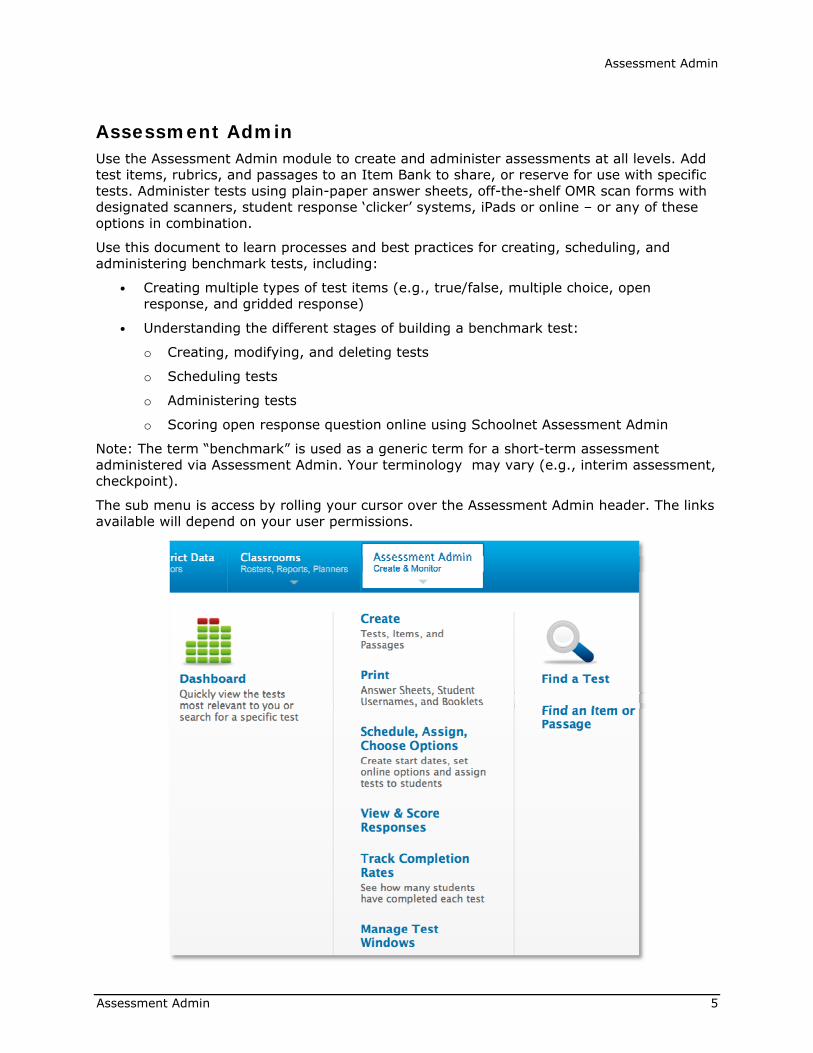
The sub menu is access by rolling your cursor over the Assessment Admin header. The links available will depend on your user permissions.

Assessment Admin
Sign in to Access Schoolnet through ISEE Portal 6
Sign in to Access Schoolnet through ISEE Portal You must sign in to use Schoolnet.
1. Go to http://www.sde.idaho.gov
2. Click the sign-in link to ISEE within option 10 at the top of the page or within the Top Topics section at the bottom of the page.
3. Select your organization as SDE, Meridian Joint School District or Other. Sign in
using your credentials.
4. Locate and click the Schoolnet link at bottom of the screen
You are now on the My Schoolnet (Home) tab

Assessment Admin
Assessment Admin Dashboard 7
Assessment Admin Dashboard The Assessment dashboard is accessed by clicking the Assessment Admin header on the blue navigation bar. It contains useful links, such as to scheduled tests and the item bank.
Test administrators (and teachers who have been granted additional Assessment Admin permissions) see a dashboard with a layout as shown below.
Teachers who do not have school level Assessment Admin permissions will see a view with all tests assigned to students in the selected section. There are tabs for Active Tests (in all categories), Benchmark Tests, and Classroom Tests.

Assessment Admin
Planning 8
Teachers can also view upcoming tests right on their home page, as shown below. Tests are shown in the following order: Scheduled, In Progress, and Completed tests (up to a maximum of 10).
Planning Prior to creating your first test, decide how you will categorize and administer tests. Topics to consider include:
• Delivery method: online, paper, OMR, student response ‘clickers’, or a combination
• Categories and naming for tests and items
• User permissions
• Technology/network considerations for online testing
• Turnaround training and communication plans
Assessment Naming Conventions Prior to entering the first test item, establish a structure and naming convention for tests. Consider the following options:
• Keep the test names reasonably short – they appear in menus.
• The order that tests appear in menus is determined first by grade level (ascending) and second by start date (descending). The start date is appended automatically to the test name, so to avoid duplication, don’t include the date in the title.
• Incorporate subject and grade level into the name for reference. You might agree on conventions to use, such as any abbreviations.
• For building-specific assessments, naming is important. Consider starting the name with a location code to make it easier to choose the correct test for reporting.

Assessment Admin
Test Items 9
Test Items Use the Assessment Admin module to create test questions, passages and rubrics.
Create questions under one of the following scenarios:
• Create individual test questions to add to the item bank for use in tests created later
• Create questions as a part of a specific test. Optionally, add to the item bank for reuse
Question Types For paper and online tests, create any combination of the following types of questions. For OMR tests, the pre-printed answer sheets determine which question types and how many questions you can use. Most clicker models supported by Schoolnet function only with multiple choice questions.
• Multiple Choice – Multiple answer options to choose from (one correct answer)
• True/False – “True” or “False” answer
• Gridded – Numeric answer; the student fills grid numbers with the correct digits
• Open Response – Written response answer (or oral response in which the teacher will manually record points awarded)
Item Alerts When you work through creating a test item, alerts appear to indicate the steps required to complete the test item. Note that alerts disappear only after the page refreshes: saving or going to the standard selection screen will make a resolved alert go away.
Creating a Multiple Choice Question for the Item Bank Multiple choices questions are supported for all assessment delivery methods.
To create a new multiple choice test item:
1. From the Assessment Admin menu, click Create
2. On the Create page, click Create an Item
3. On the Item Central: Create New Item page, click Multiple Choice
4. Enter a test question by clicking Click here to add content

Assessment Admin
Test Items 10
5. In the text editor, type the test question and then click Save
6. For the first answer, enter the answer choices by clicking Click here to add content
7. In the text editor, type the answer (or distractor) and then click Save
8. Repeat the steps to enter content for each of the possible answers
9. To indicate which is the correct answer, select the check box
10. For each answer, enter the number of points the student receives when they answer
correctly
11. Use the following tools to add an explanation regarding why an incorrect answer might be selected by a student:
• To include an explanation visible in Item Analysis reports, click Click here to add a teacher explanation
• To include an explanation visible to students (if they are set up to view their results online), click Click here to add a student explanation
12. To add or delete an answer choice:
• Scroll to the bottom of the answers and click [add new answer choice]
• Click [delete] to the right of the answer
13. When you finish adding answer options, associate the test question to a subject and grade range using the menus under the Item Properties heading
14. To associate the question to a standard, under Add Standard, click Standard Lookup
15. On the Add Standard page, use the menus to filter the available standards
16. Click the + sign next to a standard to expand the list to include a standard subset
17. Select the check box for the appropriate standard and click Done

Assessment Admin
Test Items 11
You also have the option to assign additional identifiers to this question using the fields under the Optional Information heading
18. If you’ve completed the required steps for a test item, all of the alerts disappear from the Alerts section of the page
19. Click Save
20. On the Add to Item Central page, choose which users can access the item (options vary depending on your security permissions)
21. On the next screen you will determine who else will have access to the item The options vary according to your user permissions. Refer to next section, ‘Sharing Items.’ Teachers who are creating personal classroom tests only will not have this step and can proceed to the next page in this manual.
22. If you want to grant school administrators and teachers access to the test item, then select the check boxes for the appropriate schools By default, all schools are selected, so you may only need to select the check boxes for the school to remove from the list.
23. Click Save
Sharing Items If ‘Everyone’ is selected in Step #22 above, you will need to confirm that the schools that should see the item are listed in the right column. The item will not appear in Item Central for any school in the left column.

Assessment Admin
Test Items 12
Associating Passages Associate a passage to any question type. Use it to include content that applies to multiple items, such as a diagram or picture. Refer to the following points when associating a passage to questions:
The Express Test method of creating a test is not recommended for tests with passages
To include line numbering for a passage:
o If you can embed numbers in the text, then type the numbers in parentheses
o Insert line breaks (Shift+Enter) at end of each reading line to create a soft return, and precede each line of text with a line number
To add a passage to a test item, at the bottom of the test item page, click Add Passage and then choose New Passage or Search for Passage
To add a passage (and the associated test items) to a test, select Find an Item or Passage from the Assessment Admin menu

Assessment Admin
Test Items 13
Creating a Rubric Rubrics provide a scale of measurement for how a student performs on an open response item. They provide descriptions of the criteria by which students will be measured for each level.
Rubrics can be created and managed by test administrators. In addition, teachers can create rubrics that can be used on their classroom tests. In other words, the ability to create rubrics follows the same logic as for creating items and passages
Rubrics can be attached or associated to an existing open response item at any time. Alternatively, the rubric can be associated when an open response item is created
Once a rubric is added to an item, the Subject, Grade and Standard of the rubric will REPLACE the Subject, Grade and Standard of the item. Since the rubric contains the measurement of the item, the properties of the rubric will overwrite that of the item. These properties will be used for reporting purposes as well
Rubrics can be created and reused on multiple items and multiple assessments
To use multiple rubrics, use multiple open response questions on an assessment and attach a different rubric to each
To create a rubric:
1. Roll your cursor over the Assessment Admin header and click Create
2. Click Create a Rubric
3. Next to Name, enter a name for your rubric
4. Next to Subject, enter the appropriate subject
5. Next to Grade Level, enter the appropriate grade level or levels
6. Click Standard Lookup and align the rubric to a standard
7. Under Levels, enter the number of the first level
8. Enter the name of the level

Assessment Admin
Test Items 14
9. Enter a description of the level in the text box
10. Click + Add Level
11. Repeat the steps as needed
12. Click Save
13. If you have permission to create items for multiple access levels, select who else should be able to use the rubric
14. Click Save
Attaching a Rubric to a Question To attach a rubric to an open response question, follow these steps.
1. Create an open response question
2. Click Rubric Lookup (shown below)
3. Next to the rubric you want, click Add
Including Open Response Questions Use open response questions for student responses in written form, such as an essay. Students can write responses directly on their test booklet, or if it is an online test, type the response in a text box. For paper tests, score open response items manually before scanning the forms or enter the scores in Assessment Admin. Refer to the following points when creating an open response question:
From the Maximum Points menu, choose a value
Optionally, add scoring instructions, such as exemplars. Scoring instructions are used to add other instructions that will be visible to test graders. Adding Scoring Instruction content opens a built-in text editor that accepts tables, graphics, and other content to provide additional scoring details
Optionally, associate the item with a rubric

Assessment Admin
Test Items 15
If students will write directly on an answer sheet use the option, “Plain Paper Answer Sheet Settings” to determine how much space to provide on the test for students to write their answers: a half page is approximately 6.5 inches by 2 inches, and a full page is 6.5 inches by 4 inches This option appears only when adding the test item to a test (rather than creating a test item separately).
Including Gridded Response Questions Use a gridded response question for numeric answers. Students write the answer and then bubble in the corresponding numbers in the grid. Include up to eight columns. Students may enter their response flush left or right, so you may include extra columns as a distractor.

Assessment Admin
Using the Text Editor 16
Using the Text Editor Use the text editor to add tables, images, or equations to a test item. Use the toolbar for formatting.
When students take a test online, the default text size is 12 points.
Basic Editing Options
Icon Purpose
Choose a style, such as Heading 1 or Normal.
Choose a font type, such as Times New Roman or Arial.
Choose a font size, such as 10 or 12.
Make text bold.
Italicize text.
Underline text (be judicious in underlining text as most users recognize it as a hyperlink).
Choose a font color other than the default (black).
Choose a color for highlighting your text for emphasis.
Align text to the left, center, right, or justify.
Indent text.
Add numerals or bullets.

Assessment Admin
Using the Text Editor 17
Using Editing Shortcut Tools The following tools are useful shortcuts for editing your work.
Icon Purpose
Undo your most recent edit or redo/repeat your most recent edit.
Check the spelling of selected text or all text.
Remove formatting from pasted in content.
Cutting, Copying, and Pasting Content Copy and paste content to/from your editing window or a Word document.
Icon Purpose
Cut text from your editing window.
Copy text in your editing window.
Paste into your editing window.
Paste from a Word document into your editing window.
Inserting Hyperlinks, Graphics, and Special Characters Place your cursor in the editing window where the graphic or special character should appear, and click the corresponding icon in the toolbar.
Icon Purpose
Enter the text to link, highlight the text, and click the Link icon. Enter the URL and click Insert.
Click to remove a hypertext link.
Access the Equation Editor to insert a math or science equation. Click the equation type image to access the code for the equation. The preview window displays your equation in real-time. Click Save.
To control font size, click additional equation.
Insert an image. Do not copy and paste an image from the Clipboard.
Assessment Admin
Using the Text Editor 18
Icon Purpose
Insert special characters, such as a foreign language character.
Insert a table.
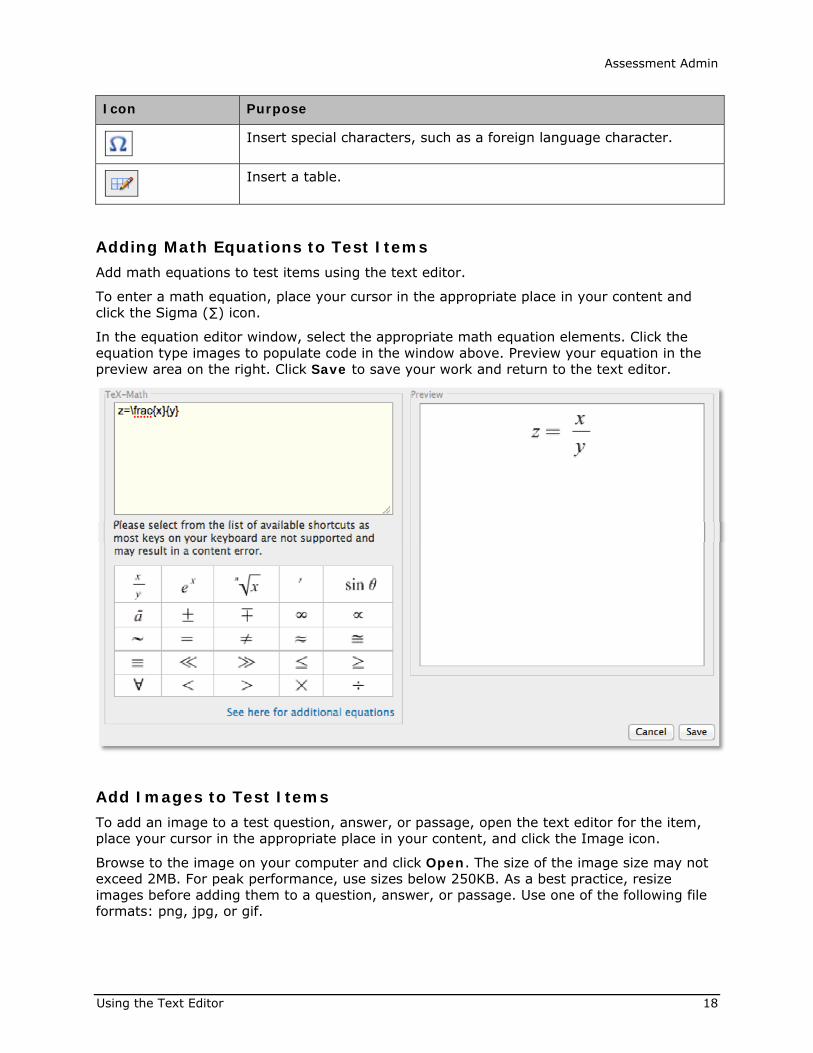
Adding Math Equations to Test Items Add math equations to test items using the text editor.
To enter a math equation, place your cursor in the appropriate place in your content and click the Sigma (∑) icon.
In the equation editor window, select the appropriate math equation elements. Click the equation type images to populate code in the window above. Preview your equation in the preview area on the right. Click Save to save your work and return to the text editor.
Add Images to Test Items To add an image to a test question, answer, or passage, open the text editor for the item, place your cursor in the appropriate place in your content, and click the Image icon.
Browse to the image on your computer and click Open. The size of the image size may not exceed 2MB. For peak performance, use sizes below 250KB. As a best practice, resize images before adding them to a question, answer, or passage. Use one of the following file formats: png, jpg, or gif.

Assessment Admin
Using the Text Editor 19
Best Practices for Test Items on Online Tests When creating an online test, use the following best practices to minimize errors. If you have performed all of the steps in this section and are still encountering problems, delete all information in the problematic question stem or answer choice, then retype your information directly into the item editor, without copying and pasting from another source.
Paste from Word icon – Use when creating items based on an existing Microsoft Word document. First, copy the text from Word, then, in the text editor, insert your cursor in the desired location and click the Paste from Word icon.
Preview your test – When you finish adding items to a test, preview the test to see how it will appear to students online. To preview a test, go to the Test Detail page by clicking the name of the test anywhere in Assessment Admin. Under the Actions heading, click Preview Online Test. Look for broken images, formatting that may confuse students, and other errors or oversights.
Broken image – If there is a broken image in a test item, try reinserting the image.

Assessment Admin
Submitting an Item for Approval 20
Submitting an Item for Approval Since great items, passages, and rubrics are created at every level throughout a school system, users can submit items to the next level for approval. A teacher can also submit an item to the school for approval.
To submit an item for approval, click Submit to [institution] on one of these pages:
Item Central page
Create New Item page
Edit Item page
Note: Depending on your site configuration, users with the ‘Create and edit items’ may not see the option to submit items on either the create or edit page
Upon approval, the item is available to everyone at the approver’s institution.
To submit an item for approval, create a new item or search for an item, then click Submit to [Institution] as shown below.

Assessment Admin
Locating Test Items, Passages and Rubrics 21
To submit an item, passage, or rubric for approval:
1. From one of the pages noted above, click Submit to [institution]
2. Confirm that you want to submit the item by clicking OK
3. If you change your mind, click Withdraw from [institution]
Locating Test Items, Passages and Rubrics Search or browse for test items, passages and rubrics in your item bank. The item bank includes both items that you created and items provided for your use.
To locate a test item or passage:
1. From the Assessment Admin menu, click Find an Item, Passage or Rubric
2. Click the appropriate tab
3. To search using a keyword, enter a value in the Search field and click Go, then skip
to step 6
4. Next, click a category to view browsing options
5. Select a value for one or more categories to narrow your search
6. When you have a selection of items or passages to view, click View Results
7. For an individual item, click View to see the item details Depending on the item category, the option to Edit is also available.
8. Click Back to Previous Page
9. Optionally, select the check box for one or more items, then scroll to the top of the page and click Add Items to Test
Understanding Test Stages The test stages define the readiness state for the test. Refer to the readiness state to determine if a test is available for scheduling and distribution.
Stage Description Trigger for Next Phase
Private Draft The test is visible only to the creator, and is the default stage when first created (new or as a copy).
Click Make Public on the Test Detail page.

Assessment Admin
Creating a Test 22
Public Draft The test is visible and available for editing to all users with permission to create and edit tests. This stage does not apply to teacher-created classroom tests.
Click Ready to Schedule on the Test Detail page.
Ready To Schedule
The test content is complete and cannot be edited. To locate tests in this stage, from the Assessment Admin menu, click Schedule.
On the Test Detail page, click Schedule this Test. Enter a start date, end date, and score due date.
Scheduled The test is assigned to a test window, but has not reached the start date.
A test switches automatically from Scheduled to In Progress when the start date is reached.
In Progress The test is between the start date and the end date.
A test switches automatically from In Progress to Complete when the end date occurs, or when the number of results exceeds a certain percent of eligible test takers. The number of results varies, but is usually set at 85%.
Complete The test is past the end date. N/A
Creating a Test Choose a test creation method based on whether you know in advance which specific questions you want to include. Teachers and assessment staff often have a test blueprint in hand or know which standards they intend to cover with the assessment.

Assessment Admin
Creating a Test 23
Option 1A: Create an Express Test Create a test by first selecting standards and then using those standards as scaffolding for the test.
To create an express test:
1. From the Assessment Admin menu, click Create
2. On the Create page, under Create an Express Test, click Start Now
3. Enter the Test Properties as described in the following table:
Field Description
Test Name Enter a name for the test following any established naming convention.
Institution Source Begin typing in the field to choose your institution. This field appears only if you have permission to create tests at more than one institution.
Test Category Choose a test category.
Score Type Choose the score type to display for this test.
Total Score - Default Raw Score – Displays in reports as a fraction (points
achieved / points possible)
Proficiency - Displays in reports as a number (points achieved)
Note that raw score and proficiency score are only reflected in these areas:
Classrooms Item Analysis reports Student Profile Schoolnet home page Classroom Assessment
Monitor report Analysis spreadsheet
Subject Pick one subject from the menu to categorize this test.
Grade Level Choose the appropriate grade levels for this test.
Preferred Standards Document
Choose the standard set for reporting.
Answer Key Only Choose whether to use this test as an answer key only. Choose No to create a complete test.
Hide Item Content from Test Results
Choose whether to hide item content from the students’ and parents’ view of test results. This feature is useful for if the test will be reused.
4. Click Select Standards

Assessment Admin
Creating a Test 24
5. In the Select Standards section, review the standards listed; view the number of available test items for each standard under the Available Items heading If there are no test items available for a standard, you can select the standard as a placeholder. This pre-selection process speeds up the entry of test items.
6. Select the check boxes for the standards to include on the test
7. Click Add to Test Map
8. In the Define Test Map section, use the Advanced Options to:
Exclude items that already appear on tests scheduled for this school year
Exclude items with passages
Search for additional items using the menus If you select any of the check boxes, click Apply.
9. For each standard in the list, enter the number of test items to include in the Items column
10. If necessary, use the trash can icon to remove any standards from the list
11. Click Build Express Test
The Test Detail page appears with options to edit the test on the left-hand side of the page and options to edit, replace, and delete test items in the middle of the page. If you substantially change the content of a question pulled from an item bank, on the page for that item within the test, click Unlink from Item Central Statistics so that the modified version is treated as a separate item for reporting purposes.
Option 2A: Create a Test Manually Create a test using existing test items in the item bank.
To create a test manually:
1. In the Assessment Admin submenu, click Create
2. On the Create page, under Create a Test Manually, click Start Now
3. Enter the Test Properties as described (* required)
Field Description
Test Name Enter a name for the test following any established naming convention.

Assessment Admin
Creating a Test 25
Field Description
Institution Source Begin typing in the field to choose your institution. This field displays only if you have permission to create tests at more than one institution.
Test Category Choose a test category.
Score Type Choose the score type to display for this test.
Total Score - Default Raw Score – Displays in reports as a fraction (points
achieved / points possible)
Proficiency - Displays in reports as a number (points achieved)
Note that raw score and proficiency score are only reflected in these areas:
Classrooms Item Analysis reports Student Profile Schoolnet home page Classroom Assessment
Monitor report Analysis spreadsheet
Subject Pick one subject from the menu to categorize this test.
Grade Level Choose the appropriate grade levels for this test.
Preferred Standards Document
Choose the standard set for reporting.
Answer Key Only Choose whether to use this test as an answer key only. Choose No to create a complete test.
Hide Item Content from Test Results
Choose whether to hide item content from the students’ and parents’ view of test results. This feature is useful if the test will be reused.
Number of items Enter the number of questions to include on the test. You may delete and add questions later in the process if needed.
Check All Multiple Choice to speed up test creation if you plan to include only multiple choice questions on the test.
Description Enter a brief description of the test.
Link to a Test Window
Choose a test window from the menu to link the test to a pre-determined test window designated by test administrators. This field only appears if there is a test

Assessment Admin
Creating a Test 26
Field Description
window for the current date. Not commonly implemented.
4. Click Generate Test The Test Detail page appears with your test stage in the Private Draft stage.
5. The test item numbers appear across the top of the page; click a test item number to add a test question To view the test information on the left side of the page and the test items (questions) as a list, click Return to Test Detail.
6. Edit the test items as needed
See the section Test Items (Questions and Passages) in this document for information about editing test items.
Make Items Created as Part of Test Available for Other Tests When you create items within a test, your items do not automatically appear in Item Central for inclusion in future tests. Before you schedule the test you may wish to click Add All items to Item Central on the bottom of the Test Detail page.
Using Existing Items from Item Central When you add items to a test you can either create them ‘on the fly’ by selecting the desired type as described above or pull from existing questions, either those you made previously or ones made available to you. SearchYou can locate items by entering a word or phrase and clicking Search. It searches keywords,question and answer content. Using Advanced Search, you can filter on a variety of tags, such as standard, question type, difficulty, etc.

Assessment Admin
Creating a Test 27
BrowseYou can filter for items by picking criteria from one or more categories. Your categories will vary.
Your selections are displayed as well as the number of items that meet all criteria. You can click the X icon to remove one, or click Start Over to remove them all. Click View Results to see the items that meet your criteria.
From the list, check the item(s) to include and click Add Items to Test.

Assessment Admin
Creating a Test 28
Additional Test Settings: Reorder Questions, Numbering, and More Use the options in the left sidebar of the Test Detail page to customize a test.
Copy or Delete Test Although you can't rename a test at any stage, you can click Copy Test under the Actions heading on the Test Detail page and rename the copy. This option may not be available for some external located tests.
The test author and a system operator can delete a test at any stage as long as there are no student results associated with the test. If there are student results associated with the test, remove the results and then click Delete this Test under the Actions heading on the Test Detail page.
Attach Supplemental Materials In the Associated Resources section of the Test Detail page, attach files containing ancillary documents such as math formulas, grading rubrics, and existing formatted test booklets. Under the Associate Resources heading, click Add New Resource. On the Add New Resource page, click Choose File, locate the supplemental material on your computer, enter a name in the Display Name field, and click Add file.
Modify Question Ordering and Numbering Under the Customize heading on the Test Detail page, use the links to delete multiple questions at once, reorder questions, and customize the question numbering.
Also, alter the answer choices pattern by selecting a different set of letter choices for even and odd questions.
Score Groups Under the Customize heading on the Test Detail page, click Score Groups to override the default score group cut scores. Note that you cannot modify the number of score groups.

Assessment Admin
Scheduling a Test 29
Locate an Existing Test Rather than creating a new test and scheduling it immediately, you can locate a test created by another user, or stop your work on a test you created and schedule it later.
From the Assessment Admin menu, click Find a Test. On the Test Central page, use the menus in the Find a Test section to narrow the list of tests. Click a test name in the list to review the individual test.
Make a Test Public At any time while creating a test, click Make Public to make the test available to other test creators for review or content creation. This stage is not available for My Classroom test.
When all questions are complete, review the Test Items for any alerts, customize test options, and then click Ready to Schedule at the top of the page. At this point, the test is considered complete and additional steps need to be taken to edit the test.
Editing in the “Ready to Schedule” Stage You can edit tests after the Private Draft and Public Draft stage, but be aware that content changes will require you to reprint answer sheets or test booklets.
To edit a test item, on the Test Detail page, click Modify. Changes that do not require reprinting answer sheets or test booklets include changing the point value for an item, modifying which answer is correct for a particular question, and realigning standards. Note that you cannot add or remove test items or change test item types (multiple choice, true/false, gridded, open response).
Scheduling a Test When you first create a test it is in Draft status. Change the status to Ready to Schedule when there are no more changes to be made. A test must be scheduled in order to administer it to students. You can only schedule tests with a status of Ready to Schedule.
To locate a test to schedule:

Assessment Admin
Scheduling a Test 30
1. From the Assessment Admin menu, click Schedule, Assign, Choose Options
2. Filter or click column headers to sort as needed to locate a test
3. Click the Edit Test Schedule icon
Alternatively, from within the Test Detail page, click Schedule
To schedule a test:
1. For the test settings, enter the start date, end date, and score due date When entering dates, take the following into consideration:
• The dates must be in the current school year
• You can scan paper tests any time after the start date, even beyond the end date
• Online tests can be administered any time within the window, and even after if the option to restrict to window is not selected. Remember, students can’t actually take the test until they are provided the online passcode
• The score date is the recommended date for the test proctor to complete and score open response items and scan test results
• Unless granted additional permissions, teachers do not have access to test content until the start date; however, they can print answer sheets once the test is scheduled
2. Optionally, select the check box beneath the date fields to prevent students from accessing test results until after the end date
3. Use the following table to enter information for online tests:
Field Input Description
Administer this test with
If Schoolnet Secure Tester is installed on all student test computers, you have the option to create a “locked-down” test environment where students cannot access the desktop, other web sites, or programs. If selected, all online tests must be administered using the Schoolnet Secure Tester: they will not work on computers on which the download has not been installed.
Share scores with my PowerTeacher Gradebook
Teachers who use a Schoolnet site that is integrated with PowerSchool will have an option to share the test with their gradebook.
Online Passcode Students use the passcode to access the test online. A default passcode appears; however, you may edit the code to create a personalized code. The code must be unique site-wide for each test.
Show student scores upon test submission
Select the check box to display the student’s score as soon as they finish the test.

Assessment Admin
Scheduling a Test 31
Field Input Description
Prevent the students from accessing the test before the start date or after the end date
Select the check box to prevent students from accessing the test outside the testing dates.
Enforce test time Select the check box to control student access to the online test only during the specified dates, days, and times.
Timed Test Select the check box to auto-submit student tests at the end of the specified time.
Scramble Question Order
Select the check box to rearrange test questions so that the system generates different versions randomly from student to student. Note that this setting overrides custom question numbering/labels in student’s online test.
Caution: Do not use this option if your test has multiple passages with multiple linked questions. This feature could hinder students by forcing them to answer multiple questions on the same passage out of order.
Scramble Answer Choices
Select the check box to rearrange multiple choice answer options.
Allow students to pause test
Select the check box if you want students to be able to “stop the clock” on a timed test.
Allow only assigned students to take test
Select the check box to allow only students assigned the test to take the test.
4. At the bottom of the page, indicate whether or not this test is required or optional
• Assign to students – Select to assign the test to a specific set of students; teachers are required to administer the test
• Recommend to teachers – Select to recommend this test to students based on their course enrollment; teachers may assign the test to students, but are not required to do so
• Recommend to schools – Select to recommend this test to adminstrators who may assign the test to a teacher or section Use this option when you do not have sufficient knowledge of the courses at each school to assign the tests to courses.

Assessment Admin
32
5. To assign the test, to sections or individual students, click Edit Assignment. To limit the assignment by section, select the check boxes for the appropriate section for the test to be assigned. When you have the correct sections, scroll down and click Save. If you want to review your assignments select View Assignment Summary or Edit Assignment if you want to change sections or students assigned. To limit the assignment by student, select a course name in the Course field. Review the resulting list of students, and select the check box for the appropriate students. Click Add Selected. At the bottom of the page, click Done.
6. To complete the scheduling of this test, on the Schedule a Test: Test Settings page, click Save
Tests Recommended to a School If you use the option “Recommend to schools” when scheduling a test, an additional section titled Recommend Tests appears on the Assessment Admin page for school-based users with test- administrator permissions. They must click Not Assigned to assign these tests to sections at the school.
Printing Tests When you create tests that will be administered via paper, allow sufficient time to print test booklets, answer sheets, and instructions.
Access Print Options Access print options from the Print page as an administrator or the Test Dashboard as a teacher. To access print options as an administrator:
1. From the Assessment Admin menu, click Print
2. Click a column to sort, or use the search filters to narrow the list of tests
3. Click one of the icons (listed below) to the left of the test name
To access print options as a teacher:
1. From the Assessment Admin menu, click Dashboard
2. Click one of the tabs: Active Tests, Benchmark Tests, or Classroom Tests
3. Click one of the icons (listed below) to the left of the test name
What You Can Print Depending on the test, the following options are available:
Download Test
Assessment Admin
Printing Tests 33
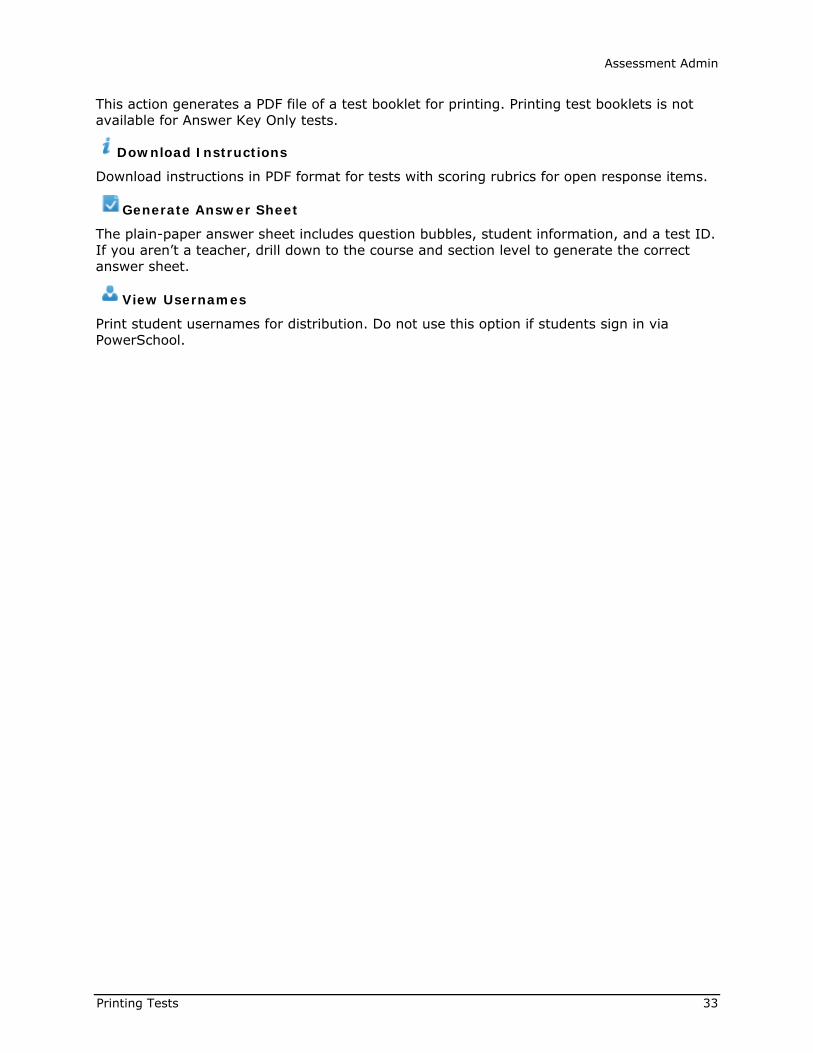
This action generates a PDF file of a test booklet for printing. Printing test booklets is not available for Answer Key Only tests.
Download Instructions
Download instructions in PDF format for tests with scoring rubrics for open response items.
Generate Answer Sheet
The plain-paper answer sheet includes question bubbles, student information, and a test ID. If you aren’t a teacher, drill down to the course and section level to generate the correct answer sheet.
View Usernames
Print student usernames for distribution. Do not use this option if students sign in via PowerSchool.

Assessment Admin
Printing Tests 34
Printing Paper Answer Sheets You may print answer sheets as soon as the test is scheduled.
To generate answer sheets:
1. Locate a test as described in the section Access Printing Options above, and click the Generate Answer Sheet icon
2. On the Answer Sheet Generator page, to print answer sheets for specific sections, click the Section tab and choose a school, grade level, course, and other values from the Section Search menus, and then click Search To print answer sheets for a particular school or grade level, click the School/Grade tab and choose a school or grade level from the School Search menus and click Search
3. In the resulting list, select the check boxes for the appropriate sections or schools
4. At the top of the page, click Generate Answer Sheet This action generates a PDF file with a cover sheet, answer sheet for each student in the section, and a blank sheet you can use for a new student. If you need additional blank sheets, reprint this last page rather than photocopying it.

Assessment Admin
35
Printer Settings Generally, you can use any printer to print an answer sheet from Schoolnet.
Use the following settings with Adobe Reader (up to version 9):
• Page Scaling: None
• Auto-Rotate and Center: checked
• Zoom: 100%
Use the following settings with Adobe Reader (versions 10+):
• Size Options: Actual Size
• Orientation: Auto Portrait/Landscape
Printing Test Booklets There are two methods to print a test booklet. First, access a list of tests using the steps from the Access Printing Options section in this document. Then, use one of the following methods:
From the list of tests, click the Download Test icon to generate a test booklet in PDF format
From the list of tests, click the name of a test. On the Test Detail page, under the Actions heading in the left sidebar, click Download Test (pdf) or Download Test (Word) Note that for Benchmark tests, this option is not available to teachers until the start date of the test.
Printing Associated Resources Some tests have associated resources, such as a pre-formatted test booklet PDF or grading rubric. To print an associated resource, first, access a list of tests using the steps from the Access Printing Options section in this document. From the list, click the name of a test. On the Test Detail page, under Associated Resources, click the name of the attachment file.

Assessment Admin
Administering a Paper Test 36
Administering a Paper Test In preparation for administering a paper test, review the following checklist.
Test Proctor Checklist Determine how to distribute answer sheets and test booklets to teachers
Communicate to teachers the procedure for new students who don’t have a pre-slugged answer sheet
Communicate scanning procedures and indicate who should receive the answer sheets
Student Checklist Fill bubbles completely with heavy, dark marks
Erase unwanted marks thoroughly
Do not mark the pre-slugged area or top right-hand corner
Do not mark the corners of the form where special markings are printed
Do not fold or staple answer sheet
Review your answers before turning in the answer sheet
Administering an Online Test Administer online tests to students via computer. Before administering an online test determine which test preparation/administration tasks are handled at the district, school, proctor, and teacher level.
Pre-Test Day Checklist Prior to test day, review the following checklist:
Verify that students have a student ID and password Note: If students use single sign-on from their SIS to access tests, then they do not need a separate username and password.
Determine a plan for new students who don’t have a student ID – will these students take a paper version of the test?
Determine whether to administer the test using Schoolnet Secure Tester; if so, students cannot access the desktop or other programs until they close the test window
Obtain the test online passcode by locating the test in Schoolnet
o Teachers click the Upcoming Tests tab in the My Classroom section of the Schoolnet home page to find the passcode
o Test proctors navigate to Assessment Admin > Dashboard to find the passcode
Confirm that the computer lab is set up properly
Assessment Admin
Administering an Online Test 37
Preparing Computers for the First Online Assessment Your school may have a computer lab used for testing, mobile laptop carts, or you may use classroom computers. Use the following checklist to minimize hardware or software distractions during the test.
Sign in to Schoolnet, and in the footer of any page, click Tech Check to run a diagnostic check
Set browser security settings to allow mixed content The procedure to allow mixed content varies by operating system and browser. The following steps apply to Internet Explorer:
1. Open the browser
2. Go to Tools and select Internet Options
3. Go to the Security tab and click Custom Level
4. Scroll to Miscellaneous and locate Display Mixed Content
5. Under Display Mixed Content, select Enable
6. Click OK
If “Administer this test with Schoolnet Secure Tester” was selected when scheduling, confirm that Schoolnet Secure Tester is installed; otherwise, students cannot access the test Alternatively, consider using network-management systems to prevent test-takers from using online chats, email, or discussion boards.
Preparing Computers for Each Online Assessment You may wish to perform these optional tasks on test computers before administering each test:
1. Enter the URL for the testing site in the browser
2. Turn screensavers off, and clear the cache memory
3. If applicable, confirm the network password so that in the event that a student signs off the computer, she can sign back in

Assessment Admin
Administering an Online Test 38
Test Day Checklist When you administer an online test, perform the following actions:
Teacher Checklist
Provide the online passcode and test name to students
Read the test instructions aloud to the students and explain the test format
Use one computer for yourself for the Proctor Dashboard
Keep track of students who do not finish the test by using the Proctor Dashboard
Make sure that students who complete the test avoid non-essential Internet use such as downloading streaming audio or video
Student Checklist
Open a web browser (unless the computer is pointed to the test already)
Point the browser to the testing site
Sign in and enter the online test passcode
Confirm that the correct student name and test name appear
Click Start Your Test if test does not appear automatically
Troubleshooting Internet Connectivity The online assessment delivery system (Test Tunnel) uses the following features to minimize the loss of work during issues with Internet connectivity:
Saves automatically to the server after every 100 characters typed by the student
Saves automatically to the server when the student clicks any of the following buttons: I’m Ready for the Next Question, Pause, View Test Summary, or the back arrow
Saves automatically to the browser’s memory
Incorporates an algorithm to save all questions (not just the current question) upon submitting a question
If a response is not saved, an alert icon appears in the upper-right hand corner above the Flagged Items icon Both proctors and students use this icon to monitor Internet connection during the test. The alert will clear as soon as the system saves all responses.
When the Test Summary page loads, all responses are saved again, but in the event that a response is not saved, a warning appears and the student can save his responses to the system clipboard
If the test is submitted unsuccessfully, the system repopulates the students’ responses automatically from the clipboard so no responses are lost, even if there was no Internet connectivity during the test taking session

Assessment Admin
Monitoring Test Progress Using the Proctor Dashboard 39
Monitoring Test Progress Using the Proctor Dashboard As the proctor for a particular test, use the Proctor Dashboard to monitor students’ test progress.
Using the Proctor Dashboard Use the Proctor Dashboard to monitor test progress.
• View the number of students who haven’t started, are working, and have completed the test
• View each student’s progress throughout the assessment using the progress bar, which appears with colored bars to represent correct, incorrect, and open response questions
• Click the Score icon to score open response answers for students who submitted their test or to access a link to resume a test submitted prematurely view section roster and monitor individual student progress during the test
Accessing the Proctor Dashboard as a Teacher To access the Proctor Dashboard, follow one of three paths:
On the Schoolnet home page, click the Upcoming Tests tab in the My Classroom section, and then click the Proctor Dashboard icon
Navigate to Assessment Admin > Dashboard, locate the test and click the Proctor Dashboard icon
Navigate to Assessment Admin > Dashboard, locate the test and click the test name, then click Proctor Dashboard under Actions on the Test Detail page

Assessment Admin
Monitoring Test Progress Using the Proctor Dashboard 40
Accessing the Proctor Dashboard as a Proctor To open the proctor dashboard not as the teacher to which the test is assigned, choose a test and then narrow your selection to an individual section.
From the Assessment Admin menu, click Track Completion Rates
On the Track page, use the filters in the left sidebar to filter the list of tests
Click the Track icon for the appropriate test
At the bottom of the page, check Exclude uncollected locations
Click the name of the appropriate institution
In the resulting list of sections at that institution, click the appropriate section name
When the list of students in that section appears, click Open Proctor Dashboard
Using the Score Page to Clear Responses or Reset Access After students start taking a test (or complete a test), use the Score page to clear or change student test responses, as dictated by policy. Also, if a student is locked out of a test, use the Score page to restore online access. Students may be locked out of a test if they accidentally submit a test prematurely.
To clear responses and reset online access:
1. Access the Score page using one of the methods described in Accessing the Score Page later in this document
2. On the Score page, click the name of the student from the left sidebar
3. Scroll to the bottom of the page and click Delete All Results for this Student’s test This action clears the student’s responses and allows the student to access the test online.
To reset online access while retaining the student’s current answers:
1. Access the Score page using one of the methods described in Accessing the Score Page later in this document
2. On the Score page, click the name of the student from the left sidebar
3. Click Resume Online Test The student must resubmit the test before the proctor can make changes to the student’s answers.

Assessment Admin
Monitoring Test Progress Using the Proctor Dashboard 41
Monitoring Test Progress as an Administrator As a test administrator, monitor collection statistics using the Track page. Use this page to see how many student results are collected for an assessment, when data is updated, and when the results are due. Only tests in the In Progress stage and the Complete stage are available for tracking.
Note that the completion threshold for test results is a site-wide setting based on the percent of results for the number of eligible students. The Collection Status percent calculation may be based on students who are not intended to take the test. At the high school level, for example, a geometry test might be mapped to grade levels 9-12, which means that there are more students eligible to take the test than the number of students who take the test.
To monitor data collection: 1. In the Assessment Admin sub-menu, click Track Completion Rates
2. Next to the test name, click the View Data Collection Report icon
3. Click on a school to view collection data by section (if applicable, you may have to
drill down from a region or area)
4. Click on a section to view collection by student

Assessment Admin
42
5. If the answer sheet has been scanned (or scored online), you can click View to see student results
These results are also now available in Classrooms and School & District Data.
6. Use the “breadcrumb” navigation to navigate back to any level of the report
Scanning Test Results If your school uses paper answer sheets to record student responses, use these instructions for scanning test answer sheets. ScanIt is Schoolnet’s scanning software and management application. Learn how to use ScanIt to scan student test answer sheets. Use any scanner that can reliably scan the image natively at 300 DPI or above. In general, no scanner settings need to be modified.
Preparing for Scanning Scanning answer sheets involves three steps: loading documents, scanning documents, and correcting scanning issues.
Complete the following setup before using ScanIt:
1. Download and install the most recent version of the ScanIt application to your computer
2. Configure ScanIt to operate with your scanner (either plain-paper scanner or OMR scanner)
3. Connect the scanner directly to your computer (a hard-wire connection rather than a network connection)
4. Verify that the computer has an internet connection and a minimum of 1 GB of available memory
5. Turn the scanner on (the green light indicates that the scanner is on)

Assessment Admin
Scanning Test Results 43
6. Open the ScanIt application, and on the sign in screen, enter your Schoolnet username and password, your site’s URL, and click Login
Loading Documents for Scantron and Paper Scanners Load answer sheets into your Scantron or plain-paper scanner.
1. Place answer sheets in a firmly lined stack Tap the stack against a table to make sure the pages line up.
2. Place the answer sheets into the scanner’s feeder with the appropriate side facing up ScanIt does not require forms to feed into the scanner in a particular direction (top first or bottom first), but the sheets must face the same direction, as indicated by your scanner (upside down or face down).
Scanning Documents The scanning speed for documents depends on the speed of your scanning hardware. Processing and upload time depends on your computer memory, Internet connection speed, and volume of sheets requiring review.
1. Click the green Scan button on the ScanIt screen If the scanner is installed correctly and configured with ScanIt, scanning begins automatically.
2. Your scanning progress appears in the pane on the left side of the ScanIt screen,
including the total number of sheets scanned, processed, and uploaded; and sheets that require review or manual entry

Assessment Admin
Scanning Test Results 44
Correcting Scanning Issues Answer sheets that the scanner cannot process are listed in ScanIt under the Review Recommended or Requires Manual Entry panes.
Review Recommended If your scanner cannot process an item because a bubble wasn’t shaded properly, then that item appears in the Review Recommended pane of ScanIt.
Use the Sheet #, Student ID, and Item # columns to identify the original answer sheet. Then, from the Answer menu in ScanIt, select a response based on the student’s original answer sheet, then click Confirm Review.
If you choose not to override any student responses, then the score for the item appears in Schoolnet as No Response.
ScanIt display for a plain-paper scanner:
Requires Manual Entry If the scanner cannot process answer sheets due to damaged paper, an invalid student ID, or an obscured bar code, then the sheets are listed on the Requires Manual Entry pane in ScanIt. If possible, repair the form and re-scan it. Otherwise, use the score feature in Assessment Admin to enter student responses manually.

Assessment Admin
Online Scoring 45
Uploading Scanned Answers to Schoolnet To upload the scanned forms to Schoolnet, click Confirm Review. Once uploaded, the answer sheet results appear immediately in the Classrooms and Assessment Admin modules and on the Student Profile in Schoolnet.
Scoring Open Response Questions For open response questions, sign in to Schoolnet and score the questions using the Score page for the test in the Assessment Admin module.
Online Scoring Enter scores manually into Schoolnet when an answer sheet is damaged and cannot be scanned or for open response questions. You can score tests with a status of In Progress or Completed. Enter scores using one of three methods:
Use the proctor dashboard to begin scoring for students who submit a test early
Enter score for an entire class in the score area
Scoring as a Test Administrator If you are not the teacher assigned to the section of tested students, use this method to score.
To score a test:
1. From, the Assessment Admin menu, click View & Score Responses
2. Use the filters in the left sidebar to locate the test
3. Click the Score icon next to the test
4. To score a few students, use the Locate a Student tab; otherwise, click the Locate a
Section tab
5. Use the search menu filters to enter search criteria for the section and click Search
6. In the resulting list of sections, click the appropriate section title
7. In the resulting list of students, click a student’s name to select that student
8. For open response questions, use the menu to select the appropriate number of points earned.
If applicable, note the link in the left column to score all open response questions.
9. Click Score

Assessment Admin
Online Scoring 46
Online Scoring as a Teacher As a teacher to whom the test is assigned, use this method to score a test.
To score a test:
1. Click Score On the Test Dashboard (Assessment Admin > Dashboard), click the Score icon for the test
If your version of the dashboard does not display the Score icon, click the test title and then Score Test under Actions.
2. Click a student’s name to select that student
3. For open response questions, use the menu to select the appropriate number of points earned
If applicable, note the link in the left column to score all open response questions.
4. Click Score
Force Scoring for Pending Online Tests If, for any reason, a student does not submit an online test, it will have a status of Pending and will not be visible in the Assessment Admin or Classrooms modules. The only way to view the results is to force scoring.
Note that this function auto-submits all tests in progress, so you should wait to perform the function until after the test window completes.
To force scores:
1. From the Assessment Admin menu, click View & Score Responses
2. Use the filters in the left sidebar to locate the test
3. Click the Score icon next to the test
4. Click the Online Test Bulk Scoring tab
5. Click Force Score Tests
All pending tests (for the specified test administration only) are submitted and scored automatically.

Assessment Admin
How Teachers Access Test Features in Assessment Admin 47
How Teachers Access Test Features in Assessment Admin When teachers go to the Assessment Admin tab they see a ‘test dashboard’ of all tests for their students with links to print usernames, test booklets and answer sheets.
1.
Score a test
This action generates a PDF file of a test booklet for printing. Printing test booklets is not available for Answer Key Only tests.
Download instructions in PDF format for tests with scoring rubrics for open response items.
The plain-paper answer sheet includes question bubbles, student information, and a test ID. If you aren’t a teacher, drill down to the course and section level to generate the correct answer sheet.
Print student usernames for distribution. Do not use this option if students sign in via PowerSchool
Go to the Proctor Dashboard

Assessment Admin
How do Students Login? 48
How do Students Login? Students access the student portal within Schoolnet to take assessments created within Assessment Admin and to access partner applications, and state resources. Teachers can access student logins within Assessment Admin.
Accessing Student Login Information 1. On the Test Detail screen click view usernames or from the Test Dashboard click
At the bottom of the list of login information, teachers can click Print User Names
Idaho Note: The first time students access the portal usernames and passwords will be as noted below. Students will then reset passwords. Students will need to remember the new password.
Username: Student’s EDUID
Password: first two characters of first name, two digit day of birth, first two characters of last name.
Login example: Sarah Jones, EDUID of 1234567, born 5-13-99. Username: 1234567 Password: sa13jo
Resetting a Student’s Password From time to time a teacher may need to reset a student’s password. Access the student login information as noted in previous section.
Note that the system may default to having all student names selected already. You can deselect all students by unchecking the box next to Student Name at the top of the list of students.
1. Select the student whose password you wish to reset
2. At the bottom right of the screen click Reset selected student’s password
A new password will be generated for the student.
3. To print the new password for the student, click Print User Names

Assessment Admin
How do Students Login? 49
Students will use the following URL to sign in with their user names and passwords:
https://schoolnet.sde.idaho.gov/student
They will now be on the Student Home page where they can login to take a test (if they have the test passcode), access Partner and State Resources.
Assessment Admin
Where Can You Find Benchmark Results? 50
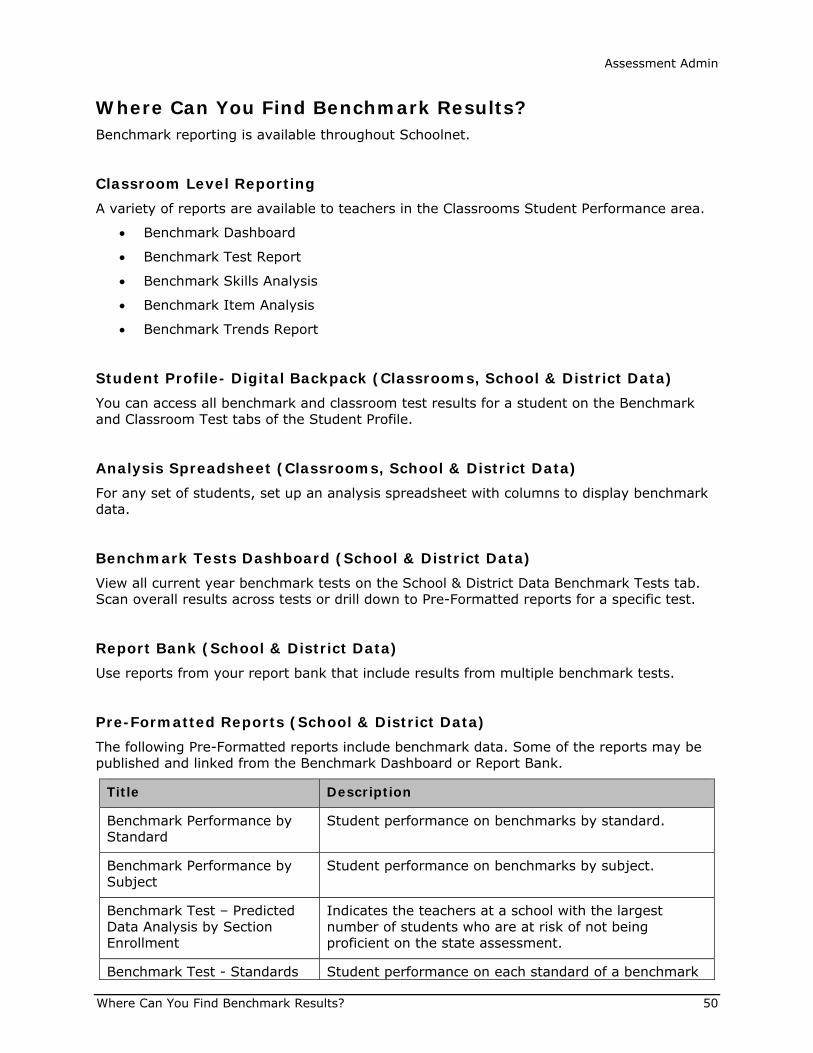
Where Can You Find Benchmark Results? Benchmark reporting is available throughout Schoolnet.
Classroom Level Reporting A variety of reports are available to teachers in the Classrooms Student Performance area.
Benchmark Dashboard
Benchmark Test Report
Benchmark Skills Analysis
Benchmark Item Analysis
Benchmark Trends Report
Student Profile- Digital Backpack (Classrooms, School & District Data) You can access all benchmark and classroom test results for a student on the Benchmark and Classroom Test tabs of the Student Profile.
Analysis Spreadsheet (Classrooms, School & District Data) For any set of students, set up an analysis spreadsheet with columns to display benchmark data.
Benchmark Tests Dashboard (School & District Data) View all current year benchmark tests on the School & District Data Benchmark Tests tab. Scan overall results across tests or drill down to Pre-Formatted reports for a specific test.
Report Bank (School & District Data) Use reports from your report bank that include results from multiple benchmark tests.
Pre-Formatted Reports (School & District Data) The following Pre-Formatted reports include benchmark data. Some of the reports may be published and linked from the Benchmark Dashboard or Report Bank.
Title Description
Benchmark Performance by Standard
Student performance on benchmarks by standard.
Benchmark Performance by Subject
Student performance on benchmarks by subject.
Benchmark Test – Predicted Data Analysis by Section Enrollment
Indicates the teachers at a school with the largest number of students who are at risk of not being proficient on the state assessment.
Benchmark Test - Standards Student performance on each standard of a benchmark

Assessment Admin
Where Can You Find Benchmark Results? 51
Analysis by Section Enrollment
test. Results are grouped by teacher within a specific school building.
Benchmark Test - Score Group Analysis
Student performance on one or a group of benchmark tests. Results are grouped by score group for a teacher within a specific school.
Benchmark Test - Standards Analysis by School Enrollment
Student performance on each standard of a benchmark test. Results are grouped by school.
Benchmark Test Item Analysis Students responses for each question on a benchmark test. The report supports gridded response questions.
Custom Reports (School & District Data) Use Custom Reports to define report parameters. For example, identify specific students by enrollment, and select which columns and rows to include.
Classrooms Assessment Monitor (Schoolnet Home Page) Teachers use the Classroom Assessment Monitor on the Schoolnet home page to view a color-coded, student-by-student display of recent benchmark and classroom test results. Additionally, view all upcoming tests related to your sections, with test name, online passcode, and test stage provided in a line-by-line format.