science day on the greenway
TRANSCRIPT

SCience Day on the Greenway
An Honors Thesis (HONRS 499)
By Loc Dang
Thesis Advisor Dr. Marcy Towns
~I~l Ball State University
Muncie, IN
Date April 2004
Date of Graduation May 2004

L ~;:
1. Abstract and Acknowledgements 2. Process Analysis 3. Appendices
a. Proposal b. Experiments and Demonstrations c. References d. Price List e. Publicity f. Contacts g. Emails to Volunteers h. Scavenger Hunts i. Newspaper Articles j. Additional Pictures (on CD) k. Congratulations and Fun Facts

Abstract
With the desire to capture children's imaginations and interest in the field of science, "Science Day on the Greenway" was created as part of an Honors College thesis project. As an outreach program, this event aspired to educate the community in the three main branches of science (chemistry, biology, and physics), especially children grades K-8th. This event incorporated many hands-on science experiments that used common non-toxic household chemicals and was set-up along a half-mile span of the Cardinal Greenway in Muncie, Indiana. The experiments that involved chemistry included, Oobleck (an activity demonstrating phase changes), Gluep (to introduce polymerization), Candy Molecules (which exhibit molecular structures), and Bath Bubblers (to show a chemical reaction). Various speakers also attended" Science Day on the Greenway" to educate the participants on native plants, wildlife, and leaf structures. Based upon community response, this event proved to be a success and will hopefully be reproduced annually.
Acknowledgements
We would like to thank Dr. Marcy Towns for her unwavering commitment to our Honors Thesis project. Without her constant encouragement and optimism, our event would not have been as successful as it turned out to be. Her experiences in past outreach programs was truly insightful and helped in the planning of our project.
We would also like to thank Beth Campbell for all of her help during the planning process and her guidance regarding the needs of the participants as well as the volunteers. Without her helpful hints, the preparations for our event would not have gone as smoothly.
Further gratitude goes to the Ball State Chemistry Department. Without their funding, we would not have much of an event.
I would personally like to thank my partner, Mary Borger, for her assistance throughout this incredible process. She truly is an inspiration to others and I will never forget the things that she has taught me. I know that she will be a wonderful teacher in the future, not only because of her intelligence, but also because of her wonderful wit and caring attitude. There were times, I'm sure, when I completely frustrated her, but without each other's talents and efforts, we would not have been able to complete the project.
Birth of an Idea Tell me and I'll forget; show me and I may remember; involve me and I'll
understand. - Chinese Proverb
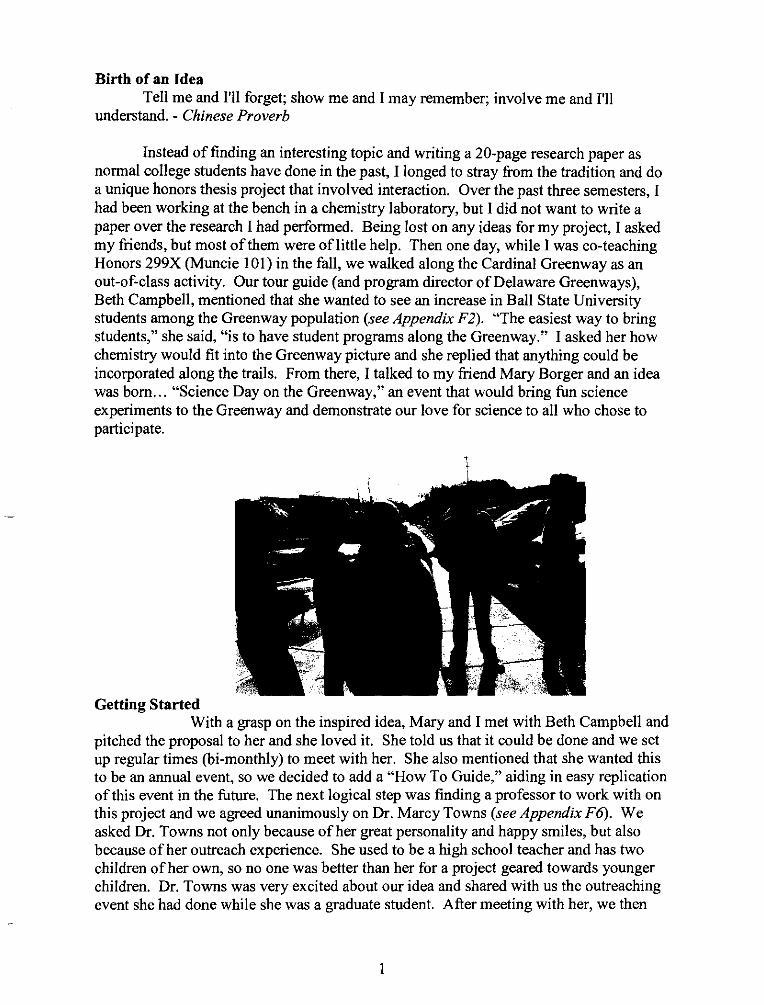
Instead of finding an interesting topic and writing a 20-page research paper as normal college students have done in the past, I longed to stray from the tradition and do a unique honors thesis project that involved interaction. Over the past three semesters, I had been working at the bench in a chemistry laboratory, but I did not want to write a paper over the research I had performed. Being lost on any ideas for my project, I asked my friends, but most of them were oflittle help. Then one day, while I was co-teaching Honors 299X (Muncie 101) in the fall, we walked along the Cardinal Greenway as an out-of-class activity. Our tour guide (and program director of Delaware Greenways), Beth Campbell, mentioned that she wanted to see an increase in Ball State University students among the Greenway population (see Appendix F2). "The easiest way to bring students," she said, "is to have student programs along the Greenway." I asked her how chemistry would fit into the Greenway picture and she replied that anything could be incorporated along the trails. From there, I talked to my friend Mary Borger and an idea was born ... "Science Day on the Greenway," an event that would bring fun science experiments to the Greenway and demonstrate our love for science to all who chose to participate.
Getting Started With a grasp on the inspired idea, Mary and I met with Beth Campbell and
pitched the proposal to her and she loved it. She told us that it could be done and we set up regular times (hi-monthly) to meet with her. She also mentioned that she wanted this to be an annual event, so we decided to add a "How To Guide," aiding in easy replication of this event in the future. The next logical step was finding a professor to work with on this project and we agreed unanimously on Dr. Marcy Towns (see Appendix F6). We asked Dr. Towns not only because of her great personality and happy smiles, but also because of her outreach experience. She used to be a high school teacher and has two children of her own, so no one was better than her for a project geared towards younger children. Dr. Towns was very excited about our idea and shared with us the outreaching event she had done while she was a graduate student. After meeting with her, we then
1
had to propose our plan to the Honors College. We met with Dr. Stedman and told her of our project. She also liked the idea and told us to write up the proposal and turn it in so that we could finally start. After getting our advisors figured out, we decided that we needed money to fund our project. We talked to the Chair of the Chemistry Department, Dr. Robert Morris, and he said that he would help us out in any way that he could, thus giving us a $300 budget for our materials (see Appendix F5).
The Proposal I thought a lot about why I wanted to do an outreach program for young children
and was inspired by my own childhood. Growing up, I hated science and did not know why it was something you had to learn. My teachers did not perform cool hands-on experiments or demonstrations, so I had no idea why science was important because they taught it by the books.
When I got to high school, my chemistry teacher had us do laboratory experiments and needless to say, they were a blast! Just learning how atoms bond and how molecules interact with each other to create different compounds, from simple salts or the more complex aspirin, absolutely amazed me. I was beginning to become thirsty for knowledge and when I graduated, I knew my career had to involve the sciences. Just understanding how things work or why they are so important to everyday life is extremely interesting and I wanted to share my knowledge. Remembering that I was not the only one who had a true disliking to science as a child, I knew that if we had enough cool hands-on experiments and demonstrations that our program would be totally successful. Science Day would be an event that would show how science can be fun and that it is not just super smart people, who wear white lab coats with pocket protectors, pouring smelly green powders into bubbling red liquids, making explosions, and yelling "Eureka! !"
In writing the proposal, Mary and I split up the obligations (see Appendix A). She was in charge of planning and the coordination of the event, while my priority was the event's pUblicity and arrangements to get people to participate in Science Day. We, of course, did not work exclusively in our proposed areas and helped each other out immensely when needed.
Meetings Galore For the following three months, we met regularly with Beth Campbell and Dr.
Towns. Beth had great insight and inputs because she was very familiar with large-scale
2

events. She gave us advice on where we should hold our event and helped us get the word out to the public. Mainly acting as our outside help, Beth let us know how the process was going and the changes that we needed to ensure our project's success. Dr. Towns, on the other hand, worked very personally with us. She helped us through thick and thin assisting us in finding and testing our experiments as well as all of our write-ups, press releases, cover letters, and the thesis assessment. Her optimism let us know that everything would turn out well and with a smile, we never doubted her. We also met with Mr. Larry Cistrelli Jr., the director of risk management, a few days before our event to ensure that we everything covered (see Appendix Fl). He emphasized highly on having water around in case of dehydration and having an emergency kit that was readily available. Starting the Process
To start, we researched and gathered science experiments that we thought would be entertaining to young minds. After researching on the Internet, from our professors and friends, and from past experiences what we wanted to do, we performed them at least once to see how well they worked. Pretty soon, we came up with about 15 hands-on experiments and demonstrations. The following is a list of our experiments and how they incorporate science. Most of these have been written up (see experimental write-ups in Appendix B with references in Appendix C), but the few in italics we thought of at the last minute and think that they would be fun to do in the future.
Airness Awareness (I) - teaches aerodynamics Bath Bubblers (2) - shows an example of a chemical reaction Bouncing Balls - to reveal why different balls bounce in different manners
Candy Molecules (3) - exhibits different molecular structures
Density Colwnn (4) - shows heaviness/lightness of different liquids Digestion (5) - explains how mucous is needed in swallowing Fossils (6) - shows how fossils can be made using the imprinting method Gluep (7) - introduces the idea of polymerization Green Pennies (8) - exhibits the effect of vinegar on copper How Soap Works (9) - indicates how soap cleans by trapping dirt Lasers/Filters - reveals why only reflected colors can be seen Kaleidoscope - presents the idea of mirroring objects Oil Spill (10) - oil-covered mermaid demonstrates how hard oil spills are to clean
3

Oobleck (11) - an activity demonstrating phase changes
Paper Airplane (12) - distance/speed of plane teaches aerodynamics Rubber Eggs (13) - displays the effect of vinegar to the calcium in egg shells Static Electricity (14) - explains the effect of static electricity on certain items
Volcanic Eruption (15) - shows the different types of volcanic eruptions
A few experiments were found to use heat or fire. Although they were fun experiments, we decided to toss them due to safety concerns.
Spending money without going over budget We decided to purchase what we could in bulk and buying the rest where we
could. We bought most of the much-needed materials at Sam's Club and obtained the remainder ofthe items at Hobby Lobby, Wal-Mart, or The Dollar Tree. Our ending tally came to be about $250 (see pricing list in Appendix D).
Some other things that we decided to have for our event were prizes. When we met with Robin Dungan (our wildlife speaker), we went to this cabin filled with different types of animals and saw some ofthe coolest chairs. These chairs were designed into different animal shapes, so I drew a few of them and gave the designs to my friend Matt. Matt is a genius, because he took my rough sketches and made them into really awesome chairs. We only bought two prizes, the dinosaur archeology dig set and a crystal growing kit, so that we could incorporate some other side branches of science. The rest of the
4

prizes were donated from the science departments (some t-shirts) and by the Greenway (helmets, t-shirts, and bottle lanyards)
While talking to Beth Campbell during one of our meetings, she pitched to us some items we would need for our event. She said that we would need to have a port-apotty at each end ofthe proposed trail length that our event was to take place and some tables to do our experiments on. After giving us some numbers and names, we called the Port-a-John company in Muncie and they told us that it would be a little over $80 for a handicap accessible port-a-john (see Appendix Fll). Because it was not in our budget, we scraped the idea and decided to just use the existing port-a-john at the Depot Trailhead. The tables, on the other hand, were surprisingly easy to obtain. We called Park Services and they will let you borrow up to 40 tables, deliver them, and pick them up free of charge (see Apfendix FlO). So we asked for 20 tables to be delivered at the Depot trailhead on the 3' of April. With tables come chairs, so we spent about $40 to rent 40 chairs from Mr. SupeRent (which we have to pick up and transport) (see Appendix F9).
The Speakers Originally, we wanted three speakers, one from each of the three main branches
of science. But as we started talking to people, it became clear that we were mainly getting people associated with biology. Our first speaker was Lyla Spath, who agreed to come to our event dressed up as a leaf (see Appendix F8). She wanted to teach children the different components of the leaf and show the many different types of existing leaves. Our second speaker was Dr. Cheryl LeBlanc, who was to give two nature walks on the day of the event (see Appendix F3). She was going to describe Indiana's native plants and animals along the Greenway, as well as how to help keep the environment clean and safe. Our third and final speaker was Robin Dungan, who works at the Minnetrista Center (see Appendix F 12). She said that she was going to bring some animals, such as salamanders, snakes, and owls to show the participants of "Science Day on the Greenway." Dates and times were set (including rain dates) and we joyously thanked them for their involvement with our project.
5
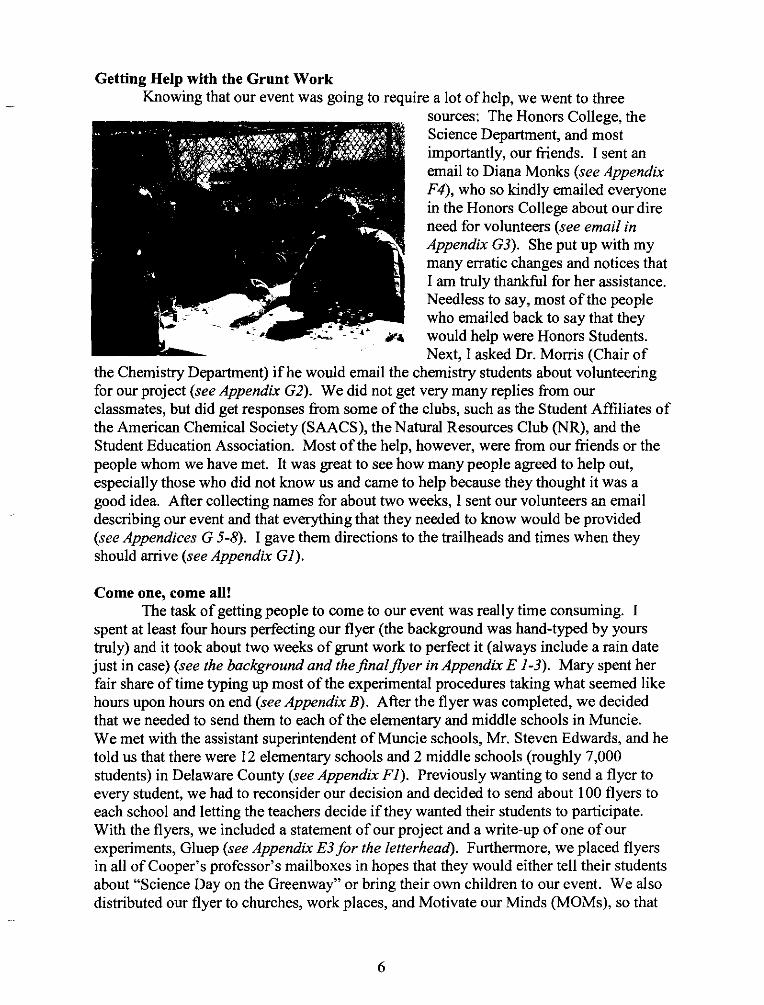
Getting Help with the Grunt Work Knowing that our event was going to require a lot of help, we went to three
sources: The Honors College, the Science Department, and most importantly, our friends. I sent an email to Diana Monks (see Appendix F4), who so kindly emailed everyone in the Honors College about our dire need for volunteers (see email in Appendix G3). She put up with my many erratic changes and notices that I am truly thankful for her assistance. Needless to say, most of the people who emailed back to say that they would help were Honors Students. Next, I asked Dr. Morris (Chair of
the Chemistry Department) ifhe would email the chemistry students about volunteering for our project (see Appendix G2). We did not get very many replies from our classmates, but did get responses from some of the clubs, such as the Student Affiliates of the American Chemical Society (SAACS), the Natural Resources Club (NR), and the Student Education Association. Most of the help, however, were from our friends or the people whom we have met. It was great to see how many people agreed to help out, especially those who did not know us and came to help because they thought it was a good idea. After collecting names for about two weeks, I sent our volunteers an email describing our event and that everything that they needed to know would be provided (see Appendices G 5-8). I gave them directions to the trailheads and times when they should arrive (see Appendix G 1).
Come one, come all! The task of getting people to come to our event was really time consuming. I
spent at least four hours perfecting our flyer (the background was hand-typed by yours truly) and it took about two weeks of grunt work to perfect it (always include a rain date just in case) (see the background and thefinalflyer in Appendix E 1-3). Mary spent her fair share oftime typing up most of the experimental procedures taking what seemed like hours upon hours on end (see Appendix B). After the flyer was completed, we decided that we needed to send them to each of the elementary and middle schools in Muncie. We met with the assistant superintendent of Muncie schools, Mr. Steven Edwards, and he told us that there were 12 elementary schools and 2 middle schools (roughly 7,000 students) in Delaware County (see Appendix F1). Previously wanting to send a flyer to every student, we had to reconsider our decision and decided to send about 100 flyers to each school and letting the teachers decide if they wanted their students to participate. With the flyers, we included a statement of our project and a write-up of one of our experiments, Gluep (see Appendix E3 for the letterhead). Furthermore, we placed flyers in all of Cooper's professor's mailboxes in hopes that they would either tell their students about "Science Day on the Greenway" or bring their own children to our event. We also distributed our flyer to churches, work places, and Motivate our Minds (MOMs), so that
6
the kids attending could partake in our project if they were free. Some other places to keep in mind for the future would be the YMCA and other various youth-oriented organizations in Muncie.
In addition, we sent a press release to the Muncie Star Press and it was printed on March 30th
, 2004 (see Appendix E4). We were going to also call the Radio Station (WLBC 104.1 FM), but we ran out of time (it would have brought more people).
Yummies We asked SAACS to sell pop during the event and they wholeheartedly agreed.
We also asked Carter (Almost World Famous Hotdog Man) ifhe would sell his product at our event and he agreed to come at 11 :00 AM to provide food for our participants.
The Day of ... The weather the day of the event could not have been more perfect. It had
sprinkled the day before and was windy, but the sun was at full blast (-55 OF) on April 3rd, 2004. (The following day saw a drop in temperatures, going from mid-50s to mid-30s.)
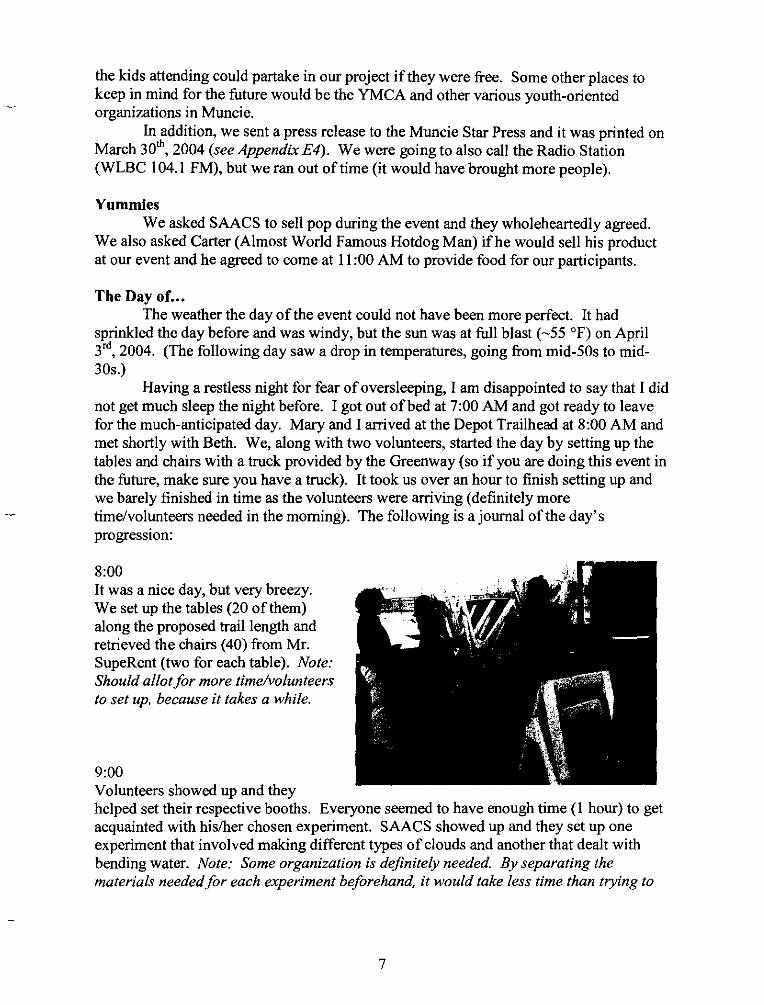
Having a restless night for fear of oversleeping, I am disappointed to say that I did not get much sleep the night before. I got out of bed at 7:00 AM and got ready to leave for the much-anticipated day. Mary and I arrived at the Depot Trailhead at 8:00 AM and met shortly with Beth. We, along with two volunteers, started the day by setting up the tables and chairs with a truck provided by the Greenway (so if you are doing this event in the future, make sure you have a truck). It took us over an hour to finish setting up and we barely finished in time as the volunteers were arriving (definitely more time/volunteers needed in the morning). The following is ajoumal ofthe day's progressIOn:
8:00 It was a nice day, but very breezy. We set up the tables (20 ofthem) along the proposed trail length and retrieved the chairs (40) from Mr. SupeRent (two for each table). Note: Should allotfor more time/volunteers to set up. because it takes a while.
9:00 Volunteers showed up and they helped set their respective booths. Everyone seemed to have enough time (1 hour) to get acquainted with hislher chosen experiment. SAACS showed up and they set up one experiment that involved making different types of clouds and another that dealt with bending water. Note: Some organization is definitely needed. By separating the materials neededfor each experiment beforehand, it would take less time than trying to
7
find everything that everyone needed all at once. Also, more than one roll of (clear) duct tape would be nice. The wind was monstrous!!
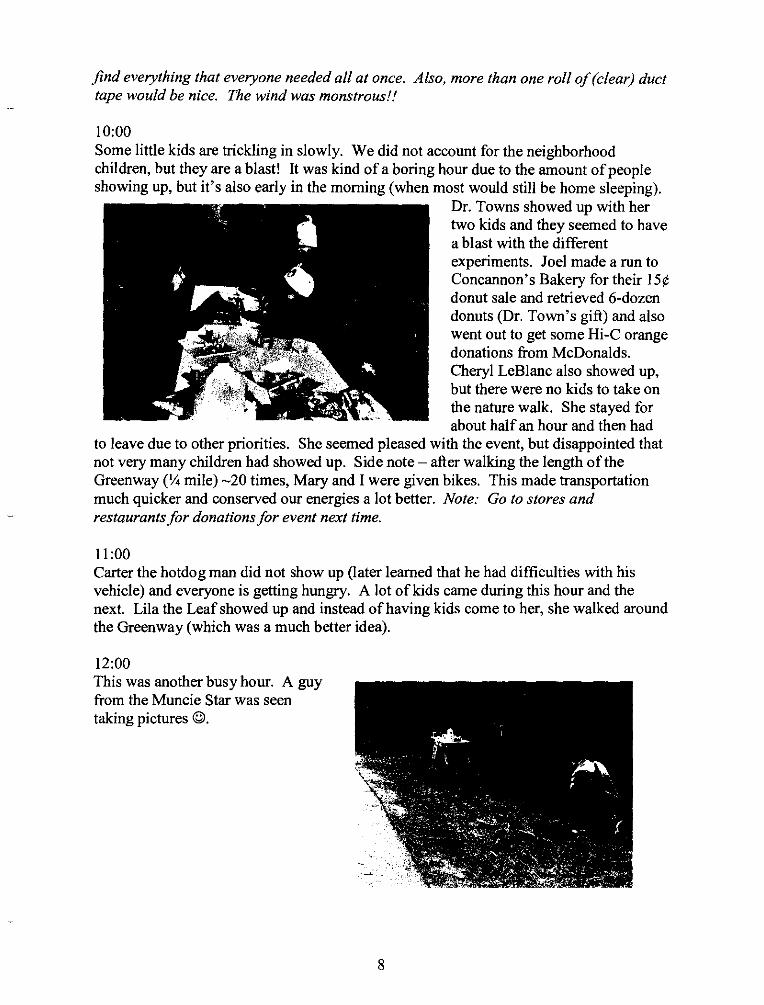
10:00 Some little kids are trickling in slowly. We did not account for the neighborhood children, but they are a blast! It was kind of a boring hour due to the amount of people showing up, but it's also early in the morning (when most would still be home sleeping).
Dr. Towns showed up with her two kids and they seemed to have a blast with the different experiments. Joel made a run to Concannon's Bakery for their IS¢ donut sale and retrieved 6-dozen donuts (Dr. Town's gift) and also went out to get some Hi-C orange donations from McDonalds. Cheryl LeBlanc also showed up, but there were no kids to take on the nature walk. She stayed for about half an hour and then had
to leave due to other priorities. She seemed pleased with the event, but disappointed that not very many children had showed up. Side note - after walking the length of the Greenway (Y.. mile) -20 times, Mary and I were given bikes. This made transportation much quicker and conserved our energies a lot better. Note: Go to stores and restaurants for donations for event next time.
11:00 Carter the hotdo g man did not show up (later learned that he had difficulties with his vehicle) and everyone is getting hungry. A lot of kids came during this hour and the next. Lila the Leaf showed up and instead of having kids come to her, she walked around the Greenway (which was a much better idea).
12:00 This was another busy hour. A guy from the Muncie Star was seen taking pictures ©.
8

1:00 The rest ofthe day kind of died during this hour (possibly due to not knowing that it was an ongoing event). Scott made a McDonald's run for those who were hungry.
2:00 The best hour by far. More kids are showing up, but not as much as 11 :00 AM to 1 :00 PM. A reporter came and interviewed Mary and I for the Muncie Star. We were totally excited and talked to him for about 15 minutes. He later left and enjoyed our event. One little girl was quoted, "I used to think that science was boring! But this is really fun!" This quote accomplishes our main goal for the event.
3:00
The kids absolutely loved Robin Dungan and her little animal friends. She was a huge success!
Things were really quiet, because almost no one was here. Some volunteers left early. Maybe more publicity was needed (like radio, or just setting up flyers in stores). Donations would have also helped (i.e. food, drinks, more prizes ... ).
4:00 Lots of help getting everything off the tables and back in cars. The dissembling of the tables and chairs went with ease with so many helpers.
4:30 People who stayed got free pizza paid by the Greenway. Yummy. 1 am so sun burnt and 1 ache all over. The day went really well! I'd say about 100 people or slightly less showed up to our event. Raffling the prizes totally did not work out at all so the prizes were just given away. Note: Just give prizes away randomly next time. Also, we need to have
9

the scavenger hunt sheets at all tables in case people just stumble in on the event. That way we could get more reviews on how well our project went (out of -100 people, only 13 were returned).
5: 00 and after I got home and showered. My body ached so much from being on that bike all day so I laid on the couch and was unproductive for the rest ofthe night. I laid there and watched TV/took a nap until II :00 PM and got up to go to bed at midnight ©.
Assessing the event Pessimistically speaking, the event was a huge success. Roughly 100 people
showed up and most parents complemented us on our fantastic project. We had a few teachers at the different tables "stealing" our ideas and asking our volunteers detailed questions about the many experiments. Some participants (and volunteers) came up to us and asked us for the experimental write-ups, which we happily shared with them. It thrilled us that people really wanted to spread our ideas and were having fun (not that we ever doubted a moment).
The event on average went extremely well. We were on the front page of the local section of the Muncie Star the next day (April 4th) and some very nice people wrote a letter to the editor saying how successful our event was, published on April 20th (see Appendix 1). We have had many congratulations and most of the volunteers have voiced that they had a very enjoyable time working with us (see Appendix K). A lot of pictures were taken on the day of our event and they can be seen on the included CD (see Appendix J).
Some things happened that we did not account for, but they worked out for the better. For instance, our placement in between trees kept most of the wind shear away, because the two tables in the open grassy area were having trouble keeping their items weighed down. Also, we did not plan on having a go-pher, but Joel and Scott helped us out tremendously. Just having them for food and transportation runs made the event progress smoothly. We, furthermore, achieved our goal for this event because two kids were heard saying that they thought science was boring, but "Science Day on the Greenway" proved to them otherwise. Another great idea was putting a bottle of hand sanitizer and ajug of water and some cups at each table in case of emergencies. Lastly, pizza was a great incentive for people to stay and help out at the end (but don't order any mushroom pizzas).
It was hard to think of things to make this event better, but we have thought of a few items to add or change. The first would be a definite way to guarantee our volunteers to show up. We had plenty of people from 9 AM to 1 PM, but from 1 PM to 4 PM, only
10

a few of our signed up volunteers were showing up. Sad to say, there was one kid (a participant) that stayed for most of our event and even he was asked to help out. Second, this event may be even better in the fall. In autumn, there would be no fear of unexpected rain and nature would still be alive (i.e. the leaves would still be on the trees and animals would still be seen along the pathway). Third, Dr. LeBlanc mentioned that definite times should be printed on the flyer so that participants will know the day's progression (maybe more people would show up if they knew what was happening). The flyer should also mention that the project is an ongoing event, so that people know that there is no definite time needed to show up. Additionally, we had some scavenger hunt forms returned, but many people did not receive them (see/arms in Appendix H). We should have some readily available on each table so people who stumble onto the event can have a form, thus ensuring their assessment of the event as well. Finally, tallies should be taken at each table so that a running count of participants (and to also see which tables are more popular among children) can be accessible.
Although it was not Carter's fault, we really needed food at the event.
The End.
11

Lac Dang Honors Thesis Proposal
Appendix A 1
1. The Honors project should broaden your educational experience through independent work that adds to your knowledge and develops your talents. How will your project help you to accomplish these objectives and add to your personal goals? Why, in short, do you want to do this particular project?
Being a science major, I chose not to write a research paper because it only stimulates a set group of people. I wanted to do something that would help the community understand the different branches of science and learn to love it the way that I do. Torn between the decision of becoming a scientist or a teacher when I first stepped foot on campus, I have decided that I can do both with my proposed thesis to have a science day on the Cardinal Greenway. With this event, the attentions of the community, specifically teenagers and younger children, will hopefully be brought together to enjoy a day of fun science on the Greenway.
2. When are you signing up for HONRS 499?
I have happily signed up for HONRS 499 for spring of 2004.
3. What will be the outcome of this project? (Be specific.)
With the conclusion of this project, a manual will be made in the form of a "How to Guide," so that this event can be repeated in the future, hopefully annually. This guide will have, but are not limited to, goals, procedures, experiments, materials needed, setup and safely gUidelines.
4. Objective or Thesis (include target audience, purpose):
Geared towards an audience of teenagers and younger children, as well as their parents, teachers and the other members of the Muncie community, "Science day on the Greenway," will try to target those who have a spark of interest in science but do not know how to pursue their curiosity. Optimistically, the day of fun experiments, the combination of book science to real life experiences, and lectures can modify preformed thoughts, and help people realize that not all forms of science are difficult. The other objective of this thesis is to help create a "How to Guide," for the Cardinal Greenway. so that they can perform the "Science Day" annually.
5. Project Description (please be specific-approximately two paragraphs):
1
Loc Dang Honors Thesis Proposal
Appendix A 1
"Science Day on the Greenway" is scheduled to occur on a Saturday of early April 2004. It is prospected to be an all-afternoon event starting at 10 AM and ending at around 4 PM, depending on how the event proceeds. The day will be filled with activities, such as scientific experiments, observing games, and guest speakers, that will help pique the observers' curiosity. For the different activities, we will be setting up booths or tables scattered along the Greenway (so this project is actually a double edged sword letting people learn about science, thus fulfilling our objectives to graduate and it also serves as a promotional event for the Cardinal Greenway, letting people enjoy a day getting to know the local everyday use trail). These booths will contain experiments and information that encompasses the three major branches of science: chemistry, biology, and physics. Also, we will try to develop some safe hands on activities for those who wish and are able to participate.
Along with the booths strewn along the Greenway, we plan on incorporating other activities to the project. Some examples will be scientific demonstrations, speakers, a question and answer session, and a nature/science scavenger hunt, letting the participants roam and explore the Cardinal Greenway, learning about the surrounding science.
Because I have chosen to work with another person on this project, my partner, Mary Borger, and I have split the obligations. While I am responsible for the event's publicity and for the arrangements for students, teachers, and other community members to come and participate in this joyous event, Mary will be in charge of planning and coordinating the monumental occasion. Together, we will work to plan all the demonstrations, activities and sponsorships for the event that are required of us, if not more, that will guarantee our success for the graduation to come.
6. State what the importance or implications of the project are. What do you expect to learn, or what would others learn from knowing about your anticipated results?
The most important goal of this project is to be able to influence the minds of young people so that they will realize science is not boring and can be used in the same sentence with the word "fun." We hope to educate the community about the different aspects of science and hope to learn from the experience as well. Hopefully, we all can gain a plethora of knowledge. A secondary goal will be to create a manual that shows how to plan, organize and host an event such as this one. The purpose for the manual
2

Loc Dang Honors Thesis Proposal
Appendix A
1
is to allow" Science day on the Greenway" to become an annual event, thus ensuring our legacy here in Muncie.
3
Mary Borger Honors Thesis Proposal 1
Appendix A 2
1. The Honors project should broaden your educational experience through independent work that adds to your knowledge and develops your talents. How will your project help you to accomplish these objectives and add to your personal goals? Why, in short, do you want to do this particular project?
I am a secondary education major, and my primary area of study is chemistry with a supporting area of biology. As part of my future career I will be required to plan science events that capture student interest. My proposed thesis project will be a science day on the Cardinal Greenway. The purpose of this event is to draw the attention of young people as well as the community in order to bring them together for a day of science and fun on the Cardinal Greenway.
2. When are you signing up for HONRS 499?
I am signed up for HONRS 499 during the spring semester of 2004.
3. What will be the outcome of this project? (Be specific.)
The outcome of this project will be a creative activity in the form of a "How To Guide," or manual, in order to allow the event to take place on an annual basis. This guide will include, but is not limited to, goals, procedures, activities, materials, setup, and safety.
4. Objective or Thesis (include target audience, purpose):
The objectives of my thesis are to create the "How To Guide," or manual, for the science day on the Cardinal Greenway as well as to gain the valuable knowledge that comes from setting-up, working, and organizing such an event. The target audience will be elementary through middle school children, their parents, teachers, and the Muncie community. The purpose of this event is to combine the knowledge that is learned from books about science and nature with real life experiences. In addition to learning science through application, this is an excellent opportunity to involve the Muncie community.
5. Project Description (please be specific-approximately two paragraphs):
The event is currently scheduled to be on a Saturday in early April, 2004. The "Science Day on the Greenway" will be an all day event starting at 10:00 AM and going until 4:00 PM. The day will be filled with activities to maintain the children's attention and interest. Among these

Mary Borger Honors Thesis Proposal 2
Appendix A 2
activities will be booths scattered along a section of the Cardinal Greenway. The booths will house science exhibits that encompass all areas of science including chemistry, biology, and physics. Along with the science exhibits, there will be hands-on experiments in which the children, parents, teachers, and community members will be able to participate.
In addition to the booths scattered along a section of the Cardinal Greenway, there will be other activities. Among these will be a science related scavenger hunt. This will be for the children, who will be required to have adult supervision the entire time. This scavenger hunt will allow the children to explore the Cardinal Greenway, along with the Science surrounding it. Other activities may include science demonstrations, speakers, and a question and answer session. The entire project will require a lot of time and resources. My partner, Loc Dang, and I have broken our duties into two areas. I am responsible for the majority of the event planning and coordination. Loc will be in charge of the event's pUblicity and arranging for students, teachers, and community members to come and participate in the event. Also he will be responsible for gathering sponsorships for the event if required. Together we will plan the activities and demonstrations.
6. State what the importance or implications of the project are. What do you expect to learn, or what would others learn from knowing about your anticipated results?
The implications of the project are numerous. The most important goal of this project is to create a working manual on how to plan, coordinate, and host such an event. The purpose is to allow the' Science day on the Greenway" to become an annual event. The second goal of the project is to educate children and the people of Muncie about Science and involve them more in the community. The third implication is the learning experience that will accompany the set-up, organization, and fruition of an event as large as this one. Everyone that participates in the' Science Day on the Greenway" will gain a wealth of knowledge.

Appendix B
The following are the demonstrations, experiments, and hands-on activities used during ·Science Day on the Greenway." Materials needed for each activity are listed on the procedural write-ups, and the prices that follow are provided as an estimate for the repetition of these experiments on future occasions. The prices reflect those from March 2004, but please note that they may have changed.
1. Airness Awareness 2. Bath Bubblers 3. Candy Molecules 4. Density Column 5. Digestion 6. Fossils 7. Gluep 8. Green Pennies 9. How Soap Works 10. Oil Spill
11. Oobleck 12. Paper Airplane 13. Rubber Eggs 14. Static Electricity 15. Volcanoes
Appendix B 1
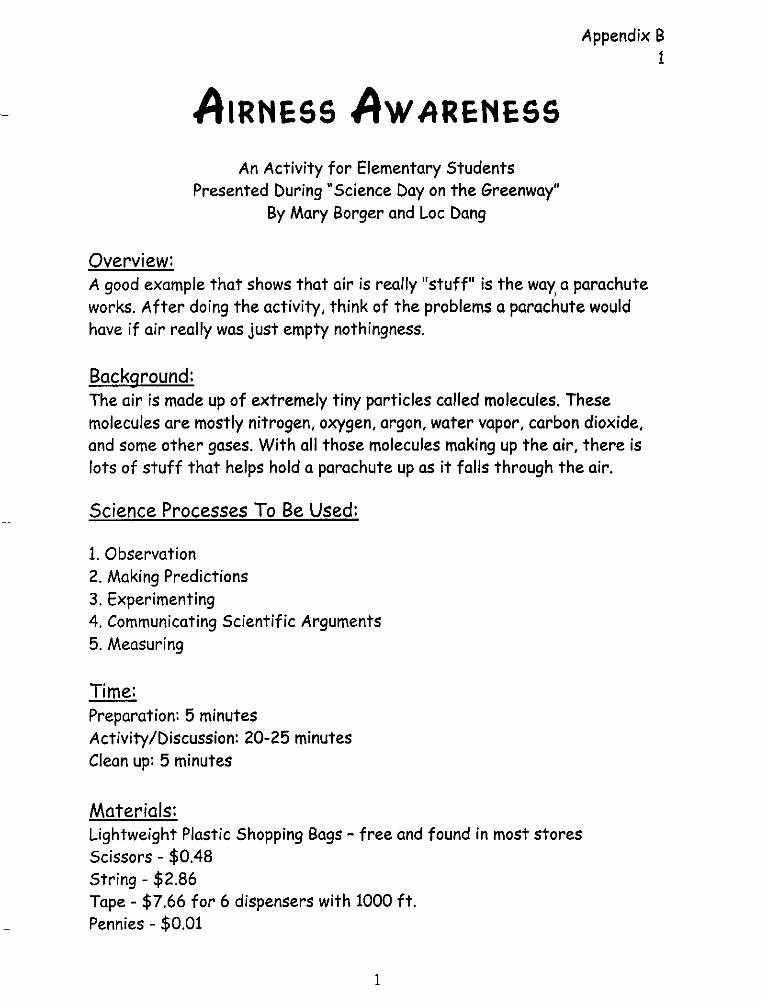
AIRNESS AWARENESS
An Activity for Elementary Students Presented During "Science Day on the Greenway"
By Mary Borger and Loc Dang
Overview: A good example that shows that air is really "stuff" is the way, a parachute works. After doing the activity, think of the problems a parachute would have if air really was just empty nothingness.
Background: The air is made up of extremely tiny particles called molecules. These molecules are mostly nitrogen, oxygen, argon, water vapor, carbon dioxide, and some other gases. With all those molecules making up the air, there is lots of stuff that helps hold a parachute up as it falls through the air.
Science Processes To Be Used:
1. Observation 2. Making Predictions 3. Experimenting 4. Communicating Scientific Arguments 5. Measuring
Time: Preparation: 5 minutes Activity/Discussion: 20-25 minutes Clean up: 5 minutes
Materials: Lightweight Plastic Shopping Bags - free and found in most stores Scissors - $0.48 String - $2.86 Tape - $7.66 for 6 dispensers with 1000 ft. Pennies - $0.01
1

Metric Rulers - $0.97
Safety and Disposal:
Appendix B 1
All materials in this activity can be thrown out with the trash. Remind the students to not play with the scissors or with the intact plastic bags, because this could lead the inability to breathe.
AIRNESS AWARENESS:
Discussion You might start this activity by asking the students if they know the composition of air. The background information above can also be discussed.
Procedure 1. Use a ruler and a pen to measure and draw a square on one side of a
plastic bag so that each side of the square is 15 centimeters. Cut out the square.
2. Cut 4 pieces of string about 20 centimeters long and tape them to the corners of the bag
3. Bring the free ends of the strings together and use tape to tape them to a penny so that you have a little parachute.
4. Hold the parachute from the middle of the square and drop it from high over your head. Describe how it falls. Why doesn't it fall really quickly like a stone? What do you think makes it float?
5. Use the other side of your bag to make another parachute that is 30 centimeters long on each side. Do you think this parachute will fall faster or slower than the smaller one? Why?
6. Hold both parachutes at the same height and drop them at the same time to see!
2

Discussion
Appendix B 1
Look at the picture below. If air is made out of molecules of nitrogen, oxygen, argon, water vapor, carbon dioxide, and some other gases, how could you use this picture to explain why one parachute falls faster or slower than the other?
15 em 30 em
Reference:
American Chemical Society. "Airness Awareness." Wondernet. 17 Nov. 2003. http://www.chemistry.orq/portal/a/c/s/l/wondernetdisplay.html?DOC=wond ernet%5Cactivities'Yo5Catmosphere'Yo5Cairness.html
3

Overview:
An Activity For Elementary Students Presented During "Science Day on the Greenway"
By Loc Dang and Mary Borger
Appendix B 2
This activity will demonstrate the properties of a chemical reaction in a way that the students can understand. They will learn how reactions work and the energies that they either absorb or release.
Background: What's the first thing that comes to mind when someone says "chemical reaction?" Do you think of really smart people with glasses wearing their lab coat with the pocket protectors, mixing a bunch of green bubbling liquids to red smoky ones? If so, you are only part way correct.
Just how important are chemical reactions? Would you believe that without them, there would be no life on earth? Well, you better believe itl Chemical reactions are not only necessary in the everyday uses (like cooking and driving), but are needed to keep your body functioning and well maintained. These reactions keep your blood flowing and they help you defend against those nasty germs that make you sick.
When anything undergoes a chemical reaction, their atoms (or molecules) rearrange to make something totally different. The easiest way to think of a chemical reaction is that if it happens, you cannot get back what you used to have. For instance, if you burn paper, you get ashes. There is no way to get the paper back out of ashes.
Science Processes To Be Used: 1 . Make observations 2. Experiment 3. Discuss Conclusions
1

Time: Preparation - 10 minutes Activity/Discussion -10 minutes Clean up - 5 minutes
Materials: Citric Acid - $9.99 Baking Soda - $4.19 for a 121b bag Water - $0.58 Scents - $3.00
Safety and Disposal:
Appendix B 2
This experiment the kids can take homel Unless allergies are a problem, the kids can take the bath bubblers home and use them during their bath. Bubblers will fizz in water and release a specific scent. Otherwise, the bubblers can be thrown away with no harm to the environment.
Discussion Explain how chemical reactions take place and how they are important to everyday life. Demonstrate by performing a reaction experiment that is relatively easy and safe to do.
Procedure 1. Explain to the students what goes happens during a chemical
reaction. 2. Pour in the dry ingredients and have them mix it with their
hands. 3. Mix their scent of choice with the water and slowly add it to
the dry ingredients with a plastic pipet. Please refrain from adding too quickly.
4. When the mixture can be molded into a ball, have them put it in a cup to dry and explain to them what will happen when they place it in the tub.
2

Review Ask the students the following questions:
1. What happened during the experiment? 2. Why wasn't all the water added all at once? 3. What did you feel? 4. What do you think will happen in the tub?
Ingredients: t cup Citric Acid t cup Baking Soda t cup water 5-10 scent drops
3
Appendix B 2
Overview:
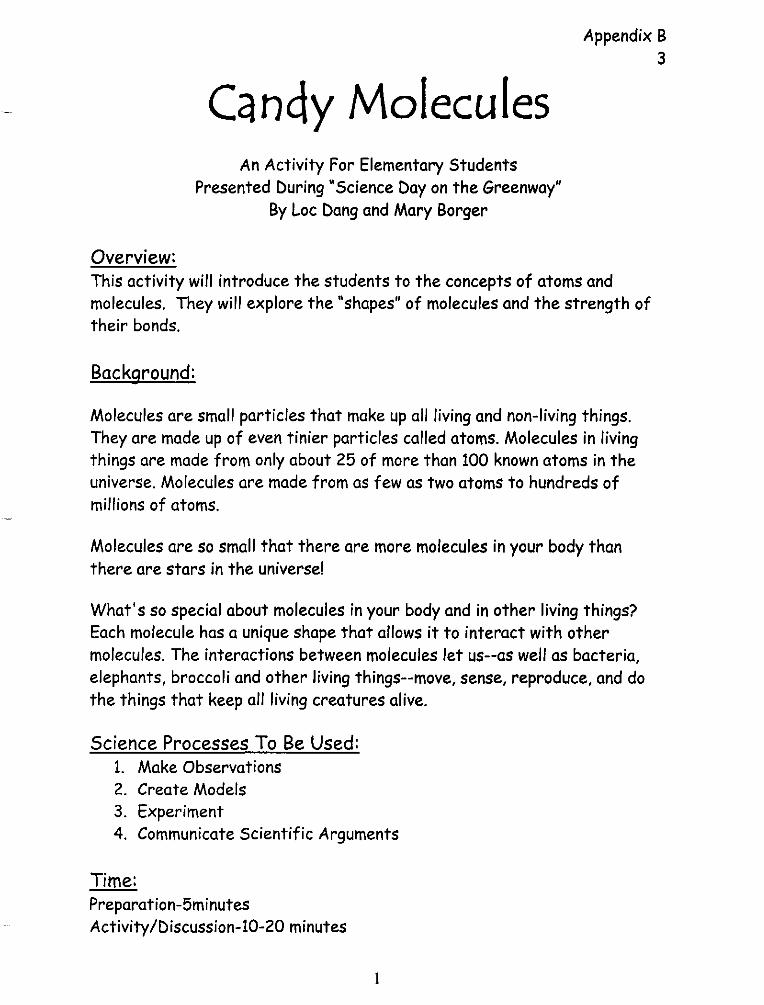
('lnc\y Molecules An Activity For Elementary Students
Presented During "Science Day on the Greenway" By Loc Dang and Mary Borger
Appendix B 3
This activity will introduce the students to the concepts of atoms and molecules. They will explore the "shapes" of molecules and the strength of their bonds.
Background:
Molecules are small particles that make up all living and non-living things. They are made up of even tinier particles called atoms. Molecules in living things are made from only about 25 of more than 100 known atoms in the universe. Molecules are made from as few as two atoms to hundreds of millions of atoms.
Molecules are so small that there are more molecules in your body than there are stars in the universe!
What's so special about molecules in your body and in other living things? Each molecule has a unique shape that allows it to interact with other molecules. The interactions between molecules let us--as well as bacteria, elephants, broccoli and other living things--move, sense, reproduce, and do the things that keep all living creatures alive.
Science Processes To Be Used: 1. Make Observations 2. Create Models 3. Experiment 4. Communicate Scientific Arguments
Time: Preparation-5minutes Activity/Discussion-l0-20 minutes
1

Clean-up-5-10 minutes
Materials: Mini Marshmallows - $0.77 Gummy bears - $5.16 for lib bag Round Toothpicks - $0.58 for 50 toothpicks
Safety and Disposal:
Appendix B 3
This experiment the kids can eat! Round toothpicks will be used so as to prevent accidents. All materials can be thrown out with the trash. Remind the students not to poke each other with the toothpicks.
Candy Molecules: Discussion Explain the idea of a molecule to the students. Include in the explanation the background information above. Demonstrate how to make molecules using various "candy" atoms.
Procedure 1. Explain to the students that each piece of candy represents an atom. 2. Each different color or shape of candy is a different atom. 3. Have the students make their own molecules out of "candy" atoms
using round toothpicks to hold the atoms together. 4. Upon completion allow the students to eat their "candy" atoms
Discussion Ask the students the following questions:
1. What molecular shapes did you discover? 2. Were some shapes more stable than others? 3. Were some molecules more stable than others depending on the
lengths of their bonds (toothpicks)? 4. Would a molecule with multiple bonds (toothpicks) be better than a
molecule with a single bond?
2

Ingredients: Mini Marshmallows, Gummy bears
Reference:
Appendix B 3
Dave Pretre. "Gumdrop and Marshmallow Models of Molecules." Farallone View Elementary School. http://www.coastside.net/farview/dave/LsnPlans/Gumdrop.htm
3
Overview:
An Activity For Elementary Students
Presented During "Science Day on the Greenway"
By Loc Dang and Mary Borger
Appendix B 4
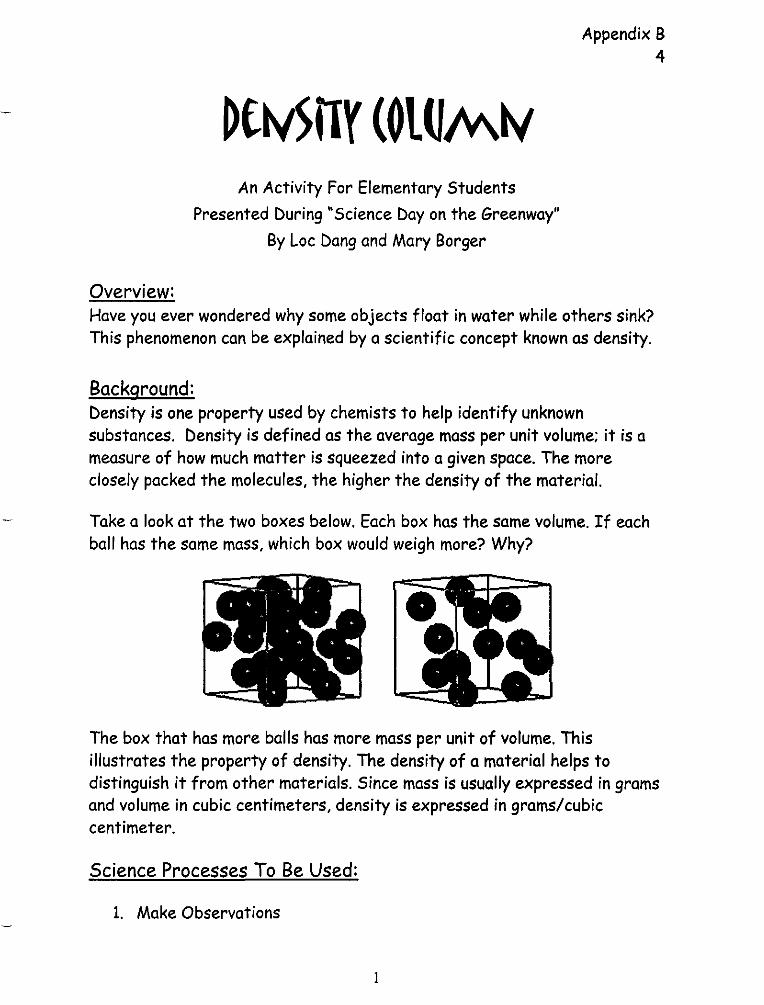
Have you ever wondered why some objects float in water while others sink? This phenomenon can be explained by a scientific concept known as density.
Background: Density is one property used by chemists to help identify unknown substances. Density is defined as the average mass per unit volume; it is a measure of how much matter is squeezed into a given space. The more closely packed the molecules, the higher the density of the material.
Take a look at the two boxes below. Each box has the same volume. If each ball has the same mass, which box would weigh more? Why?
The box that has more balls has more mass per unit of volume. This illustrates the property of density. The density of a material helps to distinguish it from other materials. Since mass is usually expressed in grams and volume in cubic centimeters, density is expressed in grams/cubic centimeter.
Science Processes To Be Used:
1. Make Observations
1

2. Form a hypothesis 3. Analyze Data 4. Communicate Scientific Arguments
Time: Preparation-10 minutes Activity/Discussion-5-10 minutes Clean-Up-5 minutes
Materials: Water - $0.58 per gallon Vegetable Oil - $4.69 per 1.25 gallon Pancake Syrup - $1.00 Tall Clear Container - $1.00
Safety and Disposal:
Appendix B 4
All chemicals are commonly found in households. Water, vegetable oil, and pancake syrup can be disposed of down the sink or out with the trash. This activity will be in the form of a demonstration so the students should not have contact with its components. Remind the students that scientists never taste chemicals, so don't eat any of the layers (especially the syrup).
Discussion Ask the students if they have every wondered why some things float while others sink in water or other substances. Discuss with them the property of density and the background. information above.
Procedure 1. In a clear tall container add 2/3 cup pancake syrup. 2. Pour 2/3 cup vegetable oil into container. 3. Pour 2/3 cup of water into the container. 4. Wait a few minutes for each of these substances to settle in the jar. 5. Notice how each substance and item has a different density and stays
in separate layers according to its density.
2
Discussion
Appendix B 4
This demonstration is a display of densities. Ask the students the following questions:
1. What substance do you think has the highest density? Why? 2. What substance do you think has the lowest density? Why? 3. How could a scientist use this type of experiment to determine the
identify of an unknown substance?
Ingredients:
Water, Vegetable Oil, Pancake Syrup
References:
1. Mandell, M. "Simple Science Experiments with Everyday Materials." Sterling Publishing, 1989.
2. American Chemical Society. "Density." Wonderscience Feb. 1989.
3

Overview:
An Activity For Elementary Students Presented During "Science Day on the Greenway"
By Mary Borger and Loc Dang
Appendix B 5
This activity will demonstrate the concept of digestion and how saliva and mucous aids in swallowing. By showing difficulty or ease with a dry or wet throat, students will explore how the throat works.
Background: Boogersl Eww, those things are gross. But if you stop and think about it, just what are boogers? If you said snot, you're getting close to the word we want. Bingol Mucus would be the correct answer. Whatever it is, it's still gross right?
What if we told you that your body needs mucus in order to live? How, you ask? Do you remember seeing on a hot sunny day in your house, a bunch of dust particles in a beam of sunlight? Everyday, you breathe a bazillion gazillion of those particles into your body. Mucus helps trap and get rid of them before they can do any damage.
So what's this have to do with digestion? Well, your throat is a long muscular tube that contracts food down to your stomach in a method called peristalsis (parra-stal-sis). Mucus, as you will see, greatly assists this process and helps you swallow with ease. Without mucus, eating would not be so much funl
Science Processes To Be Used: 1 . Make observations 2. Experiment 3. Discuss Conclusions
1

Time: Preparation - 5 minutes Activity/Discussion -10 minutes Clean up - 10 minutes
Materials: Bar of soap -Water - $0.58/gallon 4-5 pairs of hands
Safety and Disposal:
Appendix B 5
This experiment is safel If the kids take baths or showers often, then soap is no problem. Hypoallergenic and odorless soap will be used to help prevent any allergic reactions. Please remember to wash hands after the experiment.
Di3dtion:
Discussion Explain how digestion works and how important it is for the body to have mucus. Demonstrate by performing a swallowing experiment that is extremely easy and safe to do.
Procedure 1. Explain to the students what happens when you swallow. 2. Have them fist their hands and stack them one on top of
another in a way that a long "tube" is made. 3. Start a dry bar of soap at the top and have the students try
to squeeze the bar down to the bottom in a wave-like motion. Time this experiment.
4. Next, have the students wet their hands. This will be equivalent to mucus. Then wet the bar of soap so that it will
2

Appendix B 5
be moist (like saliva does before you swallow). Time this experiment.
5. After the experiment is over. have the students wash their hands.
Review Ask the students the following questions:
1. Which bar of soap was harder or slower to push down? 2. Which bar of soap was easier or faster to push down? 3. What would happen if there were too much mucus?
Ingredients: 1 Dry Bar of Hypoallergenic and Odorless Soap - $6.00 for 6 bars 1 Wet bar of Hypoallergenic and Odorless Soap - $6.00 for 6 bars Water
3

Overview:
}:OSSl{S
An Activity for Elementary Students Presented During "Science Day on the Greenway"
By Mary Borger and Loc Dang
Appendix B 6
Fossils are the remains of past life forms. Scientists can learn a lot about past life forms by studying fossils; however, very few things form fossils because conditions have to be right in order for fossilization to occur. This exercise is designed to help children learn about fossils and the process of fossilization.
Background:
Fossils are the remains of ancient animals and plants, the traces or impressions of living things from past geologic ages, or the traces of their activities. Fossils have been found on every continent on Earth, maybe even where you live.
The word fossil comes from the Latin word fossilis, which means "dug up." Most fossils are excavated from sedimentary rock layers. Sedimentary rock is rock that has formed from sediment, like sand, mud, small pieces of rocks. Over long periods of time, these small pieces of debris are compressed (squeezed) as they are buried under more and more layers of sediment that piles up on top of it. Eventually, they are compressed into sedimentary rock. The layers that are farther down in the Earth are older than the top layers.
The fossil of a bone doesn't have any bone in it! A fossilized object has the same shape as the original object, but is chemically more like a rock.
Fossils have the same shape that the original item had, but their color, density, and texture vary widely. A fossil's color depends on what minerals formed it. Fossils are usually heavier than the original item since they are formed entirely of minerals (they're essentially stone that has replaced the
1

Appendix B 6
original structure). Most fossils are made of ordinary rock material, but some are more exotic, including one fossilized dinosaur bone, a Kakuru tibia, which is an opal!
In Indiana, fossils of mammoths have been found.
Scientific Processes To Be Used: 1. Observation 2. Forming An Hypothesis 3. Making Predictions
Time: Preparation-30 minutes Activity/Discussion-1O-15 minutes Clean-up-5-10 minutes
Materials: Plaster of Paris - $5.00 Miscellaneous Objects to Make Imprints - seashells ($2.00 if bought) Aluminum Foil - $5.58 for 500 sheets Wax Paper - $4.17 for 500 sheets Water - $0.58
Safety and Disposal: Meant to be kept as a souvenir, but if disposal needed, a trash can will do. Be careful with small sharp edges.
Procedure 1. Make a "bowl" out of a sheet of aluminum foil. 2. Fill the bowl with plaster of Paris. 3. Press an object into the plaster of Paris.
2

Appendix B 6
4. Wait approximately 30 minutes, and then carefully remove the object and foil.
5. You have a fossil!!
Disci/ssion As an introduction, ask the children what they already know about fossils. Explain what a fossil is and how the fossilization process works. Emphasize the fact that fossils have been found on every continent on Earth, maybe even where the children live. The following questions can be asked concerning the previously made fossils of several objects and the objects themselves (which should be made visible to the children):
1. Can you determine what object created this fossil? 2. How did you make that decision? 3. How do you think scientists decide on what objects create fossils? 4. Have any of you found fossils before?
Ingredients: Plaster of Paris, Water
Reference:
Funology.com "The Science of Having Fun!" http://www.funology.com/laboratory/lab003.cfm
3

Overview:
An Activity For Elementary Students Presented During "Science Day on the Greenway"
By Mary Borger and Loc Dang
Appendix B 7
Gluep is a hands-on activity in which the students will mix a solution of Eimer's glue with Borax in the presence of food dye to form gluep, a new chemical.
Background: Gluep has some properties of a liquid (it flows) and some properties of a solid (it breaks). Most brands of white glue contain millions of individual chains of a polymer called polyvinyl acetate that have been dissolved in water. Before the Borax is added these chains are able to slip and slide freely over one another like strands of freshly cooked spaghetti. Although they can slip around, the polyvinyl acetate chains are so long that they do interfere with each other, causing the glue to be rather thick and to pour more slowly than water. When the Borax is added, the polyvinyl acetate strands become linked like rungs link the two sides of a ladder. The Borax forms bridges with the polymer chains, binding them together and producing a gel-like material that is thicker than the glue solution.
Science Processes To Be Used: 1. Examine changes in objects. 2. Participate in asking questions. 3. Make and share observations.
Time: Preparation-5 minutes Activity/Discussion-1O-20 minutes Clean-up-5 minutes
1

Materials: Eimer's Glue - $7.86/gallon Water - $0.58 Borax - $2.67 Popsicle Sticks - $2.24 Cups - $6.46 for 450 cups Paper Towels - $14.87 for 4000 sheets Food Dyes - $1.97
Safety and Disposal:
Appendix B 7
Do not pour Borax-glue mixture down the drain because it will plug it. Place the gluep, all student cups, and Popsicle sticks in the trash. Flush excess Borax down the drain with plenty of water. The food coloring will stain clothing. Gluep should not be eaten. Gluep leaves water marks on natural wood furniture and also sticks to carpet. Vinegar will de-gel gluep so that it can be cleaned from the carpet and clothing. Tell the children that scientists do not taste chemicals. Borax contains sodium tetraborate decahydrate, so avoid contact with eyes. If Borax is ingested, rinse mouth and give a large glassful of water or milk. Do not induce vomiting, and call a physician immediately.
Disct.lssion As an introduction you might want to talk about monomers and polymers. There are thousands of things in a child's everyday life that are made from polymers-plastic milk jugs, combs, brushes, tennis shoes, pens, balloons, band-aids, disposable diapers, football helmets, straws, toys, etc.
1. Ask for eight volunteers to demonstrate cross-linking. Tell the students that each child represents a monomer-a "mer" is a unit of something.
2. Have monomerS move freely about. 3. Have two groups of four monomers join hands to form two short
segments of a polymer chain. "Poly" means "many" and "mer" means unit, so a polymer is many units linked together.
2

Appendix B 7
4. Have each polymer move around with hands still linked. Point out that they can move relatively freely just like the polymer molecules in white glue.
5. Explain that Borax contains units that act like rungs on a ladder, or cross-linkers, connecting the polymer chains together. Play the role of the ladder rung (the cross-linker) by holding the hand of one monomer in the middle of each of the polymer chains.
6. Have the polymers try to move around as before. While some movement is still possible, it will be much more restricted than before the cross-linker was added.
7. Ask the students to predict how the glue mixed with Borax will behave. This should set the stage for the experiment.
Procedure 1. Instruct students to work on the paper towel. 2. Demonstrate each step of the following procedure and then ask the
students to do these steps: a. Put one spoonful of the colored water into your cup. b. Put one spoonful of glue into your cup. c. Stir with the Popsicle stick. What does your solution look like? d. Team up, and have your partner add one spoonful of Borax to
your cup while you stir. Now add one spoonful of Borax to your partner's cup while he or she stirs. Now each of you stir your gluep for 1 minute.
e. Remove gluep from the cup and knead it 1-2 minutes to get rid of most of the stickiness.
Experimenting with G/uep Ask the students the following questions:
1. How is your gluep different than the glue solution you started with? 2. What does gluep feel like? Look like? 3. What happens if you pull it slowly, or pull it fast? 4. Press some gluep on the table and use a penny or other coin to make an
imprint into the gluep. Does it last? 5. Turn your cup upside down. Put your gluep on top and watch what
happens!!
3
Ingredients:
Appendix B 7
Elmer's Glue-All; 20 Mule Team Borax, A Natural Laundry Booster (contains sodium tetraborate decahydrate)
References:
Re-written from Beyond the Wow! and Polymers All AroLlnd YOLI
4

Overview:
An Activity For Elementary Students Presented During "Science Day on the Greenway"
By Loc Dang and Mary Borger
Appendix B 8
This demonstration is designed to introduce children to the process of chemical change using pennies and vinegar.
Background:
A chemical reaction occurs when two or more chemical substances are mixed together. This means that the atoms that were joined together in the original substances break apart and rearrange themselves to make a new substance. One or more substances may be transformed into one or more new substances. This new substance is quite different from the original substances. Some products of chemical reactions are heat, light, sound and changes in color. Chemical reactions are classified according to the kind of change that takes place.
Examples of Chemical Reactions: 1. A sparkler contains magnesium. This, when lit, reacts with oxygen in the
air and produces light and heat. 2. The chemicals inside a rocket, when lit, react with the oxygen in the air
and produce heat, light and sound.
Science Processes To Be Used: 1. Observing 2. Forming a hypothesis 3. Making inferences
Time: Preparation-24 hours
1

Activity/Discussion-lO minutes Clean-up-5 minutes
Material: Pennies - $0.01 Vinegar - $2.68 for two I-gallon bottles Paper Towels - $14.87 for 4000 count sheets Large Dish - use one from home
Safety and Disposal:
Appendix B 8
Vinegar is a safe household solution. It is sometimes used for baking purposes. Remind the children, however, that scientists never taste chemicals. Avoid contact with eyes. If vinegar does get into the eyes, flush with a lot of water. The children will not be allowed to touch the pennies, but they will be allowed to observe both sides. Let the pennies and paper towel dry out and dispose of both with other trash. Vinegar can be disposed of down the drain, or out with the trash. Pennies may be saved and used.
Procedure 1. Fold a paper towel in half and in half again. 2. Place the paper towel on the large dish and pour vinegar on it until it is
completely wet. 3. Put the pennies on top of the wet paper towel and wait 24 hours. 4. The pennies turn green!
Discussion Chemical reactions can be explained to the children as an introduction. Ask the children to make observations about the pennies and to form a hypothesis. Provide them with the following explanation: The tops of the pennies turned green and the bottoms of the pennies stayed copper in color. Vinegar is an acid that has the chemical name of acetic acid. Part of this acid combined with the copper of the pennies in a chemical reaction to form a green coating that is a new chemical, copper acetate. Oxygen must be
2

Appendix B 8
present for this chemical reaction to occur. Oxygen comes from the air, and this is why the tops of the coins turn green but the bottoms do not.
A famous example of this type of reaction is the Statue of Liberty. When the Statue of Liberty was first created more than a 100 years ago, it was bright and shiny as a new penny because of its copper sheeting. Due to more than a century of aging, however, harsh weather conditions and pollution have turned the Statue of Liberty into the green color we see today.
Ingredients: Copper Pennies, Vinegar
Reference:
Funology.com "The Science of Having Fun!" http://www.funology.com/laboratory/lab012.cfm
3

Overview:
An Activity For Elementary Students Presented During" Science Day on the Greenway"
By Loc Dang and Mary Borger
Appendix B 9
Soap is a curious substance, designed to solve an intriguing problem. Most dirt that will not simply wipe off or be shaken out is in fact some form of fat or grease. In this demonstration, the students will be able to observe how soap removes fat or grease.
Background: In most households the most common cleaning agent is tap water. The problem is that grease and water fall into two different and largely incompatible chemical groups. Drop oil into water, and it will tend to float or form discrete droplets. Pour water into oil and you will see the same effect. Additionally, substances such as salt and sugar that dissolve in water will not dissolve in oil, whereas something like petrol will only float on water but is quite capable of dissolving oil.
This difference in behavior is due to the nature of the molecules involved. Water is largely polar, which means water molecules tend to separate into fragments with opposite electrical charges, one positive and one negative. Chemicals such as table salt that happen to be made up of collections of charged fragments, or ions, find it easy to dissolve in water because the positive ions in the salt are attracted to the negative ions in the water, and vice versa.
Fats and oils tend not to be polar. Their molecules have no particular electrical charge, and so are not attracted to polar substances such as salt. Instead, they prefer to bond with other non-polar substances.
How does soap work? You have a greasy dish in a bowl of water, but the grease is showing no inclination to dissolve in the water because the water is
1
Appendix B 9
polar and the grease is not. Attack the grease with a cloth and most of what you achieve is to move it around on the plate, because it is trying to flatten itself against the surface of the plate in an effort to get away from the water molecules.
The soap molecule is a halfway house. It consists of a long strand with an ionic water-loving, grease-repelling group on one end, and a non-polar greaseloving, water-repelling group on the other. If you drop soap into clean water, all the molecules gather on the surface with their water-loving (hydrophilic) ionic ends stuck in the water and their fat-loving (lipophilic) ends waving in the air. Slide a dirty dish in, however, and the fat-loving end of each molecule sticks to the grease as it slips past. As the dish sinks, it takes the soap molecules with it, attached by their heads to the grease but still waving their water-loving tails in the water like microscopic tadpoles.
All you have to do now is bash at the dirt with a sponge or cloth, and it can be persuaded to leave the plate, for as it lifts off the surface it becomes insulated from the water as new soap molecules rush in and try to bury their heads in it. The end result is a small blob of grease completely surrounded by a layer of soap molecules, all with their fat-loving heads pointing inwards and their water-loving tails pointing outwards. As far as the grease is concerned, all it can see are fat-loving molecules, and as far as the water is concerned, all it can see is a rather large water-loving lump.
Eventually all the soap molecules are used up, and you have to tip out the dishwashing water and start again.
Science Processes To Be Used:
1. Examine changes in objects. 2. Participate in asking questions. 3. Make and share observations. 4. Form a hypothesis
Time: Preparation-5 minutes Activity/Discussion-1O-15 minutes Clean-up-5 minutes
2

Materials: Clear Jar or Container - use from home Water - $0.58 Vegetable Oil - $4.69 for 1.25 gallons Dishwashing Liquid - $4.69 for 90 oz Joy
Safety and Disposal:
Appendix B 9
All ingredients are common household chemicals that can be disposed of down the drain or thrown out with the trash. If the solution should happen to make contact with a person's eyes, rinse with lots of water. Always remind the children that scientists do not taste chemicals.
Discussion
As an introduction you might ask the students if they can think of anything that commonly stains their clothes. Also ask them if they know how to get stains out of clothing. Encourage the students to be scientists and make many observations. Also encourage them to form a hypothesis regarding how soap removes stains.
Procedure 1. Put some vegetable oil and some water in a clear jar or container. 2. Shake the jar and notice how the water and oil stay separated. 3. Put a few drops of dishwashing liquid into the jar, and secure the lid
again. 4. Shake the jar once again, and notice how a cloudy mixture has been
created.
Discussion Ask the students if they can explain what just happened. The background information above can be discussed. The dishwashing liquid broke up the oil
3
Appendix B
9
into smaller droplets that floated in the water creating a cloudy mixture. When cleaning, soap allows oil and grime to be washed away more effectively.
Ingredients:
Water, Vegetable Oil, Dishwashing Liquid
References:
Funology.com "The Science of Having Fun'" http://www.funology.com/laboratory/lab046.cfm
4

Overview:
An Activity For Elementary Students Presented During "Science Day on the Greenway"
By Mary Borger and Loc Dang
Appendix B 10
Oil spills happen frequently around the world when oil is being transported to its users. These spills are very harmful to the life that inhabits the area where the oil was spilled. It is our responsibility to clean up these spills.
Background:
Oil spills into rivers, bays, and the ocean are caused by accidents involving tankers, barges, pipelines, refineries, and storage facilities, usually while the oil is being transported to us, its userS. Spills can be caused by the following:
.people making mistakes or being careless . • equipment breaking down . • natural disasters such as hurricanes . • deliberate acts by terrorists, countries at war, vandals, or illegal dumpers.
Oil floats on salt water (the ocean) and usually floats on fresh water (rivers and lakes). Oil usually spreads out rapidly acroSS the water surface to form a thin layer that we call an oil slick. As the spreading process continues, the layer becomes thinner and thinner, finally becoming a very thin layer called a sheen, which often looks like a rainbow. (You may have seen sheens on roads or parking lots after a rain.) Depending on the circumstances, oil spills can be very harmful to marine birds and mammals, and also can harm fish and shellfish. You may have seen dramatic pictures of oiled birds and sea otters that have been affected by oil spills. Oil destroys the insulating ability of fur-bearing mammals, such as sea otters, and the water-repelling abilities of a bird's feathers, thus exposing these creatures to the
1
Appendix B 10
harsh elements. Many birds and animals also ingest (swallow) oil when they try to clean themselves, which can poison them. Depending on just where and when a spill happens, from just a few up to hundreds or thousands of birds and mammals can be killed or injured.
Once oil has spilled, any of various local, state, and Federal government agencies as well as volunteer organizations may respond to the incident, depending on who's needed. People may use any of the following kinds of tools to clean up spilled oil:
.Booms, which are floating barriers to oil (for example, a big boom may be placed around a tanker that is leaking oil, to collect the oil) .
• Skimmers, which are boats that skim spilled oil from the water surface .
• Sorbents, which are big sponges used to absorb oil. .Chemical dispersants and biological agents, which break down the oil into its chemical constituents .
• In-situ burning, which is a method of burning freshly spilled oil, usually while it's floating on the water .
• Washing oil off beaches with either high-pressure or lowpressure hoses .
• Vacuum trucks, which can vacuum spilled oil off of beaches or the water surface .
• Shovels and road equipment, which are sometimes used to pick up oil or move oiled beach sand and gravel down to where it can be cleaned by being tumbled around in the waves.
Science Processes To Be Used: 1. Making Predictions 2. Designing Experiments 3. Analyzing Data 4. Inferring 5. Observing 6. Asking Questions
Time:
2

Preparation-5-10 minutes Activity/Discussion-1O-20 minutes Clean-up-1O-15 minutes
Materials: Large Plastic Tub - $10.00 (but we brought one from home) Sand - $3.00 Vegetable Oil - $4.69/1.25 gallon Plastic Animals and/or Vegetation - $1.00 Plastic Spoons - $5.87 for 500 spoons Sponges - $1.64 for two Straws - $7.78 for 3000 straws Newspaper - use from home
Safety and Disposal:
Appendix B 10
Keep the oil and sand mixture away from children's eyes. The "tools" for the oil clean up should not be used on fellow children, but only on the clean-up process. The components of this demonstration should be thrown away. This demonstration is messy, so it would be advised to surround the plastic tub with newspaper. Vegetable oil does leave marks on clothing, but these marks should be removable with detergent.
Discussion When oil tankers accidentally spill their cargo of oil into the ocean, they cause a huge environment danger. Oil is extremely hard to remove from the water and the beaches, and the whole environment is damaged. In this experiment, you can see how hard it is to remove oil from sand.
Procedure 1. Fill a large plastic tub with sand and oil and mix it well. 2. Place plastic animals and/or vegetation throughout sand and oil
mixture. 3. Give the children possible "tools" (sponges plastic spoons, and straws)
to use to clean up the oil spill.
3
Appendix B 10
4. Ask the children to come up with the best method for cleaning up the oil spill off of the sand given their choice of tools.
Disctlssion Ask the children if it was hard to save the environment. What method of clean up worked the best?
Ingredients: Vegetable Oil, Sand
Reference:
Funology.com "The Science of Having Fun!" http://www.funology.com/laboratory/lab040.cfm
4
Overview:
An Activity For Elementary Students Presented During "Science Day on the Greenway"
By Mary Borger and Loc Dang
Appendix B 11
Oobleck is a hands-on activity in which the students will mix a solution of cornstarch and water in the presence of food dye to form oobleck, a new chemical.
Background: Scientists have attempted to explain the unusual properties of Oobleck and similar substances in various ways. There is extensive literature on the subject including a 1906 article by Albert Einstein.
When most fluids cool they become more viscous. This means that their resistance to flowing increases. Cooking oil is a common example. Such fluids are called Newtonian. But there is another class of liquids called nonNewtonian. Their viscosity increases not with temperature, but when the liquid is stirred or compressed. But naming the property doesn't explain it, and some scientists have concentrated on the shape of starch molecules and how they fit together. Others have speculated that the electrical charge of the molecules is the key to Oobleck's strange behavior.
In one possible model, the starch molecules are compared to sand and water in a plastic squeeze bottle. The grains of sand are closely packed with a little water in between. The water's surface tension doesn't allow all the space between the sand grains to be filled with sand. Squeezing the bottle gently forces the sand grains to move against each other. This increases the spaces and allows more water to fill the spaces. The more gently you squeeze the more time there is for the water to fill the spaces and provide lubrication. But if you squeeze the bottle quickly, there isn't enough water between the sand grains and friction between the sand grains resists the flow.
1

Appendix B 11
Although sand grains are much larger than molecules of starch, starch molecules are quite large and the mix of cornstarch and water may react very much like a mixture of sand and water. This is one explanation for why Oobleck flows like a fluid, but reacts as a solid when suddenly compressed.
Other scientists base their Oobleck models on chemistry. Cornstarch is made of long chain molecules called polymers. When water is added to cornstarch and the mixture is compressed, the molecules become "tangled" and are unable to slide easily against one another.
A third model suggests that starch molecules acquire an electric charge as they rub together. The faster they are rubbed, the more electrical attraction is created among the molecules. This causes the increase in viscosity.
Science Processes To Be Used: 1. Questioning 2. Designing Experiments 3. Classifying 4. Formulating Models 5. Interpreting Data 6. Observing
Time: Preparation: 5-10 minutes Activity/Discussion: 10-15 minutes Clean-up: 5 minutes
Materials: Cornstarch - $0.73 Water - $0.58 Food Dyes - $1.97 for a four pack Large Mixing Bowl - $4.00 Measuring Cup - $1.00 Small Cups - $6.46 for 450 count Newspaper - use from home
2

Safety and Disposal:
Appendix B 11
Oobleck is safe to handle, but standard safety procedures still apply. Children are not to taste oobleck or get it in their eyes. They must also wash their hands after the activity. Oobleck will not stain clothing. Oobleck will clog sinks so do not pour it down the drain! Once it dries, it vacuums or sweeps up easily. You can save containers of oobleck by covering them with plastic wrap and putting them in the refrigerator.
Introduction Scientists have recently discovered a substance they call Oobleck. It is possible that oobleck may occur naturally as oceans on some planets, and you have been called in as expert engineers to further investigate the properties of Oobleck. Your job is to investigate the properties of oobleck. A property is an aspect of a substance that we can sense or can be detected by instruments that extend our senses (microscopes and telescopes).
Procedure 1. Mix together 2 cups of cornstarch, 3 drops of green food coloring,
and enough water to make a thick mixture (about the texture of pancake batter). Usually equal amounts of water and cornstarch will be used, but mix water in slowly.
2. Give each student some Oobleck in a small cup, and ask him or her to make some observations. Mention the following observations if they were not already stated:
a. Oobleck is a solid and a liquid at the same time. b. If you make a ball and throw it up in the air, it loses shape and
becomes flat in the air. c. Oobleck can be molded in a container and when taken out does
not keep its shape. d. If you fill a balloon with Oobleck, the air presses or forces the
Oobleck back out.
3

Appendix B 11
e. When you leave oobleck in the sun, the color evaporates; it turns hard like cement on the top and like jelly on the bottom. When heated this also happens and it gets sticky.
f. Oobleck does not bounce.
DisclIssion Ask the children if they can offer any explanations for the behavior of Oobleck. Ask them to imagine that they can see the individual molecules of cornstarch and water and to think about how they might act when being poured or pushed and pulled. This gives the children an opportunity to form their own models. Discuss the models mentioned in the background information above. You could end the discussion by explaining how difficult it is to observe what's going on at the molecular level just by observing the properties of a substance. Since there is no conclusive explanation of why Oobleck behaves as it does, suggest to the children that perhaps one day one of them will become a scientist and discover an explanation for the strange properties of Oobleck that everyone will agree is the correct one.
Ingredients: Cornstarch, Water,and Food Dye
References:
Re-written from Pam Eastlick from an activity by Jim McDonald. http://www.guam.net/planet/oobleck.html.
4

Overview:
Paper Airplanes An Activity For Elementary Students
Presented During" Science Day on the Greenway" By Loc Dang and Mary Borger
Appendix B 12
People have always been interested in learning how to fly. They first tried to make planes that flapped their wings, but it was a very long time before they could create an airplane that looks like ours today.
Background: Airplanes have many parts, but some of them are more necessary for flight than others.
1. FUSELAGE: This is the main body of an airplane without the wings, tail, or power source.
2. WINGS: These provide the lift needed to lift the plane by pushing down on the air. The air pushes back with an equal force making the plane go up into the air.
This is all an airplane really needs to get off the ground, but to keep it from crashing, the parts in the picture are helpful.
1

Wind Currenis
Lift ~
horizontal stabilizer -
_---i: Low Pressure {~~
Appendix B 12
\ W~NG ~-~~~~. . ~----------------------------------~~~~~~~
High Pressure
Airplanes get off the ground because of the difference in pressure on the top and bottom of the wings. The airplane's wings are curved as you can see in the diagram. As the airplane starts rolling down the runway, the air hits the wings and moves across the top and bottom of the wings. Since the distance across the top is longer, the air must move faster to get acroSS it in the same amount of time as the air moving across the bottom. This creates higher air pressure on the bottom of the wings than on top. As the
2

Appendix B 12
plane moves faster and faster, the air across the top must move faster creating a larger and larger pressure difference between the top and the bottom. The higher pressure on the bottom begins to exert an upward push on the wing. This push is referred to as lift. When this lift becomes large enough, it will lift the airplane into the air.
After the plane has taken off, it needs to stay at a certain speed in order to stay in the air. It also needs to stay at a certain height. If the airplane dips down lower than the needed height, it will stall and crash. If the airplane lowers its speed enough, it will not have enough air pressure to keep it in the air, and it will crash then as well. So the two things that matter most to maintaining the airplane's flight are speed and altitude.
Science Processes To Be Used: 1. Form a hypothesis 2. Create an Experiment 3. Make a Model
4. Take a Measurement
5. Communicate a scientific argument
Time: Preparation-5 minutes Activity/Discussion-15-20 minutes Clean-up-5 minutes
Materials: Paper (1 sheet for each student) - $4.87 for 500 sheets
Safety and Disposal: All paper can be recycled or thrown out with the trash. The only safety concern with this activity is the possibility of getting poked in the eye with a paper airplane. Remind the students to never throw paper airplanes at each other. When paper airplanes are thrown, make sure it is done all in the same direction or away from others.
3