se keeping an eye on the target sterilizing practice for ... · on the steam autoclave to...
TRANSCRIPT

6
T H E N E W Z E A L A N D V E T E R I N A RY N U R S E J U N E 2 01 5
Carol Bradley Associate Fellow of The Higher Education Academy (RVC), Qualified Veterinary Nurse Cert. IV,
Cert. III Health Sterilizing Technician, Cert. IV Assessment & Workplace Training
Keeping an eye on the target Sterilizing practice
for veterinary nurses
Introduction to instrument care and sterilizing practice
What has changed?Historically veterinary practice has relied on the steam autoclave to “sterilize” their instruments and haven’t had cause to give further attention to this discipline because of the low number of post-operative infection rates. This number may be in part, due to the current low level of antibiotic resistant bac-teria within the field of veterinary medicine.
Since the advent of HIV and MRSA (methicillin-resistant Staphylococcus aureus), the general public has become far more aware of the post-operative risks of surgical intervention, hospital processes and par-ticularly those processes within the realm of infection control.
As instrument cleaning, disinfection and sterilization comes under the scope of infec-tion control practice, it stands to reason that veterinary practice now finds itself under closer scrutiny in regards to infection control processes and practices.
Whilst there are many veterinary text books and research papers with a broad overview of sterilizing practice, including a nominal mention within the AVA and NZVA stand-ards, with a slightly more detailed mention in the BestPractice® standards, there are no compelling guidelines on sterilization prac-tices for veterinary hospitals in Australia and New Zealand.
In veterinary practice oversight of instru-ment care, sterilizing and disinfection is often left up to a senior veterinary nurse or practice manager who may have gained basic knowledge through various veterinary nurs-ing education providers. There is however a lack of in-depth knowledge equivalent to our
Reproduced with permission from the AVNJ Volume 20, Number 6, November 2014
human veterinary nursing counterparts and a reliance on anecdotal practices.
Current guidelinesGuiding bodies such as the Australian and New Zealand Standards have recognized a need for veterinary practices inclusion in written national guidelines. A start has been made in the AS4187-2003, Cleaning, disinfecting and sterilizing reusable medical and surgical instruments and equipment, and maintenance of associated environments in health care facilities, where specific mention is made in point 1.1 Scope of the document, “The standard may be suitable for applica-tion to the instruments and equipment used exclusively on animals in veterinary practice”1.
Whilst the standard is not a legally binding document, it is recognized as an industry guideline and discusses potential best out-comes for veterinary practices engaging in elective and emergent surgical procedures.
In the United States there is a plethora of information, guidelines and standards available, most notably the Center for Disease Control (CDC), the Association of Perioperative Registered Nurses (AORN), Healthcare Infection Control Practices Advisory Committee (HICPAC) and the American Journal of Infection Control.
As a (veterinary) medical profession, it is incumbent upon veterinary practice staff to be able to defend their infection control processes within the clinic or hospital, and to recognize correct instrument processing and sterilization as a part of the positive outcome for their patients.
Processing environment The instrument processing area ought to be isolated from all other activities so that
potential contamination of clean or sterile supplies is reduced. A dedicated room is considered optimal.
The facility should have efficient ventila-tion, with floor, wall, surface finishes, air conditioning and humidity taken into con-sideration to facilitate ease of cleaning, safety and comfort for staff.
Cleaning techniques should be designed to avoid generation of aerosols, e.g. utilizing deep sinks and ultrasonic cleaners with lids.
Work/traffic flowThe instrument processing area should have a work flow that encourages separate pro-cessing, starting from cleaning contaminated goods, instrument inspection, instrument packaging, sterilizing then storage without cross-over of traffic. Ideally the room would have a separate entry and exit.
A simple floor plan is outlined on page 7.
Disinfection or sterilization?So how do we determine what treatment contaminated instruments and equipment require for effective processing?
In 1968 Earle Spaulding devised a rational approach to disinfection and sterilization. This is commonly referred to as Spaulding’s classification. Spaulding believed that instru-ments and equipment should be cleaned and reprocessed according to the level of risk
NZVNJ Issue 74 Volume 21 Pages 6 - 19

7
T H E N E W Z E A L A N D V E T E R I N A RY N U R S E J U N E 2 01 5
associated with their intended use.
Even though Spaulding’s classification was devised in 1968, it still is as relevant today as when he introduced it.
Spaulding’s risk classification within vet-erinary education appears to 2, 3 be gaining recognition as a starting point in determining the appropriate process for decontamination and sterilization.
Spauldings Risk ClassificationCat-egory of Risk
Applic-ation
Example of items
Process to be used
Critical Entry or penetra-tion into sterile tissue, a cavity or blood-stream.
Surgical instru-ments, surgical implants.
All items must be sterile.
Semi-Critical
Contact with intact non-sterile mucosa or non-intact skin.
Flexible endo-scopes, anaes-thetic equip-ment.
Steriliza-tion is preferable where possible, otherwise high level disinfec-tion is required.
Non–Critical
Contact with intact skin.
Exam tables, blood pressure cuffs.
Clean as necessary with detergent and water.
Heat sensitive itemsFlexible endoscopes come under the semi-critical category and can be sterilized in
peracetic acid (Steris) or ethylene oxide units however these machines are currently rare in veterinary practice.
Steam sterilization isn’t suitable for flexible endoscopes due to their heat sensitive nature, therefore at a minimum they should be sub-jected to high level disinfection4.
As endotracheal (ET) tubes come into contact with intact non-sterile mucosa, they should be sterilized however many plastic, silicone or vinyl ET tubes in veterinary prac-tice are heat sensitive and can’t be sterilized therefore they should be subjected to high level disinfection, thoroughly rinsed and dried before use. If either of these processes aren’t possible, thorough cleaning with an enzymatic detergent and total drying should be completed before re-use.
There is still ongoing doubt and controversy regarding sterilization of rigid endoscopes used in laparoscopy or arthroscopy however, as these instruments penetrate sterile tissue5, according to Spaulding’s classification they must be sterilized prior to use.
On reflection I believe the ongoing discus-sion as to whether high level disinfection or sterilization ought to be used is associated with the older model of rigid endoscopes
that could not be subjected to steam or high temperatures. These telescopes flooded the veterinary market as the uptake of newer sterilisable models increased in human hospitals. If a practice owns an older style endoscope then high level disinfection must take place.
No matter which process you select, the prerequisite is CLEANING, CLEANING, CLEANING.
You can clean without sterilization but you can’t sterilize without thorough cleaning!
How clean is clean?Most references and texts recommend effec-tive or thorough cleaning must be performed before sterilization of surgical instruments that enter sterile tissue, however there is no current testing mechanism available in the clinical setting to give “real time” verification of bio burden after the cleaning process6.
It’s been reported that thorough cleaning can remove up to 99.9% of gross bio bur-den7, therefore each individual instrument or environmental surface should be closely inspected to ensure all visible gross organic material has been removed.
Cleaning does not require a disinfectant solution.
Why do we clean? Simply put, biostatics or biocidal agents require complete access to all surfaces of the instruments or equipment we are processing. The presence of blood, pus, serum or faecal matter interferes with this process, effectively protecting potential pathogenic material and acts as a physical barrier to the disinfectant or biocide.
When bioburden is left behindAny bio burden left on improperly cleaned instruments or surfaces may lead to patho-genic material being left behind and can lead to its survival despite being subjected to sterilization. If an improperly cleaned instrument is subjected to a high temperature steam sterilizing process, the bio burden can create a protective covering film “micro scab”, effectively protecting the pathogenic material within it. It’s reasonable to extrapolate that when the “contaminated” instrument is intro-duced to the sterile tissue of a patient, the natural body defenses liberates the material, thus potentially causing an infectious process.
The old adage still holds true that “what you CAN’T see CAN hurt you.”
You can clean without sterilization
but you can’t sterilize without thorough cleaning!

8
T H E N E W Z E A L A N D V E T E R I N A RY N U R S E J U N E 2 01 5
In addition to enabling proper disinfection or sterilization, effective cleaning contributes to the reduction of any potential damage to an instrument, particularly in the joints and crevices where large particles can cause misalignment or warping.
Instrument cleaning begins in the operative field (point of use)Gross blood and body fluids left to dry on surgical instruments causes pitting and staining therefore cleaning begins at the operative field.
The surgical assistant can assist with the cleaning process by wiping bloodied and dirty instruments with a clean swab mois-tened with sterile water as the procedure is in process. Saline should never be used, as this solution can cause corrosion and surface rust.
Transport of contaminated instru-ments and linensBefore transportation can occur, all sharp items such as scalpel blades and suture nee-dles must be discarded into the appropriate container. Additionally biological waste such as single use drapes, gowns, gloves, swabs etc. should be contained within the surgical suite or disposed of appropriately. Re-usable linen should be bagged for transportation to the laundry facility.
If there is to be any delay in processing instruments, a pre-treatment spray foam or a Clinipak® water soluble protection sheet or bag can be used. Alternatively a towel moistened with clean water laid over the top can prevent blood and debris from drying onto the instruments.
Appropriate cleaning detergentsHousehold dishwashing detergents or surgi-cal scrub solutions must not be used as these contribute to instrument corrosion, instru-ment staining and potential tissue toxicity. Additionally antiseptics should not be used as a cleaning agent.
Household dishing washing detergents cre-ate a lot of foam and are difficult to remove during the rinsing process. Additionally they contain brighteners, dyes, perfumes, thicken-ers and preservatives.
Chlorhexidine scrub solution contributes to instrument corrosion and damage of the passivation layer.
A dedicated surgical instrument detergent containing a mild alkaline detergent solution in the pH range of 8.0 – 10.8 is often rec-ommended because these solutions normally provide good soil removal[1]. However some studies have indicated that a neutral detergent is less corrosive on aluminium containers hence I tend to follow the rec-ommendation of a neutral pH 7-8 solution.
The manufacturers material safety data sheet (MSDS) document should be read before use of any solution.
The ideal surgical instrument cleaning deter-gent1 should be:• Biodegradable.• Non-corrosive.• Non-toxic.• Non-abrasive.• Low foaming.• Free rinsing.• Preferably liquid.• Neutral or mild
alkaline formulation.
Additional precautions• Strictly follow manufacturer’s directions
for dilution.• Do not mix solutions unless indicated.• Have an MSDS available, including first
aid instructions.• Store appropriately.• Dissimilar metals should not be cleaned
or sterilized together as this may cause
electrolytic corrosion.• Sodium chloride (saline) damages stainless
steel instruments.• Iodine and bleach will stain, pit or damage.• Engraving instruments damages the pas-
sivation layer.• Instrument colored tape isn’t recommended.• Instrument milk will not fix a damaged or
inferior instrument.• Mineral oil or silicone lubricants should
not be used because they can harbor microorganisms and prevent biocidal access.
• Air powered or electrical instruments should be lubricated using the type of lubricant according to the manufacturer’s recommendations.
• The use of distilled water where possible also negates the risk of normal tap water staining instruments.
Manual cleaning methodsAs previously stated, the aim of cleaning is to remove all organic, inorganic and microbial material.
In the vast majority of veterinary practices in Australia and New Zealand, manual cleaning of surgical instruments is still the method used to achieve this.
Washer/disinfectors are more widely used in human hospital Central Sterile Supply Departments (CSSD). Washer/disinfec-tor units are often subject to colonization and formation of biofilms if not routinely cleaned[1].
Manual cleaning of instruments should follow the rigid steps of a pre-clean rinse, soaking in an appropriate detergent, post-clean rinsing then thorough drying.
Whilst it’s ideal to rinse instruments with cool running water at the point of use[8], many veterinary practices are unable to facilitate this step due to time constraints or room design. Therefore a light weight, puncture proof transportable container with a secure lid can be used. Within the container it’s highly recommended to have a perforated tray in which to place the instru-ments to facilitate the cleaning process.
Instruments should be loaded according to weight, heaviest at the bottom, light delicate instruments at the top and micro instruments segregated. They should be fully opened and/or dismantled in preparation for cleaning.

9
T H E N E W Z E A L A N D V E T E R I N A RY N U R S E J U N E 2 01 5
Pre-clean rinse Rinse the instrument set under cool running water. This will remove the initial gross blood and soil. (Avoid hot water as this will bake the blood and soil onto the surface of the instrument which will make it very difficult to remove as well as interfering with the sterilizing process).
Instrument soakSoaking and cleaning in a deep sink of warm water (45°C) mixed with an appro-priate cleaning detergent. Adherence to the manufacturer’s instructions, particularly for soaking times and dilution rates is critical. Instruments must be scrubbed under the water, so that aerosols are contained to avoid contaminating the environment or adversely affect the staff member.
Careful cleaning of serrations and box joints should be achieved by use a soft brush. Harsh scouring pads or pastes can damage the pas-sivation layer of instruments, leaving them vulnerable to damage, rusting or pitting.
Mechanical cleaningMechanical cleaners include ultrasonic cleaners or washer/disinfector machines. I will only be discussing ultrasonic cleaning machines, as these are more commonly used in veterinary practice.
Take note that due to the fine vibrations of an ultrasonic cleaner, a slight blunting of sharp instruments may occur.
The mechanical method employs the use of an ultrasonic cleaning machine. These machines are available as a bench top or a stand-alone model and are of particular value when cleaning large numbers or difficult to clean instruments.
Ultrasonic machines clean by a process called cavitation. This process creates waves or oscillations within the water tank as a sound wave, well above the normal hearing range at 20,000 cycles per second. These sound waves create millions of sub-microscopic bubbles that collapse beneath the dirt and debris, imploding it from the surface of the instrument.
basis, to ensure the unit is working correctly otherwise instruments may not be cleaned appropriately.
The easiest and most common method of testing is to use aluminum foil (approxi-mately .025mm thick) purchased from the supermarket.
Ultrasonic cleaners are primarily used for stainless steel instruments with joints or serrations whereas absorbent materials such as plastic and rubber cannot be cleaned in these units as they absorb the vibrations, preventing the oscillation process. Lensed equipment such as endoscopes are dam-aged by this process. For safety reasons, staff should not place their hands into the unit whilst its oscillating as this may damage joints.
A low-foaming, neutral or mild alkaline detergent must be used. Normal detergents create excessive bubbles when the machine is oscillating and interferes negatively with the cleaning process.
Before use, the ultrasonic cleaner should be de-gassed (this removes dissolved oxygen in the solution). If de-gassing isn’t performed prior to use, it prevents the bubbles from imploding, resulting in a poor cleaning process.
Degassing is completed by filling the unit with fresh water and detergent. The machine is then run without instruments in the unit to remove all gases.
Instruments should be placed in an ultra-sonic basket or perforated tray and should not lie on the floor of the unit.
Tanks should be emptied and cleaned daily or when the solution becomes visibly soiled.
How do you know if your ultra-sonic cleaner is actually working?Ultrasonic cleaners ought to be tested for its cleaning performance on a daily or weekly
Testing Procedure: 1. Cut a section of aluminum foil to suit
the dimensions of the tank, with extra depth to hold onto but small enough not to touch the sides or bottom of the tank.
2. Immerse the aluminum foil into the tank water, holding in a vertical position.
3. Operate the ultrasonic machine for 10-15 seconds.
4. A consistent pattern of perforation should result with varying sizes of holes.
If the foil has any blank spots without holes or wrinkles, this indicates a problem with the cleaner and a service is required. If your foil looks like this image after the test, then you have an acceptable result.
Once the test is completed, the water should be drained and replaced with fresh water and cleaning solution, to ensure no foil residue is left in the cleaning tank.
Post clean rinseOnce clean, rinse the instruments thor-oughly, in warm to hot running water to remove all chemical residues. Using hot water facilitates the sanitation process and aids in subsequent drying of the instruments.

10
T H E N E W Z E A L A N D V E T E R I N A RY N U R S E J U N E 2 01 5
Drying of instruments Instruments should be dried thoroughly within a drying cabinet or manually dried individually with a lint free cloth prior to assembling and packaging. Drying cabinets are rare in veterinary hospitals, hence manual drying is commonly performed.
Drying is an important step in reducing the potential of re-contamination during inspec-tion and assembly as well as avoiding rusting, staining or steam quality problems.
Instruments that have any residual moisture may contribute to some common problems such as, wet loads, wet steam and perforation of paper packaging material.
Inspection Inspect the instruments for any malfunc-tion or damage, particularly needle holders that won’t grip, blunt scissors or misaligned hemostats and forceps.
RatchetsCheck instrument ratchets by closing on the first ratchet, then holding the instrument by the tip, gently tap the instrument onto a flat surface. The ratchet should stay closed. If ratchets spring open, attention is required to fix the alignment.
Needle holdersVisual examination is best to assess jaw wear, as the distal tip jaw tread wears out before anywhere else. The needle holder ought to be able to grip a standard needle on the second ratchet without twisting.
ScissorsTo check the sharpness of surgical scissors, use scissor test material; the scissor (includ-ing the tip) should cut the material cleanly and smoothly without any jagged edges or incomplete cuts. If test material isn’t avail-able, use a wet tissue.
Bone cutters & ronguersBone cutters or ronguers should be able to cut cleanly through a piece of card the same thickness as a manila folder.
Withdraw faulty instruments from service immediately.
Sorting The facility should have checklists (SOP’s – Standard Operating Procedures) available for identification and numbers of surgical instrument in sets. A copy of the checklist can be included in the instrument set for the surgeon or assisting veterinary nurse to check off.
Assemble instruments in similar groups on instrument stringers, (the old commonly used instrument pins make it difficult to keep instruments open for processing).
Whether an instrument has been used or not during the procedure, it should be considered contaminated and processed accordingly with the rest of the set.
An instrument set ought not to be sterilized unless it is complete.
Instrument stains Brown/orange
Caused by use of Chlo-rhexidine, inappropriate detergents, baked on blood or saline exposure.
Don’t wash instruments in Chlorhexidine, detergents not designed for instrument cleaning or expose to saline.
Dark brown/black
Use of inappropriate detergent or dried blood.
Use appropriate detergent and clean thoroughly.
Bluish/black
Stainless steel and chrome plated instruments sterilized together may cause carbon particles to settle on the instrument, giving a rust appearance.
Don’t sterilize dissimilar metals together, particu-larly single use with good quality stainless steel.
Light and dark spots
Water drop-lets with a high mineral content have condensed on the instrument and evapo-rated slowly or there may be retained detergent in linen or on instruments. This is particularly evident if tap water is used.
Don’t air dry instruments. Thorough rinsing and drying is required. A rubber eraser can be used to remove some stains, alternatively use a medical instrument stain remover solution.
Surface rust
Cracks and pits on the surface of instrument. If a pencil rubber can’t remove the stain, then it is most likely deep rust.
What is often thought to be rust is actually mineral deposits resulting from improper cleaning or auto-claving procedures. Rubbing the instrument with a pencil eraser will remove mineral deposits but will not remove rust.Surgistain or similar solution can also be used to remove surface rust.
Top: Misalignment of needle holders.Above: Needle holder showing wear at the tip.
WrappingWhat’s the purpose?The intention of packaging is to protect the sterilized articles from contamination until they are ready to be used or aseptically delivered to the sterile field.
Selection criteriaThere are many types of packaging materi-als on the market today, making selection difficult. When selecting packaging material the following criteria ought to be considered:
• Must be compatible with the sterilizing process being used.
• Must be able to be adequately closed or sealed.
12
T H E N E W Z E A L A N D V E T E R I N A RY N U R S E J U N E 2 01 5
• It must be permeable to air, steam and allow removal of same.
• Must be resistant to penetration by micro-organisms following sterilization.
• Free from loose particles and fibres.• No toxic ingredients or fast dyes in their
manufacture.• Perforation, damage and tear resistant
when handled.
Five types of packaging commonly used in the veterinary setting:• Paper bags. • Laminate packs.• Linen.• Synthetic materials.• Aluminum trays and boxes.
1. Paper bags - Useful for small light, non-sharp items such as swabs or cotton buds; they’re cheap and easily obtained. Dis-advantages are; they are easily perforated when wet, items can’t be visualized and heavy items can break through. Double bagging is required.
2. Laminate packs/window packs - Are a combination of transparent heat stable plastic film laminated to treated paper. These are multifunctional, relatively cheap, come in pre-cut sizes or in rolls of various widths. You can fit several small items in them and instruments can be identified through the window side. However due to the paper side they have similar disadvantages as outlined above. Double bagging is required.
Nylon packaging is well known for its retention of air and should not be used.
Wide weave materials are unacceptable as an effective barrier, e.g. tea towels.
When utilizing linen as a wrap, it should be used an inner wrap only, with a water resistant, single use wrap as the outer layer. Linen material as a stand-alone barrier wrap is no longer the material of choice for sterilizing.
Wraps should not to be too tightly wrapped or too dense as this will impede steam penetration into the centre of the bundle. The least amount of folds will allow greater penetration of steam. These should be done neatly.
Linen that has been treated with a water resistant chemical is also available for drape and gown manufacture, however validation from the manufacturer of its performance for steam penetration and drying qualities should be ascertained prior to its use. Chemically treated linen is limited in the number of launderings it can undergo before the barrier quali-ties are lost. Tracking of the number of launderings is required.
4. Synthetic materials - Synthetic disposa-ble material has superior barrier qualities compared to the others mentioned above. They will have varying degrees of moisture resistance, depending on which product you buy.
Above: Parcel pack.Above: Synthetic material.
Real time cost comparisons often show disposable materials can be cheaper than the laborious task of purchasing, making, repair, washing, folding and sterilizing of reusable linen.
Reusing single-use packaging is not an acceptable practice and should be discouraged as the material’s integrity cannot be relied upon.
5. Instrument containers - Aluminum and stainless steel instrument contain-ers are used for storing or autoclaving a wide range of surgical instruments, particularly orthopaedic implants, rigid endoscopes etc.
Wrapping methodsWrapping techniques are designed to protect the sterile instruments until use as well as reducing the risk of contamination when opening or delivering to the opera-tive field.
A parcel, envelope or modified parcel pack configuration ought to be selected as the wrapping method.
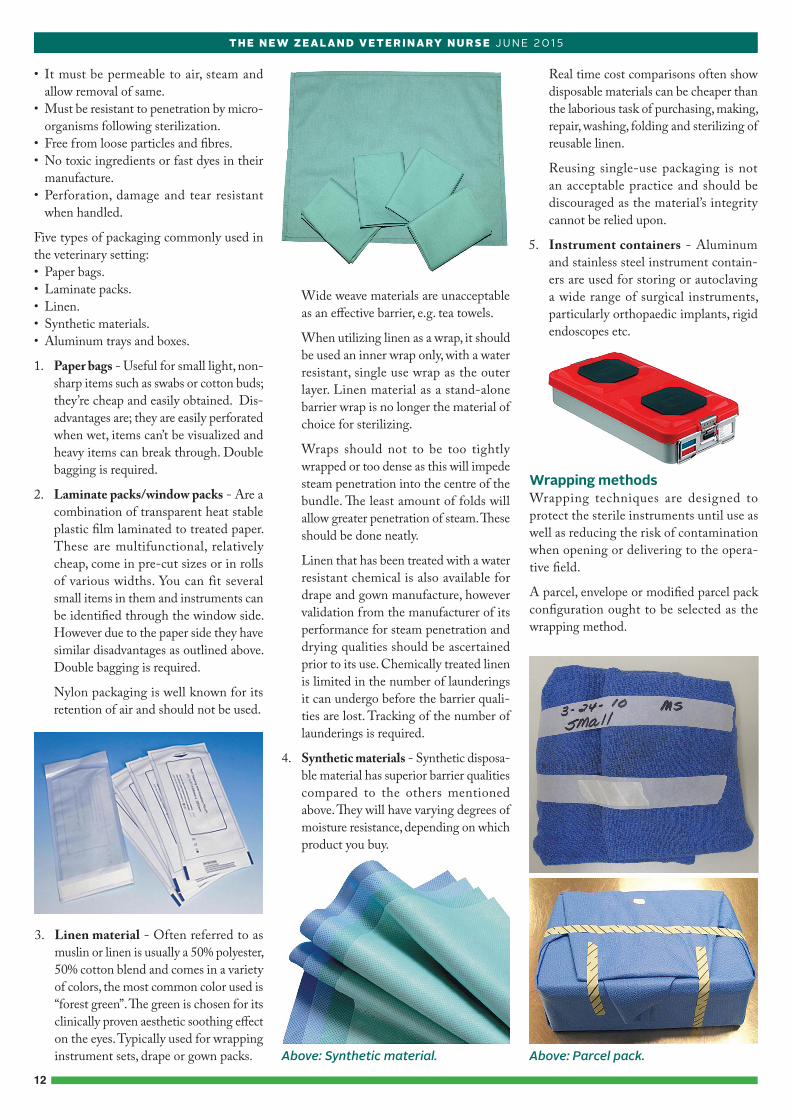
3. Linen material - Often referred to as muslin or linen is usually a 50% polyester, 50% cotton blend and comes in a variety of colors, the most common color used is “forest green”. The green is chosen for its clinically proven aesthetic soothing effect on the eyes. Typically used for wrapping instrument sets, drape or gown packs.

13
T H E N E W Z E A L A N D V E T E R I N A RY N U R S E J U N E 2 01 5
A sequential wrap, (a package within a pack-age) can be a combination of one linen and one disposable sheet (with the disposable being the outer wrap), or two disposable sheets.
Or either of the above folded non-sequen-tially (wrapped at the same time).
Avoid any gaps or wrapping too tightly as this may hinder steam penetration.
Failure to wrap appropriately subjects the sterile articles to potential contamination.
Sealing packagesPackages must be sealed completely to protect the sterilized instrument from contamination.
Whilst heat sealing is the best method for securing contents in paper bags and laminates, autoclave tape may be used. When using tape, begin by folding the corners of the open bag or laminate inwards, followed by three width wide folds of the entire width of the open end. Secure the full width with autoclave tape.
Large bundles are secured by four generous length strips of tape on each side.
Self-sealing pouches or bags should be used in accordance with the manufacturer’s instructions.
Heat sealers are applied to paper (medical paper bags) or film to paper (window packs/laminates).
After sterilization the heat seal may be slightly weakened. The seal will become robust again once cooling occurs.
Labelling requirements• Never use ball point pens as the tip may
penetrate the wrapping material; use indelible non-toxic felt tipped pens, e.g. skin marking pens instead. The incorrect use of a marker pen can potentially give off toxic fumes during the autoclave process.
• Always write on the sterilizer indicator tape or on the clear side of laminate packs. Don’t write on paper packaging as the ink may bleed or leach onto your sterilized instrument which could be transferred to your patient during surgery.
• Include content information; date of steri-lization, instrument type and staff member initials.
Sterilizing methodsGas plasma (hydrogen peroxide) – Sterrad System• Hydrogen peroxide vapor and low tem-
perature (42°C).• Kills by causing irreversible cell damage.• Useful for heat and moisture-sensitive
instruments such as endoscopes, cardiac catheters, plastic, rubber, some implants and electronic circuitry.
• Unable to process paper, linen, powders, liquids, long narrow lumens (scopes over 40cm length & under 3mm diameter, or dead-end lumens.
• No toxic residues. • Processing time approximately 55 minutes.
Gamma irradiation• Radioactive isotope Cobalt 60. Gamma
rays are electromagnetic radiation of very short wave length, similar to UV.
• Kills by breaking down bacterial DNA and inhibits bacterial division.
• Operated by large commercial enterprises.• Useful for heat sensitive equipment.• Unable to process Teflon, cotton, some
plastics and rubbers. Clear glass items may turn a dark color.
• Lethal to living beings.
Ethylene oxide (EO) gas• Kills by changing the chemical structure
of cell components.• As for gas plasma EO is useful for heat
and moisture-sensitive instruments such as endoscopes, cardiac catheters, plastic, rub-ber, some implants and electronic circuitry.
• EO can penetrate medical packaging and some plastics.
• Very toxic and flammable.
Peracetic acid - Steris System• Liquid chemical sterilant.• Kills by disrupting the cell membrane and
denaturation of cells.• Developed for sterilizing endoscopes.• Good penetration of medical packaging
and some plastics.• Useful for heat sensitive equipment that
are able to be immersed in liquids, such as plastic, rubber or instruments with lumens (the space within tubular structures).
• Also useful for any medical device that can withstand liquid immersion.
• Peracetic acid sterilization is for immediate use of items and not applicable for items requiring packaging or storing.
• Cycle time is approximately 30 minutes.
Dry heat • Elevated temperature in dry heat oven
(160-180°C).• Kills by oxidation (turns into vapour) of
cells.• Useful for micro cutting instruments,
suture needles, waxes, petroleum jelly, glassware and powders.
• Cycle time one to two hours.• Materials that could burn can’t be steri-
lized in dry heat ovens.
Steam under pressure (autoclaves)• Steam sterilizers are cheap to run.• Non-toxic, safe and simple to use. • Effective.• Can be used for wrapped and unwrapped
items.• Temperatures selected are usually 121°C
or 132°C.• Heat sensitive items can’t be sterilized in
steam.• The most commonly used sterilizing pro-
cess in veterinary practice.
The microbial targetThere are five groups of microorganisms we need to consider, Algae, Protozoa, Fungi, Viruses and Bacteria, however it’s the repro-ductive spore of bacteria that is targeted for sterilization because of its high resistance to destruction.
The image above shows a scanning elec-tron micrograph of Clostridium tetani at a magnification of x 11,200. Both vegetative and spore stages are shown. The spore forms Above: Non-sequential wrapping.
Above: Correctly sealed instrument pack awaiting labelling.

14
T H E N E W Z E A L A N D V E T E R I N A RY N U R S E J U N E 2 01 5
are the ones with the big bulges. There are faint blue strands which are flagella on the vegetative cells.
SterilizationIt’s relatively easy to kill most bacteria at temperatures 100°C in boiling water for one minute but the spores produced by the gram-positive Bacillus and Clostridium bacteria are very resistant and require much higher temperatures to achieve total destruction.
Sterilization is an absolute state, there is no such thing as almost or sort of sterile. It either is or isn’t.
The FDA and associations such as Asso-ciation of periOperative Registered Nurses (AORN) and the Association for Profes-sionals in Infection Control (APIC) define a sterilized device as having been processed in a system that delivers a sterility assur-ance level at 10-6. This is a one in a million chance of a non-sterile occurrence.
Steam under pressure sterilizationBacterial and spore destruction is accom-plished by coagulation. Similar to the way an egg is poached.
Boiling water at atmospheric pressure, at sea level, will have a measured temperature of 100°C. This boiling water vaporizes and turns into steam. However if you subject that steam to pressure in a pressure vessel, the temperatures attained are much higher. These higher temperatures are the ones we require for sterilization.
Pressure vessels (commonly called auto-claves or sterilizers) are used to achieve high temperatures with dry saturated steam. Dry saturated steam refers to steam that does not produce water droplets and the condensate is in equal balance with evaporation. Dry saturated steam has a 97% dryness factor with a 3% water vapor.
Sterilization takes place when the dry satu-rated steam under pressure, condensates on to the load, where it gives up its latent heat and transfers that extra heat onto the load within the sterilizer chamber.
Types of steam sterilizers There are four types of steam sterilizers com-monly seen in practice.
1. Pre-vacuum for porous and cannulated loads.
2. Downward displacement for porous loads only.
3. A bench top displacement type with dry-
ing capacity.4. A bench top displacement type without
drying capacity (commonly used as a flash sterilizer).
Sterilizing timeTemperature Chamber
PressureHolding Time
121°C 101 Kpa 15 minutes132°C 203 Kpa 4 minutes
Holding times are for unwrapped articles. Consideration must be given for the time it takes for steam to penetrate through the packaging material. (*Penetration time will depend on the type and thickness of wrap-ping used).
The formula is - sterilizing time + safety margin time + penetration time = total hold-ing (sterilization) time. Your drying time is then added on.
E.g. 4 minutes + 2 minutes (safety margin time) + 16 minutes (penetration time) = 22 minutes sterilizing time.
Add on the average 25 minutes drying time = 47 minutes total sterilizing and drying cycle.
Penetration times can be determined by your service provider by performing a thermocouple test.
Loading the sterilizer chamberWhen loading the sterilizer it’s essential that steam can penetrate all articles. Incorrect loading allows air to become trapped within the packages or chamber. Any air trapped within the chamber will inhibit effective steam penetration, rendering the entire load “non-sterile”.
• Articles should be loaded vertically.• If mixed loads of metal items and linen are
sterilized together, the linen is placed on the upper shelf and the metal items on the lower.
• Goods should not touch the side of the chamber walls.
• Bowls and hollow equipment should be placed upside down.
• Laminate packs should be on edge or flat with the paper side down.
• It’s better to have less in the chamber than to pack it too tightly.
Unloading• The sterilized load should be warm but dry
to the touch when the cycle is completed.• Use protective thermal gloves.• Packs should be allowed to return to nor-
mal room temperature before handling otherwise condensate can be created allowing contaminants from your hands to wick through to the contents.
• Minimize handling of sterilized packs so packing material isn’t damaged.
• Don’t carry packages under the armpit or close to the body.
• Store as soon as possible after cooling.• Any item dropped on the floor ought
to be considered contaminated and should be repackaged with new wrap and re-sterilized.
• The packs should be stored and used in date sequence.
Monitoring of steam sterilizer loads (What’s your evidence?)
There are three methods of monitoring: - Chemical, physical and biological.
Chemical indicators: - Are divided into internal or external indicators and graded into six classes. Class 1 being the most basic and Class 6 the most complex.
Class 1 - Chemical indicators are the least reliable type as they are a simple paper product impregnated with dye. They have no relevance to the verification of the sterilizing
process, except to indicate the item has been subjected to a heat source. The most common Class 1 chemical indicator is autoclave tape or internal indicators that are small strips placed inside packs that turn from white to black.
Class 2 - An example of a Class 2 indicator is the Bowie Dick used in steam sterilizers, to test for presence of air in the sterilizing chamber. These should be used every day to test the chamber before a load is processed.
Class 3 - Are single parameter indicators. They react to a chosen parameter such as time or temperature but not both.
Class 4 - Will react to two or more param-eters, typically, time and temperature.
Class 5 - Referred to as an Integrator. They

15
T H E N E W Z E A L A N D V E T E R I N A RY N U R S E J U N E 2 01 5
can be used in gravity and pre-vacuum steri-lizers with a reliable response to all critical variables required. These are the chemical indicator of choice if biological spore testing is not available.
Class 6 - Are an emulating indicator and responds to all critical variables required with a slightly higher reliability than the Class 5. More suited to pre-vacuum sterilizers.
Physical parameters: - Are those attached to your machine e.g., temperature, jacket pressure and chamber pressure gauges.
Close monitoring of these should alert you to any potential problems. For example at a temperature of 132°C, the pressure cor-relation is 203kPa and a temperature of 121°C will require a 101kPa. If there is a discrepancy between the two readings fur-
ther investigation is required.
Biological testing: - Is comprised of a bio-logical test vial containing bacterial spores. These are placed in your largest bundle within the most centered point of your sterilizer chamber.
Another spore vial is incubated (not sterilized) and used as a control, to measure against the sterilized vial. Incubation takes a minimum of one hour. As described in ASNZ 4187, Bacillus Stearothermophilus, a very hardy spore, is the organism of choice when monitoring steam sterilization.
Trouble shootingWet loads after sterilizationAs already stated, the steam required for correct sterilization is dry saturated steam, (steam without droplets of moisture). Dry
saturated steam is considered of a high qual-ity when it is within the range of 97%-100% dryness. Anything under 97% will produce excess moisture, whilst anything over 100% will produce excess heat.
Excess moisture in the sterilizing cham-ber, contributes to a process called “Wet
Activity levels of chemical disinfectants9
Common Disinfectants Activity Level Advantages DisadvantagesAlcohol Most effective at 70%
Intermediate Bactericidal, fungicidal, variable virucidal & mycobactericidalFast actingEasy to useUsed to disinfect small surfaces such as tops of vialsNo toxic residueMay be used as an instrument grade disinfectant if labeled accordingly by manufacturer
Not sporicidalAffected by organic matterHas no detergent or cleaning propertiesHardens rubber and deteriorates glueFlammableEvaporates rapidlyNo residual action
AldehydesOrtho-phthaladehyde(example OPA)
High
Mycobacterial, bactericidal, virucidal, fungicidal, Sporicidal with long contact times > 10 hours
Requires 12 minutes exposure for high level disinfectionMust be thoroughly rinsed in sterile water before useStains protein residue greyNot to be used for environmental disinfection
Hypochlorite’s (Bleach)1% (10,000ppm) for blood spills.1% (1000ppm) for clean surfaces1:50
Low - Intermediate
Broad spectrum bactericidal, fungicidal & virucidal Mycobactericidal at (.5%) 5000ppm, No toxic residueFast actingInexpensive Unaffected by water hardnessReduces biofilm of surfacesIdentified by having a tuberculocidal activity on label.
At 5% can cause eye irritation, oropharyn-geal, oesphageal and gastric burnsCorrosive to metals over 500 ppmInactivated in organic matterDiscolours fabricsReleases a toxic chlorine gas when mixed with acid or ammoniaMay only be used on instruments if the manufacturer recommends itDo not mix with other detergents or disinfectants
Phenolics Low Bactericidal, tuberculocidal, fungicidal, variable mycobactericidal & virucidalInexpensive
Adsorbed by porous material and irritates tissue, Stains Slow actingToxic to neonatesCan have a pungent odour

16
T H E N E W Z E A L A N D V E T E R I N A RY N U R S E J U N E 2 01 5
Steam”, it produces a fine mist of water droplets. In other words, it ’s ‘too wet’ to reach the high temperatures required for sterilization.
Wet loads hinder the drying process leaving the packages moist at the completion of the cycle. The moist pack is then subjected to microscopic contaminants when the cham-ber door is opened or by a wicking effect if laid on a bench.
Causes of Wet SteamOverloading of the chamber
Have less rather than more, items should not touch the sides of the chamber.
Excessive amounts of metal items in the load
Mix the load and have instruments below linen.
Instruments/equip-ment not dried prior to packing
Dry all items before packaging.
Water retained within coiled tubing or lumen
Tubing and fine lumens may not be suitable for steam sterilizing.
Blocked steam trap Regularly clean the steam trap filter.
Super-Heated steamIs heat added to steam without rela-tive moisture. This kind of steam cools without condensate and lacks the ability to penetrate and transfer its latent heat. Therefore sterilization may not take place.
Linen material and paper may burn or desiccate in the sterilizer due to dehydration.
Quaternary10
Ammonium Compounds(QACs/Quats)
Low*some newer generation QAC’s claim intermediate-high level activity, i.e. F10 & SteriGene
Bactericidal, fungicidal, virucidal (enveloped viruses)Good cleaning agentsSurface compatible
Not sporicidal but may be sporostaticNot tuberculocidal, mycobacteria or virucidal (non-enveloped)High water hardness and cotton/gauze reduces effectivenessAffected by organic matterInactivated by detergentsF10 - Not recognized in human infection control processes. TGA listed as Hospital Grade for non-critical surfacesSterigene - Claims not to be a QACNot recognized in human infection control processes
Virkon SIs an Oxidizing Agent
Low13 Bactericidal, virucidal and fungicidal Is not sporicidal13
Fast actingActive in the presence of bloodCleans and disinfectsSafe on intact metals, may corrode non-intact metalsActive on M. Tuberculosis at 3%Can leave a white residue due to using too much solution (easy to remove with paper towel)Irritant if powder is inhaled. Face mask is recommendedVery effective disinfectantRecognized in human infection control processes
Causes of Super-Heated SteamExcessive dryness of the load within the chamber
Ensure linen always go through a washing cycle before being sterilized.
Steam jacket is holding a higher temperature than chamber or there is a pressure drop in the steam supply
Sterilizer requires a service.

17
T H E N E W Z E A L A N D V E T E R I N A RY N U R S E J U N E 2 01 5
StorageRequirements for storageIf sterile goods are incorrectly stored, there is a potential for contamination, rendering the instruments or equipment non-sterile.
An ideal storage room/area would have controlled air conditioning with low tur-bulence, minimal traffic and separate from other activities.
The area must be dry, with humidity in the range of no less than 35% and no more than 70%. Temperature should be no higher than 23 degrees celsius.
Sterile stock should be free from direct sunlight, dust, dampness, insects, vermin and constant handling.
Most human hospitals and larger veterinary sterile store areas will have wire rack compac-tor storage systems however these are only suitable within a controlled environment.
Closed cupboards or shelving systems should be designed with shelving 50mm - 75mm away from the wall, 20cm - 25cm sitting above the floor and 45cm - 50cm away from the ceiling.
Smooth washable surfaces are recommended for ease of cleaning. Routine cleaning of all surfaces should be undertaken.
Sterile items must be kept away from water pipes, and not stored under sinks.
Cardboard boxes are not recommended as storage containers for sterile goods as they are porous, cannot be cleaned and potentially harbor contaminants.
Food, drink or non-sterile goods must not be stored with sterile items.
How long does a sterilized item remain sterile on the shelf? Many text books recommend a period of time for sterility depending on the type of packaging, however this is not quite accurate.
As an example, if an item is wrapped in a laminate pack and the recommendation is that this should be sterile for a period of two weeks, it is easily debunked if I were to pour a cup of coffee all over it. Therefore the two week timeframe has no relevance!
Shelf life is dependent on external events that compromise the integrity of the pro-tective barrier of the sterilized item, such as choice of packaging material, correct sterili-zation process, handling and storage, rather
than a given time frame. Therefore, shelf life is event related not time related (Gardner & Peel, 1998).
Historically many hospitals and veterinary practices would routinely re-sterilize all items not used within the “standard” time frame however evidence suggests this does not offer any additional assurance. On the contrary it suggests a compromised pack-age may not be re-sterilized until the given timeframe has been completed.
It is still standard practice to avoid prolonged storage by ensuring sensible stock levels and efficient rotation of stock.
DisinfectionPathogen resistanceMicroorganisms differ in the levels of meth-ods for inactivation or kill. There is a standard recognition of pathogens in decreasing order of resistance. The following chart is indica-tive of the pathogen involved and resulting disease with recommended sterilization or level of disinfection required. Please note this
chart does not include all pathogens or dis-eases commonly seen in veterinary practice.
Chemical disinfectantsDisinfectants are for use on inanimate objects and should not be used as an anti-septic. Its intention is to reduce the number of microbial contaminants on instruments, equipment or environmental surfaces.
Cleaning must always precede disinfection.
Disinfectants may be high, intermediate or low level. Choosing the level required is determined by referring to Spaulding’s risk classification and the items intended use. High level disinfection is not a sterilization process.
Factors in disinfectant efficacyIt’s well documented that efficacy of disin-fectants is highly reliant on pre-cleaning but in addition, contact time is crucial together with accurate concentration, water (for dilu-tion) quality and temperature.
Many manufacturers will also state or list
Decreasing order of resistance of microbes to biocides & sterilization or disinfection levels required for pathogens.* Virtually eradicated in Australia.
Prions Requires
prolonged sterilization Example:
mad cow disease
Bacterial Endospores requires sterilization
Clostridium perfringens Example: tetanus
Mycobacteria Intermediate - high level disinfection
Example: *Mycobacterium bovis/Mycobacterium Avium
/Mycobacterium paratuberculosis (Johnes disease)
Non Lipid Viruses (non-enveloped) Low level disinfection Example: Parvovirus
Fungal Spores Low level disinfection
Examples: Micosporum (ringworm)/Aspergillus
Vegatative Gram negative bacteria Low level disinfection
Examples: E. Coli, Salmonella spp, Pseudomonas aeruginosa Vegatative Gram positive bacteria
Low level disinfection Examples: Streptococcus, Staphylococcus (MRSA)
Lipid Viruses (enveloped) Low level disinfection
Examples: fading puppy syndrome/Newcastle disease

18
T H E N E W Z E A L A N D V E T E R I N A RY N U R S E J U N E 2 01 5
different contact times to treat different microorganisms, however unless you have evidence of the pathogens you are deal-ing with, it is unlikely you will know what contamination level you have; therefore as a rule of thumb, it’s suggested you use the longest contact time recommended by the manufacturer.
Interestingly enough, many popular disin-fectants require long contact times, equally some studies suggest that the disinfectant solution dries out before the full recom-mended contact time has been completed, and consequently there may be a failure to achieve the stated biostatic or biocidal outcome.
Therefore the general recommendation, when choosing a disinfectant is that it ought to have a fast biocidal action.
Solutions should be freshly made for use unless specified by the manufacturer.
Disinfectants should never be mixed with another solution without the manufacturer’s explicit recommendation.
When selecting a disinfectantConsider the following:
• What level of disinfection is required according to Spaulding’s risk classification, critical, semi-critical or non-critical?
• What level of disinfectant is it, low, inter-mediate or high?
• Is it TGA (Therapeutic Goods Associa-tion) approved?
• Is it compatible to the item you want to disinfect?
• Does the product have independent stud-ies for efficacy?
• Is it user friendly?• Is it cost effective?
Read the labelAlways read the label on the disinfectants carefully and ascertain what activity the disinfectant has on various pathogens. For instance if a label declares the disinfectant is sporicidal, ask yourself what is it sporicidal to?
As an example, if a solution states it ’s sporicidal to Mycrosporum canis, be aware that this is ringworm (a fungal spore), not a bacterial spore. Therefore the solution is not a true sporicidal in the interpretation of the hierarchy of pathogenic microorganisms.
The ideal disinfectant• Should be broad spectrum for gram nega-
tive and gram positive bacteria.• Fast acting with a rapid kill.• Kills viruses (non-enveloped and
enveloped).• Active against multi drug resistant
organisms.• Have activity against pathogenic fungi (i.e.
Candida spp).• Be active in the presence of organic matter.• Non toxic.• Environmentally friendly.
Currently there is no one “ideal” disinfect-ant for all circumstances therefore selection should be based on which targets have to be met and which compromises can be agreed on.
Selection of environmental cleaning & disinfection methodsWithin the veterinary practice, cleaning and disinfection methods can be categorized into those that have low levels of contamination or high levels of contamination.
Typically surfaces with low level contamina-tion such as reception desks, offices, walls, doors, windows, do not require disinfection unless they are visibly soiled with faeces, urine or body fluids. These can be cleaned with water and detergent.
Surfaces with potential high level con-tamination will include areas such as animal housing, exam tables, operating tables or floors (subject to soiling), will require at a minimum thorough cleaning, followed by drying then a low level disinfectant applied according to the manufacturers guidelines at the longest contact time recommended.
In conclusionAlthough there is a myriad of products on the market, it is up to the user to ensure that the correct solution is chosen on evidence based information, not sales representatives trying to sell a product.
The author does not endorse any product depicted in any images.
References1. AS4187, Cleaning, disinfecting and
sterilizing reusable medical and surgical instruments and equipment, and mainte-nance of associated environments in health care facilties. Australian/New Zealand standard: AS/NZS 4187:2003. 2003: Sydney N.S.W. : Standards Australia
International ; Wellington, N.Z. : Stand-ards New Zealand, 2003. Rev. ed.
2. Resistance, C.C.o.A., Infection Preven-tion and Control Best Practices for Small Animal Veterinary Clinics, in Meilleures pratiques de prévention et de contrâle des infections pour les cliniques vétérinaires pour petits animaux. 2009. p. 248.
3. Tobias, K.M. and S.A. Johnston, Veteri-nary surgery : small animal / [edited by] Karen M. Tobias, Spencer A. Johnston. 2012: St. Louis, Mo. : Elsevier/Saunders, c2012.
4. Muir, M., Setting the standard: Austral-ian standards AS 4187. J.GENCA, 2002. 12(2): p. 9-9.
5. Rutala, W.A. and D.J. Weber, Disin-fection and sterilization: An overview. American Journal of Infection Control, 2013. 41(5, Supplement): p. S2-S5.
6. CDC, CDC: new Draft Guideline for Disinfection and Sterilization in Healthcare Facilities. Legal Eagle Eye Newsletter for the Nursing Profession, 2002. 10(6): p. 3-3.
7. Peerman Catherine, S.B., McAuley Terry, Lucas Louise, O’Keefe Cynthia, Humphreys Joy, Sterilization Practice for Technicians, in Certificate III in Health, M.T. Peerman Catherine, Editor 1996, Mayfield Education Centre: Hawthorn, Victoria, Australia.
8. Conner, R., L. Spruce, and B. Burl-ingame, Perioperative standards and recommended practices / Association of periOperative Registered Nurses ; manager Standards and recommended practices, Ramona Conner ; director, evidence-based perioperative practice, Lisa Spruce ; perioperative nursing specialists, Byron Burlingame ... [et al.]. 2013: Denver, Colo. : AORN, c2013.
9. Rutala, W.A. and D.J. Weber, Disinfect-ants used for environmental disinfection and new room decontamination technology. American Journal of Infection Control, 2013. 41(5, Supplement): p. S36-S41.
10. Murphy, C.P., et al., Evaluation of specific infection control practices used by compan-ion animal veterinarians in community veterinary practices in southern Ontario. Zoonoses And Public Health, 2010. 57(6): p. 429-438.
11. Tristel Anistel high level surface disinfect-ant. 2013.
12. Ethical Agents Ltd TRIGENE. 2010.13. Hernandez, A., et al., Assessment of in-

19
T H E N E W Z E A L A N D V E T E R I N A RY N U R S E J U N E 2 01 5
vitro eff icacy of 1% Virkon (R) against bacteria, fungi, viruses and spores by means of AFNOR guidelines.
14. Hugo, W.B., et al., Russell, Hugo & Ayliffe’s Principles and practice of disinfec-tion, preservation and sterilization / edited by Adam P. Fraise, Peter A. Lambert, Jean-Yves Maillard. 2004: Oxford : Blackwell Pub, c2004.
15. Alicia J. Mangram, M.T.C.H., MPH, CIC; Michele L. Pearson, MD; Leah Christine Silver, BS; William R. Jarvis, MD;, CDC Guidelines for Prevention of Surgical Site Infection, 1999. 1999. 20(4): p. 260-263.
16. Humphreys, H., et al., Theatre over-shoes do not reduce operating theatre floor bacte-rial counts. J Hosp Infect, 1991. 17(2): p. 117-23.
17. Amirfeyz, R., et al., Theatre shoes - a link
in the common pathway of postoperative wound infection? Ann R Coll Surg Engl, 2007. 89(6): p. 605-8.
18. Control, C.f.D. Guideline for Prevention of Surgical Site Infection. 1999. 20, 261.
19. AORN, Perioperative Standards and Recommended Practices, 2008, AORN Publications.
20. (ACORN), A.C.o.O.R.N., Operating Room Standards, in Selection of surgical gowns 2010.
21. Braswell, M.L. and L. Spruce, Imple-menting AORN recommended practices for surgical attire. AORN J, 2012. 95(1): p. 122-37; quiz 138-40.
22. Darouiche RO, W.M.J., Itani KM, Otterson MF, Webb AL, Carrick MM, Miller HJ, Awad SS, Crosby CT, Mosier MC, Alsahrif A, Berger DH, Chorhex-idine-Alcohol versus Povidone-Iodine for
Surgical-Site Antisepsis. N Engl J Med, 2010: p. 362.
23. Evans, L.K.M., et al., The eff icacy of chlorhexidine gluconate in canine skin preparation - practice survey and clinical trials. The Journal Of Small Animal Practice, 2009. 50(9): p. 458-465.
24. Anderson, M.J., et al., Efficacy of concur-rent application of chlorhexidine gluconate and povidone iodine against six nosocomial pathogens. American Journal of Infection Control, 2010. 38(10): p. 826-831.
25. Roberts, S.M., G.A. Severin, and J.D. Lavach, Antibacterial activity of dilute povidone-iodine solutions used for ocular surface disinfection in dogs. American Journal Of Veterinary Research, 1986. 47(6): p. 1207-1210.
26. Government, H.V., Infection Prevention & Control Manual, 3rd Edition 2008, 2008.
New Zealand Veterinary Nursing Association Journal Rates for 2015
Journal printed in March, June September and December. The deadline for each journal is the 1st of the month prior, i.e. February, May, August and November.Flyer insert in journal (Copies supplied by advertiser – confirm with journal editor on numbers required) ....................$350NZVNA to print black on white or coloured paper, one side .......................................................................................................................$195 Direct mail-out, same flyer as above if provided with prepaid envelopes ...............................................................................................$350
Note - Individual Employment Opportunity = One month’s advertising free on the website if an advert is placed in the journal for employment, as per rates above.
Website opportunities:• Classified Employment or CE advert emailed to member database ....................................................................................................$120 per email• Classified Employment or CE advert on webpage ..........................................................................................................................................$100 per month• Classified Employment or CE advert on webpage and an e-mail to member databas .............................................................$200 per month
Multi-media Package deal:One e-mail to member database, webpage advert (one month) & ¼ page advert in one journal ............................................$550 per quarterOne e-mail to member database, webpage advert (one month) & ½ page advert in one journal ............................................$695 per quarterOne e-mail to member database, webpage advert (one month) & full page advert in one journal ........................................$795 per quarter
Other opportunities:Please contact the journal editor or refer to our website www.nzvna.org.nzAll prices are GST exclusive.Please contact Journal Editor – [email protected] c/- NZVNA, P.O. 35831, Browns Bay, Auckland 0753.
Rates Single Edition Annual – Four editions Sizes
Quarter Page advertisement $375 $1300 96mm wide x 135mm high
Half Page advertisement $525 $1700 192mm wide x 140mm high
Full Page advertisement $650 $2200Non-bleed advert: 192mm wide x 279mm highFull-bleed advert: 218mm wide x 305mm high
Inside Covers** (Full Page) $2900 Full-bleed advert: 218mm wide x 305mm high
Back Cover** (Full Page) $3600 Full-bleed advert: 218mm wide x 305mm high
Advertorial article $1000
**Taken for 2015