setting up aruba instant and airwave
TRANSCRIPT

Setting up Aruba Instant and AirWave
John Schaap Director Systems Engineering EMEA [email protected] +31622407110

There are two ways of provisioning Aruba Instant into AirWave.
1. The manual mode 2. The Automatic mode using DHCP option 43 & 60
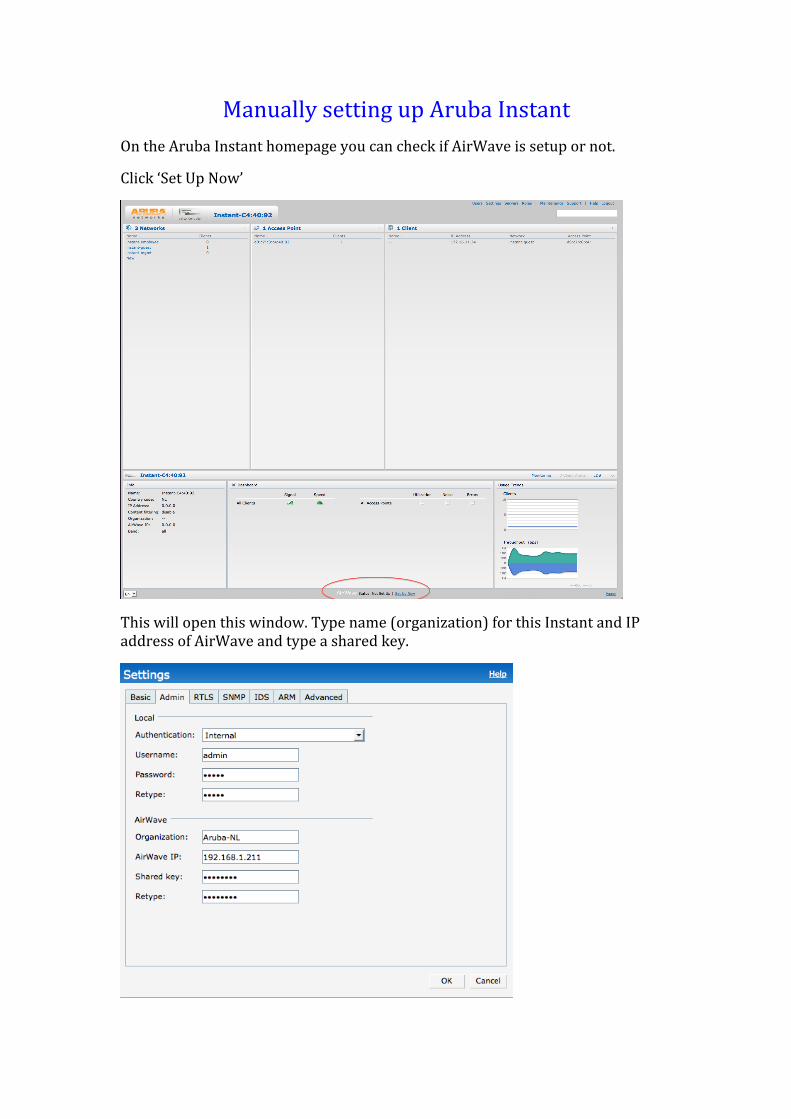
Manually setting up Aruba Instant On the Aruba Instant homepage you can check if AirWave is setup or not.
Click ‘Set Up Now’
This will open this window. Type name (organization) for this Instant and IP address of AirWave and type a shared key.
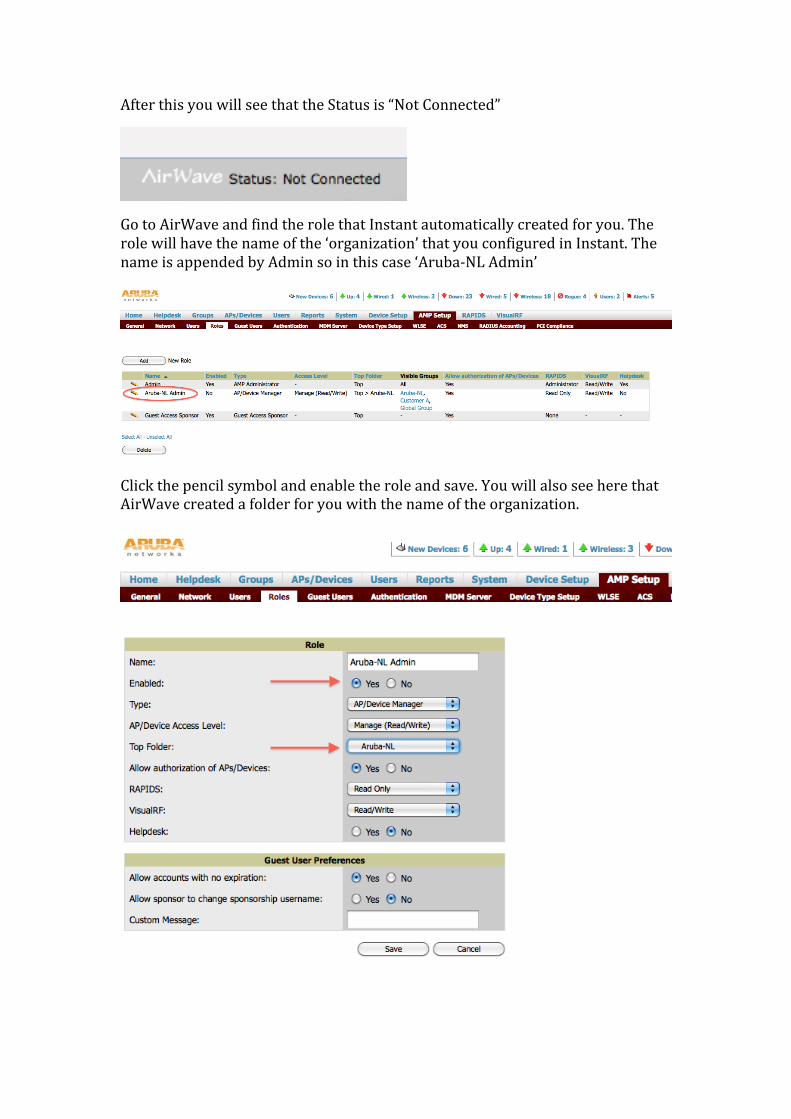
After this you will see that the Status is “Not Connected”
Go to AirWave and find the role that Instant automatically created for you. The role will have the name of the ‘organization’ that you configured in Instant. The name is appended by Admin so in this case ‘Aruba-‐NL Admin’
Click the pencil symbol and enable the role and save. You will also see here that AirWave created a folder for you with the name of the organization.

You will now see that AirWave discovered a new device (New Devices: 1). Click the New Devices link and select the device and put it in the folder that was created for this device and in a group of your choice. Always add a new device in Monitor Only mode.
You will now find 2 devices (virtual controller and AP) in your folder. It can take some minutes before the devices show up here.
Additional Instant AP’s added to this virtual controller will automatically show up in the folder once they are added and active.
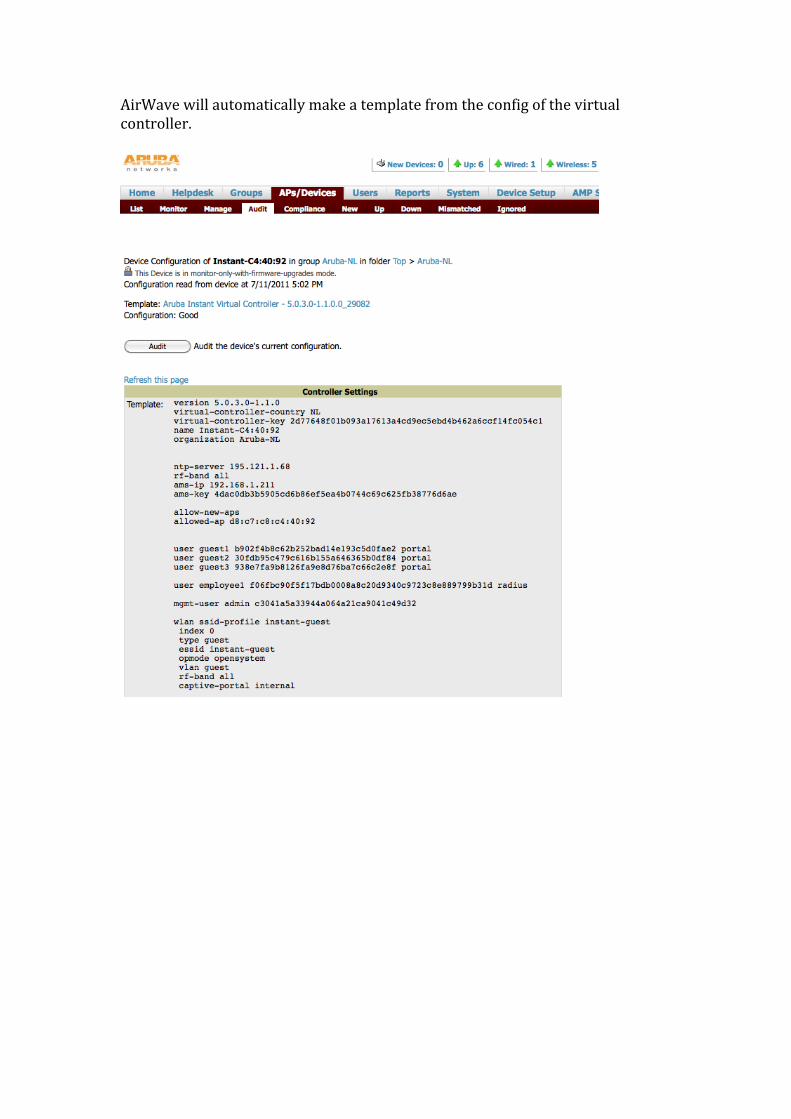
AirWave will automatically make a template from the config of the virtual controller.

Automatically setting up Aruba Instant
Configure your DHCP scope with Option 43 and 60 Option 43 = ArubaInstantAP Option 60 = name,amp-‐ip-‐address,password. The three pieces of information should be specified using comma separators without any spaces. Organization is optional (e.g ‘,192.168.1.211,aruba123’ is allowed. Note the leading comma.
Reset your IAP to factory default state and reboot the IAP. You will see that the IAP will create a new role automatically with the name that you have used in option 43. It will append the name with “Admin” so it becomes “homelab-‐iap Admin”.
Click the pencil symbol to edit the role and enable the role.

You will also see that a user is created automatically
And a group is created automatically
Also note that 1 new device is discovered.
Click “New Devices” and add them to the group that was created automatically. You can add the devices to the default folder or any other folder of your choice.
Add the devices in Monitor Only mode for now.

In the group “homelab-‐iap” you will now find both the VC and AP
You need to connect to the IAP to set the Country Code.
Note that the IAP will now also show the AirWave IP address and that the AirWave status is: Connected

AMP will import a template of the config of the IAP and you can decide to move the IAP from Monitor Only mode to Manage Read/Write. Config changes made on the template will then automatically be send to the IAP.