shelly cashman: microsoft access 2016people.uncw.edu/mferner/cit213/scslides/m05.pdf · 1 shelly...
TRANSCRIPT
1
Shelly Cashman: Microsoft Access 2016
Module 5: Multiple-Table Forms
© 2017 Cengage Learning. All Rights Reserved. May not be copied, scanned, or duplicated, in whole or in part, except for use as permitted in a license distributed with a certain product or service or
otherwise on a password-protected website for classroom use.
2
© 2017 Cengage Learning. All Rights Reserved. May not be copied, scanned, or duplicated, in whole or in part, except for use as permitted in a license distributed with a certain product or service or
otherwise on a password-protected website for classroom use.
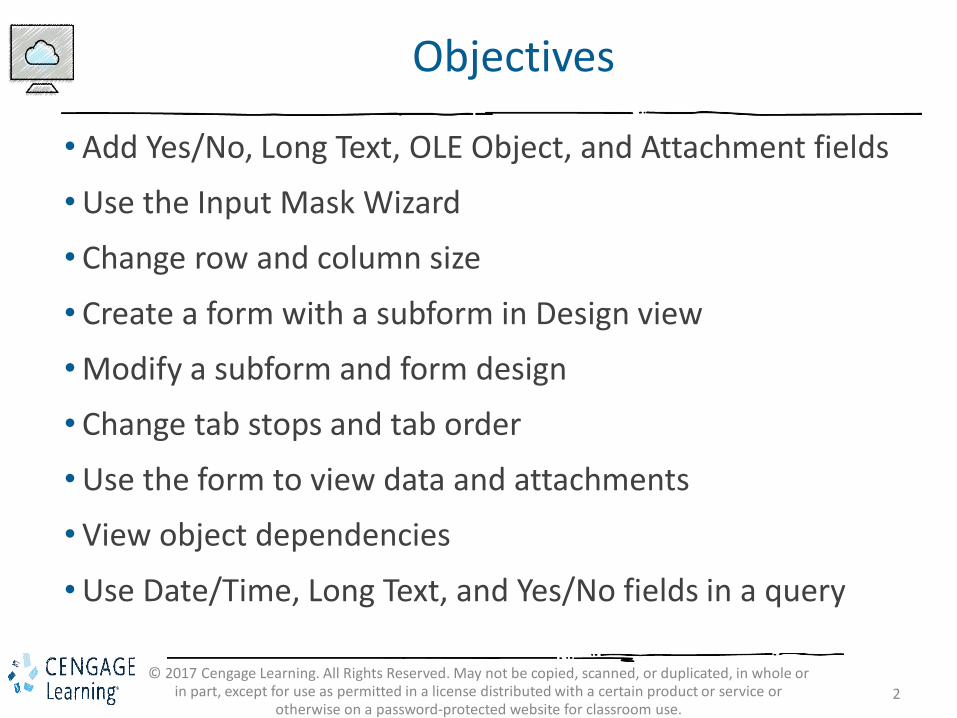
Objectives
•Add Yes/No, Long Text, OLE Object, and Attachment fields
•Use the Input Mask Wizard
• Change row and column size
• Create a form with a subform in Design view
•Modify a subform and form design
• Change tab stops and tab order
•Use the form to view data and attachments
• View object dependencies
•Use Date/Time, Long Text, and Yes/No fields in a query
3
© 2017 Cengage Learning. All Rights Reserved. May not be copied, scanned, or duplicated, in whole or in part, except for use as permitted in a license distributed with a certain product or service or
otherwise on a password-protected website for classroom use.
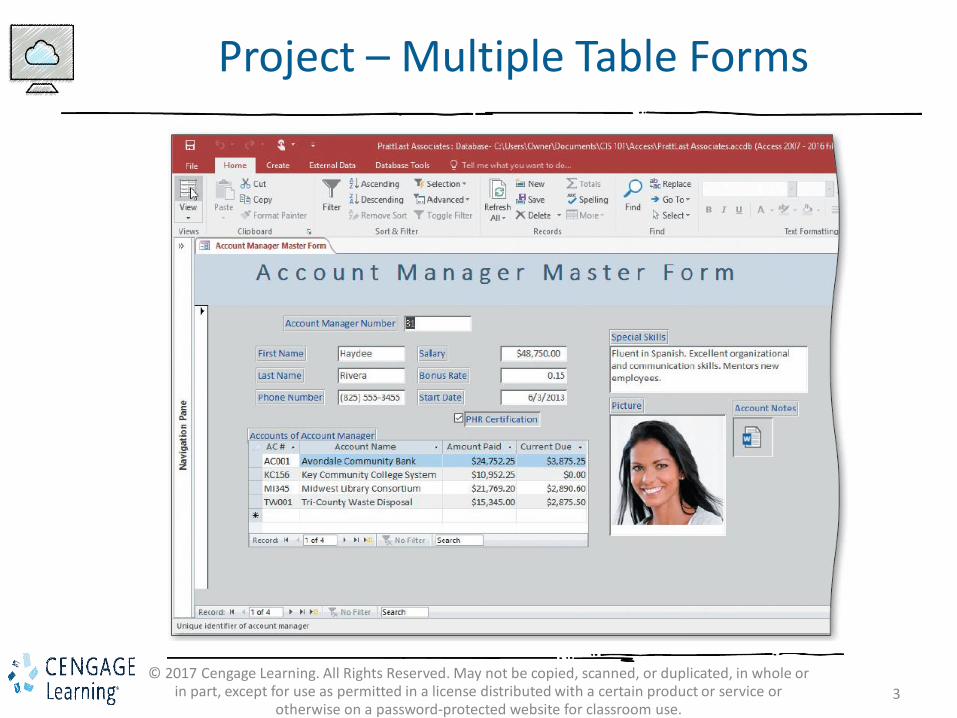
Project – Multiple Table Forms
4
© 2017 Cengage Learning. All Rights Reserved. May not be copied, scanned, or duplicated, in whole or in part, except for use as permitted in a license distributed with a certain product or service or
otherwise on a password-protected website for classroom use.
Project – Multiple Table Forms
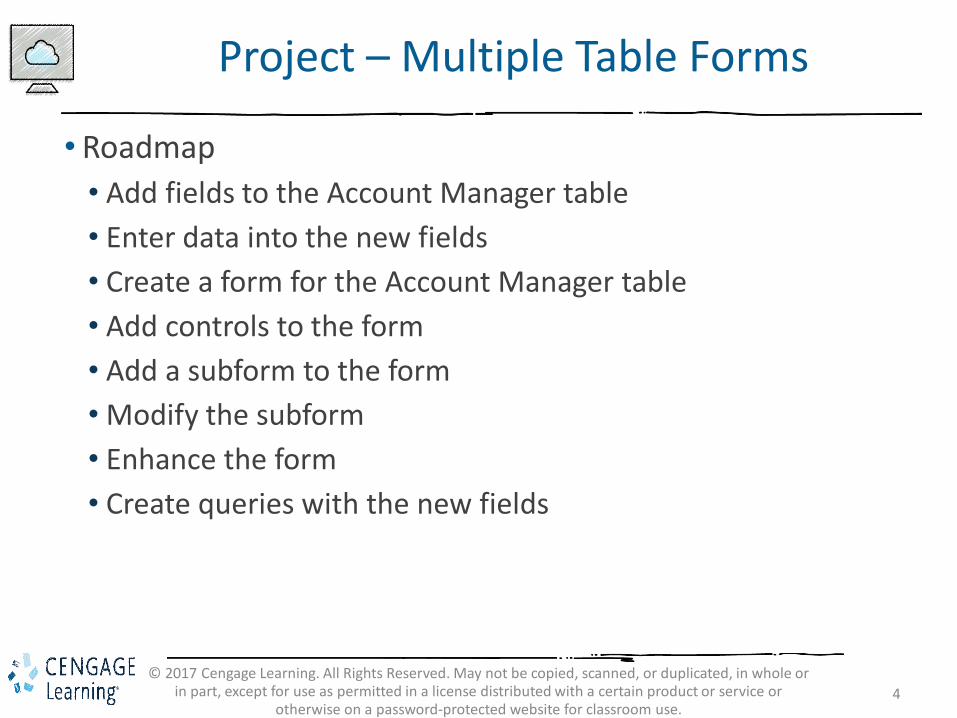
• Roadmap
• Add fields to the Account Manager table
• Enter data into the new fields
• Create a form for the Account Manager table
• Add controls to the form
• Add a subform to the form
• Modify the subform
• Enhance the form
• Create queries with the new fields
5
© 2017 Cengage Learning. All Rights Reserved. May not be copied, scanned, or duplicated, in whole or in part, except for use as permitted in a license distributed with a certain product or service or
otherwise on a password-protected website for classroom use.
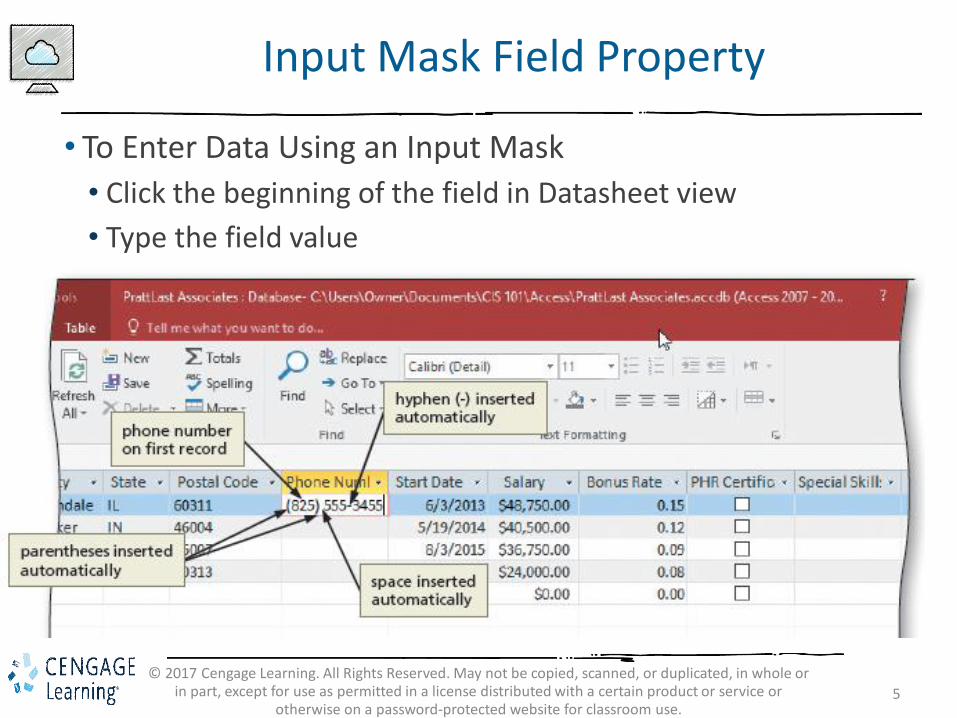
Input Mask Field Property
• To Enter Data Using an Input Mask
• Click the beginning of the field in Datasheet view
• Type the field value
6
© 2017 Cengage Learning. All Rights Reserved. May not be copied, scanned, or duplicated, in whole or in part, except for use as permitted in a license distributed with a certain product or service or
otherwise on a password-protected website for classroom use.
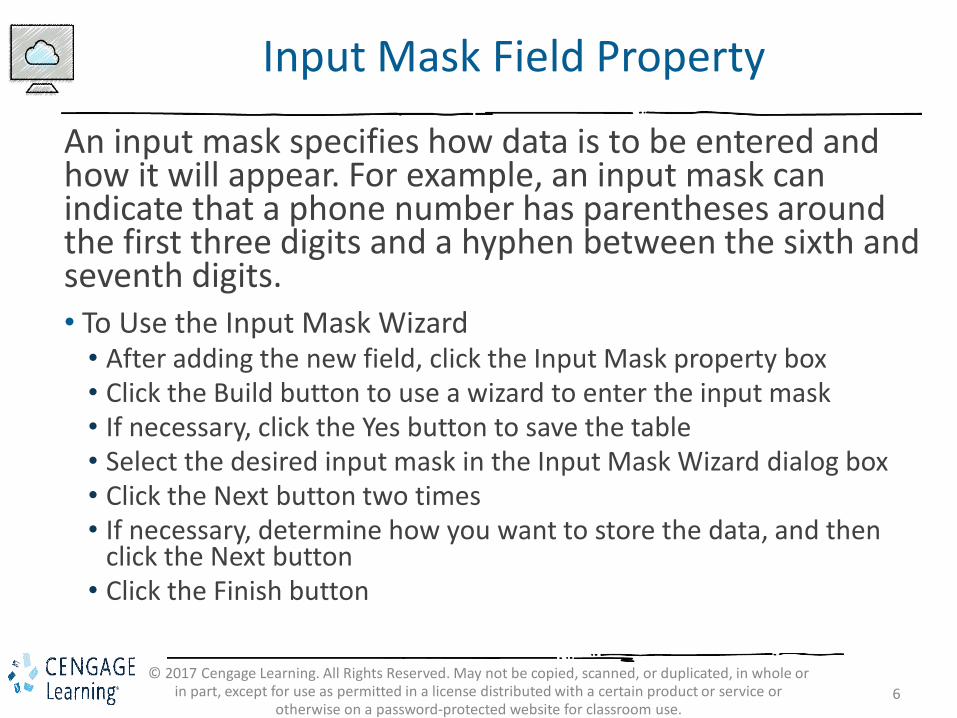
Input Mask Field Property
An input mask specifies how data is to be entered and how it will appear. For example, an input mask can indicate that a phone number has parentheses around the first three digits and a hyphen between the sixth and seventh digits. • To Use the Input Mask Wizard• After adding the new field, click the Input Mask property box• Click the Build button to use a wizard to enter the input mask• If necessary, click the Yes button to save the table• Select the desired input mask in the Input Mask Wizard dialog box• Click the Next button two times• If necessary, determine how you want to store the data, and then
click the Next button• Click the Finish button
7
© 2017 Cengage Learning. All Rights Reserved. May not be copied, scanned, or duplicated, in whole or in part, except for use as permitted in a license distributed with a certain product or service or
otherwise on a password-protected website for classroom use.
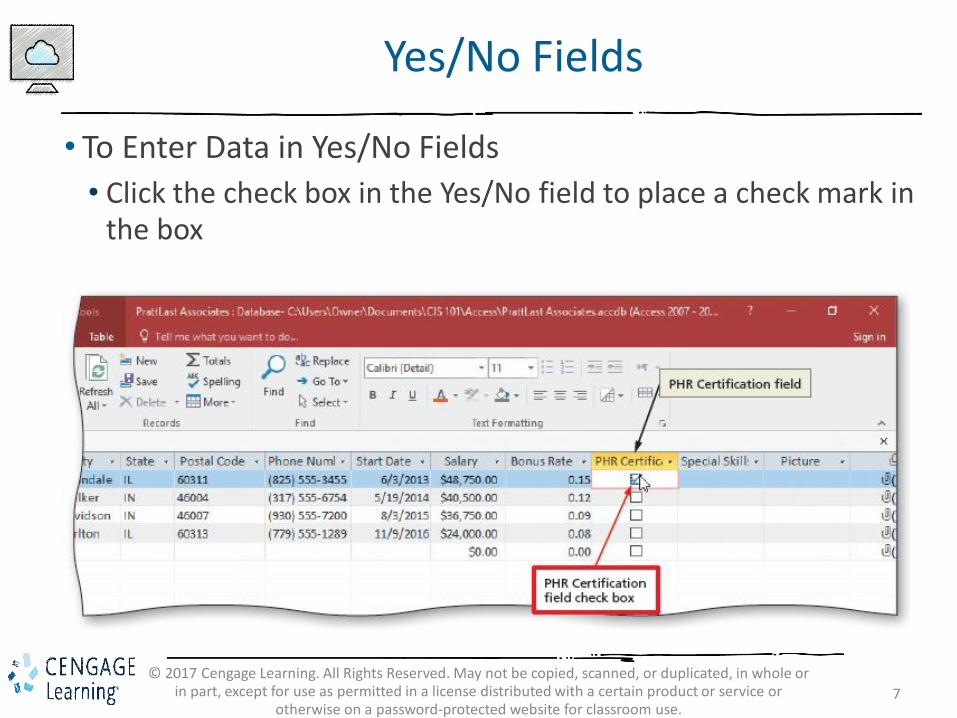
Yes/No Fields
• To Enter Data in Yes/No Fields
• Click the check box in the Yes/No field to place a check mark in the box
8
© 2017 Cengage Learning. All Rights Reserved. May not be copied, scanned, or duplicated, in whole or in part, except for use as permitted in a license distributed with a certain product or service or
otherwise on a password-protected website for classroom use.
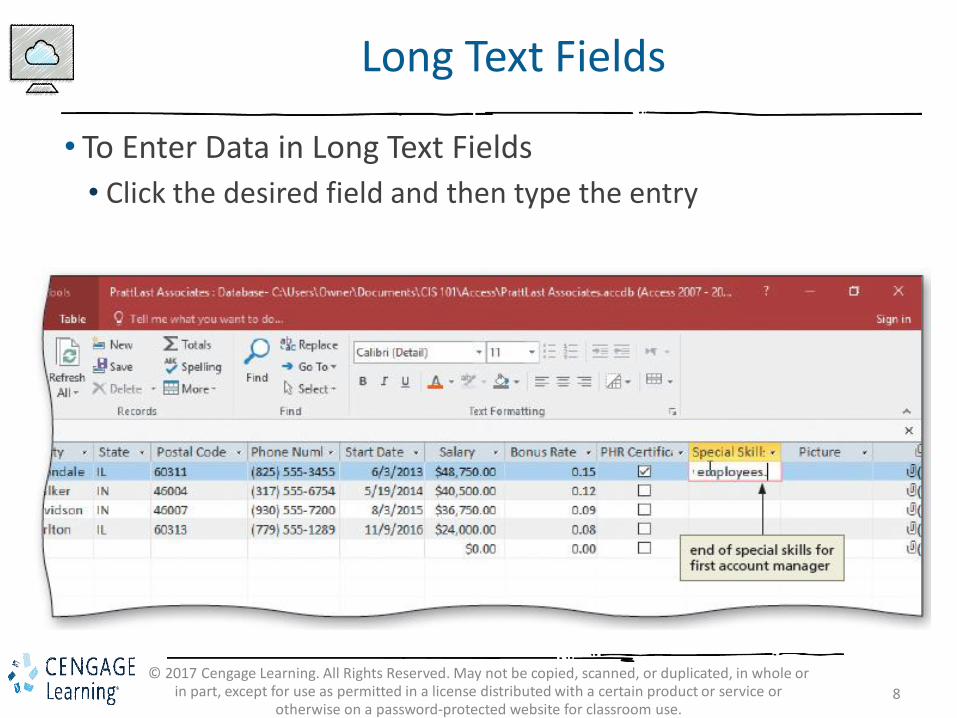
Long Text Fields
• To Enter Data in Long Text Fields
• Click the desired field and then type the entry
9
© 2017 Cengage Learning. All Rights Reserved. May not be copied, scanned, or duplicated, in whole or in part, except for use as permitted in a license distributed with a certain product or service or
otherwise on a password-protected website for classroom use.
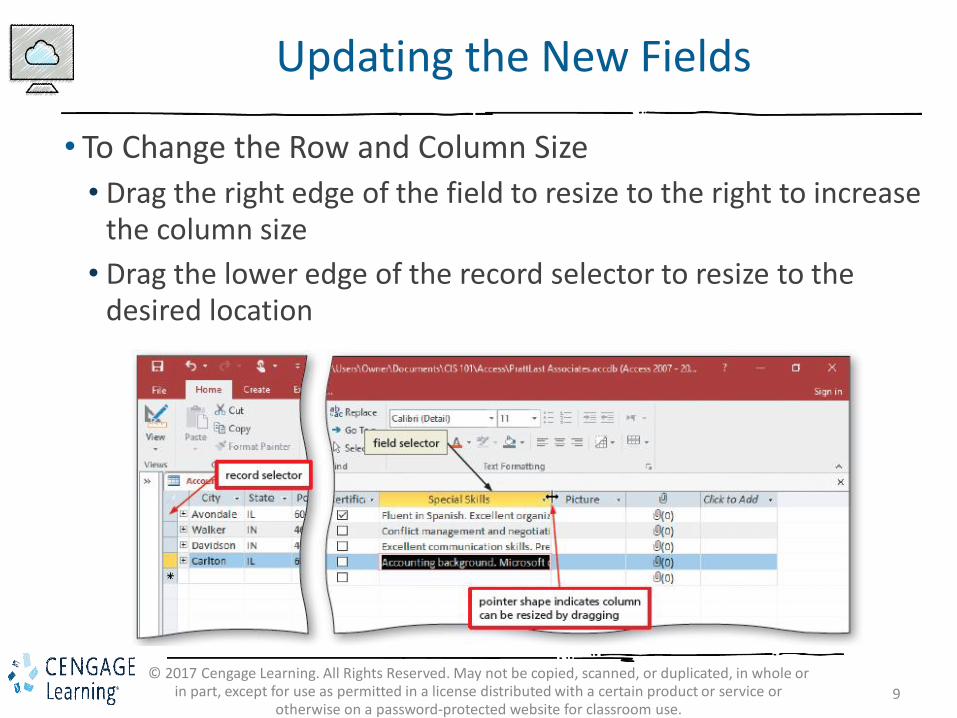
Updating the New Fields
• To Change the Row and Column Size
• Drag the right edge of the field to resize to the right to increase the column size
• Drag the lower edge of the record selector to resize to the desired location
10
© 2017 Cengage Learning. All Rights Reserved. May not be copied, scanned, or duplicated, in whole or in part, except for use as permitted in a license distributed with a certain product or service or
otherwise on a password-protected website for classroom use.
OLE Object Fields
Object Linked or Embedded
•OLE Object Fields can store video clips, sound, and other objects from Windows-based apps.
• Linked objects maintain a connection to the actual file so that the database is automatically updated to the newest version of the object. The actual file must be available at all times.
•An embedded object imports a copy of the object which becomes part of the database. If the original is changed, the database will not get the update automatically.
11
© 2017 Cengage Learning. All Rights Reserved. May not be copied, scanned, or duplicated, in whole or in part, except for use as permitted in a license distributed with a certain product or service or
otherwise on a password-protected website for classroom use.
OLE Object Fields
Object Linked or Embedded
• To Enter Data in OLE Object Fields
• Right-click the OLE object field to produce a shortcut menu
• Click Insert Object on the shortcut menu to display the Microsoft Access dialog box
• Click the desired object type
• Click the OK button
• Create the desired object
• Click the ‘Exit and return to document’ command to return to Access and insert the object
• **Note that some objects will only display in Form View
12
© 2017 Cengage Learning. All Rights Reserved. May not be copied, scanned, or duplicated, in whole or in part, except for use as permitted in a license distributed with a certain product or service or
otherwise on a password-protected website for classroom use.
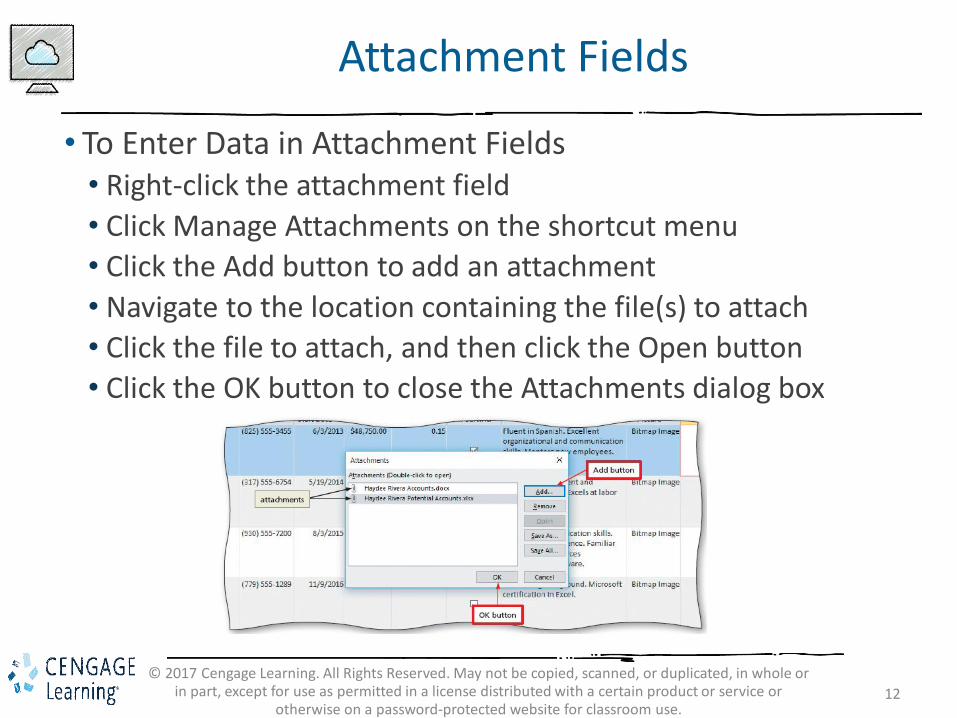
Attachment Fields
• To Enter Data in Attachment Fields• Right-click the attachment field
• Click Manage Attachments on the shortcut menu
• Click the Add button to add an attachment
• Navigate to the location containing the file(s) to attach
• Click the file to attach, and then click the Open button
• Click the OK button to close the Attachments dialog box
13
© 2017 Cengage Learning. All Rights Reserved. May not be copied, scanned, or duplicated, in whole or in part, except for use as permitted in a license distributed with a certain product or service or
otherwise on a password-protected website for classroom use.
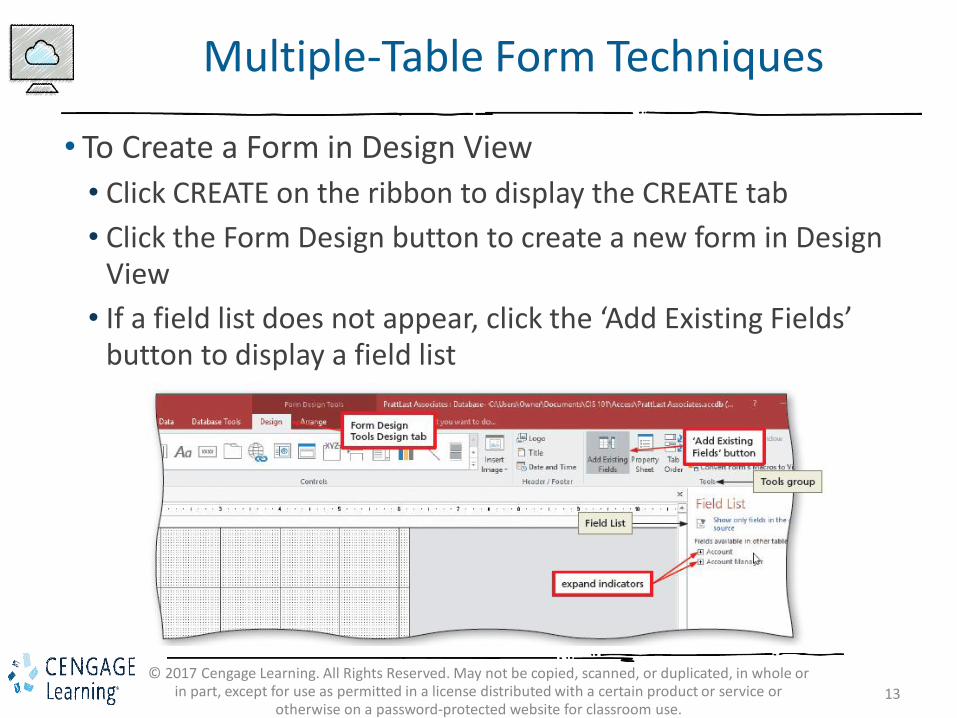
Multiple-Table Form Techniques
• To Create a Form in Design View
• Click CREATE on the ribbon to display the CREATE tab
• Click the Form Design button to create a new form in Design View
• If a field list does not appear, click the ‘Add Existing Fields’ button to display a field list
14
© 2017 Cengage Learning. All Rights Reserved. May not be copied, scanned, or duplicated, in whole or in part, except for use as permitted in a license distributed with a certain product or service or
otherwise on a password-protected website for classroom use.
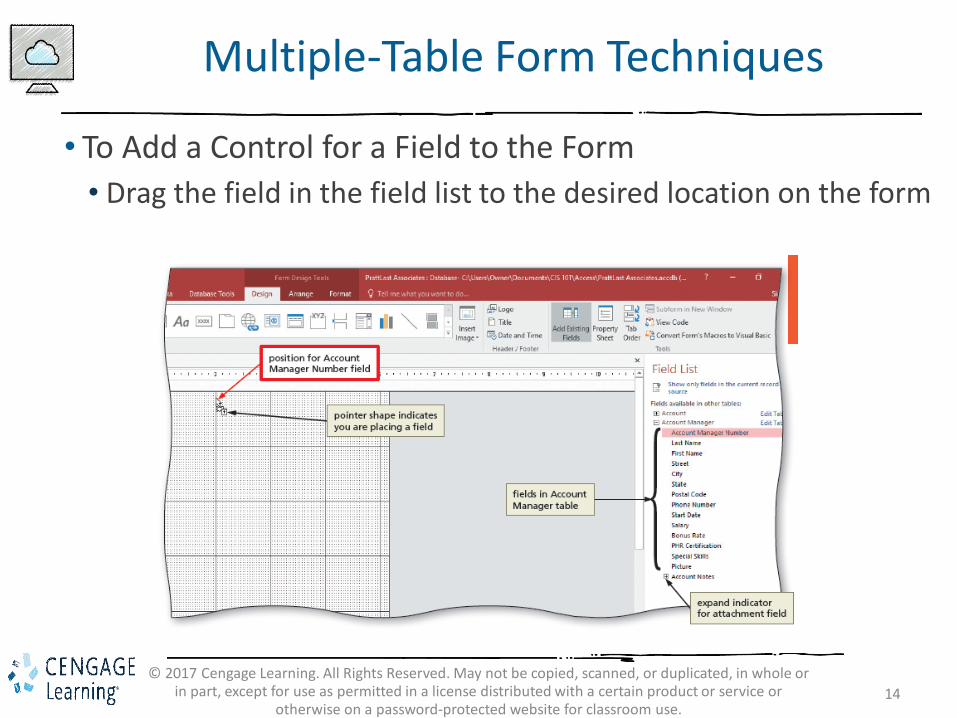
Multiple-Table Form Techniques
• To Add a Control for a Field to the Form
• Drag the field in the field list to the desired location on the form
15
© 2017 Cengage Learning. All Rights Reserved. May not be copied, scanned, or duplicated, in whole or in part, except for use as permitted in a license distributed with a certain product or service or
otherwise on a password-protected website for classroom use.
Multiple-Table Form Techniques
• To Align Controls on the Left
• Click the first control to align
• Hold the SHIFT key down and click the remaining controls to align
• Click the Align button to display the Align menu
• Click the desired alignment option
16
© 2017 Cengage Learning. All Rights Reserved. May not be copied, scanned, or duplicated, in whole or in part, except for use as permitted in a license distributed with a certain product or service or
otherwise on a password-protected website for classroom use.
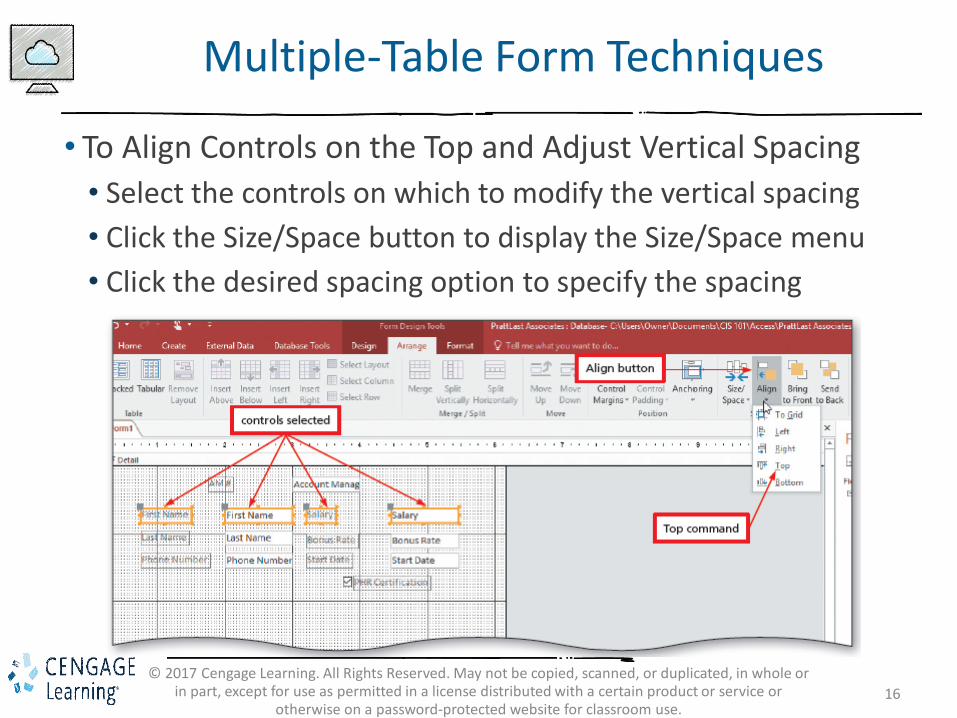
Multiple-Table Form Techniques
• To Align Controls on the Top and Adjust Vertical Spacing
• Select the controls on which to modify the vertical spacing
• Click the Size/Space button to display the Size/Space menu
• Click the desired spacing option to specify the spacing
17
© 2017 Cengage Learning. All Rights Reserved. May not be copied, scanned, or duplicated, in whole or in part, except for use as permitted in a license distributed with a certain product or service or
otherwise on a password-protected website for classroom use.
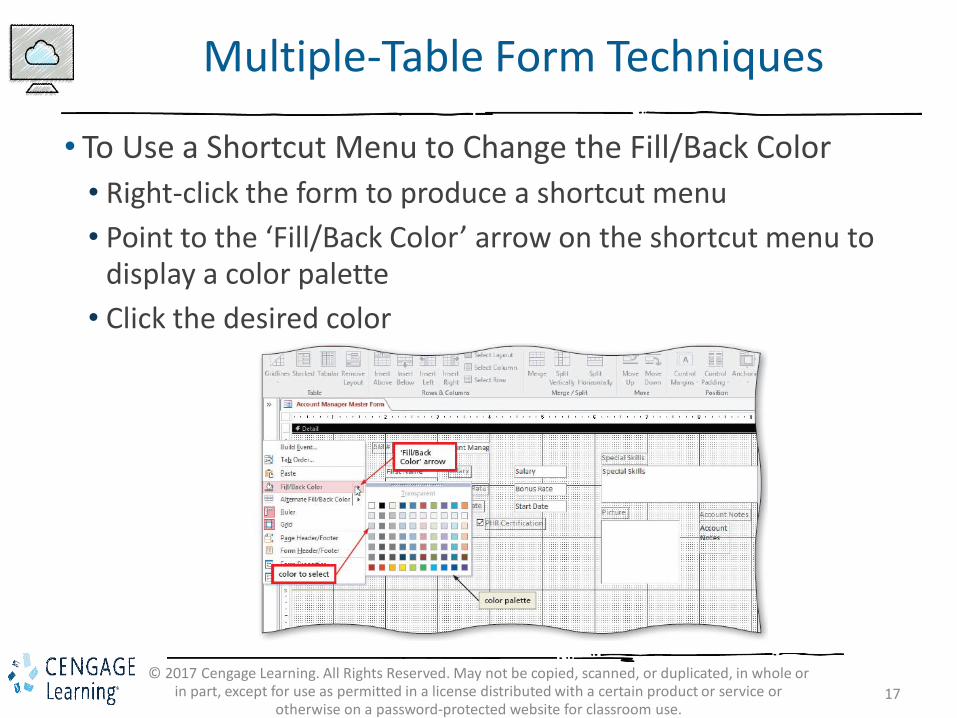
Multiple-Table Form Techniques
• To Use a Shortcut Menu to Change the Fill/Back Color
• Right-click the form to produce a shortcut menu
• Point to the ‘Fill/Back Color’ arrow on the shortcut menu to display a color palette
• Click the desired color

18
© 2017 Cengage Learning. All Rights Reserved. May not be copied, scanned, or duplicated, in whole or in part, except for use as permitted in a license distributed with a certain product or service or
otherwise on a password-protected website for classroom use.
Multiple-Table Form Techniques
• To Add a Title
• Click the Title button to add a title to the form
19
© 2017 Cengage Learning. All Rights Reserved. May not be copied, scanned, or duplicated, in whole or in part, except for use as permitted in a license distributed with a certain product or service or
otherwise on a password-protected website for classroom use.
Multiple-Table Form Techniques
• To Place a Subform
• Click the More button to display a gallery of available tools
• Be sure the ‘Use Control Wizards’ button is selected, click the Subform/ Subreport tool on the FORM DESIGN TOOLS DESIGN tab, and move the pointer to and click the position where you want to position the subform
• Ensure the ‘Use existing Tables and Queries’ option button is selected
• Click the Next button
20
© 2017 Cengage Learning. All Rights Reserved. May not be copied, scanned, or duplicated, in whole or in part, except for use as permitted in a license distributed with a certain product or service or
otherwise on a password-protected website for classroom use.
Multiple-Table Form Techniques
• To Place a Subform
• Click the Tables/Queries arrow, and then click the table that contains the fields for the subform
• Add the desired fields to the subform
• Click the Next button to move to the next SubForm Wizard dialog box
• Be sure the ‘Choose from a list’ option button is selected
• Click the Next button
• Type the desired name of the subform
• Click the Finish button to place the subform
21
© 2017 Cengage Learning. All Rights Reserved. May not be copied, scanned, or duplicated, in whole or in part, except for use as permitted in a license distributed with a certain product or service or
otherwise on a password-protected website for classroom use.
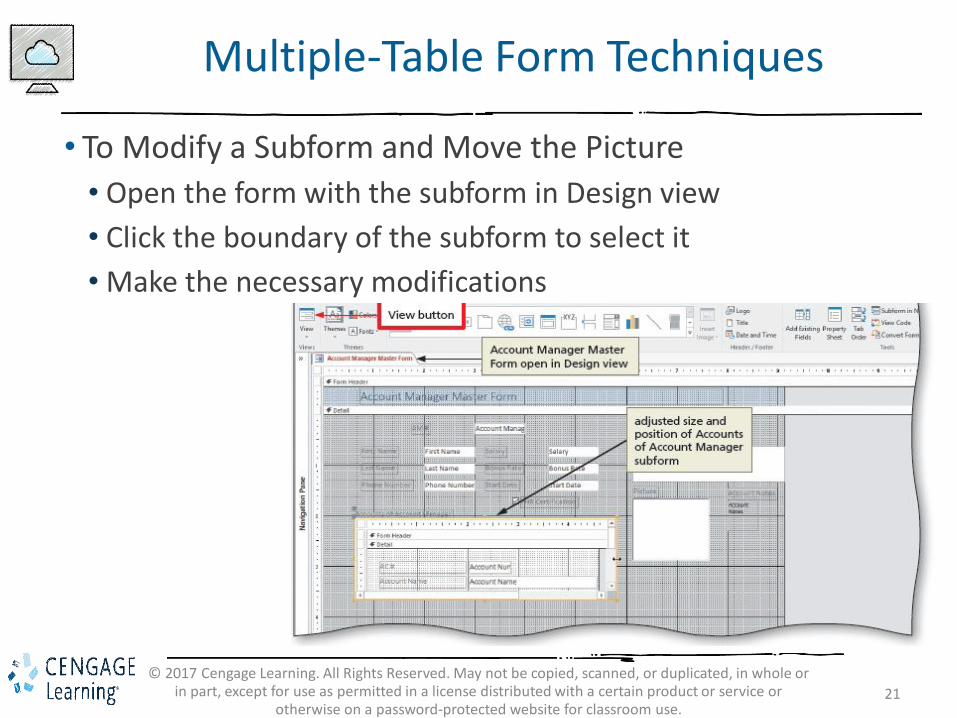
Multiple-Table Form Techniques
• To Modify a Subform and Move the Picture
• Open the form with the subform in Design view
• Click the boundary of the subform to select it
• Make the necessary modifications
22
© 2017 Cengage Learning. All Rights Reserved. May not be copied, scanned, or duplicated, in whole or in part, except for use as permitted in a license distributed with a certain product or service or
otherwise on a password-protected website for classroom use.
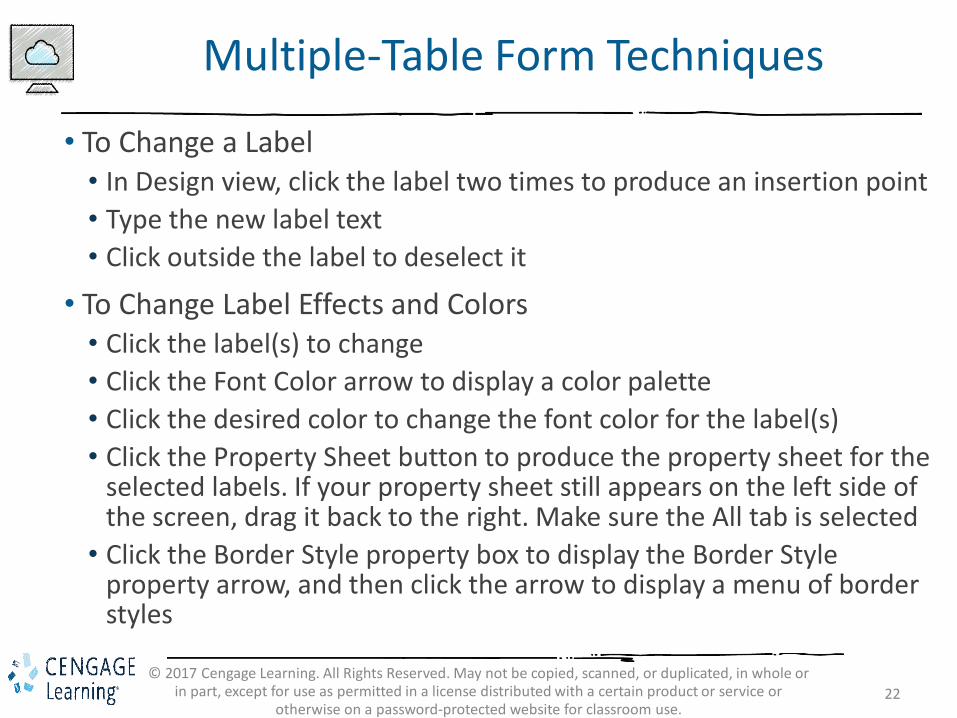
Multiple-Table Form Techniques
• To Change a Label• In Design view, click the label two times to produce an insertion point
• Type the new label text
• Click outside the label to deselect it
• To Change Label Effects and Colors• Click the label(s) to change
• Click the Font Color arrow to display a color palette
• Click the desired color to change the font color for the label(s)
• Click the Property Sheet button to produce the property sheet for the selected labels. If your property sheet still appears on the left side of the screen, drag it back to the right. Make sure the All tab is selected
• Click the Border Style property box to display the Border Style property arrow, and then click the arrow to display a menu of border styles
23
© 2017 Cengage Learning. All Rights Reserved. May not be copied, scanned, or duplicated, in whole or in part, except for use as permitted in a license distributed with a certain product or service or
otherwise on a password-protected website for classroom use.
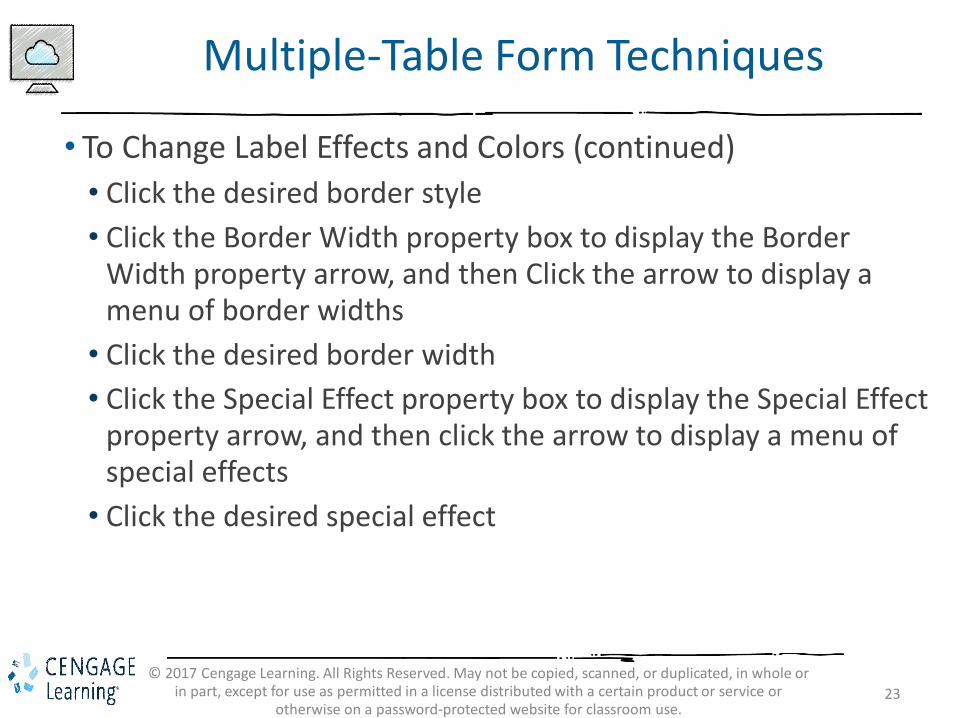
Multiple-Table Form Techniques
• To Change Label Effects and Colors (continued)
• Click the desired border style
• Click the Border Width property box to display the Border Width property arrow, and then Click the arrow to display a menu of border widths
• Click the desired border width
• Click the Special Effect property box to display the Special Effect property arrow, and then click the arrow to display a menu of special effects
• Click the desired special effect
24
© 2017 Cengage Learning. All Rights Reserved. May not be copied, scanned, or duplicated, in whole or in part, except for use as permitted in a license distributed with a certain product or service or
otherwise on a password-protected website for classroom use.
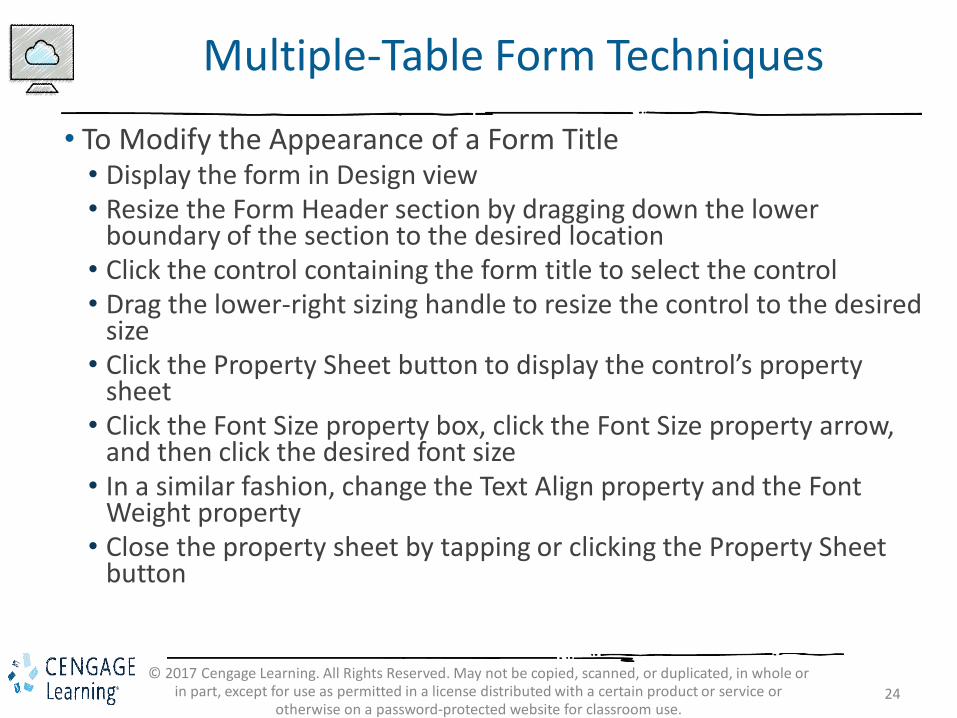
Multiple-Table Form Techniques
• To Modify the Appearance of a Form Title• Display the form in Design view• Resize the Form Header section by dragging down the lower
boundary of the section to the desired location• Click the control containing the form title to select the control• Drag the lower-right sizing handle to resize the control to the desired
size• Click the Property Sheet button to display the control’s property
sheet• Click the Font Size property box, click the Font Size property arrow,
and then click the desired font size• In a similar fashion, change the Text Align property and the Font
Weight property• Close the property sheet by tapping or clicking the Property Sheet
button
25
© 2017 Cengage Learning. All Rights Reserved. May not be copied, scanned, or duplicated, in whole or in part, except for use as permitted in a license distributed with a certain product or service or
otherwise on a password-protected website for classroom use.
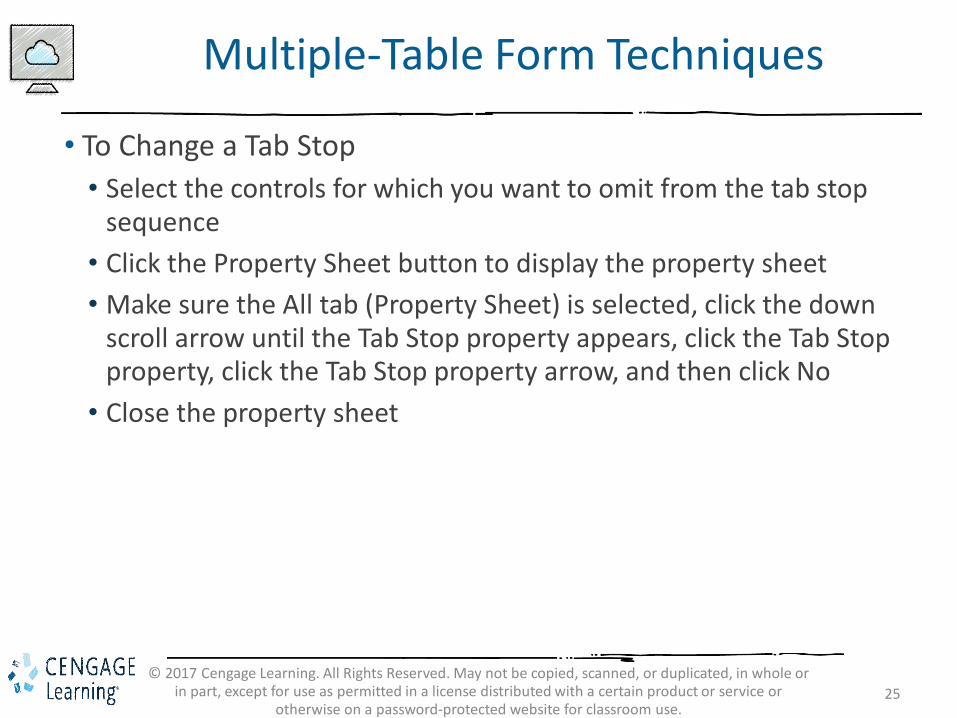
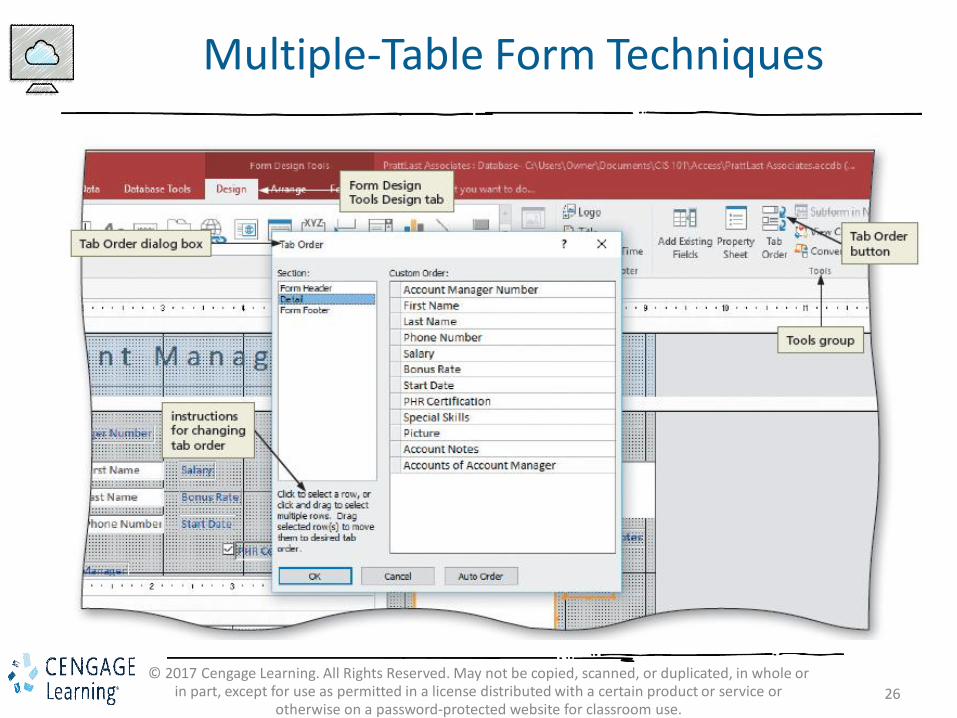
Multiple-Table Form Techniques
• To Change a Tab Stop
• Select the controls for which you want to omit from the tab stop sequence
• Click the Property Sheet button to display the property sheet
• Make sure the All tab (Property Sheet) is selected, click the down scroll arrow until the Tab Stop property appears, click the Tab Stop property, click the Tab Stop property arrow, and then click No
• Close the property sheet
26
© 2017 Cengage Learning. All Rights Reserved. May not be copied, scanned, or duplicated, in whole or in part, except for use as permitted in a license distributed with a certain product or service or
otherwise on a password-protected website for classroom use.
Multiple-Table Form Techniques
27
© 2017 Cengage Learning. All Rights Reserved. May not be copied, scanned, or duplicated, in whole or in part, except for use as permitted in a license distributed with a certain product or service or
otherwise on a password-protected website for classroom use.
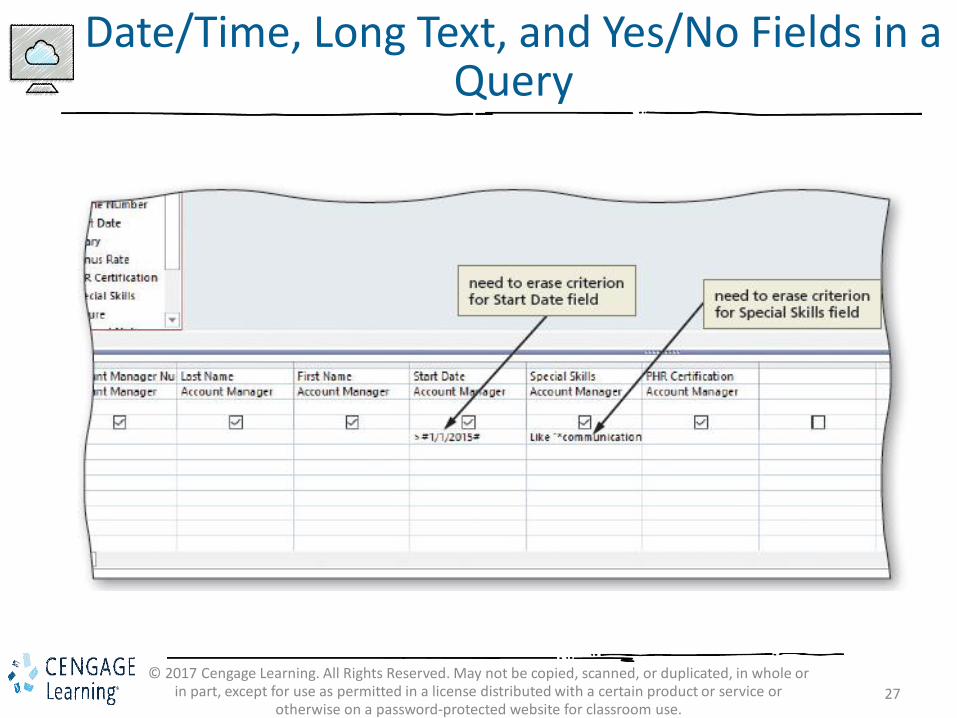
Date/Time, Long Text, and Yes/No Fields in a Query