smart window air conditioner - wink | a simpler, … · · 2018-03-16smart window air conditioner...
TRANSCRIPT

Part of the Quirky + GE collection of smart products,
Aros is an app-enabled air conditioner that reacts to
its surroundings to save you time, energy and money.
SMART WINDOW AIR CONDITIONER
AROS
AROS | 2
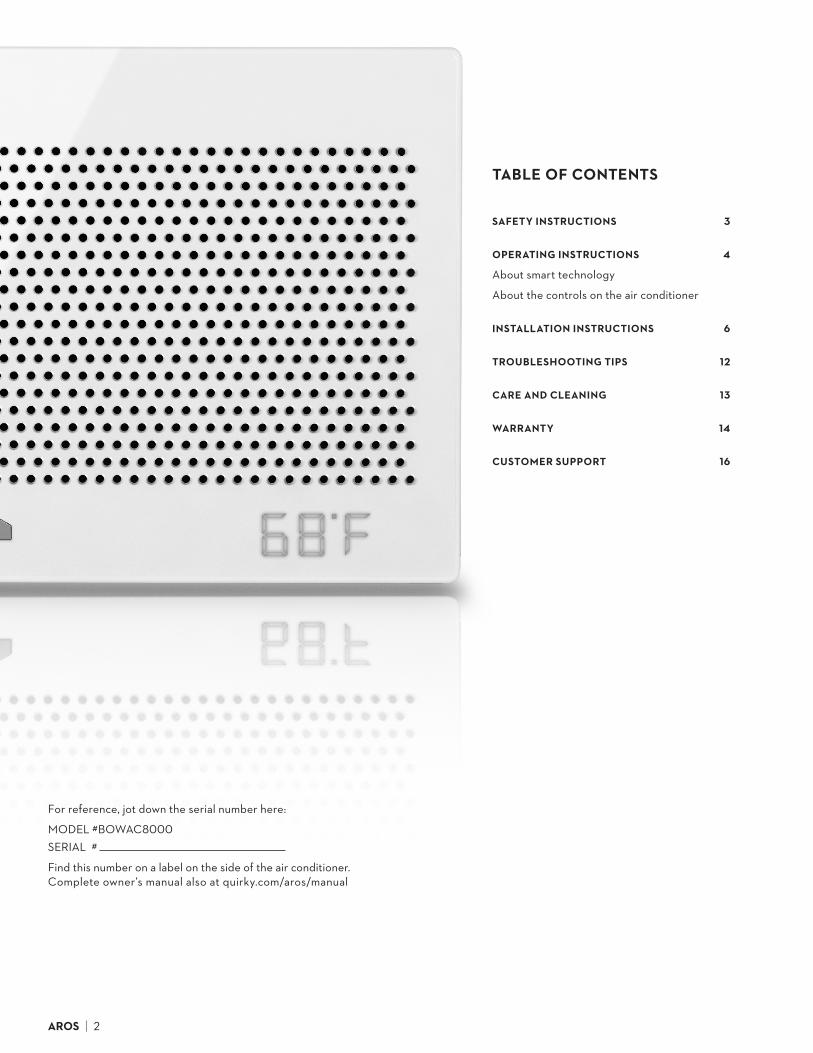
TABLE OF CONTENTS
SAFETY INSTRUCTIONS
OPERATING INSTRUCTIONS
About smart technology
About the controls on the air conditioner
INSTALLATION INSTRUCTIONS
TROUBLESHOOTING TIPS
CARE AND CLEANING
WARRANTY
CUSTOMER SUPPORT
3
4
6
12
13
14
16
For reference, jot down the serial number here:
MODEL #BOWAC8000SERIAL #
Find this number on a label on the side of the air conditioner. Complete owner’s manual also at quirky.com/aros/manual
AROS | 3
SAFETY INSTRUCTIONS
IMPORTANT SAFETY INFORMATION READ ALL INSTRUCTIONS BEFORE USING
WARNING: FOR YOUR SAFETY, THE INFORMATION IN THIS MANUAL MUST BE FOLLOWED TO MINIMIZE THE RISK OF FIRE, ELECTRIC SHOCK, OR PERSONAL INJURY.
SAFETY PRECAUTIONS
• Usethisapplianceonlyforitsintendedpurposeasdescribedinthisowner’smanual.
• Thisairconditionermustbeproperlyinstalledinaccordancewiththeinstallationinstructionsbeforeitisused.
• Neverunplugyourairconditionerbypullingonthe power cord. Always grip plug firmly and pull straight out from the receptacle.
• Replaceimmediatelyallelectricservicecordsthathavebecomefrayedorotherwisedamaged.Adamagedpowersupplycordmustbereplacedwithanewpowersupplycordobtainedfromthemanufacturerandnotrepaired.Donotuseacordthatshowscracksorabrasiondamagealongitslengthorateithertheplugorconnectorend.
• TurntheunitOFFandunplugyourairconditionerbeforeyoubegincleaning.
• Quirky+GEdonotsupportanyservicingoftheairconditioner.Westronglyrecommendthatyoudonotattempttoservicetheairconditioneryourself.
• Foryoursafety,donotstoreorusecombustiblematerials,gasoline,orotherflammablevaporsorliquidsinthevicinity
of this or any other appliance.
• Allairconditionerscontainrefrigerants,whichunderfederallawmustberemovedpriortoproductdisposal.Ifyouaregettingridofanoldproductwithrefrigerants,checkwiththecompanyhandlingdisposalaboutwhattodo.
• Ifthereceptacledoesnotmatchtheplug,thereceptaclemustbechangedoutbyaqualifiedelectrician.
• Thisairconditioningsystemrequirescontractorsandtechnicianstousetools,equipment,andsafetystandardsapprovedforusewiththisrefrigerant.
• DONOTuseequipmentcertifiedforR22refrigerantonly.
HOW TO CONNECT ELECTRICITY
Do not, under any circumstances, cut or remove the third (ground) prong from the power cord. For personal safety,this appliance must be properly grounded.
DO NOT USE AN ADAPTER PLUG WITH THIS APPLIANCE
The power cord of this appliance is equipped with a 3-prong (grounding) plug which mates with a standard 3-prong (grounding) wall outlet to minimize the possibility of electric shock hazard from this appliance.
Power cord includes a current interrupter device. A test and reset button is provided on the plug case. The device should be tested on a periodic basis by first pressing the TEST button and then the RESET button while plugged into the outlet. If the TEST button does not trip or if the RESET button will not stay engaged, discontinue use of the air conditioner and contact a qualified service technician.
Have the wall outlet and circuit checked by a qualified electrician to make sure the outlet is properly grounded.
Where a 2-prong wall outlet is encountered, it is your personal responsibility and obligation to have it replaced with a properly grounded 3-prong wall outlet.
The air conditioner should always be plugged into its own individual electrical outlet which has a voltage rating that matches the rating plate. This provides the best performance and also prevents overloading house wiring circuits which could cause a fire hazard from overheated wires.
See the installation instructions’ Electrical Requirementssection for specific electrical connection requirements.
WARNING:
USE OF EXTENSION CORDS
RISK OF FIRE could cause serious injury or death
DO NOT use an extension cord with this window air conditioner
DO NOT use surge protectors or multi-outlet adapters with this window air conditioner
READ AND FOLLOW THIS SAFETY INFORMATIONSAVE THESE INSTRUCTIONS

AROS | 4
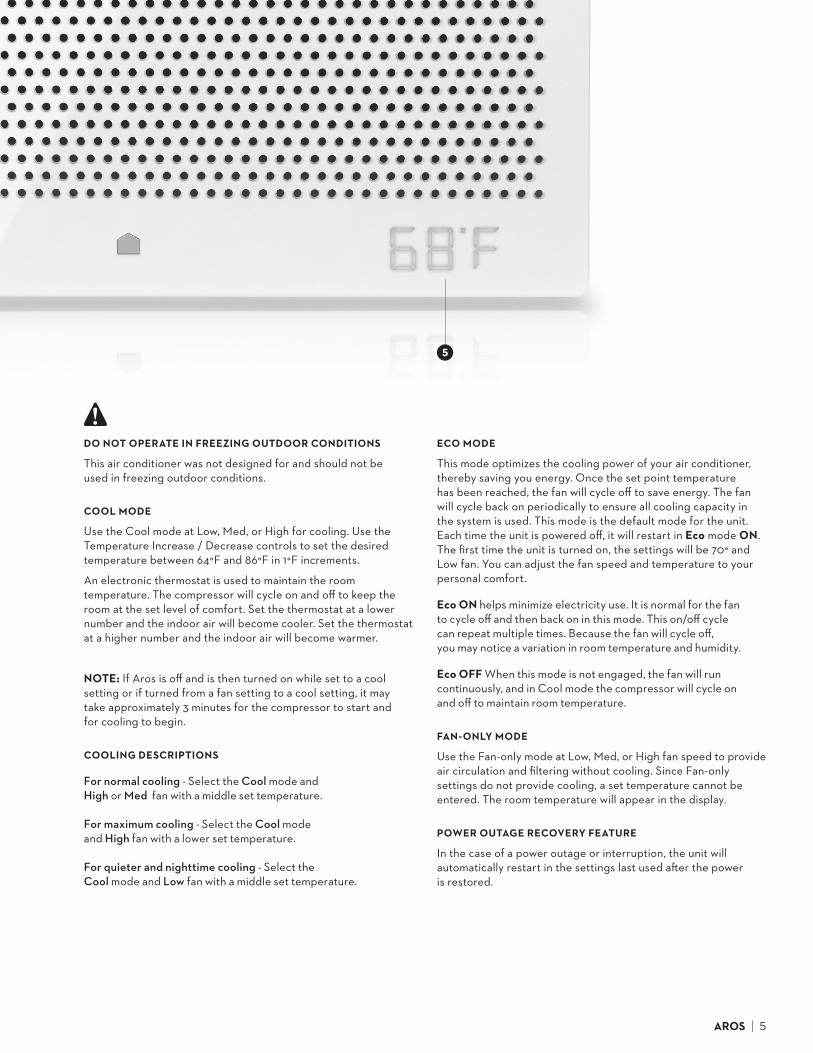
NOTE: The default temperature reading on the display is degree Fahrenheit (°F). To change the display to degree Celsius (°C), press Temperature Increase and Temperature Decrease at the same time and hold for 3 seconds. Repeat the process to change back to degree Fahrenheit (°F).
POWER
Turns air conditioner on and off. When turned on, the display will show the room temperature.
MODE
Use to set the air conditioner to Cool, Eco, or Fan-only mode
FAN SPEED
Use to set the fan speed to High, Med, or Low on the unit
TEMPERATURE INCREASE / DECREASE
Use up and down arrows to set temperature when in Cool or Eco mode
DISPLAY
Shows the room temperature. Shows the set temperature while setting the temperature in Cool or Eco modes.
ABOUT THE CONTROLS ON THE AIR CONDITIONER
Lights will illuminate next to each option when activatedto indicate the selected settings.
OPERATING INSTRUCTIONS
ABOUT SMART TECHNOLOGY
Aros has smart features that extend its functionality. It can be controlled from the Wink app on your mobile device and set to gather information about your schedule, location, usage, and more—to help automatically and efficiently maintain the perfect temperature for your home.
For more information, download and launch the Wink app on your mobile device then follow its instructions to connect.
AROS | 5
DO NOT OPERATE IN FREEZING OUTDOOR CONDITIONS
This air conditioner was not designed for and should not beused in freezing outdoor conditions.
COOL MODE
Use the Cool mode at Low, Med, or High for cooling. Use the Temperature Increase / Decrease controls to set the desired temperature between 64°F and 86°F in 1°F increments.
An electronic thermostat is used to maintain the room temperature. The compressor will cycle on and off to keep the room at the set level of comfort. Set the thermostat at a lower number and the indoor air will become cooler. Set the thermostat at a higher number and the indoor air will become warmer.
NOTE: If Aros is off and is then turned on while set to a cool setting or if turned from a fan setting to a cool setting, it may take approximately 3 minutes for the compressor to start andfor cooling to begin.
COOLING DESCRIPTIONS
For normal cooling-SelecttheCoolmodeand HighorMed fanwithamiddlesettemperature.
For maximum cooling-SelecttheCoolmode andHighfanwithalowersettemperature.
For quieter and nighttime cooling-Selectthe CoolmodeandLowfanwithamiddlesettemperature.
ECO MODE
This mode optimizes the cooling power of your air conditioner, thereby saving you energy. Once the set point temperature has been reached, the fan will cycle off to save energy. The fan will cycle back on periodically to ensure all cooling capacity in the system is used. This mode is the default mode for the unit. Each time the unit is powered off, it will restart in Eco mode ON. The first time the unit is turned on, the settings will be 70° and Low fan. You can adjust the fan speed and temperature to your personal comfort.
Eco ONhelpsminimizeelectricityuse.Itisnormalforthefan tocycleoffandthenbackoninthismode.Thison/offcycle canrepeatmultipletimes.Becausethefanwillcycleoff, youmaynoticeavariationinroomtemperatureandhumidity.
Eco OFFWhenthismodeisnotengaged,thefanwillruncontinuously,andinCoolmodethecompressorwillcycleon andofftomaintainroomtemperature.
FAN-ONLY MODE
Use the Fan-only mode at Low, Med, or High fan speed to provide air circulation and filtering without cooling. Since Fan-only settings do not provide cooling, a set temperature cannot be entered. The room temperature will appear in the display.
POWER OUTAGE RECOVERY FEATURE
In the case of a power outage or interruption, the unit will automatically restart in the settings last used after the poweris restored.
AROS | 6
ELECTRICAL REQUIREMENTS
Aros requires a 115/120-volt AC, 60-Hz grounded outlet protected with a 15-amp time-delay fuse or circuit breaker.
The 3-prong grounding plug minimizes the possibility of electric shock hazard. If the wall outlet you plan to use is only a 2-prong outlet, it is your responsibility to have it replaced with a properly grounded 3-prong wall outlet.
CAUTION:
Do not, under any circumstances, cut or remove the third (ground) prong from the power cord.
Do not change the plug on the power cord of this air conditioner.
Aluminum house wiring may present special problems; consulta qualified electrician.
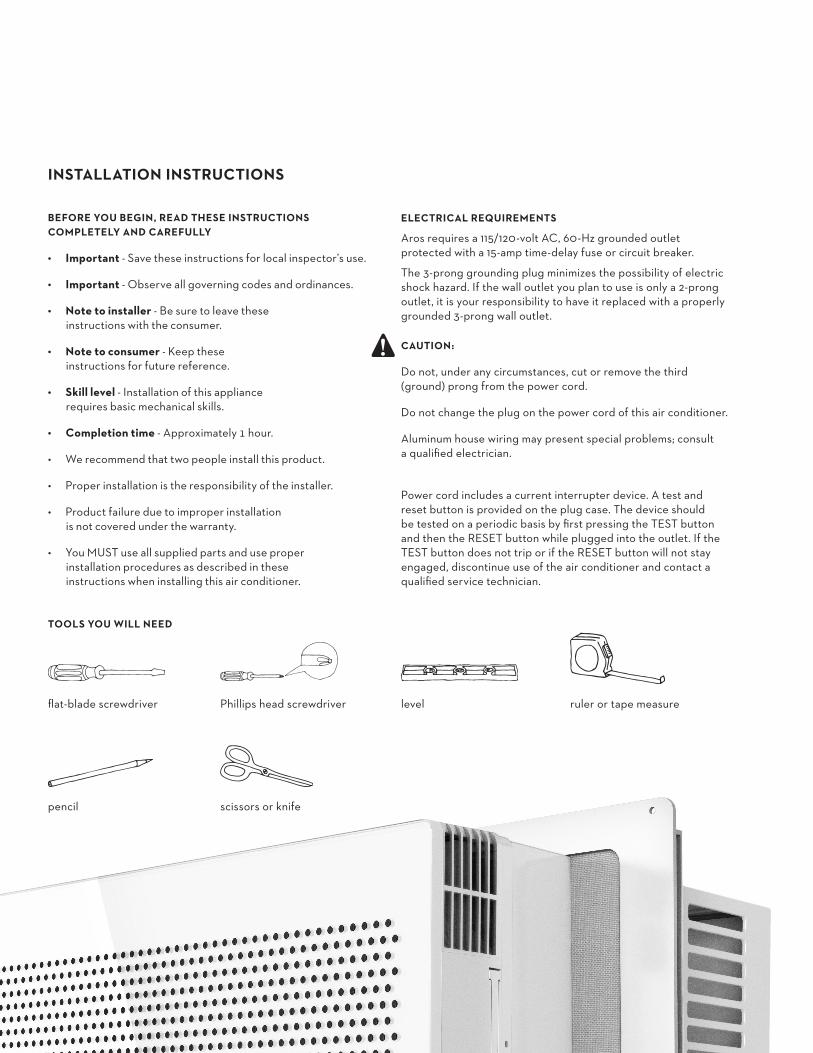
INSTALLATION INSTRUCTIONS
BEFORE YOU BEGIN, READ THESE INSTRUCTIONS COMPLETELY AND CAREFULLY
• Important-Savetheseinstructionsforlocalinspector’suse.
• Important-Observeallgoverningcodesandordinances.
• Note to installer-Besuretoleavetheseinstructionswiththeconsumer.
• Note to consumer-Keeptheseinstructionsforfuturereference.
• Skill level-Installationofthisappliancerequiresbasicmechanicalskills.
• Completion time-Approximately1hour.
• Werecommendthattwopeopleinstallthisproduct.
• Properinstallationistheresponsibilityoftheinstaller.
• Productfailureduetoimproperinstallationisnotcoveredunderthewarranty.
• YouMUSTuseallsuppliedpartsanduseproperinstallationproceduresasdescribedintheseinstructionswheninstallingthisairconditioner.
Power cord includes a current interrupter device. A test and reset button is provided on the plug case. The device should be tested on a periodic basis by first pressing the TEST button and then the RESET button while plugged into the outlet. If the TEST button does not trip or if the RESET button will not stay engaged, discontinue use of the air conditioner and contact a qualified service technician.
TOOLS YOU WILL NEED
Phillips head screwdriverflat-blade screwdriver
scissors or knife
level ruler or tape measure
pencil

AROS | 7
PARTS INCLUDED
Aros air conditioner left extension right extension
top mounting rail panel clips (2)top mounting rail seal strip
window sash seal foam top window gasket locking bracket (1)
type A screws (4) type B screws (6)

AROS | 8
1 WINDOW REQUIREMENTS
• Theseinstructionsareforastandarddouble-hungwindow. Youwillneedtomodifythemforothertypesofwindows.
• Theairconditionercanbeinstalledwithoutthesideextensionsifneededtofitinanarrowwindow.See the window opening dimensions.
• Allsupportingpartsmustbesecuredtofirmwood,masonry, or metal.
• Theelectricaloutletmustbewithinreachofthepower cord.
• Followthedimensionsinthetableandillustration.
with extensions
H
W
24.5” - 40.5” 13.5”W H

AROS | 9
wood
sill
vinyl frame
1/2” higher than storm window frame
stormwindow frame
1/2” higher than vinyl frame (on some windows)
2 STORM WINDOW REQUIREMENTS
A storm window frame will not allow the air conditioner to tilt toward the outside, and will keep it from draining properly. To adjust for this, attach a piece of wood to the sill.
• Width:2”
• Length:Longenoughtofitinsidethewindowframe.
• Thickness:Todeterminethethickness,placeapieceofwoodonthesilltomakeit1/2”higherthanthetopofthestormwindowframeorthevinylframe.
Attach securely with nails or screws provided by the installer.
top mounting rail
seal strip
FRONT VIEW
top mounting rail
remove backing seal from seal strip
3 ATTACH THE TOP MOUNTING RAIL SEAL STRIP
Remove backing from top mounting rail seal strip and adhere it to the bottom of the top mounting rail.

AROS | 10
4 PREPARE THE AIR CONDITIONER
Attach the top mounting rail to the air conditioning unit using 4 type A screws.
Attach right and left panel clips to the unit by sliding them into place.
left right
5 PREPARE YOUR STANDARD, DOUBLE-HUNG WINDOW
Cut the window sash seal to the proper length for your window. Remove the seal’s backing and adhere it to the underside of the window sash.
Install right and left extensions by sliding them over the top and bottom mounting rails on each side of the unit. Pull fabric panels from outside edges of the extensions toward the unit, then hook onto the panel clips to secure.
6 INSTALL THE AIR CONDITIONER IN THE WINDOW
Place Aros on the sill with the bottom mounting rail against its back edge.
Center it and close the window securely behind the top mounting rail.
• Arosshouldbelevelorslightlytiltedoutside.
• Usealevel;abouta1/3bubblewillbethecorrectcaseslanttotheoutside.
AROS | 11
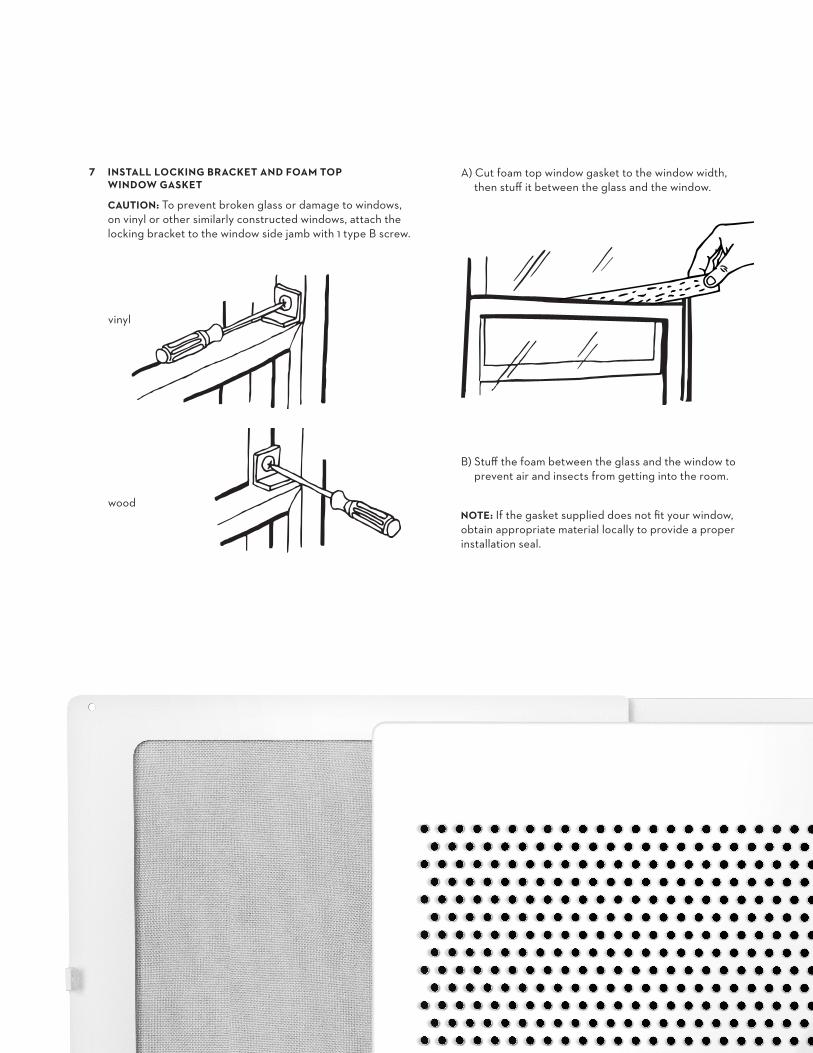
7 INSTALL LOCKING BRACKET AND FOAM TOP WINDOW GASKET
CAUTION: To prevent broken glass or damage to windows, on vinyl or other similarly constructed windows, attach the locking bracket to the window side jamb with 1 type B screw.
vinyl
A) Cut foam top window gasket to the window width, then stuff it between the glass and the window.
B) Stuff the foam between the glass and the window to prevent air and insects from getting into the room.
NOTE: If the gasket supplied does not fit your window, obtain appropriate material locally to provide a proper installation seal.
wood

AROS | 12
TROUBLESHOOTING TIPS
PROBLEM POSSIBLE CAUSES WHAT TO DO
AIR CONDITIONER DOES NOT COOL AS IT SHOULD
Cooling coils have iced up
Cold air is escaping
The room may have been hot
The air filter is dirty
The temp control may not be set correctly
Airflow is restricted
The current interrupter device is tripped
Power failure
The fuse is blown/circuit breaker is tripped
Air conditioner does not start
See AIR CONDITIONER FREEZING UP (opposite page).
Check for open furnace registers and cold air returns.
When the air conditioner is first turned on, you need to allow time for the room to cool down.
Clean the filter at least every 30 days. See the Care and Cleaning section (opposite page).
In the Cool mode, press temperature decrease.
Make sure there are no curtains, blinds, or furniture blocking the front of the air conditioner.
Press the RESET button located on the power cord plug. If the RESET button will not stay engaged, discontinue use of the air conditioner and contact a qualified service technician.
There is a protective time delay (approximately 3 minutes) to prevent tripping of the compressor overload. For this reas,on the unit may not start normal cooling for 3 minutes after it is turned back on.
Check the house fuse/circuit breaker box and replace the fuseor reset the breaker.
Make sure the air conditioner plug is pushed completely intothe outlet.
The unit will automatically restart in the settings last used after the power is restored.
AIR CONDITIONER DOES NOT START
AROS | 13
WATER COLLECTS IN BASE PAN
WATER DRIPS INDOORS
AIR CONDITIONER FREEZING UP
Moisture removed from air and drains into base pan
The air conditioner is not tilted to the outside
Ice blocks the air flow and stops the air conditioner from cooling the room
This is normal for a short period in areas with little humidity; normal for a longer period in very humid areas.
For proper water disposal, make sure the air conditioner slants slightly away from the case front to the rear.
WATER DRIPS OUTSIDE Hot, humid weather This is normal.
Set the controls at High Fan or High Cool and set the thermostat to a higher temperature.
PROBLEM POSSIBLE CAUSES WHAT TO DO
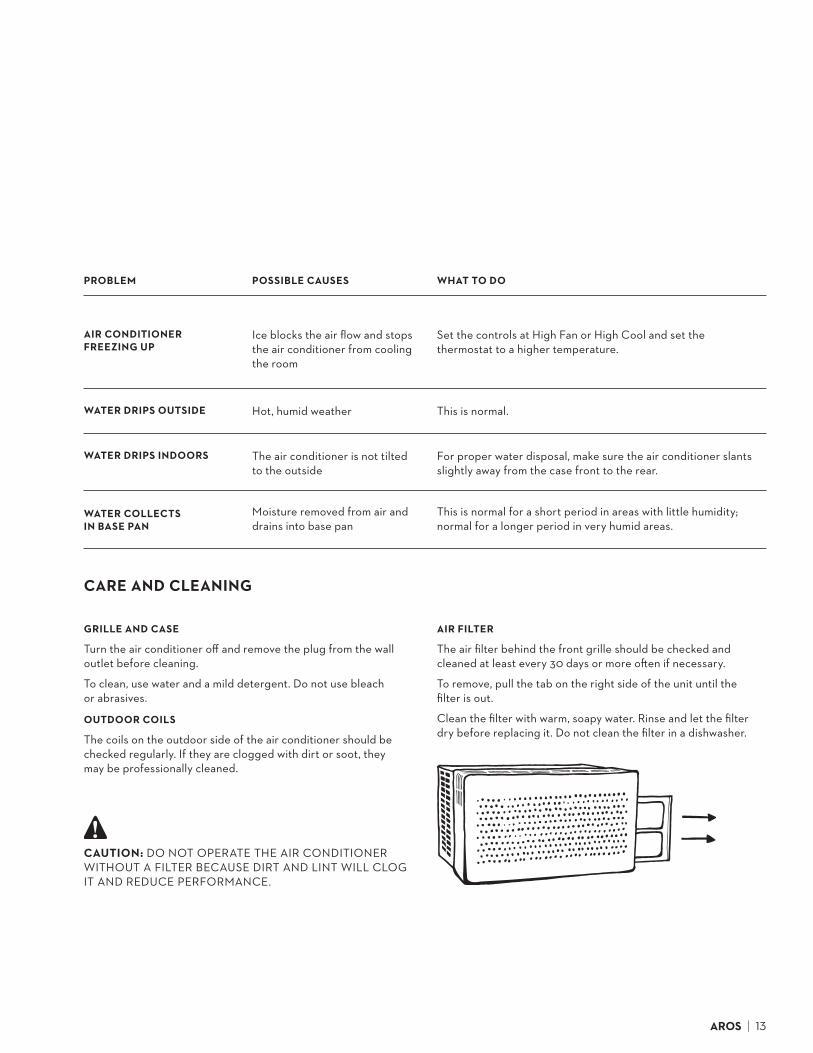
CAUTION: DO NOT OPERATE THE AIR CONDITIONER WITHOUT A FILTER BECAUSE DIRT AND LINT WILL CLOG IT AND REDUCE PERFORMANCE.
CARE AND CLEANING
GRILLE AND CASE
Turn the air conditioner off and remove the plug from the wall outlet before cleaning.
To clean, use water and a mild detergent. Do not use bleachor abrasives.
OUTDOOR COILS
The coils on the outdoor side of the air conditioner should be checked regularly. If they are clogged with dirt or soot, theymay be professionally cleaned.
AIR FILTER
The air filter behind the front grille should be checked and cleaned at least every 30 days or more often if necessary.
To remove, pull the tab on the right side of the unit until thefilter is out.
Clean the filter with warm, soapy water. Rinse and let the filter dry before replacing it. Do not clean the filter in a dishwasher.
AROS | 14
EXCLUSION OF IMPLIED WARRANTIES
Your sole and exclusive remedy is product replacement as provided in this Limited Warranty. Any implied warranties, including the implied warranties of merchantability or fitness for a particular purpose, are limited to one year or the shortest period allowed by law.
THIS WARRANTY IS EXTENDED TO THE ORIGINAL PURCHASER AND ANY SUCCEEDING OWNER FOR PRODUCTS PURCHASED FOR HOME USE WITHIN THE USA.
SOME STATES DO NOT ALLOW THE EXCLUSION OR LIMITATION OF INCIDENTAL OR CONSEQUENTIAL DAMAGES. THIS WARRANTY GIVES YOU SPECIFIC LEGAL RIGHTS, AND YOU MAY ALSO HAVE OTHER RIGHTS WHICH VARY FROM STATE TO STATE. TO KNOW WHAT YOUR LEGAL RIGHTS ARE, CONSULT YOUR LOCAL OR STATE CONSUMER AFFAIRS OFFICE OR YOUR STATE’S ATTORNEY GENERAL.
EXCLUSION OF IMPLIED WARRANTIES: EXCEPT WHERE PROHIBITED OR RESTRICTED BY LAW, THERE ARE NO WARRANTIES, WHETHER EXPRESS, ORAL OR STATUTORY WHICH EXTEND BEYOND THE DESCRIPTION ON THE FACE HEREOF, INCLUDING SPECIFICALLY THE IMPLIED WARRANTIES OF MERCHANTABILITY OR FITNESS FOR A PARTICULAR PURPOSE.
WARRANTOR: QUIRKY
1-866-5QUIRKY (1-866-578-4759)
WARRANTY
Quirky + GE Aros Air Conditioner
One-Year Limited Warranty
Staple your receipt here.
Proof of the original purchase date is needed to make a warranty claim.
FOR THE PERIOD OF
One Year from the date of the original purchase
WE WILL REPLACE
Air conditioning unit for any product which fails due to a defect in materials or workmanship. The replacement unit is warranted for the remainder of your product’s original one-year warranty period.
TO MAKE A WARRANTY CLAIM
Contact customer service by calling 1-866-5QUIRKY (1-866-578-4759).
WHAT’S NOT COVERED
• Customer instruction. This owner’s manual provides information regarding operating instructions and user controls.
• Improper installation, delivery, or maintenance. If you have an installation problem, or if the air conditioner is of improper cooling capacity, contact your dealer or installer. You are responsible for providing adequate electrical, plumbing, and other connecting facilities.
• Failure of the product resulting from modifications to the product or due to unreasonable use, including failure to provide reasonable and necessary maintenance.
• Replacement of house fuses or resetting of circuit breakers.
• Failure due to corrosion on models not corrosion-protected.
• Damage to the product caused by improper power supply voltage, accident, fire, floods, or acts of God.
• Incidental or consequential damage caused by possible defects with this air conditioner.
• Damage caused after delivery.

AROS | 15
CUSTOMER SUPPORT
For service and support, email us at [email protected]
or call 1-866-5QUIRKY (1-866-578-4759).
Complete owner’s manual also at quirky.com/aros/manual
FCC COMPLIANCE
This device complies with Part 15 of the FCC Rules.
Operation is subject to the following two conditions: (1) this device may not cause harmful interference, and (2) this device must accept any interference received, including interference that may cause undesired operation.
Changes or modifications not expressly approved by Quirky could void the user’s authority to operate the equipment. NOTE: This equipment has been tested and found to comply with the limits for a Class B digital device, pursuant to Part 15 of the FCC Rules. These limits are designed to provide reasonable protection against harmful interference in a residential installation. This equipment generates, uses and can radiate radio frequency energy and, if not installed and used in accordance with the instructions, may cause harmful interference to radio communications. However, there is no guarantee that interference will not occur in a particular installation. If this equipment does cause harmful interference to radio or television reception, which can be determined by turning the equipment off and on, the user is encouraged to try to correct the interference by one or more of the following measures:• Reorient or relocate the receiving antenna.• Increase the separation between the equipment and receiver.• Connect the equipment into an outlet on a circuit different from that to which the receiver is connected.• Consult the dealer or an experienced radio/TV technician for help.
RF Exposure Statement: To maintain compliance with FCC’s RF Exposure guidelines, this equipment should be installed and operated with minimum 20cm distance between the device and your body. Use only the supplied antenna.