solaris™ 7 - fujitsumanuals.ts.fujitsu.com/file/7006/o42351e1.pdfsolaris™ solaris™ 7 system...
TRANSCRIPT

Solaris™
Solaris™ 7
System Administration within a Domain Joachim PicholFujitsu Siemens Computers GmbH UNIX33094 Paderborne-mail: Internet:[email protected].: (05251) 8-14884Fax: (0 52 51) 8-1 52 48U42351-J-Z775-1-76Sprachen: EnEdition April 2000

Comments… Suggestions… Corrections…The User Documentation Department would like to know your opinion on this manual. Your feedback helps us to optimize our documentation to suit your individual needs.
Fax forms for sending us your comments are included at the back of the manual.
There you will also find the addresses of the relevant User Documentation Department
Copyright and Trademarks
Copyright © 2000 Fujitsu Siemens Computers GmbH.
All rights reserved.Delivery subject to availability; right of technical modifications reserved.
All hardware and software names used are trademarks of their respective manufacturers.
This manual is printed on paper treated with chlorine-free bleach.
Preface
What is an administration domain?
Domain administration with WebSysAdmin
Operating an administration domain
Solving problems
Abbreviations
Related publications
Index

Contents1 Preface . . . . . . . . . . . . . . . . . . . . . . . . . . . . . . 11.1 Target groups . . . . . . . . . . . . . . . . . . . . . . . . . . . 11.2 Notational conventions . . . . . . . . . . . . . . . . . . . . . . . 1
2 What is an administration domain? . . . . . . . . . . . . . . . 32.1 Advantages of administration domains . . . . . . . . . . . . . . 32.2 The domain-wide administration system . . . . . . . . . . . . . 52.2.1 Installing DomainAdmin . . . . . . . . . . . . . . . . . . . . . . 52.2.2 The CLOS domain operating system . . . . . . . . . . . . . . . 52.2.3 The CLODB administration domain database . . . . . . . . . . . 52.3 The administration desktop . . . . . . . . . . . . . . . . . . . . 62.3.1 WebSysAdmin clients under Windows 95/98/NT (PC console) . . 72.3.2 WebSysAdmin clients under Solaris 7 (LAN console) . . . . . . . 82.3.3 WebSysAdmin clients via VGA console with X.11 interface . . . . 8
U42351-J-Z775-1-76
3 Domain administration with WebSysAdmin . . . . . . . . . . 93.1 Features of WebSysAdmin . . . . . . . . . . . . . . . . . . . . 93.2 Starting WebSysAdmin . . . . . . . . . . . . . . . . . . . . . 103.2.1 Starting WebSysAdmin under Windows 95/98/NT (PC console) 103.2.2 Starting WebSysAdmin under Solaris 7 (LAN console) . . . . . 113.2.3 Starting WebSysAdmin on SPARC systems (VGA console) . . 123.3 Elements of WebSysAdmin . . . . . . . . . . . . . . . . . . . 12
4 Operating an administration domain . . . . . . . . . . . . . 174.1 Creating a domain . . . . . . . . . . . . . . . . . . . . . . . . 184.2 Deleting a domain . . . . . . . . . . . . . . . . . . . . . . . . 214.3 Adding a node . . . . . . . . . . . . . . . . . . . . . . . . . . 214.4 Removing a node . . . . . . . . . . . . . . . . . . . . . . . . 234.5 Adding a user . . . . . . . . . . . . . . . . . . . . . . . . . . 244.6 Cloning a user . . . . . . . . . . . . . . . . . . . . . . . . . . 274.7 Removing a user . . . . . . . . . . . . . . . . . . . . . . . . 284.8 Assigning a global password . . . . . . . . . . . . . . . . . . 284.9 Troubleshooting using the diagnostic application . . . . . . . . 304.10 Configuring domain-wide reactions . . . . . . . . . . . . . . . 324.11 Domain-wide network file system access . . . . . . . . . . . . 364.12 Displaying and checking software versions throughout the
domain . . . . . . . . . . . . . . . . . . . . . . . . . . . . . . 404.13 Transferring tasks to other nodes in a domain . . . . . . . . . . 43
5 Solving problems . . . . . . . . . . . . . . . . . . . . . . . . 475.1 Problems with Netscape or WSA . . . . . . . . . . . . . . . . 47

Contents
5.2 Performance problems . . . . . . . . . . . . . . . . . . . . . . 495.3 Problems with node administration . . . . . . . . . . . . . . . . 50
Abbreviations . . . . . . . . . . . . . . . . . . . . . . . . . . . . . . . . 55
Related publications . . . . . . . . . . . . . . . . . . . . . . . . . . . . 57
Index . . . . . . . . . . . . . . . . . . . . . . . . . . . . . . . . . . . . 59
U42351-J-Z775-1-76

1 PrefaceThis manual describes how several nodes can be bundled in an administration domain and thus managed jointly. This is possible using a domain administra-tion system, in this case the DomainAdmin add-on product. Users are given access to the essential functions of this administration system by means of the WebSysAdmin (WSA = Web based System Administration) user interface. This manual deals less with DomainAdmin itself, than with using DomainAdmin via the WSA user interface for managing the systems in an administration domain.
1.1 Target groups
This manual is written primarily for system administrators and field engineering staff. Sound operating system and hardware knowledge is required as well as
U42351-J-Z775-1-76 1
familiarity with the basics of the WebSysAdmin graphical user interface.
1.2 Notational conventions
The following notational conventions are used in this manual.
italics Denote names of commands, system calls, functions, files, procedures, programs etc. as well as menu options and input/output fields from fig-ures in the main body of text.
Name (extension)Commands, system calls, functions, files, interfaces etc., are given an extension in brackets if manual pages (descriptions) are available for them.
However, not all manual pages are printed in the reference manuals. Some manual pages, for add-on products, for example, are only available online.
I Please also refer in this context to the AnswerBook documentation for Solaris.
You can show the manual pages on the screen with the man [see man(1)] command. See the manual command for man itself for information about using this command. To do this, enter man man. You will find information
Notational conventions Preface
about printing a manual page in the manprint(1) manual page. Changes to the manual pages because of new releases are logged in the man-news(1) manual page.
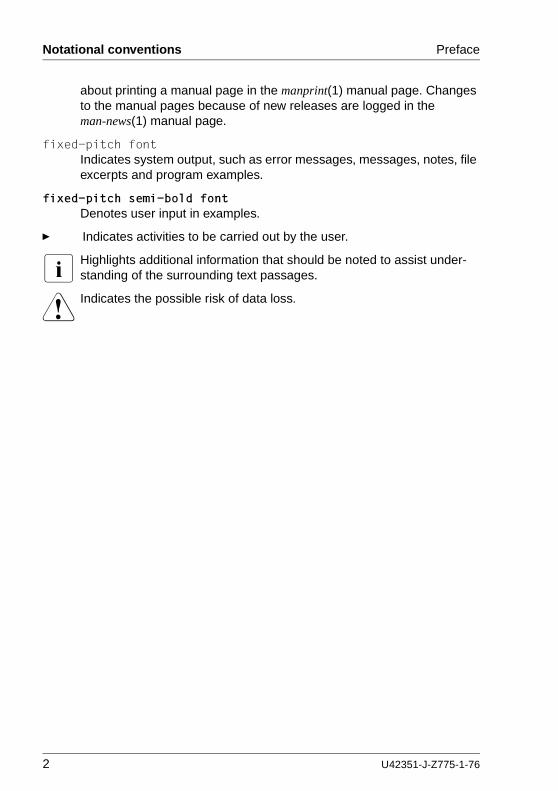
fixed-pitch fontIndicates system output, such as error messages, messages, notes, file excerpts and program examples.
fixed-pitch semi-bold fontDenotes user input in examples.
Ê Indicates activities to be carried out by the user.
I Highlights additional information that should be noted to assist under-standing of the surrounding text passages.
V Indicates the possible risk of data loss.
2 U42351-J-Z775-1-76

2 What is an administration domain?
An administration domain is a group of nodes that are linked via a network and managed jointly. This chapter provides more detailed information about:
● The advantages of an administration domain
● The administration system on which this administration domain is based (operating system and administration domain database)
● The advantage of a single administration desktop from which the entire administration domain can be managed
● Specific requirements for operating an administration desktop within a domain
U42351-J-Z775-1-76 3
2.1 Advantages of administration domains
The setting up of an administration domain offers improvements in many respects:
● Single point of administration
All nodes in a domain are supported jointly from a single administration desktop and need no longer be operated individually from the respective system console.
● Extensibility
An active node including all its resources can be inserted in or removed from the administration domain at any time.
● Transparency
Because an administration domain appears to a user like a single system (single system view), a cluster of nodes can be administered in the same way as a single operating system. Regardless of the node on which the system administrator has started the user interface, he or she can access the disk storage and other peripherals anywhere in the administration domain at any time for the purpose of administration and configuration.
● Maintenance/troubleshooting

Advantages of administration domains What is an administration domain?
The logbooks for all nodes in the administration domain can be evaluated from a central desktop.
Furthermore, the diagnostics system can be configured specifically for each node from a central desktop.
The diagram below attempts to clarify the advantages of an administration domain.
1
5
4
4 U42351-J-Z775-1-76
Figure 1: Example of an administration domain with an administration desktop (WSA client)
This administration domain comprises five nodes. The five nodes are connected to one another via TCP/IP (Ethernet). Communication is enabled on this basis for administration purposes. The entire computer network is managed from a single administration desktop (single point of administration) via the WebSysAdmin (WSA) user interface. This is why the administration desktop is also referred to as a WebSysAdmin client. WSA can be started on any node in the network (e.g. node 2) from which all nodes can be administered. This node is then referred to as the WebSysAdmin server. The administration information is updated consistently for all nodes. The five nodes appear to the system admin-istrator like a single system (single system view).
2 3

What is an administration domain? The domain-wide administration system
2.2 The domain-wide administration system
The WebSysAdmin user interface has been available for some time now for managing single systems. The DomainAdmin add-on product was developed so as to enable administration of several systems in a domain simultaneously. DomainAdmin must be installed on all nodes in the new administration domain. Cross-system administration can then be started if LAN connections exist to other systems.
2.2.1 Installing DomainAdmin
The licensed DomainAdmin product is contained on the current system CD and is called CD-SYS-SPARC; it is a component of the Solaris CD set. The installation is started with WebStart.
U42351-J-Z775-1-76 5
When you have installed the DomainAdmin add-on package with the SMAWclos and SMAWtelx packages, you can start using the domain-wide administration system via the WebSysAdmin user interface.
I A domain with the internal name CADMIN is set up automatically when you install the SIclos package. This domain is still “empty”, i.e. it does not contain any nodes as yet. You can find out how to fill this domain with nodes in the section “Creating a domain” on page 18.
2.2.2 The CLOS domain operating system
When you install the DomainAdmin product, a separate operating system is supplied for domain administration. This operating system is called CLOS.
CLOS stands for Cluster Operating System. The name can be explained by the fact that a domain was previously also termed a cluster. Clusters in the current sense (RMS, SPS, ...), however, are simply special cases of an administration domain. You will find a technical description of the CLOS administration system in the clos(7) manual page.
2.2.3 The CLODB administration domain database
The administration system needs data on all nodes in a domain from which it takes its administration information. This data is stored in several files, with all local information only being stored on the respective node. Files containing

The administration desktop What is an administration domain?
global data, on the other hand, are stored on all nodes. The volume of such data and files required by the administration system represents the database for the entire domain. The distribution and verification of the consistency of these files is the most important task of the administration system.
The domain database is called CLODB (Cluster Object Database) in accor-dance with the CLOS administration system. You will find a technical description of the CLODB database in the clodb(7) manual page.
2.3 The administration desktop
Each Solaris system has a system console. Apart from system configuration, this console is used to report events that affect the node administration. In general, these are system messages that require intervention by a system administrator.
6 U42351-J-Z775-1-76
It is not necessary for the system administrator in an administration domain to monitor and respond to several nodes at the same time. There is just one single administration desktop in an administration domain for monitoring and configu-ration purposes. From the user’s perspective, an administration domain is like a single uniform system.
The administration desktop is not logically assigned to any particular node, rather always physically to one node. When we speak of central administration, this does not simply mean displaying and reacting to messages, rather the entire administration of this domain is carried out on one desktop.
The WebSysAdmin (WSA) user interface
The WebsysAdmin graphical user interface is the user interface on the adminis-tration desktop. This user interface is supplied as standard with the Solaris operating system. Following installation of the DomainAdmin add-on product, not only is it possible to have a local view of the system, rather a domain-wide view of all systems.
The WebsysAdmin management desktop offers several advantages for operating domains:
● Quick overview of the entire administration domain
● Possibility to perform the same activities on several nodes with one single action
● Secure access to shared resources

What is an administration domain? The administration desktop
● Easy access to operations that would otherwise only be feasible with complex commands
WebSysAdmin currently includes the applications User Management, VConfig, Software, Tasks and Diagnostic.
Administration desktop requirements
You should note the requirements outlined in the next sections for the different operating systems that must be fulfilled to operate the administration desktop or WebSysAdmin client.
2.3.1 WebSysAdmin clients under Windows 95/98/NT (PC console)
The administration desktop should be a PC system with at least a 200-MHz
U42351-J-Z775-1-76 7
processor and 128-Mbyte memory, which is connected to the LAN.
– Only Netscape browsers from Version 4.5 are supported.
– A virtual Java machine (JRE 1.2 or JVM 2 as it is also known) is required on the client. If such a machine is not available, an installable version can be downloaded into a selected directory from the server when WebSysAdmin is started by following the instructions given. The virtual Java machine is active once the client has been installed and restarted.

The administration desktop What is an administration domain?
2.3.2 WebSysAdmin clients under Solaris 7 (LAN console)
The following steps must be followed to start up a WebSysAdmin client:
● Install the WebSysAdmin components from the “Add-On” CD-ROM. To do this:
Ê Mount the CD-ROM in the drive of the LAN console.
The File Manager window opens automatically showing the contents of the CD-ROM.
Ê Double-click Installer.
This starts the installation (files are unpacked etc.). Follow the instruc-tions on the screen until a window entitled Product Selection appears. The WebSysAdmin components are now installed.
Ê When the installation is complete, remove the CD-ROM by selecting File
8 U42351-J-Z775-1-76
→ Eject from the menubar of the File Manager window.
● Install the Java runtime system (SMAWjvrt) from the CD-SYS-SOL CD-ROM. The procedure is the same as already described only that the script this time is called install:
Ê Double-click install.
This starts the installation (files are unpacked etc.). Follow the instruc-tions on the screen. The Java Runtime System components are now installed.
This completes all steps necessary to start up a WebSysAdmin client.
2.3.3 WebSysAdmin clients via VGA console with X.11 interface
It is not necessary to install additional packages when using a VGA console (SPARC systems). The color intensity on the VGA screen must simply not be set to 16 bits.

3 Domain administration with WebSysAdmin
Domains are administered using the WebSysAdmin user interface. This chapter provides more detailed information about:
– The user interface in general
– Starting the user interface
– The individual elements of the user interface
3.1 Features of WebSysAdmin
WebSysAdmin is a Web-based user interface for performing system adminis-
U42351-J-Z775-1-76 9
tration of Solaris systems. Compared to system administration at command level, this interface is easy to use and allows administration to be performed efficiently even in the case of large system networks.
WebSysAdmin contains the following components as standard:
● User Management
This component offers functions for managing users and groups, for example creating, modifying and deleting user and group definitions or managing user passwords.
● VConfig
This component contains functions for configuring and managing the hardware both for a single node as well as for a number of nodes in an administration domain. Furthermore, support is also provided for managing storage devices, multipath device files, file systems and virtual disks.
● Diagnostic
The Diagnostic component offers functions for evaluating log data for the entire domain, for controlling event management and for threshold monitoring or simply monitoring as it is also termed.

Starting WebSysAdmin Domain administration with WebSysAdmin
● Tasks
The Tasks components allows the user root to manage task definitions both for a local node as well as for all nodes in a domain. Task definitions corre-spond to cron jobs and thus entries in the crontab file.
● Software
This component enables management of the installed software packages (Unix packages) on all nodes in a domain or on a local node.
Because the user interface is self-explanatory, the components can be used intuitively to a large extent. Should questions arise nevertheless, the integrated help texts provide possible answers. For this reason, the explanations below are purposely kept short and concise and are restricted to the essential elements.
3.2 Starting WebSysAdmin
10 U42351-J-Z775-1-76
WebSysAdmin can be invoked in both write and read mode. Note that the interface in write mode can only ever be called by a single user. If other users want to start WebSysAdmin on the same server, this is only possible in read mode.
3.2.1 Starting WebSysAdmin under Windows 95/98/NT (PC console)
Ê Start your browser.
Ê If you want to invoke the user interface in write mode, make the following entry in the URL line:
http://hostname:8881
e.g.: http://cosmos.pdb.siemens.de:8881
The user interface is loaded from the specified server and the welcome screen appears on your monitor.
If you want to invoke the user interface in read mode only, enter the following:
http://hostname:8882
A dialog box appears where you have to enter your user name and password.

Domain administration with WebSysAdmin Starting WebSysAdmin
Ê Choose the required dialog language (default = English) and then click the icon for the Tasks component (lower right of screen). The welcome screen now looks as follows if you choose English:
U42351-J-Z775-1-76 11
Figure 2: Welcome screen for WebSysAdmin in write mode: Tasks component selected
Ê Enter the root password.
You can now start domain administration.
I WebSysAdmin requires a minimum screen resolution of 1024x768, so that all displayed information is legible.
3.2.2 Starting WebSysAdmin under Solaris 7 (LAN console)
To start the user interface in write mode, enter the following at command level:
# /opt/SMAW/bin/wsa node name

Elements of WebSysAdmin Domain administration with WebSysAdmin
The welcome screen appears and you proceed as described (language selection, root password).
To invoke the user interface in read mode only, enter the following:
# /opt/SMAW/bin/wsa –readonly node name
A dialog box then appears and you proceed as described (user name, password, language selection, etc.).
3.2.3 Starting WebSysAdmin on SPARC systems (VGA console)
The procedure for starting the user interface described in section 3.2.2 on page 11 is the same for the VGA console on SPARC systems.
12 U42351-J-Z775-1-76
3.3 Elements of WebSysAdmin
The following diagram shows an example of a window for the VConfig component, after you have entered the root password:
Figure 3: Example: Window for VConfig component (excerpt)
I You will know that the DomainAdmin add-on product is installed, because system information is displayed for the nodes “bitch”, “kaiser20002” to „kaiser20006“ and “porky” below cluster on the left side of the hierarchical browser (see the section “Hierarchical browser” on page 14). If Domain-Admin were not installed, only a single system would be displayed.
The window comprises the following elements:

Domain administration with WebSysAdmin Elements of WebSysAdmin
Menubar and toolbar
You can execute various functions from the menubar and toolbar. Some of the actions are dependent on the context and cannot always be executed. Actions that cannot be executed in a particular context are grayed out on the screen.
Menubar Toolbar Action
File Print object list
– Export object
– End session
Edit Cut object
Copy object to clipboard
Insert object
U42351-J-Z775-1-76 13
View Update display
Application – Start applications
Application-specific menu (the selected tab appears each time, e.g. Nodes)
Create object
– Change object
Delete object
– Copy object to another node within an admin-istration domain
– Other possible application-specific actions
Help – Overview (application-specific)
– Contents (application-specific)
– About ... (version information)
– Display system information
– Choice list: Select objects
– Choice list: Cancel object selection
– Abort loading

Elements of WebSysAdmin Domain administration with WebSysAdmin
Selection configurator
The toolbar also offers a selection configurator, which you can use to find objects using the search algorithm for regular expressions. The search output can be restricted in this way.
Figure 4: Example of a selection configurator
Hierarchical browser
The hierarchical browser serves as a navigation aid, which you can use
● in an administration domain to select both the entire administration domain as well as individual nodes or individual hardware components (the latter only in VConfig).
14 U42351-J-Z775-1-76
● on a local node in the VConfig application to select individual hardware components.
Depending on what you select, the object list (see the object table below) will show the objects for the entire administration domain, the selected node or the selected hardware component.

Domain administration with WebSysAdmin Elements of WebSysAdmin
U42351-J-Z775-1-76 15
Figure 5: Example of a hierarchical browser in an administration domain
The hierarchical browser shows the following information about the status of the individual objects:
Object icon is highlighted in greenThe object can be selected.
Object icon is grayed outThe object cannot be selected at present, because it has been powered down, for example.
Object table
The object table comprises the following areas:
● The upper area comprises the tab bar. The type and number of tabs depends on the application selected.

Elements of WebSysAdmin Domain administration with WebSysAdmin
Figure 6: Example of a tab bar
● The object list appears below the tab bar. The type and number of attributes depends on the tab or sub-tab (see below) selected as well as on what you choose in the hierarchical browser and in the choice list within the toolbar.
Figure 7: Example of an object list
The first column in the object list shows the same information about the status of the individual objects as in the hierarchical browser (see above).
I The lower area may contain a sub-tab bar. Its existence as well as the
16 U42351-J-Z775-1-76
type and number of sub-tabs offered depends on the tab selected.

4 Operating an administration domain
Various different actions are involved in operating an administration domain. This chapter introduces some standard actions, illustrated with working examples. The standard actions are as follows:
● Setting up a domain and creating and removing a node.
● Creating and removing a user.
● Analyzing and resolving errors.
● Configuring cross-domain events
● Transferring tasks to other nodes
● Making network file systems available
U42351-J-Z775-1-76 17
● Comparing and checking software versions across the domain
You will also be told how
● to fill an “empty” domain by creating an initial node
● to add additional nodes to the domain
● to remove nodes from a domain
● to create a new user on a node in a domain
● to copy (clone) this new user to additional nodes in the domain
● to assign a global password for a user on several nodes
● to create a module-independent filter for troubleshooting
● to create an event and transfer (clone) it to other nodes
● to create a task and transfer (clone) it to other nodes
● to import a network file system and mount it on other nodes
● to compare the versions of selected software packages and check for consistency

Creating a domain Operating an administration domain
4.1 Creating a domain
The section “Installing DomainAdmin” on page 5 explained that following instal-lation of the SMAWclos package, a domain with the internal name CADMIN is set up automatically. This domain is still “empty”, i.e. it does not contain any nodes as yet. The following section shows you the WSA window following installation of the SMAWclos package on the “bitch” system and after you have selected the VConfig component and the Nodes entry on the menubar:
18 U42351-J-Z775-1-76
Figure 8: Example of a window for an “empty” domain (excerpt)
The WSA domain net address or alias and Node status columns in the object table indicate that the system has not yet been included in a domain. There is no entry in the WSA domain ... column and NOT_IN_CLUSTER is entered in the Node status column.
This means that the “bitch” node on which you installed SMAWclos and started WSA is itself not a member of an administration domain (the word cluster is often used as a synonym for domain). In this case, the system administrator will possibly have the task of mounting this system as the first node in the domain and thus filling the domain.
There are two equivalent approaches to creating the first node in a domain. First of all, select the object in the line in the object list by clicking it so that the line is highlighted in blue. Then, you can either
– click the Nodes entry on the menubar or
– right-click any column in the line in the object list.

Operating an administration domain Creating a domain
The following sub-menu is then displayed:
U42351-J-Z775-1-76 19
Figure 9: Example of a window for creating a domain and the first node (excerpt)
Now click the Create WSA domain function in the sub-menu.
I To create the first node, you first have to create a domain, since no domain yet exists from the user’s perspective.
When you select the Create WSA domain function, the following dialog box opens.
Figure 10: Example of a dialog box for creating a domain
The dialog box for creating a domain contains two fields. In the WSA domain net address or alias field on the left, enter the alias name of the network interface (or the IP address) that is to be used for communication in the administration domain. The node name “bitch” is proposed automatically in this case for the system; it is taken from the current node name of the UNIX system (uname –n).

Creating a domain Operating an administration domain
You can accept this name. However, if you want to use a different network interface for domain communication, enter its IP address here in dot notation or alternatively its alias name.
I The configured controllers or the permitted alias names can be estab-lished from the LAN sub-tab on the Controllers tab.
In the password field on the right, enter the root password for the node.
When you confirm both entries with Ok, an event box pops up, which tells you whether the action was executed successfully:
20 U42351-J-Z775-1-76
Figure 11: Example of an event box after creating the first node
You are told that the “bitch” node now has the status INTEGRATED, i.e. the node is integrated in the domain. When you confirm this event box with Ok, the new status is also displayed in the main window in the Node status column:

Operating an administration domain Adding a node
Figure 12: Example of the window after creating the domain and the first node (excerpt)
A new Nodes column has now been added to the left in the object list with the entry “bitch”, and the “bitch” node is also integrated in the domain with the same domain alias name (WSA domain net address or alias column); as a result, the domain is no longer “empty”.
You can also see from the hierarchical browser that an administration domain now exists, which contains the “bitch” node: The cluster icon has been entered
U42351-J-Z775-1-76 21
at the top position.
4.2 Deleting a domain
You can only delete a domain by successively deleting all integrated nodes (see the section “Removing a node” on page 23).
If the administration domain ultimately only contains a single node, select this node in the object list, choose the Nodes menu option on the menubar and then the Delete domain function. A message box is then displayed indicating that the domain will be deleted. If you confirm this box with Yes, an event box is displayed indicating that the domain has been deleted.
4.3 Adding a node
If you have created the domain as well as the first node and then want to add further nodes to the domain, you can do so as follows. If you have not already done so, switch to the VConfig application. You now have two options:
– Click the button (create object) on the toolbar or
– Choose the Nodes menu option on the menubar.
In the latter case, a sub-menu opens where you choose the Create menu option:

Adding a node Operating an administration domain
Figure 13: Example of a window for creating additional nodes (excerpt)
When you select Create, the Create node dialog box opens. The figure below gives you an example of how to fill this dialog box:
22 U42351-J-Z775-1-76
Figure 14: Example of a dialog box for creating an additional node
The name of the UNIX system (uname –n command) must be chosen for the Node name (in this case: kaiser20002). Once the node name has been entered, it is proposed as the WSA domain net address or alias. Finally, enter the root password and confirm with Ok. The newly added node is then also displayed in the main window.
I A node can only be administered fully within the domain if it can access all other nodes and if the integrated nodes can also access it using the domain net address (it must be possible to successfully execute the ping command from all nodes).
New nodes can be added successively to the domain by following the procedure described. Once you have successfully created the nodes, you can use the object list in the main window to establish which nodes are integrated in the domain. In the figure below, the domain comprises the two nodes, i.e. “bitch” and “kaiser20002”.

Operating an administration domain Removing a node
Figure 15: Example of a domain window with two nodes (excerpt)
V The CLODB database in the administration domain is copied to new nodes as they are created. All local information on the new nodes, which is stored in the database, is then lost.
4.4 Removing a node
In order to remove a node from an administration domain, select the node you want to delete in the object list and then choose Delete in the sub-menu. An important warning is then issued:
U42351-J-Z775-1-76 23
Figure 16: Warning issued when removing a node
I The warning indicates that shared configuration data in the CLODB (vdisks) database will be removed on a deleted node.
If you answer Yes, the following message box is displayed:

Adding a user Operating an administration domain
24 U42351-J-Z775-1-76
Figure 17: Example of a message box when removing a node (excerpt)
Following confirmation with Ok, the deleted node is then no longer displayed in the main window.
I If the administration domain only contains a single node and you want to remove it, you can only do so by deleting the domain fully (see the section “Deleting a domain” on page 21).
4.5 Adding a user
In order to add a user to an administration domain, click the User Mgmt. icon on the welcome screen (cf. figure on page 11) after WSA has been started; if you had already started WSA and you are currently accessing a different component, click Application on the menubar and choose the User Mgmt. appli-cation in the sub-menu. You are then shown an object list with all users, who have been created on the node or in the domain.
I When you click the Name attribute, you can influence the order in which user names are displayed (in ascending or descending alphabetical order).

Operating an administration domain Adding a user
If you now want to add a new user, click Users on the menubar and then choose the Create function in the sub-menu; or click the (create object) button on the toolbar. You are then shown a dialog box and can fill in the fields as you require:
U42351-J-Z775-1-76 25
Figure 18: Example of a dialog box for creating a new user
The domain in our example comprises the nodes “bitch” and “kaiser20002” to “kaiser20006”, as the Node entry to the top right in the figure indicates. The “bitch” node is selected and a new user “abraham” is to be created on this node. The remaining input fields are blank or the defaults are copied over, such as the user id (118). A short entry has simply been added to the comment field.

Adding a user Operating an administration domain
When you have filled in the dialog box and confirmed with Ok, the new user’s home directory is prompted:
Figure 19: Dialog box querying the home directory when creating a new user
You can generally answer Yes to this query. This completes the entire action and an Ok message is issued:
26 U42351-J-Z775-1-76
Figure 20: Example of an Ok message for creating a new user
The new user “abraham” is created on the system and entered in the object list of all users with its attributes:
Figure 21: Object list with new user (excerpt)
I Only the first 1000 users are ever listed in the object list. If there are more than 1000 users, a relevant warning is issued.
A newly created user is also not displayed in an object list with more than 1000 entries, if (as in our example) it would have to appear at the very beginning alphabetically. This new user can only be found in this case by performing a search using the selection configurator (see the figure on page 14) on the toolbar.

Operating an administration domain Cloning a user
4.6 Cloning a user
Cloning a user means copying a previously created user including his or her attributes to other nodes in a domain. To do this, select the user to be cloned and click the right mouse button. Then in the sub-menu, click the Clone function as shown in the next figure:
U42351-J-Z775-1-76 27
Figure 22: Sub-menu for cloning a user
When you have selected the user to be cloned and the Clone function, you then have to select the other nodes in the domain to which the user is to be copied in the next dialog box:
Figure 23: Example of a dialog box for cloning a user

Removing a user Operating an administration domain
When you confirm the dialog box with Ok, the user “abraham” is cloned on the nodes “kaiser20002”, “kaiser20004” and “kaiser20006”. There is no Ok message. You can check if the action was successful in the object list of users in the main window. It is only in the event of an error that a relevant message is issued.
I If the user id of a user being cloned is already assigned on a different node, cloning is not possible for this node. An error message is issued to this effect.
4.7 Removing a user
In principle, you remove a user in the same way as you create a user. A detailed description is therefore not necessary. We will simply point out that a user cannot be removed globally from all nodes in a domain rather only individually
28 U42351-J-Z775-1-76
on the respective node. There is therefore no undo function for cloning. It is possible, however, to remove several users on a node in one action, assuming the appropriate selection is made. The confirmation query prior to deletion then refers to the respective overall selection.
4.8 Assigning a global password
In addition to being able to copy an existing user retrospectively to other nodes in a domain (i.e. cloning), when you add a new user you can create this user immediately on other nodes with the same attributes. To do this, you simply have to select the required node to the top right in the dialog box for creating a new user (see figure 18 on page 25) in the Node column. The new user is then created immediately on all these nodes.
If you want to create a user simultaneously on several nodes in a domain, this user will have the same login name, the same user id, the same group membership etc. on all selected nodes. In addition, you can also assign the same password to this user on all nodes, in other words assign a global or domain-wide password.
Operating an administration domain Assigning a global password
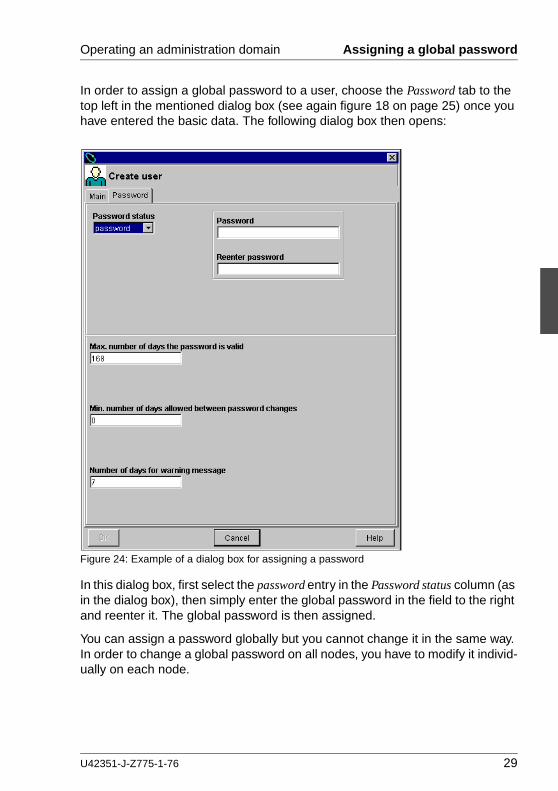
In order to assign a global password to a user, choose the Password tab to the top left in the mentioned dialog box (see again figure 18 on page 25) once you have entered the basic data. The following dialog box then opens:
U42351-J-Z775-1-76 29
Figure 24: Example of a dialog box for assigning a password
In this dialog box, first select the password entry in the Password status column (as in the dialog box), then simply enter the global password in the field to the right and reenter it. The global password is then assigned.
You can assign a password globally but you cannot change it in the same way. In order to change a global password on all nodes, you have to modify it individ-ually on each node.

Using the diagnostic application Operating an administration domain
4.9 Troubleshooting using the diagnostic application
The diagnostic system can be configured and evaluated identically from the central administration desktop for all nodes in a domain. Various functions are available for performing the two procedures of configuration and evaluation.
Domain-wide configuration
● Log administration
Among other things, log administration allows the size and number of logbooks to be defined as well as the logbook components to be assigned.
● Event management
Event management allows events and reactions to be defined. All system
30 U42351-J-Z775-1-76
messages are observed from a monitor. When the defined events occur, the assigned reactions are performed, for example sending information messages to the responsible Support Center.
Domain-wide evaluation
Domain-wide evaluation allows the logbooks to be displayed for all nodes or their entries. The performance is dependent in this case on the number of nodes and the size and number of logbooks.
When you switch from VConfig (via the Application action on the menubar) the node selection performed in the hierarchical browser is also effective in the Diagnostic application, with the result that only the logbook for the node selected in VConfig is evaluated.
Another method of reducing the large volume of information in the various logbooks in the administration domain is to use search criteria.
Two options are available to you in this case: the selection configurator and the filter.
In the selection configurator (see the description on page 14 earlier) – as is also the case with the other applications – it is only possible to evaluate one attribute from the table objects, in order to search, for example, throughout a domain for all messages from a particular driver.

Operating an administration domain Using the diagnostic application
However, the following example combines three attributes (“from date”, “to date” and “Log message”), in order to reduce the result set further. A filter is needed for this purpose.
Independently of the object, a filter allows serious errors to be sought specifi-cally for a defined period. For example, a system administrator may want to view all warnings that have occurred in a domain within the last 24 hours.
The example assumes a single domain, which comprises the two nodes “bitch” and “kaiser2002”. Since you may want to record all serious errors that occur in the domain, select the top option in the hierarchical browser, i.e. cluster. You can then use the Logevaluation menu option and the Filter function to open the dialog box where you can specify the filter:
U42351-J-Z775-1-76 31
Figure 25: Example of a module-independent filter
This filter only specifies the key data for the time period (covering 24 hours) and the “Log message” attribute.
I You are shown the precise format for the date fields by dragging the cursor to the from date entry.

Using the diagnostic application Operating an administration domain
When you exit the dialog box with Ok, a list of all messages that fulfill the specified criteria will be output.
4.10 Configuring domain-wide reactions
Event Management uses messages and the frequency of their occurrence to define events and trigger reactions in accordance with these events.
For example, if you want to take up the option of receiving all system disruptions or warnings throughout the domain by e-mail, you have to proceed as follows:
1. Create an event definition.
2. Clone this event definition.
3. Create a reaction definition.
32 U42351-J-Z775-1-76
4. Clone this reaction definition.
5. Activate the modified event and reaction definitions.
These steps are now illustrated individually using the following example.
Step 1: Create event definition
Ê Select a suitable entry in the Unit:Event name column in the object table (in the example: FJSVmadm: FJSVmadm Warning Message) and right-click it.
The following pop-up menu appears:
Figure 26: Example of a window for creating an event definition (excerpt)
Ê Click the Create event definition option. The following input mask is displayed:

Operating an administration domain Using the diagnostic application
U42351-J-Z775-1-76 33
Figure 27: Example of a dialog box for creating an event definition
Fill in this dialog box as shown in the diagram above, overwriting existing entries where necessary. The only fields to edit in this case are Unit:Event name and Reaction 1. Write a meaningful text of your choice in Unit:Event name and for Reaction 1 enter user:react-mail.
Ê Click Ok to exit the dialog box.
Ê You will now find the new event definition user:mail-event in the object table.
Step 2: Clone event definition
You have to clone the event definition to transfer it to other systems in the domain. To do this, proceed as follows:
Ê Select the entry you just created in the Unit:Event name column in the object table (in the example: user:mail-event).
Ê Click the Clone option in the Event Management menu. A dialog box opens where you have to select the destination nodes:

Using the diagnostic application Operating an administration domain
Figure 28: Example of a dialog box for cloning an object
Ê After you have selected the required node (in the example: kaiser20002), click Ok to exit the dialog box.
34 U42351-J-Z775-1-76
Ê You will then find the new event definition user:mail-event for all required destination nodes in the object table.
Step 3: Create reaction definition
Ê Change to the subfolder Reactions.
Ê Choose a suitable entry in the Unit:Event name column in the object table (in the example: SMAWlog3: Mail to root) and right-click it. The following pop-up menu appears:
Figure 29: Example of a window for creating a reaction definition (excerpt)

Operating an administration domain Using the diagnostic application
Ê Click Create reaction definition. The following dialog box is then displayed:
Figure 30: Example of a dialog box for creating a reaction definition
Ê The only fields to edit in this case are Unit:Reaction name and Command.
U42351-J-Z775-1-76 35
Enter the text user:react-mail in the Unit:Reaction name field and add “-A<Mail-Adr.>” to the Command field as described in the diagram above.
Ê Click Ok to exit the dialog box.
Step 4: Clone reaction definition
The reaction definition must also be cloned if it is to be transferred to other systems in the domain. To do this, proceed as described on page 33 in the section “Clone event definition”.
Step 5: Activate modified event and reaction definitions
The following steps are required to activate the newly created event and reaction definitions:
Ê Change to the subfolder Events.

Using the diagnostic application Operating an administration domain
Ê Click the Activate option in the Event Management menu. The following dialog box is displayed:
Bild 31: Example of a dialog box for activating event/reaction definitions
Ê Click Ok to activate the newly created event and reaction definitions.
This completes all necessary steps. The new events will now also be monitored and will trigger the required reactions where necessary.
36 U42351-J-Z775-1-76
4.11 Domain-wide network file system access
DomainAdmin offers all nodes in the domain the option to access a network file system (NFS). This section uses an example to show how this can be managed in a few simple steps. The following tasks are to be performed in this example:
● An entry should be made on all systems for the network file system in the /etc/vfstab file.
● The network file system should be mounted immediately.
● The system should also be mounted automatically when this system reboots.
I Domain-wide access requires a network file system, which has been enabled for network access within the domain or from another server that can be accessed via the network.
Within the domain, a network file system can be enabled on the NFS tab. Otherwise, this can be done with the share command or through manual entries in the /etc/dfs/dfstab file on the server.
Information on the topic of NFS and share can be found in the help for WSA or the relevant manual pages.
Importing a network file system
To import a network file system, you have to:

Operating an administration domain Using the diagnostic application
Ê Change to the File systems tab (VConfig application).
Ê Click the File systems option in the menubar.
Ê Now choose the Import network file system option.
Figure 32: Example of a selection menu for importing network file systems
The following dialog box is displayed:
U42351-J-Z775-1-76 37

Using the diagnostic application Operating an administration domain
38 U42351-J-Z775-1-76
Figure 33: Example of a dialog box for importing network file systems
Fill in the dialog box as displayed in the diagram above:
Ê In the NFS node field, enter the node on which the file system being imported is located (in the example: kaiser20005).
Ê In the NFS path field, enter the path of the file system being imported on the specified node (in the example: /work_c0t3d0s3_nfs).
I When importing a network file system, you can specify both a node name and NFS node path, which do not belong to the domain.
Ê In the Nodes list, select all systems that are to receive access to the network file system. The options Autom. mount at boot (controlled by the entry in the /etc/vfstab file) and Immediate mount are executed by default and thus lead to the actions required in the example.

Operating an administration domain Using the diagnostic application
Ê In the Mountpoint field, you can enter a pathname, which is to be used as the mount point for the network file system. The same pathname is used for all selected nodes (in the example: /work_c0t3d0s3_nfs). This can subsequently be modified separately for each individual node.
Ê All other fields are already assigned default values, which can be copied over here.
Ê Click Ok to exit the dialog box.
As a result of the previously described actions, the imported network file systems (see selection) on the selected nodes are displayed in the object list on the Usage parameters sub-tab:
I The search criterion “Actual mount point contains nfs” was specified with the selection configurator to reduce the number of objects displayed.
U42351-J-Z775-1-76 39
Figure 34: Object list with domain-wide network file system
The network file system (in the example: /work_c0t3d0s3_nfs) is thus available to all selected NFS clients in the domain with the access rights defined in the dialog box (see figure 33 on page 38).

Using the diagnostic application Operating an administration domain
4.12 Displaying and checking software versions throughout the domain
One of the administrator’s main tasks is to maintain the software used. The administrator therefore has to ensure, for example, that all packages required on the respective systems are available in their current versions. This includes verifying that the same versions are being used on all nodes in a domain to avoid the individual nodes behaving differently.
For this purpose, DomainAdmin offers various options in the Software application to ensure simple administration of the software used.
Therefore, if you want to know, for example, whether the same version of a particular package is used on all nodes in the domain, you can establish this as follows:
1. Select the entire domain in the hierarchical browser (click cluster).
40 U42351-J-Z775-1-76
2. Specify the abbreviated form of the required package (see the Pkginst attribute) in the search field of the selection configurator (in the example: SMAWlog3) and click the icon:
Figure 35: Example of searching for installed packages
As a result, the example shows an object list with twelve packages, which are available with identical versions on all systems:
Figure 36: Example of targeted selection of installed packages

Operating an administration domain Using the diagnostic application
Checking the packages for consistency
The second step involves selecting six packages and checking them for consis-tency. This is how you do this:
Ê Select the packages to be checked in the object list.
Ê In the menubar, click the Software option and choose the Check ... action.
U42351-J-Z775-1-76 41
Figure 37: Example of a menu for checking packages
Ê The following dialog box is displayed:
Figure 38: Example of a dialog box for checking software packages

Using the diagnostic application Operating an administration domain
Choose the options you require from those listed.
I The two options Check file attributes and Check file contents are already selected by default.
Ê Start the checking process by clicking Ok. A progress indicator in the form of an increasing bar as well as a percent figure show how advanced the checking process is.
As soon as the checking process is complete, a dialog box is opened containing the result of the checks:
42 U42351-J-Z775-1-76
Figure 39: Example of a dialog box with the result of a package check
The checking results are listed in the dialog box.
I If errors are listed here (e. g. incorrect access rights), you can resolve these if necessary in the next step with the Correct known inconsis-tencies option.
Ê Click Ok to exit the dialog box.
The checking of packages is now complete.

Operating an administration domain Using the diagnostic application
4.13 Transferring tasks to other nodes in a domain
Every administrator will transfer repetitive tasks to the cron system from Solaris. These system tasks (or simply tasks) can be defined easily on one or more nodes under DomainAdmin using the Task Management application.
If you want to create a task, for example, which is to execute daily backups on all nodes in a domain at 10 pm every evening, you have to:
Ê Click the Tasks option in the menubar and choose the Create option.
U42351-J-Z775-1-76 43
Figure 40: Example of a menu for creating a task
The following dialog box is displayed:

Using the diagnostic application Operating an administration domain
44 U42351-J-Z775-1-76
Figure 41: Example of a dialog box for creating a task
To complete the proposed task, proceed as follows:
Ê Enter the name of the shell script to be executed in the Command input field (in this example: /opt/SMAW/cron-backup).
Ê Now select the node that is to execute this task.
I It is recommended to first try out more complex tasks on one node and only then distribute them through cloning. This approach is also favored here.
Ê Now fill in the time period fields as shown in figure 41.
Ê Click Ok to activate the new task.

Operating an administration domain Using the diagnostic application
Ê The successful execution of the action is confirmed in a message box:
Figure 42: Example of an “OK Message” after creating a task
Ê Click Ok to exit the dialog box.
You will now find the new task in the object list. It exists exclusively on the bitch node at present.
U42351-J-Z775-1-76 45
Figure 43: Example of an object table after creating a task
Transferring the new task to other nodes in the domain
The new task should now be transferred to other nodes in the domain. To do this, proceed as follows:
Ê Select the task to be cloned in the object list.
Ê Click the Tasks option in the menubar. Choose the Clone option from the menu.
Figure 44: Example of a menu for cloning a task

Using the diagnostic application Operating an administration domain
Ê The following dialog box is displayed:
Figure 45: Example of a dialog box for cloning objects
Ê Select all required nodes and click Ok to exit the dialog box.
46 U42351-J-Z775-1-76
You will now find the cloned task on all selected nodes:
Figure 46: Example of an object table after cloning a task
The other selected nodes can now execute the new task.

5 Solving problemsWhen working with applications under WebSysAdmin, a wide variety of faults and problems may arise. These problems may originate in the browser being used, in the WSA interface itself or in the individual applications (i.e. in the Domain-Admin add-on product). Some problems from these three groups that we know from experience may recur are highlighted below. We also illustrate possible workarounds or ways to avoid such problems.
Whatever causes problems may well have, they always make their presence felt in the user’s working medium, i.e. in the interface. If the screen does not respond at all, or only sluggishly or with error messages and if this adversely affects the user’s work, the user is not interested on who or what may be the cause rather he or she just wants to be able to continue working as normal. The following problem scenarios and their proposed solutions are thus structured more in terms of their effect, since the same cause (e.g. high storage
U42351-J-Z775-1-76 47
requirement) may have different effects (irregular interface or performance). We will look in greater detail at
● Problems using WSA
● Performance problems
● Problems managing domain nodes
I In general, help texts are available for using WebSysAdmin, which generally also reference problems and constraints with regard to specific actions. If possible, you should consult these help texts when in doubt.
5.1 Problems with Netscape or WSA
It is a basic necessity when working with WebSysAdmin that you have the best possible hardware and software configuration. Details regarding the relevant technical data can be found in the section “The administration desktop” on page 6.

Problems with Netscape or WSA Solving problems
The following list of problems is structured as follows: First, the problem is described briefly (indicated by •), then a solution is proposed (indicated by Ê).
● The WSA interface does not respond, there are no plausible messages and output.
WSA may have been started more than once in Netscape.
Ê Terminate and restart Netscape.
● When you start WSA, no connection is established, the plug-in is not loaded.
The Apache server may not be running on the node.
Ê Check whether the Apache server is running. Enter the command ps -ef | grep http. If the result is negative, start the Apache server using the following commands:
1. cd /etc/rc2.d
48 U42351-J-Z775-1-76
2. sh S97SIapache
● The WSA screen is not correct, applications are missing.
Ê Change the browser settings for the cache and proxy.
1. Navigate to Edit → Preferences → Advanced → Cache and manually empty the two caches. Furthermore, under the heading “Document in cache is compared to document on network”, select the Every time entry.
2. Navigate to Edit → Preferences → Advanced → Proxies and select the “Direct connection to the Internet” or “Automatic proxy configuration” entry. In the latter case, the specified proxy file must ensure that a proxy server is excluded (no proxy).
● When WSA is started, a message appears to the effect that the selected application is already running and it is only possible to work in read mode, although no other user is working with WSA.
Ê Check whether the “WSAserver” process is still running on any node in the domain. Enter the ps -ef | grep WSAserver command. If the result is positive, terminate the process with the following command: kill -14 PID.
If the problem persists, start the following commands on the node on which your WSA server is to run:
clos_unlock -f -p WSAvconf

Solving problems Performance problems
clos_unlock -f -p WSAvdiag
clos_unlock -f -p WSAvuser
See also the clos_unlock(1M) manual page for the command.
● If WSA is used intensively for several days, there may be a bottleneck in the PC’s virtual memory.
Ê Use the task manager to check the resource usage and terminate and restart the Web browser if necessary.
● There are locations on the WSA screen where it appears that buttons cannot be clicked with the mouse.
Ê Click various areas of the button or reposition the WSA window.
● The automatic column width calculation does not always work properly.
Ê Manually correct the column width using the mouse.
U42351-J-Z775-1-76 49
● Messages are sometimes truncated in the case of the confirmation and error box with the result that they cannot be read fully.
Ê Use the mouse to enlarge the boxes.
● When an event is confirmed (e.g. node status change) the data is not always automatically reloaded.
Ê Perform a Refresh using the View menu option on the menubar.
● When the Web browser has been terminated, the Windows temp directory (C:\windows\temp) still contains files called jar_cachexxx.jar. This may cause a memory bottleneck on the relevant drive.
Ê Delete the files.
5.2 Performance problems
In order to exclude the possibility of performance problems, you should make sure initially that hardware requirements are fulfilled optimally. In other words, you should use a PC system with at least a 200-MHz processor and 128-Mbyte memory as the administration desktop.
Furthermore, you should be aware that the performance is not dictated by the number of nodes in a domain rather by the number of objects being managed (number of cabinets, disks and vdisks).

Problems with node administration Solving problems
● A domain is under pressure and the response times are much too slow.
WSA always waits until the last node in a domain has supplied its data (rule: the slowest node in the domain determines the overall speed).
Ê If you want to perform actions even though a node is heavily loaded, you can only avoid the problem by disabling the node in question (Nodes tab, Disable action).
V If you disable a node, configurations that relate to this node are no longer possible.
● The network load is high with the result that communication in the domain is also impaired.
Ê You should set up a separate network for data communication (second LAN controller).
● After you added a node to a domain, the response times are slow.
50 U42351-J-Z775-1-76
With the increase in the number of objects to be managed, the memory and the performance of the PC are impaired.
Ê Increase the performance of the PC (main memory extension, faster processor).
● After a lengthy session with many actions, the response time behavior deteriorates.
The Web browser has a high memory requirement and the output and messages in the WSA interface are not plausible.
Ê Terminate Netscape and all its applications and then restart it.
5.3 Problems with node administration
Node administration, i.e. the creation and removal of nodes, is the basic function of domain administration. Should problems arise in this context, these are often serious and have a global effect. However, problems that are only to be avoided before nodes are created or deleted should also be noted. The following infor-mation is therefore subdivided into “up-front” problems, problems creating nodes and problems removing nodes.

Solving problems Problems with node administration
Up-front problems
● You want to change the IP net address or the net alias name for domain communication.
Ê Make the necessary changes either directly in the configuration files (using an editor) or via WSA.
Ê Then proceed as follows:
1. Stop the Closmon monitor, in other words the interface that controls communication between the nodes in a domain. For this purpose, start the following command on all nodes in the domain:
sacadm -kp CADMIN
2. On every node in the domain, change the IP net address and the network alias for domain communication in the /etc/saf/CADMIN/_pmtab file using an editor (e.g. vi).
U42351-J-Z775-1-76 51
3. Start the Closmon monitor again on all nodes in the domain. To do this, use the
sacadm -sp CADMIN
command.
4. Update and distribute the domain database. To do this, invoke the
cod_sync
command on one node in the domain.
Please refer to the manual pages of the same name for information about the sacadm and cod_sync commands.
● A node in a domain permanently has the status “not available” (NOT_AVAIL).
This may happen if
a) the node is locked
b) the IP net address of the node has changed
c) the network connection is lost
Ê In case a) you have to release the node (Nodes tab, Enable action).
Ê In case b) you have to edit the _pmtab file (see above for how to do this: stop the Closmon monitor etc.).
Ê In case c) you have to restore the network connection.

Problems with node administration Solving problems
Problems creating/after creating nodes
● When you create a node, the error message COD archive is not consistent or COD archive busy appears.
An inconsistency message means that a difference has been noted between the archived domain database (COD) and the local configuration.
Ê First perform a consistency check by invoking the
cod_check -e
command. If the check confirms the inconsistency, update and distribute the COD archive with the
cod_sync
command. Please refer to the manual pages of the same name for infor-mation about the cod_check and cod_sync commands.
52 U42351-J-Z775-1-76

Solving problems Problems with node administration
Problems after deleting nodes
● The following query is issued when a node is booted:
This node seems to be removed from a cluster while being down!It cannot boot with shared vdisks.There are two options:
1: Remove this node from the CADMIN cluster and boot into multi user mode.In this case all shared vdisks will be removed.
2: This option is for experts only!Leave this node inconsistent and fall back to single user mode.While inconsistent, this node cannot boot to multi user mode.
enter your choice (1,2) [1]
The node was integrated in the administration domain and deleted when it had the status “not available” (NOT_AVAIL).
Ê In this case, alternative 1 should be chosen for booting to restore the consistency of the database.
U42351-J-Z775-1-76 53

Abbreviations
CD-ROM Compact Disk-Read Only Memory
CDS++ C++ Development System
CLODB Cluster Object Database
CLOS Cluster Operating System
COD Cluster Object Database (Archiv-Datei)
HA High Availability
U42351-J-Z775-1-76 55
HW Hardware
ID Identifier
IP Internet Protocol
JENV Java Runtime Environment
JRE Java Runtime Environment
JVM Java Virtual Machine
LAN Local Area Network
LAR Lockout Auto Recovery
OPS Oracle Parallel Server
OPSRES Oracle Parallel Server Resilvering
RCS II Reliant Cluster Server II
RMS Reliant Monitor Software

Abbreviations
SCSI Small Computer Systems Interface
SPS Siemens Parallel Server
TCP/IP Transmission Control Protocol/Internet Protocol
URL Uniform Resource Locator
VDisk Virtual Disk
VGA Video Graphics Adapter
WSA Web-based System Administration
56 U42351-J-Z775-1-76

Related publicationsPlease apply to your local office for ordering the manuals.
You can also view a number of the manuals on the Internet. The Web address is as follows: http://www.siemens.de/servers/man/man_de.htm
[1] Solaris 7 System DiagnosticsSystem Administrator Guide
ContentDescribes the Logging V3.0 product (system level) and its WebSysAdmin user interface.
[2] Reliant Cluster 1.0 Concepts
U42351-J-Z775-1-76 57
(Solaris)System Administrator Guide
ContentDescribes the concepts of the RC product.
[3] Reliant Cluster 1.0 Installing RC(Solaris, Reliant UNIX)System Administrator Guide
ContentContains guidelines for installing Reliant Cluster Software (RC) on Reliant UNIX or Solaris systems.
[4] Reliant Monitor Software V3.1D Administering RMS Using RCVM (Solaris, Reliant UNIX)System Administrator Guide
ContentDescribes the RCVM Motif-based graphical user interface, via which the Reliant Monitor Software (RMS) resources are administered.
[5] Reliant Monitor Software V3.1E RMS Configuration and Administration(Solaris, Reliant UNIX)

Related publications
System Administrator Guide
ContentDescribes the functionality as well as the tasks for configuring and administering RMS.
[6] RC Scalable Internet Services (SIS) 2.0 (Solaris, Reliant UNIX)System Administrator Guide
ContentDescribes the configuration and management of SIS.
58 U42351-J-Z775-1-76

IndexAactivating
event definition 35reaction definition 35
administration desktop 4, 7requirements 7
administration domainadvantages 3database 5definition 3
CCADMIN 5, 18checking packages
node 23user 28
diagnosticstroubleshooting 30
domaincreating 18deleting 21
domain administration databaseCLODB 5, 23
DomainAdminadd-on product 1installing 5
domain-wideconfiguration 30configuring events 32creating events 32evaluation 30
for consistency 41CLODB
domain administration database 6, 23
U42351-J-Z775-1-76 59
cloningevent definition 33reaction definition 35tasks 45user 27
CLOSoperating system for domain
administration 5configuration
domain-wide 30consistency checking
of packages 41creating
domain 18event definition 32node 21reaction definition 34tasks 43user 24
Ddeleting
domain 21
Eevaluation
domain-wide 30event definition
activating 35cloning 33creating 32
Ffilter 31
Hhierarchical browser (WebSysAdmin)
14
Mmenubar (WebSysAdmin) 13
NNFS access, domain-wide 36node
creating 21deleting 23

Index
Oobject list (WebSysAdmin) 16object table (WebSysAdmin) 15
Ppassword
global 28problems
Netscape or WSA 47node administration 50performance 49
Rreaction definition
activating 35cloning 35creating 34
creating 24deleting 28
user interfaceWebSysAdmin 6
WWebSysAdmin
client 4elements 12hierarchical browser 14menubar 13object list 16object table 15screen resolution 11selection configurator 14server 4starting 10
60 U42351-J-Z775-1-76
Sscreen resolution for WebSysAdmin
11selection configurator
(WebSysAdmin) 14setting up tasks 43software versions
checking 40displaying 40
startingWebSysAdmin 10
sub-tab bar (WebSysAdmin) 16
Ttab bar (WebSysAdmin) 15tasks
cloning 45creating 43
toolbar (WebSysAdmin) 13transferring tasks 43troubleshooting
diagnostics 30
Uuser
cloning 27
sub-tab bar 16tab bar 15toolbar 13user interface 6

Comments on Solaris™ 7System Administration within a Domain
U42351-J-Z775-1-76
CommentsSuggestionsCorrections
✁
Submitted by
Fujitsu Siemens Computers GmbHUser Documentation33094 PaderbornGermany
Fax: (0 52 51) 8-1 52 48
Internet: [email protected]://manuals.mchp.siemens.de

Information on this document On April 1, 2009, Fujitsu became the sole owner of Fujitsu Siemens Compu-ters. This new subsidiary of Fujitsu has been renamed Fujitsu Technology So-lutions.
This document from the document archive refers to a product version which was released a considerable time ago or which is no longer marketed.
Please note that all company references and copyrights in this document have been legally transferred to Fujitsu Technology Solutions.
Contact and support addresses will now be offered by Fujitsu Technology So-lutions and have the format …@ts.fujitsu.com.
The Internet pages of Fujitsu Technology Solutions are available at http://ts.fujitsu.com/... and the user documentation at http://manuals.ts.fujitsu.com.
Copyright Fujitsu Technology Solutions, 2009
Hinweise zum vorliegenden Dokument Zum 1. April 2009 ist Fujitsu Siemens Computers in den alleinigen Besitz von Fujitsu übergegangen. Diese neue Tochtergesellschaft von Fujitsu trägt seit-dem den Namen Fujitsu Technology Solutions.
Das vorliegende Dokument aus dem Dokumentenarchiv bezieht sich auf eine bereits vor längerer Zeit freigegebene oder nicht mehr im Vertrieb befindliche Produktversion.
Bitte beachten Sie, dass alle Firmenbezüge und Copyrights im vorliegenden Dokument rechtlich auf Fujitsu Technology Solutions übergegangen sind.
Kontakt- und Supportadressen werden nun von Fujitsu Technology Solutions angeboten und haben die Form …@ts.fujitsu.com.
Die Internetseiten von Fujitsu Technology Solutions finden Sie unter http://de.ts.fujitsu.com/..., und unter http://manuals.ts.fujitsu.com finden Sie die Benutzerdokumentation.
Copyright Fujitsu Technology Solutions, 2009