soldiers’ angels
TRANSCRIPT

SOLDIERS’ ANGELS
Paracord Bracelets for Deployed Service MembersParacord bracelets have been used by service members for many years because they are lightweight, strong, and versatile. They can be used for survival in many different situations - service members have used the
paracord to stem the flow of blood from an open wound or gunshot. The bracelets have also been known to boost morale - it means they have each other’s back in the face of danger - they are going to get each other home. The gift that you are making today will let our deployed service members know that America is here to support them - we have not forgotten their
service and sacrifice to our county.
Thank you for supporting our troops!

STEPS 1& 2
Instructions for making paracordbracelets - video instructions are
also available at: https://www.youtube.com/watch?v=UKSGg2luCLI
1. Fold cord in half. Note: Two colors of cord are being used in these instructions to show how the cords cross over each other. The cord included in your kit is
one color.
2. Insert the folded end of cord through one end of the buckle.
1
2
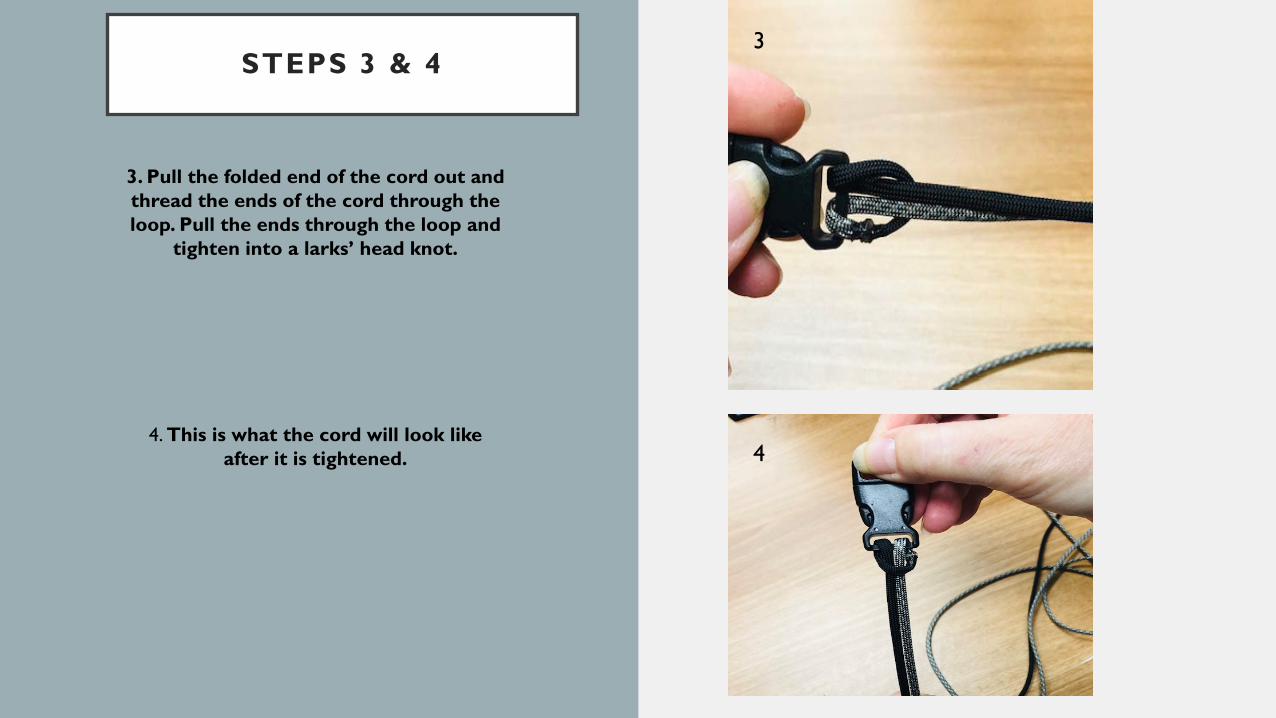
STEPS 3 & 4
3. Pull the folded end of the cord out and thread the ends of the cord through the loop. Pull the ends through the loop and
tighten into a larks’ head knot.
4. This is what the cord will look like after it is tightened.
3
4

STEPS 5,6 & 7
5. Take the other ends of the folded cord and hold them evenly together.
6. Thread the ends of the cord through the other side of the buckle.
7. Pull the ends of the cord through the buckle and form a loop. Unclip/open the
buckle.
5
6
7

STEPS 8 & 9
8. Pull the buckles apart until there is approximately seven (7”) inches of cord
between the buckles.
9. Fold the cord and lay the bracelet flat onto a table or flat surface. Make sure that the side where the cords are over the end of the buckle are facing you.
The two parallel cords in the center are the base cords. The cords that are on
each side are the working cords.
Base Cords
Working Cords
8
9
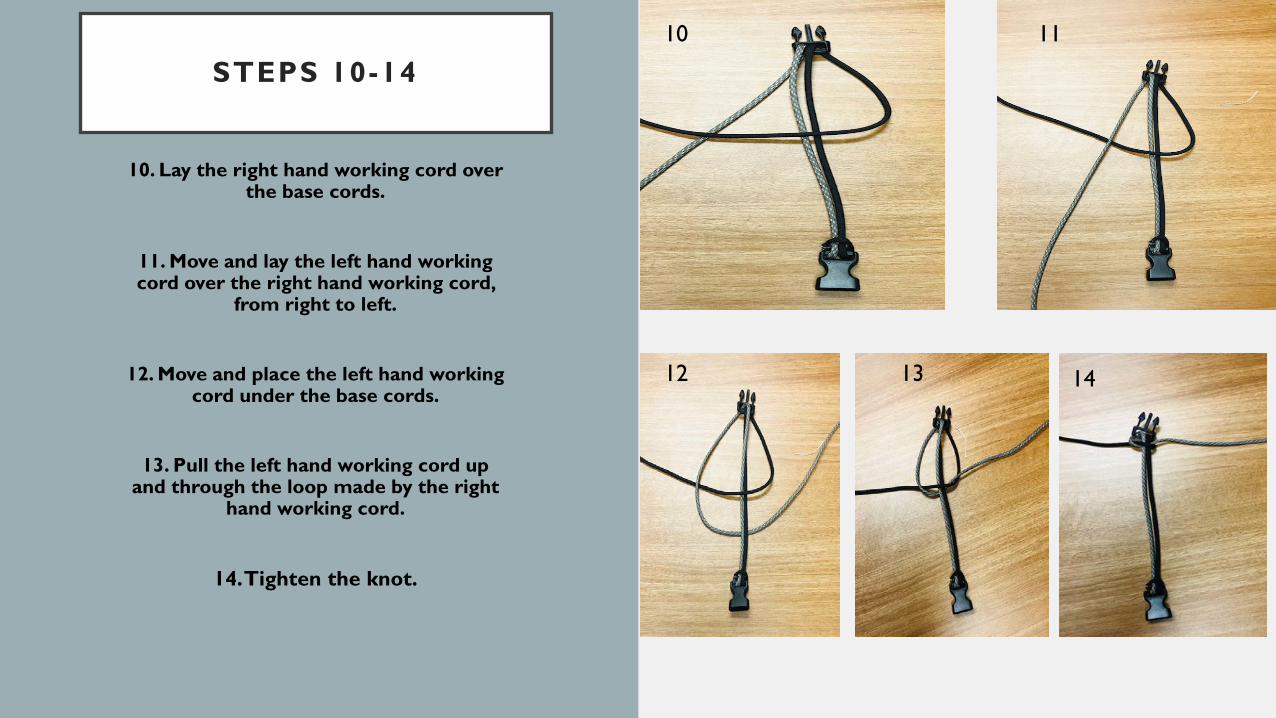
STEPS 10-14
10. Lay the right hand working cord over the base cords.
11. Move and lay the left hand working cord over the right hand working cord,
from right to left.
12. Move and place the left hand working cord under the base cords.
13. Pull the left hand working cord up and through the loop made by the right
hand working cord.
14. Tighten the knot.
10 11
12 13 14
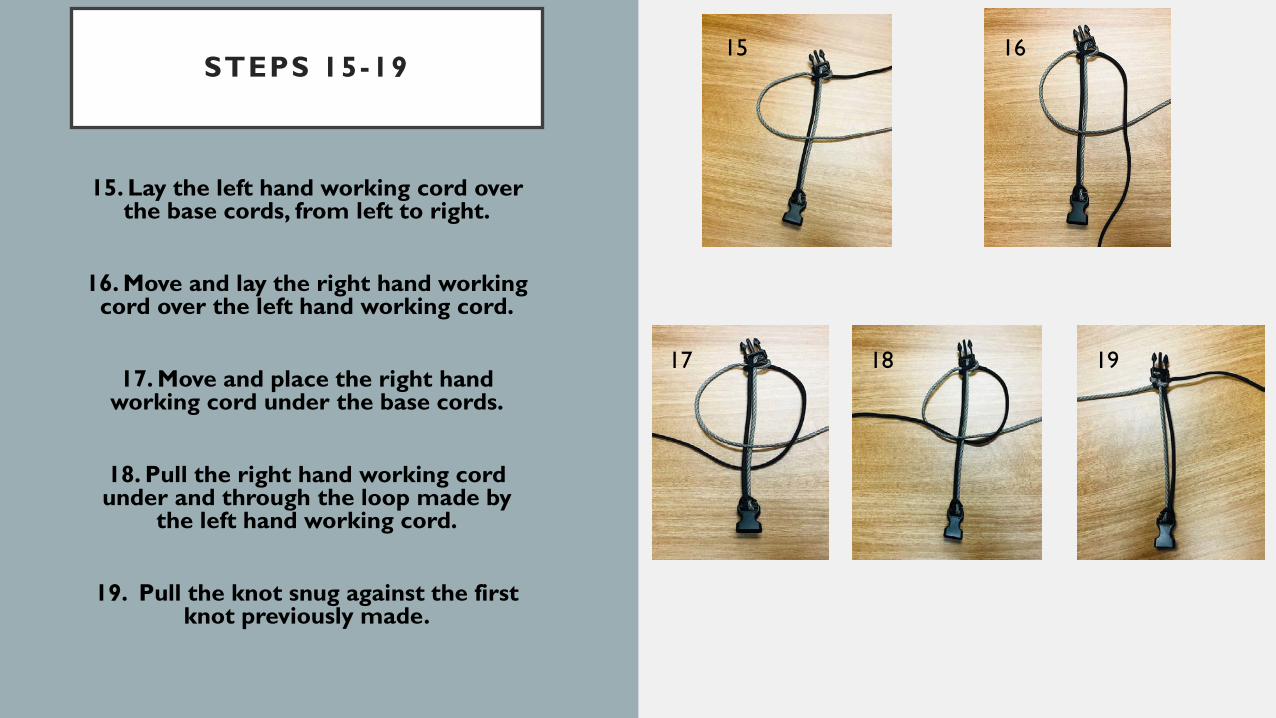
STEPS 15-19
15. Lay the left hand working cord over the base cords, from left to right.
16. Move and lay the right hand working cord over the left hand working cord.
17. Move and place the right hand working cord under the base cords.
18. Pull the right hand working cord under and through the loop made by
the left hand working cord.
19. Pull the knot snug against the first knot previously made.
15 16
17 18 19

STEPS 20 & 21
*Repeat steps 10-19, alternating between starting with the left hand working cord and right hand working cord. If you lose track of which cord to
start with, look for the vertical bar on the last knot made. The side that the vertical bar is on will
determine which cord you start with. Every so often, gently push the knots towards the top of your
bracelet to tighten the bracelet.
This is what the bracelet will look like when you are finished knotting the working cords.
20. Cut the working cords approximately ¼” from the bracelet.
21. Use a lighter to fuse/melt the cut ends of the cord.
This is the vertical bar. In this picture the bar is on the left of working cord, so you would start with the left hand working cord.
20 21

FINISHED PRODUCT
Here is the finished bracelet that will be included in a care package sent to a
deployed service member.
Thank you for your support!
If you have any questions or need further information, please contact
Nancy Marshall at 210-629-0020