sos home vent book - home - sound oxygen service · the respiratory system is designed to ......
TRANSCRIPT

1 SOUND OXYGEN SERVICE PATIENT/CAREGIVER INSTRUCTIONS
PATIENT/CAREGIVER
INSTRUCTIONS
Home Ventilator:
FOR Invasive and Non‐
Invasive Use
To be used in conjunction with
ventilator equipment, prescribed
by physician, and product‐
specific operating manual.

2 SOUND OXYGEN SERVICE PATIENT/CAREGIVER INSTRUCTIONS
Table of Contents
Introduction………………………………......2
Your Home Ventilator……………………..3
How the Lungs Work……………………….3
Types of Ventilation………………………..5
Tracheostomy…………………………………6
Non Invasive Ventilation…………………7
Introduction to Ventilator……………….8
Maintaining the Ventilator………………8
Ventilator Monitoring……………………11
Changing Circuit and Humidifier……12
The Manual Resuscitator………………13
Intro to Respiratory Procedures…..14
Suctioning…………………………………….15
Tracheostomy Care……………………….15
Early Warning Signs………………………16
Emergency Procedures…………………17
Safety Precautions………………………..19
Ventilator Troubleshooting…………..20
Contact Us…………………………………….21

3 SOUND OXYGEN SERVICE PATIENT/CAREGIVER INSTRUCTIONS
Introduction
Your decision to use or provide
mechanical ventilation and
respiratory care in the home is an
important one. We fully appreciate
the concern and commitment that
preceded this decision and Sound
Oxygen Service is committed to
helping you learn the techniques that
you and your caregivers will need to
make your ventilation a safe and
positive experience.
While you are still in the hospital or
care facility, your home ventilation
education program will begin. This
program will cover the mechanical
and technical aspects of your home
care and equipment.
This booklet has been provided to
help you learn how to operate and
care for your ventilator. Although it
may seem like a tremendous amount
of information, in time and with
practice, you will become familiar
with the care and use of the
equipment. We require individuals
sharing in the care of the ventilator
and ventilated patient to become
well acquainted with the information
found within this manual. THIS BOOK
IS ONLY A GUIDE. If you have any
questions, we encourage you to
follow up with your Sound Oxygen
Respiratory Therapy team.
Sound Oxygen Service (SOS), in
collaboration with your hospital or
facility and physician, will provide
support and training to your family
and caregivers in order to
successfully transition you home with
a ventilator. All home ventilation
plans require a strong caregiver
support system. SOS will help
coordinate with your physician and
hospital to establish resources that
may be necessary.
Each caregiver must be trained in
the use and care of and be
competent in the management of
the following areas:
The home ventilator and
accessories
General anatomy and
physiology of the lung
Respiratory care equipment
Emergency procedures
Community resources and
support services
Once you are transitioned from the
hospital to your home, our
Respiratory Therapists will visit you
on a regular basis to provide training
reinforcement and routine
equipment checks and maintenance.
Our clinicians will contact you to
4 SOUND OXYGEN SERVICE PATIENT/CAREGIVER INSTRUCTIONS
schedule these required visits.
Caregivers must cooperate to ensure
SOS is able to perform the prescribed
activities and preventative
maintenance on the equipment.
Your Home Ventilator
Your physician has prescribed a home
ventilator system for you. This
booklet will assist you in
understanding general ventilator use,
but each system also has its own
product specific operating manual.
Along with this booklet, you should
keep the manufacturer’s operating
manual to refer to.
How the Lungs Work
The respiratory system is designed to
bring oxygen into the body and expel
carbon dioxide into the air. This very
sophisticated system can be simply
understood by dividing it into three
separate areas:
1. The upper airway, which includes the opening of the air
passages of the nose, mouth
and passages leading to the
trachea (windpipe).
2. The trachea, bronchi and alveoli, which consist of the
main windpipe, the vocal cords
(voice box), the large air
passage diving into each lung
and air sac where the air which
is inhaled comes into contact
with the bloodstream.
3. The respiratory muscles,
including the diaphragm and
other breathing muscles that
are responsible for the
pumping action which draws
air in and pushes it out of the
body.
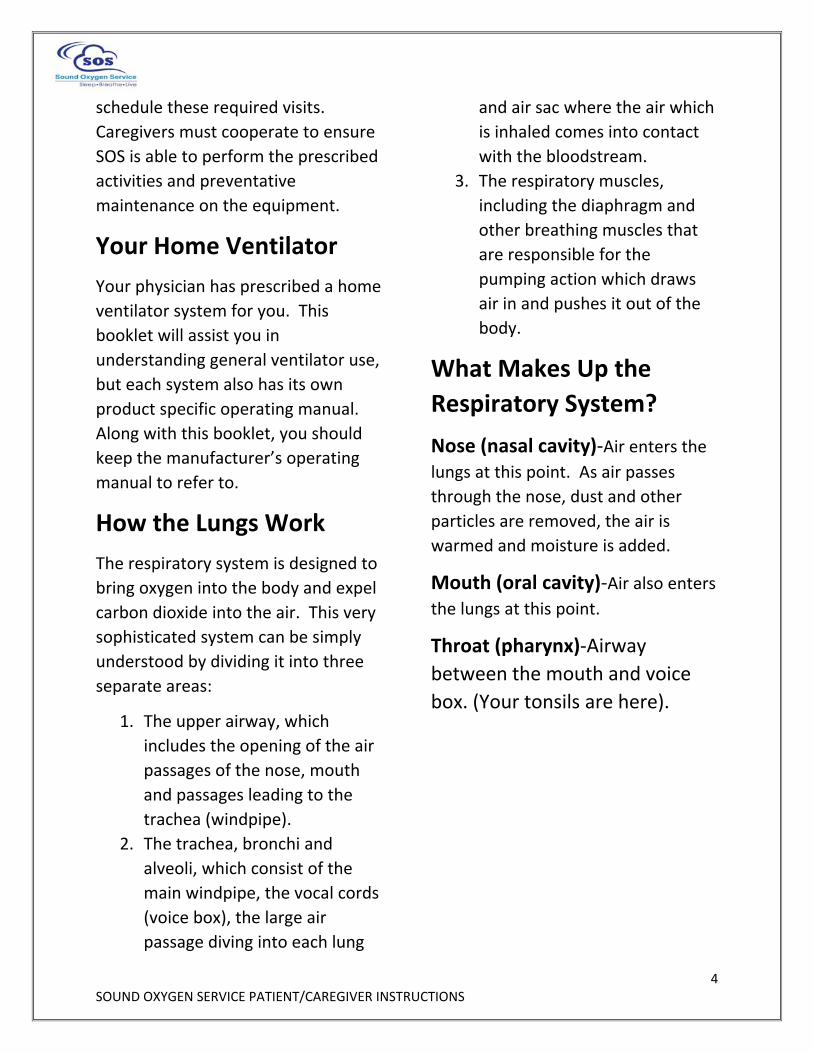
What Makes Up the
Respiratory System?
Nose (nasal cavity)‐Air enters the lungs at this point. As air passes
through the nose, dust and other
particles are removed, the air is
warmed and moisture is added.
Mouth (oral cavity)‐Air also enters the lungs at this point.
Throat (pharynx)‐Airway
between the mouth and voice
box. (Your tonsils are here).
5 SOUND OXYGEN SERVICE PATIENT/CAREGIVER INSTRUCTIONS
Voice box (larynx)‐This is a group of incomplete cartilage rings, the
largest being the Adam’s apple,
which you can feel and sometimes
see on the front of your neck. Inside
the Adam’s apple are the vocal cords
that produce your voice as you speak.
The epiglottis is also located in the
larynx. This is a flap that covers the
windpipe during swallowing to
prevent from choking.
Trachea (windpipe)‐This is the large air tube below the voice box
that divides at its base into two
branches (bronchi), one to each lung.
Large air tubes (bronchi)‐These allow air to pass into the lungs. The
large air tubes continue to divide into
small air tubes (smaller bronchi and
bronchioles).
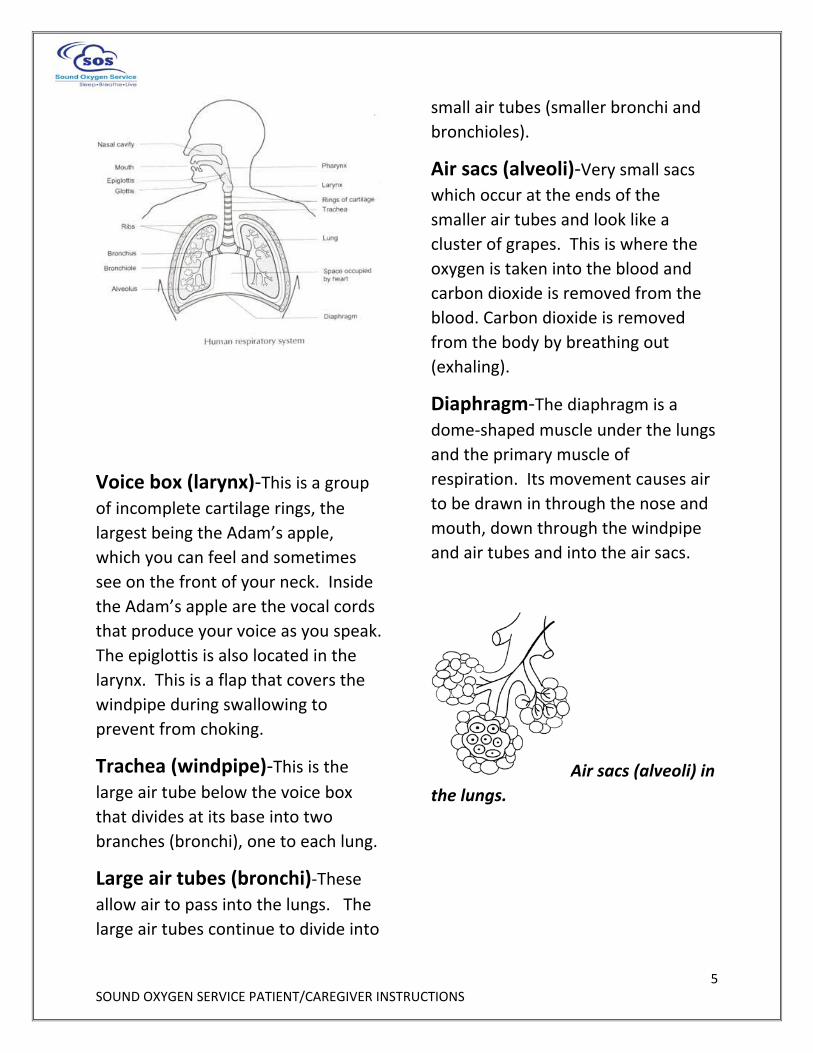
Air sacs (alveoli)‐Very small sacs
which occur at the ends of the
smaller air tubes and look like a
cluster of grapes. This is where the
oxygen is taken into the blood and
carbon dioxide is removed from the
blood. Carbon dioxide is removed
from the body by breathing out
(exhaling).
Diaphragm‐The diaphragm is a
dome‐shaped muscle under the lungs
and the primary muscle of
respiration. Its movement causes air
to be drawn in through the nose and
mouth, down through the windpipe
and air tubes and into the air sacs.
Air sacs (alveoli) in
the lungs.
6 SOUND OXYGEN SERVICE PATIENT/CAREGIVER INSTRUCTIONS
How We Breathe
Fresh air enters the upper airway
through the mouth and nose, goes
into the back of the throat and
through the larynx or voice box into
the main air passages. In the nose,
air is warmed, filtered and
humidified. The warmer air is able to
hold on to more moisture. This is to
prevent the air passages from drying
out as the air passes into the lungs.
The moist surfaces in the nose also
filter dust particles and inhalants.
The heated, moistened and filtered
air enters the trachea or windpipe.
The trachea then divides into two
main branches, or bronchi, that
deliver air into the lungs. One branch
serves the right lung and the other,
the left. Inside the lungs, these
airways divide many more times.
They get smaller in size so that they
may deliver air to the deepest areas
of the lungs. Eventually these small
airways end in alveoli where the body
actually takes the oxygen from the air
we breathe into our bloodstream. It
is also here where the carbon dioxide
is returned to the air from the
bloodstream. There are hundreds of
millions of these alveoli in each of our
lungs. They are made of an elastic
tissue that stretches when we
breathe in and recoils and relaxes
when we breathe out. There is a
network of very thin blood vessels
called capillaries surrounding each
alveoli. Blood is pumped to the lungs
to pick up a fresh supply of oxygen
from the air sacs and to release into
the air sacs the carbon dioxide from
throughout our body.
How the Lungs Keep Clean
Ordinarily, the lungs are protected by
the nose, which provides filtered,
warmed and humidified air. Any
remaining dust or particles become
trapped in the mucus that lines the
trachea and bronchi. This mucus is
continually moving toward the top of
the trachea by cells called “cilia” so
that the mucus can be coughed out
or swallowed. For this system to
work properly, the cilia must be able
to move the mucus forward.
Smoking inhibits the cilia’s ability to
do this. Drinking too little water can
also make the mucus thick and hard
to move.
Types of Ventilation
Ventilators are used both invasively
and non‐invasively.
Invasive ventilation is ventilation
delivered through a tracheostomy. It
may be used 24 hours a day or
sometimes less depending on the
7 SOUND OXYGEN SERVICE PATIENT/CAREGIVER INSTRUCTIONS
needs of the patient and prescription
from the physician. The ventilator
delivers volume breaths of air directly
into the lungs. Sometimes
supplemental oxygen is added to the
breaths delivered by the ventilator.
Non‐invasive ventilation (NIV)
assistance or non‐invasive positive
pressure ventilation (NPPV) uses a
nasal mask, face mask, or
mouthpiece, connected to a
ventilator to provide ventilation
support during sleep or intermittently
throughout the day. This support
rests the lung muscles, and improves
breathing performance during the
day. If use is at night only, this is
referred to as nocturnal NPPV. If use
is intermittent, this may be referred
to as “Mouthpiece” or “Sip and Puff”
ventilation.
Tracheostomy
What is a Tracheostomy?
A tracheostomy is a surgically
produced hole in the trachea. A
tracheostomy tube is usually used to
hold the hole open.
A tracheostomy bypasses a person’s
nose and mouth and substitutes as
his or her airway. That person
breathes and coughs through the
tracheostomy as long as it remains
unobstructed.
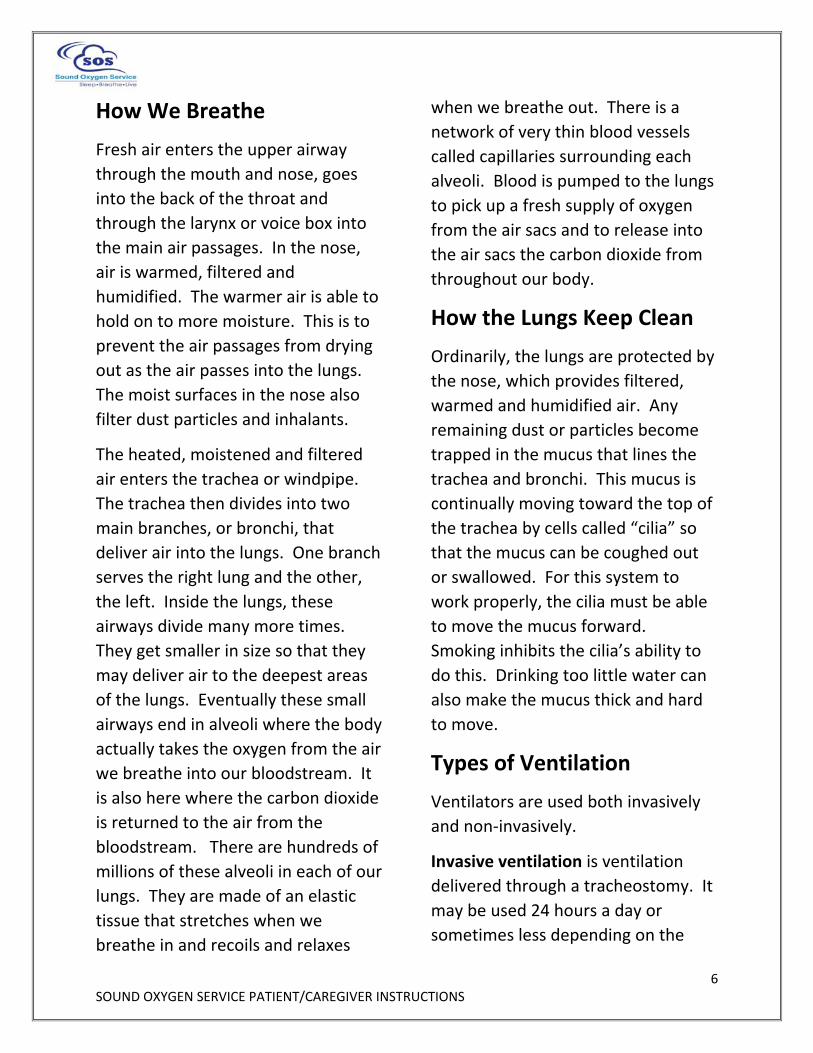
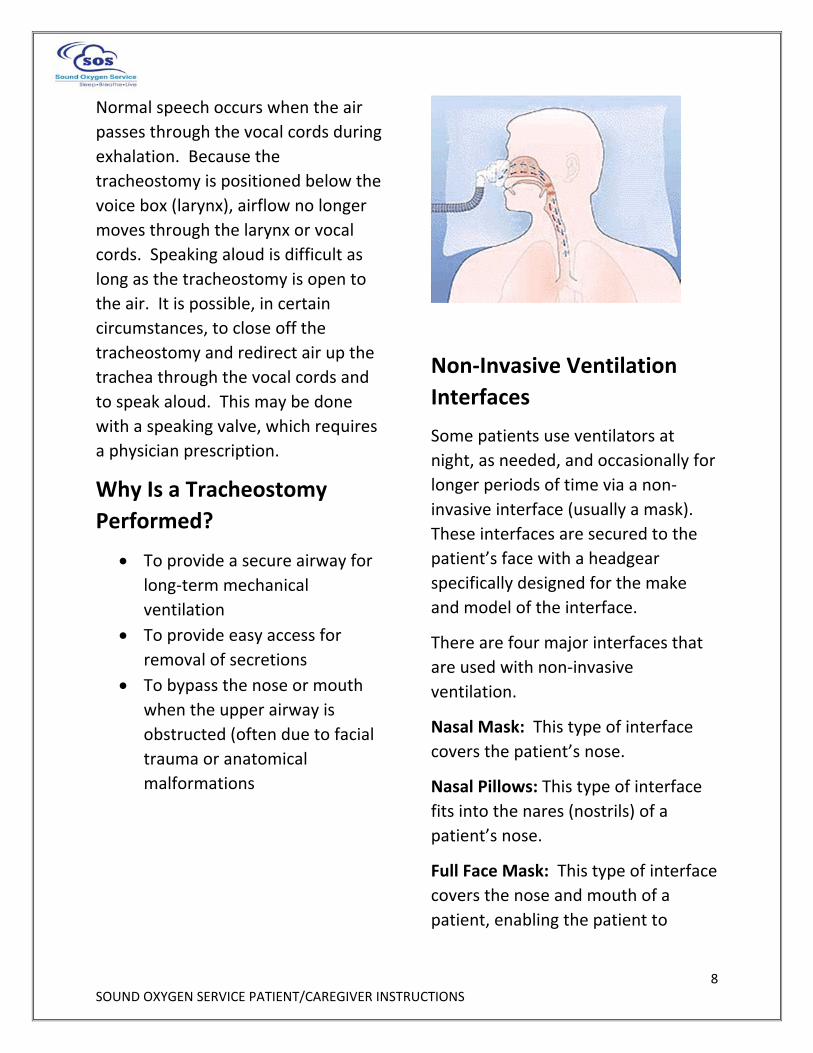
When breathing through a
tracheostomy, the air no longer
passes through the nose where it
normally would be warmed, filtered
and humidified. Because of this,
most patients require a heated
humidifier which will warm and
humidify the air delivered from the
ventilator to the patient’s lungs.
Some patients may only require the
use of a heat moisture exchanger
(HME) to provide the humidity
needed. HMEs are also referred to as
“artificial noses”. This device retains
the heat and moisture from the
patient’s exhaled air. The moisture is
then returned to the air being inhaled
on the next breath. This device also
acts as a filter for keeping dirt, dust
and bacteria from entering the lungs.
8 SOUND OXYGEN SERVICE PATIENT/CAREGIVER INSTRUCTIONS
Normal speech occurs when the air
passes through the vocal cords during
exhalation. Because the
tracheostomy is positioned below the
voice box (larynx), airflow no longer
moves through the larynx or vocal
cords. Speaking aloud is difficult as
long as the tracheostomy is open to
the air. It is possible, in certain
circumstances, to close off the
tracheostomy and redirect air up the
trachea through the vocal cords and
to speak aloud. This may be done
with a speaking valve, which requires
a physician prescription.
Why Is a Tracheostomy
Performed?
To provide a secure airway for
long‐term mechanical
ventilation
To provide easy access for
removal of secretions
To bypass the nose or mouth
when the upper airway is
obstructed (often due to facial
trauma or anatomical
malformations
Non‐Invasive Ventilation
Interfaces
Some patients use ventilators at
night, as needed, and occasionally for
longer periods of time via a non‐
invasive interface (usually a mask).
These interfaces are secured to the
patient’s face with a headgear
specifically designed for the make
and model of the interface.
There are four major interfaces that
are used with non‐invasive
ventilation.
Nasal Mask: This type of interface
covers the patient’s nose.
Nasal Pillows: This type of interface
fits into the nares (nostrils) of a
patient’s nose.
Full Face Mask: This type of interface
covers the nose and mouth of a
patient, enabling the patient to

9 SOUND OXYGEN SERVICE PATIENT/CAREGIVER INSTRUCTIONS
breathe with both the nose and
mouth, and is secured with headgear.
Mouth Piece Ventilation: This type
of interface is used for intermittent
on‐demand ventilation. The patient
initiates a breath through the
mouthpiece or straw to receive
ventilation.
Introduction to the
Ventilator
This section of the manual covers the
ventilator and its operations, other
related support equipment, and
general care procedures. This section
should be referred to frequently to
ensure a safe environment for home
ventilation.
Learning the process of home
ventilation requires a serious
commitment and a lot of practice. As
you study and review this booklet
and machine manual, questions will
arise. Please do not hesitate to call
us. Your SOS Respiratory Therapist is
always available as a resource.
Maintaining the Ventilator
The ventilator, like any piece of
equipment, needs routing
maintenance. Your SOS clinician will
monitor the equipment on each
follow‐up visit. There are, however,
certain ventilator observations that
must be performed on a routine
basis.
It is extremely important for you to
wash your hands before working
with the ventilator or the patient.
Some caregivers prefer to use gloves
when performing care.
10 SOUND OXYGEN SERVICE PATIENT/CAREGIVER INSTRUCTIONS
Ventilator Check (Monitoring)
It is vitally important that the
ventilator be checked regularly to
guarantee proper function of the
ventilator and to protect against
accidental changes that may occur
within the controls. Our SOS
Respiratory Therapists will schedule
routine visits with the patient and or
the caregivers.
Caregivers must remain within close
proximity of the patient at all times
to allow immediate response to
alarms and/or patient distress.
Changing the Patient Circuit
(Tubing)
The patient circuit includes all the
parts that make up the ventilator
tubing and humidification system,
and must be changed and or cleaned
on a routine basis. This will prevent
the patient from getting an infection
and will provide a system that is as
clean as possible. Routine cleaning
and/or changing the circuit is
required. Check with your SOS
Respiratory Therapist to establish the
frequency of circuit changes ordered
by the physician. If not specified by
your physician or the manufacturer,
circuits should be changed/cleaned
weekly. A spare ventilator circuit
must be available for use at all times.
The importance of equipment
cleaning and disinfection cannot be
overemphasized. Ventilator patients
are highly susceptible to respiratory
infections. A very likely source of
such an infection is equipment that is
being used and not cleaned or
supplies not being replaced on a
regular basis. FOR SUCCESSFUL
HOME VENTILATION, YOU MUST
KEEP THE EQUIPMENT VERY CLEAN.
Water Accumulation in the
Ventilator Tubing
Water accumulation in the patient
tubing should be removed by
draining the water into a container
and then emptying the container into
the toilet. Remember to clean the
container after you have dumped the
water out. If too much water
accumulates in the tubing it will make
a “gurgling” noise in the ventilator
tubing during inspiration. The
amount of water in the tubing will
vary, depending on the temperature
of the water in the humidifier and the
ambient air temperature. Do not
drain condensation back into the
humidifier chamber.
11 SOUND OXYGEN SERVICE PATIENT/CAREGIVER INSTRUCTIONS
Reminder: The heater/humidifier
must always be placed lower than
the patient’s head. Humidifiers that
are kept above the level of the
patient’s head may cause water in
the tubing to flow into the patient’s
tracheostomy tube and cause it to
go into the lungs.
Depletion of the Water Level
in the Humidifier
When the water level in the
humidifier is low, it must be refilled.
If you have been provided a gravity
feed water system which provides a
continuous flow of water in to the
humidifier, refilling occurs by
replacing the water bag. This is
usually required every 24‐48 hours. If
you do not use the gravity feed water
system, distilled water is added until
the humidifier reaches the “full” line
on the chamber assembly. This is
usually done every 4‐6 hours.
When adding water to the humidifier,
the patient can be connected directly
to the ventilator and by ‐passing the
humidifier.
Distilled or sterile water is required
for use in your humidifier.
Humidifier Temperature
The temperature of the inspired gas
should be monitored with a
temperature probe kept in line with
the circuit, and close to the patient.
The temperature should be kept
close to body temperature (about
98.6 degrees F or 37 degrees C)
CAUTION: This is particularly
important since high temperatures
can cause airway burns or irritation
and lower temperatures may lead to
inadequate humidification and mucus
plugging.
Troubleshooting
Some problems may occur during
home ventilation. Usually these
problems are easily resolved and
there is no cause for major alarm.
When such situations arise, they
should be dealt with quickly and
calmly, so as not to cause undue
anxiety to the patient. Directions for
troubleshooting the ventilator are
located in your ventilator manual and
in this booklet under “Ventilator
Troubleshooting Guide”.
12 SOUND OXYGEN SERVICE PATIENT/CAREGIVER INSTRUCTIONS
Patient Monitoring
In the event of a malfunction, it is
important to know if there is a
patient issue (e.g., the patient needs
suctioning, a bronchodilator
treatment, etc.) or if the equipment
has malfunctioned. If the ventilator
alarm activates, always look at and
attend to the patient first, then
address the alarm situation.
Routinely monitor the patient’s color,
mental status and other vital signs as
appropriate.
Do not make any changes or
adjustments to the ventilator
settings. If ventilator setting changes
are ordered by the prescribing
physician, they will contact your SOS
Respiratory Therapist to make those
changes.
Ventilator Monitoring
The ventilator must also be
monitored routinely for tidal volume
setting, respiratory rate, system
pressure and alarm function.
Mechanical problems, such as
punctures or kinks in the tubing,
malfunction of the exhalation valve,
changes in the respiratory rate, alarm
failure, or the patient’s condition, can
result in insufficient or decreased
ventilation to the patient. Routine
monitoring of the ventilator and
tubing can help identify potential
problems before they create
difficulties.
The ventilator is equipped with safety
alarms. These alarms are sensitive to
low and high pressures in the
ventilator circuit or airway.
Bronchospasm (coughing) or
excessive secretions may cause the
ventilator to alarm. Under no
circumstances, shall the patient
disconnect alarm (low pressure or
low exhaled volume) or high pressure
alarm be disabled. In order for one to
hear and react to these alarms,
someone must always be within
hearing range of the alarm. Audible
alarms must be loud enough to be
heard by all caregivers in all areas of
the home.
The caregivers should keep an
accurate record of the patient’s
prescribed settings. This will help
ensure the physician’s orders are
followed and will alert the caregiver if
settings change. Caregivers should
observe the following settings:
1. Ventilator Mode (i.e., AC/PC,
SIMV etc.)
2. Oxygen liter flow (if applicable) 3. Tidal Volume (if the ventilator
is set in volume mode)

13 SOUND OXYGEN SERVICE PATIENT/CAREGIVER INSTRUCTIONS
4. Breath rate setting‐ on the ventilator
5. Breath rate –patient 6. Patient pressure (Peak
Inspiratory Pressure or PIP)
7. Inspiratory time
8. Trigger/sensitivity (breathing effort)
9. Low pressure alarm setting
10. High pressure alarm setting
11. Positive End Expiratory Pressure (PEEP)
12. Pressure Support (if applicable) 13. Humidifier heater setting
14. Temperature
15. Battery life (internal and external)
Changing the Ventilator
Circuit and the Heated
Humidifier Chamber
As stated previously, it is essential
that the patient circuit and humidifier
chamber (f applicable) be cleaned or
changed frequently to percent the
patient from getting an infection.
The circuit must be changed or
cleaned weekly or as directed from
your physician or according to
manufacturer recommendations.
NOTE: The heated humidifier
chamber should be changed or
cleaned at the same interval as the
ventilator circuit.
Equipment Required
Clean patient circuit
Clean humidifier chamber, if
applicable
Manual resuscitator
Oxygen source, if needed
Secondary ventilator, if
available
Instructions
It is highly recommended that two
people be available when changing
the ventilator circuit. However, if
only one person is available the
following procedure should be
followed:
1. Wash your hands or apply
gloves.
2. Place the manual resuscitator
at the patient’s side.
3. Have the clean circuit assembled and ready for use.
SKIP TO STEP 6 IF YOU ARE NOT
USING A HEATED HUMIDIFIER
4. Connect the clean patient circuit to the clean humidifier
chamber.
5. Fill the clean humidifier
chamber with distilled water,
or change the continuous feed
water bag.
6. If a second ventilator is available, place the patient on

14 SOUND OXYGEN SERVICE PATIENT/CAREGIVER INSTRUCTIONS
the secondary ventilator. If a
second ventilator is not
available, tell the patient you
are going to interrupt their
ventilation for 1 or 2 breaths.
7. Ventilate the patient with the manual resuscitator during the
circuit/humidifier change
process.
8. Disconnect the dirty tubing from the ventilator and
patient.
9. Remove the dirty humidifier
chamber and replace it with a
clean one.
10. Connect the clean circuit to the ventilator and test for leaks.
11. Connect the short connective tube from the humidifier
chamber inlet to the ventilator.
12. Reconnect the patient and ensure proper operation of the
ventilator and circuit.
13. Observe the patient’s chest and pressure displayed on the
ventilator during the next
inspiration. Both should rise.
14. Observe ventilator settings 15. If the ventilator does not
appear to be functioning
correctly, ventilate the patient
with a manual resuscitator bag
until the problem can be
corrected or until the patient is
placed on the secondary
ventilator.
16. Wash your hands thoroughly
to maintain clean conditions.
The Manual Resuscitator
A manual resuscitator is a bag and
valve device that is used to deliver a
volume of air to the patient’s lungs.
It is used at times when normal
mechanical ventilation is either
inconvenient or impossible. (i.e., for
troubleshooting ventilator issues,
changing the ventilator circuit, or
during equipment
failure/emergency). It may also be
used to hyperoxygenate or
hyperinflate patients following
suctioning.
The patient valve on the manual
resuscitator connects directly onto
the patient’s tracheostomy tube. By
squeezing the bag, air is pushed
though the valve and into the
patient’s lungs. When the bag is
released, exhaled air escapes through
the patient valve and into the room.
Fresh air enters through a check valve
and refills the bag. A mask is supplied
for use in the event that emergency
bag/mask ventilation is required.
Equipment Needed
Manual resuscitator

15 SOUND OXYGEN SERVICE PATIENT/CAREGIVER INSTRUCTIONS
Oxygen source, if ordered
Instructions
1. Explain the procedure to the patient.
2. Connect the manual
resuscitator to the
tracheostomy tube.
3. If the patient breathes on his/her own, squeeze the bag
as he/she begins to inhale,
attempting to synchronize the
breaths you are giving the
patient with his/her own
breaths. If the patient does
not breathe on their own,
begin squeezing the bag as
soon as it is connected to the
tracheostomy tube.
4. Observe the chest while squeezing the bag. Continue to
squeeze the bag until the chest
rises.
5. Release the bag when an observable rise in the chest has
occurred.
6. Repeat this squeeze/release cycle at the same respiratory
rate at which the ventilator is
set. Allow a 1:2 ratio for
moving air in and out of the
lungs. Exhalation should
always be about twice as long
as inspiration.
7. Wash your hands thoroughly to
maintain clean conditions.
NOTE:
Oxygen may be added, if
prescribed, to the manual
resuscitator to provide oxygen
to the patient during the
suctioning procedure.
A face mask should also be
available in case the
tracheostomy site closes and
the patient must be ventilated
through the nose.
If it is necessary to use a face
mask for manual resuscitation,
it may be necessary to obstruct
the opening to the
tracheostomy site to alleviate
leaks.
Introduction to
Respiratory Care
Procedures Maintaining an open and clear
airway is the most important
part of home ventilation. As
previously discussed, the
airway is the pathway for air to
get to the alveoli in the lung.
This allows oxygen to be taken
into the blood stream and
carbon dioxide to be removed.
The primary goal of airway care
16 SOUND OXYGEN SERVICE PATIENT/CAREGIVER INSTRUCTIONS
is to prevent obstruction of the
airway so that the movement
of air into the lungs is not
restricted. A totally obstructed
airway is a medical emergency
which requires immediate
action.
Therefore, this section will
discuss the respiratory care
procedures which are
necessary to:
Maintain a clear airway
Avoid an obstructed airway
Relieve an obstruction, should
one occur
Suctioning: Why It Is
Necessary
Coughing is the normal way a person
clears his or her airway of secretions.
When the ability to cough is weak or
absent, secretions will build up in the
lungs and airway. Secretions
interfere with the lung’s ability to get
oxygen to the alveoli, and they can
also cause the patient to have a
difficult time breathing. When
secretions begin to accumulate,
suctioning the airway will be
necessary. Suctioning removes the
secretions from the airways and
allow the patient to breathe easier.
Your discharging facility will provide
training on the proper suctioning
procedure. If this has not already
taken place, please inform your SOS
Respiratory Therapist so training can
be scheduled.
Tracheostomy Care, Tube
Changes, and Maintaining
and Clearing the Airway, and
Stoma Care
Your discharging facility will provide
training on the proper techniques for
tracheostomy care, tube changes,
suction, maintaining and cleaning the
airway, emergency reinsertion of the
tracheostomy tube, stoma care, and
manual resuscitator use. If this has
not already taken place, please
inform your SOS Respiratory
Therapist to help facilitate that
training in the facility.
Tracheostomy tube must be changed
routinely to minimize the chance of
secretion build up and respiratory
infection. The frequency that the
tube needs to be changed will
depend on what your physician
orders. As a safety precaution,
another trach tube of the same size,
as well as a tube one size smaller,
should always be available.
Please note: Your SOS Respiratory
Therapist will not perform the trach
tube change. Only a physician, nurse
17 SOUND OXYGEN SERVICE PATIENT/CAREGIVER INSTRUCTIONS
or trained caregiver may change the
trach tube in the home. DO NOT
attempt to change the tracheostomy
tube unless you have been trained
to do so.
Early Warning Signs
It is important for you to be aware of
the signs and symptoms that may
indicate infection or heart and lung
problems. Early recognition of these
symptoms could help avoid more
serious complications.
Infection
Improper equipment cleaning or
failure to routinely clean the
equipment can lead to respiratory
infections. Likewise, improper
aseptic techniques during suction,
tracheostomy change or stoma care
can lead to infection. Changes in
sputum consistency, volume, color,
amount and odor are all indications
that should be observed for signs of
infection. Dramatic changes in these
clinical signs and symptoms could be
a sign of infection and should be
reported to the physician.
If any of these occur, notify your
physician immediately.
Breathing Symptoms
Increased shortness of breath
Wheezing
Increased coughing
Increased respiratory rate
Increased accessory muscle use
Sputum Changes
Color
Increase in quantity
Change in thickness or
consistency
Presence of blood
Tracheostomy Site Symptoms
Pulsating tracheostomy tube
Bleeding at the tracheostomy
stoma
Discharge or odor from the
tracheostomy area
Swelling or redness around the
tracheostomy stoma
Physical Body Symptoms
Fever
Loss of appetite
Rapid weight gain
Swelling of thee feet, ankles or
legs
Headaches
Sleepiness
Visual disturbances
Dizziness
Cyanosis (blue skin color
around nose and mouth)
Confusion or anxiety
18 SOUND OXYGEN SERVICE PATIENT/CAREGIVER INSTRUCTIONS
If you are having trouble with the
equipment, call Sound Oxygen
Service.
If the patient is experiencing any
physical problems, call the patient’s
physician.
If the patient is experiencing severe
physical problems, call 911!
Emergency Procedures
Emergency Reinsertion of the
Tracheostomy Tube
Manipulation of the tube during
suctioning or tracheostomy care can
lead to tube displacement.
Consequently, when providing
tracheostomy care, the tube must
always be stabilized. If the
tracheostomy tube accidentally falls
out, follow the instructions for
reinsertion of the tracheostomy tube
provided by your discharging facility.
If the facility instructions are not
available, please see the below
reminders.
If you have difficulty reinserting the
tracheostomy tube, call 911!
1. Replace the trach tube, using a new sterile trach tube, as
instructed by the facility staff
OR
2. Reinsert the original trach tube OR
3. Occlude the stoma and use the
manual resuscitator bag and
mask to ventilate the patient at
a rate of 8‐16 breaths per
minute until medical assistance
can be summoned.
During tube reinsertion, observe the
patient’s color and if possible, count
their pulse rate. If their color
becomes bluish or the pulse rate
significantly changes, stop trying to
insert the tube, occlude the stoma
and ventilate with the manual
resuscitator bag and mask until
medical assistance can be obtained.
If the patient cannot breathe on their
own, you must reinsert the tube
within 30 seconds or ventilate until
reinsertion is possible. If unable to
reinsert the tube, ventilate the
patient and call 911.
You may want to have access to a
trach tube which is one size smaller
than the tube the patient uses.
Inserting this tube will be easier than
the standard tube if the airway is
swollen.
NOTE: Tube reinsertion can be a
difficult procedure. It is very
important to practice changing the
19 SOUND OXYGEN SERVICE PATIENT/CAREGIVER INSTRUCTIONS
trach tube in the facility before the
patient goes home.
Power Failure
Home ventilators have an internal
battery and an external battery will
be provided. In the event of a power
failure, the ventilator will
automatically switch to the internal
battery unless the external battery is
connected. The external battery
must always be kept full charged and
connected to the ventilator in the
event of a power failure. Internal
and external battery duration varies
by ventilator model, settings, and age
of battery. Check the manufacturer
manual for estimated battery
duration.
NOTE: The internal battery is
intended for use during short periods
while switching between external
power sources, emergency situations,
or when the user needs to be mobile.
The length of time the ventilator will
operation on internal power depends
on many factors such as device
settings, battery charge levels and
condition or age of the battery.
For patients who rely on the
ventilator for full time life support, it
is critical that at least one fully
charged external battery is available
when the patient is mobile or does
not have access to an A/C power
source, and that the patient make
arrangements to get to an A/C power
source as soon as possible.
The internal battery is NOT intended
to serve as a primary power source.
It should only be used when other
sources are not available, or briefly
when necessary‐ for example, when
changing power sources.
It is important to mark the circuit
breather or fuse in your home that
controls the ventilator.
The local power company should be
notified that you are using life
support equipment in your home.
You will receive a letter from your
SOS Respiratory therapist to
complete and provide to your local
utility providers.
Equipment Failure
If a problem arises with the home
ventilator, those in attendance must
hand ventilate the patient using the
manual resuscitator bag. As soon as
the patient is being ventilated
adequately with the resuscitator,
troubleshoot the equipment and
attempt to correct the problem. If
the patient has a secondary
ventilator, place the patient on his or
her secondary system and attempt to
20 SOUND OXYGEN SERVICE PATIENT/CAREGIVER INSTRUCTIONS
troubleshoot the primary ventilator
problem. If at any time during this
process the patient exhibits difficulty
in breathing call 911.
After the patient is stabilized and
using the secondary ventilator and if
the equipment issues have not been
corrected, contact your SOS
Respiratory Therapist.
Safety Precautions
Use all equipment safely.
Never change ventilator
settings
If oxygen is used with the
ventilator, always turn off the
oxygen flow before turning off
the ventilator
Always bleed the oxygen into
the ventilator following the
manufacturer’s recommended
method
Respond immediately to any
alarm. It may indicate a
potentially life‐threatening
event. Refer to the ventilator
operator’s manual for
information regarding alarms
on your model of ventilator.
Always remain within proximity
of the ventilated patient at all
times to allow for immediate
response to alarms and/or
patient distress.
Never immerse the ventilator or any
electrical equipment in water.
Never plug in the ventilator if it is
wet or damp. Moisture always
increases the potential of electrical
shock.
Do not store any liquid on top of the
ventilator.
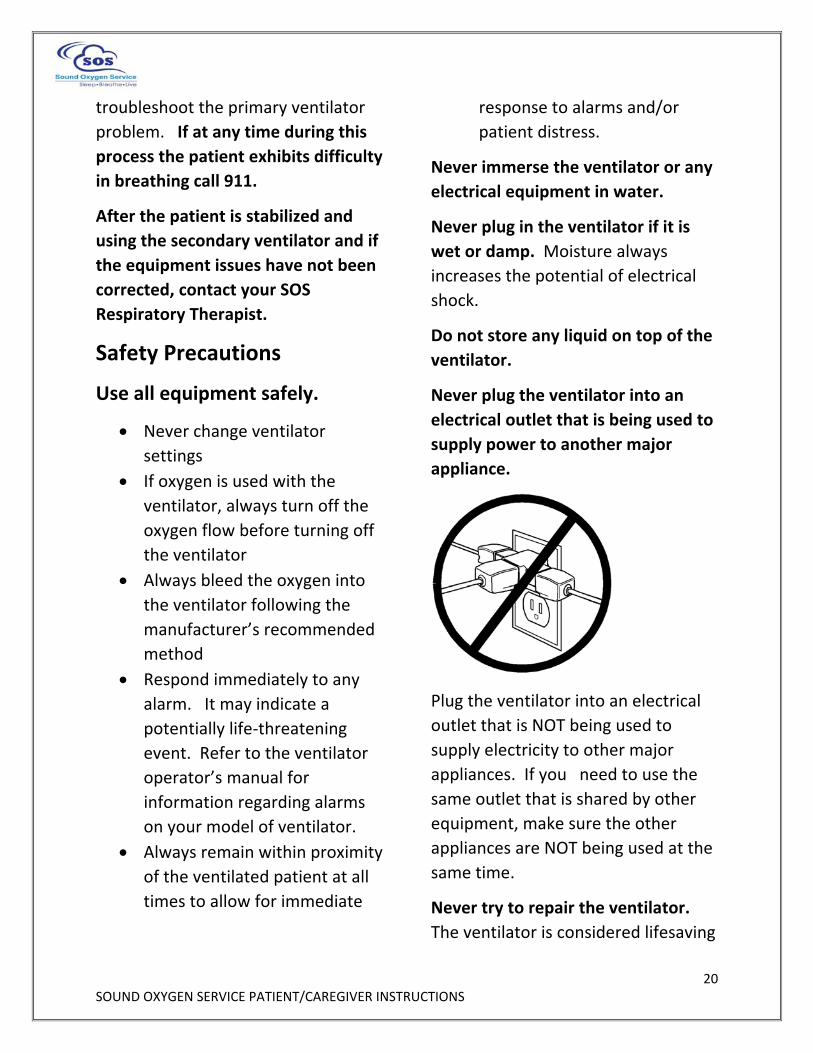
Never plug the ventilator into an
electrical outlet that is being used to
supply power to another major
appliance.
Plug the ventilator into an electrical
outlet that is NOT being used to
supply electricity to other major
appliances. If you need to use the
same outlet that is shared by other
equipment, make sure the other
appliances are NOT being used at the
same time.
Never try to repair the ventilator.
The ventilator is considered lifesaving
21 SOUND OXYGEN SERVICE PATIENT/CAREGIVER INSTRUCTIONS
medical equipment and must be
worked on by a professional. Contact
your SOS Respiratory Therapist if you
feel your ventilator is not working
appropriately.
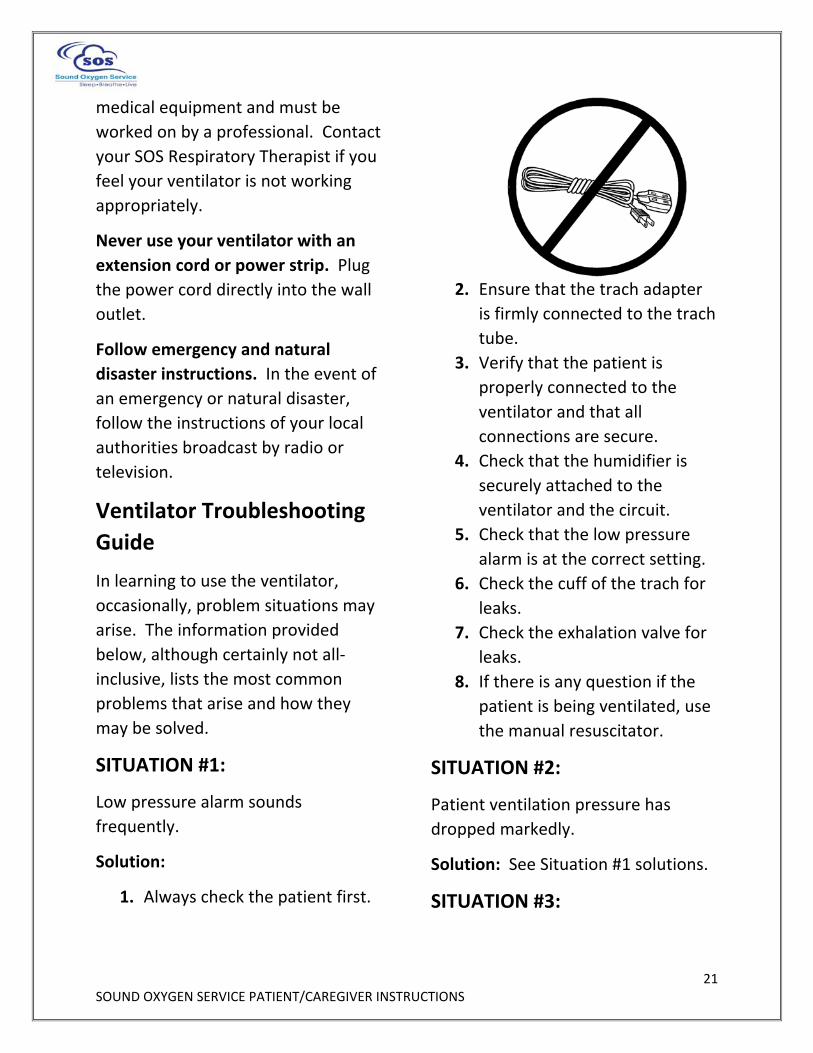
Never use your ventilator with an
extension cord or power strip. Plug
the power cord directly into the wall
outlet.
Follow emergency and natural
disaster instructions. In the event of
an emergency or natural disaster,
follow the instructions of your local
authorities broadcast by radio or
television.
Ventilator Troubleshooting
Guide
In learning to use the ventilator,
occasionally, problem situations may
arise. The information provided
below, although certainly not all‐
inclusive, lists the most common
problems that arise and how they
may be solved.
SITUATION #1:
Low pressure alarm sounds
frequently.
Solution:
1. Always check the patient first.
2. Ensure that the trach adapter is firmly connected to the trach
tube.
3. Verify that the patient is properly connected to the
ventilator and that all
connections are secure.
4. Check that the humidifier is
securely attached to the
ventilator and the circuit.
5. Check that the low pressure alarm is at the correct setting.
6. Check the cuff of the trach for leaks.
7. Check the exhalation valve for leaks.
8. If there is any question if the patient is being ventilated, use
the manual resuscitator.
SITUATION #2:
Patient ventilation pressure has
dropped markedly.
Solution: See Situation #1 solutions.
SITUATION #3:

22 SOUND OXYGEN SERVICE PATIENT/CAREGIVER INSTRUCTIONS
High pressure alarm sounds
frequently.
NOTE: Frequent coughing will initiate
the high pressure alarm.
Solution:
1. Always check the patient first. 2. Check for kinks or crimps in the
tubing.
3. Suction the patient if needed. 4. Check that the high alarm is at
the correct setting (not too
low).
5. Check for and remove any
water in the circuit that may be
present.
6. Check the trach tube for obstruction (change the inner
cannula if applicable)
SITUATION #4:
Low power alarm is sounding.
Solution:
The internal battery is running down.
Connect the ventilator to a wall
circuit for external battery power
source. If no other source is
available, remove the patient from
the ventilator and ventilate with a
manual resuscitation bag.
NOTE: IF YOU ARE EVER IN DOUBT
OF THE VENTILATOR’S WORKING
STATUS OR IF THE PATIENT IS IN
DISTRESS, CALL 911!
CONTACT US:
Sound Oxygen Service
877‐269‐0405
Or visit our website at:
www.soundoxygen.com