spinning - central vermont solid waste management district
TRANSCRIPT

Spinning craps into Soil
ORGANICSC V S W M D
Classroom activities using a compost tumbler

- 2 -
ORGANICSC V S W M D
The CVSWMD would like to thank Cornell University for permission to excerpt, revise, and/or reprint activities and information from the following Cornell work:
Trautmann, N. M., and M. E. Krasny. 1998. Composting in the Classroom: Scientific Inquiry for High School Students. Natural Resources, Cornell University, Ithaca, NY.
Cornell Waste Management Institute, Cornell University. http://cwmi.css.cornell.edu
CVSWMD Credits:
Kate Clemente, School Compost Specialist
Rick Young, Outreach Coordinator
Cathy Donohue, Marketing/Communications Manager
Illustrations: Joal Morris © 2007
Central Vermont Solid Waste Management District137 Barre Street, Montpelier, Vermont 05602Tel: 802-229-9383 • Toll-free: 800-730-9475
Web site: cvswmd.org • E-mail: [email protected]

- 3 -
ContentsIntroduction to the booklet . . . . . . . . . . . . . . . . . . . . . . . . . . . . . 4
Compost: What it is, why to use it, and how to make it in a tumbler . . . . . . . . . . . . . . . . . . . . . . . . . . . 5
Using Compost Journals . . . . . . . . . . . . . . . . . . . . . . . . . . . . . . . 7
Activities:
1 . Decay Takes Time . . . . . . . . . . . . . . . . . . . . . . . . . . . . . . 11
2 . To Biodegrade or Not to Biodegrade, That is the Question . . . . . . . . . 12
3 . Grow! Grow! A Plant Growth Contest . . . . . . . . . . . . . . . . . . . . 14
4 . What the Temperature Tells You . . . . . . . . . . . . . . . . . . . . . . . 15
5 . What the pH Tells You . . . . . . . . . . . . . . . . . . . . . . . . . . . . 16
6 . The Carbon-Nitrogen Connection . . . . . . . . . . . . . . . . . . . . . . 18
7 . Moisture Monitoring . . . . . . . . . . . . . . . . . . . . . . . . . . . . . 20
Glossary . . . . . . . . . . . . . . . . . . . . . . . . . . . . . . . . . . . . . . . 21
- 4 -
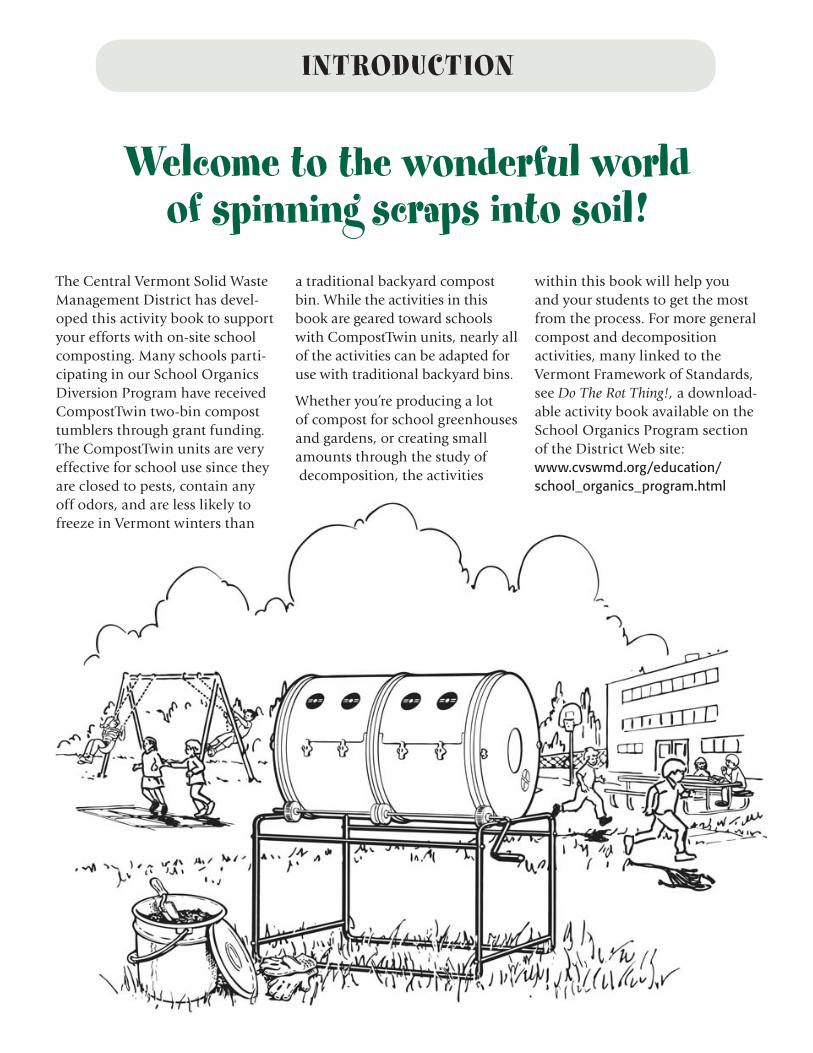
Welcome to the wonderful world of spinning scraps into soil!
a traditional backyard compost bin. While the activities in this book are geared toward schools with CompostTwin units, nearly all of the activities can be adapted for use with traditional backyard bins.
Whether you’re producing a lot of compost for school greenhouses and gardens, or creating small amounts through the study of decomposition, the activities
within this book will help you and your students to get the most from the process. For more general compost and decomposition activities, many linked to the Vermont Framework of Standards, see Do The Rot Thing!, a download-able activity book available on the School Organics Program section of the District Web site: www.cvswmd.org/education/school_organics_program.html
INTRODUCTION
The Central Vermont Solid Waste Management District has devel-oped this activity book to support your efforts with on-site school composting. Many schools parti-cipating in our School Organics Diversion Program have received CompostTwin two-bin compost tumblers through grant funding. The CompostTwin units are very effective for school use since they are closed to pests, contain any off odors, and are less likely to freeze in Vermont winters than

- 5 -
The compost tumbler is a man-aged composting system that replicates the natural process of decomposition within a controlled environment.
To make compost using the com-post tumbler, start by collecting a variety of organic materials, such as food scraps from the cafeteria or student lunches, grass clip-pings and leaf matter from the school grounds, manure from local farms, sawdust from the school shop, or other biodegrad-able materials. Keep in mind that the organisms which break down organic material require oxygen
(for respiration), water (for micro-bial growth), nitrogen (to build proteins), and carbon (for energy), in the correct quantities, in order to live and thrive. The carbon- nitrogen ratio within the compost should be around 30:1 (see The Carbon-Nitrogen Connection activity for more information). Carbon materials are brown woody materials, while nitrogen materials include food scraps and green leaves and grass. The pile needs organic materials with enough liquid in them to keep it as damp as a wrung-out sponge.
A ll of the experiments within this booklet require the
use or creation of compost. Compost is organic mate-
rial that has rotted to the point where plants can use the
nutrients. Consider the forest floor. Leaves, logs, and dead animals
pile up, rot, and make fertile soil. Controlled composting is a way
to manage this process so that it is faster and more convenient.
Compost improves the structure and fertility of soil. It makes clay
soil drain better and makes sandy soil hold more water. Compost
adds nutrients to the soil and provides a source of good bacteria.
This natural product will bring your soil to a neutral pH and
prevent plant disease.
Compost:What it is, why to use it, and how to make it in a tumbler
How to Make Compost

- 6 -
Step-By-Step1. Place the organic materials that you have collected into one of the compost tumbler chambers.
2. For the first month, place all organic materials collected into just one of the tumbler chambers to build up the amount of material in that chamber.
3. If turned frequently (every day or every other day), the compost tumbler will efficiently aerate the compost, which will ensure that the bacteria have enough oxygen to survive and complete their aerobic metabolic functions.
4. After a month, stop filling the first chamber and switch to the second chamber. This will give the materials in the first chamber a chance to finish composting while you are starting a new batch in the second chamber. Allow a few months for your compost to finish.
Put these materials IN the tumbler:
• Grass clippings
• Leaves, dead or alive
• Food scraps
• Fruit and vegetable scraps
• Coffee grounds and filters
• Tea bags and loose tea
• Egg shells (break down faster if crushed)
• Grass and shrubbery clippings
• Old or dead plants and clippings
• Straw and hay
• Wood chips/saw dust
• Wood ashes (small quantities from untreated, unpainted wood)
• Pine needles (must be shredded or torn apart)
• Small amounts of plain cardboard
• Beverages (small amounts of liquid)
Keep the following materials OUT of the tumbler:
• Fat, in solid or liquid form
• Bones
• Meat
• Fish
• Coal ash
• Charcoal
• Colored and/or chemically treated paper
• Plants treated with pesticides and/or herbicides
• Pressure treated wood
• Painted wood
• Human excrement (manure from farms is OK)
• Pet bedding
• Diseased plants
• Weeds and invasive plants
• Limit peanut butter to small amounts only
• Poisonous plants (poison ivy, poison oak)

- 7 -
the experiment’s title and date at the top of the page and write their observations and measure-ments below.
A more complex journal could be put together by the teacher. This journal could include the outlines of each experiment with an observation sheet attached to each activity. These observation sheets can include date and time, measurements, data collected, descriptions of the materials used and processes observed, or any
The activities in this booklet note the use of compost
journals. In general, a journal can be a helpful tool for monitoring progress on a project or in a subject area, as well as handy for keeping notes and handouts on a subject in one place.
The compost journals can be as simple or a complex as you would like to make them. The simplest form of a compost journal could be a basic ruled notebook in which the students write down
other information that is pertinent to the experiment. The compost journals can also be used as a place in which students answer questions about the experiment based on their observations and measurements.
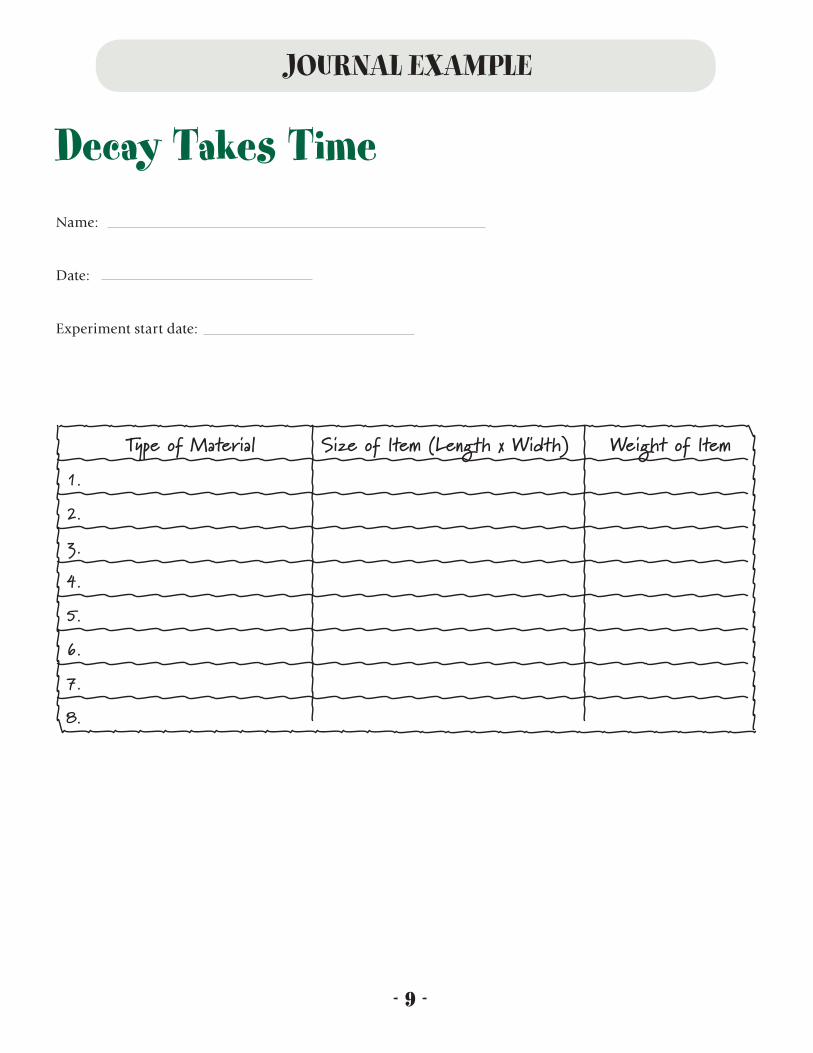
The following offers two examples of pages that could be used in the compost journal; they correspond to the What the Temperature Tells You and Decay Takes Time activities.
Using Compost Journals

- 8 -
What the Temperature Tells YouName:
Date:
Experiment start date:
Dates compost was turned:
Temperature (Celsius or Fahrenheit) of the compost:
Average temperature of the compost from the day’s measurements:
Observations (smell, color of material):
What effect did turning the tumbler have on the compost temperature?
What effect does turning the tumbler have on the speed that the material
breaks down in the compost pile?
Why?
JOURNAL EXAMPLE
- 9 -
JOURNAL EXAMPLE
Decay Takes TimeName:
Date:
Experiment start date:
Type of Material Size of Item (Length x Width) Weight of Item
1.
2.
3.
4.
5.
6.
7.
8.

- 10 -
Activities

- 11 -
Materials Needed Organic material
Compost journals
Colored pencils, crayons, markers
Background InformationAll living things go through the life cycle of birth, growth, and death. After death has occurred, the organic materials that made up the living plant or animal are returned to the soil where they are broken down by organisms such as bacteria, fungi, worms, and insects. Through this process of decomposition, the organic materials are eventually turned into a rich, earthy substance called compost.
Our human composting systems replicate this natural process within a controlled environment such as a compost pile, a compost bucket, or a compost tumbler. These controlled systems increase the decomposition rate and there-fore increase the rate at which compost is formed.
Organisms within the compost that break down organic mate-rial need oxygen (for respiration),
4. For the next 3 or 4 months do not add any new materials to the side of the tumbler that you are using for the experiment. Turn the tumbler on a regular basis (every other day is best).
5. Every week take a sample of your mix and have students describe it through written descriptions and drawings. Take measurements of the particle sizes and make a list of all the items students can identify in the mix. Note any bugs or other organisms identified in the mix. Students should date their entries.
6. You should find that certain items get smaller and smaller as time goes on, eventually “disap-pearing” altogether. Some items will take longer to degrade than others, and some might not degrade well at all. You might also find an increase in organisms in the mix as time goes on; try to identify them.
Talk about the findings and have students include this informa-tion in their journals. Talk about the role the organisms play in the whole process, and why they are important. Try to address what is causing the organic material to decompose, and how the tumbler is speeding up this process. Continue this experiment until the compost has fully degraded.
ACTIVITY
1 water (for microbial growth), nitrogen (to build proteins), and carbon (for energy), in the correct quantities, in order to live and thrive. If turned frequently, the compost tumbler will supply the compost with efficient aera-tion, which will ensure that the bacteria have enough oxygen to survive and complete their aero-bic, metabolic functions. Carbon materials are brown woody mate-rials, while nitrogen materials include food scraps and green leaves and grass. The pile needs enough water to stay as wet as a wrung-out sponge.
ProcedureYou only need to use one chamber of the compost tumbler for this activity; the other chamber can be left free for another experiment or for other materials that need to be processed at the same time.
1. Collect organic materials. Be sure to include a variety of materials, including grasses, leaf matter, food scraps, and possibly some paper products. Cut each material down to six inches or less in length.
2. Have students examine the items going into the tumbler and make notes in their compost jour-nal describing the size, shape, and composition of each material.
3. Place materials in one side of the compost tumbler.
Decay Takes Time

- 12 -
Materials NeededOrganic materials (food scraps, grass clippings, leaf matter, sawdust, etc.)
Non-organic material (cans, bottles, paper, cardboard, plastic bags, etc.)
Products that are labeled as bio-degradable, such as napkins, paper plates, some plastic products
Compost journal
BackgroundBiodegradable materials are things that can break down easily and naturally. All of the products on the earth are comprised of funda-mental chemical elements. When an organic product is returned to the earth, its composition is broken apart. Eventually all of the organic material will be broken apart and the remaining elements will be returned to the soil.
Human industry has learned to manipulate the chemical structure of elements and re-form them into products that are not able to be easily, cleanly, or quickly broken down by decomposers found within the non-industrial environ-ment. These products are known as non-biodegradable.
Procedure 1. Prepare a standard organic mixture of compostable/biode-gradable materials. Divide this in half. In one half of the mix, add a bunch of “non-biodegradable” or questionable items, such as plastics, different paper products, metals, or some more sturdy organics.
2. Have students examine the items going into the tumbler and make notes describing the size, shape, and composition of each material in their compost journal. Have the students create a hypoth-esis about which materials will degrade and which will not.
3. Place the completely organic mix in one chamber of the com-post tumbler, and the mix with non-biodegradable materials in the other chamber of the compost tumbler.
4. For the next 3 or 4 months do not add any new materials to the compost tumbler. Turn the tumbler on a regular basis; every day or every other day is best.
5. Every two weeks take a sample of your mix and have students describe it through written de-scriptions and drawings. Measure
the particle sizes and make a list of all the items students can iden-tify in the mix. Note any bugs or other organisms identified in the mix. Students should date their entries.
To Biodegrade or Not to Biodegrade, That Is the Question
ACTIVITY
2How Long Does it Take?
Here is a list of how long it takes commonly used products
to biodegrade when they are scattered about as litter:
Cotton rags: 1-5 months
Paper: 2-5 months
Rope: 3-14 months
Orange peels: 6 months
Wool socks: 1 to 5 years
Cigarette butts: 1 to 12 years
Plastic-coated paper milk cartons: 5 years
Leather shoes: 25 to 40 years
Nylon fabric: 30 to 40 years
Tin cans: 50 to 100 years
Aluminum cans: 80 to 100 years
Plastic 6-pack holder rings: 450 years
Glass bottles: 1 million years
Plastic bottles: Forever

- 13 -
al, some erosion or rusting may have occurred. How did the paper products degrade? Some papers will degrade fully, while others might include some plastic or wax which won’t break down as easily.
Why is it bad to have non-degrad-able items in the compost? Why can’t we throw non-degradable items out into nature? Use this
6. You should find that the items within the completely organic chamber of the tumbler will decrease in size as time passes. Eventually these materials should completely decompose and turn into a soil mixture.
The non-organic items within the second chamber of the tumbler should still be basically intact. If you have added items that are met-
evidence to talk about the life cycle of human-made products. You can also tie this into a discus-sion about reusing and recycling, as well as reducing waste through careful product selection and use.
This activity can be used to demonstrate the importance of keeping the compost free of non-biodegradable contamination.

- 14 -
Materials neededCompost journal
Finished compost
A variety of seeds
6-pack seed planters
Topsoil from outside
Light source, either artificial or sunlight
BackgroundBecause of its high nutrient content, compost can be used as a soil amendment to enhance the productivity of soil. Com-post also increases the ability of soil to retain water. The physical characteristics of compost make it an ideal mulch to place around shrubs, trees, and other plants to reduce soil erosion, evaporation, and weed growth.
Compost that is mature and has favorable physical and chemical properties should enhance the growth of plants.
Procedure1. Use some finished compost to prepare a growth experiment for your class. This can be done in the school greenhouse or right in the classroom.
2. Choose one or two types of plants to start from seed. Sunflow-ers or tomatoes are good choices, but the options really are limitless.
3. Get two large seed trays. Fill the first one with topsoil.
4. For the second tray, mix a portion of potting soil with a good amount of compost. A 50:50 mix will be sufficient. Plant an equal number of the same type of seeds in both trays, at the same depth and in the same manner. Make sure each tray is equally watered for the next few months.
5. Monitor the growth of the plants with your students (height, number of leaves, health). Have the students record these changes in their compost journals. As the seeds germinate and grow, talk with students about the differenc-es they see between the two trays. Did the seeds germinate at the same time? Did the plants grow
at the same rate? Are they the same size? Do they have the same color? Have the students write reports about what they observed. Discuss why compost is helpful to the plants.
6. Another option is to create differing ratios of compost and soil in different trays. The first plant tray could be 10% compost, the second 20% compost, the third 30% compost, and so on until the last tray is made up of 100% compost. Compare the growth results from all of the trays. What ratio of compost produced the best results? Have the students discuss how well the plants grew in the different envi-ronments. If there are differences in growth between the trays, dis-cuss why that may have occurred.
Grow! Grow! A Plant Growth Contest
ACTIVITY
3
- 15 -
Materials NeededCompost thermometer
Compost journals
BackgroundTemperature can act as an indica-tor of the chemical changes that take place as material composts.
The aerobic metabolic activity of bacteria produces heat as a byproduct. Different communities of micro-organisms which break down different organic products predominate during various temperature phases. Therefore, you can tell what stage of decom-position your compost is in based on the temperature of the pile.
Initial decomposition is carried out by mesophilic micro-organ-isms, which thrive at moderate temperatures. These microbes rapidly break down the easily degradable compounds and soluble sugars in the compost. The heat they produce causes the compost temperature to rise rapidly.* This phase usually lasts for a couple of days.
Note: If the compost does not heat up, it may be deficient in moisture or nitrogen.
Once temperatures exceed 40°C, the mesophilic micro-organisms are replaced by thermophilic, or heat-loving, bacteria. During the thermophilic stage, high tempera-tures accelerate the breakdown of proteins, fats, and complex carbohydrates such as cellulose and hemicellulose, the major structural molecules in plants. This stage can last from a few days to several months depending on the size of the system and the composition of the ingredients.
As the supply of organic matter diminishes, the compost tem-perature gradually decreases and mesophilic micro-organisms take over for the final phase of curing, or maturation, of the remaining organic matter. This stage can last for several months.
Periodic temperature measure-ments can be used to chart the progress of the three phases of composting.
Procedure1. Make a basic compost pile in the compost tumbler. Once the material has begun to degrade, begin to monitor the temperature.
2. Place the compost thermometer into the pile.
3. Leave the thermometer in place long enough for the reading to stabilize. Have the students
note the temperature in their compost journals.
4. Take readings in several differ-ent locations in the compost pile, including various distances from the top and sides. Have the stu-dents record the different values. Add up all the totals and divide by the number of tests for an average temperature value for the day.
5. The compost pile may have hotter and colder areas depend-ing on the location in the bin, the moisture content, and the chemi-cal composition of the ingredients. Discuss this with the students and have them see if they can find differences in the temperatures. Where are the hottest readings? Is the pile hotter or colder after the pile is turned? What is the temper-ature a day after the pile has been turned? Do different amounts of ingredients produce higher tem-peratures?
6. Repeat the monitoring on a daily basis.
7. Once the compost has reached the final maturation phase, have the students make a graph from all of the average temperature values of the compost pile; put time on the X axis and temperature on the Y axis. Did the temperature values correlate to the different stages discussed in the background section of this activity? Did the pile follow the trends suggested?
What the Temperature Tells You
ACTIVITY
4

- 16 -
Materials NeededpH paper or a soil test kit
Compost journals
Small cups, cupcake wrappers, or paper plates
Scale
BackgroundpH values can be used to chart the progress of the decomposition of your compost. During the course of decomposition, the pH generally ranges between 5.5 and 8.5. The initial pH depends on the composition of the separate organic ingredients.
In the early stages of decomposi-tion, bacteria and fungi break down the organic materials. Organic acids are created as by-products of this digestion process. These organic acids decrease the pH value and therefore increase the acidity of the pile. Higher acidity (lower pH) encourages the growth of fungi. Fungi help to break down the organic materials lignin and cellulose, which are generally found in woody plant matter.
The organic acids break down further which results in an increase in the pH value.
The pH value is also raised when ammonia is released into the atmosphere by microbes as they break down proteins and other organic nitrogen sources.
During the last stages of the com-posting process, the pH tends to become more neutral because the acidic ammonia is either lost to the atmosphere or used for new microbial growth. Finished compost generally has a pH between 6 and 8.
If the system becomes anaerobic (oxygen deficient), acid accumula-tion will occur which may increase the acidity of the compost by lowering the pH to around 4.5. A low pH will severely limit micro-bial activity. In such cases, aera-tion usually is sufficient to return the compost pH to acceptable ranges.
Procedure1. Create a basic batch of compost in one chamber of the compost tumbler.
2. Once visible decomposition has begun, take daily or weekly pH measurements of the compost. On the days that you measure the pH, also have the students record their observations about the state of the organic materials within the compost pile.
3. Measuring the pH of the pile can be done in a variety of ways based upon the available materials and the composition of the pile.
A damp but not muddy pile: Insert the pH paper directly into the compost or you can remove samples from the pile and place the pH paper directly into them.
a. After you insert the pH paper into the compost, let it sit for a few moments.
b. Remove the paper and determine the pH by making color comparisons with the pH indicator.
A muddy pile:With a muddy pile in which you cannot use pH paper directly in it because the mud is obscuring the values, take samples of the compost and dry them before measuring the pH. You can either take individual readings of the different samples of compost or combine the compost samples to get an average pH reading.
a. Bring the samples inside and spread them out in a thin layer on a baking sheet.
For individual samples:Make sure that you have sepa-rate sheets for each sample so that they don’t become mixed.
To mix the samples:Make sure that they are well mixed before laying them out on the baking sheet.
b. Place the sheet(s) in an oven and dry at 105–110°C (approxi-mately 220°F) for 24 hours.
What the pH Tells YouACTIVITY
5

- 17 -
c. Weigh out 5g samples of oven-dried compost into small cups.
d. Add 25ml distilled water to each sample.
e. Mix thoroughly for 5 seconds and then let stand for 10 seconds.
f. Read the pH with a calibrated meter or with pH paper.
4. Have students record the dif-ferent pH values in their compost journals. Because pH is based upon a logarithmic scale, you should not add the values together to get a simple average. Instead, keep track of individual measure-ments and ranges of values.
The pH will probably not be the same throughout your compost
because different materials will be undergoing different stages of decomposition throughout it. Therefore, it is important to take samples from several different locations in the compost pile. Make sure that every time you take samples you utilize the same method for determining the pH.
- 18 -
food scraps, liquid wastes, wood chips, etc.). Ask the students to list which materials they think have a high carbon content and which materials have a high nitrogen content.
2. Create two separate mixes of organic material—one for each chamber of the compost tumbler. Both mixes should be
made to have the correct (30:1) carbon-
nitrogen ratios.
3. Add more mater-ials that are high in carbon to one
chamber of the tumbler and more
materials that are high in nitrogen to the other chamber. For example: To increase the
amount of nitrogen in one chamber of the compost tumbler, you could add extra food scraps to that side. Make sure to only vary one material type at a time, or your results will be difficult to explain.
4. Turn the tumbler every other day. Observe the compost on a weekly basis. Have the students write down the physical changes they can see, as well as anything else they observe about the piles. Are the materials within one chamber of the tumbler degrading faster than the other? Are there any smells associated with one
Materials NeededCompost journals
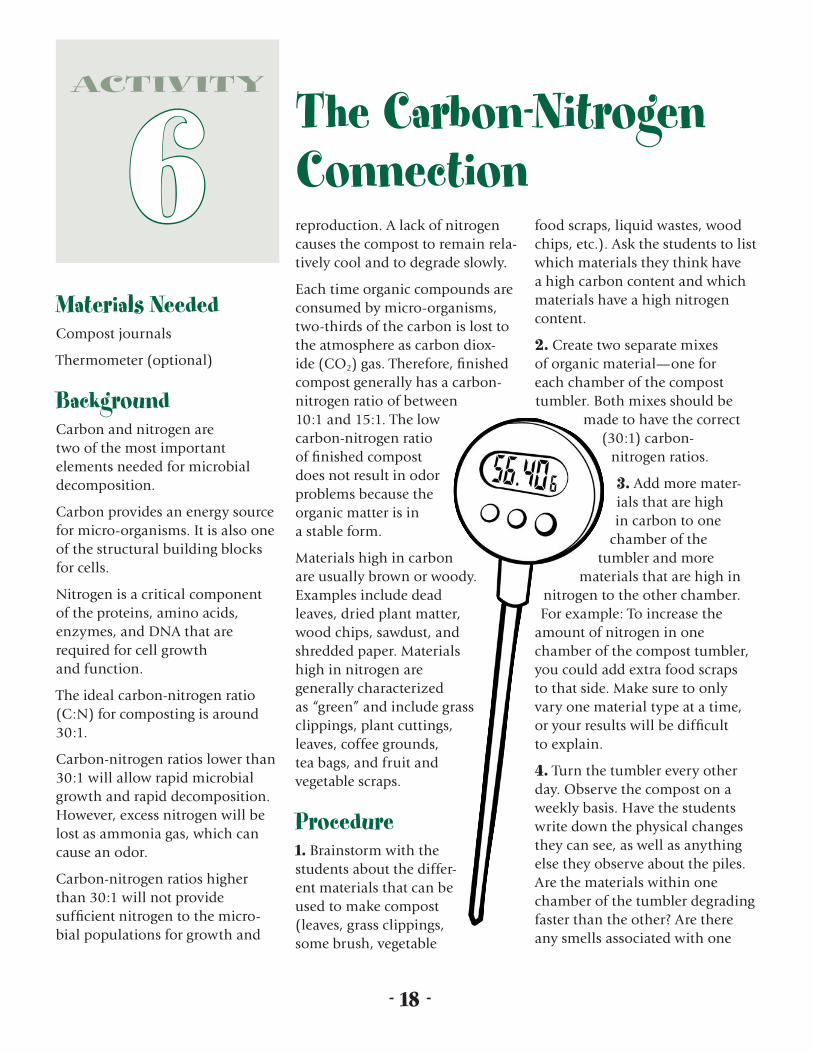
Thermometer (optional)
BackgroundCarbon and nitrogen are two of the most important elements needed for microbial decomposition.
Carbon provides an energy source for micro-organisms. It is also one of the structural building blocks for cells.
Nitrogen is a critical component of the proteins, amino acids, enzymes, and DNA that are required for cell growth and function.
The ideal carbon-nitrogen ratio (C:N) for composting is around 30:1.
Carbon-nitrogen ratios lower than 30:1 will allow rapid microbial growth and rapid decomposition. However, excess nitrogen will be lost as ammonia gas, which can cause an odor.
Carbon-nitrogen ratios higher than 30:1 will not provide sufficient nitrogen to the micro-bial populations for growth and
reproduction. A lack of nitrogen causes the compost to remain rela-tively cool and to degrade slowly.
Each time organic compounds are consumed by micro-organisms, two-thirds of the carbon is lost to the atmosphere as carbon diox-ide (CO2) gas. Therefore, finished compost generally has a carbon-nitrogen ratio of between 10:1 and 15:1. The low carbon-nitrogen ratio of finished compost does not result in odor problems because the organic matter is in a stable form.
Materials high in carbon are usually brown or woody. Examples include dead leaves, dried plant matter, wood chips, sawdust, and shredded paper. Materials high in nitrogen are generally characterized as “green” and include grass clippings, plant cuttings, leaves, coffee grounds, tea bags, and fruit and vegetable scraps.
Procedure1. Brainstorm with the students about the differ-ent materials that can be used to make compost (leaves, grass clippings, some brush, vegetable
ACTIVITY
6 The Carbon-Nitrogen Connection

- 19 -
Materials High in Carbon (C:N)
Dead leaves (40-80:1)
Sawdust (200-750:1)
Hardwood chips or shavings (450-800:1)
Softwood chips or shavings (200-1,300:1)
Bark–hardwood (100-400:1)
Bark–softwood (100-1,200:1)
Straw (50-150:1)
Mixed paper (100-200:1)
Newspaper (400-900:1)
Corrugated cardboard (600:1)
Materials High in Nitrogen (N:C)
Vegetable scraps (10-20:1)
Fruit scraps (20-50:1)
Coffee grounds (20:1)
Grass and shrubbery clippings (10-25:1)
or both chambers of the tumbler? Are the piles different tempera-tures? At the end of the matura-tion phase, does the compost differ from one chamber of the tumbler to the other?
5. Use your results to discuss the importance of maintaining the correct chemical balance within the compost pile.
- 20 -
Materials NeededCupcake wrappers, paper plates, or paper cups
Compost journal
Moisture meter
Oven
Scale
BackgroundBacteria and other micro-organ-isms require between 50% and 60% moisture content within compost in order to function optimally. Decomposition occurs most rapidly in the water particles within compost. If conditions become drier than 35–40%, bacte-rial activity is inhibited. Moisture levels above 65% result in slow decomposition, odor production, anaerobic conditions, and nutri-ent leaching. The compost should be about as wet as a wrung-out sponge, with only a drop or two squeezed out when it is compressed.
Moisture content of compost materials (% wet weight)
• Vegetables and fruits 80–90%
• Grass clippings 80%
• Leaves 40%
• Sawdust 40%
• Shrub trimmings 15%
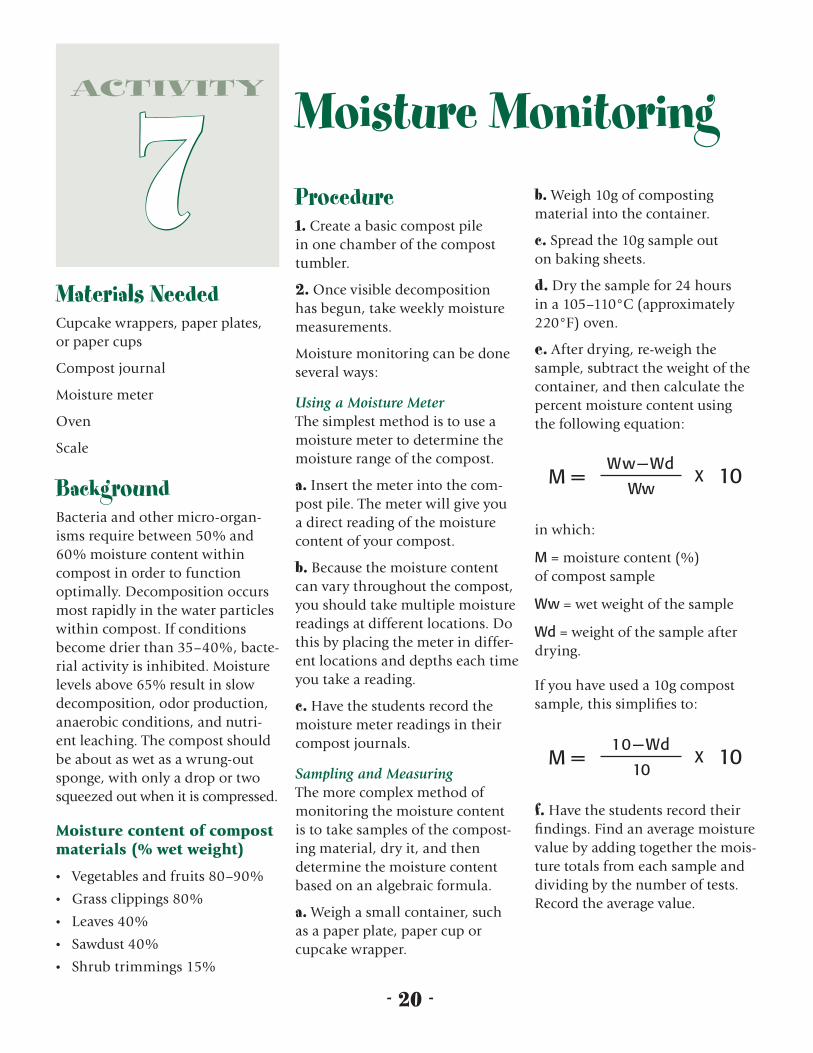
Procedure1. Create a basic compost pile in one chamber of the compost tumbler.
2. Once visible decomposition has begun, take weekly moisture measurements.
Moisture monitoring can be done several ways:
Using a Moisture MeterThe simplest method is to use a moisture meter to determine the moisture range of the compost.
a. Insert the meter into the com-post pile. The meter will give you a direct reading of the moisture content of your compost.
b. Because the moisture content can vary throughout the compost, you should take multiple moisture readings at different locations. Do this by placing the meter in differ-ent locations and depths each time you take a reading.
c. Have the students record the moisture meter readings in their compost journals.
Sampling and MeasuringThe more complex method of monitoring the moisture content is to take samples of the compost-ing material, dry it, and then determine the moisture content based on an algebraic formula.
a. Weigh a small container, such as a paper plate, paper cup or cupcake wrapper.
b. Weigh 10g of composting material into the container.
c. Spread the 10g sample out on baking sheets.
d. Dry the sample for 24 hours in a 105–110°C (approximately 220°F) oven.
e. After drying, re-weigh the sample, subtract the weight of the container, and then calculate the percent moisture content using the following equation:
in which:
M = moisture content (%) of compost sample
Ww = wet weight of the sample
Wd = weight of the sample after drying.
If you have used a 10g compost sample, this simplifies to:
f. Have the students record their findings. Find an average moisture value by adding together the mois-ture totals from each sample and dividing by the number of tests. Record the average value.
ACTIVITY
7 Moisture Monitoring
M = X 10Ww—Wd
Ww
M = X 1010—Wd
10
M = X 10Ww—Wd
Ww
M = X 1010—Wd
10

- 21 -
Aeration The process by which air is circulated through, mixed with, or dissolved in a substance.
Aerobic Requiring oxygen.
Aerobic Organism A living thing that requires oxygen to carry out its metabolic functions.
Amino Acid A molecule that contains both an amine and a carboxyl functional group. Building blocks of proteins.
Ammonia A compound with the formula NH3. It is normally encountered as a gas with a char-acteristic pungent odor.
Anaerobic Without air.
Anaerobic Organism A living thing that does not require oxygen for its metabolic functions.
Bacteria Unicellular micro-organisms.
Biodegradable Material A material that can be broken down by other living organisms; usually originates from a plant or an animal.
Biodegradation The processby which organic substances are broken down by other living organisms.
Carbon A chemical element which is essential to all living systems.
Cellulose The primary structural component of cell walls in green plants.
Decomposers Organisms (often fungi, bacteria, or earthworms) that break down organic materials to gain nutrients and energy.
Decomposition A biological process through which organic material is broken down.
Degradable Able to be broken down.
Digestion The process of chemi-cally and mechanically converting a substance for use in the body.
Enzymes Proteins that catalyze chemical reactions.
Fungi Primary decomposer of organic material.
Hemicellulose One of the prima-ry structural components of cell walls in green plants.
Lignin Structural component found in the cell walls of woody plants.
Mesophilic Micro-organisms Microbes that thrive in moderate temperatures, between 25 and 40°C.
Metabolic Activity The chemi-cal reactions that occur in living cells which allow cells to grow, reproduce, respire, maintain their structures, and respond to their environments.
Microbe An organism that is microscopic (too small to be seen by the human eye).
Micro-organism An organism that is microscopic (too small to be seen by the human eye). Micro-organisms can be bacteria, fungi, archaea, or protists.
Nitrogen A chemical element which forms an essential part of amino acids and nucleic acids, both of which are essential to all life.
Non-Biodegradable A substance that cannot be broken down by living organisms; usually origi-nates from an industrial process.
Non-Organic A substance that is not derived from a living organism.
Organic Material/Organic Matter A substance derived from a living organism.
pH A measure of the acidity or alkalinity of a solution. Solutions with a pH less than 7 are acidic, while those with a pH greater than 7 are basic (alkaline). A pH of 7 is neutral.
Proteins Large organic com-pounds made of amino acids arranged in a chain and joined together by peptide bonds.
Thermophilic Micro-organisms Microbes that thrive at high temperatures, above 45°C.
GLOSSARY

ORGANICSC V S W M D