stampin’ anonymous - chic n scratch
TRANSCRIPT
Stampin’ Anonymous Tutorials ©Stampin’ UP!
Stampin’ Anonymous Bonus November 23-28, 2018 Tutorials
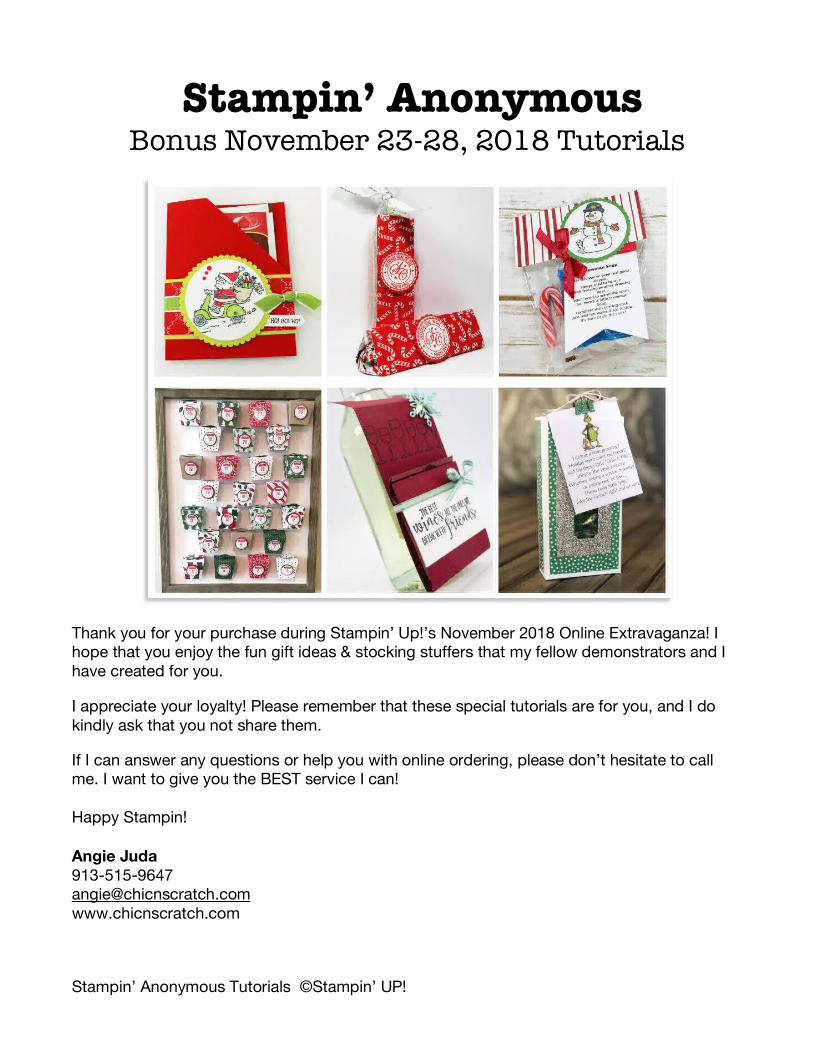
Thank you for your purchase during Stampin’ Up!’s November 2018 Online Extravaganza! I hope that you enjoy the fun gift ideas & stocking stuffers that my fellow demonstrators and I have created for you.
I appreciate your loyalty! Please remember that these special tutorials are for you, and I do kindly ask that you not share them.
If I can answer any questions or help you with online ordering, please don’t hesitate to call me. I want to give you the BEST service I can! Happy Stampin! Angie Juda 913-515-9647 [email protected] www.chicnscratch.com
Stampin’ Anonymous Tutorials ©Stampin’ UP!
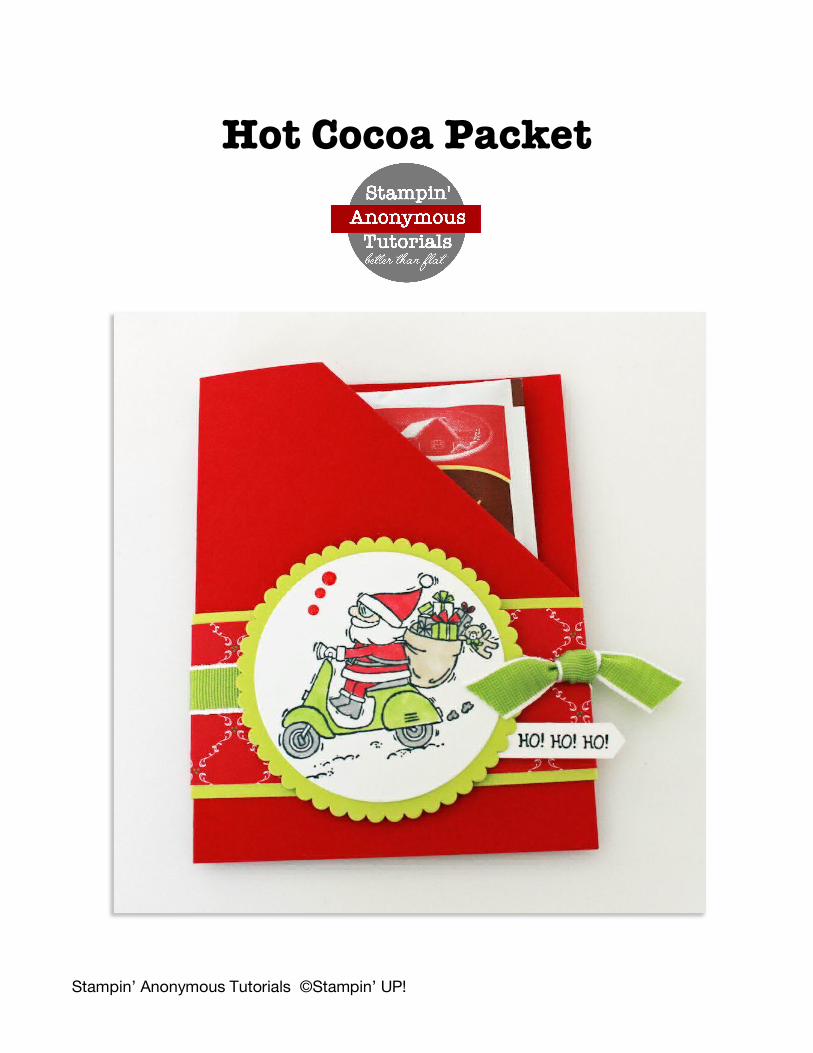
Hot Cocoa Packet

Stampin’ Anonymous Tutorials ©Stampin’ UP!
Supply List:
• 147821 So Santa Clear Mount Stamp Set (or 147824 Wood Mount) • 132708 Tuxedo Black Memento • 146876 Light Granny Apple Green Stampin’ Blends Marker • 144582 Light Crumb Cake Stampin’ Blends Marker • 147933 Light Real Red Stampin’ Blends Marker • 144595 Light Pool Party Stampin’ Blends Marker • 145054 Light Smoky Slate Stampin’ Blends Marker • 102482 Real Red Card Stock • 144245 Lemon Lime Twist Card Stock • 146921 Under the Mistletoe Designer Series Paper • 100730 Whisper White Card Stock • 147811 Santa’s Workshop Enamel Shapes • 146920 Granny Apple Green ½” Textured Weave Ribbon • 141705 Layering Circles Framelits • 141491 Classic Label Punch • 126189 Paper Piercing Tool • 126889 Stampin’ Trimmer • 138995 Tear & Tape Adhesive • 104430 Stampin’ Dimensionals • 103683 Mini Glue Dots • 143263 Big Shot • Cocoa packet
Project Details:
• Real Red Cardstock o 8-1/2” x 5-1/2”
• Lemon Lime Twist Cardstock o 2” x 8-1/2” o Scallop Circle
• Under the Mistletoe Designer Series Paper o 1-3/4” x 8-1/2”
• Whisper White Cardstock o Circle and scrap for greeting

Stampin’ Anonymous Tutorials ©Stampin’ UP!
Instructions:
1. Score the 8-1/2 x 5-1/2 piece of Real Red card stock at 4-1/4. 2. Make a tick mark at 5-3/4 on the 8-1/2 side. Rotate the card stock 45 degrees and
make a tick mark at 2-3/4. Create a diagonal score line connecting the two tick marks (see picture & diagram).
3. Fold the pocket in half on score line. Fold on diagonal score line tucking the front corner of the pocket to the inside. Adhere flap using Tear & Tape on the bottom.

Stampin’ Anonymous Tutorials ©Stampin’ UP!
4. Add the Designer Series Paper to the Lemon Lime Twist Strip, fold around pocket and burnish with bone folder. It will not meet in the middle but that’s okay because it will be covered up with the scallop circle.
5. Add the Granny Apple Green Ribbon, tying it on the right side. 6. Stamp Santa image with Memento ink and color with Stampin’ Blends Markers.
Cut it out with the Layering Circles Framelits. Add it to Lemon Lime Twist scallop circle. Add to front of pocket with Stampin’ Dimensionals.
7. Add three enamel shapes or Red Rhinestones using a Paper Piercer. 8. Stamp greeting with Memento Ink and cut it out with the Classic Label Punch.
Slide behind main image and attach with Glue Dots or a Stampin’ Dimensional. 9. Add a cocoa packet in the pocket and gift it to someone special.
Stampin’ Anonymous Tutorials ©Stampin’ UP!
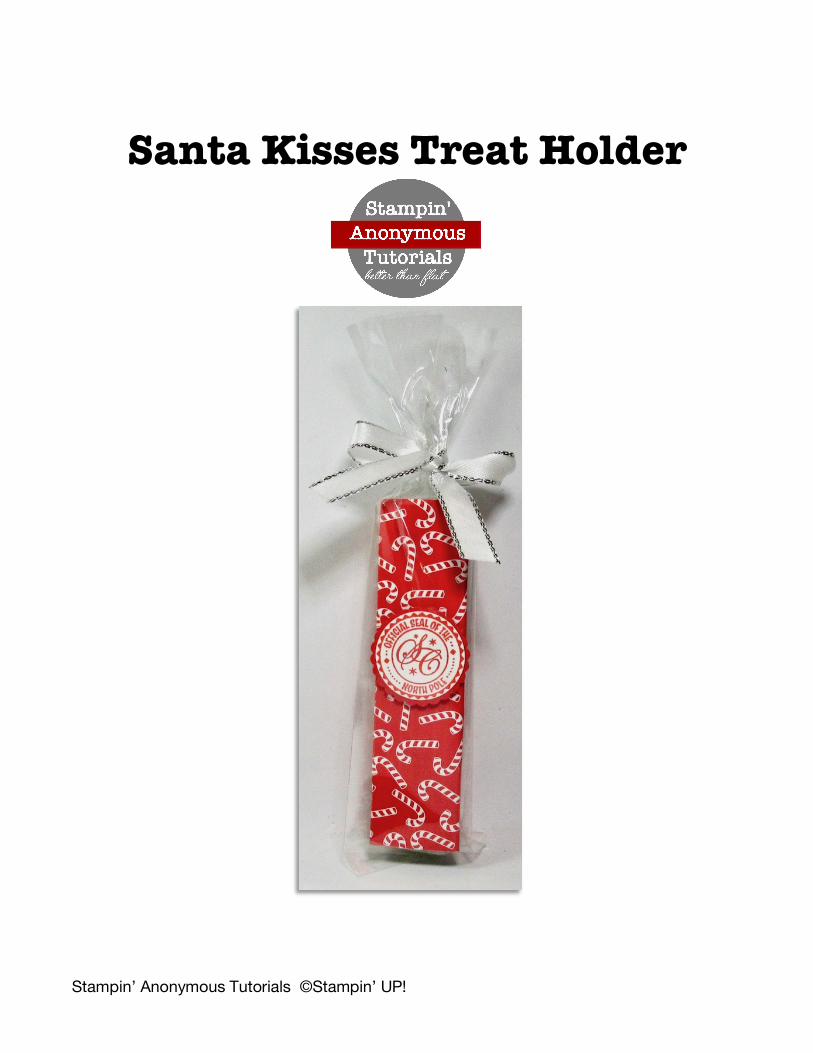
Santa Kisses Treat Holder

Stampin’ Anonymous Tutorials ©Stampin’ UP!
Supply List:
• 147690 Signs of Santa stamp set • 147050 Poppy Parade classic ink • 100730 Whisper White card stock • 119793 Poppy Parade card stock • 147809 Santa’s Workshop designer paper • 119868 1” Circle punch • 146138 1-1/8” Scallop Circle punch • 144213 3/8” Silver Metallic-Edge Ribbon • 141703 2” x 8 Cellophane Bags • 138995 Tear & Tape • 104332 Snail Adhesive • 144108 Mini Stampin’ Dimensionals • 126889 Stampin’ Trimmer
Project Details:
• Santa’s Workshop Designer paper o 3 ¼” x 4”
• Whisper White card stock o Scrap for stamping & punching 1” Circle punch
• Poppy Parade card stock o Scrap for punching 1-1/8” Scallop Circle punch
• Silver Metallic edge ribbon o Approximately 10”
Instructions:
1. Cut a piece of Santa’s Workshop designer paper at 3-¼” x 4.” Then with the 4” side across the top your Stampin’ Trimmer score at 1”, 2”, and 3”
2. Between the 3” score line to outside edge add Tear & Tape adhesive. Add four Peppermint chocolate (or any flavor) Hershey Kisses between the 1” & 2” score line
3. Fold over the outside flap and seal down the Tear & Tape tightly securing the kisses in place.
Stampin’ Anonymous Tutorials ©Stampin’ UP!
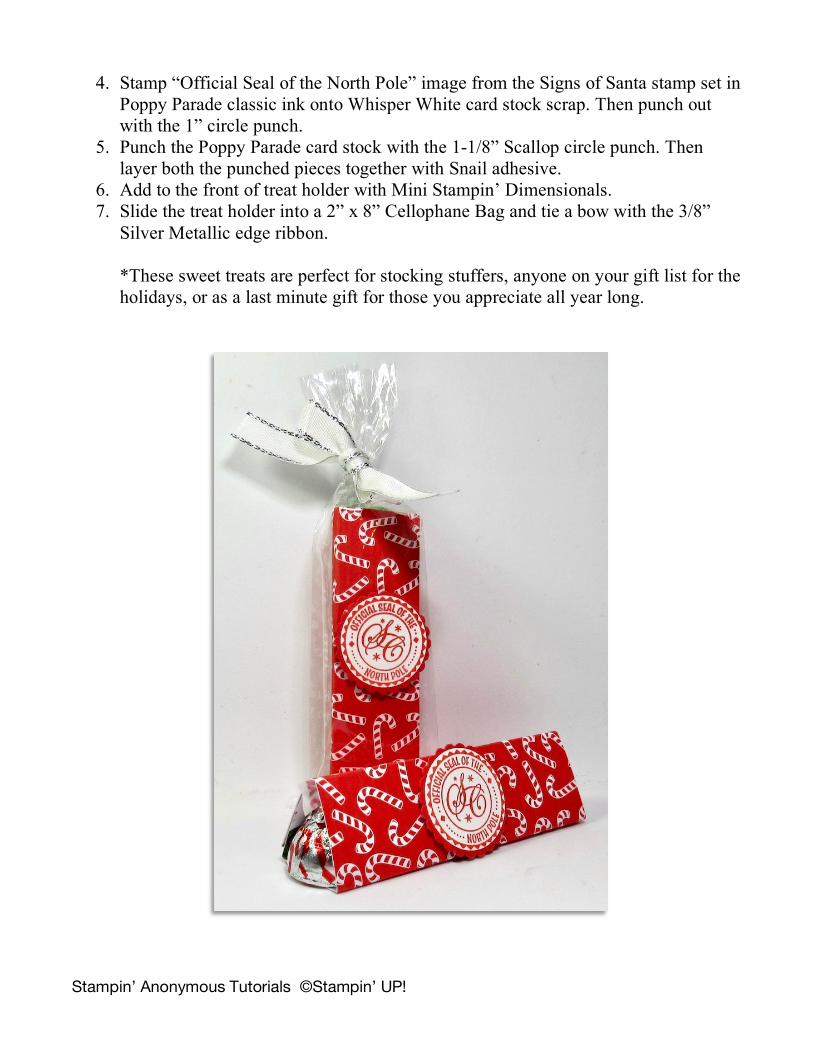
4. Stamp “Official Seal of the North Pole” image from the Signs of Santa stamp set in Poppy Parade classic ink onto Whisper White card stock scrap. Then punch out with the 1” circle punch.
5. Punch the Poppy Parade card stock with the 1-1/8” Scallop circle punch. Then layer both the punched pieces together with Snail adhesive.
6. Add to the front of treat holder with Mini Stampin’ Dimensionals. 7. Slide the treat holder into a 2” x 8” Cellophane Bag and tie a bow with the 3/8”
Silver Metallic edge ribbon.
*These sweet treats are perfect for stocking stuffers, anyone on your gift list for the holidays, or as a last minute gift for those you appreciate all year long.

Stampin’ Anonymous Tutorials ©Stampin’ UP!
Seasonal Chums Snowman Soup

Stampin’ Anonymous Tutorials ©Stampin’ UP!
Supply List:
• 144948 Seasonal Chums Stamp Set • 132708 Memento Ink Pad • 147820 Farmhouse Christmas Designer Series Paper • 100730 Whisper White Cardstock • 102584 Garden Green Cardstock • 144685 Seasonal Tags Framelits • 141705 Layering Circles Framelits • 144608 Stampin’ Blends Color Lifter • 144595 Light Pool Party Stampin’ Blends • 145054 Light Smoky Slate Stampin’ Blends • 147941 Dark Basic Black Stampin’ Blends • 146877 Dark Granny Apple Stampin’ Blends • 144577 Dark Pumpkin Pie Stampin’ Blends • 144598 Cherry Cobbler Stampin’ Blends Combo • 122334 Simply Scored Tool • 147894 Real Red Mixed Satin Ribbon • 143720 2-¼” Circle Punch • 145667 Tailored Tag Punch • 143263 Big Shot • 102619 Medium Clear Envelopes • 104332 Snail Adhesive • 104430 Stampin’ Dimensionals • Stapler, hot cocoa packet, mini marshmallow packet, mini candy cane and three
Hershey Kisses Project Details:
• Whisper White Cardstock o 8-½” x 11” for printing Snowman Soup Poem o 2-¼” square for die cutting snowman image o 2-¼” circle punch
• Garden Green o 2-½” die cut scallop circle from Layering Circles
• Farmhouse Christmas Designer Series Paper o 4-5/8” x 4 “ scored in half at 2”
Stampin’ Anonymous Tutorials ©Stampin’ UP!
Instructions:
1. Cut the adhesive strip off of a Medium Clear Envelope and fill with hot cocoa packet, mini marshmallow packet, mini candy cane and three Hershey Kisses. TIP: As of the writing of this tutorial, mini marshmallow packets and mini candy canes can be found at Oriental Trading all year round.
2. Print the attached Snowman Soup poem and cut into six 2-½” x 5-¼” panels. Dovetail the bottom of the banner. I use my Tailored Tag Punch for easy dovetails.
3. Score the Farmhouse Christmas Designer Series Paper in half at 2” and fold the Designer Series Paper over the bag. Before you staple the topper, tuck the poem under the topper. Staple, closing the bag and securing the poem, in a place that will surely be covered by your snowman decoration.
4. Die-cut your scalloped circle, punch your 2-¼” circle and adhere them together with Snail Adhesive. Adhere to the bag topper using Stampin’ Dimensionals being sure to cover your staples.
5. Tie a length of Real Red Mixed Satin Ribbon around the poem panel and snug the bow up against the bag topper as shown.
6. Stamp and color your snowman image, then die cut and adhere to the circle with Stampin’ Dimensionals.

Stampin’ Anonymous Tutorials ©Stampin’ UP!
Snowman Soup
Was told you've been real good all year,
always glad to hear it! With freezing weather drawing
near, you'll need to warm the spirit.
So, here's a little Snowman Soup,
complete with stirring stick. Just add hot water & sip it slow.
It's sure to do the trick!
Snowman Soup
Was told you've been real good all year,
always glad to hear it! With freezing weather drawing
near, you'll need to warm the spirit.
So, here's a little Snowman Soup,
complete with stirring stick. Just add hot water & sip it slow.
It's sure to do the trick!
Snowman Soup
Was told you've been real good all year,
always glad to hear it! With freezing weather drawing
near, you'll need to warm the spirit.
So, here's a little Snowman Soup,
complete with stirring stick. Just add hot water & sip it slow.
It's sure to do the trick!
Snowman Soup
Was told you've been real good all year,
always glad to hear it! With freezing weather drawing
near, you'll need to warm the spirit.
So, here's a little Snowman Soup,
complete with stirring stick. Just add hot water & sip it slow.
It's sure to do the trick!
Snowman Soup
Was told you've been real good all year,
always glad to hear it! With freezing weather drawing
near, you'll need to warm the spirit.
So, here's a little Snowman Soup,
complete with stirring stick. Just add hot water & sip it slow.
It's sure to do the trick!
Snowman Soup
Was told you've been real good all year,
always glad to hear it! With freezing weather drawing
near, you'll need to warm the spirit.
So, here's a little Snowman Soup,
complete with stirring stick. Just add hot water & sip it slow.
It's sure to do the trick!

Stampin’ Anonymous Tutorials ©Stampin’ UP!
Takeout Treat Box Advent Calendar

Stampin’ Anonymous Tutorials ©Stampin’ UP!
Supply List:
• 146499* Pick a Pennant stamp set • 147905 Santa’s Workshop Memories & More Card Pack • 147892 All is Bright Designer Series Paper • 147809 Santa’s Workshop Specialty Designer Series Paper • 146957 Sparkle Glimmer Paper • 147817 Joyous Noel 6” x 6” Glimmer Paper • 102584 Garden Green cardstock • 119793 Poppy Parade cardstock • 100730 Whisper White cardstock • 143263 Big Shot Die Cut Machine • 147927 Takeout Thinlits Dies • 146138 1-1/8” Scallop Circle Punch • 146139 1-3/8” Scallop Circle Punch • 119861 1-1/4” Circle Punch • 126889 Stampin’ Trimmer • 102300 Bone Folder • 104330 Stampin’ Dimensionals • 138995 Tear & Tape Adhesive • 104332 SNAIL Adhesive • Framed white board (purchased at Jo-Ann) • Velcro® to attach each box to white board
*Alternate suggestion if Santa’s Workshop Memories & More Card Pack is unavailable Project Details:
• All is Bright & Santa’s Workshop Specialty Designer Series Paper o 6” x 12” (one box from each piece of 6” x 12” DSP)
• Garden Green, Poppy Parade & Whisper White cardstock o 5-1/2” x 8-1/2” (of each color to punch out either 1-1/8” scallop circle or
1-1/4” circle punch) • Sparkle Glimmer Paper
o 8” x 8” (to punch out 13 1-3/8” scallop circles) • Tranquil Tide Glimmer Paper
o (2 pieces) 6” x 6” (to punch out 12 1-3/8” scallop circles)

Stampin’ Anonymous Tutorials ©Stampin’ UP!
Instructions:
1. Die-cut designer paper using Takeout Thinlit box with Big Shot. Cut 25 boxes total (2 pieces for each box).
2. Crease on all score lines with Bone Folder. 3. Use Tear & Tape Adhesive and assemble all boxes. 4. Punch out 25 circles using 1-1/4” Circle Punch and Whisper White card stock. 5. Punch out 12 scallop circles using 1-1/8” Scallop Circle Punch and Poppy Parade
card stock. Then punch out 13 scallop circles using 1-1/8” Scallop Circle Punch and Garden Green card stock.
6. Punch out 12 scallop circles using 1-3/8” Scallop Circle Punch and Tranquil Tide Glimmer Paper. Then punch out 13 scallop circles using 1-3/8” Scallop Circle Punch and Sparkle Glimmer Paper.
7. Layer either Garden Green on Sparkle Glimmer Paper or Poppy Parade on Tranquil Tide Glimmer Paper using Tear & Tape Adhesive.
8. Use Stampin’ Dimensionals to adhere Whisper White circles on top. 9. Place the boxes on framed white board in the pattern of your choice. (You may
choose to alternate between Sparkle and Tranquil Tide scallops on each box.) 10. Once a pattern has been decided upon, place a number sticker on each circle until
you have all 25 boxes numbered. 11. Use Velcro to adhere boxes to white board.

Stampin’ Anonymous Tutorials ©Stampin’ UP!
Mini Wine Bottle Tag & Treat

Stampin’ Anonymous Tutorials ©Stampin’ UP!
Supply List:
• 144999 Half Full Stamp Set • 132708 Memento Tuxedo Black Ink • 147083 Cherry Cobbler Cardstock • 100730 Whisper White Cardstock • 147097 Coastal Cabana Cardstock • 146893 Tea Room Ribbon Combo Pack (Coastal Cabana) • 126889 Stampin’ Trimmer • 103579 Paper Snips • 143263 Big Shot • 149692 Snow Fall Thinlits Dies – avail. November 2018 only • 144262 Big Shot Die Brush (optional but helpful) • 133324 Scalloped Tag Topper Punch • 119861 1-1/4” Circle Punch • 104332 Snail Adhesive • 103683 Glue Dots • Gallo Family mini wine bottles – 187 ml • Red Ghirardelli Chocolate square – dark chocolate 60% cacao
Project Details:
• Cherry Cobbler Cardstock o 2” x 8-1/2” scored at 2-1/4”, 2-1/2”, and 6-1/2”
• Whisper White Cardstock o Two pieces that are 2” x 1-1/4”
• Coastal Cabana Cardstock o Scraps for die-cutting snowflakes
• Coastal Cabana Tea Room Ribbon o 2” o 12”
Instructions:
1. After cutting and scoring Cherry Cobbler cardstock strip, punch the end closest to the 6-1/2” score mark with the Scalloped Tag Topper Punch.
Stampin’ Anonymous Tutorials ©Stampin’ UP!
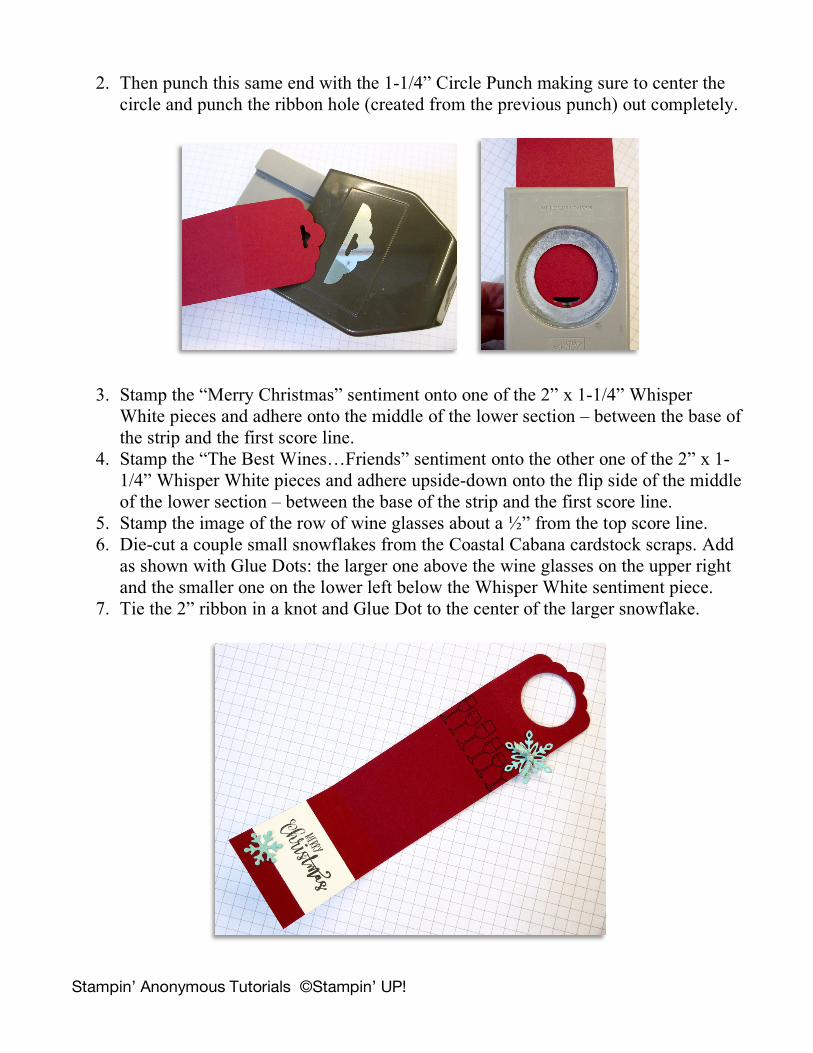
2. Then punch this same end with the 1-1/4” Circle Punch making sure to center the circle and punch the ribbon hole (created from the previous punch) out completely.
3. Stamp the “Merry Christmas” sentiment onto one of the 2” x 1-1/4” Whisper White pieces and adhere onto the middle of the lower section – between the base of the strip and the first score line.
4. Stamp the “The Best Wines…Friends” sentiment onto the other one of the 2” x 1-1/4” Whisper White pieces and adhere upside-down onto the flip side of the middle of the lower section – between the base of the strip and the first score line.
5. Stamp the image of the row of wine glasses about a ½” from the top score line. 6. Die-cut a couple small snowflakes from the Coastal Cabana cardstock scraps. Add
as shown with Glue Dots: the larger one above the wine glasses on the upper right and the smaller one on the lower left below the Whisper White sentiment piece.
7. Tie the 2” ribbon in a knot and Glue Dot to the center of the larger snowflake.

Stampin’ Anonymous Tutorials ©Stampin’ UP!
8. Fold the bottom section up to create a “pocket,” slide in the Ghirardelli chocolate square, and tie the 12” ribbon around it as shown to hold it shut.
9. Slip over a mini bottle of wine (I used a Gallo Family mini Mascato wine bottle) and give as a gift to a friend for Christmas.

Stampin’ Anonymous Tutorials ©Stampin’ UP!
Grinch Pills Box

Stampin’ Anonymous Tutorials ©Stampin’ UP!
Supply List:
• 140272 Whisper White Card Stock • 146963 2018/2020 In Color Designer Series Paper • 142314 Window Sheets • 146960 Silver Glimmer Paper • 141704 3” x 6” Cello Bags • 146932 2018/2020 In Color Binder Clips • 124262 Whisper White Bakers Twine • 147912 Merry Christmas Thinlits • 143263 Big Shot • 126889 Stampin’ Trimmer • 103579 Paper Snips • 104332 Snail Adhesive • 138995 Tear & Tape Adhesive
Project Details:
• Whisper White Card Stock o 6” x 7-1/2”
• Silver Glimmer Paper o 1-3/4” x 3-1/2”
• 2018/2020 In Color Designer Series Paper o Two pieces 2-1/4” x 4-3/4” o Two pieces 3/4” x 4-3/4”
• Window Sheet o 1-1/2” x 4”
Instructions:
1. Score the large Whisper White card stock on the 7-1/2” side at 2-1/2”, 3-1/2”, 6” and 7”.
2. Turn card stock 90 degrees and score at 1”. 3. From the bottom of this piece of card stock cut in on each score line, to create your
1” tabs (this is the bottom of the box). Create the closure tab by cutting away the bottom right corner piece. Fold on all the score lines.
Stampin’ Anonymous Tutorials ©Stampin’ UP!
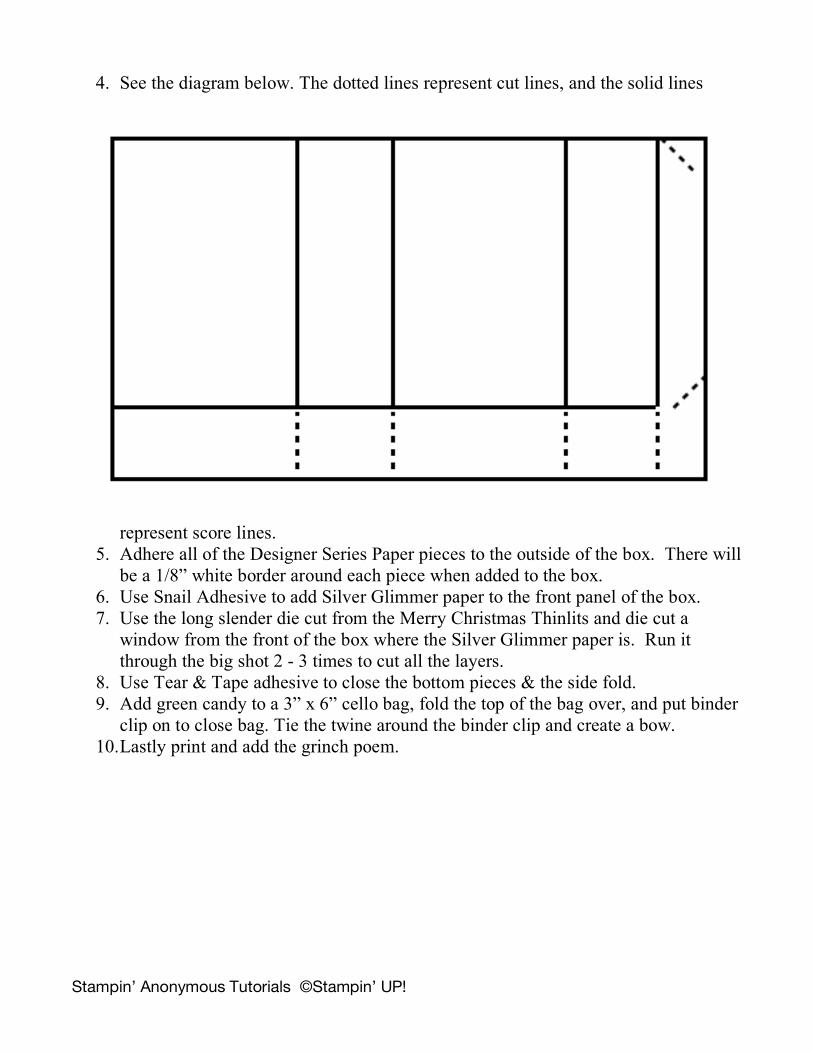
4. See the diagram below. The dotted lines represent cut lines, and the solid lines
represent score lines. 5. Adhere all of the Designer Series Paper pieces to the outside of the box. There will
be a 1/8” white border around each piece when added to the box. 6. Use Snail Adhesive to add Silver Glimmer paper to the front panel of the box. 7. Use the long slender die cut from the Merry Christmas Thinlits and die cut a
window from the front of the box where the Silver Glimmer paper is. Run it through the big shot 2 - 3 times to cut all the layers.
8. Use Tear & Tape adhesive to close the bottom pieces & the side fold. 9. Add green candy to a 3” x 6” cello bag, fold the top of the bag over, and put binder
clip on to close bag. Tie the twine around the binder clip and create a bow. 10. Lastly print and add the grinch poem.

Stampin’ Anonymous Tutorials ©Stampin’ UP!

Stampin’ Anonymous Tutorials ©Stampin’ UP!