state machine code generation in python -...
TRANSCRIPT

State Machine Code Generationin Pythonv1.0.1 (gnosis version)
By Jason Breti ([email protected]) http://breti.org/codegenCopyright 2007-2008, Jason Breti. Please refer to the license information on the next page.
SummaryCode Generation in Python shows you how to create an XML model of a state chart from a UML state chart diagram. You then learn how to use Python to code generate C++ state machine code from that XML model. Several “gotchas” are mentioned along the way that could cause you grief if you’ve never seen them before. Although implemented in C++, the approach may easily be applied to any desired language.
AcknowledgmentsI would like to thank my editors for all their great advice: Richard Schulte, Steven Solie, and es-pecially Jeremiah Wittevrongel. Thank you all! Thanks also go to Al Kelley and Ira Pohl for their “dissection” method of explaining programs.
The author may be contacted through his address: [email protected]. Suggestions for improve-ments are very welcome. Thanks for reading!
Contents
Legalese 2
Introduction 3
What is Code Generation? 3
How do I Model a State Machine so it can be Code Generated? 4
How do I Implement a State Machine? 16
How do I add my own Custom Code to the Code Generation? 38
The Final Product 53
What Problems are Best Suited for Code Generation? 55
Will I Lose my Job to Code Generation? 58
References 58

Legalese
The Text
The text of this paper is licensed under a Creative Commons Attribution-No Derivative Works 3.0 Unported License. Please consult the following link for further details.
http://creativecommons.org/licenses/by-nd/3.0/
The Code
The code in this paper is licensed under the BSD License, as described in the copy-right text below. Please consult the following link for details:
http://creativecommons.org/licenses/BSD/
Copyright (c) 2007-2008, Jason Breti (http://breti.org/codegen)
All rights reserved.
Redistribution and use in source and binary forms, with or without modification, are permitted provided that the following conditions are met:
• Redistributions of source code must retain the above copyright notice, this list of condi-tions and the following disclaimer.
• Redistributions in binary form must reproduce the above copyright notice, this list of conditions and the following disclaimer in the documentation and/or other materials pro-vided with the distribution.
• The name of the contributor may not be used to endorse or promote products derived from this software without specific prior written permission.
THIS SOFTWARE IS PROVIDED BY THE COPYRIGHT HOLDERS AND CONTRIBU-TORS "AS IS" AND ANY EXPRESS OR IMPLIED WARRANTIES, INCLUDING, BUT NOT LIMITED TO, THE IMPLIED WARRANTIES OF MERCHANTABILITY AND FITNESS FOR A PARTICULAR PURPOSE ARE DISCLAIMED. IN NO EVENT SHALL THE COPY-RIGHT OWNER OR CONTRIBUTORS BE LIABLE FOR ANY DIRECT, INDIRECT, INCI-DENTAL, SPECIAL, EXEMPLARY, OR CONSEQUENTIAL DAMAGES (INCLUDING, BUT NOT LIMITED TO, PROCUREMENT OF SUBSTITUTE GOODS OR SERVICES; LOSS OF USE, DATA, OR PROFITS; OR BUSINESS INTERRUPTION) HOWEVER CAUSED AND ON ANY THEORY OF LIABILITY, WHETHER IN CONTRACT, STRICT LIABILITY, OR TORT (INCLUDING NEGLIGENCE OR OTHERWISE) ARISING IN ANY WAY OUT OF THE USE OF THIS SOFTWARE, EVEN IF ADVISED OF THE POSSIBILITY OF SUCH DAMAGE.
State Machine Code Generation in Python (gnosis) Jason Breti
v1.0.1 page 2 of 61

Introduction
This paper will show you how to perform code generation for finite state machines (state charts). Code generation has been around pretty much as long as coding, but there have often been obsta-cles preventing code generation from being straightforward. This paper takes you through a simplified code generation scenario, teaches you the necessary technologies, and shows you how to go from model to code in a useful and flexible way that you can integrate into your develop-ment process.
When you have finished you’ll have answers to these questions:
• What is code generation, really?• How do I model a state machine so it can be code generated?• How do I code generate a state machine?• What happens when I want to add my own custom code to the code generation?• What problems are best suited for code generation?• Am I going to lose my job to code generation?
Because it’s always a good idea to provide a practical example, we will use the example of a car alarm to examine the code generation in C++ of a state machine. Car alarm state machine de-signs are relatively involved, so the example here is greatly simplified. Ideally, this removes un-necessary complexity yet still shows a useful example.
You should have a general understanding of Python, XML, and UML state charts, but you haven’t necessarily worked with code generation.
The source code in its entirety is available from my Grass Roots Code Generation site at http://breti.org/codegen.
What is Code Generation?
What exactly is code generation, anyway? The term is thrown about a lot, and it has many dif-ferent meanings depending on whether the source is a textbook, framework or tool vendor. That can make it pretty difficult to pin down a definition that satisfies everyone. For the purposes of this paper, we will use the following definition of code generation:
Code generation is the process of creating an output file through a combination of a generic form of the output file and a data model representing the variance in the output file.
This definition contains several important concepts:
• Creating an output file means that the process creates actual, physical, compilable or parseable (can be parsed) source code. This code is not a temporary or intermediate stage that requires further processing. You can feed the output into whatever compiler or parser you want.
State Machine Code Generation in Python (gnosis) Jason Breti
v1.0.1 page 3 of 61

• Generic form of the output file means that the output comes partly from a generalized form of the code. You can reuse this general form many times to create different varia-tions of the output file. This general form is called a template.
• Data model means that some form of input data exists. The template uses this data to create the output file. The term data model is used rather than the more generic model to reinforce the idea that parseable hard data is used in code generation, rather than abstract design models that, although useful, do not contribute directly to code generation.
To imagine it another way, picture code generation as the combination of the concepts in Figure 1, below.
Data Model Template Code Generated
Output File+
Figure 1: Conceptual Parts of Code Generation
How do I Model a State Machine so it can be Code Generated?
State machines are excellent candidates for code generation. This is probably because it’s rela-tively easy to go from Harel or UML state chart diagrams1 to code, compared to other UML dia-grams. Here we use UML state charts.
When designing your state machine, the most important aspect to consider is how “fancy” you want it to be. Put another way, you should ask yourself how much of the UML state chart stan-dard you want to use. Each additional aspect of state charts you add to a data model for code generation increases the complexity of the code generation process, and hence the difficulty of your implementation. Some times the benefits aren’t worth the extra complexity.
State Chart OverviewFigure 2 below shows a generic state chart labeled with selected terms. What follows is a rough overview of each of these terms and some design concerns for implementing them in the code. You can use this as a guide to the degree of complexity you want in your design.
State machines have many features, including ones that aren’t in this diagram. Frequently the tendency with UML is to use more than is strictly necessary to get the job done. This is fine when modelling, because you’re focussing on a different level of abstraction, but it can become a bigger problem when you need to implement the model in code. To keep your implementation simpler, use only those parts of the model that you absolutely need.
State Machine Code Generation in Python (gnosis) Jason Breti
v1.0.1 page 4 of 61
1 Please see the references for books explaining state chart diagrams.

State Name
onentry / entryaction()
do / doloopaction()
onexit / exitaction()
State Name
initial state state
final state
transitionentry action(s)
internal action(s)
exit action(s) event trigger [guard] /
transitionaction()
Figure 2: State Chart Essentials
The following list is a summary of the commonly used features of a state chart and the relative complexities to implement them (from least to most complex):
• state• transition• event• guard• entry action(s)• exit action(s)• transition action(s)• do loop (internal action(s) inside state)
If you have to implement one of the three action types (entry, exit, transition), the entry action is the best. Developers easily grasp the concept of executing code upon entry to a state, and so this action is easiest to maintain.
Although adding an exit action is useful under some conditions, it’s generally not needed and it can confuse developers because it occurs before a transition (which seems counterintuitive to many not familiar with state charts). An exit action is useful when you use a do loop inside the state (usually for cleanup after the do), or when nesting states and exiting from the parent state.
The scoping of a transition action is more problematic. By definition, the code in a transition action is executed outside the two states between the transition, and so should not have any visi-bility to the data in the states. This visibility rule is often violated, leading to unexpected results.
State Machine Code Generation in Python (gnosis) Jason Breti
v1.0.1 page 5 of 61

A state’s internal actions frequently surprise developers who are implementing a state chart for the first time. Many think that the internal action is a once-only execution. This is not so. The internal actions are executed continuously until an event occurs that causes a transition out of the state. Conceptually this might seem like a good idea, but it can be difficult to implement easily and generically. Internal actions are an exception to the rest of the state chart (which is based on an event driven implementation).
To simplify the solution, we’re going to exclusively use entry actions. However, you can expand the solution to include other action types if you see the need for them.
You may notice that a history state is missing from this list. History is usually used in tandem with sub-states (states nested within states). We won’t cover sub-states, and so don’t discuss his-tory in a state either.
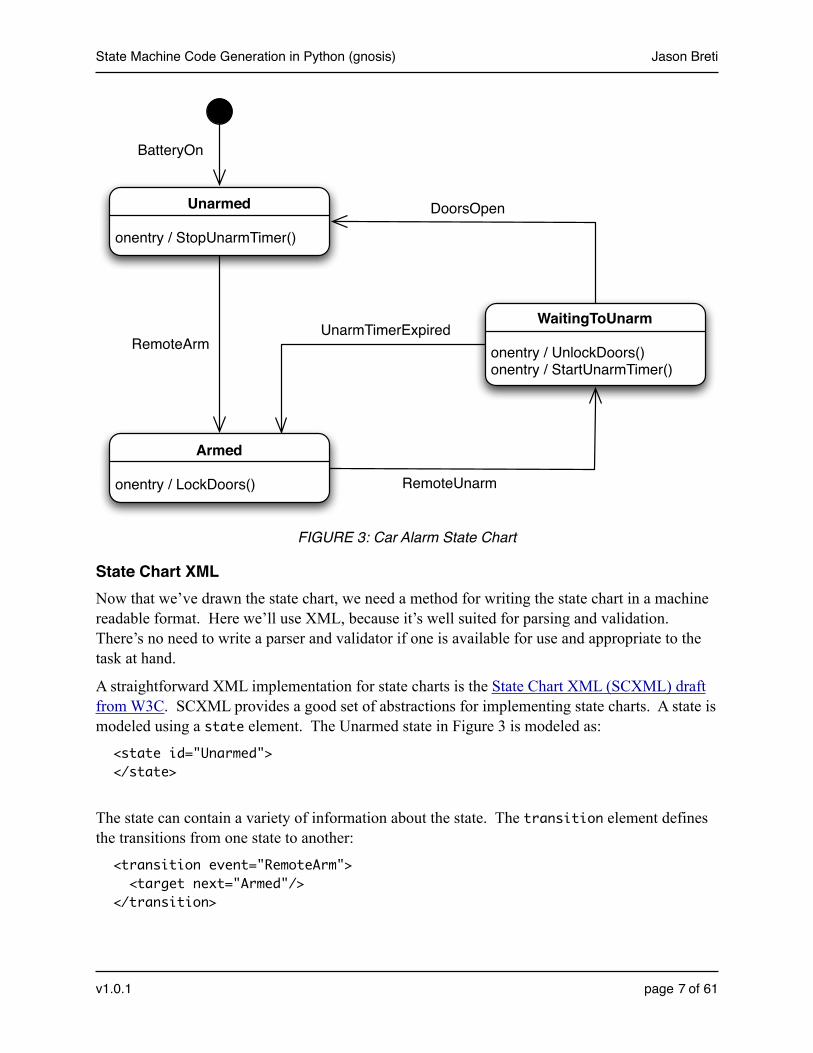
State Chart AppliedWe will use a practical example of a car alarm to demonstrate how to model a state machine and then code generate it. A car alarm has a fair degree of complexity, more than you might expect. Since we are focussing on state machine code generation and not the details of car alarms, we’ll use a highly simplified state machine for the car alarm, as shown in Figure 3.
This car alarm has four states:
• Initial: nothing much happens here.• Unarmed: the state when the alarm is not engaged. The car doors are unlocked in this
state.• Armed: the state when the alarm is engaged. The car doors are locked in this state.• Waiting To Unarm: the temporary state in which the doors have been unlocked but not yet
opened. If the doors are not opened within a certain amount of time, the system will re-arm itself by returning to the armed state and re-locking the doors.
There are many other interesting aspects of car alarms: horn timers, flashing indicators, panic buttons on the remote, error conditions (such as attempting to arm the system when the doors are open), and so on. These are not covered in this simplified design.
State Machine Code Generation in Python (gnosis) Jason Breti
v1.0.1 page 6 of 61
Unarmed
onentry / StopUnarmTimer()
Armed
onentry / LockDoors()
WaitingToUnarm
onentry / UnlockDoors()onentry / StartUnarmTimer()
RemoteArm
RemoteUnarm
UnarmTimerExpired
DoorsOpen
BatteryOn
FIGURE 3: Car Alarm State Chart
State Chart XMLNow that we’ve drawn the state chart, we need a method for writing the state chart in a machine readable format. Here we’ll use XML, because it’s well suited for parsing and validation. There’s no need to write a parser and validator if one is available for use and appropriate to the task at hand.
A straightforward XML implementation for state charts is the State Chart XML (SCXML) draft from W3C. SCXML provides a good set of abstractions for implementing state charts. A state is modeled using a state element. The Unarmed state in Figure 3 is modeled as:
<state id="Unarmed"></state>
The state can contain a variety of information about the state. The transition element defines the transitions from one state to another:
<transition event="RemoteArm"> <target next="Armed"/></transition>
State Machine Code Generation in Python (gnosis) Jason Breti
v1.0.1 page 7 of 61

The transition element includes an attribute describing the event that starts the transition. The target element indicates the state to transition into. In our example the Unarmed state transi-tions to the Armed state when the RemoteArm event occurs.
The Unarmed state also contains entry code. SCXML supports the onentry element for this pur-pose but unfortunately does not support the execution of a method call. Here we extend SCXML to add a special function element to support methods. In the Unarmed state the method Sto-pUnarmTimer() is executed on entry to the state:
<onentry> <function name="StopUnarmTimer"/></onentry>
The entire Unarmed state can be specified with the following XML:
<state id="Unarmed"> <onentry> <function name="StopUnarmTimer"/> </onentry>
<transition event="RemoteArm"> <target next="Armed"/> </transition></state>
The other states are listed in the same SCXML file. Here’s the entire state chart:
<?xml version="1.0" encoding="UTF-8"?><!-- car_alarm.xml - state chart XML file --><scxml initialstate="Initial">
<state id="Initial"> <transition event="BatteryOn"> <target next="Unarmed"/> </transition> </state> <state id="Unarmed"> <onentry> <function name="StopUnarmTimer"/> </onentry> <transition event="RemoteArm"> <target next="Armed"/> </transition> </state> <state id="Armed">
State Machine Code Generation in Python (gnosis) Jason Breti
v1.0.1 page 8 of 61

<onentry> <function name="LockDoors"/> </onentry> <transition event="RemoteUnarm"> <target next="WaitingToUnarm"/> </transition> </state> <state id="WaitingToUnarm"> <onentry> <function name="UnlockDoors"/> <function name="StartTimer"/> </onentry> <transition event="DoorsOpen"> <target next="Unarmed"/> </transition> <transition event="UnarmTimerExpired"> <target next="Armed"/> </transition> </state></scxml>
Notice that the WaitingToUnarm state has multiple functions to call. You can list these one after the other, and they’re executed in that order. Also, the initial state is specified by the initial-state="Initial" attribute on the scxml element. Otherwise it’s identical in style to the other states.
Parsing the State Chart XMLOnce you’ve determined the XML format, you need to configure a parser to read the file. In Py-thon, there are a variety of ways you can parse XML. There are low level XML libraries built into Python, which are described in Python in a Nutshell. To simplify the implementation, we’ll use a higher level open source library instead of these built-in libraries.
There are several good open source Python XML libraries. The choice of library is really more a matter of personal style than anything else. Some libraries search better and faster than others, while others use a syntax closer to the XML. Because we’re working with a small XML file, speed isn’t really a concern. There’s also the choice between SAX and DOM parsers (see XML in a Nutshell for a description of these). Again, the state chart XML file is small so we’ll use a DOM parser for simplicity. Even with very large and complex state charts, you probably won’t need to move away from these two choices.
The XML parser from the Gnosis library provides straightforward parsing capabilities and cre-ates Python objects for each element in the XML file. The attributes exist as properties of the Python objects and you can be navigate through them easily.
State Machine Code Generation in Python (gnosis) Jason Breti
v1.0.1 page 9 of 61

This loader file code creates a class Loader that can parse the XML representation of a state chart into an XML file:
# loader.py - XML Loader File
import gnosis.xml.objectify
class Loader: # this will hold the XML representation of the state chart stateChartXML = '' def load(self, fileName): stateChartGnosis = gnosis.xml.objectify.XML_Objectify(fileName) self.stateChartXML = stateChartGnosis.make_instance()
if __name__ == '__main__': loader = Loader() loader.load('./car_alarm.xml')
Breakdown of the loader.py State Chart XML Loader File
stateChartGnosis = gnosis.xml.objectify.XML_Objectify(fileName)self.stateChartXML = stateChartGnosis.make_instance()
The first line reads the file and converts it to a Gnosis XML object. The second line converts the internal representation to a Python object that can be traversed normally in Python.
Working with the Parsed State chartYou can inspect the stateChartXML object to see what it contains. Before processing the object, we should look at a summary of the key parts of the XML file, because these parts are contained in the object. The Python code queries these parts for getting data out of the XML file. The key parts are as follows:
<... initialstate="..."> <state id="..."> (there must be at least one of these [1..*]) <onentry> <function name="..."/> (there may be any number of these [0..*]) </onentry> <transition event="..."> (there may be any number of these [0..*]) <target next=".."/> </transition> </state></scxml>
As a starting point, the XML file on page 8 begins with the initialstate attribute.
State Machine Code Generation in Python (gnosis) Jason Breti
v1.0.1 page 10 of 61

<scxml initialstate="Initial">
The name of the initial state is specified in the initialstate attribute. This attribute is part of the top element of the XML file, and so occurs at the top level of the Python XML object as well. You can print it by using the initialstate variable at the top level of the object.
>> import loader>> sc = loader.Loader()>> sc.load('./car_alarm.xml')>> print sc.stateChartXML.initialstateInitial>>
The variable initialstate is not hard coded into the parser. It appears in the format specified in the XML file. If the XML file was changed to:
<scxml BeginWithThisState="Initial">
The corresponding contents of the Python XML object would be displayed as:
>> print sc.stateChartXML.BeginWithThisState
You can also iterate through the states and list them all. Referring back to the XML file, states are specified with the state element and the id attribute.
<state id="Unarmed"></state>
We can iterate through the states and print out their names as follows.
>> for state in sc.stateChartXML.state:.. print state.id, 'state'.. Initial stateUnarmed stateArmed stateWaitingToUnarm state>>
The state element is also part of the top level XML, so you can obtain it directly from the top level of the Python XML object as we did with initialstate.
The onentry and transition elements are special, in that they are optional for each state. In this case we need to check for their existence before iterating over them, or an exception will be raised. We can check for their existence with the __dict__ attribute for the object. The follow-ing code is an example of iterating over the transition elements.
State Machine Code Generation in Python (gnosis) Jason Breti
v1.0.1 page 11 of 61

>> for state in sc.stateChartXML.state:.. print state.id, 'state'.. if state.__dict__.has_key('transition'):.. for transition in state.transition:.. print ' on', transition.event, 'event’.. print ' transition to', transition.target.next, 'state'.. Initial state on BatteryOn event transition to Unarmed stateUnarmed state on RemoteArm event transition to Armed stateArmed state on RemoteUnarm event transition to WaitingToUnarm stateWaitingToUnarm state on DoorsOpen event transition to Unarmed state on UnarmTimerExpired event transition to Armed state>>
Introducing CheetahCheetah is a templating engine for Python. You can create a template you can use many times with different files. Figure 4 shows the process of using a template. The template is compiled by the Cheetah compiler into a Python version of the template. This file is then used with the Python loader file and the XML input file to code generate the output file.
A Cheetah template consists of a combination of output text and Python-like code. In fact, the Python-like code looks very much like Python because it is Python, albeit slightly modified. Al-though we’ve described Cheetah as being a compiler, this isn’t entirely accurate. Cheetah is really a Python pre-processor that is optimized for text output. So instead of the text being de-limited in quotes, as in a normal Python file, the text is the “normal” part and the Python com-mands are delimited.
State Machine Code Generation in Python (gnosis) Jason Breti
v1.0.1 page 12 of 61

Source Data.xml
Cheetah Template.tmpl Compiled Cheetah Template.py
is compiled withCheetah
Code GeneratedOutput File
Python Loader File.pyPython Generator File.py
is parsed by generates
is imported by
Figure 4: Cheetah Template Code Generation
As an example, the command output from the previous page can be translated into a Cheetah template with relative ease, as shown in the code for statechart_debugout.tmpl below. This Cheetah template produces the same output as the command from the previous page.
## statechart_debugout.tmpl - Cheetah template for states and transitions#for $state in $stateChartXML.state:$state.id state #if $state.__dict__.has_key('transition'): #for transition in state.transition: on $transition.event event transition to $transition.target.next state #end for #end if#end for
Breakdown of the statechart_debugout.tmpl Cheetah Template File
#for $state in $stateChartXML.state:#end for
Python commands are prefixed with a hash character (#for and #if). Because Python is the exception in the template and text is normal, Cheetah needs some way to determine that the for and if are Python commands. That’s what the hash does.
State Machine Code Generation in Python (gnosis) Jason Breti
v1.0.1 page 13 of 61

Python commands that result in control blocks have #end markers to designate the end of the control block (#end for and #end if). Because indentation is used for text output in the Cheetah template, we can’t use it to designate the boundaries of control blocks (as we would in regular Python).
Colons (:) are not required at the end of block statements (#for and #if) because Cheetah can determine the end of the block with the #end for and #end if. However, it is good practice to keep the colon to remind you that you’re typing a Python block.
$state.id state
Variables are prefixed with a dollar sign ($state). This applies to temporary variables and variables passed in from the loader program (discussed below). Strictly speaking, dollar signs are optional on variables when it’s clear that the text is a variable (for example, the dollar sign in the state variable in #for state …). However, it’s good practice to use the dollar sign at all times so you are clear that you’re referencing a variable and not a text word.
The Cheetah template needs to be compiled before it can be imported by Python. Use the Chee-tah compile command:
>> cheetah compile statechart_debugout.tmplCompiling statechart_debugout.tmpl -> statechart_debugout.py
This produces the file statechart_debugout.py that is imported by Python, in a similar fashion to the Compiled Cheetah Template.py file shown in Figure 4.
The generator file code below creates a class Generator that can invoke Cheetah to perform code generation and save the results.
# generator.py - generate output files
import osfrom statechart_debugout import statechart_debugout
from loader import Loader
class Generator: def generateChart(self, stateChartXML, fileName, template): template.stateChartXML = stateChartXML self.generateOutputFile(fileName, template)
def generateOutputFile(self, fileName, template): outputFile = open(fileName,'w') try: outputFile.write(str(template)) finally:
State Machine Code Generation in Python (gnosis) Jason Breti
v1.0.1 page 14 of 61

outputFile.close() if __name__ == '__main__': loader = Loader() loader.load('./car_alarm.xml')
template = statechart_debugout()
generator = Generator() generator.generateChart(loader.stateChartXML, './car_alarm.out', template)
Breakdown of the generator.py Code Generator File
from statechart_debugout import statechart_debugout
This is a new imported class statechart_debugout. It is the Compiled Cheetah Template.py file from Figure 4.
template = statechart_debugout()
This line instantiates an object template from the statechart_debugout class. It creates a Cheetah object based on the compiled Cheetah template.
def generateChart(self, stateChartXML, fileName, template): template.stateChartXML = stateChartXML self.generateOutputFile(fileName, template)
This generateChart method accepts the Cheetah object template as a parameter. The first line of the method takes advantage of Python’s dynamic programming capabilities and adds the stateChartXML attribute to the template object (also provided as a parameter to the method). Anything visible in the scope of the template object becomes visible in Cheetah. The XML object stateChartXML is now in the template namespace, and therefore accessi-ble by the template object.
def generateOutputFile(self, fileName, template): outputFile = open(fileName,'w') try: outputFile.write(str(template)) finally: outputFile.close()
This method creates the code generation output file. The write line causes the entire string output from the generateStateChart method to be written to the specified filename. The
State Machine Code Generation in Python (gnosis) Jason Breti
v1.0.1 page 15 of 61
write line looks innocuous, but it actually runs all of Cheetah. Invoking the Python str() method on the Cheetah template object causes Cheetah to execute and generate output. The output is returned as a string, which is then written to a file with the Python write() method.
The try...finally block is used in case there is an error opening or writing the file. Realis-tically, you may wish to place more checking around this.
This completes the major portions of the scripting part of code generation. At this point you know how to specify an XML file, load it into Python as a Gnosis XML object, and generate output from it using a Cheetah template.
How do I Implement a State Machine?
At this point we need to step away from code generation for a moment and think about the look of the final implementation. What should the code look like once it has been code generated? Developers unfamiliar with code generation often start by generating code. This isn’t really the best place to start, at least while you’re learning about code generation.
The best place to start for your first few code generation projects is with the target code. Hand write a bit of the target code so you know what it should look like. Once you are generally satis-fied with it, then you can refactor it to a code generation template. As one of the reviewers of this paper is wont to say: “Make it work, then make it better.” Applied to code generation: “make the code compile by hand, then make it better by code generating it.”
We will start with the design and implementation of the state machine as it appears in C++ code. There are many ways to implement a state machine. This solution is reasonably flexible, but others may be better suited to your needs, so feel free to modify it as you feel necessary. The class diagram for the solution is shown in Figure 5.
The state machine consists of a state controller, a state chart, states, and events. The first three are implemented as classes and the last as an enumerated type.
The State Controller class is the main interface exposed to an external application. The control-ler contains a State Chart class. Events may be sent to it through the triggerEvent() method. The State Chart is a container that allocates and holds pointers to all the states (m_state), and is also a table that maps the transitions between states based on incoming events (m_transitions). The State Controller class changes a state by sending the event through the transitionState() method.
Events contains all events from the state machine in an enumerated type. It is visible outside the State Controller, so you should include it in your external application when you want to send events.
State Machine Code Generation in Python (gnosis) Jason Breti
v1.0.1 page 16 of 61

+ triggerEvent()
- m_stateChartState Controller
+ transitionState()
- m_state- m_transitions- m_currentState
State Chart
+ onentry()State
1 .. *
1
Events
Figure 5: State Machine Class Diagram
The State ClassesThe State class is a base class for the states necessary for the state machine, as shown in Figure 6.
+ onentry()State
+ StopUnarmTimer()Unarmed
+ LockDoors()Armed
+ UnlockDoors()+ StartUnarmTimer()
WaitingToUnarm Initial
Figure 6: States Class Diagram
There are four child State classes, one for each of the states in Figure 3. The Unarmed, Armed, and WaitingToUnarm states each have code generated methods matching the methods provided in the car_alarm.xml file.
State Machine Code Generation in Python (gnosis) Jason Breti
v1.0.1 page 17 of 61

The State base class, SM_State contains a virtual onentry() method that is overridden by the child classes. The header file is shown below:
// sm_state.h - State Base Class Headerclass SM_State{public: SM_State (); virtual ~SM_State();
virtual void onentry (); };
There isn’t anything needed in the implementations, so they’re all empty.
// sm_state.cpp - State Base Class ImplementationSM_State::SM_State (){}
SM_State::~SM_State (){}
void SM_State::onentry (){}
The Unarmed state inherits from this class and includes the StopUnarmTimer() method from Figure 3.
// sm_state_Unarmed.h - Unarmed State Class Headerclass SM_State_Unarmed : public SM_State{public: SM_State_Unarmed (); ~SM_State_Unarmed ();
void onentry (); private: void StopUnarmTimer();};
The implementation of the onentry() method for the Unarmed state invokes the StopUnarmTi-mer() method. If you want to do something because of that event, you should write your code in the StopUnarmTimer() method.
// sm_state_Unarmed.cpp - Unarmed State Class ImplementationSM_State_Unarmed::SM_State_Unarmed (){}
State Machine Code Generation in Python (gnosis) Jason Breti
v1.0.1 page 18 of 61

SM_State_Unarmed::~SM_State_Unarmed (){}
void SM_State_Unarmed::onentry (){ StopUnarmTimer();}
void SM_State_Unarmed::StopUnarmTimer (){ std::cout << "SM_State_Unarmed::StopUnarmTimer\n"; // Write code here that stops the “Unarm” timer}
The Events FileEvents need to be visible to the outside application, as they are used to cause changes in the state machine. Here we implement events as the enumerated type SM_EVENTS in a header file. In-clude this header file in any code that needs to trigger an event in the state machine. The events from Figure 3 are implemented as follows.
// sm_events.h - State Machine Events Headerenum SM_EVENTS{ SM_EVENT_BatteryOn, SM_EVENT_DoorsOpen, SM_EVENT_RemoteArm, SM_EVENT_RemoteUnarm, SM_EVENT_UnarmTimerExpired,};
The State Chart ClassThe State Chart class holds all the states and controls transitions between states based on the events. It has the following responsibilities:
• Act as a container for the states (held in the m_states map)• Act as a container for the transitions from one state to another (held in the m_transitions
map)• Keep track of the current state (held in the m_currentState string)• Provide an initialize() method. Upon initialization, allocate memory for all the states, set
up the transitions properly and return the pointer to the initial state. The initial state was marked in the car_alarm.xml file as: <scxml initialstate="Initial">
• Provide a transitionState() method. When an event arrives, check to ensure that it is a valid event for transitioning from the current state to another. If not valid, return a false
State Machine Code Generation in Python (gnosis) Jason Breti
v1.0.1 page 19 of 61

and remain in the same state. If valid, then return a true and provide a reference pointer to the next state through the nextState parameter.
The code for the state chart class is below:
// sm_stateChart.h - State Chart Class Header#include "sm_state.h"#include "sm_events.h"#include <map>#include <string>
class SM_StateChart{public: SM_StateChart (); ~SM_StateChart ();
SM_State* initialize (); bool transitionState (SM_EVENTS transitionEvent, SM_State*& nextState);
private: // The following typedefs are used for the map that contains pointers // to the states. All these objects should be freed to prevent memory // leaks. typedef std::map<std::string, SM_State*> States;
typedef std::pair<std::string, SM_State*> StatePair;
// The following typedefs are for holding the state transition // information based on incoming Events. typedef std::map<SM_EVENTS, std::string> TransitionStep; typedef std::pair<SM_EVENTS, std::string> TransitionStepPair; typedef std::map<std::string, TransitionStep> Transitions;
typedef std::pair<std::string, TransitionStep> TransitionsPair;
// Holds pointers to all the states currently allocated. States m_states;
State Machine Code Generation in Python (gnosis) Jason Breti
v1.0.1 page 20 of 61

// Holds from each state to all other permitted states. Transitions m_transitions; // The current state for the state machine std::string m_currentState;};
The implementation for the state chart class is below:
// sm_stateChart.cpp - State Chart Class Implementation//-------------------------------------------------------------------------SM_StateChart::SM_StateChart (): m_states(), m_transitions(), m_currentState(){}
//-------------------------------------------------------------------------SM_StateChart::~SM_StateChart (){ if (!m_states.empty()) { States::iterator statesIterator; for ( statesIterator = m_states.begin(); statesIterator != m_states.end(); ++statesIterator) { delete statesIterator->second; } }}
//-------------------------------------------------------------------------SM_State* SM_StateChart::initialize (){ m_currentState = "Initial"; SM_State* initialStatePtr = 0; SM_State* tempStatePtr = 0; // Construct all the necessary states // Add Initial State to the Map tempStatePtr = new SM_State_Initial;
State Machine Code Generation in Python (gnosis) Jason Breti
v1.0.1 page 21 of 61

if (tempStatePtr != 0) { m_states.insert( StatePair("Initial", tempStatePtr) ); }
// Add Unarmed State to the Map tempStatePtr = new SM_State_Unarmed; if (tempStatePtr != 0) { m_states.insert( StatePair("Unarmed", tempStatePtr) ); }
// Repeat for the rest of the states
// Connect the states to each other through transitions TransitionStep tempTransitionStep;
// Add Transitions from the Initial state to all other permitted states tempTransitionStep.insert( TransitionStepPair(SM_EVENT_BatteryOn, "Unarmed") ); m_transitions.insert( TransitionsPair("Initial", tempTransitionStep) );
tempTransitionStep.clear();
// Add Transitions from the Unarmed state to all other permitted states tempTransitionStep.insert( TransitionStepPair(SM_EVENT_RemoteArm, "Armed") ); m_transitions.insert( TransitionsPair("Unarmed", tempTransitionStep) );
// repeat for the rest of the transitions
return initialStatePtr;}
Breakdown of the SM_StateChart::initialize() Method
// Add Initial State to the MaptempStatePtr = new SM_State_Initial;
if (tempStatePtr != 0){ m_states.insert( StatePair("Initial", tempStatePtr) );}
State Machine Code Generation in Python (gnosis) Jason Breti
v1.0.1 page 22 of 61
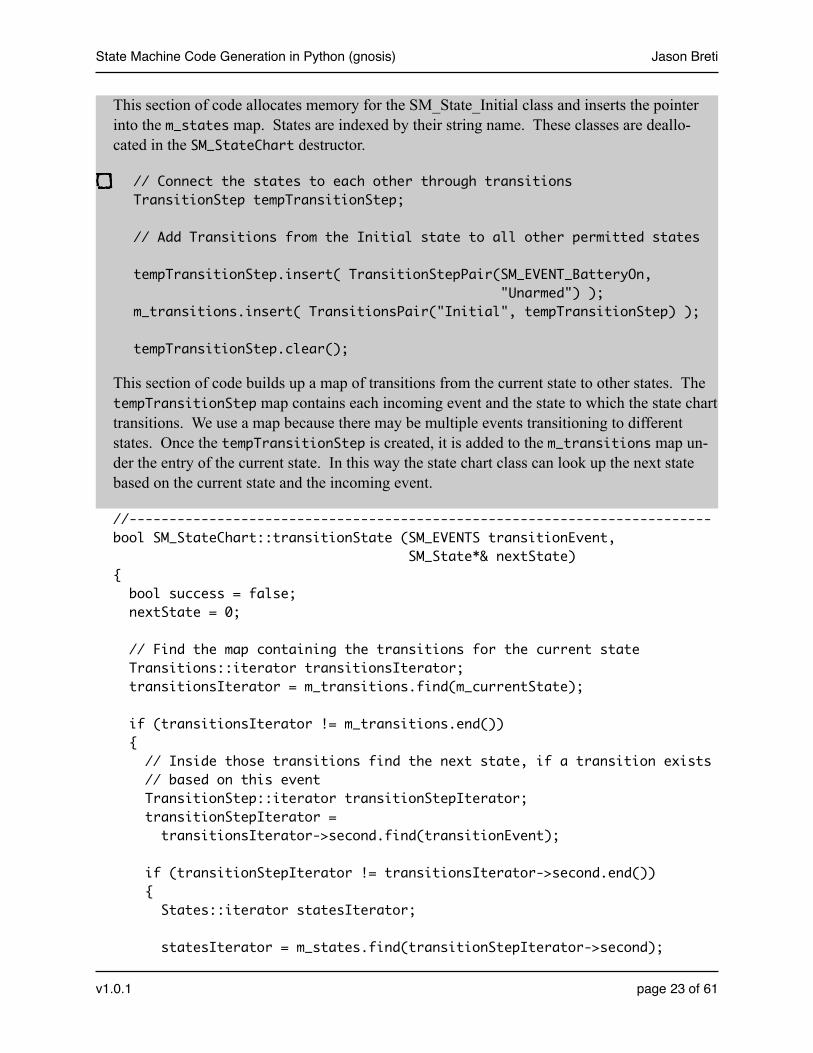
This section of code allocates memory for the SM_State_Initial class and inserts the pointer into the m_states map. States are indexed by their string name. These classes are deallo-cated in the SM_StateChart destructor.
// Connect the states to each other through transitionsTransitionStep tempTransitionStep;
// Add Transitions from the Initial state to all other permitted states
tempTransitionStep.insert( TransitionStepPair(SM_EVENT_BatteryOn, "Unarmed") );m_transitions.insert( TransitionsPair("Initial", tempTransitionStep) );
tempTransitionStep.clear();
This section of code builds up a map of transitions from the current state to other states. The tempTransitionStep map contains each incoming event and the state to which the state chart transitions. We use a map because there may be multiple events transitioning to different states. Once the tempTransitionStep is created, it is added to the m_transitions map un-der the entry of the current state. In this way the state chart class can look up the next state based on the current state and the incoming event.
//-------------------------------------------------------------------------bool SM_StateChart::transitionState (SM_EVENTS transitionEvent, SM_State*& nextState){ bool success = false; nextState = 0; // Find the map containing the transitions for the current state Transitions::iterator transitionsIterator; transitionsIterator = m_transitions.find(m_currentState); if (transitionsIterator != m_transitions.end()) { // Inside those transitions find the next state, if a transition exists // based on this event TransitionStep::iterator transitionStepIterator; transitionStepIterator = transitionsIterator->second.find(transitionEvent); if (transitionStepIterator != transitionsIterator->second.end()) { States::iterator statesIterator; statesIterator = m_states.find(transitionStepIterator->second);
State Machine Code Generation in Python (gnosis) Jason Breti
v1.0.1 page 23 of 61
if (statesIterator != m_states.end()) { nextState = statesIterator->second; m_currentState = transitionStepIterator->second; success = true; } } } return success;}
Breakdown of the SM_StateChart::transitionState() Method
Transitions::iterator transitionsIterator;transitionsIterator = m_transitions.find(m_currentState);
This code locates the section of the map related to transitions from the current state.
TransitionStep::iterator transitionStepIterator;transitionStepIterator = transitionsIterator->second.find(transitionEvent);
This code locates the event inside the previously located section.
bool SM_StateChart::transitionState (SM_EVENTS transitionEvent, SM_State*& nextState){bool success = false;nextState = 0;... if (statesIterator != m_states.end()) { nextState = statesIterator->second; m_currentState = transitionStepIterator->second; success = true; }... return success;}
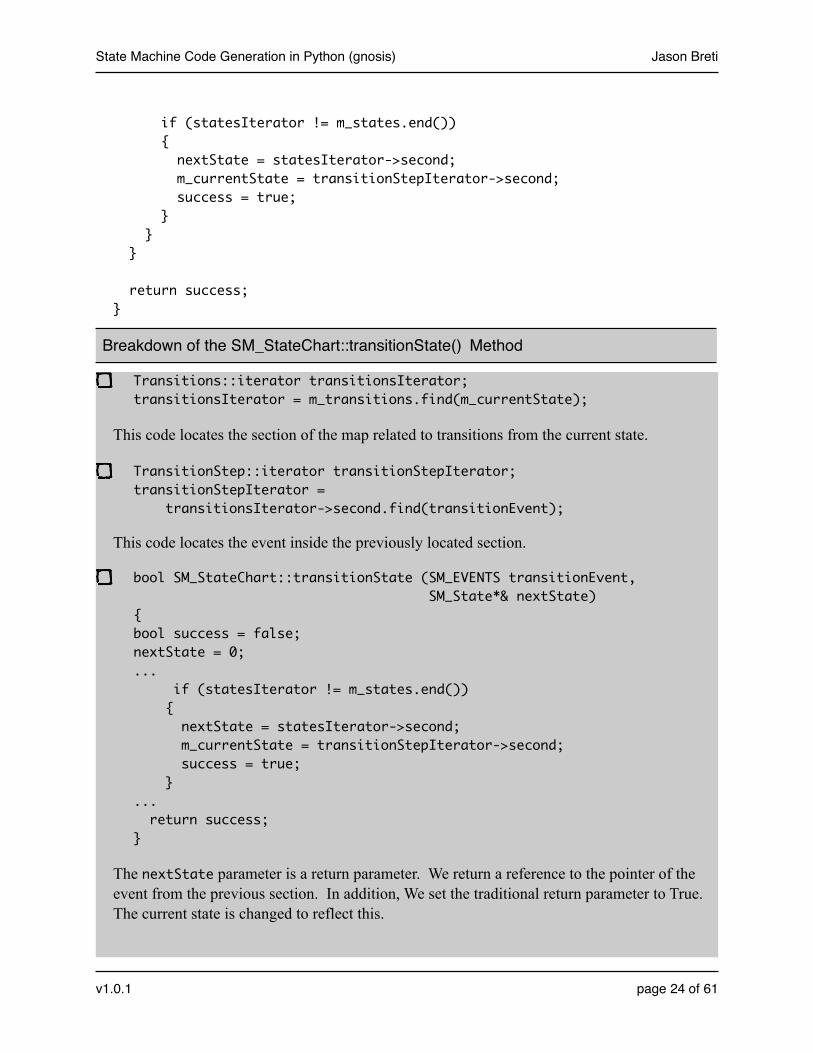
The nextState parameter is a return parameter. We return a reference to the pointer of the event from the previous section. In addition, We set the traditional return parameter to True. The current state is changed to reflect this.
State Machine Code Generation in Python (gnosis) Jason Breti
v1.0.1 page 24 of 61

If the event is not found, then nextState is set to null and we return a False, indicating that the incoming event did not result in a state transition.
The State Controller ClassThe State Chart class is a container for the state machines. It responds to requests to change state, but does not execute any state code (the code is executed by the State Controller class). The State Controller class is also the external interface to the entire state chart. It has the follow-ing responsibilities:
• Act as a container for the state chart (held in m_stateChart)• Provide an initialize() method. When you call initialize(), the state chart to initializes it-
self. and executes the initial state code.• Provide a triggerEvent() method. This provides you with an interface totrigger a change
in the state machine based on a new event.
The code for the state controller class is below:
// sm_stateController.h - State Controller Class Header#include "sm_events.h"#include "sm_stateChart.h"
class SM_StateController{public: SM_StateController (void); ~SM_StateController(void);
void initialize (void); void triggerEvent (enum SM_EVENTS event); private: SM_StateChart m_stateChart; };
The implementation for the state controller is below:
// sm_stateController.cpp - State Controller Class Implementation#include "sm_state.h" // class SM_State
SM_StateController::SM_StateController (void){}
SM_StateController::~SM_StateController (void){}
//-------------------------------------------------------------------------
State Machine Code Generation in Python (gnosis) Jason Breti
v1.0.1 page 25 of 61

void SM_StateController::initialize (void){ SM_State* initialStatePtr = m_stateChart.initialize(); // Once all the states have been initialized then transition into the // initial state if (initialStatePtr != 0) { initialStatePtr->onentry(); }}
Breakdown of the SM_StateController::initialize() Method
SM_State* initialStatePtr = m_stateChart.initialize();
if (initialStatePtr != 0){ initialStatePtr->onentry();}
The first line initializes the state chart object, causing memory to be allocated for all the states and the event transitions. The pointer to the initial state is returned so that the onentry() method for this state can be called. This is the only time an onentry() method is called when not reacting to an incoming event.
//-------------------------------------------------------------------------void SM_StateController::triggerEvent (enum SM_EVENTS event){ SM_State* nextStatePtr = 0; if (m_stateChart.transitionState(event, nextStatePtr)) { nextStatePtr->onentry(); }}
Breakdown of the SM_StateController::triggerEvent() Method
SM_State* nextStatePtr = 0;
if (m_stateChart.transitionState(event, nextStatePtr)){ nextStatePtr->onentry();}
State Machine Code Generation in Python (gnosis) Jason Breti
v1.0.1 page 26 of 61

If the transitionState() method call to the state chart is successful, then an event causes a transition from one state to another in the state chart. Call the onentry() method for the new state to execute the onentry code for that state.
You may want to to put some special handling here in case events are sent to the state machine out of order. Events of this nature could point to bugs in your car_alarm.xml implementation.
Now that you have seen the physical code of the state machine, some important points are worth noting.
First, many of the files in the implementation do not have any information related to the specifics of the state machine. Put another way, whenever the car_alarm.xml file changes, these files do not change. These files are the state machine framework. They are required to operate the state machine, but do not generally change (unless you are fixing bugs). Other files relate to the state machine and change when car_alarm.xml changes. These latter files are code generated. We can break this down as shown in Table 1.
Table 1: State Machine Framework vs Code Generated Files
State MachineFramework
State MachineCode Generation
sm_stateController.h & .cppsm_stateChart.hsm_state.h & .cpp
sm_stateChart.cpp
sm_state_Initial.h & .cppsm_state_Unarmed.h & .cppother states…sm_events.h
Secondly, there are several repetitive sections of text. You will find these highly prone to error if not changed correctly. A good example is the initialize() method in the State Chart class, where the similar code is repeated several times. When working on your development project, look for these areas as good candidates for code generation.
We now leave the state machine implementation and return to code generation, this time looking at code generating the state machine implementation itself.
Python MainWe have enough requirements now that we need a launcher program to run all the different types of codegen. The main code from now on is run through codegenmain.py, shown below:
# codegenmain.py - Perform Code Generation with Cheetah
from sm_events_h import sm_events_hfrom sm_stateChart_cpp import sm_stateChart_cppfrom sm_state_generic_h import sm_state_generic_h
State Machine Code Generation in Python (gnosis) Jason Breti
v1.0.1 page 27 of 61

from sm_state_generic_cpp import sm_state_generic_cpp
from loader import Loaderfrom generator import Generator
if __name__ == '__main__': loader = Loader() loader.load('../car_alarm.xml') generator = Generator() entireChartFiles = {'../statemachine/sm_events.h': sm_events_h(), '../statemachine/sm_stateChart.cpp': sm_stateChart_cpp() } for fileName in entireChartFiles: print 'Generating:', fileName generator.generateChart(loader.stateChartXML, fileName, entireChartFiles[fileName]) stateFiles = {'.h': sm_state_generic_h(), '.cpp': sm_state_generic_cpp() }
for extension in stateFiles: for state in loader.stateChartXML.state: fileName = '../statemachine/sm_state_' + state.id + extension print 'Generating:', fileName generator.generateState(loader.stateChartXML, state, fileName, stateFiles[extension])
Breakdown of the codegenmain.py File
from sm_events_h import sm_events_hfrom sm_stateChart_cpp import sm_stateChart_cppfrom sm_state_generic_h import sm_state_generic_hfrom sm_state_generic_cpp import sm_state_generic_cpp
As we discussed in the section on Cheetah on page 12, these files include the compiled Chee-tah templates. In Table 1 we see that there are four types of files to code generate. The first import is for code generating the sm_events.h file. The second import is for the
State Machine Code Generation in Python (gnosis) Jason Breti
v1.0.1 page 28 of 61

sm_stateChart.cpp file. The last two are generic templates for generating state .h and .cpp files. We use the title “generic” to indicate that the template itself is generic and is used to generate multiple files, a pair each for the Initial, Unarmed, Armed, and WaitingToUnarm states.
There aren’t any restrictions on the names of the Cheetah template files. We use the conven-tion to take the ≪filename≫.≪extension≫, replace the period with an underscore and use the template (.tmpl) extension. For example, the sm_events.h file is code generated by the sm_events_h.tmpl. You can use any convention that makes sense to you.
entireChartFiles = {'../statemachine/sm_events.h': sm_events_h(), '../statemachine/sm_stateChart.cpp': sm_stateChart_cpp() } for fileName in entireChartFiles: print 'Generating:', fileName generator.generateChart(loader.stateChartXML, fileName, entireChartFiles[fileName])
The entireChartFiles dictionary creates a lookup table based on the filenames and the Cheetah template classes used to code generate those file names. The for loop iterates through these and calls a generator object to perform the actual code generation, as shown in the generator.py file on page 14.
stateFiles = {'.h': sm_state_generic_h(), '.cpp': sm_state_generic_cpp() }
for extension in stateFiles: for state in loader.stateChartXML.state: fileName = '../statemachine/sm_state_' + state.id + extension print 'Generating:', fileName generator.generateState(loader.stateChartXML, state, fileName, stateFiles[extension])
This section iterates through Cheetah templates as in the previous section, but also iterates through all the states. We create filenames by adding the state name to the fileName. The generateState() method is new, but is almost identical to the generateChart() method we discussed earlier. The method is shown below and the complete generator.py is shown in the listings in the appendix. The only addition is the state variable. We will return to these rou-tines one more time in the next section.
State Machine Code Generation in Python (gnosis) Jason Breti
v1.0.1 page 29 of 61

# Additional method for the generator.py file def generateState(self, stateChartXML, state, fileName, template):
template.state = state template.stateChartXML = stateChartXML
self.generateOutputFile(fileName, template)
sm_events_h.tmpl Cheetah TemplateThe Events Cheetah template is straightforward, so it is included first. The listing is below.
//-------------------------------------------------------------------------//// File Name: sm_events.h//// This file is code generated. Do not make any changes to this file as// they will be overwritten.//-------------------------------------------------------------------------
\#ifndef SM_EVENTS_H\#define SM_EVENTS_H
enum SM_EVENTS{#set $events = [ ]#for $state in $stateChartXML.state: #if $state.__dict__.has_key('transition'): #for transition in state.transition: #if $events.count($transition.event) == 0: #silent $events.append($transition.event) #end if #end for #end if#end for#silent $events.sort()#for $event in $events: SM_EVENT_${event},#end for};
//-------------------------------------------------------------------------\#endif
Breakdown of the sm_events_h.tmpl Cheetah Template File
State Machine Code Generation in Python (gnosis) Jason Breti
v1.0.1 page 30 of 61

// This file is code generated. Do not make any changes to this file as// they will be overwritten.
This comment is a useful signal to remind you to avoid making changes to this file by hand, and use code generation instead.
#set $events = [ ]#for $state in $stateChartXML.state: #if $state.__dict__.has_key('transition'): #for transition in state.transition: #if $events.count($transition.event) == 0: #silent $events.append($transition.event) #end if #end for #end if#end for#silent $events.sort()
This section of code creates a list of the events in a temporary Python List. The code to iterate through the states is the same as on page 13. The $events list is sorted alphabetically at the end. We sort because it is a good idea to impose some order on the generated lines. The order is useful when performing a file compare on different versions of the code generated file if you wish to check for changes. If an order isn’t present then it is difficult to detect what has changed. Although we don’t cover it here, keep in mind that some applications may need a different method for specifying order, such as retaining a specific number assignment for the enumerations.
#silent $events.append($transition.event)#silent $events.sort()
These two lines make use of the #silent keyword in Cheetah. This keyword is used when a command needs to be processed without generating any output. If the #silent keyword did not exist on these lines, then they would appear as blank lines in the code generated file, be-cause Python does not generate any output for the append() and sort() methods.
#for $event in $events: SM_EVENT_${event},#end for
This loop generates the output events as shown in the events header file on page 18. Note the use of the braces around the ${event} loop variable so there is no gap between the preceding underscore and the following comma. Braces are required when there aren’t any spaces around code generated variables, so Cheetah can properly generate the output as you intend.
State Machine Code Generation in Python (gnosis) Jason Breti
v1.0.1 page 31 of 61

sm_stateChart_cpp.tmpl Cheetah TemplateMost of the sm_stateChart_cpp.tmpl file is very close to the sm_stateChart.cpp file on page 21. We will only cover a couple of topics at the end of the file.
//-------------------------------------------------------------------------//// File Name: sm_stateChart.cpp//// This file is code generated. Do not make any changes to this file as// they will be overwritten.//-------------------------------------------------------------------------
//-------------------------------------------------------------------------\#include "sm_stateChart.h" // class SM_StateChart
\#include <string>
// Include all the necessary states#for $state in $stateChartXML.state:\#include "sm_state_${state.id}.h"#end for
//-------------------------------------------------------------------------//// Class Name : SM_StateChart////-------------------------------------------------------------------------
SM_StateChart::SM_StateChart (): m_states(), m_transitions(), m_currentState(){}
//-------------------------------------------------------------------------SM_StateChart::~SM_StateChart (){ if (!m_states.empty()) { States::iterator statesIterator; for ( statesIterator = m_states.begin(); statesIterator != m_states.end();
State Machine Code Generation in Python (gnosis) Jason Breti
v1.0.1 page 32 of 61

++statesIterator) { delete statesIterator->second; } }}
//-------------------------------------------------------------------------SM_State* SM_StateChart::initialize (){ m_currentState = "${stateChartXML.initialstate}"; SM_State* initialStatePtr = 0; SM_State* tempStatePtr = 0; // Construct all the necessary states #for $state in $stateChartXML.state: // Add $state.id State to the Map tempStatePtr = new SM_State_${state.id}; if (tempStatePtr != 0) { m_states.insert( StatePair("${state.id}", tempStatePtr) ); }
#end for
// Connect the states to each other through transitions TransitionStep tempTransitionStep;
#for $state in $stateChartXML.state: #if $state.__dict__.has_key('transition'): // Add Transitions from the $state.id state to all other permitted states #for transition in state.transition: tempTransitionStep.insert( TransitionStepPair( SM_EVENT_${transition.event}, "${transition.target.next}") ); #end for m_transitions.insert( TransitionsPair("${state.id}", tempTransitionStep) );
tempTransitionStep.clear();
#end if#end for
State Machine Code Generation in Python (gnosis) Jason Breti
v1.0.1 page 33 of 61

return initialStatePtr;}
//-------------------------------------------------------------------------bool SM_StateChart::transitionState (SM_EVENTS transitionEvent, SM_State*& nextState){ bool success = false; nextState = 0; // Find the map containing the transitions for the current state Transitions::iterator transitionsIterator; transitionsIterator = m_transitions.find(m_currentState); if (transitionsIterator != m_transitions.end()) { // Inside those transitions find the next state, if a transition exists // based on this event TransitionStep::iterator transitionStepIterator; transitionStepIterator = transitionsIterator->second.find(transitionEvent); if (transitionStepIterator != transitionsIterator->second.end()) { States::iterator statesIterator; statesIterator = m_states.find(transitionStepIterator->second); if (statesIterator != m_states.end()) { nextState = statesIterator->second; m_currentState = transitionStepIterator->second; success = true; } } } return success;}
//-------------------------------------------------------------------------
Breakdown of the sm_stateChart_cpp.tmpl Cheetah Template File
m_currentState = "${stateChartXML.initialstate}";
State Machine Code Generation in Python (gnosis) Jason Breti
v1.0.1 page 34 of 61

This sets the initial state, as was done on the example on page 11.
#for $state in $stateChartXML.state: // Add $state.id State to the Map tempStatePtr = new SM_State_${state.id}; if (tempStatePtr != 0) { m_states.insert( StatePair("${state.id}", tempStatePtr) ); }
#end for
This is a familiar loop by now. There are two examples of ${state.id} with braces to show how formatting is done when there aren’t any spaces.
There is a loop through transitions below the one we just mentioned, but it doesn’t contribute anything new to the example.
sm_state_generic_h.tmpl Cheetah TemplateThe state templates are very similar to existing examples, except for the fact that a state vari-able is passed in, so they only deal with information inside a specific state.
//-------------------------------------------------------------------------//// File Name: sm_state_${state.id}.h//// This file is code generated. Do not make any changes to this file as// they will be overwritten.//-------------------------------------------------------------------------
\#ifndef SM_STATE_${state.id.upper()}_H\#define SM_STATE_${state.id.upper()}_H
\#include "sm_state.h"
class SM_State_${state.id} : public SM_State{public:
//----------------------------------------------------------------------- SM_State_${state.id} ();
//----------------------------------------------------------------------- ~SM_State_${state.id} ();
State Machine Code Generation in Python (gnosis) Jason Breti
v1.0.1 page 35 of 61

//----------------------------------------------------------------------- void onentry (); protected:
private: //----------------------------------------------------------------------- #if $state.__dict__.has_key('onentry'): #for onentry in $state.onentry: #for step in onentry.function: void ${step.name}(); #end for #end for #end if
//----------------------------------------------------------------------- // copy constructor not implemented SM_State_${state.id}( const SM_State_${state.id}& );
// assignment operator not implemented SM_State_${state.id}& operator=( const SM_State_${state.id}& );
}; // SM_State_${state.id}
//-------------------------------------------------------------------------\#endif
Breakdown of the sm_state_generic.h.tmpl Cheetah Template File
\#ifndef SM_STATE_${state.id.upper()}_H\#define SM_STATE_${state.id.upper()}_H\#include "sm_state.h"...\#endif
Remember that the hash mark is used for Cheetah commands. When you really want hash marks to appear in the code generation, prefix then with backslashes.
The Python string upper() method is a good example of using Python methods with Cheetah variables, as well as the proper placement of braces (to avoid spaces in the codegen output) in combination with these methods.
public:... void onentry ();...
State Machine Code Generation in Python (gnosis) Jason Breti
v1.0.1 page 36 of 61

private: #if $state.__dict__.has_key('onentry'): #for onentry in $state.onentry: #for step in onentry.function: void ${step.name}(); #end for #end for #end if
Note here that the onentry() method is always code generated, regardless of whether there are onentry elements in the state. We do this because the method is required by the base class. We generate the methods specified by the onentry elements in the private section of the code.
This is also a good example of indentation. We indent the Cheetah commands as they would normally be for proper logic block indentation. The void ${step.name}(); line is indented as it should appear in the codegen output, so it looks somewhat out of place with the Cheetah command indents.
sm_state_generic_cpp.tmpl Cheetah TemplateThis template is very similar to the previous template. Note, that we will return to this file in the next section.
//-------------------------------------------------------------------------//// File Name: sm_state_${state.id}.cpp////-------------------------------------------------------------------------
\#include "sm_state_${state.id}.h" // class SM_State_${state.id}
//-------------------------------------------------------------------------//// Class Name : SM_State_${state.id}////-------------------------------------------------------------------------
SM_State_${state.id}::SM_State_${state.id} (){}
//-------------------------------------------------------------------------SM_State_${state.id}::~SM_State_${state.id} (){}
//-------------------------------------------------------------------------void SM_State_${state.id}::onentry ()
State Machine Code Generation in Python (gnosis) Jason Breti
v1.0.1 page 37 of 61

{ #if $state.__dict__.has_key('onentry'): #for onentry in $state.onentry: #for step in onentry.function: ${step.name}(); #end for #end for #end if}
//-------------------------------------------------------------------------#if $state.__dict__.has_key('onentry'): #for onentry in $state.onentry: #for step in onentry.function:void SM_State_${state.id}::${step.name} (){}
//-------------------------------------------------------------------------
#end for #end for #end if
At this point you now know how to take a state based XML file and code generate all files to im-plement the state machine in code. You also know the difference between state machine frame-work files and state machine code generated files.
We now turn to one the final major topic: adding custom code to your code generation.
How do I add my own Custom Code to the Code Generation?
Up to this point you have seen how to generate a state chart, states and events from an input XML file. The output files are nice and clean and somewhat, but not entirely, useless.
Why useless? Because at the moment they are not maintainable. If we step back a minute and look at the beginning and end products, we see something like in Figure 7.
State Machine Code Generation in Python (gnosis) Jason Breti
v1.0.1 page 38 of 61

car_alarm.xml car alarm codeoutput files
CodeGeneration
Figure 7: Code Generation Magic
How do you actually use the output files? Once the files are linked into your existing build proc-ess, the first thing you will probably do is to add hand crafted code into the methods generated in the file (LockDoors(), UnlockDoors(), StartUnarmTimer() and StopUnarmTimer()). The moment this happens the car alarm output files are no longer entirely code generated. This does not seem a particularly notable moment, but it has very important implications on your develop-ment process.
Taking a look at Figure 8, you can see that the developer modified car alarm output files are no longer the same as the code generated output files. The file is now a code generated file plus hand crafted code. This is fine at present, but what happens when the state chart for the car alarm changes? For example, what happens when you add an extra state, transition or method? At this point you have a few choices:
• Modify the car_alarm.xml file and run the code generation again. Then, copy your pre-vious hand crafted code, section by section, into the freshly code generated car_alarm file. Once you are done, you may potentially add more hand crafted code based on your changes (for example, if you added a new method to the car_alarm.xml file).
• Abandon the car_alarm.xml file and maintain the hand crafted car_alarm output files yourself, adding states manually (states that used to be added by the code generation).
• Or worse, update the car_alarm.xml file (because some process says you have to) but don’t use it anymore and then maintain the hand crafted file as in the previous option. Now you are maintaining two versions of the state chart that aren’t linked to each other and one of them you don’t even use anymore!
Human nature and experience suggests to me that people start out with good intentions using the first option (or saying that they will do the first option) and then later fall back on either options two or three, depending on how restrictive a process they are using. They do this because time restrictions of a project always motivate people to take the quickest possible course of action. There is no value in maintaining two representations of a model if one of them is no longer used, so the unused part quickly falls into disuse, becomes out of date, defeating the point of code gen-eration.
State Machine Code Generation in Python (gnosis) Jason Breti
v1.0.1 page 39 of 61

CodeGeneration
DeveloperChanges
car alarm codeoutput files
with hand craftedmodifications
car alarm codeoutput files
hand craftedcode
sections
car_alarm.xml
Figure 8: Modifications to the Code Generated State Chart
A few solutions to this problem are available to you. If you are using a language that utilizes partial compilation of files or classes (like C#), then you can keep separate the code generation and hand crafted files. You can also do this with dynamic languages that have reflective proper-ties, like Python. This is great if you are writing your target code in those languages, but most languages unfortunately do not support this option.
We will discuss round trip coding as a solution. Round trip coding2 means that the hand crafted
State Machine Code Generation in Python (gnosis) Jason Breti
v1.0.1 page 40 of 61
2 You may have heard the term “round trip” before, as it is often used by tool vendors. The term has received some bad press because tools often fail to live up to the claims of the spirit of the term. In all fairness, true round tripping is very difficult to do correctly for all circumstances. Here you control all aspects of code generation, so you can ensure round tripping fits your needs.

code is reused by the code generation when the code generation changes, as shown in Figure 9.
car_alarm.xml
CodeGeneration
DeveloperChanges
car alarm codeoutput files
with hand craftedmodifications
hand craftedcode
sections
hand crafted codeis read by
Figure 9: Round Trip Code Generation
In Figure 9, you make changes to the hand crafted sections of the car_alarm output files, as you did before. The difference is that a new step is introduced where the hand crafted sections are read from the existing code generated file before a new code generated file is made. Then, once the new code generated file is made, the hand crafted sections are automatically reintroduced into the code. The result is a new version of Figure 4, as shown in Figure 10, below.
There are several steps required to perform round trip code generation. These are very similar to some aspects of code generation you have already seen. The steps are:
• Parse the code generated file for hand crafted code.• Pass the parsed hand crafted code into the Cheetah template.• Generate the output file taking into account the parsed hand crafted code.
State Machine Code Generation in Python (gnosis) Jason Breti
v1.0.1 page 41 of 61

Source Data.xml
Cheetah Template.tmpl Compiled Cheetah Template.py
is compiled withCheetah
Code GeneratedOutput File
is parsed by
is imported by
generates
hand craftedcode
sections
is parsedby
Python Loader File.pyPython Generator File.py
Figure 10: Round Trip Cheetah Template Code Generation
Parsing the Code Generated File Using MarkersWhen we parsed the XML state chart, we had a ready-built parser to handle the files. Now we need to write our own parser. Fortunately this parser is simple. We need to take a look at the nature of the code generated output file and how it is used, before we can parse the file.
Looking back again on Figure 9, we can see that the code generated output file is used in two ways: for code generation and for developer editing. To these we add a third use: compilation by the build process. These requirements mean that whatever we do to the file needs to be:
• parsable by the code generation scripts• editable by the developers• compilable by the build tools
Similar to our discussion before about maintaining a link between XML models and code gener-ated code, we can’t have any break in the development process here or files will cease to be maintained and get out of date. We need to come up with a solution that satisfies all three of the previous points.
Generally speaking, to parse anything, some form of marker is needed by a parser. In code where there are control blocks, markers designate the beginning and end of control blocks. The code examples in Figure 11 show a variety of markers used to specify control blocks:
State Machine Code Generation in Python (gnosis) Jason Breti
v1.0.1 page 42 of 61

for (int i = 0; i < 10; ++i)
{
// do something exciting
};
for i in range(1,10):
# do something very exciting
<state id="EmptyState">
<! -- do something exciting -->
</state>
begin marker end marker
(end of indent)
Figure 11: A Variety of Markers
We need to specify a set of custom markers to parse the hand crafted code in the code generated file. These markers can be anything, taking into account the three requirements mentioned in the points above. Since the markers need to be compilable, the best strategy is to put them into comments. They also need to be unique so the parser does not mistake hand crafted code and parse the wrong code. For our parser we will use the markers in Figure 12:
void UnlockDoors(void)
{
//#-#--HandCraftedCode Begin UnlockDoors
// do something exciting
//#-#--HandCraftedCode End UnlockDoors
}
begin marker end marker
Figure 12: Hand Crafted Code Markers
There are many other things we can do with the markers to make them unique, but the markers in Figure 12 will do for our purposes. Feel free to experiment with other types of markers if these aren’t satisfactory. Note that these markers are specific to languages that use “//” to specify a comment. Depending on the language, change the beginning of the marker to correspond to the format of the comment that you need.
The following Python code parses the markers:
class Parser:
State Machine Code Generation in Python (gnosis) Jason Breti
v1.0.1 page 43 of 61
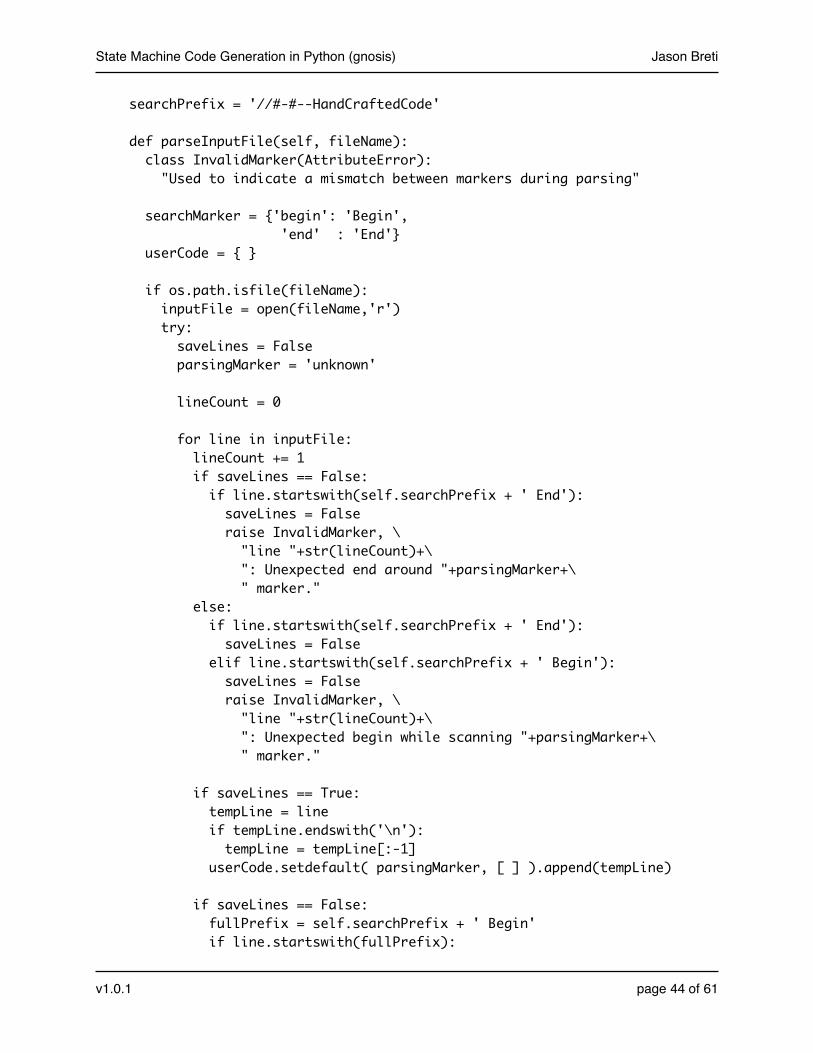
searchPrefix = '//#-#--HandCraftedCode'
def parseInputFile(self, fileName): class InvalidMarker(AttributeError): "Used to indicate a mismatch between markers during parsing" searchMarker = {'begin': 'Begin', 'end' : 'End'} userCode = { } if os.path.isfile(fileName): inputFile = open(fileName,'r') try: saveLines = False parsingMarker = 'unknown' lineCount = 0 for line in inputFile: lineCount += 1 if saveLines == False: if line.startswith(self.searchPrefix + ' End'): saveLines = False raise InvalidMarker, \ "line "+str(lineCount)+\ ": Unexpected end around "+parsingMarker+\ " marker." else: if line.startswith(self.searchPrefix + ' End'): saveLines = False elif line.startswith(self.searchPrefix + ' Begin'): saveLines = False raise InvalidMarker, \ "line "+str(lineCount)+\ ": Unexpected begin while scanning "+parsingMarker+\ " marker." if saveLines == True: tempLine = line if tempLine.endswith('\n'): tempLine = tempLine[:-1] userCode.setdefault( parsingMarker, [ ] ).append(tempLine) if saveLines == False: fullPrefix = self.searchPrefix + ' Begin' if line.startswith(fullPrefix):
State Machine Code Generation in Python (gnosis) Jason Breti
v1.0.1 page 44 of 61

parsingMarker = line[len(fullPrefix):].strip().split()[0] if userCode.has_key(parsingMarker): raise InvalidMarker, \ "line "+str(lineCount)+\ ": Duplicate marker "+parsingMarker+\ " found." else: saveLines = True finally: inputFile.close() return userCode
Breakdown of the parseInputFile() method
class InvalidMarker(AttributeError): "Used to indicate a mismatch between markers during parsing"
This creates a special exception specifically for code generation. The code raises it when end-ing markers are found before beginning markers, or a new beginning marker is found before an end marker. If raised, this exception indicates problems in your code generation templates with mismatched markers.
if os.path.isfile(fileName): inputFile = open(fileName,'r') try: ... finally: inputFile.close()
This section reads the input file if it exists. Using the try...finally block causes the file to close either on successful reading or a raised InvalidMarker exception (or any other excep-tion, for that matter).
saveLines = FalseparsingMarker = 'unknown'lineCount = 0
These are a variety of bookkeeping variables used during parsing. The first, saveLines, is a boolean indicating whether the parser should remember the lines being parsed. The parser only saves lines in between markers controlled by saveLines.
The second, parsingMarker, keeps track of the name of the marker. This name appears after the Begin and End in Figure 12. The name is used during code generation to recreate the con-
State Machine Code Generation in Python (gnosis) Jason Breti
v1.0.1 page 45 of 61

tents of the marker in the same space. Although the name of the marker may be anything, it’s a good idea to keep the name of the marker related to the method name you are parsing. There are also special sections for the include files, used when you need to add custom includes for your code that isn’t part of the code generation.
Use the third, lineCount, when raising InvalidMarker exceptions to point to the problem line. With large code generated files it is difficult to debug the exact location, so the line number is very helpful.
userCode = { }...return userCode
The parser works by filling the userCode dictionary and then returning its contents to the call-ing method. Recall that a dictionary works based on a key, where a value is held for each unique key in the dictionary. The key is the name of the marker (stored in parsingMarker). The data is a Python list of strings that contains each line in between the markers. The gener-ated uses the userCode dictionary later to recreate the hand crafted code as it was parsed.
for line in inputFile: ... if saveLines == True: tempLine = line.strip('\n') userCode.setdefault( parsingMarker, [ ] ).append(tempLine) ...
The for loop that loops through the input files is somewhat counterintuitive, so we will start with the easiest part. Assume that we have found a Begin marker (thus saveLines is true) and assigned it’s name to parsingMarker. This section of code appends the line to an entry in the userCode dictionary with a key set to the parsingMarker value.
If a carriage return exists at the end of the line, the inner if statement removes it, because a carriage return is added by Cheetah at the end of every line code generated. We will return to this point later, so we’ll just note it now and not say anything more until the breakdown sec-tion of page 51.
The setdefault() line bears comment, because it is cryptic, but powerful3. This line takes advantage Python’s ability to string multiple operations together at once for brevity. Read as English, this line performs the following steps: Look for a key set to parsingMarker in the userCode dictionary. If the key does not exist, then set the data for this key to an empty Py-thon list (the [ ]). Either way, append the contents of tempLine to the Python list referenced by this key.
State Machine Code Generation in Python (gnosis) Jason Breti
v1.0.1 page 46 of 61
3 This line is described at http://wiki.python.org/moin/KeepingListsInDictionaries

This builds a list of all parsed lines in between the markers.
Now let’s take a look at the loop again with the marker parsers included but with the error code removed.
saveLines = False...for line in inputFile: if saveLines == False: # error processing removed else: if line.startswith(self.searchPrefix + ' End'): saveLines = False elif line.startswith(self.searchPrefix + ' Begin'): # error processing removed
if saveLines == True: tempLine = line.strip('\n') userCode.setdefault( parsingMarker, [ ] ).append(tempLine)
if saveLines == False: fullPrefix = self.searchPrefix + ' Begin' if line.startswith(fullPrefix): parsingMarker = line[len(fullPrefix):].strip().split()[0] if userCode.has_key(parsingMarker): # error processing removed else: saveLines = True
There are three major blocks of parsing occurring in this loop, separated by empty lines. The last block processes a Begin marker. The first block processes an End marker. The middle block saves lines to the userCode dictionary as discussed in the previous point.
The fact that the Begin block is last and the End block first may seem counterintuitive. The Begin block parsing appears after the save to the userCode dictionary because the next line is being saved, not the current line (which contains a Begin marker). If the Begin block ap-peared before the save to the userCode dictionary then the //#-#-HandCraftedCode Begin parsingMarker would be saved as part of the userCode entry, resulting in it being dupli-cated when the generator regenerates this section.
Similarly, the End block appears before the save to the userCode dictionary because the //#-#-HandCraftedCode End parsingMarker line would be saved and result in similar duplica-tion.
Once the code is parsed, it is passed to the Cheetah template. The familiar generateChart() and generateState() methods are modified as follows:
State Machine Code Generation in Python (gnosis) Jason Breti
v1.0.1 page 47 of 61
EndMarkerBlock
SaveBlock
BeginMarkerBlock

def generateChart(self, stateChartXML, fileName, template): parser = Parser()
template.stateChartXML = stateChartXML template.userCode = parser.parseInputFile(fileName)
self.generateOutputFile(fileName, template)
def generateState(self, stateChartXML, state, fileName, template): parser = Parser()
template.state = state template.stateChartXML = stateChartXML template.userCode = parser.parseInputFile(fileName) template.searchPrefix = parser.searchPrefix
self.generateOutputFile(fileName, template)
Breakdown of the generateChart() and generateState() method modifications
parser = Parser()
This creates a parser object.
template.userCode = parser.parseInputFile(fileName)template.searchPrefix = parser.searchPrefix
The parser is invoked and the user parsed code is set as an attribute of the template. This adds to the Cheetah namespace. We use the searchPrefix is from the parser so the search flags match between the parser and the generator.
A Modified sm_state_generic_cpp.tmpl with Support for Hand Crafted CodeWe can change the Cheetah template to check for the code and generate it in place. We return to the sm_state_generic_cpp.tmpl file to show the necessary modifications.
//-------------------------------------------------------------------------//// File Name: sm_state_${state.id}.cpp//// This file is code generated. Do not make any changes to this file, // except in the areas marked by "HandCraftedCode" markers. All other // changes will be overwritten.//-------------------------------------------------------------------------
State Machine Code Generation in Python (gnosis) Jason Breti
v1.0.1 page 48 of 61

\#include "sm_state_${state.id}.h" // class SM_State_${state.id}
// Insert any developer specific includes between the markers below#set $markerName = "State_" + $state.id + "::includes"$searchPrefix Begin $markerName#if $markerName in $userCode: #for line in $userCode[$markerName]:$line #end for#else:// Hand Crafted Code Goes Here. Remove this comment when adding code. #end if$searchPrefix End $markerName
//-------------------------------------------------------------------------//// Class Name : SM_State_${state.id}////-------------------------------------------------------------------------
SM_State_${state.id}::SM_State_${state.id} (){}
//-------------------------------------------------------------------------SM_State_${state.id}::~SM_State_${state.id} (){}
//-------------------------------------------------------------------------void SM_State_${state.id}::onentry (){ #if $state.__dict__.has_key('onentry'): #for onentry in $state.onentry: #for step in onentry.function: ${step.name}(); #end for #end for #end if}
//-------------------------------------------------------------------------#if $state.__dict__.has_key('onentry'): #for onentry in $state.onentry: #for step in onentry.function:void SM_State_${state.id}::${step.name} (){
State Machine Code Generation in Python (gnosis) Jason Breti
v1.0.1 page 49 of 61

#set $markerName = $step.name$searchPrefix Begin $markerName #if $markerName in $userCode: #for line in $userCode[$markerName]:$line #end for #else: printf("SM_State_${state.id}::${step.name}\n"); // Hand Crafted Code Goes Here. Remove this comment when adding code. #end if$searchPrefix End $markerName}
//-------------------------------------------------------------------------
#end for #end for #end if
Breakdown of the sm_stateChart_cpp.tmpl Cheetah Template File
// This file is code generated. Do not make any changes to this file, // except in the areas marked by "HandCraftedCode" markers. All other // changes will be overwritten.
This file has different comments at the top. It is a reminder that you may edit code in the des-ignated sections. Code outside those sections is overwritten the next time code generation is run.
#set $markerName = "State_" + $state.id + "::includes"$searchPrefix Begin $markerName$searchPrefix End $markerName...#set $markerName = $step.name$searchPrefix Begin $markerName$searchPrefix End $markerName
These lines add the markers into the code generated file so they can later be parsed. The first set of markers are used for extra #includes to access other modules that the hand crafted code uses. The second set of markers uses the $step.name (the name of the method), since it is used for code within each of the onentry() methods. The $searchPrefix is provided from the generateState() method.
$userCode[$markerName]
State Machine Code Generation in Python (gnosis) Jason Breti
v1.0.1 page 50 of 61

This adds whatever was parsed and passed into Cheetah into the code generated file. What-ever was typed by developers in the original file (the black boxes from Figure 10) is added into the code generated file here.
The next point illustrates a couple of special considerations.
#if $markerName in $userCode: (Indentation changed for clarity) #for line in $userCode[$markerName]: $line #end for#else: // Hand Crafted Code Goes Here. Remove this comment.#end if
The $userCode[$markerName] has a carriage return at the end of the line. This is an obvi-ous point, but creates a subtle requirement for the parser. The parser must strip off the car-riage return at the end of every line, otherwise this results in two carriage returns in the gener-ated code. Each time the generator is run adds more carriage returns. This is undesirable, so the parser strips off the carriage return for the incoming lines. The discussion for the parser in the Breakdown section on page 46 describes where this carriage return is removed.
The #else in this block also has an important and subtle point. The very first time the code generation is executed, there isn’t any hand crafted code. If there isn’t any hand crafted code to parse, then there isn’t any hand crafted code to insert. It may be important to put in default code so that the code generated file will compile properly, even without hand crafted code. This is because you will want to compile your code generated code immediately (possibly for unit testing) and you won’t want to add all your hand crafted code at once. An example of default code might be a return statement to return a default value to satisfy the compiler, or a debug or log statement to remind you to fill in information for this method. Here a comment is added, but you may add any relevant code you wish.
Hand Generated BackupsWe need to cover one final topic important to code generation with hand generated code. If you look back to Figure 10, you may notice a subtle point about the hand generated code blocks: the code is not backed up. Why is this a problem? There are several unique circumstances with code generation that can cause an unfortunate loss of hand crafted code. A few examples are:
• You make a mistake while changing the Cheetah template related to the logic around out-putting the hand crafted code. This may result in all the code disappearing from your code generated output file.
• You change the input XML file to remove a state and all the code related to that state (both generated and hand crafted code) disappears from your code generated output file.
State Machine Code Generation in Python (gnosis) Jason Breti
v1.0.1 page 51 of 61

• You make a spelling error to an existing method name while changing something else in the input XML file. The hand crafted code from the original method name disappears from your code generated output file.
As you can see, these are all related around unintended errors in your input files or scripts, but they can have drastic consequences on a large portion of your code. Depending on how you work, you can use source control to go back to a previous version. However, realistically you are not saving versions all the time during development, and you will be caught with this when you least expect it.
For these reasons, you need to add backup protection into your code generation scripts so your code does not disappear when you don’t want it to disappear. The mechanism below creates backups in the format ≪outputfile≫.backup.###, where ≪outputfile≫ is the name of the code generated output file and ### is a number starting at 001 and increasing from then onwards. Be-fore new code generation is run, the code generated output file is saved to this file name.
def getBackupFileName(self, fileName): startVersion = 1 backupFileName = fileName + '.backup.' + '%03d'%startVersion while os.path.isfile(backupFileName): startVersion += 1 backupFileName = fileName + '.backup.' + '%03d'%startVersion
return backupFileName
Breakdown of the getBackupFileName() method
backupFileName = fileName + '.backup.' + '%03d'%startVersion
This generates a string based on the input filename and appends the .backup. and a zero de-limited number at the end. If the input fileName has a path then the path is the same, since the front of the fileName string is not changed.
Note that Python will happily output versions over 999, but they will no longer be zero delim-ited. You may not want to keep more than 999 versions of a file around in your folders!
The generateOutputFile() method is modified to backup the file as shown below:
def generateOutputFile(self, stateChartXML, fileName, userCode): backupFileName = self.getBackupFileName(fileName) os.rename(fileName, backupFileName) outputFile = open(fileName,'w') try: outputFile.write(self.generateStateChart(stateChartXML, userCode)) finally:
State Machine Code Generation in Python (gnosis) Jason Breti
v1.0.1 page 52 of 61

outputFile.close()
The Final Product
At this point you have everything you need to perform code generation. However, the solution was provided to you piecemeal so this section shows the final code generation files with all changes and modifications applied. Figure 13 shows an overview of all the files and how they relate to one another.
The files fall into one or more of the following categories:
• Files that are code generated or partially code generated (white)• Files that are part of the state machine framework and not normally changed (grey)• Files that are edited (hand crafted) by the developer (black)
To maintain the state machine, you need only change the car_alarm.xml file and the hand crafted sections in each of the states. Other than those sections, the code generator script will take care of any changes based on car_alarm.xml.
State Machine Code Generation in Python (gnosis) Jason Breti
v1.0.1 page 53 of 61

car_alarm.xml
CodeGeneration
sm_stateChart.cpp
code generated
hand crafted
Developer Code
sm_stateChart.h
sm_state.h & .cpp
state machineframework
sm_state_Initial.cppsm_state_Unarmed.cpp
sm_state_Armed.cppsm_state_WaitingToUnarm.cpp
sm_state_Initial.hsm_state_Unarmed.h
sm_state_Armed.hsm_state_WaitingToUnarm.h
sm_events.h
Note: Some file connections not shown for clarity
sm_stateController.h & .cpp
Figure 13: Final Layout of all Compiled Files
The code generation cloud in the figure contains all the codegen files, the contents of which are shown in Figure 14.
State Machine Code Generation in Python (gnosis) Jason Breti
v1.0.1 page 54 of 61
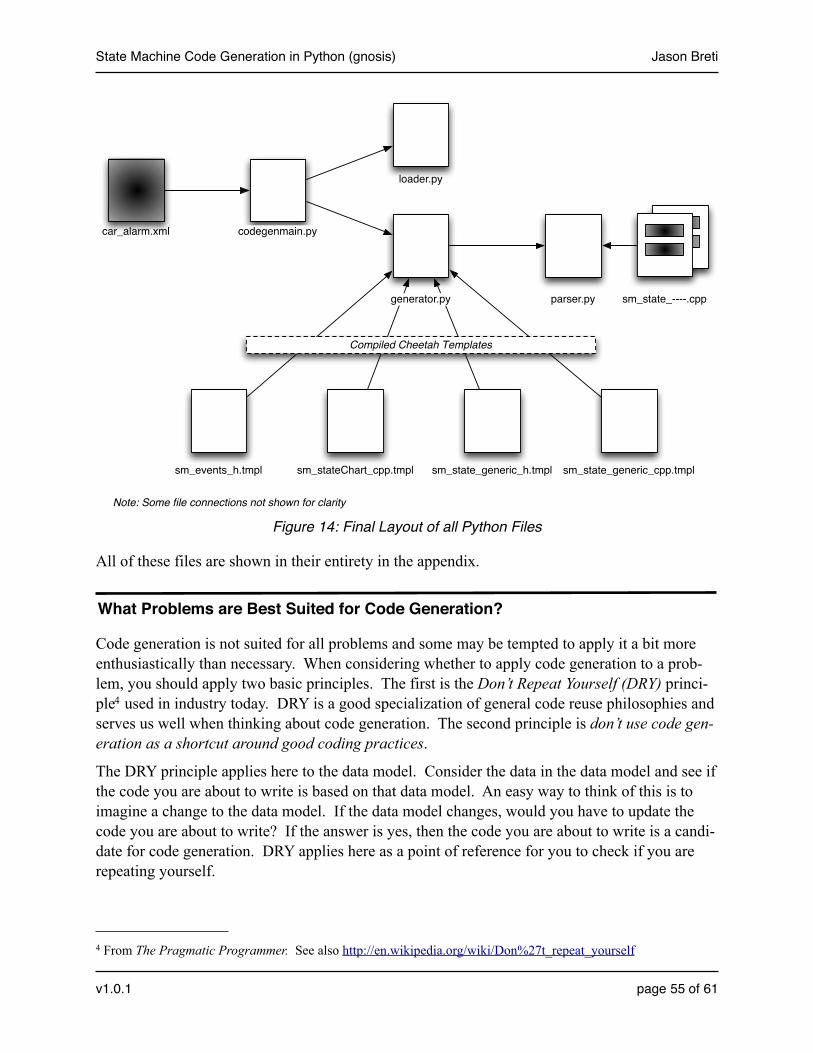
car_alarm.xml
loader.py
codegenmain.py
parser.py
sm_stateChart_cpp.tmplsm_events_h.tmpl sm_state_generic_h.tmpl sm_state_generic_cpp.tmpl
generator.py
Compiled Cheetah Templates
sm_state_----.cpp
Note: Some file connections not shown for clarity
Figure 14: Final Layout of all Python Files
All of these files are shown in their entirety in the appendix.
What Problems are Best Suited for Code Generation?
Code generation is not suited for all problems and some may be tempted to apply it a bit more enthusiastically than necessary. When considering whether to apply code generation to a prob-lem, you should apply two basic principles. The first is the Don’t Repeat Yourself (DRY) princi-ple4 used in industry today. DRY is a good specialization of general code reuse philosophies and serves us well when thinking about code generation. The second principle is don’t use code gen-eration as a shortcut around good coding practices.
The DRY principle applies here to the data model. Consider the data in the data model and see if the code you are about to write is based on that data model. An easy way to think of this is to imagine a change to the data model. If the data model changes, would you have to update the code you are about to write? If the answer is yes, then the code you are about to write is a candi-date for code generation. DRY applies here as a point of reference for you to check if you are repeating yourself.
State Machine Code Generation in Python (gnosis) Jason Breti
v1.0.1 page 55 of 61
4 From The Pragmatic Programmer. See also http://en.wikipedia.org/wiki/Don%27t_repeat_yourself

For example, assume that you are writing a protocol between a client and a server, as shown in Figure 15.
hand craftedserver code
Server Client
hand craftedclient code
server messagesending
with hand craftedmodifications
client messagereceiving
with hand craftedmodifications
messageformat
messageformat
code generated
hand crafted
client messagereception
with hand craftedmodifications
server messagecreation
with hand craftedmodifications
Figure 15: Server/Client Codegen Example
You intend to implement the protocol in a data model and want to use code generation. Roughly speaking, if you consider such an implementation, you may think of the following places where you might repeat yourself (there are others):
• The server code for creating the messages sent to the client• The server code for sending the messages to the client• The client code for receiving the messages from the server• The client code for decoding the messages from the client.• The message data structures on the server and the client used in the protocol
This is a good candidate for code generation, because if you ever change an aspect of the proto-col, it may conceivably ripple through to all these portions of the code, and you might miss something if you hand fix four out of the five locations but not the fifth one. This becomes even
State Machine Code Generation in Python (gnosis) Jason Breti
v1.0.1 page 56 of 61

more problematic when you didn’t write the protocol in the first place and discover you missed that fifth fix because you didn’t know about it!
Although this might be considered a slightly broader interpretation of DRY, you can see how such a solution would benefit from changes to one data model file applied to five areas using code generation.
There are limits to this principle, however. The second principle we covered is that code genera-tion should not be used as a way to get around good design principles. In Figure 15, you may notice that the message formats seem to be included in the server sending/client receiving code. This isn’t a good overall design principle because it causes you to update this code when the pro-tocol changes. Depending on the implementation language, there are probably a variety of ways that this can be solved so you can avoid changing these files. Use proper encapsulation rather than code generation to solve this problem.
As a second example, presume that every piece of data in the data model results in a line of code, such as in Figure 16.
<music>
<song>
<title>The First One</title>
<cost>1.99</cost>
</song>
<song>
<title>The Second One</title>
<cost>2.99</cost>
</song>
<song>
<title>The Third One</title>
<cost>3.84</cost>
</song>
<song>
<title>The Fourth One</title>
<cost>4.12</cost>
</song>
</music>
switch (title)
{
case "The First One":
cost = 1.99;
break;
case "The Second One":
cost = 2.99;
break;
case "The Third One":
cost = 3.84;
break;
case "The Fourth One":
cost = 4.12;
break;
default:
cost = 0.00;
}
Code
Generation
Figure 16: Do Not Codegen This
Here a data model containing the cost of songs is code generated into a switch statement that is compiled into some other code. This creates maintenance problems and will lead to future de-velopers updating the code on the right without updating the code on the left. Designers will probably also wince at the code on the right and refactor it into some other form of lookup table, but that is a different matter.
A far better approach is to read the data from the XML file into an internal structure when you need it (or save it if you have the memory). You don’t need to use code generation to solve this problem.
State Machine Code Generation in Python (gnosis) Jason Breti
v1.0.1 page 57 of 61

Admittedly, the previous examples are simplistic, but they do a good job of presenting the prin-ciples to avoid. Most of the time the decisions are more subtle and the decision whether to apply code generation is less clear. Hopefully this gives you an appreciation of the problem space.
Will I Lose my Job to Code Generation?
I threw in this question for fun, but I am asked it surprisingly often. The question seems to be related to a general uneasiness in the use of, for want of a better phrase, abstracting technologies. Abstracting technologies are those that take an existing problem and solve it at a higher level of abstraction, which presumably makes it easier to solve, requires less effort and, taken to an ex-treme, seems to imply that people are out of a job because of overall lower workload.
To put the question in perspective, I think it might be helpful to look at the most common ab-stracting technology in use in the development community: the higher level development lan-guage. It doesn’t really matter which language we are talking about: dynamic languages like Py-thon, Javascript or Lua or static languages like C++ or C, they are all higher level than assembly language (some more so than others). There was a time, some readers will remember, that learn-ing assembly language was required because there was no language above it (or at least not one for the processor you were using). When higher level languages came into existence, a Great Debate ensued as to whether or not higher level languages were “good enough” to express the richness of what was necessary, and well, perhaps we should just stick with assembly. To some extent this lack of richness was true, at least for the original higher level compilers. This is why C and C++ have the asm keyword, for example. When compilers weren’t efficient enough then developers had to go back to writing assembly inline.
Thinking about the question again, you can see that jobs were not lost when we moved from as-sembly development to higher level code development. Rather, the problems were solved at a different level and new skills were learned. Many tasks were made easier and so developers could focus on more difficult problems and not have to worry about the messy details of assem-bly, trusting that the compilers would do the work for them.
Code generation is much the same issue. Developers will be given harder (and hopefully inter-esting) problems to solve, because of the higher level of abstraction. They can then trust that these code generators will do the abstracting work for them.
Whether or not that answers the question is of course up to you.
References
There are a wide variety of references that are related to code generation, since it covers so many areas of interest. I hope you find the following references helpful.
Code Generation Theory ReferencesGood code generation references are hard to come by. There isn’t really that much out there that I’ve found useful. If you are interested in the theoretical underpinnings of code generation, Gen-
State Machine Code Generation in Python (gnosis) Jason Breti
v1.0.1 page 58 of 61

erative Programming is an excellent, though heavy, book to digest. Many of the principles of compiler development work well for code generation, since they share much in kinship. Louden’s Compiler Construction is a good theoretical book for thinking about the more ad-vanced parts of analyzing data models and generating code. Any good compiler book would probably serve equally well.
• Krysztof Czarnecki, Ulrich Eisenecker, Generative Programming(Addison Wesley Professional, 2000), ISBN 0-201-30977-7http://www.awprofessional.com/bookstore/product.asp?isbn=0201309777&rl=1
• Kenneth Louden, Compiler Construction(PWS Publishing Company, 1997), ISBN 0-534-93972-4
Python ReferencesThere are several great Python references, both on and off the web. If you are learning Python, I recommend the excellent online book Dive into Python (or buy the print copy and support the author) or Learning Python. If you are experienced and need good references, take a look at Py-thon in an Nutshell or the online Python documentation at the Python website.
• Mark Lutz, David Ascher , Learning Python, Third Edition (O’Reilly, 2007), ISBN 0-596-51398-6http://www.oreilly.com/catalog/9780596513986/
• Mark Pilgrim, Dive into Pythonhttp://www.diveintopython.org/
• Alex Martelli, Python in a Nutshell, Second Edition (O’Reilly, 2003), ISBN 0-596-10046-9http://www.oreilly.com/catalog/pythonian2/index.html
• Python Documentation Home Pagehttp://python.org/doc/
Cheetah ReferencesThe Cheetah documentation at the home website is quite good, so I recommend it as your source of reference.
• Cheetah Documentation Home Pagehttp://www.cheetahtemplate.org/learn.html
XML ReferencesXML can be a big beast, but that doesn’t mean that you need to use all of it. My advice to you is to keep your XML as simple as possible to maintain an overall lower stress level (that, and lots of soothing tea). XML in a Nutshell is a good reference for all the XML goodness you can think of. For other goodness, check out Murchie’s for the tea.
State Machine Code Generation in Python (gnosis) Jason Breti
v1.0.1 page 59 of 61

The Gnosis XML documentation is pretty sparse, but David Mertz’s Charming Python essays on the same page do a good job of introducing you to the library. You’ll have to dig through the code if you want to use more advanced parts of the library, however.
Another excellent XML library for Python is called ElementTree. As of Python 2.5 ElementTree is included in the main python base. I tend to prefer ElementTree but I also recognize that Gno-sis works well for simple tasks and training. An alternate version at my website implements the code in ElementTree. If you have to pick one, prefer ElementTree over Gnosis.
• Elliotte Rusty Harold, W. Scott Means, XML in a Nutshell, Third Edition(O’Reilly, 2003), ISBN 0-596-00764-7http://www.oreilly.com/catalog/xmlnut3/index.html
• Gnosis Documentation and Download Home Page(including selected Charming Python and XML Matters essays)http://gnosis.cx/download/
• ElementTree Documentation and Download Home Pagehttp://effbot.org/zone/element-index.htm
• ElementTree on the Python main documentation pagehttp://www.python.org/doc/2.5/lib/module-xml.etree.ElementTree.html
• Murchie’s Home Page(I especially recommend the No. 10 Blend but since there are so many O’Reilly books in this reference, I would be remiss if I didn’t mention the very good O’Reilly Blend.)http://www.murchies.com/
State Chart ReferencesMy favourite UML book is The Unified Modeling Language User Guide, but there are many good UML books that explain state charts well. The draft reference for the State Chart XML may be found on the W3C website.
• Grady Booch, James Rumbaugh, Ivar Jacobson, The Unified Modeling Language User Guide, Second Edition(Addison Wesley Professional, 2005), ISBN 0-321-26797-4http://www.awprofessional.com/bookstore/product.asp?isbn=0321267974&rl=1
• State Chart XML Documentation Home Pagehttp://www.w3.org/TR/2005/WD-scxml-20050705/
One Last ReferenceI am aware of one published book on code generation with Python. Unfortunately, it appears to be out of print and I cannot locate a copy. I have not read it so I cannot recommend it (actually I can’t say anything about it other than it exists). You may be able to locate a used copy if you are lucky.
State Machine Code Generation in Python (gnosis) Jason Breti
v1.0.1 page 60 of 61

• Jack Herrington, Code Generation In Action(Manning Publications Co., 2003), ISBN 1930110979http://www.manning.com/herrington/
Appendix: ”The Final Product” File Listings
This section contains the full listing of all code discussed in the “The Final Product” section.
This source code is also included at http://breti.org/codegen. The code is released under the BSD license, so have fun playing with it. The files included there are:
• Input state chart file• car_alarm.xml
• Python codegen files• codegenmain.py• loader.py• generator.py• parser.py
• Cheetah Template Files• sm_events.tmpl• sm_stateChart_cpp.tmpl• sm_state_generic_h.tmpl• sm_state_generic_cpp.tmpl
• Test File• main.cpp
• State machine framework files• sm_stateController.h• sm_stateController.cpp• sm_stateChart.h• sm_state.h• sm_state.cpp
State Machine Code Generation in Python (gnosis) Jason Breti
v1.0.1 page 61 of 61