step by step - dr. schutz
TRANSCRIPT

Step by StepColour floor design and renovationof resilient & resin floorsexplained step by step

www.dr-schutz.com

04-05
06-08
09
10-11
12-13
14-15
Stripping and rinsing the floorBefore a floor is sealed, it has to be stripped and rinsed, respectively neutralised. Here we tell you how to do it.
PU Design and colour chipsAn old floor is redesigned using a coloured 2 part PU Sealer and coloured chips.
Logo embedding system This groundbreaking technology offers the possibility to embed high qua-lity logos, signs, marks or other bespoke designs under a protective layer of PU Sealer. It’s unique, fast and easy to apply.
Routine cleaning and stain removalTo guarantee the benefits of Dr. Schutz sealers long-term, the right day-to-day cleaning procedure is of paramount importance. Stains and marks can also be removed easily and effectively using our special stain removal agents. Have a look how it works.
The Dr. Schutz ServiceThanks to a modern R&D department and our co-operation with the world’s leading floor manufacturers we are able to guarantee the effec-tiveness of all our products. Judge for yourself
Partners to installers and professionals Our team of qualified floor care experts is always there to help you. Just contact us.
Content

04
Preparation
04
Initial situation You have probably seen this kind of floor before. It looks thoroughly worn and old fashioned too. With the help of a high quality coloured sealer and a colour chip combination this run down floor will be given a fresh look as well as a new, highly wear resistant surface.
Stripping First of all you must strip the floor to remove old polish layers. For resilient floors use Turbo Strip and mix it with water in a ratio of 1:1 to 1:5 (depending on the level of soiling). In case of extreme soling Turbo Strip can also be applied undiluted.
Applying the stripper
The mixture of stripper and water is poured onto the floor and applied across the entire area by using the Dr. Schutz Quickstep applicator. Allow Turbo Strip to operate for approximately 5-15 minutes. It will dissolve old polish layers, which must be removed to ensure optimal bonding of the subsequent sealer coats. Work area by area without allowing the mixture to dry on the floor.
Manual stripping of the edges and corners Corners and edges, which cannot later be reached by a rotary disc machine, are stripped with the help of Dr. Schutz Padmaster and a small green or grey renovation pad. Please make sure that any residues of old polish layers are fully removed in the process.

Preparation
Mechanical stripping of the surface Use the SRP 2 rotary disc machine and fasten a grey pad onto the plate. By pulling the lever on the left hand side the cleaning liquid is applied onto the floor. Use a figure of eight technique with the machine and move at an even speed across the whole floor.If you gently push downwards on the handle of the SRP2, the machine moves to the right and if you push upwards, it moves to the left.
Removing residues A mixture of stripper, dirt and old polish residues is now covering the floor. This is removed using the Dr. Schutz Professional Wet/ Dry Vacuum Cleaner or the Premium F 2 Spray Extraction Machine.
Rinsing the floor (neutralisation) After stripping the floor must be rinsed or neutralised. For this purpose use clear water and wipe over the floor using the Dr. Schutz Quickstep applicator. The water can also be poured onto the floor area by area. Mop the entire area until the surface is dry.
Rinsing the floor (neutralisation) Make sure that the entire surface area is rinsed. Instead of using the Dr. Schutz Quickstep Applicator for manual neutralisation, you can also rinse mechanically using the Premium F 2. After manuel neut-ralisation use the Dr. Schutz Professional Wet/ Dry Vacuum Cleaner to remove all fluids.
Afterwards Before stripping the floor was badly soiled and showed many signs of heavy traffic such as scuff and foot marks. After stripping and rinsing the floor is now clean and ready to be redesigned and protected.
05

06
Applying the colour coat The first colour coat is applied using PU Design which is available in 10 different standard colours. Beyond that another 200 special colours are available upon request. First shake the sealer container as well as the cross linker bottle well. Then pour the Cross Linker into the PU Design canister in a ratio of 1:10 and mix well. Smaller quantities for smaller areas can be mixed in a measuring jug.
Sealing the edges (first coat) Start on the side that faces the light. Use a radiator brush or a small lacquer roller and work area by area.
Sealing the surface (first coat) To seal the surface, pour the sealer onto the floor and roll it across the surface using the Aquatop lacquer roller. Apply the first coat at right angles to the direction of the light. Then overlap this coat lengthways. Applying the sealer in this crossway fashion will allow you to cover all areas at ease. This first coat has a drying time of approx. 2 hours. In case that the first colour coat does not fully cover the old floor, the application of a second colour coat is recom-mended.
2h
PU Design – First Colour Coat

Applying the colour chip mix Apply the chip combination of your choice either manually or using the Dr. Schutz chip applicator. The chips must be applied while the lacquer coat is still wet. As this is very important make sure that you work area by area. Apply the chips evenly over the surface paying attention all the time. Use a chip quantity according to your taste.
Teamwork It is best to work in a team, with one person sealing while the other one can focus on the chip application. Work at a good pace and treat area by area. The floor has to dry two hours afterwards.
Mixing PU 100 for the final coat First shake the two containers well, then pour the Cross Linker into the PU 100 canister in a ratio of 1:10 and mix well. Smaller quanti-ties for smaller areas can be mixed in a measuring jug.
2h
PU Design – Applying the Colour Chip Mix
07

08
PU Design – Final Coat with PU 100
Sealing the edges (final coat)
Start on the side that faces the light. Use a radiator brush or a small lacquer roller and work area by area.
Sealing the surface (final coat) After two hours drying time repeat the sealing of the edges and surface. As before, start at the edges and then work over the entire surface. After the second coat the drying time is 2 hours once again. The floor may be used with care after approx. 12 hours. It is therefo-re recommended to let the surface cure over night.
Before and after Beforehand the floor was old and worn. It was then stripped clean but still exposed to traffic and surface damages. After protecting it with PU Design and PU 100 on top, the floor is covered with an extremely wear resistant coating that makes maintenance so much easier and protects it from heavy traffic and other exposures. The coloured finish of PU Design plus chip combination provides the floor with a fresh and individual look. A costly renovation and replacement of the floor was avoided, thereby saving the environ-ment too.
2h
Logo Embedding
09
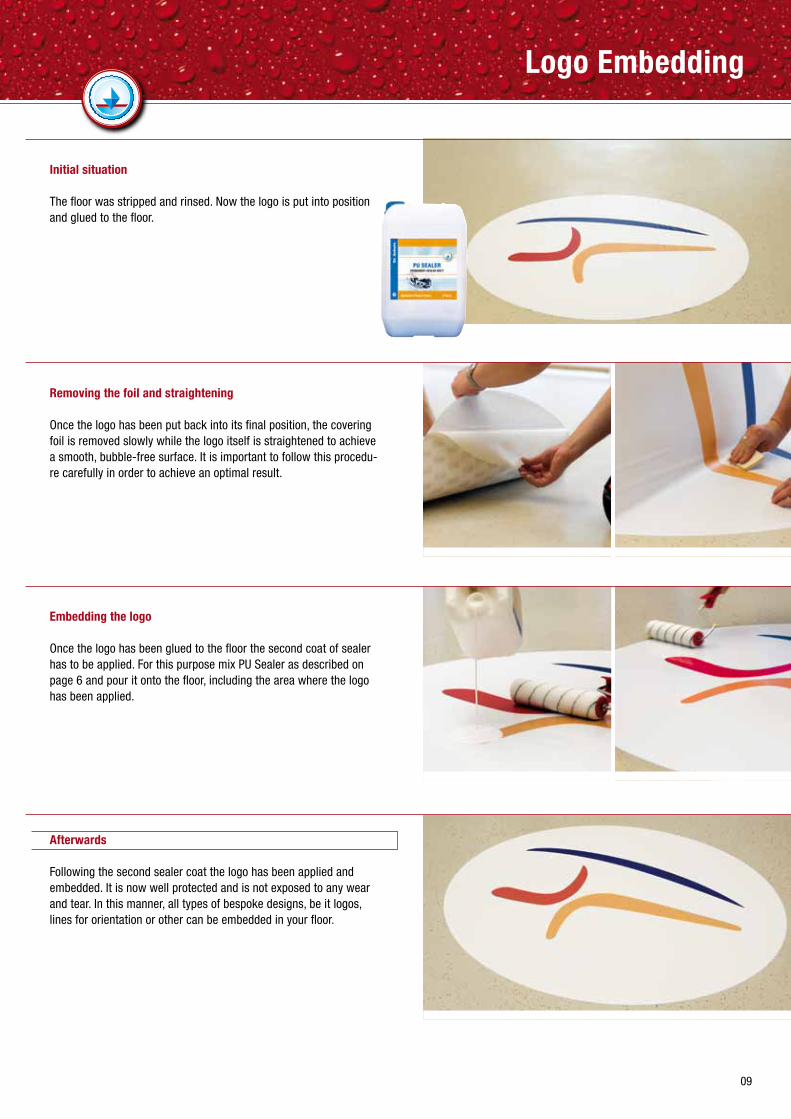
Initial situation The floor was stripped and rinsed. Now the logo is put into position and glued to the floor.
Removing the foil and straightening Once the logo has been put back into its final position, the covering foil is removed slowly while the logo itself is straightened to achieve a smooth, bubble-free surface. It is important to follow this procedu-re carefully in order to achieve an optimal result.
Embedding the logo Once the logo has been glued to the floor the second coat of sealer has to be applied. For this purpose mix PU Sealer as described on page 6 and pour it onto the floor, including the area where the logo has been applied.
Afterwards Following the second sealer coat the logo has been applied and embedded. It is now well protected and is not exposed to any wear and tear. In this manner, all types of bespoke designs, be it logos, lines for orientation or other can be embedded in your floor.

10
Maintenance
Routine cleaning using a double bucket trolley (1) Cleaning a floor professionally requires the use of the Dr. Schutz Quickstep Mop as well as a double bucket trolley. Mix water with PU Cleaner in a ratio of 1:200 and pour the mixture into the red bucket. Pour only clear water into the red bucket as this will later be used to rinse the mop after every cleaning step.
Routine cleaning using a double bucket trolley (2) After cleaning an area of the floor, wring out the dirty cover using the press above the red bucket and remove coarse dirt. Following that soak the cover once again in the blue bucket and continue cleaning.
Routine cleaning using a double bucket trolley (3)
In order to retain the value of your floor and to guarantee the benefits of the sealer long term, the correct routine maintenance procedure is critical. If done correctly it will extend the lifetime of your floor considerably.

Stain Removal
11
Stain removal with Elatex (1)
Elatex acts against many kinds of stains, including coke, fruit juices, ketchup, ball pen, marmalade, red wine, coffee, chocolate, shoe polish, nail varnish, tar, felt pen etc. It is particularly suited for shoe and scuff marks as well as permanent markers.
Stain removal with Elatex (2) Spray Elatex onto a non-felting cloth or a white, non-abrasive pad. For stubborn stains you can spray the product directly onto the floor. On floors that have been protected with a Dr. Schutz PU Sealer, it is recommended to use undiluted PU Cleaner instead of Elatex to avoid damages to the protective layer.
Stain removal with Elatex (3) Remove stain by dabbing from the outside to the centre – do not rub. Remove all residues by dabbing with a dry cloth. Clean the treated area with clear water, then dry. In this manner the stain is removed at ease and to great effect.

12
The Dr. Schutz company
Dr. Schutz:Market Leader in InnovativeFlooring Design & Renovation
Dr. Schutz is a family business with a truly successful history.Because our customers have the benefit of our unique solutions for every kind of floor in more than 50 countries.
Since 1955: Innovation, Growth, International Reputation

Innovation: New Ideas to the Fore.Up to date product innovations which save costs and protect the environment.
Our technical advances contribute to your added value. After all, new ideas open up new market opportunities. Our work is adap-ted to the demands of specific types of building, which means optimizing time and materials. At the same time our working
methods protect the environment, which means they are sustai-nable in the long term.
Service: What Dr. Schutz offers you:In-service training, on-site advice and consultation round the clock.
Meeting your needs as our customer is at the heart of our work and business. Flexibility, close customer liaison and support for your success are what has made our name. For you there is an extensive network of competent floor care advisors, who are at
your assistance at any time you need them. At the same time our training academies offers the possibility for professionals to extend their knowledge and improve their skills in renovation and refurbishment.
Quality:Knowledge you can trust –experience you can count onProduct and quality management have the same priority for us as for everyone who works for and with us.
For more than 50 years we have always had the same high quality standards – achieved through effective quality control measures. That is how we, a modern medium-sized company, have remained the dependable partner of our customers.
14
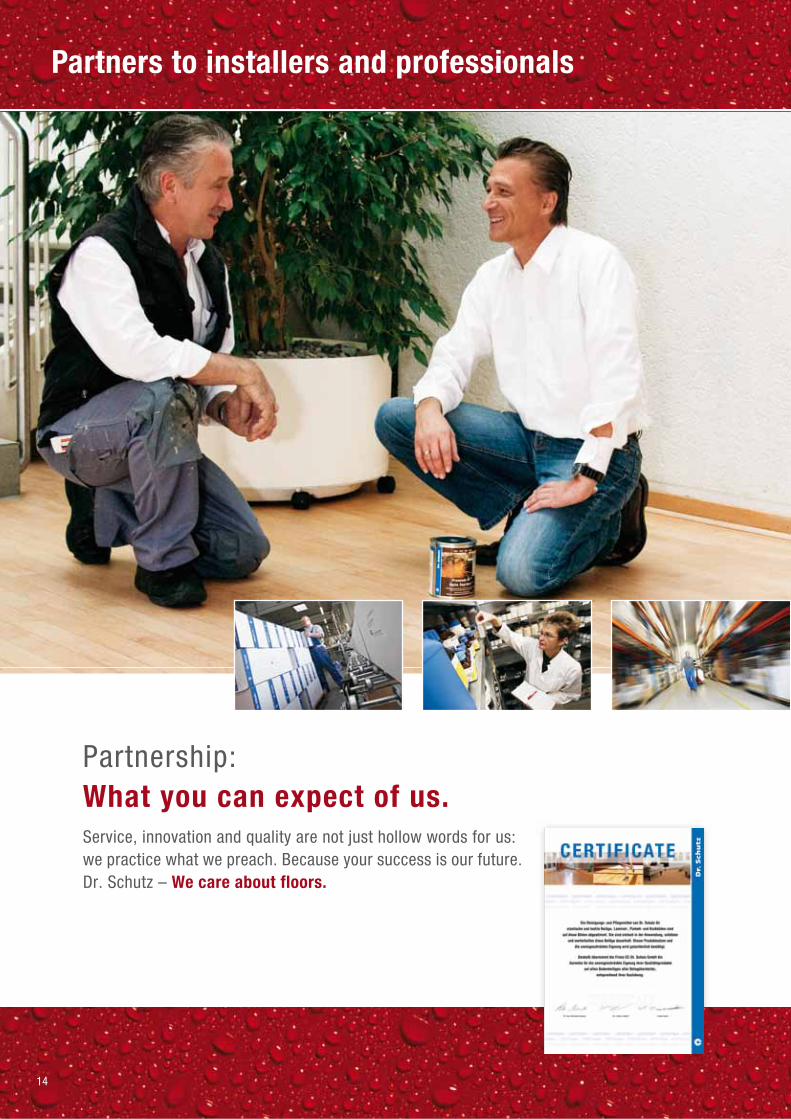
Partnership:What you can expect of us.Service, innovation and quality are not just hollow words for us:we practice what we preach. Because your success is our future.Dr. Schutz – We care about floors.
Partners to installers and professionals

• Allure • Altro• Amorim• Amtico• Ardex• Armstrong DLW• Balta Industries• Balterio• BASF• Beaulieu/Beauflor• Bergo Flooring AB• Bolon AB• BSW• C/R/O• Centiva• CNL International
• Comfundo• Cortex• Debolon• Dinoflex Europe• Domo,• Dunloplan• Dura• Egger• Enia Carpet• Filzfabrik Fulda• Finett• Flexura• Formtech AG• Forbo Flooring• Gamrat• Gerflor
• Girloon• Grabo LLC• Halbmond• Ideal Floorcoverings• Interface• ITC• IVC• Karndean• KLB Kötztal• Le Tissage d’Arcade• LG Chem• Likolit• Linofatra• Liuni• Lock-Tile• Longlife
• Mapei• Maxit• Medes• Meister Werke• M-flor• Mondo• MultiFloors• Negotap• Neoflex (Rephouse Europe)• Nonwoven S.p.A.• Novalis International• Object Carpet• Objectflor• Ossfloor• Pemarsa S.A.• Philharmoniker Parkett
• ARTIGO • PLP Creativ• Project Floors• Remmers Bautechnik GmbH• Romex• SaarFloor Systems• SGH• Soluflex• Steirer Parkett• Swiff-Train Company• Tajima• Tarkett • Tekima Teppichkunst• Toggoflor• TOLI Flooring• Toucan-T
• Tru-Woods• TWN• Upofloor• Vegro• Villeroy & Boch• Vinyflor Nederland• Vinylasa/ American Tile, Inc• Virag S.r.l.• Weber Saint - Gobain• Wicanders• WPT/Windmöller Flooring• Zipse• 2TEC2
15
Recommended by leading floor manufacturers worldwide.*
Safety: For a reassuring feeling in every respect.Dr. Schutz stands for the trust which you can certainly have in us, our work and products.We provide you with the following guarantee:
You receive a certificated guarantee on all Dr. Schutz products and systems, which covers their function and safe application.
Specifically developed cleaning and care instructions, for every kind of flooring and type of building, fulfil International Stan-dards, which give your customer additional safety.
Furthermore, for our long-term coatings and coverings from the Dr. Schutz PU series, we offer an extended guarantee of 3 years on commercial buildings and even 10 years on residential pro-perties.
Find out more at: dr-schutz.com/warranty.html
Tested and certified by leading institutes.
* Find out more information about the specific recommendations of floor-covering manufacturers in the clean and care instructions for your individual flooring, at www.dr-schutz.com

www.dr-schutz.com Layout & DesignSilberfalke [email protected]