step by step guide for creating location ...step by step guide for creating location codes for gst...
TRANSCRIPT
STEP BY STEP GUIDE FOR CREATING LOCATION CODES FOR GST DIVISIONS/RANGES/CIRCLES
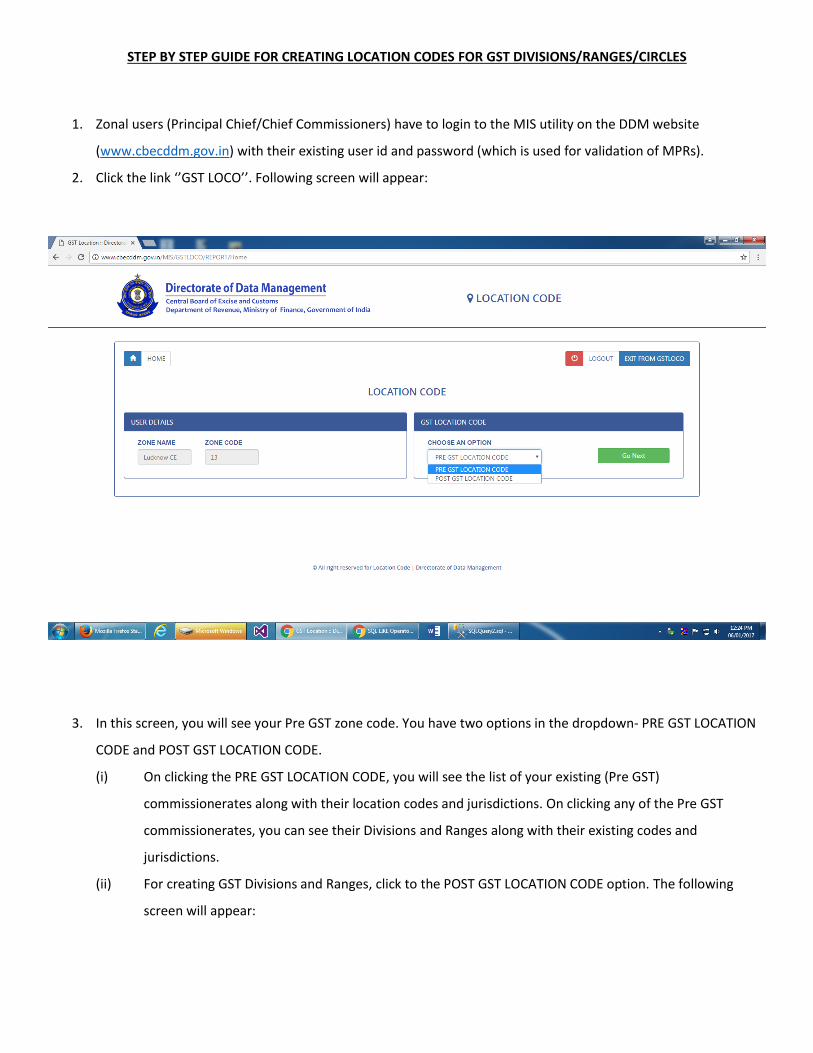
1. Zonal users (Principal Chief/Chief Commissioners) have to login to the MIS utility on the DDM website
(www.cbecddm.gov.in) with their existing user id and password (which is used for validation of MPRs).
2. Click the link ‘’GST LOCO’’. Following screen will appear:
3. In this screen, you will see your Pre GST zone code. You have two options in the dropdown- PRE GST LOCATION
CODE and POST GST LOCATION CODE.
(i) On clicking the PRE GST LOCATION CODE, you will see the list of your existing (Pre GST)
commissionerates along with their location codes and jurisdictions. On clicking any of the Pre GST
commissionerates, you can see their Divisions and Ranges along with their existing codes and
jurisdictions.
(ii) For creating GST Divisions and Ranges, click to the POST GST LOCATION CODE option. The following
screen will appear:

In this screen, your new location code/ GST zone code will appear which will be different from the existing zone code.
The new GST Executive commissionerates and Audit commissionerates of your GST zone will appear here along with
their jurisdictions and codes as per the DGHRD notifications. Links for creating Divisions and Circles will be visible for the
GST Executive commissionerates and the Audit commissionerates respectively on this screen.
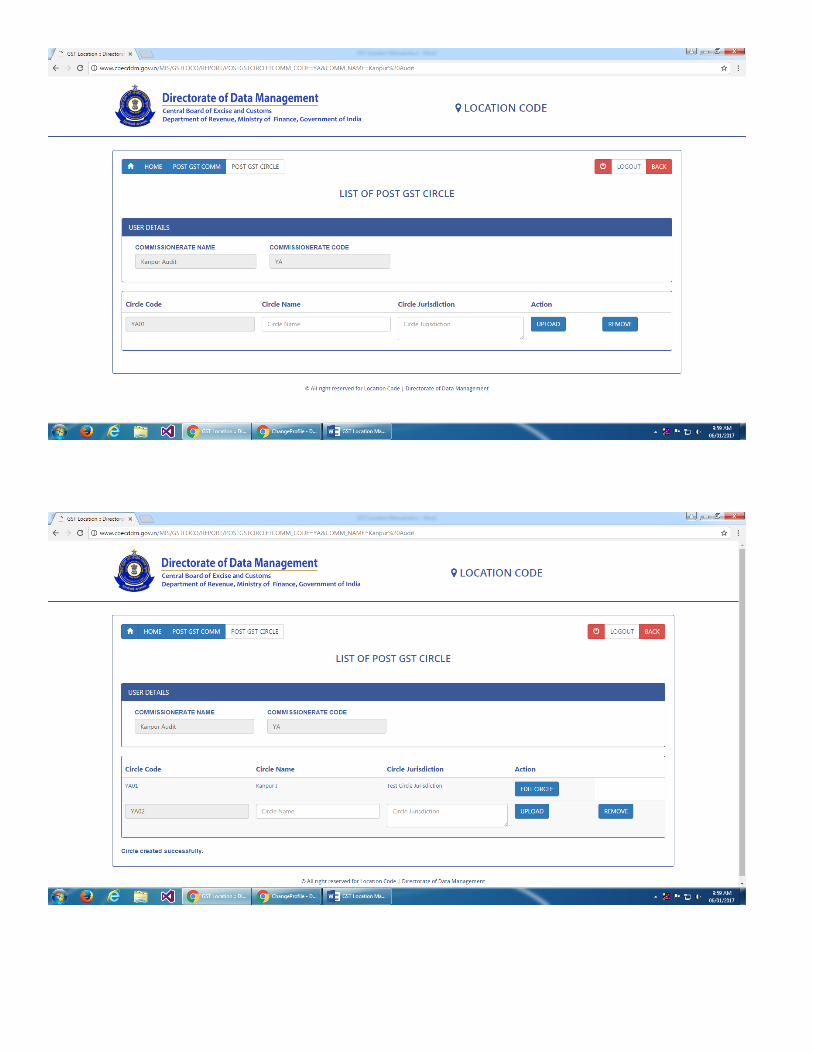
4. For creating Circle for the Audit Commissionerates of your zone, click to CREATE CIRCLE link and for creating
Divisions for the Executive Commissionerates, click to CREATE DIVISION link. You have to enter the name of the
Circle/Division and its jurisdiction. The Circle/Division code will be auto generated. After entering the name and
jurisdiction, click the UPLOAD link. Another row will appear on the screen under which name and jurisdiction of
the next Circle/Division of the commissionerate will be entered and uploaded. As many rows may be filled up as
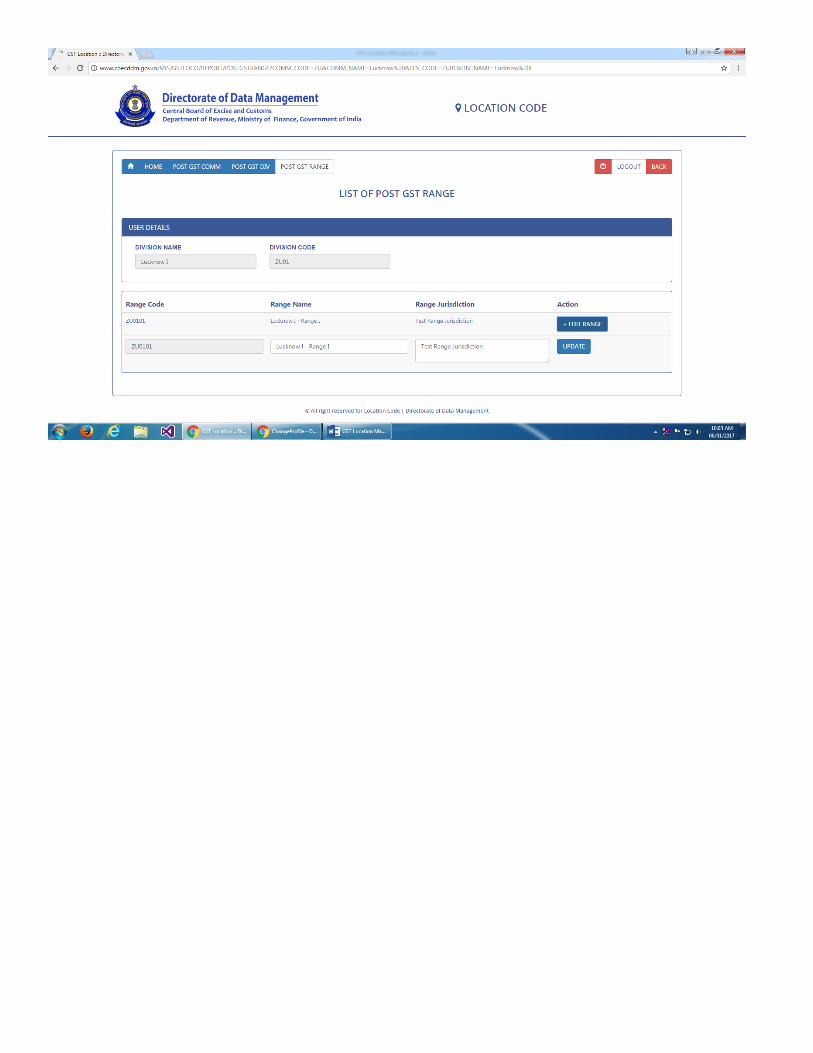
the number of Circles/Divisions. After uploading the details of each Circle/Division, the EDIT link will be available
for correction of the details entered if needed. After editing of any entered detail, you have to click the UPDATE
link on the screen. As you proceed downwards creating Circles/Divisions one by one, a row will be automatically
created at the bottom with auto generated code, even after all the Circles/Divisions have been created. Delete
this unwanted row by clicking the REMOVE link. Suppose, you realize, after deleting the last row using the
REMOVE link, that one or more Circles/Divisions were to be created, click the ADD link on the screen to create
the same. At various steps as you proceed, screens as shown below will appear respectively, as the case may be:
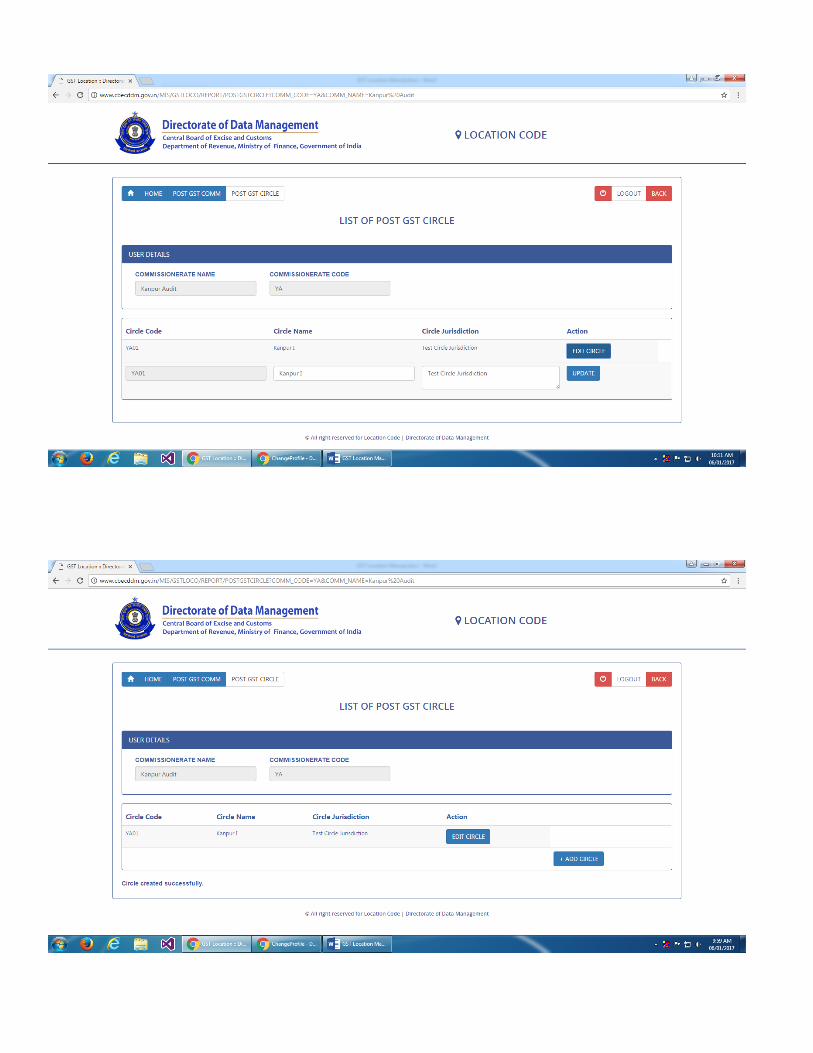
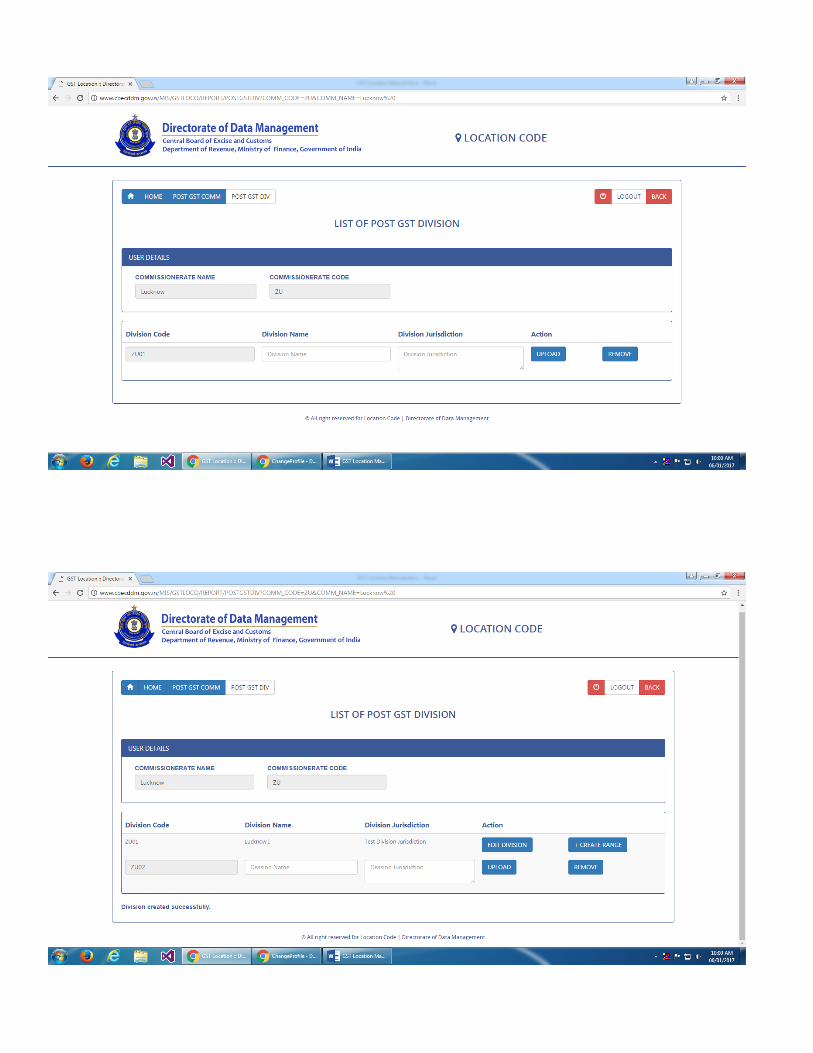
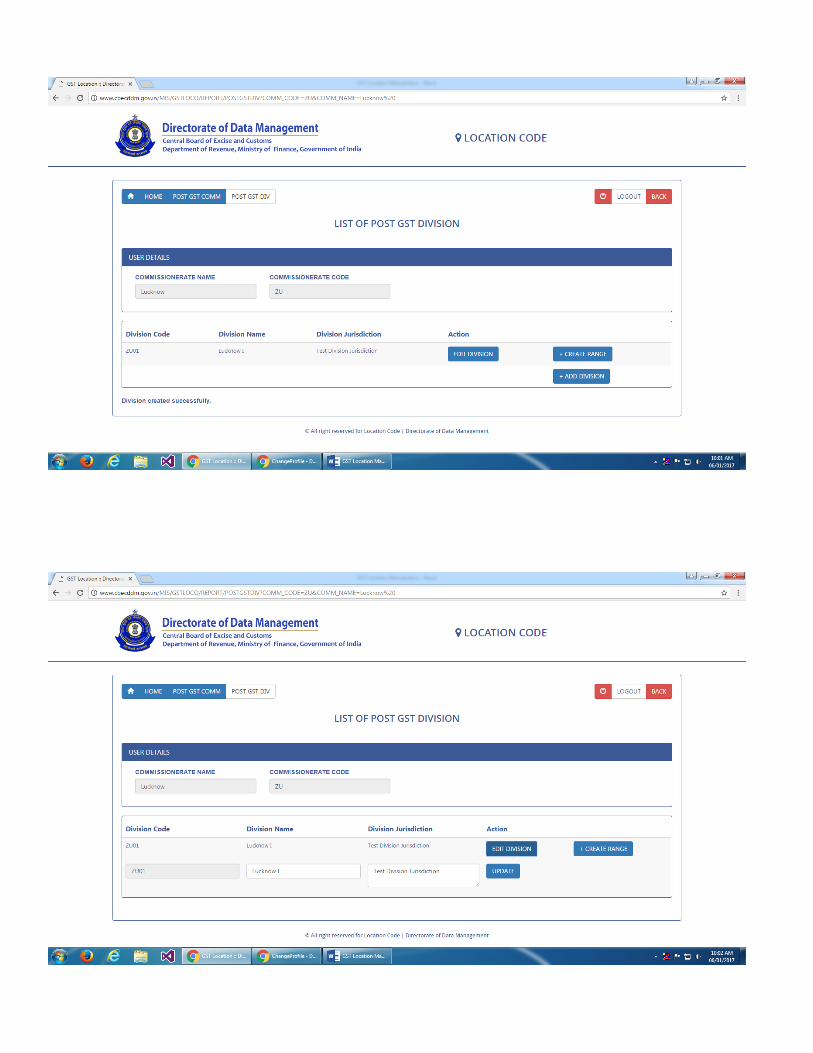
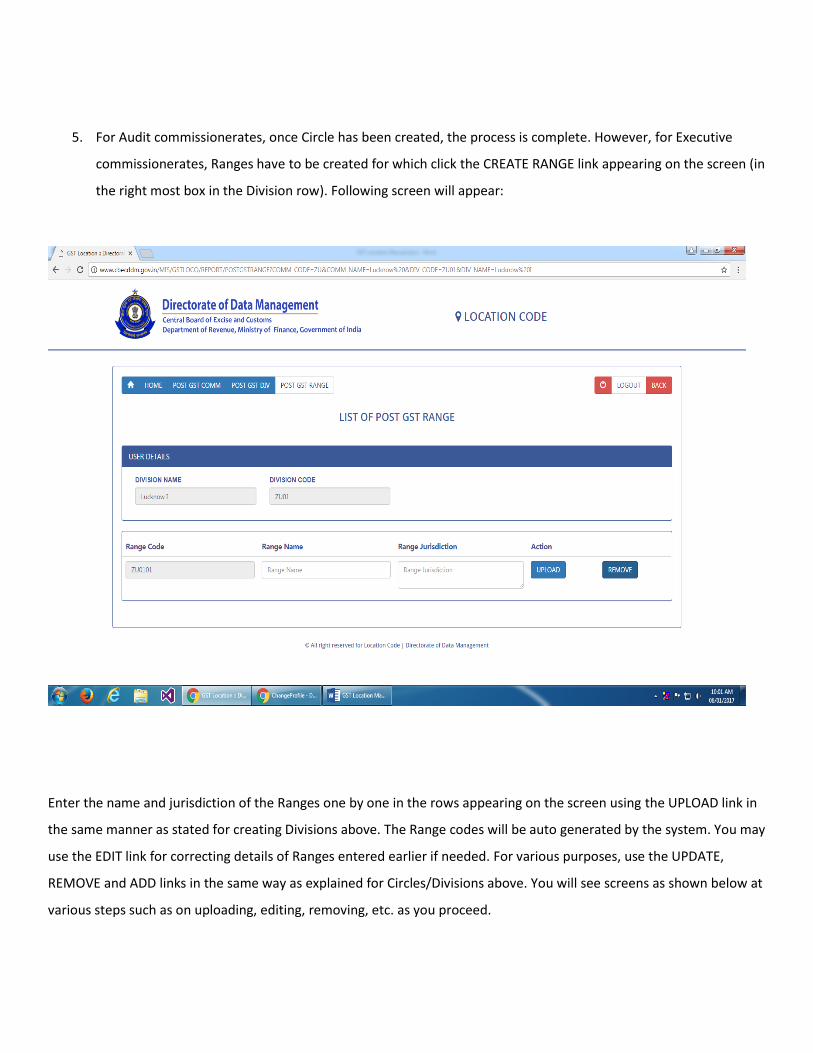
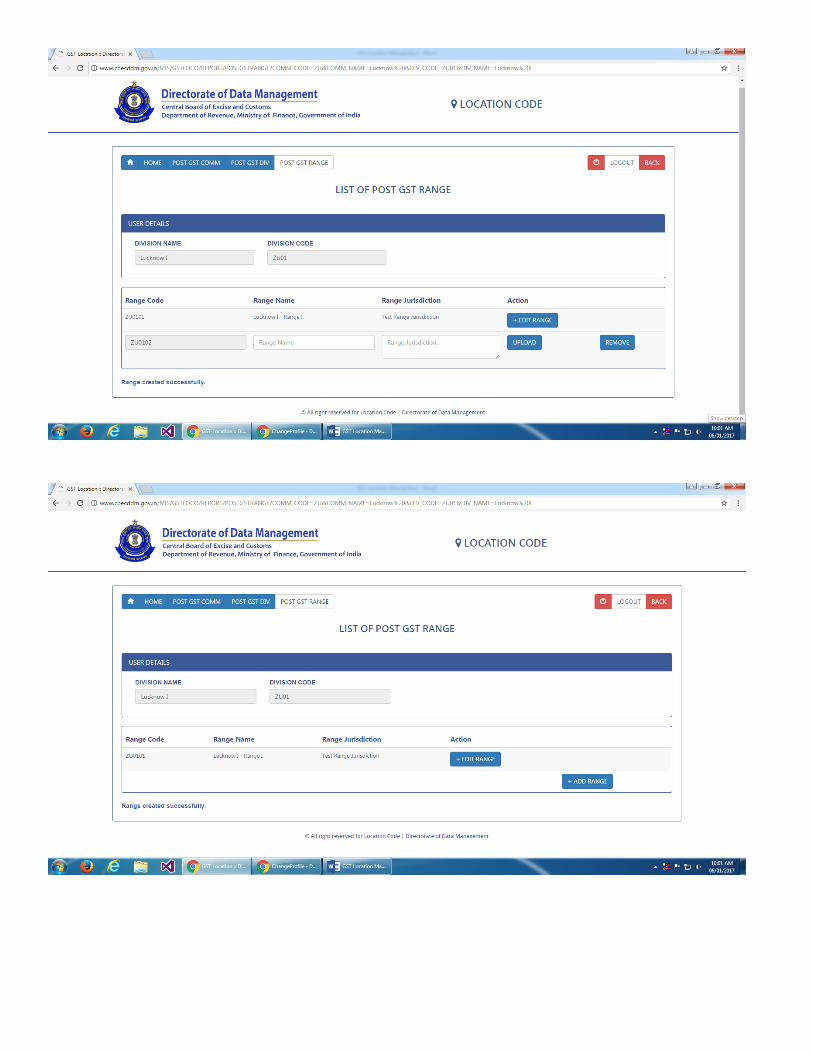
5. For Audit commissionerates, once Circle has been created, the process is complete. However, for Executive
commissionerates, Ranges have to be created for which click the CREATE RANGE link appearing on the screen (in
the right most box in the Division row). Following screen will appear:
Enter the name and jurisdiction of the Ranges one by one in the rows appearing on the screen using the UPLOAD link in
the same manner as stated for creating Divisions above. The Range codes will be auto generated by the system. You may
use the EDIT link for correcting details of Ranges entered earlier if needed. For various purposes, use the UPDATE,
REMOVE and ADD links in the same way as explained for Circles/Divisions above. You will see screens as shown below at
various steps such as on uploading, editing, removing, etc. as you proceed.