stonesoft vpn client 6.0 for windows product guide€¦ · stonesoft vpn client for windows...
TRANSCRIPT

Stonesoft VPN Client forWindowsProduct Guide6.0Revision A

2
Table of contentsPreface...................................................................................................................................... 3
About this guide............................................................................................................................................. 3Find product documentation.......................................................................................................................... 4
1 Introduction...........................................................................................................................................................5How the Stonesoft VPN Client works............................................................................................................5Stonesoft VPN Client configuration and updates.......................................................................................... 5Virtual IP addresses for the Stonesoft VPN Client........................................................................................6How settings for IPsec connections work......................................................................................................6
2 Deployment........................................................................................................................................................... 7Deployment options........................................................................................................................................7
3 Installing and upgrading the Stonesoft VPN Client.......................................................................................10Installation overview..................................................................................................................................... 10Download the installation file....................................................................................................................... 10Install with the wizard.................................................................................................................................. 11Install using a custom installation package................................................................................................. 11Upgrade the Stonesoft VPN Client..............................................................................................................15
4 Configuring certificates.....................................................................................................................................16Authenticating with client certificates...........................................................................................................16Authenticating with internal certificates........................................................................................................17Authenticating with external certificates.......................................................................................................19Change the certificate passphrase.............................................................................................................. 20View user certificate details......................................................................................................................... 21Change the certificate user ID type.............................................................................................................21Enable CRL checks..................................................................................................................................... 22Certificate expiration.....................................................................................................................................22Delete certificates.........................................................................................................................................22
5 Troubleshooting VPN connections..................................................................................................................23Logs and diagnostics................................................................................................................................... 23Solving connectivity issues.......................................................................................................................... 25
Appendix A: Using the Stonesoft VPN Client in automated mode....................................28How automated mode works....................................................................................................................... 28How automated mode affects the user interface........................................................................................ 28Preparing files for installation...................................................................................................................... 28Create a script to install the Stonesoft VPN Client in silent mode..............................................................30Install the Stonesoft VPN Client in silent mode.......................................................................................... 31Connection retry times in automated mode................................................................................................ 32Error handling in automated mode..............................................................................................................32
Index......................................................................................................................................... 34

Preface | 3
PrefaceThis guide provides the information you need to work with your Forcepoint product.
About this guideThis information describes the guide's target audience, the typographical conventions and icons used in thisguide, and how the guide is organized.
AudienceForcepoint documentation is carefully researched and written for the target audience.
The information in this guide is intended primarily for:
• Administrators — People who implement and enforce the company's security program.• Users — People who use the computer where the software is running and can access some or all of its
features.
ConventionsThis guide uses these typographical conventions and icons.
Book title, term, emphasis Title of a book, chapter, or topic; a new term; emphasis.
Bold Text that is strongly emphasized.
User input, code, message Commands and other text that the user types; a code sample; adisplayed message.
Interface text Words from the product interface like options, menus, buttons, anddialog boxes.
Hypertext A link to a topic or to an external website.
Note: Additional information, like an alternate method of accessing anoption.
Tip: Suggestions and recommendations.
Important/Caution: Valuable advice to protect your computer system,software installation, network, business, or data.
Warning: Critical advice to prevent bodily harm when using ahardware product.
Preface | 4
Find product documentationOn the ServicePortal, you can find information about a released product, including product documentation,technical articles, and more.
1. Go to the ServicePortal at https://support.mcafee.com and click the Knowledge Center tab.2. In the Knowledge Base pane under Content Source, click Product Documentation.3. Select a product and version, then click Search to display a list of documents.

Introduction | 5
IntroductionThe Stonesoft® VPN Client provides a secure virtual private network (VPN) connection to a Stonesoft Firewall/VPN gateway for end-user computers running on Microsoft Windows platforms.
The Stonesoft VPN Client protects private information transferring over the Internet and allows verification ofthe end user’s identity. Remote end users are able to connect to internal networks securely. The StonesoftVPN Client mainly runs in the background, automatically prompting the end user to authenticate when a VPN isrequired.
You can find information about installation, configuration, troubleshooting, and use scenarios in this guide.Additional information about the Stonesoft VPN Client is covered in the following documents:
• Configuring VPN access for the Stonesoft VPN Client end users — See the Stonesoft Next GenerationFirewall Product Guide.
• Using the Stonesoft VPN Client — See the Stonesoft VPN Client User Guide.• Windows platform requirements — See the Stonesoft VPN Client Release Notes.
How the Stonesoft VPN Client worksIn the Management Client, VPN and Gateway elements and settings are configured into a VPN profile. Theprofile is assigned to end users, then firewall policy is edited to allow incoming connections from the StonesoftVPN Client. During installation, the Stonesoft VPN Client connects back to the firewall.
There might be a limit on the gateway of how many end users can connect at the same time. However, there isno license or serial code enforcement in the Stonesoft VPN Client. The Stonesoft VPN Client is licensed as partof the Firewall/VPN gateway. You can freely install it on any number of hosts.
Stonesoft VPN Client configuration and updatesThe Stonesoft VPN Client settings are mostly configured through Stonesoft Management Center (SMC).
The Stonesoft VPN Client downloads a configuration file from the Firewall/VPN gateways to set the correctoptions for establishing a mobile VPN with that gateway. These options include the following:
• encryption• authentication• endpoints to contact• IP addresses that are accessible through the VPN
When changes are made on the gateway, each Stonesoft VPN Client updates the configuration the next time theStonesoft VPN Client starts a new VPN connection. Due to the centralized configuration method, the StonesoftVPN Client can connect to Stonesoft Firewall/VPN gateways only.

Introduction | 6
Virtual IP addresses for the Stonesoft VPNClient
The primary access method for production use is the Virtual Adapter feature. This feature allows the StonesoftVPN Client to have a second, virtual IP address that is independent of the end-user computer address in the localnetwork.
The virtual IP address is only used in communications through the VPN tunnels. The VPN gateway gets theIP address and network settings of the Stonesoft VPN Client from an external DHCP server and forwards theinformation to the Stonesoft VPN Client. For one-way access without DNS resolving, the VPN gateway canalternatively be set up to apply NAT to translate the Stonesoft VPN Client connections. This method is meant fortesting purposes.
The VPN gateway specifies the destination IP addresses for traffic that the Stonesoft VPN Client sends intothe VPN tunnel. The IP addresses are configured as Site elements for each gateway in the ManagementClient. When the Sites contain specific internal networks, the Stonesoft VPN Client receives a configuration forsplit tunneling. Split tunneling means that only the specified portion of traffic uses the VPN tunnel, and otherconnections use the local network as usual.
Most DHCP servers allow a configuration in which a particular client computer is always assigned a particular IPaddress. For example, the DHCP server might assign the IP address based on the MAC address if VPN clientshave fixed MAC addresses for their Virtual Adapters. By default, when the Stonesoft VPN Client virtual adapterrequests an IP address, it uses the MAC address of the physical interface used in the VPN connection.
To configure the IP address distribution on the gateway, see and the Stonesoft Next Generation Firewall ProductGuide.
How settings for IPsec connections workFor IPsec connections, the Stonesoft VPN Client might need to use different settings at different locations due todifferent port filtering and NAT arrangements.
The Stonesoft VPN Client can work within the allowed settings to automatically try to connect using different portcombinations if the automatic IKE retry option is active in the Stonesoft VPN Client installation. The StonesoftVPN Client tries the settings one by one in the following order until the connection succeeds or all options areexhausted:
1. Enable or disable the option to use random local source ports on the client.2. Use only destination port UDP/4500 (NAT-T port) for the gateway, instead of both port UDP/500 and
UDP/4500.3. Use a combination of a random local source port and destination port UDP/4500 for the gateway.
The end user is notified if the Stonesoft VPN Client is unable to use one of the two necessary ports.

Deployment | 7
DeploymentTo allow end users to access company networks through the Stonesoft VPN Client, plan your deploymentcarefully.
Deployment optionsConsider the available options for deployment.
VPN typesStonesoft VPN Client for Windows supports IPsec and SSL VPN tunnels; select the one that is right for yourenvironment.
IPsec — IPsec VPNs allow any IP traffic to be transported in the VPN regardless of which higher-level protocolthe traffic uses on top of the IP protocol. Hosts can communicate through the VPN as if it was a normal linkwithout the need for application-specific configurations on the gateway device.
SSL — SSL VPNs allow any IP traffic to be transported in the VPN in the same way as IPsec VPNs. Theencrypted tunnels for SSL VPNs use TCP port 443, which is usually allowed by intermediate firewalls by default.Hosts can communicate through the VPN as if it was a normal link without the need for application-specificconfigurations on the gateway device.
Note: There are two ways to access SSL VPN tunnels. You can use a VPN client or the SSLVPN Portal that provides access through a web browser. SSL VPN tunnels and the SSL VPNPortal are different remote access methods: you access the SSL VPN tunnel using a VPN clientand the SSL VPN Portal using a web browser. SSL VPN tunnels and the SSL VPN Portal cannotbe on the same IP address and port pair simultaneously. If both are needed, we recommendconfiguring the SSL VPN tunnel to port 443 and adding the port number to the URI whenaccessing the portal. The SSL VPN Portal is not within the scope of this document.
The information in this document applies both to IPsec VPNs and SSL VPNs unless otherwise noted.
Installation typesYou can install the Stonesoft VPN Client in interactive mode by manually starting the installer, or in silent modethrough a remote software deployment service.
A standard installation uses the downloaded Stonesoft VPN Client files. There are two ways to install theStonesoft VPN Client in a standard installation:
• Wizard — Uses a guided installation and configuration process• Silent batch file — Uses a script to install the Stonesoft VPN Client without end-user interaction
A custom installation uses a third-party program to make a custom installation package that includes the gatewayinformation and the VPN Client settings.
Installation file typesSeveral files are available to use for installing the Stonesoft VPN Client.
• Stonesoft-VPN-Client.exe

Deployment | 8
• Stonesoft-VPN-Client-x64.msi• Stonesoft-VPN-Client-x86.msi
The variable, <version>, is the exact version number that changes each time an update is released. The x64 .msipackage is meant for a 64-bit operating system and the x86 .msi for a 32-bit operating system installation. Theexecutable package uses the correct package for the operating system automatically.
You can install the Stonesoft VPN Client locally with the .exe installer. The .msi packages allow remoteinstallation or customized installations that remove the need for some end-user actions:
• With a standard installation package, the end-users type the gateway IP address manually, authenticatethemselves to the gateway, and verify the certificate fingerprint of the gateway. Alternatively, you can exportthe contact details of the gateway to a file and instruct the end users to copy the file to the correct location.
• If you generate a custom installation package, you can include the gateway information in the installationpackage, requiring no end-user intervention.
Related tasksDownload the installation file on page 10The Stonesoft VPN Client installation files are available on the Stonesoft NGFW download page.
Standard installationEnd users either install the Stonesoft VPN Client following the instructions in the installation wizard, or you canprovide a batch file for silent installation.
Use the following commands for silent installation, replacing <version> with the exact version number in the fileyou are using:
• .exe file — Stonesoft_VPN_<version>.exe /quiet• .msi file — msiexec /i Stonesoft-VPN-Client-<version>-x64.msi /quiet or msiexec /i
Stonesoft-VPN-Client-<version>-x86.msi /quiet
Custom installationYou can customize the Stonesoft VPN Client installation package by creating a Microsoft Installer (MSI) transformfile from the Stonesoft-VPN-Client-<version>-x64.msi or Stonesoft-VPN-Client-<version>-x86.msi file.
The contact information of the security gateways and the VPN Client settings are added to the transform file. Tocustomize the installation package, you must be familiar with MSI transforms and know how to apply transformsto installation packages.
User authenticationEnd users must authenticate before they can connect to a gateway.
You can select different authentication methods for each gateway. If several authentication methods are allowedfor an end user, the end user can select between the methods in the Stonesoft VPN Client.
Two basic authentication methods are available:
• User name and password — The gateway can be integrated with external authentication servers.• Certificate — Various certificate authentication options are available for the Stonesoft VPN Client.
Note: Certificate authentication is only supported with IPsec connections. SSL VPNs neveruse client certificates.
Note: Different methods can be used on the same gateway simultaneously.

Deployment | 9
The user name and password method supports integration with external RADIUS or TACACS+ authenticationservers. This integration allows various authentication schemes such as RSA SecurID cards or Active Directory/Network Policy Server (NPS) authentication.
The Stonesoft VPN Client always sends the user name and password using the UTF-8 character encoding.When using external authentication servers, make sure that they support UTF-8 encoding if the user names orpasswords contain letters outside the US-ASCII character set.
For a detailed overview to user authentication and step-by-step configuration instructions, see the Stonesoft NextGeneration Firewall Product Guide.
Related conceptsAuthenticating with client certificates on page 16Stonesoft VPN Client IPsec connections support using certificates to authenticate end users.

Installing and upgrading the Stonesoft VPN Client | 10
Installing and upgrading the StonesoftVPN Client
You can add the Stonesoft VPN Client as a new installation or you can upgrade the Stonesoft VPN Client.
Installation overviewThe installation process requires gateway configuration changes using the Management Client before theinstallation of the Stonesoft VPN Client on the end user computer.
• Before installing the Stonesoft VPN Client, you must configure the VPN-related elements and settings usingthe Management Client.
• Create a VPN, or add the Client Gateway element to an existing VPN and configure the Client settings inthe internal Gateway and VPN Profile elements.
• Create the user accounts, or integrate an existing LDAP database or an external authentication servicewith the SMC.
• Edit the firewall policy so that the policy allows incoming connections from the Stonesoft VPN Client.• Both the administrator and the end user can install the Stonesoft VPN Client. You can use the standard
Stonesoft VPN Client installation package or create a custom installation package. Either installation optionrequires that you download the installation files.
• A standard installation package allows the end user to install the Stonesoft VPN Client through theinstallation wizard.
• In a custom installation package, you can include the contact information for the gateway so that the endusers do not need to add it manually.
• During the upgrade process, the earlier version of the Stonesoft VPN Client is removed and replaced with thecurrent version with the same settings.
Note: You can find the instructions for tasks performed in the Management Client in the StonesoftNext Generation Firewall Product Guide.
Download the installation fileThe Stonesoft VPN Client installation files are available on the Stonesoft NGFW download page.
You must have a Grant Number (found in the Grant Letter you received from Forcepoint) to access productdownloads.
CAUTION: Do not use files that have invalid checksums. If downloading the files again does nothelp, contact Forcepoint support.
1. Go to http://www.mcafee.com/us/downloads/downloads.aspx, enter your grant number, then select theappropriate product and version.
2. Download the installation files.These packages are available:
• .exe — Standard installations• .msi — Custom installation package creation
3. Change to the directory that contains the files to be checked.
Installing and upgrading the Stonesoft VPN Client | 11
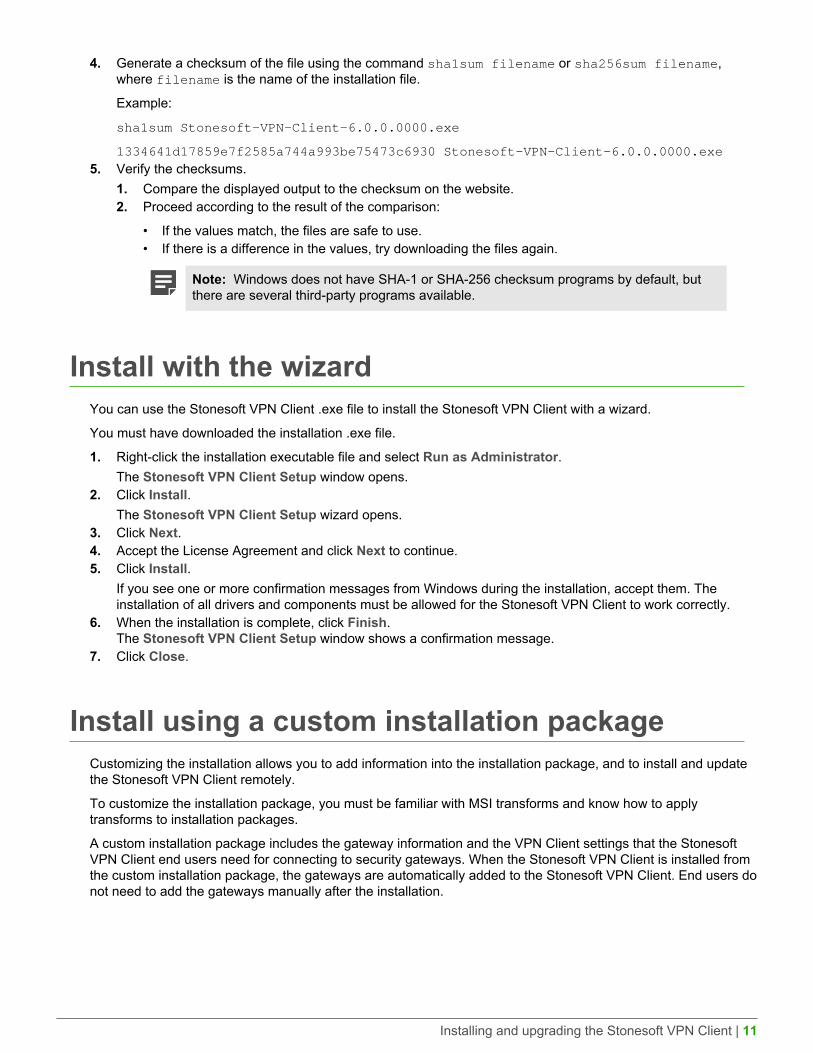
4. Generate a checksum of the file using the command sha1sum filename or sha256sum filename,where filename is the name of the installation file.
Example:
sha1sum Stonesoft-VPN-Client-6.0.0.0000.exe
1334641d17859e7f2585a744a993be75473c6930 Stonesoft-VPN-Client-6.0.0.0000.exe
5. Verify the checksums.1. Compare the displayed output to the checksum on the website.2. Proceed according to the result of the comparison:
• If the values match, the files are safe to use.• If there is a difference in the values, try downloading the files again.
Note: Windows does not have SHA-1 or SHA-256 checksum programs by default, butthere are several third-party programs available.
Install with the wizardYou can use the Stonesoft VPN Client .exe file to install the Stonesoft VPN Client with a wizard.
You must have downloaded the installation .exe file.
1. Right-click the installation executable file and select Run as Administrator.The Stonesoft VPN Client Setup window opens.
2. Click Install.The Stonesoft VPN Client Setup wizard opens.
3. Click Next.4. Accept the License Agreement and click Next to continue.5. Click Install.
If you see one or more confirmation messages from Windows during the installation, accept them. Theinstallation of all drivers and components must be allowed for the Stonesoft VPN Client to work correctly.
6. When the installation is complete, click Finish.The Stonesoft VPN Client Setup window shows a confirmation message.
7. Click Close.
Install using a custom installation packageCustomizing the installation allows you to add information into the installation package, and to install and updatethe Stonesoft VPN Client remotely.
To customize the installation package, you must be familiar with MSI transforms and know how to applytransforms to installation packages.
A custom installation package includes the gateway information and the VPN Client settings that the StonesoftVPN Client end users need for connecting to security gateways. When the Stonesoft VPN Client is installed fromthe custom installation package, the gateways are automatically added to the Stonesoft VPN Client. End users donot need to add the gateways manually after the installation.

Installing and upgrading the Stonesoft VPN Client | 12
Save the gateway contact information to a fileYou can save the contact information for security gateways to a file. The file can then be added into a custominstallation package or copied to the end-user computers that already have a Stonesoft VPN Client installed.
The gateway contact information allows end users to connect to new gateways without needing to add thesecurity gateway address manually and without verifying the gateway certificate fingerprint.
Export gateway contact informationYou must export the contact information from the Management Client into a file to add the gateway contactinformation to the installation package.
Exporting the gateway contact information allows you to distribute the contact information files to end users.You can add the files to a custom installation package or send them to end users so that they can copy the filesmanually to their computer.
The contact information is always gateway-specific.
For details about product features, usage, and best practices, click Help or press F1.
1. In the Management Client, select Menu > Configuration > VPN.2. In the element tree, select Gateways.3. For each contact you want to export:
1. Right-click the internal Gateway element for which you want to save the configuration and selectTools > Save Gateway Contact Information.
2. Browse to the folder where you want to save the contact information file.3. Enter a file name and click Save.
The contact information of the selected security gateway is saved in an .xml file.
Copy gateway contact information files manuallyYou can add new gateways to an existing Stonesoft VPN Client by copying the exported gateway contactinformation files to the client computers.
Provide the files to the Stonesoft VPN Client end users and instruct them to copy the files to the correct location.
1. Place the exported gateway contact information file in a location that is accessible to the client computer.2. Copy the security gateway contact information .xml file to the <system_drive>\ProgramData\Forcepoint
\Stonesoft VPN Client\gateway_info directory on the client computer.
Export VPN client settings for Stonesoft VPN Client usersExporting VPN client settings for Stonesoft VPN Client users simplifies the VPN client configuration for end users.
The mobile VPN must be fully configured on the gateway. These steps are for Stonesoft VPN Client only.
For details about product features, usage, and best practices, click Help or press F1.
1. In the Management Client, select Menu > Configuration > VPN.2. In the element tree, select the Gateways branch, then right-click the VPN Client gateway.3. Select Tools > Export Stonesoft VPN Client Configuration.4. (Optional) Next to the Export File field, click Browse, then browse to the folder where you want to save the
file.5. Select the gateway and click Export, then save the file.
Save a separate file for each gateway to which VPN clients directly connect.
You are now ready to make the configuration available to VPN client users, or use the exported VPN clientsettings in a custom installation package.

Installing and upgrading the Stonesoft VPN Client | 13
Create a transform fileCustomize the Stonesoft VPN Client installation package, and add the gateway information to it. The installationpackage is customized by creating an MSI (Microsoft Installer) transform file from the Stonesoft-VPN-Client-<version>-x64.msi or Stonesoft-VPN-Client-<version>-x86.msi file.
The following workflow assumes that you are familiar with MSI transforms and know how to apply them toinstallation packages.
You can create a custom installation package from the .msi file with any Windows installation package editor,for example, with Orca. Orca is a Windows Installer package editor provided as part of the Microsoft Windowssoftware development kit (SDK).
In the following tables, some of the values are predefined values that you must use in specific columns. Thepredefined values are shown in bold italic. You can select the other values as needed.
1. Open the Stonesoft VPN Client .msi file in the third-party installer program.2. In the transform file, add a component.
Enter the following values in the columns:
Table 1: Information for a new component
Column Value
Component Enter a unique name for the component.
ComponentID Enter a unique ID for the component.
Directory_ GATEWAY_INFO
Attributes 16 (msidbComponentAttributesPermanent)
KeyPath Enter a unique name for the gateway contactinformation file. Do not use the actual name ofthe file. Both the actual name of the file and thisadditional unique name are used later in this task.
3. Add a feature.Enter the following values in the columns:
Table 2: Information for a new feature
Column Value
Feature Enter a unique name for the feature.
Display 0
Level 1
Attributes 24 (msidbFeatureAttributesDisallowAdvertise andmsidbFeatureAttributesUIDisallowAbsent)
4. Map the new component and the new feature.Enter the following values in the columns:
Table 3: Information for mapping the new component and the new feature
Column Value
Feature_ Enter a name for the new feature.
Component_ Enter a name for the new component.
5. Add gateway contact information to the file table.

Installing and upgrading the Stonesoft VPN Client | 14
You must add the contact information for each security gateway into the File table. If there are severalsecurity gateways, add the contact information of each gateway on a separate row in the table.
Enter the following values in the columns:
Table 4: Adding gateway contact information
Column Value
File Enter the same unique file name used in theKeyPath column in the Component table.
Component_ Enter the name of the component.
FileName Enter the name of the gateway contact informationfile.
FileSize Enter the size of the gateway contact information filein bytes.
Attributes 8192 (msidbFileAttributesNoncompressed)
Sequence Enter the next available number after the highestnumber in the Sequence column. For example, ifthe highest number is 28, enter 29 as the value.
6. Add new media.Enter the following values in the columns:
Table 5: Information for adding new media
Column Value
DiskId Enter the next available number after the highestnumber in the DiskId column. For example, if thehighest number is 2, enter 3 as the value.
LastSequence Enter the last sequence value used in the File table.
7. Save the transform file.1. Select a suitable folder and enter a name for the transform file.2. Click Save.
The transform file you created is a new .mst file.
Install with a transform fileYou can use the .mst file together with the Stonesoft VPN Client VPN .msi file to install the Stonesoft VPN Clientremotely or locally on the command line.
If you want the end users to install the Stonesoft VPN Client on the command line, send them the transform file,the gateway contact information files, and installation instructions.
1. Copy the transform file to the same directory as the .msi file.2. Create the path in the directory where you have the installation files:
\ProgramData\Forcepoint\Stonesoft VPN Client\gateway_info3. Copy the exported gateway contact information files to the gateway_info directory.4. (Remote installation) To start the installation, run the .msi file with the transform .mst file following the
instructions of the software solution you are using.5. (Command-line installation) Start the installation in one of the following ways:

Installing and upgrading the Stonesoft VPN Client | 15
• If an earlier version of the Stonesoft VPN Client is already installed on the computer, run one of thesecommands:
msiexec /i Stonesoft-VPN-Client-<version>-x64.msi REINSTALLMODE=vomus REINSTALL=ALL TRANSFORMS=<transform_file>
msiexec /i Stonesoft-VPN-Client-<version>-x86.msi REINSTALLMODE=vomus REINSTALL=ALL TRANSFORMS=<transform_file>
• If an earlier version of the Stonesoft VPN Client is not installed on the computer, run one of thesecommands:
msiexec /i Stonesoft-VPN-Client-<version>-x64.msi TRANSFORMS=<transform_file>
msiexec /i Stonesoft-VPN-Client-<version>-x86.msi TRANSFORMS=<transform_file>
<version> is the exact version number that changes each time an update is released.
Related informationCustom installation scenario
Upgrade the Stonesoft VPN ClientWhen there is a new version of the Stonesoft VPN Client, you can upgrade the existing installation.
1. Download the installation .exe file.
Note: If you are not the administrator, the administrator supplies this file.
2. Double-click the executable file.A confirmation message appears.
3. Click Yes.The Welcome screen for the installation wizard opens.
4. Click Next to start the upgrade.During the upgrade process, the earlier version of the Stonesoft VPN Client is removed and replaced withthe current version using the same settings.
5. Accept the License Agreement and click Next to continue.6. When the upgrade is finished, click Finish to close the wizard.
Related tasksDownload the installation file on page 10The Stonesoft VPN Client installation files are available on the Stonesoft NGFW download page.
Install using a custom installation package on page 11Customizing the installation allows you to add information into the installation package, and to install and updatethe Stonesoft VPN Client remotely.

Configuring certificates | 16
Configuring certificatesThe Stonesoft VPN Client can authenticate end users using internal or external certificates. You can usecertificates only with IPsec-based Stonesoft VPN Client connections.
Authenticating with client certificatesStonesoft VPN Client IPsec connections support using certificates to authenticate end users.
In certificate-based authentication, you or the end user must first create a certificate request. The request processalso generates a private key for the certificate. The certificate cannot be used without the private key, whichshould always be protected by a passphrase to prevent unauthorized use of the certificate. The certificate requestmust be signed by a valid certificate authority (CA) to produce a valid certificate. For a gateway to accept theclient certificate as proof of identity, it must be configured to trust the CA that has signed the Stonesoft VPNClient certificate.
Supported certificate authentication schemesThere are four general options for setting up certificates required for authentication.
Certificate option What to do
Create certificates using theManagement Server internal tools
Create a certificate request in the Stonesoft VPN Client. Then sign therequest through the Management Client using the Management Serverinternal VPN CA.
Create certificates externally Import certificates with their associated private key into the StonesoftVPN Client.
Certificate and private key stored ona smart card
The Stonesoft VPN Client calls the external smart card software onthe computer and there is no need for any configuration steps on theStonesoft VPN Client. The smart card is ready to use and is availablewhen inserted if the smart card reader is correctly configured in Windows.
Locally stored certificates in theMicrosoft Certificates Store
Certificates are stored in the Microsoft Certificates Store on the end-usercomputer and are automatically available for use with the Stonesoft VPNClient.
When the certificate request is generated in the Stonesoft VPN Client, the resulting certificate is called an InternalCertificate in the Stonesoft VPN Client. When the certificate request is created using other tools, the certificate iscalled an External Certificate in the Stonesoft VPN Client.
User identitiesCertificates are a proof of the certificate holder identity. The exact form of the identity used can vary.
Two fields in internal certificates can be used for authentication in mobile VPNs:
• Subject Name — Contains a Distinguished Name (DN) that can consist of multiple items such as CommonName (CN), Organization (O), Country (C), and Email Address (E).
• Subject Alternative Name — Usually contains the user’s email address. Some client certificates do not havea Subject Alternative Name. This field is used in authentication if it is available in the client certificate.

Configuring certificates | 17
Depending on the certificate, an end user can authenticate to a gateway either with an email address, a subjectname, a DNS name, or an IP address. The end user can change their user ID type in the Stonesoft VPN Client,except for certificates stored on smart cards or in the Microsoft Certificates Store. The certificate information ismatched against details defined in the User elements in the Management Client or in an external LDAP database.
Authenticating with internal certificatesThe Stonesoft VPN Client has tools for creating a certificate request and the associated private key.
When the certificate request is ready, the end user must deliver the certificate request to a trusted CA for signing.The request can be signed using the SMC internal VPN CA or some other certificate authority. The signedcertificate is sent back to the end user, who must import it in the Stonesoft VPN Client. To use the certificate forauthentication, the end user must enter the passphrase that protects the private key each time they connect. Thepassphrase was selected by the end user when creating a certificate request or when they decide to change thekey.
Create a basic certificate requestYou can create a basic certificate request for an internal certificate in the Stonesoft VPN Client.
1. Start the Certificate Request Wizard.1. In the system tray on the Windows taskbar, right-click the Stonesoft VPN Client icon, then select
Properties.2. Click the Certificates tab.3. Click Create Certificate Request.
2. Verify that Basic Mode is selected and click Next.3. In the User Name field, enter the user name.
The user name must correspond to what is defined on the gateway.
Note: If you are not the administrator, contact the administrator if you are unsure what toenter as the user name.
4. In the Passphrase field, enter and confirm a passphrase to use whenever you authenticate yourself usingthe certificate.You can select this passphrase yourself. We recommend choosing a passphrase that meets the followingrequirements:
• Be at least eight characters long• Contain a combination of numbers, letters, and special characters
Note: Secure passphrases are never based on personal information such as names,birthdays, ID numbers, or phone numbers.
5. Click Create. You are prompted to save the certificate request.6. Click Save. A file save dialog box opens.7. Save and send the file for signing.
1. Browse to the correct folder, enter a file name, and click Save. Make sure that Certificate Requests(*.csr) is selected as the file type.
2. (Optional) Click Launch Default Windows E-Mail Application to create a message in your defaultemail application.
3. If you are not the administrator, send the certificate request .csr file that you saved to the administratorfor signing.
8. Click Finish to close the wizard.
When you receive the signed internal certificate, import it.

Configuring certificates | 18
Create an advanced certificate requestAn advanced certificate request offers more options than a basic certificate request for defining the properties ofthe certificate request and the private key. The exact options to use depend on the capabilities of the CA and therequirements and preferences of your organization.
1. In the system tray on the Windows taskbar, right-click the Stonesoft VPN Client icon, then selectProperties.
2. Click the Certificates tab.3. Click Create Certificate Request.4. Select Advanced Mode and click Next.5. Enter the information according to your environment as described in the table.
Table 6: Create certificate request options
Setting Description
Subject Name Distinguished name that identifies the end user onthe gateway.
Alternative Subject Type Type of attribute to use as the Subject Alternativename.
Alternative Subject Value Value of the attribute that is used as the SubjectAlternative name.
Private Key Type Algorithm for generating the private key.
Private Key Length Length of the private key.
Passphrase Passphrase you want the end user to enter andconfirm when the user authenticates using thecertificate. We recommend choosing a passphrasethat meets the following requirements:
• Be at least eight characters long• Contain a combination of numbers, letters, and
special characters
Note: Secure passphrases are neverbased on personal information such asnames, birthdays, ID numbers, or phonenumbers.
6. Click Next.7. (Optional) Select additional options for Key Usage and Extended Key Usage according to your environment.8. Click Create. The certificate request is created and saved as a .csr file.
If you configured internal certificates as a gateway authentication method, you must:
• Inform end users that they must create a certificate request in the Stonesoft VPN Client.• Provide end users with the information they must enter.• Inform end users which options they must select when they create the certificate request.

Configuring certificates | 19
Obtain signed certificatesCertificate requests generated in the Stonesoft VPN Client are signed by the Management Server internal VPNCA or by a third-party CA.
The CA that signs the Stonesoft VPN Client certificate must be defined as a trusted VPN certificate authorityin the SMC. To sign a certificate request internally, use the certificate signing tool in the VPN branch of theConfiguration view in the Management Client. See the Stonesoft Next Generation Firewall Product Guide formore information.
Import a signed certificateA signed certificate must be imported into the Stonesoft VPN Client.
Note: If you are not the administrator, the administrator signs your certificate request for aninternal certificate and sends it back to you.
1. In the system tray on the Windows taskbar, right-click the Stonesoft VPN Client icon, then select Properties.2. Click the Certificates tab.3. Click Import Certificate.4. Verify that Internal Certificate is selected and click Next.5. Click Select.
A Windows file browser opens.6. Browse to the correct folder, select the signed certificate, and click Open.7. Click Finish to close the wizard.
The certificate is now listed on the Certificates tab. The Certificates tab displays, among other information, theexpiration date of the certificate.
Authenticating with external certificatesYou might prefer to use external tools to create the certificate request instead of having it created in the StonesoftVPN Client. This method is useful if the end users already have suitable signed certificates and private keys thatcan be used.
There are of three ways of using previously generated external certificates with the Stonesoft VPN Client. Youcan use:
• An external certificate stored on a smart card• A certificate stored in the Microsoft Certificates Store on your local computer• An imported certificate in the Stonesoft VPN Client
Locally stored certificates used for the Microsoft Certificates Store on the end-user computer are automaticallyavailable for use with the Stonesoft VPN Client. In all other cases, the end users must import both the certificateand the private key in the Stonesoft VPN Client. The certificates and the private keys can be imported either asa single PKCS # 12 file or as two separate files. You must inform the end users which options they must selectwhen importing the external certificates.
Only certificates signed by the Management Server internal VPN certificate authority are trusted by default. Othercertificate signers must be configured as trusted on the gateway to allow the end users to authenticate. See theStonesoft Next Generation Firewall Product Guide for more information.

Configuring certificates | 20
Import a PKCS #12 fileImport the file containing the certificate and the private key.
1. Open the Import Certificate Wizard.1. In the system tray on the Windows taskbar, right-click the Stonesoft VPN Client icon, then select
Properties.2. Click the Certificates tab.3. Click Import Certificate.
2. Select External Certificate.3. Select PKCS # 12 File and click Next.4. Click Browse and select the PKCS #12 file to import.5. In the PKCS #12 Password field, enter the PKCS #12 password for the certificate file.6. In the Passphrase field, enter and confirm a passphrase to use whenever you authenticate yourself using
the certificate.You can select this passphrase yourself. We recommend choosing a passphrase that meets the followingrequirements:
• Be at least eight characters long• Contain a combination of numbers, letters, and special characters
Note: Secure passphrases are never based on personal information such as names,birthdays, ID numbers, or phone numbers.
7. Click Next > Finish.
The signed certificate is now listed on the Certificates tab. The Certificates tab displays, among otherinformation, the expiration date of the certificate.
Import separate certificate and private key filesIf there is an existing external certificate and private key files that you want to use for authentication, you canimport them into the Stonesoft VPN Client.
1. In the system tray on the Windows taskbar, right-click the Stonesoft VPN Client icon, then select Properties.2. Click the Certificates tab.3. Click Import Certificate. The Import Certificate Wizard opens.4. Select External Certificate.5. Select Separate Certificate and Private Key Files and click Next.6. Click Browse to select the certificate file and private key file to import.7. Click Next > Finish.
The certificate is now listed on the Certificates tab. The Certificates tab displays, among other information, theexpiration date of the certificate.
Change the certificate passphraseYou must enter a passphrase every time the Stonesoft VPN Client asks you to authenticate yourself using thiscertificate. You can change the passphrase of a certificate that you have imported through the Stonesoft VPNClient.
You can choose this passphrase yourself. We recommend choosing a passphrase that meets the followingrequirements:
• It is at least eight characters long

Configuring certificates | 21
• It contains a combination of numbers, letters, and special characters
Note: Secure passphrases are never based on personal information such as names, birthdays,ID numbers, or phone numbers.
1. In the system tray on the Windows taskbar, right-click the Stonesoft VPN Client icon, then select Properties.2. Click the Certificates tab.3. Right-click the certificate and select Change Key Passphrase.
The Change Key Passphrase dialog box opens.4. Enter the current passphrase and the new passphrase in both fields provided, and click OK.
Note: If you leave the new passphrase fields empty, the private key of the certificate is notencrypted. For security reasons, it is highly recommended that you enter a passphrase.
View user certificate detailsTo learn more about a user certificate, you can access the Microsoft Certificates Store on your computer and theissuer certificate in the Trusted Root Certification Store.
Although the Windows Certificate dialog box provides tools for installing the user certificate, installing the usercertificate is not necessary for the operation of the Stonesoft VPN Client.
Note: This operating system dialog box is not part of the Stonesoft VPN Client. If you want moreinstructions for it, press F1 to view the context-specific Windows help for this dialog box.
1. In the system tray on the Windows taskbar, right-click the Stonesoft VPN Client icon, then select Properties.2. Click the Certificates tab.3. Right-click the certificate and select Details of User Certificate or Details of Issuer Certificate.
The Windows Certificate dialog box opens.
The General, Details, and Certification Path tabs provide detailed information about the certificate.
Change the certificate user ID typeSeveral user IDs can be available for each imported certificate. The options available depend on which types ofinformation are included in the certificate.
CAUTION: If you are not the administrator, do not change the user ID type unless theadministrator specifically instructs you to do so.
1. In the system tray on the Windows taskbar, right-click the Stonesoft VPN Client icon, then select Properties.2. Click the Certificates tab.3. Right-click the certificate that you want to change and select one of these options:
• Certificate ID to Use > E-mail• Certificate ID to Use > Subject Name• Certificate ID to Use > DNS Name• Certificate ID to Use > IP Address.

Configuring certificates | 22
Enable CRL checksFor IPsec connections, you can optionally enable Certificate Revocation List (CRL) checks to verify the validity ofgateway certificates.
1. In the system tray on the Windows taskbar, right-click the Stonesoft VPN Client icon, then select Properties.
2. Click the Advanced tab.3. Select Check Gateway Certificate Validity on Certificate-Specified CRLs.4. Click Apply.5. Click Close.
Certificate expirationFor added security, certificates have an expiration date. Certificates signed by the Management Server internalVPN CA are valid for three years from their creation.
It is not possible to extend the validity of the certificates. To continue using certificate authentication for more thanthree years on the same installation, you must create a new certificate.
The CA also has an expiration date. The Management Server internal VPN CA is valid for 10 years. A new CA isautomatically created six months before the expiration, and you must create new certificates for the clients andsign them with the new CA.
Delete certificatesSometimes, an imported certificate might become unnecessary. In such cases, you can delete the obsoletecertificate through the Stonesoft VPN Client.
1. In the system tray on the Windows taskbar, right-click the Stonesoft VPN Client icon, then select Properties.2. Click the Certificates tab.3. Right-click the certificate and select Delete Certificate.
A confirmation dialog box appears.4. Click Yes to permanently delete the certificate.

Troubleshooting VPN connections | 23
Troubleshooting VPN connectionsIf you are having problems with your VPN connections, consider these options for resolving the issue.
Logs and diagnosticsThe Stonesoft VPN Client has a Diagnostics tab where you can access logs and diagnostics information toanalyze VPN connections.
Access logs and diagnosticsLogs and diagnostics are a useful resource for administrators and Forcepoint support when troubleshootingVPNs.
There are two ways to gather the diagnostics and log files. The most convenient way to gather information fromend-user computers is to instruct end users to collect a diagnostics file that also includes the logs. You can alsoview the logs separately when you are troubleshooting a Stonesoft VPN Client locally.
1. In the system tray on the Windows taskbar, right-click the Stonesoft VPN Client icon, then select Properties.
2. Click the Diagnostics tab.
Collect diagnostic informationDiagnostics collect all the relevant information on how the Stonesoft VPN Client operates, including logs, networkinterface status, routes, and active connections.
The diagnostics are collected in a single archive for easy transfer. The file does not contain secret informationsuch as passwords, but it does contain information related to the VPN configuration such as internal IPaddresses. Depending on your operating environment, the file might need to be handled securely.
Diagnostics information is meant for administrators. If you are experiencing connection problems with theStonesoft VPN Client, the administrator might ask you to collect and send in a file containing diagnosticsinformation about your installation.
1. In the system tray on the Windows taskbar, right-click the Stonesoft VPN Client icon, then select Properties.2. Click the Diagnostics tab.3. Click Collect Diagnostics.
The Collect Diagnostics dialog box opens and displays the progress of the data collection. You might seean additional dialog box open when system information is gathered.
4. When the data collection finishes, click Save Diagnostics.5. Browse to the location where you want to save the file, enter a file name, and click Save.
Reading logsThe Stonesoft VPN Client maintains its own log of events related to its operation. You can view this log directly inthe Stonesoft VPN Client.
This log is also included in the diagnostics file. Depending on the issue you are troubleshooting, there might beadditional relevant logs in the Windows logs.

Troubleshooting VPN connections | 24
Figure 1: View Logs dialog box
1. Log entries2. Links to view more detailed information3. Modes to view logs in real time, from a certain time period, all stored logs, or the most recent logs with
detailed information4. Keyword search to look for specific log entries
Note: This option is not available in all view modes.
5. Navigation to find more occurrences of the keyword
Capture network trafficFrom the Stonesoft VPN Client, you can record the network traffic of the local computer during a problemsituation to help with troubleshooting.
If you are not the administrator, the administrator might ask for the traffic capture files. Alternatively, theadministrator might capture local network traffic through your Stonesoft VPN Client. The traffic recordings aresaved on the local computer in the traffic dump files adapter.pcap and protocol.pcap in the specified folder.
1. In the system tray on the Windows taskbar, right-click the Stonesoft VPN Client icon, then select Properties.2. Click the Diagnostics tab.3. Click Capture Traffic.
The Capture Traffic dialog box opens.4. (Optional) Click Browse and browse to the folder where you want to save the traffic capture files.5. Click Start Capture.
The traffic capture begins.6. Click Stop Capture when all traffic related to the problem has been recorded.7. Click Close to close the Capture Traffic dialog box.

Troubleshooting VPN connections | 25
Accessing and customizing traffic dump filesTraffic captures record the network traffic of the local computer to help with troubleshooting when networkproblems are suspected.
The recorded traffic is saved on the local computer in the traffic dump files adapter.pcap and protocol.pcap.These files can be opened with any program that can display .pcap files.
You can customize how traffic is captured by changing the values for the registry key HKEY_LOCAL_MACHINE\SYSTEM\CurrentControlSet\services\sgravpn\Parameters on the local computer.
Table 7: Registry values for customizing traffic captures
Name Type Description
CaptureMaxSize REG_DWORD The maximum traffic capture filesize in MB. If not defined, themaximum size is 10 MB.
CaptureDirectory REG_SZ The default directory in which trafficcapture files are stored.
CaptureSnapLength REG_DWORD The number of bytes captured fromeach network packet. If not defined,the whole packet is captured.
CaptureSystemStartup REG_DWORD If set to 1, the traffic capture isstarted immediately when theoperating system starts.
Solving connectivity issuesYou can resolve some connectivity issues by adjusting different VPN settings.
Using different connection settingsSome connectivity problems can be solved by configuring the Stonesoft VPN Client to automatically try differentcombinations of retry settings.
The automatic retry setting is useful in dealing with network connections that severely restrict the allowedcommunications. In such situations, you can browse the Internet outside the VPN connection, but the StonesoftVPN Client is unable to connect to the VPN gateway. The retry option is on the Advanced tab in Stonesoft VPNClient Properties dialog box.
Activate or deactivate random local VPN portsFor IPsec VPN connections, you can configure the Stonesoft VPN Client to select random local VPN ports whenopening a VPN connection.
Note: By default, the Stonesoft VPN Client uses local ports 500 and 4500 for VPN connections.
VPN connections might fail because the default local ports that the Stonesoft VPN Client uses for VPNconnections, ports 500 and 4500, cannot be used in your environment.
Troubleshooting VPN connections | 26
If these default ports cannot be used for VPN connections, enable a random selection of ports from the 1025–65535 range every time a VPN connection is made.
1. In the system tray on the Windows taskbar, right-click the Stonesoft VPN Client icon, then select Properties.2. Click the Advanced tab.3. Select or deselect Use Random Local VPN Connection Ports.4. Click Apply.5. Click Close.
Change the Stonesoft VPN Client MTUIf you experience network problems, you can adjust the maximum transmission unit (MTU) size for your StonesoftVPN Client installation.
Large chunks of data that you send over networks are broken down into several smaller units, called packets,for transfer. The MTU defines how large the packets can be. A larger MTU is more efficient, but the packet sizemight have to be reduced if the packets are sent through a network or device that cannot handle large packets.
Important: If you are not the administrator, do not change the Stonesoft VPN Client MTU unlessthe administrator tells you to.
1. In the system tray on the Windows taskbar, right-click the Stonesoft VPN Client icon, then select Properties.2. Click the Advanced tab.3. Select the MTU from the list or type in the MTU value.
If you are not the administrator, the administrator tells you what value to use.4. Click Apply and Close.5. Restart the computer.
Change the Stonesoft VPN Client MAC addressIf you experience networking problems, you can adjust the MAC (media access control) address of yourStonesoft VPN Client. Changing the MAC address requires Windows administrator rights.
Note:
The Stonesoft VPN Client MAC address can also be changed through the command line or with ascript by running the sgvmac.exe command.
Example: To change the MAC address to 06:05:04:03:02:01, enter:
sgvmac.exe 06:05:04:03:02:01
A media access control address (MAC address) is a unique identifier assigned to the Stonesoft VPN Client forcommunications on the network. Changing the MAC address affects the virtual IP address the Stonesoft VPNClient gets when connecting to the gateway.
Important: If you are not the administrator, do not make this change unless the administrator tellsyou to.
1. In the system tray on the Windows taskbar, right-click the Stonesoft VPN Client icon, then select Properties.2. Click the Advanced tab.3. Click Select MAC Address.
The MAC Address for Virtual IP Address dialog box opens.
Troubleshooting VPN connections | 27
Windows might display a security dialog box before the MAC Address for Virtual IP Address dialog boxopens.
4. Select or type the correct MAC Address and click Apply.
Note: If you are not the administrator, your administrator provides the information.
5. Click Close.6. Click Apply and Close in the Stonesoft VPN Client Properties dialog box.

Using the Stonesoft VPN Client in automated mode | 28
Appendix
Using the Stonesoft VPN Client inautomated mode
You can configure the Stonesoft VPN Client to establish and maintain VPN connections automatically. This modeis useful for situations where there is no user present to start the VPN connection, such as for automated tellermachines.Related tasksInstall using a custom installation package on page 11Customizing the installation allows you to add information into the installation package, and to install and updatethe Stonesoft VPN Client remotely.
How automated mode worksIf the Stonesoft VPN Client is started in automated mode, it automatically creates a VPN connection to theVPN gateway specified in the Stonesoft VPN Client configuration. It also automatically creates a VPN when thecomputer on which the Stonesoft VPN Client has been installed is started.
The Stonesoft VPN Client user is authenticated either with a certificate or with a password. The first certificatefound in the Stonesoft VPN Client Certificate directory is used with certificate authentication.
Important: If you want to use the Stonesoft VPN Client in automated mode on a computer thatalready has the Stonesoft VPN Client installed, you must first uninstall the existing Stonesoft VPNClient. Then reinstall it according to the instructions in this document.
How automated mode affects the user interfaceThe Stonesoft VPN Client user interface is not started automatically when the Stonesoft VPN Client has beeninstalled in automated mode.
If necessary, you can start the user interface from the Programs folder in the Start menu. In automated mode, theuser interface can only be used for monitoring the connection status. All commands from the user interface areignored.
Preparing files for installationSeveral files are always needed for installing and authenticating the Stonesoft VPN Client for use in automatedmode.
• Stonesoft VPN Client installation file• Gateway contact information file for the Stonesoft VPN Client• Depending on the authentication method, one of these files:
• Password file — You must have the password file for the Stonesoft VPN Client.• Certificate file — You must have a private key file and a certificate file for the Stonesoft VPN Client.
Note: The private key must not be encrypted.
Using the Stonesoft VPN Client in automated mode | 29
If the Stonesoft VPN Client user is authenticated with a password, you must create a .txt file that defines theuser name and the password. Optionally, the signature type that matches the gateway certificate (RSA, DSS, orECDSA) can also be defined. If the signature type is not specified in the password file, RSA is used.
The user name and the password are defined in the password file using this format:
<user>user name</user>
<pass>password</pass>
The signature type is defined in one of the following ways:
<auth>RSA</auth>
<auth>DSS</auth>
<auth>ECDSA</auth>
The private key file and certificate file or the password file are used to authenticate the user. Only one of theauthentication methods can be used at the same time. The gateway contact information file contains theinformation the Stonesoft VPN Client needs for making an initial connection to a gateway. The installer asksfor the gateway contact information and for the authentication files (the private key file and certificate file, or thepassword file) during the installation. The gateway contact information file is created in the Management Client.
Related conceptsUser authentication on page 8End users must authenticate before they can connect to a gateway.
Authenticating with client certificates on page 16Stonesoft VPN Client IPsec connections support using certificates to authenticate end users.
Related tasksSave the gateway contact information to a file on page 12

Using the Stonesoft VPN Client in automated mode | 30
You can save the contact information for security gateways to a file. The file can then be added into a custominstallation package or copied to the end-user computers that already have a Stonesoft VPN Client installed.
Create a script to install the Stonesoft VPNClient in silent mode
When you install the Stonesoft VPN Client with a command-line script in silent mode, the installation runs withoutany messages about the progress of the installation.
Example script 1 — This script is for certificate authentication.
@echo.
@echo * Installing Stonesoft VPN Client...
%1 /quiet /log install_log.txt SG_INSTALL_MODE=Automated
@echo.
@echo * Stopping Stonesoft VPN Client Service...
net stop sgipsecvpn
@echo.
@echo * Copying configuration files...
copy %2 "%ALLUSERSPROFILE%\Forcepoint\Stonesoft VPN Client\certificates\client.crt"
copy %3 "%ALLUSERSPROFILE%\Forcepoint\Stonesoft VPN Client\certificates\client.prv"
copy %4 "%ALLUSERSPROFILE%\Forcepoint\Stonesoft VPN Client\gateway_info\contact_info_a.xml"
@echo.
@echo * Starting Stonesoft VPN Client Service...
net start sgipsecvpn
Example script 2 — This script is for username and password authentication.
@echo.
@echo * Installing Stonesoft VPN Client...
%1 /quiet /log install_log.txt SG_INSTALL_MODE=Automated
@echo.
@echo * Stopping Stonesoft VPN Client Service...
net stop sgipsecvpn
@echo.
@echo * Copying configuration files...
copy %2 "%ALLUSERSPROFILE%\Forcepoint\Stonesoft VPN Client\passwd.txt"
copy %3 "%ALLUSERSPROFILE%\Forcepoint\Stonesoft VPN Client\gateway_info\contact_info_a.xml"
@echo.
@echo * Starting Stonesoft VPN Client Service...
net start sgipsecvpn
Each example script works in this order:
1. It starts the installer with the following arguments: /quiet /log install_log.txtSG_INSTALL_MODE=Automated. It also creates a log file install_log.txt from the installation process.

Using the Stonesoft VPN Client in automated mode | 31
2. It then starts the Stonesoft VPN Client. The Stonesoft VPN Client service is still shut down because the filesused in authentication and the gateway contact information file are still missing.
3. Next the script copies the missing files to the directory %ALLUSERSPROFILE%\Forcepoint\StonesoftVPN Client.
4. Finally, the script starts the Stonesoft VPN Client service.
To use the script, put all relevant files in the same directory:
• Script file• Stonesoft VPN Client installation file• Gateway contact information file for the Stonesoft VPN Client• (If a certificate is used as the authentication method) Certificate file and private key file for the IPsec Stonesoft
VPN Client• (If a password is used as the authentication method) Password file for the Stonesoft VPN Client
Note: If you use your own script, use the same destination file names for the certificate and theprivate key as in the example script — client.crt and client.prv.
Install the Stonesoft VPN Client in silent modeYou can install the Stonesoft VPN Client silently with your own script or with one of the example scripts.
1. Open a command prompt as an administrator.2. Run the script and enter the parameters according to the selected authentication method:
• If you use a certificate (Example Script 1), enter:
script.bat <INSTALLER.EXE> <CERTIFICATE> <PRIVATE_KEY> <GW_CONTACT_INFO_FILE>
• If you use a password (Example Script 2), enter:
script.bat <INSTALLER.EXE> <PASSWORD> <GW_CONTACT_INFO_FILE>
When the installation is finished, Stonesoft VPN Client has been configured for use in automated mode. It startsautomatically and tries to establish a VPN to the gateway.
If the number of Stonesoft VPN Client installations is large, it might be necessary to adjust the default connectionretry times.
Related conceptsConnection retry times in automated mode on page 32If the Stonesoft VPN Client is used in automated mode, it automatically tries to reconnect to the VPN gateway ifthe VPN connection is lost.
Error handling in automated mode on page 32If errors occur in VPN connections, the Stonesoft VPN Client automatically attempts to recover. There are twotypes of errors — unrecoverable and recoverable.
How automated mode affects the user interface on page 28
Using the Stonesoft VPN Client in automated mode | 32
The Stonesoft VPN Client user interface is not started automatically when the Stonesoft VPN Client has beeninstalled in automated mode.
Connection retry times in automated modeIf the Stonesoft VPN Client is used in automated mode, it automatically tries to reconnect to the VPN gateway ifthe VPN connection is lost.
The default connection retry times for the automated Stonesoft VPN Client are:
• Minimum connection retry time: 3 seconds• Maximum connection retry time: 192 seconds.
In installations that have many automated Stonesoft VPN Client installations, it might be necessary to adjust thedefault connection retry times. Changing the connection retry times might be useful to ensure connectivity afternetwork outages, for example. To adjust the default connection retry times, edit the retryconf.txt file and save itto the directory <system_drive>\ProgramData\Forcepoint\Stonesoft VPN Client\retryconf.txt. The Stonesoft VPNClient must be installed before you can save the retryconf.txt file to the directory.
The syntax for adjusting the connection retry times using the retryconf.txt file is the following:
<min>minimum connection retry time in seconds</min>
<max>maximum connection retry time in seconds</max>
<rnd>percentage of randomness in connection retry time</rnd>
The default connection retry time is an increasing multiple of the minimum connection retry time, but itdoes not exceed the maximum connection retry value. The randomness percentage adds time*rnd(-1.0 ..1.0)*percentage/100 to the connection retry time during each attempt. However, the connection retry time neverexceeds the maximum connection retry time or goes below the minimum connection retry time.
Unless specified in the configuration file, the randomness percentage is not used. If the retryconf.txt file does notexist in the directory, the default connection retry times are used.
Error handling in automated modeIf errors occur in VPN connections, the Stonesoft VPN Client automatically attempts to recover. There are twotypes of errors — unrecoverable and recoverable.
Unrecoverable errorsUnrecoverable errors cannot be resolved automatically and require user interaction.
If the Stonesoft VPN Client encounters an unrecoverable error, it shuts down and does not attempt a restart.Unrecoverable errors include:
• A required certificate, private key, or gateway information file is missing or contains invalid information.• The private key is encrypted and requires entering a passphrase.• The password file is incorrectly formatted or contains incorrect information (for example, there is a typo in the
user name or password).

Using the Stonesoft VPN Client in automated mode | 33
Recoverable errorsCertain types of errors are recoverable and do not require user interaction.
When the Stonesoft VPN Client encounters a recoverable error, it automatically tries to establish a new VPNconnection to the gateway. Depending on the error, the next connection attempt is either a normal connection tothe next gateway endpoint or an initial connection.
The Stonesoft VPN Client tries to make a normal connection when the following errors occur:
• Any connection state fails due to a recoverable error.• Gateway connectivity problems have been detected (dead peer detection).
The Stonesoft VPN Client tries to make an initial connection when the following errors are encountered:
• Configuration load fails. A failure can happen if the Stonesoft VPN Client receives an invalid configuration filefrom the gateway.
• The Stonesoft VPN Client has already attempted to connect to all gateway endpoints to solve the error.
When an error that does not require an initial connection occurs, the Stonesoft VPN Client always tries toconnect to the next gateway endpoint. When an initial connection is required, the Stonesoft VPN Client starts theconnection attempts from the first gateway endpoint specified in the gateway information file. If the configurationfile is not retrieved from the gateway, the Stonesoft VPN Client attempts to connect to the next gateway endpoint.
If an initial connection is required to recover from an error, the Stonesoft VPN Client usually waits for 3 secondsbefore initiating the connection. If the initial connection fails, the delay before the next connection attemptincreases exponentially — 3 s, 6 s, 12 s, up to a maximum of one hour.
If the number of Stonesoft VPN Client installations is large, it might be necessary to adjust the default connectionretry times.
Related conceptsConnection retry times in automated mode on page 32If the Stonesoft VPN Client is used in automated mode, it automatically tries to reconnect to the VPN gateway ifthe VPN connection is lost.

Index | 34
IndexAaddressing, virtual IP 6authenticating
certificates 16method 8
automated mode 28
Ccertificate request
advanced 18basic 17passphrase 17signed 19
certificatesauthenticating 16configuring 16CRL checks 22deleting 22details 21expiration 22external 19import 19, 19internal 17options 16passphrase 20signed 19
checksum 10client, VPN
upgrade 15client MAC, troubleshooting 26client MTU, troubleshooting 26connections
retry times 32settings 6troubleshooting 25
contact information, gatewayexport 12save 12
conventions and icons used in this guide 3CRL checks 22
Ddelete certificates 22diagnostics 23documentation
audience for this guide 3product-specific, finding 4typographical conventions and icons 3
dump files 25
Eerrors, automated mode
recoverable 33unrecoverable 32
expiration, certificates 22export, contact information 12
external certificates 19
Ggateway
client 7contact information 12
Iidentities, user 16import
certificate 19, 20PKCS #12 file 20private key files 20
installationchecksum 10command line 14custom 8, 11executable 7files 10file types 7interactive vs. silent 7options 7remote 7scripts 30silent 31standard 7, 8transform file 14using the wizard 11
internal certificates 17
Llogs
accessing 23collecting 23reading 23
MMicrosoft Installer file
edit 13silent installation 8Stonesoft VPN Client file name 7
MTU 26
Ppassphrase, change 20PKCS #12 file 20
Rretry settings 25, 32
SServicePortal, accessing 4

Index | 35
ServicePortal, finding product documentation 4settings
retry 25, 25, 32VPN 6
split tunneling 6
Ttechnical support, finding product information 4traffic, network
capture 24customize 25dump files 25
transform filescreate 13edit 13install 14
troubleshootingconnections 25logs and diagnostics 23MAC address 26MTU 26
Uupgrade 15user identities 16
VVirtual Adapter 6virtual IP addressing 6VPN
automated 7, 28client configuration 5gateway 5, 7
VPN ports 25
Copyright © 1996 - 2016 Forcepoint LLC Forcepoint™ is a trademark of Forcepoint LLC.
SureView®, ThreatSeeker®, TRITON®, Sidewinder® and Stonesoft® are registered trademarks of Forcepoint LLC. Raytheon is a registered trademark of Raytheon Company.
All other trademarks and registered trademarks are property of their respective owners.