stuffed toy - dear stella designdearstelladesign.com/wp-content/uploads/norton_the_narwhal.pdfc...
TRANSCRIPT
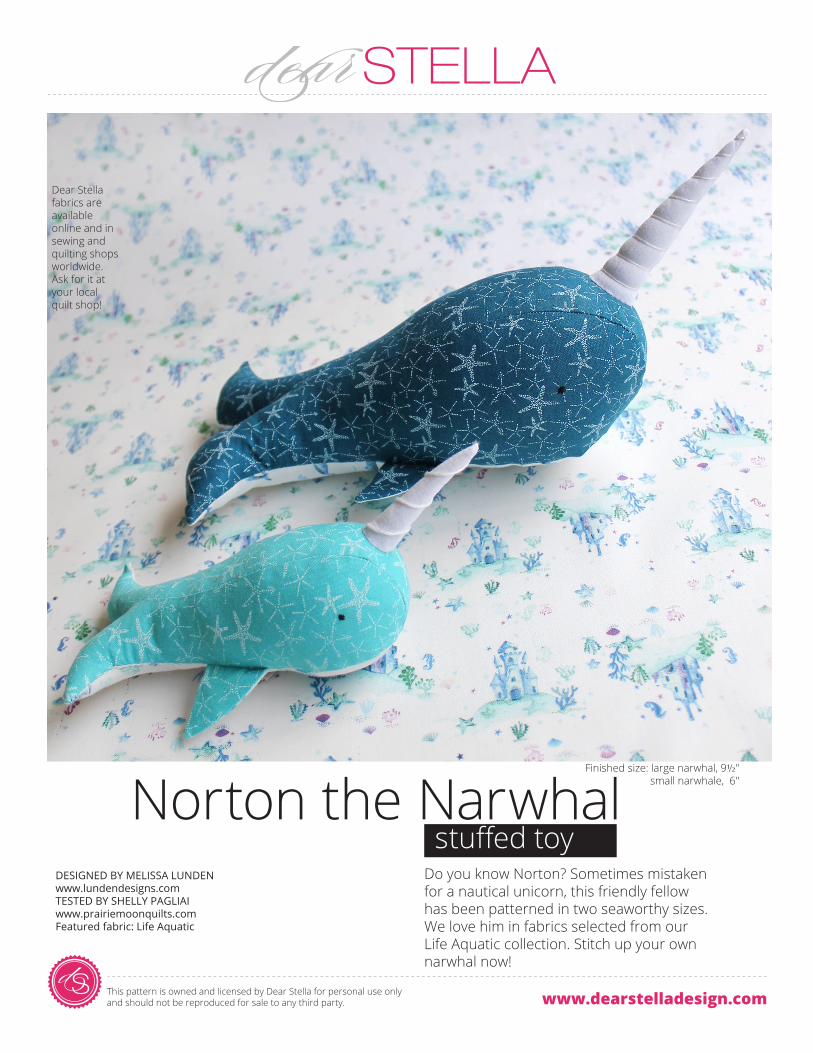
Do you know Norton? Sometimes mistaken for a nautical unicorn, this friendly fellow has been patterned in two seaworthy sizes. We love him in fabrics selected from our Life Aquatic collection. Stitch up your own narwhal now!
Dear Stella fabrics are available online and in sewing and quilting shops worldwide. Ask for it at your local quilt shop!
Norton the Narwhalstuffed toy
DESIGNED BY MELISSA LUNDENwww.lundendesigns.comTESTED BY SHELLY PAGLIAIwww.prairiemoonquilts.com Featured fabric: Life Aquatic
This pattern is owned and licensed by Dear Stella for personal use only and should not be reproduced for sale to any third party. www.dearstelladesign.com
Finished size: large narwhal, 9½"small narwhale, 6"

C
NorToN The NArWhAL STuFFeD Toy
This pattern is owned and licensed by Dear Stella for personal use only and should not be reproduced for sale to any third party. www.dearstelladesign.com
PAGe 2 oF 6
Materials and Cutting
Fabric Yardage* CuttingPrepare the pattern before cutting.
StarfishStella-504 Navy
1/4 yard
For each narwhal, cut: One and one reversed side/backs One back One and one reversed (upper) fin
NarwhalsStella-501 Blue
1/4 yardFor each narwhal, cut:
One belly One and one reversed (lower) fin
NetStella-370 White
6" x 6" scrap
For each narwhal, cut: One tusk
Other
Fiberfill 12 oz.
White and black embroidery floss, perle cotton or heavyweight thread.
Note: All seam allowances are 1/4" unless otherwise specified. Press the seam allowances to one side.
Prepare the Pattern and Pieces Print the pattern pieces on pages
3–6. Measure each 1" (2.5 cm) square to make sure patterns print at 100%.
Cut out all pattern pieces along the solid outlines. Align the large side/tail and belly A and B sections along the dashed lines as indicated. Tape the sections together along the dashed lines to complete those pattern pieces.
Use your favorite marking method to transfer the eye, tusk, and alignment pattern markings to the fabrics.
Assemble the Narwhal Using the black embroidery floss,
perle cotton, or heavyweight thread, satin stitch one eye on the right side of each side/tail piece.
With right sides together, and match-ing A marks, align one long edge of the back to the upper curved edge of the side/tail. Starting at the A mark, sew the back to the side/tail, stopping at the pointed end of the back. Clip the sewn edge and fingerpress the seam
allowance to one side. Repeat to join the remaining side/tail piece to the opposite edge of the back.
With right sides together, match and pin the side/tail pieces together at the B mark. Sew the side/tail pieces together from the B mark to the pointed end of the back.
Place one upper and one lower fin right sides together, matching all outer edges. Stitch along the curved and long straight edges, leaving the short straight edge unsewn. Trim the sewn seam allowances and turn the fin right side out. Use a stiletto to smooth the sewn edges and form the fin point. Make two fins for each narwhal.
Align the unsewn edge of one fin to the lower edge of the side/tail at the marks. The curved edge of the fin should be closest to the nose of the norwhal. Pin the fin in place, making sure the fin and side/tail fabrics match. Repeat for the remaining fin.
With right sides togeth-er, match the C marks on the belly and back pieces. Starting at C, sew the belly to the narwhal body along one long edge, catching the raw edge of the fin in the seam. Sew past the fin, then stop and backstitch.
Repeat on the opposite side of the belly, this time, continuing around the tail and leaving a 11/2" to 2" opening for turning. Clip the curves and trim the seam allowances at the corners of the tail.
*one large and one small narwhal can be made from the given yardages.
Fin
ACA
Fin
ACA
B
Fin
C
Tip: Sew slowly around curved edges, stopping with the needle down as needed to adjust and realign fabric edges. It may be helpful to use a shorter stitch length.

Alig
n Si
de/T
ail B
alo
ng th
is e
dge.
This squareshould measure
1" x 1"(2.5 cm x 2.5 cm)
when printed.
Eye
Upper edge
Norton the NarwhalLarge Side/Tail A
Norton the NarwhalLarge Side/Tail B
Alig
n Si
de/T
ail A
alo
ng th
is e
dge.
A
Fin
B
NorToN The NArWhAL STuFFeD Toy Turn the narwhal right side out.
Use a stiletto to carefully smooth the seam and form crisp corners at the tail points.
Stuff the narwhal with fiberfill through the opening. Use a stuffing fork or other tool to work the fiberfill into the small spaces. Fold the seam allowance to the wrong side at the opening and hand stitch the opening closed.
Make the Tusk Fold the tusk right sides together,
aligning the long straight edges. Sew the straight edges together, forming a narrow cone. Trim the seam allowances to 1/8" and turn the tusk right side out. Use a stilletto to form a point at the tusk end.
Stuff the tusk with fiberfill. Fold the raw edges to the wrong side at the base of the tusk. Center the tusk on the back as indicated by the pattern marking, and hand stitch the tusk in place.
Thread a needle with white embroi-dery floss, perle cotton, or heavyweight thread. Secure the thread end to the base of the tusk with a few short
stitches. Wrap the thread around the tusk in a spiral, securing the thread as needed with a few hand stitches. Secure the thread end at the top of the tusk, and trim any excess thread.
This pattern is owned and licensed by Dear Stella for personal use only and should not be reproduced for sale to any third party. www.dearstelladesign.com
PAGe 3 oF 6

This squareshould measure
1" x 1"(2.5 cm x 2.5 cm)
when printed.
Norton the Narwhal
Large Back
Norton the NarwhalLarge Tusk
Tusk
Norton the Narwhal
Large Fin
A
A
C
NorToN The NArWhAL STuFFeD Toy
This pattern is owned and licensed by Dear Stella for personal use only and should not be reproduced for sale to any third party. www.dearstelladesign.com
PAGe 4 oF 6

Alig
n Be
lly B
alo
ng th
is e
dge.
This squareshould measure
1" x 1"(2.5 cm x 2.5 cm)
when printed.
Nor
ton
the
Nar
wha
lLa
rge
Belly
A
Norton the NarwhalLarge Belly B
Align Belly A along this edge.
C
NorToN The NArWhAL STuFFeD Toy
This pattern is owned and licensed by Dear Stella for personal use only and should not be reproduced for sale to any third party. www.dearstelladesign.com
PAGe 4 oF 6

This squareshould measure
1" x 1"(2.5 cm x 2.5 cm)
when printed.
Norton the NarwhalSmall Back
Norton the NarwhalSmall Tusk
Eye
Upper edge
Tusk
Norton the NarwhalSmall Belly
SmallFin
Norton the NarwhalSmall Side/Tail
A
C
A C A
Fin
B
NorToN The NArWhAL STuFFeD Toy
This pattern is owned and licensed by Dear Stella for personal use only and should not be reproduced for sale to any third party. www.dearstelladesign.com
PAGe 6 oF 6