sure seal connectors - rs components · 2019. 10. 12. · sur e-seal...
TRANSCRIPT
Sure-Seal
▲○
○
○
○
○
○
○
○
○
○
○
○
○
○
○
○
○
○
○
○
○
○
○
○
○
○
○
○
○
○
○
○
○
○
○
○
○
○
○
○
○
○
○
○
○
○
○
○
○
○
○
○
○
○
○
○
○
○
○
○
○
○
○
○
○
○
○
○
○
○
○
○
○
®
Specifications subject to change.
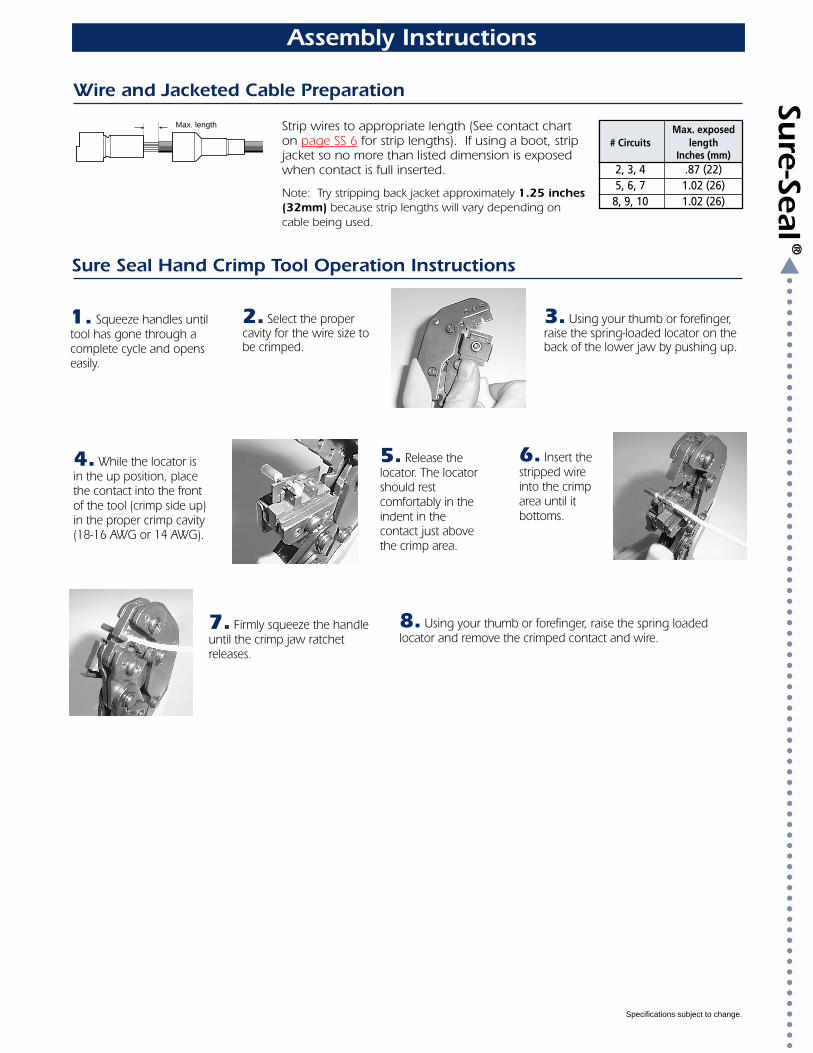
Assembly Instructions
2. Select the propercavity for the wire size tobe crimped.
3. Using your thumb or forefinger,raise the spring-loaded locator on theback of the lower jaw by pushing up.
Wire and Jacketed Cable Preparation
Sure Seal Hand Crimp Tool Operation Instructions
Max. exposed# Circuits length
Inches (mm)2, 3, 4 .87 (22)5, 6, 7 1.02 (26)
8, 9, 10 1.02 (26)
Strip wires to appropriate length (See contact charton page SS 6 for strip lengths). If using a boot, stripjacket so no more than listed dimension is exposedwhen contact is full inserted.
Note: Try stripping back jacket approximately 1.25 inches(32mm) because strip lengths will vary depending oncable being used.
Max. length
1. Squeeze handles untiltool has gone through acomplete cycle and openseasily.
5. Release thelocator. The locatorshould restcomfortably in theindent in thecontact just abovethe crimp area.
6. Insert thestripped wireinto the crimparea until itbottoms.
7. Firmly squeeze the handleuntil the crimp jaw ratchetreleases.
4. While the locator isin the up position, placethe contact into the frontof the tool (crimp side up)in the proper crimp cavity(18-16 AWG or 14 AWG).
8. Using your thumb or forefinger, raise the spring loadedlocator and remove the crimped contact and wire.