symantec netbackup for vmware administrator's...
TRANSCRIPT

Symantec NetBackup ™ forVMware Administrator'sGuide
UNIX, Windows, and Linux
Release 7.0.1

Symantec NetBackup™ for VMware GuideThe software described in this book is furnished under a license agreement and may be usedonly in accordance with the terms of the agreement.
Documentation version: 7.0.1
Legal NoticeCopyright © 2010 Symantec Corporation. All rights reserved.
Symantec, the Symantec Logo, and NetBackup are trademarks or registered trademarks ofSymantec Corporation or its affiliates in the U.S. and other countries. Other names may betrademarks of their respective owners.
Portions of this software are derived from the RSA Data Security, Inc. MD5 Message-DigestAlgorithm. Copyright 1991-92, RSA Data Security, Inc. Created 1991. All rights reserved.
This Symantec product may contain third party software for which Symantec is requiredto provide attribution to the third party (“Third Party Programs”). Some of the Third PartyPrograms are available under open source or free software licenses. The License Agreementaccompanying the Software does not alter any rights or obligations you may have underthose open source or free software licenses. Please see the Third Party Legal Notice Appendixto this Documentation or TPIP ReadMe File accompanying this Symantec product for moreinformation on the Third Party Programs.
The product described in this document is distributed under licenses restricting its use,copying, distribution, and decompilation/reverse engineering. No part of this documentmay be reproduced in any form by any means without prior written authorization ofSymantec Corporation and its licensors, if any.
THE DOCUMENTATION IS PROVIDED "AS IS" AND ALL EXPRESS OR IMPLIED CONDITIONS,REPRESENTATIONS AND WARRANTIES, INCLUDING ANY IMPLIED WARRANTY OFMERCHANTABILITY, FITNESS FOR A PARTICULAR PURPOSE OR NON-INFRINGEMENT,ARE DISCLAIMED, EXCEPT TO THE EXTENT THAT SUCH DISCLAIMERS ARE HELD TOBE LEGALLY INVALID. SYMANTEC CORPORATION SHALL NOT BE LIABLE FOR INCIDENTALOR CONSEQUENTIAL DAMAGES IN CONNECTION WITH THE FURNISHING,PERFORMANCE, OR USE OF THIS DOCUMENTATION. THE INFORMATION CONTAINEDIN THIS DOCUMENTATION IS SUBJECT TO CHANGE WITHOUT NOTICE.
The Licensed Software and Documentation are deemed to be commercial computer softwareas defined in FAR 12.212 and subject to restricted rights as defined in FAR Section 52.227-19"Commercial Computer Software - Restricted Rights" and DFARS 227.7202, "Rights inCommercial Computer Software or Commercial Computer Software Documentation", asapplicable, and any successor regulations. Any use, modification, reproduction release,performance, display or disclosure of the Licensed Software and Documentation by the U.S.Government shall be solely in accordance with the terms of this Agreement.

Symantec Corporation350 Ellis StreetMountain View, CA 94043
http://www.symantec.com

Technical SupportSymantec Technical Support maintains support centers globally. TechnicalSupport’s primary role is to respond to specific queries about product featuresand functionality. The Technical Support group also creates content for our onlineKnowledge Base. The Technical Support group works collaboratively with theother functional areas within Symantec to answer your questions in a timelyfashion. For example, the Technical Support group works with Product Engineeringand Symantec Security Response to provide alerting services and virus definitionupdates.
Symantec’s support offerings include the following:
■ A range of support options that give you the flexibility to select the rightamount of service for any size organization
■ Telephone and/or Web-based support that provides rapid response andup-to-the-minute information
■ Upgrade assurance that delivers software upgrades
■ Global support purchased on a regional business hours or 24 hours a day, 7days a week basis
■ Premium service offerings that include Account Management Services
For information about Symantec’s support offerings, you can visit our Web siteat the following URL:
www.symantec.com/business/support/
All support services will be delivered in accordance with your support agreementand the then-current enterprise technical support policy.
Contacting Technical SupportCustomers with a current support agreement may access Technical Supportinformation at the following URL:
www.symantec.com/business/support/
Before contacting Technical Support, make sure you have satisfied the systemrequirements that are listed in your product documentation. Also, you should beat the computer on which the problem occurred, in case it is necessary to replicatethe problem.
When you contact Technical Support, please have the following informationavailable:
■ Product release level

■ Hardware information
■ Available memory, disk space, and NIC information
■ Operating system
■ Version and patch level
■ Network topology
■ Router, gateway, and IP address information
■ Problem description:
■ Error messages and log files
■ Troubleshooting that was performed before contacting Symantec
■ Recent software configuration changes and network changes
Licensing and registrationIf your Symantec product requires registration or a license key, access our technicalsupport Web page at the following URL:
www.symantec.com/business/support/
Customer serviceCustomer service information is available at the following URL:
www.symantec.com/business/support/
Customer Service is available to assist with non-technical questions, such as thefollowing types of issues:
■ Questions regarding product licensing or serialization
■ Product registration updates, such as address or name changes
■ General product information (features, language availability, local dealers)
■ Latest information about product updates and upgrades
■ Information about upgrade assurance and support contracts
■ Information about the Symantec Buying Programs
■ Advice about Symantec's technical support options
■ Nontechnical presales questions
■ Issues that are related to CD-ROMs or manuals

Support agreement resourcesIf you want to contact Symantec regarding an existing support agreement, pleasecontact the support agreement administration team for your region as follows:
[email protected] and Japan
[email protected], Middle-East, and Africa
[email protected] America and Latin America

Technical Support . . . . . . . . . . . . . . . . . . . . . . . . . . . . . . . . . . . . . . . . . . . . . . . . . . . . . . . . . . . . . . . . . . . . . . . . . . . . . . . . . . . . . . . . . . . . . . . 4
Chapter 1 Introduction . . . . . . . . . . . . . . . . . . . . . . . . . . . . . . . . . . . . . . . . . . . . . . . . . . . . . . . . . . . . . . . . . . . . . . . . . . 11
About NetBackup for VMware .... . . . . . . . . . . . . . . . . . . . . . . . . . . . . . . . . . . . . . . . . . . . . . . . . . . . . 11The features of NetBackup for VMware .... . . . . . . . . . . . . . . . . . . . . . . . . . . . . . . . . . . 12New features in the 7.0.1 release ... . . . . . . . . . . . . . . . . . . . . . . . . . . . . . . . . . . . . . . . . . . . . 12Features added in the 7.0 release ... . . . . . . . . . . . . . . . . . . . . . . . . . . . . . . . . . . . . . . . . . . . . 13
Full virtual machine backup vs file-level backup .... . . . . . . . . . . . . . . . . . . . . . . . . . . . . 14NetBackup for VMware: vStorage vs VCB .... . . . . . . . . . . . . . . . . . . . . . . . . . . . . . . . . . . . . . . 14Minimum levels for vStorage support ... . . . . . . . . . . . . . . . . . . . . . . . . . . . . . . . . . . . . . . . . . . . 14When is VCB required? .... . . . . . . . . . . . . . . . . . . . . . . . . . . . . . . . . . . . . . . . . . . . . . . . . . . . . . . . . . . . . . . 14NetBackup for VMware components ... . . . . . . . . . . . . . . . . . . . . . . . . . . . . . . . . . . . . . . . . . . . . . 15NetBackup for VMware environment diagrams .... . . . . . . . . . . . . . . . . . . . . . . . . . . . . . . 16Overview of the backup process ... . . . . . . . . . . . . . . . . . . . . . . . . . . . . . . . . . . . . . . . . . . . . . . . . . . . 17NetBackup for VMware license requirement ... . . . . . . . . . . . . . . . . . . . . . . . . . . . . . . . . . . 18Overview of VMware tasks ... . . . . . . . . . . . . . . . . . . . . . . . . . . . . . . . . . . . . . . . . . . . . . . . . . . . . . . . . . . 18Overview of NetBackup tasks ... . . . . . . . . . . . . . . . . . . . . . . . . . . . . . . . . . . . . . . . . . . . . . . . . . . . . . . 19About VMware storage optimization .... . . . . . . . . . . . . . . . . . . . . . . . . . . . . . . . . . . . . . . . . . . . . 20Terminology .... . . . . . . . . . . . . . . . . . . . . . . . . . . . . . . . . . . . . . . . . . . . . . . . . . . . . . . . . . . . . . . . . . . . . . . . . . . . 21
Chapter 2 Notes and prerequisites . . . . . . . . . . . . . . . . . . . . . . . . . . . . . . . . . . . . . . . . . . . . . . . . . . . . . 23
Prerequisites ... . . . . . . . . . . . . . . . . . . . . . . . . . . . . . . . . . . . . . . . . . . . . . . . . . . . . . . . . . . . . . . . . . . . . . . . . . . . . 23VMware notes and restrictions ... . . . . . . . . . . . . . . . . . . . . . . . . . . . . . . . . . . . . . . . . . . . . . . . . . . . . 24Deleting a vSphere Client snapshot ... . . . . . . . . . . . . . . . . . . . . . . . . . . . . . . . . . . . . . . . . . . . . . . 25Setting the Changed Block Tracking option in vSphere Client ... . . . . . . . . . . . . 25Notes on the hotadd transfer type .... . . . . . . . . . . . . . . . . . . . . . . . . . . . . . . . . . . . . . . . . . . . . . . . 27Creating a helper virtual machine for hotadd transfer ... . . . . . . . . . . . . . . . . . . . . . . 28
Chapter 3 Configure NetBackup for VMware . . . . . . . . . . . . . . . . . . . . . . . . . . . . . . . . . . . 29
Adding the VMware backup host to the NetBackupconfiguration .... . . . . . . . . . . . . . . . . . . . . . . . . . . . . . . . . . . . . . . . . . . . . . . . . . . . . . . . . . . . . . . . . . . . . 30
Adding NetBackup credentials for VMware .... . . . . . . . . . . . . . . . . . . . . . . . . . . . . . . . . . . . 30Changing the host name of a VMware server in NetBackup .... . . . . . . . . . . . . . . 33Incremental backups must be based on timestamps .... . . . . . . . . . . . . . . . . . . . . . . . 34
Contents

Configuring a VMware policy from the Policies node .... . . . . . . . . . . . . . . . . . . . . . . 34Configuration parameters for VMware .... . . . . . . . . . . . . . . . . . . . . . . . . . . . . . . . . . . . . . . . . . 38
Client name selection .... . . . . . . . . . . . . . . . . . . . . . . . . . . . . . . . . . . . . . . . . . . . . . . . . . . . . . . . . . . 38Virtual machine backup .... . . . . . . . . . . . . . . . . . . . . . . . . . . . . . . . . . . . . . . . . . . . . . . . . . . . . . . 39Transfer type .... . . . . . . . . . . . . . . . . . . . . . . . . . . . . . . . . . . . . . . . . . . . . . . . . . . . . . . . . . . . . . . . . . . . . 40Virtual machine quiesce ... . . . . . . . . . . . . . . . . . . . . . . . . . . . . . . . . . . . . . . . . . . . . . . . . . . . . . . . 41Exclude unused and deleted blocks ... . . . . . . . . . . . . . . . . . . . . . . . . . . . . . . . . . . . . . . . . . 42Existing snapshot handling .... . . . . . . . . . . . . . . . . . . . . . . . . . . . . . . . . . . . . . . . . . . . . . . . . . . 42Monolithic export (VCB only) ... . . . . . . . . . . . . . . . . . . . . . . . . . . . . . . . . . . . . . . . . . . . . . . . . 43Snapshot mount point (VCB only) ... . . . . . . . . . . . . . . . . . . . . . . . . . . . . . . . . . . . . . . . . . . . 43
Browse for VMware Virtual Machines screen .... . . . . . . . . . . . . . . . . . . . . . . . . . . . . . . . . . 44Virtual machine host names and display names must be unique in a
master server's policies ... . . . . . . . . . . . . . . . . . . . . . . . . . . . . . . . . . . . . . . . . . . . . . . . . . . . . . . . . 47Configuring a VMware policy from the Snapshot Policy Configuration
wizard .... . . . . . . . . . . . . . . . . . . . . . . . . . . . . . . . . . . . . . . . . . . . . . . . . . . . . . . . . . . . . . . . . . . . . . . . . . . . . . . 47About incremental backups of virtual machines ... . . . . . . . . . . . . . . . . . . . . . . . . . . . . . . 48Configuring incremental backups .... . . . . . . . . . . . . . . . . . . . . . . . . . . . . . . . . . . . . . . . . . . . . . . . . 48Volume Manager volumes in the virtual machine .... . . . . . . . . . . . . . . . . . . . . . . . . . . . 49Reducing the size of backups .... . . . . . . . . . . . . . . . . . . . . . . . . . . . . . . . . . . . . . . . . . . . . . . . . . . . . . . 50About block-level backup .... . . . . . . . . . . . . . . . . . . . . . . . . . . . . . . . . . . . . . . . . . . . . . . . . . . . . . . . . . . . 50Recovery options: vStorage vs VCB .... . . . . . . . . . . . . . . . . . . . . . . . . . . . . . . . . . . . . . . . . . . . . . . 51About older policies and pre-7.x backup hosts ... . . . . . . . . . . . . . . . . . . . . . . . . . . . . . . . . 53
Chapter 4 Back up VMware virtual machines . . . . . . . . . . . . . . . . . . . . . . . . . . . . . . . . . . 55
Backing up virtual machines ... . . . . . . . . . . . . . . . . . . . . . . . . . . . . . . . . . . . . . . . . . . . . . . . . . . . . . . . 55Further information on NetBackup policies ... . . . . . . . . . . . . . . . . . . . . . . . . . . . . . . . . . . . . 57
Chapter 5 Restore VMware virtual machines . . . . . . . . . . . . . . . . . . . . . . . . . . . . . . . . . . . 59
About restore of individual files ... . . . . . . . . . . . . . . . . . . . . . . . . . . . . . . . . . . . . . . . . . . . . . . . . . . . 59About restore of the virtual machine from a VCB backup .... . . . . . . . . . . . . . . . . . 60Restore notes and restrictions ... . . . . . . . . . . . . . . . . . . . . . . . . . . . . . . . . . . . . . . . . . . . . . . . . . . . . . 60If the recovery host is not at the same NetBackup release level as the
backup host ... . . . . . . . . . . . . . . . . . . . . . . . . . . . . . . . . . . . . . . . . . . . . . . . . . . . . . . . . . . . . . . . . . . . . . . . 62Restoring individual files ... . . . . . . . . . . . . . . . . . . . . . . . . . . . . . . . . . . . . . . . . . . . . . . . . . . . . . . . . . . . . 62Setting up NetBackup Client Service for restore to a shared virtual
machine drive ... . . . . . . . . . . . . . . . . . . . . . . . . . . . . . . . . . . . . . . . . . . . . . . . . . . . . . . . . . . . . . . . . . . . . 64Restoring the full VMware virtual machine .... . . . . . . . . . . . . . . . . . . . . . . . . . . . . . . . . . . . 65
Restore Marked Files dialog box (VMware) ... . . . . . . . . . . . . . . . . . . . . . . . . . . . . . . . 67Virtual Machine Recovery dialog boxes (restore to original
location) ... . . . . . . . . . . . . . . . . . . . . . . . . . . . . . . . . . . . . . . . . . . . . . . . . . . . . . . . . . . . . . . . . . . . . . . 70Virtual Machine Recovery dialogs boxes (restore to alternate
location) ... . . . . . . . . . . . . . . . . . . . . . . . . . . . . . . . . . . . . . . . . . . . . . . . . . . . . . . . . . . . . . . . . . . . . . . 73
Contents8
Chapter 6 Best practices and more information . . . . . . . . . . . . . . . . . . . . . . . . . . . . . 81
Best practices ... . . . . . . . . . . . . . . . . . . . . . . . . . . . . . . . . . . . . . . . . . . . . . . . . . . . . . . . . . . . . . . . . . . . . . . . . . . . 81For VCB backups .... . . . . . . . . . . . . . . . . . . . . . . . . . . . . . . . . . . . . . . . . . . . . . . . . . . . . . . . . . . . . . . . . 82VMware with deduplication .... . . . . . . . . . . . . . . . . . . . . . . . . . . . . . . . . . . . . . . . . . . . . . . . . . 82
More information on VMware .... . . . . . . . . . . . . . . . . . . . . . . . . . . . . . . . . . . . . . . . . . . . . . . . . . . . . 83Further assistance with NetBackup .... . . . . . . . . . . . . . . . . . . . . . . . . . . . . . . . . . . . . . . . . . . . . . 83Support information on NetBackup for VMware .... . . . . . . . . . . . . . . . . . . . . . . . . . . . . 83
Chapter 7 Troubleshooting . . . . . . . . . . . . . . . . . . . . . . . . . . . . . . . . . . . . . . . . . . . . . . . . . . . . . . . . . . . . . . . . . . 85
NetBackup logging for VMware .... . . . . . . . . . . . . . . . . . . . . . . . . . . . . . . . . . . . . . . . . . . . . . . . . . . 86Other logs for troubleshooting .... . . . . . . . . . . . . . . . . . . . . . . . . . . . . . . . . . . . . . . . . . . . . . . 87
VMware environment—important! .. . . . . . . . . . . . . . . . . . . . . . . . . . . . . . . . . . . . . . . . . . . . . . . . . 88Why is VCB not being used? .... . . . . . . . . . . . . . . . . . . . . . . . . . . . . . . . . . . . . . . . . . . . . . . . . . . . . . . . 88Limiting the VMware servers that NetBackup searches when browsing
for virtual machines ... . . . . . . . . . . . . . . . . . . . . . . . . . . . . . . . . . . . . . . . . . . . . . . . . . . . . . . . . . . . . 88Preventing browsing delays caused by DNS problems .... . . . . . . . . . . . . . . . . . . . . . 89Changing the browsing timeout for virtual machine discovery .... . . . . . . . . . 90Changing timeout and logging values for vSphere .... . . . . . . . . . . . . . . . . . . . . . . . . . . 91Notes and tips for VMware .... . . . . . . . . . . . . . . . . . . . . . . . . . . . . . . . . . . . . . . . . . . . . . . . . . . . . . . . . . 92Credentials for VMware server are not valid ... . . . . . . . . . . . . . . . . . . . . . . . . . . . . . . . . . . . 93NetBackup status codes related to VMware .... . . . . . . . . . . . . . . . . . . . . . . . . . . . . . . . . . . . 93Snapshot error encountered (status code 156) ... . . . . . . . . . . . . . . . . . . . . . . . . . . . . . . . . 96Restore fails when you restore individual files to a virtual machine
that has NetBackup client software .... . . . . . . . . . . . . . . . . . . . . . . . . . . . . . . . . . . . . . . . 98Backup or restore job hangs .... . . . . . . . . . . . . . . . . . . . . . . . . . . . . . . . . . . . . . . . . . . . . . . . . . . . . . . . 99Mount point missing on a restored Windows virtual machine .... . . . . . . . . . 100Remove the Consolidate Helper snapshot ... . . . . . . . . . . . . . . . . . . . . . . . . . . . . . . . . . . . . . 100NetBackup catalog information for virtual machine backups made
by 6.5.4 or earlier may prevent browsing the imported imagesfor restore ... . . . . . . . . . . . . . . . . . . . . . . . . . . . . . . . . . . . . . . . . . . . . . . . . . . . . . . . . . . . . . . . . . . . . . . . . 100
Invalid client error when you restore files using NetBackup BARinterface installed on the virtual machine .... . . . . . . . . . . . . . . . . . . . . . . . . . . . . . 101
VMware virtual machine does not reboot after restore ... . . . . . . . . . . . . . . . . . . . 101
Appendix A Backup of VMware raw devices (RDM) . . . . . . . . . . . . . . . . . . . . . . . . . . 103
About VMware raw device mapping (RDM) .... . . . . . . . . . . . . . . . . . . . . . . . . . . . . . . . . . . 103NetBackup support details for RDMs .... . . . . . . . . . . . . . . . . . . . . . . . . . . . . . . . . . . . . . . . . . . 104Configurations for backing up RDMs .... . . . . . . . . . . . . . . . . . . . . . . . . . . . . . . . . . . . . . . . . . . 104About alternate client backup of RDMs .... . . . . . . . . . . . . . . . . . . . . . . . . . . . . . . . . . . . . . . . 104Requirements for alternate client backup of RDMs .... . . . . . . . . . . . . . . . . . . . . . . 105Configuring alternate client backup of RDMs .... . . . . . . . . . . . . . . . . . . . . . . . . . . . . . . . 105
9Contents

Appendix B File-level backup of Windows virtual machines . . . . . . . . . . 109
About file-level backup of Windows virtual machines ... . . . . . . . . . . . . . . . . . . . . . 109Configuration tasks for file-level backup .... . . . . . . . . . . . . . . . . . . . . . . . . . . . . . . . . . . . . . 110File-level backup options .... . . . . . . . . . . . . . . . . . . . . . . . . . . . . . . . . . . . . . . . . . . . . . . . . . . . . . . . . . 111What can be restored from a file-level backup? .... . . . . . . . . . . . . . . . . . . . . . . . . . . . . 111Configuring a policy for Windows file-level backup .... . . . . . . . . . . . . . . . . . . . . . . . 112
Index . . . . . . . . . . . . . . . . . . . . . . . . . . . . . . . . . . . . . . . . . . . . . . . . . . . . . . . . . . . . . . . . . . . . . . . . . . . . . . . . . . . . . . . . . . . . . . . . . . . . . . . . . . . . . . . . . . . 115
Contents10

Introduction
This chapter includes the following topics:
■ About NetBackup for VMware
■ Full virtual machine backup vs file-level backup
■ NetBackup for VMware: vStorage vs VCB
■ Minimum levels for vStorage support
■ When is VCB required?
■ NetBackup for VMware components
■ NetBackup for VMware environment diagrams
■ Overview of the backup process
■ NetBackup for VMware license requirement
■ Overview of VMware tasks
■ Overview of NetBackup tasks
■ About VMware storage optimization
■ Terminology
About NetBackup for VMwareNetBackup for VMware provides backup and restore of the VMware virtualmachines that run on VMware ESX servers. NetBackup for VMware takes advantageof VMware vStorage APIs for data protection. The backup process is off-loadedfrom the ESX server to a VMware backup host.
1Chapter

The features of NetBackup for VMwareNetBackup for VMware does the following:
■ Performs off-host backup of virtual machines (NetBackup client software isnot required on the virtual machine). Off-host backup reduces the backupprocessing load on the VMware ESX server.
■ Automatically creates quiesced snapshots using VSS (Windows only).
■ Uses snapshot technology to keep virtual machines 100% available to users.
■ Supports VMware vSphere as well as older VMware environments.
■ Performs full backups and incremental backups, including block-levelincrementals.
■ Backs up and restores individual files (Windows only) or the full virtualmachine.
■ Can restore selected files from a backup of a full Windows virtual machine.
■ Backs up the virtual machines even when they are turned off.
New features in the 7.0.1 releaseThe following items are new in NetBackup 7.0.1:
■ NetBackup supports backup and restore of the virtual machines that are in aVMware vApp. Virtual machines in a vApp appear along with other virtualmachines in the NetBackup policy Browse for Virtual Machines dialog.NetBackup also lets you restore a virtual machine within a vApp.
■ NetBackup supports backup and restore of the virtual machines that are in avirtual network (VMware vNetwork Distributed Switch).
■ NetBackup supports the NBDSSL transfer type for restores. This type is forencrypted transfer (SSL) over a local network that uses the Network BlockDevice (NBD) driver protocol.
■ NetBackup can configure a restored virtual machine to have thin provisioneddisks. Thin provisioning saves disk space by enabling the dynamic growth ofthe vmdk file.See “Recovery Options dialog box” on page 70.
■ NetBackup supports restores to the ESX servers that are in a VMware highavailability (HA) cluster or in a VMware Distributed Resource Scheduler (DRS)cluster. You can select a clustered ESX server from the NetBackup RecoveryOptions dialog.
IntroductionAbout NetBackup for VMware
12

■ For the environments that contain many servers and virtual machines, youcan speed up the browsing of virtual machines when you create a backup policy.See “Limiting the VMware servers that NetBackup searches when browsingfor virtual machines” on page 88.
■ NetBackup includes an option to prevent delays in browsing for virtualmachines on the networks that have DNS problems.See “Preventing browsing delays caused by DNS problems” on page 89.
■ NetBackup includes an option that lets you validate VMware server credentialsfor a particular backup host rather than for all backup hosts. The option is theFor backup host field on the Add Virtual Machine Server dialog.See “Adding NetBackup credentials for VMware” on page 30.
■ Before it creates a snapshot for the backup, NetBackup removes by default anysnapshot that a NetBackup backup had previously created for the virtualmachine. Use the Remove NBU option on the Existing snapshot handlingparameter.See “Existing snapshot handling” on page 42.
Features added in the 7.0 releaseThe following items were added in the 7.0 release:
■ NetBackup supports VMware vSphere with vStorage APIs for data protection.VMware Consolidated Backup (VCB) is still supported but not required in mostcases. vStorage eliminates the need to make a VCB copy of a virtual machinesnapshot on the VMware backup host. Instead, NetBackup backs up thesnapshot directly from the ESX server.See “NetBackup for VMware: vStorage vs VCB” on page 14.
■ NetBackup can back up certain pre-vSphere environments (such as ESX 3.x)without requiring VCB.
■ NetBackup can perform file-level and block-level incremental backups ofvirtual machines (cumulative and differential).
■ NetBackup can perform full and incremental backups by means of the samesnapshot backup option.
■ NetBackup can create virtual machine backups that are storage optimized(unused space on the virtual machine is not backed up).
■ NetBackup can back up virtual machines by their host name, VMware displayname, or UUID.
■ New virtual machine recovery dialogs make it easier to recover the virtualmachine to the original location or to an alternate location.
13IntroductionAbout NetBackup for VMware

Full virtual machine backup vs file-level backupWhen it is configured as described in this guide, NetBackup backs up the entirevirtual machine as a set of virtual disk files. The backup includes all data files aswell as operating system files and VMware virtual disk files. From the backup,you can recover the guest OS and the entire virtual machine. Depending on theoption that is chosen in the backup policy, you can also recover individual filesfrom the same backup (Windows virtual machines only).
For Windows, NetBackup also supports file-level backup (backup of selected files).File-level backup requires VCB. For more information on file-level backup ofWindows virtual machines, see the appendix titled "File-level backup of Windowsvirtual machines."
NetBackup for VMware: vStorage vs VCBNetBackup 6.5.x for VMware relied upon VMware Consolidated Backup technology(VCB) to make off-host backups of virtual machines. VCB software was installedon the VMware backup host (called the backup proxy server). For backups of theentire virtual machine, all files were copied from the VMware datastore and writtento disk on the backup host.
NetBackup 7.x uses VMware vStorage APIs for data protection. vStorage APIsenable a variety of data protection features for more efficient use of storagecapacity and faster backups. NetBackup can use vStorage to back up the latestvSphere environments and earlier VMware environments.
Note that NetBackup 7.x can back up vSphere environments using VCB. VMwareintends to discontinue VCB in a future release, however, and recommends the useof vStorage APIs.
Minimum levels for vStorage supportTo use VMware vStorage, NetBackup requires the following minimum levels ofVMware servers: ESX 3.5, or VirtualCenter 2.5. NetBackup can use vStorage witholder ESX servers (such as 3.0.2) if they are behind a VirtualCenter at version 2.5or later.
When is VCB required?NetBackup can protect most VMware environments by means of VMware'svStorage APIs, without using VCB.
VCB is required in the following cases:
IntroductionFull virtual machine backup vs file-level backup
14

■ For backups of selected files instead of the entire virtual machine, if aNetBackup client is not installed on the virtual machine.
■ For the following older VMware environments:
■ ESX servers older than 3.5 if no VirtualCenter server is present.
■ For VirtualCenter servers older than 2.5.
NetBackup for VMware componentsNetBackup for VMware uses the following components.
Table 1-1 Components of NetBackup for VMware
DescriptionComponent
NetBackup for VMware uses a special Windows server that iscalled a backup host (formerly called the VMware backup proxyserver). The backup host is a NetBackup client that performsbackups on behalf of the virtual machines. The backup host canalso be configured as a NetBackup master or media server.
The backup host is the only host on which NetBackup clientsoftware is installed. No NetBackup client software is requiredon the VMware virtual machines.
Note that the backup host is referred to as the recovery hostwhen it performs a restore.
Backup host
Virtual machines provide complete guest operating systems onvirtualized hardware. In a NetBackup policy, a virtual machineis configured as a NetBackup client, even though NetBackupclient software is not installed on the virtual machine.
Virtual machine
The VMware ESX server presents a virtualized hardwareenvironment to multiple virtual machines; each virtual machineruns an independent operating system. Users can runapplications in the virtualized OS as if the OS was installed inits own physical computer.
ESX server
The VMware vCenter Server (or VirtualCenter server)coordinates multiple ESX servers and workloads. It can migratevirtual machines from one ESX server to another. It also providesthe ability to back up the virtual machines that are turned off.
The vCenter Server is optional in the NetBackup for VMwareenvironment.
vCenter Server
15IntroductionNetBackup for VMware components

Table 1-1 Components of NetBackup for VMware (continued)
DescriptionComponent
For older VMware environments, VMware Consolidated Backupsoftware (VCB) allows NetBackup to communicate with theVMware VirtualCenter server and with individual ESX servers.VCB is installed on the VMware backup proxy.
See “When is VCB required?” on page 14.
VCB
For the backups that were made with VCB, the VMwareConverter server assists in full virtual machine restores to theESX server. The Converter must be installed on the same hostas the backup host.
Converter server
Note that the VMware NetBackup Integration Module (VNIM) is not required.Conflicts can occur between NetBackup for VMware policies and any olderscript-based policies that use VNIM.
See “Notes and tips for VMware” on page 92.
NetBackup for VMware environment diagramsFigure 1-1 shows the hardware components for NetBackup for VMware.
Figure 1-1 NetBackup for VMware: backup environment
NetBackupmaster server
LAN / WAN
VMware ESX serverwith virtual machines
VMware backup hostacting as both NetBackupmedia server and client
SAN
NetBackupstorage unit(disk or tape)
VMware virtual disk files(datastore) must be available to
VMware backup host
Figure 1-2 shows a NetBackup for VMware environment with a VMwareVirtualCenter that manages multiple ESX servers.
IntroductionNetBackup for VMware environment diagrams
16

Figure 1-2 VMware VirtualCenter that manages multiple ESX servers
VMwareVirtualCenter
NetBackupmaster server
LAN / WAN
VMware ESXservers
VMware backup host VMware virtual disk files(datastore)
SAN
NetBackupstorage unit(disk or tape)
Overview of the backup processThe following tables describe the phases in the NetBackup backup process.
Table 1-2 NetBackup backup process with vStorage
DescriptionPhase
The NetBackup master server initiates the backup.Phase 1
The NetBackup client on the VMware backup host initiates a VMwaresnapshot on the virtual machine.
Phase 2
Windows only: VSS synchronizes the file system on the virtual machine.Phase 3
The VMware server creates a snapshot on the virtual disk datastore.Phase 4
The NetBackup client reads the snapshot from the datastores and writesthe data to the NetBackup storage unit.
Phase 5
Table 1-3 NetBackup backup process with VCB
DescriptionPhase
The NetBackup master server initiates the backup.Phase 1
The NetBackup client on the VMware backup host initiates a VMwaresnapshot on the virtual machine.
Phase 2
Windows only: VSS synchronizes the file system on the virtual machine.Phase 3
The VMware server creates a snapshot on the virtual disk datastore.Phase 4
17IntroductionOverview of the backup process

Table 1-3 NetBackup backup process with VCB (continued)
DescriptionPhase
The VMware backup host does one of the following:
■ For full virtual machine backup, it copies the files from the VMwaredatastore and writes them to disk on the backup host.
■ For file-level backup, it mounts individual disk volumes from theVMware datastore.
Phase 5
The NetBackup client reads the data from the backup host and writes thedata to the NetBackup storage unit.
Phase 6
NetBackup for VMware license requirementNetBackup for VMware requires the NetBackup Enterprise Client license.
Overview of VMware tasksThe VMware components including ESX servers and virtual machines must beset up before you configure NetBackup.
Table 1-4 briefly describes these VMware-specific tasks; further assistance withthese tasks may be found in your VMware documentation.
Table 1-4 VMware tasks
TasksSequence
Set up disk storage on Fibre Channel or iSCSI. The VMware backuphost must be able to access the disk storage.
Phase 1
Install the VMware ESX server and virtual machines.Phase 2
Install VMware Tools on the virtual machines that you plan to backup.
Phase 3
Optional: install a vCenter (or VirtualCenter) server.Phase 4
For recovery of VCB backups: Install the VMware Converter server onthe VMware restore host.
The VMware Converter server is not required for vStorage.
Phase 5
IntroductionNetBackup for VMware license requirement
18

Table 1-4 VMware tasks (continued)
TasksSequence
For older versions of VMware only: Install a supported version of VCBon the VMware backup host.
See “When is VCB required?” on page 14.
For further information on supported guest operating systems andVMware components and versions, refer to the following Symantectech note:
http://entsupport.symantec.com/docs/340091
Symantec recommends that the NetBackup media server and theVMware backup host be installed on the same host.
Phase 6
Notes:
■ Ensure that the hardware and the SAN are configured properly. The VMwaredatastore where the target virtual machine files exist must be accessible tothe VMware backup host.With vStorage, and with VCB version 1.1 and ESX server 3.5, note: A SANconnection between the backup host and the datastore is optional if you usethe NBD transfer type or NBDSSL transfer type.
■ VMware has specific hardware and configuration requirements. VMware SANrequirements can be found in the appropriate VMware SAN Configurationguide.
Overview of NetBackup tasksTable 1-5 lists the NetBackup configuration tasks that are described later in thischapter and in other NetBackup documentation, as indicated.
Table 1-5 NetBackup tasks
TasksSequence
Install the NetBackup 7.0.1 master server and media server.
See the NetBackup Installation Guide.
Symantec recommends that the NetBackup media server and theVMware backup host be installed on the same host.
Phase 1
Install the NetBackup 7.0.1 Enterprise Client license on the masterserver, and install NetBackup client 7.0.1 software on the VMwarebackup host.
Phase 2
19IntroductionOverview of NetBackup tasks

Table 1-5 NetBackup tasks (continued)
TasksSequence
Add the VMware backup host to your NetBackup configuration.
See “Adding the VMware backup host to the NetBackupconfiguration” on page 30.
Phase 3
Set NetBackup access credentials for the VMware vCenter orVirtualCenter (if any), or for VMware ESX servers.
See “Adding NetBackup credentials for VMware” on page 30.
Phase 4
Configure incremental backups for VMware.
See “Incremental backups must be based on timestamps ”on page 34.
Phase 5
Create a NetBackup policy for VMware.
See “Configuring a VMware policy from the Policies node”on page 34.
Phase 6
Perform a backup or restore.
See “Backing up virtual machines” on page 55.
See “Restoring individual files” on page 62.
See “Restoring the full VMware virtual machine” on page 65.
Phase 7
Recheck the configuration.
See “Best practices” on page 81.
See “NetBackup status codes related to VMware” on page 93.
Phase 8
About VMware storage optimizationVMware’s vStorage technology can track block-level changes in the virtualmachine. Block-level change tracking allows NetBackup to skip unused(unallocated) regions on the virtual disk during the backup. The result is a smallerbackup image (storage optimized).
You can enable storage optimization in either of the following ways:
■ Select Perform block level incremental backup in the NetBackup policy.NetBackup uses storage optimization when it backs up the virtual machinesthat are listed in the policy.For Perform block level incremental backup, the VMware virtual machineversion must be vmx-07 or later.
IntroductionAbout VMware storage optimization
20

Note: It may be necessary to delete an existing snapshot before you start thebackup.See “Deleting a vSphere Client snapshot” on page 25.
■ Or, if you intend to use the snapshot feature of vSphere Client before you starta NetBackup backup of the virtual machine: Set the vSphere Client “ctkEnabled”option to “true” before you use vSphere Client to create the snapshot.See “Setting the Changed Block Tracking option in vSphere Client” on page 25.
TerminologyTable 1-6 lists the terminology that is used in NetBackup for VMware. For furtherexplanations of VMware terminology, refer to your VMware documentation.
Table 1-6 NetBackup for VMware terms
DefinitionTerm
In NetBackup for VMware, the datastore is a disk that containsthe virtual machines files.
datastore
An operating system that runs on a virtual machine.guest OS
A software virtualization layer that lets different operatingsystems run simultaneously on the same physical computer.
hypervisor
A virtual disk that cannot be captured with a snapshot. Anindependent disk can be configured as either persistent ortemporary.
Note: NetBackup for VMware cannot back up the data on anindependent disk. The backup appears to succeed, but the backupimage contains no data for the independent disk.
independent disk
Allows a virtual machine to directly access physical disks (on FibreChannel or iSCSI). By means of RDM, disk LUNs appear to be filesin a VMFS volume.
Note that disks in RDM mode cannot be backed up with VMwareVCB (on a backup host). NetBackup client software must beinstalled in the virtual machine.
Raw device mapping(RDM)
Flushes the OS buffers (Windows only) before VMware snapshotsare initiated. The sync driver is installed by means of VMwareTools.
sync driver
See VMware Consolidated Backup.VCB
21IntroductionTerminology

Table 1-6 NetBackup for VMware terms (continued)
DefinitionTerm
An execution environment that the hypervisor creates for thecomputer hardware. The resulting virtualized environment allowsdifferent operating systems to run simultaneously on the samephysical computer.
virtual machine
A logical network that allows the exchange of data between virtualmachines. A virtual network uses a virtual switch (VMwarevSwitch). A virtual network can be connected to a physicalnetwork.
virtual network
In a VMware ESX server, one or more vmdk files make up the diskimage or virtual drive in a virtual machine. The.vmdk files containthe operating system, applications, and data in the virtualmachine.
vmdk file
An off-host backup server in a NetBackup for VMwareenvironment. The VMware backup host performs backups onbehalf of virtual machines.
The backup host is referred to as the recovery host during restore.
VMwarebackup/recovery host
An off-host backup application programming interface (API)created by VMware. Designed to off load backups from the ESXserver.
VMware ConsolidatedBackup
Installed inside each VMware virtual machine. Enhances thevirtual machine performance and adds backup-relatedfunctionality.
VMware Tools
VMware vStorage APIs enable data protection features for moreefficient use of storage capacity. NetBackup can use vStorage toback up the latest vSphere environments as well as to back upearlier VMware environments.
vStorage
IntroductionTerminology
22
Notes and prerequisites
This chapter includes the following topics:
■ Prerequisites
■ VMware notes and restrictions
■ Deleting a vSphere Client snapshot
■ Setting the Changed Block Tracking option in vSphere Client
■ Notes on the hotadd transfer type
■ Creating a helper virtual machine for hotadd transfer
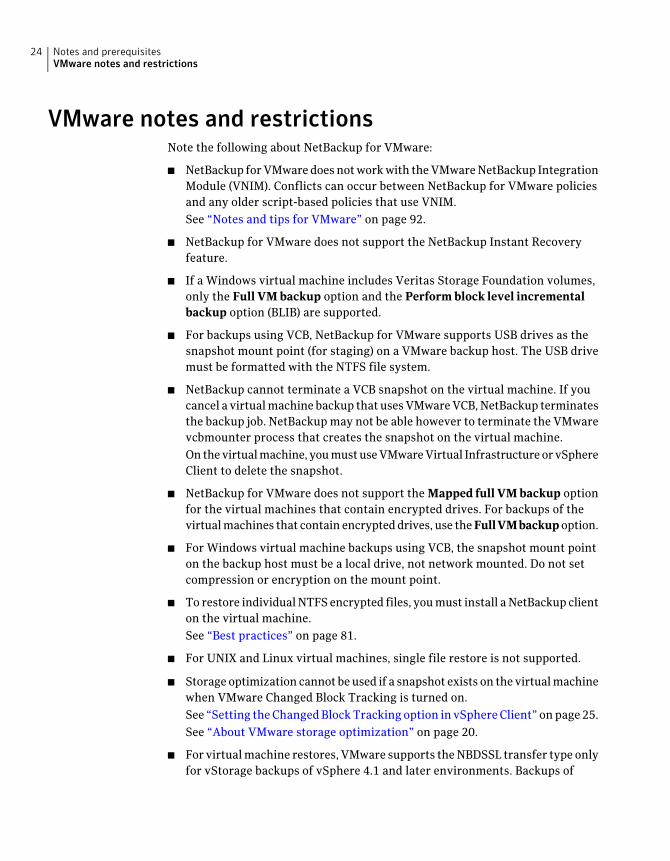
PrerequisitesThe following prerequisites apply to NetBackup for VMware:
■ The VMware backup host must run Windows 2003 or 2008. (For VCB onWindows 2008, VCB 1.5 is required.) The supported hardware types are thesame as for any NetBackup Windows client. For further information onsupported guest operating systems and VMware components and versions,refer to the following Symantec tech note:http://entsupport.symantec.com/docs/340091
■ To use the hotadd transfer type for backup or restore, the VMware backup orrestore host is installed in a virtual machine.For ESX 3.5 and earlier: You must set up a shadow virtual machine that hasthe same name as the backup host but with the (VCB-HELPER) suffix.
See “Creating a helper virtual machine for hotadd transfer” on page 28.See “Notes on the hotadd transfer type” on page 27.
2Chapter
VMware notes and restrictionsNote the following about NetBackup for VMware:
■ NetBackup for VMware does not work with the VMware NetBackup IntegrationModule (VNIM). Conflicts can occur between NetBackup for VMware policiesand any older script-based policies that use VNIM.See “Notes and tips for VMware” on page 92.
■ NetBackup for VMware does not support the NetBackup Instant Recoveryfeature.
■ If a Windows virtual machine includes Veritas Storage Foundation volumes,only the Full VM backup option and the Perform block level incrementalbackup option (BLIB) are supported.
■ For backups using VCB, NetBackup for VMware supports USB drives as thesnapshot mount point (for staging) on a VMware backup host. The USB drivemust be formatted with the NTFS file system.
■ NetBackup cannot terminate a VCB snapshot on the virtual machine. If youcancel a virtual machine backup that uses VMware VCB, NetBackup terminatesthe backup job. NetBackup may not be able however to terminate the VMwarevcbmounter process that creates the snapshot on the virtual machine.On the virtual machine, you must use VMware Virtual Infrastructure or vSphereClient to delete the snapshot.
■ NetBackup for VMware does not support the Mapped full VM backup optionfor the virtual machines that contain encrypted drives. For backups of thevirtual machines that contain encrypted drives, use the FullVMbackup option.
■ For Windows virtual machine backups using VCB, the snapshot mount pointon the backup host must be a local drive, not network mounted. Do not setcompression or encryption on the mount point.
■ To restore individual NTFS encrypted files, you must install a NetBackup clienton the virtual machine.See “Best practices” on page 81.
■ For UNIX and Linux virtual machines, single file restore is not supported.
■ Storage optimization cannot be used if a snapshot exists on the virtual machinewhen VMware Changed Block Tracking is turned on.See “Setting the Changed Block Tracking option in vSphere Client” on page 25.See “About VMware storage optimization” on page 20.
■ For virtual machine restores, VMware supports the NBDSSL transfer type onlyfor vStorage backups of vSphere 4.1 and later environments. Backups of
Notes and prerequisitesVMware notes and restrictions
24

VMware systems that are earlier than vSphere 4.1 cannot be restored usingthe NBDSSL transfer type.
■ If the policy's Client name selection option is set to VM hostname, note:NetBackup cannot select a VMware virtual machine for backup if it cannotobtain an IP address for the virtual machine.
■ If the restore host is on Windows Server 2008 and you use the SAN transfertype for the restore, the SAN luns must be online. Refer to the information onstatus code 5 in the following section:See “NetBackup status codes related to VMware” on page 93.
■ See “Restore notes and restrictions” on page 60.
Deleting a vSphere Client snapshotFor a storage optimized backup, you must delete any vSphere Client snapshot andre-initiate the NetBackup backup if both of the following are true:
■ A vSphere Client snapshot of the virtual machine already exists before thebackup starts.
■ The vSphere Client Changed Block Tracking (ctkEnabled) option was notenabled before the vSphere snapshot was created.
Background information is available on storage-optimized backups:
See “About VMware storage optimization” on page 20.
To delete a vSphere Client snapshot
1 In the vSphere Client interface, right-click on the virtual machine and selectSnapshot > Snapshot Manager.
2 Select the snapshot and click Delete.
Setting theChangedBlock Tracking option in vSphereClient
If you use vSphere Client to create a snapshot before the VMware changed blocktracking option is enabled, NetBackup cannot use storage optimization for thatvirtual machine. You must do the following on the virtual machine before usingvSphere Client to take a snapshot.
Note that NetBackup does not require that you use the Snapshot feature in vSphereClient. NetBackup automatically creates a snapshot when a NetBackup backupjob starts.
25Notes and prerequisitesDeleting a vSphere Client snapshot

To enable Changed Block Tracking for the virtual machine
1 In vSphere Client, power off the virtual machine.
2 Select the virtual machine, then click Edit settings.
3 Obtain the hard drive controller and disk numbers (SCSI and IDE) for eachvirtual drive on the virtual machine.
To find the controller number and disk numbers, do the following:
■ Click the Hardware tab.
■ Click on each hard disk. Its controller number and disk number (SCSI orIDE) appear under Virtual Device Node, in the form SCSI(X.X) orIDE(X.X). Make a note of each.
4 Click the Options tab. Under Advanced, General, click ConfigurationParameters.
5 On the Configuration Parameters screen, click Add Row.
6 Enter ctkEnabled in the Name column and enter true for the Value.
Notes and prerequisitesSetting the Changed Block Tracking option in vSphere Client
26
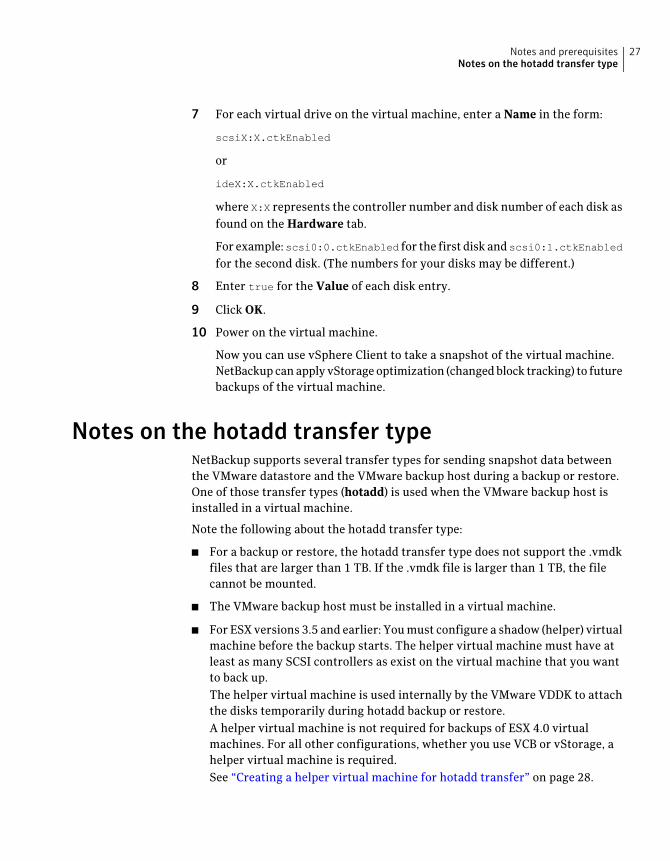
7 For each virtual drive on the virtual machine, enter a Name in the form:
scsiX:X.ctkEnabled
or
ideX:X.ctkEnabled
where X:X represents the controller number and disk number of each disk asfound on the Hardware tab.
For example: scsi0:0.ctkEnabled for the first disk and scsi0:1.ctkEnabled
for the second disk. (The numbers for your disks may be different.)
8 Enter true for the Value of each disk entry.
9 Click OK.
10 Power on the virtual machine.
Now you can use vSphere Client to take a snapshot of the virtual machine.NetBackup can apply vStorage optimization (changed block tracking) to futurebackups of the virtual machine.
Notes on the hotadd transfer typeNetBackup supports several transfer types for sending snapshot data betweenthe VMware datastore and the VMware backup host during a backup or restore.One of those transfer types (hotadd) is used when the VMware backup host isinstalled in a virtual machine.
Note the following about the hotadd transfer type:
■ For a backup or restore, the hotadd transfer type does not support the .vmdkfiles that are larger than 1 TB. If the .vmdk file is larger than 1 TB, the filecannot be mounted.
■ The VMware backup host must be installed in a virtual machine.
■ For ESX versions 3.5 and earlier: You must configure a shadow (helper) virtualmachine before the backup starts. The helper virtual machine must have atleast as many SCSI controllers as exist on the virtual machine that you wantto back up.The helper virtual machine is used internally by the VMware VDDK to attachthe disks temporarily during hotadd backup or restore.A helper virtual machine is not required for backups of ESX 4.0 virtualmachines. For all other configurations, whether you use VCB or vStorage, ahelper virtual machine is required.See “Creating a helper virtual machine for hotadd transfer” on page 28.
27Notes and prerequisitesNotes on the hotadd transfer type

■ NetBackup does not support IDE disks on the virtual machine or on the backuphost.
■ On the virtual machine to back up, no two disks should have the same name.(Identical names can occur if the disks reside on different datastores.)
■ The ESX server (where the backup-host virtual machine resides) must haveaccess to the datastore of the virtual machines that you want to back up.
■ The datastore for the backup-host virtual machine must have some free spacebefore the hotadd backup begins. Otherwise, the backup may fail.
■ For additional hotadd information, see the following VMware VDDK ReleaseNotes:http://www.vmware.com/support/developer/vddk/VDDK-1.1-Relnotes.html
Creating a helper virtualmachine for hotadd transferThis procedure applies only to ESX versions 3.5 (and earlier) with use of the hotaddtransfer type.
To create a helper virtual machine for hotadd backup or restore
1 Create a virtual machine.
You do not need to assign any drives to the virtual machine.
2 Give the helper virtual machine the same VMware display name as the virtualmachine where the backup host is installed. Add the (VCB-HELPER) suffix tothe name.
For example, if the virtual machine that contains the backup host is calledbu_host_VM, the name of the helper virtual machine must be the following:
bu_host_VM(VCB-HELPER)
Note that the complete name including the suffix must not exceed 32characters.
3 For more information on helper virtual machines, see the following VMwaredocument:
VMware Virtual Machine Backup Guide (Update 2 and later for ESX Server3.5, ESX Server 3i version 3.5, VirtualCenter 2.5).
Notes and prerequisitesCreating a helper virtual machine for hotadd transfer
28

Configure NetBackup forVMware
This chapter includes the following topics:
■ Adding the VMware backup host to the NetBackup configuration
■ Adding NetBackup credentials for VMware
■ Changing the host name of a VMware server in NetBackup
■ Incremental backups must be based on timestamps
■ Configuring a VMware policy from the Policies node
■ Configuration parameters for VMware
■ Browse for VMware Virtual Machines screen
■ Virtual machine host names and display names must be unique in a masterserver's policies
■ Configuring a VMware policy from the Snapshot Policy Configuration wizard
■ About incremental backups of virtual machines
■ Configuring incremental backups
■ Volume Manager volumes in the virtual machine
■ Reducing the size of backups
■ About block-level backup
■ Recovery options: vStorage vs VCB
■ About older policies and pre-7.x backup hosts
3Chapter

Adding the VMware backup host to the NetBackupconfiguration
You must add the VMware backup host to your NetBackup configuration. In theNetBackup Administration Console, do the following.
To add the VMware backup host
1 Click HostProperties>MasterServer> and double click NetBackupmasterserver > VMware backup hosts.
2 Click Add.
3 Enter the fully qualified domain name of the VMware backup host, and clickAdd.
4 When you are finished adding backup hosts, click Close.
5 Click Apply and then OK.
Adding NetBackup credentials for VMwareTo back up or restore virtual machines, the NetBackup server requires logoncredentials to access the VMware ESX servers or the VMware vCenter servers. Inthe NetBackup Administration Console, do the following.
To add NetBackup credentials
1 Click Media and Device Management > Credentials > Virtual MachineServers.
2 Click Actions > New > New Virtual Machine Server.
3 On the Add Virtual Machine Server dialog, enter the name of a virtualmachine server (vCenter server or ESX server).
Note: Enter the server name in the same format in which it is registered inDNS and in the VMware server (whether short or fully-qualified).
NetBackup needs access to this server for either of the following reasons:
■ To browse the server's virtual machines and back them up.
■ To use the server as a target for restoring virtual machines.Use the next dialog to identify the type of this server (vCenter, ESX, orESX for restore only).
Configure NetBackup for VMwareAdding the VMware backup host to the NetBackup configuration
30

4 In the Credentials pane of the Virtual Machine Server dialog, enter thefollowing:
Virtual machine server type
Select the type of VMware server that NetBackup needs to access:
■ VMware VirtualCenter serverDesignates a vCenter (or VirtualCenter) server that manages ESX servers.When you create a policy to back up this server's virtual machines,NetBackup can browse this server and list its virtual machines. If thecredentials provide full access privileges to the vCenter server, you canrestore virtual machines to this server.Note: Do not enter logon credentials for the individual ESX servers thatthis vCenter server manages. NetBackup needs credentials for the vCenteronly.
■ VMware ESX serverDesignates a standalone ESX server that is not managed by a vCenterserver. NetBackup will be able to browse the ESX server to present a listof its virtual machines for backup. You can also restore virtual machinesto this ESX server. To use the server as a target for restores, enter thecredentials that provide full access privileges to the ESX server.
■ VMware restore ESX serverDesignates an ESX server to which NetBackup can restore virtual machines.You must enter the credentials that provide full access privileges to theserver.
Note: NetBackup can access this type of server for restores only, not forbackups.
Note: For restore, VMware vStorage cannot communicate with the ESXservers that are earlier than version 3.5. To restore virtual machines thatwere backed up with vStorage, the target ESX server must be 3.5 or lateror must be managed by a vCenter server 2.5 or later.
The restore ESX server type has the following advantages:
■ For large environments with hundreds of hosts, NetBackup may notneed full access to the vCenter server. With the restore ESX servertype, you can give NetBackup full access to a single ESX server that isdedicated to restore.
31Configure NetBackup for VMwareAdding NetBackup credentials for VMware

■ SAN-based restores that go directly to a restore ESX server are fasterthan restores that go through the vCenter server.
For further information on this option, refer to the following Symantectech note:http://entsupport.symantec.com/docs/348519
User name
Enter the user name for the virtual machine server. Note that spaces in usernames are not allowed.
Password
Enter the password (and confirm it) for the virtual machine server.
Validate Credentials
Select this box to have the credentials verified.
You can use the Forbackuphost pull-down to select a particular backup hostfor which to validate the credentials. Note that a backup host appears in thepull-down list if it was added to the master server's Host Properties dialog.
See “Adding the VMware backup host to the NetBackup configuration”on page 30.
If For backup host is set to <Any> (the default), NetBackup attempts tovalidate the credentials using each backup host in turn. NetBackup continueschecking only until validation succeeds for a particular backup host or thelist of backup hosts is exhausted.
During validation: An invalid user name or password is deleted if you haveentered it for the first time and you do not select a backup host.
If your VMware backup host is running a version of NetBackup that is earlierthan 6.5.4, the credentials cannot be validated. An error message is displayed.You must verify that the credentials you entered are correct for the VMwareserver. If the credentials are correct, you can ignore the error message.
Connect using port number
If the default port number has not been changed on the VMware server, noport specification is required. In that case, make sure that the Connectusingport number box is not checked.
If the VMware server has been configured to use a different port, click theConnect using port number box and specify that port number.
For VCB, note the following:
■ If you use a version of VCB that is older than 1.1, click the Connect usingport number box and specify port 902.
Configure NetBackup for VMwareAdding NetBackup credentials for VMware
32

■ If you select port 902 and use an ESX server 3.5 or later, the backup hostcannot communicate with the VirtualCenter or ESX servers. The attemptto back up the virtual machines fails. The credentials validation also failsif you selected Validate Credentials.
5 Click OK.
6 If your site has multiple standalone ESX servers, use the Virtual MachineServer dialog to enter credentials for each ESX server.
Changing the host name of a VMware server inNetBackup
Use the following procedure if you need to change a VMware server's host nameas it is stored in NetBackup.
Example reasons for changing the VMware server name are the following:
■ You used a short host name for the server for its NetBackup credentials, andneed to replace that name with the fully qualified host name.
■ Two hosts currently resolve to the same IP address, and one of them must berenamed and assigned a new IP address.
To change the host name of a VMware host in NetBackup
1 Remove the current credentials that were entered for the VMware host.
Do the following:
■ In the NetBackup Administration Console, click on Media and DeviceManagement > Credentials > Virtual Machine Servers.
■ Right-click on the credentials definition for the VMware server and selectDelete (or press the Delete key).
2 Remove the VMware host from the NetBackup EMM database.
Enter the following command:
nbemmcmd -deletehost -machinename VMware_server_name
-machinetype virtual_machine
3 In the NetBackup Administration Console, re-enter NetBackup's credentialsfor the VMware server.
See “Adding NetBackup credentials for VMware” on page 30.
Make sure to enter the correct host name for the VMware server.
33Configure NetBackup for VMwareChanging the host name of a VMware server in NetBackup

Incremental backups must be based on timestampsIncremental backups of virtual machines must be based on timestamps, not onarchive bit. You must configure the NetBackup client on the VMware backup hostas described in this section.
To configure the client on the VMware backup host for incremental backups
1 Start the NetBackup Backup, Archive, and Restore interface from theNetBackup client that is installed on the VMware backup host.
2 Click File > NetBackup Client Properties.
3 On the General tab, make sure Perform incrementals based on archive bitis clear (unchecked).
Configuring a VMware policy from the Policies nodeYou can create a policy (full or incremental) to back up the virtual machine ineither of two ways:
■ Use the Policies node of the NetBackup Administration Console (described inthis topic).
■ Use the Snapshot Policy Configuration wizard.See “Configuring a VMware policy from the Snapshot Policy Configurationwizard” on page 47.
To configure a policy for backup of individual files, see the appendix titled"File-level backup of Windows virtual machines."
To configure a policy to back up the virtual machine
1 In the NetBackup Administration Console, click Policies and select Actions> New > New Policy.
2 Select the FlashBackup-Windows policy type.
The FlashBackup-Windows policy type is recommended for mostenvironments. Use it to back up individual drives (Windows), or to back upthe entire virtual machine (any supported virtual machine).
Note the following about the FlashBackup-Windows policy type:
■ Increases the backup speed as compared to standard file-order backupmethods, if the virtual machine is heavily populated with small files.
■ Can create a backup from which you can restore selected files or the fullvirtual machine.
Configure NetBackup for VMwareIncremental backups must be based on timestamps
34

For UNIX and Linux virtual machines, FlashBackup-Windows is the onlysupported policy type.
3 Select a policy storage unit or storage unit group.
Storage unit groups are described in the NetBackup Administrator’s Guide,Volume I.
4 Note that the FlashBackup-Windows policy type automatically selects Performsnapshot backups.
The following is the Snapshot Client pane on the lower left of the policyattributes tab:
Make sure that CollectdisasterrecoveryinformationforBareMetalRestoreis not selected.
5 Select Perform off-host backup.
6 From the pull-down list for the Use field, select VMware backup host.
7 In the Machine field, specify the name of the VMware backup host.
If the VMware backup host does not appear in the Machine pull-down list,make sure that it was added to the Host Properties setting.
See “Adding the VMware backup host to the NetBackup configuration”on page 30.
You may have to close and reopen the policy for the added VMware backuphost to appear in the list.
35Configure NetBackup for VMwareConfiguring a VMware policy from the Policies node

8 For block-level backups of the virtual machine, select Perform block levelincremental backups.
This option reduces the backup size. To enable this option, you must firstselect Perform off-host backup and VMware backup host.
See “About block-level backup” on page 50.
9 Click Options.
The following is the upper half of the Snapshot Options dialog box(Configuration Parameters). The lower portion (Snapshot Resources) is notused.
See “Configuration parameters for VMware” on page 38.
10 To save these settings, click OK and then Apply.
11 Use the Schedules tab to define a schedule.
On the attributes tab, you can select Full backup, Differential IncrementalBackup, or Cumulative Incremental Backup.
Incremental backups require one of the following configurations:
■ On the policy attributes tab, select Perform block level incrementalbackups. Requires an ESX server 4.0 and a virtual machine at vmx-07 orlater.
■ Or select the Mapped full VM backup or Full backup with file levelincremental option for the Virtualmachinebackup type on the SnapshotOptions dialog.
Configure NetBackup for VMwareConfiguring a VMware policy from the Policies node
36

12 On the Clients tab, click New to specify virtual machines to back up.
You can type the host name in the EntertheVMwarehostname field, or clickBrowse and select virtual machine.
See “Browse for VMware Virtual Machines screen” on page 44.
Note: In the NetBackup Java Administration Console, the Install Softwareoption is for installing NetBackup client software on trusting UNIX clients.This option does not apply to virtual machines.
13 Use the Backup Selections tab to specify the virtual machine drives to backup.
Click New. You can make entries manually, or click on the pull-down (UNIX)or hand icon (Windows) to select from available directives.
For VMware backup, the System_State directive (Windows 2000) and theShadowCopy Components directive (Windows 2003) are not supported.
Enter either of the following and then click Add (on UNIX) or press Enter(Windows):
■ Individual drive letters.Enter the drive letter as follows (for example):
\\.\E:
The drive must be designated exactly as shown (E:\ is not correct).
■ ALL_LOCAL_DRIVES
The ALL_LOCAL_DRIVES directive backs up all local drives on the virtualmachines that are selected on the Clients tab. This entry is the only onesupported for UNIX and Linux virtual machines.Note the kinds of files that are included in an ALL_LOCAL_DRIVES backup:
37Configure NetBackup for VMwareConfiguring a VMware policy from the Policies node

The ALL_LOCAL_DRIVES directive backs up all data fileson the virtual machines.
ALL_LOCAL_DRIVES also backs up the following, if thesnapshot option is Full VM backup, Mapped full VM backup,or Full backup with file level incremental:
■ Windows System State files
■ Windows OS partitions that contain the Windowssystem files (usually C:)
■ VMware virtual disk files
Note: If you chose Full VM backup or Mapped Full VMbackup for the Virtual Machine Backup parameter,ALL_LOCAL_DRIVES is the only entry allowed for backupselections.
FlashBackup-Windowspolicy
To back up individual files or folders instead of a drive, you must configurea file-level backup. See the appendix titled "File-level backup of Windowsvirtual machines." Note that VCB is required.
14 If you click Apply or OK on the policy Attributes tab, a validation processchecks the policy and reports any errors. If you click Close, no validation isperformed.
Configuration parameters for VMwareThe following parameters apply to the VMware snapshot method:
Client name selectionSpecifies the type of name by which NetBackup recognizes a virtual machine.
The network hostname for the virtual machine. (This optionis the default.)
VM hostname
The name of the virtual machine as it appears in the VMwareinterface.
Note the following:
■ Do not use non-ASCII characters in display names.
■ Each display name must be unique in your VMwareenvironment.
■ See “Restoring individual files” on page 62.
VMware display name
Configure NetBackup for VMwareConfiguration parameters for VMware
38

The unique ID assigned to the virtual machine when thevirtual machine was created.
VMware UUID
If you create a policy and then change the ClientNameSelection value, note: Youmay have to delete the virtual machine selections that were made on the Clientstab and re-enter them. Otherwise, NetBackup may no longer be able to identifythe virtual machines to back up.
For example, the host names in the Clients tab cannot be used and the virtualmachines are not backed up in the following case:
■ If you change the Client Name Selection from VM hostname to VM displayname, and
■ The display names of the virtual machines are different from the host names.
In this case, delete the host name entries on the Clients tab and browse the networkto select the virtual machines by display name.
Note: When creating virtual machines, use the same name for both host nameand display name. If the Client Name Selection is changed, the existing entrieson the Clients tab still work.
Virtual machine backup
Backs up either of the following:
■ Individual folders and files, individual drives, or all local drives,with the MS-Windows policy type.
■ Individual drives or all local drives, with theFlashBackup-Windows policy type.
FilelevelsnapshotusingVCB cannot be used to back up Windowssystem files or VMware virtual disk files.
FilelevelsnapshotusingVCB requires VCB on the VMware backuphost.
See “About file-level backup of Windows virtual machines”on page 109.
File level snapshotusing VCB
Backs up the entire virtual machine. From the backup, you canrestore the entire virtual machine but not individual files. Youcan also use this option to make incremental backups: in the policyschedule, select differential incremental backup or cumulativeincremental backup.
Full VM backup
39Configure NetBackup for VMwareConfiguration parameters for VMware

Backs up the entire virtual machine. (This option is the default.)
Two kinds of restore are possible from a mapped full backup:restore of the entire virtual machine or of individual folders andfiles. You can also use this option to make incremental backups:in the policy schedule, select differential incremental backup orcumulative incremental backup.
This option is the default.
To perform a VMware backup to a deduplication storage unit,select the Mapped full VM backup option. This option providesthe best deduplication rates. Use of the Full VM backup optionresults in a lower rate of deduplication.
Mapped full VMbackup
This option is intended for pre-7.x versions of NetBackup forVMware. This option backs up the entire virtual machine for fullbackups. It also backs up individual files, folders, or drives forincremental backups, by means of the file-level snapshot capabilityof VCB.
Choose this option in either of the following cases:
■ You have not upgraded your backup host to NetBackup 7.x.
■ Your VMware environment still requires VCB.
See “When is VCB required?” on page 14.
Note: For 7.x systems with VMware ESX 3.5 or later orVirtualCenter 2.5 or later, use Mapped full VM backup or FullVM backup instead. Then set up an incremental schedule.
Full backup with filelevel incremental
Transfer typeIf you use VCB for the backup, these options require ESX server 3.5 or later andVCB 1.1 or later.
The transfer types determine how the snapshot data is sent from the VMwaredatastore to the VMware backup host. The appropriate option depends in part onthe type of network that connects the VMware datastore to the VMware backuphost.
For unencrypted transfer over Fibre Channel (SAN) or iSCSI.This value is the default.
san
For unencrypted transfer over a local network that uses theNetwork Block Device (NBD) driver protocol. This type oftransfer is usually slower than Fibre Channel.
nbd
Configure NetBackup for VMwareConfiguration parameters for VMware
40

For encrypted transfer (SSL) over a local network that usesthe Network Block Device (NBD) driver protocol. This typeof transfer is usually slower than Fibre Channel.
nbdssl
Provides transfer flexibility if the VMware datastore isavailable on both a SAN and a local network. NetBackupattempts an unencrypted transfer over Fibre Channel (SAN)or iSCSI. If that fails, it transfers the snapshot data usingthe Network Block Device (NBD) driver protocol over thelocal network.
try san then nbd
Provides transfer flexibility if the VMware datastore isavailable on both a SAN and a local network. NetBackupattempts an unencrypted transfer over Fibre Channel (SAN)or iSCSI. If that fails, it transfers the snapshot data with SSLencryption using the Network Block Device (NBD) driverprotocol over the local network.
try san then nbdssl
Lets you run the VMware backup host in a virtual machine.This feature requires ESX 3.5 Update2 or later.
For instructions on this transport mode and on installingthe backup host in a VMware virtual machine, refer to yourVMware documentation.
hotadd
This option is for vStorage backups only (not VCB). ForvStorage backups, this option is the default.
NetBackup tries each transfer type in this order: san, hotadd,nbd, nbdssl. It uses the first type that succeeds for all disksin the virtual machine. For example: if one of the disks cannotbe accessed using san, the san transfer type is not used forany of the virtual machine’s disks. NetBackup then tries touse the hotadd type for all the disks. NetBackup continuesto try each type until it finds one that succeeds for all thedisks.
try all types
Virtual machine quiesce
Note: This option applies only to Windows virtual machines (such as Windows2003 and XP or later). It does not apply to older Windows systems or to UNIX orLinux.
This option is enabled by default. In the great majority of cases, you should acceptthe default.
41Configure NetBackup for VMwareConfiguration parameters for VMware

I/O on the virtual machine is quiesced before NetBackup creates the snapshot.Without quiescing file activity, data consistency in the snapshot cannot beguaranteed. If not consistent, the backed up data may be of little or no value.
If this option is disabled, the snapshot is created without quiescing I/O on thevirtual machine. In this case, you must perform your own checks for dataconsistency in the backup data.
Caution: Symantec does not recommend that you disable quiesce. In most cases,this option should be enabled.
Exclude unused and deleted blocksThis option reduces the size of the backup image by excluding any unused ordeleted blocks within the file system on the virtual machine. (This option is enabledby default.)
Note the following:
■ This option applies only to backups of an entire virtual machine (it does notapply to backups that specify individual files only).
■ This option supports the Windows NTFS file system only.
■ This option uses proprietary mapping technology to identify vacant sectors(allocated but empty) within the file system. If the virtual disk contains rawspace, that raw space is included in the backup.
Existing snapshot handling
Note: This option applies only to backups that use VMware vStorage. It does notapply to backups that use VMware VCB.
After it creates a snapshot, NetBackup usually deletes the snapshot when thebackup has succeeded. If snapshots are not automatically deleted (whether createdby NetBackup or not), the performance of the virtual machine may eventually beaffected.
Note also that the existence of undeleted snapshots can cause restore failures dueto lack of disk space. If the virtual machine was configured on multiple datastoresand a leftover snapshot existed on the virtual machine when it was backed up,NetBackup tries to restore all .vmdk files to the snapshot datastore. As a result,the datastore may not have enough space for the .vmdk files, and the restore fails.(For a successful restore, you can restore the virtual machine to an alternatelocation. Use the Storage Destination dialog in the Virtual Machine Recoverydialogs to select a datastore for the .vmdk files.)
Configure NetBackup for VMwareConfiguration parameters for VMware
42

The Existingsnapshothandling parameter specifies what action NetBackup takeswhen a snapshot is discovered before creating a new snapshot for the backup.
NetBackup ignores any existing virtual machine snapshots(including snapshots previously created by NetBackup) andproceeds with snapshot creation and the backup.
Ignore
If any snapshot exists on the virtual machine, NetBackup abortsthe job for that virtual machine only.
Abort
If a virtual machine snapshot exists that a NetBackup vStorageor VCB backup previously created: NetBackup removes the oldsnapshot, creates an updated snapshot, and proceeds with thevirtual machine backup. (This option is the default.)
Remove NBU
Monolithic export (VCB only)This option applies only to backups that use VCB.
When NetBackup backs up a virtual machine, it copies the virtual machine .vmdkfiles from the VMware datastore to the VMware backup host. Note that NetBackupcan copy a large vmdk file to the VMware backup host as 2GB files instead of asa larger file. Sending a large vmdk file in smaller (2GB) units can improve transferspeed.
This option is disabled by default: the vmdk file is transferred to the VMwarebackup host in 2GB chunks.
Enabled means that the vmdk file is transferred to the VMware backup host as asingle file, regardless of how large the vmdk file is. In some cases, transferring avery large vmdk file may result in a slower transfer speed.
Snapshot mount point (VCB only)Specifies a folder on the VMware backup host. This option applies only to backupsthat use VMware VCB on the backup host.
An example mount point is:
G:\mnt
If the folder does not exist on the VMware backup host, NetBackup creates it.
This folder is used in one of two ways, depending on the parameter value that youchoose:
■ For file-level backups (File level snapshot using VCB), the VMware backup hostmounts snapshots of individual virtual disk volumes in this folder. These
43Configure NetBackup for VMwareConfiguration parameters for VMware

snapshots are links to the virtual datastore. No virtual machine data is copiedto this folder.
■ For full virtual machine backups (Full VM backup or Mapped full VM backup),the VMware backup host creates a snapshot of the entire virtual machine inthis folder. This snapshot contains copies of all virtual disk files on the virtualdatastore that constitute a point-in-time image of the entire virtual machine.Enough space must be available in this folder to contain the snapshot.For Windows virtual machines, the mount point must be a local drive, notnetwork mounted. Also, do not set compression or encryption on the mountpoint.See “Notes and tips for VMware” on page 92.
Browse for VMware Virtual Machines screenUse this screen to select a vCenter server (VirtualCenter), ESX server, or individualvirtual machines. You can enter the host name manually or browse and selectfrom a list.
■ Enter the VM hostnameClick this option if you want to manually enter the name of a virtual machine.The format of the name depends on your system. It may be the fully qualifiedname or another name, depending on your network configuration and howthe name is defined in the guest OS. If NetBackup cannot find the name youenter, policy validation fails.To enter a host name, make sure that Browse and select Virtual Machine isnot selected.
Configure NetBackup for VMwareBrowse for VMware Virtual Machines screen
44

■ Browse and select Virtual MachineClick this option to discover vCenter servers, datacenters, and ESX servers(shown in the left pane). You can select virtual machines from a list (in theright pane).The virtual machines that are contained in a VMware vApp are displayed inthe right pane along with other virtual machines. The vApp however is notshown in the left pane.The virtual machine names that are listed may be derived from a cache file.Use of the cache file is faster than rediscovering the virtual machines on thenetwork if your site has a large number of virtual machines.If NetBackup cannot obtain the IP address of the virtual machine, the hostname and IP address are displayed as NONE.Note that virtual machine host names or display names must be unique withina master server's policies:See “Virtual machine host names and display names must be unique in a masterserver's policies” on page 47.
■ Last UpdateTo update the cache file and re-display virtual machines, click the refresh iconto the right of the Last Update field. This field shows the date and time of themost recent cache file that contains the names of virtual machines.
For NetBackup to access the virtual machines, note the following:
■ For older virtual machines, VMware VCB must be installed on the VMwarebackup host.
■ The NetBackup master server must have credentials for the VMwareVirtualCenter or ESX server(s).See “Adding NetBackup credentials for VMware” on page 30.
■ DNS problems may prevent or slow down discovery of the virtual machines.See “Preventing browsing delays caused by DNS problems” on page 89.
■ To limit the search to particular vCenter or ESX servers, you can create aBACKUP registry entry as an exclude list. Excluding unneeded servers candramatically speed up the search for virtual machines.See “Limiting the VMware servers that NetBackup searches when browsingfor virtual machines” on page 88.
■ The browsing timeout value must not be set too low.See “Changing the browsing timeout for virtual machine discovery”on page 90.
■ VM Host Name, Display Name, UUID, etc.When you select an ESX server in the left pane, information about its virtualmachines appears in columns in the right pane. You can change the settings
45Configure NetBackup for VMwareBrowse for VMware Virtual Machines screen

and arrangement of these columns by right-clicking on any of the columnheaders.The columns are the following:
The host name of the virtual machine.VM Host Name
The display name of the virtual machine.Display Name
The UUID of the virtual machine.UUID
The IP address of the virtual machine.IP Address
The guest OS system as defined when the virtual machinewas created.
OS
The datastore where the virtual machine configurationfiles are stored.
Data Store
The power on/off status of the virtual machine when itwas last discovered.
Power
Shows whether the virtual machine has a physical disk inraw device mapping mode (RDM) or has an independentdrive.
RDM Status
The VMware release version of the virtual machine(vmx-04 or vmx-07).
Platform
The time and date at which the virtual machine's UUIDwas initially discovered and cached.
Discovered Timestamp
Shows whether the virtual machine supports the VMwareChanged Block Tracking feature (for BLIB). Changed BlockTracking requires ESX server 4.0 and a virtual machineat vmx-07 or later.
Change Tracking Support
The ESX server in which the virtual machine resides (alsoappears in the left pane).
ESX Host
The datacenter that contains the virtual machine (alsoappears in the left pane).
Data Center
The vCenter server that manages the ESX server (alsoappears in the left pane).
Virtual Center Name
The virtual machines you selected are listed in the Clients tab.
Configure NetBackup for VMwareBrowse for VMware Virtual Machines screen
46

Virtual machine host names and display namesmustbe unique in a master server's policies
Certain VMware environments do not require unique names for virtual machines.For instance, virtual machines within a vCenter server can have the same host ordisplay names as virtual machines in another vCenter server. The same is true ofdatacenters, which are logical groupings of virtual resources within a vCenterserver. Virtual machine host names or display names must be unique within adatacenter, but need not be unique between two datacenters on the same vCenter.A virtual machine named VM1 can exist in datacenter A. Another virtual machine(also named VM1) can exist in datacenter B, on the same vCenter server.
Identically named virtual machines however present a problem if the sameNetBackup master server is configured to back up the virtual machines by meansof the same host name or display name. Virtual machines that are backed up bya particular NetBackup master server must be uniquely identified across all of itspolicies.
To back up the two virtual machines named VM1, do one of the following:
■ Change their VMware names so they are unique in the master server's policies.
■ Configure the policies to identify the virtual machines by their UUIDs. (Notethat UUIDs are always unique.)
Configuring aVMwarepolicy fromtheSnapshotPolicyConfiguration wizard
Use the following procedure.
To create a backup policy by means of the Snapshot Policy Configuration wizard
1 In the NetBackup Administration Console (on the NetBackup master server),click on the name of the master server.
2 Click Create a Snapshot Backup Policy.
47Configure NetBackup for VMwareVirtual machine host names and display names must be unique in a master server's policies

3 Click Next.
4 On the Select Client screen, enter a name for the policy.
5 For Virtual Machine Type, select VMware.
6 Enter the name of the VMware backup host.
7 Follow the remaining screens in the wizard.
The wizard creates the policy according to your selections.
About incremental backups of virtual machinesNetBackup provides a flexible approach to incremental backups, as follows:
■ For vStorage, NetBackup enables full virtual machine and file-levelincrementals in the same backup.
■ For VCB, NetBackup enables file-level incrementals.
Note the following about incremental backups of virtual machines:
■ Incremental backups must be based on timestamps.See “Incremental backups must be based on timestamps ” on page 34.
■ With VCB, the only backup option that supports incrementals is Full backupwithfilelevel incremental. BLIB is not available. Operating system files cannotbe restored from the incremental backups that use this option.
■ Better support for incremental is available when you use BLIB (Performblocklevel incremental backups). BLIB requires ESX 4.0 and virtual machines atvmx-07 or later.
Configuring incremental backupsUse one of the following procedures, depending on the type of virtual machinebackup (vStorage or VCB). Note that BLIB cannot be used with VCB.
More information is available on creating a policy.
See “Configuring a VMware policy from the Policies node” on page 34.
To configure incremental backup of a virtual machine (vStorage)
1 In the NetBackup policy Attributes tab, select the FlashBackup-Windowspolicy type.
2 Select Perform off-host backup.
3 For Use, select VMware backup host.
Configure NetBackup for VMwareAbout incremental backups of virtual machines
48
4 For Machine, select a VMware backup host.
5 Optional: for BLIB, select Perform block level incremental backups. Thisoption is at the top of the Snapshot Client pane.
6 Click Options.
7 On the Snapshot Client Options dialog, click in the Value column to selectFull VM backup or Mapped full VM backup for Virtual machine backup.
More information is available on the configuration parameters.
See “Configuration parameters for VMware” on page 38.
8 Click OK.
9 On the Schedules tab, select DifferentialIncrementalBackup or CumulativeIncremental Backup.
10 Fill in the Clients tab and Backup Selections tab.
To configure incremental backup of a virtual machine (VCB)
1 In the NetBackup policy Attributes tab, select the FlashBackup-Windowspolicy type.
2 Select Perform off-host backup.
3 For Use, select VMware backup host.
4 For Machine, select a VMware backup host.
5 Click Options.
6 On the Snapshot Client Options dialog, click in the Value column to selectFull backup with file level incremental for Virtual machine backup.
See “When is VCB required?” on page 14.
See “NetBackup for VMware: vStorage vs VCB” on page 14.
Volume Manager volumes in the virtual machineTo back up a virtual machine that contains Veritas Storage Foundation VolumeManager volumes, use the Full VM backup option. Make sure that the Excludeunused and deleted blocks option is disabled.
Note: Restore of selected files from a backup of the full virtual machine is notsupported if the virtual machine contains Storage Foundation Volume Managervolumes.
See “VMware notes and restrictions” on page 24.
49Configure NetBackup for VMwareVolume Manager volumes in the virtual machine

Reducing the size of backupsNetBackup provides several options for reducing the size of the backup image, asfollows:
■ Perform block level incremental backups (on policy attributes tab)Referred to as BLIB. Reduces the size of incremental backups by trackingblock-level changes. Only the blocks that have changed since the last full orincremental are included in an incremental backup. This option applies tocumulative and to differential backups. This option works only with ESX 4.0virtual machines at version vmx-07 or later.
■ Exclude unused and deleted blocks (on Snapshot Options dialog from policyattributes tab)Reduces the size of a full backup by excluding any unused or deleted sectorswithin the file system on the virtual machine.This option applies to full backups only and is not related to BLIB. Excludeunused and deleted blocks uses proprietary mapping technology to identifyvacant sectors (allocated but empty) within the file system. If the virtual diskcontains raw space, the raw space is included in the backup. To exclude rawspace from the backup, select Perform block level incremental backups onthe policy attributes tab.
About block-level backupNetBackup supports block-level backups of the virtual machine. For block-levelbackups, NetBackup uses VMware's Changed Block Tracking feature to reducethe backup size. Since this option works at the block level (not at the file level), itapplies only to backups of the entire virtual machine. It cannot be used when thepolicy backup selections list specifies individual files.
This option reduces the size of full backups as well as the size of incrementalbackups, as follows.
Table 3-1 Block-level backup of the virtual machine: full vs incrementalschedule
Optimization that is used in backupType of backup
Backs up only the blocks that are currently used(allocated) in the virtual machine. Unallocated blocksare not included in the backup.
Backup of entire virtual machine,with full schedule
Configure NetBackup for VMwareReducing the size of backups
50

Table 3-1 Block-level backup of the virtual machine: full vs incrementalschedule (continued)
Optimization that is used in backupType of backup
Backs up only the blocks that have changed since thelast backup. Blocks that have not changed are notincluded in the backup.
Backup of entire virtual machine,with incremental schedule
Note the following about block level incremental backups:
■ Can be used only with ESX 4.0 and later virtual machines at version vmx-07or later.
■ Can be used only with the FlashBackup-Windows policy type.
■ Not available in VCB-based backups.
Recovery options: vStorage vs VCBThis topic compares the NetBackup restore options available with vStorage vsVCB.
Table 3-2 describes the recovery features that are available from vStorage basedbackups. The first two columns (Virtual machine backup and Schedule) are backupoptions; the other columns describe the recovery options.
These features require the FlashBackup-Windows policy type.
Table 3-2 Recovery features with vStorage
CommentsCanrecoverfiles
Canrecovervirtualmachine
ScheduleVirtualmachinebackup
NoYesFullFull VMbackup
Requires BLIB.NoYesIncrementalFull VMbackup
YesYesFullMapped fullVM backup
For full virtual machinerecovery, BLIB is required.
YesYesIncrementalMapped fullVM backup
51Configure NetBackup for VMwareRecovery options: vStorage vs VCB

Table 3-2 Recovery features with vStorage (continued)
CommentsCanrecoverfiles
Canrecovervirtualmachine
ScheduleVirtualmachinebackup
NetBackup uses vStorage.YesYesFullFull backupwith file levelincremental
Requires VCB.YesNoIncrementalFull backupwith file levelincremental
Table 3-3 describes the recovery features that are available from VCB-basedbackups. Note that BLIB cannot be used with VCB.
Because it pertains only to Windows file-level backups, the File level snapshotusing VCB backup option is not included in this table.
See “About file-level backup of Windows virtual machines” on page 109.
Table 3-3 Recovery features with VCB (note: BLIB is not supported)
Comments (BLIB is notsupported)
Canrecoverfiles
Canrecovervirtualmachine
ScheduleVirtualmachinebackup type
For VCB-based backups, the FullVM backup option does notsupport incrementals.
NoYesFullFull VMbackup
Incremental backup is notavailable with VCB and Full VMbackup. Use Full backup withfile level incremental instead.
N/AN/AIncrementalFull VMbackup
YesYesFullMapped fullVM backup
Incremental backup is notavailable with VCB and MappedfullVMbackup. Use Fullbackupwith file level incrementalinstead.
N/AN/AIncrementalMapped fullVM backup
Configure NetBackup for VMwareRecovery options: vStorage vs VCB
52

Table 3-3 Recovery features with VCB (note: BLIB is not supported) (continued)
Comments (BLIB is notsupported)
Canrecoverfiles
Canrecovervirtualmachine
ScheduleVirtualmachinebackup type
This backup option providessupport for NetBackup 6.5.xsystems that are upgraded to7.0.1.
YesYesFullFull backupwith file levelincremental
Performs a file-level incrementalbackup only.
This backup option providessupport for NetBackup 6.5.xsystems that are upgraded to7.0.1.
YesNoIncrementalFull backupwith file levelincremental
About older policies and pre-7.x backup hostsA NetBackup 7.x master server can use the policies that were created for NetBackup6.5.x. NetBackup however does not convert the 6.5.x options to 7.x options. It usesthe policies as is, without modification or conversion.
Even if the policies are updated to the 7.x options, a 6.5.x backup host ignoresthose options. The backup host must be updated to 7.x to recognize and use the7.x policy options.
53Configure NetBackup for VMwareAbout older policies and pre-7.x backup hosts

Configure NetBackup for VMwareAbout older policies and pre-7.x backup hosts
54

Back up VMware virtualmachines
This chapter includes the following topics:
■ Backing up virtual machines
■ Further information on NetBackup policies
Backing up virtual machinesVirtual machine backups initiate from a NetBackup policy. You can start thebackup manually from a policy, or have it run automatically according to a schedulethat is defined in the policy.
To create the policy, you can use the Policies node of the NetBackupAdministration Console, or the Snapshot Policy Configuration wizard.
See “Configuring a VMware policy from the Policies node” on page 34.
See “Configuring a VMware policy from the Snapshot Policy Configuration wizard”on page 47.
4Chapter

To back up a virtual machine manually from an existing policy
1 Click on the Policies node in the NetBackup Administration Console, selectthe policy, and click Actions > Manual Backup.
The Manual Backup dialog appears.
Back up VMware virtual machinesBacking up virtual machines
56

2 Select the type of schedule for the backup.
3 Select the clients (virtual machines) to back up.
4 Click OK to start the backup.
5 To see the job progress, click Activity Monitor in the NetBackupAdministration Console.
It may take a few moments for the job to appear in the Activity Monitor. Donot start another backup if a job does not immediately appear. If the job doesnot show up after a few moments, close and restart the NetBackupAdministration Console.
Note that your VMware backup request launches more than one job. The firstjob automatically creates and deletes snapshots. This job has a dash (-) in theSchedule column. The second job backs up the virtual machine files from thesnapshot.
Further information on NetBackup policiesFor further information on policies and backup schedules, see the "Creating backuppolicies" chapter of the NetBackup Administrator's Guide, Volume I.
57Back up VMware virtual machinesFurther information on NetBackup policies

Back up VMware virtual machinesFurther information on NetBackup policies
58

Restore VMware virtualmachines
This chapter includes the following topics:
■ About restore of individual files
■ About restore of the virtual machine from a VCB backup
■ Restore notes and restrictions
■ If the recovery host is not at the same NetBackup release level as the backuphost
■ Restoring individual files
■ Setting up NetBackup Client Service for restore to a shared virtual machinedrive
■ Restoring the full VMware virtual machine
About restore of individual filesYou can use either of the following procedures to restore files individually.
5Chapter

Restore individual files to the virtual machine by restoring to therecovery host. The virtual machine drives that are the destinationfor the restore must be configured in one of the following ways:
■ The virtual machine drives must be shared through the guestoperating system on the virtual machine.
See “Setting up NetBackup Client Service for restore to a sharedvirtual machine drive” on page 64.
■ NetBackup client software must be installed on the VMwarevirtual machine.
One-stage process
Restore individual files from the VMware recovery host to aNetBackup Windows client (not to the virtual machine). See theNetBackup Backup, Archive, and Restore Getting Started Guide onhow to restore to different locations.
Then manually copy the restored files to the Windows virtualmachine. (NetBackup does not perform this step.)
Two-stage process
About restore of the virtual machine from a VCBbackup
To restore a virtual machine from a backup that was made with VCB, restore allvirtual machine files to the VMware recovery host. The recovery host is used asa staging host. You must use this approach if NetBackup 6.5.x made the backup.
After you restore the virtual machine files to the VMware recovery host, do oneof the following:
■ Use VMware automated restoreNetBackup integrates with VMware vCenter Converter to restore the virtualmachine to a designated ESX server. The virtual machine files are then removedfrom the staging host.Certain compatibility issues exist between newer and older versions of VMwareESX server and VMware Converter. Refer to the following Symantec tech notefor more information:http://entsupport.symantec.com/docs/340091
■ Use the VMware Converter application to restore the virtual machine fromthe staging host to the virtual machine server.
Restore notes and restrictionsBefore you begin the restore, note the following:
Restore VMware virtual machinesAbout restore of the virtual machine from a VCB backup
60

■ Unless a NetBackup client is installed on the virtual machine, you must do therestore from the NetBackup master server.
■ To restore files to the original virtual machine location, the destination mustbe specified as the virtual machine's host name (not display name or UUID).
■ If the attempt to restore a full virtual machine fails while using the SANtransport type, try the NBD transport type instead.
■ For the SAN transfer type, the job may be slow when you restore to a vCenterServer. For greater speed, designate an ESX server as the destination for therestore.Note that you can set up an ESX server to be used for restores. You can addNetBackup restore credentials for that ESX server by means of the VMwarerestore ESX server server type.See “Adding NetBackup credentials for VMware” on page 30.
■ NetBackup can use vStorage to back up ESX 3.0.2 virtual machines if a vCenterserver 2.5 or later manages them. NetBackup cannot however restore thebackups directly to an ESX 3.0.2 server. VMware vStorage APIs cannotcommunicate with the ESX servers that are earlier than 3.5. The restore mustgo through the vCenter server. (Make sure to select a vCenter server on theNetBackup Recovery Options dialog.)See “Recovery Options dialog box (restore to alternate location)” on page 73.
■ If the virtual machine was backed up by its display name or UUID, and thedisplay name differs from the host name, note: You must specify the correctdestination client for the restore. Use the Specify NetBackup Machines andPolicy Type dialog in the NetBackup Backup, Archive, and Restore interface.See “Invalid client error when you restore files using NetBackup BAR interfaceinstalled on the virtual machine” on page 101.
■ To restore the VMware files that were encrypted on the virtual machine usingWindows NTFS encryption, install a NetBackup client on the virtual machine.
■ For a virtual machine that is running a Linux guest operating system: Whenyou restore a virtual machine (to its original location or different location),the ESX server assigns the virtual machine a new (virtual) MAC address. Afteryou restart the virtual machine, you may have to configure its MAC address.For instance, the original MAC address of the virtual machine may be in aconfiguration file that has to be updated.Refer to your VMware documentation for more details.
■ When restoring large files, make sure that no snapshots are active on thedestination virtual machine. Otherwise, the files are restored to the VMwareconfiguration datastore, which may be too small to contain the files you wantto restore. In that case, the restore fails.
61Restore VMware virtual machinesRestore notes and restrictions

The configuration datastore (sometimes called the VMX directory) containsthe configuration files that describe the virtual machine, such as .vmx files.Note that active snapshots of vmdk files are also stored on the configurationdatastore.
■ If you cancel the virtual machine restore before it completes, thenot-fully-restored virtual machine remains at the target location. NetBackupdoes not delete the incomplete virtual machine when the restore job is canceled.You must manually remove the incomplete virtual machine.
If the recovery host is not at the same NetBackuprelease level as the backup host
Note the following about mixed-level backups and restores:
■ To restore from a NetBackup 7.x backupTo restore a virtual machine from a backup that a NetBackup 7.x backup hostperformed, a NetBackup 7.x recovery host is required. You cannot use aNetBackup 6.5.x recovery host to restore a virtual machine that was backedup by a NetBackup 7.x backup host.
■ To restore from a NetBackup 6.5.x backupTo restore a virtual machine (or selected files) from a NetBackup 6.5.x backup,the VMware Converter must be installed on the NetBackup recovery host. Therecovery host can run NetBackup 6.5.x or 7.x. A staging area is required.
Restoring individual filesIf the VMware backup was made with either of the following, you can restoreindividual files:
■ An MS-Windows policy.
■ A FlashBackup-Windows policy with a Virtual Machine Backup parameterset to File levelsnapshotusingVCB, MappedfullVMbackup, or Fullbackupwith file level incremental.
Restore VMware virtual machinesIf the recovery host is not at the same NetBackup release level as the backup host
62

To restore individual files
1 In the NetBackup Backup, Archive, and Restore interface, specify the sourceclient and destination client and the type of policy:
For UNIX systems, on the Restore Files tab, click the Restore icon:
For Windows systems, click Files>SpecifyNetBackupMachinesandPolicyType.
2 Specify the following:
The NetBackup master server that directed the backup.Server to use forbackupandrestores
The VMware virtual machine that was backed up.
Note: If the policy identified the virtual machine by its VMwaredisplay name or UUID (not by host name), specify that displayname or UUID.
Source client forrestores
Specify one of the following:
■ The host name of the VMware virtual machine that wasbacked up, if NetBackup client software has been installedon the virtual machine.
Specify the host name even if the policy identified thevirtual machine by its VMware display name or UUID. Donot enter the VMware display name or UUID.
■ The NetBackup recovery host.
Note: The NetBackup Client Service must be logged on asAdministrator.
See “Setting up NetBackup Client Service for restore to a sharedvirtual machine drive” on page 64.
Destination clientfor restores
The type of policy that made the backup: MS-Windows orFlashBackup-Windows.
Policy type forrestores
3 Select the type of restore, as follows:
■ For UNIX systems, on the Restore Files tab, select Normal Backups.
■ For Windows systems, click Files > Select Files and Folders to Restore >from Normal Backup
63Restore VMware virtual machinesRestoring individual files

4 For UNIX systems enter the Browse directory that contains the directoriesor files to restore.
5 Click the files you want to restore.
6 Start the restore, as follows:
■ On UNIX systems: Click Restore.
■ On Windows systems: Click Actions > Restore....
7 For Windows systems, if NetBackup client software is not installed on thedestination virtual machine, select one of the following:
■ Restore everything to a different location
■ Restore individual folders and files to different locationsDestinations must be entered as UNC path names that refer to shareddrives on the virtual machine.
For example, to restore the file E:\folder1\file1 on virtual machine vm1,enter the following destination:
\\vm1\e$\folder1\file1
The NetBackup Client Service must be logged on under an account that hasAdministrator privileges.
See “Setting up NetBackup Client Service for restore to a shared virtualmachine drive” on page 64.
Setting up NetBackup Client Service for restore to ashared virtual machine drive
To restore individual files to a Windows virtual machine that has a shared drive,note: the NetBackup Client Service must be logged on under an account that hasAdministrator privileges (not as the Local System account). An account withAdministrator privileges lets NetBackup write to the directories on the virtualmachine to which the data is restored.
If you try to restore files while the NetBackup Client Service is logged on as theLocal System account, the restore fails.
To log on the NetBackup Client Service as Administrator
1 In Windows Services on the VMware recovery host, double-click theNetBackup Client Service.
2 Check the Log On tab: if the service is not logged on under an account thathas Administrator privileges, stop the service.
Restore VMware virtual machinesSetting up NetBackup Client Service for restore to a shared virtual machine drive
64
3 Change the logon to the Administrator account, or to an account that hasAdministrator privileges.
The account must have Administrator privileges in the domain in which boththe virtual machine and the VMware backup host reside.
4 Restart the service.
5 Retry the restore.
Restoring the full VMware virtual machineIf the VMware backup was made with both of the following, you can restore theentire virtual machine:
■ A FlashBackup-Windows policy.
■ The Virtual Machine Backup parameter was set to any of the following:
■ Full VM backup
■ Mapped full VM backup
■ Full backupwith file level incremental, and the policy schedule was a fullbackup type.
More detail is available on restore options.See “Recovery options: vStorage vs VCB” on page 51.
To restore the full virtual machine
1 Start the NetBackup Backup, Archive, and Restore interface.
2 Specify the source client and destination client and type of policy:
For UNIX systems, on the Restore Files tab, click the restore icon.
For Windows systems: Click Files>SpecifyNetBackupMachinesandPolicyType.
3 Specify the following:
The NetBackup master server that directed the backupServer to use forbackupandrestores
The VMware virtual machine that was backed upSource client forrestores
This field is ignored. The destination for the restore is specifiedin a different screen as explained in a later procedure.
Destination clientfor restores
FlashBackup-WindowsPolicy type forrestores
65Restore VMware virtual machinesRestoring the full VMware virtual machine

4 Select the type of restore:
For UNIX systems, on the Restore Files tab, select Restore type > VirtualMachine Backups.
For Windows systems, click the down arrow on the Select forRestore option.Select RestorefromVirtualMachineBackup. A restore window displays thebackups available for restore.
5 Select the virtual machine backup to restore.
For UNIX systems, do the following:
■ On the RestoreFiles tab, specify the Startdate and Enddate within whichto search for the backup. Click either of the calendar options.
■ Specify root (/) in the Browse directory field and press Enter.
■ Click on the root directory that is displayed under Directory Structure.
For Windows systems, in the NetBackupHistory pane, click on the VMwarebackup. Then click on the item that is displayed under AllFolders. You cannotselect individual files. You must select the entire virtual machine.
Restore VMware virtual machinesRestoring the full VMware virtual machine
66

6 Select restore options.
For UNIX systems, click Restore.
For Windows systems, click Actions > Restore.
The type of dialog that appears next depends on how NetBackup performedthe backup (by means of VCB or vStorage).
See “ Restore Marked Files dialog box (VMware)” on page 67.
See “ Virtual Machine Recovery dialog boxes (restore to original location)”on page 70.
See “Virtual Machine Recovery dialogs boxes (restore to alternate location)”on page 73.
Restore Marked Files dialog box (VMware)If NetBackup used VMware VCB to back up the virtual machine, the RestoreMarked Files dialog appears when you click Restore.
67Restore VMware virtual machinesRestoring the full VMware virtual machine

The Restore Options are as follows:
■ Restore all virtual machine files to a virtual machine server automaticallyusing VMware ConverterRestores all virtual machine files to the staging area that you specify on thisdialog box. NetBackup then issues a VMware-provided script to restore thevirtual machine to the virtual machine server you specify. After the restore iscomplete, the restored virtual machine is powered off. The virtual machinefiles are then removed from the staging machine.If the virtual machine display name already exists on the Virtual machineserver, the restore fails.Note the following options:
Restore VMware virtual machinesRestoring the full VMware virtual machine
68

Retains the UUID of the original virtual machine (note that theUUID is a globally unique identifier). The virtual machine isrestored with the same UUID that it had before the restore. Thisoption requires that the previous virtual machine (the one thatwas backed up) has been deleted, so that the UUID is free.
Note: If the UUID exists, the restore fails.
The default (no identify restore) makes sure that the displayname of the new virtual machine (created by the restore) doesnot already exist. The virtual machine that the restore createsis given a new UUID.
Perform identityrestore to restoreUUID (UniversalUnique Identifier)
Verifies that the virtual machine that the restore creates doesnot have the same IP address as the virtual machine that wasbacked up. The network information is deleted at the time ofthe restore.
The default is to retain the IP information. Use the default if:
■ You have already deleted the virtual machine that was backedup, and
■ You want the restored virtual machine to keep the same IPinformation as the original virtual machine.
Strip networkinformation fromthe virtual machinethat has beenrestored
Does not restore hardware backing information from the originalimage. Default settings are substituted.
Remove backinginformation fordevices likeDVD/CD-ROMdrives, serial orparallel ports
■ Restore all virtual machine files to the staging machineRestores all virtual machine files to the staging host. NetBackup does notrestore the files to the virtual machine server. If not restoring to the originallocation, you can use the VMware Converter to restore the virtual machinefrom the staging host to the Virtual machine server.See your VMware documentation.
The Restore Destination Choices are as follows:
■ Virtual machine serverBy default, this field shows the server that was stored in the backup imageinformation. You can use that server as the restore destination, or enter adifferent virtual machine server as the destination.
■ Staging machine for restorationSelect or enter the recovery host to which the VMware files are temporarilyrestored. If you chose Restore all virtual machine files to a virtual machine
69Restore VMware virtual machinesRestoring the full VMware virtual machine

server automatically using VMware Converter, the files are restored to theVirtual machine server and deleted from this staging server.The default is the backup host that was used for the backup. The name of thatbackup host is stored in the backup image information. On this dialog box, thepull-down list for staging hosts includes the VMware backup hosts that aredefined in existing NetBackup policies.Restore staging locationEnter a Windows file path on the staging host to which the virtual machinefiles are temporarily restored. The default is the VMware backup host mountpoint that was stored in the backup image information.
The Override default priority options are the following:
■ Override default priorityPlace a check mark in this box to override the default priority.
■ Job priorityUse this field to set a higher priority.
Virtual Machine Recovery dialog boxes (restore to original location)If NetBackup used VMware vStorage to back up the virtual machine, the VirtualMachine Recovery dialog boxes appear when you start the restore.
Recovery Destination dialog boxSelect the type of destination for the recovery: the original location or alternatelocation.
■ Original settings of the virtual machine when it was backed upShows the configuration of the virtual machine at the time of the backup.When you restore the virtual machine to its original location, theseconfiguration settings are used and cannot be changed.
■ Recover virtual machine toSelect Original location or Alternate location.
Recovery Options dialog boxSelect the recovery host, transfer type, and other options, as follows:
■ Destination settings of the virtual machine to be recoveredShows the configuration of the virtual machine at the time of backup. Thesesettings are applied to the virtual machine when it is restored.
■ NetBackup Recovery Host
Restore VMware virtual machinesRestoring the full VMware virtual machine
70
The host that performs the recovery. The default is the host that performedthe backup (the backup host).In most cases, you can use the host that performed the backup. Selecting adifferent host as the recovery host can result in a slow restore or a failedrestore, depending on the transfer type. For example, if the host that performedthe backup used a SAN connection to access the datastore, but the host youselect as recovery host does not have SAN access to the datastore, the restorefails if you select the san transfer type.
■ Transfer TypeDetermines how the restore data is sent from the recovery host to the VMwaredatastore. The appropriate option depends in part on the type of network thatconnects the VMware datastore to the recovery host.The default is the type that the backup used.
For unencrypted transfer over Fibre Channel (SAN) or iSCSI.san
For unencrypted transfer over a local network that uses theNetwork Block Device (NBD) driver protocol. This type oftransfer is usually slower than Fibre Channel.
nbd
For encrypted transfer (SSL) over a local network that usesthe Network Block Device (NBD) driver protocol. This typeof transfer is usually slower than Fibre Channel.
nbdssl
Provides transfer flexibility if the VMware datastore isavailable on both a SAN and a local network. NetBackupattempts an unencrypted transfer over Fibre Channel (SAN)or iSCSI. If that fails, it transfers the snapshot data usingthe Network Block Device (NBD) driver protocol over thelocal network.
Try san then nbd
Requires that the recovery host is in a virtual machine. Thisfeature requires ESX 3.5 Update2 or later.
For instructions on this transport mode and on installingthe recovery host in a VMware virtual machine, refer to yourVMware documentation.
hotadd
NetBackup tries each transfer type in this order: san, hotadd,nbd, nbdssl. It uses the first type that succeeds for all disksin the virtual machine. For example: If one of the diskscannot be accessed using san, the san transfer type is notused for any of the virtual machine’s disks. NetBackup thentries to use the hotadd type for all the disks. NetBackupcontinues to try each type until it finds one that succeedsfor all the disks.
Try all types
71Restore VMware virtual machinesRestoring the full VMware virtual machine

■ Overwrite the existing virtual machineIf a virtual machine with the same UUID or display name exists at thedestination, that virtual machine must be deleted before the restore begins.Otherwise, the restore fails. Select this option to have the virtual machinedeleted.
■ Restore UUIDRetains the UUID of the original virtual machine (note that the UUID is aglobally unique identifier). The virtual machine is restored with the same UUIDthat it had before the restore.This option requires that the virtual machine has been deleted on thedestination server, so that the UUID is free. Otherwise, you must selectOverwrite the existing virtual machine.
Note the following:
■ If a virtual machine with the same display name but with a different UUIDexists at the target restore location, the restore fails. You must either deletethe existing virtual machine and run the restore, or keep the existing virtualmachine and abandon the attempt to restore.
■ If a virtual machine with a different display name but with the same UUIDexists at the target restore location: You must either delete the existingvirtual machine and run the restore, or select RestoreUUID and Overwritethe existing virtual machine. In the latter case, NetBackup deletes theexisting virtual machine and restores the original virtual machine.
■ If you do not want to keep the existing virtual machine, you can do one ofthe following: Remove the existing virtual machine, or log into the ESXserver and remove the directory where the virtual machine resides.
■ Remove network interfacesRemoves any network interfaces from the restored virtual machine. Selectthis option if the network connections on the destination virtual machine havechanged since the backup was made.
■ Power on virtual machine after recoverySelect this option to have the recovered virtual machine automatically poweredon when the recovery is complete.
■ Create thin provisioned disksThis option configures the restored virtual machine with thin provisioneddisks, even if the original virtual machine used thick provisioning.Thin provisioning saves disk space through dynamic growth of the vmdk file.The vmdk files are no larger than the space that the data on the virtual machinerequires. The virtual disks automatically increase in size as needed.
Restore VMware virtual machinesRestoring the full VMware virtual machine
72

Refer to the following Symantec document for more support details on thinprovisioned disks:Support for NetBackup 7.x in virtual environmentshttp://entsupport.symantec.com/docs/340091
■ Override default job priorityPlace a check mark in this box to override the default priority.
■ Job PriorityUse this field to set a higher priority.
Perform Recovery dialog boxReview the settings that are to be applied to the restored virtual machine.
■ Recovery settingsLists several settings that are used for the recovery.
■ Run Pre-Recovery CheckClick this option to verify credentials, available space on the datastore, andother important requirements.
■ Start RecoveryStarts the recovery of the virtual machine.
Virtual Machine Recovery dialogs boxes (restore to alternate location)If NetBackup used vStorage to back up the virtual machine, the Virtual MachineRecovery dialog boxes appear when you start the restore.
Recovery Destination dialog box (restore to alternate location)■ Original settings of the virtual machine when it was backed up
Shows the configuration of the virtual machine at the time of the backup.When restoring to an alternate location (not to the original location), you canchange these settings after you click Next.
■ Recover virtual machine toSelect Alternate location.
Recovery Options dialog box (restore to alternate location)This dialog initially displays the original virtual machine settings that wererecorded in the NetBackup catalog when the virtual machine was backed up. Beforeaccepting any default values, you may have to verify that the original hosts orservers are still available.
73Restore VMware virtual machinesRestoring the full VMware virtual machine

This dialog contains the following fields:
■ NetBackup Recovery HostThe recovery host transfers the virtual machine files to the VMware destinationthat is specified in other fields on this dialog. The default for the recovery hostis the original backup host that backed up the virtual machine.
Consider the following when selecting a recovery host:
■ To use the original VMware backup host for the recovery, verify that thebackup host still exists. The original backup host may have been removedor reconfigured after the backup occurred.
■ The current processing load on the host that you want to use may be afactor. The recovery host undergoes significant I/O activity when it restoresa virtual machine.
■ The network connection between the recovery host and the destinationdatastore may limit the type and speed of data transmission. For example,to use the SAN transfer type, the recovery host must have access to theappropriate luns in the datastore.
■ vCenter ServerSpecifies the vCenter server for the restored virtual machine. To use theoriginal vCenter Server (the default), verify that the original vCenter serverstill exists.To use a different vCenter Server, make sure that it is compatible with thevirtual machine you want to restore. Note that a vmx-07 virtual machine canbe restored only to a vSphere 4.0 or later server.The restore may finish faster if you use the SAN transfer type with a restoreESX server (bypassing any vCenter servers).
When choosing a target host for the restore, note the following:
■ If NetBackup has credentials to access a vCenter server (but does not havecredentials to access a VMware restore ESX server), you can restore thevirtual machine through the vCenter server. In this case, the data movementfor the restore passes through the vCenter server. Passing the virtualmachine data through the vCenter server may increase the amount of timethat is needed to complete the restore.The credentials must give NetBackup full access privileges to the vCenterserver.See “Adding NetBackup credentials for VMware” on page 30.
■ If NetBackup has credentials to access a vCenter server as well as a VMwarerestore ESX server, the restore may complete faster. In this case, by defaultNetBackup passes the virtual machine data directly to the restore ESX
Restore VMware virtual machinesRestoring the full VMware virtual machine
74

server, bypassing the vCenter server. You can select a vCenter folder inwhich to place the restored virtual machine.The credentials must give NetBackup full access privileges to the restoreESX server.
■ If NetBackup has credentials to access an ESX server, you can designatethat server as the target for the restore. The credentials must giveNetBackup full access privileges to the ESX server.Select None for the vCenter Server, and click Search to select the ESXserver.
Note:Due to VMware limitations, NetBackup cannot restore a vStorage-basedvirtual machine backup directly to an ESX server that is earlier than version3.5.
■ ESX ServerSpecifies the ESX server on which the restored virtual machine is to reside.To use the original ESX server (the default), verify that the original ESX serverstill exists.Click the Search option to browse for a different ESX server.See “Select ESX server dialog box (restore to alternate location)” on page 76.
■ DatacenterShows the VMware datacenter containing the selected ESX server.
■ FolderA folder is a logical entity within the vCenter that contains VMware objects,such as datastores, networks, and virtual machines.By default, this field shows the VMware folder that contained the virtualmachine when the virtual machine was backed up. If you select a different ESXserver to which to restore the virtual machine, this field changes to None. Youmust then click Browse to select a folder within the datacenter for the restoredvirtual machine.See “Select Folder dialog box (restore to alternate location)” on page 77.
■ Display NameSpecifies the VMware display name for the restored virtual machine. Thedefault is the display name that the virtual machine had when it was backedup.The display name must be unique for the vCenter Server where the virtualmachine is restored.
75Restore VMware virtual machinesRestoring the full VMware virtual machine

Note: If a virtual machine with this display name already exists at this location(or at the original location), you are prompted to click Overwrite the existingvirtual machine. You cannot restore the virtual machine if the result is twovirtual machines with the same display name on the same vCenter server.
■ Resource PoolUse this option to have the restored virtual machine assigned to either aVMware resource pool or to a vApp. Resource pools manage the host's CPUand memory. vApps are logical containers for virtual machines, and also sharesome functionality with virtual machines.
■ DatastoreSpecifies the VMware configuration datastore where the virtual machineconfiguration files are stored.The configuration datastore (sometimes called the VMX directory) containsthe configuration files that describe the virtual machine, such as .vmx files.Active snapshots of vmdk files are also stored on the configuration datastore.
■ Transfer TypeDetermines how the data is sent from the recovery host to the VMwaredatastore. The appropriate type depends on the type of connection betweenthe NetBackup recovery host and the VMware datastore.More information is available about these options.See “Recovery Options dialog box” on page 70.
■ Overwrite the existing virtual machineSelect this option to overwrite an existing virtual machine that has the samedisplay name or UUID as the virtual machine to be restored.If a virtual machine with the same display name or UUID exists at thedestination vCenter, NetBackup deletes the virtual machine before the restorebegins.
Select ESX server dialog box (restore to alternate location)You can enter the name of the ESX server, or drill down in the list to select aserver.
■ Specify ESX serverEnter the fully qualified name of the ESX server in this field.
■ SearchClick Search to display a list of available ESX servers that are on the vCenterserver. Drill into the list and place a check mark beside an ESX server.
Restore VMware virtual machinesRestoring the full VMware virtual machine
76

Note: Some older ESX servers may not support the version of the virtualmachine that you want to restore. Verify that the ESX server is compatiblewith the virtual machine.
Select Folder dialog box (restore to alternate location)This dialog shows the vCenter folders that exist on the datacenter that is shownin the Datacenter field.
Pick a folder from the list of available folders. The restored virtual machine isplaced in this folder.
If two datacenters of the same name exist in the vCenter server, all folders for theidentically named datacenters are displayed. After you select a folder and clickOK, verify that the folder on the RecoveryOptions dialog contains the destinationESX server. If the selected folder is on the wrong datacenter, the restore fails.
Storage Destination dialog box (restore to alternate location)Select the datastores where the .vmdk files are to be restored.
■ Source VMDK File NameShows the names of the virtual machine .vmdk files that were backed up.
■ DatastoreShows the VMware datastore where the .vmdk files are restored. Click in thisfield for a pull-down to select another datastore available to the ESX server.
■ Datastore StatusIndicates whether the datastore has enough space to contain the selected.vmdk file.
The datastore has enough space to contain the selected.vmdk file of the virtual machine that you restore.
OK
The datastore does not have enough space to contain theselected .vmdk file of the virtual machine that you restore.
Insufficient space
■ Create thin provisioned disksThis option configures the restored virtual machine with thin provisioneddisks. It does so even if the original virtual machine used thick provisioningat the time of the backup.Thin provisioning saves disk space by means of dynamic growth of the vmdkfile. The vmdk files are no larger than the space that the data on the virtualmachine requires. The virtual disks automatically increase in size as needed.
77Restore VMware virtual machinesRestoring the full VMware virtual machine

Refer to the following Symantec document for support details on thinprovisioned disks:Support for NetBackup 7.x in virtual environmentshttp://entsupport.symantec.com/docs/340091
Network Connections and other options dialog box (restore toalternate location)■ Select/unselect all network names
This box selects or unselects all the networks that are listed under NetworkNames. If a network is selected, the restored virtual machine is automaticallyconnected to that network.Place a check mark in this box if you want to select all network connectionsfor the restored virtual machine.
■ Network NamesSelect the networks that you want the restored virtual machine to be connectedto. Note that virtual networks are displayed in addition to physical networks.When the virtual machine is backed up, its network connections (physical orvirtual) are recorded in the NetBackup catalog.
For the restore, NetBackup determines what networks currently exist, andlists the network names as follows:
■ If a network that was recorded in the backup catalog for the virtual machinestill exists, it is listed on this screen and automatically selected.
■ If a network is available that was not listed in the NetBackup catalog, it islisted on this screen but not selected.
■ If a network was recorded in the backup catalog but is not currentlyavailable, it is not listed.
■ Power on virtual machine after recoveryPowers on the virtual machine after it is restored.
■ Override default job priorityPlace a check mark in this box to override the default priority.
■ Job PriorityUse this field to set a higher priority.
Perform Recovery dialog box (restore to alternate location)■ Recovery settings
Lists the settings that are used for the recovery.
■ Run Pre-Recovery Check
Restore VMware virtual machinesRestoring the full VMware virtual machine
78

Verifies the credentials, determines whether the datastore has available space,and reviews other important requirements. You must run this check at leastonce. You can proceed with the restore even if the check fails.
■ Start RecoveryStarts the recovery of the virtual machine.
79Restore VMware virtual machinesRestoring the full VMware virtual machine

Restore VMware virtual machinesRestoring the full VMware virtual machine
80

Best practices and moreinformation
This chapter includes the following topics:
■ Best practices
■ More information on VMware
■ Further assistance with NetBackup
■ Support information on NetBackup for VMware
Best practicesThe following are best practices for VMware:
■ For a more efficient backup, the NetBackup media server and the VMwarebackup host should be installed on the same host.
■ When creating virtual machines, use the same name for both host name anddisplay name. If the policy's Client Name Selection is changed, the existingentries on the policy Clients tab still work.
■ VMware recommends that you run no more than four simultaneous backupsof virtual machines that reside on the same datastore.
■ Successful VMware snapshots depend on the following:
■ The amount of I/O that occurs on the virtual machine datastore. Backupsshould be scheduled when relatively little I/O activity is expected. Reducingthe number of simultaneous backups can also help. (Use the Limit jobsperpolicy attribute in the NetBackup policy.)
6Chapter

■ The design of the I/O substructure that is associated with each virtualmachine datastore. For correct I/O design and implementation, consultyour VMware documentation.
■ Include in a single NetBackup policy those virtual machines that use the samedatastore. This practice lets you control the amount of backup-related I/O thatoccurs per datastore, to limit the backup effect on the target virtual machines.
■ NetBackup supports multiple backup hosts. When a single backup host issaturated with a backup process, another backup host can be added to increasebackup throughput.
■ Upgrade to the latest version of VMware vSphere or Virtual Infrastructure.
■ See the Symantec white paper titled NetBackup for VMware Best PracticesGuide.
For VCB backupsWhen backing up virtual machines with VCB, note the following regarding thesnapshot mount point on the VMware backup host (backup proxy):
■ On the backup host, the file system that contains the snapshot mount pointundergoes extensive I/O during full virtual machine backup. For this reason,the file system should reside on a high performance device.
■ On the backup host, the file system that contains the snapshot mount pointshould be reserved for snapshots only. It should also be on a dedicated SCSIor Fibre Channel bus.
■ The file system that contains the snapshot mount point should be routinelydefragmented. A heavily fragmented file system can adversely affect backupperformance.
■ To increase backup throughput on the backup host, define multiple snapshotmount points. Each mount point should be created on a disk that is connectedon its own disk bus (such as SCSI or IDE). Thus, I/O activity that one policycreates can be isolated from I/O activity that other policies create.
VMware with deduplicationFor a VMware backup to a deduplication storage unit, select the Mapped fullVMbackup option for the Virtualmachinebackup parameter on the VMware snapshotmethod. This option provides the best deduplication rates. Use of the Full VMbackup option results in a lower rate of deduplication.
More information is available about VMware configuration parameters.
See “Configuration parameters for VMware” on page 38.
Best practices and more informationBest practices
82

More information on VMwareVMware Inc. provides an extensive set of manuals on VMware products.
http://www.vmware.com/support/pubs/
Further assistance with NetBackupFor assistance with Snapshot Client configuration, refer to theNetBackupSnapshotClient Administrator's Guide. The guide contains installation and configurationinstructions on Snapshot Client.
For a list of all supported combinations of platforms and snapshot methods, seethe NetBackup 7.x Snapshot Client Compatibility document:
http://entsupport.symantec.com/docs/340298
Support information on NetBackup for VMwareUp-to-date information on NetBackup support in a virtual environment is availablein the following tech note:
Support for NetBackup 7.x in a virtual environment
http://entsupport.symantec.com/docs/340091
This tech note provides a wide range of support information, such as a list ofsupported guest operating systems, file systems, and required VMwarecomponents.
83Best practices and more informationMore information on VMware

Best practices and more informationSupport information on NetBackup for VMware
84

Troubleshooting
This chapter includes the following topics:
■ NetBackup logging for VMware
■ VMware environment—important!
■ Why is VCB not being used?
■ Limiting the VMware servers that NetBackup searches when browsing forvirtual machines
■ Preventing browsing delays caused by DNS problems
■ Changing the browsing timeout for virtual machine discovery
■ Changing timeout and logging values for vSphere
■ Notes and tips for VMware
■ Credentials for VMware server are not valid
■ NetBackup status codes related to VMware
■ Snapshot error encountered (status code 156)
■ Restore fails when you restore individual files to a virtual machine that hasNetBackup client software
■ Backup or restore job hangs
■ Mount point missing on a restored Windows virtual machine
■ Remove the Consolidate Helper snapshot
■ NetBackup catalog information for virtual machine backups made by 6.5.4 orearlier may prevent browsing the imported images for restore
7Chapter

■ Invalid client error when you restore files using NetBackup BAR interfaceinstalled on the virtual machine
■ VMware virtual machine does not reboot after restore
NetBackup logging for VMwareFor log messages about VMware backup or restore, see the following NetBackuplog directories.
Table 7-1 NetBackup logs that pertain to VMware backup and restore
Resides onContains themessages on
Log directory
NetBackup master ormedia server
Backup and restoreinstall_path\NetBackup\logs\bpbrm
NetBackup mediaserver
Backup and restoreinstall_path\NetBackup\logs\bptm
VMware backup hostSnapshot creationand backup
install_path\NetBackup\logs\bpfis
VMware backup hostSnapshot creationand backup
install_path\NetBackup\logs\bpcd
VMware backup hostBackupinstall_path\NetBackup\logs\bpbkar
NetBackup masterserver
Restoreinstall_path\NetBackup\logs\bprd
VMware recoveryhost
Restoreinstall_path\NetBackup\logs\tar
VMware backup orrecovery host
Policy configurationand on restore
install_path\NetBackup\logs\bpVMutil
The client where theBackup, Archive, andRestore interface isrunning.
Restoreinstall_path\NetBackup\logs\bpVMreq
VMware backup hostPolicy configurationinstall_path\NetBackup\logs\nbproxy
Note: These log directories must already exist in order for logging to occur. Ifthese directories do not exist, create them.
TroubleshootingNetBackup logging for VMware
86

To create the log directories, run the following command on the NetBackup serversand backup host:
Windows:
install_path\NetBackup\logs\mklogdir.bat
UNIX (on master or media servers):
/opt/openv/netbackup/logs/mklogdir
More detail is available on snapshot logs and logging levels.
See the NetBackup Snapshot Client Administrator’s Guide.
A broader discussion of NetBackup logging is available.
See the NetBackup Troubleshooting Guide.
Other logs for troubleshootingThe following may also contain valuable backup information.
Table 7-2 Other logs for VMware
Resides onContains themessages onLog directory
VMware backup host
See “Enabling VxMS logging”on page 87.
Note: The use of VxMSlogging can reduce theperformance of the backuphost.
File mapping during backup\Program Files\CommonFiles\VERITAS\VxMS\Logs
Enabling VxMS loggingVxMS logging may require significant resources on the VMware backup host.
To enable VxMS logging
1 On the Windows desktop of the backup host, click Start > Run and enterregedit.
2 To be on the safe side, make a backup of the current registry (File > Export).
87TroubleshootingNetBackup logging for VMware

3 Go to HKEY_LOCAL_MACHINE > SOFTWARE > Veritas > VxMS.
4 Change the Logging DWORD value.
For example: Useful logging levels (in decimal) are 3400 for low and 7400 forhigh.
VMware environment—important!Unsupported equipment can cause many problems. Ensure that your VMwareenvironment (including ESX servers, SAN devices, and backup host) conforms toall requirements and recommendations that are spelled out by VMware. Forinstance, if VMware does not support your HBAs, device drivers, or guest operatingsystems, NetBackup cannot work.
For support details, see VMware documentation at the VMware support site (forexample, the VMware compatibility guides).
Why is VCB not being used?When possible, NetBackup automatically uses vStorage instead of VCB, even whenbacking up certain VMware environments that are older than vSphere. If the ESXserver is at least 3.5, or the VirtualCenter is at least 2.5, NetBackup uses vStorage.Even if installed, VCB is not used in these environments.
NetBackup uses VCB for VMware environments that are older than ESX 3.5 orVirtualCenter 2.5. It also uses VCB if the policy is configured for Windows file-levelbackups. See the appendix titled "File-level backup of Windows virtual machines."
Limiting theVMware servers thatNetBackupsearcheswhen browsing for virtual machines
As part of creating a NetBackup policy, you must specify which virtual machinesto back up. One approach is to let NetBackup search the network and list allavailable virtual machines. However, if your VMware environment contains manyVMware servers and virtual machines, it may take too long to search and list allof them. For example, consider an environment with 10 vCenter servers. To backup the virtual machines on one of the 10 vCenter servers, browsing virtualmachines on all 10 servers is unnecessary.
To speed up browsing, you can exclude particular VMware servers from the search.When it probes the network for virtual machines, NetBackup queries only theVMware servers that are not named in the exclude list for the backup-host.
TroubleshootingVMware environment—important!
88

To limit the VMware servers that NetBackup discovers, per backup host
1 On the Windows desktop of the backup host, click Start > Run and enterregedit.
2 To be on the safe side, make a backup of the current registry (File > Export).
3 Go to HKEY_LOCAL_MACHINE > SOFTWARE > Veritas > NetBackup >CurrentVersion > Config and create a key called BACKUP.
4 Right-click in the right pane and click New > String Value. EnterexcludeVMservers as the name.
5 Right-click the excludeVMservers name and click Modify.
6 In the EditString dialog, enter a comma-delimited list of the VMware serversthat are NOT to be queried when NetBackup browses the network. Do notenter spaces. You can enter vCenter servers and individual ESX servers.
The exclude list applies only to this backup host. The servers are not queriedwhen NetBackup browses for virtual machines to list on the policy's Browsefor Virtual Machines dialog of the NetBackup Administration Console.
Preventing browsing delays causedbyDNSproblemsNetBackup may be unable to identify virtual machines when you use the Browsefor Virtual Machines dialog. Virtual machine host names may not be properlyconfigured in your Domain Name Server system (DNS), or the DNS system maybe slow. A timeout message may appear, or messages similar to the following mayappear in the NetBackup detailed status log:
17:25:37.319 [12452.10360] get_vSphere_VMs: Processing vm 002-wcms
17:25:37.319 [12452.10360] get_vSphere_VMs: uuid
421a8b46-063d-f4bd-e674-9ad3707ee036
89TroubleshootingPreventing browsing delays caused by DNS problems

17:25:37.319 [12452.10360] get_vSphere_VMs: vmxdir [san-05] 002-wcms/
17:25:37.319 [12452.10360] get_vSphere_VMs: datastore san-05
17:25:37.319 [12452.10360] get_vSphere_VMs: IpAddress 172.15.6.133
17:25:41.866 [12452.10360] get_vSphere_VMs: retry_gethostbyaddr for
172.15.6.133 failed with The requested name is valid, but no data of
the requested type was found.
Note: NetBackup may be unable to determine the host names of the virtualmachines from their IP addresses (reverse lookup may fail).
To prevent browsing delays caused by DNS problems
1 On the Windows desktop of the backup host, click Start > Run and enterregedit.
2 To be on the safe side, make a backup of the current registry (File > Export).
3 Go to HKEY_LOCAL_MACHINE > SOFTWARE > Veritas > NetBackup >CurrentVersion > Config and create a key called BACKUP.
4 Create a new DWORD under BACKUP, called disableIPResolution.
This registry key causes NetBackup to use the virtual machine's IP addressas the virtual machine's host name.
5 Use the NetBackup Browse for Virtual Machines screen to rediscover thevirtual machines to show the host names set to the IP addresses.
See “Browse for VMware Virtual Machines screen” on page 44.
Changing the browsing timeout for virtual machinediscovery
In the NetBackup Administration Console on Windows, you can adjust the timeavailable for browsing for virtual machines in the NetBackup policy.
To change the browsing timeout value
1 In the NetBackup Administration Console on Windows, click on the Policiesnode.
2 From the main menu, click View > Options, then click the Policies tab.
3 Adjust the VMware connect timeout value.
4 Click OK.
TroubleshootingChanging the browsing timeout for virtual machine discovery
90

Changing timeout and logging values for vSphereThe following are vSphere registry keys and their default values for varioustimeouts.
Table 7-3 Registry keys and defaults for vSphere timeouts
Default value (in seconds)DWORD registry key name
900jobtimeout
900poweroptimeout
900snapshottimeout
180registertimeout
180browsetimeout
300connecttimeout
The registry key and default for the vSphere API logging level are the following.
Table 7-4 Registry key and default for vSphere API log level
Default valueDWORD registry key name
0 (no logging)vmcloglevel
To change vSphere timeouts and logging values
1 On the Windows desktop of the backup host, click Start > Run and enterregedit.
2 To be on the safe side, make a backup of the current registry (File > Export).
3 Go to HKEY_LOCAL_MACHINE > SOFTWARE > Veritas > NetBackup >CurrentVersion > CONFIG and create a key called BACKUP.
4 To change a timeout value, create a new DWORD under BACKUP, using theappropriate registry name (such as jobtimeout or poweroptimeout).
Enter a value for the timeout.
5 To change the level of vSphere API logging, create a new DWORD calledvmcloglevel and enter the new logging value.
The allowed values are 0 through 6, where 0 is no logging and 6 is the highestlogging level.
91TroubleshootingChanging timeout and logging values for vSphere

Notes and tips for VMwareNote the following:
■ For incremental backups, make sure that the VMware backup host is correctlyconfigured. Otherwise, NetBackup performs only full backups.See “Incremental backups must be based on timestamps ” on page 34.
■ You cannot restore Windows operating system files from a file-level backupof a virtual machine. You can restore standard data files only. A restore of theoperating system requires a full virtual machine backup.
■ Make sure that the VMware Tools are installed on each virtual machine.Otherwise, communication problems and other problems can result.
■ You cannot restore individual VMware files onto the virtual machine itself,except under certain conditions.See “About restore of individual files” on page 59.
■ (This item applies to VCB backups only.) For the Full VM backup, Mapped fullVM backup, or Full backup with file level incremental options: Backups arenot supported if the snapshot staging area in the VMware backup host hascompression or encryption enabled.
■ (This item applies to VCB backups only.) For the Full VM backup, Mapped fullVM backup, or Full backup with file level incremental options: Backups arenot supported if the snapshot mount point on the VMware backup host hascompression or encryption enabled. For the backup, the VMware backup hostcopies the space-optimized VMware virtual machine images to its snapshotmount point. The Windows NTFS file system that is allocated for the snapshotmount point should not have the Compression or Encryption attribute set. Ifeither attribute is set, backups succeed but single file restores cannot beperformed from the backups.
■ For VMware environments that require VCB: Make sure that you have thelatest VCB version on the VMware backup host.See “When is VCB required?” on page 14.
■ NetBackup for VMware does not work with the VMware NetBackup IntegrationModule (VNIM).
Note the following:
■ If VNIM is installed, do not configure a NetBackup for VMware policy (withthe VMware snapshot method) to call any scripts that use VNIM. Such apolicy results in a backup that fails.
TroubleshootingNotes and tips for VMware
92

■ Do not run any NetBackup for VMware policy at the same time as ascript-based policy that calls VNIM. If the two policies require access tothe same virtual machine, a conflict may result and the backup may fail.
Credentials for VMware server are not validA number of possible problems can prevent NetBackup from gaining access tothe ESX server or VirtualCenter. NetBackup’s AddVirtualMachineServer dialoghas a Validate Credentials box that directs NetBackup to verify the credentialswhen you click OK. If the credentials do not pass validation, a pop-up messageappears.
Problems can result for a variety of reasons, including the following:
■ An incorrect virtual machine server name. Make sure that the server name isentered correctly.More information is available about changing the server name that is storedin NetBackup.See “Changing the host name of a VMware server in NetBackup” on page 33.
■ An invalid user name or password. Make sure that a valid user name andpassword were entered correctly.
■ An incorrect port number. Make sure that the port number is correct on theNetBackup ChangeVirtualMachineServer dialog. If the VMware server usesthe default port, no port specification is required. You can uncheck the Connectusing port number box.
■ You do not have enough privileges to perform backups or restores. (Notehowever that lack of sufficient privileges may not cause the credentialvalidation to fail.)For general guidelines for permissions, see the following:http://entsupport.symantec.com/docs/348519For the minimum permissions needed to back up and restore with vStorage,see the following:http://entsupport.symantec.com/docs/354813
NetBackup status codes related to VMwareThis topic provides assistance for NetBackup status codes.
93TroubleshootingCredentials for VMware server are not valid

Table 7-5 NetBackup status codes related to VMware
Explanation and recommended actionNetBackup statuscode
A virtual machine restore may fail with status 5 in the following cases:
■ If an .ISO file was presented to a virtual machine as a virtual CD or DVD during backup,the ISO file must be available on the destination host. If the ISO file is not available onthe host where you restore the virtual machine, the restore fails. Note that the VirtualInfrastructure interface on the VirtualCenter may include the following message:
Invalid configuration for Device '1'
■ The VMware restore host is on Windows Server 2008 but the SAN LUNs are offline.
The detailed status log that is in the NetBackup Activity Monitor includes the messageVirtual machine restore: file write failed.
If the restore host is on Windows Server 2008 and you use the SAN transfer type, youmust manually change the SAN LUNs to be online.
■ For vStorage restores: The restore host cannot access the VMware datastore by means ofthe transfer type that was selected for the job. The job's detailed status log on the restorehost may contain messages such as the following:
3:26:43 INF - Beginning read-blockmap on server luebeckof client moneevm4, reading file h:\dstu\moneevm4_1259284475_C1_F1.13:27:21 (19400.001) INF - TAR STARTED13:27:23 (19400.001) INF - Beginning restore from server luebeckto client luebeck.13:27:36 (19400.001) FTL - Virtual machine restore: VxMS initializationfailed13:27:37 (19400.001) FTL - Virtual machine restore: file create failed13:28:42 (19400.001) INF - TAR EXITING WITH STATUS = 513:28:42 (19400.001) INF - TAR RESTORED 0 OF 1 FILES SUCCESSFULLY13:28:42 (19400.001) INF - TAR KEPT 0 EXISTING FILES13:28:42 (19400.001) INF - TAR PARTIALLY RESTORED 0 FILES13:29:54 (19400.xxx) INF - Status = the restore failed to recoverthe requested files.
Select a different transfer type and retry the restore.
5, the restore failedto recover therequested files
TroubleshootingNetBackup status codes related to VMware
94

Table 7-5 NetBackup status codes related to VMware (continued)
Explanation and recommended actionNetBackup statuscode
This error can occur for the following reasons:
■ Taken together, the virtual machine and the alternate client virtual machine may containtoo many disks. If the total is too great for the alternate client's SCSI controllers to handle,a backup or restore using the hotadd transfer type fails. The following message appearsin the job's detailed status log:
ERR - Error opening the snapshot disks usinggiven transport mode: Status 23.
Add more SCSI controllers to the alternate client virtual machine.
■ For vStorage backups: If the VMware backup host cannot access the VMware datastoreby means of the transfer type that was selected for the job, the backup fails.
The job's detailed status log on the backup host may contain messages such as thefollowing:
12/4/2009 1:12:34 PM - Error bpbrm(pid=21376) fromclient moneevm4_clone: ERR - Error opening the snapshotdisks using given transport mode: Status 23.12/4/2009 1:12:39 PM - Error bpbrm(pid=21376) could notsend server status message12/4/2009 1:12:40 PM - end writing; write time: 00:00:28the backup failed to back up the requested files(6)
Select a different transfer type and retry the backup.
■ A previous hotadd backup of the virtual machine may have failed. Certain mount directoriesor cloned disks must be manually removed to allow hotadd backups to succeed, as follows:
■ During a hotadd backup, VMware creates a linked clone of the virtual machine's disksand attaches the cloned disks to the backup host. (The attached disks can be seen inthe vSphere Client interface.) If a hotadd backup of the virtual machine fails, NetBackupmay be unable to remove the cloned disks from the backup host. In the backup host,the presence of the cloned disks prevents subsequent backups from completing.
Remove the cloned disks from the VMware backup host and retry the backup.
■ During a virtual machine backup, VMware creates mount directories in theC:\Windows\Temp folder on the backup host. After the backup, VMware automaticallyremoves the mount directories. In some cases, such as when the backup uses the hotaddtransfer type, NetBackup may be unable to remove the mount directories.
Remove the mount directories from the \Temp folder and retry the backup. The foldername contains a string such as VMware-System.
6, the backup failedto back up therequested files
A number of different issues can cause this error.
See “Snapshot error encountered (status code 156)” on page 96.
156, snapshot errorencountered
95TroubleshootingNetBackup status codes related to VMware

Table 7-5 NetBackup status codes related to VMware (continued)
Explanation and recommended actionNetBackup statuscode
To restore selected files (not the entire virtual machine) to the original location, you mustspecify the host name of the virtual machine. Do not specify the display name or UUID asthe destination.
227, no entity wasfound
Snapshot error encountered (status code 156)This topic describes VMware issues that relate to status code 156.
Table 7-6 Possible causes of status code 156
Description and recommended actionCauses of status code156
NetBackup may not be able to obtain the volume ID of a drive that is listed in the policy’sbackup selections. In that case, none of the drives that are listed in the policy for theclient (virtual machine) are backed up. The backup fails with NetBackup status code 156.
Try one of the following:
Use the ALL_LOCAL_DRIVES directive instead of listing individual drives.
A drive letter that is specified in the policy’s backup selections list may be incorrect, orthe drive may be down. Update the client’s include list (Exceptions to exclude list), andfix or remove the drive entry in the backup selections list.
NetBackup cannot obtainthe volume ID of a drive
You cannot run more than one backup per virtual machine at a time. If you start a secondbackup of the virtual machine while the first backup is active, the second job fails witha status 156.
Recommended action: Wait until the first job completes, then run the second one.
A backup of the virtualmachine is already active
If you cancel a virtual machine backup that uses VMware VCB, NetBackup terminatesthe backup job. But NetBackup may be unable to terminate the VMware vcbmounterprocess that creates the snapshot on the virtual machine. If you then start another backupof the virtual machine, and the previous snapshot is still active, the new job fails withstatus 156.
Recommended action: On the virtual machine, use VMware Virtual Infrastructure orvSphere Client to delete the current snapshot. Then use NetBackup to restart the backup.
A VCB snapshot of thevirtual machine isalready active
TroubleshootingSnapshot error encountered (status code 156)
96

Table 7-6 Possible causes of status code 156 (continued)
Description and recommended actionCauses of status code156
If the VMware backup host has insufficient space in which to mount a VCB snapshot ofthe virtual machine, the backup fails with status 156.
The bpfis log on the VMware backup host may contain a message such as the following:
13:35:37.859 [5536.1276] <2> onlfi_vfms_logf: [2007-09-2113:35:34.578 'vcbMounter' 2204 error] Error: Failed to exportthe disk: There is not enough space on the disk
Recommended action: Free up additional space on the backup host and rerun the backup.
VCB only: The VMwarebackup host hasinsufficient space for thesnapshot
If the VMware backup host cannot access the VMware datastore by means of the transfertype that was selected for the job, the backup fails.
The bpfis log on the backup host may contain messages such as the following:
12:23:29.998 [3892.3332] <2> onlfi_vfms_logf: [2008-05-0712:23:26.279 'App' 3668 trivia] Attempting to openLVID:46a9ed36-ca235c12-1236-00001a1a24e4/46a9ed35-aa804fd4-6b99-00001a1a24e4/1.
12:23:29.998 [3892.3332] <2> onlfi_vfms_logf: [2008-05-0712:23:26.279 'App' 3668 error] No path to deviceLVID:46a9ed36-ca235c12-1236-00001a1a24e4/46a9ed35-aa804fd4-6b99-00001a1a24e4/1 found.
Recommended action: Select a different transfer type and retry the backup.
VCB only: The selectedtransfer type cannot beused
NetBackup cannot find the host name or VMware display name of a virtual machine thatis listed in the backup policy. The detailed status log may include the following errormessage:
Critical bpbrm (pid=<pid number>) from client <client name>:FTL - snapshot creation failed, status 156.)
If the virtual machines do not have static IP addresses, you can configure NetBackup toidentify virtual machines by their VMware display names or UUIDs. Examples of theenvironments that do not use static IP addresses are clusters, and the networks thatassign IP addresses dynamically.
Note that NetBackup may have been configured to identify virtual machines by theirVMware display names. In that case, make sure that the display names are unique andthat they do not contain special characters.
See “Client name selection” on page 38.
Cannot find virtualmachine name
97TroubleshootingSnapshot error encountered (status code 156)

Table 7-6 Possible causes of status code 156 (continued)
Description and recommended actionCauses of status code156
For versions of VCB earlier than 1.5: A disk was mounted on a virtual machine but thedisk is assigned to the virtual machine in raw mode (RDM). As a result, the attempt tocreate a snapshot of the virtual machine fails.
The bpfis log on the backup host may contain a message such as the following:
12:46:27.175 [2636.5628] <2> onlfi_vfms_logf: [2007-10-1712:46:27.019 'App'1976 verbose] Fault Msg: "Virtual machine is configured to use adevice that prevents the snapshot operation: Device '' is a rawdisk, which is not supported."
For VCB 1.5 and for vStorage, the RDM is ignored (not backed up) and any independentdisk is recreated but empty.
See “Configurations for backing up RDMs” on page 104.
The virtual machine diskis in raw mode (RDM)
If the attempt to create a snapshot of the virtual machine exceeds the VMware timeoutof 10 seconds, the snapshot fails with NetBackup status 156. This timeout may occur ifthe virtual machine is configured with a large number of volumes. Note that the timeoutmay be encountered even if the Virtual machine quiesce option was disabled.
Do one of the following:
■ Reduce the number of volumes within the virtual machine.
■ Install a NetBackup client on the virtual machine and select another backup methodfor the policy (not the VMware snapshot method).
The attempt to create asnapshot exceeded theVMware timeout
For the Full VM backup, Mapped full VM backup, or Full backup with file level incrementaloptions: Backups are not supported if the snapshot staging area in the VMware backuphost has compression or encryption enabled.
VCB only: compressionor encryption is enabledon the snapshot stagingarea in the VMwarebackup host
Restore fails when you restore individual files to avirtual machine that has NetBackup client software
When you restore individual files to a virtual machine that has a NetBackup client,make sure that a firewall does not interfere with the restore. If a firewall stopsthe restore, turn off the firewall and retry the restore.
TroubleshootingRestore fails when you restore individual files to a virtual machine that has NetBackup client software
98

Backup or restore job hangsNetBackup may have exceeded the maximum number of allowed VMware NFCconnections to the ESX server when it used the transfer types nbd or nbdssl. Notethat NetBackup uses one NFC connection per virtual disk on the ESX or ESXiserver.
If NetBackup is configured to access the ESX server directly (not through a vCenteror VirtualCenter server), fewer connections are allowed. The following are themaximum connections as set by VMware:
Table 7-7 VMware NFC connection limits
Maximum NFCconnections allowed
Type of access to the ESXserver
ESX version
9Directly to ESX serverESX 3.5
27Through vCenterESX 3.5
9Directly to ESX serverESX 4
27Through vCenterESX 4
11Directly to ESX serverESXi 4
23Through vCenterESXi 4
Try a different transport type (such as SAN or hotadd). If a different transporttype is not available and NetBackup accesses the ESX servers directly, set upaccess through a vCenter (or VirtualCenter) server. Use of a server increases themaximum number of allowed connections. For example: With 27 connections,NetBackup can access a virtual machine that has up to 27 disks, if the ESX serveris behind a vCenter server.
Note that the connection limits are per-host (that is, per vCenter or ESX server).
For example, assume the following environment:
■ An ESX 4.0 server with three virtual machines.
■ Each virtual machine has 10 virtual disks.
■ The virtual machines are behind a vCenter 4.0 server.
For a simultaneous backup of the three virtual machines, NetBackup requires 30NFC connections. With a limit of 27 NFC connections per vCenter server, any ofthe three backup jobs may hang.
These limits are described in the VMware Virtual Disk API Programming Guide:
99TroubleshootingBackup or restore job hangs

http://www.vmware.com/support/developer/vddk/vddk11_api_programming.pdf
Mount point missing on a restored Windows virtualmachine
A Windows virtual machine may fail to write its mount point configuration todisk (the mount point configuration remains in RAM). In that case, the mountpoint information cannot be backed up. When the virtual machine is restored,the data from the mounted volume is restored, but the mount point is absent fromthe restored virtual machine.
Reassign the mount point on the restored virtual machine. To make sure themount point is correctly configured, restart the virtual machine.
Remove the Consolidate Helper snapshotIf a datastore is out of space when you attempt to delete snapshots, VMwarecreates a snapshot named Consolidate Helper. You should manually delete thissnapshot before the next backup. Otherwise, change files may accumulate on thedatastore. The accumulation of such files can affect both the backup performanceand the I/O performance of the virtual machine.
For more information, see the following VMware knowledge base article aboutdeleting the Consolidate Helper snapshot:
http://kb.vmware.com/kb/1003302
NetBackup catalog information for virtual machinebackups made by 6.5.4 or earlier may preventbrowsing the imported images for restore
If you import a NetBackup 6.5.4 or earlier virtual machine backup image to aNetBackup 7.x system, note: the catalog header file of the imported image mayhave the wrong value for VM_TYPE. The value of the imported image may beincorrectly reported as 0 even for type 1 (Full VM) and type 2 (Mapped full VM)backups. As a result, you cannot use the Backup, Archive, and Restore interfaceto browse and restore the virtual machine image.
You must change the VM_TYPE value in the header file of the imported image tocorrect this problem. For the backups that were made with the Full VM backupoption, set VM_TYPE to 1. For the backups that were made with the Mapped fullVM backup option, set VM_TYPE to 2.
TroubleshootingMount point missing on a restored Windows virtual machine
100

For instructions, see the following tech note:
http://seer.entsupport.symantec.com/docs/308841.htm
Invalid client error when you restore files usingNetBackup BAR interface installed on the virtualmachine
If the virtual machine was backed up by display name or UUID, and the displayname is not the same as the host name, note: You cannot restore individual filesby means of the Backup, Archive, and Restore (BAR) interface if the interface isinstalled on the virtual machine itself. The files can be restored if BAR is installedon the master server or media server. In this case, BAR must not be installed onthe virtual machine that you want to restore to.
To restore files, the Destination client for restores field in the BAR interfacemust have a valid host name or IP address.
VMware virtualmachine does not reboot after restoreThe virtual machine may have had SCSI and IDE drives at the time of backup andthe guest OS resided on a SCSI drive. In that case, the virtual machine whenrestored may attempt to boot from the IDE drive. The boot attempt fails with themessage "Operating system not found." This problem occurs when NetBackupuses the VMware vStorage APIs.
VMware has identified this problem and will address it in a future release.
As a workaround, you can reconfigure the BIOS on the virtual machine to bootfrom the correct SCSI device.
101TroubleshootingInvalid client error when you restore files using NetBackup BAR interface installed on the virtual machine

TroubleshootingVMware virtual machine does not reboot after restore
102

Backup of VMware rawdevices (RDM)
This appendix includes the following topics:
■ About VMware raw device mapping (RDM)
■ NetBackup support details for RDMs
■ Configurations for backing up RDMs
■ About alternate client backup of RDMs
■ Requirements for alternate client backup of RDMs
■ Configuring alternate client backup of RDMs
About VMware raw device mapping (RDM)VMware raw device mapping mode (RDM) allows a virtual machine to directlyaccess physical disks. With raw device mapping, a VMware virtual machine canuse large storage devices such as disk arrays. Access to the data on an RDM diskis faster than to a fully virtualized disk (vmdk file). An RDM disk can be locallyattached to the ESX server or configured on a Fibre Channel SAN.
NetBackup supports the disk arrays that are configured on a virtual machine asRDMs.
Note: NetBackup cannot back up the RDM by means of a VMware backup host.
AAppendix
NetBackup support details for RDMsFor notes and restrictions on NetBackup support for VMware RDM (such as therequired version of VCB), see the following Symantec tech note:
Support for NetBackup 7.x in virtual environments
http://entsupport.symantec.com/docs/340091
Configurations for backing up RDMsYou can use either of the following NetBackup configurations to back up diskarrays as RDMs:
■ Without Snapshot Client: Install a NetBackup client on the virtual machine.You can configure NetBackup to back up the virtual machine and any RDMsas if the client was installed on a physical host. Without Snapshot Clientsoftware on the virtual machine, the features of Snapshot Client are notavailable. (This configuration is not discussed in this NetBackup for VMwareguide.)
■ With Snapshot Client: Install a NetBackup client and Snapshot Client softwareon the virtual machine. Configure an alternate client backup.
About alternate client backup of RDMsAlternate client backup of an RDM consists of the following:
■ The RDM disk array contains the data to be backed up. Another host containingNetBackup client software and Snapshot Client software must have access tothe disk array. This host is the alternate client. In this configuration, the virtualmachine is called the primary client.
■ A snapshot of the data is created on the disk array and is mounted on thealternate client. The alternate client creates a backup image from the snapshot,using original path names, and streams the image to the NetBackup mediaserver.
■ The alternate client handles the backup I/O processing; the backup has littleor no effect on the virtual machine. The media server reads the snapshot datafrom the alternate client and writes the data to storage.
■ The virtual machine and alternate client must be running the same operatingsystem, volume manager, and file system. For each of these I/O systemcomponents, the alternate client must be at the same level as the primaryclient, or higher level.
Backup of VMware raw devices (RDM)NetBackup support details for RDMs
104

For complete requirements on alternate client backup, refer to the Policyconfiguration chapter of theNetBackupSnapshotClientAdministrator'sGuide.
Requirements for alternate client backup of RDMsTo use Snapshot Client to back up an RDM, note the following:
■ RDM devices must be configured in physical compatibility mode. You selectthis mode when you create the RDM. Physical compatibility mode is notconfigured in NetBackup.For an introduction to RDM, refer to your VMware documentation. For example,see the following VMware document:ESX Server 3 Configuration Guide
■ NetBackup may require certain OS and array configuration, depending on theguest OS and the array. For details, see the disk arrays chapter of theNetBackupSnapshot Client Administrator's Guide.
■ NetBackup client software must be installed on the virtual machine.
■ The requirements for the NetBackup for VMware feature (a backup host andthe VMware snapshot method) do not apply to backups of RDM disk arrays.To back up RDM disk arrays, you must configure a Snapshot Client alternateclient backup.
Configuring alternate client backup of RDMsThe following procedure highlights key points in creating an alternate clientbackup of a disk array that is configured as an RDM. For broader details on diskarray configuration, refer to theNetBackupSnapshotClientAdministrator'sGuide.
105Backup of VMware raw devices (RDM)Requirements for alternate client backup of RDMs

To create an alternate client policy for a disk array that is configured as an RDM
1 Select a policy type that is appropriate for the OS of the virtual machine andfor the type of data to back up.
Refer to the Policy configuration chapter of the NetBackup Snapshot ClientAdministrator's Guide.
2 On the policy Attributes tab in the Administration Console, click Performsnapshot backups and Perform off-host backup.
The following is a detail from the Attributes tab.
3 Select AlternateClient from the Use pull-down. Do not select VMwarebackuphost.
In the Machine field, enter the name of the host that is configured as anoff-host backup computer (the alternate client).
4 Click Options.
5 Select a snapshot method.
The VMware method does not apply to alternate client backup and is notavailable in the list.
Select a snapshot method that is appropriate for the volume or array. Forexample:
■ The HP_EVA_Snapclone method or other EVA method for an HP EVAarray.
■ The EMC_CLARiiON_Snapview_Clone or other CLARiiON method for anEMC CLARiiON array.
Backup of VMware raw devices (RDM)Configuring alternate client backup of RDMs
106

■ FlashSnap.For FlashSnap, the following must be installed: VxVM 3.2 or later forUNIX, VxVM 4.0 or later for Linux and AIX, or VxVM 3.1 or later forWindows. Also, volumes must be configured over the primary host’s disks.The VxVM FlashSnap license must also be installed.
■ VSS (for Windows guest operating systems only).
The array may require additional OS and NetBackup configuration asdescribed in the disk arrays chapter of the NetBackup Snapshot ClientAdministrator's Guide. The same guide contains more details on snapshotmethods.
6 If required by an array snapshot method that you selected in the previousstep, specify the Snapshot Resources.
7 In the policy’s Clients list, select the virtual machine on which the array isconfigured as an RDM.
8 In the policy’s Backup Selections list, specify the disk that you want to backup, or the files or volumes that reside on the disk.
107Backup of VMware raw devices (RDM)Configuring alternate client backup of RDMs

Backup of VMware raw devices (RDM)Configuring alternate client backup of RDMs
108

File-level backup ofWindows virtual machines
This appendix includes the following topics:
■ About file-level backup of Windows virtual machines
■ Configuration tasks for file-level backup
■ File-level backup options
■ What can be restored from a file-level backup?
■ Configuring a policy for Windows file-level backup
About file-level backup ofWindows virtual machinesIf you use VMware VCB, you can back up individual Windows files instead of theentire virtual machine. This appendix describes how to configure such a backup.
In most cases, it may be better to schedule full and incremental backups of theentire virtual machine with the NetBackup MappedfullVMbackup option. Froma mapped virtual machine backup, you can restore the virtual machine or individualfiles. To set up such a policy, see the "Configure NetBackup for VMware" chapterin this guide.
To back up individual files from a Windows virtual machine, you can use eitherof these approaches:
■ Install the NetBackup client software in the virtual machine. NetBackupconducts the backup as though the client is installed in a physical host. Mostof the features that NetBackup supports on physical hosts are also supportedwhen the client is installed on the virtual machine. (This configuration is notdescribed in this appendix or in this guide.)
BAppendix

For further support details on this configuration, see "General NetBackupsupport in a virtual environment" in the Symantec tech note titled Supportfor NetBackup 7.x in virtual environments:http://entsupport.symantec.com/docs/340091
■ Set up a backup host that includes VCB and a NetBackup client. This appendixdescribes how to configure this kind of backup.
Note: File-level backup as described in this appendix requires VMware VCB. Notethat VMware intends to phase out support for VCB in favor of VMware vStorageAPIs for data protection.
Configuration tasks for file-level backupThe following table summarizes the tasks for setting up file-level backup.
Table B-1 Configuration tasks for file-level backup
TasksSequence
Install VMware components.
See “Overview of VMware tasks” on page 18.
Phase 1
Install the NetBackup 7.0.1 master server and media server.
See the NetBackup Installation Guide.
Symantec recommends that the NetBackup media server and the VMwarebackup host be installed on the same host.
Phase 2
Install the NetBackup 7.0.1 Enterprise Client license on the master server,and install NetBackup client 7.0.1 software on the VMware backup host.
Phase 3
Add the VMware backup host to your NetBackup configuration.
See “Adding the VMware backup host to the NetBackup configuration”on page 30.
Phase 4
Set NetBackup access credentials for the VMware vCenter or VirtualCenter(if any), or for VMware ESX servers.
See “Adding NetBackup credentials for VMware” on page 30.
Phase 5
Configure incremental backups for VMware.
See “Incremental backups must be based on timestamps ” on page 34.
Phase 6
File-level backup of Windows virtual machinesConfiguration tasks for file-level backup
110

Table B-1 Configuration tasks for file-level backup (continued)
TasksSequence
Create a NetBackup policy.
See “Configuring a policy for Windows file-level backup” on page 112.
Phase 7
File-level backup optionsTable B-2 describes the backup options and recovery options for file-level backup.
Table B-2 Options for file-level backups (MS-Windows policies)
What can be restoredWhat is backed upVirtual machinebackupparameter
Backup Selectionsentry
Individual directories and filesSpecified directories and files only,excluding Windows system files
File level snapshotusing VCB
Individual directoriesand files
Individual directories and filesAll data files and directories inspecified drives, excludingWindows system files
File level snapshotusing VCB
Individual drives
For example: E:\
Individual directories and filesAll data files and directories on alllocal virtual machine drives,excluding Windows system files
File level snapshotusing VCB
ALL_LOCAL_DRIVES
directive
What can be restored from a file-level backup?You can use file-level backup to back up ordinary files and directories on thevirtual machine. The backed up files and directories can be individually restored.
Important note: File-level backup does not support restore of the following:
■ The VMware virtual disk files that define the virtual machine.
■ Windows system protected files (System State).
■ Windows system directories such as the following:
C:\WINDOWS\system
C:\WINDOWS\system32
■ Windows system database files (such as RSM Database and Terminal ServicesDatabase)
111File-level backup of Windows virtual machinesFile-level backup options

To back up the virtual disk files and operating system files, use theFlashBackup-Windows policy type and the Full VM backup or Mapped full VMbackup options. These options are described in another chapter of this guide.
See “Configuring a VMware policy from the Policies node” on page 34.
Configuring a policy for Windows file-level backupUse the following procedure to make file-based backups of Windows drives,directories, or files. Requires the VCB software on the VMware backup host.
To configure a policy for file-level backup
1 In the NetBackup Administration Console, create a new policy.
2 For the policy type, select MS-Windows.
3 Select a policy storage unit or storage unit group.
4 Select Perform snapshot backups.
5 Select Perform off-host backup.
6 From the pull-down list for the Use field, select VMware backup host.
7 In the Machine field, specify the name of the VMware backup host.
If the backup host does not appear in the Machine pull-down list, make surethat it was added to the Host Properties setting.
See “Adding the VMware backup host to the NetBackup configuration”on page 30.
You may have to close and reopen the policy for the VMware backup host toappear in the list.
8 Click Options.
Select the following:
■ For the Virtual machine backup option, select File level snapshot usingVCB.
■ For the Snapshot mount point (VCB only) option, specify a directory onthe VMware backup host. For example:G:\mnt
The VMware backup host mounts snapshots of individual virtual diskvolumes in this directory. The snapshots are links to the virtual machinedatastore. No virtual machine data is copied to this directory.
More information is available about the other configuration parameters.
See “Configuration parameters for VMware” on page 38.
File-level backup of Windows virtual machinesConfiguring a policy for Windows file-level backup
112

9 To save these settings, click OK and then Apply.
10 Use the Schedules tab to define a schedule.
Full backups and incremental backups are supported.
11 On the Clients tab, click New to specify virtual machines to back up.
You can type the host name in the EntertheVMwarehostname field, or clickBrowse and select virtual machines.
See “Browse for VMware Virtual Machines screen” on page 44.
12 Use the Backup Selections tab to specify the files to back up.
Click New. You can make entries manually, or click on the pull-down (UNIX)or hand icon (Windows) to select from available directives.
For VMware snapshot backup, the System_State directive (Windows 2000)and the ShadowCopy Componentsdirective (Windows 2003) are not supported.
Enter any of the following and then click Add (on UNIX) or press Enter(Windows):
■ Individual folders and files.
■ Individual drive letters.Enter the drive letter as follows (for example):
E:\
The drive letter must not be a network (shared) drive: It must specify adrive on the virtual machine.
■ The ALL_LOCAL_DRIVES directive.
This directive backs up the data files on all local drives on the virtualmachines that are selected on the Clients tab.
File-level backup as described in this procedure cannot back up the following:
■ Windows System State
■ Windows system files (such as on C:)
■ VMware virtual disk files
A procedure is available for backing up these files.
See “Configuring a VMware policy from the Policies node” on page 34.
13 If you click Apply or OK on the policy Attributes tab, a validation processchecks the policy and reports any errors.
If you click Close, no validation is performed.
113File-level backup of Windows virtual machinesConfiguring a policy for Windows file-level backup

File-level backup of Windows virtual machinesConfiguring a policy for Windows file-level backup
114

Symbols156 (status code) 96–97227 (status code) 965 (status code) 946 (status code) 95
AALL_LOCAL_DRIVES 37, 96alternate client backup
configure for RDM 105of RDM 104
alternate location for restore 73archive bit 34
Bbackup
environment diagrams 16file-level 109host 15
adding to configuration 30how to enter in policy 35
how to configure 34how to perform 55job hangs 99off-host
configuration 35process overview 17reduce size of 50throughput 82
Backup Selections list 37Bare Metal Restore 35best practices 81BIOS
reconfigure for booting 101BLIB 20, 36, 48, 50block level incremental backup. See BLIBblocks
exclude unused and deleted 42browse virtual machines 44browsing timeout 90
Ccache file
for browsing virtual machines 45catalog header file
wrong value for VM_TYPE 100catalog information in 6.5.x 100change VMware hostname in NetBackup 33Changed Block Tracking 20, 50
how to enable 25client
installed in virtual machine 109Client name selection option 38code 156 error 96–97code 227 error 96code 5 error 94code 6 error 95configuration datastore 62configuration steps 18Consolidate-Helper snapshot 100Converter
VMware 16credentials
adding for VMware 30troubleshooting 93
ctkEnabled 25Cumulative Incremental Backup 36
Ddatacenter
for restore 75datastore
out of space 100deduplication 82Differential Incremental Backup 36disable virtual machine quiesce 41Discovered Timestamp 45disk array
configured as RDM 105display name 38, 45drives
and reboot failure 101
Index

EEMM database
remove VM host name from NetBackup 33encrypted drives 24encryption of snapshot data transfer 40Enterprise Client license 18environment
diagrams 16importance to performance 88
equipment 88ESX server 15, 30exclude list
speed up discovery of virtual machines 45Exclude unused and deleted blocks option 42Existing snapshot handling option 42
FFile level snapshot using VCB 39, 109file-level backup
about 109configuration tasks 110policy for 112
files list. See Backup Selections listFlashBackup-Windows policy 34Full VM backup 39
Hheader file
VM_TYPE value 100helper virtual machine
for hotadd transfer type 28host name 38, 45
changing in NetBackup 33host properties
for VMware 30hotadd transfer type 41, 71, 95
notes on 27hypervisor 21
Iimported image
trouble restoring 100incremental backup 40
about 48requirements 36setting up 48timestamp setting 34
independent disk 21, 46, 98
individual file backup 109Install Software option 37Instant Recovery not supported 24invalid client 101ISO file 94
Jjob hangs 99
LLast Update 45license requirements 18logging
how to create folders for 87VMware 86vSphere 91VxMS 87
Mmanual backup 55Mapped full VM backup 40Monolithic export option 43mount point
for snapshot (VCB) 43missing 100snapshot 82VMware 38
Nnbd 40nbdssl 41nbemmcmd 33Network Block Device (NBD) transfer 40Network Block Device (NBD) transfer with SSL 40Network Connections dialog 78NFC connections 99NTFS file system
for USB drives 24
Ooff-host backup 35optimized storage 20overview
configuration steps 18of backup process 17restore procedure 59
overwrite virtual machine 72
Index116

PPerform block level incremental backup 20, 36Perform Recovery dialog 78Perform snapshot backups option 35policy
for file-level backup 112for full virtual machine backup 34types 34wizard for creating 47
port number 32, 93prerequisites 23privileges 93
Qquiesce virtual machine 41
RRDM 21, 98
about 103alternate client backup of 104–105configurations supported 104
reboot failure 101Recovery Destination dialog 70recovery host 15, 71recovery options 51–52
vStorage vs VCB 51Recovery Options dialog 70, 73recovery wizard. See restore from vStorage backuprelease level
using mixed levels 62remove VMware host name from NetBackup EMM
database 33resource pool
for virtual machine restore 76restore
and catalog information 100from VCB backup 67from vStorage backup 70individual files 62job hangs 99notes on 60procedure overview 59virtual machine 65
Restore Marked Files dialog 67run a backup 55
SSAN luns 94
SAN transfer type 40SCSI drives
and reboot failure 101scsiX:X.ctkEnabled 25Select ESX server dialog 76Select Folder dialog 77server name
changing in NetBackup 33size of backups 50snapshot
how to enable Changed Block Tracking 25mount point 43, 82removing leftover 42vSphere Client
how to delete 25Snapshot Policy Configuration wizard 47SSL encryption of snapshot data 40start a backup 55status code 156 96–97status code 227 96status code 5 94status code 6 95Storage Destination dialog 77storage optimization 20, 24
enable Changed Block Tracking 25how to delete snapshot for 25
Tterminology 21thin provisioned disks 72timeout
browsing 90timeouts
vSphere 91timestamps
for incrementals 34transfer types 40
and hung job 99for restore 71hotadd 27
troubleshootingtips 92
UUSB drives
as the snapshot mount point 24UUID 38, 45
117Index

Vvalidate
credentials 30vApp
browsing virtual machines within 45for virtual machine restore 76
VCB 14, 16, 22and file-level backup 109incrementals 49port number 32recovery options 52restore from backup 60, 67snapshot mount point 43when required 14why not used 88
VCB-HELPER suffix 28vcbmounter
NetBackup cannot terminate 96vCenter Converter 60vCenter server 15Virtual machine quiesce option 41Virtual Machine recovery wizard
restore to alternate location 73virtual machines
backup options 39browsing 44configure backup policy for 34how to back up 55
virtual network 12select for restore 78
VirtualCenter server 15VM_TYPE value in header file 100vmdk file 22
transferring to backup host 43VMware
and Linux 35backup environment 15–16backup host 30, 35backups 55configuration overview 18Converter 16credentials 30ESX server 15, 30host properties 30introduction 11logging 86main features 12policy configuration 34
file-level backup only 112
VMware (continued)required components 15snapshot mount point 38terminology 21troubleshooting 86
VMware Consolidated Backup. See VCBVMware NetBackup Integration Module (VNIM) 16VMware Tools 22VMX directory 62vmx-07 36vNetwork Distributed Switch 12, 78VNIM 16, 92volume ID of drive
troubleshooting 96Volume Manager volumes 49vSphere Client
enable Changed Block Tracking 25vSphere Client snapshot
how to delete 25vStorage 14, 22
incrementals 48–49minimum VMware levels required 14recovery options 51restore from backup made by 70
VxMS logging 87
Wwizard
to create backup policy 47to recover virtual machine 70
Index118