teacher guide - hammermill papers · 27 lessons 9: writing the final ... the teacher, guide your...
TRANSCRIPT
T E A C H E R G U I D E
I S
L E A R N I N G F R O M M A S T E R S
TM

1 THE VALUE OF WRITING AND EDITING ON PAPER
3 SECTION 1 — FICTION: LUCY MAUD MONTGOMERY
5 Lesson 1: Learning About Habits of Fiction Writers11 Lesson 2: Learning from Masters: L.M. Montgomery15 Lesson 3: Students Create an Outline18 Lesson 4: Learning to Write in Silence21 Lesson 5: Writing Studio23 Lesson 6: Revising the First Draft25 Lesson 7: Peer Editing26 Lesson 8: Completing the Second Draft27 Lessons 9: Writing the Final Draft
29 SECTION 2 — NONFICTION: FREDERICK DOUGLASS
31 Lesson 1: Learning from Masters: Frederick Douglass34 Lesson 2: Students Explore Rhetorical Appeals36 Lesson 3: Students Create an Outline39 Lesson 4: Draft the Persuasive Essay42 Lessons 5: Writing Studio44 Lesson 6: Revising the First Draft46 Lesson 7: Completing the Second Draft47 Lessons 8: Writing the Final Draft
49 SECTION 3 — POETRY: WILFRED OWEN
51 Lesson 1: Learning from Masters: Wilfred Owen56 Lesson 2: Preparing to Outline a Poem59 Lesson 3: Students Create a Metaphor and Alliteration for Their Poems63 Lesson 4: Poetry Studio Introduction66 Lesson 5: Poetry Studio69 Lesson 6: Revising the First Draft by Listening to the Poem71 Lesson 7: Revising for Word Choice73 Lesson 8: Writing the Final Draft
75 Appendix: Section 1 Student Work Sheets81 Appendix: Section 2 Student Work Sheets85 Appendix: Section 3 Student Work Sheets
Hammermill.com 1
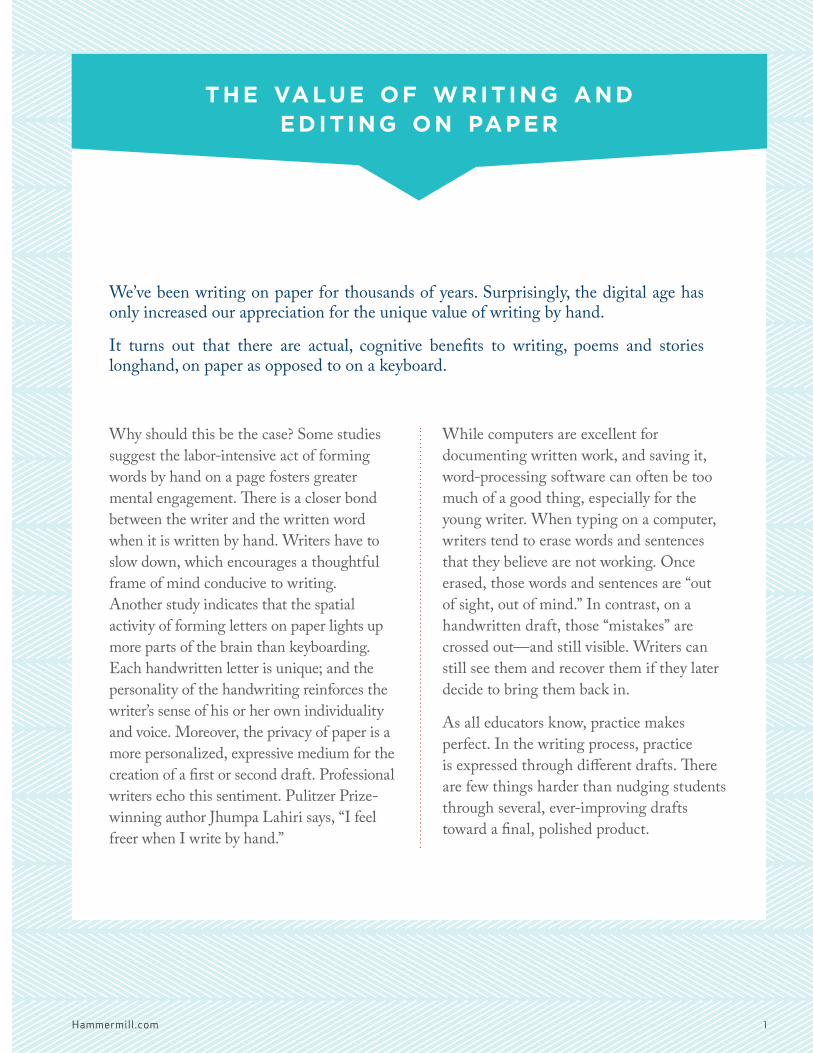
Why should this be the case? Some studies suggest the labor-intensive act of forming words by hand on a page fosters greater mental engagement. There is a closer bond between the writer and the written word when it is written by hand. Writers have to slow down, which encourages a thoughtful frame of mind conducive to writing. Another study indicates that the spatial activity of forming letters on paper lights up more parts of the brain than keyboarding.Each handwritten letter is unique; and the personality of the handwriting reinforces the writer’s sense of his or her own individuality and voice. Moreover, the privacy of paper is a more personalized, expressive medium for the creation of a first or second draft. Professional writers echo this sentiment. Pulitzer Prize-winning author Jhumpa Lahiri says, “I feel freer when I write by hand.”
While computers are excellent for documenting written work, and saving it, word-processing software can often be too much of a good thing, especially for the young writer. When typing on a computer, writers tend to erase words and sentences that they believe are not working. Once erased, those words and sentences are “out of sight, out of mind.” In contrast, on a handwritten draft, those “mistakes” are crossed out—and still visible. Writers can still see them and recover them if they later decide to bring them back in.
As all educators know, practice makes perfect. In the writing process, practice is expressed through different drafts. There are few things harder than nudging students through several, ever-improving drafts toward a final, polished product.
the value of writ ing and edit ing on paper
We’ve been writing on paper for thousands of years. Surprisingly, the digital age has only increased our appreciation for the unique value of writing by hand.
It turns out that there are actual, cognitive benefits to writing, poems and stories longhand, on paper as opposed to on a keyboard.

2 Hammermill.com
The Writing Is Rewriting program aims to help you, the teacher, guide your students through the writing process in an enjoyable and inspiring way. The student workbooks are stocked with multicolored paper. Each color represents a unique draft.
• The first draft is written on blue paper• The second draft is written on yellow paper • The final draft is written on white paper
This classroom-tested approach enables students to see their progress.
They are not merely writing the same essay or poem over and over again. Rather, they are progressing through visually-distinct stages toward a final, perfected product.
This color-coded process is in keeping with the practices of some of our most distinguished authors. As the novelist Joyce Carol Oates, who writes longhand, says “Writing is a consequence of thinking, planning, dreaming—this is the process that results in ‘writing’ rather than the way in which writing is recorded.”
We hope you enjoy leading your students through this program, and learning from the writing habits of great authors such as L.M. Montgomery, Frederick Douglass and Wilfred Owen. We’ve intentionally selected authors popular in the middle school grades.
Happy writing and revising!
T H E VA L U E O F W R I T I N G A N D E D I T I N G O N PA P E R
WE RECOMMEND
We recommend having a ream of paper in a corner of your classroom for students to take a sheet from whenever they need to. For example, some students may arrive at school early or leave the classroom late, or finish a test before the time is up. For these “in between” moments, suggest that a student take a few pieces of paper and write a story, a poem, a journal entry or just draw.
The greater facility students have with writing and drawing, the more facile they will be in any writing task. In this digital age, when so many of our students spend hours and hours in front of a screen, a few quiet moments with a blank page can have untold developmental benefits.

L U C Y M A U D M O N T G O M E R Y
S E C T I O N 1 F I C T I O N
Hammermill.com 3
1

OVERVIEW
This middle-school fiction unit enables your class to produce a polished short story in a little over two weeks. Nine lessons are recommended to execute this unit. The lessons encompass learning from a legendary fiction author’s good habits, outlining a story, drafting a story in timed, silent conditions, as well as revising, editing and proofreading. The colored paper in the student workbook of Writing Is Rewriting will be used for first, second and final drafts.
The methods used in this unit address habits of concentration and organization that benefit students in all areas of their academic life. Last but certainly not least, your class will produce a collection of short stories that you all can be truly proud of.
OBJECTIVES
• Use a step-by-step process for outlining, writing, revising, editing and proofreading a short story
• Learn about L.M. Montgomery, the author of Anne of Green Gables and her writing process
• Recognize that becoming a writer is a process that requires excellent reading, listening, speaking and writing habits that are cultivated over years
F I C T I O N

Hammermill.com 5
LESSON OVERVIEW
In this lesson, students will begin a creative writing project. They will learn that they can become better writers by adopting the habits of a famous novelist.
• Learn about L.M. Montgomery• Discuss the author’s quote• Discuss LMM’s habits• Activity: Students evaluate LMM’s habits in
their workbooks
MATERIALS NEEDED FOR STUDENTS
• Writing Is Rewriting workbook• Pen or pencil
HOMEWORK
Students will identify good habits; use homework sheet from Appendix 1.
1
LESSON ONE
LEARNING ABOUT HABITS OF FICTION WRITERS
LEARN ABOUT L.M. MONTGOMERY
Ask students if they enjoy writing stories.
Explain that the class will soon start a creative writing project. Point out that we can become better creative writers by learning from the habits of famous novelists.
Ask students if they are familiar with the book Anne of Green Gables, written by L.M. Montgomery. Explain that this book is one of the best-loved children’s novels of all time.
Introduce today’s lesson by saying:
Today, we’ll learn about the author and her best practices for writing and revising her fiction. Then, we’ll apply what we’ve learned as we start to work on our own stories.
Review the information on page 4-5 of the student workbook with the class.
Ask students to use the information on the page to answer these questions:
What does “L.M.” in “L.M. Montgomery” stand for?
Lucy Maud
When was Lucy Maud Montgomery born?
1874
Was it common for women to become writers in 1874?
Not especially.
Why do you think she published her books as “L.M.” Montgomery instead of as “Lucy Maud” Montgomery?

6 Hammermill.com
Because at the time she was writing, male authors were taken more seriously than female writers. By using “L.M.,” her gender was not clear to publishers. This made it more likely that publishers would take her seriously.
What conclusions can you draw about L.M. Montgomery from the number of stories, novels, poems and essays she produced?
She was an extremely prolific writer; someone who had the ability to produce a high number of works probably through working hard throughout her life.
What is Anne of Green Gables about?
Anne of Green Gables is about a young orphan girl who is sent to a couple who live on a farm in Prince Edward Island, Canada. The couple adopt a boy but are sent a girl instead. At first they do not want to keep Anne, but ultimately they decide to keep her. The novel tells about her adventures living on the farm in Prince Edward Island.
Have volunteers read the text. Then ask students the questions below:
Has anyone read or seen Anne of Green Gables? If so, what did you think about it? Do you have any thoughts on why it has been such a popular book and series for so many decades?
Answers will vary.
How many of you would love to become professional authors of novels and poems and stories?
Answers will vary.
What do you think having that kind of job would be like?
Answers will vary.
LEARN WHY WRITERS WRITE
Read the author’s quote on page 6 in the student workbook and the short paragraph that follows it. Then, ask these questions:
What do you think Emily means when she says that she just, “has to write?”
Elicit that some people have an unstoppable impulse to create. For certain individuals, their brains constantly come up with melodies and ideas for songs. For other individuals, their brains constantly think about fascinating pictures they want to create. And for some other individuals, they are constantly coming up with stories. It is just the way their brains work. Not everyone’s brain works that way. For people like Emily, they have a compulsive need to write stories. It is something that they feel they must do—as essential as breathing.
Why would Emily still want to write even if she is poor all her life?
Because writing is what she was born to do; she needs to do it and doing it makes her happy.
Why would Emily still want to write even if her work was never published?
Same reason as above. Ultimately, writers write because they need to write, since it is so much a part of how they think and live. Even though they would, of course, prefer to be published and have money, lack of success will not stop a true writer from writing.
L E A R N I N G A B O U T H A B I T S O F F I C T I O N W R I T E R S11

Hammermill.com 7
DISCUSS L.M. MONTGOMERY
Point out that L.M. Montgomery was an extraordinarily successful author. Nevertheless, she faced more than her share of rejection. Anne of Green Gables, one of the most successful books of all time, was rejected by the first four publishers she sent it to. One reason L.M. Montgomery was so successful was that she was thick-skinned. She did not let rejection make her feel like a failure.
Have a volunteer read the paragraph that begins, “As writers, we can learn a lot from L.M. Montgomery’s example…” on page 6 of the student workbook.
HABITS VERSUS TALENT
A lot of people think that becoming a writer is just about having talent. That is not true. Plenty of people have the talent to write fiction, but very few of these people actually complete the writing of a novel. It turns out that habits are at least as important as talent in determining who will become a professional writer.
So, let’s look at some of the habits of L.M. Montgomery on pages 6, 7 and 8. Then we’ll think about how each habit helped L.M. Montgomery succeed as a writer.
With the class, review each habit and ask:
“How did this habit help L.M. Montgomery develop as a writer of fiction?”
Use the completed table below to guide and support your classroom discussion.
1GOOD HABITS HOW DID THIS HABIT HELP L.M. MONTGOMERY DEVELOP
AS A WRITER OF FICTION?
She listened to good storytellers often.
Good writers use their ears as well as their eyes. When we listen to good storytellers, we develop an ear for interesting language and the structure of captivating stories. We notice what aspects of stories engage listeners. Then we can use what we’ve learned to tell great stories ourselves.
She found children who wanted to listen to her stories. Then, she told them stories often. In fact, she became known as “Story Girl” in her neighborhood
Good writers like to tell stories verbally. When you tell a story verbally, you get instant feedback from the reactions of your audience. You can tell what parts of your story are working and what parts of your story are a bit dull. By telling lots and lots of stories to people who want to hear them, we get better and better at creating unforgettable tales.
L E A R N I N G A B O U T H A B I T S O F F I C T I O N W R I T E R S11
ACTIVITY: LISTENING AND SPEAKING (WORKBOOK PAGE 6)1

8 Hammermill.com
SELF-MANAGEMENT1GOOD HABIT HOW DID THIS HABIT HELP L.M. MONTGOMERY DEVELOP
AS A WRITER OF FICTION?
She kept a notebook in which to write down ideas for stories.
People have great ideas all the time. If they don’t write them down, chances are they will forget them. Many authors get ideas for stories from events that actually happened. By keeping records of these ideas, they have a never-ending source of fresh stories to inspire their fiction.
She kept a diary in which she wrote her private feelings and thoughts.
Writers need to write every day, just like musicians need to practice their instrument every day. By writing in a diary every day, writers practice their art and get in touch with their feelings. This makes it much easier to write stories fluently.
From the time she was in middle school, she entered her stories and poems in writing competitions.
Writers need to complete their work and receive feedback on it. Unfortunately, many writers lack the discipline to reach the stage of a final draft. Instead, they write a part of a draft and abandon it. By entering competitions often, L.M. Montgomery forced herself to complete a final draft of her creative work and get feedback on it. This made her a better writer.
From a young age, she read voraciously. She loved the work of Charlotte and Emily Bronte, George Eliot and Jane Austen.
Almost all great writers started out as great readers. To read voraciously means to devour books; to have an enormous capacity for reading. If you want to be a writer, your first step should be to read as much as you can. Like L.M. Montgomery, you should also read the work of great authors. By reading all the time, L.M. Montgomery expanded her imagination, her vocabulary and her storytelling talents.
She wrote her stories on paper by hand and later transferred them to type.
Writing by hand is slower than writing on a keyboard. That is a good thing for creative writers! This slower process encourages contemplation and creativity. Most fiction writers prefer to write stories by hand than to use computers. They transfer their work to a computer at the end of the process.
ACTIVITY: WRITING AND READING (WORKBOOK PAGE 7)1
L E A R N I N G A B O U T H A B I T S O F F I C T I O N W R I T E R S11

Hammermill.com 9
EXPLAIN TO STUDENTS WHAT “SELF-MANAGEMENT” IS.
Self-management means the control a person exhibits over their behavior and actions.
For example, if you never do your homework even though you know you need to, you may have weak self-management. Or, if you want to make the soccer team, but you never practice soccer, then you have weak self-management. Self-management requires self-control and the adoption of habits that help us meet our goals.
Here is the great thing about all the habits on page 8. Just because we may not have great habits now does not mean that we can’t lose bad habits and develop good ones. We can all adopt good habits, but we have to be patient, as it can take a long time for them to become automatic. It can take years to develop good self-management habits.
Encourage your students to start consciously developing their self-management habits in middle school, as it will set them up for success later in life.
L E A R N I N G A B O U T H A B I T S O F F I C T I O N W R I T E R S11
GOOD HABIT HOW DID THIS HABIT HELP L.M. MONTGOMERY DEVELOP
AS A WRITER OF FICTION?
She made a plan for writing stories and stuck to it.
Most writers write a draft or a part of a draft and never get any further. How can we produce a great story if we don’t finish it and take it through several drafts? By making a writing plan and sticking to it, L.M. Montgomery was able to produce the finest work she was capable of.
When publishers rejected her stories, she did not take it personally. She persisted in writing and sending out her work to other publishers.
All writers face rejection. J.K. Rowling, the author of Harry Potter, was rejected by over 20 publishers. The ability to not take rejection personally is a sign of great maturity. It is an essential skill for writers, because rejection is a part of the job. People who take rejection personally are more likely to give up on themselves and their work—and then they will never find out how good they could have been. L.M. Montgomery took all her rejection letters in stride. She did not let it harm her confidence or enthusiasm for writing.
SELF-MANAGEMENT1 ACTIVITY: SELF-MANAGEMENT (WORKBOOK PAGE 8)1
10 Hammermill.com
GOOD HABIT HOW DID THIS HABIT HELP L.M. MONTGOMERY DEVELOP
AS A WRITER OF FICTION?
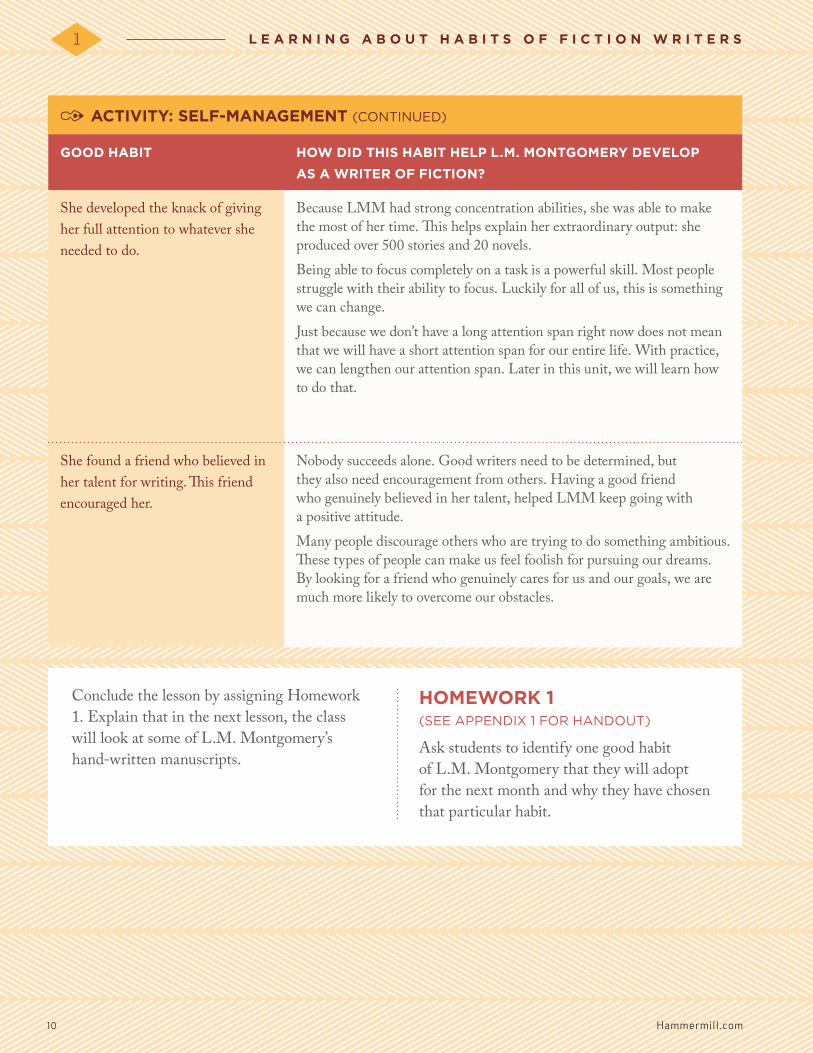
She developed the knack of giving her full attention to whatever she needed to do.
Because LMM had strong concentration abilities, she was able to make the most of her time. This helps explain her extraordinary output: she produced over 500 stories and 20 novels. Being able to focus completely on a task is a powerful skill. Most people struggle with their ability to focus. Luckily for all of us, this is something we can change. Just because we don’t have a long attention span right now does not mean that we will have a short attention span for our entire life. With practice, we can lengthen our attention span. Later in this unit, we will learn how to do that.
She found a friend who believed in her talent for writing. This friend encouraged her.
Nobody succeeds alone. Good writers need to be determined, but they also need encouragement from others. Having a good friend who genuinely believed in her talent, helped LMM keep going with a positive attitude. Many people discourage others who are trying to do something ambitious. These types of people can make us feel foolish for pursuing our dreams. By looking for a friend who genuinely cares for us and our goals, we are much more likely to overcome our obstacles.
L E A R N I N G A B O U T H A B I T S O F F I C T I O N W R I T E R S11
SELF-MANAGEMENT1 ACTIVITY: SELF-MANAGEMENT (CONTINUED)1
Conclude the lesson by assigning Homework 1. Explain that in the next lesson, the class will look at some of L.M. Montgomery’s hand-written manuscripts.
HOMEWORK 1 (SEE APPENDIX 1 FOR HANDOUT)
Ask students to identify one good habit of L.M. Montgomery that they will adopt for the next month and why they have chosen that particular habit.

Hammermill.com 11
LESSON OVERVIEW
In this lesson, Students will study L.M. Montgomery’s first page of her handwritten manuscript for Anne of Green Gables.
They will observe the edits she made and make inferences about why she made them.
• Review homework from Lesson 1• Read and discuss manuscript• Activity: Students evaluate LMM’s habits in
their workbooks
MATERIALS NEEDED FOR STUDENTS
• Writing Is Rewriting workbook• Printout of the first page of the handwritten
manuscript of Anne of Green Gables (Available at http://torontoist.com/2007/11/a_season_of_can/)
• Pen or pencil
HOMEWORK
Students will draw a picture; use homework sheet from Appendix 1.
REVIEW HOMEWORK 1 (7 MINUTES)
Ask a few volunteers to read their homework responses to the class. Congratulate them on their goals. Ask a few probing questions about how they will develop the habit they have selected. Collect the homework.
INTRODUCE THE LESSON
Refer to the image of the handwritten manuscript in the print-out.
We can see the first page of the novel, in L.M. Montgomery’s handwriting, right here.
Why is it helpful for us to see the actual handwritten manuscript of an author’s work?
We can see how a great author edited and made changes as she wrote her story. Looking at handwritten manuscripts of great novels reminds us that even the greatest authors edited their work as they wrote, just as we do.
Have a volunteer read the paragraph on page 10 of the student workbook that begins “Typewriters were available…”
Is LMM’s writing neat or messy?
It is rather neat, but difficult to read. She was the only one who saw her handwritten manuscript, so only she needed to decipher it.
What benefits can you see from writing fiction by hand using paper and pencil or pen?
2
LESSON TWO
LEARNING FROM MASTERS: L.M. MONTGOMERY

12 Hammermill.com
Writing by hand feels more personal and expressive because it is in your handwriting, and not in typeface. It encourages the flow of words and ideas, which feels more private than typing on a computer. When we write a first draft, it is a very personal process that we don’t necessarily want to share with others.
LEARN FROM L.M. MONTGOMERY’S EDITS (PAGE 11 IN THE STUDENT WORKBOOK)
Provide 15 minutes for students to complete the activity. Once time is up, invite volunteers to share their answers. Use the answer key below to guide your responses to student answers when they share them.
SELF-MANAGEMENT1
Look at the handwritten manuscript. Find a word or phrase that she added in the editing process. Write it here:
Why do you think L.M. Montgomery added that word or phrase? Was it to make her writing clearer? Or more descriptive? Or more expressive? Explain what that edit added to the text:
WORD OR PHRASE THAT LMM ADDED PROBABLE REASON FOR THIS EDIT
Mrs Rachel Lynde is Surprised She added this, as this is the chapter title.
“Main” in “Avonlea main road” She added this for clarity. Avonlea was a place familiar to LMM, but not yet familiar to her readers. By adding “main” to “Avonlea road,” she helped the reader visualize that the Avonlea road is a main road, not just a dirt road. It also suggests that Avonlea is a town.
“Quiet” in “quiet well-conducted little stream” She added “quiet” as a sensory detail to better describe the stream. “Well-conducted” is a lovely phrase, but its definition may be unclear to LMM’s readers. Ask your own students if they understand what “well-conducted” means.By adding “quiet”, LMM was able to ensure that all her readers could visualize the stream. She supported the more ambitious and charming descriptor “well-conducted” by adding “quiet.” Once you have explained that “well-conducted” means “well-behaved,” ask students why this phrase is a charming way to describe a stream. Notice that it personifies the stream by giving it a characteristic that we would normally ascribe to a human being. In this way, the author is making the natural landscape “come alive” for the reader.
ACTIVITY: LEARNING FROM EDITS ANSWER KEY (WORKBOOK PAGE 11)1
L E A R N I N G F R O M M A S T E R S12

Hammermill.com 13
“Or out of place” added to “if she noticed anything odd”
She added “or out of place” for emphasis and clarity. Ask students why they think LMM found “If she noticed anything odd,” not good enough? Explain that if a person noticed anything “odd,” we would expect them to react somehow. That, in itself, does not tell us anything unique about the character of Mrs. Lynde. However by adding “out of place”, we are able to recognize that Mrs. Lynde is looking very closely at her surroundings—and even if anything is “out of place,” she will react. This detail supports the earlier description of Mrs. Lynde as having a “sharp eye.”
This page is the first page of Anne of Green Gables. What story element does this page mostly focus on? Setting? Character? Plot? Conflict?
The story element mostly focuses on the setting. We know this because most of the details in the paragraph concern the setting. Secondarily, it introduces the character of Mrs. Lynde. Just because the chapter is titled “Mrs. Rachel Lynde is Surprised” does not mean that the opening paragraph is primarily about her.
Why do you think L.M. Montgomery opened her novel by focusing on the story element you chose?
Many authors open their novels by establishing the setting. Providing a rich description of the setting, and perhaps a character’s interactions with it, helps establish the mood of the novel. As readers, we can picture the setting easily. That makes it much easier for us to get absorbed in the story as we begin to read it.
L E A R N I N G F R O M M A S T E R S12
SELF-MANAGEMENT1 ACTIVITY: LEARNING FROM EDITS ANSWER KEY (CONTINUED)1
WORD OR PHRASE THAT LMM ADDED PROBABLE REASON FOR THIS EDIT
STORY ELEMENTS
LEARN FROM L.M. MONTGOMERY’S HABITS
Have volunteers read the next four paragraphs from page 10 of the student workbook. Then ask the questions below.
Which character trait or habit do you admire the most in LMM and why?
Answers will vary.
Why are good habits so important to success in any profession?
Habits are behaviors we enact on a regular, perhaps daily basis. By setting up good habits, such as getting all our work done on time, we create a pattern for success.
Do you think it’s possible to just decide one day out of the blue to write a novel and then write a great novel?

14 Hammermill.com
L E A R N I N G F R O M M A S T E R S12
ANSWER KEY FOR HOMEWORK 2
The details about the setting are highlighted
CHAPTER 1: MRS. RACHEL LYNDE IS SURPRISED.
Mrs. Rachel Lynde lived just where the Avonlea main road dipped down into a little hollow, fringed with alders and ladies’ eardrops and traversed by a brook that had its source away back in the woods of the old Cuthbert place; it was reputed to be an intricate, headlong brook in its earlier course through those woods, with dark secrets of pool and cascade; but by the time it reached Lynde’s Hollow it was a quiet, well-conducted little stream, for not even a brook could run past Mrs. Rachel Lynde’s door without due regard for decency and decorum; it probably was conscious that Mrs. Rachel was sitting at her window, keeping a sharp eye on everything that passed, from brooks and children up, and that if she noticed anything odd or out of place she would never rest until she had ferreted out the whys and wherefores thereof.
It is possible, and some people may even claim to have done it. However, if we look closely, it is more likely that those people practiced many of the good habits that LMM had, such as reading voraciously throughout their lives, and developing a strong attention span.
Are you like LMM? Which traits or habits do you already share with her?
Answers will vary.
HOMEWORK 2: (SEE APPENDIX 1
FOR THE HANDOUT)
Use the details about the setting in the first paragraph of Anne of Green Gables to draw a picture. Be sure to use all the details in the text in your drawing.
You may draw the character of Mrs. Lynde as well. You may label the details if you wish. After you have made your drawing, reflect on how LMM has enabled us to picture the setting of her novel.

Hammermill.com 15
LESSON OVERVIEW
After a quick review of the homework assignment, students will begin their creative writing project by reviewing story elements and making an outline.
• Review Homework 2 • Discuss story elements and work on activities
MATERIALS NEEDED FOR STUDENTS
• Writing Is Rewriting workbook• Pen or pencil
HOMEWORK
Students will choose how they wish to start their writing assignment.
REVIEW HOMEWORK 2
Ask for a couple of volunteers to share their drawings of the setting of Anne of Green Gables.
Compare and contrast these drawings. Do they look alike or similar?
Observe that the author gave many key details to help the reader visualize the setting. At the same time, each reader visualizes in his or her own unique way. For that reason, some aspects of each drawing are unique.
This is not a mistake. It points to something wonderful about reading: that, as readers, we interpret a text through our own inner eye and imagination.
INTRODUCE THE LESSON
Explain that the class will now launch into its creative writing project. Following in LMM’s footsteps, we will start by developing an idea
for a short story. Invite students to review the contents of page 12 of the Writing Is Rewriting workbook. Explain that students will begin planning their story by thinking through basic story elements.
THE SETTING OF THE STORY
Before we complete this sheet, let’s briefly review our basic story elements.
What is a setting?
Setting is both the place and time where a story takes place. Encourage students to be imaginative in terms of their setting. Do they want to set their story in the past, the present or the future?
Do they want to set their story in their hometown, a country far away or place that only exists in their imagination? Emphasize that it is entirely up to them.
3
LESSON THREE
STUDENTS CREATE AN OUTLINE

16 Hammermill.com
Write some examples of settings on the board. Examples of settings: a castle in the 1600s, a city street in 2015, a small town in 1880, a shopping mall in 2001, a faraway planet in 3005, Antarctica right now, a shipping barge in the middle of the Pacific Ocean in 1910, a school bus in 2086.
Invite students to suggest a few more and write these on the board.
Describe the setting. Use adjectives.
Explain that adjectives are describing words.
Write examples of adjectives that could describe settings on the board, for example: Elegant, rural, immense, crowded, spacious, idyllic, picturesque, spooky, ruined, leafy.
Invite students to suggest a few more and write these on the board. Now, pause to give students 4 minutes to complete numbers 1 and 2 on page 12 in the student workbook.
THE MAIN CHARACTER
What is the main character in a story?
The main character is the protagonist, the person who drives the action of the story. The main character will face a problem and need to solve it.
Encourage students to use their imagination when developing their main character. Write some examples of a main character on the board. Examples: a shipping captain, a spy, a middle-school student, a brilliant scientist, a fashion model, a detective, an elderly person.
Invite students to suggest a few more and write these on the board.
What are the main character’s character traits?
Character traits are the habits and qualities of a person.
Write some examples of character traits on the board. Examples: curious, persistent, lazy, athletic, intelligent, early riser, night owl, vegetarian, nosy, bilingual, disorganized.
Invite students to suggest a few more and write these on the board. Emphasize that, when writing the story, they should incorporate the character traits of the main character in the plot and its resolution.
Now, pause to give students 4 minutes to complete numbers 3 and 4.
THE PROBLEM
What problem is your main character facing? Emphasize that all plots feature a problem and a solution. The problem has to be important. It has to be clear why the problem must be solved and what will happen if the problem is not solved
Example: A middle-grade student realizes that her neighbors have vanished. She suspects that they have been kidnapped. Since nobody else believes her, if she doesn’t rescue her neighbors, nobody will!
Invite students to suggest a few more problems they could give to a main character. Be sure to probe their thinking about why this problem is important.
Why does this problem matter? What is at stake if the problem does not get solved?
Now, pause to give students 4 minutes to complete numbers 5 and 6 on pages 12 and 13.
S T U D E N T S C R E A T E A N O U T L I N E13
Hammermill.com 17
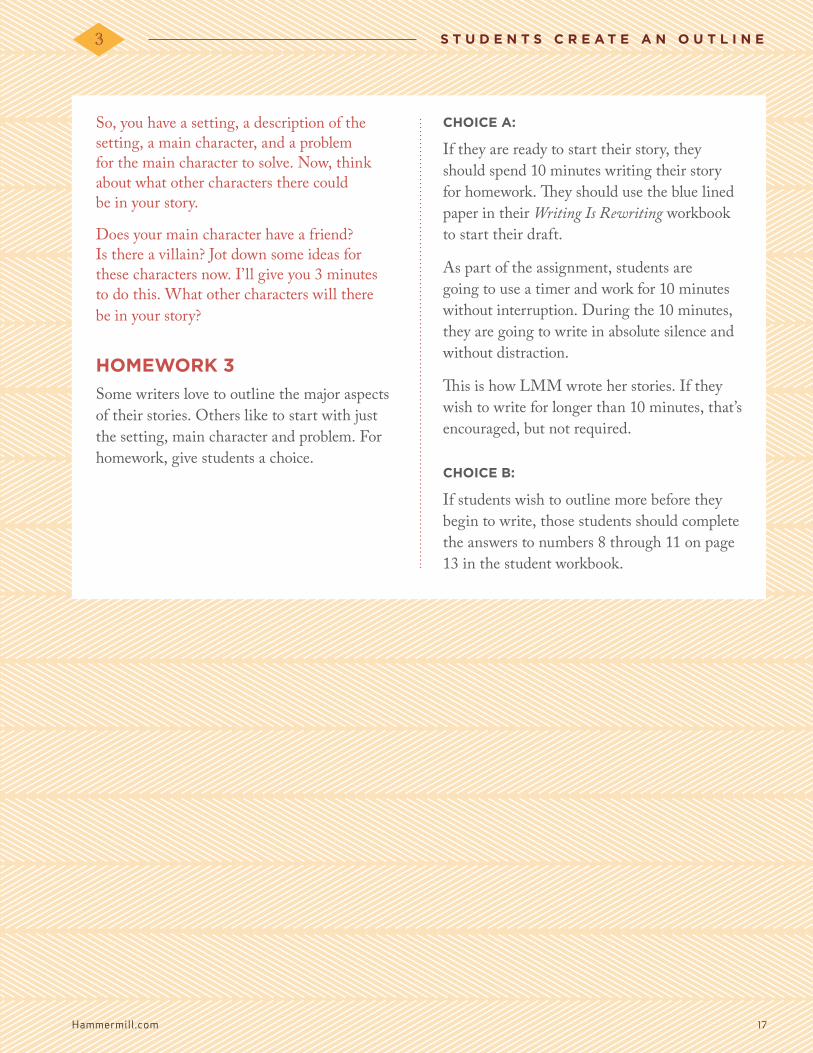
So, you have a setting, a description of the setting, a main character, and a problem for the main character to solve. Now, think about what other characters there could be in your story.
Does your main character have a friend? Is there a villain? Jot down some ideas for these characters now. I’ll give you 3 minutes to do this. What other characters will there be in your story?
HOMEWORK 3
Some writers love to outline the major aspects of their stories. Others like to start with just the setting, main character and problem. For homework, give students a choice.
CHOICE A:
If they are ready to start their story, they should spend 10 minutes writing their story for homework. They should use the blue lined paper in their Writing Is Rewriting workbook to start their draft.
As part of the assignment, students are going to use a timer and work for 10 minutes without interruption. During the 10 minutes, they are going to write in absolute silence and without distraction.
This is how LMM wrote her stories. If they wish to write for longer than 10 minutes, that’s encouraged, but not required.
CHOICE B:
If students wish to outline more before they begin to write, those students should complete the answers to numbers 8 through 11 on page 13 in the student workbook.
S T U D E N T S C R E A T E A N O U T L I N E13

18 Hammermill.com
REVIEW HOMEWORK 3
Ask for a couple of volunteers to share their story. Ask them why they chose the setting, characters and problems.
INTRODUCE THE LESSON
Explain that today the class will use one of L.M. Montgomery’s techniques for writing with fluidity. We are going to practice writing in silence without interruption.
Writing requires deep concentration. In order to concentrate, we need to work in silence. We need to avoid distractions. We even need to avoid asking other people questions.
For the next four lessons, this classroom is going to be a writing studio. A writing studio is a silent space where writers come to write. We are going to use a timer to help us focus for short spans of time on our work.
Right now, I am going to set a timer for 5 minutes. During those five minutes, we are going to write our stories in silence. I want to be clear about my expectations. Once the timer begins, I should only see people writing in silence. That means:
• We can’t work on our outlines anymore
• We can’t ask questions of classmates or teachers
• We can’t take bathroom breaks
• We can’t sharpen our pencils
PREPARE STUDENTS FOR SILENT WRITING (5 MINUTES)
Before we get started, let’s make sure we’re prepared. Does everyone have something to write with? Does anyone need to sharpen their pencil?
LESSON OVERVIEW
Writing in silence is essential for the deep concentration that fiction writing requires. Today, students will learn a process for helping them to concentrate on writing and limit distractions.
• Review homework from Lesson 3• Introduce the lesson• Activity: Students practice silent writing
MATERIALS NEEDED FOR STUDENTS
• Writing Is Rewriting workbook• Pen or pencil
HOMEWORK Students will practice what they learned in class on their own.
4
LESSON FOUR
LEARNING TO WRITE IN SILENCE

Hammermill.com 19
You have 90 seconds to ensure you have something to write with.
Set a timer for 90 seconds. Once time is up, continue with the lesson.
Does everyone have their Writing Is Rewriting book?
Check that everyone has their book and give additional copies to anyone who may have forgotten it.
Take a moment now to review your outlines. You’re doing this so that, when we start the timer, you have a clear idea of what your story is about.
Give students 1 minute to complete the task.
Now turn to the first page of blue lined paper in your Writing Is Rewriting book.
This is the paper you’re going to free write your draft on. If you already started your story for homework last night, keep going. If you finished an outline for homework last night, then you will be starting your story today.
As you write, focus on telling your story. Don’t worry about spelling or punctuation or capitalization. We can take care of all of that later. Does anyone have any questions?
BEGIN SILENT WRITING
(5 MINUTES)
I am setting the timer for 5 minutes. During the next 5 minutes, I should see every single person in this room writing. I will not hear anyone talking or asking questions, even to me.
Set the timer.
Begin!
While the 5 minutes lasts, resist the urge to circulate the room or speak to students.
It is distracting to student writers to have a teacher roaming the room and reading over their shoulders. This is one of those instances where the less you do as the teacher, the more helpful it is.
Allow students to hear the timer sound.
Great job, everyone. Put your pencils down for a moment. We’re going to reflect on how that went.
REFLECT ON SILENT WRITING (3 MINUTES)
How did that feel? Was it difficult to get started? Did you notice that once you got going, it was quite absorbing?
We live in a period of information overload. With the distractions of social media, computers and smartphones, it can be difficult to develop our attention spans. Five minutes does not sound like a lot of time but when we really give ourselves over to our task, we can achieve quite a lot in just 5 minutes. Look at how much you wrote in 5 minutes!
Imagine if you build up your attention span and can write for a few hours a day. That is what LMM was able to do. No wonder she was able to produce so many novels and stories.
We’re going to try it again. We’ll do another 5 minutes in complete silence.
L E A R N I N G T O W R I T E I N S I L E N C E14
20 Hammermill.com
BEGIN SILENT WRITING (5 MINUTES)
I am setting the timer for 5 minutes. During the next 5 minutes, I should see every single person in this room writing. I will not hear anyone talking or asking questions, even to me.
Set the timer.
Begin!
After 5 minutes, let students hear the timer go off.
REFLECT ON SILENT WRITING (3 MINUTES)
Are you feeling engaged in your story?
When the timer went off this time, did you wish you could have just continued? That’s a good sign.
Some of us will have an easier time than others focusing on our writing, but that just means that if you find it harder, you have to practice working with a timer more.
Let’s try it again for 10 minutes this time.
BEGIN SILENT WRITING (10 MINUTES)
I am setting the timer for 10 minutes. During the next 10 minutes, I should see every single person in this room writing. I will not hear anyone talking or asking questions, even to me.
Set the timer.
Begin!
After 10 minutes, let students hear the timer go off.
You did a great job. Over the next few days, we’re going to practice writing our story under silent, timed conditions. It’s going to allow us to develop our concentration as well as our writing skills. And, just as importantly, it’s going to enable us to produce a complete story.
On average, it should take us about 3 hours to write a short story. I’ve allocated that time for us to work on your stories. Much of the time will be spent in class, and some of the time will be completed by you as homework.
HOMEWORK 4
Spend 20 minutes in 5 minute increments drafting your story. Use a timer.
L E A R N I N G T O W R I T E I N S I L E N C E14
Hammermill.com 21
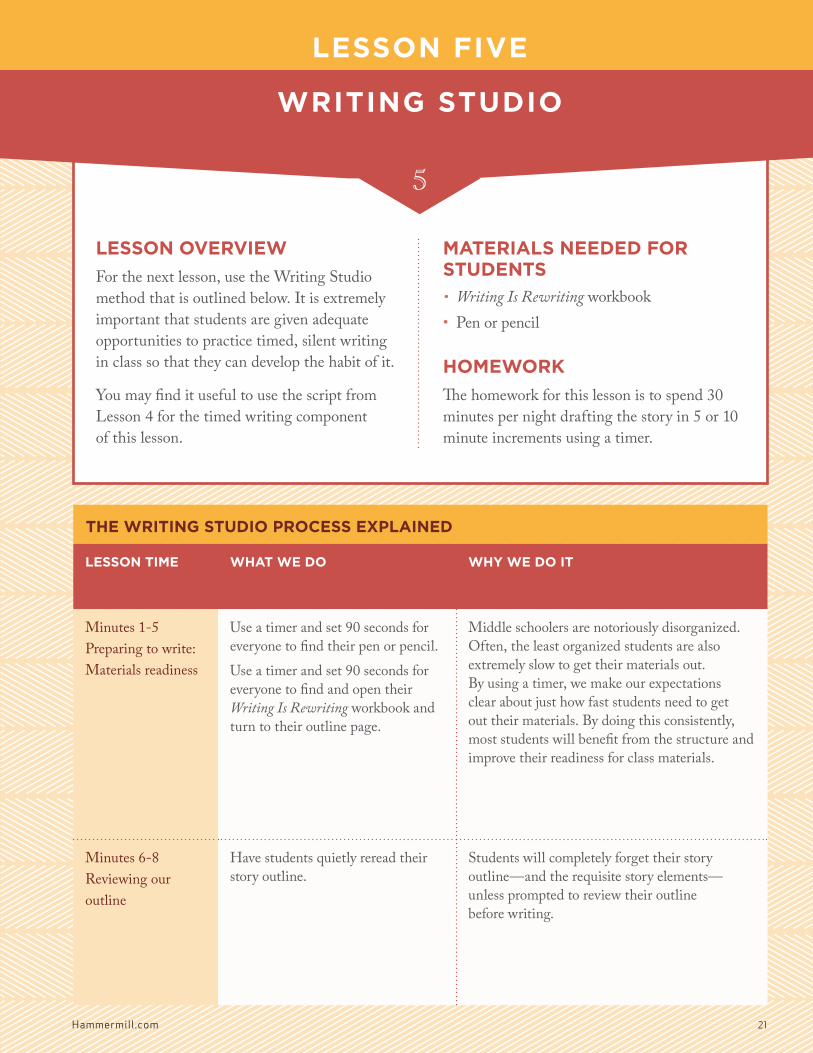
LESSON OVERVIEW
For the next lesson, use the Writing Studio method that is outlined below. It is extremely important that students are given adequate opportunities to practice timed, silent writing in class so that they can develop the habit of it.
You may find it useful to use the script from Lesson 4 for the timed writing component of this lesson.
MATERIALS NEEDED FOR STUDENTS
• Writing Is Rewriting workbook• Pen or pencil
HOMEWORK
The homework for this lesson is to spend 30 minutes per night drafting the story in 5 or 10 minute increments using a timer.
5
LESSON FIVE
WRITING STUDIO
SELF-MANAGEMENT1LESSON TIME WHAT WE DO WHY WE DO IT
Minutes 1-5Preparing to write: Materials readiness
Use a timer and set 90 seconds for everyone to find their pen or pencil. Use a timer and set 90 seconds for everyone to find and open their Writing Is Rewriting workbook and turn to their outline page.
Middle schoolers are notoriously disorganized. Often, the least organized students are also extremely slow to get their materials out. By using a timer, we make our expectations clear about just how fast students need to get out their materials. By doing this consistently, most students will benefit from the structure and improve their readiness for class materials.
Minutes 6-8Reviewing our outline
Have students quietly reread their story outline.
Students will completely forget their story outline —and the requisite story elements—unless prompted to review their outline before writing.
THE WRITING STUDIO PROCESS EXPLAINED

22 Hammermill.com
W R I T I N G S T U D I O
SELF-MANAGEMENT1
Minutes 25-35Preparing to write: materials readiness
Timed Writing Set a timer for 10 minutes. Tell students to write in silence for 10 minutes.
No bathroom breaks, questions of the teacher or anyone else are allowed. Increased concentration produces increased skill and output.
Minutes 35-40Reviewing our outline
Progress Check-InHave students stop writing. Go around the room, asking students for an update on where they are with their stories. Use the spreadsheet to keep tabs on student output.
This step will enable students to understand how a plan helps us achieve our goals. They will see how incremental work produces a larger, completed story.
THE WRITING STUDIO PROCESS EXPLAINED (CONTINUED)
Minutes 9-20Silent writing
Set a timer for 10 minutes. Tell students to write in silence for 10 minutes. No bathroom breaks, questions of the teacher or anyone else are allowed.
The art of writing is the art of asking and answering questions of yourself as you write. If students do not have the capacity to problem-solve and think through questions on their own, they will not develop into proficient writers. We do not help them by assisting them with questions. They need to learn self-reliance and independent problem-solving. Moreover, absolute silence is essential to deep concentration. When we chat with students or other adults in the room, we break students’ concentration.
Minutes 20-25Question time
Five minute reflection break. Take questions. Allow bathroom breaks/ pencil sharpening, etc.
By enabling short breaks, we empower students to learn to hold questions and tasks for an appropriate time in the not-too-distant future. Students who finish their stories before 3 hours should be encouraged to go back to the start and work on revising it.
LESSON TIME WHAT WE DO WHY WE DO IT
15

Hammermill.com 23
INTRODUCE THE LESSON
By now, we all have a completed draft of a story. It’s time for us to work on revising it.
Why do you think so many professional writers say that “Writing is Rewriting”?
Elicit that “practice makes perfect.” The first time we create something, it might be very good but it may also be a little rough. The act of revising and polishing it is what makes it excellent.
We spent about 3 hours writing our first draft. I’ve set aside 90 minutes for revising our first draft. Let’s start the revising process by listening to one of our classmate’s stories and offering them feedback.
Have the volunteer read his or her story out loud to the class.
Why is it so important that we hear the work by reading it aloud?
Emphasize that by hearing stories, we are much more likely to notice mistakes or lack of flow.
Ask the volunteer if they noticed any aspect of the story that they would like to improve based on reading it aloud.
Model effective feedback by first telling the student two things you admire about the story before sharing one aspect of the story you think could be strengthened.
With the class, go over the questions on page 25 of the workbook in regard to the student’s draft. Use it to create a memo of things the author needs to address when editing his/her draft.
LESSON OVERVIEW
Students will begin revising their first draft by first reading their work out loud to themselves. Listening to one’s work out loud is a process many distinguished authors use. By hearing our fiction, we are much more likely, as authors, to notice dysfluencies, story structure problems and grammatical errors.
• Discuss the revision process• Activity: Students read their stories aloud
and make edits
MATERIALS NEEDED FOR STUDENTS
• Writing Is Rewriting workbook• Pen or pencil
HOMEWORK
Students will make revisions to their first draft on the blue paper of the workbook.
6
LESSON SIX
REVISING THE FIRST DRAFT
24 Hammermill.com
R E V I S I N G T H E F I R S T D R A F T16
READING OUR WORK ALOUD TO OURSELVES
Now that we know how to check our own work, let’s begin that process now. You are going to read your stories quietly out loud to yourselves. As you hear mistakes or areas that are not working, pause to revise them.
Just as we did before, I am going to use a timer to help us concentrate. Because you will be reading to yourself, I should hear a hum of voices reading aloud. I do not expect to hear a loud classroom. I’m setting the timer for 5 minutes. Begin!
After 5 minutes, invite students to ask questions or share any issues they are having with the revision process.
Set the timer again for 10 minute increments until the class ends.
HOMEWORK 6
For homework, students must revise their story on the blue paper of the workbook. They should come into class the next day with evidence that they have made changes throughout the story and can clearly articulate why those changes improve the story.

Hammermill.com 25
INTRODUCE THE LESSON
Divide the class into pairs of two.
I’ve divided you into pairs so that you will have a peer editor. Today, each pair member will listen to the story read to them by their classmate.
As you listen, make notes about any parts of the story that you like or that you think need work. I am handing out a Peer Editing worksheet (Handout for Lesson 9). This is what you will make your notes on as you listen to your classmate’s story.
When it is your turn to read your story, feel free to pause and make any brief fixes or notes on things you would like to change, too.
Allow 15 minutes for each partner to have a turn.
HOMEWORK 7
Use your own revisions and your peer editor’s comments, to write a second draft of your story onto the yellow paper in your Writing Is Rewriting workbook.
LESSON OVERVIEW
This lesson continues the revision process as students read their work aloud to a peer editor. Rather than write edits on the students’ work itself, the peer editor uses a worksheet (located in Appendix 1) to note aspects of the story that are successful or need further work.
Again, the process demands that the student author read the work aloud. This is deliberate. Students benefit from hearing their stories aloud more than once. Moreover, the act of reading one’s work aloud requires the student to take ownership of their work. This in turn, encourages them to take their writing seriously.
• Introduce the lesson• Activity: peer editing in pairs
MATERIALS NEEDED FOR STUDENTS
• Handout for Lesson 9 (see Appendix 1) • Writing Is Rewriting workbook• Pen or pencil
HOMEWORK
Students will write the second drafts on the yellow paper of the workbook and make changes using today’s peer edit notes.
7
LESSON SEVEN
PEER EDITING

26 Hammermill.com
LESSON OVERVIEW
Students will incorporate their own notes, as well as the feedback from their peer editor, as they continue to complete their second draft on yellow paper.
• Introduce the lesson• Activity: Students work on the second draft
MATERIALS NEEDED FOR STUDENTS
• The peer editor handout with notes• Writing Is Rewriting workbook• Pen or pencil
HOMEWORK
Students will use CUPS to proofread their second drafts.
INTRODUCE THE LESSON
You now have feedback from your peer editor as well as your own notes about things you’d like to change to improve your stories. We’re going to work in increments of 10 minutes in order to complete our second draft. I want to remind you that your second draft will be completed on yellow paper. You’ll find the yellow paper in your Writing Is Rewriting workbook.
Use the timed, silent writing format in increments of 10 minutes to enable students
to complete the second draft of their story on the yellow paper.
HOMEWORK 8
Use CUPS to thoroughly proofread your second draft. Our expectation is that it is completely free of any capitalization, clarity, punctuation or spelling errors when you submit it to the teacher. The CUPS process is clearly laid out for you in your Writing Is Rewriting workbooks.
8
LESSON EIGHT
COMPLETING THE SECOND DRAFT

Hammermill.com 27
LESSON OVERVIEW
Students will meet with the teacher for personalized feedback. Next, they will refine their fiction pieces on the white paper, completing their final draft.
• Ongoing student conferences• Activity: students refine their stories or read
independently
MATERIALS NEEDED FOR STUDENTS
• Writing Is Rewriting workbook• Pen or pencil
HOMEWORK
Assign the homework. Students will finish their final drafts.
PREPARING FOR STUDENT CONFERENCES
Getting personalized feedback from you, the teacher, is invaluable for student authors. The time you spend reading and commenting on their work rewards them for their hard work and creativity.
Before holding student conferences, it is imperative that you read and review the student work. Clearly mark on the student draft the changes you would like to see. It is recommended to make any proofreading corrections you think are necessary. However, it is critical that you also include substantive comments—noticing elegant word choice, exciting plot turns, intriguing characters—and other evidence of the craft of the fiction writer.
HOLDING STUDENT CONFERENCES
Schedule individual conferences with student authors lasting no more than 5 minutes. During your conference, have the student author read the work aloud to you for 2 minutes. Even if this does not allow them to completely read their story, this step is critical because it:
• Causes them to take ownership of their work• Ensures that they hear their work before an
attentive audience• Gives you, the teacher, a chance to hear the
work as the author intended it to be heard
9
LESSON NINE
WRITING THE FINAL DRAFT HOLDING STUDENT CONFERENCES

28 Hammermill.com
Because you will have commented on their draft already, you do not need to take time during the conference to make notes on the draft. Instead, use the remaining time to
• Congratulate the author on two aspects of the draft you admire
• Communicate to the author the major issue that needs to be addressed in the final draft; e.g., “The conflict is not clear.” or “I am not sure why this problem really matters.” or “Who is the villain?”
ACTIVITIES FOR OTHER STUDENTS DURING STUDENT CONFERENCES
While you conference with students, give the rest of the class the option to further refine their stories or to read independently. If you have copies of Anne of Green Gables available, it is a great idea to encourage students to read the book.
HOMEWORK 9
Produce a final draft of your story onto the white paper in the Writing Is Rewriting workbook. Be sure that all notes from your teacher on your yellow draft are incorporated in the final draft. You may wish to make additional changes in the final draft. Last, but
not least, go over your final draft for CUPS proofreading errors. Use the rubric on the handout to self-assess your finished story.
Submit the work to your teacher.
EVALUATING STUDENT FICTION
As you, the teacher, evaluate the finished work of the students, we recommend using the rubric in Appendix 1 in the back of this book. You will notice that the rubric evaluates not only the quality of the work, but also the student’s adherence to the revision process. This holds them accountable for their effort throughout the creative writing project.
OPTIONAL: HOLD A PUBLISHING PARTY
If you’ve followed all nine lessons of this program, chances are that your class has produced some outstanding fiction.
It is a wonderful idea to celebrate your students’ hard work and creativity by holding a publishing party and inviting parents, the principal and other caring adults to it.
S T U D E N T - T E A C H E R C O N F E R E N C E S9

2
F R E D E R I C K D O U G L A S S
S E C T I O N 2 N O N F I C T I O N
Hammermill.com 29

S E C T I O N 2
NONFICTION
OVERVIEW
This middle-school nonfiction unit enables your class to produce a persuasive essay in a little over two weeks. Eight lessons are recommended to execute this unit. The lessons encompass learning from a great author’s process of revision, outlining a persuasive essay, supporting an argument with key points, drafting a persuasive essay in timed, silent conditions, as well as revising, editing and proofreading. The colored paper in this section of Writing Is Rewriting will be used for first, second and final drafts.
The methods used in this unit address habits of concentration and organization that benefit students in all areas of their academic life. Lastly but certainly not least, your class will produce a collection of persuasive essays that you all can be truly proud of.
OBJECTIVES:
• Use a step-by-step process for outlining, writing, revising, editing and proofreading a persuasive essay
• Learn about Frederick Douglass, the author of Narrative of the Life of Frederick Douglass and his development as a writer and speaker
• Recognize that becoming a writer is a process that requires excellent reading, listening, speaking and writing habits that are cultivated over years

Hammermill.com 31
LESSON OVERVIEW
In this lesson, students will study a page of Frederick Douglass’ autobiography. They will observe the edits he made and make inferences about why he made those edits.
• Discuss Frederick Douglass’ manuscript• Activity: Students evaluate Douglass’ edits
MATERIALS NEEDED FOR STUDENTS
• Writing Is Rewriting workbook• Printout of the handwritten page of
Frederick Douglass’ autobiography (Available at https://memory.loc.gov/mss/mfd/34/34001/0005.jpg)
• Pen or pencil
HOMEWORK
No homework for this lesson.
INTRODUCE THE LESSON
Refer to the image of the Frederick Douglass’s handwritten manuscript.
Frederick Douglass wrote about his own experiences as an enslaved person in order to persuade others of the cruelty of slavery. We can see a page from his autobiography right here. Why is it helpful for us to see the actual manuscript of an author’s work?
Douglass made changes to his work as he wrote. Studying these handwritten manuscripts reminds us that even the greatest authors started out with a rough draft and edited until it improved. They edited as they wrote, just as we do.
Point out that Frederick Douglass wrote in script.rather than in print.
Why does script enable a writer to write faster than writing in print?
In script, the pen or pencil doesn’t lift off the page between letters in a word, which enables faster writing.
Is Frederick Douglass’ writing neat or messy?
It is very neat, but difficult to read. Since he was the only one who saw his handwritten manuscript, only he needed to decipher it.
What benefits can you see from writing by hand using paper and pencil or pen?
Writing by hand encourages the flow of words and ideas. It feels more private than writing on a computer. Writing a first draft is a very personal process that we don’t necessarily want to share with others.
1
LESSON ONE
LEARNING FROM MASTERS: FREDERICK DOUGLASS

32 Hammermill.com
ACTIVITY: LEARN FROM FREDERICK DOUGLASS’ EDITS (15 MINUTES)
Provide 15 minutes for students to complete the activity on page 55 in the student workbook.
Have students reflect on Frederick Douglass’ edits for 15 minutes. Invite volunteers to share their answers.
Use the answer key below to guide your responses to student answers when they share them out.
L E A R N I N G F R O M M A S T E R S11
Look at the handwritten manuscript. Find a word or phrase that he added in the editing process. Write it in the first column of the table below.
Why do you think Frederick Douglass added that word or phrase? Was it to make his writing clearer? Or more descriptive? Or more expressive? Explain what that edit added to the text in the second column of the table below.
WORD OR PHRASE THAT FD ADDED PROBABLE REASON FOR THIS EDIT
Of railroad travel Clarity: if he had not added those words, it would not be clear if “of that time” meant “of that time of day” or “of that historical era.”
Anxious mind Correction: he first wrote “anxiety,” which does not make sense. He changed “anxiety” to an adjective
“anxious” and added the noun “mind” to make his meaning clear.
For with me Emphasis on his mental state: Douglass first wrote “and” and then crossed “and” out and replaced it with “for with me.” This edit brings the emphasis on his anxious mental state.
In this part of my flight Specificity: Without this edit, his statement “minutes were hours and hours were days” could have meant that this was the case with him in general. By adding
“in this part of my flight,” Douglass makes it clear that this refers to this particular section of his journey to the North.
ACTIVITY: LEARNING FROM EDITS ANSWER KEY (WORKBOOK PAGE 55)1

Hammermill.com 33
L E A R N I N G F R O M M A S T E R S11
QUESTION ANSWER
This page is from an early draft of Frederick Douglass’ autobiography. Frederick Douglass is trying to convince his reader that the experience of slavery dehumanizes the enslaved person. Which details in this passage support Frederick Douglass’ claim that slavery is dehumanizing?
The details in the passage show that Douglass feels like a hunted animal, rather than a human being. First of all, he feels like a criminal escaping a terrible crime—even though he has done nothing wrong—and in fact something wrong (slavery) has been done to him. Secondly, he feels more afraid than a “fox or deer with hungry hounds in full chase on his tail” as he makes his escape to the North. By comparing himself to a hunted animal, he supports his assertion that the condition of enslavement is dehumanizing.
Is this a logical appeal, an emotional appeal or an ethical appeal?
This is an emotional appeal, because it appeals to the reader’s feelings; e.g., “How would you like it if you were treated like a hunted animal?”
Why do you think Frederick Douglass compared himself to a hunted animal? Why not just say that he was very afraid?
By providing a strong visual for the reader (or listener), Frederick Douglass is able to make a strong analogy of an enslaved person as a person who is being treated as something less than human. This analogy helps the reader grasp the experience of the enslaved author more than a simple statement of emotion (e.g., “I was terrified”) would.
ACTIVITY: LEARNING FROM EDITS ANSWER KEY (CONTINUED)1

34 Hammermill.com
LESSON OVERVIEW
Students will identify a claim that they will argue in a persuasive essay. Then they will create a logical, emotional and ethical appeal on behalf of that claim.
• Introduce the lesson• Discuss different types of appeals, and work
on activities
MATERIALS NEEDED FOR STUDENTS
• Writing Is Rewriting workbook• Pen or pencil
HOMEWORK
Students will review their appeals.
2
LESSON TWO
STUDENTS EXPLORE RHETORICAL APPEALS
INTRODUCE THE LESSON
Explain that the class will now launch its persuasive essay. Following in Frederick Douglass’ footsteps, we will start by developing an outline for a persuasive essay.
Invite students to turn to page 56 of their workbooks to begin.
Explain that this page presents us with three topics we can choose from:
• All schools should require school uniforms • The school day should end at 1pm to allow
more free time for students • Children should attend school 11 months
out of the year with one month off in AugustStudents should select one of the topics. They will write a persuasive essay supporting the claim they have chosen. Emphasize that it doesn’t matter if the student really believes in the claim. In fact, it is a good exercise in
persuasive writing if they do not believe in the claim and try to convince others of the claim anyway.
We do not recommend allowing students to select their own claims for this project; the focus should be on learning how to execute the formal elements of persuasive writing and not on the claim itself.
Now that you’ve chosen the claim you will be presenting, our next step is to come up with
• a logical appeal for the claim• an emotional appeal for the claim• an ethical appeal for the claim
Let’s do an example of each together. I’m going to use the topic “All schools should require school uniforms.”
Read aloud or have a volunteer read aloud the content on the logical row of the table.

Hammermill.com 35
So, what would a logical appeal in support of school uniforms look like?
Elicit statements that appeal to our common sense, for example: Uniforms are cheaper than buying lots of clothes for school. It’s easier to get dressed in the morning when wearing a uniform. How would you like it if you didn’t have as nice clothes as other people at school and each day you were made to feel not as good as others because of it?
Now, let’s move on to an emotional appeal.
Read aloud or have a volunteer read aloud the content on the emotional row of the table.
So, what would an emotional appeal in support of school uniforms look like?
Elicit statements that appeal to people’s feelings, for example: Some children are badly bullied about their clothes at school. How would you like it if you didn’t have clothes as nice as other people at school, and each day you were made to feel not as good as others because of it?
Let’s move on to an ethical appeal.
Read aloud or have a volunteer read aloud the content on the ethical row of the table.
So, what would an ethical appeal in support of school uniforms look like?
Elicit statements that appeal to our sense of fairness; for example: School is a place where everyone should feel equal. It’s hard to do that when we all dress so differently. By wearing a uniform, we have a sense of a community—and that we’re all equal members in that community. And that’s a good thing! Nobody looks richer or poorer, or neater or messier. We all look the same.
Now, it’s your turn. For the claim you’ve chosen, create a logical claim, an emotional claim and an ethical claim.
Allow 5 minutes for students to work independently on each appeal.
Then, ask volunteers to share their appeals.
Correct any appeals that do not fit the appropriate category of appeal.
Do this for all three appeals.
Bring the lesson to a close by suggesting that students revisit their appeals for homework.
HOMEWORK 2
Review your appeals. Ensure that each appeal is the strongest that it can be.
S T U D E N T S E X P L O R E R H E T O R I C A L A P P E A L S12

36 Hammermill.com
LESSON OVERVIEW
Students will create an outline for their persuasive essay. Their outline will incorporate the logical, emotional and ethical appeals they have planned.
• Introduce the lesson• Discuss elements of the outline and work on
activities
MATERIALS NEEDED FOR STUDENTS
• Writing Is Rewriting workbook• Pen or pencil
HOMEWORK
Assign the homework. Students will begin drafting their introductory paragraphs.
3
LESSON THREE
STUDENTS CREATE AN OUTLINE
INTRODUCE THE LESSON
Explain that the class will incorporate the appeals they have developed into an outline for a persuasive essay.
The key to a strong persuasive essay is a good outline. On page 58 in your workbook, we have an outline modeled for us. Let’s go through it together.
Have a volunteer read the first row of the table.
PRESENT THE CLAIM
Our first paragraph needs to present our claim and also give context for the issue. The example on this row shows us how we can do that.
Now, I want each of you to jot down your claim and your understanding of the issue in the space provided. This can be done in simple note form, or in full sentences.
I’ll give you 3 minutes for this step. During those 3 minutes, I should see everyone writing and I should hear no talking. Begin!
Give students 3 minutes to complete the task.
Let’s hear what you came up with.
Invite up to 3 volunteers to share what they wrote. It should include a clear claim and a bit of context for the issue itself. Make any corrections necessary.
MAKE A LOGICAL APPEAL
Let’s move on to paragraph 2.
Have a volunteer read the second row of the table.
So, our second paragraph needs to make a logical appeal to our reader. This should be no problem for us, since we’ve already developed a logical appeal.

Hammermill.com 37
Simply write your logical appeal in the space provided. I’ll give you 3 minutes to do this. During that time, I should not hear anyone talking. Instead, I should see everyone writing.
After 3 minutes:
Excellent! Let’s hear a couple of your logical appeals.
Invite up to 3 volunteers to share what they wrote. Make any corrections necessary with regard to whether these are truly logical appeals.
MAKE AN EMOTIONAL APPEAL
Let’s move on to paragraph 3.
Have a volunteer read the third row of the table.
So, our third paragraph needs to make an emotional appeal to our reader. We’ve already developed this, so go ahead and write yours in the space provided.
You have 3 minutes to do this. Begin!
MAKE AN ETHICAL APPEAL
Give students 3 minutes to complete the task.
Let’s move on to paragraph 4.
Have a volunteer read the fourth row of the table.
So, our fourth paragraph needs to make an ethical appeal to our reader. We’ve already developed this, so go ahead and write yours in the space provided.
You have 3 minutes to do this. Begin!
After 3 minutes:
Let’s hear a couple of your ethical appeals. Remember, this is the appeal that addresses our sense of fairness.
Invite up to 3 volunteers to share what they wrote. Make any corrections necessary to ensure that these are truly ethical appeals and not emotional or logical appeals.
THE COUNTERARGUMENT
We are doing a great job! We’re on to paragraph 5.
As good persuasive writers, we have to acknowledge the opposing view of our argument.
We should say what we think is strong about the opposite view against our argument, and then explain why our position is still the better one.
We call this the counterargument, because it is the argument counter, or against, our own.
Have a volunteer read the fifth row of the table.
I’m giving you 5 minutes to come up with your counterargument. During this time, I should see everyone working. I am not going to take any questions during this time, because I want you to try to develop this on your own. There should also be no talking among students.
Give students 5 minutes to complete the task.
Let’s hear some of your counterarguments. First, read the claim you are supporting. Then, read your counterargument.
Have up to three volunteers share what they wrote. The counterargument should clearly show the other side of the claim of the essay. It should also include an explanation of why the counterargument is weaker than the arguments in support of the claim.
S T U D E N T S C R E A T E A N O U T L I N E13

38 Hammermill.com
CONCLUSION
We’re up to our final paragraph in the essay, which is always the conclusion. In a persuasive essay, the conclusion should be forceful, leaving the reader with a strong sense of your overall argument.
Have a volunteer read the the sixth row of the table.
I am going to give you 7 minutes to jot down notes for your conclusion. Focus on ending your essay on a strong, forceful, persuasive note.
Give students 7 minutes to complete the task.
Let’s hear what some of you came up with.
Have up to three volunteers share what they wrote. Make any corrections necessary. Bring the lesson to a close by saying:
We created outlines for our persuasive essays. Our outlines include:
• A strong introduction, in which we present our claim and the issue itself
• A logical appeal in support of our claim• An emotional appeal in support of our claim• An ethical appeal in support of our claim• An acknowledgement of the
counterargument and explanation of why our claim is stronger
• A forceful conclusion
HOMEWORK 3
For homework, please use your outline to draft the introductory paragraph (paragraph one) on the blue paper in your Writing Is Rewriting workbook.
S T U D E N T S C R E A T E A N O U T L I N E13
Hammermill.com 39
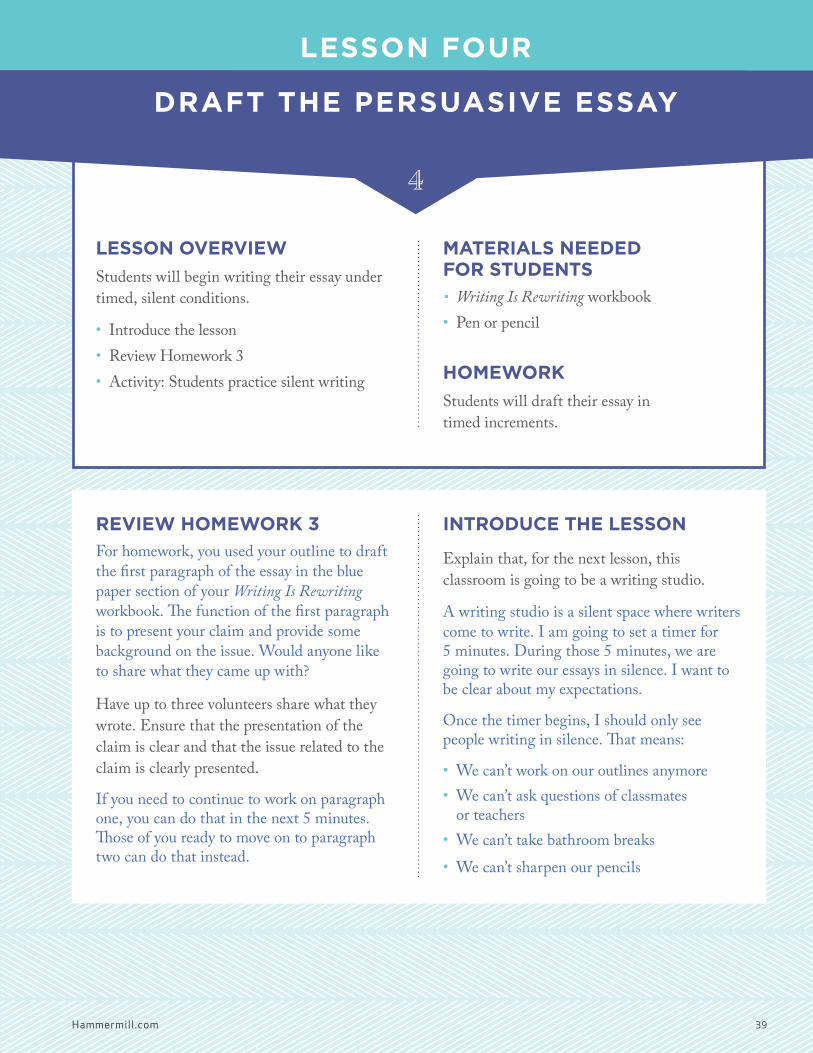
REVIEW HOMEWORK 3
For homework, you used your outline to draft the first paragraph of the essay in the blue paper section of your Writing Is Rewriting workbook. The function of the first paragraph is to present your claim and provide some background on the issue. Would anyone like to share what they came up with?
Have up to three volunteers share what they wrote. Ensure that the presentation of the claim is clear and that the issue related to the claim is clearly presented.
If you need to continue to work on paragraph one, you can do that in the next 5 minutes. Those of you ready to move on to paragraph two can do that instead.
INTRODUCE THE LESSON
Explain that, for the next lesson, this classroom is going to be a writing studio.
A writing studio is a silent space where writers come to write. I am going to set a timer for 5 minutes. During those 5 minutes, we are going to write our essays in silence. I want to be clear about my expectations.
Once the timer begins, I should only see people writing in silence. That means:
• We can’t work on our outlines anymore• We can’t ask questions of classmates
or teachers • We can’t take bathroom breaks • We can’t sharpen our pencils
LESSON OVERVIEW
Students will begin writing their essay under timed, silent conditions.
• Introduce the lesson• Review Homework 3• Activity: Students practice silent writing
MATERIALS NEEDED FOR STUDENTS
• Writing Is Rewriting workbook• Pen or pencil
HOMEWORK
Students will draft their essay in timed increments.
4
LESSON FOUR
DRAFT THE PERSUASIVE ESSAY
40 Hammermill.com
PREPARE STUDENTS FOR SILENT WRITING (5 MINUTES)
Before we get started, let’s make sure we’re prepared. Does everyone have something to write with? Does anyone need to sharpen their pencil? You have 90 seconds to ensure you have something to write with.
Set a timer for 90 seconds. Once the 90 seconds are up, continue the lesson.
Does everyone have their Writing Is Rewriting workbook?
Check that everyone has their book, and give additional copies to anyone who may have forgotten it.
Take a moment now to review your outlines. You’re doing this so that when we start the timer, you have a clear idea of what your essay is about.
Give students 1 minute to complete the task.
Now turn to the first page of blue lined paper in your Writing Is Rewriting workbook. As you write, use your outline to guide you. Don’t worry about spelling or punctuation or capitalization. We can take care of all of that later. Does anyone have any questions?
BEGIN SILENT WRITING (5 MINTUES)
I am setting the timer for 5 minutes. During the next 5 minutes, I should see every single person in this room writing. I will not hear anyone talking or asking questions, even to me.
Set the timer.
Begin!
While the 5 minutes lasts, resist the urge to circulate the room or speak to students.
It is distracting to student writers to have a teacher roaming the room and reading over their shoulders. This is one of those instances where the less you do as the teacher, the more helpful it is.
Allow students to hear the timer sound.
Great job, everyone. Put your pencils down for a moment. We’re going to reflect on how that went.
REFLECT ON SILENT WRITING (3 MINUTES)
How did it feel to write in silence for 5 minutes?
Was it difficult to get started?
Did you notice that it was quite absorbing?
Five minutes does not sound like a lot of time, but when we really give ourselves over to our task, we can achieve quite a lot in just 5 minutes. Look at how much you wrote in 5 minutes! Would anyone like to share what they wrote?
Have up to three volunteers share their draft. Provide feedback.
We’re going to go back to work on drafting our essays. Please remember to use your outlines as you write your draft. If you follow your outline, you should find it relatively easy to turn your outline into a full essay.
Set the timer.
Begin!
D R A F T T H E P E R S U A S I V E E S S A Y14
Hammermill.com 41
After 5 minutes, let students hear the timer go off.
TAKE QUESTIONS (3 MINUTES)
We’ll take a short break now, so that you can ask me any questions you might have.
Give students 3 minutes to complete the task.
We’re making good progress. We’re going to try silent writing for 10 minutes this time. I am setting the timer for 10 minutes.
Set the timer.
Begin!
After 10 minutes, let students hear the timer go off.
You did a great job. Over the next few days, we’re going to practice writing our essay under silent, timed conditions. It’s going to allow us to develop our concentration as well as our writing skills. And, just as importantly, it’s going to enable us to produce an outstanding persuasive essay.
HOMEWORK 4
The homework for each of these lessons is to spend 20 minutes per night drafting the essay in 5 or 10 minute increments using a timer.
14 D R A F T T H E P E R S U A S I V E E S S A Y

42 Hammermill.com
LESSON OVERVIEW
For the next lesson, use the Writing Studio method that is outlined below. It is extremely important that students are given opportunities to practice timed, silent writing in class so that they can develop the habit of it.
You may find it useful to use the script from Lesson 4 for the timed writing component of these lessons.
MATERIALS NEEDED BY STUDENTS
• Writing Is Rewriting workbook• Pen or pencil
HOMEWORK 5
The homework for each of these lessons is to spend 20 minutes per night drafting the essay in 5 or 10 minute increments using a timer.
5
LESSON FIVE
WRITING STUDIO
SELF-MANAGEMENT1LESSON TIME WHAT WE DO WHY WE DO IT
Minutes 1-5Preparing to Write: Materials Readiness
Use a timer, and set 90 seconds for everyone to find their pen or pencil. Use a timer, and set 90 seconds for everyone to find and open their Writing Is Rewriting workbook and turn to their outline page.
Middle schoolers are notoriously disorganized. Often, the least organized students are also extremely slow to get their materials out. By using a timer, we make our expectations clear about just how fast students need to get out their materials. By doing this consistently, most students will benefit from the structure and improve their readiness for class materials.
Minutes 6-8Reviewing Our Outline
Have students quietly reread their essay outline.
Students will completely forget their essay outline unless prompted to review their outline before writing.
THE WRITING STUDIO LESSON FORMAT

Hammermill.com 43
W R I T I N G S T U D I O5
SELF-MANAGEMENT1LESSON TIME WHAT WE DO WHY WE DO IT
Minutes 9-20Silent Writing
Set a timer for 10 minutes. Tell students to write in silence for 10 minutes. No bathroom breaks, questions of the teacher or anyone else are allowed.
The art of writing is the art of asking and answering questions of the self as you write. If students do not have the capacity to problem-solve and think through questions on their own, they will not develop into proficient writers. We do not help them by assisting them with questions. They need to learn self-reliance and independent problem-solving. Moreover, absolute silence is essential to deep concentration. When we chat with students or other adults in the room, we break students’ concentration.
Minutes 20-25Question Time
Five-minute reflection break. Take questions. Allow bathroom breaks, pencil sharpening, etc.
By enabling short breaks, we empower students to learn to hold questions and tasks for an appropriate time in the not-too-distant future.
Minutes 25-35Timed Writing
Set a timer for 10 minutes. Tell students to write in silence for 10 minutes. No bathroom breaks, questions of the teacher or anyone else are allowed.
Increased concentration produces increased skill and output.
Minutes 35-40Progress Check-In
Have students stop writing. Go around the room, asking students for an update on where they are with their essays. Use the spreadsheet to keep tabs on student output.
This step will enable students to understand how a plan helps us achieve our goals. They will see how incremental work produces a forceful and polished persuasive essay.
THE WRITING STUDIO LESSON FORMAT (CONTINUED)

44 Hammermill.com
INTRODUCE THE LESSON
By now, we all have a completed draft of the essay. It’s time for us to start revising it. Why do you think so many professional writers say that writing is rewriting?
Elicit that “practice makes perfect.” The first time we create something, it might be very good but it may also be a little rough. The act of revising and polishing it is what makes it excellent.
We spent about 3 hours writing our first draft. I’ve set aside 90 minutes for revising our first draft. Let’s start by listening to one of our classmate’s essays and offering feedback.
Have the volunteer read his or her essay out loud to the class.
Why is it so important that we hear the work by reading it aloud?
By hearing essays, we are much more likely to notice mistakes or lack of flow.
Ask the volunteer if they noticed any aspect of the essay that they would like to improve based on reading it aloud. Model effective feedback by first telling the student two things you admire about the essay before sharing one aspect of the essay you think could be strengthened.
With the class opened to page 71 of the student workbook, go over the questions in regard to the student’s draft. Use it to create a memo of things the author needs to address when editing his/her draft.
LESSON OVERVIEW
Students will begin revising their first draft by reading their work out loud to themselves. Listening to one’s work out loud is a process many distinguished authors use. By hearing the persuasive essays, students are much more likely to notice disfluencies, structural problems and grammatical errors.
• Introduce the lesson• Activity: Students read aloud and make edits• Activity: Peer editing in pairs
MATERIALS NEEDED BY STUDENTS
• Writing Is Rewriting workbook with completed first draft
• Nonfiction Handout 7, Appendix 2• Pen or pencil
HOMEWORK
Assign the homework. Students will begin revising their first draft by first reading their work out loud to themselves
6
LESSON SIX
REVISING THE FIRST DRAFT BY LISTENING TO THE ESSAY

Hammermill.com 45
READING OUR WORK ALOUD TO OURSELVES
Now that we know how to check our own work, let’s begin that process now. You are going to read your essays quietly out loud to yourselves. As you hear mistakes or areas that are not working, pause to revise them.
Again, the process demands that the student author read the work aloud. This is deliberate. Students benefit from hearing their essays aloud more than once. Moreover, the act of reading one’s work aloud requires students to take ownership of their work. This, in turn, encourages them to take their writing seriously.
PEER EDITING
I’ve divided you into pairs so that you will have a peer editor. Today, each pair will listen to the essay read to them by their classmate.
As you listen, make notes about any parts of the essay that you like or that you think need work. I am handing out a Peer Editing worksheet (Appendix 2 Nonfiction Handout 7). This is what you will make your notes on as you listen to your classmate’s essay.
When it is your turn to read your essay, feel free to pause and make any brief fixes or notes on things you would like to change, too.
Allow 15 minutes for each partner to have a turn.
HOMEWORK 6
Use your own revisions and your peer editor’s comments, to write a second draft of your essay onto the yellow paper in your Writing Is Rewriting workbook.
R E V I S I N G T H E F I R S T D R A F T16
46 Hammermill.com
LESSON OVERVIEW
Students will incorporate their own notes, as well as the feedback from their peer editor, as they complete their second draft on yellow paper.
• Introduce the lesson• Activity: Silent writing
MATERIALS STUDENTS WILL NEED:
• Writing Is Rewriting workbook• Pen or pencil
HOMEWORK
Students use CUPS to proofread their work.
7
LESSON SEVEN
COMPLETING THE SECOND DRAFT
INTRODUCE THE LESSON
SAY:
You now have feedback from your peer editor as well as your own notes about things you’d like to change to improve your essays. We’re going to work in increments of 10 minutes in order to complete our second draft. I want to remind you that your second draft will be completed on yellow paper. You’ll find the yellow paper in your Writing Is Rewriting workbook.
Use the timed, silent writing format in increments of 10 minutes to enable students to complete the second draft of their essay on the yellow paper.
HOMEWORK 7
Use CUPS to thoroughly proofread your second draft.
Our expectation is that it is completely free of any capitalization, understanding, punctuation or spelling errors when you submit it to the teacher.
The CUPS process is clearly laid out for students in their Writing Is Rewriting workbooks.
Hammermill.com 47
LESSON OVERVIEW
Students will meet with the teacher for personalized feedback. Next, they will refine their persuasive essay on the white paper, completing their final draft.
• Ongoing conferences• Activity: students refine their essays or read
independently
MATERIALS STUDENTS WILL NEED:
• Writing Is Rewriting workbook• Pen or pencil
HOMEWORK
Students will complete the final draft of their essay.
PREPARING FOR STUDENT CONFERENCES
Getting personalized feedback from you, the teacher, is invaluable for student authors. The time you spend reading and commenting on their work rewards them for their hard work and creativity.
Before holding student conferences, it is imperative that you read and review the student work. Clearly mark on the student draft the changes you would like to see.
It is recommended to make any proofreading corrections you think are necessary. However, it is critical that you also include substantive comments—noticing elegant word choice, exciting plot turns, intriguing characters—and other evidence of the craft of the fiction writer.
HOLDING STUDENT CONFERENCES
Schedule individual conferences with student authors lasting no more than 5 minutes. During your conference, have the student author read the work aloud to you for 2 minutes. Even if this does not allow them to completely read their essay, this step is critical because it:
• Causes them to take ownership of their work• Ensures that they hear their work before
an attentive audience• Gives you, the teacher, a chance to hear the
work as the author intended it to be heard
8
LESSON EIGHT
WRITING THE FINAL DRAFT HOLDING STUDENT CONFERENCES

48 Hammermill.com
Because you will already have commented on their draft, you will not need to take time during the conference to make notes on the draft. Instead, use the remaining time to:
• Congratulate the author on two aspects of the draft you admire
• Communicate to the author the major issue that needs to be addressed in the final draft; e.g., “The claim is unclear.” or “I am not sure that this is an ethical appeal. It feels more like an emotional appeal.” or “What is the counterargument?”
ACTIVITIES FOR OTHER STUDENTS DURING STUDENT CONFERENCES
While you conference with students, give the rest of the class the option to further refine their essays or to read independently. If you have copies of Narrative of the Life of Frederick Douglass available, it is a great idea to encourage students to read the book.
HOMEWORK 8
Produce a final draft of your essay onto the white paper in the Writing Is Rewriting workbook. Be sure that all notes from your teacher on your yellow draft are incorporated in the final draft. You may wish to make additional changes in the final draft. Lastly,
but not least, go over your final draft for CUPS proofreading errors. Use the rubric (which can be found in the appendix) to self-assess your finished essay.
Submit the work to your teacher.
EVALUATING STUDENT ESSAYS
As you, the teacher, evaluate the finished work of the students, we recommend using the nonfiction rubric in Appendix 2.
You will notice that the rubric evaluates not only the quality of the work, but also the student’s adherence to the revision process. This holds them accountable for their effort throughout the persuasive writing project.
OPTIONAL: HOLD A PUBLIC SPEAKING PARTY
If you’ve followed all 8 lessons of this program, chances are that your class has produced some outstanding persuasive essays.
It is a wonderful idea to celebrate your students’ hard work by holding a public speaking party in which students read their essays out loud. Inviting principals and parents to attend is a great idea to honor the accomplishments of your students.
S T U D E N T - T E A C H E R C O N F E R E N C E S8

W I L F R E D O W E N
S E C T I O N 3 P O E T R Y3
Hammermill.com 49

S E C T I O N 2
POETRY
OVERVIEW OF POETRY UNIT
This middle-school poetry unit enables your class to produce a polished poem in about two weeks. Ten lessons are recommended to execute this unit. The lessons encompass learning from a famous poet’s process of revision, reviewing literary devices such as simile, metaphor, imagery and alliteration, identifying rhyme schemes and drafting a poem in timed, silent conditions, as well as revising, editing and proofreading. The colored paper in this section of Writing Is Rewriting will be used for first, second and final drafts.The methods used in this unit address habits of concentration and organization that benefit students in all areas of their academic life. Lastly, your class will produce a collection of poetry that you all can be truly proud of.
OBJECTIVES:
• Use a step-by-step process for outlining, writing, revising, editing and proofreading a poem
• Learn about Wilfred Owen, the war poet who memorialized the sacrifices of World War I soldiers and find out about his development as a writer and reader
• Recognize that becoming a writer is a process that requires excellent reading, listening, speaking and writing habits that are cultivated over years

Hammermill.com 51
INTRODUCE THE LESSON
Refer to the image of Wilfred Owen’s handwritten draft of Dulce et Decorum Est.
Wilfred Owen wrote poems about his experiences on the battlefield. We can see a draft of one of his poems right here.
Why is it helpful for us to see the actual handwritten manuscript of a poet’s work?
We can see how a great poet wrote his poems and learn what changes he made as he edited his work. Looking at handwritten manuscripts of great works reminds us that even the greatest poets started out with a rough draft and edited it until it became a better draft, just as we will do.
Point out that Wilfred Owen writes in script rather than in print. When writing in script, it’s not necessary to lift the pen or pencil off the page between letters in a word, which enables faster writing.
Is Wilfred Owen’s writing neat or messy?
It is rather messy and difficult to read. Its illegibility is probably the result of fast writing to capture all his ideas as they come to him.
What benefits can you see from writing by hand using paper and pencil or pen?
Writing by hand on paper encourages the flow of words and ideas, and feels more private than typing on a computer. When we write a first draft, it is a very personal process that we don’t necessarily want to share with others.
LESSON OVERVIEW
Students will study an early draft of Wilfred Owen’s masterpiece, Dulce et Decorum Est. They will observe the edits he made and make inferences about why he made those edits.
• Discuss Wilfred Owen’s manuscript• Activity: Students evaluate Wilfred
Owen’s edits• Activity: Students reflect on Wilfred
Owen’s edits
MATERIALS NEEDED FOR STUDENTS
• Writing Is Rewriting workbook• Printout of the handwritten page of Wilfred
Owen’s poem Dulce et Decorum Est (http://treasures.bodleian.ox.ac.uk/treasures/dulce-et-decorum-est/)
• Pen or pencil
HOMEWORK
No homework for this lesson.
1
LESSON ONE
LEARNING FROM MASTERS: WILFRED OWEN

52 Hammermill.com
LEARN FROM WILFRED OWEN’S EDITS (15 MINUTES)
Provide 15 minutes for students to complete the activity on pages 101-105 in their workbooks.
REFLECT ON WILFRED OWEN’S EDITS (15 MINUTES)
Invite volunteers to share their answers.
Use the answer key below to guide your responses to student answers when they share them.
L E A R N I N G F R O M M A S T E R S11
WORD OR PHRASE THAT WO ADDED PROBABLE REASON FOR THIS EDIT
Bent Description: he changed “hunched” to “bent” because it is easier to visualize. “Bent” is also more expressive of carrying a very heavy load than “hunched.”
Till on the glimmering Contrast: “glimmering” flares sounds positive. Later in the line, the soldiers “turn their backs” on the
“glimmering flares.” The turning their backs on the hopeful flares adds to the sadness of the mood.
Halting each mile Emphasis on his physical state: “halting” means walking slowly or stopping every so often. Later in the line, that the soldiers had to “halt” often because some had lost their boots.
Disappointed Personification: by writing that the (bullet) shells were “disappointed,” the poet is treating the bullets as people who are “disappointed” because they did not explode when they were dropped.
Look at the handwritten manuscript. Find a word or phrase that Wilfred Owen added in the editing process. Write it in the first column of the table below.
Why do you think Wilfred Owen added that word or phrase? Was it to make his writing clearer? Or more descriptive? Or more expressive? Explain what that edit added to the text. How did it help him make his point more effectively?
ACTIVITY: COMPARING DRAFTS ANSWER KEY (WORKBOOK PAGE 103)1
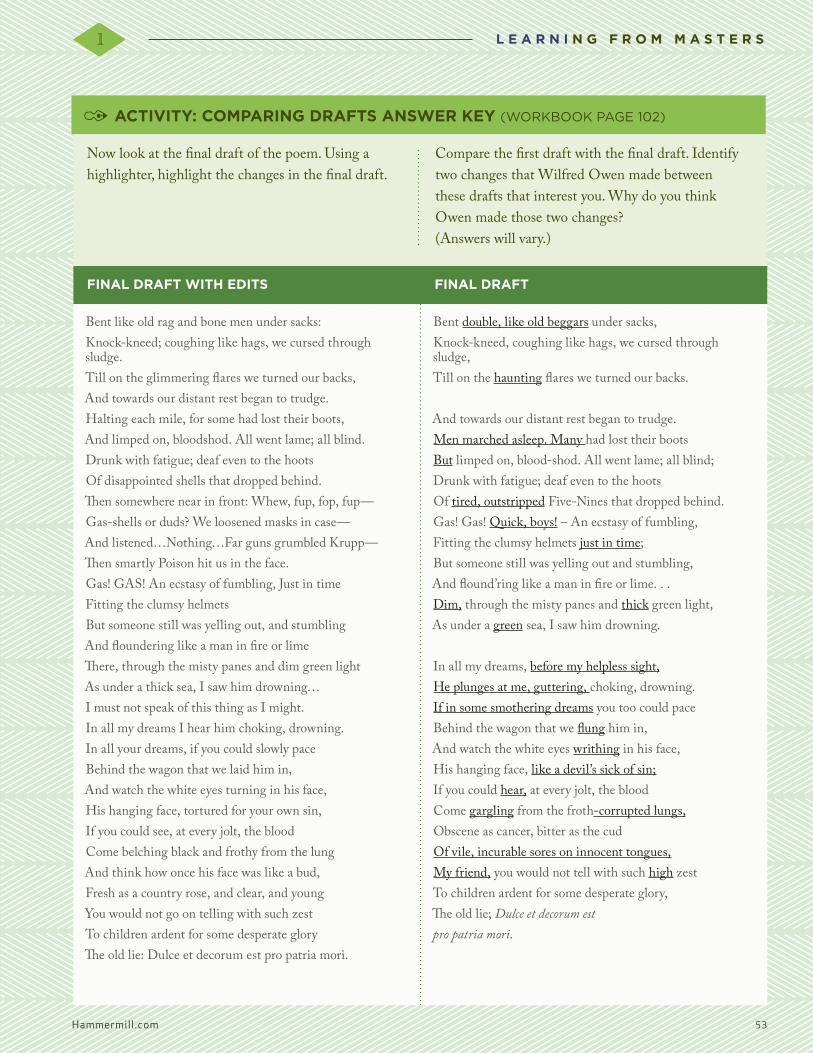
Hammermill.com 53
L E A R N I N G F R O M M A S T E R S11
FINAL DRAFT WITH EDITS FINAL DRAFT
Bent like old rag and bone men under sacks:Knock-kneed; coughing like hags, we cursed through sludge.Till on the glimmering flares we turned our backs,And towards our distant rest began to trudge.Halting each mile, for some had lost their boots,And limped on, bloodshod. All went lame; all blind.Drunk with fatigue; deaf even to the hootsOf disappointed shells that dropped behind.Then somewhere near in front: Whew, fup, fop, fup—Gas-shells or duds? We loosened masks in case—And listened…Nothing…Far guns grumbled Krupp—Then smartly Poison hit us in the face.Gas! GAS! An ecstasy of fumbling, Just in timeFitting the clumsy helmetsBut someone still was yelling out, and stumblingAnd floundering like a man in fire or limeThere, through the misty panes and dim green lightAs under a thick sea, I saw him drowning…I must not speak of this thing as I might.In all my dreams I hear him choking, drowning.In all your dreams, if you could slowly paceBehind the wagon that we laid him in,And watch the white eyes turning in his face,His hanging face, tortured for your own sin,If you could see, at every jolt, the bloodCome belching black and frothy from the lungAnd think how once his face was like a bud,Fresh as a country rose, and clear, and youngYou would not go on telling with such zestTo children ardent for some desperate gloryThe old lie: Dulce et decorum est pro patria mori.
Bent double, like old beggars under sacks,Knock-kneed, coughing like hags, we cursed through sludge,Till on the haunting flares we turned our backs. And towards our distant rest began to trudge.Men marched asleep. Many had lost their bootsBut limped on, blood-shod. All went lame; all blind;Drunk with fatigue; deaf even to the hootsOf tired, outstripped Five-Nines that dropped behind.Gas! Gas! Quick, boys! – An ecstasy of fumbling,Fitting the clumsy helmets just in time;But someone still was yelling out and stumbling,And flound’ring like a man in fire or lime. . .Dim, through the misty panes and thick green light,As under a green sea, I saw him drowning.
In all my dreams, before my helpless sight,He plunges at me, guttering, choking, drowning.If in some smothering dreams you too could paceBehind the wagon that we flung him in,And watch the white eyes writhing in his face,His hanging face, like a devil’s sick of sin;If you could hear, at every jolt, the bloodCome gargling from the froth-corrupted lungs,Obscene as cancer, bitter as the cudOf vile, incurable sores on innocent tongues,My friend, you would not tell with such high zestTo children ardent for some desperate glory,The old lie; Dulce et decorum estpro patria mori.
11
Now look at the final draft of the poem. Using a highlighter, highlight the changes in the final draft.
Compare the first draft with the final draft. Identify two changes that Wilfred Owen made between these drafts that interest you. Why do you think Owen made those two changes? (Answers will vary.)
ACTIVITY: COMPARING DRAFTS ANSWER KEY (WORKBOOK PAGE 102)1
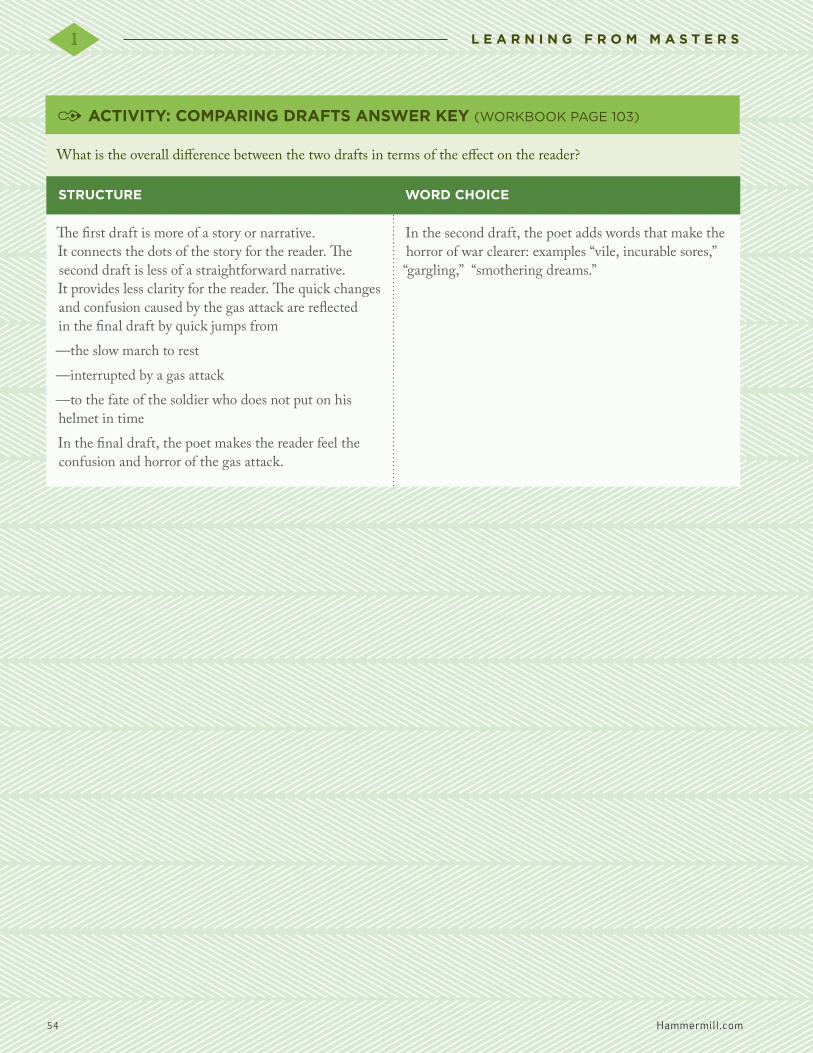
54 Hammermill.com
L E A R N I N G F R O M M A S T E R S11
What is the overall difference between the two drafts in terms of the effect on the reader?
STRUCTURE WORD CHOICE
The first draft is more of a story or narrative. It connects the dots of the story for the reader. The second draft is less of a straightforward narrative. It provides less clarity for the reader. The quick changes and confusion caused by the gas attack are reflected in the final draft by quick jumps from—the slow march to rest—interrupted by a gas attack—to the fate of the soldier who does not put on his helmet in timeIn the final draft, the poet makes the reader feel the confusion and horror of the gas attack.
In the second draft, the poet adds words that make the horror of war clearer: examples “vile, incurable sores,” “gargling,” “smothering dreams.”
1 ACTIVITY: COMPARING DRAFTS ANSWER KEY (WORKBOOK PAGE 103)

Hammermill.com 55
L E A R N I N G F R O M M A S T E R S11
LITERARY
DEVICE
WHAT IT IS EXAMPLE IN THE
FINAL DRAFT
WHAT EFFECT DOES IT HAVE ON
THE READER?
Personification Giving human characteristics or behaviors to non-human things
Disappointed shells It makes the reader feel that even the shells of bullets are disappointed that they did not hit their targets—making the soldiers feel hated even by the shells.
Imagery Creating a vivid picture with words that is easy for the reader to visualize
Fitting the clumsy helmets just in time
This detail makes it easy for us to picture the soldiers rushing to put the helmets on. The word “clumsy” makes it clear that the helmets are difficult to put on...which makes it easy to understand why one soldier does not manage to put on his helmet in time.
Repetition The repeating of a word
Drowning is repeated twice
The repetition of this word makes the effect of the gas on the soldier clear.
Alliteration The repetition of the same initial sound in a word
Knock-kneed This sounds like the knees are actually knocking against one another. The sound of knees knocking against one another suggests that the soldiers’ legs are exhausted.
Using the table below, identify one example of personification, imagery, repetition and alliteration in the final draft. (Answers may vary, but the answers in the box below are strong examples of each poetic device.)
How do the similes, imagery, alliteration and rhyme scheme contribute to the poem’s power in conveying the horrors of war? (Answers will vary, but should include strong examples such as the ones above, and explain the effect on the reader.)
1 ACTIVITY: COMPARING DRAFTS ANSWER KEY (WORKBOOK PAGES 104-105)

56 Hammermill.com
INTRODUCE THE LESSON
Explain that the students will write a poem of their own. They will start by thinking about the topic of their poem.
Invite students to turn to page 106 of their Writing Is Rewriting workbooks to begin. Explain that this page presents us with four topics we can choose from:
• War • A place of natural beauty that you love (such
as a park, the beach, a forest) • A person you love • An amazing adventure you had, such as
riding on a roller coasterStudents should select one of the above topics by circling it.
Let’s go around quickly and hear the topic you’ve chosen.
Have each student say the topic they’ve chosen for their poem.
Now, let’s move on to question 2. Think about how you want the reader to feel when reading your poem. If you need help thinking of an emotion you want your reader to feel, you can circle one of the emotions under question 2. Or, you can write in an emotion that is not there and circle it.
Allow students one minute to do this.
Let’s go around quickly and hear the emotion you’ve chosen.
Have each student say the one-word emotion they’ve chosen for their poem.
Great. It’s important that we start out with a topic and an emotion we want our reader to feel about that topic.
LESSON OVERVIEW
Students will select a topic that they would like to write a poem about. Then, they will identify an emotion they want their reader to feel and a theme or message for their poem. Lastly, they will develop a simile and image that matches their topic, intended emotion and message.
• Discuss the elements of a poem and work on activities
MATERIALS NEEDED FOR STUDENTS
• Writing Is Rewriting workbook• Pen or pencil
HOMEWORK
Students will complete the Using Literary Devices table on page 108 in their workbooks.
2
LESSON TWO
PREPARING TO OUTLINE A POEM
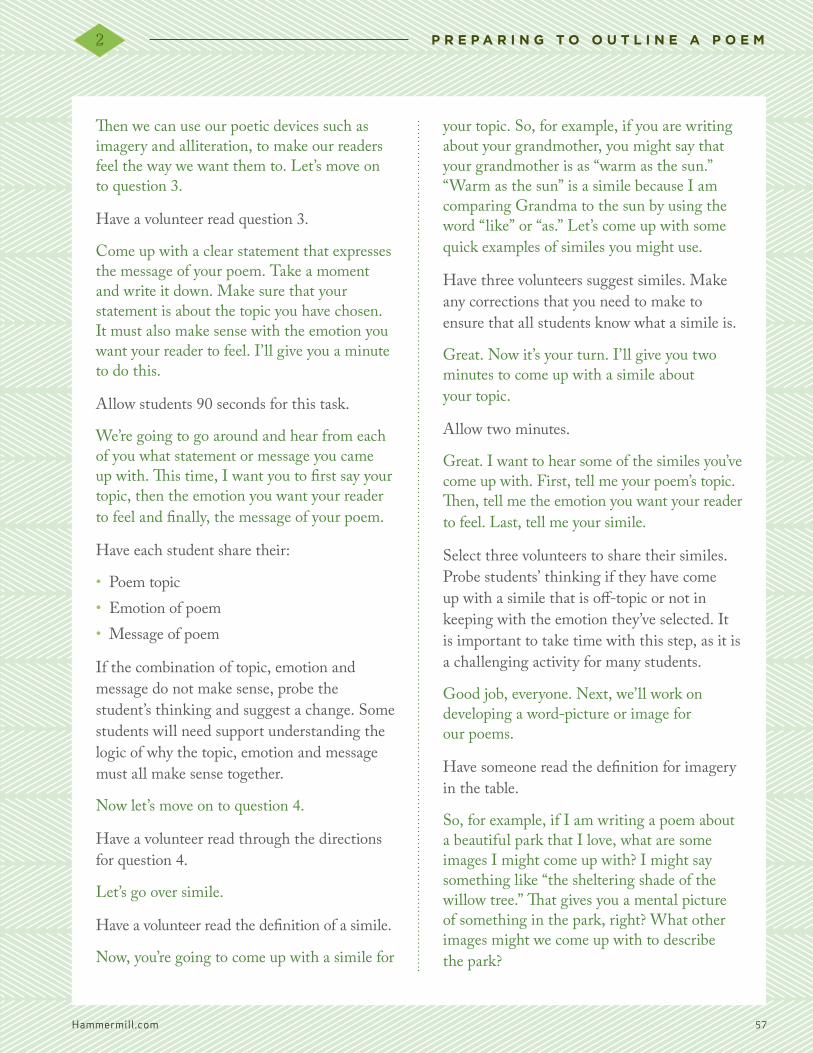
Hammermill.com 57
Then we can use our poetic devices such as imagery and alliteration, to make our readers feel the way we want them to. Let’s move on to question 3.
Have a volunteer read question 3.
Come up with a clear statement that expresses the message of your poem. Take a moment and write it down. Make sure that your statement is about the topic you have chosen. It must also make sense with the emotion you want your reader to feel. I’ll give you a minute to do this.
Allow students 90 seconds for this task.
We’re going to go around and hear from each of you what statement or message you came up with. This time, I want you to first say your topic, then the emotion you want your reader to feel and finally, the message of your poem.
Have each student share their:
• Poem topic• Emotion of poem• Message of poem
If the combination of topic, emotion and message do not make sense, probe the student’s thinking and suggest a change. Some students will need support understanding the logic of why the topic, emotion and message must all make sense together.
Now let’s move on to question 4.
Have a volunteer read through the directions for question 4.
Let’s go over simile.
Have a volunteer read the definition of a simile.
Now, you’re going to come up with a simile for
your topic. So, for example, if you are writing about your grandmother, you might say that your grandmother is as “warm as the sun.” “Warm as the sun” is a simile because I am comparing Grandma to the sun by using the word “like” or “as.” Let’s come up with some quick examples of similes you might use.
Have three volunteers suggest similes. Make any corrections that you need to make to ensure that all students know what a simile is.
Great. Now it’s your turn. I’ll give you two minutes to come up with a simile about your topic.
Allow two minutes.
Great. I want to hear some of the similes you’ve come up with. First, tell me your poem’s topic. Then, tell me the emotion you want your reader to feel. Last, tell me your simile.
Select three volunteers to share their similes. Probe students’ thinking if they have come up with a simile that is off-topic or not in keeping with the emotion they’ve selected. It is important to take time with this step, as it is a challenging activity for many students.
Good job, everyone. Next, we’ll work on developing a word-picture or image for our poems.
Have someone read the definition for imagery in the table.
So, for example, if I am writing a poem about a beautiful park that I love, what are some images I might come up with? I might say something like “the sheltering shade of the willow tree.” That gives you a mental picture of something in the park, right? What other images might we come up with to describe the park?
P R E P A R I N G T O O U T L I N E A P O E M12

58 Hammermill.com
Elicit three images from students. Emphasize that strong imagery is easy to picture.
Now, it’s your turn. Think about the topic you’ve selected for your poem. Think about the emotion you want the reader to feel. Then, come up with a picture you can present in words for the reader to “see.” Write down that image in the space provided. I’ll give you 2 minutes for this step.
Provide 2 minutes.
Let’s hear some of the great images you’ve come up with for your poems. First, tell us the topic of your poem and the emotion you want the reader to feel. Then, tell us the image.
Have three volunteers share their images. Probe their thinking if their image is not an
actual image (word picture), or if their image is not about the topic of their poem. Take the time that you need to ensure that all students have grasped what an image is and have created an effective one.
HOMEWORK 2
For homework, I want you to complete the fourth column in this table. I want you to explain how your simile and image support the message of your poem and the way you want the reader to feel. If you discover that your simile and image do not support the message of your poem and the way you want the reader to feel, change the simile and image so that they do support the message and feeling of the poem.
P R E P A R I N G T O O U T L I N E A P O E M12

Hammermill.com 59
REVIEW HOMEWORK 2
In advance of Lesson 3, be sure to evaluate the homework for Lesson 2 for all students. Write on students’ workbooks any misunderstandings of simile and imagery.
It is extremely important to the success of the overall poem that students have mastered these terms and have produced examples of simile and imagery on the topic of their poem.
INTRODUCE THE LESSON
Explain that, today, the class will continue to plan their poems by creating metaphors for their topics and examples of alliteration.
Invite students to turn to page 108 of their Writing Is Rewriting workbooks to begin.
Poets use literary devices such as similes, metaphors, images and alliteration to communicate their message and the emotion of their poem. You’ve done a great job with similes and imagery. Today, we’ll continue on page 108 with metaphor and alliteration.
Have a volunteer read the definition for metaphor on the third row of the table.
Let’s imagine we’re writing a poem about our grandmother. Who can give me an example of a metaphor for Grandma?
Elicit three metaphors from students. Ensure that the metaphors don’t include “like” or “as.” Some examples might be: “Grandma is an angel.” or “Grandma is a light glowing in the dark.”
Great. It looks like we’re clear on what metaphors are. Now, it’s time to create a
LESSON OVERVIEW
Students will create a metaphor and alliteration for their poems. Then, they will create a list of rhymes for their poems.
• Discuss literary devices and work on activities
• Discuss poem structure and work on activities
• Discuss rhyme scheme and work on activities
MATERIALS NEEDED FOR STUDENTS
• Writing Is Rewriting workbook• Rhyming dictionary• Pen or pencil
HOMEWORK
Students will start writing their poems.
3
LESSON THREE
STUDENTS CREATE A METAPHOR AND ALLITERATION FOR THEIR POEMS

60 Hammermill.com
metaphor for your poem’s topic. I’ll give you two minutes to do that. Be sure to write your metaphor in the table.
Give students 2 minutes to complete the task.
Let’s hear some of the great metaphors you’ve come up with for your poems. First, tell us the topic of your poem and the emotion you want the reader to feel. Then, share the metaphor you’ve created.
Invite up to three volunteers to share what they wrote. Ensure that the metaphors are real metaphors and not similes and that they make sense for the topic of the emotion of the poem.
Let’s move on to alliteration.
Have a volunteer read the definition for alliteration.
So let’s go back to that imaginary poem we’re writing about our grandmother. I might use alliteration to describe Grandma this way: “kind and caring.” Who can give me other examples of alliteration describing Grandma?
Elicit three examples of alliteration and ensure that they begin with the same initial sound.
Great. It looks like we’re clear on what alliteration is. Now, it’s time to create an example of alliteration for your poem’s topic. I’ll give you two minutes to do that. Be sure to write it in the table.
Give students 2 minutes to complete the task.
Let’s hear some of the alliteration you’ve come up with for your poems. First, tell us the topic of your poem and the emotion you want the reader to feel. Then, share the alliteration you’ve created.
Elicit three examples of alliteration and ensure that they begin with the same initial sound. Probe student thinking if it is unclear how the alliteration evokes the intended topic and emotion of the poem.
OUTLINING A POEM
Good job, everyone. We’re getting closer and closer to writing our poem. We’re going to start outlining our poem.
Our poem will have three stanzas. As you know, a stanza is like a paragraph in a poem. Just like a paragraph, a stanza has a main idea. I want you to think about your topic and your message. What do you think should be the main idea in the first stanza of your poem? What do you think should be the main idea in the second stanza of your poem? And what do you think should be the main idea in the third stanza of your poem?
On the board, write Stanza 1, Stanza 2, Stanza 3.
Let’s think about our poem about Grandma. Our message is that we love Grandma, and our emotion is gratitude. What should the main idea be in Stanza 1?
Elicit suggestions such as a physical description of Grandma’s beautiful face. Write this under Stanza 1 on the board.
Then, what should the main idea be of Stanza 2? Maybe we could mention how Grandma always helps us.
Elicit other suggestions for Stanza 2, such as “Grandma helps me with my homework,” and write it on the board.
S T U D E N T S C R E A T E A M E T A P H O R13
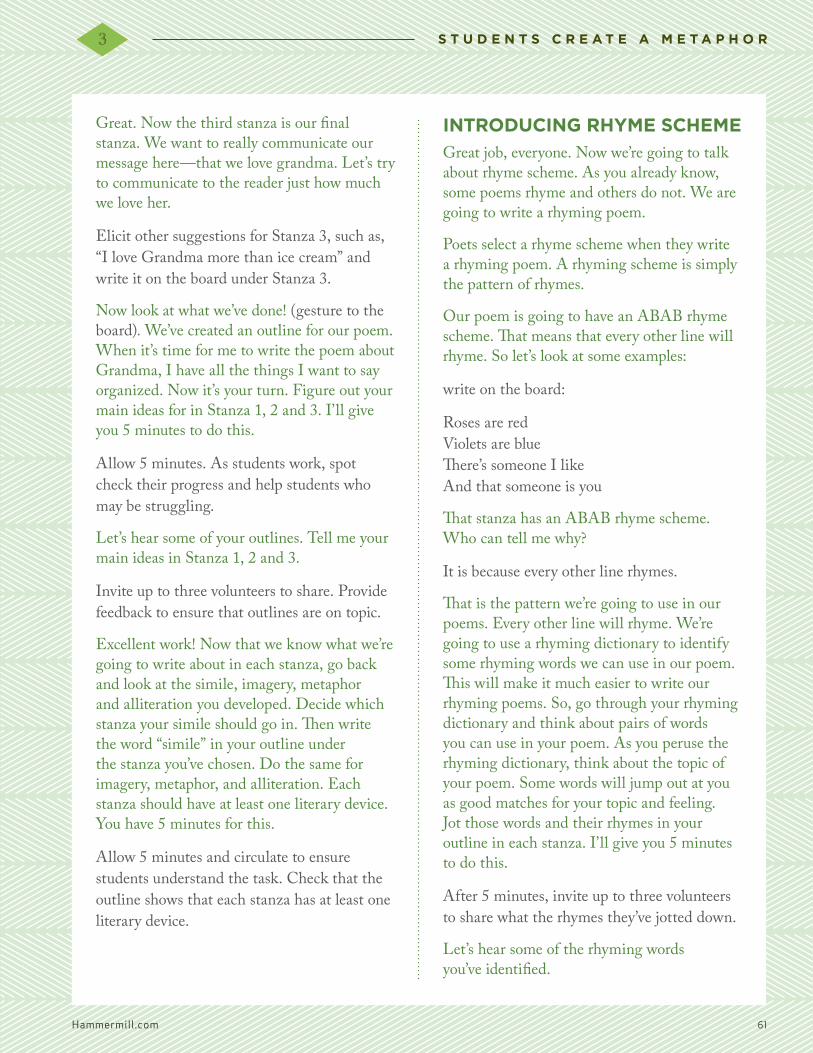
Hammermill.com 61
Great. Now the third stanza is our final stanza. We want to really communicate our message here—that we love grandma. Let’s try to communicate to the reader just how much we love her.
Elicit other suggestions for Stanza 3, such as, “I love Grandma more than ice cream” and write it on the board under Stanza 3.
Now look at what we’ve done! (gesture to the board). We’ve created an outline for our poem. When it’s time for me to write the poem about Grandma, I have all the things I want to say organized. Now it’s your turn. Figure out your main ideas for in Stanza 1, 2 and 3. I’ll give you 5 minutes to do this.
Allow 5 minutes. As students work, spot check their progress and help students who may be struggling.
Let’s hear some of your outlines. Tell me your main ideas in Stanza 1, 2 and 3.
Invite up to three volunteers to share. Provide feedback to ensure that outlines are on topic.
Excellent work! Now that we know what we’re going to write about in each stanza, go back and look at the simile, imagery, metaphor and alliteration you developed. Decide which stanza your simile should go in. Then write the word “simile” in your outline under the stanza you’ve chosen. Do the same for imagery, metaphor, and alliteration. Each stanza should have at least one literary device. You have 5 minutes for this.
Allow 5 minutes and circulate to ensure students understand the task. Check that the outline shows that each stanza has at least one literary device.
INTRODUCING RHYME SCHEME
Great job, everyone. Now we’re going to talk about rhyme scheme. As you already know, some poems rhyme and others do not. We are going to write a rhyming poem.
Poets select a rhyme scheme when they write a rhyming poem. A rhyming scheme is simply the pattern of rhymes.
Our poem is going to have an ABAB rhyme scheme. That means that every other line will rhyme. So let’s look at some examples:
write on the board:
Roses are red Violets are blue There’s someone I like And that someone is you
That stanza has an ABAB rhyme scheme. Who can tell me why?
It is because every other line rhymes.
That is the pattern we’re going to use in our poems. Every other line will rhyme. We’re going to use a rhyming dictionary to identify some rhyming words we can use in our poem. This will make it much easier to write our rhyming poems. So, go through your rhyming dictionary and think about pairs of words you can use in your poem. As you peruse the rhyming dictionary, think about the topic of your poem. Some words will jump out at you as good matches for your topic and feeling. Jot those words and their rhymes in your outline in each stanza. I’ll give you 5 minutes to do this.
After 5 minutes, invite up to three volunteers to share what the rhymes they’ve jotted down.
Let’s hear some of the rhyming words you’ve identified.
S T U D E N T S C R E A T E A M E T A P H O R13

62 Hammermill.com
HOMEWORK 3
Take your Writing Is Rewriting workbook home. Then, write the first stanza of your poem in the blue paper section of your workbook. Make sure that you follow an ABAB rhyme structure.
Be sure to include the simile, imagery, metaphor or alliteration you decided to use in Stanza 1. If you want to write the other stanzas of your poem as well, you can!
S T U D E N T S C R E A T E A M E T A P H O R13

Hammermill.com 63
REVIEW HOMEWORK 3
For homework, we drafted the first stanza of our poem using an ABAB structure. Who would like to share their draft of their first stanza? First, tell us your poem’s topic. Then tell us your stanza’s main idea. Last, read your stanza.
Have up to three volunteers share what they wrote. Ensure that the rhyming scheme is ABAB. Probe student thinking if the content does not match the poem’s topic.
Great job, everyone! I am going to review each person’s draft today and give each of you feedback on your work. But first, let’s start our lesson.
INTRODUCE THE LESSON
For the next three lessons, this classroom is going to be a poetry studio. A poetry studio is
a quiet space where writers come to write. We are going to use a timer to help us concentrate for short spans of time on our work.
We all should have a draft of Stanza 1. So when we begin writing today, we should move on to Stanza 2. If for some reason you did not write Stanza 1 for homework, you can start writing Stanza 1 now.
Everyone needs a rhyming dictionary. You can use your rhyming dictionary as you write your poem.
Once the timer begins, I should only see people writing in silence.
That means:
• We can’t ask questions of classmates or teachers
• We can’t take bathroom breaks• We can’t sharpen our pencils
LESSON OVERVIEW
Students will begin writing their poem under timed, silent conditions.
• Review Homework 3• Introduce the lesson• Activity: Students practice silent writing
MATERIALS NEEDED FOR STUDENTS
• Writing Is Rewriting workbook• Rhyming dictionary• Pen or pencil
HOMEWORK
Students respond to the teacher’s notes on stanzas.
4
LESSON FOUR
POETRY STUDIO INTRODUCTION

64 Hammermill.com
PREPARE STUDENTS FOR SILENT WRITING (5 MINUTES)
Before we get started, let’s make sure we’re prepared.
Does everyone have something to write with? Does anyone need to sharpen their pencil? You have 90 seconds to ensure you have something to write with.
Set a timer for 90 seconds. Once time is up, continue the lesson.
Does everyone have their Writing Is Rewriting workbook?
Check that everyone has their book and give additional copies to anyone who may have forgotten it.
Does everyone have a rhyming dictionary?
Check that everyone has one, and give additional copies to anyone who may have forgotten it.
Take a moment now to review your outlines for your poem. You’re doing this so that when we start the timer, you have a clear idea of what your poem is about and the main idea of Stanza 2. You should have noted in your outline what literary device you are going to include in Stanza 2.
Allow 60 seconds for students to read over their poem outlines.
Now turn to the blue lined paper in your Writing Is Rewriting workbook. As you write, use your outline to guide you. Don’t worry about spelling or punctuation or capitalization. We can take care of all of that later. Does anyone have any questions?
BEGIN SILENT WRITING (5 MINUTES)
I am setting the timer for 5 minutes. During the next 5 minutes, I should see every single person in this room writing. I will not hear anyone talking or asking questions, even to me.
Set the timer.
Begin!
While the 5 minutes lasts, resist the urge to circulate the room or speak to students.
It is distracting to student writers to have a teacher roaming the room and reading over their shoulders. This is one of those instances where the less you do as the teacher, the more helpful it is.
Allow students to hear the timer sound.
Great job, everyone. Put your pencils down for a moment. We’re going to reflect on how that went.
REFLECT ON SILENT WRITING (3 MINUTES)
How did it feel to write in silence for 5 minutes? Was it difficult to get started? Did you notice that once you got going, it was quite absorbing?
Five minutes does not sound like a lot of time, but when we really give ourselves over to our task, we can achieve quite a lot in just 5 minutes. Look at how much you wrote in 5 minutes! Would anyone like to share what they wrote?
Have up to three volunteers share their Stanza 2. Provide feedback.
P O E T R Y S T U D I O I N T R O D U C T I O N14

Hammermill.com 65
We’re going to go back to work on drafting our Stanza 2. There is a lot we have to make sure that we do. First, we have to make sure that our stanza says what we want it to say. Then, we have to ensure that it uses the literary device we planned for it. And last, we have to ensure that it follows the ABAB rhyme scheme. So we have to be patient to get this done well.
Set the timer.
Begin!
After 5 minutes, let students hear the timer go off.
TAKE QUESTIONS (3 MINUTES)
We’ll take a short break now, so that you can ask me any questions you might have.
Give students 3 minutes to complete the task.
We’re making good progress. We’re going to try to perfect our Stanza 2 now. This time, I am setting timer for 10 minutes.
Set the timer.
Begin!
After 10 minutes, let students hear the timer go off.
You did a great job. Please hand in your workbooks to me. I will read your drafts and give you feedback.
HOMEWORK 4
When I have returned your draft with my comments, please spend time responding to my comments on your Stanza 1 and 2.
P O E T R Y S T U D I O I N T R O D U C T I O N14
66 Hammermill.com
LESSON OVERVIEW
For the next lesson, use the Writing Studio method that is outlined below. It is extremely important that students are given opportunities to practice timed, silent writing in class so that they can develop the habit of it.
You may find it useful to use the script from Lesson 4 for the timed writing component of these lessons. Just adapt them for Stanza 3.
It is important to recognize that even though poems are much shorter than other forms of writing, they are much more complicated to write. Providing students enough time to complete all the elements, such as rhyme scheme and literary devices, will allow them to do their best work.
MATERIALS NEEDED BY STUDENTS
• Writing Is Rewriting workbook• Rhyming dictionary• Pen or pencil
HOMEWORK 5
The homework for the students this lesson is to spend 20 minutes per night rereading their stanzas against their poem outline and making any changes they wish.
5
LESSON FIVE
POETRY STUDIO

Hammermill.com 67
SELF-MANAGEMENT1LESSON TIME WHAT WE DO WHY WE DO IT
Minutes 1-5Preparing to Write: Materials Readiness
Use a timer and set 90 seconds for everyone to find their pen or pencil. Use a timer and set 90 seconds for everyone to find and open their Writing Is Rewriting workbook and turn to their outline page.
Middle schoolers tend to be disorganized. Often, the least organized students are also extremely slow to get their materials out. By using a timer, we make our expectations clear about just how fast students need to get out their materials. By doing this consistently, most students will benefit from the structure and improve their readiness for class materials.
Minutes 6-8Reviewing Our Outline
Have students quietly reread their poem outline.
Students will completely forget their poem outline—and the requisite literary devices—unless prompted to review their outline before writing.
Minutes 9-20Silent Writing
Set a timer for 10 minutes. Tell students to write in silence for 10 minutes. No bathroom breaks, questions of the teacher or anyone else are allowed.
The art of writing is the art of asking and answering questions of the self as you write. If students do not have the capacity to problem-solve and think through questions on their own, they will not develop into proficient writers. We do not help them by assisting them with questions. They need to learn self-reliance and independent problem-solving. Moreover, absolute silence is essential to deep concentration. When we chat with students or other adults in the room, we break students’ concentration.
Minutes 20-25Question Time
Five minute reflection break. Take questions. Allow bathroom breaks, pencil sharpening, etc.
By enabling short breaks, we empower students to learn to hold questions and tasks for an appropriate time in the not-too-distant future.
THE POETRY STUDIO LESSON FORMAT
P O E T R Y S T U D I O5
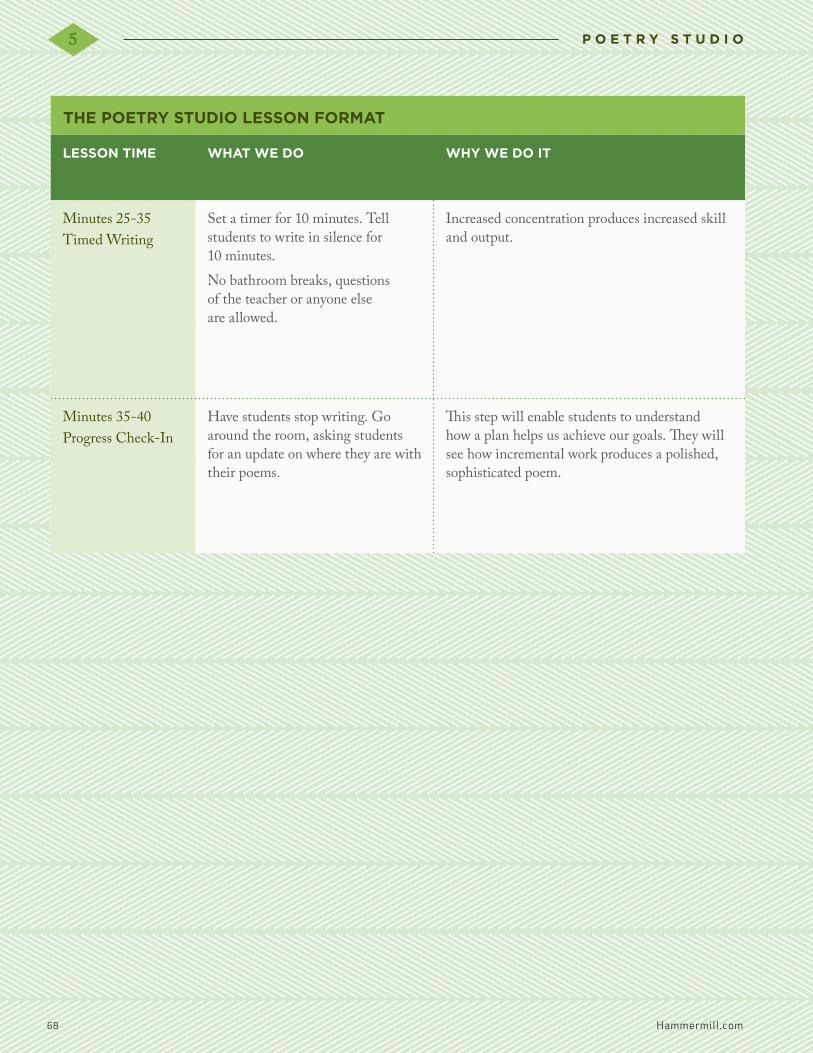
68 Hammermill.com
SELF-MANAGEMENT1LESSON TIME WHAT WE DO WHY WE DO IT
Minutes 25-35Timed Writing
Set a timer for 10 minutes. Tell students to write in silence for 10 minutes. No bathroom breaks, questions of the teacher or anyone else are allowed.
Increased concentration produces increased skill and output.
Minutes 35-40Progress Check-In
Have students stop writing. Go around the room, asking students for an update on where they are with their poems.
This step will enable students to understand how a plan helps us achieve our goals. They will see how incremental work produces a polished, sophisticated poem.
THE POETRY STUDIO LESSON FORMAT
P O E T R Y S T U D I O5

Hammermill.com 69
INTRODUCE THE LESSON
By now, we all have a completed draft of the poem. As we revise our poem, we’re going to write a second draft in the yellow section of our workbook. Why do you think so many professional writers say that writing is rewriting?
The first time we create something, it might be very good, but it may also be a little rough. The act of revising it and polishing it is what makes it excellent.
We spent about 3 hours writing our first draft. I’ve set aside 90 minutes for revising our first draft. Let’s start the revision process by listening to one of our classmate’s poems and offering him or her feedback.
Have the volunteer read his or her poem out loud to the class.
Why is it so important that we hear the work by reading it aloud?
Emphasize that by hearing poems, we are much more likely to notice mistakes or lack of flow. Ask the volunteer if they noticed any aspect of the poem that they would like to improve based on reading it aloud.
Model effective feedback by first telling the student two things you admire about the poem before sharing one aspect of the poem you think could be strengthened.
With the class, go over the questions on page 121 in regard to the student’s draft.
LESSON OVERVIEW
Even though students have been revising their work as they draft, this lesson will focus on listening to their poem as they read it aloud. Students will read their work out loud to themselves. Listening to one’s work out loud is a process many distinguished poets use. By hearing our poems, we are much more likely, as poets, to notice disfluencies, lack of rhythm and grammatical errors.
• Introduce the lesson• Activity: Students read their poems aloud
and make edits
MATERIALS NEEDED FOR STUDENTS
• Writing Is Rewriting workbook• Rhyming dictionary• Pen or pencil
HOMEWORK
Students make changes to their poems based on the teacher’s notes.
6
LESSON SIX
REVISING THE FIRST DRAFT BY LISTENING TO THE POEM

70 Hammermill.com
Use it to create a memo of things the poet needs to address when editing his/her poem.
READING OUR WORK ALOUD TO OURSELVES
Now that we know how to check our own work, let’s begin that process now. You are going to read your poems quietly out loud to yourselves. As you hear mistakes or areas that are not working, pause to revise them.
Provide timed revising in increments of 5 minutes. Then, take in the student workbooks and review their progress, offering feedback on rhythm and rhyme.
HOMEWORK 6
Read the teacher’s comments on the rhythm and rhyme of your poem. Make any edits needed to ensure that the rhythm and rhyme of your poem is more effective.
R E V I S I N G T H E F I R S T D R A F T B Y L I S T E N I N G T O T H E P O E M16

Hammermill.com 71
LESSON OVERVIEW
In this lesson, students will learn how to use a thesaurus to revise their poems for the best possible word choice.
• Discuss word choice and work on activity• Activity: Peer editing in pairs
MATERIALS NEEDED FOR STUDENTS
• Writing Is Rewriting workbook• Rhyming dictionary• Thesaurus• Pen or pencil• Peer Editing Worksheet: Appendix 3:
Handout for Lesson 7
HOMEWORK
Assign the homework. Students will make edits to their poem based on today’s feedback.
7
LESSON SEVEN
REVISING FOR WORD CHOICE
INTRODUCE THE LESSON
When we reviewed Wilfred Owen’s edits, we noticed that he changed some of his word choices to make the words in his poem more expressive. We’re going to do that now. We’re going to read through our poem to make sure that the words in our poem are the most expressive they can be. If we think there is a better word for what we mean, we’re going to use a thesaurus to help us.
Hold up a thesaurus.
A thesaurus is like a dictionary, except that it gives you synonyms for the word you looked up instead of a definition. Let’s pretend I have the word “gentle” in my poem. I think that “gentle” is a pretty good word, but I want to
see if I can find an even better one. What I do is look up the word “gentle” in my thesaurus and read all the synonyms for gentle. Here are some synonyms for gentle listed in my thesaurus: kind, considerate, compassionate, good-natured, mild, serene. There’s what I need! Serene! That is a much better word than “gentle.” I’ll make that edit in my poem by crossing out “gentle” and inserting “serene.”
Any questions about how to do this so far?
Respond to questions.
What I want you to do right now is turn to your second draft of your poem. Read through your poem and circle any words that you are not completely happy with. Do that now. I’ll give you 2 minutes to do it.

72 Hammermill.com
Give students 2 minutes to complete the task.
Go to the first word you’ve circled. Now look up that word in your thesaurus.
Wait while they do this.
Now, see if you can find a better word for the word you circled. Read through the list of synonyms.
Give students a minute to do this.
Once you’ve found a good replacement, make the edit on your second draft.
Circulate as students do this to ensure that students are doing this correctly.
Now, I’m going to give you 15 minutes to do this for all the words you have circled.
After 15 minutes, divide the class into pairs.
I’ve divided you into pairs so that you will have a peer editor. Today each student will listen to the poem read to them by their classmate.
As you listen, make notes about any parts of the poem that you like or that you think need work. I am handing out a Peer Editing worksheet (Appendix 3: Handout for Lesson 7). This is what you will make your notes on as you listen to your classmate’s poem.
When it is your turn to read your poem, feel free to pause and make any brief fixes or notes on things you would like to change, too.
Allow 5 minutes for each partner to have a turn.
HOMEWORK 7
Use your own revisions and your peer editor’s comments, to write a third draft of your poem onto the yellow paper in your Writing Is Rewriting workbook.
R E V I S I N G F O R W O R D C H O I C E17

Hammermill.com 73
LESSON OVERVIEW
Students will meet with the teacher for personalized feedback. Next, they will refine their poems on the white paper, completing their final draft.
• Ongoing student conferences• Activity: Students refine their poems or read
independently
MATERIALS STUDENTS WILL NEED
• Writing Is Rewriting workbook• Pen or pencil
HOMEWORK
Students will finish their final drafts on white paper and proofread using CUPS.
PREPARING FOR STUDENT CONFERENCES
Getting personalized feedback from you, the teacher, is invaluable for student poets. The time you spend reading and commenting on their work rewards them for their hard work and creativity.
Before holding student conferences, it is imperative that you read and review the student work. Clearly mark on the student’s yellow-paper draft the changes you would like to see. It is recommended to make any proofreading corrections you think are necessary. However, it is critical that you also include substantive comments—noticing imaginative word choice, effective literary
devices, adherence to rhyme scheme—and other evidence of the craft of the poet.
HOLDING STUDENT CONFERENCES
Schedule individual conferences with student poets lasting no more than 5 minutes. During your conference, have the student poet read the work aloud to you. This step is critical because it:
• Causes them to take ownership of their work• Ensures that they hear their work before an
attentive audience• Gives you, the teacher, a chance to hear the
work as the poet intended it to be heard
8
LESSON EIGHT
WRITING THE FINAL DRAFT

74 Hammermill.com
Because you will have commented on their draft already, you will not need to take time during the conference to make notes on the draft. Instead, use the remaining time to:
• Congratulate the poet on two aspects of the draft you admire
• Communicate to the poet the major issue that needs to be addressed in the final draft; e.g., “The rhythm is off in some places.” or “I am not sure what your message is.” or “What is this metaphor supposed to be communicating?”
ACTIVITIES FOR OTHER STUDENTS DURING STUDENT CONFERENCES
While you conference with students, give the rest of the class the option to further refine their poems or to read independently. If you have copies of other poems available, it is a great idea to encourage students to read them.
HOMEWORK 8
Produce a final draft of your poem onto the white paper in the Writing is Rewriting workbook. Be sure that all notes from your teacher on your yellow draft are incorporated in the final draft. You may wish to make additional changes in the final draft. Last, but not least, go over your final draft for CUPS proofreading errors. Use the rubric (Rubric for
Evaluating Poem in Appendix 3) to self-assess your finished poem.
Submit the work to your teacher.
EVALUATING STUDENT POETRY
As you, the teacher, evaluate the finished work of the students, we recommend using the rubric in the Appendix of this section.
You will notice that the rubric evaluates not only the quality of the work, but also the students’ adherence to the revision process. This holds them accountable for their effort throughout the poetry writing project.
OPTIONAL: HOLD A PUBLISHING PARTY
If you’ve followed all eight lessons of this program, chances are that your class has produced some beautiful and accomplished poetry.
It is a wonderful idea to celebrate your students’ hard work and creativity by holding a poetry party and inviting parents, the principal and other caring adults to it. Have each student read their poem aloud in front of the audience and publish a “collected poems” edition of the class’s work to distribute to attendees.
W R I T I N G T H E F I N A L D R A F T8

S E C T I O N 1
Hammermill.com 75
A P P E N D I X1


NAME
DATE
FICTION: HOMEWORK 1
L.M. Montgomery wrote Anne of Green Gables and approximately 20 other novels, as well as over 500 stories. Her remarkable productivity was due to her good habits.
Review her habits below. Then circle one habit that you do not currently have and would like to develop.
• Listening to stories
• Telling stories to others
• Reading a great deal of fiction
• Being persistent: never giving up
• Being thick-skinned: not taking rejection personally
• Being diligent: creating a work plan and sticking to it
• Finding supporters who believe in us and will encourage us
• Developing the capacity to concentrate
The habit I selected is
I value this habit because
I plan to develop this habit by

NAME
DATE
FICTION: HOMEWORK 2
Use the details about the setting in the first paragraph of Anne of Green Gables to draw a picture. The paragraph is reprinted on the right.
Be sure to use all the details in the paragraph in your drawing. You may draw the character of Mrs. Lynde as well. You may label the details if you wish. After you have made your drawing, reflect on how LMM has enabled us to picture the setting of her novel.
CHAPTER 1: MRS. RACHEL LYNDE IS SURPRISED.
Mrs. Rachel Lynde lived just where the Avonlea main road dipped down into a little hollow, fringed with alders and ladies’ eardrops and traversed by a brook that had its source away back in the woods of the old Cuthbert place; it was reputed to be an intricate, headlong brook in its earlier course through those woods, with dark secrets of pool and cascade; but by the time it reached Lynde’s Hollow it was a quiet, well-conducted little stream, for not even a brook could run past Mrs. Rachel Lynde’s door without due regard for decency and decorum; it probably was conscious that Mrs. Rachel was sitting at her window, keeping a sharp eye on everything that passed, from brooks and children up, and that if she noticed anything odd or out of place she would never rest until she had ferreted out the whys and wherefores thereof.
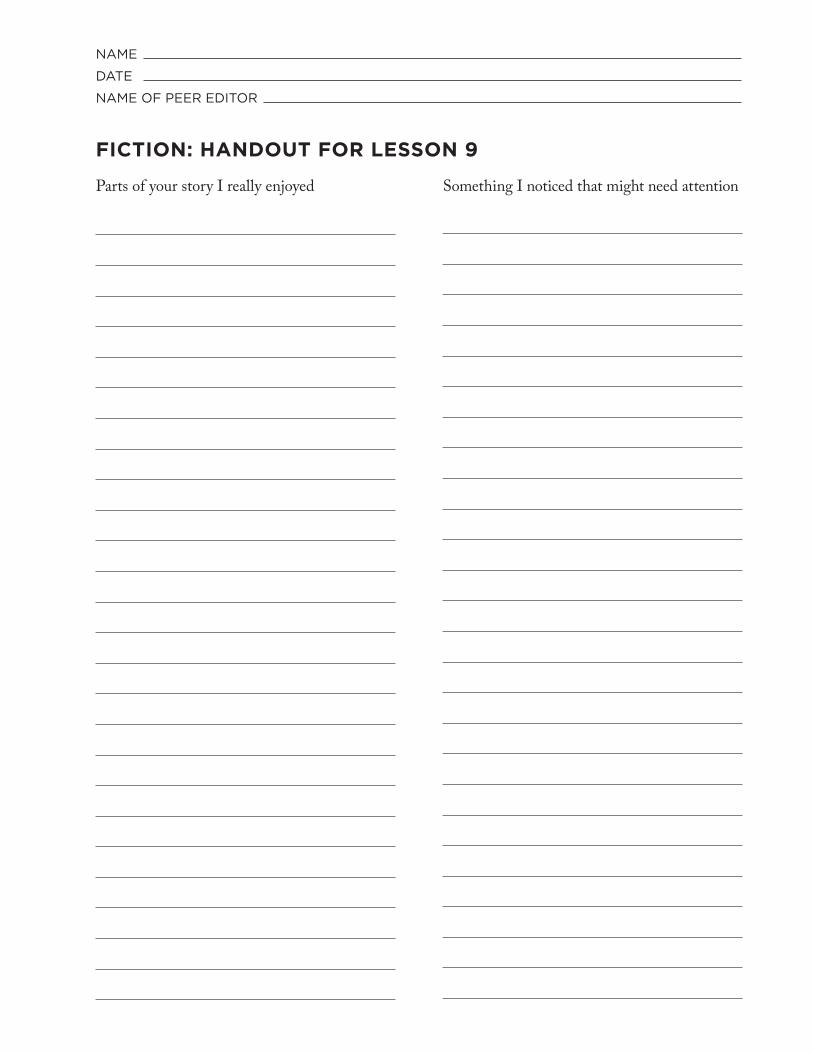
Parts of your story I really enjoyed Something I noticed that might need attention
NAME
DATE
NAME OF PEER EDITOR
FICTION: HANDOUT FOR LESSON 9

STUDENT SCORE ON SHORT STORY
TEACHER COMMENTS
*This means student worked silently during timed silent writing periods and did not distract self or others. A high score on this criteria indicates good self-control and self-management.
CRITERIA TOTAL
POINTS
NOT
EVIDENT
SOMEWHAT
EVIDENT
MOSTLY
EVIDENT
FULLY
EVIDENT
Evidence of outline 5 0 1-2 3-4 5
Evidence of completed first draft
15 0 1-7 8-14 15
Evidence of completed second draft that incorporates edits
15 0 1-7 8-14 15
Evidence of completed final draft that incorporates edits
15 0 1-7 8-14 15
Evidence of CUPS proofreading
15 0 1-5 6-9 15
Cooperation in Silent Reading/Revising*
15 0 1-7 8-14 15
Story reflects story elements of character, conflict and resolution, setting
15 0 1-7 8-14 15
Overall reading pleasure derived from the story
10 0 1-5 6-9 10
TOTAL SCORE 100
NAME
DATE
NAME OF PEER EDITOR
FICTION: RUBRIC FOR EVALUATING SHORT STORY

Hammermill.com 81
A P P E N D I X2
Hammermill.com 81

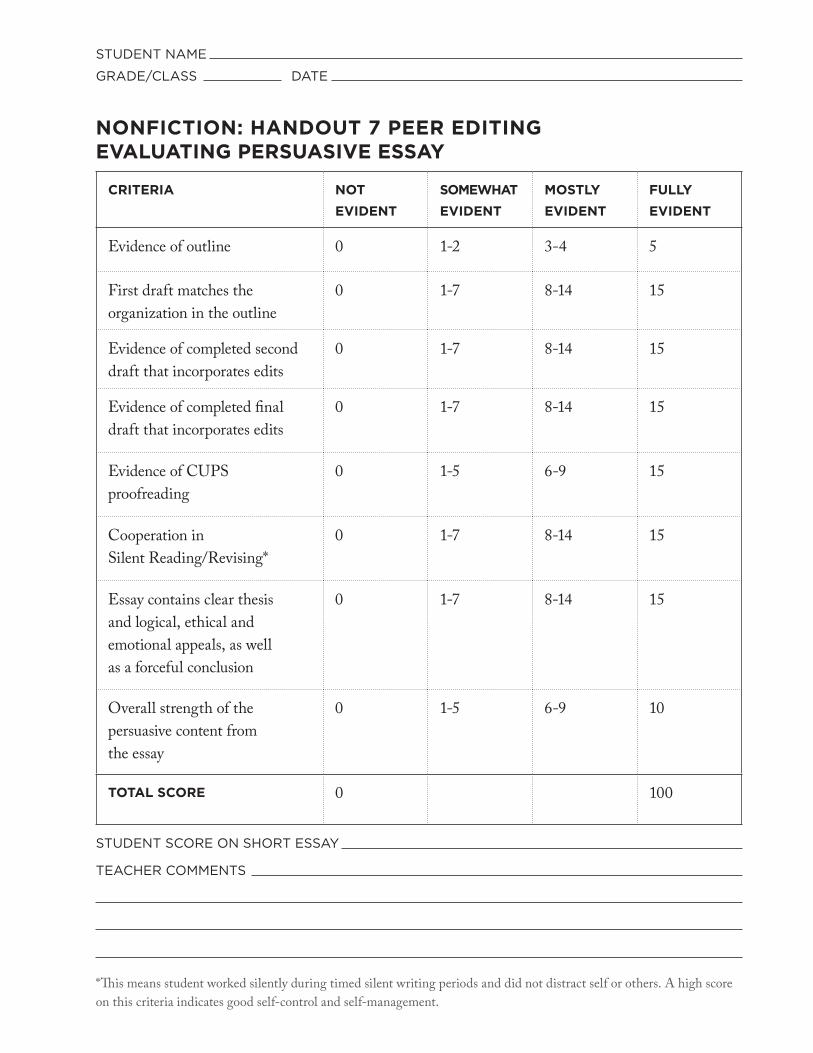
STUDENT SCORE ON SHORT ESSAY
TEACHER COMMENTS
*This means student worked silently during timed silent writing periods and did not distract self or others. A high score on this criteria indicates good self-control and self-management.
CRITERIA NOT
EVIDENT
SOMEWHAT
EVIDENT
MOSTLY
EVIDENT
FULLY
EVIDENT
Evidence of outline 0 1-2 3-4 5
First draft matches the organization in the outline
0 1-7 8-14 15
Evidence of completed second draft that incorporates edits
0 1-7 8-14 15
Evidence of completed final draft that incorporates edits
0 1-7 8-14 15
Evidence of CUPS proofreading
0 1-5 6-9 15
Cooperation in Silent Reading/Revising*
0 1-7 8-14 15
Essay contains clear thesis and logical, ethical and emotional appeals, as well as a forceful conclusion
0 1-7 8-14 15
Overall strength of the persuasive content from the essay
0 1-5 6-9 10
TOTAL SCORE 0 100
STUDENT NAME
GRADE/CLASS DATE
NONFICTION: HANDOUT 7 PEER EDITING EVALUATING PERSUASIVE ESSAY

STUDENT NAME
GRADE/CLASS DATE
NONFICTION: RUBRIC EVALUATING PERSUASIVE ESSAY
CRITERIA NOT
EVIDENT
SOMEWHAT
EVIDENT
MOSTLY
EVIDENT
FULLY
EVIDENT
Evidence of outline 0 1-2 3-4 5
First draft matches the organization in the outline
0 1-7 8-14 15
Evidence of completed second draft that incorporates edits
0 1-7 8-14 15
Evidence of completed final draft that incorporates edits
0 1-7 8-14 15
Evidence of CUPS proofreading
0 1-5 6-9 15
Cooperation in Silent Reading/Revising*
0 1-7 8-14 15
Essay contains clear thesis and logical, ethical and emotional appeals, as well as a forceful conclusion
0 1-7 8-14 15
Overall strength of the persuasive content from the essay
0 1-5 6-9 10
TOTAL SCORE 0 100
STUDENT SCORE ON SHORT ESSAY
TEACHER COMMENTS
*This means student worked silently during timed silent writing periods and did not distract self or others. A high score on this criteria indicates good self-control and self-management.

Hammermill.com 85
A P P E N D I X3


NAME OF PEER EDITOR
NAME OF STUDENT POET
DATE
POETRY: HANDOUT FOR LESSON 7
Parts of your poem I really enjoyed Something I noticed that might need attention
LITERARY DEVICE IT ISN’T THERE! IT’S GREAT! YOU CAN MAKE IT
EVEN BETTER!
Simile
Metaphor
Alliteration
Imagery
MY EVALUATION OF YOUR LITERARY DEVICES:
Peer Editor: Check one for each literary device.
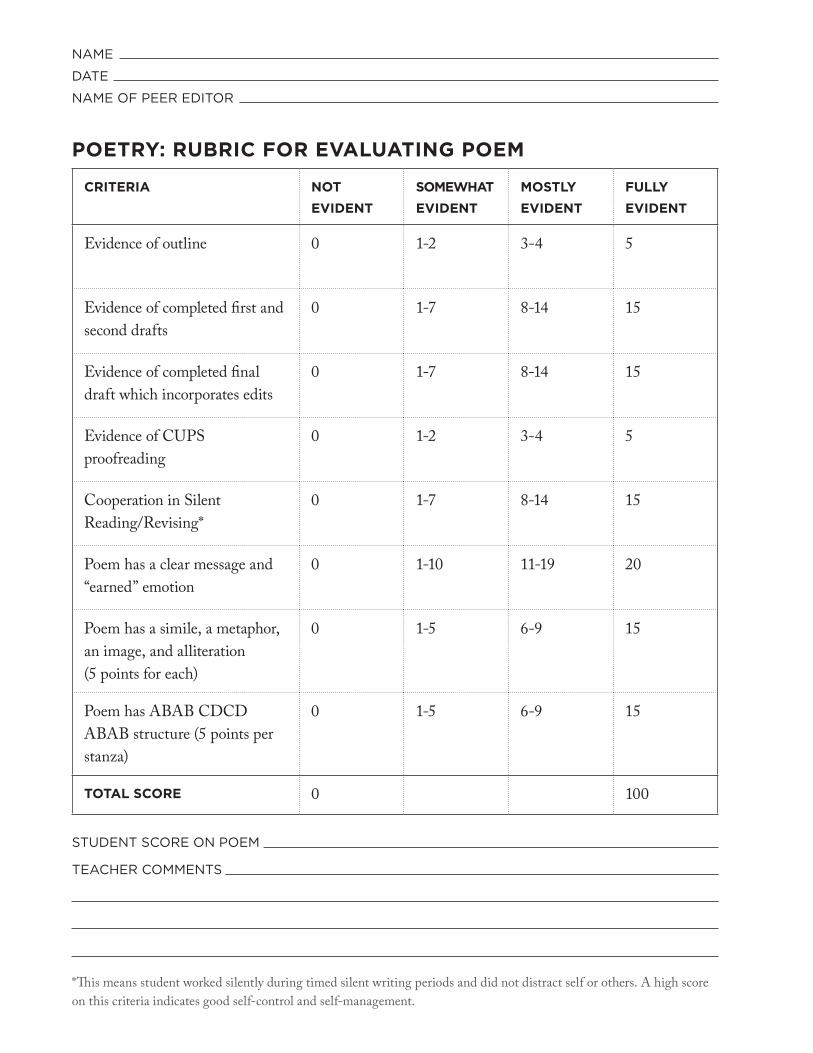
STUDENT SCORE ON POEM
TEACHER COMMENTS
*This means student worked silently during timed silent writing periods and did not distract self or others. A high score on this criteria indicates good self-control and self-management.
CRITERIA NOT
EVIDENT
SOMEWHAT
EVIDENT
MOSTLY
EVIDENT
FULLY
EVIDENT
Evidence of outline 0 1-2 3-4 5
Evidence of completed first and second drafts
0 1-7 8-14 15
Evidence of completed final draft which incorporates edits
0 1-7 8-14 15
Evidence of CUPS proofreading
0 1-2 3-4 5
Cooperation in Silent Reading/Revising*
0 1-7 8-14 15
Poem has a clear message and “earned” emotion
0 1-10 11-19 20
Poem has a simile, a metaphor, an image, and alliteration (5 points for each)
0 1-5 6-9 15
Poem has ABAB CDCD ABAB structure (5 points per stanza)
0 1-5 6-9 15
TOTAL SCORE 0 100
NAME
DATE
NAME OF PEER EDITOR
POETRY: RUBRIC FOR EVALUATING POEM


Cover printed on Hammermill® Color Copy Digital Cover, 100 lb.Pages printed on Accent® Opaque Text Smooth White, 60 lb.
Illustrations by Riccardo Vecchio
© 2016 International Paper Company. All rights reserved. Printed in USA.Accent and Hammermill are registered trademarks and Paper is Power™, Paper is Power logo, and Paper for Life are trademarks of International Paper Company.
HML-PPWTEA