teacher’s guide to ecards - amazon s3 · teacher’s guide to ecards 6th edition january 2011
TRANSCRIPT
Teacher’s Guide to eCards
6th EditionJanuary 2011
http://ecards.greenlearning.ca
2 — Teacher’s Guide to eCards © 2011 GreenLearning Canada
Teacher’s Guide to eCards1st Edition, published September 20072nd Edition, published February 20083rd Edition, published August 20094th Edition, published October 20095th Edition, published January 20106th Edition, published January 2011
© 2011 GreenLearning CanadaRegistered teachers can download additional copies of this publication from our website, http://ecards.greenlearning.ca.
About GreenLearning Canada
GreenLearning Canada creates innovative teaching resources and other rich educational experiences that empower Canadians to create positive social and environmental change in their own lives, schools and communities. Through GreenLearning, youth—Grade 4 and up—learn to think critically about energy and environmental issues that will continue to play a significant role in their futures and on the world stage. For more information about GreenLearning Canada, visit http://www.greenlearning.ca.
3 — Teacher’s Guide to eCards © 2011 GreenLearning Canada
In the winter of 2006, GreenLearning’s review of Ontario’s Social Studies curriculum revealed a number of gaps around the topic of energy. Focusing in on the Natural Resources Unit of Grade 7 Geography, we assembled a stellar team to help us map out a resource that would deliver energy curriculum in a comprehensive, compelling and effective manner.
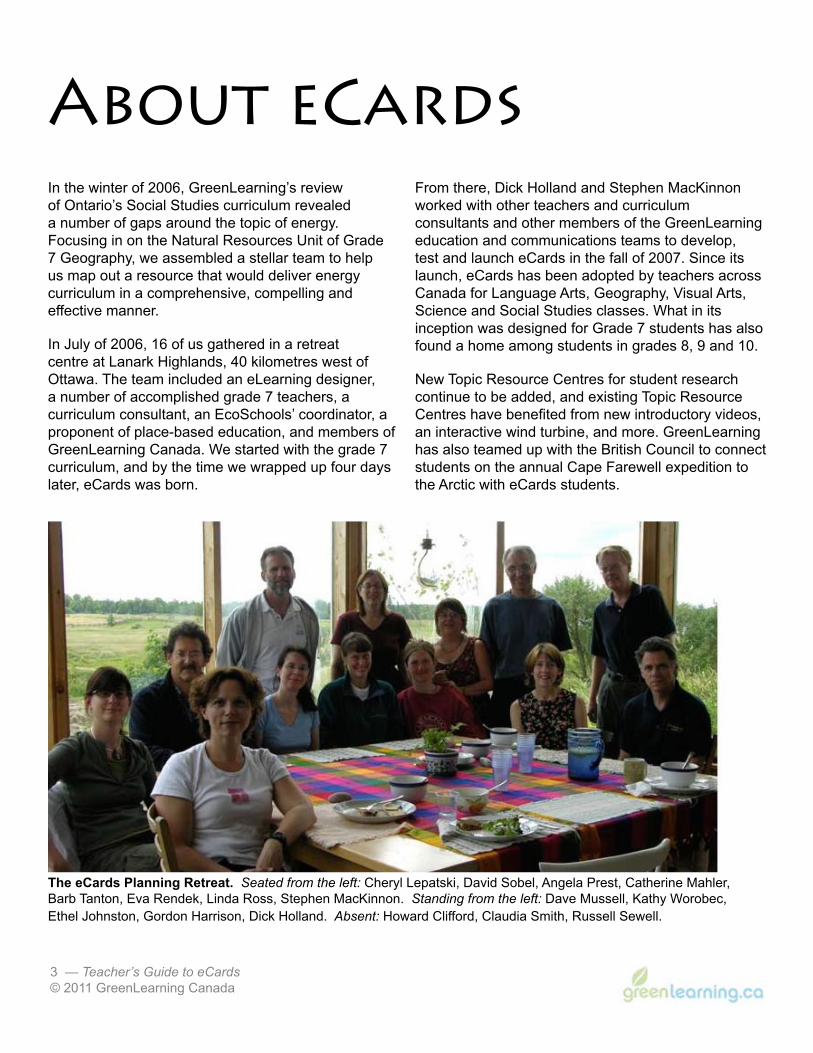
In July of 2006, 16 of us gathered in a retreat centre at Lanark Highlands, 40 kilometres west of Ottawa. The team included an eLearning designer, a number of accomplished grade 7 teachers, a curriculum consultant, an EcoSchools’ coordinator, a proponent of place-based education, and members of GreenLearning Canada. We started with the grade 7 curriculum, and by the time we wrapped up four days later, eCards was born.
From there, Dick Holland and Stephen MacKinnon worked with other teachers and curriculum consultants and other members of the GreenLearning education and communications teams to develop, test and launch eCards in the fall of 2007. Since its launch, eCards has been adopted by teachers across Canada for Language Arts, Geography, Visual Arts, Science and Social Studies classes. What in its inception was designed for Grade 7 students has also found a home among students in grades 8, 9 and 10.
New Topic Resource Centres for student research continue to be added, and existing Topic Resource Centres have benefited from new introductory videos, an interactive wind turbine, and more. GreenLearning has also teamed up with the British Council to connect students on the annual Cape Farewell expedition to the Arctic with eCards students.
The eCards Planning Retreat. Seated from the left: Cheryl Lepatski, David Sobel, Angela Prest, Catherine Mahler, Barb Tanton, Eva Rendek, Linda Ross, Stephen MacKinnon. Standing from the left: Dave Mussell, Kathy Worobec, Ethel Johnston, Gordon Harrison, Dick Holland. Absent: Howard Clifford, Claudia Smith, Russell Sewell.
About eCards
4 — Teacher’s Guide to eCards © 2011 GreenLearning Canada
On behalf of GreenLearning Canada, we want to express our appreciation to those who volunteered their time and their insights during the inception and planning retreat for eCards in Lanark Highlands in July 2006.
We are also grateful to the teachers and curriculum consultants who participated in 2007 in alpha and beta testing to give eCards a thorough in-class testing and provide the development team with invaluable feedback:
Teachers
Nicholas Bond Meenakshi Chopra Grant Davidson Nicole D’Silva Cheryl Dell Diane Hull Nizam Hussain Heather Knapp-Irvin Jacquelyn McDonald
Curriculum Consultants
Regan Dore-Anderson Ethel Johnston Sue Paradiso Ian Pettigrew Wallace
We extend a special thanks to Catherine Mahler and everyone at Ontario EcoSchools; Elizabeth Everhardus at Pollution Probe; Bill and Lorraine Kemp for permitting us to videotape the solar panels and wind turbine that power their off-grid home; and Ethel Johnston, Curriculum Consultant, Toronto District School Board, for her insights and guidance in developing eCards.
We are also grateful to our sponsors. Without their generous support, none of this important work would be possible.
To learn more about GreenLearning’s founding sponsors, visit
http://www.greenlearning.ca/founding-sponsors/.
To learn more about our current sponsors, visit
http://www.greenlearning.ca/sponsors/.
eCards has been, and continues to be, a
truly collaborative effort. We thank you all!
Acknowledgements
Greg McKean David Moskal Irene Rendl Nirit Sasson Jeff Schlotter Barb Tanton Valia Reinsalu Christine Walker Sylvia Warden
5 — Teacher’s Guide to eCards © 2011 GreenLearning Canada
Table of ContentsAbout eCards 3
Acknowledgements 4
About This Guide 6
1. Why eCards? 72. Getting Started 9
Quickstart Checklist 9 Technical Requirements 11
Browsers & Other RequirementsTeacher Accounts Classroom Accounts Student Graphics Timing Considerations Working at Home
3. Curriculum Connections 14Ontario Connections Alberta Connections
4. Introducing eCards 15Discussion Question Activity Sample eCard Activity Big Question/eCard Solution Activity
5. Teaching eCards 19Step 1. Choosing a Topic 19 Step 2. Conducting Research 20
Working with the TRCs Using the Ask an Expert Feature Bringing in Other SourcesGiving Feedback
Step 3. Creating Content 24The PlanThe GraphicsThe Message
Step 4. Assembling & Sending 27Step 5. Assessing & Wrapping Up 27
Assessment RubricsOther Wrap-Up Activities
The eCards Development Team 30
> If you want to get started
right away, see the Quickstart
Checklist on page 9.
6 — Teacher’s Guide to eCards © 2011 GreenLearning Canada
1. Why eCards?
Introduces you to eCards—what it is, who �it’s for, and how it meets the needs of both students and teachers.
2. Getting Started
Offers a Quickstart Checklist for those who are �ready to get started now and for those who want a summary of the tasks ahead.
Describes the technical requirements and �timing considerations of eCards.
3. Curriculum Connections
Provides an overiew of eCards curriculum �links, with specific reference to Ontario and Alberta.
4. Introducing eCards
Suggests activities to help you introduce the �project to your class.
5. Teaching eCards
Offers instructions to help you as you guide �students through the eCard process: choosing topics, conducting research, creating the message and graphics, and assembling and sending eCards.
Makes recommendations for wrapping up and �assessing student achievement.
To get started right away, see the Quickstart Checklist on page 9.
About This GuideThis Teacher’s Guide is designed to help you make the most of eCards with your class. Written by teachers for teachers, this Guide will give you the information you need to get started and lead your students through the eCards experience. The Guide contains four chapters:
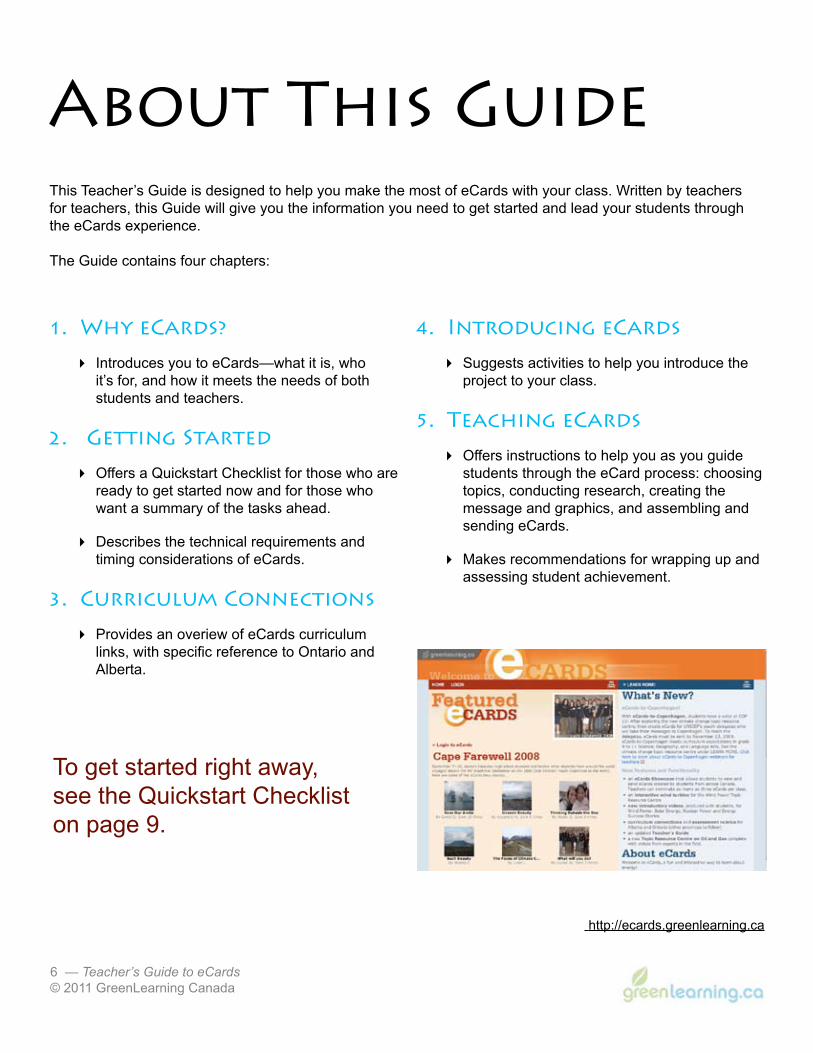
http://ecards.greenlearning.ca
7 — Teacher’s Guide to eCards © 2011 GreenLearning Canada
1. Why eCards?
In the Words of One eCards Teacher
eCards enables young people to do real research, exploring the kinds of energy that in the future will power their work, their play and their lives. It gives them the opportunity to form and express their opinions, and in a small way help shape the kind of energy future that they want. eCards is a positive, hands-on approach to learning, and students and teachers alike are excited about working with this medium. — Lisa Santandrea, London Catholic District School Board
8 — Teacher’s Guide to eCards © 2011 GreenLearning Canada
eCards develops the higher-level skills of critical thinking, synthesis and reflection in one of the places where young people enjoy learning most.
Designed for student security and ease of use, eCards is a standalone resource: on the eCards website, students have all of the balanced, current and age-appropriate information they need. The Topic Resource Centres that support the research phase of the project were written specifically for grade 7–9 students and have been tested in grade 7–9 classes in Ontario and Alberta.
eCards was designed with more than student needs in mind. As a teacher, you can expect:
an innovative and structured eLearning �approach to topical issues
comprehensive Teacher Materials—from �activities that introduce eCards to your class right through to assessment rubrics and wrap-up activities
pedagogy that reflects significant educational �developments such as differentiated learning, critical thinking and teaching-learning critical pathways
a website that is reliable and easy to navigate �
ample opportunity to provide online feedback �to your students as they research and create their eCards
access to the eCards Showcase— �GreenLearning’s gallery of exemplary student eCards, nominated from classes across the country
access to an online Teacher Forum (coming �soon!)—a meeting place where eCards teachers share ideas, post files, ask questions and provide support to one another
a growing number of Topic Resource Centres �for student research: • Wind Power • Solar Energy • Nuclear Power • Oil and Gas • Energy Success Stories • Arctic Glaciers • Air Aware (Air Quality) • Climate Change.
everything you need to give your students �an authentic experience in research and advocacy.
eCards is an opportunity to do much more than meet curriculum expectations. It is an opportunity to facilitate students in changing the world and shaping their futures—one eCard at a time.
We hope that you will enjoy teaching eCards as much as your students will enjoy creating them.
9 — Teacher’s Guide to eCards © 2011 GreenLearning Canada
This chapter includes a checklist for those of you who want to get started without reading the rest of this Teacher’s Guide. If you do intend to read on, this checklist will give you an overview of what’s to follow. Following the checklist, this chapter also includes a discussion of the technical requirements and timing considerations for eCards.
Quickstart Checklist These are the key steps involved in bringing eCards to your class:
If you have not already done so, � register for a GreenLearning teacher account at http://www.greenlearning.ca/register/. Once approved, we will email you a teacher ID and password that allows you to access the teacher-only materials for all GreenLearning programs.
Log into the eCards website � at http://ecards.greenlearning.ca/. From the red menu options on the left side of the screen, choose Classroom Accounts. We recommend that you create a new account for each class.
Identify where in your curriculum � you will place the eCards unit. You can make good use of as many as 8 class periods for your students to create their eCards. Decide whether you will do the unit all at once or whether you will return to it intermittently throughout the term: eCards works well either way. Computer lab availability may make this decision for you.
Book your computer lab time. � We recommend that you dedicate one period to introducing eCards, then plan for 6 or 7 periods of computer time for one eCard.
Test your teacher and classroom IDs � and passwords on a typical lab computer to make sure you won’t encounter any surprises.
Make arrangements � to access a computer paint program, digital camera(s) and/or a scanner. For more information about the technical requirements of eCards, consult the next section in this chapter.
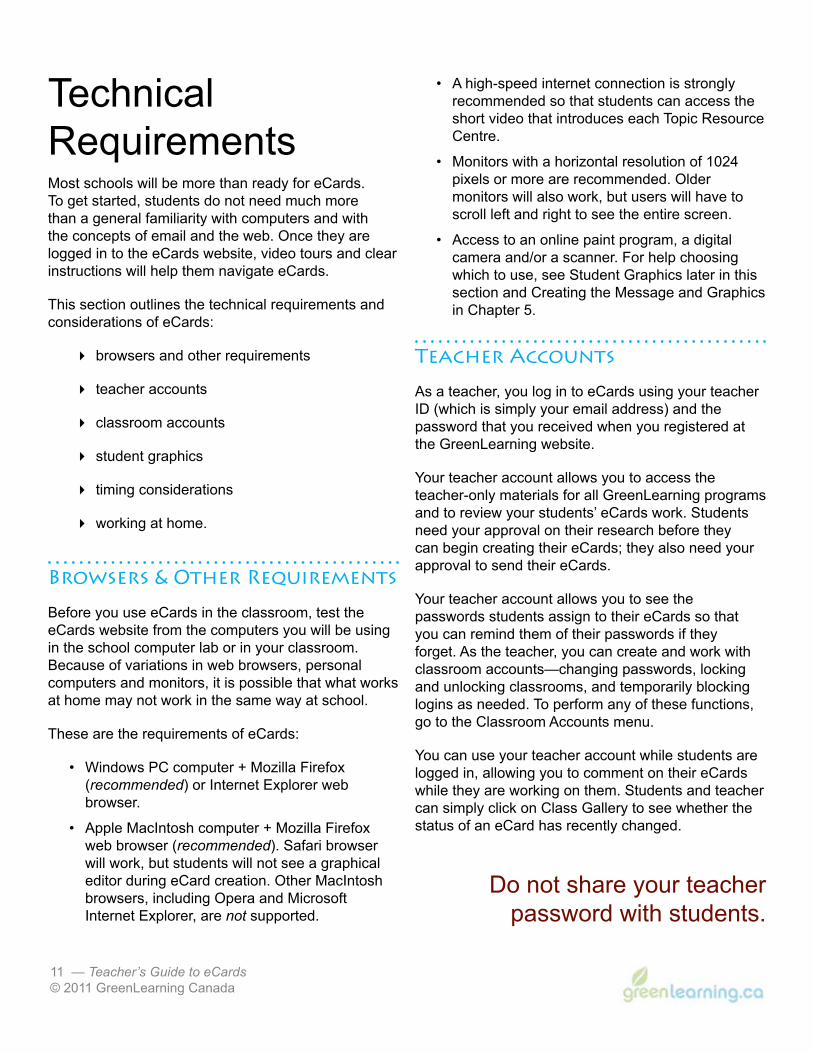
Determine whether you will let students �choose their own energy topics or whether you will assign topics to them. Since eCards was designed to make the choice of topic part of the students’ learning experience, we recommend that you let them do so. To familiarize yourself with the topics, take a look at the Topic Resource Centres on the eCards website.
2. Getting Started
10 — Teacher’s Guide to eCards © 2011 GreenLearning Canada
As you plan eCards for your class, � visit the Teacher Forum (coming soon!) to see what other eCards teachers recommend or to pose questions.
Select an introductory activity � from Chapter 4 to introduce eCards to your class. You can print the handout for each activity from eCards’ Teacher Materials menu.
To send a letter home to parents, print the �Letter to Parents from the Teacher Materials menu or copy it into a file on your computer so that you can tailor it for your class.
Take the video tours � for a quick visual summary of the eCards process. The video tours are available under the Learn More and About eCards menus. As the videos illustrate, after you have introduced the eCards unit to your class (1 period), the process involves five key steps.
Choosing a topic . . . . . . . . . . . . . . . . . 1 period (unless you choose it for them)
Conducting the research . . . . . . . . . . 3 periods
Creating the message & graphics . . . 2 periods
Assembling and sending eCards . . . . 1 period
Assessing eCards & wrapping up . . . . 1 period
For your own planning, � note when you will be called upon for feedback and approval: after the research step, and again after the creation of the message and graphics.
When planning, � decide whether you will use the optional Ask an Expert feature which lets your students communicate with an energy expert at GreenLearning Canada. Students can pose a question as a class, in small groups, or individually.
To begin teaching eCards, � conduct the introductory activity you have chosen from
Chapter 4. Then direct your students to the eCards website and to the video tours. Students log in using the same classroom ID, but they can protect their creations by saving them with their own passwords.
If you run into �literacy challenges with some students as they work with the Topic Resource Centres, you can find strategies to help them in the Conducting the Research section in the last chapter of this Guide.
Check your email account so that you can �approve your students’ eCards as they send them to recipients. Without your approval, a sent eCard is not actually sent.
Once your students have completed their �eCards, use an assessment rubric and/or wrap-up activity to evaluate and conclude the project as a whole. You can find assessment rubrics for Geography, Language, Science, Media Literacy and Social Studies under the Teacher Materials menu. Wrap-up activities are included in the last chapter of this Teacher’s Guide.
Consider nominating as many as three �exemplary eCards per class to the eCards Showcase. eCards posted in the Showcase can be viewed and sent by all registered eCards teachers and classes.
11 — Teacher’s Guide to eCards © 2011 GreenLearning Canada
Technical RequirementsMost schools will be more than ready for eCards.To get started, students do not need much more than a general familiarity with computers and with the concepts of email and the web. Once they are logged in to the eCards website, video tours and clear instructions will help them navigate eCards.
This section outlines the technical requirements and considerations of eCards:
browsers and other requirements �
teacher accounts �
classroom accounts �
student graphics �
timing considerations �
working at home. �
Browsers & Other Requirements
Before you use eCards in the classroom, test the eCards website from the computers you will be using in the school computer lab or in your classroom. Because of variations in web browsers, personal computers and monitors, it is possible that what works at home may not work in the same way at school.
These are the requirements of eCards:
Windows PC computer + Mozilla Firefox • (recommended) or Internet Explorer web browser.
Apple MacIntosh computer + Mozilla Firefox • web browser (recommended). Safari browser will work, but students will not see a graphical editor during eCard creation. Other MacIntosh browsers, including Opera and Microsoft Internet Explorer, are not supported.
A high-speed internet connection is strongly • recommended so that students can access the short video that introduces each Topic Resource Centre.
Monitors with a horizontal resolution of 1024 • pixels or more are recommended. Older monitors will also work, but users will have to scroll left and right to see the entire screen.
Access to an online paint program, a digital • camera and/or a scanner. For help choosing which to use, see Student Graphics later in this section and Creating the Message and Graphics in Chapter 5.
Teacher Accounts
As a teacher, you log in to eCards using your teacher ID (which is simply your email address) and the password that you received when you registered at the GreenLearning website.
Your teacher account allows you to access the teacher-only materials for all GreenLearning programs and to review your students’ eCards work. Students need your approval on their research before they can begin creating their eCards; they also need your approval to send their eCards.
Your teacher account allows you to see the passwords students assign to their eCards so that you can remind them of their passwords if they forget. As the teacher, you can create and work with classroom accounts—changing passwords, locking and unlocking classrooms, and temporarily blocking logins as needed. To perform any of these functions, go to the Classroom Accounts menu.
You can use your teacher account while students are logged in, allowing you to comment on their eCards while they are working on them. Students and teacher can simply click on Class Gallery to see whether the status of an eCard has recently changed.
Do not share your teacher password with students.
12 — Teacher’s Guide to eCards © 2011 GreenLearning Canada
As the teacher, you control the eCards process every step of the way, and you oversee every eCard that is sent from the Class Gallery. It is essential that you keep your teacher ID and password to yourself.
Classroom Accounts
All of your students log in with the same classroom ID and password. Once they have begun to create their eCards, they will save them with their own passwords to prevent others from gaining access to them.
For simplicity, we recommend that you have one classroom account for each classroom of students you teach. For example, you might have one eCards classroom for your first period geography students, and another for your afternoon science class.
To create a classroom account, use your teacher account to log in to the eCards website at http://ecards.greenlearning.ca/. If you are logging in to eCards for the first time, you will be prompted to create a classroom account. If not, use the Classroom Accounts menu to create a new account.
Record your classroom ID and password. Your students need them to log in to eCards.From the Classroom Accounts menu, you can review and manage your classroom accounts. You can lock and unlock classrooms, for example, and assign new passwords.
Student Graphics
eCards recommends that students create the graphics that they will use for their eCards. Working with student images allows you to avoid potential copyright infringements and to extend the opportunity for students to use their creativity and work with technology.
Student graphics can take the form of an image created with a computer paint program, a photograph taken with a digital camera, or a handmade image scanned into a file with a scanner.
A paint (or draw) program. Most students have used a computer paint program, making it a simple and accessible choice. School computers likely have paint programs licensed by the Ministry. PCs come loaded with the Windows Paint program, and older Apple computers have Appleworks for painting or drawing images. There are also online paint websites available, such as http://artpad.art.com/artpad/painter/.
A digital camera. Many students have experience using a digital camera and may have access to one at home. Most schools will have a digital camera that you can make use of.
A scanner. Most schools are equipped with a flatbed scanner, but students may not have experience scanning images. Scanned eCards graphics have the advantage of flexibility—students can draw their images for homework or they can do them at their desks if computer time is limited. They may, however, need some help scanning their images.
You can choose one approach to graphics for all students, or let students choose their own approach. eCards supports jpg files up to 8 MB in size.
However students create their graphics, they need to save
them as jpg files.
For a student handout on this topic, see Creating Images under the Teacher Materials menu of the eCards website.
13 — Teacher’s Guide to eCards © 2011 GreenLearning Canada
Timing Considerations
If your class periods are 45 to 60 minutes in length, you can expect your students will need 7 or 8 classes to complete one eCard:
Introducing eCards to your class . . . . . . . . . 1 period
Step 1. Choosing a topic . . . . . . . . . . . . . . . .1 period [unless you do this for them]
Step 2. Conducting the research . . . . . . . . . 3 periods
Step 3. Creating the message & graphics . . 2 periods
Step 4. Assembling & sending eCards . . . . . 1 period
Step 5. Assessing eCards & wrapping up . . . 1 period [optional]
Subsequent eCards with the same students would require less time--approximately 5 or 6 class periods.
It is possible to adapt the project and teach it in as few as three or four classes, Since students and teachers can access the eCards website from home, you can reduce the amount of time that students need in class by assigning part of the project for homework.
You can easily extend the eCards project—by taking advantage of the Ask an Expert feature, drawing out curricular connections, or including more peer review, for example.
To take full advantage of the eLearning capabilities of eCards, plan for 6 or 7 periods of computer time.
Working at Home
Teachers and students can access the eCards website from home.You can review and evaluate eCards at your convenience, and your students can work on their eCards for homework.
Alternatively, you can lock the eCards classroom to prevent students from accessing their eCards outside of class. To lock or unlock the classroom, go to the Classroom Accounts menu
Lock the classroom if you want to prevent students
from accessing their work outside of class.
A Note on Technical Problems
Every effort has been made to ensure that eCards will function on as many computer configurations as possible.
In the unlikely event that you encounter difficulty, consider these potential sources of technical problems: browser version, browser security settings, flash version, connectivity, filtering or firewall settings. Having a technical problem? Use the Report a Problem form on the eCards website, or email [email protected].
14 — Teacher’s Guide to eCards © 2011 GreenLearning Canada
3. Curriculum ConnectionseCards has easy applications across a number of subject areas: Geography, Social Studies, Science, Language Arts, Media Literacy and Visual Arts.
While developing students’ knowledge and critical thinking about energy issues, eCards both relies on and advances their writing, reading, media literacy, visual art and information technology skills. Teachers have used eCards for students in a range of subjects in grades 7 through 12.
The new climate change topic resource centre is geared to a slightly higher grade level: to grade 10, with an emphasis on meeting curriculum expectations in Science, but with applicability for grades 9 to 12 Geography and Language Arts as well.
In whatever context eCards is taught, you can expect a rich learning experience for students. eCards gives students an opportunity to
think critically about current energy issues �
develop their research skills �
develop their knowledge of Canada and its �natural resources
enhance their language arts skills, especially �their media literacy skills
advance their visual arts skills �
work with technology �
learn in an interdisciplinary environment as �they choose and create visual and textual messages geared to a specific audience.
Ontario Connections
eCards was originally developed for the Natural Resources Unit of Ontario Grade 7 geography, with strong applications in Language Arts and Visual Arts.
eCards also responds to two Considerations for Program Planning that the Ontario Ministry of Education stresses as part of all subject areas and expects of all teachers.
With its emphasis on energy research and • written and visual communication, eCards provides an opportunity for cross-curricular and integrated learning.
As a web-based resource that involves graphics • created by students, eCards also increases the role of technology in the classroom.
Alberta Connections
eCards has been curriculum aligned to Alberta grades 6 (Social Studies, Language Arts, Art), 7 (Language Arts, Science, Art, Social Studies) and 9 (Language Arts, Science, Art).
eCards also responds to Alberta’s Information and Communication Technology for grades 4 through 9. Look for details under the Teacher Materials menu.
A Note on Air Aware eCards
The Air Aware topic resource centre has been curriculum-aligned for Grades 10–12. See the curriculum connections under the Teacher Materials menu at http://ecards.greenlearning.ca.
15 — Teacher’s Guide to eCards © 2011 GreenLearning Canada
Before they begin creating their eCards, students need some understanding of energy resources and why they are important to our future. Your textbook may help you introduce energy-related concepts. It is also helpful if students understand the concept of advocating for change and influencing others to alter their behaviour.
These activities can help you set the context for eCards:
the Discussion Question Activity �[approximately 30 minutes]
the Sample eCard Activity �[approximately 20 minutes]
the Big Question/eCard Solution Activity �[approximately one hour]
Use any one or combination of these activities depending on how much time you have available and what kinds of discussions you want to encourage.
Discussion Question Activity
You can print the Discussion Question handout from the Teacher Materials menu. It is a formatted copy of the seven questions listed below.
Put students in small groups with a copy of the seven questions. After they have answered them in their groups, discuss the questions as a class. You do not need to go into great depth with the answers because a more in-depth understanding will emerge as the students work on their eCards.
In the class discussion, focus on highlighting these key points:
1. What is the difference between renewable and non-renewable energy?
Ensure that students understand the difference between energy sources such as wind and solar that cannot be depleted and others such as oil and nuclear that are finite.
2. What is the relationship between energy and climate change?
In a broad way, help them understand that our energy needs and our energy use directly affect climate change. Every step in the extraction, production, use and disposal of energy sources can have an impact on the environment. These sources power much of our daily lives, from heating and cooling homes and businesses, to short and long distance transportation, to the electricity that is so much a part of our lives.
3. How does our personal behaviour affect energy use?
Let students see that a whole range of actions that we choose every day affects energy use and that modifying each one, even to a small degree, can help reduce the need for energy. When taken collectively, small changes by individuals can add up to a lot—changes such as adjusting the temperature of an air conditioner or thermostat, washing only full loads of laundry, reducing the use of a dishwasher, and carpooling or bicycling to reduce car use.
Other changes can include family decisions such as taking advantage of government incentives to make homes and businesses more energy efficient. They can also extend to political behaviour such as voting with energy choices in mind and joining groups working on climate change.
4. Introducing eCards

16 — Teacher’s Guide to eCards © 2011 GreenLearning Canada
4. Who do you know who is interested in saving energy?
As students mention the people they know, probe a little to learn what these people do to save energy, when they started to do so, why saving energy is important to them, and so on.
5. How can we use the Internet to convince people to change their behaviour?
Ensure that students understand that the Internet is an increasingly acceptable way to communicate with others—not only family and friends, but politicians and community leaders as well. Help them distinguish between personal correspondence that is well thought out and carefully written and other forms of communication such as tweets, text messages, chain letters and petitions.
6. When we want to influence politicians, why are individual cards or letters more effective than other approaches, such as online petitions?
Help them think about the different kinds of communication a politician likely receives and how we might expect that he or she would value them. A politician is more likely to pay attention to something that takes time and thought to create than something that appears to be a fleeting thought. Unlike a few keyboard clicks, a carefully written piece of correspondence can suggest a serious commitment to an issue. Also help students understand that politicians see everyone who contacts them not only as a constituent but also as a voter/ supporter or a potential voter/supporter.
7. Is it important to conserve energy and develop renewable sources of energy? Why?
A mind map on the blackboard or flipchart paper can help you take up this question. Ensure that students touch on a wide range of answers that take into account a number of the positive effects of conserving energy and of using renewable sources:
They both reduce the rate of global warming.•
They reduce pollution and all of its unhealthy side • effects.
They protect us over the long term because • eventually we will run out of non-renewable energy sources.
They reduce our reliance on foreign (and potentially • unstable) sources of energy.
Renewable energy brings manufacturing and • employment benefits to Canadians.
Conservation saves money for individuals and • communities, allowing money to go to other priorities.
Conservation soon becomes a habit, bringing with it • many positive ripple effects.
Low-impact renewable sources do not disturb nature • and ecosystems nearly to the extent that non-renewable sources do.
Renewable sources do not require that we build • more big power plants.
Renewable sources increase in efficiency and • decrease in price the more they are researched, produced and used.
A Note on Introducing Arctic Glaciers
If your class will be working with the Arctic Glaciers Topic Resource Centre, you might want to pose different questions:
1. What are your impressions of the Arctic? Use descriptive adjectives.
2. What three qualities do you have that would make you a good candidate for an expedition to the Arctic?
3. What do you think you would find difficult about traveling on a ship for two weeks? What would you find exciting?
4. What does the phrase climate change mean to you?
5. What concerns do you have about climate change?
For more information about the 2007 Cape Farewell youth expedition, on which this Topic Resource Centre is based, visit http://voyage4.capefarewell.com/
17 — Teacher’s Guide to eCards © 2011 GreenLearning Canada
Sample eCard Activity
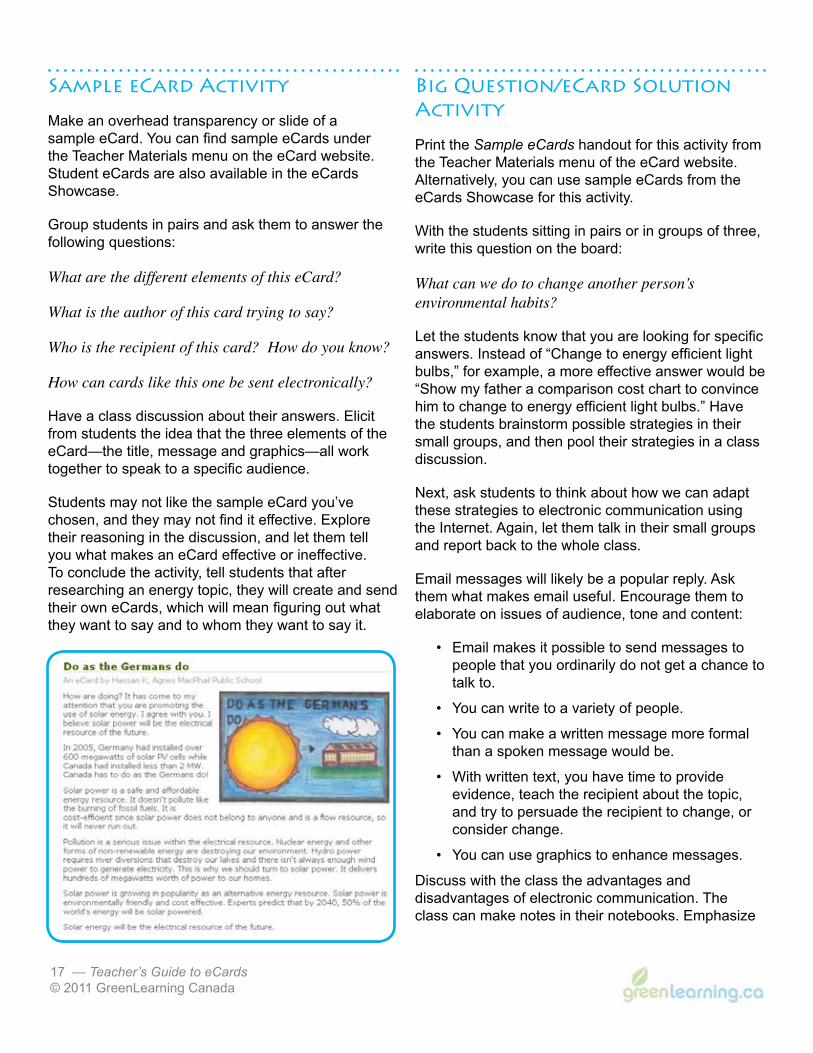
Make an overhead transparency or slide of a sample eCard. You can find sample eCards under the Teacher Materials menu on the eCard website. Student eCards are also available in the eCards Showcase.
Group students in pairs and ask them to answer the following questions:
What are the different elements of this eCard?
What is the author of this card trying to say?
Who is the recipient of this card? How do you know?
How can cards like this one be sent electronically?
Have a class discussion about their answers. Elicit from students the idea that the three elements of the eCard—the title, message and graphics—all work together to speak to a specific audience.
Students may not like the sample eCard you’ve chosen, and they may not find it effective. Explore their reasoning in the discussion, and let them tell you what makes an eCard effective or ineffective. To conclude the activity, tell students that after researching an energy topic, they will create and send their own eCards, which will mean figuring out what they want to say and to whom they want to say it.
Big Question/eCard Solution Activity
Print the Sample eCards handout for this activity from the Teacher Materials menu of the eCard website. Alternatively, you can use sample eCards from the eCards Showcase for this activity.
With the students sitting in pairs or in groups of three, write this question on the board:
What can we do to change another person’s environmental habits?
Let the students know that you are looking for specific answers. Instead of “Change to energy efficient light bulbs,” for example, a more effective answer would be “Show my father a comparison cost chart to convince him to change to energy efficient light bulbs.” Have the students brainstorm possible strategies in their small groups, and then pool their strategies in a class discussion.
Next, ask students to think about how we can adapt these strategies to electronic communication using the Internet. Again, let them talk in their small groups and report back to the whole class.
Email messages will likely be a popular reply. Ask them what makes email useful. Encourage them to elaborate on issues of audience, tone and content:
Email makes it possible to send messages to • people that you ordinarily do not get a chance to talk to.
You can write to a variety of people.•
You can make a written message more formal • than a spoken message would be.
With written text, you have time to provide • evidence, teach the recipient about the topic, and try to persuade the recipient to change, or consider change.
You can use graphics to enhance messages.•
Discuss with the class the advantages and disadvantages of electronic communication. The class can make notes in their notebooks. Emphasize
18 — Teacher’s Guide to eCards © 2011 GreenLearning Canada
the advantages and reinforce the behaviour you want to see in your students. They will come back to these ideas as they create their eCards, but for now establish these initial points:
send messages to individuals (no mass • mailings)
compose them yourself•
use a different format and tone for different • recipients
consider including graphics to enhance a • message
use original graphics when possible because • they can be more effective than stock images found on the Internet.
Discuss with the class the commercial greeting card sites on the Internet. They have likely seen these sites, and some may have used them to send a greeting to someone. Ask the students why making and sending their own original electronic cards is more effective for learning and for convincing other people to change their habits.
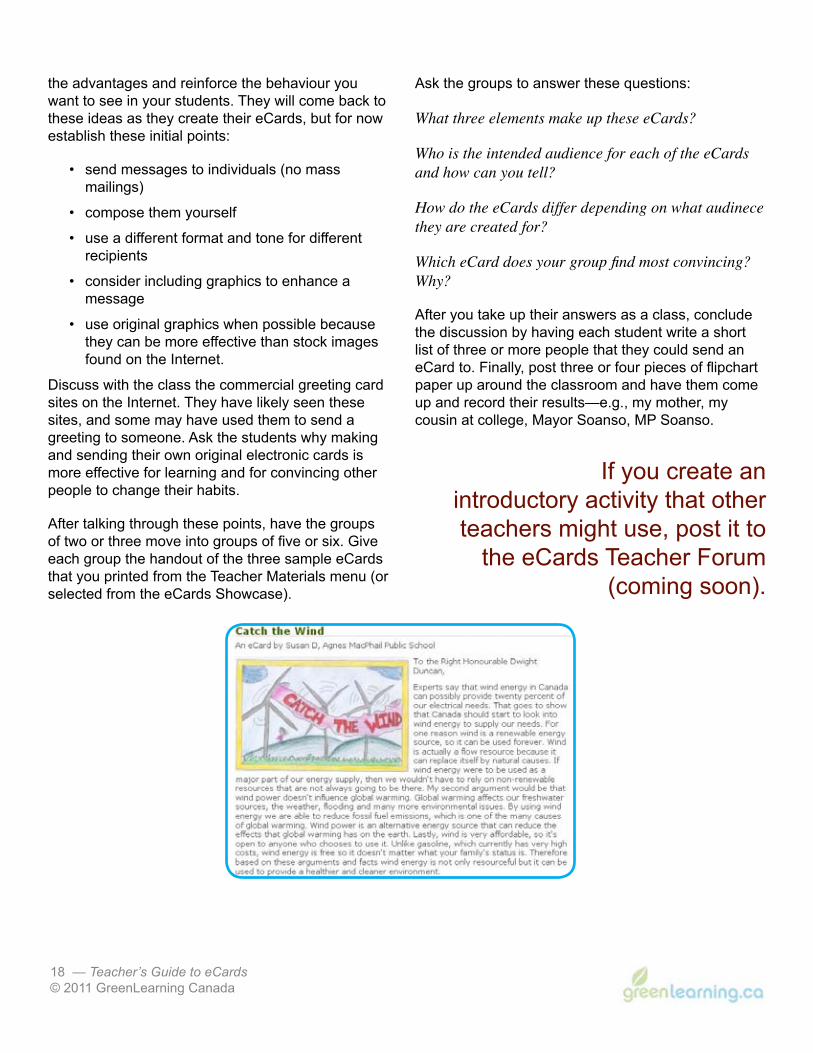
After talking through these points, have the groups of two or three move into groups of five or six. Give each group the handout of the three sample eCards that you printed from the Teacher Materials menu (or selected from the eCards Showcase).
Ask the groups to answer these questions:
What three elements make up these eCards?
Who is the intended audience for each of the eCards and how can you tell?
How do the eCards differ depending on what audinece they are created for?
Which eCard does your group find most convincing? Why?
After you take up their answers as a class, conclude the discussion by having each student write a short list of three or more people that they could send an eCard to. Finally, post three or four pieces of flipchart paper up around the classroom and have them come up and record their results—e.g., my mother, my cousin at college, Mayor Soanso, MP Soanso.
If you create an introductory activity that other teachers might use, post it to
the eCards Teacher Forum (coming soon).
19 — Teacher’s Guide to eCards © 2011 GreenLearning Canada
There is no one way to use eCards in the classroom, and as you work with eCards you will undoubtedly find ways to make it your own.
This chapter takes you through the experience of teaching eCards in some detail:
Step 1. Choosing a topic �
Step 2. Conducting research �• Working with the TRCs • Using the Ask an Expert feature • Bringing in other sources • Giving feedback
Step 3. Creating the message and graphics �• The plan • The message • The graphics
Step 4. Assembling and sending eCards �
Step 5. Assessing eCards and wrapping up �• Assessment rubrics • Other wrap-up activities
The eCards website also explains the steps involved in teaching eCards, but in less detail.
Step 1. Choosing a Topic
Although you can choose the students’ topics for them—even assign the whole class to the same topic—eCards was designed to make the choice of topics part of the students’ learning experience.
If students are going to choose their own topics, let them begin by investigating the Topic Resource Centres on the eCards website: http://ecards.greenlearning.ca/. Students can log in with the classroom ID and password that you give them.
Encourage students to look at the introductory material for each of the energy topics to determine which one interests them most. eCards currently has eight energy-related topics:
Climate Change � (new!)
Air Aware � (new!)
Wind Energy �
Solar Energy �
Nuclear Power �
Oil and Gas � (new!)
Energy Success Stories �
Arctic Glaciers �
Time permitting, students can eventually create more than one eCard, but for now have them select just one topic. Once students have made their decisions, they write a short paragraph explaining why they chose the topic they did. They submit that to you—via the eCards website—for your approval before beginning their research.
5. Teaching eCards
20 — Teacher’s Guide to eCards © 2011 GreenLearning Canada
Step 2. Conducting Research
Student research involves working with a Topic Resource Centre and understanding it well enough to answer four research questions.
The eCards website includes all of the information that students need, but during their research you may also want to let students pose a question to our energy expert or consult other sources online. Once students have answered the questions, they submit their answers to you for feedback and for approval so that they can move on to creating their eCards.
Working with the Topic Resource Centres
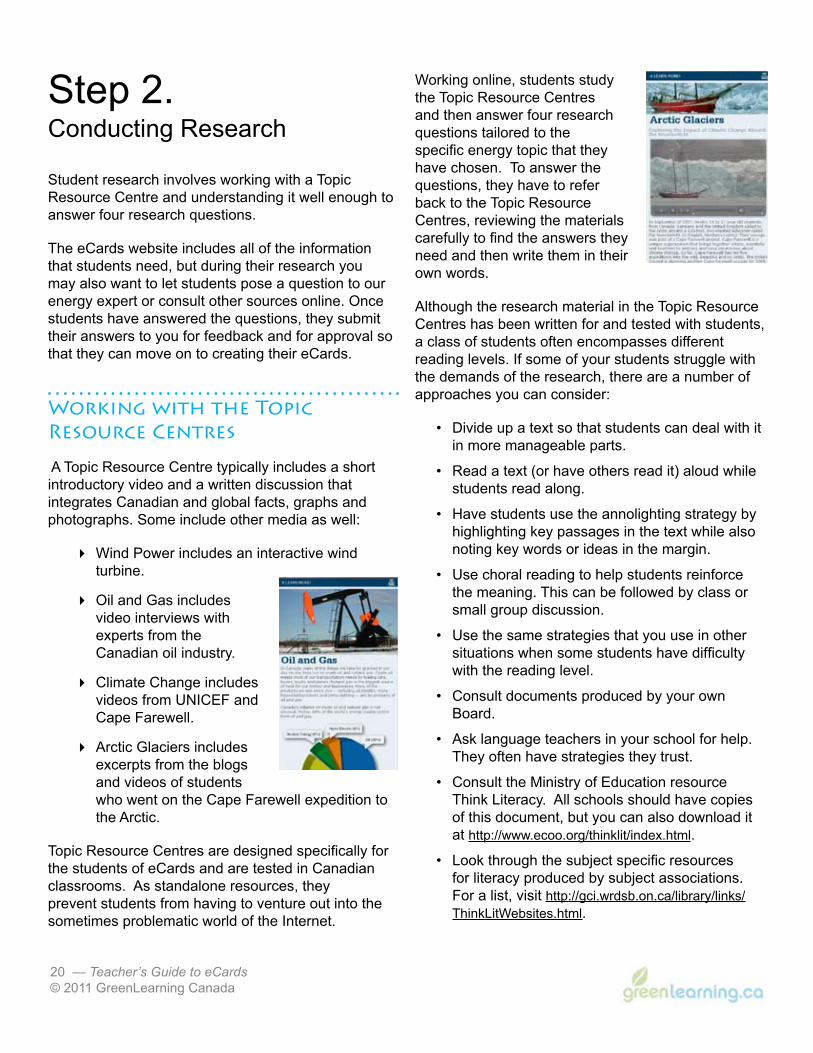
A Topic Resource Centre typically includes a short introductory video and a written discussion that integrates Canadian and global facts, graphs and photographs. Some include other media as well:
Wind Power includes an interactive wind �turbine.
Oil and Gas includes �video interviews with experts from the Canadian oil industry.
Climate Change includes �videos from UNICEF and Cape Farewell.
Arctic Glaciers includes �excerpts from the blogs and videos of students who went on the Cape Farewell expedition to the Arctic.
Topic Resource Centres are designed specifically for the students of eCards and are tested in Canadian classrooms. As standalone resources, they prevent students from having to venture out into the sometimes problematic world of the Internet.
Working online, students study the Topic Resource Centres and then answer four research questions tailored to the specific energy topic that they have chosen. To answer the questions, they have to refer back to the Topic Resource Centres, reviewing the materials carefully to find the answers they need and then write them in their own words.
Although the research material in the Topic Resource Centres has been written for and tested with students, a class of students often encompasses different reading levels. If some of your students struggle with the demands of the research, there are a number of approaches you can consider:
Divide up a text so that students can deal with it • in more manageable parts.
Read a text (or have others read it) aloud while • students read along.
Have students use the annolighting strategy by • highlighting key passages in the text while also noting key words or ideas in the margin.
Use choral reading to help students reinforce • the meaning. This can be followed by class or small group discussion.
Use the same strategies that you use in other • situations when some students have difficulty with the reading level.
Consult documents produced by your own • Board.
Ask language teachers in your school for help. • They often have strategies they trust.
Consult the Ministry of Education resource • Think Literacy. All schools should have copies of this document, but you can also download it at http://www.ecoo.org/thinklit/index.html.
Look through the subject specific resources • for literacy produced by subject associations. For a list, visit http://gci.wrdsb.on.ca/library/links/ThinkLitWebsites.html.
21 — Teacher’s Guide to eCards © 2011 GreenLearning Canada
Using the Ask an Expert Feature
Ask an Expert is an optional feature of eCards that allows students to supplement their research by consulting an energy expert associated with the eCards project. The expert will respond to email messages from students if they have specific requests for further information. Students can access this feature while working on their research questions by clicking on Ask an Expert.
GreenLearning has an acknowledged reputation for balanced, research-based information on a wide range of energy issues. Our staff experts are chosen not only for their ability to answer questions with a quick turnaround time, but also for their experience with schools and young people which allows them to make age-appropriate responses that are clear and helpful.
Although Ask an Expert is an optional feature of eCards, you may want to build it in as a mandatory step in the research process. Students can send individual questions, or the whole class can work together to create a single good question for the expert.
Alternatively, students in small groups can compare notes on how far they have progressed in their research and then compose a shared question to send to the expert that will help them for the next class.
Extend the research phase of eCards by composing Ask an Expert questions as a class or in small groups. You can typically expect the expert to reply to student questions within 24 hours. All responses will be directed to your email address.
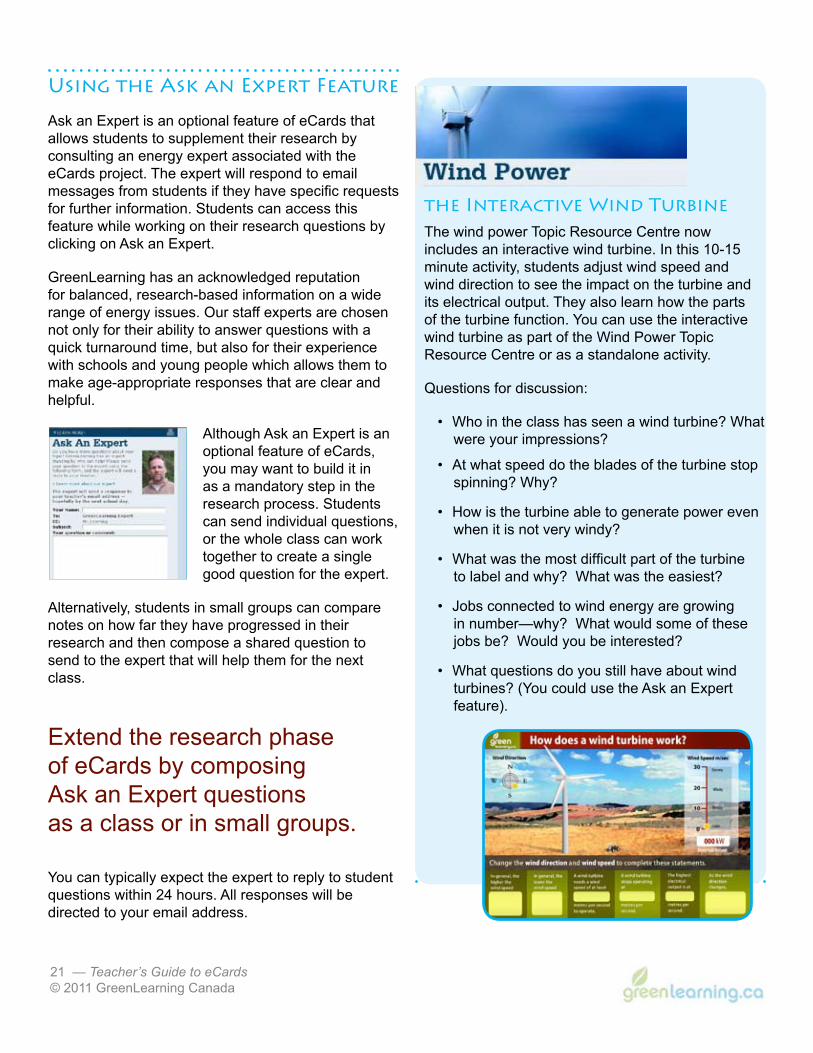
A Note on
the Interactive Wind TurbineThe wind power Topic Resource Centre now includes an interactive wind turbine. In this 10-15 minute activity, students adjust wind speed and wind direction to see the impact on the turbine and its electrical output. They also learn how the parts of the turbine function. You can use the interactive wind turbine as part of the Wind Power Topic Resource Centre or as a standalone activity.
Questions for discussion:
Who in the class has seen a wind turbine? What • were your impressions?
At what speed do the blades of the turbine stop • spinning? Why?
How is the turbine able to generate power even • when it is not very windy?
What was the most difficult part of the turbine • to label and why? What was the easiest?
Jobs connected to wind energy are growing • in number—why? What would some of these jobs be? Would you be interested?
What questions do you still have about wind • turbines? (You could use the Ask an Expert feature).
22 — Teacher’s Guide to eCards © 2011 GreenLearning Canada
Bringing in Other Sources
The eCards project is designed as a standalone teaching resource to prevent you from having to direct your students to other research sources on the web. If you do want your students to do further web-based research, however, or if you want to consult other sources yourself, consider these credible organizations:
Energy Generally
The SEEDS (Society, Environment and Energy �Development Studies) Foundation Energy Literacy Series
http://www.seedsfoundation.ca/energyliteracyseries2.html
Created by an Alberta-based organization that addresses the topic of climate change to schools, this website provides interactive modules on ten energy topics.
The Pembina Institute’s Renewable Energy website �
http://re.pembina.org/
This site contains comprehensive information about renewable energy sources, the benefits of renewable energy, and Canada’s involvement in the transition to a renewable energy future.
Ministry of Energy Renewable Energy information �
http://www.energy.gov.on.ca/index.cfm?fuseaction=renewable.faqs
Written for the general public, this FAQ (frequently asked questions) webpage contains answers to eight common questions about renewable energy.
Wind Energy
Canadian Wind Energy Association �
http://www.canwea.ca/
Representing Canada’s wind energy businesses and related organizations, this website includes news, videos and pages of information.
Wind Web Tutorial �
http://www.awea.org/faq/
Created by the American Wind Energy Association, this site looks at many aspects of wind energy such as the basics, the costs and the potential.
re-energy.ca �
http://www.re-energy.ca/t_windenergy.shtml
This accessible Canadian site contains background information, useful links and even instructions on building a model wind turbine.
Solar Energy
Solar Today Magazine �
http://ases.org/index.php?option=com_content&view=article&id=14&Itemid=22
This online magazine from the American Solar Energy Society gives news of the extensive expansion of solar power and new scientific innovations in its use. These short, accessible articles on many aspects of solar power have an American focus.
Solar Design Associates �
http://www.solardesign.com/index.html
Created by a U.S. business that helps design solar houses and buildings, this website includes a virtual tour of a solar house.
Solar Energy �
http://www.re-energy.ca/t_solarelectricity.shtml
This rich Canadian site includes a lot of accessible information, including links to other useful sites.
Nuclear Power
The Pembina Institute’s � Nuclear Power in Canada: An Examination of Risks, Impacts and Sustainability
http://www.pembina.org/pubs/pub.php?id=1346
This report provides a thorough academic study of the environmental impact of nuclear power through all stages of its production.
NuclearInfo.net �
http://nuclearinfo.net/
Developed by physicists in Australia, this website offers information to the general public about the risk and benefits of nuclear power.
Nuclear Basics 101 �
http://www.eia.doe.gov/basics/nuclear_basics.html
Created by the U.S. government’s Energy Information Administration, this website includes a wide range of information aimed at middle school students.
23 — Teacher’s Guide to eCards © 2011 GreenLearning Canada
Oil & Gas
The Centre for Energy �
http://www.centreforenergy.com/
This site has extensive resources for teachers and students. The Centre for Energy is a Canadian not-for-profit centre that works with different parts of the industry to explore energy and environmental issues and develop educational materials.
ASPO International �
http://www.peakoil.net/
The Association for the Study of Peak Oil is a network of scientists and others who study the concept and consequences of peak oil.
The World Petroleum Council �
http://www.world-petroleum.org/index.htm
The World Petroleum Council seeks solutions to the technical, environmental and social challenges the petroleum industry faces by promoting dialogue among all members of the industry.
Air Aware
Clean Air Champions, Air Aware Program �
http://www.airaware.net
Clean Air Champions’ Air Aware program is targeted to grades 10 to 12 and focuses on air quality and active living. The site includes curriculum connections for grades 10 to 12; a number of games, activities, and backgrounders on air quality; as well as links to curriculum-aligned resources such as Air Aware eCards.
Environment Canada, Clean Air Site �
http://www.amnh.org/exhibitions/climatechange/?src=h_h
Environment Canada offers a thorough discussion of air pollution issues including sources of pollution, its impacts, and ways to take action. The site also connects you to Environment Canada’s Air Quality Health Index (AQHI) which offers forecasts of Local Conditions.
Health Canada, Let’s Talk About Air Quality �
http://www.climatechangeeducation.org
Health Canada offers thorough and current information about air quality and air pollutants, with an emphasis on the impact of air pollution on human health.
Climate Change
Unite for Climate �
http://www.uniteforclimate.org
This site offers an entry point into youth-powered solutions on climate change. It links to campaigns of climate-change initiatives involving youth from around the world and houses a library of media on climate change.
American Museum of Natural History: Climate Change �
http://www.amnh.org/exhibitions/climatechange/?src=h_h
This website offers interactive features that mirror the museum’s in situ exhibits, complete with charts, informative text, graphs, and an activity that has users learn about the greenhouse effect by building a terrarium. The site also offers a Climate Change Guide for Educators.
ClimateChangeEducation.org �
http://www.climatechangeeducation.org
This volunteer-run portal site lists climate change resources from around the globe and includes a catalogue of K–12 climate change resources across subject areas.
Intergovernmental Panel on Climate Change (IPCC) �
http://www.ipcc.ch/
The IPCC is the global source of information on climate change. See the Synthesis Report for its assessment and summary of the work of thousands of the world’s most respected climate scientists.
The Pembina Institute �
http://climate.pembina.org
The Pembina Institute’s climate change website reports on Canadian climate change issues and solutions. The site includes fact sheets, policy papers, research reports, and media releases.

24 — Teacher’s Guide to eCards © 2011 GreenLearning Canada
Energy Success Stories
CETC (CAMNET Energy Technology Centre) Success �Stories
http://canmetenergy-canmetenergie.nrcan-rncan.gc.ca/eng/index.html
This Natural Resources Canada site highlights on-going success stories involving CETC and covers a wide range of energy issues.
David Suzuki Foundation �
http://www.davidsuzuki.org/Climate_Change/Solutions/
The website of this well-respected organization lists solutions in different categories: Industry, Transportation, Urban Planning, Buildings, and Green Leaders.
Arctic Glaciers
Cape Farewell Youth Expedition, September 14–23, �2007
http://voyage4.capefarewell.com
The Cape Farewell site offers an extensive range of materials about the 2007 youth expedition to the Arctic aboard the Noorderlicht. The site includes photo and video galleries as well as blog entries and video diaries.
Centre for Glaciology, Aberystwyth University �
http://www.aber.ac.uk/~glawww/arctic.shtm
This site contains ample information about Arctic Glaciers and addresses why it is important to study them.
Giving Feedback
When students have answered all four research questions, they click a button to indicate that their work is complete which sends it to you for review. Next to the eCards in the Class Gallery, you will now see a Review button. Click it to see a student’s answers. A student needs your approval before moving on to the next step in the process, creating the message and graphics.
To decrease the amount of time you spend giving feedback, consider working with a list of frequent comments. If you save them in a file on your word processor, you can select them and personalize them
with additional comments as you move from one student to the next. If your students submit their topic questions to you in hard copy, you could print out the list and check the comments that apply, adding comments as you see fit.
These are some of the comments you might anticipate:
You need to include more detail in your answer • to this question.
You need to include more evidence to back up • your opinions.
Be careful of grammatical errors.•
Be careful of spelling errors.•
Please revise this and re-submit it.•
Please revise this on paper and hand it in to me.•
Please meet with me to go over this material.•
Once students have your approval, they can begin to create their eCards.
Step 3. Creating Content
With their research complete, students think about what they have learned and decide what idea they want to communicate and to whom. They come up with a plan, which they send to you in the form of answers to three questions, and then they proceed to write their message and title and to design the graphics that will accompany them.
The Plan
To help students come up with an eCard plan, you may want to give them some time in small discussion groups to think aloud about what they want to say in their eCard and to get peer feedback on their ideas. If you circulate as the groups are talking, you can hear some of the ideas and encourage any students who are having trouble.
25 — Teacher’s Guide to eCards © 2011 GreenLearning Canada
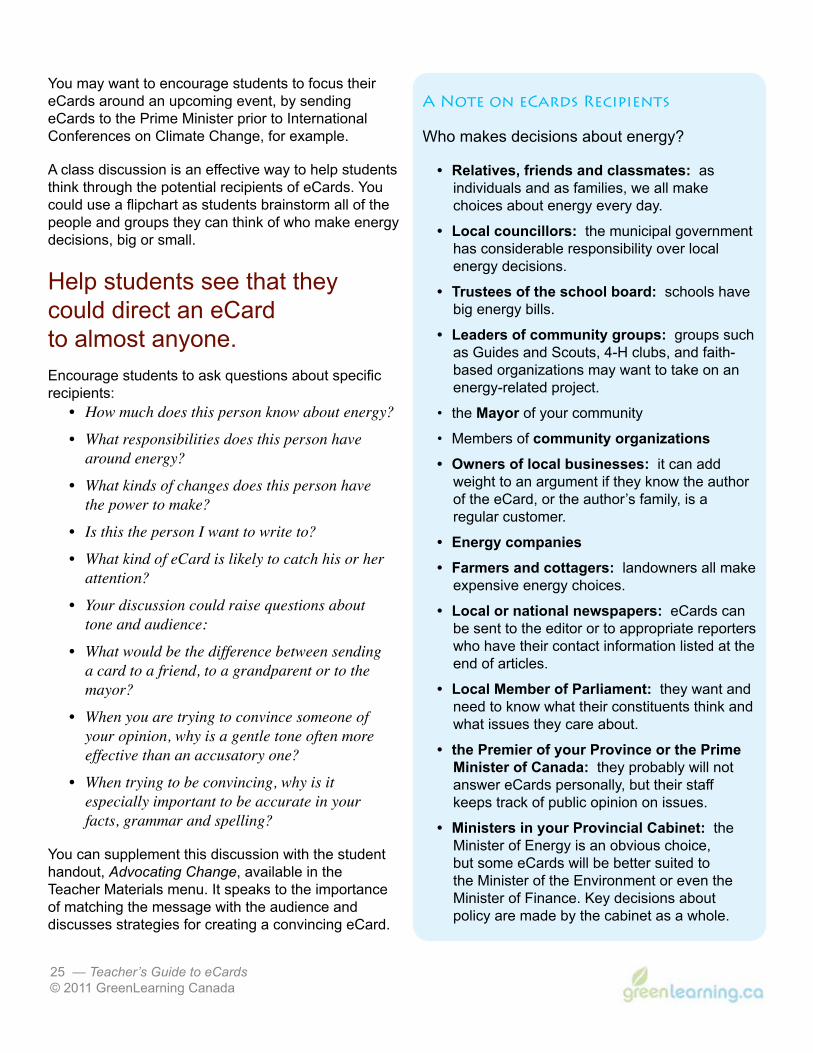
You may want to encourage students to focus their eCards around an upcoming event, by sending eCards to the Prime Minister prior to International Conferences on Climate Change, for example.
A class discussion is an effective way to help students think through the potential recipients of eCards. You could use a flipchart as students brainstorm all of the people and groups they can think of who make energy decisions, big or small.
Help students see that they could direct an eCard to almost anyone.Encourage students to ask questions about specific recipients:
How much does this person know about energy?•
What responsibilities does this person have • around energy?
What kinds of changes does this person have • the power to make?
Is this the person I want to write to?•
What kind of eCard is likely to catch his or her • attention?
Your discussion could raise questions about • tone and audience:
What would be the difference between sending • a card to a friend, to a grandparent or to the mayor?
When you are trying to convince someone of • your opinion, why is a gentle tone often more effective than an accusatory one?
When trying to be convincing, why is it • especially important to be accurate in your facts, grammar and spelling?
You can supplement this discussion with the student handout, Advocating Change, available in the Teacher Materials menu. It speaks to the importance of matching the message with the audience and discusses strategies for creating a convincing eCard.
A Note on eCards Recipients
Who makes decisions about energy?
Relatives, friends and classmates:• as individuals and as families, we all make choices about energy every day.
Local councillors:• the municipal government has considerable responsibility over local energy decisions.
Trustees of the school board: • schools have big energy bills.
Leaders of community groups:• groups such as Guides and Scouts, 4-H clubs, and faith-based organizations may want to take on an energy-related project.
the • Mayor of your community
Members of• community organizations
Owners of local businesses:• it can add weight to an argument if they know the author of the eCard, or the author’s family, is a regular customer.
Energy companies•
Farmers and cottagers:• landowners all make expensive energy choices.
Local or national newspapers:• eCards can be sent to the editor or to appropriate reporters who have their contact information listed at the end of articles.
Local Member of Parliament: • they want and need to know what their constituents think and what issues they care about.
the Premier of your Province or the Prime •Minister of Canada: they probably will not answer eCards personally, but their staff keeps track of public opinion on issues.
Ministers in your Provincial Cabinet: • the Minister of Energy is an obvious choice, but some eCards will be better suited to the Minister of the Environment or even the Minister of Finance. Key decisions about policy are made by the cabinet as a whole.
26 — Teacher’s Guide to eCards © 2011 GreenLearning Canada
When students are ready with their ideas, they describe their plans online by answering three questions:
1. Who are you choosing to send your eCard to and why?
2. Explain your choice of image. What are you trying to convey?
3. Is your message consistent with your image and chosen recipient?
The Message
Working online or at their desks, students write a message of approximately 100–200 words and also generate a title for their eCard. As they do so, they keep the intended audience of the card in mind.
Once students have completed a first draft, you could group them in pairs for peer editing sessions. They can help each other assess the effectiveness of their messages and titles, and you can circulate among them to see how they are doing.
The Graphics
The image is as important to an eCard as the message because it is part of the message—graphics contribute to what an eCard communicates to its intended audience. To give students an opportunity to be creative and to avoid copyright infringements, we recommend that you work only with images that the students create themselves.
Student-created images can take different forms:
an image created using a computer �paint program
a digital photo �
a scanned drawing or painting made by hand. �
Students can take photos around the school or in the neighbourhood, or they can bring in photos of past trips. They can also create digital images by taking photographs of their own work: their posters, paintings, tableaus, sculptures, or installation art.
Likewise, with a scanner, students can create digital images of their work in other creative mediums: drawings, collages or paintings, for example.
Use a scanner or digital camera
to create a digital image of a student’s artwork.
27 — Teacher’s Guide to eCards © 2011 GreenLearning Canada
To encourage creativity and avoid copyright infringements, give students time to create their own images.
Depending on the availability of equipment and on your familiarity with it, you may have all students taking the same approach (e.g., all students draw their image and then scan it into a computer file) or you may opt to have students make a choice. Refer to the Technical Requirements section of this Teacher’s Guide for a discussion of the accessibility and availability of these approaches.
In class, you can provide students with the handout Creating Images, available on the Teacher Materials menu. Students taking the same approach can be grouped together to work with the instructions.
Whatever approach students take, they need to end up with a saved .jpg file that they can upload into their eCard. Remind students to save their .jpg files somewhere accessible.
Step 4. Assembling & Sending eCards
When students have assembled a carefully crafted title, well-written text and an image that they created, they can preview their eCards and make further revisions as they see fit. This point in the process marks another good opportunity for peer review: in pairs or groups of three, students can compare notes and help one another identify areas for possible improvement.
When they are happy with their eCards, students click a button to submit their eCards to you for your final approval.
Once you have approved an eCard, it is ready to be sent. In this last step of the eCards process, students are prompted to enter the recipient’s email address and to add any comments they want to include as the sender. They double-check their work and then press send.
A sent eCard first goes to the teacher’s email address so that you can take a quick look to approve the sending of the eCard to a particular recipient. You can check to ensure that a student does not include an inappropriate comment with their eCard, intentionally or unintentionally.
Likewise, when students send one of their classmate’s eCards from the Class Gallery, it comes to your email address first for a quick one-click approval.
Step 5. Assessing eCards & Wrapping Up
You can conclude the eCards project when students send their eCards or go on to use an assessment rubrics and/or wrap-up activities.
Assessment Rubrics
The eCards project meets provincial requirements while incorporating the latest research on assessment. Teachers give feedback to students throughout the research and creation process. Assessment rubrics are also available for evaluating students’ work in the project as a whole.You will find assessment rubrics for Alberta (Science, Social Studies, Language Arts) and Ontario (Geography, Language Arts, Media Literacy) under the Teacher Materials menu. Look for rubrics for other provinces in upcoming releases of eCards.
28 — Teacher’s Guide to eCards © 2011 GreenLearning Canada
As part of your assessment process, you could involve the whole class in a discussion about what worked and what could be improved upon. You could give students an opportunity to improve their eCards and to participate in peer-to-peer assessment.
Other Wrap-Up Activities
1. Explore the Class Gallery or the eCards Showcase
Consider making use of the eCards in your Class Gallery or the eCards Showcase to wrap up the eCards project. Students can read one another’s eCards in the Class Gallery, learning from one another’s work as they do so. Alternatively, they can review eCards created by students in other classes that have been posted to the eCards Showcase.
If you want your class to be able to access the eCards
Showcase, enable it under Edit Classroom in the
Classroom Accounts menu.
Ask students to choose one other student’s eCard to send. They can explain to the class, or in their notebooks, why they chose the one they did. Ask students to determine where they will send the eCard. Encourage students once again to reflect on the wide range of people who make energy choices and decisions. Also remind them of the importance of matching the message of an eCard with its recipient.
When students send a classmate’s eCard or a card from the eCards Showcase, they enter their own email address, a recipient’s email address and, if they like, a personal comment. Prior to being sent, all eCards sent from the Class Gallery come to your email address for a quick one-click approval.
2. Discuss the replies to sent eCards
Consider setting aside class time for students to report on the responses they get to their eCards. Pose questions to the students in small groups, and then share the answers as a class:
Are you satisfied with the response that you received to your eCard? Is it what you expected?
What tone did the recipient respond with? Did politicians and officials answer with a different tone than friends, relatives and community members?
Was your eCard persuasive? Did the title, message and graphics of your eCard work together to convince the recipient of your ideas?
As you look back on your eCard, would you do anything differently next time?
How could this activity be better for students?
3. Create an energy bulletin board
Keep students engaged in thinking about energy by creating a classroom bulletin board for media coverage of the energy topics they investigated. Students can look for items individually or in groups. They can also print and post the replies they get to their eCards.

29 — Teacher’s Guide to eCards © 2011 GreenLearning Canada
4. Nominate exemplary ecards to the eCards Showcase
You can nominate as many as three eCards from each class to the eCards Showcase—a collection of exemplary eCards from classes all over Canada. As a wrap-up activity, the class could make this selection together, weighing some of the strengths and weaknesses of the eCards in your Class Gallery and then selecting the one (or two or three) to nominate.
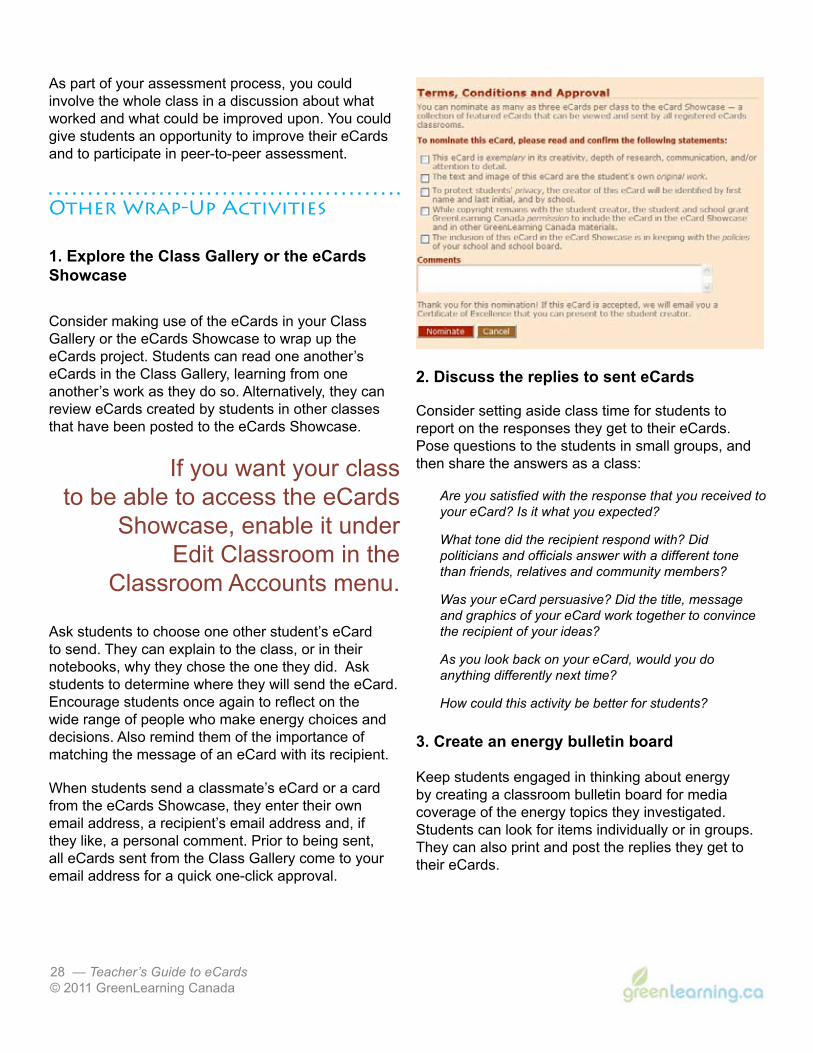
Only teachers can nominate eCards to the eCards Showcase. When you do so, you will be prompted to read and confirm a number of statements to attest to the originality of the eCard and to clarify issues of permission, privacy, school policy and copyright.
For copyright reasons, only eCards with original student graphics are eligible for the eCards Showcase.
If the eCard(s) you nominate are accepted to the eCards Showcase, you will be notified by email.
The eCards Showcase is accessible to all registered eCards teachers. You can enable or disable student access to the eCards Showcase using Edit Classroom in the Classroom Accounts menu.
�A Note on the New Teacher Forum Coming Soon!
The eCards Teachers Forum is a virtual meeting place for eCards teachers. There, teachers share ideas, ask questions, post files and generally support one another in teaching eCards.
You may want to use the Teacher Forum to:
see what �teachers are saying about eCards
learn about the �different ways that teachers introduce eCards to their classes
discuss standalone application ideas for the �interactive wind turbine
suggest classroom activities that involve �the eCards Showcase
identify eCards curriculum links in your �province
offer advice about how a class can share �a digital camera
share assessment ideas �
look for another class to work with �collaboratively on eCards
troubleshoot and pose questions. �
The Teacher Forum also provides you with a direct link to the eCards development team. We will keep you posted on upcoming eCards professional development workshops, and other GreenLearning workshops, in your area. We will also let you know about eCards developments and opportunities to test new eCards resources in your classroom.
30 — Teacher’s Guide to eCards © 2011 GreenLearning Canada
Dick Holland
Dick is a pre-service instructor at the Ontario Institute for Studies in Education at the University of Toronto (OISE/UT) and a teacher with the Toronto District School Board. He has worked extensively in schools in Ontario as a curriculum designer, teacher, departmental head, textbook and policy author, curriculum consultant, and workshop facilitator. Dick also consults internationally on global and environmental education.
Stephen MacKinnon
Stephen teaches at Athens District High School in the Upper Canada District School Board where his students have created a number of award-winning websites. Stephen has more than ten years experience as an online teacher. He has created and developed several educational internet projects including Musical Cyberfest as well as online learning materials for the Ontario Ministry of Education, Industry Canada, and Learning for a Sustainable Future.
The eCards Development Team
Gordon Harrison
Now the Executive Director of GreenLearning Canada, Gordon began his career as an environmental educator in the elementary classroom. Gordon then worked as education coordinator for Pollution Probe and a number of other environmental NGOs, and as an environmental consultant with Marbek Resource Consultants. He also developed programs including EcoScope for Sustaining Wetlands as well as the education component of the Canada India Rural Energy Project.