test-driven development with go - leanpubsamples.leanpub.com/golang-tdd-sample.pdf ·...
TRANSCRIPT

Test-driven developmentwith Go
Yigal Duppen
Test-driven development with Go
Yigal Duppen
This book is for sale at http://leanpub.com/golang-tdd
This version was published on 2014-02-07
This is a Leanpub book. Leanpub empowers authors and publishers with the Lean Publishingprocess. Lean Publishing is the act of publishing an in-progress ebook using lightweight tools andmany iterations to get reader feedback, pivot until you have the right book and build traction onceyou do.
©2014 Yigal Duppen
Contents
Introduction . . . . . . . . . . . . . . . . . . . . . . . . . . . . . . . . . . . . . . . . . . . . 1The product vision . . . . . . . . . . . . . . . . . . . . . . . . . . . . . . . . . . . . . . . 1Intended audience . . . . . . . . . . . . . . . . . . . . . . . . . . . . . . . . . . . . . . . . 1Requirements . . . . . . . . . . . . . . . . . . . . . . . . . . . . . . . . . . . . . . . . . . 2About the code samples . . . . . . . . . . . . . . . . . . . . . . . . . . . . . . . . . . . . . 2
Hello World . . . . . . . . . . . . . . . . . . . . . . . . . . . . . . . . . . . . . . . . . . . . 5Your first Go program . . . . . . . . . . . . . . . . . . . . . . . . . . . . . . . . . . . . . . 5Compiling the program . . . . . . . . . . . . . . . . . . . . . . . . . . . . . . . . . . . . . 5Code style and go fmt . . . . . . . . . . . . . . . . . . . . . . . . . . . . . . . . . . . . . 7A first skeleton for generating QR codes . . . . . . . . . . . . . . . . . . . . . . . . . . . . 7Wrapping up . . . . . . . . . . . . . . . . . . . . . . . . . . . . . . . . . . . . . . . . . . . 9
Test-driven development . . . . . . . . . . . . . . . . . . . . . . . . . . . . . . . . . . . . . 10Writing tests in Go . . . . . . . . . . . . . . . . . . . . . . . . . . . . . . . . . . . . . . . 10Red, Green, Refactor . . . . . . . . . . . . . . . . . . . . . . . . . . . . . . . . . . . . . . 13Testing error handling . . . . . . . . . . . . . . . . . . . . . . . . . . . . . . . . . . . . . 19Wrapping up . . . . . . . . . . . . . . . . . . . . . . . . . . . . . . . . . . . . . . . . . . . 24
Creating QR codes . . . . . . . . . . . . . . . . . . . . . . . . . . . . . . . . . . . . . . . . . 25What is a QR code, exactly? . . . . . . . . . . . . . . . . . . . . . . . . . . . . . . . . . . 25QR code terminology . . . . . . . . . . . . . . . . . . . . . . . . . . . . . . . . . . . . . . 25Creating a QR code . . . . . . . . . . . . . . . . . . . . . . . . . . . . . . . . . . . . . . . 26Introducing versions . . . . . . . . . . . . . . . . . . . . . . . . . . . . . . . . . . . . . . 26Wrapping up . . . . . . . . . . . . . . . . . . . . . . . . . . . . . . . . . . . . . . . . . . . 31
IntroductionGeneral intro blurb; why this book?; blah blah Go
The product vision
In this book I will show you how to create an online service to generate QR codes, using nothingbut Go and its standard libraries.
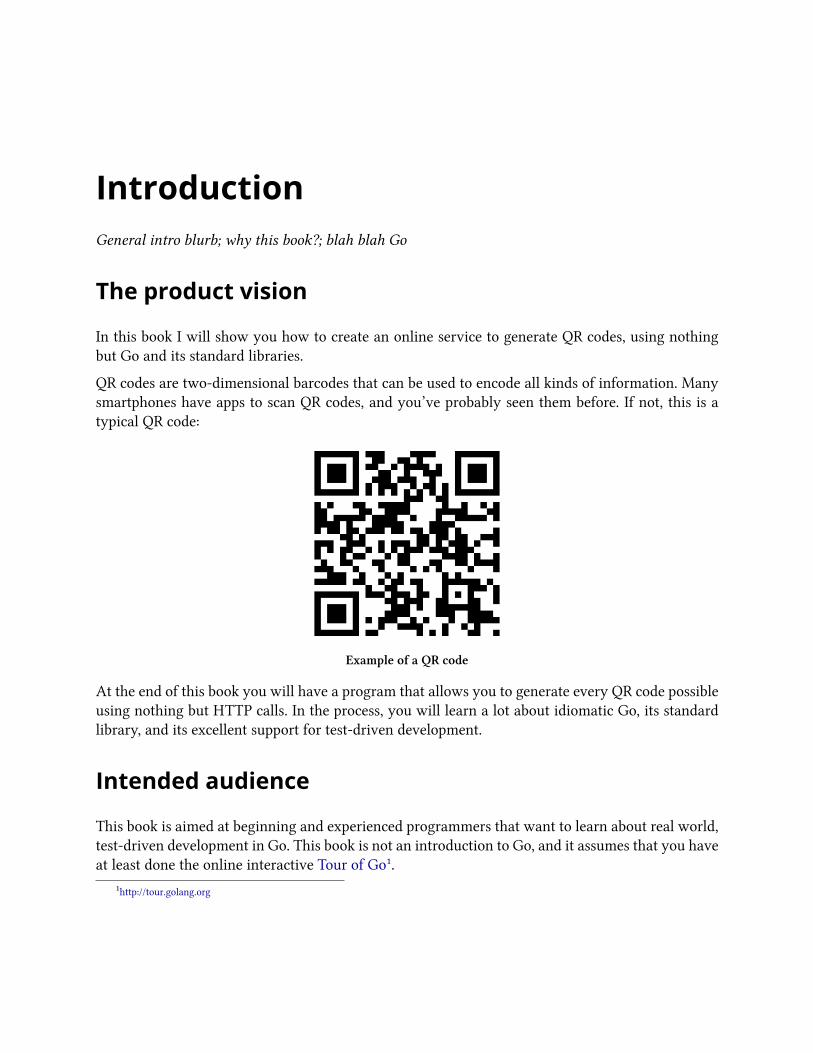
QR codes are two-dimensional barcodes that can be used to encode all kinds of information. Manysmartphones have apps to scan QR codes, and you’ve probably seen them before. If not, this is atypical QR code:
Example of a QR code
At the end of this book you will have a program that allows you to generate every QR code possibleusing nothing but HTTP calls. In the process, you will learn a lot about idiomatic Go, its standardlibrary, and its excellent support for test-driven development.
Intended audience
This book is aimed at beginning and experienced programmers that want to learn about real world,test-driven development in Go. This book is not an introduction to Go, and it assumes that you haveat least done the online interactive Tour of Go¹.
¹http://tour.golang.org
Introduction 2
Requirements
It is possible to read this book without every touching anything but your e-reader. However, if youwant a more interactive experience you can build all the samples in this book with just a few tools:
Go It might seem obvious, but Go is the number one dependency for this book. You can downloadit from the Gowebsite². If you’re working on OS X, you can install Go using Homebrew³. MostLinux distributions provide Go packages for their package manager.
A command line shellUsing Go is best done using the command line. You should have a Bash-compatible shell atyour disposal to replay the samples in this book. Most Linux installations have Bash as theirdefault shell; OS X users can use Terminal.app; and Windows users can download Cygwin⁴or Git Bash⁵.
An editorFinally, you need an editor to write your Go code. There is a large number of options here,but Sublime Text⁶ seems to be very popular. The default Go installation comes with excellentplugins or Emacs and Vim.
About the code samples
Go code
This book contains a lot of code samples. Go code is the most prominent, and such code is alwaysannotated with a filename and line numbers; these numbers do not necessarily start at 1, but refer tothe position in the file at the time of writing. Each fragment will contain the filename as its header,and it is usually followed by some plain text annotations.
fragment.go
17 func (r *Receiver) MyFunc() err {
18 print("Anything")
19 print("Even more")
20 }
17 Some interesting information about line 17
²http://golang.org³http://brew.sh⁴http://www.cygwin.com⁵http://msysgit.github.io⁶http://www.sublimetext.com

Introduction 3
17–20Some interesting information about the entire code block from line 17 up to (and including)line 20.
Sometimes a code samples lacks line numbers –- in such cases, the code is not actually included inthe source code, but is meant to make a point.
go fmt highlights operator precedence
func Hypothetical(a b c int) int {
return 4*a*a + (b*c)/2
}
Command line sessions
Software development is an interplay between your editor and your command line. Relevantcommand line sessions are also included in this book, and presented like this:
An interactive command line session
$ echo "Hello world"
Hello world
$ cat HelloWorld.txt
cat: HelloWorld.txt: No such file or directory
Command line sessions do not have line numbers, and always use $ to indicate the prompt.
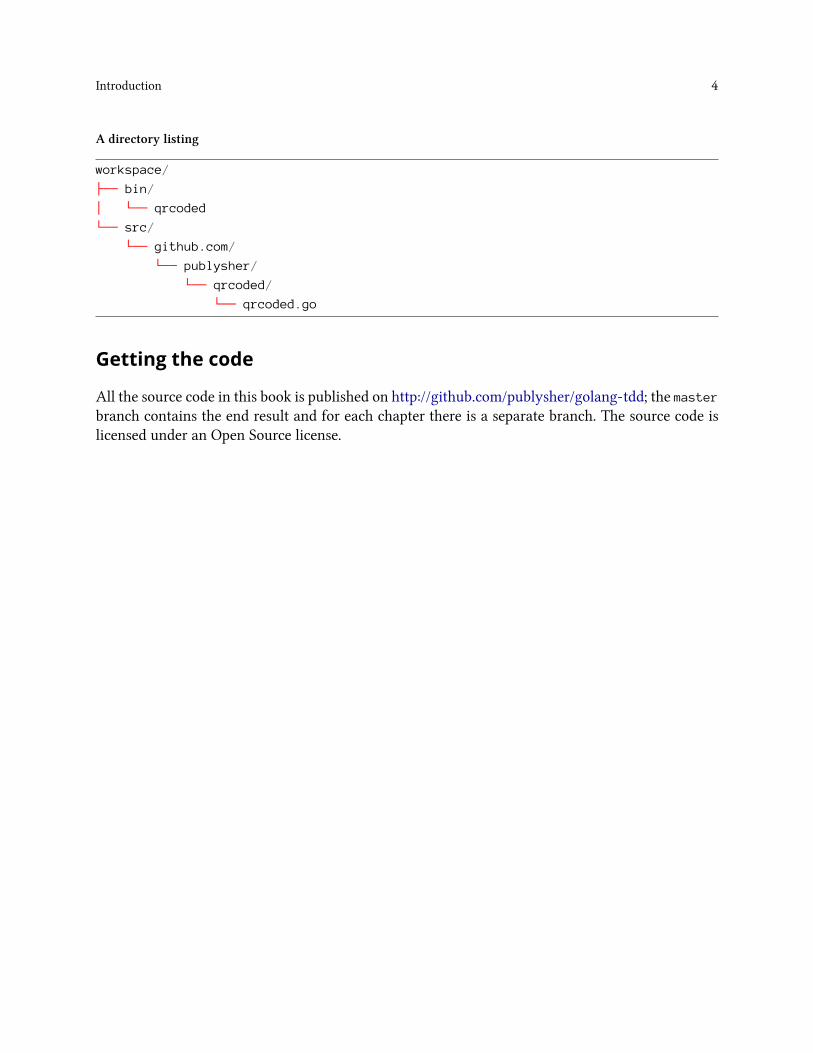
Directory listings
In a few cases I have to refer to directory listings. These are always rooted in workspace, the generalname for the directory where you store your source code.
Introduction 4
A directory listing
workspace/
├── bin/
│ └── qrcoded
└── src/
└── github.com/
└── publysher/
└── qrcoded/
└── qrcoded.go
Getting the code
All the source code in this book is published on http://github.com/publysher/golang-tdd; the masterbranch contains the end result and for each chapter there is a separate branch. The source code islicensed under an Open Source license.
Hello WorldIn the best tradition of computer programming, I will start with a simple “Hello world” program.Using this program I will introduce you to the Go toolchain.
Your first Go program
Writing Go starts with creating a new workspace, the directory where you will store all your Gocode. Fire up an editor, create a new file called qrcoded.go⁷ in your workspace and make sure itlooks like this:
qrcoded.go
1 package main
2
3 import "fmt"
4
5 func main() {
6 fmt.Println("Hello QR Code")
7 }
If you have done the online Tour of Go⁸, this program will not pose any mystery to you. However,where the Tour of Go uses the interactive Go Playground, this book will use the command line tocompile, test and run your program.
Compiling the program
Go is a compiled language, and running the program requires compiling it first. This is done using thego build command, which compiles your program into an executable. The name of the executable isidentical to the name of the Go source file containing the main() function. In this case, the resultingbinary is called qrcoded.
⁷qrcoded stands for QR code daemon; this is a Unix naming convention for programs intended to run in the background.⁸You really should do the Tour of Go if you want to fully appreciate the code samples. It can be found at http://tour.golang.org

Hello World 6
Using go build
$ go build qrcoded.go
$ ls
qrcoded qrcoded.go
$ ./qrcoded
Hello QR Code
The go tool is the center of the Go ecosystem. It defines a number of commands to manage yoursoftware development, thus obviating the need for any kind of external build management tool.One of these commands is the clean command, which removes all compiled artefacts from yourworkspace:
Using go clean
$ ls
qrcoded qrcoded.go
$ go clean
$ ls
qrcoded.go
The go tool has many more subcommands, and I will cover most of them in this book. Twocommands deserve a special mention at this point: go help, which describes all available commands,and go run.
In the previous examples you might have noticed two things. In the first place, the “build, execute,clean” cycle is somewhat repetitive. And secondly, you might have noticed that the go build
command is fast. This is not just because you are compiling a simple program – the Go compiler isimpressively fast. In fact, a fast compile cycle was an essential part of Go’s design goals, and manydesign choices have been influenced by this goal.
The Go team has leveraged the speed of the compiler to make running your program even simpler:
Using go run
$ go run qrcoded.go
Hello QR Code

Hello World 7
Code style and go fmt
Most languages have continuing debates on stylistic issues such as the virtues of spaces versus tabs,the optimal location of curly braces, and the ordering of imports. While such a debate can be funfrom time to time, it’s not productive.
The Go designers have taken a firm stance on the preferred code style, defining a style that isoptimized for version control systems and code reviews. But instead of writing it down in a dustycorner of the internet, they have provided us with the go fmt tool:
Fixing formatting issues
$ go fmt qrcoded.go
qrcoded.go
You might have theoretical, aesthetical or even religious objections to the choices made by Go, butit’s a good idea to always go fmt your code. If only to prevent useless debates.
A first skeleton for generating QR codes
“HelloWorld” is a good way to get started, but it is still a long way from the eventual goal: generatingQR codes. So let’s take the next step, and see what a program for generating QR codes could looklike:
qrcoded.go
1 package main
2
3 import (
4 "fmt"
5 "io/ioutil"
6 )
7
8 func main() {
9 fmt.Println("Hello QR Code")
10
11 qrcode := GenerateQRCode("555-2368")
12 ioutil.WriteFile("qrcode.png", qrcode, 0644)
13 }
11 Using the classical software engineering technique called Wishful Thinking, I have assumedthe existence of a function that generates a QR code for a given input string. In this case theinput is a phone number⁹ and the expected output is an encoded PNG looking like this:
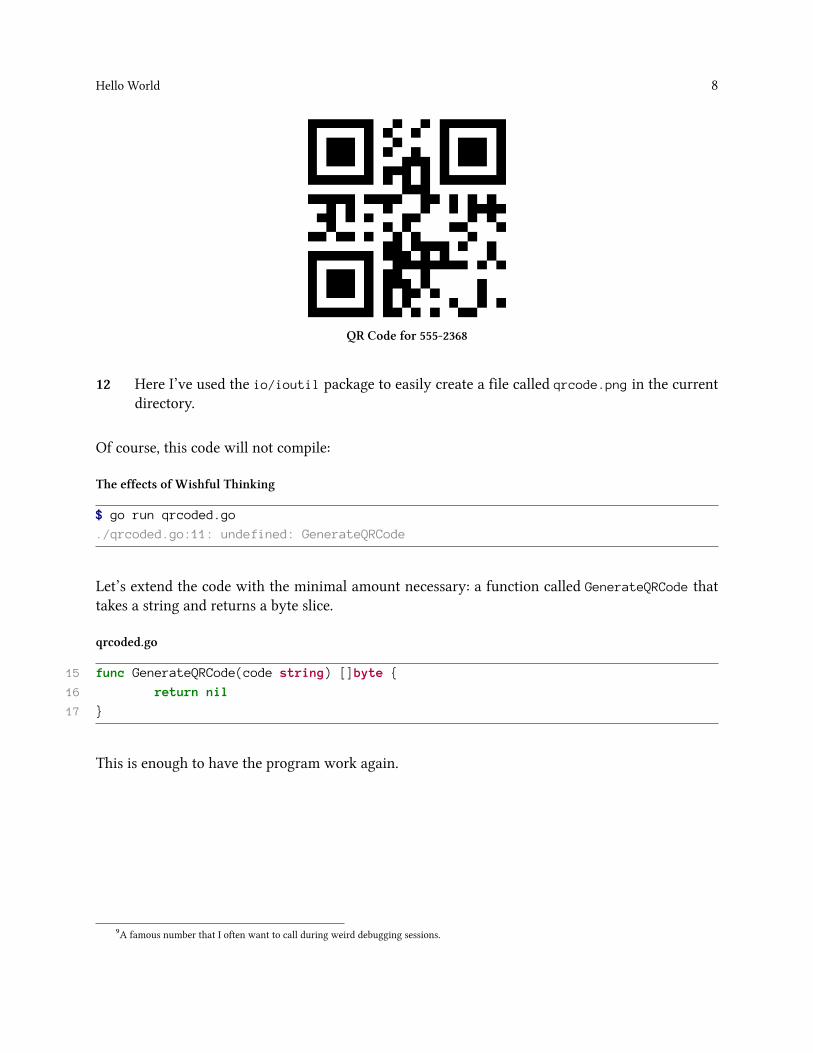
Hello World 8
QR Code for 555-2368
12 Here I’ve used the io/ioutil package to easily create a file called qrcode.png in the currentdirectory.
Of course, this code will not compile:
The effects of Wishful Thinking
$ go run qrcoded.go
./qrcoded.go:11: undefined: GenerateQRCode
Let’s extend the code with the minimal amount necessary: a function called GenerateQRCode thattakes a string and returns a byte slice.
qrcoded.go
15 func GenerateQRCode(code string) []byte {
16 return nil
17 }
This is enough to have the program work again.
⁹A famous number that I often want to call during weird debugging sessions.
Hello World 9
Creating a QR code
$ go run qrcoded.go
Hello QR Code
$ ls
qrcode.png qrcoded.go
$ file qrcode.png
qrcode.png: empty
Success! Our code is one step closer to generating QR codes.
From here on, you can slowly flesh out the GenerateQRCode function; at each iteration you can go
run the program and check the resulting file, either by using the file command or by opening it inan image editor and visually verifying that the correct QR code has been generated.
This is a perfectly valid approach, but I believe there is a better approach. It’s called test-drivendevelopment and it is the main subject of this entire book. Continue to the next chapter to see it inaction.
Wrapping up
In this chapter I have introduced the go command and a number of it’s most important subcom-mands:
go build
Compile the program into an executable.
go clean
Remove all compiled artefacts.
go run
Compile the program, execute it, and clean up the generated executable.
I have also extended the base program to provide aminimal structure for generating barcodes, pavingthe way for the centerpiece of this book: test-driven development in Go.
Test-driven developmentTest-driven development is a strict discipline for creating modular, well-designed and testable codewithout doing any upfront design. It achieves this by making you work in extremely short cycles:create an automated test, write the minimum amount of code to satisfy that test, and refactor yourcode to improve the quality. This approach ensures a few nice properties of the resulting code:
1. Starting with a test forces you to think about the intended behavior;2. Writing code based on a test forces you to write testable code;3. Immediately refactoring the result forces you to think about your code and how it fits in the
larger picture.
In this chapter I will describe how you can create an automated test suite with Go, and I will showtwo examples of the test, code, refactor cycle.
Writing tests in Go
Writing tests is completely integrated in Go through the go test tool. This command searches forfiles matching *_test.go and executes all functions that match a specific pattern. Let’s have a lookat go test:
Running go test
$ go test
? _/workspace/golang-tdd [no test files]
As you can see, go test complains about the absence of test files. This is correct, because therearen’t any files matching *_test.go. So go ahead and create a file called qrcoded_test.go:
qrcoded_test.go
1 package main
When you run go test again, the output is slightly different:
Test-driven development 11
Running go test with an empty test file
$ go test
testing: warning: no tests to run
PASS
ok _/workspace/golang-tdd 0.018s
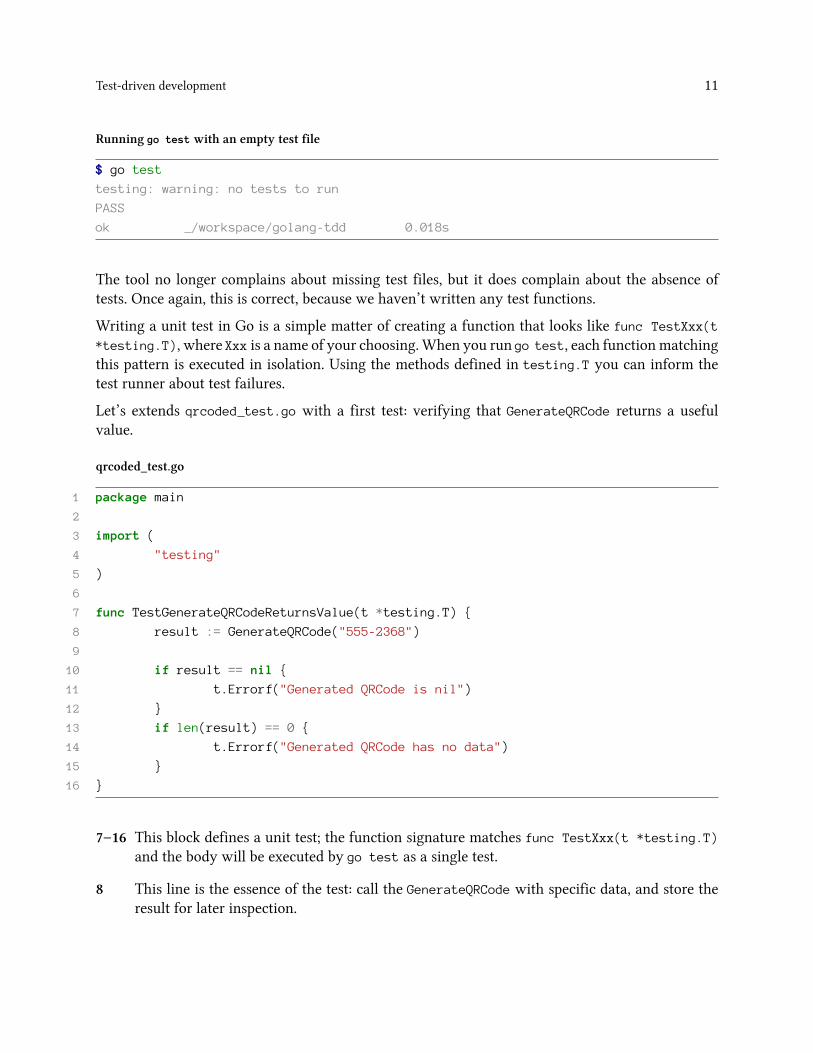
The tool no longer complains about missing test files, but it does complain about the absence oftests. Once again, this is correct, because we haven’t written any test functions.
Writing a unit test in Go is a simple matter of creating a function that looks like func TestXxx(t
*testing.T), where Xxx is a name of your choosing.When you run go test, each functionmatchingthis pattern is executed in isolation. Using the methods defined in testing.T you can inform thetest runner about test failures.
Let’s extends qrcoded_test.go with a first test: verifying that GenerateQRCode returns a usefulvalue.
qrcoded_test.go
1 package main
2
3 import (
4 "testing"
5 )
6
7 func TestGenerateQRCodeReturnsValue(t *testing.T) {
8 result := GenerateQRCode("555-2368")
9
10 if result == nil {
11 t.Errorf("Generated QRCode is nil")
12 }
13 if len(result) == 0 {
14 t.Errorf("Generated QRCode has no data")
15 }
16 }
7–16 This block defines a unit test; the function signature matches func TestXxx(t *testing.T)
and the body will be executed by go test as a single test.
8 This line is the essence of the test: call the GenerateQRCode with specific data, and store theresult for later inspection.
Test-driven development 12
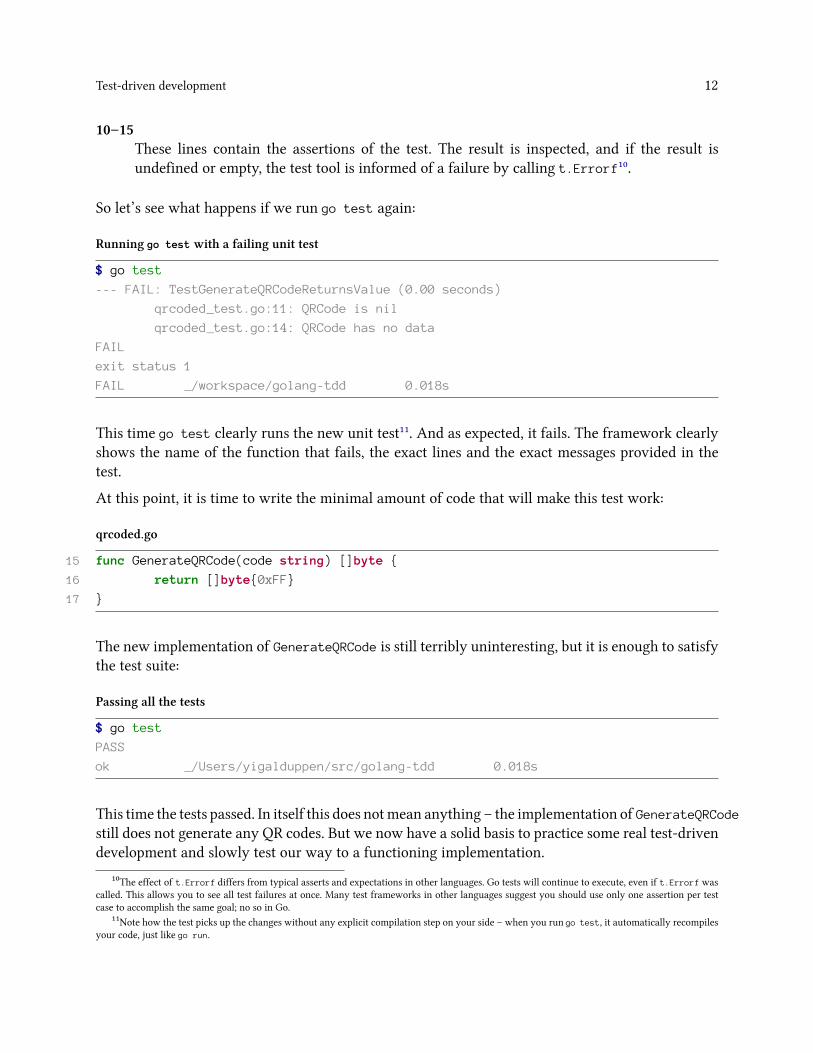
10–15These lines contain the assertions of the test. The result is inspected, and if the result isundefined or empty, the test tool is informed of a failure by calling t.Errorf¹⁰.
So let’s see what happens if we run go test again:
Running go test with a failing unit test
$ go test
--- FAIL: TestGenerateQRCodeReturnsValue (0.00 seconds)
qrcoded_test.go:11: QRCode is nil
qrcoded_test.go:14: QRCode has no data
FAIL
exit status 1
FAIL _/workspace/golang-tdd 0.018s
This time go test clearly runs the new unit test¹¹. And as expected, it fails. The framework clearlyshows the name of the function that fails, the exact lines and the exact messages provided in thetest.
At this point, it is time to write the minimal amount of code that will make this test work:
qrcoded.go
15 func GenerateQRCode(code string) []byte {
16 return []byte{0xFF}
17 }
The new implementation of GenerateQRCode is still terribly uninteresting, but it is enough to satisfythe test suite:
Passing all the tests
$ go test
PASS
ok _/Users/yigalduppen/src/golang-tdd 0.018s
This time the tests passed. In itself this does notmean anything – the implementation of GenerateQRCodestill does not generate any QR codes. But we now have a solid basis to practice some real test-drivendevelopment and slowly test our way to a functioning implementation.
¹⁰The effect of t.Errorf differs from typical asserts and expectations in other languages. Go tests will continue to execute, even if t.Errorf wascalled. This allows you to see all test failures at once. Many test frameworks in other languages suggest you should use only one assertion per testcase to accomplish the same goal; no so in Go.
¹¹Note how the test picks up the changes without any explicit compilation step on your side – when you run go test, it automatically recompilesyour code, just like go run.

Test-driven development 13
Red, Green, Refactor
In the previous section I created a test for code that was not under test before. This is very useful,but it is not the same as test-driven development. At the beginning of this chapter I explainedhow test-driven development is characterized by a well-defined cycle, commonly known as theRed/Green/Refactor cycle:
Red The cycle starts by writing a test that captures the new requirement; this test is expected tofail. Many tools display test failures in red, hence the name.
GreenThe cycle continues by writing the minimal amount of code necessary to satify the tests.This name too is derived from the fact that many tools display test success in green. Whenyou start practicing test-driven development, it is a common pitfall to write more than theminimal amount of code. Be aware of this, and keep asking yourself if you are doing morethan the minimum required.
RefactorThe latest step in the cycle is what makes test-driven development a viable process: it forcesyou to step back, to look at your code, and to improve its structure without adding anyfunctionality. The refactor step is not an optional step¹² – without this step your code willquickly degenerate into a well-tested but incomprehensible mess.
Let’s have a look at a real-world Red/Green/Refactor cycle by posing a new requirement: the byteslice returned by GenerateQRCode should represent a valid PNG image.
Red
The first step is to create a new test that captures this requirement. Broadly speaking, there are twoways of approaching this: you can either check if the first eight bytes match the magic header¹³ forPNGs, or you can just go ahead and decode the image – if an error occurs during decoding, youknow that the byte slice did not represent a PNG.
If you’re a paranoid reader, you might have detected a flaw in this reasoning: what if the decodingalgorithm contains a bug, which causes an error for perfectly valid PNGs? This is a valid concern,and it shows why test-driven development is not a magic solution to bugs. Test-driven developmentis a technique to develop your software; you will have to assume that dependencies outside yourscope, such as the Go standard library, work as advertised.
This assumption is carried on throughout this book, and it is the reason why this next test uses thedecode-to-see-if-it-works technique:
¹²At least not in test-driven development. If you ignore the refactoring step, you are practicing test-first development. This is also a viabledevelopment strategy, but it requires upfront design.
¹³Every PNG file starts with the bytes 0x89, 0x50, 0x4E, 0x47, 0x0D, 0x0A, 0x1A, 0x0A. If it doesn’t, it isn’t a PNG.

Test-driven development 14
qrcoded_test.go
13 func TestGenerateQRCodeGeneratesPNG(t *testing.T) {
14 result := GenerateQRCode("555-2368")
15 buffer := bytes.NewBuffer(result)
16 _, err := png.Decode(buffer)
17
18 if err != nil {
19 t.Errorf("Generated QRCode is not a PNG: %s", err)
20 }
21 }
1–12 In order to keep the code samples to the point, I will often show only the relevant part of afile. I will also omit any imports that are introduced by the code. In this case, the imports youdo not see are bytes and image/png.
13–21Here I have introduced an entirely new test function. This is not strictly required by theRed/Green/Refactor cycle – it is also perfectly valid to extend an existing test to capture thenew functionality.
16 This line contains the decoding logic: I decode the byte array, discarding any positive results,and focus on the error. The next three lines verify that this error did not occur. Note howpng.Decode does not work on byte slices but on types satisfying the io.Reader interface. Thisis why line 15 wraps the resulting byte slice in a bytes.Buffer.
Knowing the current state of the GenerateQRCode function, it is safe to assume that this will makethe test fail. Nevertheless, don’t do anything until you know for sure:
Going red
$ go test
--- FAIL: TestGenerateQRCodeGeneratesPNG (0.00 seconds)
qrcoded_test.go:26: Generated QRCode is not a PNG: unexpected EOF
FAIL
exit status 1
FAIL _/workspace/golang-tdd 0.020s
This is the intended result; now it is time to extend the GenerateQRCode function with the minimalamount of code to satisfy this test.
Test-driven development 15
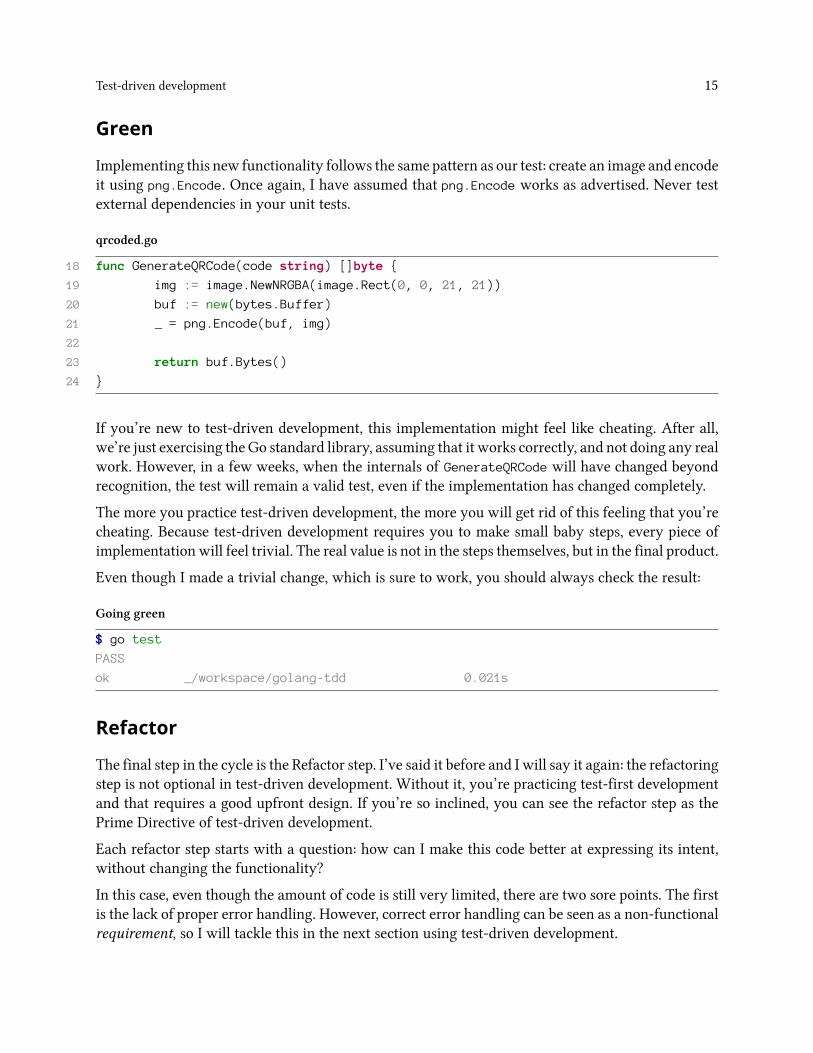
Green
Implementing this new functionality follows the same pattern as our test: create an image and encodeit using png.Encode. Once again, I have assumed that png.Encode works as advertised. Never testexternal dependencies in your unit tests.
qrcoded.go
18 func GenerateQRCode(code string) []byte {
19 img := image.NewNRGBA(image.Rect(0, 0, 21, 21))
20 buf := new(bytes.Buffer)
21 _ = png.Encode(buf, img)
22
23 return buf.Bytes()
24 }
If you’re new to test-driven development, this implementation might feel like cheating. After all,we’re just exercising the Go standard library, assuming that it works correctly, and not doing any realwork. However, in a few weeks, when the internals of GenerateQRCode will have changed beyondrecognition, the test will remain a valid test, even if the implementation has changed completely.
The more you practice test-driven development, the more you will get rid of this feeling that you’recheating. Because test-driven development requires you to make small baby steps, every piece ofimplementation will feel trivial. The real value is not in the steps themselves, but in the final product.
Even though I made a trivial change, which is sure to work, you should always check the result:
Going green
$ go test
PASS
ok _/workspace/golang-tdd 0.021s
Refactor
The final step in the cycle is the Refactor step. I’ve said it before and I will say it again: the refactoringstep is not optional in test-driven development. Without it, you’re practicing test-first developmentand that requires a good upfront design. If you’re so inclined, you can see the refactor step as thePrime Directive of test-driven development.
Each refactor step starts with a question: how can I make this code better at expressing its intent,without changing the functionality?
In this case, even though the amount of code is still very limited, there are two sore points. The firstis the lack of proper error handling. However, correct error handling can be seen as a non-functionalrequirement, so I will tackle this in the next section using test-driven development.
Test-driven development 16
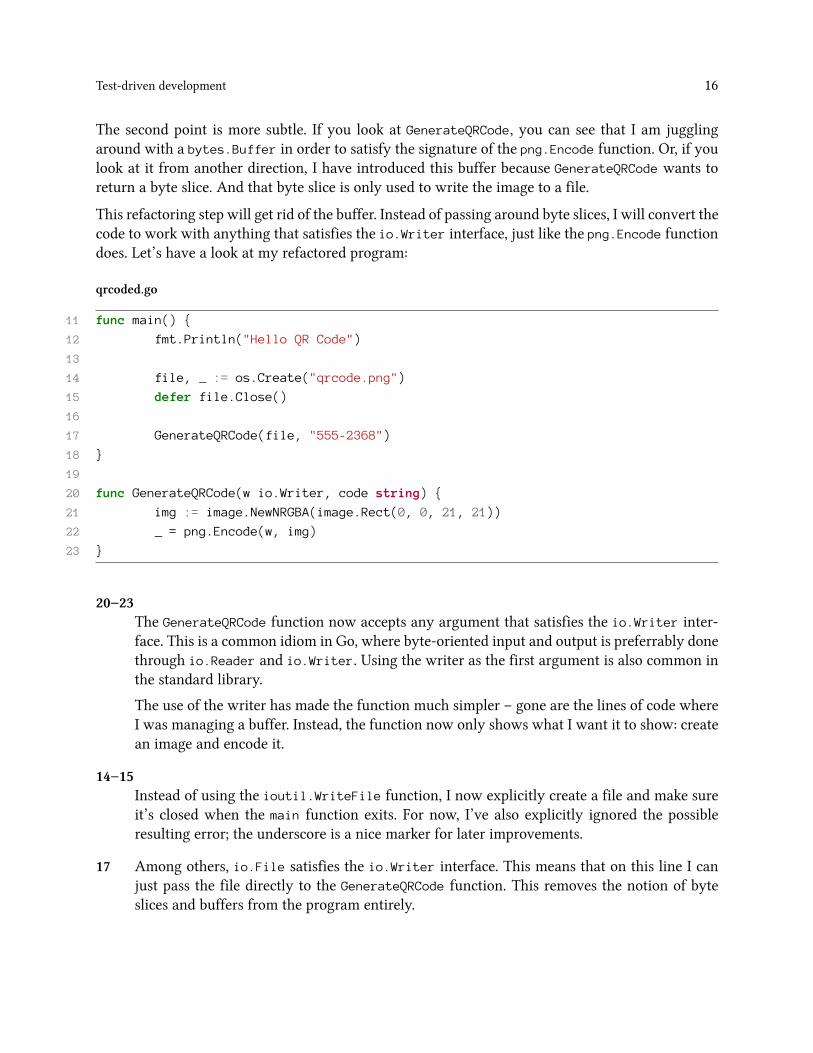
The second point is more subtle. If you look at GenerateQRCode, you can see that I am jugglingaround with a bytes.Buffer in order to satisfy the signature of the png.Encode function. Or, if youlook at it from another direction, I have introduced this buffer because GenerateQRCode wants toreturn a byte slice. And that byte slice is only used to write the image to a file.
This refactoring step will get rid of the buffer. Instead of passing around byte slices, I will convert thecode to work with anything that satisfies the io.Writer interface, just like the png.Encode functiondoes. Let’s have a look at my refactored program:
qrcoded.go
11 func main() {
12 fmt.Println("Hello QR Code")
13
14 file, _ := os.Create("qrcode.png")
15 defer file.Close()
16
17 GenerateQRCode(file, "555-2368")
18 }
19
20 func GenerateQRCode(w io.Writer, code string) {
21 img := image.NewNRGBA(image.Rect(0, 0, 21, 21))
22 _ = png.Encode(w, img)
23 }
20–23The GenerateQRCode function now accepts any argument that satisfies the io.Writer inter-face. This is a common idiom in Go, where byte-oriented input and output is preferrably donethrough io.Reader and io.Writer. Using the writer as the first argument is also common inthe standard library.
The use of the writer has made the function much simpler – gone are the lines of code whereI was managing a buffer. Instead, the function now only shows what I want it to show: createan image and encode it.
14–15Instead of using the ioutil.WriteFile function, I now explicitly create a file and make sureit’s closed when the main function exits. For now, I’ve also explicitly ignored the possibleresulting error; the underscore is a nice marker for later improvements.
17 Among others, io.File satisfies the io.Writer interface. This means that on this line I canjust pass the file directly to the GenerateQRCode function. This removes the notion of byteslices and buffers from the program entirely.
Test-driven development 17
This example shows how a little refactoring can dramatically improve the readability (and under-standability) of your code. As you will see in the next section, this change has also improved thetestability of the code. And it bears repeating that this and only this is the promise of test-drivendevelopment: clear, modular, testable code.
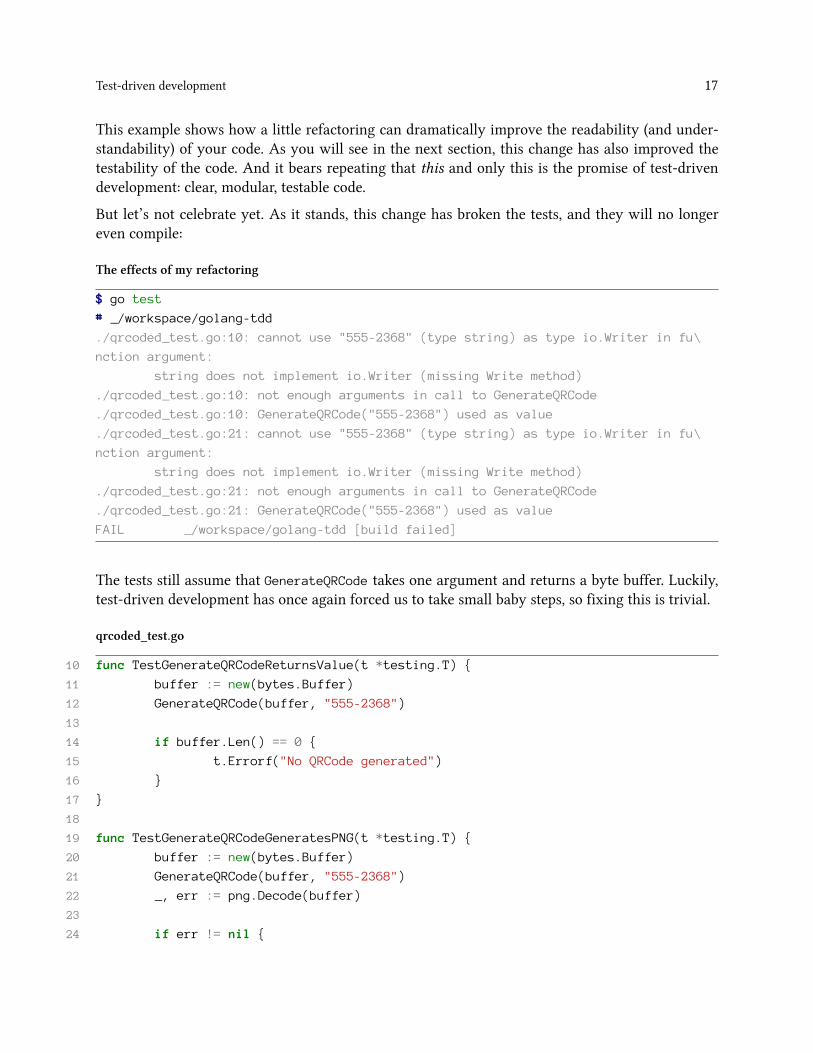
But let’s not celebrate yet. As it stands, this change has broken the tests, and they will no longereven compile:
The effects of my refactoring
$ go test
# _/workspace/golang-tdd
./qrcoded_test.go:10: cannot use "555-2368" (type string) as type io.Writer in fu\
nction argument:
string does not implement io.Writer (missing Write method)
./qrcoded_test.go:10: not enough arguments in call to GenerateQRCode
./qrcoded_test.go:10: GenerateQRCode("555-2368") used as value
./qrcoded_test.go:21: cannot use "555-2368" (type string) as type io.Writer in fu\
nction argument:
string does not implement io.Writer (missing Write method)
./qrcoded_test.go:21: not enough arguments in call to GenerateQRCode
./qrcoded_test.go:21: GenerateQRCode("555-2368") used as value
FAIL _/workspace/golang-tdd [build failed]
The tests still assume that GenerateQRCode takes one argument and returns a byte buffer. Luckily,test-driven development has once again forced us to take small baby steps, so fixing this is trivial.
qrcoded_test.go
10 func TestGenerateQRCodeReturnsValue(t *testing.T) {
11 buffer := new(bytes.Buffer)
12 GenerateQRCode(buffer, "555-2368")
13
14 if buffer.Len() == 0 {
15 t.Errorf("No QRCode generated")
16 }
17 }
18
19 func TestGenerateQRCodeGeneratesPNG(t *testing.T) {
20 buffer := new(bytes.Buffer)
21 GenerateQRCode(buffer, "555-2368")
22 _, err := png.Decode(buffer)
23
24 if err != nil {
Test-driven development 18
25 t.Errorf("Generated QRCode is not a PNG: %s", err)
26 }
27 }
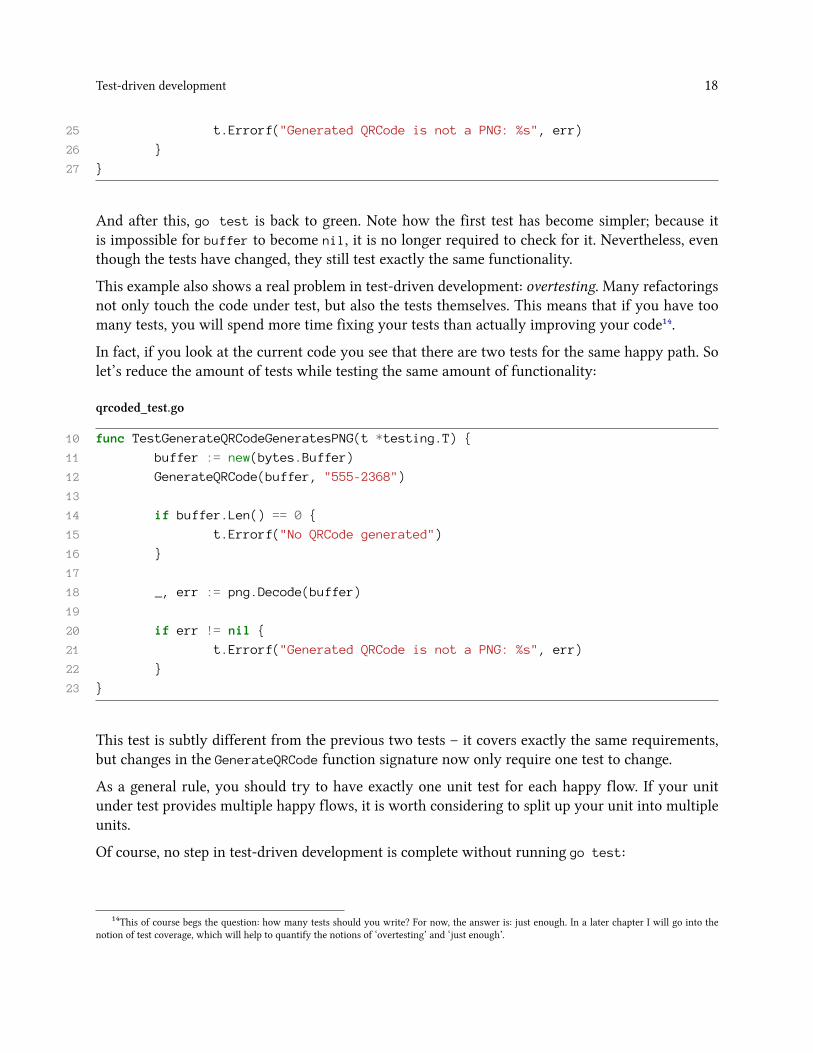
And after this, go test is back to green. Note how the first test has become simpler; because itis impossible for buffer to become nil, it is no longer required to check for it. Nevertheless, eventhough the tests have changed, they still test exactly the same functionality.
This example also shows a real problem in test-driven development: overtesting. Many refactoringsnot only touch the code under test, but also the tests themselves. This means that if you have toomany tests, you will spend more time fixing your tests than actually improving your code¹⁴.
In fact, if you look at the current code you see that there are two tests for the same happy path. Solet’s reduce the amount of tests while testing the same amount of functionality:
qrcoded_test.go
10 func TestGenerateQRCodeGeneratesPNG(t *testing.T) {
11 buffer := new(bytes.Buffer)
12 GenerateQRCode(buffer, "555-2368")
13
14 if buffer.Len() == 0 {
15 t.Errorf("No QRCode generated")
16 }
17
18 _, err := png.Decode(buffer)
19
20 if err != nil {
21 t.Errorf("Generated QRCode is not a PNG: %s", err)
22 }
23 }
This test is subtly different from the previous two tests – it covers exactly the same requirements,but changes in the GenerateQRCode function signature now only require one test to change.
As a general rule, you should try to have exactly one unit test for each happy flow. If your unitunder test provides multiple happy flows, it is worth considering to split up your unit into multipleunits.
Of course, no step in test-driven development is complete without running go test:
¹⁴This of course begs the question: how many tests should you write? For now, the answer is: just enough. In a later chapter I will go into thenotion of test coverage, which will help to quantify the notions of ‘overtesting’ and ‘just enough’.
Test-driven development 19
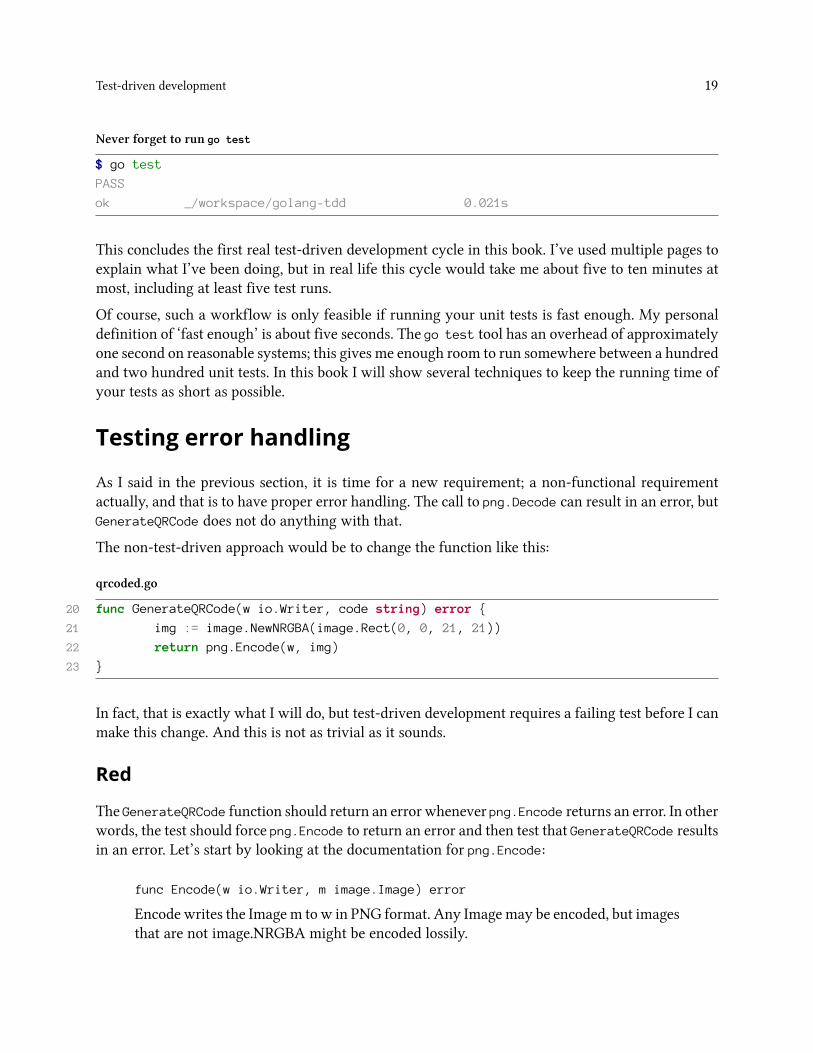
Never forget to run go test
$ go test
PASS
ok _/workspace/golang-tdd 0.021s
This concludes the first real test-driven development cycle in this book. I’ve used multiple pages toexplain what I’ve been doing, but in real life this cycle would take me about five to ten minutes atmost, including at least five test runs.
Of course, such a workflow is only feasible if running your unit tests is fast enough. My personaldefinition of ‘fast enough’ is about five seconds. The go test tool has an overhead of approximatelyone second on reasonable systems; this gives me enough room to run somewhere between a hundredand two hundred unit tests. In this book I will show several techniques to keep the running time ofyour tests as short as possible.
Testing error handling
As I said in the previous section, it is time for a new requirement; a non-functional requirementactually, and that is to have proper error handling. The call to png.Decode can result in an error, butGenerateQRCode does not do anything with that.
The non-test-driven approach would be to change the function like this:
qrcoded.go
20 func GenerateQRCode(w io.Writer, code string) error {
21 img := image.NewNRGBA(image.Rect(0, 0, 21, 21))
22 return png.Encode(w, img)
23 }
In fact, that is exactly what I will do, but test-driven development requires a failing test before I canmake this change. And this is not as trivial as it sounds.
Red
The GenerateQRCode function should return an error whenever png.Encode returns an error. In otherwords, the test should force png.Encode to return an error and then test that GenerateQRCode resultsin an error. Let’s start by looking at the documentation for png.Encode:
func Encode(w io.Writer, m image.Image) error
Encode writes the Imagem to w in PNG format. Any Imagemay be encoded, but imagesthat are not image.NRGBA might be encoded lossily.
Test-driven development 20
This is not very encouraging. The signature clearly states that png.Encode can return an error, butthe documentation doesn’t state how this can happen. You could of course trace the source code, butluckily the Go standard library has a few conventions:
1. Any error that can occur is named and documented in the documentation of that package.2. Invalid arguments generally cause an error; nil arguments generally cause a panic.3. Any error that occurs by using one of the arguments is passed on, unless explictly stated
otherwise.
Let’s compare these criteria to png.Encode:
1. The documentation for image/png specifies two errors, FormatError and UnsupportedError,but these errors can only occur during decoding. In other words, png.Encode will not returnan error by itself.
2. Creating an invalid interface will be caught at compile-time, and creating an invalid image isnot possible in this case – the call to image.NewNRGBA specifies a non-empty rectangle, whichis guaranteed to return a valid image. For both arguments, passing nil is not an option either,because we are not testing panic conditions.
3. The image.Image type contains no relevant methods that can result in an error. But theio.Writer interface does. This is a likely candidate.
So, in order to test the error flow of GenerateQRCode, we need something that implements io.Writerand will cause an error on Write. One option would be to use a read-only temp file, but there is abetter approach: using a test double.
A test double is a simplified implementation of a type that exhibits specific behavior to help intesting. Traditionally, there are five types of test doubles:
DummiesTypes without any behavior at all, provided only because the signature of the unit under testrequires them.
StubsTypes implementing the minimum amount of behavior to satisfy a test.
MocksPartial implementations for which you can define expectations on how their methods will becalled.
SpiesPartial implementations on which you can assert that specific methods have been called.
FakesFull, lightweight implementations such as in-memory databases.
Test-driven development 21
Many languages have libraries that allow you to create stubs, mocks and spies at runtime. However,Go only allows you to define new types at compile time, so using test doubles in Go takes a bit morework. Luckily the concept of interfaces in Go makes it only a tiny bit of extra work.
As stated before, the test needs an implementation of io.Writer that generates an error on Write.For now, it is enough to define a simple stub:
qrcoded_test.go
29 type ErrorWriter struct{}
30
31 func (e *ErrorWriter) Write(b []byte) (int, error) {
32 return 0, errors.New("Expected error")
33 }
34
35 func TestGenerateQRCodePropagatesErrors(t *testing.T) {
36 w := new(ErrorWriter)
37 err := GenerateQRCode(w, "555-2368")
38
39 if err == nil || err.Error() != "Expected error" {
40 t.Errorf("Error not propagated correctly, got %v", err)
41 }
42 }
29 This line defines a new type, aptly called ErrorWriter.
31–33This function turns the ErrorWriter into a stub satisfying io.Writer. Its implementation isstraightforward: every call to Write will return an error.
These three innocuous lines are exemplary of idiomatic Go. Creating a type that satisfiesio.Writer is extremely easy; this means that my previous refactoring which introduced theio.Writer argument made it a lot easier to test the function.
35–42These lines define the new test; the result of GenerateQRCode is inspected and asserted to bethe expected error.
Running go test will once again fail. Not because of missing functionality, but because the code nolonger compiles:
Test-driven development 22
Running go test fails once again
$ go test
# _/workspace/golang-tdd
./qrcoded_test.go:37: GenerateQRCode(w, "555-2368") used as value
FAIL _/Users/yigalduppen/src/golang-tdd [build failed]
The test now assumes that GenerateQRCode returns an error, which it does not. So let’s change theGenerateQRCode function a little bit:
qrcoded.go
20 func GenerateQRCode(w io.Writer, code string) error {
21 img := image.NewNRGBA(image.Rect(0, 0, 21, 21))
22 png.Encode(w, img)
23 return nil
24 }
This change is enough to make the test fail succesfully.
Succesful failure
$ go test
--- FAIL: TestGenerateQRCodePropagatesErrors (0.00 seconds)
qrcoded_test.go:36: Error not propagated correctly, got <nil>
FAIL
exit status 1
FAIL _/Users/yigalduppen/src/golang-tdd 0.020s
Green
In the introduction of this section I already gave away the solution:
qrcoded.go
20 func GenerateQRCode(w io.Writer, code string) error {
21 img := image.NewNRGBA(image.Rect(0, 0, 21, 21))
22 return png.Encode(w, img)
23 }

Test-driven development 23
This change is enough to make the tests work.
You might wonder why I did not do this immediately while I was changing the signature ofGenerateQRCode. After all, what makes png.Decode(...); return nil so much better than return
png.Decode(...)?
The reason for this is that the Red step must always result in a failing test. This is not just becauseof dogma; it guarantees that your new test actually tests what you think it tests.
Even though test-driven development dictates tiny steps, it is still very easy to make mistakes. Ifsuch a mistake occurs in a test, you might end up with a test that will suddenly fail when you leastexpect it, for no apparent reason at all. That’s why test-driven development dictates a failing test.
Refactor
As I said before, refactoring is not optional. However, at this point the amount of code under test isvery small, and it seems structurally sound. So in this case I’ve decided to improve the error handlingin main.
qrcoded.go
11 func main() {
12 log.Println("Hello QR Code")
13
14 file, err := os.Create("qrcode.png")
15 if err != nil {
16 log.Fatal(err)
17 }
18 defer file.Close()
19
20 err = GenerateQRCode(file, "555-2368")
21 if err != nil {
22 log.Fatal(err)
23 }
24 }
All normal and error output is now handled using the log package instead of fmt. Early exits aretaken care of by log.Fatal, which automatically calls os.Exit(1). There are still no unit tests forthe main function, so running go test stays green.
Yes, this really is cheating: I have only refactored code that is not under test. Believe me when I statethat I have only done so for didactic purposes.
Test-driven development 24
Wrapping up
In this chapter I have introduced the go test unit test framework and I have shown how you canuse this to practice test-driven development.
I have explained that merciless refactoring is a prerequisite for succesful test-driven development,and I have shown how this can indeed improve your code.
Furthermore, I have shown how a judicious use of small interfaces as arguments can make your Gocode so much more testable.
In the next chapter I will give more examples of the Red/Green/Refactor cycle, giving some moreexamples on how you can create clean, idiomatic and testable Go code.

Creating QR codesTest-driven development is all about taking one small step at a time. Nevertheless, it still pays off tohave a general sense of direction before you take the next step. In this chapter I will give a high-leveloverview of QR codes, and use test-driven development to sketch out the general direction.
What is a QR code, exactly?
In the previous chapters I have shown some examples of QR codes, and you probably recognizedthem as such. Based on these examples, I could show you any possible QR code, and you would stillrecognize them as being QR codes. Unfortunately, this does not tell us anything about how you cangenerate a QR code.
QR codes are an officially standardized type of 2-dimensional barcode, and the nice people of ISOhave explained all the gory details of QR codes in a document called ‘ISO/IEC 18004:2006(E) – QRCode 2005 bar code symbology specification’. With such a title, what can go wrong?
As it turns out, there are four distinct kinds of QR codes: they are called QR Code Model 1, QRCode Model 2, QR Code 2005 and Micro QR Code. Model 1 has been deprecated, so this book won’tbother with those. Model 2 QR codes are a strict subset of QR Code 2005 and don’t require anyspecial treatment. Micro codes are very interesting, but in order to keep the scope down, this bookwill focus on generating QR Codes 2005.
So, to answer the question in this section’s title: a QR code is a 2-dimensional barcode pattern ofdark and light squares, as specified by ISO/IEC 18002:2006(E).
QR code terminology
QR Codes are a means of conveying some input data: a program encodes input data as a patternof dark and light squares. This pattern can then be converted to an image and printed. The printedimage can subsequently be scanned to obtain the original input data¹⁵.
The dark and light squares are called modules. The specification does not say anything about theexact color of the dark and light squares, but I will often refer to them as black and white modules.
The number of modules in a QR code is determined by its version. For example, a Version 1 QR codecontains 21x21 modules; and the largest specified version, Version 40, contains 177x177 modules.
The pattern of a QR code is a combination of three different subpatterns: the functional pattern,which is always the same for each version, and is used to calibrate a scanner; the encoding pattern,
¹⁵Scanning and decoding QR codes is not covered in this book.
Creating QR codes 26
which contains the actual data you want to convey; and a data masking pattern, which is combinedwith the encoding pattern to prevent scanners from getting confused¹⁶.
The specification defines a lot more terminology, but for now this is enough.
Creating a QR code
Creating a QR code follows a simple 8-step program. The end-user is expected to specify the inputdata, the desired level of error correction capabilities, and the program then does the following:
1. Data analysis – this is used to determine the kind of data to be encoded, which in turns definesthe smallest possible version that can be used.
2. Data encoding – this converts the input data into a list of 8-bit codewords.3. Error correction – this creates the error correction codes.4. Message structuring – this combines the data and error correction codes into an optionally
padded list of bits.5. Module placement – this converts the message to an encoding pattern and combines it with
the functional pattern.6. Data masking – this applies different data masking patterns and selects the one with the best
result.7. Format and version information – this extends the pattern with format and version informa-
tion, resulting in the final pattern.8. Image creation – this converts the pattern to an actual image.
Each of these steps has its own challenges, but this is how you create a QR code in a nutshell.
Introducing versions
The current implementation is still a long way from implementing the 8-step program. But test-driven development is all about baby steps, so let’s start with the first step: versions. At this moment,the notion of versions does not exist. So let’s create a test that incorporates this notion.
Red
The first thing versions indicate, is the size of the pattern. For example, a Version 1 QR Code has apattern of 21x21 modules. It doesn’t sound too hard to create a test for this:
¹⁶Note how the specification does nothing to prevent us from getting confused.

Creating QR codes 27
qrcoded_test.go
31 func TestVersionDeterminesSize(t *testing.T) {
32 buffer := new(bytes.Buffer)
33 GenerateQRCode(buffer, "555-2368", Version(1))
34
35 img, _ := png.Decode(buffer)
36 if width := img.Bounds().Dx(); width != 21 {
37 t.Errorf("Version 1, expected 21 but got %d", width)
38 }
39 }
33 Here I’ve changed the signature of GenerateQRCode to take an additional version parameter.Note how I haven’t said anything about the exact type of versions, just that when I sayVersion(1), I get a valid representation of Version 1.
36-38And here I check that the width of the resulting image is indeed 21 pixels wide. Technicallyspeaking, the size of the image is not really related to the size of the pattern, but hey, babysteps.
Once again, I’ve written a test that changes the expected signature of GenerateQRCode, so go test
will not even compile correctly.
Fixing the signature results in the following code:
qrcoded.go
26 func GenerateQRCode(w io.Writer, code string, version Version) error {
27 img := image.NewNRGBA(image.Rect(0, 0, 21, 21))
28 return png.Encode(w, img)
29 }
30
31 type Version int8
31 Here I’ve decided to introduce Version as a top-level type. It is an alias for int8, so newversions can be created by casting integers like this: Version(24).
26 The new version parameter matches the new signature. This of course results in newcompilation errors, so the old tests and main function have to be changed as well. Since noneof these tests depends on the version, any expression evaluating to a version can be used. I’vearbitrarily chosen Version(1).

Creating QR codes 28
After fixing all the calls to GenerateQRCode, the tests finally run. And pass.
As I explained in the previous chapter, this is a problem. And now you can see why. My test currentlycovers the ‘Version 1 QR codes are 21x21 modules large’-case, but the image I generate on line27 already matches that case by accident¹⁷. This shows why tests that succeed immediately don’tactually test anything.
The easiest answer would be to create a new test that tests another version/size combination. Butthere is a better way, often used in Go testing: it is called a table-driven test.
Table-driven tests all follow the same pattern: first, they define a ‘table’ where each row describesthe input and the expected output of a specific case. Then the test iterates over those rows, applyingthe unit under test on the input and comparing the result with the expected output:
qrcoded_test.go
40 func TestVersionDeterminesSize(t *testing.T) {
41 table := []struct {
42 version int
43 expected int
44 }{
45 {1, 21},
46 {2, 25},
47 {6, 41},
48 {7, 45},
49 {14, 73},
50 {40, 177},
51 }
52
53 for _, test := range table {
54 buffer := new(bytes.Buffer)
55 GenerateQRCode(buffer, "555-2368", Version(test.version))
56 img, _ := png.Decode(buffer)
57 if width := img.Bounds().Dx(); width != test.expected {
58 t.Errorf("Version %2d, expected %3d but got %3d",
59 test.version, test.expected, width)
60 }
61 }
62 }
41–51This multi-line statement creates the table; it is an initializer expression, where the type is ananonymous struct. Each struct contains two fields: the version and the expected size. Lines
¹⁷Admittedly, a carefully prepared accident.
Creating QR codes 29
45–50 define a number of testcases. I could have enumerated all possible versions and sizes, butin order to save space¹⁸ I’ve used a sample. Note how I have explicitly included the boundaryvalues 1 and 40.
53–61This block iterates over the table, executing the test I created earlier for each row.
58–59Table-driven tests can cover a lot of cases, so you make your life a lot easier if your errormessages are as specific as possible.
This time go test finally fails.
Green
A nice thing about table-driven tests is that they allow you to see aditional structure over your inputand output. In this case, it’s quite obvious that the number of modules can be given by the functionf(x) = 4x+ 17. This makes the initial solution quite straightforward:
qrcoded.go
26 func GenerateQRCode(w io.Writer, code string, version Version) error {
27 size := 4*int(version) + 17
28 img := image.NewNRGBA(image.Rect(0, 0, size, size))
29 return png.Encode(w, img)
30 }
This is enough to make the tests run, but it is not entirely satisfactory…
Refactor
The TestVersionDeterminesSize test function covers the entire GenerateQRCode function; however,as its name suggests it only actually checks the size calculation. It feels as if the test does too much,and this is usually an indicator that the unit under test does too much as well.
In order to focus the test, the first step is to extract the size calculation into a separate function:
¹⁸And because I’m lazy.
Creating QR codes 30
extracted size calculation
func DeriveSizeFromVersion(version Version) int {
return 4*int(version) + 17
}
The name of this function already gives away the next step: why not make this a method of theVersion type?
qrcoded.go
26 func GenerateQRCode(w io.Writer, code string, version Version) error {
27 size := version.PatternSize()
28 img := image.NewNRGBA(image.Rect(0, 0, size, size))
29 return png.Encode(w, img)
30 }
31
32 type Version int8
33
34 func (v Version) PatternSize() int {
35 return 4*int(v) + 17
36 }
34 Go allows you to add methods to any type you have defined in the current package, even ifit’s an alias for a basic type. I’ve named the method PatternSize instead of Size to clarifythe intent of this function.
27 I have now removed the explicit size calculation, and call version.PatternSize() directly.
This is a good moment to use go test to verify that everything still works as it should. Noticehow the code has become much better: the GenerateQRCode function no longer needs to know thatVersion can be cast to an int – it just asks the version for its size.
Now that I’ve extracted the size calculation from the GenerateQRCode function, it becomes possibleto focus the test:
Creating QR codes 31
qrcoded_test.go
53 for _, test := range table {
54 size := Version(test.version).PatternSize()
55 if size != test.expected {
56 t.Errorf("Version %2d, expected %3d but got %3d",
57 test.version, test.expected, size)
58 }
59 }
This test no longer references GenerateQRCode, it does not know about images, and it does notknow about PNGs. Instead, it does exactly what its name suggests: testing that you can determinethe pattern size from the function.
You might notice that our newly focused test no longer tests that GenerateQRCode actually interactswith the version to determine the image size. This is correct for two reasons: first of all, the imagesize is not derived from just the version; it is also derived from the number of pixels per module, andthe size of the so called quiet zone, a formally defined padding around the pattern. In other words,checking the image size was wrong to begin with.
The second reason is more personal: in my opionion it is overkill to test that such trivial interactionsoccurred. This opinion is not shared by every proponent of test-driven development, so you shoulddecide for yourself what you prefer.
If I were to test this interaction, this is how I would do it. First of all, I would turn Version intoan interface, so I could create a MockVersion in my test. This MockVersion would then containadditional methods to check if the Size method was actually called. All in all, a lot of code for atrivial interaction.
Wrapping up
In this chapter I’ve shown you a high-level overview of the world of QR Codes. I have used thisoverview to introduce the domain concept of versions and I have introduced you to table-driventesting, a common idiom in Go.
I have shown how test-driven development can help you identify code that does too much, and howthe refactor step can help you in separation of concerns.
In the next chapter I will show how creating packages can help you even more in achieving modular,testable code.