the cuisine package - ctantug.ctan.org/macros/latex/contrib/cuisine/cuisine.pdf · the cuisine...
TRANSCRIPT

The cuisine package
Ben Cohen
2014/06/26, v0.7
Abstract
This package provides an environment for typesetting recipes in steps inwhich each ingredient is on the left of the page next to the method stepwhere it is used.
1 Introduction
There appear to be two styles of typesetting recipes in general use. The more com-mon (at least in recipe books in the U.K.) is where the ingredients appear at thetop above the method, as in the class macros/latex/contrib/other/recipe. An-other way is to have each ingredient next to the method step in which it appears, asin the package macros/latex/contrib/supported/cooking; the cuisine pack-age also uses this style, but closer to the format in Practical Professional Cookeryby H. L. Cracknell and R. J. Kaufmann.
2 Usage
The package is loaded using the header \usepackage{cuisine}; the availableoptions are:
• number Recipes will be numbered sequentially to the left of the recipe title.(This is the default.) The recipe steps will always be numbered.
• nonumber Recipes will not be numbered.
• index Recipe titles will be written to the index for the document.
• noindex Recipe titles will not be written to the document index. (This isthe default.)
• contents Recipe titles will be written to the contents for the document.
• nocontents Recipe titles will not be written to the document contents.(This is the default.)
1
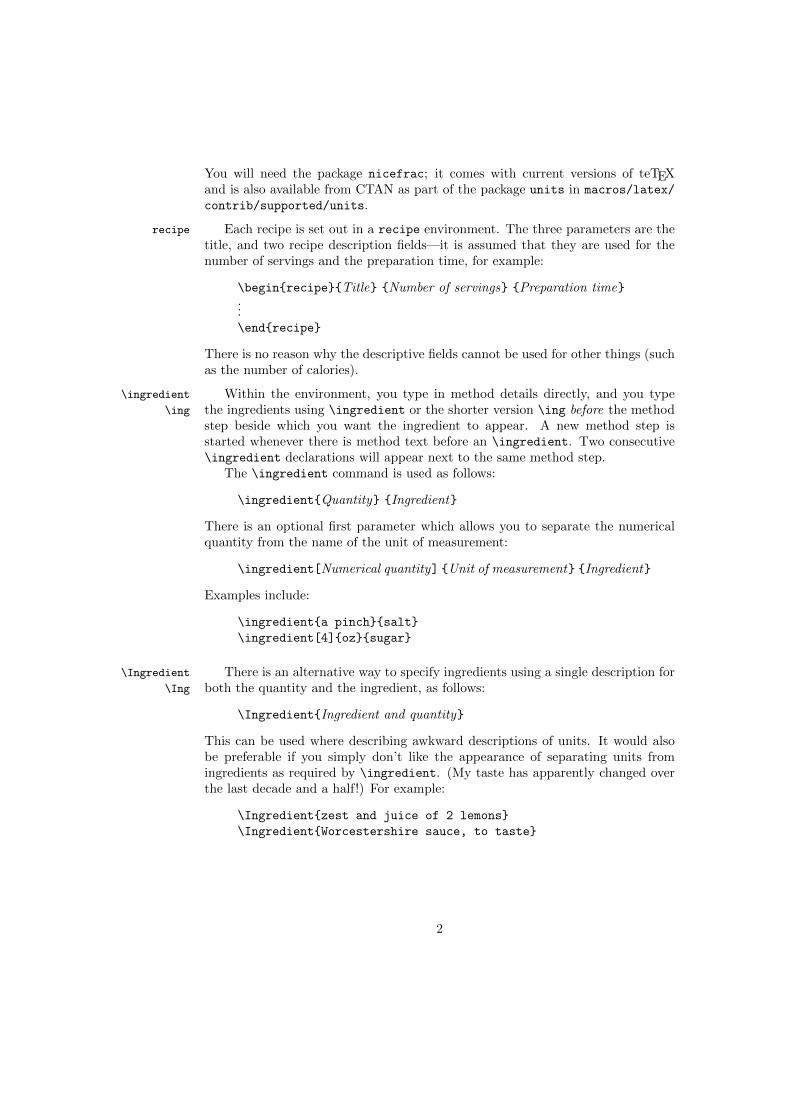
You will need the package nicefrac; it comes with current versions of teTEXand is also available from CTAN as part of the package units in macros/latex/
contrib/supported/units.
Each recipe is set out in a recipe environment. The three parameters are therecipe
title, and two recipe description fields—it is assumed that they are used for thenumber of servings and the preparation time, for example:
\begin{recipe}{Title} {Number of servings} {Preparation time}...\end{recipe}
There is no reason why the descriptive fields cannot be used for other things (suchas the number of calories).
Within the environment, you type in method details directly, and you type\ingredient
\ing the ingredients using \ingredient or the shorter version \ing before the methodstep beside which you want the ingredient to appear. A new method step isstarted whenever there is method text before an \ingredient. Two consecutive\ingredient declarations will appear next to the same method step.
The \ingredient command is used as follows:
\ingredient{Quantity} {Ingredient}
There is an optional first parameter which allows you to separate the numericalquantity from the name of the unit of measurement:
\ingredient[Numerical quantity] {Unit of measurement} {Ingredient}
Examples include:
\ingredient{a pinch}{salt}
\ingredient[4]{oz}{sugar}
There is an alternative way to specify ingredients using a single description for\Ingredient
\Ing both the quantity and the ingredient, as follows:
\Ingredient{Ingredient and quantity}
This can be used where describing awkward descriptions of units. It would alsobe preferable if you simply don’t like the appearance of separating units fromingredients as required by \ingredient. (My taste has apparently changed overthe last decade and a half!) For example:
\Ingredient{zest and juice of 2 lemons}
\Ingredient{Worcestershire sauce, to taste}
2
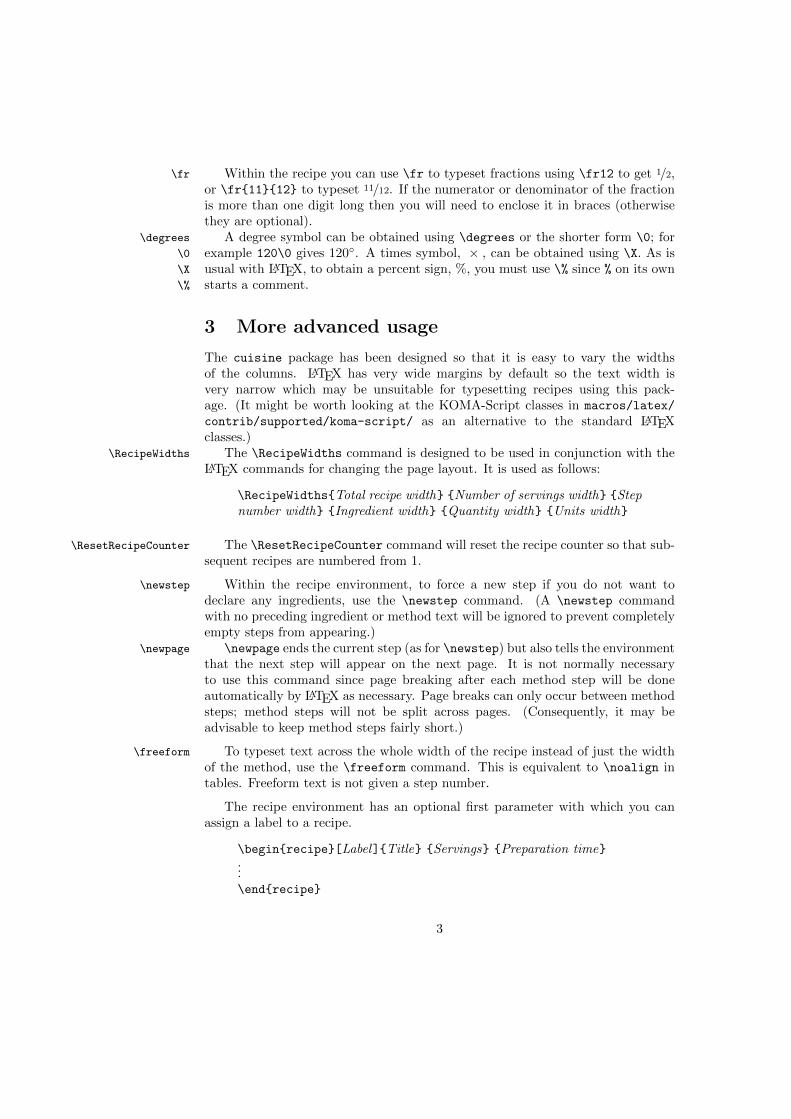
Within the recipe you can use \fr to typeset fractions using \fr12 to get 1/2,\fr
or \fr{11}{12} to typeset 11/12. If the numerator or denominator of the fractionis more than one digit long then you will need to enclose it in braces (otherwisethey are optional).
A degree symbol can be obtained using \degrees or the shorter form \0; for\degrees
\0
\X
\%
example 120\0 gives 120◦. A times symbol, × , can be obtained using \X. As isusual with LATEX, to obtain a percent sign, %, you must use \% since % on its ownstarts a comment.
3 More advanced usage
The cuisine package has been designed so that it is easy to vary the widthsof the columns. LATEX has very wide margins by default so the text width isvery narrow which may be unsuitable for typesetting recipes using this pack-age. (It might be worth looking at the KOMA-Script classes in macros/latex/
contrib/supported/koma-script/ as an alternative to the standard LATEXclasses.)
The \RecipeWidths command is designed to be used in conjunction with the\RecipeWidths
LATEX commands for changing the page layout. It is used as follows:
\RecipeWidths{Total recipe width} {Number of servings width} {Stepnumber width} {Ingredient width} {Quantity width} {Units width}
The \ResetRecipeCounter command will reset the recipe counter so that sub-\ResetRecipeCounter
sequent recipes are numbered from 1.
Within the recipe environment, to force a new step if you do not want to\newstep
declare any ingredients, use the \newstep command. (A \newstep commandwith no preceding ingredient or method text will be ignored to prevent completelyempty steps from appearing.)
\newpage ends the current step (as for \newstep) but also tells the environment\newpage
that the next step will appear on the next page. It is not normally necessaryto use this command since page breaking after each method step will be doneautomatically by LATEX as necessary. Page breaks can only occur between methodsteps; method steps will not be split across pages. (Consequently, it may beadvisable to keep method steps fairly short.)
To typeset text across the whole width of the recipe instead of just the width\freeform
of the method, use the \freeform command. This is equivalent to \noalign intables. Freeform text is not given a step number.
The recipe environment has an optional first parameter with which you canassign a label to a recipe.
\begin{recipe}[Label]{Title} {Servings} {Preparation time}...\end{recipe}
3

\pageref and \ref then refer to the recipe page number and recipe numberrespectively of the recipe with that label. For example, the label in the recipe belowwill make \ref{Zabaglione} give recipe number 1. (Note that you cannot use\label for this purpose within the environment because it breaks the formatting.)
4 Fonts
The fonts used in the different parts of a recipe can be altered by changingthe definition of the following macros; this should be done using, for example,\renewcommand*{\recipetitlefont}{\sffamily}.
\recipefont The default font used for the fonts below\recipetitlefont The font for the recipe title\recipeservingsfont The font for the number of servings\recipetimefont The font for the preparation time\recipenumberfont The font for the recipe number\recipestepnumberfont The font for each step number\recipequantityfont The font for the numerical quantity\recipeunitfont The font for the unit of measurement
(or descriptive quantity)\recipeingredientfont The font for the ingredient\recipemethodfont The font for the method details\recipefreeformfont The font for freeform descriptions
5 Examples
5.1 A simple example
There is only whitespace between the first three ingredients, so they are used forthe first step with the method text which follows. (Had there been text before thefirst ingredient, that text would become the first step and the heating instructionwould be the second step.) The fourth \ingredient signals the end of the methodtext and starts a new step. The final \end{recipe} finishes that step.
\begin{recipe}{Yorkshire Pudding}{4 portions}{1\fr12 hours}
\ingredient[\fr12]{pt}{milk}
\ingredient[2]{oz}{butter}
\ingredient[5]{oz}{self-raising flour}
Heat the milk and butter until nearly boiling. Add flour and allow to
seeth over.
\ingredient[3]{}{eggs}
\ingredient{to taste}{salt and pepper}
Add the remaining eggs and whisk again. Cook at 220\0C for about 1 hour.
\end{recipe}
4
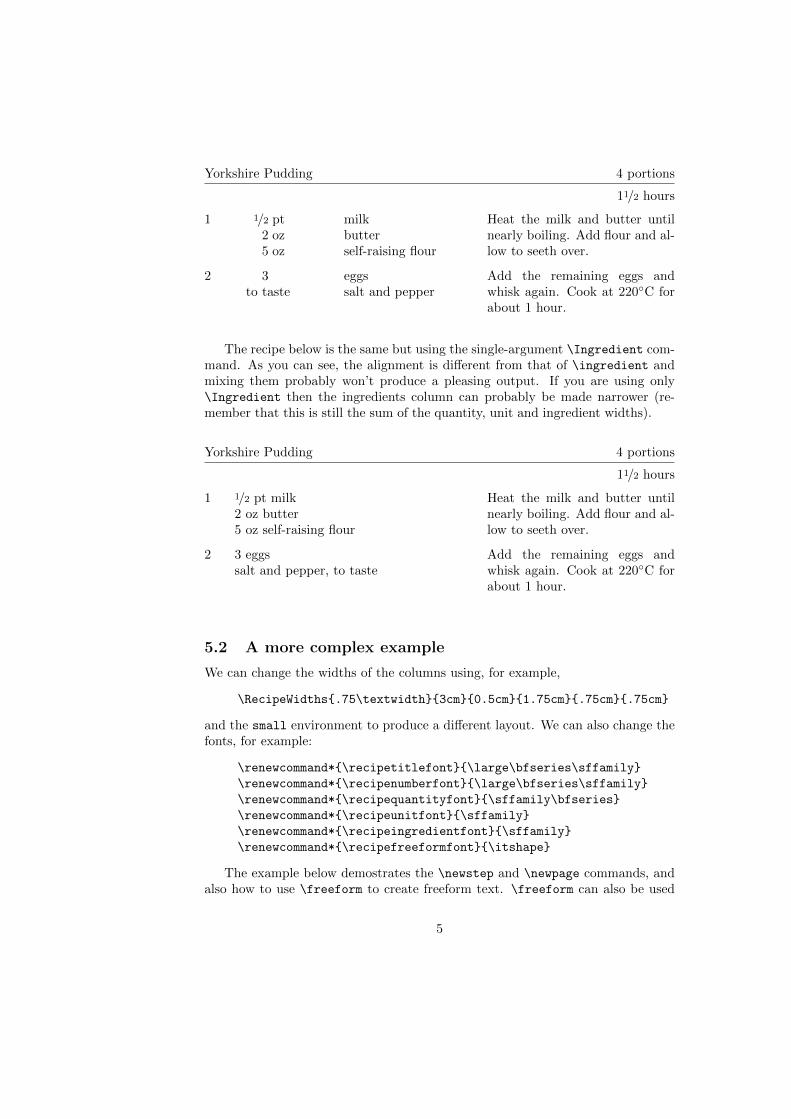
Yorkshire Pudding 4 portions
11/2 hours
1 1/2 pt milk2 oz butter5 oz self-raising flour
Heat the milk and butter untilnearly boiling. Add flour and al-low to seeth over.
2 3 eggsto taste salt and pepper
Add the remaining eggs andwhisk again. Cook at 220◦C forabout 1 hour.
The recipe below is the same but using the single-argument \Ingredient com-mand. As you can see, the alignment is different from that of \ingredient andmixing them probably won’t produce a pleasing output. If you are using only\Ingredient then the ingredients column can probably be made narrower (re-member that this is still the sum of the quantity, unit and ingredient widths).
Yorkshire Pudding 4 portions
11/2 hours
1 1/2 pt milk2 oz butter5 oz self-raising flour
Heat the milk and butter untilnearly boiling. Add flour and al-low to seeth over.
2 3 eggssalt and pepper, to taste
Add the remaining eggs andwhisk again. Cook at 220◦C forabout 1 hour.
5.2 A more complex example
We can change the widths of the columns using, for example,
\RecipeWidths{.75\textwidth}{3cm}{0.5cm}{1.75cm}{.75cm}{.75cm}
and the small environment to produce a different layout. We can also change thefonts, for example:
\renewcommand*{\recipetitlefont}{\large\bfseries\sffamily}
\renewcommand*{\recipenumberfont}{\large\bfseries\sffamily}
\renewcommand*{\recipequantityfont}{\sffamily\bfseries}
\renewcommand*{\recipeunitfont}{\sffamily}
\renewcommand*{\recipeingredientfont}{\sffamily}
\renewcommand*{\recipefreeformfont}{\itshape}
The example below demostrates the \newstep and \newpage commands, andalso how to use \freeform to create freeform text. \freeform can also be used
5
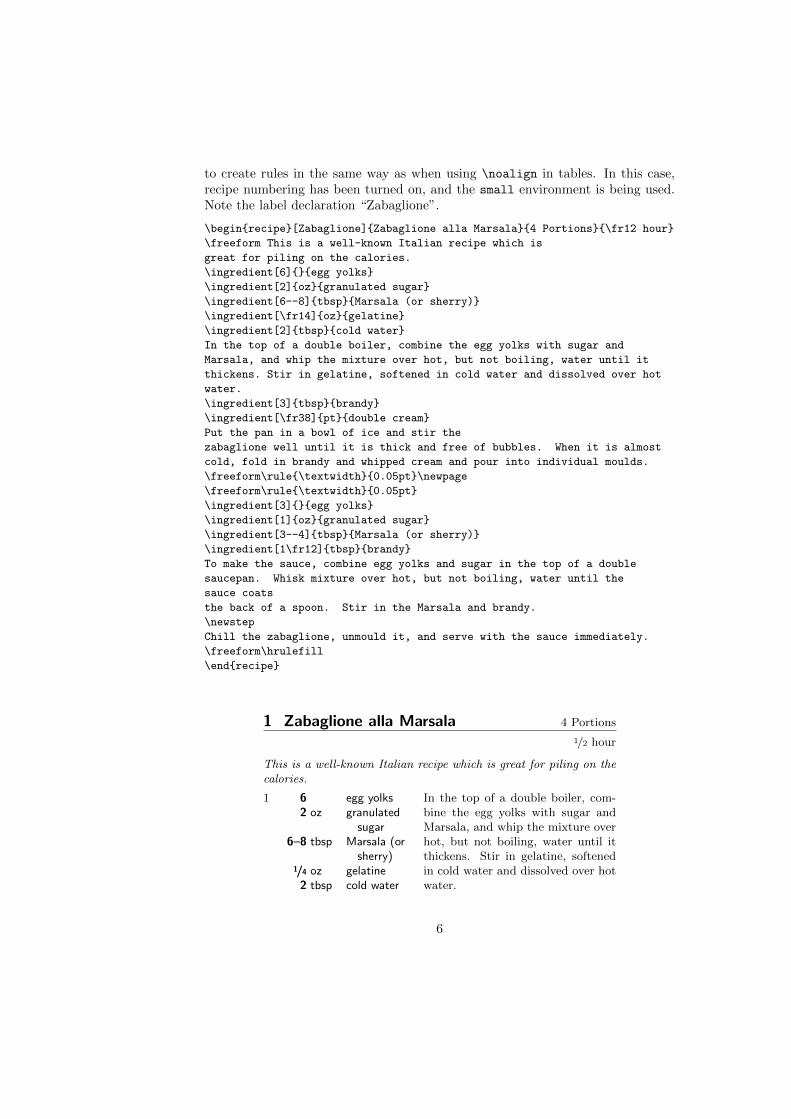
to create rules in the same way as when using \noalign in tables. In this case,recipe numbering has been turned on, and the small environment is being used.Note the label declaration “Zabaglione”.
\begin{recipe}[Zabaglione]{Zabaglione alla Marsala}{4 Portions}{\fr12 hour}
\freeform This is a well-known Italian recipe which is
great for piling on the calories.
\ingredient[6]{}{egg yolks}
\ingredient[2]{oz}{granulated sugar}
\ingredient[6--8]{tbsp}{Marsala (or sherry)}
\ingredient[\fr14]{oz}{gelatine}
\ingredient[2]{tbsp}{cold water}
In the top of a double boiler, combine the egg yolks with sugar and
Marsala, and whip the mixture over hot, but not boiling, water until it
thickens. Stir in gelatine, softened in cold water and dissolved over hot
water.
\ingredient[3]{tbsp}{brandy}
\ingredient[\fr38]{pt}{double cream}
Put the pan in a bowl of ice and stir the
zabaglione well until it is thick and free of bubbles. When it is almost
cold, fold in brandy and whipped cream and pour into individual moulds.
\freeform\rule{\textwidth}{0.05pt}\newpage
\freeform\rule{\textwidth}{0.05pt}
\ingredient[3]{}{egg yolks}
\ingredient[1]{oz}{granulated sugar}
\ingredient[3--4]{tbsp}{Marsala (or sherry)}
\ingredient[1\fr12]{tbsp}{brandy}
To make the sauce, combine egg yolks and sugar in the top of a double
saucepan. Whisk mixture over hot, but not boiling, water until the
sauce coats
the back of a spoon. Stir in the Marsala and brandy.
\newstep
Chill the zabaglione, unmould it, and serve with the sauce immediately.
\freeform\hrulefill
\end{recipe}
1 Zabaglione alla Marsala 4 Portions
1/2 hour
This is a well-known Italian recipe which is great for piling on thecalories.
1 6 egg yolks2 oz granulated
sugar6–8 tbsp Marsala (or
sherry)1/4 oz gelatine2 tbsp cold water
In the top of a double boiler, com-bine the egg yolks with sugar andMarsala, and whip the mixture overhot, but not boiling, water until itthickens. Stir in gelatine, softenedin cold water and dissolved over hotwater.
6
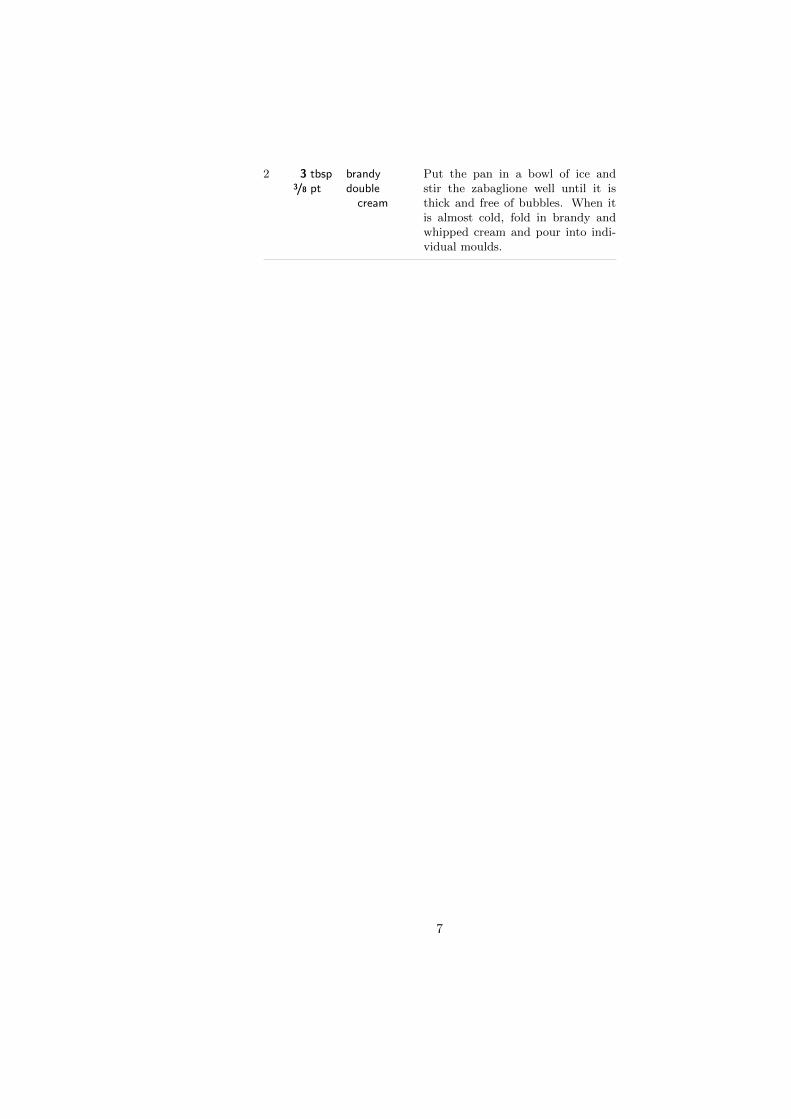
2 3 tbsp brandy3/8 pt double
cream
Put the pan in a bowl of ice andstir the zabaglione well until it isthick and free of bubbles. When itis almost cold, fold in brandy andwhipped cream and pour into indi-vidual moulds.
7

3 3 egg yolks1 oz granulated
sugar3–4 tbsp Marsala (or
sherry)11/2 tbsp brandy
To make the sauce, combine eggyolks and sugar in the top of a dou-ble saucepan. Whisk mixture overhot, but not boiling, water until thesauce coats the back of a spoon. Stirin the Marsala and brandy.
4 Chill the zabaglione, unmould it,and serve with the sauce immedi-ately.
6 Bugs, Issues, Features, . . .
• Method steps can’t be split across pages. This means you can get lotsof empty white space at the bottom of pages, especially if you have longmethods.
• There may be alignment problems if the recipe fonts differ much in height.
• Formatting doesn’t work very well when the ingredient quantity is too widefor its box.
• There is no support for dual sets of quantities, for example where two systemsof measurement are used or for different numbers of servings. You can write\ingredient{<4 oz>/<100 g>}{butter}, or use \Ingredient but I don’tthink implementing commands such as \ingredient[1]{oz}[25]{g}{butter}would be worthwhile.
Please e-mail me at ben [email protected] if you can help find or solve any prob-lems with this package.
7 Change History
v0.5 Written—release on CTAN.
v0.6 Fixed a couple of vertical alignment problems. Labelling of recipes for \ref. \X
(times) macro. Added different index and contents options, and corrected a bugthat sometimes gave the wrong page number. If recipe’s #4 is empty, don’t leavea blank line. The step number width can be changed but the recipe number widthvaries.
v0.7 Added the \Ingredient command for single-argument ingredients.
8
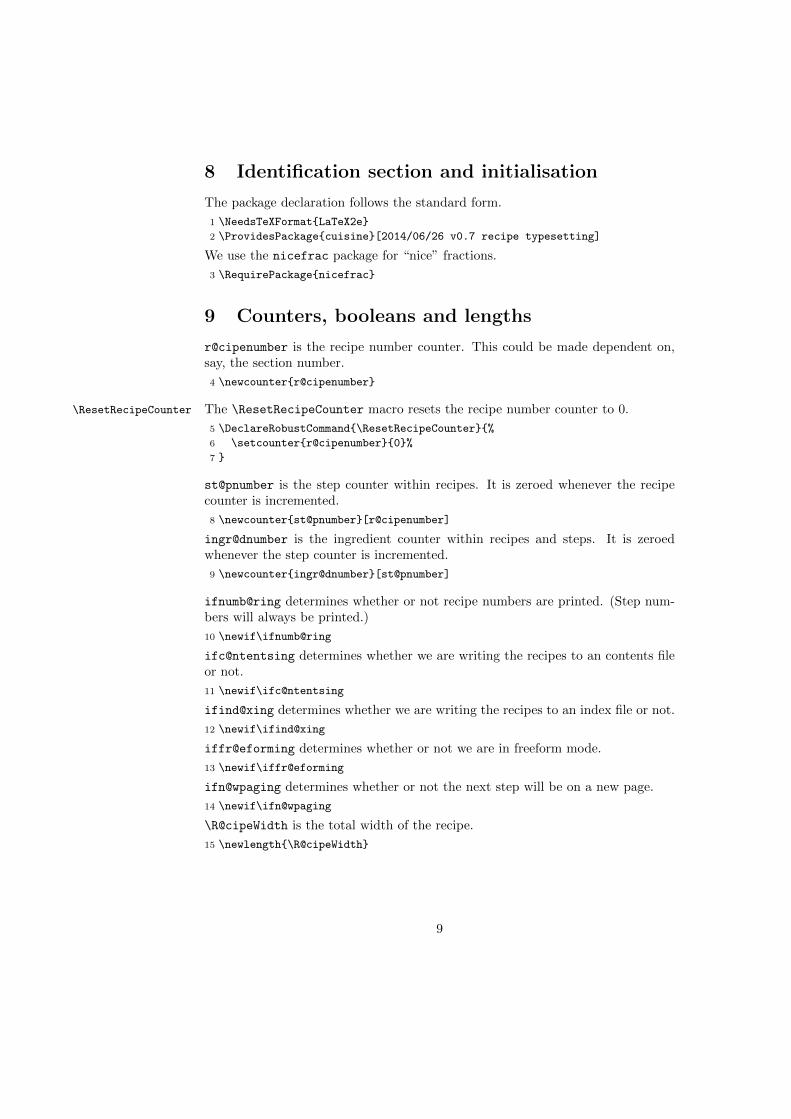
8 Identification section and initialisation
The package declaration follows the standard form.
1 \NeedsTeXFormat{LaTeX2e}
2 \ProvidesPackage{cuisine}[2014/06/26 v0.7 recipe typesetting]
We use the nicefrac package for “nice” fractions.
3 \RequirePackage{nicefrac}
9 Counters, booleans and lengths
r@cipenumber is the recipe number counter. This could be made dependent on,say, the section number.
4 \newcounter{r@cipenumber}
\ResetRecipeCounter The \ResetRecipeCounter macro resets the recipe number counter to 0.
5 \DeclareRobustCommand{\ResetRecipeCounter}{%
6 \setcounter{r@cipenumber}{0}%
7 }
st@pnumber is the step counter within recipes. It is zeroed whenever the recipecounter is incremented.
8 \newcounter{st@pnumber}[r@cipenumber]
ingr@dnumber is the ingredient counter within recipes and steps. It is zeroedwhenever the step counter is incremented.
9 \newcounter{ingr@dnumber}[st@pnumber]
ifnumb@ring determines whether or not recipe numbers are printed. (Step num-bers will always be printed.)
10 \newif\ifnumb@ring
ifc@ntentsing determines whether we are writing the recipes to an contents fileor not.
11 \newif\ifc@ntentsing
ifind@xing determines whether we are writing the recipes to an index file or not.
12 \newif\ifind@xing
iffr@eforming determines whether or not we are in freeform mode.
13 \newif\iffr@eforming
ifn@wpaging determines whether or not the next step will be on a new page.
14 \newif\ifn@wpaging
\R@cipeWidth is the total width of the recipe.
15 \newlength{\R@cipeWidth}
9

The following are, respectively, the widths of the recipe number box, the recipetitle box, the recipe number-of-servings box, and the total of the recipe title andnumber-of-servings boxes.
16 \newlength{\R@cipeNumberWidth}
17 \newlength{\R@cipeTitleWidth}
18 \newlength{\R@cipeServingsWidth}
19 \newlength{\R@cipeTandSWidth}
This is the distance ingredient (etc.) paragraphs are outdented.
20 \newlength{\R@cipeOutdent}
These are the horizontal spaces between the quantity and units, and between theunit and the ingredient.
21 \newlength{\R@cipeIngQUSpace}
22 \newlength{\R@cipeIngUISpace}
These are the vertical distances for the recipe title-to-rule adjustments (usuallynegative).
23 \newlength{\R@cipeTitleVerticalAdjustTop}
24 \newlength{\R@cipeTitleVerticalAdjustBot}
These are the widths of the ingredient descriptors and combinations of them.
25 \newlength{\R@cipeIngredientWidth}
26 \newlength{\R@cipeQuantityWidth}
27 \newlength{\R@cipeUnitsWidth}
28 \newlength{\R@cipeQandUWidth}
29 \newlength{\R@cipeIandUWidth}
30 \newlength{\R@cipeIQUWidth}
31 \newlength{\R@cipeSingleIngWidth}
\R@cipeMethodWidth is the width of the method text.
32 \newlength{\R@cipeMethodWidth}
\St@pNumberWidth is the width of the step number and \R@cipeStepWidth is thewidth of everything within a step.
33 \newlength{\St@pNumberWidth}
34 \newlength{\R@cipeStepWidth}
The following macros are to set the lengths defined above.
\R@cipeMethodWidths \R@cipeMethodWidths is to set the widths of the boxes/columns used in the recipesteps. There are four parameters: #1 is the step number width, #2 is the ingredientwidth, #3 the quantity width, #4 the units width. The other lengths below arededuced from these and \R@cipeMethodWidth. The 0.5cm values are to leave alittle space between the columns.
35 \DeclareRobustCommand*{\R@cipeMethodWidths}[4]{%
36 \setlength{\St@pNumberWidth}{#1}%
37 \setlength{\R@cipeIngredientWidth}{#2}%
38 \setlength{\R@cipeQuantityWidth}{#3}%
39 \setlength{\R@cipeUnitsWidth}{#4}%
40 \setlength{\R@cipeQandUWidth}{\R@cipeQuantityWidth}%
10
41 \addtolength{\R@cipeQandUWidth}{\R@cipeUnitsWidth}%
42 \setlength{\R@cipeIQUWidth}{\R@cipeQandUWidth}%
43 \addtolength{\R@cipeIQUWidth}{\R@cipeIngredientWidth}%
44 \addtolength{\R@cipeIQUWidth}{0.5cm}%
45 \setlength{\R@cipeIandUWidth}{\R@cipeIQUWidth}%
46 \addtolength{\R@cipeIandUWidth}{-\R@cipeQuantityWidth}%
47 \setlength{\R@cipeStepWidth}{\R@cipeWidth}%
48 \addtolength{\R@cipeStepWidth}{-\St@pNumberWidth}%
49 \setlength{\R@cipeMethodWidth}{\R@cipeStepWidth}%
50 \addtolength{\R@cipeMethodWidth}{-\R@cipeIngredientWidth}%
51 \addtolength{\R@cipeMethodWidth}{-\R@cipeQandUWidth}%
52 \addtolength{\R@cipeMethodWidth}{-0.5cm}%
53 \setlength{\R@cipeSingleIngWidth}{\R@cipeIQUWidth}%
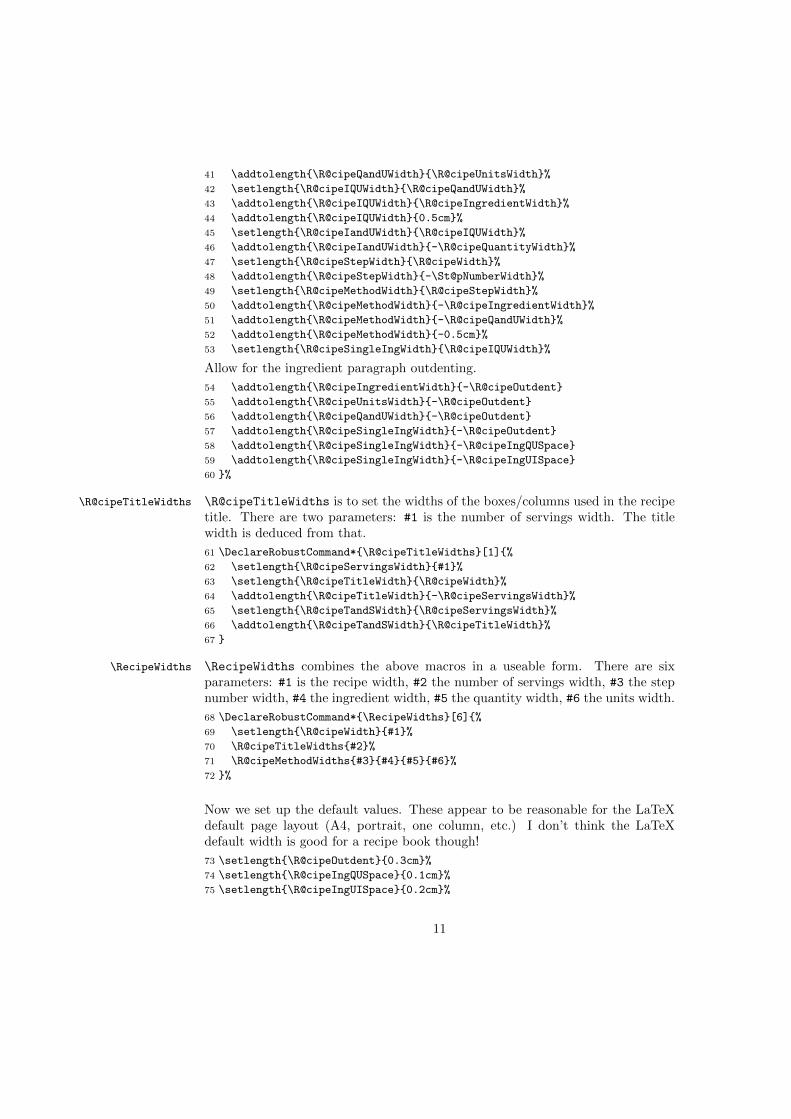
Allow for the ingredient paragraph outdenting.
54 \addtolength{\R@cipeIngredientWidth}{-\R@cipeOutdent}
55 \addtolength{\R@cipeUnitsWidth}{-\R@cipeOutdent}
56 \addtolength{\R@cipeQandUWidth}{-\R@cipeOutdent}
57 \addtolength{\R@cipeSingleIngWidth}{-\R@cipeOutdent}
58 \addtolength{\R@cipeSingleIngWidth}{-\R@cipeIngQUSpace}
59 \addtolength{\R@cipeSingleIngWidth}{-\R@cipeIngUISpace}
60 }%
\R@cipeTitleWidths \R@cipeTitleWidths is to set the widths of the boxes/columns used in the recipetitle. There are two parameters: #1 is the number of servings width. The titlewidth is deduced from that.
61 \DeclareRobustCommand*{\R@cipeTitleWidths}[1]{%
62 \setlength{\R@cipeServingsWidth}{#1}%
63 \setlength{\R@cipeTitleWidth}{\R@cipeWidth}%
64 \addtolength{\R@cipeTitleWidth}{-\R@cipeServingsWidth}%
65 \setlength{\R@cipeTandSWidth}{\R@cipeServingsWidth}%
66 \addtolength{\R@cipeTandSWidth}{\R@cipeTitleWidth}%
67 }
\RecipeWidths \RecipeWidths combines the above macros in a useable form. There are sixparameters: #1 is the recipe width, #2 the number of servings width, #3 the stepnumber width, #4 the ingredient width, #5 the quantity width, #6 the units width.
68 \DeclareRobustCommand*{\RecipeWidths}[6]{%
69 \setlength{\R@cipeWidth}{#1}%
70 \R@cipeTitleWidths{#2}%
71 \R@cipeMethodWidths{#3}{#4}{#5}{#6}%
72 }%
Now we set up the default values. These appear to be reasonable for the LaTeXdefault page layout (A4, portrait, one column, etc.) I don’t think the LaTeXdefault width is good for a recipe book though!
73 \setlength{\R@cipeOutdent}{0.3cm}%
74 \setlength{\R@cipeIngQUSpace}{0.1cm}%
75 \setlength{\R@cipeIngUISpace}{0.2cm}%
11

76 \setlength{\R@cipeTitleVerticalAdjustTop}{-0.25cm}
77 \setlength{\R@cipeTitleVerticalAdjustBot}{-0.25cm}
78 \RecipeWidths{\textwidth}{3cm}{0.8cm}{3.5cm}{1cm}{1.7cm}
10 Fonts
This is where the default fonts are set up. \recipefont is the default font forthe other recipe fonts; thus the other fonts inherit from this but can be alteredindividually.
79 \newcommand*\recipefont{\normalfont}
80 \newcommand*\recipetitlefont{\recipefont}
81 \newcommand*\recipenumberfont{\recipefont}
82 \newcommand*\recipestepnumberfont{\recipefont}
83 \newcommand*\recipequantityfont{\recipefont}
84 \newcommand*\recipeunitfont{\recipefont}
85 \newcommand*\recipeingredientfont{\recipefont}
86 \newcommand*\recipemethodfont{\recipefont}
87 \newcommand*\recipeservingsfont{\recipefont}
88 \newcommand*\recipetimefont{\recipefont}
89 \newcommand*\recipefreeformfont{\recipefont}
11 Boxes
\st@pingrbox is to hold the ingredients cumulatively as each \ingredient com-mand is processed; \st@pingrtmpbox and \titl@tmpbox are used as temporarytransfer boxes.
90 \newsavebox{\st@pingrbox}
91 \newsavebox{\st@pingrtmpbox}
92 \newsavebox{\titl@tmpbox}
This is used to hold a single ingredient as it is being processed:
93 \newsavebox{\st@pIQUbox}
This is to hold the method (or freeform) text for the step:
94 \newsavebox{\st@pmethodbox}
12 Options
nonumber — Should recipes be numbered? (The default is yes.)
95 \DeclareOption{number}{\numb@ringtrue}
96 \DeclareOption{nonumber}{\numb@ringfalse}
contents — Should recipes be indexed to a file? (The default is no.)
97 \DeclareOption{contents}{\c@ntentsingtrue}
98 \DeclareOption{nocontents}{\c@ntentsingfalse}
12

index — Should recipes be indexed to a file? (The default is no.)
99 \DeclareOption{index}{\ind@xingtrue}
100 \DeclareOption{noindex}{\ind@xingfalse}
Process the options, using the defaults if necessary.
101 \ExecuteOptions{number,noindex,nocontents}
102 \ProcessOptions\relax
13 The main macros
13.1 Macros for displaying the steps and title
\Displ@ySt@p \Displ@ySt@p displays the ingredients and method for the current step and resetsthings ready for the next step.
103 \DeclareRobustCommand{\Displ@ySt@p}{%
First, increment the step counter and put extra vertical space between steps. (Butit isn’t uniform yet, unfortunately.)
104 \stepcounter{st@pnumber}%
Display this step.
105 \makebox[\R@cipeWidth]{%
106 \makebox[\St@pNumberWidth][l]{\recipestepnumberfont\arabic{st@pnumber}}%
107 \usebox{\st@pingrbox}%
108 \usebox{\st@pmethodbox}%
109 }%
Finally, clear the step storage boxes for the next step.
110 \savebox{\st@pingrbox}[\R@cipeIQUWidth]{}
111 }%
\Fr@eFormStep \Fr@eFormStep displays a free form description; it works in the same way as\Displ@ySt@p.
112 \DeclareRobustCommand{\Fr@eFormStep}{%
113 \usebox{\st@pmethodbox}%
114 \savebox{\st@pmethodbox}[\R@cipeMethodWidth]{}%
115 }%
\DisplaySt@p This calls one of the two display routines above, depending on whether we arefreeforming or not.
116 \DeclareRobustCommand{\DisplaySt@p}{%
117 \iffr@eforming%
118 \Fr@eFormStep%
119 \else%
120 \Displ@ySt@p%
121 \fi%
122 \ifn@wpaging%
123 \recipen@wpage%
124 \else%
13

125 \vskip0.2cm%
126 \fi%
127 \n@wpagingfalse%
128 }%
\r@cipetitle \r@cipetitle displays the recipe title construction, given the parameters #1 thetitle, #2 the number of servings and #3 the preparation time.
129 \DeclareRobustCommand{\r@cipetitle}[3]{%
The \parskip ensures that the distance between the rule and the text above andbelow does not change when the page’s vertical glue “sets”. The following displaysthe text line above the rule; the recipe number width is automatically determinedhere.
130 \mbox{%
131 \makebox[\R@cipeWidth][t]{%
132 \parbox[t]{\R@cipeWidth}{%
133 \ifnumb@ring%
134 \savebox{\titl@tmpbox}{%
135 {\recipenumberfont\arabic{r@cipenumber}\ \ }%
136 }%
137 \setlength{\R@cipeNumberWidth}{\wd\titl@tmpbox}%
138 \addtolength{\R@cipeTitleWidth}{-\R@cipeNumberWidth}%
139 \addtolength{\R@cipeTandSWidth}{-\R@cipeNumberWidth}%
140 \lineskip0pt\mbox{}\\[-\baselineskip]%
141 \parbox[b]{\R@cipeNumberWidth}{%
142 \rule{0pt}{\baselineskip}%
143 \strut\usebox{\titl@tmpbox}%
144 \strut%
145 }%
146 \makebox[\R@cipeTandSWidth][t]{%
147 \parbox[t]{\R@cipeTandSWidth}{%
148 \lineskip0pt\mbox{}\\[-\baselineskip]%
149 \parbox[b]{\R@cipeTitleWidth}{%
150 \rule{0pt}{\baselineskip}%
151 \strut{\recipetitlefont #1}\strut\hfill}%
152 \parbox[b]{\R@cipeServingsWidth}{%
153 \strut{\hfill\recipeservingsfont #2}\strut}%
154 }%
155 }%
156 \addtolength{\R@cipeTandSWidth}{\R@cipeNumberWidth}%
157 \addtolength{\R@cipeTitleWidth}{\R@cipeNumberWidth}%
158 \else%
159 \lineskip0pt\mbox{}\\[-\baselineskip]%
160 \parbox[b]{\R@cipeTitleWidth}{%
161 \rule{0pt}{\baselineskip}%
162 \strut{\recipetitlefont #1}\strut\hfill}%
163 \parbox[b]{\R@cipeServingsWidth}{%
164 \strut{\hfill\recipeservingsfont #2}\strut}%
165 \fi%
14
166 }%
167 }%
168 }\par%
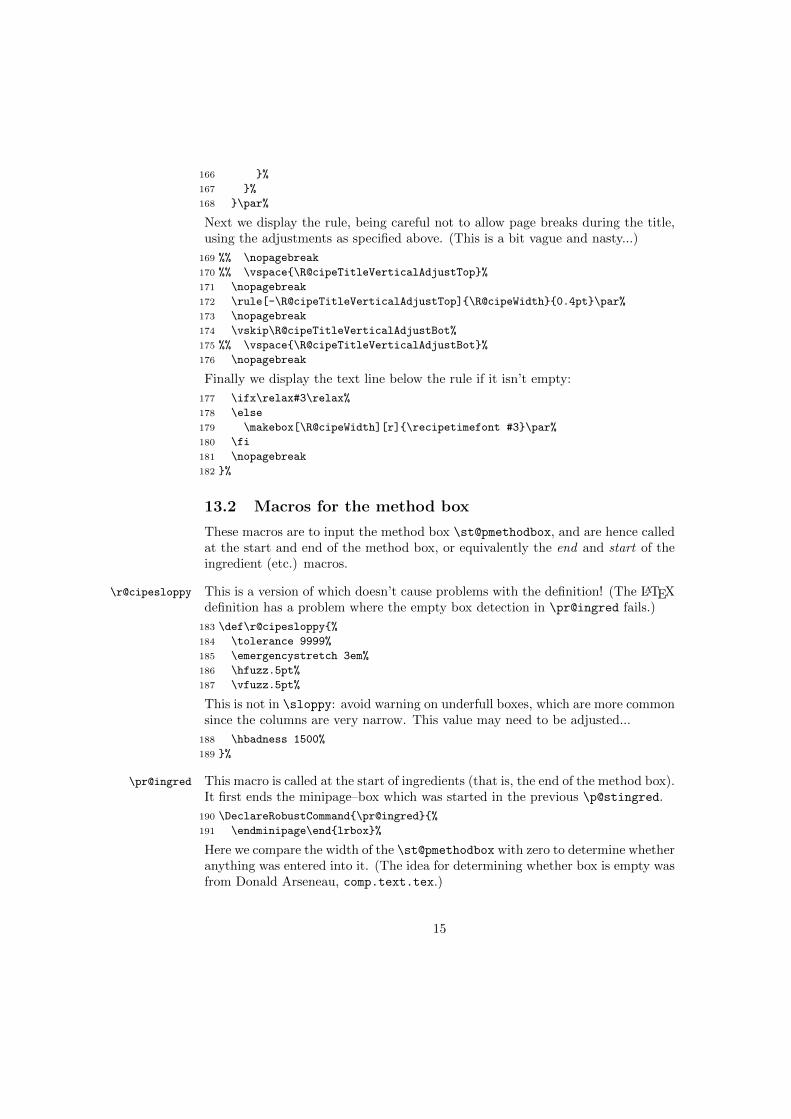
Next we display the rule, being careful not to allow page breaks during the title,using the adjustments as specified above. (This is a bit vague and nasty...)
169 %% \nopagebreak
170 %% \vspace{\R@cipeTitleVerticalAdjustTop}%
171 \nopagebreak
172 \rule[-\R@cipeTitleVerticalAdjustTop]{\R@cipeWidth}{0.4pt}\par%
173 \nopagebreak
174 \vskip\R@cipeTitleVerticalAdjustBot%
175 %% \vspace{\R@cipeTitleVerticalAdjustBot}%
176 \nopagebreak
Finally we display the text line below the rule if it isn’t empty:
177 \ifx\relax#3\relax%
178 \else
179 \makebox[\R@cipeWidth][r]{\recipetimefont #3}\par%
180 \fi
181 \nopagebreak
182 }%
13.2 Macros for the method box
These macros are to input the method box \st@pmethodbox, and are hence calledat the start and end of the method box, or equivalently the end and start of theingredient (etc.) macros.
\r@cipesloppy This is a version of which doesn’t cause problems with the definition! (The LATEXdefinition has a problem where the empty box detection in \pr@ingred fails.)
183 \def\r@cipesloppy{%
184 \tolerance 9999%
185 \emergencystretch 3em%
186 \hfuzz.5pt%
187 \vfuzz.5pt%
This is not in \sloppy: avoid warning on underfull boxes, which are more commonsince the columns are very narrow. This value may need to be adjusted...
188 \hbadness 1500%
189 }%
\pr@ingred This macro is called at the start of ingredients (that is, the end of the method box).It first ends the minipage–box which was started in the previous \p@stingred.
190 \DeclareRobustCommand{\pr@ingred}{%
191 \endminipage\end{lrbox}%
Here we compare the width of the \st@pmethodbox with zero to determine whetheranything was entered into it. (The idea for determining whether box is empty wasfrom Donald Arseneau, comp.text.tex.)
15

192 \ifdim\wd\st@pmethodbox=0in%
193 % \PackageWarning{cuisine}{No text}% % use for testing
194 \else%
195 % \PackageWarning{cuisine}{Method text}%
196 \DisplaySt@p%
197 \fi%
198 }%
\p@stingred And this macro is called at the end of ingredients (the start of the method box).This is very odd. Using \begin{lrbox}...\end{lrbox} isn’t supposed to workproperly over an environment definition (and doesn’t seem to, either). So we use\lrbox...\endlrbox. But we want to nest a \minipage inside this, which fails.But it does work with \begin{lrbox}\minipage...\endminipage\end{lrbox}.
WHY?!What happens, anyway, is that a new minipage–box is started. Provided the userdoesn’t put anything other than whitespace and comments between this and thenext \pr@ingred then the box will be empty. This is how \p@stingred knowswhether to display the step or not when called by \ingr@dient.
199 \DeclareRobustCommand{\p@stingred}{%
200 \fr@eformingfalse%
201 \begin{lrbox}{\st@pmethodbox}\minipage[t]{\R@cipeMethodWidth}%
202 \recipemethodfont%
203 \noindent%
204 \ignorespaces%
205 \r@cipesloppy%
206 }%
13.3 Step terminating macros
These macros call \pr@ingred and \p@stingred, and can (through \pr@ingred)cause the next step to be started.
\m@thodend The \m@thodend command (which is \newstep in the environment) forces a newstep unless there is no method and no ingredient.
207 \DeclareRobustCommand{\m@thodend}{%
208 \endminipage\end{lrbox}%
209 \ifdim\wd\st@pmethodbox=0in%
210 \ifnum\value{ingr@dnumber}>0%
In this case, the method box is empty so we put something in it to avoid problemswith alignment.
211 \savebox{\st@pmethodbox}[\R@cipeMethodWidth]{\mbox{}}%
212 \DisplaySt@p%
213 \fi%
214 \else%
215 \DisplaySt@p%
216 \fi%
217 \p@stingred%
218 }%
16

\r@cipen@wpage \r@cipen@wpage is a macro which sets \n@wpagingtrue—so that the next stepwill appear on the next page—and then forces the next step.
219 \DeclareRobustCommand\r@cipen@wpage{\global\n@wpagingtrue\m@thodend}
\fr@eform \fr@eform is for freeform text, like \noalign in tables. Again, as for \m@thodend,we want to force the new step unless there is no method and no ingredient.
220 \DeclareRobustCommand{\fr@eform}{%
221 \endminipage\end{lrbox}%
222 \ifdim\wd\st@pmethodbox=0in%
223 \ifnum\value{ingr@dnumber}>0%
224 \savebox{\st@pmethodbox}[\R@cipeMethodWidth]{\mbox{}}%
225 \DisplaySt@p%
226 \fi%
227 \else%
228 \DisplaySt@p%
229 \fi%
The rest is like \p@stingred:
230 \fr@eformingtrue%
231 \begin{lrbox}{\st@pmethodbox}\minipage[t]{\R@cipeWidth}%
232 \recipefreeformfont%
233 \noindent%
234 \ignorespaces%
235 \r@cipesloppy%
236 }%
\ingr@dient The \ingr@dient command takes 3 parameters, one optional. #3 is the ingredient.If #1 is non-blank then #1 is the numerical quantity and #2 the unit of measure,otherwise #2 is the quantity. Start by ending the method box.
237 \DeclareRobustCommand{\ingr@dient}[3][]{%
238 \pr@ingred%
The following is the main bit to typeset the ingredients list. (Thanks to UlrikeFischer, comp.text.tex, for help with aligning box baselines.)This is a hack to see if #1 is empty (Patrick Guio, comp.text.tex).
239 \ifx\relax#1\relax%
If it is empty we typeset #2 in the whole QandU width. We align the top of theingredient box with the bottom of the quantity box but have the baseline as thetop line of the quantity box. Use ragged right because the column is too narrowfor flush right.
240 \savebox{\st@pIQUbox}[\R@cipeIQUWidth][t]{%
241 \parbox[t]{\R@cipeIQUWidth}{%
242 \lineskip0pt\mbox{}\\[-\baselineskip]%
243 \rule{\R@cipeOutdent}{0cm}%
244 \parbox[b]{\R@cipeQandUWidth}{%
245 \raggedright\recipeunitfont%
246 \setlength{\parindent}{-\R@cipeOutdent}%
17
This sees whether the text is large enough to fit on one line, in which case itcentres it; otherwise it formats it sensibly.Note: the \hfill matches another one elsewhere to centre the line.
247 \savebox{\st@pingrtmpbox}{#2}%
248 \ifdim\wd\st@pingrtmpbox>\R@cipeQandUWidth%
249 \rule{0pt}{\baselineskip}%
250 \strut #2\strut%
251 \else%
252 \noindent%
253 \rule{0pt}{\baselineskip}%
254 \strut #2\hfill\strut%
255 \fi%
256 }%
257 \rule{\R@cipeIngUISpace}{0cm}%
258 \rule{\R@cipeOutdent}{0cm}%
259 \parbox[t]{\R@cipeIngredientWidth}{\raggedright%
260 \recipeingredientfont%
261 \setlength{\parindent}{-\R@cipeOutdent}%
262 \strut #3\strut}%
263 }%
264 }%
265 \else
If #1 was not empty, typeset #1 and #2 separately. First align the top of theingredient box with the bottom of the unit box but have the baseline as the topline of the unit box; then repeat with that box below the quantity box.
266 \savebox{\st@pingrtmpbox}[\R@cipeIandUWidth][t]{%
267 \parbox[t]{\R@cipeIandUWidth}{%
268 \lineskip0pt\mbox{}\\[-\baselineskip]%
269 \rule{\R@cipeOutdent}{0cm}%
270 \parbox[b]{\R@cipeUnitsWidth}{%
271 \raggedright\recipeunitfont%
272 \setlength{\parindent}{-\R@cipeOutdent}%
273 \rule{0pt}{\baselineskip}%
274 \strut #2\strut\hfill}%
275 \rule{\R@cipeIngUISpace}{0cm}%
276 \rule{\R@cipeOutdent}{0cm}%
277 \parbox[t]{\R@cipeIngredientWidth}{%
278 \raggedright\recipeingredientfont%
279 \setlength{\parindent}{-\R@cipeOutdent}%
280 \strut #3\strut}%
281 }%
282 }%
283 \savebox{\st@pIQUbox}[\R@cipeIQUWidth][t]{%
284 \parbox[t]{\R@cipeIQUWidth}{%
285 \lineskip0pt\mbox{}\\[-\baselineskip]%
286 \parbox[b]{\R@cipeQuantityWidth}{\rule{0pt}{\baselineskip}%
287 \hfill %
288 \raggedright\recipequantityfont%
289 \strut #1\strut%
18
290 \rule{\R@cipeIngQUSpace}{0cm}}%
291 \usebox{\st@pingrtmpbox}%
292 }%
293 }%
294 \fi%
Use \st@pingrtmpbox as a temporary holding box. The \lineskip0pt and the\struts ensure that the ingredients’ and the method text’s baselines are alignedcorrectly.
295 \savebox{\st@pingrtmpbox}[\R@cipeIQUWidth][t]{\usebox{\st@pingrbox}}%
296 \savebox{\st@pingrbox}[\R@cipeIQUWidth][t]{%
297 \begin{minipage}[t]{\R@cipeIQUWidth}%
298 \lineskip0pt%
299 \ifnum\value{ingr@dnumber}>0%
300 \usebox{\st@pingrtmpbox}\par%
301 \usebox{\st@pIQUbox}\strut%
302 \else%
303 \usebox{\st@pIQUbox}\strut%
304 \fi%
305 \end{minipage}%
306 }%
307 % \usebox{\st@pingrbox} % For testing: show cumulative boxes.
308 \stepcounter{ingr@dnumber}%
309 \p@stingred%
310 }%
\Ingr@dient The \Ingr@dient command takes just one parameter. It fits in the same finalbox as \ingr@dient but is much simpler. Start by ending the method box.
311 \DeclareRobustCommand{\Ingr@dient}[1]{%
312 \pr@ingred%
We typeset #1 in the single ingredient width, which is the IQU width minus theoutdent. Use ragged right because the column is too narrow for flush right.
313 \savebox{\st@pIQUbox}[\R@cipeSingleIngWidth][t]{%
314 \parbox[t]{\R@cipeSingleIngWidth}{%
315 \lineskip0pt\mbox{}\\[-\baselineskip]%
316 \rule{\R@cipeOutdent}{0cm}%
317 \parbox[t]{\R@cipeSingleIngWidth}{\raggedright%
318 \recipeingredientfont%
319 \setlength{\parindent}{-\R@cipeOutdent}%
320 \strut #1\strut}%
321 }%
322 }%
Use \st@pingrtmpbox as a temporary holding box. The \lineskip0pt and the\struts ensure that the ingredients’ and the method text’s baselines are alignedcorrectly.
323 \savebox{\st@pingrtmpbox}[\R@cipeIQUWidth][t]{\usebox{\st@pingrbox}}%
324 \savebox{\st@pingrbox}[\R@cipeIQUWidth][t]{%
325 \begin{minipage}[t]{\R@cipeIQUWidth}%
19
326 \lineskip0pt%
327 \ifnum\value{ingr@dnumber}>0%
328 \usebox{\st@pingrtmpbox}\par%
329 \usebox{\st@pIQUbox}\strut%
330 \else%
331 \usebox{\st@pIQUbox}\strut%
332 \fi%
333 \end{minipage}%
334 }%
335 % \usebox{\st@pingrbox} % For testing: show cumulative boxes.
336 \stepcounter{ingr@dnumber}%
337 \p@stingred%
338 }%
14 The recipe environment
recipe This is the main environment in the package. Its 3 parameters are #2 is the recipetitle, #3 is the number of portions, and #3 the preparation time. Of course, #3 and#4 can be whatever you like but that is one way of using them. #1 is the label.
339 \newenvironment{recipe}[4][]{%
These are the things that are put at the start of the recipe environment. First,set things up. Increment the recipe counter (which can be used in \label), makecommand aliases and empty the boxes. Note that \label is set through #1, not\label.
340 \refstepcounter{r@cipenumber}
341 \ifx\relax#1\relax
342 \else
343 \label{#1}
344 \fi
345 \let\label\relax
346 \let\newstep\m@thodend
347 \let\recipen@wpage\newpage
348 \let\newpage\r@cipen@wpage
349 \let\0\d@grees
350 \let\X\tim@s
351 \let\degrees\d@grees
352 \let\fr\fr@ction
353 \let\ing\ingr@dient
354 \let\ingredient\ingr@dient
355 \let\Ing\Ingr@dient
356 \let\Ingredient\Ingr@dient
357 \let\freeform\fr@eform
358 \n@wpagingfalse%
359 \setlength{\parindent}{0pt}
360 \savebox{\st@pingrbox}[\R@cipeIQUWidth]{}
361 \savebox{\st@pmethodbox}[\R@cipeMethodWidth]{}
20

Make sure that the recipe is spaced appropriately from the preceding text andstart a new page if necessary. This is not part of \r@cipetitle because puttingthe break after \addcontentsline might yield the wrong page number. The blankline below is intentional.
362
363 \bigskip\medskip
364 \pagebreak[0]
365 \parskip0pt%
Next deal with the contents/index entry if we need to. Again, the \nopagebreak
prevents the contents line occurring on the previous page.
366 \ifc@ntentsing%
367 \addcontentsline{toc}{subsection}{#2}%
368 \fi%
369 \ifind@xing%
370 \index{#2 (\arabic{r@cipenumber})}%
371 \fi%
372 \nopagebreak%
Display the title and start the method box.
373 \r@cipetitle{#2}{#3}{#4}
374 \vskip0.2cm%
375 \p@stingred%
376 }%
377 {%
These are the things put at the end of recipes. End the method box and deal withthe last step. Give a warning if the recipe is empty. It is apparently not necessaryto reset the earlier assignments and \parindent.
378 \pr@ingred%
379 \ifnum\value{st@pnumber}=0% then complain!
380 \PackageWarning{cuisine}{The recipe did not have any steps}%
381 \fi%
382
383 \pagebreak[0]%
384 \medskip%
This prevents indentation problems after the end of the environment.
385 \@endpetrue%
386 }%
15 Miscellaneous useful macros
\d@grees This is to typeset a degrees symbol.
387 \DeclareRobustCommand{\d@grees}{%
388 ${}^\circ$%
389 }%
\tim@s This is to typeset a times symbol (like ×).
21
390 \DeclareRobustCommand{\tim@s}{%
391 \relax${}\times{}$\relax%
392 }%
\fr@ction This is to typeset fractions, currently using package nicefrac.
393 % \begin{macrocode}
394 \DeclareRobustCommand{\fr@ction}[2]{%
395 \nicefrac#1#2%
396 }%
22