the everyday gourmet - snagfilms · —martha stewart, ... this book is in copyright. ... you a...
TRANSCRIPT

For thousands of years, spices made their way along the Silk Road from the Far East to the Middle East and then by boat to northern Europe. Camel caravans brought pepper, ginger, cinnamon, nutmeg, and more to buyers willing to pay exorbitant prices for the flavor and even the magical or medicinal powers of spices. Over time, spices came to distinguish the “flavor profiles” of various regions of the world: India, with cumin, curry leaves, and tamarind; China, with ginger, sesame seeds, and star anise; and Mexico, with canella, chiles, and garlic. In this course, you’ll tour these regions and others, exploring a variety of cooking traditions and the flavors of cuisines from around the world.
In six lessons, you’ll learn techniques and flavor combinations that lead to delicious meals and discover strategies for seasoning to consistently achieve great results. Not only will you encounter new spices and new dishes from a range of cultures, but you’ll also see ways to manipulate spices that can be applied to the recipes you cook every day. You’ll explore techniques for enhancing the flavor of ingredients, such as wet or dry toasting, and learn to make distinctive and exotic spice blends. Along the way, you’ll also pick up some interesting tidbits of culinary history, tips for storing and handling spices, and even ideas for entertaining. Above all, this course will encourage you to experiment in the kitchen—to taste new flavors, try new ingredients with confidence, and make the time you spend cooking a richer and more satisfying experience for both you and your family.
Look for our gourmet cooking, baking, and other Great Courses related to food and wine at www.thegreatcourses.com.
The Everyday GourmetEssential Secrets of Spices in CookingBill Briwa, Chef-InstructorThe Culinary Institute of America
The E
veryday Gourm
et: Essential Secrets of Spices in C
ooking
THE GREAT COURSES®
Corporate Headquarters4840 Westfields Boulevard, Suite 500Chantilly, VA 20151-2299USAPhone: 1-800-832-2412www.thegreatcourses.com
Course No. 9222 © 2013 The Teaching Company.
Cover Images: © iStock/Thinkstock. Professor Photo: Justin Smith @JustinTimePhoto.com.
OI9222A
A unique collaboration…
The Great Courses, leaders in lifelong learning
“Pure intellectual stimulation that can be popped into the [audio or video] player anytime.”
—Harvard Magazine
“Passionate, erudite, living legend lecturers. Academia’s best lecturers are being captured on tape.”
—The Los Angeles Times
“A serious force in American education.” —The Wall Street Journal
partners with…
The Culinary Institute of America, leaders in culinary education
“The CIA has been setting the standard for excellence in professional culinary education for more than 60 years.”
—Martha Stewart, entrepreneur and domestic lifestyle innovator
“ [A]n institution that has truly changed the way the world looks at food.”
—Anthony Terlato, chairman of Terlato Wine Group and Wine Enthusiast’s Man of the Year in 2003
“It’s the best culinary school in the world.” —Paul Bocuse, world-renowned French chef
The Everyday Gourmet: Essential Secrets of Spices in Cooking is taught by Chef Bill Briwa, Certified Executive Chef, Certified Hospitality Educator, and Chef-Instructor at The Culinary Institute of America (CIA), the world’s premier culinary college. Founded in 1946 as a school to train returning World War II veterans in the culinary arts, the CIA has grown from its original enrollment of 50 students and three faculty members to include more than 2,800 undergraduate students, more than 150 chefs and instructors, and four campuses. In addition to its degree and certificate programs, the college also offers continuing education programs for foodservice professionals, wine professionals, and food enthusiasts; publishes textbooks and cookbooks; operates nine student-staffed restaurants; and hosts the Worlds of Flavor Conference and Festival.
Notable alumni include Anthony Bourdain, chef, author, and television personality; Anne Burrell, from Food Network’s Secrets of a Restaurant Chef; and Cat Cora, from Food Network’s Iron Chef America.
The Everyday Gourmet: Essential Secrets of Spices in Cooking was filmed on location at the CIA’s campus at Greystone in California’s Napa Valley.
Chef Bill Briwa is a Chef-Instructor at The Culinary Institute of America at Greystone, where he has developed curricula and has taught cooking, flavor dynamics, gastronomy, and food-and-wine pairing for the past 15 years. A Certified Executive Chef and Certified Hospitality Educator, Chef Briwa has worked extensively in the hospitality industry and has owned and operated his own bistro. The Culinary Institute of America is the world’s premier culinary college, setting the standard for excellence in professional culinary education for more than six decades.

PUBLISHED BY:
THE GREAT COURSESCorporate Headquarters
4840 Westfields Boulevard, Suite 500Chantilly, Virginia 20151-2299
Phone: 1-800-832-2412Fax: 703-378-3819
www.thegreatcourses.com
Copyright © The Teaching Company, 2013
Printed in the United States of America
This book is in copyright. All rights reserved.
Without limiting the rights under copyright reserved above,no part of this publication may be reproduced, stored in
or introduced into a retrieval system, or transmitted, in any form, or by any means
(electronic, mechanical, photocopying, recording, or otherwise), without the prior written permission of
The Teaching Company.

i
Bill Briwa, C.E.C., C.H.E.Chef-Instructor
The Culinary Institute of America at Greystone
A 1980 graduate of The Culinary Institute of America (CIA), Chef Bill Briwa has worked in the hospitality industry for
more than 30 years and is a Certified Executive Chef and Certified Hospitality Educator. In addition to being the resident chef for The Hess Collection winery in California’s Napa Valley, Chef Briwa owned and operated his own bistro and worked at Thomas Keller’s award-winning
restaurant The French Laundry. He was also the executive chef for The Wine Spectator Restaurant at the CIA at Greystone and served as an officer on the board of the St. Helena Farmers’ Market. As culinary chair of the 2004 Napa Valley Wine Auction, Chef Briwa helped raise more than five million dollars for local charities. In addition to his work as a cook and chef, he has worked as both a baker and pastry chef. His writing on food and wine, olive oil, and cooking has been featured locally and in Fine Cooking, Mise en Place, and Sunset, as well as in the trade publications Flavor & the Menu and Practical Winery & Vineyard Journal.
As a Chef-Instructor at the CIA, Chef Briwa has developed curricula and has taught cooking, flavor dynamics, gastronomy, and food-and-wine pairing full time for the past 15 years. He has traveled to both teach and study cooking across the United States; in China, Mexico, South and Central America, and Europe; and around the Mediterranean. In addition, he is part of the Industry Services Group at the CIA and works closely with a broad range of corporate clients to help them realize their culinary goals.
Chef Briwa has been a speaker at many professional conferences, and he takes part in the Healthy Kitchens, Healthy Lives conference held twice each year at the CIA at Greystone. The conference is copresented by Harvard School of Public Health and the CIA. Chef Briwa has collaborated with Dr. Connie Guttersen, an instructor at the CIA and author of The Sonoma Diet, on numerous presentations on

ii
LESSON GUIDES
nutrition and cooking, including a course on the science of healthy cooking produced by The Great Courses. In 2003, Chef Briwa was a judge for the American Cheese Society, and in 2005, he presented on gastronomy at the annual conference of the International Association of Culinary Professionals. In 2005, 2006, and 2007, he presented at the International Foodservice Manufacturers Association’s Chain Operators Exchange conference, and in 2008 and 2009, he spoke at the National Restaurant Association Show. Chef Briwa also presented at Beyond Extra Virgin IV, a conference on superpremium olive oil, in Verona, Italy.
Over the last 30 years of cooking and teaching, Chef Briwa has taken one short break from the stove to become a puppeteer. He lives in Yountville, California, with his wife and a border collie—both of whom think highly of his cooking.
Chef Briwa is the instructor for three other offerings in The Great Courses’ Everyday Gourmet series: Rediscovering the Lost Art of Cooking, Making Healthy Food Taste Great, and Making Great Meals in Less Time. ■

LESSON 1India—Heart of the Spice World ������������������������������������������������������������3
LESSON 2China—From Peppercorns to Tea �������������������������������������������������������15
LESSON 3Mexico—Chiles for Every Palate ���������������������������������������������������������25
LESSON 4Mediterranean Spices—Exotic Blends ������������������������������������������������36
LESSON 5Treasured Spices in Northern Europe �������������������������������������������������50
LESSON 6New American Cuisine—The Global Kitchen ��������������������������������������61
Recipe List �������������������������������������������������������������������������������������������68Glossary ����������������������������������������������������������������������������������������������69Bibliography �����������������������������������������������������������������������������������������71Photographic Credits ���������������������������������������������������������������������������73
LESSON GUIDES
Table of Contents
SUPPLEMENTAL MATERIAL
iii

iv
Note to the Home Chef
The ingredient lists provided in this guidebook are for general reference only. Chef Briwa frequently substitutes or adds ingredients as he cooks and encourages you to do the same. The key to becoming a great chef is to learn about your ingredients and how they change in the process of cooking, to taste your food frequently as you develop a dish, and to be courageous enough to experiment in the kitchen.

The Everyday Gourmet Essential Secrets of Spices in Cooking
Although we’re all members of the human family, as anyone who has traveled knows, cultures around the world vary widely. Customs, traditions, and even foodstuffs are unique to particular regions or
groups of people. Just as each of us has individual traits that distinguish us from others, so, too, the food of each culture has a flavor profile that defines, in some ways, the people who eat it.
In part, a flavor profile is shaped by climate and geography, both of which have an effect on the availability and taste of ingredients. It’s also shaped by history, tradition, and cooking techniques. And of course, what makes a flavor profile distinctive is how its culture chooses to embrace spices.
In this six-lesson course, we will explore a variety of cooking traditions from around the world, with the goal of understanding those seductive ingredients collectively known as spices. We will identify cooking techniques and flavor combinations that lead to delicious dishes and explore strategies for seasoning to consistently achieve great results. Along the way, I will share tips on buying, storing, and working with a broad selection of spices and spice blends, from star anise to za’atar.
Throughout the course, we’ll focus on three overarching goals that will make you a better cook:
● Developing an understanding of the workings of taste and flavor
● Mastering basic cooking techniques
● Searching out high-quality ingredients and learning what you can expect of them
1

2
The payoff for achieving these goals is cooking that is more enjoyable to others and a richer and more personally satisfying experience in the kitchen for you. This course will broaden your horizons as it invites you to explore a world of spices.
Best regards,
Bill Briwa, Chef-InstructorThe Culinary Institute of America

3
India— Heart of the Spice World
Lesson 1
Most of the spices we consume come from the East—from India and the Spice Islands beyond. India alone produces 50 percent of the spices that are consumed globally. From cumin to coriander, from
paprika to pepper, Indian cuisine is a cuisine of spice. If there are techniques to be learned about working with spices, then India should be our teacher. In this lesson, we’ll make a complete Indian meal, including a basmati rice pilaf, sambar, shrimp with chile tamarind sauce, and chai tea. We’ll also learn to make a masala—an Indian spice mixture—and two methods for toasting spices that yield interesting results.
Basmati Rice Pilaf
At the center of almost every Indian meal is rice. For our meal, we’ll make a rice pilaf using fragrant basmati rice. Begin by rinsing the rice in water until the water runs clear—without any creamy white starch in it. Then, drain the rice.
Next, sweat the onions in ghee—clarified butter, which won’t burn. All the milk solids have been removed from this butter, and it typically has a fuller flavor. Ghee is the oil of choice for much of Indian cooking.
Ingredients
Yield: 6 portions
• 2 cups basmati rice• 3 cups water• ¼ cup ghee• 2 cups thinly sliced
onions• 2 sticks cinnamon
• 4 whole cloves • 2 Tbs cardamom
seeds• 1½ tsp salt

4
When the onions are translucent, begin adding some whole spices: cardamom seeds, cinnamon sticks, and cloves. Because this rice will
cook for about 20 minutes, these spices have plenty of opportunity to slowly give up their flavor in a liquid environment.
Next, add the rice to the pan, stirring or tossing to ensure that each grain gets a coat of the flavorful fat so that it won’t stick to other grains.
Basmati rice is a long-grain rice, about five times as long as it is wide, and it usually cooks up fluffy and loose. Basmati is one of the few rices that actually gets longer when it cooks, rather than wider.
For every type of rice, there is a specific ratio of rice to water for
cooking. For basmati rice, the ratio is about 1.5:1 (water to rice). Pour the water into the pan, give the rice one good stir, and then make sure to season the water with salt before cooking. This step makes a significant difference in the finished product; always season the liquid before cooking the rice. If you don’t know how much salt to add, taste the liquid; it should taste like well-seasoned broth.
Turn the heat up to bring the rice to a boil. When it reaches a boil, reduce the heat until it’s barely at a simmer—just a few bubbles breaking the surface. Cover the pan with a tight-fitting lid and cook the rice gently for 20 minutes. Watch the steam that escapes from under the lid. If you see too much steam, turn the heat down a bit. At the end of the 20 minutes, pull the pan off the heat and let the rice sit for 5 or 10 minutes. Rice is very delicate just after it has finished cooking; resting for a few minutes allows it to firm up slightly.
Basmati RiceMost of us don’t think of rice as a spice, yet the basmati rice used in India has a wonderful fragrance—both nutty and roasted� Even raw basmati rice has a remarkably full aroma�
Curry PowderCurry powder is a familiar spice mixture to us, but if you go to India, you won’t find it. Indian cooks make their mixtures as they need them, and the one used for fish and vegetables may be different than the one used for meats�

5

6
Sambar Masala
If rice is at the center of the table in an Indian meal, close beside it, you’ll find something called dal—a cross between a stew and a soup that’s made primarily with lentils. The dal known as sambar comes from the southern part of India. It starts out with a spice mixture called a masala.
The first step in creating a sambar dal is to make the sambar powder. Begin by toasting whole spices—coriander, cumin, peppercorns, and fenugreek—in a dry pan to draw out their flavor. As the pan starts to heat up, make sure to keep the spices moving so they don’t burn. You’ll know the pan is getting hot when the spices start to become aromatic. Next, you’ll notice some popping; the seeds pop just the way popcorn does in a hot pan. Then, you’ll notice that the color slowly begins to darken. Finally, you’ll see a little bit of smoke coming off the pan. Keep tossing or stirring the spices throughout these changes; otherwise, they will burn. When the spices are toasted, remove them from the pan to a cool plate.
The next step is to toast the various dals. We’re using three different kinds: moong dal, which is mung beans that have had the outside layer ground off and are then split; urad dal, another kind of lentil that has had the outside ground off and has been split; and chana dal, which is a small garbanzo that has been split. In India, these dals are considered not just lentils but also spices; we’ll toast them to bring out their rich, nutty flavor.
Ingredients
Yield: 1 cup
• ½ cup coriander seeds
• 12–14 whole dry red chile pods
• 1 ½ tsp cumin seeds
• 1 ½ tsp black peppercorns
• 1 ½ tsp fenugreek seeds
• 1 ½ tsp white split gram beans (urad dal)
• 1 ½ tsp yellow mung beans (moong dal)
• 1 ½ tsp yellow split peas (chana dal)
• 2 Tbs turmeric

7
When you first add the dals to the pan, they look fairly bright—without much color. Toast them until they start to take on a golden hue, using the white urad dal as a marker for browning. Again, keep the dals moving as you toast them.
Once the spices and dals are toasted, grind them in a spice mill (or with a mortar and pestle) to make sambar powder. You can also add some dried chiles to enhance the heat. One of the nice things about making this powder yourself is that you can choose to add more or fewer chiles. If you are particularly sensitive to spicy food, you might not be able to use commercial sambar powder (available at Indian grocery stores), but if you make it yourself, you can adjust the heat to your liking.
Sambar is a dal from southern India, where the weather is very hot; as many of us know, eating spicy food is one trick for staying cool in a hot environment. A trick for moderating the heat of chiles is to break them in half and remove the seeds and ribs. This technique eliminates 80 percent or more of the chiles’ heat.
Finally, to the ground-up ingredients, add turmeric, which has a wonderful citrusy flavor and a distinctive color. Because it is a ground spice and would burn easily, it isn’t toasted.

Sambar
For the dal known as sambar in southern India, begin by putting the moong dal into water and cooking it into a puree. This step should take about 20 or 30 minutes. Because the outside layer has been ground off and the beans have been split, they tend to fall apart and create a puree easily. You’re looking for a texture that’s a cross between a soup and a stew.
To the moong dal, add the tomato concassé and turmeric and allow them to cook together. After about 20 minutes, take a taste. You might be surprised to find that all on its own, the turmeric is a bit bitter. But both salt and acid can counter bitterness. When you add the sambar powder to finish the dish, you’ll find that its flavors are so large that bitterness stops being the star and becomes one of the supporting players of a more compelling mix of flavors.
At this point, add the carrots, zucchini, and potatoes, and cook for another 20 minutes, until the vegetables are tender. You want the potatoes to fall apart a little bit and thicken the mixture. If at any point the sambar seems dry, add a little more liquid.
Ingredients
Yield: 6 portions
• 4 cups water• 1 cup moong dal
(or masoor dal)• 2 tomatoes, concassé• 2–3 zucchini, sliced
lengthwise• 2 carrots, cut in large chunks • 2 potatoes, cut in large
chunks• 1 Tbs turmeric• 2 tsp salt• 2 tsp tamarind paste or 1
Tbs fresh lemon juice• 1 Tbs vegetable oil or ghee
• 1 Tbs coriander seed, toasted and ground
• 1 tsp cumin seed, toasted and ground
• 1 Tbs black mustard seed, toasted
• 1–2 jalapeños, seeded and chopped
• 6–8 dried curry leaves, toasted
• 1 Tbs sambar masala
8

In a separate pan, we’ll toast some additional spices: mustard seed, coriander seed, cumin seed, and curry leaves. But instead of using a dry pan, the idea here is to pop these spices like popcorn in a little bit of oil. Begin by heating some ghee, then add the mustard, coriander, and cumin seeds. Make sure you have a lid close by because when the mustard seeds heat up, they’ll pop out of the pan. Leave the pan uncovered until you hear the first couple of pops. Then, put the lid on and keep swirling the pan as though you were making popcorn. Periodically, stop and listen to what’s happening in the pan.
For a textural element, sizzle some curry leaves in the hot ghee. Then, pour the oil with the spices in it directly into the sambar. This step completely changes the flavor profile of the dish, and because the spices were freshly popped, the flavor is still vital. Taste again and add a little salt and a squeeze of lemon juice or some tamarind paste. Of course, also add the sambar powder we made earlier. Serve the sambar with additional powder and basmati rice pilaf.
9

10
Shrimp with Chile Tamarind Sauce
Shrimp with chile tamarind sauce will go along with our rice and sambar. Begin by mixing cayenne, turmeric, and salt together in a bowl, then adding some shrimp and coating it with the spices. The mixture of spices flavors the shrimp—in effect, marinates them—and acts as a preservative. In a culture that doesn’t always have ready access to refrigeration, adding shrimp to a spice mixture like this one will guarantee that it stays fresh.
The next step is to create a masala. In an Indian kitchen, the cook might pull out a masala dabba, or spice caddy, and mix together some cayenne, coriander, and cumin. We’ll use the same three spices for our masala, and we’ll adjust the flavor of the finished dish by adding more of that masala at the end, just as we did when we made the sambar. To complete your mise en place, have on hand some tamarind paste.
In a large pan, heat some oil and pop the mustard seeds, keeping a lid close by, just as we did earlier. Next, add some fenugreek seeds and curry leaves. When the curry leaves stop sizzling, add sliced onions and cook until they are translucent and starting to brown along the edges. Next, add garlic, ginger, and hot chiles, but go light on the chiles because there is already some cayenne in this dish. Once the garlic is aromatic, add the tomatoes; you may need to lower the heat at this point to prevent the garlic from burning. This mixture, along with the tamarind paste, will be the sauce. Toward the end of cooking, you may
Ingredients
Yield: 6 portions
Shrimp and sauce:• 1 ½ lb medium or large
shrimp, peeled and deveined• ¼ tsp cayenne• ¼ tsp turmeric• 1 ¼ tsp salt• 5 Tbs vegetable oil • ½ tsp tamarind paste• ½ tsp mustard seeds• ⅛ tsp fenugreek seeds• 10–12 fresh curry leaves
• 2 cups onions, thinly sliced• 1 ½ tsp garlic, minced• 1 ½ tsp ginger, minced• 1 tsp fresh green chile
(serrano or Thai), minced• ¾ cup tomatoes, choppedMasala:• 3 tsp coriander• ¾ tsp cayenne• ½ tsp cumin

11
need to turn up the heat to reduce the sauce.
While the sauce cooks, sauté the shrimp in oil, allowing the spices on the outside of the shrimp to touch the hot surface of the pan. Heat the oil in the pan first and watch for it to smoke. The smoke is an indication of the fat beginning to break down; when it smokes, you should either take the pan off the heat or add food. Essentially, the smoke is telling you that the oil can’t get any hotter.
Shrimp cooks in as little as 5 minutes. Once it changes color and firms up, you know it’s almost done. At that point, add the sauce to the shrimp and finish cooking the two together. This step allows the fond—foundational flavors that are clinging to the pan—to make their way into the sauce. You can turn off the heat because the shrimp will continue to cook in the residual heat of the pan.
Tamarind
Tamarind is a souring agent� It is the fruit of the tamarind tree and grows in the shape of a long pod—about as long as a banana—but flat and brown� On the outside is a hard shell, which is cracked off, and the inside is a sweet-sour paste shot through with fibers and seeds. The way to get the fibers and seeds out is to break up the block and soak it in hot water—overnight if possible� What’s left is tamarind liquid and paste� It’s very sour but also has some sweetness and fruitiness to it and makes a delicious condiment�

12
Finally, add the masala we made earlier. Because you’re adding it right at the end, it will lend a wonderful vibrancy to the flavor and aroma of the dish. Don’t add all of the masala; put some on the table to allow your guests to adjust the seasoning for themselves.
Chai Tea
To complete our Indian meal, grind up some cinnamon, cardamom, cloves, and black peppercorns using a mortar and pestle. Make sure to break the seeds open and create a wide surface area. Once the spices are ground, put them in a pot with 4 cups of water and about ½ cup of sugar. Bring the mixture to a boil and let it steep for 5 to 10 minutes. Next, add 1 cup of milk and a little bit of black tea, bring the mixture back to a boil, and steep for 3 to 5 minutes. Strain the spices out and enjoy your soothing chai tea.
concassé: Method of peeling, seeding, and roughly chopping tomatoes.
dal: Dried beans or lentils, such as moong dal, urad dal, and chana dal. Also a dish made primarily with lentils that is a cross between a stew and a soup.
fenugreek: An herb of the pea family that has aromatic seeds.
fond: Culinary term referring to foundational flavors.
ghee: Clarified butter used in India.
masala: Indian spice mixture.
Ingredients
Yield: 3 portions
• 1 cinnamon stick• 6 black peppercorns• 4 whole cloves• 2 cardamom pods• 4 cups water• 1 cup milk
• 2 Tbs loose black tea• ½ cup sugar
or to taste
Important Terms

13

14
masala dabba: Indian spice caddy.
mise en place: French term meaning “set in place” or “everything in place”; in professional kitchens, the term refers to organized and prepped ingredients, ready to be used in a dish.
sambar: A type of dal served in southern India.
Essential Herbs and Spices of India
Capers Cardamom Cinnamon
Curry Leaves FennelCloves
Tamarind TurmericFenugreek
15
China— From Peppercorns to Tea
Lesson 2
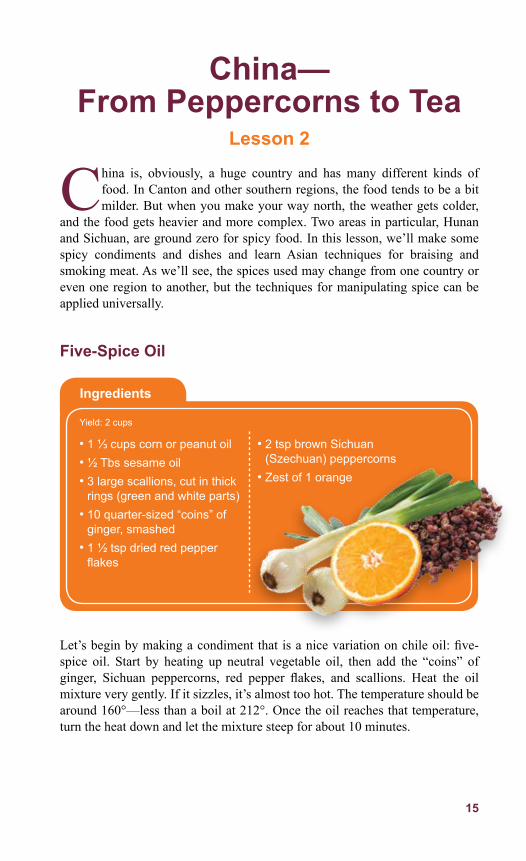
China is, obviously, a huge country and has many different kinds of food. In Canton and other southern regions, the food tends to be a bit milder. But when you make your way north, the weather gets colder,
and the food gets heavier and more complex. Two areas in particular, Hunan and Sichuan, are ground zero for spicy food. In this lesson, we’ll make some spicy condiments and dishes and learn Asian techniques for braising and smoking meat. As we’ll see, the spices used may change from one country or even one region to another, but the techniques for manipulating spice can be applied universally.
Five-Spice Oil
Let’s begin by making a condiment that is a nice variation on chile oil: five-spice oil. Start by heating up neutral vegetable oil, then add the “coins” of ginger, Sichuan peppercorns, red pepper flakes, and scallions. Heat the oil mixture very gently. If it sizzles, it’s almost too hot. The temperature should be around 160°—less than a boil at 212°. Once the oil reaches that temperature, turn the heat down and let the mixture steep for about 10 minutes.
Ingredients
Yield: 2 cups
• 1 ⅓ cups corn or peanut oil• ½ Tbs sesame oil• 3 large scallions, cut in thick
rings (green and white parts)• 10 quarter-sized “coins” of
ginger, smashed• 1 ½ tsp dried red pepper
flakes
• 2 tsp brown Sichuan (Szechuan) peppercorns
• Zest of 1 orange

16
After 10 minutes, take the oil off the heat and add sesame oil and orange zest. Allow the oil to cool and steep, overnight if possible. The next day, strain out all the solids. Transfer the oil to a jar or bottle; it will keep nicely in the refrigerator or even on the pantry shelf for two or three months.
When you taste the oil, you might be surprised at how mild it is, especially if you’ve ever tasted a raw Sichuan peppercorn, which can numb the inside of your mouth. As the oil sits on your palate, you’ll notice the orange and the spice from the ginger. The numbing, electric quality of the peppercorn is still present, but it’s subtle. You’ll also notice the burn of the pepper flakes in your throat. This five-spice oil is a complex condiment.
Sichuan Pepper-SaltAnother condiment we can make with Sichuan peppercorns is Sichuan pepper-salt. Cook twice as much salt as Sichuan peppercorns together in a dry pan. The salt will take a bit of time to heat up, but after a while, you will notice the aroma of the peppercorns and the salt will turn a bit dark. When it does, take it off the heat and keep it moving for 3 or 4 minutes; the hot salt will continue cooking. After a few minutes, the salt will start to turn gray; this change means that the spices are starting to toast. You may also see a little smoke coming off
Sichuan PeppercornsIn a handful of Sichuan peppercorns, you may notice some small black seeds mixed in with the reddish husk� If you get a batch of Sichuan peppercorns that have too many black seeds, it’s worth the time and effort to separate the two� The seeds tend to be hard and don’t have as much flavor as the outside of the peppercorn�
Sichuan pepper-salt is a spicy alternative to common table salt; store in a cool, dry place in a sealed container, and it will last for months.

17
the pan. Remember to keep the pan moving. Toasting extracts the essential oils from the Sichuan peppercorns and mixes them with the salt. When the spices have cooled, grind them in a spice grinder.
The Five Heaps
Our next dish is often called Chengdu noodles because it’s made in Chengdu, but sometimes, you’ll see a variation called the five heaps. The heaps are the garnishes that guests can choose to mix into this noodle dish.
Start by boiling some Hong Kong noodles for about 3 minutes. You can make the dressing in about the same time.
The dressing for this dish is traditionally made with sesame paste. If you don’t have that on hand, you can substitute peanut butter. In a food processor, combine peanut butter, toasted sesame seeds, soy sauce, rice wine vinegar, five-flavor oil, sugar, and Sichuan pepper-salt. If the dressing is too thick, you
Ingredients
• ½ lb fresh or frozen Hong Kong noodles (long and thin)
Dressing:• 2 Tbs toasted sesame seeds• 2 Tbs five-spice oil
(see above)• 2 Tbs Chinese sesame
paste or peanut butter• 2 Tbs water• 1 Tbs soy sauce• 2 tsp unseasoned Chinese
or Japanese rice vinegar• 1 ½ tsp sugar• Scant ¼ tsp roasted Sichuan
pepper-salt• ¼–½ tsp chile oil (optional)
Five heaps:• 1 cup crisp green vegetable
(choose one): slivered fresh snow peas or sugar snap peas, slivered string beans or Chinese long beans cut into 2-inch lengths, slivered celery hearts and inner ribs cut into 2-inch lengths, slivered seedless cucumber
• 1 cup carrots, julienned or shredded
• 1 cup radishes, shredded• 1 cup Black Forest ham,
slivered, or cooked chicken, shredded
Garnish:• Fresh coriander,
coarsely chopped
Yield: 2–3 main-course portions or 4–6 side-dish portions

18

19
may also need to add some water. Make sure the dressing is fairly sharp because it has to flavor both the noodles and some of the garniture. You can make this dressing in large batches and keep it in the refrigerator.
When the noodles are done, drain them and add a bit of five-flavor oil to keep them from sticking. Then toss with the dressing.
To present this salad, put the noodles directly in the center of a plate. Around the noodles, arrange green beans, ham, bean sprouts, snow peas, carrots, and radishes. Drizzle a bit more of the five-flavor oil over all, then sprinkle with Sichuan pepper-salt and fresh cilantro. When you taste the dish, pay attention to the electric flavor of the Sichuan peppercorns, whether it comes from the pepper-salt or five-flavor oil.
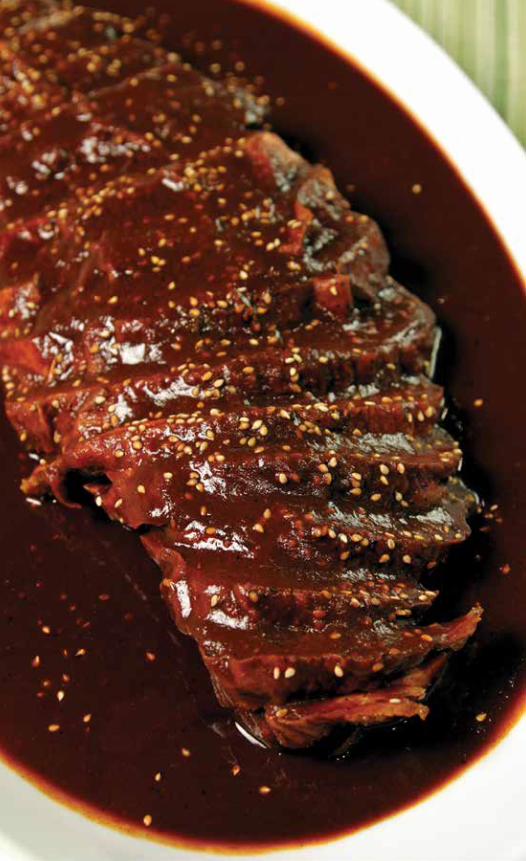
Red-Cooked Beef and Turnips
Ingredients
Yield: 3–4 portions
Beef and vegetables:• 3 Tbs oil• 2 cloves garlic, lightly
crushed• 1 lb short ribs, cut in pieces• 2 cups boiling water• ½ lb icicle turnips, peeled
and roll cut• ½ carrot, peeled and roll cut• ½ tsp salt
Seasonings:• 2 Tbs dry sherry• 4 Tbs dark soy sauce• 2 tsp sugar• 1 star anise• 1 medium scallion, cut into
four pieces• 2 quarter-sized
slices peeled ginger
Red CookingFurther north in China, where the weather is colder, cooks use a style of cooking that we know as braising, but they call it red cooking� What makes this style distinctive is that it uses soy, sherry, ginger, and even star anise to create the braising liquid� This liquid has so much flavor and is considered so valuable that it’s often saved and reused after meat has been braised in it� The liquid is reinforced with new spices, but it carries the flavor of the previous braise with it�

20
The preparation for red-cooked beef begins with cutting the short ribs into smaller pieces. Cut between the bones, but be sure to leave the bones in because they add a tremendous amount of flavor. Brown the ribs in a pan with a little oil, turning to color all sides. This step should take about 5 minutes. Next, add the scallion, star anise, ginger, and garlic to the pan.
You may sometimes find recipes for red cooking that include a broad array of spices, from fennel seed to cinnamon, star anise, and even cloves. Almost always, whole spices are used so that they can be removed and replaced when they’ve outlived their usefulness. Using whole spices also guarantees that the flavor is gentle and round, rather than the aggressive flavor that may result from using ground spices.
The liquid for red cooking is either Chinese rice wine or a combination of dry sherry and soy sauce (not so much that the liquid becomes overly salty) and water. Cooking the meat and bones in this liquid yields a delicious broth. Add the liquid to the pan with the ribs and spices, bring it up to a simmer, cover it, and cook it either on top of the stove or in an oven at 325°.
Short ribs cut into 2-inch pieces will take about 1 ½ hours to cook. In the last 30 minutes of cooking time, add the carrots and turnips. Carrots lend some sweetness to the dish, while turnips are slightly bitter. Turnips are also thirsty; they will absorb the flavor of the braised meet.
You can also add some dried mushrooms, such as shiitake mushrooms. Dried mushrooms have much more savory flavor than fresh mushrooms do. Soak the

21
dried shiitakes in water until they are rehydrated. Remove the stems, which are quite hard, and cut the mushrooms into halves or thirds. Add some of the soaking liquid to the braise.
Continue cooking the short ribs and vegetables until both are tender. Before serving, baste the short ribs with some of the braising liquid. Note that this liquid is not thickened the way braises are in our culinary tradition. Serve the ribs and vegetables with rice.
A long-simmered dish like this one is the perfect venue for whole spices, because they give up their flavor over long cooking times.
Tea-Smoked Quail with Eggplant and Stir-Fried Greens
Chinese cooks often use spices to smoke food; this dish uses tea to smoke quail. Start with black tea that has tannin in it to give a bit of bite to the smoke. To this, add Sichuan peppercorns, brown and white sugar, rice (for nuttiness), and orange zest. The sugar will yield a sticky smoke that will
Ingredients
Smoking mixture:• ¼ cup moist brown sugar• ¼ cup white sugar• ¼ cup jasmine rice• Zest of 1 orange• ½ cup black tea• 1 Tbs Sichuan
peppercornsQuail and eggplant:• 3 Japanese eggplants• 2 tsp Chinese five-spice
powder• 1 tsp sea salt• 6 quails, 5 oz each
Yield: 6 portions
Pickled daikon and carrot:• ½ cup sherry vinegar• ½ cup rice vinegar• 1 cup sugar• 1 ½ Tbs sea salt• 2 tsp sesame oil• 6 white peppercorns• 1 daikon, julienned • 1 carrot, juliennedAsian greens:• 8 cups spinach• 2 Tbs peanut oil• 1 tsp sesame oil

22

23
cling to the outside of the meat. Think of this smoking mixture as a seasoning or a spice. You can keep it on hand in a sealed container almost indefinitely.
Traditionally, the quail might be placed in a wok so that it sits above the smoldering tea. You can also use a stovetop smoker with the quail sitting on a screen.
Cut a glove-boned or semi-boneless quail in half and separate the legs from the breast. Knock a small knuckle off the end of the leg bone so that as the meat cooks, the bone will be exposed. This method is called frenching the bone. Take almost all of the wings off both sides of the breast and french those bones, as well.
Before smoking the quail, season it on both sides, using Chinese five-spice powder (consisting of Sichuan peppercorns, star anise, cinnamon stick, fennel, and cloves) and salt. Again, because spices act as a preservative, you can season the quail ahead of time and keep it in the refrigerator for a day or two.
Line the smoker with foil, place the quail on the screen, and turn on the heat. (You may want to turn on a hood fan or open a window during this process.) Usually, the sugar starts to smolder first. For a lid, you can use a piece of foil into which you’ve poked a small hole. Look for a steady little stream of smoke to come through the hole—what you might see coming from the chimney of a picturesque cottage in the mountains. That stream of smoke tells you that the temperature inside the smoker is 350° to 375°. At that temperature, the quail will probably be cooked through in about 8 minutes. After you turn off the heat, let the smoke subside before you take the lid off. If the quail isn’t quite done, put it into the oven for a minute or two.
Serve the quail with sautéed greens, roasted eggplant, and pickled daikon radish and carrots. The eggplant can be roasted over an open flame, peeled, and chopped. You might also season it with some of the pickling liquid to make an eggplant salad. Layer the sautéed greens, eggplant salad, and pickled daikon and carrots and top with a pinch of Chinese five-spice powder. Moisten the quail pieces with some of the pickling liquid and garnish with cilantro.
Star AniseIn Latin, “star anise” is Illicium verum� Illicium references fragrance and verum refers to truth; thus, the meaning is “true fragrance�” Star anise is one of the components of Chinese five-spice powder and truly has a captivating aroma�

24
frenching: A technique of cutting away part of the bone so that the meat will pull away and expose the bone during cooking.
red cooking: Chinese style of cooking similar to braising. Soy, sherry, ginger, and star anise are used to create the braising liquid, which is often saved and reused after meat has been braised in it.
Important Terms
Essential Herbs and Spices of East Asia
Chinese Chives Galangal
Lemongrass Pandan Leaves Sesame Seeds
Kaffir Lime Leaves
Sichuan Peppercorns TeaStar Anise

25
Mexico— Chiles for Every Palate
Lesson 3
About 500 years ago, Columbus set sail to the west in hopes of finding a route to India and an entrée into the lucrative spice trade. In particular, he was looking for pepper. When he arrived in the Americas, he didn’t
find pepper, but he discovered a treasure chest of plants and foodstuffs never before seen in the Old World, including corn, beans, and chiles. In this lesson, we’ll focus on chiles and the magic made with them by Mexican chefs. We’ll create a mole, a dish that is more than just a sauce in Mexico—it’s an event.
All about ChilesChiles can be a confusing subject: Different cultures may call the same chile by different names; chiles that are ripe versus those that are underripe may also have different names; and a dried chile may have a different name than a fresh one of the same variety. Let’s look at a few examples to try to clear up this confusion.
● On a scale of 1 to 10 in terms of heat, a jalapeño is right in the middle, a 4 or 5. It has a green, grassy flavor. When you bite into it, it eats like a green pepper—juicy and crispy.
o When a jalapeño is dried over a slow, smoky fire, it becomes a chipotle, such as a chipotle meco. This chile is green and has a deep smoky aroma.
o We often seen chipotle chiles cooked and sold in adobo sauce.
● Dried guajillo and New Mexico chiles are difficult to tell apart. The New Mexico chile is a bit more wrinkled, which means that when it was fresh, its flesh was thicker. The guajillo chile is smoother, which means that when it was fresh, its flesh was very thin.
o The guajillo has a lean, almost citrusy flavor, and it’s very bright tasting.
Distinguishing ChilesOne way to distinguish between chiles that look similar is to cut them open, remove the seeds, and hold them up to a light� This allows you to see the colors of the chiles more readily�

26
o The New Mexico chile has almost a sweet flavor; it’s not bitter, harsh, or overly hot. Most of the chile powder used in the United States comes from New Mexico chiles.
● Both the chile ancho and the chile mulato come from poblano peppers or close relatives. When the poblano is completely ripe, it becomes an ancho. The mulato chile is dried before it reaches full ripeness.
o Anchos tend to have a deep, rich, and fruity flavor, somewhat reminiscent of sun-dried tomatoes or even prunes. There’s a sweetness to anchos that you don’t find in a mulato.
o A mulato, because it’s harvested when it’s still green, has a green, vegetal flavor. Often, these chiles are used to balance the richness and sweetness of a ripe chile, which after all, is nothing more than ripe fruit.
● The chile negro, or pasilla negro, comes from a chilaca, which grows almost in a corkscrew fashion. Pasilla means “passageway,” and negro means “black”; thus, the chile is long, thin, and black. This chile is also harvested and dried green. Like the mulato, the chile negro or pasilla negro is used to balance the sweetness of other ripe chiles.
● An árbol chile (or chile de árbol) is thin, red, and hot. A good rule of thumb is that the smaller and redder a chile is, the hotter it will be. You can grind chile árbol up to make chile flakes and use the flakes as you would cayenne powder.

27
Toasting ChilesIn a raw state, even dried chiles have bitter and harsh, aggressive flavors. Toasting the chiles in a dry pan is a way to “reconcile” these flavors. Before you start, keep in mind that the aroma coming off the chiles can be a bit of an irritant; turn on your fan hood or open a window in your kitchen while you work. Place a chile in a hot pan and press it down against the surface of the pan very quickly using a towel. You may see a wisp or two of smoke coming off the pan, and you may hear the chile crackling. This technique allows the chile to soften. Its color will become mottled, and it may begin to blister. Toasting the chile in this way takes only about 10 seconds, but it makes an enormous difference in flavor. Untoasted, chiles are awkward and bitter, but after just 10 seconds in a dry pan, their flavors become deeper, richer, and rounder.
Note that chiles that are shiny and smooth have thin flesh; thus, they won’t tolerate aggressive toasting. Put each chile in the pan and turn it over quickly. Don’t allow it to scorch. If you see it starting to turn black, you’ve gone too far.
Ancho Chile PowderAncho chile powder (a varietal chile powder) has a much deeper flavor than the chile powder we’re familiar with in this country, which is typically mixed with cumin, oregano, garlic powder, and other spices�

28
After the chiles are toasted, remove the stem, seeds, and ribs inside. As you’re handling the chiles, remember that they contain a compound called capsaicin, which is what makes them hot. You can’t see capsaicin, but it transfers to your fingers when you’re working with chiles and can burn your hands or your eyes if you touch them. Because capsaicin is oily, you need to wash your hands with soap and water after you handle chiles to eliminate it.
Once the chiles are cleaned, put them in a bowl, pour hot water over them, and allow them to sit for about 15 or 20 minutes to rehydrate. In effect, you’re turning them back into fresh chiles after you’ve toasted them.
Techniques for Developing FlavorWhenever they touch an ingredient, Mexican cooks enhance its flavor. For example, they toast unpeeled garlic in a dry pan, in effect creating roasted garlic inside the papery husk. You can do the same thing with an onion. Leave the skin on, cut it into wedges, and place it in a dry pan. It will caramelize on the outside—even getting a little charred—and the flesh will cook.
Mexican OreganoMexican oregano is not exactly like Italian oregano� When the Spaniards came to Mexico, they were familiar with oregano, but it wasn’t available in this new country� What they found instead was a plant in the verbena family that they called oregano� Mexican oregano is available in Mexican grocery stories, but if you can’t find it, you can substitute marjoram, which is more floral than Italian oregano and closer to the Mexican version�

29
You can do something similar to tomatoes, but instead of toasting them in a dry pan, put them under the broiler for about 8 to 10 minutes, turning once. You’ll see that the outside of the tomatoes blackens and the flesh collapses. Remove the worst of the blackened skin and capture the flesh of the tomatoes, which will have a rich, concentrated flavor—much fuller than even a fresh tomato. If there’s any juice left in the pan, save that for making a mole.
Of course, nuts taste great, but they become even better when toasted in the oven or fried. Try putting some peanuts in hot oil. These nuts are fairly dense, so when they begin to take on a bit of color, take them out and drain them.
In the same oil, you can also fry some raisins. Their moisture will turn to steam, and they will puff up quickly as their sugar caramelizes. Remove them after they’ve puffed up to ensure that their sugar doesn’t burn.
True CinnamonChinese cinnamon is taken from the bark of the cassia tree, while Mexican cooks use true cinnamon or canella� Canella is also from the bark of a tree, but it’s very delicate� It’s also more fragrant and floral than Chinese cinnamon� If you’ve ever eaten the candy called Red Hots®, that’s the flavor of true cinnamon�

30
Mole Rojo (Red Oaxacan Mole)
Mole rojo, or red mole, is just one of any number of moles found in Mexico. In Oaxaca, they have not just one mole but seven different moles, and they’re justly famous for them. Some of these are fairly simple, such as coloradito, which has just one chile in it. Mole negro typically has five or six chiles in it, and it’s almost black. Even the seeds are taken from the chiles, transformed to charcoal, and then soaked and added to the mole. There are also green and yellow moles, taking their color from the type of chiles used and the addition of herbs. The mole called manchamanteles has fruit in it, and its name translates as “tablecloth stainer” because that’s what happens when this mole splashes onto the tablecloth.
To make mole rojo, start by making a puree of the ingredients we fried or roasted earlier—tomatoes, chiles, peanuts, pecans, raisins, onion, and garlic—along with black pepper, cloves, cinnamon, toasted sesame seeds, and oregano. Mexican cooks might use a metate—consisting of a stone rolling pin and a stone slab—to make the puree, but you can use a blender.
Ingredients
• ½ lb Roma tomatoes, oven roasted
• ½ white onion, quartered and dry roasted
• 3 cloves garlic, unpeeled and dry roasted
• ½ lb ancho chiles, toasted, seeds and veins removed, and rehydrated
• 4 mulato chiles, toasted, seeds and veins removed, and rehydrated
• ¼ lb guajillo chiles, toasted, seeds and veins removed, and rehydrated
• 5 Tbs canola oil
Yield: 6 portions
• 1 oz raw peanuts (without skin), fried• 1 oz pecans, toasted• 2 Tbs brown sesame seeds• 2 Tbs black raisins, fried• 6 black peppercorns• 2 whole cloves• 1 stick canella (Mexican cinnamon),
broken into a 2-inch length• ½ tsp dried Oaxacan or
Mediterranean oregano• 2 cups broth or water• 3 oz Mexican chocolate• Salt and sugar
to taste
31

32
Begin with the wettest ingredients: the tomatoes and chiles. Add a little bit of the soaking liquid from the guajillos to make the mole redder. Notice that the soaking liquid for the chiles has taken on different colors. The liquid for the ancho chiles looks dark, almost like a cabernet or a zinfandel. The liquid for the mulatos—the less ripe chile—looks almost like a pinot noir. Finally, add the onions, garlic, nuts, raisins, and spices and puree, adding a little liquid as necessary.
Once the mixture is smooth, the next step is to sear it to make the flavor even deeper, richer, and more complex, much as we did when toasting the chiles. Heat some vegetable oil in a pan and use a spatula with a flat side that allows you to scrape the bottom of the pan and avoid burning the mixture. Initially, the oil will emulsify with the puree, but as the mixture cooks longer, the oil will begin to separate and the puree will start to glisten. That’s your cue that this step is complete. Searing the puree should take about 15 minutes.
The way to earn your money as a chef is to scrape the bottom of the pan as the puree is cooking to make sure it doesn’t catch and burn. If your puree is relatively dry, it shouldn’t sputter and spit too much. Keep the heat on high,

33
but if you notice that the mixture is starting to burn, pull the pan off the heat, clean up the pan by scraping, and move it back to the heat.
The puree starts out as liquid, but as it cooks, it gets darker and gains the consistency of tomato paste. The payoff for scraping the pan for 15 to 20 minutes is complexity and depth of flavor. Many people complain that chile dishes are too hot, but this searing technique smooths and rounds out the flavor.
The next step is to add some turkey (or chicken) stock a little at a time and smooth out the mole, breaking up any lumps. Add stock until the mole is a little bit thinner than you ultimately want it. You’ll then reduce it to get the right consistency.
At this point, you should taste the mole and season it with salt, sugar, and chocolate. It’s not necessary to add pepper because the mole already contains so many chiles. Mexican chocolate is granular; it has sugar and some spices added to it. Its role is to underscore the ripe sun-dried tomato and prune flavors of the ancho chile. Stir in the chocolate until it dissolves, then taste the mole, noting especially the relationship between the chiles and the sweetness.
As an exercise, take out a small serving of the mole, taste it, add some salt, taste it again, add more salt, and so on. Take the mole from unseasoned to properly seasoned to overseasoned. Then apply what you learned from that small serving to the large pot. When you’ve seasoned the mole properly, you’ll be able to taste the chiles, the chocolate, and the spices.
The finished mole may look a bit thicker than sauces you might ordinarily make—almost like heavy cream. You can adjust the consistency if necessary. It may also seem as if you have too much sauce, but the amount is about right for 8 to 10 people; you’ll use 6 to 8 ounces per portion. Garnish with sesame seeds and serve over poached or roasted turkey with rice, beans, tortillas, and additional mole.
For beverages, serve refresco, beer, or hibiscus tea. Put 1 cup of hibiscus blossoms into 2 quarts of water, bring to a boil, add the zest of a lemon, allow to steep for 20 minutes, then strain and sweeten the tea.

34
Essential Herbs and Spices of Mexico
Annatto Seeds Canella
Chile Powder Cilantro Coriander Seeds
Cayenne
OreganoCumin
metate: A Mexican cooking tool consisting of a stone rolling pin and a stone slab; used for making purees and grinding ingredients.
mole: A spicy Mexican sauce made with various chiles and other ingredients.
Important Terms

35
Chile árbol: Thin, red, and very hot� Used in salsas; can be ground and substituted for cayenne�
Chile ancho: Has a deep, rich, fruity flavor, reminiscent of sun-dried tomatoes or prunes� Used in sauces and chile oil� Can be sautéed and added to pasta dishes�
Chile negro: Long, thin, and black� Used in sauces and marinades for pork or chicken�
Chipotle chile: A dried jalapeño� Ground for chile powder or spice rubs; often canned in adobo sauce and used in sauces, soups, and stews�
Guajillo chile: Has a lean, citrusy flavor; very bright tasting� Used for taco or enchilada sauce or added to chili�
Mulato chile: Mild with a green, vegetal flavor. Used in moles and enchilada sauce�
New Mexico chile: Has a sweet flavor; not bitter, harsh, or overly hot. Used in most chile powder in the United States�
Serrano chile: Somewhat hotter than a jalapeño� Used in pico de gallo and salsa�
Identifying Chiles

36
Mediterranean Spices—Exotic Blends
Lesson 4
Many people believe that civilization got its start in the Mediterranean. With civilization came culture, and with culture came cuisine. In this lesson, we’ll take a tour of spices from
Morocco, Tunisia, Egypt, and Turkey, and we’ll learn how both climate and culture have influenced the seasonings used in these regional cuisines. We’ll prepare several variations of bread salad and close with a suggestion for an exotic party that will allow your friends to join you in sampling the interesting and varied tastes of the Mediterranean.
A Spice Tour of the Mediterranean
● The Moroccan spice mix known as ras el hanout—“top of the shop”—gets its name from the image of a spice merchant selling his best wares to impress a customer. Authentic versions of ras el hanout may contain as many as 30 different spices, some of which, such as belladonna, might be considered poisonous.
● Harissa is a chile pepper paste that comes from North Africa, around Tunisia. At about the same time that Columbus was making his way to America and bringing chiles home, the Spaniards won their independence from the Moors, and there was an exodus of people from Spain to Tunisia, bringing with them the newly discovered chiles. Harissa contains garlic, lemon, and caraway.
● Tabil (meaning “spice”) is also from Tunisia. This mixture contains turmeric, giving it a yellow color, and numerous other exotic spices that are ordinarily found in curry powder. In fact, you could probably use curry powder as a substitute for tabil.
● In both Morocco and Tunisia, we find a vinaigrette known as charmoula. This all-purpose marinade and dressing contains parsley, cilantro, paprika, and cumin. It’s often used to marinate fish or lamb, and it’s used in vegetable salads. One recipe for a tiered salad calls for raw and cooked vegetables dressed with charmoula and then stacked on top of each other: cucumber, tomatoes, onions, beets, potatoes, peppers, and so on.

37
38
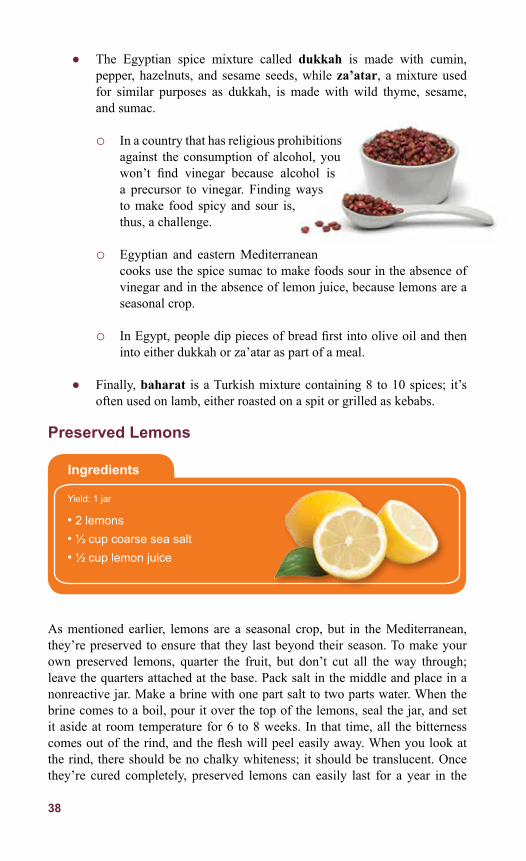
● The Egyptian spice mixture called dukkah is made with cumin, pepper, hazelnuts, and sesame seeds, while za’atar, a mixture used for similar purposes as dukkah, is made with wild thyme, sesame, and sumac.
o In a country that has religious prohibitions against the consumption of alcohol, you won’t find vinegar because alcohol is a precursor to vinegar. Finding ways to make food spicy and sour is, thus, a challenge.
o Egyptian and eastern Mediterranean cooks use the spice sumac to make foods sour in the absence of vinegar and in the absence of lemon juice, because lemons are a seasonal crop.
o In Egypt, people dip pieces of bread first into olive oil and then into either dukkah or za’atar as part of a meal.
● Finally, baharat is a Turkish mixture containing 8 to 10 spices; it’s often used on lamb, either roasted on a spit or grilled as kebabs.
Preserved Lemons
As mentioned earlier, lemons are a seasonal crop, but in the Mediterranean, they’re preserved to ensure that they last beyond their season. To make your own preserved lemons, quarter the fruit, but don’t cut all the way through; leave the quarters attached at the base. Pack salt in the middle and place in a nonreactive jar. Make a brine with one part salt to two parts water. When the brine comes to a boil, pour it over the top of the lemons, seal the jar, and set it aside at room temperature for 6 to 8 weeks. In that time, all the bitterness comes out of the rind, and the flesh will peel easily away. When you look at the rind, there should be no chalky whiteness; it should be translucent. Once they’re cured completely, preserved lemons can easily last for a year in the
Ingredients
Yield: 1 jar
• 2 lemons• ⅓ cup coarse sea salt• ½ cup lemon juice

39
refrigerator. When you use them, cut very thin slices and rinse them in water before adding to a dish.
Fattoush
The bread salad called fattoush from the eastern Mediterranean uses both fresh lemons and sumac, which has a sour flavor profile and can also be used in marinades for meat. Using sumac gives both a bit of lemon flavor and an herbal flavor.
Ingredients
• 1 large cucumber, cut to ¼-inch dice
• 1 bunch scallions, shredded
• 1 bunch Italian parsley, chopped
• ½ cup mint, chopped• 1 cup arugula, torn• 1 cup purslane, torn• 1 Tbs minced garlic
• ¼ cup lemon juice• ¾ cup extra-virgin olive oil• 1 Tbs ground sumac• 3 ripe tomatoes, seeded
and cut to ½-inch dice• 3 pitas, split and toasted• Sea salt and freshly
ground black pepper to taste
Yield: 6 portions

40

41
Start with a full-flavored green, such as arugula. To the torn green, add broken-up pita chips made from stale pita drizzled with olive oil and toasted. Season the mixture with a good three-finger pinch of sumac.
For the vinaigrette, mix one part acid, in this case, lemon juice, with three parts oil. Use a full-flavored, “punchy” olive oil. Add minced garlic and season with salt and pepper.
To the salad, add diced tomatoes (with their juice), diced cucumbers, green onions, and purslane. This interesting green is almost like a succulent. It’s a bit lemony, and it has the same omega-3 oils that are found in wild salmon. In fact, it’s one of the few vegetable sources of omega-3 oils. Finally, add some parsley and chopped mint.
Toss the salad with the dressing, add a bit more sumac, and allow it to sit for 30 minutes or so. During this time, the vegetables release a certain amount of very flavorful water. This vegetable water mingles with the dressing and is absorbed by the bread, softening it a bit. Remember, too, that you don’t need to be shy with the sumac because it’s not sharp in the same way that lemon is sharp; it actually has a pleasant acidity.
Shepherd’s Salad
Chopping MintIf you chop mint too aggressively, it will turn black� Try to gather the leaves together and cut through the stack just one time� Slice the mint into ribbons (a chiffonade) to ensure that it holds its green color�
Ingredients
• ½ lb firm, ripe tomatoes, roasted and diced
• 1 green bell pepper, roasted and diced
• 1 red pepper, roasted and diced
• 2 cloves garlic, peeled
• 2 thin slices preserved lemon
• Tabil, to taste• Harissa, to taste• Mint, to taste• 3 Tbs extra-virgin olive oil• 1 Tbs vinegar• Capers
Yield: 4 portions

42
Mechouia is a Tunisian “shepherd’s salad” made with roasted vegetables, harissa, olive oil, lemon, and capers. For this salad, start with some roasted tomatoes and red and green peppers. Peel away the blackest part of the tomatoes and dice them roughly. Peel the roasted peppers, remove the seeds, and dice those, as well. You might even add a poblano pepper for a little spice. Reserve any of the liquid that remains after you dice the vegetables.
Next, flavor the salad with some garlic, tabil, harissa, mint, and preserved lemon. Keep in mind that harissa is fiery; make sure you know how hot it is before you spoon it into the salad. Cut very small, thin pieces of the preserved lemon and rinse them in water before adding them to the salad. Make sure you add the preserved lemon before you salt the salad.
For the dressing, mix capers, olive oil, preserved lemon, and a splash of vinegar. Again, salt with a light hand because both the preserved lemon and the capers are very salty.
In the Mediterranean, this salad would be served as part of a selection of small dishes called meze to begin a meal.
Blanquit Mechouia Salad with Cheese on Bread Rounds
Ingredients
• 1 baguette, sliced • 3 tomatoes, roasted
and chopped• 3 bell peppers, roasted
and diced• 1 tsp caraway seeds• Gruyère or Edam
cheese, diced• 1 clove garlic, crushed• 2 oz olive oil• 1 tsp mint, pulverized• Tabil to taste
Yield: 6–8 portions
• Salt to taste• 1 oz vinegar• 2 pieces preserved lemon, chopped fine• 1 tsp harissa (to taste)• Water as needed• 4 oz tuna packed in oil• 1 oz green olives, roughly chopped• 1 oz black olives,
roughly chopped• 1 hard-boiled egg• 2 oz capers

43
The basic shepherd’s salad lends itself to a number of variations. For example, you can enrich the mechouia by adding chopped olives, both green and black; some firm diced cheese, such as Gruyère or Edam; tuna; and caraway seeds. This version of the salad has additional savory flavors and is more colorful.
You can also turn the mechouia into a Tunisian bread salad called blanquit. To the vegetable juices you reserved when chopping the roasted tomatoes and peppers, add a bit of harissa, some vinegar, and some olive oil. Basically, you’re turning those juices into a vinaigrette. Slice up a stale baguette and allow the slices to soak in the vinaigrette for 5 to 10 minutes, turning once. Carefully transfer the bread slices to individual plates and top with the enriched mechouia. Drizzle on a little bit of olive oil and any remaining vinaigrette.
Finally, you can split open a baguette and use the mechouia as a relish to make a Tunisian market sandwich, similar to the way a muffuletta sandwich is made in New Orleans. To the mechouia, add some carrot salad made with lemon juice, garlic, harissa, and caraway. Then add some more tuna and, for authenticity, potato and hard-boiled eggs. Replace the top half of the baguette and press down to get all the juices flowing into the bread.
A Mediterranean Evening for Friends One way to create a fun party is to leverage some of the information you’ve learned about spices to prepare variations on a theme for your friends to taste. You could, for example, make various types of lamb kebabs for a cookout.
Try Spanish lamb kebabs spiced with saffron, garlic, Spanish paprika, and cayenne. These kebabs are a throwback to the time when the Moors occupied

44
Spain and brought their appreciation of exotic spices with them. You might also make Italian kebabs, skewered on rosemary and seasoned with black pepper and garlic. Greek kebabs could be seasoned with dill, garlic, lemon, and black pepper and anointed with olive oil. Finally, a Turkish variation would, of course, be seasoned with baharat, which contains cinnamon, nutmeg, cumin, and the type of ingredients we find in pickling spice: bay leaf, allspice, cloves, coriander seeds, and mustard seeds. When the meal is complete, serve mint tea as it’s made in Tunisia: heavily steeped and sweetened, with a few toasted pine nuts floating on top.
Lamb Kebab Variations
Ingredients
Moorish-Inspired Lamb Kebabs with Grapes
• 2 Tbs olive oil • 2 Tbs lemon juice• 6 cloves garlic, minced• 2 Tbs parsley, minced• 1 tsp fresh ginger, minced• 1 ½ tsp fresh ground
coriander seeds• ¼ tsp turmeric• 1 tsp smoky Spanish-style
paprika or a bit of chipotle powder
• ¼ tsp cayenne or red pepper flakes
• ½ tsp freshly ground black pepper
• 1 Tbs oregano, minced• Several saffron threads• 1 lb leg-of-lamb meat for
skewers or 8 rack-of-lamb chops
• 1 lb Flame Seedless grapes
Yield: 6 portions
Lamb Kebabs with Rosemary, Thyme, and Garlic
• 2 Tbs olive oil • 2 Tbs lemon juice• 4 cloves garlic, minced• 2 Tbs parsley, minced• 2 tsp rosemary, minced• 2 bay leaves, ground • ½ tsp freshly ground black pepper• Salt to taste• 1 lb leg-of-lamb meat for skewers
or 8 rack-of-lamb chops• 6 8-inch-long rosemary branches
Yield: 6 portions

45

46
Ras el Hanout
Ingredients:3 tsp black peppercorns2 tsp powdered ginger2 tsp powdered cumin2 tsp powdered cinnamon2 tsp powdered coriander½ tsp powdered nutmeg½ tsp hot red pepper8 cardamom seeds8 cloves
Directions: Combine all ingredients and grind using a mortar and pestle�
Harissa
Ingredients:1 clove garlic, peeled2 dried New Mexico peppers, stemmed, seeded, softened in warm water, and squeezed dry1 dried tomato slice, softened in warm water and squeezed dry1 tsp salt½ tsp Tunisian tabil⅛ tsp ground carawayOlive oil as neededLemon juice as needed
Directions: Grind ingredients into a paste�
Tabil
Ingredients:2 Tbs ground coriander seeds2 tsp ground caraway seeds¼ tsp garlic powder½ tsp ground red pepper¼ tsp crushed fennel seed¼ tsp crushed anise seed¼ tsp ground cumin¼ tsp ground turmeric½ tsp ground black pepper
Directions: Combine ingredients and store in a sealed jar�
Mediterranean Spice Blends

47
Dukkah
Ingredients:1 cup sesame seeds1 ¾ cup coriander seeds⅔ cup hazelnuts, blanched and skinned½ cup cumin seeds1 tsp sea salt½ tsp ground black pepper
Directions: Toast the nuts and seeds in the oven or a dry pan; grind together with salt and pepper�
Za’atar
Ingredients:¼ cup sumac2 Tbs thyme1 Tbs sesame seeds, roasted2 Tbs marjoram2 Tbs oregano1 tsp coarse salt
Directions: Grind the sesame seeds with a mortar and pestle; combine with other ingredients�
Baharat
Ingredients:1 ½ tsp dried winter savory1 Tbs pickling spice½ tsp ground cinnamon½ tsp freshly grated nutmeg½ tsp mint leaves, dried and crumbled½ tsp ground cumin1 tsp ground black pepper
Directions: Combine all ingredients and grind finely; store in a sealed jar.

baharat: A Turkish spice mixture.
blanquit: A Tunisian bread salad.
charmoula: An all-purpose marinade and vinaigrette used in both Morocco and Tunisia.
chiffonade: A technique of slicing ingredients, such as herbs, into thin ribbons.
dukkah: An Egyptian spice mixture made with cumin, pepper, hazelnuts, and sesame seeds.
fattoush: Eastern Mediterranean bread salad.
harissa: Chile pepper paste from North Africa.
mechouia: Tunisian “shepherd’s salad” made with roasted vegetables.
meze: An appetizer course in the Mediterranean.
purslane: A succulent green eaten in salads.
ras el hanout: A Moroccan spice mixture containing as many as 30 spices; translates literally as “top of the shop.”
Important Terms
48

49
Essential Herbs and Spices of the Mediterranean
Allspice Garlic
Mint Mustard Seeds
Saffron
Poppy Seeds
Ginger
SumacRed Pepper
tabil: A Tunisian spice mixture containing turmeric and other exotic spices.
za’atar: An Egyptian spice mixture made with wild thyme, sesame, and sumac.

50
Treasured Spices in Northern Europe
Lesson 5
The exotic spices we’ve discussed to this point in the course come from the Near, Middle, and Far East. Originally, they made their way by camel caravan to the Mediterranean and then by boat to northern
Europe, increasing in cost along the way. By the time the spices reached northern Europe, they were incredibly expensive, but people were willing to pay the price to make their food palatable and to take advantage of the spices’ medicinal properties. In this lesson, we’ll use the spices of northern Europe to make goulash, a beet salad with juniper vinaigrette, mulled wine, and the classic English dessert syllabub.
Goulash
Let’s begin by making a Hungarian goulash with Hungarian paprika. Brown cubes of beef shank in a flavorful fat, such as duck fat, lard, or bacon fat. If none of those appeals to you, use vegetable oil. When the meat has browned, add a bit more fat and some onions to the pan and cook the onions along with
Ingredients
• 2 lb beef shank, cleaned and cut into ½-inch cubes
• Salt and black pepper to taste
• ½ cup duck fat (or bacon fat, lard, or vegetable oil)
• 4 cups onion, julienned• 5 Tbs Hungarian paprika• 3 cloves garlic, minced• 1 tsp caraway seeds• 1 cup dry white wine• 1 qt chicken stock• 1 ½ cups tomato, crushed• 6 sprigs thyme
Yield: 8 portions
• 3 bay leaves• 1 green bell pepper, cut into
½-inch-wide slices• 2 cups waxy potatoes, cut to
⅓-inch dice• 4 Tbs fresh marjoram, chopped• Lemon juice as needed• ½ cup sour cream• ¾ tsp lemon zest, finely grated• ½ cup blanched carrot, julienned• 2 Tbs Italian parsley• 1 Tbs dill,
chopped

51
the meat until they’re translucent but not colored. The moisture from the onions will begin to deglaze the pan; in other words, it will free the meat drippings clinging to the sides and bottom of the pan.
When the onions are translucent, add some garlic to the pan, and when it becomes aromatic, add the paprika. By cooking this spice in the hot fat, you are waking up its flavor. But note that ground spices burn quite easily, so you may need to turn the heat down a bit. As soon as the paprika touches the heat, you’ll get a wonderful aroma of spiciness. If you don’t, you may have kept your paprika for too long.
The next step is to deglaze the pan, which is done by scraping together all the solids that are clinging to it with some white wine. The wine will also bring some acidity to the dish, which will help cut through the fattiness of the meat. Turn the temperature back up to reduce the mixture. As it reduces, add crushed caraway. You can use a spice mill or a mortar and pestle to crush the caraway seeds, or you can just rock the rounded edge of a pan over the spices on a cutting board.
When the liquid has reduced to almost the consistency of a syrup, add some chicken stock. Bring the mixture to a boil, then reduce the heat to a simmer and skim off any foam that appears. Cook the meat for about 45 minutes.
Once the meat is almost tender, add sliced green peppers, crushed tomatoes, and diced potatoes. As the potatoes cook, their starch will thicken the broth further. The tomatoes will fall apart and flavor the goulash. At the same time, add thyme, marjoram, and bay leaf. Allow the dish to cook for another 30 minutes, until all the vegetables and the meat are tender.
Right at the end of the cooking time, remove the thyme and bay leaf and add a bit of lemon zest to brighten the dish. Take a taste, and if you want the goulash to be spicier, add black or cayenne pepper. You can serve immediately or make this dish a day ahead and refrigerate it to allow the flavors of the spices to become even more robust.
Spices as MedicineThroughout history, spices have been valued for their medicinal properties� For example, pepper is a strong anti-botulism agent, and at one point, it was literally worth its weight in gold: An ounce of pepper cost an ounce of gold� Nutmeg was believed to prevent the plague, and a pound of it was worth seven oxen�

52

53
Use a simple salad of cooked carrots, dill, and parsley with a squeeze of lemon juice as a garnish. You might also add a dollop of sour cream to bring some freshness to this long-simmered dish.
About PaprikaAll paprika comes from chiles, and as we’ve said, all chiles got their start in the Americas. Chiles belong to a family of plants called capsicums, within which there is a great deal of variety. Explorers brought the seeds of capsicums back with them to Europe, and after they were planted in this new environment, the plants began to change. In addition, Europeans often discarded the seeds from hotter chiles and saved those from milder ones. Over time, capsicums evolved into a family of chiles that yield a mild paprika, one that isn’t as hot as that found in Mexico.
In Europe, two areas are renowned for the quality of their paprika: Spain and Hungary. Spanish paprika is made with chiles slowly dried over a fire. Not surprisingly, it has a distinctive smokiness to its flavor. In Spain, paprika is called pimentón and comes in dulce (“sweet”) or picante (“spicy”) versions. Once this paprika is finely ground, it begins to lose its aroma and some of its essential oils. It should be stored in a cool, dry place, sealed in a can that blocks it from light, and should be kept no longer than six months to a year.
As mentioned earlier, what makes a chile powder hot—whether it’s paprika or another varietal chile powder—is capsaicin. About 60 percent of the capsaicin is in the ribs of a chile, 20 percent is in the seeds, and 20 percent is in the flesh. As a broad rule of thumb, Hungarian paprika tends to be a little spicier than Spanish paprika, which means that more of the seeds and ribs of the chile are retained in its preparation. If you want to spice up a sweet paprika, add a bit of cayenne.
CarawayCaraway is one of the few exotic-tasting spices indigenous to northern Europe� It enjoys a temperate climate and walks a fine line between an herb and a spice� Europeans use caraway to flavor rich meats, such as pork, goose, and duck; potato dishes; rye bread; sauerkraut; and even a liqueur called kümmel� It’s thought to make food easier to digest�
Herbs versus SpicesTypically, herbs come from the tender parts of the plant, such as leaves or blossoms� Spices come from the more fibrous and tough parts of the plant, such as stalks, bark, seeds, stems, and roots�

54
Roasted Beets with Juniper Vinaigrette
Juniper grows prolifically throughout the Northern Hemisphere. The spice is made from the berries of the juniper tree and has a complex flavor. In it, you’ll taste the flavors of gin and citrus, a woodsy note, a bit of sweetness, and an underlying bitterness.
For this salad, first make the vinaigrette. Here, mustard serves as an emulsifier, helping to keep the oil and acid combined. To the mustard, add some shallots and salt. Use one part acid—in this case, both lemon juice and vinegar—to three parts oil. Next, add ground juniper and pepper. If possible, always buy whole spices, which retain their flavor longer than ground spices; then, when you need them, you can grind the spices yourself and be the first to enjoy their wonderful aroma. Shake the vinaigrette well and set aside.
Place the diced beets in a bowl. Note that the challenge in cooking beets is to get them tender without losing their color. You can do this by leaving the peel on when you boil or roast them and leaving a piece of the root and a piece of the stem on either end, as well. Pour some of the vinaigrette over the beets and stir in another pinch of juniper and some salt.
Because beets have an assertive flavor, use assertive greens, such as watercress and other bitter greens, for this salad. Make a bed of the greens
Ingredients
Salad:• 1 head frisée or other
bitter green• 1 bunch watercress or
other peppery green• ⅓ cup parsley leaves• 1 lb cooked beets, diced• 1 apple, sliced• 4 oz goat cheese
(optional)• 2 oz walnuts, toasted
Yield: 8 portions
Vinaigrette:• 1 Tbs shallots, minced• 2 Tbs lemon juice• 2 Tbs vinegar• 1 tsp Dijon mustard• 1 tsp ground juniper• ¼ cup olive oil• Salt and pepper to taste• Sugar to taste

55

56
and spoon some of the beets on top. Tuck in some apple slices, trying to avoid staining them red if possible. On top, sprinkle goat cheese. Drizzle additional vinaigrette over the greens, add a squeeze of lemon juice, and garnish with toasted, chopped walnuts.
If ever there was a vegetable with an image problem, the beet would be it: despised by children and adults alike, canned to the consistency
of mush, left behind on salad bars everywhere. No one, it seems, has a kind word to say about the lowly beet. But done right, beets are easy to prepare, sweet, full-flavored, and delicious. Sliced into salads with goat cheese and citrus; roasted with thyme, bay leaves, and anise seed; dressed with walnut oil, sherry vinegar, shallots, and tarragon; or served hot in a risotto, beets are a treasure—all versatility, pure potential. Below are 10 tips to help you put a new spin on beets for your friends and family.
1. Cook beets with their skin intact. The pigment that gives beets their color is water soluble and will bleed away if you peel before you cook, leaving beets that look washed out and anemic.
2. Once it’s cooked, a beet’s skin should slip off easily by rubbing with a paper towel; if it doesn’t, then you probably need a longer cooking time.
3. Test for doneness by piercing beets with a knife; they should offer very little resistance. The knife should go in and pull out easily.
4. Vinegar brightens the taste and color of beets, but don’t overdo it.
5. For a sweet, deep flavor, rub beets with olive oil and wrap them in foil. Roast at 350° until tender. After they cool, rub off the skin and slice.
6. If you buy beets with the greens attached, don’t throw them out. They can be boiled until tender and used as you would any other hearty green. Add them to pasta or try a frittata made with beet greens, bacon, and potatoes.
Getting the Best from Beets

57
7. Clean up right after peeling and slicing beets or you may find that your fingers and cutting board are stained red. You can also cover your cutting board with a piece of parchment paper or plastic wrap while you’re working with beets.
8. Beets have plenty of flavor, so don’t be timid when it comes to seasoning. Salt and acid, in particular, help balance the natural sweetness and earthiness of beets.
9. Small, golf-ball-sized beets cook quickly (usually within 20 minutes), while larger or older beets need extra cooking time to become tender (1 to 2 hours). Always test beets with a knife to be sure they are tender.
10. Take advantage of the farmers’ market in your area. Ask vendors about the many varieties of beets, how they taste, and when they are in season. Share your recipe ideas with others and take home some new ideas to try for yourself.
Hot Spiced Wine
Every culture that has wine will likely, at some point, warm that wine and add spices to it. In Scandinavia, this drink is called glogg; in Germany, it’s glühwein; and in England, it’s mulled wine.
For this hot spiced wine, begin by creating a sugar syrup that you will flavor with whole spices. Don’t use ground spices for this wine, or you’ll end up with a sandy, wet mess. Heat water and sugar in a pan and add some cinnamon
Ingredients
• 2 oranges, sliced• 1 lemon, sliced• 1 ¼–1 ½ cups sugar• 2 cups water• 3 cinnamon sticks• 6 ginger “coins”• 6 green cardamom pods,
crushed
Yield: 12 portions
• 4 star anise• 8 cloves• 2 bottles red or white fruity,
low-tannin wine
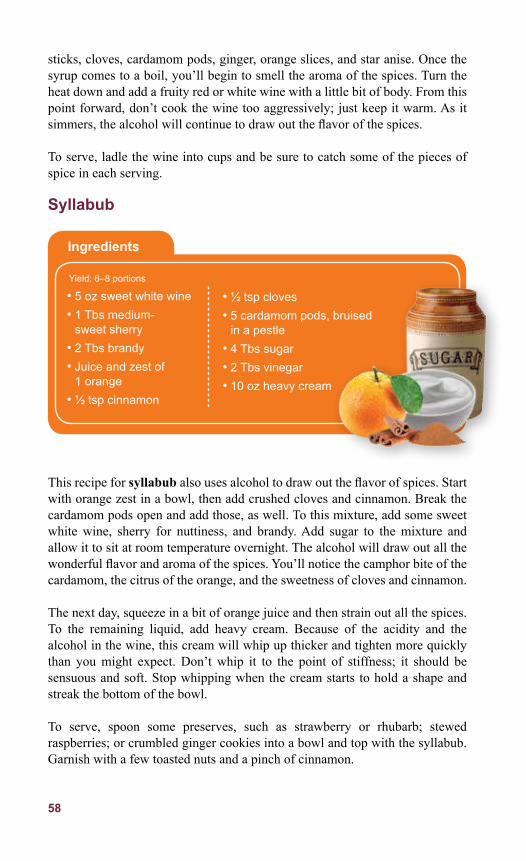
58
sticks, cloves, cardamom pods, ginger, orange slices, and star anise. Once the syrup comes to a boil, you’ll begin to smell the aroma of the spices. Turn the heat down and add a fruity red or white wine with a little bit of body. From this point forward, don’t cook the wine too aggressively; just keep it warm. As it simmers, the alcohol will continue to draw out the flavor of the spices.
To serve, ladle the wine into cups and be sure to catch some of the pieces of spice in each serving.
Syllabub
This recipe for syllabub also uses alcohol to draw out the flavor of spices. Start with orange zest in a bowl, then add crushed cloves and cinnamon. Break the cardamom pods open and add those, as well. To this mixture, add some sweet white wine, sherry for nuttiness, and brandy. Add sugar to the mixture and allow it to sit at room temperature overnight. The alcohol will draw out all the wonderful flavor and aroma of the spices. You’ll notice the camphor bite of the cardamom, the citrus of the orange, and the sweetness of cloves and cinnamon.
The next day, squeeze in a bit of orange juice and then strain out all the spices. To the remaining liquid, add heavy cream. Because of the acidity and the alcohol in the wine, this cream will whip up thicker and tighten more quickly than you might expect. Don’t whip it to the point of stiffness; it should be sensuous and soft. Stop whipping when the cream starts to hold a shape and streak the bottom of the bowl.
To serve, spoon some preserves, such as strawberry or rhubarb; stewed raspberries; or crumbled ginger cookies into a bowl and top with the syllabub. Garnish with a few toasted nuts and a pinch of cinnamon.
Ingredients
• 5 oz sweet white wine• 1 Tbs medium-
sweet sherry• 2 Tbs brandy• Juice and zest of
1 orange• ½ tsp cinnamon
• ½ tsp cloves• 5 cardamom pods, bruised
in a pestle• 4 Tbs sugar• 2 Tbs vinegar• 10 oz heavy cream
Yield: 6–8 portions

59

60
deglaze: A cooking technique that involves adding liquid to a hot pan and scraping into it any bits of food clinging to the sides of the pan after browning. The liquid and browned bits are often used to make a pan sauce.
kümmel: A liqueur flavored with caraway seeds.
pimentón: Spanish paprika.
syllabub: A traditional English dessert made with cream curdled with wine and other spirits and served over fruit or cookies.
Important Terms
Essential Herbs and Spices of Northern Europe
Caraway Seeds Dill
Mace Marjoram
Savory
Nutmeg
Juniper
ThymePaprika

61
New American Cuisine—The Global Kitchen
Lesson 6
About 500 years ago, Ferdinand Magellan set sail to circumnavigate the globe for the first time. From that time to this, the world has only grown smaller. Increasingly, cultures that were previously isolated came into
contact, and often, the outcome was conflict. But today, a new style of cooking has evolved that is the result of our embracing the world of flavor—the flavor of a global kitchen. In this lesson, we’ll explore this new style, sometimes known as fusion or New American cuisine. We’ll make variations on one dish—fried chicken—that draw inspiration from cultures around the world.
Tandoori-Style Marinated Chicken
In India, chicken is often marinated in yogurt in much the same way that Americans marinate chicken in buttermilk. The reason for using yogurt or buttermilk as a marinade is that their acidity tenderizes the chicken. Of course, spices are included to make the chicken flavorful, along with salt to make it juicy and delicious. For this tandoori-style chicken, we’ll use the spice mix known as garam masala.
Ingredients
• 1 clove garlic, crushed• Ginger, peeled and chopped• Serrano chiles, chopped• 1 cup non-pectin yogurt• 2 Tbs garam masala• ½–1 tsp cayenne pepper• 1 tsp salt• 8 pieces chicken, thighs and drumsticks• ½ cup flour • Vegetable oil
Yield: 8 portions

62
Place the chicken pieces into the yogurt. Then add the garam masala, serrano chiles, garlic, and fresh ginger. If you’re unsure about how much of these spices to add, mix them a little at a time into the yogurt before you add the chicken. Keep tasting the yogurt and adding more spices until you’re happy with the flavor. Refrigerate the chicken in the marinade overnight.
When you’re ready to fry the chicken, heat a pan of oil to between 325° and 350°. Look for the oil to start to shimmer. If it smokes, it’s too hot. To test the temperature, put a cube of bread in the oil. It should turn golden brown in about 45 seconds.
As the oil heats, wipe off most of the yogurt from the chicken pieces and put them in a resealable bag with a bit of flour seasoned with salt and pepper. Shake the chicken until it’s completely covered. Take the chicken pieces out and pat off any excess flour.
Whenever you put something into hot oil, always remember that the oil will rise as soon as it’s displaced; thus, you don’t want to put in too much food at once. Keep the pan no more than half full. And place the food away from yourself so that the hot oil doesn’t splash on you. Finally, never leave the pot of hot oil without turning off the burner.
Carefully place the chicken pieces into the oil. If the pieces brown within the first 30 seconds, the oil is too hot. Look for a little bit of browning to start at about 1 minute. When the chicken is golden on the first side, flip it over. If it gets too brown on the outside, but you’re still concerned that it’s underdone, finish the chicken in a slow oven (325°). When the chicken is done, remove the pieces to a plate covered with a paper towel to drain.

63
Serve this tandoori-style chicken with Major Grey’s mango chutney and a dollop of yogurt to cool the palate from the warming spices.
Global Twists on Fried ChickenFor Asian-inspired fried chicken, use the tea-smoking method we saw in an earlier lesson, but don’t cook the chicken all the way through. Again, place the smoked chicken pieces in yogurt and add some Chinese five-spice powder and salt. Make sure that the yogurt coats the outside of the meat completely. Keep the chicken in the refrigerator overnight before frying the next day. Serve with a sauce made from honey and the juice of some kimchi.
When we explored the spices of Mexico, we roasted chiles in a dry pan. After that step, you can remove the stems and seeds, allow the chiles to cool, and grind them up into a varietal chile powder. For Mexican fried chicken, make a spice rub with ancho and guajillo chile powders, ground coriander, Mexican oregano (or marjoram), toasted cumin powder, clove, brown sugar, and salt. This rub can be used for any barbecued meat. To add interest to the rub, add a little bit of instant coffee, which provides some bitterness and depth of flavor. Stir some of this spice rub into yogurt and store the rest in a sealed jar in a dry, dark place. It will keep for about a month. Again, coat the chicken with the Latin-inspired yogurt marinade and allow it to rest in the refrigerator overnight. Serve with mole into which you’ve stirred some fruit preserves for sweetness and fruitiness and a splash of vinegar.
For a final global twist, season the chicken with ras el hanout from Morocco. You can make a simple version of this blend using cloves, cardamom, cinnamon,

64

65
cumin, ginger, black pepper, nutmeg, coriander, and some hot chiles, or you can buy a ready-made version.
The Moroccan chicken is made with a surprising technique. In many places around the world, chicken is braised until it’s completely cooked before grilling or frying. The chicken is allowed to cool in the broth so that it absorbs more flavor before being recooked later.
To make Moroccan-style chicken, sweat some onions and fennel in oil until they’re translucent. Add some garlic, turn up the heat a bit, and then add ras el hanout. Take care not to burn the spices in the hot oil. Next, add some chicken pieces, but don’t worry about browning them at this stage; you’re simply coating them in the flavorful spices and oil in the pan. Next, in quick succession, add some tomatoes, green olives, preserved lemons, and rehydrated saffron.
Again, you don’t want to brown the chicken, but you also don’t want to add liquid to the pan until the chicken has begun to firm up. Look for the meat to get white on the outside. Some of the protein in the chicken is soluble. If you add cold stock while the chicken is still raw, the soluble protein will come out into solution. Then, when the mixture comes to a boil, all the protein will coagulate, rising to the top in an unpleasant foam.
Once the chicken has seized up—turned white—introduce a little bit of chicken stock, bring the mixture to a boil, cover, and simmer very gently until the chicken is cooked all the way through. Set the chicken pieces aside. Next, taste the braising liquid. It has been cooked down so that it’s almost a concentrate of chicken, vegetables, and ras el hanout. Stir some yogurt into the braise to make a sauce. Pour some of the sauce over the chicken and store the rest in the refrigerator. After you fry the chicken the next day, serve with the reserved sauce and a dollop of yogurt.
Indian ColeslawTo go along with our fried chicken, we’ll make some coleslaw variations from the countries we’ve visited, starting with India. Begin with some ground turmeric, cayenne, and cumin. To these, add unsweetened coconut, sometimes called macaroon coconut. Add just enough water to make a small ball of the spices and coconut and set aside.
Next, heat a pan and add some oil. Once the oil begins to creep around the pan, add some mustard seeds and pop them, as we did in an earlier lesson. When the mustard seeds start to pop, cover the pan and keep it moving. Listen for the popping to stop.

66
To the same pan, add some dal, curry leaves, and one chile pepper. Sizzle the curry leaves in the hot fat until they become crispy and the dal turns golden. Although dal is a legume, it’s also a spice and will become nutty. The nice thing about using a whole chile pepper is that if you decide the dish is becoming too hot, you can simply remove it. Next, add some onions; the idea here is to cook them just briefly to reduce their moisture and their hot, sulfurous quality; you want the onions to become slightly sweet. Remember to keep your eye on the spices and dal, though, to avoid burning them.
Next, add some julienned (matchstick-cut) carrots and a splash of water to start them steaming. The carrots should be cooked but crisp-tender. After giving the carrots a brief head start, add the shredded cabbage and, again, a splash of water. Finally, stir in the spices and coconut you mixed earlier. Make sure the coleslaw comes out of the pan before it loses its crisp texture. For dressing, squeeze on a splash of lemon or lime juice and add salt. Serve the coleslaw hot or at room temperature.
Asian ColeslawFor an Asian-inspired slaw to accompany tea-smoked chicken, start with a jar of kimchi and drain it but save the liquid. Chop the kimchi and add it to a bowl with some shredded Napa cabbage, red cabbage, and carrots—almost like adding pickles to coleslaw. Include some snow peas, sliced green onions, and toasted sesame seeds. Toss the slaw with a little soy sauce and rice wine vinegar. Because of the soy sauce, it probably won’t need salt. Allow the slaw to macerate before serving.
Latin ColeslawFor Latin coleslaw, combine shredded red and green cabbage, shredded jicama, green onions, and cilantro with tomatillo salsa. Squeeze on some lime juice, add salt, and allow to macerate. If you like the idea of a hotter slaw, add some green chiles, but remember that the chicken has a number of chiles in it already. This slaw is designed to cool off the palate, not heat it up.
Mediterranean ColeslawFinally, for a Mediterranean slaw, combine shredded cabbage, grated or shredded fennel, chopped green olives, slices of preserved lemon, and both whole and chopped parsley. Be sure to include some of the fennel tops for color. Dress this slaw with lemon juice, extra-virgin olive oil, cracked black pepper, and some of the liquid from the preserved lemons instead of salt.
Passport to FlavorIn these lessons, we’ve traveled around the world and visited many different cultures. We’ve also learned about the spices that help define those cultures and explored techniques for manipulating spices to yield delicious results. To

get even more pleasure from your cooking in the future, continue to experiment in the kitchen, always tasting, learning, and trying new techniques and flavors.
garam masala: An Indian spice blend.
jicama: A Mexican root vegetable; it looks similar to a turnip but is sweet and is often used in salads.
kimchi: A spicy Korean side dish traditionally made with cabbage, radishes, and other vegetables.
67
Important Terms
Essential Herbs and Spices of New American Cuisine
Basil Black Pepper
Chile Powder Garlic
Sage
Celery Seed
TarragonRosemary
Oregano

68
Lesson 1Basmati Rice Pilaf ���������������������� 3Sambar Masala �������������������������� 6Sambar �������������������������������������� 8Shrimp with Chile Tamarind Sauce ������������������� 10Chai Tea ���������������������������������� 12
Lesson 2Five-Spice Oil ������������������������� 15The Five Heaps ������������������������ 17Red-Cooked Beef and Turnips ��� 19
Tea-Smoked Quail with Eggplant and Stir-Fried Greens ����������� 21
Lesson 3Mole Rojo (Red Oaxacan Mole) ��� 30
Recipe ListLesson 4Preserved Lemons �������������������� 38Fattoush ���������������������������������� 39Shepherd’s Salad ���������������������� 41Blanquit Mechouia Salad with Cheese on Bread Rounds ������ 42Moorish-Inspired Lamb Kebabs with Grapes ������������������������� 44Lamb Kebabs with Rosemary, Thyme, and Garlic ��������������� 44
Lesson 5Goulash ����������������������������������� 50Roasted Beets with Juniper Vinaigrette ��������������������������� 54Hot Spiced Wine ���������������������� 57Syllabub ���������������������������������� 58
Lesson 6Tandoori-Style Marinated Chicken ���������������� 61
Glossarybaharat: A Turkish spice mixture.
blanquit: A Tunisian bread salad.
charmoula: An all-purpose marinade and vinaigrette used in both Morocco and Tunisia.
chiffonade: A technique of slicing ingredients, such as herbs, into thin ribbons.
concassé: Method of peeling, seeding, and roughly chopping tomatoes.
dal: Dried beans or lentils, such as moong dal, urad dal, and chana dal. Also a dish made primarily with lentils that is a cross between a stew and a soup.
deglaze: A cooking technique that involves adding liquid to a hot pan and scraping into it any bits of food clinging to the sides of the pan after browning. The liquid and browned bits are often used to make a pan sauce.
dukkah: An Egyptian spice mixture made with cumin, pepper, hazelnuts, and sesame seeds.
fattoush: Eastern Mediterranean bread salad.
fenugreek: An herb of the pea family that has aromatic seeds.
fond: Culinary term referring to foundational flavors.
frenching: A technique of cutting away part of the bone so that the meat will pull away and expose the bone during cooking.
garam masala: An Indian spice blend.
ghee: Clarified butter used in India.
harissa: Chili pepper paste from North Africa.
jicama: A Mexican root vegetable; it looks similar to a turnip but is sweet and is often used in salads.
69

70
kimchi: A spicy Korean side dish traditionally made with cabbage, radishes, and other vegetables.
kümmel: A liqueur flavored with caraway seeds.
masala: Indian spice mixture.
masala dabba: Indian spice caddy.
mechouia: Tunisian “shepherd’s salad” made with roasted vegetables.
metate: A Mexican cooking tool consisting of a stone rolling pin and a stone slab; used for making purees and grinding ingredients.
mise en place: French term meaning “set in place” or “everything in place”; in professional kitchens, the term refers to organized and prepped ingredients, ready to be used in a dish.
mole: A spicy Mexican sauce made with various chiles and other ingredients.
meze: An appetizer course in the Mediterranean.
pimentón: Spanish paprika.
purslane: A succulent green eaten in salads.
red cooking: Chinese style of cooking similar to braising. Soy, sherry, ginger, and star anise are used to create the braising liquid, which is often saved and reused after meat has been braised in it.
sambar: A type of dal served in southern India.
syllabub: A traditional English dessert made with cream curdled with wine and other spirits and served over fruit or cookies.
ras el hanout: A Moroccan spice mixture containing as many as 30 spices; translates literally as “top of the shop.”
tabil: A Tunisian spice mixture containing turmeric and other exotic spices.
za’atar: An Egyptian spice mixture made with wild thyme, sesame, and sumac.

BibliographyBibliography
Note: All books listed below are available on the website of The Culinary Institute of America at http://www.ciaprochef.com/fbi/.
Conniff-Dobrich, Cate. Seasons in the Wine Country: Recipes from The Culinary Institute of America at Greystone. San Francisco: Chronicle Books, 2010.
The Culinary Institute of America (CIA). Breakfasts and Brunches. New York: Lebhar-Friedman, 2005.
———. Cooking at Home with The Culinary Institute of America. New York: Wiley, 2003.
———. The Culinary Institute of America Cookbook: A Collection of Our Favorite Recipes for the Home Chef. New York: Lebhar-Friedman, 2008.
———. Gourmet Meals in Minutes. New York: Lebhar-Friedman, 2004.
———. Grilling: Exciting International Flavors from the World’s Premier Culinary College. New York: Lebhar-Friedman, 2006.
———. Healthy Cooking at Home with The Culinary Institute of America. New York: Wiley, 2011.
———. The New Book of Soups. New York: Lebhar-Friedman, 2009.
———. One Dish Meals. New York: Lebhar-Friedman, 2006.
———. Pasta: Classic and Contemporary Pasta, Risotto, Crespelle, and Polenta Recipes. Hoboken, NJ: John Wiley & Sons, 2013.
———. The Professional Chef. 9th ed. New York: Wiley, 2001. (The online version of this book can be found at https://www.inkling.com/store/professional-chef-cia-9th/.)
———. Vegetables. New York: Lebhar-Friedman, 2007.
———, Mark Erickson, and Lisa Erickson. Cooking for One: A Seasonal Guide to the Pleasure of Preparing Delicious Meals for Yourself. New York: Lebhar-Friedman, 2011.
——— and Ben Fink. Hors d’oeuvre at Home with The Culinary Institute of America. New York: Wiley, 2007.
——— and Lynne Gigliotti. Mediterranean Cooking. Boston: Houghton Mifflin Harcourt, 2013.
71
72
——— and Abigail Kirsch. Entertaining: Recipes and Inspirations for Gathering with Family and Friends. Hoboken, NJ: John Wiley & Sons, 2012.
——— and Katherine Polenz. Vegetarian Cooking at Home with The Culinary Institute of America. New York: Wiley, 2012.
———, Gianni Scappin, Alberto Vanoli, and Steven Kolpan. Italian Cooking at Home with The Culinary Institute of America. New York: Wiley, 2011.
——— and Martha Rose Shulman. Culinary Boot Camp: Five Days of Basic Training at The Culinary Institute of America. New York: Wiley, 2006.
Fischer, John W., and Lou Jones. Bistros and Brasseries: Recipes and Reflections on Classic Café Cooking. New York: Lebhar-Friedman, 2008.
Scappin, Gianni, and Vincenzo Lauria. A Tavola! Recipes and Reflections on Traditional Italian Home Cooking. New York: Lebhar-Friedman, 2009.
Shulman, Martha Rose. Spain and the World Table. New York: DK Adult, 2011.

73
Photographic Credits
Page i: © iStockphoto/Thinkstock.
Page iv: © iStockphoto/Thinkstock.
Page 1: © iStockphoto/Thinkstock.
Page 2: © iStockphoto/Thinkstock.
Page 3: © iStockphoto/Thinkstock.
Page 4: © iStockphoto/Thinkstock.
Page 5: © iStockphoto/Thinkstock.
Page 6: © iStockphoto/Thinkstock.
Page 7: © iStockphoto/Thinkstock.
Page 8: © iStockphoto/Thinkstock.
Page 9: © iStockphoto/Thinkstock.
Page 10: © iStockphoto/Thinkstock.
Page 11: Justin Smith @JustinTimePhoto.com.
Page 12: © iStockphoto/Thinkstock.
Page 13: © Zoonar/Thinkstock.
Page 14: © iStockphoto/Thinkstock.
Page 15: © iStockphoto/Thinkstock.
Page 17: © iStockphoto/Thinkstock.
Page 18: Justin Smith @JustinTimePhoto.com.
Page 19: © iStockphoto/Thinkstock.
Page 20: Justin Smith @JustinTimePhoto.com.
Page 21: © iStockphoto/Thinkstock.
Page 22: Justin Smith @JustinTimePhoto.com.
Page 23: © iStockphoto/Thinkstock.
Page 24: © iStockphoto/Thinkstock.
Page 26: © iStockphoto/Thinkstock.
Page 27: Justin Smith @JustinTimePhoto.com, © iStockphoto/Thinkstock.
Page 28: © iStockphoto/Thinkstock.
Page 29: © iStockphoto/Thinkstock, Justin Smith @JustinTimePhoto.com.
Page 30: © iStockphoto/Thinkstock.
Page 31: Justin Smith @JustinTimePhoto.com.
Page 32: © iStockphoto/Thinkstock.
Page 33: © iStockphoto/Thinkstock.
Page 34: © iStockphoto/Thinkstock.
Page 35: © iStockphoto/Thinkstock.

Page 37: © iStockphoto/Thinkstock.
Page 38: Justin Smith @JustinTimePhoto.com.
Page 39: Justin Smith @JustinTimePhoto.com.
Page 40: © iStockphoto/Thinkstock.
Page 41: Justin Smith @JustinTimePhoto.com, © iStockphoto/Thinkstock.
Page 42: Justin Smith @JustinTimePhoto.com.
Page 43: © iStockphoto/Thinkstock.
Page 44: Justin Smith @JustinTimePhoto.com, © iStockphoto/Thinkstock.
Page 45: © Goodshoot/Thinkstock.
Page 46: © iStockphoto/Thinkstock.
Page 47: Justin Smith @JustinTimePhoto.com.
Page 48: © iStockphoto/Thinkstock.
Page 49: © iStockphoto/Thinkstock.
Page 50: © iStockphoto/Thinkstock.
Page 52: © iStockphoto/Thinkstock.
Page 54: © iStockphoto/Thinkstock.
Page 55: Justin Smith @JustinTimePhoto.com.
Page 56: © iStockphoto/Thinkstock.
Page 57: © iStockphoto/Thinkstock.
Page 58: © iStockphoto/Thinkstock.
Page 59: Justin Smith @JustinTimePhoto.com.
Page 60: © iStockphoto/Thinkstock.
Page 61: © iStockphoto/Thinkstock.
Page 62: Justin Smith @JustinTimePhoto.com.
Page 63: Justin Smith @JustinTimePhoto.com.
Page 64: Justin Smith @JustinTimePhoto.com.
Page 65: © iStockphoto/Thinkstock.
Page 67: © iStockphoto/Thinkstock.
Page 68: © iStockphoto/Thinkstock.
Page 72: © iStockphoto/Thinkstock.
74