thermospas® aquatic series owner s manual - the best hot tubs and spas ...€¦ · thermospas has...
TRANSCRIPT

ThermoSpas® Aquatic Series Owner’s ManualSafety, Maintenance and Technical Information
Welcome To ThermoSpasCongratulations! You are now the official owner of the finest spa built. All of us at ThermoSpas are looking forward to enjoying a relationship with you that will last for many years to come.
As you get to know your spa, you will quickly discover why ThermoSpas is the fastest growing spa manufacturer in the country. You have made the right decision in choosing ThermoSpas. We’re betting our reputation on it. A reputation built on the foundation of our many strengths:
Our CredentialsThermoSpas has been manufacturing spas since 1983. We strive to stay on the cutting edge of spa design and maintenance technology. We are constantly looking for ways to bring our cus-tomers the latest features and products designed to enhance the enjoyment and therapeutic value of our spas. We are a member of the prestigious Association of Pool and Spa Professionals (APSP). One of the APSP’s primary goals is, “To contribute to the health, safety, and welfare of the public in the installation, maintenance, and operation of swimming pools, and spas.” Our best credentials come from thousands of satisfied ThermoSpas owners who write and call us every day to tell us how happy they are with their spa and what a positive difference it has made in their lives.
Our QualityThermoSpas’ emphasis on quality will become crystal clear with each passing day you own your spa. We make our spas from only the highest quality materials, inside and out. Your spa was test-ed with hot water to meet our quality assurance standards.
Our Customer ServiceOur Customer Care Department is staffed by trained representatives who really care about help-ing you. They are knowledgeable in every facet of spa maintenance. And they are available to answer your call Monday - Friday 9:00 am - 6:00 pm and Saturday 9:00 am - 1:00 pm, Eastern Time. The Technical Service Department is open Monday - Friday 9:00 am - 5:00 pm and Satur-day 9:00 am - 1:00 pm, Eastern Time to answer any of your technical questions or needs.
Your Responsibility To Your SpaNow that we’ve told you about our priorities in providing you with an exceptional product and on-going support, we urge you to read through this manual completely. This manual, along with the information previously supplied in the Welcome Kit will familiarize you with the simple opera-tion and maintenance of your spa (which will become second nature to you in no time). Most im-portantly, it will help you keep your spa running smoothly and in tip-top condition for many years to come.
Have Fun and Enjoy!
Welcome to ThermoSpas

Table of Contents
Read and Follow These Important Instructions .................................................1
Proper Use and Installation ..................................................................................1Safety In and Around Your Spa .................................................................................................... 1Spa Safety Literature .................................................................................................................... 4Entrapment Risk ........................................................................................................................... 4Be Aware of the Risk of Fatal Hyperthermia ................................................................................. 5
Choosing A Location .............................................................................................6Outdoor Location .......................................................................................................................... 6Indoor Location ............................................................................................................................. 7
Electrical Set Up ....................................................................................................9The Safe Electrical Hook-up of Your Spa ..................................................................................... 9Electrical Service Requirements................................................................................................... 9
Spa Start Up .........................................................................................................12
Spa Diagram.........................................................................................................16
Equipment Diagram .............................................................................................17
Topside Control Panel .........................................................................................18Main Control Panel (Dolphin and Islander Models) .................................................................... 18Auxiliary Pump Control Panel ..................................................................................................... 19Wave Lounge Pump and Valve Control Panel............................................................................ 19Maui Control Panel ..................................................................................................................... 19
Operating Instructions ........................................................................................20Setting the Temperature (Dolphin and Islander Models) ............................................................ 20Setting the Temperature (Maui Models) ..................................................................................... 20Circulation Pump ....................................................................................................................... 20Jets Pump 1................................................................................................................................ 20
How To Contact Us
Office . . . . . . . . . . . . . . . . . . . . . . . . . . . . . . . . . . . . . . . . .800.876.0158Fax . . . . . . . . . . . . . . . . . . . . . . . . . . . . . . . . . . . . . . . . . . .203.303.0029Customer Care Department . . . . . . . . . . . . . . . . . . . . . . .800.876.0158, option 5Technical Service Department . . . . . . . . . . . . . . . . . . . . .800.876.0158, option 2Address . . . . . . . . . . . . . . . . . . . . . . . . . . . . . . . . . . . . . . .ThermoSpas • 10 Research Parkway Suite 300 • Wallingford, CT • 06492Website . . . . . . . . . . . . . . . . . . . . . . . . . . . . . . . . . . . . . . .www.ThermoSpas.com
Ta
ble
of C
on
ten
ts

Jets Pump 2 (If equipped) .......................................................................................................... 21Jets Pump 3 to 5 (If equipped) ................................................................................................... 21Wave Lounge Pump and Valve Control (Dolphin Diamond and Maui Diamond models) ........... 21Blower (Gold, Platinum and Diamond Models)........................................................................... 21Control Valves ............................................................................................................................ 22Jets ............................................................................................................................................. 22Lights .......................................................................................................................................... 23
Programming Instructions ..................................................................................24Programming the Time (Dolphin and Islander Models) .............................................................. 24Standard Mode (Dolphin and Islander Models) .......................................................................... 24Standard Mode (Maui Models) ................................................................................................... 24Economy Mode (Dolphin and Islander Models).......................................................................... 25Economy Mode (Maui Models) ................................................................................................... 25Standard-In-Economy Mode (Dolphin and Islander Models)...................................................... 25Standard-In-Economy Mode (Maui Models) ............................................................................... 25Sleep Mode (Dolphin and Islander Models) ............................................................................... 26Sleep Mode (Maui Models)......................................................................................................... 26Standby Mode (Dolphin and Islander Models) ........................................................................... 26Standby Mode (Maui Models)..................................................................................................... 26Economy Mode Heating Cycles (Dolphin and Islander Models) ................................................ 26O3 Ozone ................................................................................................................................... 27Invert (Dolphin and Islander Models).......................................................................................... 27Panel Lock/Unlock (PL) - Dolphin and Islander Models ............................................................. 27Temperature Lock/Unlock (TL) - Dolphin and Islander Models .................................................. 28Programming Fahrenheit or Celsius (Dolphin and Islander Models) .......................................... 28Programming the Time in a 12-hour or 24-hour Format (Dolphin and Islander Models) ............ 28
Automatic Functions ...........................................................................................29Clean-up Cycle ........................................................................................................................... 29Purge Cycle ................................................................................................................................ 29Freeze Protection ....................................................................................................................... 29Circulation Pump ....................................................................................................................... 29Power-Up Sequence .................................................................................................................. 29
Basic Spa Maintenance.......................................................................................30
Changing/Cleaning Filters ..................................................................................32Cleaning The Filter ..................................................................................................................... 32
Spas with ThermOzone .......................................................................................34Components ............................................................................................................................... 34Operation .................................................................................................................................... 34Chemical Usage ......................................................................................................................... 34
Drain and Refill ....................................................................................................35
Cleaning the Cover ..............................................................................................36

Flushing Lines .....................................................................................................36
Shell Surface Cleaning........................................................................................37
Winterizing (Closing Your Spa) ..........................................................................38
Components .........................................................................................................39Water Pump................................................................................................................................ 39Circulation/Filtration Pump ......................................................................................................... 39Air Pump (Blower) ...................................................................................................................... 39Spa Pack and Heater ................................................................................................................. 40Spa Light Assembly .................................................................................................................... 40
Common Diagnostic Messages .........................................................................41
Common Reminder Messages ...........................................................................42
Troubleshooting - Water Chemistry ...................................................................43
Troubleshooting - Mechanical Systems ............................................................44
Glossary ...............................................................................................................46
F.A.Q.s ..................................................................................................................51
Floor Load Determination ...................................................................................54
Electrical Requirements......................................................................................55
Spa Measurements ..............................................................................................55
Water Capacity .....................................................................................................56


1
Read and Follow These Important InstructionsWhen using the electrical equipment, basic safety precautions should always be followed. A green colored terminal marked G, GR, Ground, Grounding or the Symbol is located inside the supply terminal box or compartment. To reduce the risk of electric shock, this terminal must be connected to the grounding means provided in the electric supply service panel with a con-tinuous copper wire equivalent in size to the circuit conductors supplying this equipment. At least two lugs marked “BONDING LUGS” are provided on the external service or on the inside of the supply terminal box or compartment. To reduce the risk of electric shock, connect the local common bonding grid in the area of the spa or spa to these terminals with an insulated or bare copper conductor not smaller than No. 6 AWG. All field-installed metal components such as rails, ladders, drains, or other similar hardware within three meters of the spa or spa shall be bonded to the equipment grounding bus with copper conductors not smaller than No. 6 AWG.
Proper Use and InstallationThermoSpas has made every effort to provide you with a safe and reliable product. The detailed instructions provided previous to, and with the receipt of, your spa will explain how to safely in-stall, operate and maintain your spa. Safety in using a spa ultimately lays with you the customer. There is no substitute for the use of good judgment and common sense when it comes to safety in and around your spa.
Safety In and Around Your SpaREAD AND FOLLOW ALL INSTRUCTIONS CAREFULLY!
! DANGER: RISK OF SEVERE INJURY OR DROWNING!• Extreme caution must be exercised to prevent unauthorized access by children.• To avoid accidents, ensure that children do not use this spa unless supervised at all times.
Adult supervision is a critical safety factor in preventing children from drowning.• Use the straps and clip tie downs to secure the spa cover when not in use. This will help
discourage unsupervised children from entering the spa. Keep the spa cover secure in high-wind conditions.
• There is no representation that the cover, clip tie-downs, or actual locks will prevent access to the spa.
! DANGER: RISK OF SEVERE INJURY OR DROWNING!• Keep hair, loose articles of clothing or hanging jewelry away from suction fittings, rotating jets
or other moving components to avoid entrapment that could lead to drowning or severe injury.• Never use the spa unless all suction guards, filter, filter lid, or skimmer assembly are installed
to prevent body and/or hair entrapment.• Never operate or use the spa if the filter, filter lid, or skimmer assembly are broken or any part
of the skimmer assembly is missing. Please contact your dealer or nearest service center for service.
• The suction fittings and suction covers in this spa are sized to match the specific water flow created by the pump(s). If it is necessary to replace the suction fittings, suction covers or pump(s), be sure that the flow rates are compatible and are in compliance with the VGB Safety Act.
• Never replace a suction fitting or suction cover with one rated less than the flow rate marked on the original suction fitting. Using improper suction fittings or suction covers can create a body or hair suction entrapment hazard that may lead to drowning or severe injury.
Sa
fety
Re
qu
irem
ents

2
! DANGER: RISK OF SEVERE INJURY FROM ELECTRIC SHOCK OR DEATH FROM ELECTROCUTION!
• Install the spa at least 5 feet (1.5m), from all metal surfaces. As an alternative, a spa may be installed within 5 feet of metal surfaces if each metal surface is permanently connected (bonded) by a minimum No. 8 AWG (8.4 mm²) solid copper conductor attached to the wire connector on the grounding lug, inside the equipment compartment on the equipment box.
• A grounding wire connector is provided on this unit to connect a minimum No. 8 AWG (8.4 mm²) solid copper conductor between this unit and any metal equipment, metal enclosures of electrical equipment, metal water pipe, or conduit within 5 feet (1.5m) of the unit.
• Never permit any electrical appliance, such as a light, telephone, radio, television, etc. within 5 feet (1.5m) of a spa unless such appliances are built-in by the manufacturer.
• Never bring any electrical appliances into or near the spa.• Never operate any electrical appliances from inside the spa or when you are wet.• The electrical supply for this product must include a suitably rated switch or circuit breaker
to open all ungrounded supply conductors to comply with section 422-20 of the National Electrical Code/USA, ANSI/NFPA 70. The disconnecting means must be readily accessible and visible to the spa occupant but installed at least 5 feet (1.5m), from the spa.
• The electrical circuit supplied for the spa must include a suitable ground fault circuit interrupter (GFCI) as required by NEC Article 680-42.
! WARNING: RISK OF SEVERE INJURY OR DEATH!• Extreme caution must be exercised to prevent diving or jumping into the spa or slipping and
falling, which could result in unconsciousness, drowning, or serious injury. Remember that wet surfaces can be very slippery.
• Never stand, walk or sit on the top railing of the spa.
! WARNING: RISK OF HYPERTHERMIA (OVER-HEATING) CAUSING SEVERE INJURY, BURNS, WELTS OR DEATH!
• Water temperature in excess of 104°F (40°C) may be injurious to your health.• Refer to the Hyperthermia for specific causes and symptoms of this condition.• The water in the spa should never exceed 104°F (40°C). Water temperatures between 100°F
(38°C) and 104°F (40°C) are considered safe for a healthy adult.• Lower water temperatures are recommended for young children (children are especially
sensitive to hot water) and when spa use may exceed 10 minutes.• The Consumer Products Safety Commission/USA has stated that the water temperature in a
spa should not exceed 104°F (40°C).• Always test the spa water temperature before entering the spa. The user should measure the
water temperature with an accurate thermometer since the tolerance of water temperature-regulating devices may vary as much as +/- 5°F (2°C).
! WARNING: RISK OF SEVERE INJURY OR DEATH! • Since excessive water temperatures have a high potential for causing fetal damage during
the early months of pregnancy, if pregnant or possibly pregnant, consult your physician before using a spa.
• Pregnant or possibly pregnant women should limit spa water temperatures to 100°F (38°C).• Persons suffering from obesity or a medical history of heart disease, low or high blood
pressure, circulatory system problems, diabetes, infectious diseases or immune deficiency syndromes should consult a physician before using a spa.
• If you experience breathing difficulties in association with using or operating your spa, discontinue use and consult your physician.
Safe
ty R
eq
uire
me
nts

3
• Persons using medication should consult a physician before using a spa since some medication may induce drowsiness, while other medication may affect heart rate, blood pressure, and circulation.
• Persons suffering from any condition requiring medical treatment, the elderly, or infants should consult with a physician before using a spa.
• The use of alcohol, drugs, or medication before or during spa use may lead to unconsciousness with the possibility of drowning.
! WARNING: RISK OF SEVERE INJURY OR DEATH!• Prolonged immersion in a spa may be injurious to your health.• Observe a reasonable time limit when using the spa. Exposures at higher temperatures can
cause high body temperature (over-heating). Symptoms may include dizziness, nausea, fainting, drowsiness, and reduced awareness. These effects could possibly result in drowning or serious injury.
• Never use a spa immediately following strenuous exercise. Enter and exit the spa slowly. Wet surfaces can be slippery.
! WARNING: TO DECREASE RISK OF INFECTION OR DISEASE!• To reduce the risk of contracting a waterborne illness (e.g. an infection, bacteria or virus) and/
or respiratory ailments, maintain water chemistry within the parameters listed on the inside cover of this manual and consult with a licensed engineer regarding proper ventilation if installed indoors or in an enclosed area.
• People with infectious diseases should not use a spa to avoid water contamination, which could result in spreading infections to others.
• Always shower before and after using your spa. Maintain water chemistry in accordance with manufacturer’s instructions. Failure to do so may result in contracting a waterborne illness (e.g. an infection, bacteria or virus).
! WARNING: In addition to maintenance of filters and water chemistry, proper ventilation is recommended to reduce the risk of contracting a waterborne illness (e.g. an infection, bacteria or virus) and/or respiratory ailments that could be present in the air or water. Consult a licensed architect or building contractor to determine your specific needs if installing your spa indoors.
CAUTION: TO DECREASE RISK OF PRODUCT DAMAGE.• Maintain water chemistry in accordance with manufacturer’s instructions.• Proper chemical maintenance of spa water is necessary to maintain safe water and prevent
possible damage to spa components.
! WARNING: RISK OF SEVERE INJURY OR DEATH! The appliance is not intended for use by persons (including children) with reduced physical,
sensory or mental capabilities, or lack of experience or knowledge, unless they have been given supervision or instruction concerning use of the appliance by a person responsible for their safety.
NOTE: This spa is not intended nor designed to be used in a commercial or public application. The spa buyer shall determine whether there are any code restrictions on the use or installation of this spa since local code requirements vary from one locality to another.
Sa
fety
Re
qu
irem
ents

4
Spa Safety LiteratureTo ensure you have a safe and enjoyable spa experience, learn all you can about spa safety and emergency procedures. Especially useful are the brochures listed below:
• Children Aren’t Waterproof• Pool and Spa Emergency Procedures For Infants and Children• Layers of Protection• The Sensible Way to Enjoy Your Spa or Spa
The Association of Pool and Spa Professionals publishes these brochures. To acquire a bro-chure:
• Go to http://apsp.org• Conduct your own search on the Internet• Write to the following address: The Association of Pool and Spa Professionals 2111 Eisenhower Avenue Alexandria VA 22314 703.838.0083
Entrapment RiskThe Consumer Products Safety Commission/USA has reported that users of pools and spas have become entrapped (stuck) to drain and/or suction fittings causing death, drowning, or seri-ous injury (see diagram below). This spa was manufactured to meet the standards and specifica-tions outlined in the “Virginia Graeme Baker Pool and Spa Safety Act” (VGB Safety Act). Entrap-ment risk can be minimized if proper precautions are taken.NOTE: SUCTION COVERS MUST BE REPLACED EVERY FIVE YEARS.
! DANGER: RISK OF PERSONAL INJURY OR DEATH!Never operate the spa if a suction fitting, suction cover, filter, filter lid or skimmer assembly are broken, damaged or missing.
! DANGER: RISK OF SEVERE INJURY OR DROWNING! Hair entrapment: May occur if hair is entangled, knotted or snagged in a drain suction or skim-mer assembly. This has been reported in persons who when submerge themselves underwater, allowing hair to come close and/or within the reach of the suction fittings, suction covers or skim-mer assembly.• Keep hair away from suction fittings, suction covers, filter, filter lid or skimmer assembly.• Children are at risk for hair entrapment if swimming under water.• Never allow children to play or get near the suction fittings, suction covers, filter, filter lid or
skimmer assembly.
Suction Covers
Skimmer Cover
Skimmer location and ap-pearance may vary from one shown
Safe
ty R
eq
uire
me
nts
5
! DANGER: RISK OF SEVERE INJURY OR DROWNING! Limb entrapment: May occur when a limb becomes entrapped, inserted or sucked into a suction or outlet opening.• Always keep suction fittings, suction covers, filter, filter lid or skimmer assembly in place when
operating to avoid limb entrapment.• Never allow children to play or get near the suction fittings, suction covers, filter, filter lid or
skimmer assembly.
! DANGER: RISK OF SEVERE INJURY OR DROWNING! Body entrapment: May occur when part of the torso becomes entrapped, inserted or sucked into a suction or outlet opening.• Never allow children to play or get near the suction fittings, suction covers, filter, filter lid or
skimmer assembly.
! DANGER: RISK OF SEVERE INJURY OR DROWNING! Evisceration (disembowelment) entrapment: May occur when the buttocks becomes en-trapped, inserted or sucked into a suction or outlet opening.• Never sit on suction fittings, suction covers, filter, filter lid or skimmer assembly.• Never allow children to play or get near the suction fittings, suction covers, filter, filter lid or
skimmer assembly.
! DANGER: RISK OF SEVERE INJURY OR DROWNING!Mechanical entrapment: May occur when jewelry, swimsuit, or hair accessories become entan-gled, knotted or snagged in a drain suction or skimmer assembly.• Never allow your jewelry, swimsuit, or hair accessories to come close to the suction fittings,
suction covers or skimmer assembly.• Never allow children to play or get near the suction fittings, suction covers, filter, filter lid or
skimmer assembly.
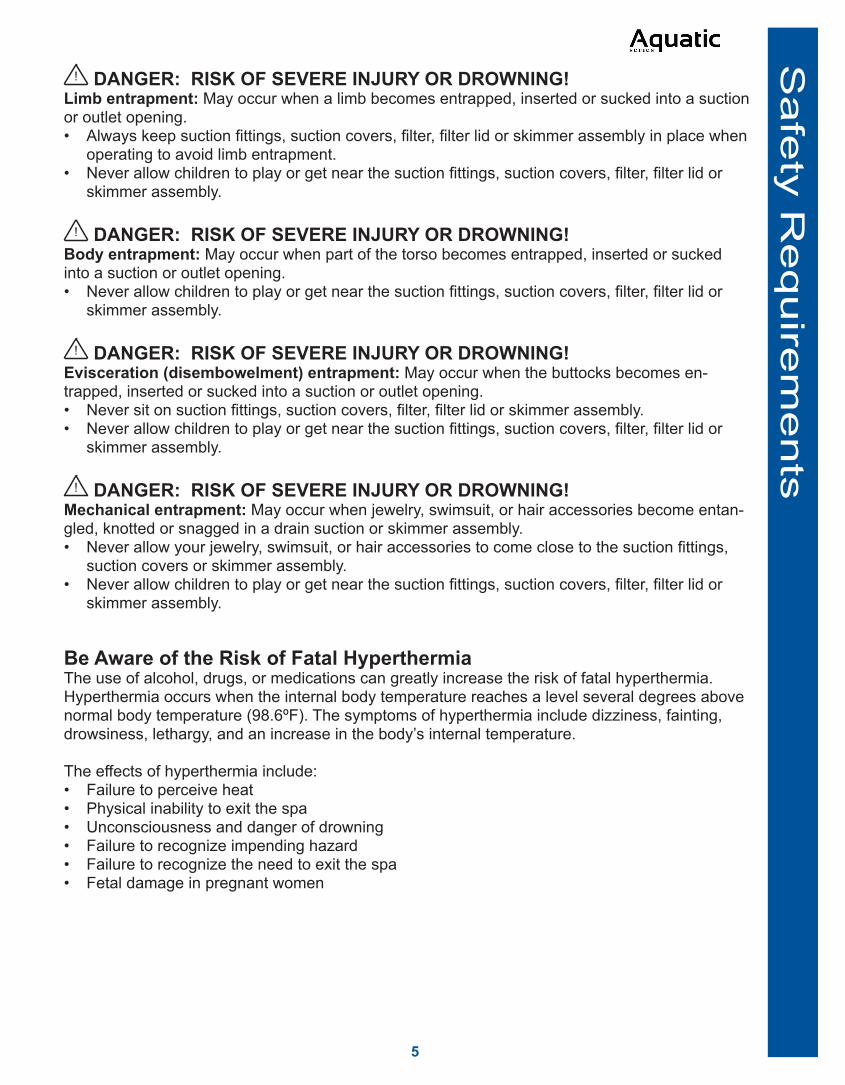
Be Aware of the Risk of Fatal HyperthermiaThe use of alcohol, drugs, or medications can greatly increase the risk of fatal hyperthermia. Hyperthermia occurs when the internal body temperature reaches a level several degrees above normal body temperature (98.6ºF). The symptoms of hyperthermia include dizziness, fainting, drowsiness, lethargy, and an increase in the body’s internal temperature.
The effects of hyperthermia include: • Failure to perceive heat• Physical inability to exit the spa • Unconsciousness and danger of drowning• Failure to recognize impending hazard• Failure to recognize the need to exit the spa• Fetal damage in pregnant women
Sa
fety
Re
qu
irem
ents
6
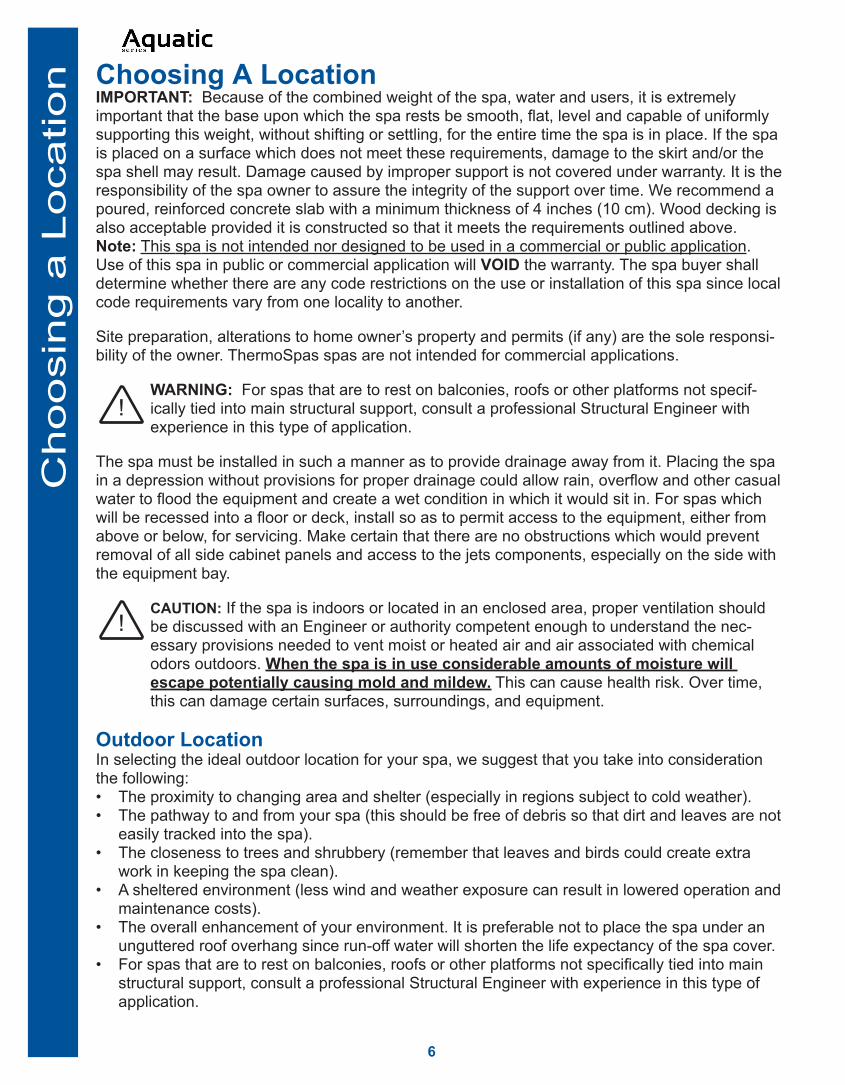
Choosing A LocationIMPORTANT: Because of the combined weight of the spa, water and users, it is extremely important that the base upon which the spa rests be smooth, flat, level and capable of uniformly supporting this weight, without shifting or settling, for the entire time the spa is in place. If the spa is placed on a surface which does not meet these requirements, damage to the skirt and/or the spa shell may result. Damage caused by improper support is not covered under warranty. It is the responsibility of the spa owner to assure the integrity of the support over time. We recommend a poured, reinforced concrete slab with a minimum thickness of 4 inches (10 cm). Wood decking is also acceptable provided it is constructed so that it meets the requirements outlined above.Note: This spa is not intended nor designed to be used in a commercial or public application. Use of this spa in public or commercial application will VOID the warranty. The spa buyer shall determine whether there are any code restrictions on the use or installation of this spa since local code requirements vary from one locality to another.
Site preparation, alterations to home owner’s property and permits (if any) are the sole responsi-bility of the owner. ThermoSpas spas are not intended for commercial applications.
WARNING: For spas that are to rest on balconies, roofs or other platforms not specif-ically tied into main structural support, consult a professional Structural Engineer with experience in this type of application.
The spa must be installed in such a manner as to provide drainage away from it. Placing the spa in a depression without provisions for proper drainage could allow rain, overflow and other casual water to flood the equipment and create a wet condition in which it would sit in. For spas which will be recessed into a floor or deck, install so as to permit access to the equipment, either from above or below, for servicing. Make certain that there are no obstructions which would prevent removal of all side cabinet panels and access to the jets components, especially on the side with the equipment bay.
CAUTION: If the spa is indoors or located in an enclosed area, proper ventilation should be discussed with an Engineer or authority competent enough to understand the nec-essary provisions needed to vent moist or heated air and air associated with chemical odors outdoors. When the spa is in use considerable amounts of moisture will escape potentially causing mold and mildew. This can cause health risk. Over time, this can damage certain surfaces, surroundings, and equipment.
Outdoor LocationIn selecting the ideal outdoor location for your spa, we suggest that you take into consideration the following:• The proximity to changing area and shelter (especially in regions subject to cold weather).• The pathway to and from your spa (this should be free of debris so that dirt and leaves are not
easily tracked into the spa).• The closeness to trees and shrubbery (remember that leaves and birds could create extra
work in keeping the spa clean).• A sheltered environment (less wind and weather exposure can result in lowered operation and
maintenance costs).• The overall enhancement of your environment. It is preferable not to place the spa under an
unguttered roof overhang since run-off water will shorten the life expectancy of the spa cover.• For spas that are to rest on balconies, roofs or other platforms not specifically tied into main
structural support, consult a professional Structural Engineer with experience in this type of application.
!
!
Cho
osin
g a
Lo
ca
tio
n

7
• In the unlikely event that you should ever need to access or gain entry to any portion of the spa for servicing, it is highly recommended that you plan your outdoor installation to provide full access to the entire spa. Please take this into consideration when placing the spa in a deck or enclosed by a surrounding.
• Consider locating your spa away from any reflective surface or glass to prevent any damage to the synthetic skirt.
• Do not shim the spa. To ensure proper support the spa must sit flat on the intended foundation.
• Floor load capacity must be a minimum of 100 lbs. per square foot and must meet your local building codes. Swim spas and spas over 39" in depth require higher load capacity. Reference page 54 for information.
• Spa can not be installed on asphalt, laid in dead sand or on stone dust. • Spa can not be placed directly on a gravel or lawn surface.• Delivery crew is not equipped to level and/or repair spa sites.• Most spa servicing is performed on the spa equipment that is located behind the side cabinet
panels of the spa. It is important to install the spa to allow easy access to the spa equipment. We recommend an 18" minimum clearance around all sides of the spa to avoid additional service charges. Providing service access is the responsibility of the owner.
• ! WARNING: Do not rest your spa directly on top of a power line. Electrical shock or power failure may result. The power line to the spa should be routed to come up through the bottom of the spa cabinet or through the side wall by drilling a hole.
Indoor LocationFor indoor installations many factors need to be considered before installing a spa indoors:
WARNING: In addition to maintenance of filters and water chemistry, proper ventilation is recommended to reduce the risk of contracting a waterborne illness (e.g. an infection, bacteria or virus) and/or respiratory ailments that could be present in the air or water. Consult a licensed architect or building contractor to determine your specific needs if installing your spa indoors.
• PROPER FOUNDATION: Consult a Structural Engineer when considering a foundation that will adequately support the spa the entire time it is in place. Proper support is critical especially if the spa is to rest on a second story or higher. For spas that are to rest on balconies, roofs or other platforms not specifically tied into the main structural support, you should consult a professional Structural Engineer with experience in this type of application.
• PROPER DRAINAGE: It is extremely important to have in place measures to sufficiently handle excessive water spillage. Be sure the flooring in which the spa rests on has adequate drainage and can handle draining of the entire contents of the spa. Be sure to make provisions for ceilings or any other structures that may be below the spas installation. Areas around your spa can become wet or moist so all flooring and subsequent furniture, walls and adjacent structures should be able to withstand or resist water and moisture.
• PROPER VENTILATION: Proper ventilation should be discussed with an Engineer or authority competent enough to understand the necessary provisions needed to vent moist or heated air and air associated with chemical odors outdoors. When the spa is in use considerable amounts of moisture will escape potentially causing mold and mildew, over time this can damage certain surfaces and or surroundings.
• SUFFICIENT ACCESS: In the unlikely event that you should ever need to access or gain entry to any portion of the spa for servicing, it is highly recommended that you plan your indoor installation to provide full access to the entire spa.
!
Ch
oo
sin
g a
Lo
catio
n

8
• WARRANTY: Damage caused by not following these guidelines or any improper installation not in accordance with local codes or authorities is not covered under the spas warranty. Please consult your local state or city building ordinances.
• DO NOT SHIM THE SPA: To ensure proper support the spa must sit flat on the intended foundation.
• Spas installed indoors must be placed on a non-porous surface with a drain. • Do not put the spa on a carpet or hardwood floors due to possible splash out from the tub.
Water will accumulate around the spa, so flooring materials must provide a good grip when wet. Water damage to the home owner’s property from splashing or leaks are at the home owner’s risk. This is not covered under any ThermoSpas warranty.
• Adequate ventilation must be provided in order to allow for chemical fumes to escape. Take into consideration that these fumes could enter other indoor areas.
• When the spa is installed indoors, adequate room must be provided to allow the cover and lifter to operate and function properly. Depending of the lifter used, up to 50% of the cover is exposed. There should be sufficient room accounted for the spa height plus cover lifter measurement, Figure 1.
• Consult your local state or city building ordinances to ensure installation is in accordance with local codes. Any damage caused if you do not follow these guidelines voids the spa’s warranty.
• Most spa servicing is performed on the spa equipment that is located behind the side cabinet panels of the spa. It is important to install the spa to allow easy access to the spa equipment. We recommend an 18" minimum clearance around all sides of the spa to avoid additional service charges. Providing service access is the responsibility of the owner.
Spa Height
Cover Height
Figure 1 (Cover lifter and
spa may vary from the one shown)
Cho
osin
g a
Lo
ca
tio
n

9
Electrical Set UpBefore beginning the wiring process turn off the circuit breaker so that no power is connected to the controller. ThermoSpas recommends all spa wiring to be done by a licensed electrician. Improper wiring may void your warranty. Incorrect or incomplete wiring will very likely create a dangerous hazard. Performing a conversion or any other modification to the original hardware or installation configuration mandates that the owner assumes full responsibility for assuring that the resulting system complies with all applicable national, state, and local wiring codes and ordinances for the location of the unit. Be aware that there are major differences in wiring codes if this unit is to be installed at any location other than a private residence.
The Safe Electrical Hook-up of Your Spa• The electrical installation of your spa must be done by a qualified electrician in accordance
with the National Electrical Code (NEC), and all local codes effective at the time of installation.• Your spa must be installed on a dedicated electrical circuit. No other appliances or electrical
equipment may be used on this circuit.
! WARNING: If your spa is not installed in accordance with the NEC, it may create a danger-ous safety hazard. Improper electrical installation may also damage the inner workings of a spa and void your warranty.
! WARNING: If your electrician is not absolutely sure how to correctly connect your system, call the ThermoSpas Technical Service Department at 800.876.0158, option 2. Mistakes may be costly and will invalidate your equipment warranty.
Before beginning the wiring process turn off the circuit breaker so that no power is connected to the controller. ThermoSpas recommends all spa wiring to be done by a licensed electrician. Improper wiring may void your warranty.
Electrical Service RequirementsBefore wiring for a spa, one of the first considerations is whether or not your main service or sub-panel feeding your spa has the capacity to provide sufficient power to your spa. A licensed electrician will be able to perform a load calculation to determine this.
Select the inlet you want to use, drill a hole large enough for the wires on the skirt panel and then feed the power cable through to the control box. To allow access you will have to trim/cut the ThermoFoil blanket under the skirt. For access from underneath the spa, please contact the Service Department for help (800.876.0158).
DANGER
Turn power off before servicing. This task should only be performed by a quali-fied technician.
!RISK OF SHOCK OR ELECTROCUTION!
RED
BLK
WHT
TB1
CONTROL BOXGeneral location of the spa pack. Location varies by model.
Ele
ctric
al S
et U
p

10
The electrical requirements for your spa are found on the Electrical Guide Sheet contained in the Welcome Kit for your specific model. It is very important to review your electrical requirements before starting installation.
Electrical Service ConsiderationsThe Electrical Service determines how many pumps can run in conjunction with the heater. If the dedicated GFCI circuit was installed with a smaller breaker than the recommended size (typically 60 amps), your heater will automatically shut off to avoid tripping your circuit breaker if too many pumps are activated (including the blower). Heating will automatically turn back on after pumps have been shut off. The heater will also automatically shut off on larger spas when 3 or more pumps (including the blower) are turned on. All of this may occur even though the circulation pump continues to run – when the heater is on, progressing bars will be indicated from the bot-tom to the top of the heater icon.
! WARNING: Wiring to your spa must be COPPER ONLY! Note that the wiring from a main panel to a sub-panel for the spa must be copper and the sub-panel is rated for copper (CU).
In all spa installations, refer to the The Electrical Guide sheet contained in the Welcome Kit.
The length of the wiring from the panel or feed to your spa also has to be determined. If the total run exceeds 75 feet, the wire size must be increased by one wire size to adjust for the corre-sponding voltage drop. To make future service work easier we recommend leaving at least 6' of slack in the main electrical wire which may be coiled inside the cabinet. Ground Fault Circuit Interrupt (GFCI) Requirements: All spa electrical circuits must be GFCI protected on a dedicated circuit.
It is common practice for electrical service for a spa to be supplied by a regular two-pole breaker at the rated amperage at the main panel, and the disconnecting means (NEC Article 100) is usu-ally a 125-amp sub-panel with the required GFCI breaker(s) mounted inside. The GFCI breaker becomes the required disconnecting means. These sub-panels sometimes will not have a ground bar included and it must be purchased separately. The ground bar is a small metal bar with holes provided for ground wires and screws to secure the wires to the ground bar. This ground bar is NOT to be bonded or connected to the neutral bar, and the neutral bar must be isolated from any grounding source. The GFCI pigtail in this instance is connected into the neutral bar—not the ground bar.
Ele
ctr
ica
l S
et U
p

11
NOTES:1. NEUTRAL AND GROUND MUST BE ISOLATED AT THE SUB PANEL.2. On Balboa TS Series Packs, ground wire must enter the pack through strain relief and attach
to ground bar on outside of pack.3. Positions of electrical connections may vary by breaker manufacturer.4. For specific breaker and wire size refer to your Electrical Guide.
RED
BLK
WHT
TB1
Sub Panel at SpaMain PanelNeutral/Ground Bar
See NOTE 3
See NOTE 2
GFCI Breaker
Spa Pac
Terminal block inside of Pac
Breaker
Neutral Bar
GroundGreen
GroundGreen
* Load Neutral (white) must connect to the GFCI break-er at the Sub Panel NOT the neutral bar
Load Neutral (White)*
White PigtailWire
Isolated Ground Bar
Ground Bar on outside of Pac
Red
Black
Red
Black
Neutral(White)
Spa Pack Connections
RED
BLK
WHT
TB1
TB1
Black
White
Red
Green
Ext
erna
l Pow
er
RED
BLK
WHT
GROUNDING LUG
INSIDE THE CONTROL BOX
To spacircuit
Ele
ctric
al S
et U
pGround Fault Circuit Interrupt (GFCI) Wiring Diagram

12
Spa Start UpPlease read through all steps before beginning. This section explains the necessary procedures required to start up your spa. Familiarize yourself with this procedure prior to beginning the pro-cess. Use this procedure as a guideline.
• Make sure you have any Instructions along with the Welcome Kit and Chemical Starter Kit prior to filling your spa.
• If your water is acidic, hard, or has a high mineral content it is recommended to contact one of our trained Customer Care Representatives prior to filling your spa.
• Failure to follow these start-up instructions for your spa and observe the recommended maintenance time periods may result in pump damage or require draining and refilling the spa.
Total start-up process time will vary from 3-24 hours based on the following variables:
1. Incoming water temp & water pressure (fill rate)2. Size and type of spa3. Water characteristics (hardness, mineral content)4. Desired final water temperature5. Ambient Conditions
Inspect and Filling you spaOnce your spa is in its final location it is time to inspect it to ensure it is ready to be filled. Gently remove all packing and crating materials from the spa.
Step 1: Remove the panels/insulation of the spa so you can see the interior.
Step 2: Remove filters, the accessory bag and the spa chemical starter kit located inside the spa shell.
Step 3: Wipe spa clean with a soft damp sponge. Be careful not to scratch the surface with any particles that may have fallen into the tub.
Step 4: Make sure the “T” valves on each water pump are open by pulling them up as far as they will go and locking them in the open position, page 39.
Step 5: Make sure all water pump and heater unions are tight, page 39.
Step 6: Make sure the drain valve is closed, page 39.
Step 7: Install the filter(s).
Sp
a S
tart
Up
13
Step 9: Ensure your water source is safe for spa use. Water may contain minerals that may cause stains or deposits. Water with a high mineral count, such as iron or copper, may discolor the water once a sanitizer is added. If you have any doubt, visit http://online.ThermoSpas.com or call our Customer Care department during our normal business hours.
Note: In certain situations, if your water is extremely “hard,” it is preferable to fill half-way with hard water and the rest of the way with softened water. Water that is too soft can be corrosive to metal components.
Step 10: Let the water run out of your garden hose for several minutes before filling the spa. This will flush out stagnant water in the line that may cause bacteria.
Note: We suggest putting a sock over the end of your hose to act as a strainer and protect the spa shell acrylic from the hose.
Step 11: Begin filling your spa. The actual water level may vary depending on the bather load. When there are no bathers in the spa, the water must be high enough to prevent pump surge and low enough that when the recommended number of bathers are in the tub that the water is not overflowing out of the spa. The recommended water level is half way up the filter area with no bathers. While spa is filling periodically check underneath to be sure unions are tight and not leaking.
Note: Unions are located on both the spa’s water pump(s) and heater. It is imperative that they are checked and tightened before filling the spa. Although every spa is thoroughly tested in our factory during final inspection, some connections may loosen during transport from the factory to your home.
Initial PreparationStep 1: Starting the spa with insufficient water can damage the pump and heater. Once your
spa is sufficiently filled (half way up the filter), turn the circuit breaker on.
Step 2: After turning on the circuit breaker, your spa will cycle through a series of self-diagnostic codes as indicated on the topside control panel.
Step 3: Wait 5 minutes so the spa can complete self-priming and diagnostic self-checks.
Step 4: If your topside control panel display shows the temperature, the temperature flashing or “--”; this is normal. If any other codes are shown, refer to troubleshooting guide located in the appendix or visit http://online.ThermoSpas.com and click on Customer Center for more information.
Step 5: Activate the pumps to make sure they work and there are no leaks. Carefully inspect the spa for any leaks by checking the hoses and plumbing connections. Check the unions on the pumps and heater. If a leak is detected, stop the filling process and contact ThermoSpas Service Department. If everything checks out proceed to step 6.
Note: The spa should be inspected periodically for leaks.
Step 6: Reinstall the panels.
Sp
a S
tart U
p

14
Heat WaterStep 1: Set desired temperature by pressing the Warm ( ) or Cool ( ) button. For Maui
models press the Temperature ( ) button.
Step 2: Install insulated cover, close it over spa, and secure it with the lock down straps.
Step 3: Allow between 5 and 24 hours for the water to reach the desired temperature. A 240-volt service will raise it approximately 4° to 8°F per hour.
DANGER: RISK OF PERSONAL INJURY.Check water temperature carefully before entering hot tub! Excessive water tempera-ture can cause burns, welts and body temperature to rise, hyperthermia (over-heating).
Prep Water: Maintaining Correct Water Chemistry and SafetyImproper use of spa chemicals may be dangerous and could damage your spa and its cover. Since this damage is not covered by your warranty; it is extremely important to take precautions when using these products. Only use chemicals and cleaning agents designed for spas. Damage resulting from the use of non-recommended chemicals and/or cleaning agents is not covered under the warranty. Following the procedures in this guide will make the maintenance and care of your spa simple and economical.
Avoid using any biguanide or copper-based algaecides with your spa. Use of these prod-ucts is not recommended by ThermoSpas and may void your warranty.
CAUTION: RISK OF PERSONAL INJURY OR SPA DAMAGE!Never add chlorine tablets (trichlor) or acid to your hot tub for any reason! These chem-icals may damage components within your hot tub, burn or irritate your skin, create a rash, and void the manufacturer warranty for your spa.
Proper Handling of Chemicals1. Keep all chemicals out of reach of children.
2. Always keep lids on chemicals when not in use and store them in a cool, dry location away from direct sunlight.
3. Do not store chemicals within the interior of the spa’s cabinet.
4. Do not interchange caps or measuring scoops for different types of chemicals.
5. Do not smoke around chemicals. Some can emit highly flammable fumes.
6. In case of contact or if a chemical is swallowed, call a doctor or local Poison Control Center. If a doctor is required, bring the chemical container with you so the doctor can determine the appropriate treatment.
7. Never mix chemicals or chemical solutions directly with each other.
8. Always add chemicals to water when mixing them. Never add water to chemicals.
9. When in doubt, call Customer Care.
WARNING: RISK OF POISONING OR DEATH.Never leave chemicals opened and accessible to anyone. Use chemicals according to the vendors instructions. Always store chemicals in a safe and/or locked location. Keep away from and out of reach of children.
!
!
!
Sp
a S
tart
Up

15
Proper Procedure for Adding ChemicalsProper water chemistry is essential to the safety of the user as well to the life of the spa compo-nents. Improper water chemistry may cause skin irritation or facilitate the transmittal of disease. Proper water chemistry is the sole responsibility of the spa owner. The costs incurred from injury or damage resulting from improper water chemistry are not covered under the ThermoSpas, Inc. warranty.
1. Turn on jets pump(s) when adding chemicals to ensure proper mixing and leave your spa cover open until the sanitizer level becomes stable to protect pillows and plastic knobs from chemical attack.
2. Do not add chemicals through the skimmer.
3. Only add one chemical at a time. Unless otherwise specified always wait at least 10 minutes after adding chemicals to your spa before adding more chemicals.
Note: Depending on the metals or mineral content of your tap water, one of the chemicals in the treatment may react to cause a discoloration or formation of a precipitate. In this event you should not have to drain your spa. There are treatments to solve this problem. If you have any questions contact Customer Care.
WARNING: BECAUSE OF THE RISK OF INHALING CHEMICAL VAPORS.• To decrease the risk of injury, drowning or entrapment, never leave your hot tub un-
attended for any reason while the cover is open and accessible, especially to small children and animals!
• Precautions should be taken to minimize your exposure to chemical vapors (that could cause lung, brain, or skin damage).
!
Sp
a S
tart U
p

16
Spa DiagramThe illustration below shows a typical spa with multiple jet styles, a bubbling system, an ozone system upgrade and an independent circulation/filtration pump system. If your spa was not or-dered with any of these features, the system components will not be found in your spa. Refer to special operating instructions specific to your spa for more details. These illustrations are de-signed to help you identify key components. Use the legend to locate a particular component.
10
11
1111
11
11
11
11 11
11
11
16 161616
16
14
16
16
16
16
16
16
15
15
15
15
15
1515
1515
15
15
1515
17
18
14 4
4
66
7
7
7
7
77
7
7
88
9
12
5 5
5
13
2
3
5
8
No. Part No. Part1 Topside Control Panel 10 Light2 Wave Lounge Panel 11 Blower Air Jets3 Pump 4 Control Panel 12 Circulation Fitting4 Therapy Control Valve 13 Throttle Relief Fitting5 Blower Control Valve 14 Cup Holder6 Throttle Control Valve 15 Laser Jet7 Suction Fittings 16 Therapy Jet8 Pillow 17 Whirlpool Jet9 Skimmer Filter 18 Storm Jet
Sp
a S
tart
Up

17
Equipment DiagramThe illustration below shows a typical equipment compartment. If your spa was not ordered with any of these features, the system components will not be found in your spa. These illustrations are designed to help you identify key components. Use the legend to locate a particular compo-nent.
Water Pump
Ozone Generator
Spa Pac and Heater
De-gas Vessel(ThermOzone)
Air Pump (Blower)
Circulation/Filtration Pump
Insulation
Mixing Vessel(ThermOzone)
Typical equipment diagram. Diagram varies by model.
Sp
a S
tart U
p

18
Topside Control PanelMain Control Panel (Dolphin and Islander Models)
Button Functions:
Time Button: Use to set the time and when pressed the Liquid Crystal Display (LCD) screen will display the time.
Mode/Prog Button: Use to switch modes between Standard, Economy, Standard-in-Economy or Sleep mode.
Warm Button: Press continuously to increase water temperature, one degree at a time.
Cool Button: Press continuously to decrease water temperature, one degree at a time.
Light Button: Turns light(s) on or off. Continually pressing the button on and off, you can cycle through the various colors and other effects.
Blower Button: Turns the blower on or off.
Pump 1: Press once to turn Pump 1 on low speed; a second time for high speed; a third time to turn off.
Pump 2: Press once to turn Pump 2 on; press again to turn off.
LCD Display Icons: Heat Icon: When the bars alternate between the top and bottom bar, the spa is
measuring the water temperature. When the bars progress from bottom to top, the spa water is being heated. When this feature is active, the heat icon will appear on the LCD display.
Note: Temperature range is from 80° to 104°F (26° to 40°C).
Light Icon: When the underwater light and optional lighting are turned on, the light icon will appear on the LCD display.
Blower Icon: When the blower is on the icon will appear on the LCD screen.
Pump Icon: When a pump is activated the icon will appear on the LCD screen. For a 2-speed pump the icon will move slowly to indicate low speed and moves faster to indicate high speed.
Ozone Icon: When the ozone is on (if equipped), this icon will appear on the LCD display.
Time
F1F2
TL
PL
Warm
Mode/Prog Cool
Light Blower
Pump 1 Pump 2
102Designed to Improve Your Life
O³
Sp
a D
iag
ram
19
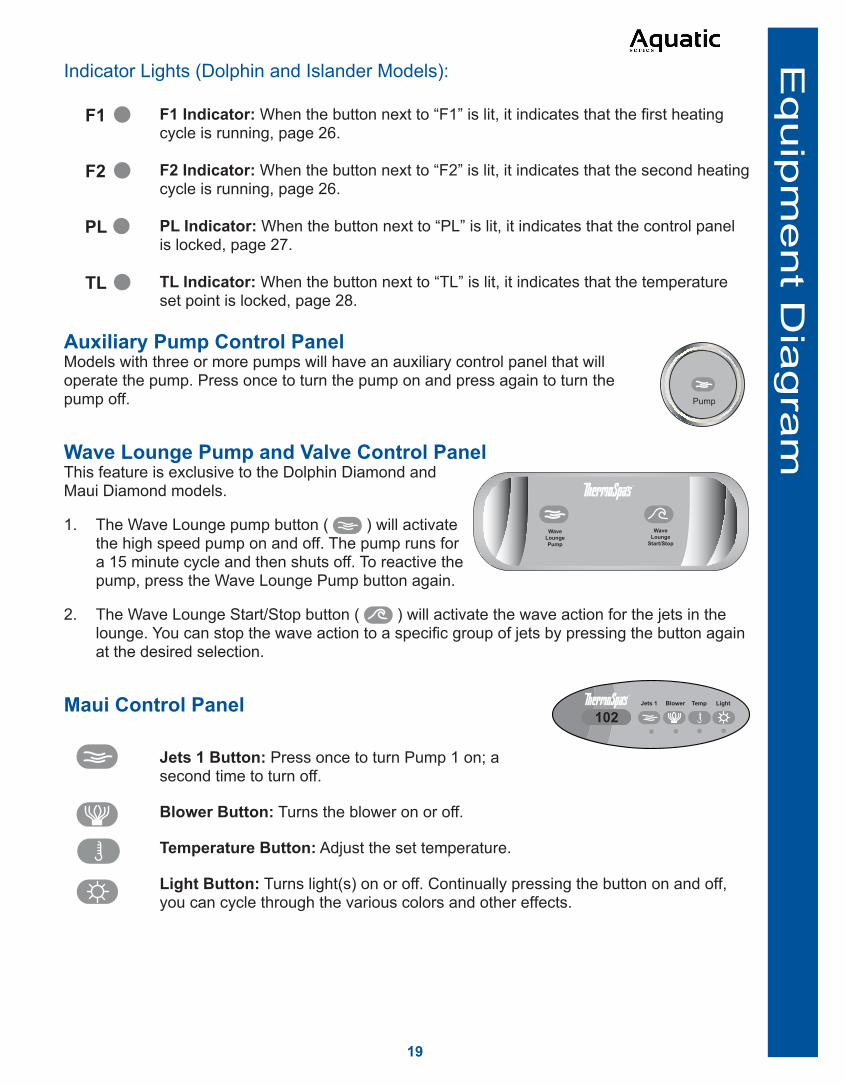
Indicator Lights (Dolphin and Islander Models):
F1 Indicator: When the button next to “F1” is lit, it indicates that the first heating cycle is running, page 26.
F2 Indicator: When the button next to “F2” is lit, it indicates that the second heating cycle is running, page 26.
PL Indicator: When the button next to “PL” is lit, it indicates that the control panel is locked, page 27.
TL Indicator: When the button next to “TL” is lit, it indicates that the temperature set point is locked, page 28.
Auxiliary Pump Control PanelModels with three or more pumps will have an auxiliary control panel that will operate the pump. Press once to turn the pump on and press again to turn the pump off.
Wave Lounge Pump and Valve Control PanelThis feature is exclusive to the Dolphin Diamond and Maui Diamond models.
1. The Wave Lounge pump button ( ) will activate the high speed pump on and off. The pump runs for a 15 minute cycle and then shuts off. To reactive the pump, press the Wave Lounge Pump button again.
2. The Wave Lounge Start/Stop button ( ) will activate the wave action for the jets in the lounge. You can stop the wave action to a specific group of jets by pressing the button again at the desired selection.
Maui Control Panel
Jets 1 Button: Press once to turn Pump 1 on; a second time to turn off.
Blower Button: Turns the blower on or off.
Temperature Button: Adjust the set temperature.
Light Button: Turns light(s) on or off. Continually pressing the button on and off, you can cycle through the various colors and other effects.
F1
F2
PL
TL
Pump
Wave Lounge Pump
Wave Lounge
Start/Stop
LightTempJets 1 Blower
102
Eq
uip
me
nt D
iag
ram

20
Operating InstructionsSetting the Temperature (Dolphin and Islander Models)The LCD screen will constantly display the current water tempera-ture, unless there is an error code or the spa needs attention. To set the desired water temperature: 1. Press the Warm ( ) or Cool ( ) button to display the current set temperature.2. Press the Warm ( ) button to raise the temperature until the desired temperature is
displayed on the LCD screen. Maximum set temperature is 104°F.3. Press the Cool ( ) button to lower the temperature until the desired temperature is
displayed on the LCD screen. Minimum set temperature is 80°F.4. Do not press any buttons and after 3 seconds you will exit the feature.Anytime the spa is heating, the heat icon will be displayed on the LCD screen. The temperature bars on the heat icon will progress from bottom to top, Figure 1.
Setting the Temperature (Maui Models)Press the Temperature ( ) button to adjust the temperature. The display shows the actual water temperature until the button is pressed. When the button is pressed, the display will show the set temperature. Pressing the button a second time and any successive time will cause the set temperature to increase or decrease depending on what direction was last chosen. If the opposite direction is desired, release the button and let the display revert to the actual water temperature. Repeat the above steps and pressing the button will adjust the temperature in the opposite direction. Each time the panel reverts to the actual water temperature, the Temp button will toggle between increasing and decreasing the set temperature.
Circulation Pump The Circulation Pump will run 24 hours a day, 7 days a week to efficiently and effectively filter your spa water. However, if the spa temperature exceeds the set-point by 3°F the circulation pump will automatically turn off. It will only turn back on during the preset filtration cycles or after the water temperature is within or below 3°F of the set-point. Any time the circulation pump is running, your spa will be filtering water (unless your filters are too dirty to permit water to pass through them).
Jets Pump 1Jets pump 1 is a 2-speed pump. To operate Jets pump 1: 1. Press Jets pump 1 ( ) button once to activate low speed.
The pump icon will move slowly to indicate low speed, Figure 2.Note: Pump 1 will automatically turn off after 15 minutes, when in low speed. You can press the Jets pump 1 button again to reactive the pump.2. Press Jets pump 1 ( ) button again to activate high speed. The pump icon will move
faster to indicate high speed, Figure 2.Note: Pump 1 will automatically turn off after 15 minutes, when in high speed. You can press the Jets pump 1 button twice to reactive the pump in high speed.3. Press Jets pump 1 ( ) button a third time to turn the pump off. The pump icon will
disappear from the LCD screen.4. Refer to “Automatic Functions” (page 29), for automated pump functions.
Figure 1
Figure 2
Topsid
e C
on
tro
l P
an
el
21
Jets Pump 2 (If equipped)Jets pump 2 is a 1-speed pump. To operate Jets pump 2: 1. Press Jets pump 2 ( ) button once to turn the pump on. The pump icon will
move faster to indicate high speed, Figure 3.Note: Pump 2 will automatically turn off after 15 minutes. You can press the Jets pump 2 button again to reactive the pump.3. Press Jets pump 2 ( ) button a second time to turn the pump off. The pump icon will
disappear from the LCD screen.4. Refer to “Automatic Functions” (page 29), for automated pump functions.
Jets Pump 3 to 5 (If equipped)Models equipped with Jets pump 3, 4 or 5 use a 1-speed pump. Each of these pumps will have an auxiliary pump control panel, Figure 4. To operate: 1. Press Jets pump ( ) button once to turn the pump on. The pump icon will
move faster to indicate high speed, Figure 5.Note: Pumps time out and turn off after 15 minutes. You can press the Jets pump but-ton again to reactive the pump.2. Press Jets pump ( ) button a second time to turn the pump off.3. Refer to “Automatic Functions” (page 29), for automated pump functions.
Wave Lounge Pump and Valve Control (Dolphin Diamond and Maui Diamond models)The wave lounge offers a unique massaging experience. The jets system located throughout the lounge move the massaging action from your neck down to your feet. To operate the wave lounge: 1. Press Wave Lounge Pump ( ) button once to activate the high speed pump on and off. Note: The pump will automatically turn off after 15 minutes.2. Press Wave Lounge Start/Stop ( ) button to activate a sequencing wave massaging
action. The wave massaging action will begin at the neck and shoulders and work its way down to the feet. To stop the massage action on one specific area, just push the start/stop button. To resume the massaging action, push the button again.
Blower (Gold, Platinum and Diamond Models)The blower activates all blower air jets, Figure 6. The blower introduces air into the air jets for a bubbling affect.1. Press Blower ( ) button once to turn on. The blower icon will display on the
LCD screen, Figure 7.Note: The Blower will automatically turn off after 15 minutes. You can press the blower button again to reactive the blower.2. Press Blower ( ) button a second time to turn off. The blower icon will
disappear from the LCD screen.3. Refer to “Automatic Functions” (page 29), for automated blower functions.
Figure 3
Pump
Figure 4
Figure 5
Wave Lounge Pump
Wave Lounge
Start/Stop
Figure 6
Figure 7
To
psid
e C
on
trol P
anel

22
Control ValvesSeveral components have dedicated valves that give you more control over their function. The operation of each valve is described below.
1. Blower Control Valve (Figure 8) Controls the intensity of the air blower on spas equipped with a bubbling system.
Simply turn the valve to increase and decrease the amount of air introduced to the air jets.
2. Pillow Jet Control Valve (Figure 9) Controls the water intensity flow to the pillow jets. Turn the valve clockwise to
decrease the intensity; counterclockwise to increase the intensity.
3. Therapy Control Valve (Figure 10) Controls the water to air ratio to vary the intensity of the jet.
4. Diverter Valve (Figure 11) Rotate valve to divert flow to specific sections of the spa.
5. Throttle Control Valve (Figure 12) The Throttle Control Valve controls the jet intensity of an entire seat without
affecting others areas.
JetsNote: Some models will not be equipped with the jets listed.
Therapy JetsPopular spa jets with powerful directional streams. These are easily controllable to give you just the right amount of massage. Turn the outer ring to open or close the jet to control the power. The nozzle can be adjusted by simply touching it and pointing it to the desired location on your body.
Diverting Whirlpool JetsThe same size and functionality as the standard whirlpool jet, but with the addition of a diverting mechanism that permits you to direct the water flow to other jets in the spa. The outer ring turns to open the jet all the way for maximum whirlpool flow, or turn it to additional settings to divert water to different sections of the spa.
Laser JetsPinpoint and soothe individual joints. These are smaller than the rest of the jets, but they are very powerful. When clustered together and positioned prop-erly, you will get a one-of-a-kind massage.
Figure 8
Figure 9
Figure 10
Figure 11
Low High
TOTALCONTROLTHERAPY
Figure 12
Therapy Jet
Diverting Whirlpool Jet
Laser Jet
Opera
tin
g In
str
uctio
ns

23
Storm JetA large round jet that is particularly good for those with special therapy needs because they create a powerful current. These jets provide a swirling, pulsating water stream for hydrotherapy. They may be turned on or off individually as the bather desires.
Patented Pillow JetsGive an unbeatable neck massage and include a control valve to adjust the intensity. This is a favorite feature among many ThermoSpas customers. Nothing compares to a nice neck massage, so the Pillow Jet was created to do just that. No need to put your head under water – just sit back in your therapy seat, put your head on the pillow, push the button and you receive a nice flow of warm water across the back of your neck.
LightsThe underwater light,and optional lighting are turned on or off by pressing the light but-ton. When turned on, the light icon is displayed on the LCD. In some cases, the light is turned low, medium, high, off. Continually pressing the button on and off, you can cycle through the various colors and other effects.
Outer Ring can be turned to adjust flow
Op
era
ting
Instru
ctio
ns

24
Programming InstructionsProgramming the Time (Dolphin and Islander Models)When power is first applied and the Priming Mode has finished, the control panel will display the time icon (TIME). You will need to program the time of day by following the steps below. If the time is not programmed the LCD screen will flash the “Time” icon until it is programmed.1. Press the Time button ( ).2. Press the Mode/Prog button ( ) to enter the hour setup.3. Press the Warm ( ) or Cool ( ) button to adjust the hour.4. Press the Mode/Prog button ( ) to enter the minutes setup.5. Press the Warm ( ) or Cool ( ) button to adjust the minutes.6. Press the Time button ( ) to exit the menu.Note: • To view the time press the Time button and the LCD screen will display the current time.• Any time power is cut to the spa, the time will have to be reprogrammed (except for the
Diamond models).
Standard Mode (Dolphin and Islander Models)Standard Mode constantly maintains the set temperature, assuming too many pumps aren’t running. Heating will occur until the water reaches the next highest degree about the tempera-ture set-point. The Standard (STANDARD) icon will be displayed unless the mode is changed. When in Standard mode the heater will turn on as needed. To program the spa to run in Standard mode:1. Press the Mode/Prog ( ) button to enter the mode programming.2. Press the Cool ( ) button to scroll through the mode settings: STANDARD, ECONOMY,
STANDARD-IN-ECONOMY and SLEEP.3. The current mode will flash on the LCD screen until a selection is confirmed and
programmed.4. Once the Standard mode is displayed on the LCD screen, press the Mode/Prog ( )
button to confirm and exit the menu.5. The “STANDARD” icon will be constantly displayed on the LCD screen as an indication of
the mode the spa is currently set to.Note: In regions where the climate is hot you need to consider heat transfer. As the pumps run they produce heat that can raise the water temperature. If you experience multiple overheating problems call the technical service department and lower the temperature to the lowest setting.
Standard Mode (Maui Models)Standard Mode constantly maintains the set temperature, assuming too many pumps aren’t running. Heating will occur until the water reaches the next highest degree about the tempera-ture set-point. The Standard (Std) icon will be displayed briefly when selected. When in Standard mode the heater will turn on as needed. To program the spa to run in Standard mode:1. Press the Temperature ( ) and then the Light ( ) button to enter the mode
programming.2. Press the Temperature ( ) button to scroll through the mode settings: Standard,
Economy, Standard-in-Economy and Sleep.3. Once the Standard mode is displayed on the LCD screen press the Light ( ) button to
confirm your selection and exit the menu.Note: In regions where the climate is hot you need to consider heat transfer. As the pumps run they produce heat that can raise the water temperature. If you experience multiple over-heating problems call the technical service department and lower the temperature to the lowest setting.
Pro
gra
mm
ing
In
str
uctio
ns

25
Economy Mode (Dolphin and Islander Models)Allows the spa to heat only during the preset heating cycles, page 26. Heating will occur un-til the water reaches the next highest degree about the temperature set-point. The Economy (ECONOMY) icon will be displayed unless the mode is changed. When in economy mode the heater will turn on only when there is a heat call during a programmed heating cycle. To program the spa to run in economy mode:1. Press the Mode/Prog ( ) button to enter the mode programming.2. Press the Cool ( ) button to scroll through the mode settings: STANDARD, ECONOMY,
STANDARD-IN-ECONOMY and SLEEP.3. The current mode will flash on the LCD screen until a selection is confirmed and programmed.4. Once the Economy mode is displayed on the LCD screen, press the Mode/Prog ( )
button to confirm and exit the menu.5. The “ECONOMY” icon will be constantly displayed on the LCD screen as an indication of the
mode the spa is currently set to.
Economy Mode (Maui Models)Heating will occur until the water reaches the next highest degree about the temperature set-point. The Economy (Ecn) icon will be displayed unless the mode is changed. When in economy mode the heater will turn on only when there is a heat call during a programmed heating cycle. To program the spa to run in Economy Mode:1. Press the Temperature ( ) and then the Light ( ) button to enter the mode
programming.2. Press the Temperature ( ) button to scroll through the mode settings: Standard,
Economy, Standard-in-Economy and Sleep.3. Once the Economy mode is displayed on the LCD screen press the Light ( ) button to
confirm your selection and exit the menu.
Standard-In-Economy Mode (Dolphin and Islander Models)Allows you to temporarily change the mode to Standard while in Economy mode. This would allow the heater to run for one hour to heat the spa. Once the hour is up the spa will revert back to Economy mode and the spa will heat only during the preset filtration cycles. Heating will occur until the water reaches the next highest degree about the temperature set-point. Both the Stan-dard (STANDARD) and Economy (ECONOMY) icon will be displayed. To activate this mode:1. The spa must be in economy mode.2. While in economy mode, press the Jets Pump 1 ( ) button.3. For the next hour the spa will run in Standard-In-Economy mode allowing the heater to
activate.4. To exit this mode, during the hour, press the Mode/Prog ( ) button. If not, after the hour
is up the spa will revert back to economy mode.
Standard-In-Economy Mode (Maui Models)Allows you to temporarily change the mode to Standard while in Economy mode (SE). This would allow the heater to run for one hour to heat the spa. Once the hour is up the spa will revert back to Economy mode and the spa will heat only during the preset filtration cycles. Heating will occur until the water reaches the next highest degree about the temperature set-point. To activate this mode:1. The spa must be in economy mode.2. While in economy mode, press the Jets Pump 1 ( ) button.3. For the next hour the spa will run in Standard-In-Economy mode allowing the heater to
activate.4. To exit this mode, during the hour, press the Temperature ( ) and then the Light ( )
button. If not, after the hour is up the spa will revert back to economy mode.
Pro
gra
mm
ing
Instru
ctio
ns

26
Sleep Mode (Dolphin and Islander Models)Heats the spa to within 20° of the temperature set-point, but only during filtration cycles. The Sleep icon will be displayed unless the mode is changed. To activate this mode:1. Press the Mode/Prog ( ) button to enter the mode programming.2. Press the Cool ( ) button to scroll through the mode settings: STANDARD, ECONOMY,
STANDARD-IN-ECONOMY and SLEEP.3. The current mode will flash on the LCD screen until a selection is confirmed and programmed.4. Once the Sleep mode is displayed on the LCD screen, press the Mode/Prog ( ) button
to confirm and exit the menu.5. The “SLEEP” icon will be constantly displayed on the LCD screen as an indication of the
mode the spa is currently set to.
Sleep Mode (Maui Models)Heats the spa to within 20° of the temperature set-point, but only during filtration cycles. The Sleep icon will be displayed unless the mode is changed. The Sleep (SLP) icon will be displayed on the LCD screen when this mode is active. To activate this mode:1. Press the Temperature ( ) and then the Light ( ) button to enter the mode
programming.2. Press the Temperature ( ) button to scroll through the mode settings: Standard,
Economy, Standard-in-Economy and Sleep.3. Once the Sleep mode is displayed on the LCD screen press the Light ( ) button to
confirm your selection and exit the menu.
Standby Mode (Dolphin and Islander Models)Use the Standby Mode to temporarily shut off all spa functions. This mode can be used to when replacing the filters or when the filters need to be cleaned. This mode last for 1 hour. To activate this mode:1. Press the Cool ( ) button.2. Press the Jets Pump 2 ( ) button.3. The LCD screen will display “Sby” to indicate that the spa is in standby mode.4. To resume normal operation, press any Control Panel button (except Jets pump 1) or wait
for the hour to be up.
Standby Mode (Maui Models)Use the Standby Mode to temporarily shut off all spa functions. This mode can be used to when replacing the filters or when the filters need to be cleaned. This mode last for 1 hour. To activate this mode:1. Press the Temperature ( ) and then the Blower ( ) button to enter the mode
programming.2. Press the Blower ( ) button.3. The LCD screen will display “Sby” to indicate that the spa is in standby mode.4. To resume normal operation, press any Control Panel button (except Jets pump 1) or wait
for the hour to be up.
Economy Mode Heating Cycles (Dolphin and Islander Models)Six minutes after power-up, the spa will begin its first heating cycle. The second cycle will occur 12 hours later. During each filter cycle, the circulation pump, heater and ozone will turn on. The plumbing lines will also be purged. Although the circulation pump is set to run for 24 hours, the filter cycles can still be programmed. This allows the lines to purge or allow the spa to heat when set in economy mode. To program the heating cycles:1. Press the Time ( ) button.
Pro
gra
mm
ing
In
str
uctio
ns

27
2. Press the Mode/Prog ( ) button three times. Must be done within three seconds of pressing the Time button. The LCD screen will display “Program,” “Filter 1” and “Start Time,” respectively.
3. Press the Warm ( ) or Cool ( ) button to adjust the hour start time in increments of one hour.
4. Once the time you selected is displayed, press the Mode/Prog ( ) button to confirm your selection.
5. Press the Warm ( ) or Cool ( ) button to adjust the minutes in increments of five minutes then press the Mode/Prog ( ) button to confirm your selection.
6. Press the Mode/Prog ( ) button to confirm the program for first heating cycle. The LCD screen will display “Program,” “Filter 1” and “End Time.” To program the second heating cycle continue to step 7.
7. Press the Mode/Prog ( ) button. The LCD screen will display “Program,” “Filter 2” and “Start Time.”
8. Press the Warm ( ) or Cool ( ) button to adjust the hour start time in increments of one hour.
9. Once the time you selected is displayed, press the Mode/Prog ( ) button to confirm your selection.
10. Press the Warm ( ) or Cool ( ) button to adjust the minutes in increments of five minutes then press the Mode/Prog ( ) button to confirm your selection.
11. Press the Mode/Prog ( ) button to confirm the program for second heating cycle. The LCD screen will display “Program,” “Filter 2” and “End Time.”
12. Press the Mode/Prog ( ) button to confirm and save all program times. Then the LCD screen will display the current temperature.
Note: Pressing the Time button at any time during the cycle programming will exit the menu and save your changes up to that time.
O3 OzoneWhen the LCD screen displays “O3”, the optional Ozonator (if equipped) is activated. The Ozone will run when the circulation pump is running. If any Control Panel button is pressed, the Ozone Icon will turn off and the Ozonator will deactivate for 1 hour. However, if the optional ThermOzone system is installed it is always functioning.
Invert (Dolphin and Islander Models)To invert the LCD screen display, while in the spa:1. Press the Warm ( ) or Cool ( ) button.2. Press the Blower ( ) button.3. Repeat the steps above to invert again.
Panel Lock/Unlock (PL) - Dolphin and Islander ModelsTo prevent unauthorized use of the spa, you can lock the control panel so that the but-tons are deactivated. When this feature is active the “PL” indicator light will be lit.To lock the panel (buttons must be pressed within three seconds of each other):1. Press the Time ( ) button.2. Press the Jets Pump 1 ( ) button.3. Press the Warm ( ) button.
To unlock the panel (buttons must be pressed within three seconds of each other):1. Press the Time ( ) button.2. Press the Jets Pump 1 ( ) button.3. Press the Cool ( ) button.
O³
102
102
PL
Pro
gra
mm
ing
Instru
ctio
ns

28
Temperature Lock/Unlock (TL) - Dolphin and Islander ModelsTo prevent unauthorized use adjustment to the temperature of the spa, you can lock the temperature set point. The Warm and Cool buttons are deactivated. When this feature is active the “TL” indicator light will be lit.To lock/unlock the panel (buttons must be pressed within three seconds of each other):1. Press the Warm ( ) or Cool ( ) button.2. Press the Time ( ) button.3. Press the Jets Pump 1 ( ) button.4. Press the Warm ( ) button.
Programming Fahrenheit or Celsius (Dolphin and Islander Models)You can program the temperature to display in either Fahrenheit (°F) or Celsius (°C). To access this feature:1. Press the Warm ( ) button.2. Press the Jets Pump 1 ( ) button.3. Press the Light ( ) button.4. Press the Warm ( ) or Cool ( ) button to scroll the menus until the LCD screen
displays “USr.”5. Press the Jets Pump 1 ( ) button to enter the user preference menu.6. Press the Warm ( ) or Cool ( ) button to scroll the sub-menus until the LCD screen
displays “tc.”7. Press the Warm ( ) or Cool ( ) button to toggle between “Y” (for Celsius) and “n” (for
Fahrenheit) to make a selection.8. Press the Jets Pump 1 ( ) button to confirm and select your setting.9. Press the Light ( ) button twice to exit to programming menus.
Programming the Time in a 12-hour or 24-hour Format (Dolphin and Islander Models)You can program the time to read in either a 12-hour or 24-hour configuration. To access this feature:1. Press the Warm ( ) button.2. Press the Jets Pump 1 ( ) button.3. Press the Light ( ) button.4. Press the Warm ( ) or Cool ( ) button to scroll the menus until the LCD screen
displays “USr.”5. Press the Jets Pump 1 ( ) button to enter the user preference menu.6. Press the Warm ( ) or Cool ( ) button to scroll the sub-menus until the LCD screen
displays “24.”7. Press the Warm ( ) or Cool ( ) button to toggle between “Y” (for 24-hr format) and
“n” (for 12-hr format) to make a selection.8. Press the Jets Pump 1 ( ) button to confirm and select your setting.9. Press the Light ( ) button twice to exit to programming menus.
TLP
rogra
mm
ing
In
str
uctio
ns

29
Automatic FunctionsClean-up CycleThe Clean-up Cycle is a feature that automatically turns on a pump (or the blower) 30 minutes after it was last turned off or timed out. The pump will run for approximately 30 seconds to move water through the system to help maintain clear water.
Purge CycleThe Purge Cycle is intended to keep the spa as clean as possible by flushing all jet lines every 12 hours. All pumps will turn on for 2-3 minutes. In Economy mode, the purge cycle occurs at the beginning of each heating cycle.
Freeze ProtectionFreeze Protection is activated if the temperature sensors in the heater detect a temperature drop to 44°F. All pumps (including the blower) activate automatically and remain on until 4 minutes af-ter the sensors detect that the spa temperature has risen to 45°F or higher. During this time “ICE” will be displayed and no button presses will be recognized until the spa water has reached 45°F.Note: • It is imperative that the spa remain on. Do not drain the spa or cut the power. If the spa must
be drained, the we recommend that you winterize the spa, page 38. It must be allowed to heat.
• To assist with water circulation you can use a submersible pump. Place the pump in the footwell of the spa, facing upwards. (Do not attach a water hose to the pump.) This creates a waterfall and keeps the water moving. Leave the pump running until the spa is repaired. Keep the spa covered and all panels on the unit. The submersible pump will also generate heat and protect the spa for a period of time.
Circulation Pump The Circulation Pump will run 24 hours a day, 7 days a week to efficiently and effectively filter your spa water. However, if the spa temperature exceeds the set-point by 3°F the circulation pump will automatically turn off. It will only turn back on during the preset filtration cycles or after the water temperature is within or below 3°F of the set-point. Any time the circulation pump is running, your spa will be filtering water (unless your filters are too dirty to permit water to pass through them).
Power-Up SequenceWhen power is first applied to the spa, an automatic Priming Mode will begin and the LCD screen will display “Pr.” This mode last up to 4 minutes and once complete the spa will begin to heat until the set temperature is reached.Note: During the priming mode if either the Warm or Cool button is pressed the spa will exit the Priming Mode early.
Au
tom
atic
Fu
nctio
ns

30
Basic Spa MaintenanceKeeping your ThermoSpas spa operating for maximum enjoyment requires a simple mainte-nance routine. Following the procedures below at the recommended intervals will insure that your spa provides years of service. If you have any questions concerning the maintenance of your spa please contact ThermoSpas’ Customer Care department.
Cleaning and chemical products for your spa can be purchase at ThermoSpas’ online store at http://online.ThermoSpas.com.
1. Daily Maintenance• Check for leaks by walking around the spa and looking at the base of the cabinet for signs of
water.• Be sure the spa cover is in place and tied down to the spa.• Check spa temperature.• Look for any signs of external damage to the spa and spa cover.• Remove any foreign objects or debris that may have fallen into the spa.
2. Check Sanitizer Level• Check sanitizer level and adjust as necessary, two to three times a week.
3. Weekly Maintenance• Add Stain and Scale.• Add Protection Plus/Natural and Clean.• Shock Spa.
4. Scheduled MaintenanceA. Clean the shell above the water line with ThermoSpas All Purpose Cleaner once a week.• All Purpose Cleaner will not alter the water chemistry, or scratch the acrylic shell.• ThermoSpas does not recommend the use of household cleaners on the spa shell. Most will
alter the water chemistry and some contain abrasives that will scratch and dull the spa shell.• The Scum Mitt offered by ThermoSpas is ideal for use with the All Purpose Cleaner.
B. Clean the spa filter(s) at least every 1-3 weeks depending upon usage.• Follow the cleaning process outlined in this manual.• If the spa is used heavily the filters should be cleaned at more frequent intervals.• Having a second set of filters on hand is strongly recommended as they greatly reduce the
down time the spa requires for filter maintenance.
Item FrequencyWater level and Condition Of Spa DailyCover DailySpa Temperature DailyForeign Objects or Debris in Spa DailyClean Shell Above Water Line WeeklyClean Filter(s) 3 weeks Max. and at each drain & refillDrain and Refill Spa 4 months Max.Flush and Clean Lines Each Drain & RefillClean the Spa Cover MonthlyClean and Protect Cabinet As recommended
Basic
Sp
a M
ain
ten
an
ce

31
C. Drain and refill the spa every 3 to 4 months.• Follow the drain and refill procedures in this manual.• Each time the spa is drained and refilled the lines should be flushed and cleaned. Follow the
procedure outlined in this manual.• It is recommended the entire shell surface be cleaned and protected each time the spa is
drained and refilled. Use ThermoSpas All Purpose Cleaner and ThermoGloss as outlined in the procedure in this manual.
• The filter(s) should be cleaned with each drain and refill.• Spas that are used heavily will require more frequent drain and refill cycles.• Conditioning the Cover Monthly.• The cover should be thoroughly cleaned and conditioned once a month using ThermoSpas
Cover Conditioner.• Cleaning and Protecting the Cabinet.• Cabinets constructed of ThermoBoard require hosing and wiping down once or twice a year.
Cleaning and chemical products for your spa can be purchase at ThermoSpas’ online store at http://online.ThermoSpas.com.
Ba
sic
Sp
a m
ain
tenance
32
Changing/Cleaning FiltersWe strongly recommend that you clean the filter every one to three weeks depending on how often your spa is used. Just because a filter is dirty does not mean it needs to be replaced. Fil-ters that are cleaned regularly can last up to 12 months. To determine whether your filter needs replacing look within the pleats of the filter inspecting for any build up of grime and dirt particles after cleaning. If dirt particles remain the filter should be replaced. Filters are not designed to last more than 12 months. We recommend using ThermoSpas Filter Clean to clean the filter(s) in your spa.Note: Some ThermoSpas spas use two or more filters.
DANGER: Risk of Severe Injury or Drowning by entrapment!• Keep hair, loose articles of clothing or hanging jewelry away from suction fittings, rotating jets
or other moving components to avoid entrapment that could lead to drowning or severe injury.• Never use the spa unless all suction guards, filter, filter lid, or skimmer assembly are installed
to prevent body and/or hair entrapment.• Never operate or use the spa if the filter, filter lid or skimmer assembly are broken or any part
of the skimmer assembly is missing. Please contact your dealer or nearest service center for service.
• The suction fittings and suction covers in this spa are sized to match the specific water flow created by the pump(s). If it is necessary to replace the suction fittings, suction covers or pump(s), be sure that the flow rates are compatible and are in compliance with the VGB Safety Act.
• Never replace a suction fitting or suction cover with one rated less than the flow rate marked on the original suction fitting. Using improper suction fittings or suction covers can create a body or hair suction entrapment hazard that may lead to drowning or severe injury.
• Owners must alert all spa users to the potential risk of Hair, Limb, Body, Evisceration (disembowelment) and Mechanical Entrapment.
Cleaning The FilterDANGER: TURN POWER TO SPA OFF! TO DECREASE RISK OF DEATH, DROWNING, OR ENTRAPMENT, NEVER OPERATE SPA WHEN FILTER IS NOT PROPERLY INSTALLED OR IF SKIMMER ASSEMBLY IS DAMAGED OR AL-TERED!
During filtration and automatic cycles, water flows through the spa skimmer and into the filter cartridge(s) to trap suspended particles and oils on their surface pleats. To ensure optimum performance, it is necessary to remove and clean the filter cartridge(s) once a month or sooner depending on spa use and water quality.
The skimmer for the Aquatic Series can vary. To follow are the two distinct skimmer housing and the cleaning procedure for each.
Cleaning products for your spa can be purchase at ThermoSpas’ online store at http://online.ThermoSpas.com.
!
Cle
an
ing
th
e F
ilte
rs

33
A. Top Mount Filter Cleaning Procedure - Islander and Maui Models(Do not use a pressure washer):1. Remove round weir by turning assembly and pulling it upward.2. Once the round weir is removed, this will expose the skimmer
basket that sits in the filter canister. Pull the basket up to remove.3. Remove filter cartridge by grasping top of filter and pulling
upward.4. Clean filter cartridge by first filling a bucket with water, adding
8 oz. of ThermoSpas Filter Clean. Mix solution by moving filter cartridge up and down several times. For best results, allow filter to soak for 12 to 24 hours (never less than 3).
5. After soaking, remove filter and rinse out any remaining debris. You can do this using a garden hose with high-pressure nozzle. After rinsing, allow filter to air dry.
Note: If you are experiencing calcium deposits on your filter, (a white, chalk-like substance), you may need to soak your cartridge in “Fil-ter Clean” for an extended period of time. Calcium deposits are an indication of very hard water. For instructions on what to do if your water is unusually hard, please refer to the Chemical Care Guide that comes with your hot tub. If you are still experiencing problems, contact the ThermoSpas Custom-er Care Department at 800.876.0158.6. To install cartridge, make sure weir/basket assembly has been removed, then simply insert
filter into cartridge housing. Finally, replace weir/basket assembly by loading it into the top of the cartridge housing, remembering to twist until the flat edges are locked together.
B. Top Mount Filter Cleaning Procedure - Dolphin Models (Do not use a pressure washer)::
For these models, the filter canisters are located inside a skimmer assembly. To access the canisters:1. Remove Skimmer Lid that covers the skimmer
assembly.2. Once the lid is removed you can see the
filter canisters at the bottom of the skimmer assembly.
3. Follow the instructions for the Top Mount Filter Cleaning Procedure above.
Filter Cartridge
Skimmer Basket
Filter Canister
Round Weir
Complete Housing Assembly
Skimmer Assembly
Top View of Skimmer Assembly
Skimmer Lid removed exposing filter canisters
Skimmer Lid
Cle
an
ing
the
Fitle
rs

34
Spas with ThermOzoneThermOzone accomplishes water sanitation by us-ing a powerful oxidant, Ozone. This 100% organic compound reacts with and destroys bacteria, mold, fungus, etc. Through a proprietary process, ozone effectiveness and air quality are maximized to pro-vide optimal sanitation of your spa.
Components
A Ozone Generator : Using Corona discharge technology, the Ozone generator delivers 250 mg of Ozone per hour to the Mixing Vessel.
B Mixing Vessel : Using Venturi action, the Mixing Vessel pulls ozone from the Generator and mixes it with Spa water fed from the circulation pump. This is where the sanitation occurs. An overflow tube feeds unused ozone to the carbon filter but an internal valve keeps water from entering the carbon filter. Treated water is sent back to the spa via the ozone jet.
C Carbon Filter : Any excess ozone is passed through the Carbon Filter and is neutralized of its oxidation effectiveness, releasing harmless oxygen underneath your cabinet.
D Ozone Jet : A special laser jet provides a return back to the spa for the treated water.
OperationIn spas equipped with a circulation pump, the ThermOzone system is active any time the circula-tion pump is running.
Chemical Usage1. Spas that have ThermOzone installed should maintain a 1.0-3.0 ppm Chlorine level or a
1.0-3.0 ppm Bromine Level.2. Depending on your usage, and if your water is clear, you can continue to reduce the amount
of chemicals you are using by trying to add sanitizer on a once weekly schedule and performing the rest of your weekly maintenance (Stain and Scale, Natural and Clear etc...) on a bi-weekly basis.
Note: Chemicals must be maintained at a proper level. Take into consideration how often the hot tub is used and the number users.
3. For ThermOzone to work more efficiently, please remember to clean your filters bi-weekly. Make sure you go no longer than one month between filter cleanings.
Note: If water becomes cloudy, please resume all chemical maintenance on a regular weekly ba-sis. If your usage increases, you may have to add an additional sanitizer treatment in the middle of the week.
AB CD
Spas w
ith
Th
erm
Ozo
ne

35
Drain and RefillDrain and refill the spa at least every 4 months. It is recommended that the plumbing lines be flushed and cleaned each time the spa is drained, page 36.Note: This is also an excellent time to change and clean the spa’s filter(s).
1. Turn the spa circuit breaker off.2. Remove the skirt panel(s) and screws. Normally the panel you need to remove is located
below the topside control, Figure 1.3. Locate the drain valve, Figure 2. Normally the drain valve will be attached to a 2 x 6 wood
slat with tie wraps. Cut the wraps and gently pull the drain valve from the equipment bay.4. Hold the drain hose above the water line, then unthread the drain cap from the hose, Figure
3. Place the drain valve and hose on the ground to direct the water away from the spa.5. Turn the flow valve to the open position to allow the spa to start draining, Figure 3. Use a
foam sponge, mop, or wet/dry vacuum to remove any remaining water left in the bottom of the spa footwell or in seating areas.
Note: You can use a submersible pump.6. Completely dry the shell surface with a soft, clean cloth.7. Clean the shell surface of any debris or mildew using ThermoGloss and ThermoSpas’ All
Purpose Cleaner.8. Once you have completed all task above, make sure the drain valve is in the “OFF” position
and reinstall the drain cap. Place the drain valve back in the equipment bay. Reinstall the skirt panel and screws.
9. You are now ready to refill the spa.10. Periodic visual inspection must be made to detect any leaks within the cabinet.
RED
BLK
WHT
TB1
CONTROL BOX
Figure 1: Front skirt panel directly be-low the topside control (location vary from model to model and one shown).
RED
BLK
WHT
TB1
CONTROL BOX
DRAIN VALVE
Figure 2: General equipment bay (location vary from model to model and one shown).
Figure 3
Dra
in a
nd
Re
fill

36
Cleaning the CoverWhile your vinyl cover is made to withstand the elements, it is important to care for it by keeping it clean at all times. Many contaminates may stain the vinyl if left on over a period of time. Remove stains immediately!
Conditioning the CoverConditioning the spa cover monthly will prolong its life. We recommend using ThermoSpas Cover Conditioner. It helps keep vinyl from hardening and cracking, and is especially effective for covers exposed to harsh outdoor elements like the sun’s ultra-violet rays, snow, and sleet. Cover Condi-tioner should only be used on the topside of the cover. To clean the underside of the cover simply use a garden hose and a 2:1 mix of water and vinegar. You can use bleach, simply spray and clean the underside and rinse thoroughly. Allow cover to dry.Note: Do not use petroleum-based vinyl cleaning products because they may be harmful to the cover and will void its warranty.
1. Apply ThermoSpas Cover Conditioner full strength with a damp sponge or soft brush, make sure to wear gloves.
2. Leave the conditioner on the cover for three minutes. Areas with excessive dirt or residue build-up may need extra scrubbing.
3. Wipe the cover clean with a damp sponge or cloth.4. Rinse the cover with water.
Cleaning products for your spa can be purchase at ThermoSpas’ online store at http://online.ThermoSpas.com.
Flushing LinesThere are many plumbing lines in a spa. No matter how clean you keep the water, chemicals clean only the water, not the plumbing lines. Bacteria and mildew-attracting scum can accumulate in the vast number of spa plumbing lines and fittings. You need to flush and clean them to prolong the life of your spa and keep it running smoothly.
Flushing and cleaning needs to be done every 6 months to one year, or if you notice a film devel-oping around the spa fittings. You should perform this procedure just before you drain your spa. We recommend using ThermoSpas Jet Line Cleaner to dissolve the build up of body oils, dirt, hair, soap, scum, rust and mineral deposits which are the perfect breeding ground for bacteria and mold.Note: Some residual foaming may occur, if so, use ThermoSpas Foam Away to suppress foam.
1. Remove filter(s) and clean.2. Before spa is drained, empty contents (16 fl. oz.) of ThermoSpas Jet Line Cleaner in to warm
spa water.3. Turn pump(s) “on” and run jets for 15 minutes. (Ensure filter is not in spa and cover is
closed.)4. Turn pump(s) and jets “off” and let sit for 1 hour.5. Turn pump(s) “on” and run jets and blower for 15 minutes.6. Drain the spa, hosing off the inside walls while draining.7. Proceed to clean the spa shell as instructed in the “Drain and Refill” section, page 35.
Cleaning products for your spa can be purchase at ThermoSpas’ online store at http://online.ThermoSpas.com.
Cle
an
ing
th
e C
ove
rF
lushin
g L
ines
37
Shell Surface CleaningCleaning Above the Water LineThe perfect product for cleaning the shell surface above the water line (when the spa is filled) is ThermoSpas All Purpose Cleaner. This helps to prevent a scum line from forming. Because it is a natural enzyme, it will not affect the water’s chemistry, it’s safe to use, it won’t scratch the acrylic, and it helps to eliminate mold or mildew odors without bleaching the surface.Note: Beware of using products such as Windex, as they will alter the water’s chemistry; or other abrasive cleansers that can scratch the acrylic surface.
1. Spray the exposed surface area of the shell above the waterline with All Purpose Cleaner. This will not affect the water chemistry.
2. Wait a few minutes and then simply wipe away the grime with a soft cloth or damp sponge. For heavily soiled areas, spray generously, wait five minutes and scrub with a two-textured sponge. ThermoSpas offers an accessory called the Scum Mitt, which is perfect for this use.
Deep Cleaning the Entire Shell SurfaceAnytime the spa is drained and dry, we recommend two products when cleaning the entire shell surface: ThermoGloss and All Purpose Cleaner. ThermoGloss helps create a hard, durable, pro-tective coating on the shell that seals the surface and hides scratches in the acrylic. All Purpose Cleaner is ideal for ridding the surface of any dry residue.Note: Do not use car wax of any kind.
1. Remove any scum lines using All Purpose Cleaner.2. Shake ThermoGloss well before using and apply only on the shell surface. The surface
should be completely dry upon application.3. Spread evenly using an overlapping circular motion.4. Allow the ThermoGloss to dry, spray All Purpose Cleaner on the dry residue left by the
ThermoGloss, and wipe the shell surface clean with a dry, soft cloth.
Cleaning products for your spa can be purchase at ThermoSpas’ online store at http://online.ThermoSpas.com.
Sh
ell S
urfa
ce
Cle
anin
g
38
Winterizing (Closing Your Spa)If you do not plan to use your spa during freezing weather, you will have to winterize it. Failure to winterize your spa will cause irreversible damage (in freezing temperatures) to the pump and plumbing lines.
Winterization of your spa is easy. Follow the steps below each time you drain the water from your spa in freezing temperatures to prevent serious damage from occurring to your spa:
1. Turn the spa circuit breaker off.2. Open all therapy control valves and all jets, page 22.3. Drain your spa, page 35. You can use a submersible pump.4. Remove the cabinet panel in front of the spa’s equipment compartment.5. Open the drain valve to drain any remaining water and leave open afterwards.6. Locate the heater and open the heater unions at both ends by turning counter-clockwise,
page 40.7. Clear water from the water pump(s) suction and return lines using a canister-type wet
vacuum. You MUST use a canister type wet vacuum in order to ensure that the lines are cleared of all remaining water.
8. Remove the drain plug(s) from all water pump(s), page 20.9. Replace the drain plug(s) after all the water has drained.10. Reconnect the heater unions on the heater at both ends by turning clockwise until they are
tight. Make sure o-ring gaskets are sealed properly so as not to pinch o-rings. Do not over-tighten.
11. Put the cabinet panel in front of the equipment compartment back on.12. Turn the spa circuit breaker on.13. Briefly turn the blower, if equipped, ON to expel water from the plumbing and air channels.14. Turn the spa circuit breaker off.15. Use a wet vacuum at EACH fitting/jet/suctions to assist in removing any existing water in
fittings, water lines and spa shell.16. Sponge out remaining water from spa shell.17. Clean the shell and remove any debris.18. Clean the filter. Store the filter basket and filter(s) element indoors.19. Install the insulated spa cover and check to ensure that rain water and/or snow is not
entering the spa through the cover.
Customer ResponsibilitiesAny spa is subject to freezing in cold weather. You must follow these procedures during a power failure or if the spa is not operating properly in order to prevent your spa from freezing. Freezing is not covered under the warranty.Note: To assist with water circulation you can use a submersible pump. Place the pump in the footwell of the spa, facing upwards. (Do not attach a water hose to the pump.) This creates a waterfall and keeps the water moving. Leave the pump running until the spa is repaired. Keep the spa covered and all panels on the unit. The submersible pump will also generate heat and protect the spa for a period of time.
Preventative MaintenanceDuring the cold weather season, you should inspect your spa every day to insure it is running properly. If you detect a problem and the temperature is dropping, contact the service department immediately during regular working hours. It is the customer’s responsibility to follow the proce-dures listed above in order to prevent a freeze up.Note: Spa should be covered with a tarp after closing process. Covering your spa with a tarp will protect and keep the spa from getting water into it as it sits dormant.
Win
terizin
g

39
ComponentsWater PumpNOTE: On some water pumps, pipes heading to water jets may be located on the top of the pump. However, the configuration of the hose, “T” valve, remains the same. Pump configuration vary by model.
Valve Lock
TO WATER JETS
Pump Union
Pump Motor
Water Pump Volute
Self Priming Hose
From Suction
“T” Valve
Drain Plug
Open Valve Closed Valve
Circulation/Filtration PumpDesigner Series Spas are equipped with a circulation pump for continuous filtration. Pump configuration vary by model.
Air Pump (Blower)Aquatic Series Spas are equipped with an air blowerfor the Bubbling System (not included on the Silver models).
PumpMotor
From Suction
TO WATER JETS
WaterPumpVolute
Motor
TO AIR JETS
Co
mp
on
en
ts

40
The Spa pack is normally behind the cabinet located underneath the topside control panel.
Spa Light Assembly
The LED light is attached to the light lens by screwing on to it. The light housing is accessible from underneath the skirt panel for ease of replacement.
Spa Pack and Heater(Electronic Center of Spa)
Heater Union
Heater Union(hand tighten only by
turning clockwise)
Heater
Led Light
Nut
Gasket
Lens
Co
mp
on
en
ts

41
Common Diagnostic MessagesError Code Meaning Action
OHH
Overheat - The spa has shut down. One of the sensors has detected a temperature of 118˚F (approximately 47.8˚C) at the heater.
DO NOT ENTER THE WATER! Remove the spa cover and allow water to cool. Once the heater has cooled or the temperature reaches 107˚F (ap-proximately 41.7˚C) you can reset the spa by pressing any button. If spa does not reset, turn off the power to the spa and contact ThermoSpas Service Department 800.876.0158.
OHS
Overheat - The spa has shut down. One of the sensors has detected a temperature of 110˚F (approximately 43.3˚C) at the heater.
DO NOT ENTER THE WATER! Remove the spa cover and allow
water to cool. The spa will automatically reset once the temperature reaches 107˚F (approximately 41.7˚C). If the problem per-sists, contact ThermoSpas Service Depart-ment 800.876.0158.
ICEA potential freeze condition exists. Activates when the temperature goes below 44˚F (6.7˚C)
No Action required. The pumps and blower will automatically activate to circulate the water regardless of spa status.
SnASpa is shut down. The sensor that is plugged into sensor “A” Jack is malfunctioning or not working.
If the problem persists, contact Thermo-Spas Service Department 800.876.0158. (This may appear temporarily in an over-heat situation and disappear when the heater cools.)
SnBSpa is shut down. The sensor that is plugged into sensor “B” Jack is malfunctioning or not working.
If the problem persists, contact Thermo-Spas Service Department 800.876.0158. (This may appear temporarily in an over-heat situation and disappear when the heater cools.)
SnS
Sensors are out of balance. If this error code is alternating with the temperature, it could be a tempo-rary condition. If the LED screen displays only this message (blink-ing) then the spa is shut down.
If the problem persists, contact Thermo-Spas Service Department 800.876.0158.
HFL
The temperature sensors have detected a substantial difference between temperatures. This could be caused by a flow problem.
Check the water level in the spa. Add water if necessary. Prime the pumps if the wa-ter level is okay. If the problem persists, contact ThermoSpas Service Department 800.876.0158.
LF
Low flow problem detected. (This error displays on the fifth occur-rence of the “HFL” message with-in 24 hrs.) Heater is deactivated, but other spa functions continue to run normally.
Refer to actions required for “HFL” mes-sage. The heater will not automically reset. To reset, once the flow error has be fixed, press any button on the control panel.
!
!
Co
mm
on
Dia
gn
ostic
Messages

42
Common Reminder MessagesCode Occurrence Action
rPH Every 7 daysTest and adjust pH levels. Refer to the manufacturers instructions.
rSA Every 7 daysTest and adjust sanitizer lev-els. Refer to the manufactur-ers instructions.
rCL Every 30 daysRemove, clean and reinstall filter(s). Refer to the manufac-turers instructions.
rtg Every 30 days Test and reset GFCI per man-ual instructions.
rdr Every 90 daysTest Total Dissolved Solids levels. Spa might need to be drained and refilled.
rCO Every 180 daysClean and condition cover. Refer to page 36 for instruc-tions.
rtr Every 180 days Clean and condition wood per manufacturers instructions.
rCH Every 365 days Install new filter or filter(s).
Com
mon R
em
ind
er
Me
ssa
ge
s

43
Troubleshooting - Water ChemistryProblem Possible Cause SolutionCloudy Water • Dirty Filter
• High TDS Levels• High pH or alkalinity
• High calcium count• Dissolved solids• Dissolved solids
• Clean filter with filter cleaner• Drain and refill with fresh
water• Check and adjust using pH/
Alkalinity Down• Drain halfway and refill• Add clarifier to your water• Shock with sanitizer you
currently use
Brown Water • High mineral count• Low alkalinity level• Low sanitizer level
• Add “Stain & Scale”• Test and add pH/Alkalinity Up• Test and add sanitizers
Green Water • Algae growth • Shock with sanitizer
Yellow Water • Low pH • Add pH Up
White Scale Deposits • Low sanitizer level • Test and add sanitizer
Excessive Foaming • Soft water• High TDS level• High contaminant level
• Test and add “Liquid Calcium”• Drain and refill the hot tub• Add one capful of “Foam
Away”
Waterline Scum Ring • Inadequate filtration• High content of oils
• Check and clean filter(s)• Add “Natural and Clear”
Pitting of Metal Fixtures • Low alkalinity or pH • Check and add pH/Alkalinity Up
Erratic pH Test Results • Low alkalinity• Sanitizer level too high
• Old pH indicator strip
• Add pH/Alkalinity Up• Remove cover and turn on
bubbling system• Check expiration date and
replace
Musty Odor • Bacteria/algae growth • Shock the water with sanitizers
Eye Irritation • Low pH level• Low sanitizer level
• Test and add pH/Alkalinity Up• Test and add sanitizer
Skin Irritation • Low sanitizer level• Sanitizer irritation
• Water temperature too high• Soaking too long
• Test and add sanitizer• After adding sanitizer always
wait 20 minutes before entering hot tub
• Reduce water temperature• Soak for shorter intervals
Tro
ub
lesh
oo
ting
- Wate
r Chem
istry

44
Troubleshooting - Mechanical SystemsProblem Possible Cause SolutionPump(s) will not start • “T” valve(s) not open
• Pump(s) not primed
• Frozen pump impeller
• Check both “T” valves on all pumps. Be sure valve is open by pulling up on handle until detent click is felt. Detent prevents valve from vibrating shut.
• Open suction side pump union until water begins to trickle.
• Use hairdryer to warm pump volute in area of drain plug. Keep hairdryer 6 inches from volute and heat using a side to side motion. Do not allow volute to become hot to the touch.
Spa Pump(s) surging • Air being pulled through
• Water level low
• If spa is equipped with a Skimmer basket, it should be all the way down. Door should move freely.
• Fill spa to recommended level.
No Water Pressure in Sections of the Spa
• Water not being Diverted Correctly
• Pump not on
• Jets not Open
• Turn diverting whirlpool jet or valve to divert water.
• Turn on correct pump. Refer to “pump(s) will not start” (above) Water temperature is 3 or more above set temperature - wait to cool.
• Turn jets counter-clockwise to open.
Spa Not Heating (Heat Icon On)
• Pump(s) not on• Closed T Valve open to
allow water to go through it.• Spa maybe in Economy
Mode (Icon/Bulb Not On)• Dirty Filters• Pump Malfunction• Inadequate Water Level• Heater Malfunction
• Refer to “pump(s) will not start” (above)
• Lift “T” Valve up so it is all the way
• Put spa in Standard mode.
• Replace filters with clean or new filters.
• Repair or replace pump.• Add water until it reaches proper
level.• Replace heater.
Circulation Pump Not Working
• Water Temperature is 3° or more above set temperature.
• Open cover and wait for spa to cool. If spa is equipped with a blower, turn it on.
Spa only heats on High Speed Pump
• Dirty or clogged filter(s)
• Water level low• “T” valve closed or open
valves
• Clean Filter(s) See instructions on, page 32.
• Fill spa to correct level, page 13• Open and lock all “T” partially
Tro
uble
shooting -
Mech
an
ica
l S
yste
ms

45
Troubleshooting - Mechanical SystemsProblem Possible Cause SolutionFlashing O3 on Control Panel Spas with Ozonators
Spas without Ozonators(TS 702 Series Control Pan-els) to purchase
• Ozone working
• Irrelevant
• No Action required.
• Call customer care or service 800.876.0158.
“FLO” Appears on Control Panel or “FLO” flashes and alternates with Temperature
• Pump(s) not running
• Water level low• Pump Surging
• Dirty or Clogged
• See “Pump(s) will not Start.”• Fill spa to correct level.• See “Pump Surging” Section
above.• Check filter installation Filters
Clean filter(s), page 18.
dr/dry Inadequate water detected in heater. (Displayed on 3rd oc-currence of “dr” message) Spa is shut down.
• Closed T-Valves
• Loss of prime
• Circulation Pump Malfunction
• Dirty filters/old filters
• Open T-Valve by lifting handle all the way up.
• Prime pump while pump is on by loosing union.
• Call Thermospas for service 800.876.0158 to order a new pump or to set up a service appointment.
• Remove and clean filters or replace with new ones.
OHH (Overheat) The spa has shut down. One of the sensors has detected that the spa water is 110° F (Approximately 43.3° C)
• Partially closed T-Valve• Outside temperature
is at or around 110°F/43.3°C
• Dirty filters/old filters
• Lift T-Valve all the way up.• Remove some hot water and
add cool water. Turn blower on, this will cool water down, then remove the cover.
• Remove and clean filters, replace with new ones.
Breaker keeps tripping or will not Reset
• Improperly wired ground
• Spa Controller needs repair
• Spa Heater needs repair
• Contact your electrician or ThermoSpas 800.876.0158.
• Customer Care
Spa Leaks • Loose union , drain valve open
• Leaking Barb Fitting
• Leaking Glue fitting
• Check and tighten all unions, close drain valve.
• Check hose to barb connection. Clamp hose if required, call ThermoSpas for service 800.876.0158.
• Call ThermoSpas for service 800.876.0158.
Tro
ub
lesh
oo
ting
- Mechanic
al S
yste
ms

46
GlossaryActivator (Potassium Monopersulfate) - Also known as non-chlorine shock, it is a strong oxi-dizer capable of eliminating contaminants from your spa. It is a non-chlorine chemical compound often used for shock treatments in spas and pools. It is very popular for use in mineral purification systems.
Algae - Algae may form on your spa surfaces or it may bloom in suspension. We typically know algae to be green, but it may also be yellow (mustard algae), black, blue-green or any shade in between. It may form separate spots, or seem to grow in sheets. Pink algae, is not algae at all, but a form of bacteria. Algae are living, breathing organisms that need warmth, sunlight and CO2 to thrive.
Bather Load - The number of individuals using a spa in a 24 hour period. This is the primary source of bacterial and organic contamination.
Bromine Liquid Salts - In 2-Part Bromine, a compound called sodium bromide (Liquid Salts) is first introduced into the water. Sodium bromide is NOT a sanitizer by itself. To work as a sanitiz-er the sodium bromide needs an oxidizer, such as monopersulfate, to activate it. The addition of an oxidizer sets the bromide in motion, turning the bromide into the killing form of bromine. After destroying bacteria, algae and other organisms, it can become bromide once again. The oxidizer shocks the water and off-gases the physical waste. Adding additional oxidizer can start the pro-cess all over, converting bromide into a sanitizer. This cycle can occur repeatedly.
Bromine Liquid Salts Advantages• Does not create an offensive odor• Is pH neutral• If tub is not in use, no chemicals need to be added for up to 1 week• Considered the most effective Bromine system on the market
Disadvantages• Requires the use and knowledge of two separate chemicals• Cannot be used with ThermoClear
Bromine Tablets - Bromine tablets are a combination of 70% bromide and 30% chlorine. Tablets are inserted into a dispenser that floats in the water providing continuous coverage. As the tablet dissolves, it releases the bromide and chlorine. The two work together immediately to produce bromine, the active chemical used in sanitation.
Advantages• Easy to use• Scent of chlorine is reduced
Disadvantages• Bromine can potentially bleach out the shell’s surface• Odor of 30% chlorine still exists• Tablets are not pH neutral• Cannot be used with ThermoClear
Calcium - One of the principal elements making up the earth’s crust; its compounds, when dis-solved, make the water hard. The presence of calcium in water is a factor contributing to the formation of scale.
Glo
ssa
ry
47
Copper - Copper in water is a common problem in many households. Copper is present due to the corrosion of plumbing materials from Acidic (low pH) or Aggressive water (low TDS). Com-mon problems associated with copper due corrosion are leaks in the plumbing system or blue-green staining. High copper content can also cause some health concerns by effecting the stom-ach and intestines. The EPA has set a maximum contaminant level of 1.3 ppm.
Disinfect - To kill living organisms on contact. The difference between a disinfectant and a sani-tizer is the “kill time”: a disinfectant kills 99.9% of living organisms instantly. Chlorine and bromine are the only two sanitizers classified as disinfectants.
Enzymes - Used in spa formulations designed to break down and digest oils similar to the way enzymes are used in oil spill clean-up efforts.
Fill Water - Used in filling or adding to the water level. Whether from the hose or from a well, your fill water brings its own chemical make up and water balance (or lack thereof).
Filter - A device used to remove particles suspended in the water by pumping water through a porous substance or material.
Filter Cleaner - A deep cleaning filter soak that includes a releasing agent to relax the filter me-dia and allow dirt and grim to be dissolved and cleaned.
Filter Media - A pleated, porous synthetic fabric in filter cartridges, used to trap foreign matter. Filter cartridges must be cleaned regularly with filter cleaning compounds.
Foam Away - Excessive foaming is typically caused by swim-wear used when bathing in a spa. Using a capful of “Foam Away” instantly reduces foam and will allow detergents to be filtered out of your water.
Foaming - A term used to describe surface foam on your water, especially in spas/hot tubs. Foaming is caused by high TDS levels working in combination with soft water and oils. Certain low grade algaecides can foam when added to the spa. Use enzymes for foam control.
Iron - An element often found discolored in ground water (in the form of ferrous iron) in concen-trations usually ranging from zero to 10 ppm (mg/1). It is objectionable in water supplies because it can effect water taste and cause unsightly colors produced when iron reacts with tannins in beverages such as coffee and tea. Iron causes staining after oxidation and precipitation, as ferric hydroxide (yellow, brown, and red on clothing, dishes, fixtures, and bathroom tile). Iron can also be found in a bacterial form which will appear as black or brown slime and can effect the odor of your water. Iron is a common water problem throughout the United States, it can be found in well water and municipal water. The EPA has set a maximum level for Iron of 0.3 ppm in water, iron concentrations at this level or higher can cause staining.
Jet Line Cleaner - This anti-bacterial cleaner is added to spa water prior to draining and refill-ing. Left in the spa for an extended period (3 – 24 hrs), this cleaner will break down accumulated biofilm in spa plumbing. This product can also be used in jetted bath tubs.
Manganese - An element sometimes found in ground water, usually with dissolved iron but in lower concentrations. Manganese is a typical natural occurring mineral found in municipal and well water. Manganese effects the taste and the color or water. Manganese can also cause stain-ing of clothes and dish ware and black stains and other problems similar to iron. The EPA has determined that concentrations greater than 0.05 ppm can cause these aesthetic problems.
Glo
ssa
ry
48
Media - The selected materials in a filter that form the barrier to the passage of certain suspend-ed solids or dissolved molecules.
Mineral Purification System (ThermoClear Cartridge) - Mineral cartridges are placed in your filter core and release silver and copper ions into the spa water. These ions kill bacteria and virus’s. Activator must be used to oxidize the organic material the silver and copper ions have killed. Very low levels of chlorine (0.5 ppm) or Bromine (1 ppm) are recommended as a safety precaution.
Mineral Sanitizer - A sanitation system that releases very low levels of silver ions into the water which assist in controlling bacteria 24 hours per day. ThermoClear cartridges trap bacteria that approach it’s surface. Activator then assists in cremating (oxidizing) the dead bacteria within the cartridge. The cartridge should be placed in the filter area.
Multi Purpose Cleaner - An enzymatic cleanser used to clean scum lines and mineral deposits off the shell and cabinet surface. This cleanser is pH neutral and will not affect water chemistry. It should be used on a weekly basis and is also a good cleaner to prep your shell for a coating of Acrylic Gloss.
Natural and Clear - A natural enzyme used to devour oils and organic material (skin,hair etc..) left in the spa by bathers that cannot be burned off by oxidizers, sanitizers or disinfectants used in spa sanitation.
Oxidize - To destroy and burn off all the dirt and inorganic or dead organic matter in the water. A sanitizer can oxidize materials such as ammonia, nitrogen-containing contaminants and swimmer waste.
Ozone - is “active oxygen”, nature’s special molecule (an ozone molecule consists of three ox-ygen atoms). It is created in nature by the combination of oxygen in the air, and ultraviolet rays or by the electrical discharge during a lightning storm. Ozone is a natural purifier (meaning no harmful chemical by-products are created during purification), it has a clean, fresh scent noticed after a rainstorm. Ozone is the most powerful oxidizer that can be safely used in a swimming pool or spa and is the alternative water purifier to traditional pool/spa chemicals such as chlorine and bromine. Because ozone is a disinfectant it will allow you to reduce your sanitizer usage. It is always recommended that a 1 – 3 ppm sanitizer level be maintained with any ozone system.
pH - The scale of relative acidity. Measurements are expressed in numbers from 0 - 14, with 7.0 being neutral. Acceptable spa ranges are 7.2 – 7.8
pH Down - Used to decrease both the pH and Alkalinity levels of your spa water
pH Up - Used to Increase both the pH and Alkalinity levels of your spa water.
PPM - Abbreviation for ‘parts per million’, the unit of measurement used in chemical testing which indicates the parts by weight in relation to one million parts by weight of water.
Protection Plus - A high powered metal sequestering agent used to keep mineral and metal deposits from forming on the shell. This product also adds a clarifier to screen the water of fine particulate unable to be caught by your filter.
Glo
ssa
ry

49
Safety Cover - A spa cover which meets strict ASTM standards for strength, construction, and anchoring, which reduces the drowning risk to small children. (Our covers are built to the ASTM safety standard). Not all hot tub covers on the market meet this important rating.
Sanitize - Means to kill all bacteria, algae, disease-causing organisms, and any other uninvited guests. One important job of any sanitizer is to provide a sanitizer residual, a level of sanitizer that hangs around (resides) in the water for some period of time to destroy any living organisms as they are introduced into the hot tub.
Scale - Forms on surfaces in contact with water when the calcium hardness, pH or total alkalin-ity levels are too high. Scale may appear as gray, white or dark streaks. It may also appear as a hard crust around the tile.
Sequestering Agent - A sequestering agent ties-up minerals tightly in solution, preventing their precipitation, which colors the water and/or stains the spa. Use Stain and Scale, Protection Plus and/or Natural and Clean.
Shock - This word is used two ways in the pool and spa industry. As a noun it loosely describes the products used in shocking, such as hypochlorites, potassium permonysulfate or hydrogen peroxide. As a verb it describes the act of bringing the sanitizer level up so high that breakpoint chlorination is reached. When breakpoint is reached, a “shock” or perhaps a “lightning bolt” is a better analogy, is sent through the water, tearing apart molecules and slashing through cell walls.
Skimmer - A surface skimmer is a plumbing fitting set at water level, containing a weir mecha-nism and a debris basket. The skimmer is part of the suction side circulation system.
Skimmer Basket - Beneath the lid, the basket strains debris, as the first line of defense in filter-ing the water.
Sodium Bicarbonate - Another base, however its properties will increase alkalinity more than pH. Used to raise total alkalinity levels.
Sodium Bisulfate - An granular form of acid, used to counteract a scaling condition by lowering pH and/or alkalinity.
Spa Cover Conditioner - This product is specially formulated for vinyl spa covers. It will not dry out vinyl as automobile cleaners might. “Spa Cover Conditioner” will deep clean your cover while providing a bright, durable shine that will inhibit harmful UV rays.
Spa Fragrance - Special perfumes designed to enhance the hot tub experience and overcome chemical odors. These are designed for spas, and will not alter water balance or clog filters.
Stain and Scale - A metal sequestering agent used to keep mineral and metal deposits from forming on spa equipment.
Superchlorination - Applying 7 - 10 times the normal amounts of chlorine to the spa as an add-ed “boost” for contaminant removal. Some refer to superchlorinating as being less than shocking, in that breakpoint thresholds are not reached, or the terms may be used synonymously.
Test Strips - Easy-to-use dip strips for measuring the pH, total alkalinity and sanitizer levels of spa water. Strips are also available for testing water hardness and Total Dissolved Solid levels.
Glo
ssa
ry

50
ThermoGloss - This product is an acrylic gloss that provides a tough coating to protect your shell from scratches and scale build up. Designed for hot water environments, this product will not break down and cause problems in spa water.
ThermOzone - The only automatic ozonator with an EPA approved, built-in de-gasser tank that eliminates all offensive and potentially dangerous gases. This makes it safe to use while you’re in your hot tub, and it is the only one recommended for indoor hot tub installations. ThermOzone produces eight times more ozone per hour than other ozonators, and it minimizes the creation of excess “off-gas” by using a Mixing Degas Vessel (MDV) to safely mix ozone into the water. Ozone only disinfects water while it is in contact with it, and the MDV provides an area where the ozone contacts the water for a longer period of time, making it more effective. If any excess off-gas is produced, ThermOzone eliminates it with a charcoal/carbon canister, safely converting the off-gas back into oxygen.
Total Alkalinity - The ability of the pool/spa water to resist changes in pH. The “buffering” ca-pacity of the water. Additions of Sodium Bicarbonate will increase the levels, expressed in ppm. Additions of Sodium Bisulfate decrease Alkalinity levels. Acceptable measurements range from 80 – 120.
Total Dissolved Solids (TDS) - Is a measurement of the total amount of minerals, residue, and other particles that cannot be oxidized from the water and remain. When water evaporates, dis-solved salts, minerals, etc. are left behind. These levels of dissolved solids increase in the spa as water evaporates over time. Tubs that have a high TDS level means that the water is over satu-rated and cannot receive any more chemicals. TDS should never be higher than 3000 ppm. The water needs to be drained at this point, and the tub cleaned and refilled.
Water Hardness - A characteristic of natural water due to the presence of dissolved calcium and magnesium; water hardness is responsible for most scale formations. Hardness is usually expressed in parts per million. The ideal range for Water Hardness is 100-250 ppm, though 250-400 is acceptable. Soft water in spa will cause instant foaming and staining of water and shell. Water with low hardness is highly corrosive, causing significant damage to any metal. Water will dissolve other minerals rapidly until it gets to saturation point. Large, coarse soft-water scale will form as a result. Hardness levels can be brought up by using Liquid Calcium. Water that has hardness that is too high, can cause excessive scale formation. Water may also become cloudy or slightly discolored hardness levels can only be reduced by using an in-home water treatment system or removing water from the tub, and adding distilled water.
Weir - The device in a skimmer that controls the amount of water coming into the skimmer, and keeps debris inside, otherwise known as a “flapper-gate.”
Winterizing - The procedure of preparing spas for freezing weather, in cold climates when the spa will not be operated. May include draining and cleaning the shell, and opening connections to release water from plumbing and heaters. Most people continue to heat and operate their spas in winter; for them, winterizing is not necessary if appropriate measures are taken to prevent freeze-up.
Glo
ssa
ry

51
F.A.Q.sQ: What happens if I don’t change my ThermoClear cartridge in four months?A: The ThermoClear cartridge will start to become ineffective after four months. So, along with
having water that could potentially have a high TDS reading, prohibiting chemicals from being effective, you will have no method of sanitizing your water leading to potential health risks.
Q: Which is better to use on a weekly basis with ThermoClear: Spa Activator or Chlorine?A: If you are not in any way allergic to Chlorine, then we strongly recommend using it. Chlorine
has a higher ORP rating (oxidation reduction potential) which is the measure of oxidizing power. The oxidizing power is the ability to burn away organic matter. However, you must continue to use the Spa Activator each time you use your hot tub.
Q: What should I do if my dog or cat jumps into the hot tub?A: Unfortunately animals in hot water produce over 50 times more bacteria than humans,
because of this you have to drain and refill your spa.
Q: What happens if I put too much sanitizer into the water?A: Too much Spa Activator can cause the skin to itch and potentially produce a skin rash. Over-
shocking your water could potentially damage your hot tub cover, and this would not be covered in the warranty. Also, an excess of sanitizer might not produce any reading on your test strip because you have gone beyond its reading capabilities. This has led people to add more Spa Activator which can make matters worse.
Q: How can I reduce my sanitizer level?A: There are two simple methods to reduce sanitizer levels:1. Drain 1/2 of your water and refill the hot tub; or2. Remove the cover and turn on the air bubbling system. Monitor the sanitizer level with test
strips until the recommended level is achieved.
Q: Why does ThermoSpas recommend against the use of Biguanide or copper based algaecides in my spa?
A: There are two reasons:1. Biguanide and copper based algaecide products may attack critical parts of the pumps and
plumbing leading to premature failure of the spa.2. Chlorine may not be used with Biguanide based sanitizers. Over time certain bacteria will
develop a tolerance to Biguanide. When this occurs chlorination of the spa is the most effective means of destroying these bacteria. At this time, it is common for most spas to switch to a chlorine and/or bromine sanitizer.
Q: Can I change sanitizers?A: The use of ThermoClear and Chlorine can be interchanged in the same spa water. All other
sanitizers require the draining of the hot tub. We recommend the use of ThermoSpas’ Jet Line Cleaner for cleaning out the lines.
Q: Why can’t I use swimming pool chemicals?A: A hot tub is dramatically different from a swimming pool because you are working with
water that is both heated and also aerated. The ratios of people are also quite different. For example, four people in a hot tub is equivalent to 300 people in an average size pool. The heated water and higher bather load ratio can cause organic contaminants not found
F.A
.Q.s

52
in swimming pools. Because of this, the chemical make-up of swimming pool chemicals is usually quite different from that of hot tub chemicals. One example is that swimming pool chemicals are not buffered so they can create havoc on the pH level of your hot tub water.
Q: Why are my pillows/headrests discolored or bleached out?A: Headrests that are constantly submerged in spa water that is not properly treated with
chemicals may discolor. However, even if you have been performing your water maintenance faithfully and correctly, the pillows will still naturally discolor over time. ThermoSpas does not provide warranty coverage for bleaching or discoloration of spa pillows.
Q: I have done everything I could and my water is still messed up.A: ThermoSpas offers free computerized testing of your water. If you reach the point of having
no luck with keeping your water in balance, and have tried draining and refilling your tub, you can send us a sample of your hot tub water for analysis. Please contact our customer care department 800.876.0158.
Q: What can I do if th pH is my spa is high (over 8.0) and will not come down?A: Follow the steps below.1. Turn on all pumps and add 1 ounce of ThermoSpas pH Down. Wait 15 minutes and retest
the pH.2. If the pH is still out of the acceptable range add 1/2 ounce of pH down and retest after 15
minutes. Pumps should continue to run.3. If the pH reading is still high, Step 2 may be repeated an additional two times.4. Upon completion of Step 3, if the pH is still high, contact ThermoSpas Customer Care Dept.
Q: Why do I need any chemicals if Ozonators work so well?A: Ozone is a powerful oxidizer and is considered to be 25 times more effective and works
100 times faster than traditional sanitizers like Chlorine or Bromine. However, ozone only lasts about 20 minutes in a hot tub when the filtration pump shuts off. There are many contaminants (i.e. algae, ammonia, nitrogen laden compounds, and bather wastes) that are not controlled by ozone. Also, Ozonators have no affect on reducing the use of any other chemical but sanitizers. Proper chemical use is recommended, take into consideration the how ofter the hot tub is used and the number of bathers that use it.
Q: How do you prime a pump?A: The best way to prime a pump is to put pump into high speed and loosen pump union just a
little bit to let the air escape from pump then tighten the union back up.
Q: What do I do if I have FLO on display?A: (Flashing FLO) First make sure filters are clean and seated properly. Make sure water level
is to correct line on filter assay. Prime pump to free air pocket if any. (Solid FLO) You need to make an adjustment on the pressure switch itself with power to spa.
Q: What is “dr”?A: “dr” means there is inadequate water detected in the heater and on 3rd occurrence of this
control panel will display dr4 or dry. RESOLVE: Prime pump and make sure all “T” valves are up before contacting service for further trouble shooting.
Q: How come 24-hour circulation pump turns on for 3 minutes then shuts off?A: With the new addition of the 24-hour circulation pump they are set to turn on for 3 minutes
then shut off once the spa goes over the desired set temperature to eliminate heat gain from pump.
Co
mm
on
Dia
gnostic M
essages
F.A
.Q.s

53
Q: How do I change my filters if my pump circulation pump runs for 24 hours?A: On some models of ThermoSpas it is almost impossible to change the filters while the pump
is on so the spa must be put into standby mode or power turned off at the circuit breaker.
Q: What does O3 mean on the control panel?A: O3 simply means if you have an ozonator in your spa it is on. If you do not have one and
wish to order one or to have one installed please call the service department.NOTE: If O3 doesn’t show up on your control panel this doesn’t mean your ozonator isn’t working O3 shows up periodically and ozonator works even when light isn’t on.
Q: I am going away on vacation, should I winterize?A: Winterizing your spa while your on vacation is not only smart but it could save you operation
cost. You won’t have to have someone check it every 24 hours. Also, if the power goes out or spa freezes this will eliminate any freeze damage which isn’t covered under any warranty.
NOTE: It is the customers responsibility to keep the spa from freezing.
Q: Why is my pump always running?A: If your spa has a circulation pump it is set to run 24/7, unless the spa temperature goes 3
degrees above the set temperature. Another reason is heater malfunction, please contact the service department.
Q: How do I troubleshoot an instant tripping breaker?A: The proper way to troubleshoot is first turn GFCI breaker off. Access spa pack and unplug
all components except for light. All water pumps, blowers, and ozonator if spa has one. Then turn GFCI breaker back on. If breaker does not hold the only components that are still connected is the heater since heater wires are inside spa pac. If breaker does hold, replug in components (one at a time) and which ever one is failing will trip breaker when you plug it in. At this point second, third, forth pump can be left unplugged. Also if blower or ozonator is causing the problem, they can be left unplugged. Only spas heater and primary pump are necessary to maintain heat and filter cycle.
Q: I have no pressure to one of my seats, what is the problem?A: Try your whirlpool jet or top side diverter valve to direct water flow to that seat(s). Check the
jets for that seat(s). Your jets may be in the closed position. Most of the jets in your spa have an outer ring that turns to the left and right. This will open or close the jets.
Q: My pump isn’t working properly and it doesn’t seem to be pushing any water at all, what can I do?
A: Remove the skirt panel and find your pump. Chances are a gate valve might be closed, which will shut the pump off. Open the valve by lifting the handle. Your pump may need to be primed. Open the union connection slightly to bleed the air out of the line.
Q: I need a service appointment, but I’m only available after 5 PM. Is there any way that you can come later?
A: If your spa and circuit breaker are outdoors, you don’t need to be home. We can easily set up an appointment and you will not need to lose time at work. Our technicians work to be sure that all of their scheduled stops are completed to satisfaction every day, and that includes scheduling time of their stops.
F.A
.Q.s

54
Q: I have a brand new hot tub and it is leaking. I need a service man right away.A: Firstly, there are a few things we will ask you to do. Describe that area of the spa where the
leak seems to be coming from. Remove one of the skirt panels in that area and check your pump(s) union connections. If you have a loose union, simply tighten the connection and the leak should stop. This is a part of your spa start up and is the responsibility of all of our customers to make sure that this is done.
Floor Load DeterminationAll structures must comply with local and national building requirements. The following recom-mended measurements represent maximum spans for decking floor joints (shown in feet and inches), assuming the following:
• Modulus > 0.9 MM psi (represents the majority of wood species• Static Load < 10psf (standard for decking design)• Moisture Load < 19.0% (standard for pressure treated wood)• Deflection = L/360 (standard for building codes)
NOTE These specifications are subject to change without notice and are for refer-ence only.
100 pounds/sq. foot live load
Joint Size (inches)
Joint Spac-ing (inches on center)
Wood GradeSelect Struc-
tural No. 1 No. 2 No. 3
2 x 612 7-11 7-9 7-6 6-316 7-2 7-1 6-6 5-524 6-4 6-1 5-3 4-5
2 x 812 10-5 10-3 9-8 8-016 9-6 9-4 8-4 6-1124 8-4 7-8 6-10 5-8
2 x 10¹² 13-4 12-10 12-6 9-516 12-1 11-1 10-10 8-224 10-4 9-1 8-10 6-8
2 x 1212 16-3 15-4 14-8 11-316 14-9 13-3 12-8 9-924 10-4 10-4 10-4 8-0
F.A
.Q.s
Flo
or
Load D
ete
rmin
ation

55
Electrical Requirements
Model Voltage Breaker Size No. of Wires Wire GaugeDolphin Diamond 240V 60A GFCI 4 Wire 6/4
Dolphin Gold 240V 50A GFCI 4 Wire 6/4
Dolphin Silver 240V 50A GFCI 4 Wire 6/4
Islander Diamond 240V 60A GFCI 4 Wire 6/4
Islander Gold 240V 50A GFCI 4 Wire 6/4
Islander Silver 240V 50A GFCI 4 Wire 6/4
Maui Diamond 240V 60A GFCI 4 Wire 6/4
Maui Gold 240V 50A GFCI 4 Wire 6/4
Maui Silver 240V 50A GFCI 4 Wire 6/4
Spa MeasurementsNOTE These specifications are subject to change without notice and are for refer-
ence only.
Model Length Width HeightAverage
Filled Weight Min. Pad Size
Dolphin Diamond93 in.
(236.2 cm)84.5 in.
(214.6 cm)44.5 in.
(113.0 cm)5,043 lb.
(2,292.3 kg)4 in.
(102 mm)
Dolphin Gold93 in.
(236.2 cm)84.5 in.
(214.6 cm)44.5 in.
(113.0 cm)5,043 lb.
(2,292.3 kg)4 in.
(102 mm)
Dolphin Silver93 in.
(236.2 cm)84.5 in.
(214.6 cm)44.5 in.
(113.0 cm)5,043 lb.
(2,292.3 kg)4 in.
(102 mm)
Islander Diamond78.5 in.
(199.4 cm)78.5 in.
(199.4 cm)40.5 in.
(102.9 cm)3,555 lb.
(1,616 kg)4 in.
(102 mm)
Islander Gold78.5 in.
(199.4 cm)78.5 in.
(199.4 cm)40.5 in.
(102.9 cm)3,555 lb.
(1,616 kg)4 in.
(102 mm)
Islander Silver78.5 in.
(199.4 cm)78.5 in.
(199.4 cm)40.5 in.
(102.9 cm)3,555 lb.
(1,616 kg)4 in.
(102 mm)
Maui Diamond65. in.
(238.8 cm)85 in.
(215.9 cm)34 in.
(86.7 cm)2,651 lb.
(1,205 kg)4 in.
(102 mm)
Maui Gold65. in.
(238.8 cm)85 in.
(215.9 cm)34 in.
(86.7 cm)2,651 lb.
(1,205 kg)4 in.
(102 mm)
Maui Silver65. in.
(238.8 cm)85 in.
(215.9 cm)34 in.
(86.7 cm)2,651 lb.
(1,205 kg)4 in.
(102 mm)
Ele
ctric
al R
eq
uire
ments
Spa
Re
qu
irem
en
ts

56
Water Capacity
Model *Approximate Aver-age Fill
Dolphin Diamond 475 US gal. (1,797.8 Liters)
Dolphin Gold 475 US gal. (1,797.8 Liters)
Dolphin Silver 475 US gal. (1,797.8 Liters)
Islander Diamond 315 US gal. (1,192.3 Liters)
Islander Gold 315 US gal. (1,192.3 Liters)
Islander Silver 315 US gal. (1,192.3 Liters)
Maui Diamond 235 US gal. (889.5 Liters)
Maui Gold 235 US gal. (889.5 Liters)
Maui Silver 235 US gal. (889.5 Liters)
Water Capacity Reference For Chemicals* Use approximate average fill for chemical measurement
Wa
ter
Ca
pa
city

57

Designed to Improve Your Life
6530-918 Rev A
10 Research ParkwaySuite 300Wallingford, CT 06492www.ThermoSpas.com
SAVE THESE INSTRUCTIONS