this document contains the following information: sepsis
TRANSCRIPT
UsersHandouts/Sepsis/Sepsis Process Emergency Dept 1.31.17 Page 1
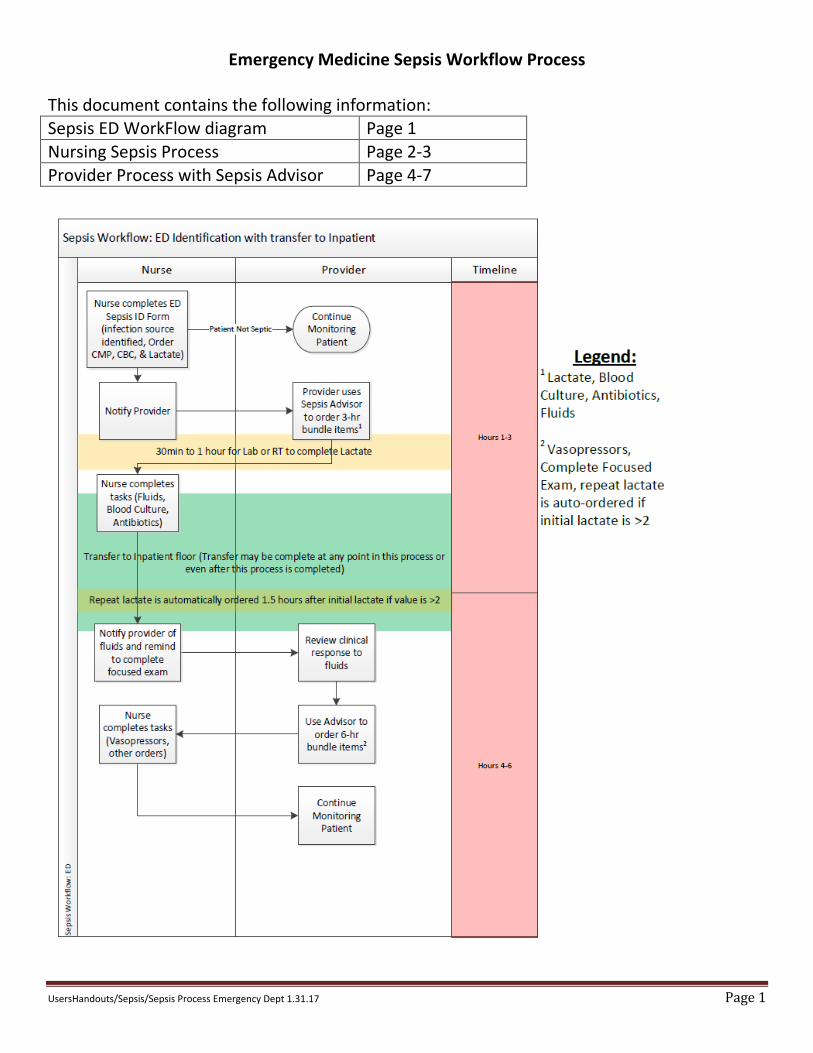
Emergency Medicine Sepsis Workflow Process This document contains the following information: Sepsis ED WorkFlow diagram Page 1
Nursing Sepsis Process Page 2-3
Provider Process with Sepsis Advisor Page 4-7

UsersHandouts/Sepsis/Sepsis Process Emergency Dept 1.31.17 Page 2
Emergency Medicine Sepsis Process NURSING
Charting the ED Initial Assessment Form
Chart the required pages of the ED Initial
Assessment Form
Charting a Yes in the Screen for Sepsis field,
pops open the ED Nursing Sepsis ID
window
Follow the 3 Steps listed in the green area
Click the Return icon after 3 steps are completed to close this window
Order the Initial Labs (1
st Lactate) and other
labs as appropriate

UsersHandouts/Sepsis/Sepsis Process Emergency Dept 1.31.17 Page 3
Sign the form upon completion
UsersHandouts/Sepsis/Sepsis Process Emergency Dept 1.31.17 Page 4
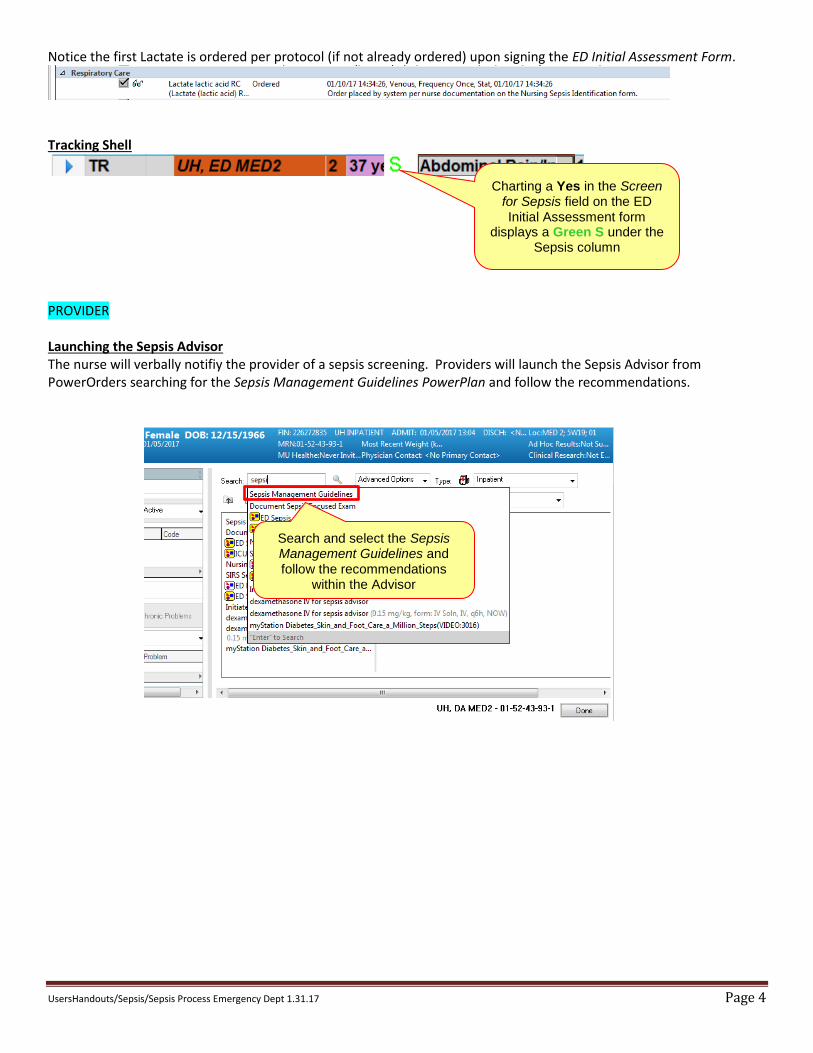
Notice the first Lactate is ordered per protocol (if not already ordered) upon signing the ED Initial Assessment Form.
Tracking Shell
PROVIDER Launching the Sepsis Advisor The nurse will verbally notifiy the provider of a sepsis screening. Providers will launch the Sepsis Advisor from PowerOrders searching for the Sepsis Management Guidelines PowerPlan and follow the recommendations.
Search and select the Sepsis Management Guidelines and follow the recommendations
within the Advisor
Charting a Yes in the Screen for Sepsis field on the ED Initial Assessment form
displays a Green S under the Sepsis column
UsersHandouts/Sepsis/Sepsis Process Emergency Dept 1.31.17 Page 5
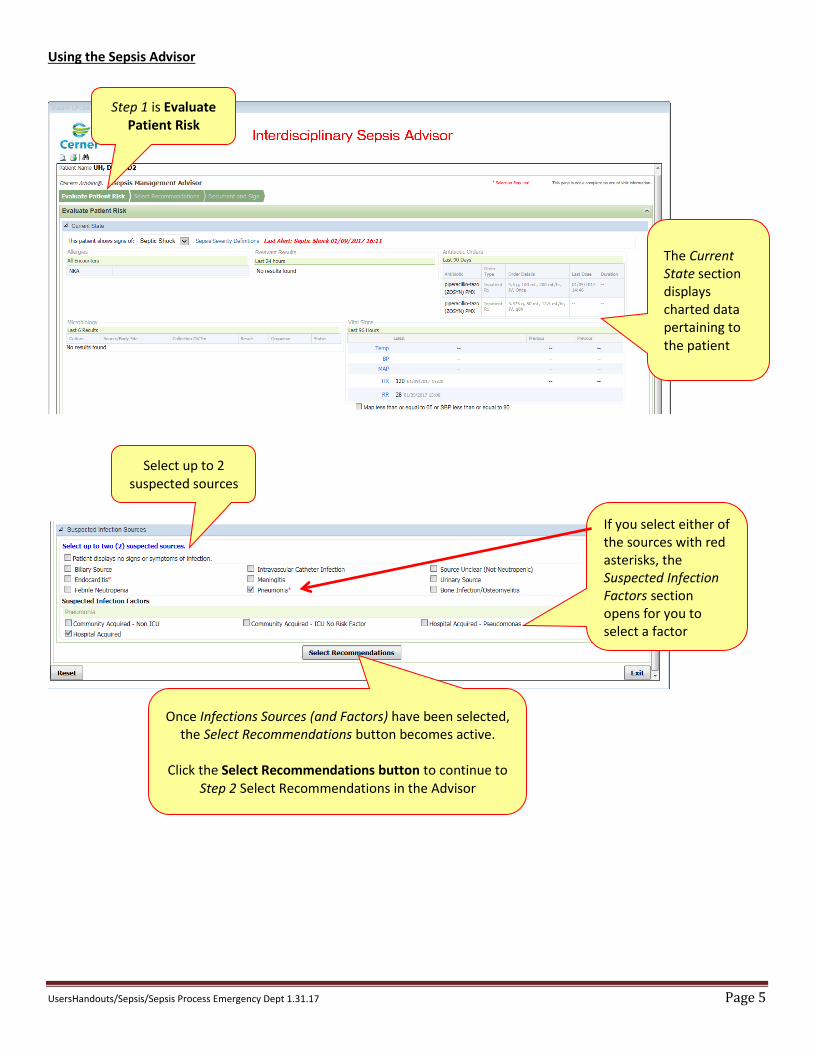
Using the Sepsis Advisor
The Current State section displays charted data pertaining to the patient
If you select either of the sources with red asterisks, the Suspected Infection Factors section opens for you to select a factor
Select up to 2 suspected sources
Once Infections Sources (and Factors) have been selected, the Select Recommendations button becomes active.
Click the Select Recommendations button to continue to
Step 2 Select Recommendations in the Advisor
Step 1 is Evaluate Patient Risk

UsersHandouts/Sepsis/Sepsis Process Emergency Dept 1.31.17 Page 6
Step 2 is Select Recommendations
Each section is separated by a blue
header line
Circles indicate
only 1 item can be
selected
Square boxes
indicate multiple
orders can be selected
Once you have made your selections, click the
Confirm button
UsersHandouts/Sepsis/Sepsis Process Emergency Dept 1.31.17 Page 7
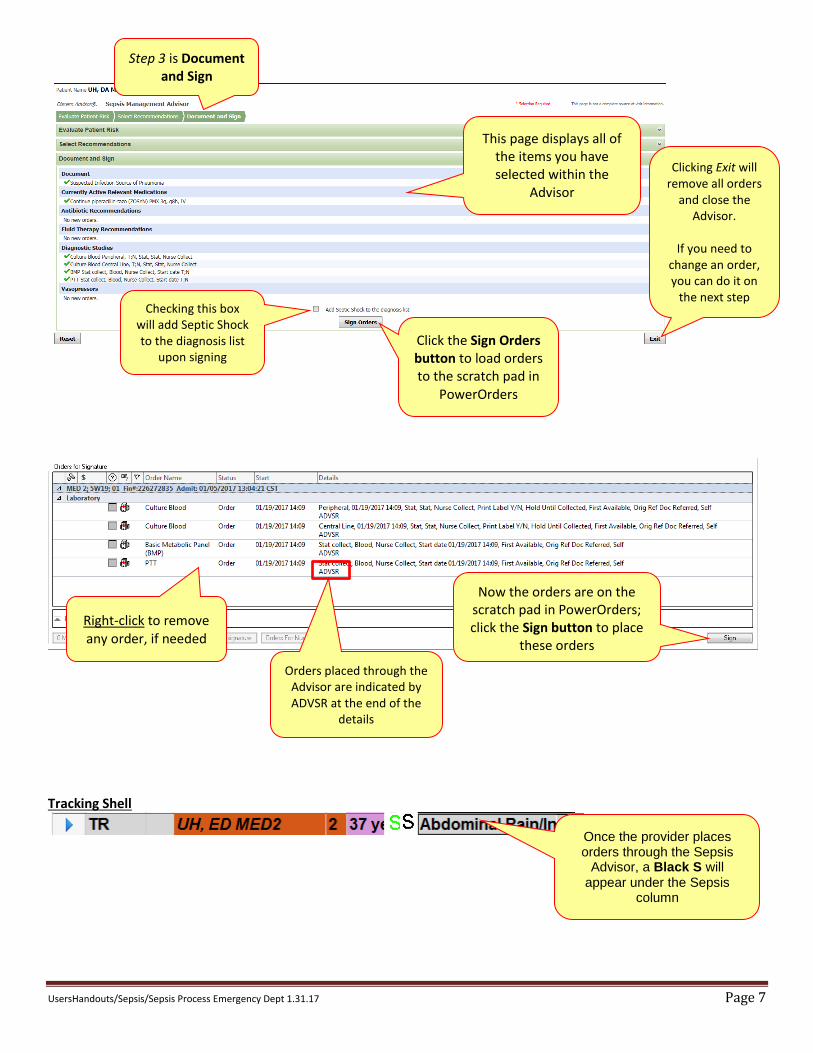
Tracking Shell
Step 3 is Document and Sign
This page displays all of the items you have selected within the
Advisor
Checking this box will add Septic Shock to the diagnosis list
upon signing Click the Sign Orders button to load orders to the scratch pad in
PowerOrders
Clicking Exit will remove all orders
and close the Advisor.
If you need to
change an order, you can do it on
the next step
Now the orders are on the scratch pad in PowerOrders; click the Sign button to place
these orders
Right-click to remove any order, if needed
Orders placed through the Advisor are indicated by ADVSR at the end of the
details
Once the provider places orders through the Sepsis
Advisor, a Black S will appear under the Sepsis
column
UsersHandouts/Sepsis/Sepsis Process Emergency Dept 1.31.17 Page 8
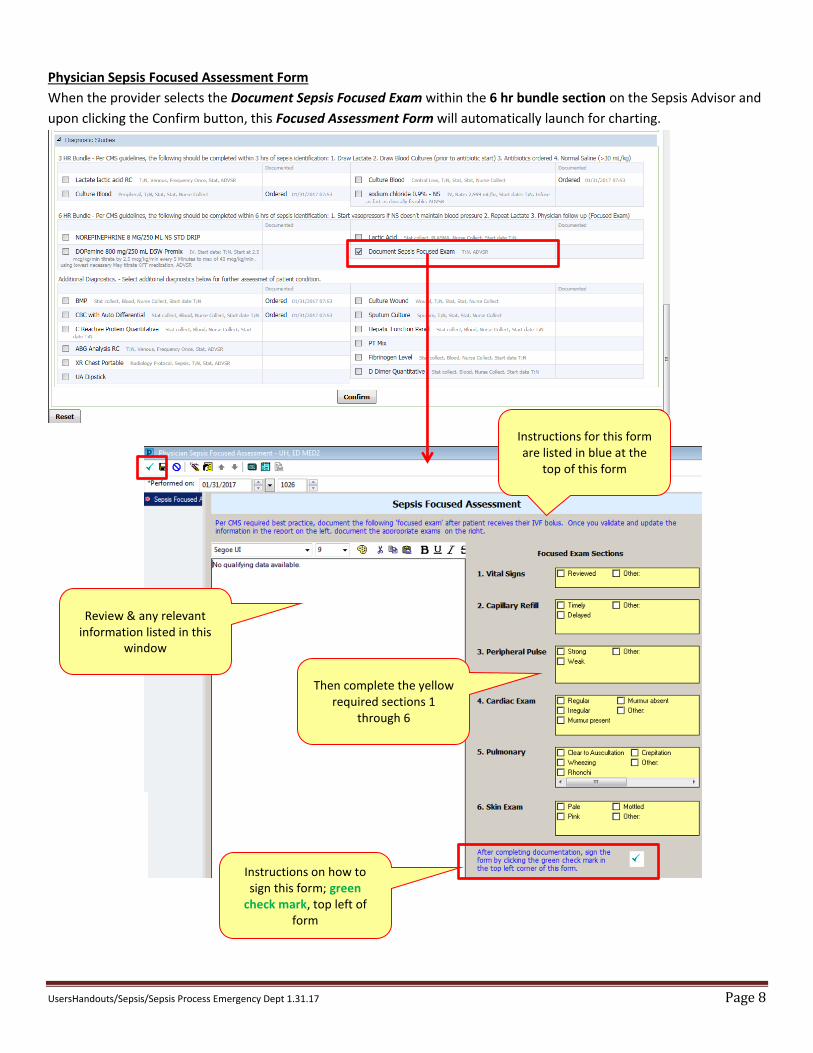
Physician Sepsis Focused Assessment Form
When the provider selects the Document Sepsis Focused Exam within the 6 hr bundle section on the Sepsis Advisor and
upon clicking the Confirm button, this Focused Assessment Form will automatically launch for charting.
Then complete the yellow required sections 1
through 6
Instructions for this form are listed in blue at the
top of this form
Review & any relevant information listed in this
window
Instructions on how to sign this form; green
check mark, top left of form