this user manualmultimedia.3m.com/mws/media/688553o/lavatm-c-o-s-chairside-oral... · user manual...
TRANSCRIPT

User Manual for Lava™ Lab Software 2.6 for Chairside Oral Scanner This User Manual is intended for licensed users of Lava™ Lab Software 2.6 for Chairside Oral Scanner This document contains proprietary and confidential information of 3M ESPE. No part of this document may be duplicated or transmitted in any form without prior written consent of 3M ESPE. Every effort has been made to verify this guide’s completeness and accuracy. 3M ESPE makes no warranty or guarantee as to its accuracy or applicability for use. Information in this guide is subject to change without notice. Brontes Technologies, a 3M Company 10 Maguire Road, Suite 310 Lexington, MA 02421 General: +1 (781) 541-5200 Fax +1 (781) 541-5272 Service and Support: 1-877-SCAN-LAVA (1-877-722-6528) Customer support email: [email protected] 3M, ESPE, and Lava are trademarks of 3M or 3M ESPE AG. © 3M 2010. All rights reserved. Part No. 63-0024 - Manual, Lava Lab Software for C.O.S. 2.6 Last updated: May 12, 2010 44000760973/02
Lava™ Lab Software 2.6 for Chairside Oral Scanner Page - 2
User Manual for Lava™ Lab Software 2.6 for Chairside Oral Scanner
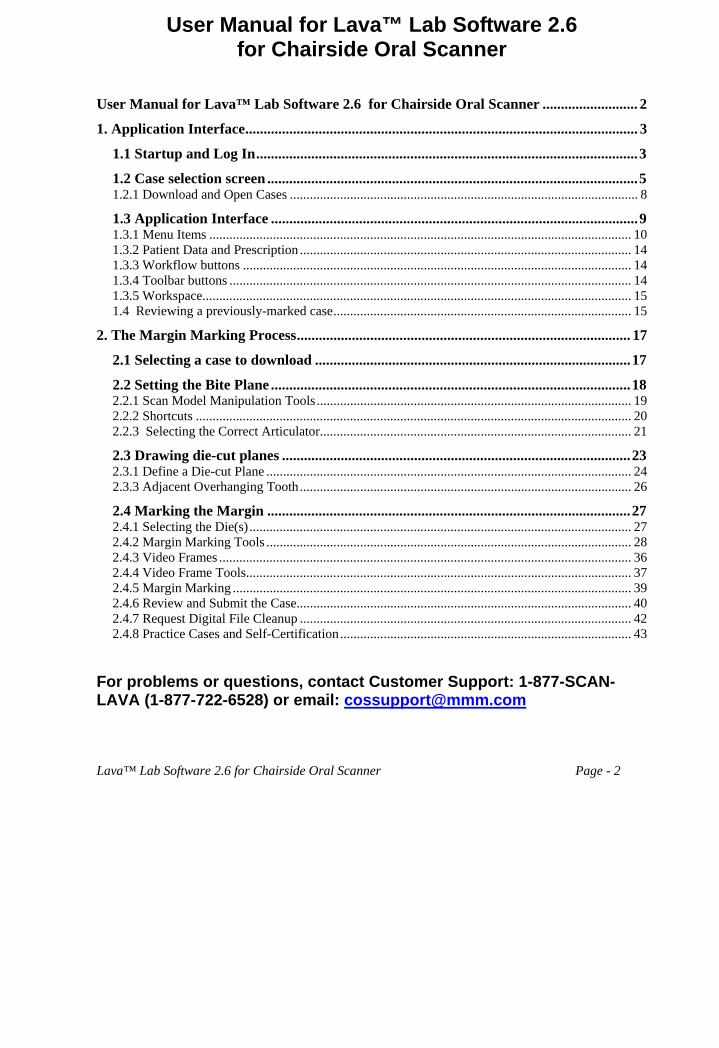
User Manual for Lava™ Lab Software 2.6 for Chairside Oral Scanner .......................... 2 1. Application Interface........................................................................................................... 3
1.1 Startup and Log In........................................................................................................3 1.2 Case selection screen .....................................................................................................5 1.2.1 Download and Open Cases ........................................................................................................ 8 1.3 Application Interface ....................................................................................................9 1.3.1 Menu Items .............................................................................................................................. 10 1.3.2 Patient Data and Prescription ................................................................................................... 14 1.3.3 Workflow buttons .................................................................................................................... 14 1.3.4 Toolbar buttons ........................................................................................................................ 14 1.3.5 Workspace................................................................................................................................ 15 1.4 Reviewing a previously-marked case......................................................................................... 15
2. The Margin Marking Process........................................................................................... 17 2.1 Selecting a case to download ......................................................................................17 2.2 Setting the Bite Plane ..................................................................................................18 2.2.1 Scan Model Manipulation Tools .............................................................................................. 19 2.2.2 Shortcuts .................................................................................................................................. 20 2.2.3 Selecting the Correct Articulator............................................................................................. 21 2.3 Drawing die-cut planes ...............................................................................................23 2.3.1 Define a Die-cut Plane ............................................................................................................. 24 2.3.3 Adjacent Overhanging Tooth................................................................................................... 26 2.4 Marking the Margin ...................................................................................................27 2.4.1 Selecting the Die(s) .................................................................................................................. 27 2.4.2 Margin Marking Tools ............................................................................................................. 28 2.4.3 Video Frames ........................................................................................................................... 36 2.4.4 Video Frame Tools................................................................................................................... 37 2.4.5 Margin Marking ....................................................................................................................... 39 2.4.6 Review and Submit the Case.................................................................................................... 40 2.4.7 Request Digital File Cleanup ................................................................................................... 42 2.4.8 Practice Cases and Self-Certification....................................................................................... 43
For problems or questions, contact Customer Support: 1-877-SCAN-LAVA (1-877-722-6528) or email: [email protected]

Lava™ Lab Software 2.6 for Chairside Oral Scanner Page - 3
1. Application Interface
1.1 Startup and Log In To start the application, double-click the “3M ESPE” icon on your desktop.
Desktop icon
Using the account information provided by 3M ESPE, enter your email address into the “User Name” field and your password into the “Password” field. Click the “Log In” button or press Enter.
Log in window

Lava™ Lab Software 2.6 for Chairside Oral Scanner Page - 4
Proxy Settings If you require a proxy to access the internet, click the “Settings” button on the login screen, then select the “Use HTTP Proxy” check box and enter your server credentials. The “Case Manager Server” must always be listed as https://api.3m.com.
Proxy Settings

Lava™ Lab Software 2.6 for Chairside Oral Scanner Page - 5
1.2 Case selection screen
Case selection screen Case Selection Screen Tabs There are three tabs from which to choose:
• Cases Ready for Marking – List of cases (see example above) ready to margin mark. See Section 2, “Margin Marking.”
• Review Submitted Cases – List of cases already submitted. See Section “1.4, Reviewing a Previously Marked Case.”
• Practice Cases – For practicing marking skills. If you are a new user still training on the system, this tab offers five sample cases on which to practice your Lava Lab Software 2.6 skills and qualify to become a Certified User. Note: This tab is displayed only if there are Practice cases available.

Lava™ Lab Software 2.6 for Chairside Oral Scanner Page - 6
Case Selection Columns
There are seven columns in the Case selection screen:
• Patient Name – Name of the patient. • Doctor – The doctor who took the scan. • Request Date – The date by which the doctor wants the restoration.
Note: Delivery is assumed to be end of day on the date requested. • Case # – The case number assigned by the scanner to the data • Status – One of either: “New,” “In Progress,” or “Completed”
o New: A case awaiting margin marking o In Progress: A case that has been started but not finished marking o Completed: A case that has been marked and uploaded
• Prescription – A link to the Case Manager to view the prescription. • Action – One of: “Download,” “Open,” or “Review”
o Download: Click to download the case from the server.
Note: You do not need to delete your local copy before re-downloading a case.
o Open: Click to open the case after downloading. o Review: Click to open the case for Review.
Refresh List feature - You can refresh the case list by pressing the button at the bottom of the screen or by checking the auto-refresh box to have the system automatically refresh the list at intervals ranging from 15 to 60 minutes. Print button – Click this button at the top right corner of the screen to display a printable version of your case list. The Filter Button: Filtering a List of Cases To make searching for cases easier, you can reduce the number of cases displayed by the Select Case screen. Enter a value in the field at the top, left of the Select Case screen then click the Filter button (or press Return). The system will display in the current tab only those cases that match the filter value you entered.

Lava™ Lab Software 2.6 for Chairside Oral Scanner Page - 7
After filtering a list, the “Filter” button will change to “Clear Filter.” Click this button to remove the filter value and to re-display the unfiltered list of cases. Sorting cases Cases can be sorted by any of the columns, except the Prescription column, (which is a column of links to Case Manager). Just click the column name to sort its contents in descending order. Click it a second time to sort it by ascending order.

Lava™ Lab Software 2.6 for Chairside Oral Scanner Page - 8
1.2.1 Download and Open Cases There are two ways to open a case: download and open an individual case, or open the next available case.
Individual case From the case selection screen, click the button under the “Action” column corresponding to the desired case. The button will change to , which indicates the case is being downloaded. Or double click anywhere on the line for the case to download it. While the case downloads, the button area displays the transfer speed of the download and its progress. To cancel a download, click the “X” on the right of the button. When the download has finished, click the button to open the case. Next available case Click the button at the bottom of the Case selection screen. This will download and open the case with the earliest “Request Date”. Bulk download
To download multiple cases, click the button for each case you want to download. You can mark other cases for download as cases are downloading in the background. Re-download To re-download a case, you do not have to delete the local copy first. Just highlight the case in the list and press the button on the bottom of the form.

Lava™ Lab Software 2.6 for Chairside Oral Scanner Page - 9
1.3 Application Interface
Areas of the interface
The application interface is made up of five general areas:
1. Application menus 2. Patient data and prescription 3. Workflow buttons 4. Toolbar buttons 5. Workspace, with one left and two right views.

Lava™ Lab Software 2.6 for Chairside Oral Scanner Page - 10
1.3.1 Menu Items File: Load and save your case work.
File menu
Select Case: Loads the case selection screen for accessing cases. Save: Save your current case work. Request Assistance: There are two options:
• Request a Digital File Cleanup (“make-it-work”) from Customer
Service to determine whether a margin obstruction can be digitally deleted. (See 2.4.7 “Request Assistance.”) When Customer Service cleans up the digital file and sends it back to the lab, the software will prompt the user to download the latest data before loading.
• Email Trainer.
Exit: Exits the application.

Lava™ Lab Software 2.6 for Chairside Oral Scanner Page - 11
Edit: Undo/redo actions
Edit menu
Undo: “Undoes” the most recent action. Redo: “Redoes” the most recent action. Delete: Deletes an object that can be acted upon (margin curve, cut-planes, die selection, etc.).
Mode: Change the workflow mode
Mode menu
Set Bite Plane: The first workflow step you enter in the application. Die-cut: Define the die-cuts in the scan model. Mark Margins: Define the margin curve and ditch ranges on the die using video frames and the scan model. Review: Examine the completed margin curve for any gross errors and submit the case.

Lava™ Lab Software 2.6 for Chairside Oral Scanner Page - 12
View: Manipulate the model view
View menu
Pan: Moves the model up, down, left or right. Rotate: Rotates the model in 3D space. Zoom: Left click and drag mouse up to zoom out; left click and drag mouse down to zoom in. Zoom Window: Greatly magnifies the region selected by the rectangular box. Left-click and drag your cursor to define the area. The Lava Lab Software 2.6 will magnify that area. Zoom All: Returns the model to its original magnification.
Settings: Global application settings
Settings menu
High Quality Display: Unselecting this will render fewer triangles when manipulating the scan model. It is recommended to keep this setting enabled. Backface Lighting: Toggle the lighting on the underside of the scan model on and off.

Lava™ Lab Software 2.6 for Chairside Oral Scanner Page - 13
Transparent Margin Curve: Toggle viewing the margin curve “through” the die where applicable. If the margin curve is behind the tooth, enabling this feature allows you to see the curve in a light green shade.
Help: Application help and support
Help menu
Contents: Load the help file document. Update: Display the Update dialog box, where you can choose options for when your system checks for updates to the Lava Lab Software 2.6. You can “Check now” for updates by clicking the “Check now” button. Or you can direct your system to check for updates automatically: check the “Enable Auto Update” box and select the day and time of day at which to search.
Update dialog box from Help menu
About: Display copyright and version information about this software.

Lava™ Lab Software 2.6 for Chairside Oral Scanner Page - 14
1.3.2 Patient Data and Prescription This space displays information regarding the case, including a link to view the complete prescription online.
Patient data and prescription link
Patient Name: The name of the current patient. Doctor: The doctor who created the scan. Case Number: The 3M ESPE-specific case number for the scan model. View Prescription: A link that will direct you to the Case Manager to view the complete prescription for the case (login required). Necessary to see which teeth should be marked for the case.
1.3.3 Workflow buttons These four workflow buttons are used to move from one step to the next when marking a case. After a step is completed, the button changes from gray (e.g., the “Review” button below) to a selected state with a green arrow (buttons 1, 2, and 3). That indicates it can be clicked on to move to the next step.
Workflow buttons
1.3.4 Toolbar buttons This space is for the tools used to work on the case. The current workflow step determines which buttons are available.

Lava™ Lab Software 2.6 for Chairside Oral Scanner Page - 15
1.3.5 Workspace The workspace is where the work on the case happens. Each workflow step is completed here. Again, the current workflow step determines which items are displayed.
1.4 Reviewing a previously-marked case Cases that have already been marked can be retrieved from the server and reviewed after they are submitted. From the Select Case screen, click the “Review Submitted Cases” tab to display a list of cases margin marked by your lab within the default date range, which is 45 days. You can change the date range within which to look by changing the dates in the Date Range’s “From” and “To” fields on the left side of the screen.
Submitted cases for a given date range You can further narrow your search by entering a value in one or more of the fields displayed above the Date Range fields. The more search fields you use, the narrower your search. These fields are:
• Doctor name • Patient name • Case number

Lava™ Lab Software 2.6 for Chairside Oral Scanner Page - 16
Click the button for the case you want to review. When it has finished downloading, the button will change to . Click that button to bring up the case. See the example below.
Screen for review of a submitted case

Lava™ Lab Software 2.6 for Chairside Oral Scanner Page - 17
2. The Margin Marking Process
2.1 Selecting a case to download To begin margin marking, select a case to download from the case selection screen (see section 1.2 “Case Selection Screen”) and open the case. A window like the one below displays.
First views of the scan model

Lava™ Lab Software 2.6 for Chairside Oral Scanner Page - 18
2.2 Setting the Bite Plane
Articulator selected In the “Setting the Bite Plane” step, you must perform two tasks:
1. First, select the articulator type (quad or full) for the restoration by clicking on it. That defines the type of articulator in which the model kit will be created.
2. Define the extrusion angle and bite plane of the scan model. This is the angle, relative to the articulator, at which the scan model will be placed.
To manipulate the scan model into the correct view, use the tools explained below. Note: The hinge remains on the left side of the screen as you manipulate the model.

Lava™ Lab Software 2.6 for Chairside Oral Scanner Page - 19
2.2.1 Scan Model Manipulation Tools
Scan model manipulation tools
Pan: Moves the model up, down, left or right.
Free Rotate: Rotates the model in 3D space.
You can move the model in any of the three views in this step, but you can only rotate the model from the left view.
Zoom: Left click and drag mouse up to zoom out; left click and drag mouse down to zoom in.
Zoom area: Greatly magnifies the region selected by the rectangular box.
Reset Zoom: Returns the model and articulator to fit in current view.
Display upper arch
Display lower arch

Lava™ Lab Software 2.6 for Chairside Oral Scanner Page - 20
2.2.2 Shortcuts Here is a complete list of the model positioning shortcuts. Note that some shortcuts can be activated using more than one key combination.
• Middle mouse button: Freely rotate the model in any direction. • <Ctrl>+middle mouse button: Pan the model • Scroll wheel: Zoom the model • Spacebar: Press the spacebar to enter and exit View Manipulation mode.
View Manipulation mode provides tools that will be familiar to technicians with experience using other Lava™ software products:
• Right mouse button: Freely rotate the model • Left mouse button: Pan the model • Middle mouse button: Zoom the model
And you can always click on the respective toolbar button to perform these view manipulations. Note: You can move the model in any of the three views in this step, but you can only rotate the model from the left view.

Lava™ Lab Software 2.6 for Chairside Oral Scanner Page - 21
2.2.3 Selecting the Correct Articulator Quad articulators are typically used when the model consists of molar through cuspid teeth, effectively posterior cases. A full articulator is used either when you have an anterior preparation, or when the case contains anterior teeth. Select which articulator type to assign to the case by left-clicking on an articulator icon.
Articulator selection icons After you select and position the articulator and before you move on to the die-cut step, make sure the model is oriented correctly relative to the “HINGE” indicator. That means the distal sides of the teeth should be facing the hinge. It does not matter whether the buccal or lingual sides of the teeth face you.
Quad articulator
Full articulator

Lava™ Lab Software 2.6 for Chairside Oral Scanner Page - 22
Position the Hinge, Set the Bite Plane When the articulator has been selected and the extrusion angle defined, click the “Die-cut” work-flow button to proceed to the next step.

Lava™ Lab Software 2.6 for Chairside Oral Scanner Page - 23
2.3 Drawing die-cut planes The Die-cut screen displays a tooth chart. The tooth selected by the doctor on the Lava C.O.S. is highlighted in green. (If the patient is missing the tooth, the chart displays that tooth in dark gray.) The purpose of this step is to isolate from the rest of the model the tooth or teeth whose margins are to be marked. Unlike band saw cuts made in traditional stone models, these digital die-cuts do not remove any material from the model.
Die-cut screen
Tooth selected by doctor for restoration
Tooth #3

Lava™ Lab Software 2.6 for Chairside Oral Scanner Page - 24
2.3.1 Define a Die-cut Plane
Click on the 2D model in the upper box of the arch you want to mark and move the cursor from the lingual to the buccal surface (or vice-versa) and click again. Another way to do this is to click and drag the cursor.
Drawing lines creates the planes Please note that you cannot manipulate or reposition the model in the upper box. However, you can manipulate the scan model in the lower box to see exactly where the planes intersect the scan model. Modify/delete a die-cut plane To modify or delete an existing die-cut plane, hover the cursor over its corresponding line until the line turns yellow. Click to select it and the line will turn purple. The line can now be click-and-dragged left, right, up, or down. A selected line can also be “nudged” via the keyboard arrow keys. To change the angle of the plane, hover your cursor over an end point until its display turns bold. Then click and drag the end point to adjust the plane’s angle.
End point

Lava™ Lab Software 2.6 for Chairside Oral Scanner Page - 25
You can also drag the entire plane by clicking and dragging on the line between either endpoint. To delete a plane, select its line, then choose “Edit > Delete” from the menu or press the Delete key on your keyboard. Single unit and multiple, adjacent operative teeth Shown below are examples of creating planes for individual teeth and adjacent teeth. If there are two adjacent operative teeth, three planes are needed. If there are three operative teeth, as shown below, four planes are needed. For bridge cases, cut planes should be defined around each operative tooth.
A single-unit with die-cuts defined
Adjacent teeth with die-cuts
After creating cut-plane(s) for the case, click the “Mark Margins” work-flow button.

Lava™ Lab Software 2.6 for Chairside Oral Scanner Page - 26
2.3.3 Adjacent Overhanging Tooth In some circumstances an adjacent tooth may overhang the margin. When defining a cut-plane with an adjacent tooth that overhangs the margin of the operative tooth, make sure that the overhanging tooth protrudes the cut plane as shown in the example below. Notice that the adjacent tooth forms an “island,” as indicated by the arrow, and that the cut-plane enters, and then exits the adjacent overhang. This “island” portion of the adjacent tooth overhanging the margin will be shown in the margin marking step but is digitally-ignored when the case is submitted for production.
Acceptable cut plane enters and exits protruding adjacent tooth

Lava™ Lab Software 2.6 for Chairside Oral Scanner Page - 27
2.4 Marking the Margin In this step, the margin curve is defined for the operative tooth or teeth.
2.4.1 Selecting the Die(s) If the case has only one operative tooth, that die will be selected for you automatically when you enter the margin marking step. If there are multiple teeth, you must first select the die you want to mark in the top-left “Die-cut Selection” frame by clicking between the red die-cut lines. This will prepare the die and place it in the ”Scan Model” frame, load the relevant video frames, and automatically select the “Draw Margin Curve” tool to prepare you for marking.
Margin marking screen for single die

Lava™ Lab Software 2.6 for Chairside Oral Scanner Page - 28
2.4.2 Margin Marking Tools
Margin marking tools
Draw Margin Curve
When you enter the margin marking step and select a die, this tool is selected automatically. To begin marking the margin, left-click with your mouse in the “Scan Model” view or the video frame window and drag and click to add points to define the margin curve along the scan model.
Draw Curve with Margin Assist
This tool helps you draw a margin curve. Select the Draw Curve with Margin Assist button then create the first three points on the margin yourself. (This tool also works on both the scan model and the video images.) Then drag the cursor around the prep just inside of the margin. The application will automatically place points where it “thinks” they should go, that is, the sharpest locations on the margin curve. You will see the tool creating different colored points as it goes. The colors designate the probable accuracy of the point’s position. According to the application’s calculations, red points have found a suitably sharp feature to snap to, while black points have not. Note that just because a point is red does not mean that it is exactly on the margin -- all points should be reviewed prior to submitting the case. To suspend the creation of points while using Draw Curve with Margin Assist, hold down the Ctrl key. To restart the process, place the cursor over the model and release the Ctrl key. To “reabsorb” the points one at a time, backtrack the cursor along the path of the dots.

Lava™ Lab Software 2.6 for Chairside Oral Scanner Page - 29
You can also select Undo from the Edit menu to remove the points one at a time, although you may find that a quicker alternative is to press Ctrl+z, the keyboard shortcut for undo. You can also choose to use this tool if you have already drawn part of the margin curve with the standard Draw Margin tool: Select the Draw Curve with Margin Assist tool, then press and hold the Ctrl key. Return to the last point you created on the curve, release the Ctrl key, then drag the cursor along the prep.
Edit Margin Curve When you finish marking the margin by completing a closed loop, the application will switch you into the edit margin curve mode. In this mode you can add, remove, or move points. When you place your cursor over a point, it turns blue, which means it is editable. Move a point: Place your cursor over the red point and it will turn blue. Then click and drag the point to move it.
Add a point: Hold Ctrl + click on the margin line
Remove a point: Place your cursor over the point, then hold Ctrl + click on the point. Delete a margin curve: Press the Delete key. You will be asked to confirm the deletion.

Lava™ Lab Software 2.6 for Chairside Oral Scanner Page - 30
Specifying Margin Ditch Range(s) Depending on the type of restoration, a lab may want to ditch certain areas of the SLA die while leaving other areas un-ditched. After you’ve marked the margin, you can specify which regions of the margin are to be ditched or unditched.
Specify Margin Ditch Range(s) To define regions of the margin:
1. Select the Ditching Range tool, which becomes active after completing a margin loop.
2. Click a spot on the model where you want the ditched region to start. (The spot does not have to be a margin point.)
3. Move the cursor until you reach the end of the region to be ditched and click that spot.

Lava™ Lab Software 2.6 for Chairside Oral Scanner Page - 31
Regions marked by a green line will be ditched. Regions marked in purple will not be ditched.
IMPORTANT: When selecting a region, you must move the cursor in the same direction you did when you marked the margin. So if you marked the margin clockwise, you need to mark the ditching region clockwise as well.
For no ditching, click the same point on the margin twice. Clear Margin Ditch Ranges
This button clears the margin ditch range.
Hide/show margin curve Click on this button to hide or display the margin curve on the die. The icon displays the margin curve as gray when hiding a margin curve and green when displaying it.
Margin Curve is hidden.
Margin Curve is displayed.
Show/Hide adjacent teeth This icon will show/hide adjacent teeth in the “Margin Definition” window. It is useful for seeing how the margins of adjacent teeth meet the preparation area.
Email Doctor If you need to contact the doctor with a question or comment, you can send him or her an email along with a screen shot of the 3D video frame from the case. Click the Email Doctor icon. The application displays a screenshot and a form to enter an email.

Lava™ Lab Software 2.6 for Chairside Oral Scanner Page - 32
Email Screenshot screen
Email annotation tools
Save the email.
Add a box to highlight an area of the screen.
Add an ellipse to highlight an area of the screen.
Add a text box.
Add a text box with an arrow.
Clear all objects.
Make objects editable.
Attach Image button
Toolbar

Lava™ Lab Software 2.6 for Chairside Oral Scanner Page - 33
Doctor’s Annotations If a case has a margin that the doctor thinks may be ambiguous, he has the option of suggesting where the margin points can be placed. Those points appear on the Lava Lab Software 2.6 screen to aid the lab during the margin marking step. A new icon also appears in the toolbar, alerting the lab to the existence of annotations. The doctor’s annotations are small yellow dots on both the scan model and video frames. Video frames with annotations are flagged with yellow notepad icons. Click on the video frame’s thumbnail to display the frame with the yellow annotation dots. Note: The doctor’s annotations are meant as a guide and therefore may or may not be accurate. Ultimately the lab must use its best judgment when margin marking.
Doctor’s Annotations Click the Doctor Annotations icon to toggle the yellow annotation marks on the model and video frame on and off.
Frame has annotation
yellow annotation marks
yellow annotation marks

Lava™ Lab Software 2.6 for Chairside Oral Scanner Page - 34
To annotate a screenshot and email it to a doctor: 1. Depending on the nature of your highlight or note, select a box, ellipse, text box,
or text box with arrow from the toolbar to mark an area of the screen. You can annotate the model or a video frame.
2. Click on the model or a video frame and drag to draw the annotation tool. If you’re using a text tool, add the text after drawing the box.
3. Click the “Attach Image” button to include the image with an email. If you need to add more details to different screenshots, close out of the Email Screenshot screen after you’ve added your first set of notes/objects. Then add more notes/objects to the new screen and select the Attach Image button. The Email Attachments box lists all the screenshots you’re including in your email. 4. When done, click the “Send Email” button to open up your email program, then
send the email. Notes:
• For the text box with arrow tool, after entering the text, drag the arrow to point it where needed.
• After creating an object (box, ellipse, text box, or text box with arrow), select the Edit button to edit the attributes (color, thickness, etc.) of the object.
• You need to know the doctor’s email address. The Lava Lab Software 2.6 only has the doctor’s email if that address is on his/her scanner. In such cases, the email address will appear in the Send To field.
• You can email up to five images per email to a doctor.

Lava™ Lab Software 2.6 for Chairside Oral Scanner Page - 35
Margin Review The Margin Review tool is a quick and easy way to move through margin points one at a time to assess them. When a loop is closed to complete a curve, the application automatically switches into a mode that enables you to edit the margin curve as necessary. There are three ways to move from one point to another:
• Click on the right- or left-pointing arrow on the Margin Review tool. • Press the right and left arrows on the keyboard. • Press the a and d keyboard keys to move to the previous or next placed
point. (Left-handers may find this method to be the easiest.) When a point is selected, you can move it up and down along the cutaway view using the keyboard’s up and down arrow keys. (Lefthanders can use the w and s keys.) For smaller, finer movements, hold down the Shift key while you move the point. Note: If the point you’re trying to review is off the model—and therefore not editable—you may need to first select the point with the Edit Margin Curve tool then drag the point onto the model.

Lava™ Lab Software 2.6 for Chairside Oral Scanner Page - 36
2.4.3 Video Frames The 3D video frames on the right of the margin marking screen are a subset of frames taken from the Lava C.O.S. device after the scan is complete. These video frames provide a look into the mouth of the patient exactly as the doctor saw on the scanner when the scan was performed.
Video frame tools and video stills
Video frame tools
Video stills

Lava™ Lab Software 2.6 for Chairside Oral Scanner Page - 37
2.4.4 Video Frame Tools
Video frame tools
Video frame-to-model synchronization
When this tool is active, you can select video stills (on the right side of the screen) to display the desired orientation of the model.
Scan model-to-video frame synchronization When this tool is active, the application will find the video still that best matches the current orientation of the model. If no close match is found, try different orientations of the model.
Toggle stereographic/3D mode Stereographic mode shows the video frame slide in 3D. You need to use stereographic glasses to perceive this effect.
Rotate video still Click on these buttons to rotate the current video still frame 90 degrees clockwise and counterclockwise.
Brightness slider
You can use this tool to increase or decrease the brightness of the video slide. This can help bring out additional features in the scan. You can click on the left or right icons to increase/decrease the brightness in single steps, or click and drag the slide-bar to adjust in multiple steps.

Lava™ Lab Software 2.6 for Chairside Oral Scanner Page - 38
Contrast slider
Use this tool to increase or decrease the contrast of the video slide, again to help bring out additional features in the scan. You can click on the left or right icons to increase/decrease the contrast in single steps, or click and drag the slide-bar to adjust in multiple steps.
Video Frame slides These images are stills, taken from the scanner device, of the patient’s mouth. Click on an image thumbnail to view a larger version.
Top Five Frames of the Prep
Five clearest viewing angles The Lava Lab Software 2.6 can sort the video images to display the five best angles for any point on the margin of the selected prep. Just place your cursor over the scan

Lava™ Lab Software 2.6 for Chairside Oral Scanner Page - 39
model and right-click. The top five clearest viewing angles will be displayed at the top of the stack of thumbnail video images. To return to the full list of images for the selected die cut, select “Selected Prep” from the dropdown box above the thumbnails. You can also display all available images from the scan by selecting “Show All.”
2.4.5 Margin Marking Use the “Draw Margin Curve” tool described in section 2.4.2 to place points along the margin of the scan model. Margin points can be placed on the scan model in the “Margin Definition” frame or directly in the 3D video frame. Make sure to zoom in closely and check for anomalies in the margin curve. Use the “Cut-away View” frame to adjust points along the cross-sectional view of the tooth. This frame is extremely helpful, in addition to the video frames, when marking the margin. The cut-away frame is also helpful if there are not adequate video frames to mark the margin. To complete the margin curve, place the last margin point on top of the first point, and the margin curve will turn from blue to green. After the margin curve is complete the “Edit margin curve” tool will become highlighted so that you can make corrections to the curve as necessary. The use of this tool is discussed in section 2.4.2. When you are satisfied with the margin, click the “Review” button at the top to review and submit the case. Cross-Section Projection During the margin marking step, the application displays the Scan Model view, which shows a cross-section of the cutaway view projected onto the model. This feature gives you more information about where you’re going, thereby making movement and placement easier and more accurate.

Lava™ Lab Software 2.6 for Chairside Oral Scanner Page - 40
Cross-section If you find any part of the margin curve to be in question, click the “Mark Margin” button to go back and make the necessary corrections. No changes to the margin are allowed in the Review step.
2.4.6 Review and Submit the Case In the review step you can manipulate the model with the “Scan Model Manipulating Tools,” discussed in section 2.2.1, to check the margin curve for accuracy and any gross errors. Lab notes When a case has been margin marked, the lab can add notes which will be submitted with the case and will appear on the prescription when the model arrives. Notes are added to the case in the Review step before the case is submitted. Click on the Lab Notes text box and type to enter your notes.
Projection

Lava™ Lab Software 2.6 for Chairside Oral Scanner Page - 41
Review Model Screen
Display/hide Arches
During the Review step you can also turn the display of the maxilla and the
mandible on or off. Submit Case When you are satisfied with the margin curve, click the “Submit Case” button at the bottom of the screen to send the case data for model production. After the case is uploaded successfully, the case selection list will load so a new case can be marked. NOTE: This step cannot be undone. Make absolutely certain that you are committed to the case before completing this step.
Lab notes text box
Display/hide arches
Submit Case button

Lava™ Lab Software 2.6 for Chairside Oral Scanner Page - 42
2.4.7 Request Digital File Cleanup If a lab cannot mark a margin because of an obstruction, debris covering the margin, etc., and the situation cannot be remedied after talking with or emailing the doctor, the lab can request a digital file cleanup. The request removes the case from the case list and forwards it to 3M Lava C.O.S. Support. If the case can be recovered, Lava C.O.S. Support will return it to the case list; if not, the support team will notify the lab. To request a case analysis:
1. From the File menu, select “Request Assistance” then “Request Digital File Cleanup” from the submenu. The following screen is displayed:
Request Case Analysis form
2. In the text box describe what specifically 3M Lava C.O.S. Support should look for when examining the scan.
3. Click the Submit button. Note: The lab can also use the screenshot email feature (available during Margin Marking) to capture the areas in question and email the screenshot to [email protected].

Lava™ Lab Software 2.6 for Chairside Oral Scanner Page - 43
2.4.8 Practice Cases and Self-Certification Self-certification is a process by which lab technicians new to Lava Lab Software 2.6 can practice their skills and become certified in using the software. Essentially it involves proving one’s knowledge of the software by successfully margin-marking cases provided by 3M ESPE. Before self-certification, the technician will practice margin-marking on ten practice cases. These cases provide helpful feedback if the technician’s margin-marking steps are incorrect and must be completed before starting the self-certification process. To access the practice cases, click on the “Practice Cases” tab on the Case Select screen.
Practice Cases tab Technicians are tested on:
• ditch tool • die cut planes • margin curve • bite plane • articulator selection • make it work cases

Lava™ Lab Software 2.6 for Chairside Oral Scanner Page - 44
Sample Practice Case review feedback The practice cases help the learning process by pointing out errors as you work through the case. For example, while creating die cut planes for a model, correct planes are colored green while incorrect planes are highlighted red. If there are a few repeated mistakes, the system provides the correct solution. The technician must complete these ten practice cases before he or she can proceed to the ten additional cases that comprise the certification process. The technician must

Lava™ Lab Software 2.6 for Chairside Oral Scanner Page - 45
correctly margin-mark those ten cases to be certified. Unlike the practice cases, the certification cases do not offer helpful feedback. Technicians who complete the cases correctly will be certified immediately. Those who do not correctly margin-mark the cases will receive feedback from a 3M ESPE trainer. For problems or questions, contact Customer Support: 1-877-SCAN-LAVA (1-877-722-6528) or email: [email protected]