title using basic controls of music playervijaya/ssrvm/dokuwiki/media/...title using basic controls...
TRANSCRIPT

Title Using Basic Controls Of Music PlayerDate May, 2007 Ref No. 2.6
Contributors Semeena Kader Std 2
Reviewers Farida
Brief DescriptionExplanation on the basic controls of a music player.Goal To teach the students basic controls of a music player.Prerequisites Familiarity with computer, should know how to open and play a music file.Duration 1 session
Detailed Description:
When we open the music player, we can see various buttons .
The other basic control buttons in the music players are:
1

To Play a music file
To pause the playing file
To Fast Forward
To Rewind
To stop playing the music file
Lesson Plan
1. Refresh previous lessons about music player, by asking questions such as “What is music player?”; “What is music file” etc.
2. Ask students to open and play a music file. (If they find any difficulty, teacher can do that)
3. Show them various control buttons available on the player.4. Show PAUSE button and demonstrate its working by clicking on it. Point out that pause
symbol changes to play symbol when clicked on it. Again click on play button and show its symbol changed to pause again.
5. Similarly show other controls play previous and next music file and explain their purpose.
6. Show volume control and increase/decrease volume while playing the music.7. Finally play music and ask children to use all the controls by themselves.
2

Worksheets (Ref. No 2.6)
Match the following
3

Title Using the basic features of Paint software, such as draw objects using the drawing toolbar and colours
Date May, 2007 Ref No 2.7Contributor Usha Viswanathan Std: 2
Reviewer Farida
Brief Description
Introduction to functionalities of a Paint application.
Goal The students will learn how to use the various features of Paint application.Prerequisites The child should have fairly good mouse control.Duration 1 session
Detailed Description
The Paint (in windows)/ KolourPaint (in Fedora)/ TuxPaint ( in Edubuntu) is an easytouse application, which is used to draw and paint pictures. You can even insert text matter in these pictures. The opened application gives a Canvas area to draw the pictures. See figure (a).
4
figure a

How to edit an open Paint file?
Keep the TuxPaint icon on the desktop, double click the icon to open the application.
The 'Open' option on the side bar allows the user to open existing files. Select the file to be opened.
Now let us modify this file by drawing more figures and painting it. First, let us see how to draw different shapes? For this go to the side bar, select the shapes option by clicking it. Now
5
figure b
figure c

select the desired shape from the right hand side of the screen. Once we select the shape we can even rotate them to the desired angle.
Let us draw more figures on the open file and paint them. At the bottom side of the window, a colour palette is provided from where we can pick different colours. Click on the desired colour,
Now to select the “Colour Fill” tool : Click on the “Magic” button on the left side bar, on the right side we get the 'Color Fill' option along with many other effects which can be applied to the figure. Now go to the canvas area and click on the shapes to fill. Figure d shows the new modified file.
The modified file can be saved using the 'Save' button on the left side bar. Select it to save the file. A dialog box pops up asking whether to overwrite the previous file. See figure e.
( Note: Figure e also shows the toolbar (on the right hand side) when the 'Magic' option from the left side toolbar is selected.)
6
figure d

If 'Yes' option is selected the previous file is overwritten by the modified file; in case of 'No' a new file will be saved.
LESSON PLAN
1. Start the class asking the kids why pictures or drawings are needed. Tell them how pictures grab attention and result in clear understanding.
2. Tell the children that till now the pictures they have drawn were not colourful. Ask them if they want to learn how to make them colourful?
3. Open the TuxPaint application.4. Show them the toolbar on the left side of the canvas area and the colour palette.5. Now show them that to draw simple figures like circles, rectangles, etc. we have tools.6. Draw some circles and rectangles. Now select the colour from the colour palette and
use “Colour Fill” tool from the drawing toolbar to fill these shapes.7. Show them the use of pencil and eraser. Now let the kids practice.
7
figure e

Worksheets (Ref. No. 2.7)Use Paint Application to do the following exercises.
1.
2.
8

3.
4.
5. Draw a flower and colour it.
9

Title Insert and use of a CD.Date May, 2007 Ref No 2.9Contributor Dhanya Std 2
Reviewers Farida
Brief Description
This topic describes how what a CD is and how to use it.
Goal To help the child understand how to use a CD.Prerequisites Familiarity with computerDuration One Session
Detailed Description
CD stands for Compact Disk and is a single layer, optical storage media that can be used for music or other data storage. A thin platter that has computer data or music recorded on it in optical form.
In the CPU there is a CD drive. If you press the button, it opens and you have to insert the CD inside it.
10

Lesson Plan1. Students can be acquainted with a CD as follows:
Do you know what a CD is? C stand for compact and D stands for disk. Show a CD in the class and ask doesn't it look like a small throw disk you catch and throw in your playtime? That is why it is called a disk and it is so small but can store a lot of information such as more than 100 songs or a 2 hour movie or large documents such as contents of a book. It is round and flat and has a hole in between just like a dough nut!
2. If most of the children in your class are already familiar with the computer, you may want to introduce the computer parts with a guessing game. For example “This goes in and out of a computer carrying information (disk). This can hold a great deal of information, including video (CD ROM).”
11
CD drive
Power button

Title Concept of Input/Output DevicesDate May, 2007 Ref No. 2.10Contributors Neela, Farida Std 2
Reviewers Farida
Brief Description
Introduction to the concept of input/output devices on a desktop personal computer (PC)
Goal To see why we need input/output devices and identify these on a desktop computer. A step further is to teach the concept of input and output device to the student. By the end of lesson, the student will know what input/output devices mean in general, not just in regard to a computer system.
Prerequisites Students should have seen a computer and used them to play games, videos and music. They may also have used the computer to type text into files or paint.
Duration One sessionReference http://www.kidsdomain.com/brain/computer/worksheet/ws_c1_inputoutput.p
df
Detailed DescriptionWhat is output and what it input?Input means ‘taking in’. Output means ‘giving out’.
Figure a
Just as you see in figure a that when you water the plant (input) and it results in growth of the plant (output), even in computer we have input and output devices. When we use it in the
12
context of a computer system, these words are defined from the computer’s perspective. For example, it takes in what we type on the keyboard, we move the mouse and the computer shows us the position with the cursor. These are examples of input devices. The computer shows us a movie on the monitor; it plays music through the speakers. These are examples of output devices.
Input DevicesInput devices allow us to send information to the CPU and tell the computer what to do. There are several ways to get new information or input into a computer. The two most common ways are the keyboard and the mouse.
Keyboard
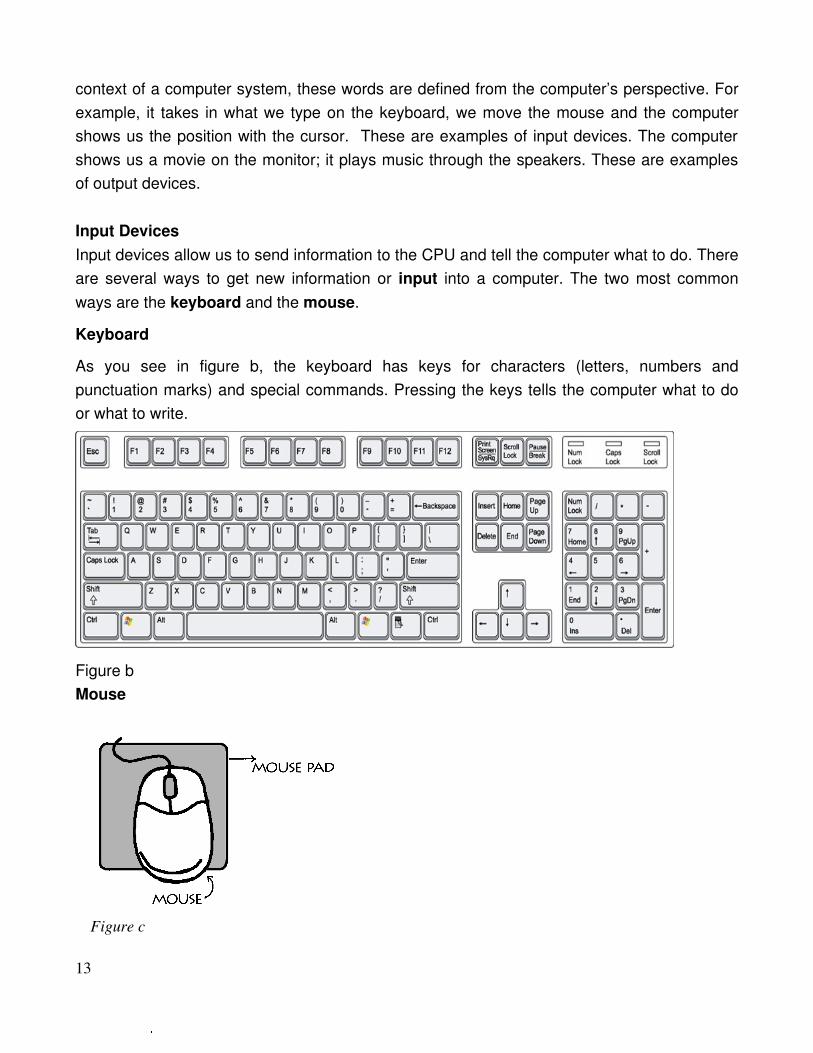
As you see in figure b, the keyboard has keys for characters (letters, numbers and punctuation marks) and special commands. Pressing the keys tells the computer what to do or what to write.
Figure bMouse
13
Figure c

Figure c shows the mouse. As you see, it has a special ball that allows you to roll it around on a pad or desk and move the cursor around on screen. Just as you read moving a finger on the book, the computer shows the cursor. By clicking on the buttons on the mouse, you give the computer directions on what to do.
Output devices
Output devices receive information from the CPU and translate it into sounds or images we can understand. Output devices display information in a way that you can you can understand.
Monitor
The most common output device is a monitor. As you see in figure d, It looks a lot a like a TV and has the computer screen. The monitor allows you to 'see' what you and the computer are doing together.
Figure d
Some other output devices are speakers and printer.
Speakers are output devices that allow you to hear sound from your computer. Computer speakers are just like stereo speakers. There are usually two of them and they come in various sizes. Figure e, illustrates this.
14

Figure e
Printer
A printer is another common part of a computer system. It takes what you see on the computer screen and prints it on paper.
Figure f
We can compare these to the input and output devices of our body:
15

Computer Human body
CPU Brain, mind
Monitor, Speakers Face, mouth, hands, legs
Keyboard, Mouse Eyes, ears, nose, skin
¬ Do we have any organs that serve as both input and output?
For example, mouth is used not only for talking but also eating.
¬ What do we have that the computer lacks?
We do not need somebody else to give use the output, we can do it on our own. We are more intelligent than a computer!
¬ What does the computer have that we lack?
It can do several tasks at a time, all equally well. We need training to be able to do this.
Lesson Plan
Start with the computer system in your class. Ask the students what they do with the computer. Some sample answers: play video games, watch videos, do work on computers (sometimes!!), paint, listen to music, etc.
Ask them what would happen if the computer system did not have a monitor, a keyboard, a mouse, a speaker.
Demonstration(Plan to spend not more than 15.)
1. Play a video. Turn off the monitor. Can you still hear the sound? What output is missing?
16

2. Turn the monitor on again and unhook the speakers. Can you see the video playing? Can you hear the sound? If there are builtin speakers, the students may hear the sound even if the speakers are unplugged. Show them where the builtin speakers are located.
3. Ask what are the minimum output devices and input devices that we need to interact with the computer.
Activity
Spend the rest of the class on the activity. Conduct a discussion among the students about input and output devices in general.
1. What other systems require input and output devices?
E.g., TV – remote control or the buttons on the TV are input devices; the monitor and speakers are output devices.
The other examples can be vehicles. petrol, driver, brakes are input devices and the wheels on which the vehicle moves are output devices?
More examples can be drawn form household appliances like mixer grinder
2. Ask the students to draw some input and output devices of the computer.
17

Title Functionality of Additional Parts and Peripherals Such as Printer and Web Cam
Date May, 2007 Ref No. 2.11Contributor Meera Hirani Std 2
Reviewers Farida
Brief Description
This unit contains different parts of the computer such as scanner, printer, web cam , speakers and the functions and uses of each part
Goal Teach about additional parts and peripherals of the computer
Prerequisites Familiarity with computers
Duration 40 minutes
References http://familyinternet.about.com/library/game/blwhat5.html
http://www.kidsonline.net/learn/clickjr/clickjr.html
www.kckps.org/courses/intro_comp.html
Detailed Description
Figure a illustrates the basic parts of the computer.
Figure a
18

The following are some more parts of a computer.
PRINTER
Figure b
● A computer printer, or more commonly just a printer, is a output device that produces a hard copy or into physical print media such as paper or transparencies.
● It is a machine attached with the computer where the letters that you type or the sketch that you make can be printed on a paper.
SPEAKERS
● Computer speakers, or multimedia speakers, are usually a simplified stereo system without a radio or other media sources built Computer speakers range widely in quality and in price.
● Typically, the simplest computer speakers come with computers when bought and have two controls for increase and decrease of volume and treble but there are other high end speakers available which have more than 5 controls!!!!
Computer icon representing speaker. Speakers
19

Computer with speakers& mike
Figure c
THE WEB CAM
Figure d
A web cam, or web camera, is the frequently used term for any camera that generates images that can be accessed by and displayed on the World Wide Web through a server. A web cam is essentially just a camera connected directly or without wires, and stores images for displaying elsewhere. A web cam is basically an inexpensive simple video camera that sits on top of your computer monitor. It is a machine meant to send live and recorded video over the net to one or more users often also have microphones built in so you can see and chat with friends on line.
Lesson Plan
1. Find out how many students remember what a computer is and how is it useful and the major parts of computer that they had studied the previous year. Revise the following
20

to reinforce what they have already learned.
● The typical computer system that is found in homes, schools and offices are called microcomputers and are also known as personal computers or PC's.
● The Teacher can now show a diagram or a photo of a desktop computer.
● Pointing out each part, one can the name for each such as:
● A computer is a machine for performing calculations automatically.
● The computer is a device that accepts input, processes/stores data, and produces outcome.
● One can not only do mathematic calculations but also write letters , applications , one can draw images and also play games!
● Similarly, rename all the basic parts of computer.
● Ask them “Have you seen any other part of computer?
2. Now, introduce the additional parts of the computer one by one saying – “the printer is like a painter who sees a real flower and paints a flower on the paper”. Describe who is the painter here (the printer). He sees the real flower so the flower is giving information to the painter just like computer gives information to the printer and the painter paints using paints just like the printer uses ink and the painting is made on paper just like the printer prints on paper or transparencies.
3. Speakers can be introduced to the students in the following manner: “We can see movies and pictures etc on a computer screen. But the movies will remain silent till the time we don't attach speakers to the computer. With the help of these speakers we can listen to songs, listen to any voice. “
4. Web cams are very interesting and can be presented to the children as: “Web cam is like an ordinary camera but is connected to the computer and if you and your friend who lives in abroad want to see each other, both of you must have a web cam and you can even see him smile and see his room this very minute!”
Activity
Getting into groups and making a model of the additional parts can be interesting and also reinforces their knowledge about that part.
Resources
21

● Scissors, Glue and tape.
● Lightcolored construction paper
● Drawings of printer, scanner and other parts without colors.
● Cardboard.
What to Do
● Begin with a brief discussion about computers. Some children may have printers and speakers attached to the computers at home. Ask children to share what they know these parts. What kinds of things do they do with these additional parts of computer? Tell children that they are going to learn the names for the additional parts of a computer and how the parts go together.
● Distribute basic diagram of printer, scanner and other parts without colors. Have each child color the picture and cut out the pieces of the parts and paste them onto a piece cardboard. Encourage children to draw a picture of the basic parts of the computer. Let them do it. Now ask them to attach the additional parts along with the basic parts of computer. Now ask them to take out the monitor/ CPU/ mouse/ Keyboard/ speaker/ scanner and others and ask them can the computer work without the part that has been removed?
Teaching Options
● You may want to play a game where children act out being a computer. Individuals or groups can take turns being different parts of a computer. One person can be the keyboard and can give the computer a job to do or a problem to solve. Another person can solve the problem and can tell the answer to the person pretending to be the screen. That person can display the answer. One can act like the printer and prints out what the CPU asks it to print, one can act out to be the speaker and sings the song asked by the computer.
22

Title Worksheets related to Input and Output concepts.Date May, 2007 Ref No. 2.12Contributors Neela, Farida, Meera
HiraniStd 2
Reviewers Farida
Brief Description Worksheets related to Input and Output concepts.GoalPrerequisitesDuration 1 SessionReferences None
23

Worksheet
1. Label which is the input and output devices in the figures below
1.
___________________________
___________________________
2.
_________________________ _________________________
24

3.
_____________________ _______________________
2. Answer True or False:
a.Your eyes are the input devices of your body. True / False.
b.Petrol is an output device for a vehicle running on the road. True / False.
c.The computer uses an output device to show us something. True / False
d.We use input devices to tell the computer what to do. True / False.
25

3. Sort which are the input and output devices of the computer and write their names
(Input/ Output Device) (Input/ Output Device)
(Input/ Output Device) (Input/ Output Device)
(Input/ Output Device) (Input/ Output Device)
4. Does your school computer system have speakers? How many?
26

5. The following are names of output devices. Fill in the blanks to identify them.
a. M __ n __ __ o __
b. __r __ n __ __ r
6. Look at the flowing and answer the following questions:
a.Give the name of the above picture.
b.How many alphabet keys does the keyboard have?
c.How many number keys does the keyboard have? Do you think it should have more? Why?
d.What happens if you press the ‘a’ key?
27

7. MATCH THE COMPUTER PARTS .SPEAKERS
PRINTER
WEBCAM
CD
28
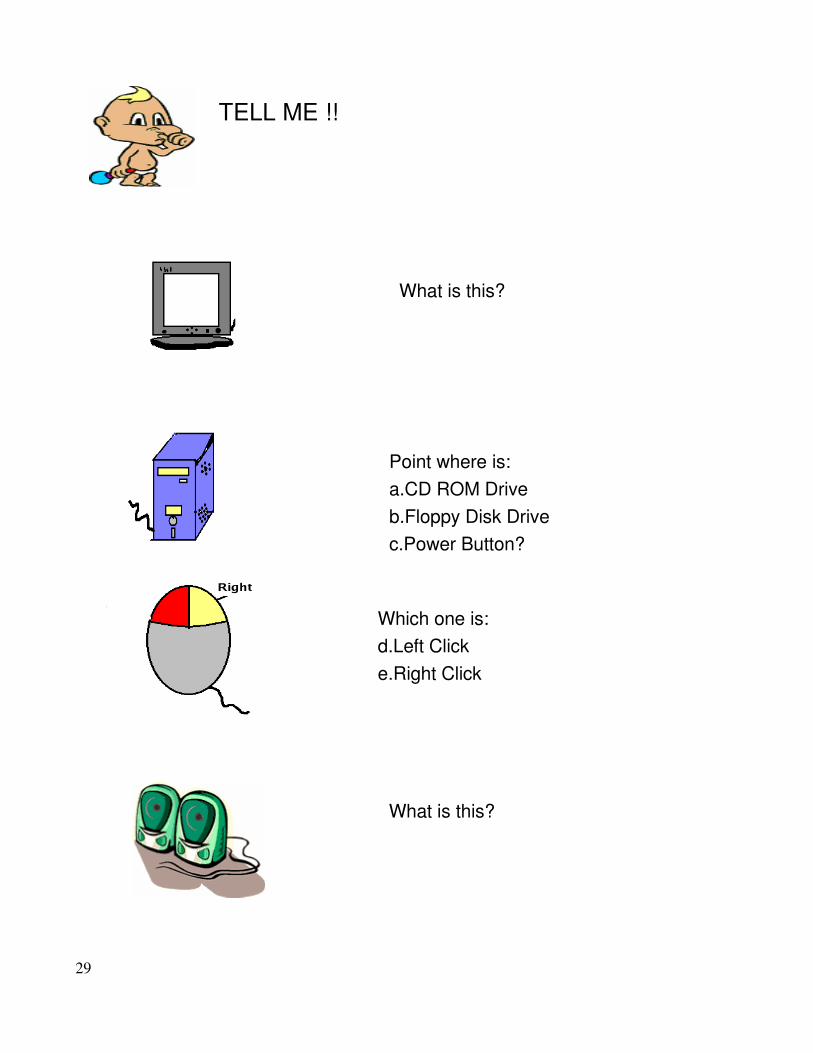
What is this?
29
What is this?
TELL ME !!
Which one is: d.Left Click e.Right Click
Point where is: a.CD ROM Drive b.Floppy Disk Drivec.Power Button?

Mr. Floppy Scan wants to attach all the additional parts of the computer to the basic parts of the computer but doesn't know the way can you guide him?
30
WHICH ONE IS:CDFloppy Disk

Title Introduction to Additional Uses of a Computer, such as Text Editor (e.g. Notepad) and Math Activities
Date May, 2007 Ref No.
Contributors Sanjivani Salunkhe Std II
Reviewers Farida
Brief Description
This topic gives the brief description about additional uses of a computer such as text editor and calculator.
Goal Learn use to use the text editor and calculator in a computer
Prerequisites Familiarity with computer.
Duration 1 session
Detailed Description
There are many other uses of the computer besides paint, games, etc. We will learn some additional uses such as to store text using text editor and to calculate the mathematical expressions using calculator.
Text Editor (e.g. Notepad)
A text editor is a type of program used for editing plain text files. You can type text in it and save the file for future use.
Starting Notepad :
To start Notepad, select Applications ==> Accessories ==> Text Editor, you will see small screen on your Desktop. Doesn't this look like a window on the Desktop? It is called the Notepad window. (See Figure a)
31

Do you see a cursor within the Notepad window? If not, click once inside the Notepad window. Now you can type anything in this window. Remember to press the Enter key to move cursor to the next line.
To resizing window click on the middle window control button. Click on it again to restore the window to it's original size.
Move the mouse pointer to the Title bar. Press the left mouse button and move the mouse You will see that Notepad window also move as you move the mouse. Release the mouse button to place the Notepad window at the desired location.
Saving In Notepad:
● To save file in Notepad, select File ==> Save As
● The Save As dialog box appears. See figure b. Enter the name of the file and click “Save”
32
figure a
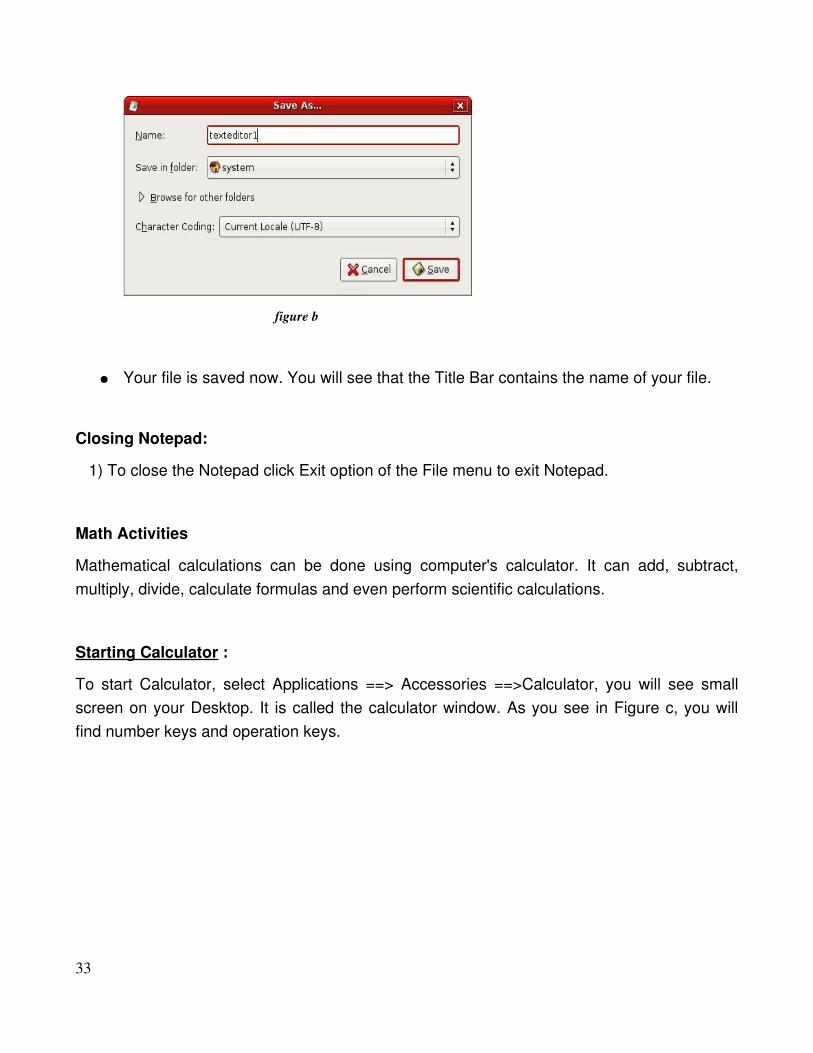
● Your file is saved now. You will see that the Title Bar contains the name of your file.
Closing Notepad:
1) To close the Notepad click Exit option of the File menu to exit Notepad.
Math Activities
Mathematical calculations can be done using computer's calculator. It can add, subtract, multiply, divide, calculate formulas and even perform scientific calculations.
Starting Calculator :
To start Calculator, select Applications ==> Accessories ==>Calculator, you will see small screen on your Desktop. It is called the calculator window. As you see in Figure c, you will find number keys and operation keys.
33
figure b

Performing Calculations on Calculator:
● To perform a simple calculation, follow the steps gives below –
● Enter the first number in the calculation.
● Press the + to add, to subtract , * to multiply or / to divide.
● Enter the next number in the calculation.
● Press = for the answer.
Here we are describing use of calculator with the following examples.
Addition of two numbers
● Type 4 on the calculator screen
● Press [+], addition key
● Type 5 on the calculator screen
● Then press [=], equal to key.
34
Figure c
Lesson Plan
1. Prepare for the lesson plan by practising some computer application such as text editor, calculator etc.
2. Switch on the computer.3. Explain the students the different uses of computer in the following manner:
How to use text editor:● Open text editor, it is usually located in the Application menu under Accessories.● Create simple text file using text editor.● Ask them what they do after they finish writing in their notebooks.
How to use calculator:● Open the calculator. On a PC, it is usually located in the Start menu under
Accessories.● Determine the calculation that you want to perform.● Use either the number keypad or the mouse to perform your calculations. To add, use
the + sign. To divide, use the / sign. To multiply, use the * sign. To subtract, use the sign.
● Click on the = sign or hit the Enter key. The answer will appear in the display window.
4. Let them try it on their own.
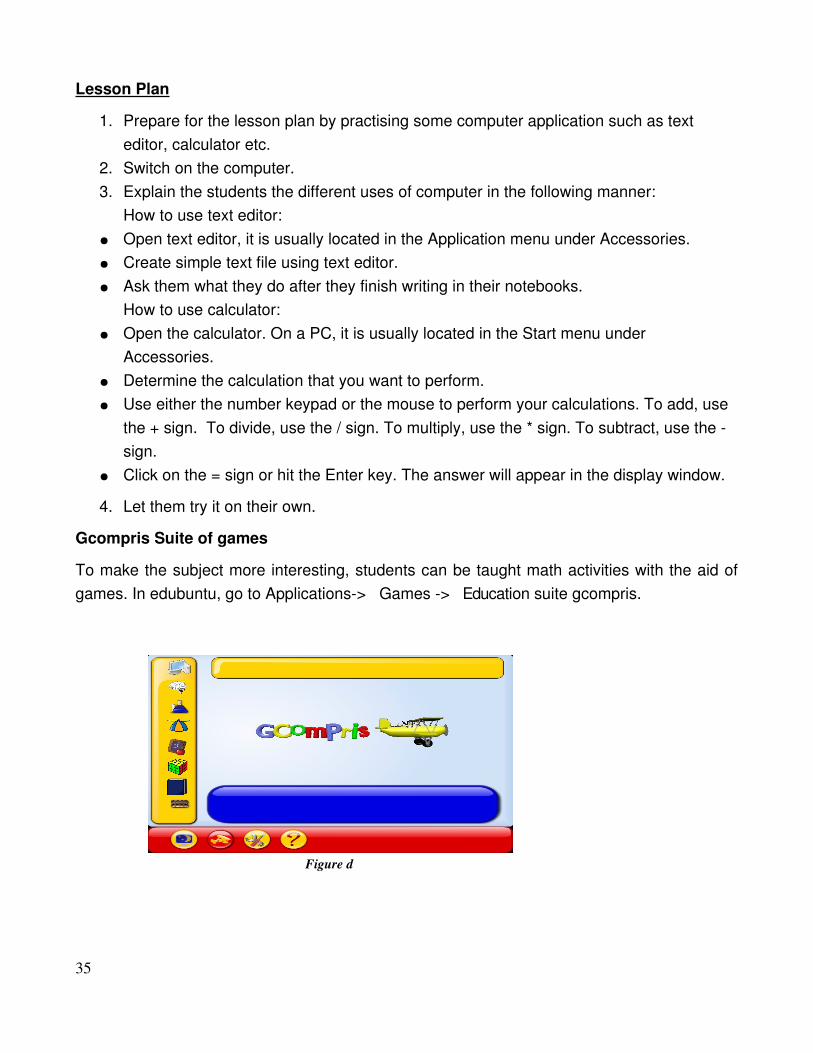
Gcompris Suite of games
To make the subject more interesting, students can be taught math activities with the aid of games. In edubuntu, go to Applications> Games > Education suite gcompris.
35
Figure d

Title Worksheets and Lab Exercises for Additional Uses
Date May, 2007 Ref No. 2.14
Contributors Sanjivani Salunke Std 2
Reviewers Farida
Brief Description Worksheets and Lab Exercise
Goal To test the student’s knowledge of additional uses of computer, particularly, text editor and calculator
Prerequisites Student must have understood the usage of text editor and calculator
Duration One Session
References None
36

Worksheet
Text Editor
1. Check out for which of the following uses can the text editor be use?
2. Number the following to indicate the steps you will follow to start a text editor?
37
Writing letters Math calculations
Listening to musicPlaying games
Maintaining class records
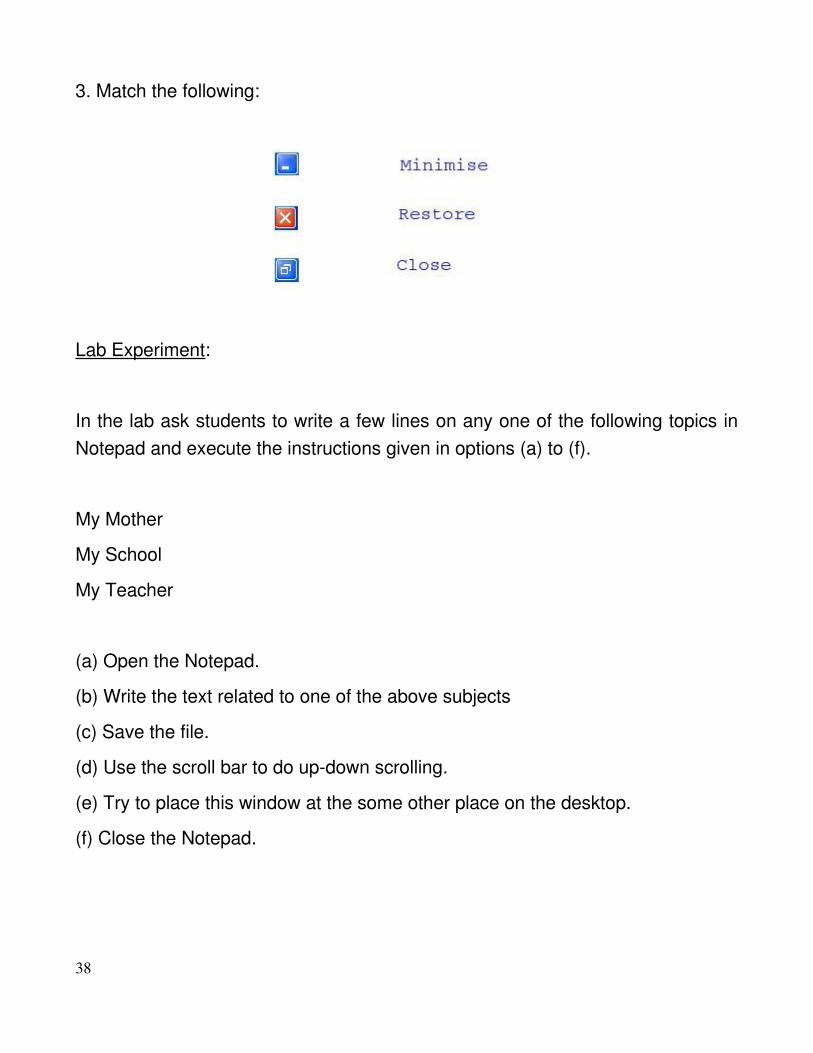
3. Match the following:
Lab Experiment:
In the lab ask students to write a few lines on any one of the following topics in Notepad and execute the instructions given in options (a) to (f).
My Mother
My School
My Teacher
(a) Open the Notepad.
(b) Write the text related to one of the above subjects
(c) Save the file.
(d) Use the scroll bar to do updown scrolling.
(e) Try to place this window at the some other place on the desktop.
(f) Close the Notepad.
38

Calculator
1.Number the following to indicate the steps you will follow to start a calculator
2. Match the following, functions and button symbol
a) Addition *
b) Subtraction +
c) Multiplication /
d) Equal to
e) Division =
39

3. What is the calculator in the computer used for?
Lab Experiment
Give the few problems to solve using a Calculator on the computer and tell students to write the results in notebook.
● (2 x 4) + 3 = _____________● 20 + 50 + 5 = _____________● (5 – 3) + 2 = ______________● (9 / 3) x 1 = ______________
40
Writing letters Math calculations
Listening to musicPlaying games
Maintaining class records

Title Operating a mouse: Selecting objects, drag and drop. Such as change the position of a file on the desktop
Date May, 2007 Ref No. 2.17
Contributor Meera Hirani Std 2
Reviewer Farida
Brief Description This section deals with one of the functions of mouse – selection, drag and drop method
Goal The purpose of this lesson is to teach how to use a computer mouse so that one is more comfortable and efficient in using a computer
Prerequisites The student should know the major parts of computer and also should have seen someone working on the computer with a mouse.
Duration 1 session References http://www.enchantedlearning.com/Webtipsforchildren.html
http://departments.oxy.edu/its/help/software/computing_basics/mouse.htmlhttp://www.lizardpoint.com/fun/geoquiz/asiaquiz.htmlhttp://www.guidebookgallery.org/tutorials/windows311forworkgroups/mouselessonwww.jgames.com/connectfour/
Detailed Description
Figure a
41

● A mouse is a small object you can roll along a hard, flat surface. Its name is derived from its shape, which looks a bit like a mouse, its connecting wire that one can imagine to be the mouse's tail, and the fact that one must make it scurry along a surface.
● You can use a mouse in conjunction with the keyboard to operate the PC.● A mouse is a hardware device, which allows the user to control a cursor to manipulate
data without complicated commands. ● As you move the mouse, the pointer on the display screen moves in the same
direction. It can be compared to moving a finger while reading the book, as you move the mouse, the cursor moves on the computer screen.
Figure b
● Mouse contains at least one and maximum three buttons, which have different functions.
● It also has a trackball fixed underneath in a holder, which helps to move the cursor on a screen. It is called a scroll wheel .
Figure c
42
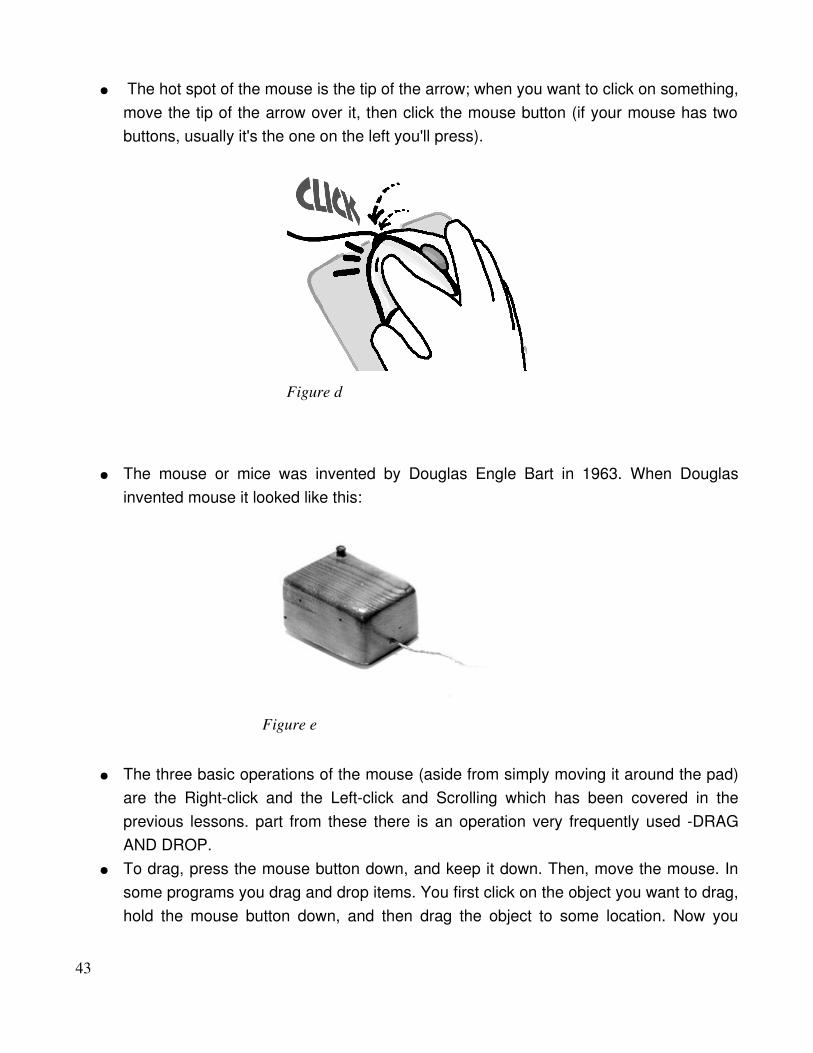
● The hot spot of the mouse is the tip of the arrow; when you want to click on something, move the tip of the arrow over it, then click the mouse button (if your mouse has two buttons, usually it's the one on the left you'll press).
Figure d
● The mouse or mice was invented by Douglas Engle Bart in 1963. When Douglas invented mouse it looked like this:
● The three basic operations of the mouse (aside from simply moving it around the pad) are the Rightclick and the Leftclick and Scrolling which has been covered in the previous lessons. part from these there is an operation very frequently used DRAG AND DROP.
● To drag, press the mouse button down, and keep it down. Then, move the mouse. In some programs you drag and drop items. You first click on the object you want to drag, hold the mouse button down, and then drag the object to some location. Now you
43
Figure e

release the mouse button and the object is in a new location. ● A faster way to cut and paste is to use the draganddrop method. This means a user
points to a selected piece of text and drags it to the location where they want it to go.
To cut and paste using the draganddrop method: 1. Highlight the piece of text you wish to move 2. Place your pointer directly on the selected piece of text 3. Begin clickinganddragging your mouse. 4. Let go of the mouse button in the spot where you want the text to be located.5. Drag and drop describes a particular action you can make with the mouse. Click an
object, such as a folder, and then hold down the mouse button as you drag the object to a new location. You drop the object by releasing the mouse button. Drag and drop can be used to easily move, print, delete, or embed an object or file into another.
Lesson Plan
Mastering the Mouse Try these tips to help with initial mouse navigation:
● Teach kids what the mouse is used for and how to use it. ● Consider putting a coloured dot or sticker on the left click button of the mouse to
differentiate from the right button.
ClickingThe first skill is the ability to click the mouse once while controlling its placement. Even though they might have learned clicking before still get them to practice it for two to three minutes before starting to teach drag and drop.
Drag and dropIt is a skill that might take some time to achieve successfully. The objects that are to be dragged should be large, and students can practice clicking, holding down the button, and moving the object with the mouse. After students are proficient, they can go to a smaller target.
44

Suppose one wants to move a folder called “BABABLACKSHEEP” to a new location. One should select the folder by single left click and hold the left button down and move the mouse over to the preferred location and release the left button when the cursor reaches this location as shown.
45
Figure f
figure g

Activity
Materials/resources
1. White paper (enough for each individual in the class) 2. Black, red, green markers or crayons (enough for each individual) 3. Cardboard box (1) 34'' width and height. (2) 1'' width and 4'' height. It is preferred if the
boxes are circular however squares or rectangles are also fine.4. Springs, glue and double sided tape.5. Buttons
Teacher demonstrates making of a mouse by using the resources given above. Stick the two tubular / small boxes to the large box as given. Stick two buttons on one end of the spring and the other side with double sided tape(this sticks on both sides). Now, attach the spring buttons to the small boxes as shown and enjoy practicing single/double and right clicking!!! If you want to practice drag and drop you can attach a colour pen right below the red button on the rear side of the cardboard and leave just about ½'' gap between the pen and the paper on which it has to draw. Now only by pressing and holding the red button the pen comes in contact with the paper and it can draw!!!
Lab Activities
● Let the students handle the mouse. Give directions like, "Make the cursor go up, down, left, right, etc.". If time permits, let each student practice moving a mouse on the mouse pad. You can emphasize that “the mouse pad is the mouse's "home," and it never leaves its house”.
● Open draw/paint program on a computer and demonstrate making a line using the
46

mouse. Important: verbalize each step and use correct terminology. Use the mouse to put the cursor on the pencil icon. You can explain what an icon is by comparing it with symbols used in maths as addition (+) and subtraction ().
● Click the mouse button to select the pencil. Let go of the mouse button. Move the pencil cursor to the middle of the screen.
● Demonstrate drawing a line. You can give the following instructions: "Click and hold down the mouse button. Make a line. Let go of the button and put the pencil cursor somewhere else. Click and hold the button. Make a line."
● Repeat the above steps and have the children explain what you are doing at each step. Demonstrate changing colours.
● As children gain confidence and facility with the mouse, instructions can become more complex and individualized, "Draw a red circle. Make a blue square. Write the digit three in yellow colour. Make two oranges."
● An added bonus: As children become proficient, their exercises can be saved and put together in a slide show for parents; i.e., one child could make squares of various colours, another could make different sized and different coloured letters, etc.
● Students can be taught mastery over the mouse with the aid of games. In edubuntu, go applications Games Education suite gcompris.
● You can select the first top option discover the computer play with computer peripherals. If time permits, games form puzzles and reading activities can be explored.
47

Title Operating a keyboard. Such as: Arrows, Page Up/Down, Backspace/ Delete keys; Gcompris games.
Date May, 2007 Ref No. 2.18
Contributor Usha Viswanathan Std 2
Reviewer Farida
Brief Description This section deals with the functions of additional keys (Arrows, Page Up/Down, Backspace, Delete keys) on the keyboard.
Goal The purpose of this lesson is to teach the functions of some more keys like the Arrows, Page Up/Down, Backspace, Delete keys on the keyboard.
Prerequisites The student should know the major parts of computer and also should have seen someone working on the computer with a keyboard.
Duration 1 session(35 mts) References http://www.citycol.com/esol/shena/
www.answers.comwww.wikipedia.orgwww.webopedia.com
Detailed Description
A Keyboard is a common input device through which data and control commands are fed into a computer. A typical computer keyboard looks like figure (a).
figure (a)
48

The Backspace Key
A key on the keyboard which moves left and erases whatever is to the left of it. It is the key which is marked either "Back Space" or "Backspace" with a large arrow pointing to the left situated at the top right of the main keyboard area.
The Arrow Keys
These are a set of 4 keys at the right of the computer keyboard that can be used to control the movement of the cursor on the screen up, down, left, and right. They are typically located at the bottom of the keyboard to the left side of the numeric keypad, usually arranged in an invertedT layout. Arrow keys are commonly used for navigating around documents and for playing games.
Page Up/ Page Down
These two keys are located on the left side of the numeric keypad. These keys are used to move the cursor up and down a page, screen or frame. Often used in combination with shift, control and Alt keys. For example: Shift + Page Up : Selects one page just above the current cursor position.
Delete Keys
This keyboard key deletes the character at the cursor location. This key is located between the main and numeric keyboards . The delete key can also be used to remove the current selection.
Lesson Plan
1. Start off the class with quick recap questions about the keyboard, why it is needed and the keys they already know.
2. Allow the students to show you some of the keys they already know.3. Now open a new document. Now start typing something, for example name of some
students.
49
4. Spell some wrongly. Now show them how you can delete the wrongly spelt names using the 'Delete' key.
5. Type the names one after the other( can use large fonts) so that more than one page is filled up. Now go to the start of the file using the 'Page Up' key. To go down use the 'Page Down' key.
6. Now show them how they can move the cursor to left/ right/ up/ down using the arrow keys.
7. Finally, let us come to the the 'Backspace' key. Show how it will erase the character just left of the cursor.
8. Now go through all the keys once again and ask them whether they have any doubts.9. Clear the doubts. Now let them practice!10.Students can be taught mastery over the keyboard with the aid of games. In edubuntu,
go applications > Games > Education suite gcompris.You can select the first top option: discover the computer > play with computer peripherals.
50

Title Operating a Keyboard: Using Numbers and Special keys, such as Shift, Caps Lock, Ctrl, Esc.
Date May, 2007 Ref No. 2.19
Contributor Usha Viswanathan Std 2Reviewer Farida
Brief Description Usage of keyboard using numbers and special keys.
Goal This topic seeks to teach the students operation of the keyboard using number and special keys such as: Shift, Caps, Ctrl, Esc.
Prerequisites Familiarity with the parts of a computer, especially the keyboard.
Duration One Session
References http://www.citycol.com/esol/shena/www.answers.comwww.wikipedia.orgwww.webopedia.com
Detailed Description:
A Keyboard is a common input device through which data and control commands are fed into a computer. A typical computer keyboard looks like figure (a).
Figure a
51

Arrow key
As you see, the keyboard has got keys to enter alphabets as well as numbers. The arrow keys allow you to move the cursor up, down, left and right.
Numeric keypad
The numeric keypad consists of all numerals from 0 9 along with the keys to do basic mathematical calculations like addition, subtraction, division and multiplication. To use the numeric keypad, first we have to activate the “Num Lock”. This is a key provided at the top left hand corner of the numeric keypad. Nowadays on the keyboard we have indicators which lights up, when the “Num Lock” is activated. The number keys are also provided just under the function keys also. We can use either of them to suit our convenience.The other special keys on a keyboard, which we are going to discuss, are the Shift, Caps Lock, Ctrl and Esc. Figure (b) shows the Shift, Ctrl and the Caps Lock keys.
Shift key:
When the Shift key is combined with alphabetic keys, the keyboard output is capital letters. For example, pressing and holding the shift key while pressing the letter "a" on the keyboard would generate a capital "A". There are typically two shift keys, on the left and right sides of a keyboard and is commonly located below the caps lock key and the enter key respectively. On a keyboard, the characters that typically require the use of the shift key include the parentheses ( ), the question mark (?), the exclamation point (!), underscore (_) and the colon (:).
52
Figure b

Caps Lock key:
The Caps Lock key is used to type capital letters continuously. While the Shift key is used to type one capital letter. Nowadays on the keyboards we have indicators which lights up, when the “Caps Lock” is activated. This is located near the “Num Lock” key above the Numeric Keypad.
When this light is on we will be able to type Capital letters. When you are finished typing in capitals, press the Caps Lock key once again to deactivate it. Now the indicator light is turned off.
When the caps lock key is on, the shift key can be used to type lowercase letters
Ctrl (Control) key:
The Ctrl (Control) key is used in the same way as the Shift key. It is pressed with a letter or digit key to give command to the computer. It is helpful in editing the document. For example, holding down ctrl key and pressing the letter “u” turns on underline in Windows word processors. The commands are generally written as ^ followed by the alphabet; for instances ^y means controly (“Ctrl” key + the letter “y” key)
Some of the common shortcuts used using the “Ctrl” key are:
^x stands for cutting the selected text/ figure/data
^c for copying the selected data
^v for pasting the cut/copied contents
^b to make text bold
^i to make text italic
^d for double underline
^u for single underline
Esc Key:
A key on the computer keyboards, usually labeled Esc. Mostly the Esc key is located in the
53

topleft corner of a keyboard. It is commonly used to exit a mode or routine, or cancel some function.
Lesson Plan
1. Start off the class with quick recap questions about the keyboard, why it is needed and the keys they already know.
2. Allow the students to show you some of the keys they already know.3. Open a new document. Show them how to type numbers using the numeric keypad
located at the two places, left and right of the keyboard.4. Type in some names of the students with all alphabets in small case. 5. Ask them is there anything wrong. Probably you will get the answer: “ First letter should
be capital”. 6. Ask them how to go about the problem. Get their inputs. Now demonstrate the use of
the Shift key. Press down the shift key along with an alphabet, to type a capital letter.7. Show them to type parentheses, colon, etc, and explain how useful the shift key is. 8. Now ask them what they will do if we want just to type in Capital letters? aha! There is
another key to help us out! So you don't have to keep the shift key pressed. The Caps lock key!
9. To demonstrate the function of the Ctrl key, first highlight all the data, which has to be changed using the mouse. Not press Ctrl and u to underline. Explain the students how it was done.
10. Similarly show some of the other shortcuts, like making text bold (^b), cut (^x), copy 11. (^c), paste (^v), etc.12. Repeat the exercise twice or thrice, to teach the students the use of Ctrl key. 13. To demonstrate the use of escape key, try to close the file (before saving it), then the
dialog box pops up asking whether you want to save the file or not. 14. Now press the “Esc” key to cancel the operation. 15. Allow the kids to practice!16.Students can be taught mastery over the keyboard with the aid of games. In edubuntu,
go to Applications > Games>Education suite gcompris.17.You can select the first top option discover the computer and play with computer
peripherals.
54

Title Social Aspects: Posture, Eye and Wrist Exercises
Date May, 2007 Ref No. 2.20Contributor Farida Std 2
Reviewer Usha Viswanathan
Brief Description This topic describes some acceptable postures and some exercises for eyes and wrists while using a computer.
Goal To make the child understand the correct postures while using a computer.
Prerequisites NoneDuration Two to three SessionsReference http://ergonomics.ucla.edu/Tips_Users.html
http://safecomputingtips.com/ergonomicexercise.htmlhttp://www.wikihow.com/ImproveYourPosture
Detailed Description
Maintain good posture when working. Sit all the way back in the chair against the backrest. Keep your knees equal to, or lower, than your hips with your feet supported.
Figure a
Keep your elbows in a slightly away from you body, with your wrists in a straight position. Avoid overreaching. Keep the mouse and keyboard within close reach.
55
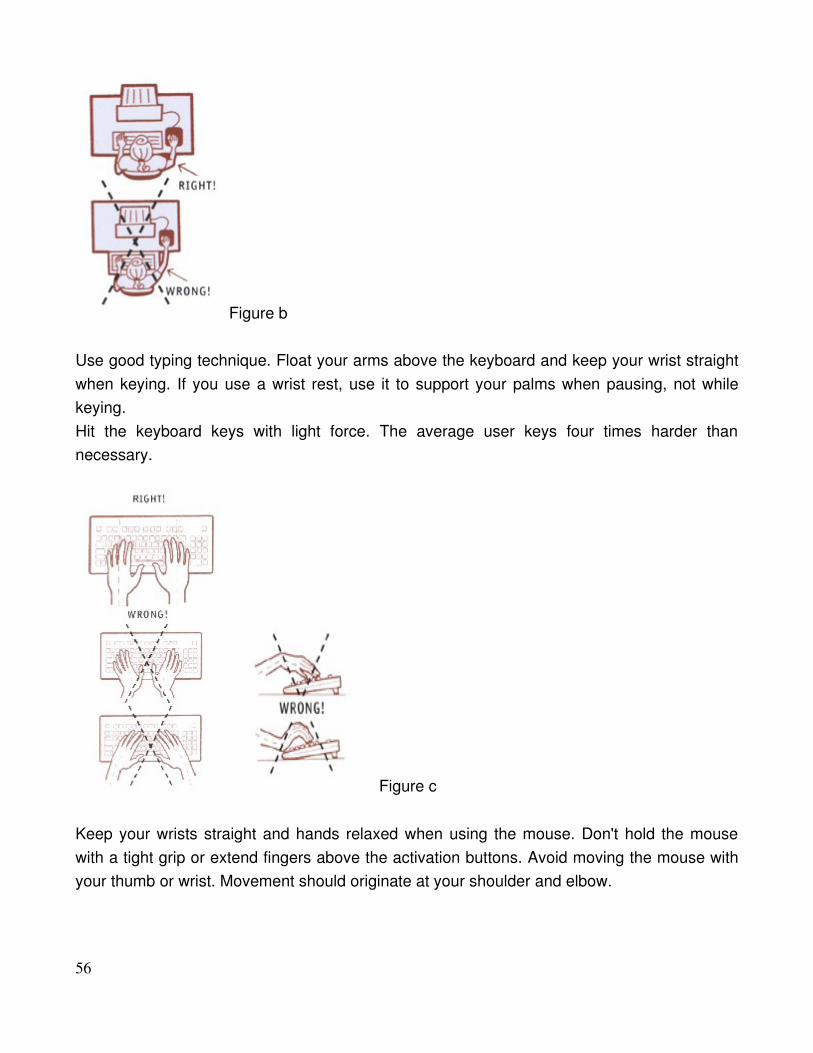
Figure b
Use good typing technique. Float your arms above the keyboard and keep your wrist straight when keying. If you use a wrist rest, use it to support your palms when pausing, not while keying.Hit the keyboard keys with light force. The average user keys four times harder than necessary.
Figure c
Keep your wrists straight and hands relaxed when using the mouse. Don't hold the mouse with a tight grip or extend fingers above the activation buttons. Avoid moving the mouse with your thumb or wrist. Movement should originate at your shoulder and elbow.
56

Figure d
Here are some exercises of posture, eyes and hands. Practice them to remain a healthy computer user!
Posture
1. Keep you ears straight over your shoulders. Raise both arms straight up along side your ears. Remember to keep your ears aligned. Bend forearms toward shoulders to touch your shoulder blades. Do 10 repetitions with both arms, then alternately for each arm singularly.
2. Keep you ears straight over your shoulders. Raise both arms out to sides at shoulder length. Hold for a slow count of ten. Slowly lower arms to sides, counting ten as you lower. Slowly raise arms back to shoulder height, counting to ten as you raise arms.
3. Be a penguin. While you wait for computer or a particular program to start, place elbows at your side, and touch your shoulders with your hands. Keeping your hands on your shoulders, and your ears aligned, raise both elbows (count one, two) and lower back to your waist (count one, two). Do as many times as your wait allows.
4. Tilt (stretch) your head in all four directions over your shoulders (forward, back, left, right), and gently massage your neck.
Eyes
1. Sit comfortably on a chair. Rub your hands together until they feel warm. Close your eyes and cover them lightly with your cupped palms. Avoid applying pressure on your eyeballs. Place your palms so that the nose remains uncovered, and the eyes remain behind the slight hollow of the palms. Make sure that no light rays enter the eyes, and leave no gaps between fingers or between the edge of the palms and the nose. Take deep breaths slowly and evenly, while thinking of some happy incident. Repeat the palming for 3 minutes or more.
2. Close your eyes tightly for 35 seconds then open them for 35 seconds. Repeat this 7
57

or 8 times. 3. Sit and relax. Roll your eyes clockwise, then counterclockwise. Repeat 5 times, and
blink in between each time. 4. Imagine that you are standing in front of a really big clock. Look at the middle of the
clock. Then look at any hour mark, without turning your head. Look back at the center. Then look at another hour mark. Do this 10 times. You can also do this exercise with your eyes closed.
Hands
1. Wrist rotation: Stretch both arms straight to the front with closed fists. Rotate both the fists together ten times in the clockwise direction and ten times in the anticlockwise direction. Do ensure that only your fists are rotating and the rest of your arms are not moving.
2. Elbow rotation: Bend your hands towards the front and hold your shoulders with your palms. Now, rotate your elbows ten times in the clockwise and ten times in the anticlockwise direction.
3. Whole hands, small circles: Stretch both hands to the sides holding your palms straight up. Now, make small circles with both palms ten times in the clockwise and ten times in the anticlockwise direction.
4. Whole hands, big circles: Stretch your hands to the sides. Make big circles (as big as possible) with both the hands ten times in the clockwise and ten times in the anticlockwise direction.
Lesson Plan
1. Demonstrate the features or appropriate manner of computer use by playing out a small skit where the actors selected amongst the students bring out right and wrong usage of computer.
2. For the exercises, make this a fun lesson for the students. You can even take them out of the classroom to the school ground and practice this exercise!
58

Worksheet ( Ref. No. 2.20)
Select which is the right way of using a computer.( Tick the right ones)
59

Title Introduction to Basic Features of a Simple Text Editor.
Date May, 2007 Ref No. 2.21+2.23
Contributors Sanjivani Salunkhe Std 2
Reviewers Farida
Brief Description This topic gives the brief description about features of a simple text editor.
Goal Learn to use of text editor more efficientlyPrerequisites Familiarity with computer.Duration 1 Session
Detailed Description
A text editor is a type of program used for typing and editing plain text files. You can type text in it and save the file for future use. The following figure shows a simple text file.
figure a
60

Features of text editors:
1. Copy, cut and paste: Most text editors provide methods to duplicate and move text within the file by issuing keyboard commands.
2. Undo and redo: As with word processors, text editors will provide a way to undo and redo the last edit. Often—especially with older text editors—there is only one level of edit history remembered and successively issuing the undo command will only "toggle" the last change. Modern or more complex editors usually provide a multiple level history such that issuing the undo command repeatedly will revert the document to successively older edits. A separate redo command will cycle the edits "forward" toward the most recent changes. The number of changes remembered depends upon the editor and is often configurable by the user.
3. Find and replace: The process of searching for a word or string in a text file and optionally replacing the search string with a replacement string. Different methods are employed, Global Search and Replace, Conditional Search and Replace, Unconditional Search and Replace. The following figure shows the toolbar shortcuts for all the above functions
figure b
4. Importing: Reading or merging the contents of another text file into the file currently being edited. Some text editors provide a way to insert the output of a command issued to the operating system's shell.
61

After all the editing, we can save the file using the 'Save' or 'Save As' options under the “File” option in the menu bar. A dialog box pops up asking to enter the name of the file. (See figure c). Give the name and click Save to save the file.
To open a new text file, select the 'File' option from the menu bar, from the drop down menu select the 'New' to open a new file. To open an existing file use the 'Open' option under the 'File' menu. The shortcuts for 'New' and 'Open' option are also provided on the toolbar.
Lesson plan
How to use text editor:1. Open text editor, it is usually located in the Application menu under Accessories.2. Create simple text file using text editor.3. Perform the different functions, like copy, paste, find, replace, save, etc on text file.4. Ask them what they do after they finish writing in their notebooks.
62
figure c

Title Worksheets and lab exercises related to text editor and keyboard.
Date May, 2007 Ref No. 2.22Contributor Usha Viswanathan Std II
Reviewer Farida
Brief Description Worksheets and lab exercises related to text editor and keyboard.
GoalPrerequisitesDuration One SessionReferences
63

WORKSHEET
1. Colour the keyboard as follows:
1. Red colour for number keys 2. blue colour for the alphabet keys3. Green for Esc key4. Brown for Caps lock key5. Pink for arrow keys 6. Yellow for shift keys7. Orange for Ctrl keys
64

2. Following is the list of short cut Keys using control and what they can do. Match it appropriately
^x Copying the selected text/picture^v Double underline^i Single underline^u Make text italic^c Make text bold^b Pasting the selected text/picture^d Cutting the selected text/picture
3. Can you guess which of the following I am?
Arrow key Number key Caps Lock key Esc key Shift key Ctl key
1)I allow you to move the cursor up, down, left and right.____________________________2)When you press me with alphabetic keys, you can type capital letters_____________________________3)You use me to type numbers_____________________________
4)If you press me you can type capital letters continuously_____________________________5)If you press me with a special letter key you can give command to the computer. I help you to make changes in the document quickly.____________________________6)You can press me and exit_____________________________
65

4. Supandi does not which keys are seen on a keyboard. Can you help him by colouring them?
66

Title Elements of a Window: Tool Bar, Scroll BarDate May, 2007 Ref No. 2.25Contributor Usha Viswanathan Std 2
Reviewer Farida
Brief Description This topic gives and idea about the title bar, scroll bar and the tool bar of a window.
Goal To familiarize the kid with different elements like the toolbar, title bar and the scrollbar of a window.
Prerequisites The kid should know how to open an application by double clicking the application icon.
Duration 2 sessions
Detailed Description
Tool Bar and Scroll Bars
Many programs and applications run within windows that can be opened, minimized, resized and closed (See figure a). The top bar of the window is called the Title Bar. This horizontal area at the top of a window identifies the window. The title bar also acts as a handle for dragging the window.
67

Tool Bar
A toolbar is a set of tools that are grouped together into an area on the main window of an application. Typically, the tools are arranged into a horizontal strip called a bar, hence the term toolbar. See figure b.
The tools on a toolbar provide quick and convenient access to commonly performed
68
figure a
figure b
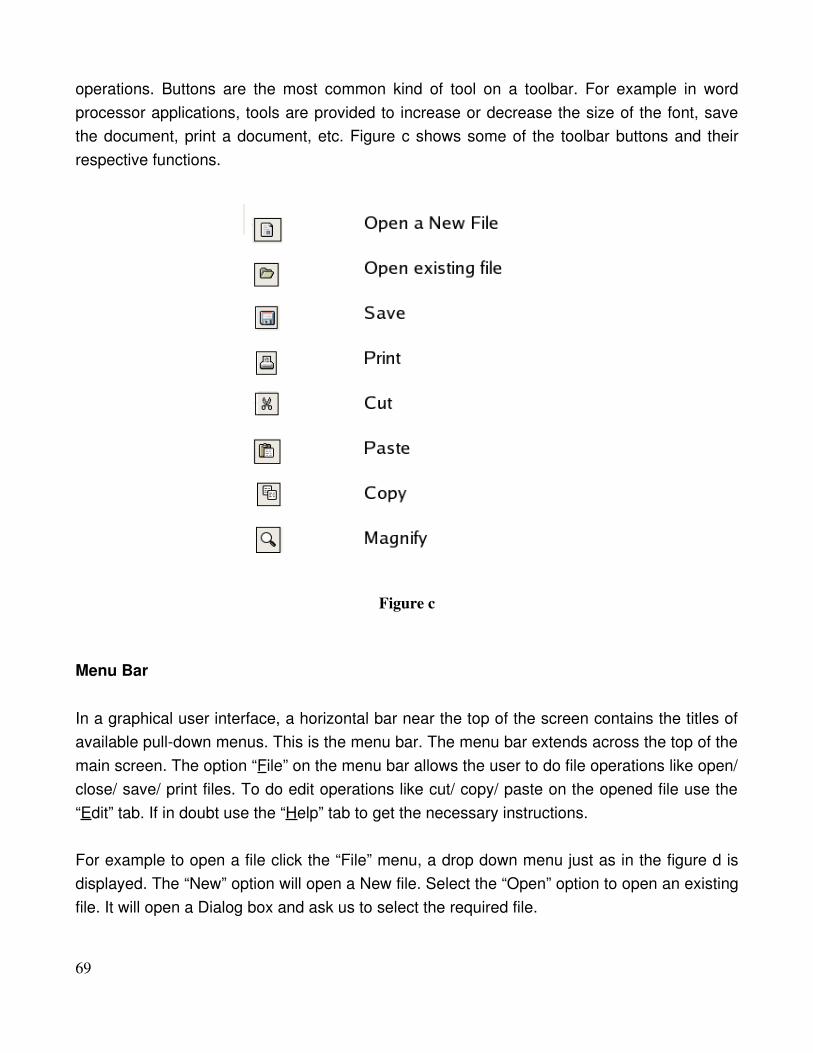
operations. Buttons are the most common kind of tool on a toolbar. For example in word processor applications, tools are provided to increase or decrease the size of the font, save the document, print a document, etc. Figure c shows some of the toolbar buttons and their respective functions.
Menu Bar
In a graphical user interface, a horizontal bar near the top of the screen contains the titles of available pulldown menus. This is the menu bar. The menu bar extends across the top of the main screen. The option “File” on the menu bar allows the user to do file operations like open/ close/ save/ print files. To do edit operations like cut/ copy/ paste on the opened file use the “Edit” tab. If in doubt use the “Help” tab to get the necessary instructions.
For example to open a file click the “File” menu, a drop down menu just as in the figure d is displayed. The “New” option will open a New file. Select the “Open” option to open an existing file. It will open a Dialog box and ask us to select the required file.
69
Figure c

Scroll Bar
A scroll bar is a tall thin hollow box that appears at the side or the bottom of a window. You can use the scroll bar to scroll the window. The scroll bar feature is supported only by systems having windows.If there are more elements than can be displayed on the screen, then a scroll bar allows the user to scroll through all the contents. A scroll bar at the bottom of the window lets you move the viewing area left and right. A scroll bar on the right side of the window lets you move the viewing area up and down.
Lesson Plan
1. Let the Icons of different applications kept on the desktop be the starting point to this class. The students can be asked to show the different icons kept on the desktop. Show them how to open a window.
2. Show them the different ways of opening the application. You can double click on the icon or select the icon, right click and select “open” from the drop down menu or the easiest of them all select the icon and press “Enter”.
70
figure d

3. To make the topic more interesting play a music file. Keep the Icon for the music player ready on the Desktop as shown in figure e.
4. Click to open the application. Select “Open file” option and then select the music file to be played. The above exercise will make them understand the significance of the “File” option in the menu bar. Enjoy the music!
5. Now open a Document or spreadsheet. Open another file using the file option from the menu bar. Let them watch.
6. Now ask the kids how they will open another file that is already saved in the system.7. Allow them to show you how to open another file. (The procedure is to select the “File”
option from the menu bar and then select “Open” from the drop down list.8. Now close all the open files, stress using the window title bar button with the “X” sign to
close the files (They already know this).9. Once the desktop is clear, open another file, which has a lot of content in it, or type in
some familiar words (like CAT, DOG, BALL, etc.) making the font big. (This is to make sure that we use the scroll bars to navigate through the whole file).
10.For formatting the fonts use the toolbar shortcuts.11.Ask the kids to read the words, once they reach the end of the visible portion ask them
how we can read the rest. Get their ideas. 12.Some may even be familiar with scroll bars!! Now show the scroll bar and show how
we can use it to read the whole document.13. If possible, open a window and allow them to play around. Let them type some words
and format the fonts. 14.While leaving the class ask them to close all the open windows. Let them get ample
practice!
Lab Exercise1. Ask the kids to show a scroll bar and how they will use a scroll bar.2. Show the icon of a music player, ask them to open the same and play a music file.3. Type in some words on a blank document and ask them to increase the size of the
fonts and change the colour.
71
Figure e

Worksheet( Ref. No. 2.25)1.
2. Match the following buttons with their respective functions:
3. Fill in the blanks using the correct word from brackets:
1. If there are more elements than can be displayed on the screen, then a ________ allows the user to scroll through all the contents. (scroll bar/ tool bar/ menu bar)
2. The _______ option on the menu bar allows the user to do operations like open/ close/ save/ print files. (file/ edit/ insert)
3. A ________ is a set of tools that are grouped together into an area on the main window. (menu bar/ toolbar/ scroll bar)
72
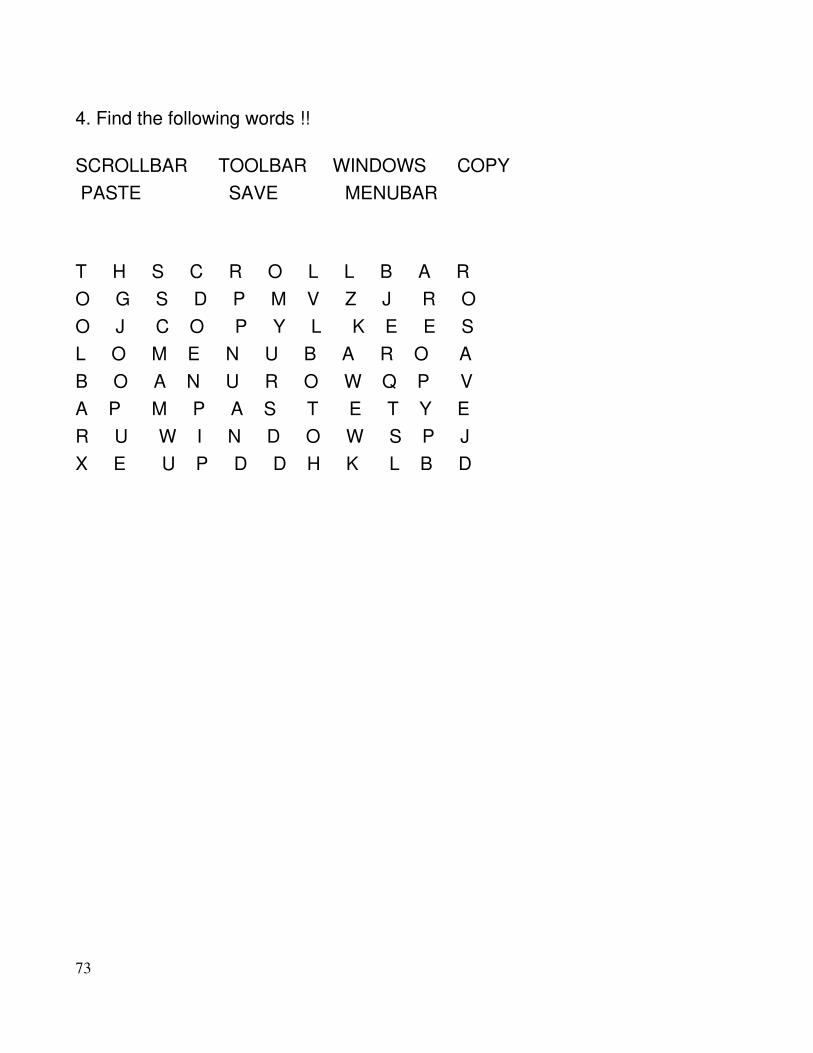
4. Find the following words !!
SCROLLBAR TOOLBAR WINDOWS COPY PASTE SAVE MENUBAR
T H S C R O L L B A R O G S D P M V Z J R OO J C O P Y L K E E SL O M E N U B A R O A B O A N U R O W Q P VA P M P A S T E T Y ER U W I N D O W S P JX E U P D D H K L B D
73

Title Create a New Document and Save itDate May, 2007 Ref No. 2.26
Contributor Dhanya Std 2
Reviewers Farida
Brief Description This topic describes how a new document is created and saved.Goal To familiarize the concept of creating a new document and saving it.Prerequisites Familiarity with computerDuration One periodReference http://www.cyberciti.biz/faq/linuxunixrulesfornamingfileanddirectory
names/
Detailed Description
“Document" refers to any kind of file. For example, it can be a file of types PDF, DOC and so on. Creating a new document means creating a new file. The type of the file created depends on the application you are using. For example, you can create an Open document text (.odt), or Open Office text document (.sxw), or Microsoft Word (.doc) and so on with the application OpenOffice.org Writer. And the file you create with the application 'Paint” will be of type JPEG, PNG and so on. Lesson Plan
Creating a New Document in OpenOffice.org Writer
Open the application by clicking on the icon for it or selecting the application from the main menu. It is under the sub menu 'office' (Applications > Office > OpenOffice.org Word Processor). Selecting this option will open up the word processor window. See figure a.
74

we can create a document by typing the contents. It can be used for anything from creating a quick letter to producing an entire book.
After creating the document, you need to save it for future use. For saving a document, press Ctrl + S (Pressing the key 'S' while pressing the 'Ctrl' key) or select the 'Save' menu as File > Save. Then a dialog box as shown below will appear.
75
figure a

Enter the name of the file and click 'Save' to save the file.
76
figure b

WORKSHEET( Ref. No. 2.26)
1. Arrange in proper orderRatish wants to open a new document, tell him what steps he should follow:
2. Neha wants to save the letter she wrote to her uncle. Can you tell her what steps she should follow? (Number the steps in order)
77
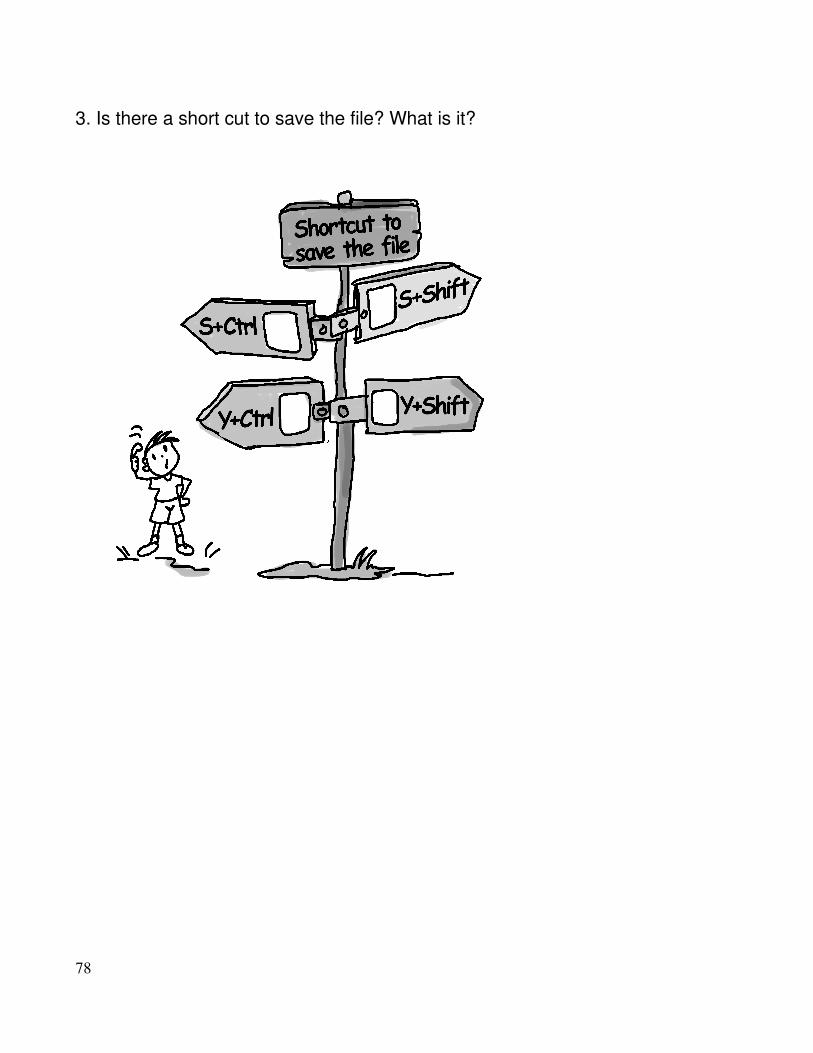
3. Is there a short cut to save the file? What is it?
78

Title Concept of File Permanence
Date: May, 2007 Ref No. 2.27
Contributor Dhanya.P Std 2
Reviewer Farida
Brief Description This topic describes the concept of saving a file using the ‘Save’ and ‘Save As’ option and then opening the file.
Goal To familiarize the ‘Save’,‘Save As’ and Open' options in an application
Prerequisites Familiarity with computer
Duration 1 session
References http://www.duke.edu/~dhewitt/tutorials/explorer/explor.html http://ctl.ifas.ufl.edu/
Detailed Description
A file is a collection of data or information that has a name, called the filename. There are many different types of files such as data files, text files, program files, directory files, and so on. Different types of files store different types of information. For example, program files store programs, whereas text files store text.
Saving a file
For saving a file, you can use 'Save As' and 'Save' options.
i) Save As When you first save a file, you are presented with a "Save As" dialog box. This box gives you all the controls you need to specify exactly where and under what name your file is saved. Using the ‘Save As’ option, a single file can be saved under different names and/or in different location.
When saving a file in a desired location, using any application, you will follow these steps:
79

1. When you are ready to save a file, click on 'File', 'Save As'2. When the 'Save As' dialog box comes up, select the directory where to store the file.3. In the 'File name' box enter your choice of a filename.4. In the 'Save as type:' box, you can select the type of the file being saved. It depends
on the application in which the file is created.5. Lastly, click on the 'Save' button. The 'Save As' dialog box for an Open Office Writer
document is illustrated in figure a.
Figure a
Selecting a Location (Folder)
Now, you can select the location where you want to save the file by selecting that from the list. Or you can click on the 'Browse for other folders' option to select another folder. It is shown in figure b.
Figure b
80

Then it will open a window as shown in figure c.
Figure c
If you select the 'Automatic File name Extension' as shown below, the file you created will be saved with an extension depending on the application as shown in figure d. Otherwise you should give the name of the file in the format Filename.extension.
Figure d
ii) Save
If u want to save a file in the current location, simply press ‘save’ button. The Save option
81

saves a document you've previously saved, writing directly over the earlier version. However, there's an exception. The first time you save any file, whether you use the 'Save' or 'Save As' options, you'll be presented with the Save As dialog box, so you can initially give the file a name. In this case, the two commands are identical.You can also use the Save As option to make a copy of an existing document.
Opening a file
If you have created a file and saved it, you can use it for future use. For opening a file, select the 'File>Open' menu. Then select the folder in which the file is saved and then select the name of the file to be opened. The dialog box that is opened when clicking the 'Open' menu is shown in figure e.
Figure e
After selecting the file, double click on it and click on the 'Open” button shown in dialog box to open the selected file.
82
Lesson Plan
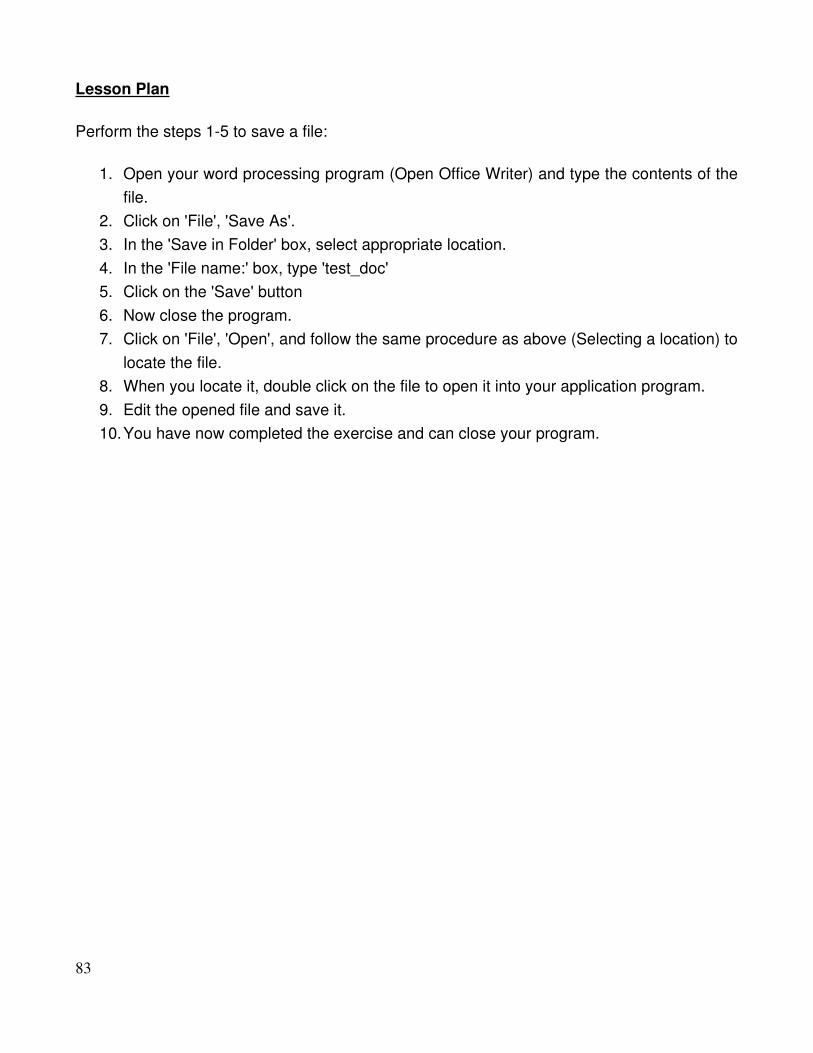
Perform the steps 15 to save a file:
1. Open your word processing program (Open Office Writer) and type the contents of the file.
2. Click on 'File', 'Save As'. 3. In the 'Save in Folder' box, select appropriate location. 4. In the 'File name:' box, type 'test_doc' 5. Click on the 'Save' button 6. Now close the program. 7. Click on 'File', 'Open', and follow the same procedure as above (Selecting a location) to
locate the file. 8. When you locate it, double click on the file to open it into your application program. 9. Edit the opened file and save it.10.You have now completed the exercise and can close your program.
83

Work Sheet (Ref. No. 2.27)
Fill in the blanks with the following words. [A word can be used more than once ]
Save Save As Name Location Open
1. For saving a previously saved file, select the _________option in the ‘File’ menu.
2. For saving a file for the first time, ____________ option takes place even if we click on the ______ option.
3. In order to save a previously saved file to a different name, use _________ option.
4. In the ‘Save As’ dialog box, we should specify the _______ and ________ of a file.
5. _______ option allows us to save a file with a different name.6. Use _____ option in the 'File' menu to open a saved file.
Lab Exercise
1. Create a document in Open office Writer and save it in a folder named ‘MyDir’. Check the type of the document saved.
2. Open the same file, edit and save it using a different name in the same folder.
Other Notes This lesson describes the concept of creating, saving and opening a file in the application 'OpenOffice Writer'. Exercise can be done with any application in any Operating System.
84

Title File Management
Date May, 2007 Ref No. 2.28
Contributor Dhanya.P Std II
Reviewers Farida
Brief Description This topic introduces the different operations on a file.
Goal To introduce the different file operations like create, copy, rename and delete.
Prerequisites Familiarity with computer and mouse usage.
Duration 1 Session
Reference http://www.computerlab.kids.new.net/parts.htm
Detailed Description
A file is a collection of data or information that has a name, called the filename. The file you create need to be saved for future use. File management means the various operations that you can perform on a file. They are mainly
a) Create a fileb) Open a filec) Cut a filed) Copy a filee) Paste a filef) Rename a fileg) Move a file to Trash
When you click on a file, it gets selected and if you right click on it, you can see a menu as shown below containing the various operations that you can perform on that file.
85

Open
Cut
Copy
Rename
Move to Trash
< some other options >
Opening a File
Click on the 'Open' option in the menu. Then the file you selected will be opened. And you can do any operations on the opened file.
Cutting a File
You can cut a file you selected, by clicking on the 'Cut' option and then the selected file will be removed from its location so that it can be paste at the desired place. For instance, you may choose to cut a file from my documents and paste it on the desktop. Remember that only when it is pasted anywhere, the file will be cut. Otherwise it will remain in the previous position only.
Copying a File
A selected file can be copied by clicking on the 'Copy' option. And then you can paste that file anywhere you want. For this, first you have to copy the file using the 'Copy' option and go to the location where you want to paste the file and right click there. Then you will be provided with a menu having an option 'Paste'. Click on that option and the file you copied will be pasted there. This option is used to make a copy of the file. Remember that the file will there in its original location also.
Renaming a File
86

A selected file can be renamed by clicking the 'Rename' option in the menu shown above. It allows a file to be known by a different name. When you click on the 'Rename' option, you are provided with an option to type the new name for the selected file as shown in figure a
Figure a In the Fig:1 , the file is a text file, and its name is 'First'. When the 'Rename' option is clicked, you are provided with an option to type the new name of that file (It is shown in blue colour in the figure). There you can type the new name of the file.
Moving a File to Trash
If you think that a file is no longer needed, you can move that file to the Trash folder. The Trash folder is a location to store all the files and folders that the user finds unwanted. It is like dustbin of a computer. The contents moved to Trash folder can later be moved to anywhere else and used, but those deleted from Trash get permanently deleted from the system. To move a file to Trash, click on the 'Move to Trash' option when that file is selected.
Lesson Plan Outline:
1. Open an application and create a file in it. Save the file and close the application.2. Select that file, right click on it and open the file using the 'Open' option.3. Make some changes to that file and close the application after saving the file. 4. Select that file and rename it.5. Select and open the renamed file and check whether there is any difference to the
content of the file from the previous one. 6. Select a file and copy and paste it into another directory (folder).7. Select a file, cut and paste it into another directory. Check whether there is any
difference to this operation from the operation in Step 6.
87
8. Select a file and cut it, but do not paste it anywhere. Check what happens then.9. Select a file and move it to Trash. Now select the moved file in Trash and place back it
to its previous location.
Lab session:
1. Select a file and open it. 2. Select a file from my documents, copy and paste it into the same location. Check what
happens then.3. Select a file from my documents, cut it and paste it to on the desktop. 4. Select a file and rename it.5. Move a file to Trash.6. Cut that file from Trash and paste it back to its previous location.
88
Worksheets:(Ref. No. 2.28)
1. For performing an operation on a file, you need to ________ the file by clicking on the file.
a) Select b) Open c) Cut
2. You can rename the file by ______________click on the file name.
a) Right b) Left
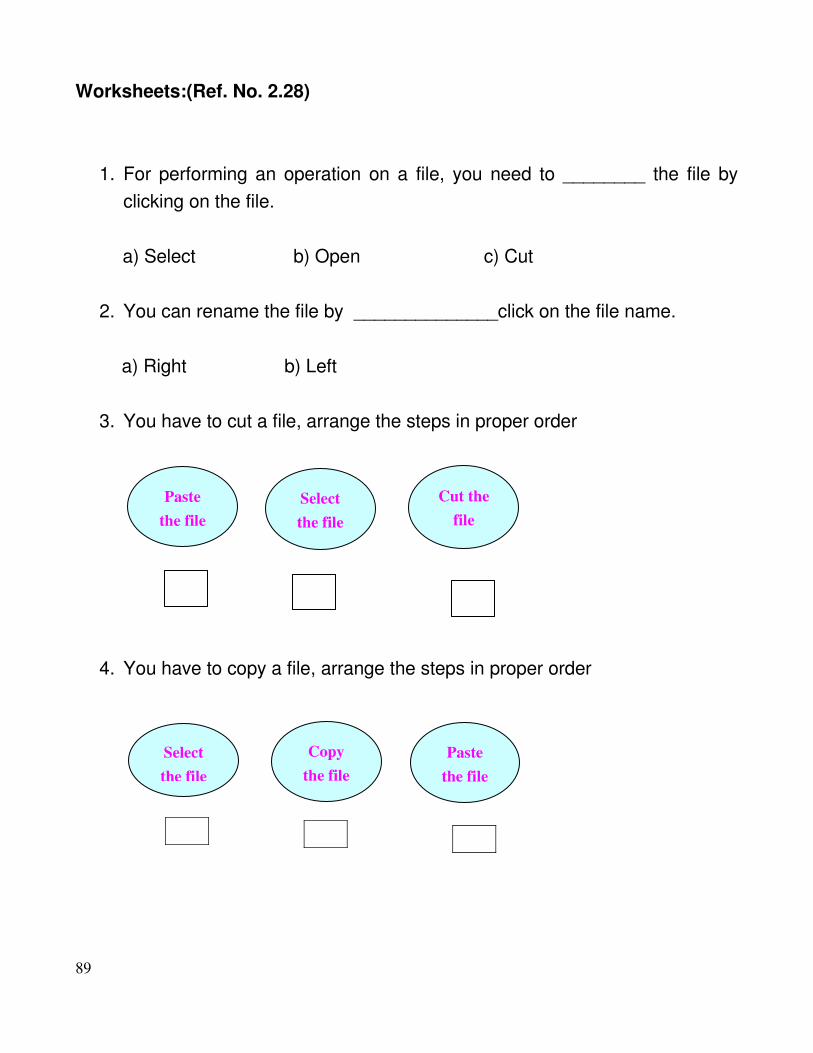
3. You have to cut a file, arrange the steps in proper order
4. You have to copy a file, arrange the steps in proper order
89
Paste the file
Cut the file
Select the file
Select the file
Paste the file
Copy the file

5. You have to delete a file from trash, arrange the steps in proper order
90
Delete from Trash
Select the File
Move to Trash

Title Worksheets and Lab Exercises for File ManagementDate May, 2007 Ref No. 2.29Contributor Dhanya Std 2
Reviewer Farida
Brief Description This topic tests student’s knowledge of file managementGoal To asses whether student has understood the concept of file
management.Prerequisites File management has been taught in the classDuration One Session
91

Worksheet (Ref. No. 2.29)1. Rita wants to open a file, tell her what steps she should follow
2. Sameer made a card for his mother. It is now in my documents. He wants to copy this file to the desktop. Can you tell him what steps he should follow?
92

3. Diya wants to move the paint files she made in Class I to trash. Tell her how to do it.
4. Nisha wants to rename the file her brother made and save it by her name. Tell her how she can do it
93

5. Answer the following questions
1. What are the operations that you can perform on a file?2. How to delete a file permanently from its storage?3. Can a file moved to Trash be restored to its original location?4. What are the difference between 'Save' and 'Save as' options? 5. What are the ways to create a new document?6. Can the symbol '/' be included in the name of a file in a Linux system?7. Is the filename '2ndStd' a valid one?
Lab Exercises
Create a file to store the Roll No: and Name of any 10 students in your class as
Roll No Name
1 _____ 2 _____ etc...
Save it by the name 'students' in a folder named 'School' .
● Close the file and open it again.● Add each student’s mother’s name as a separate column headed 'Mother’s
name'.● Save the file using another name 'studentsinfo' in the same folder.● Close the file. ● Open both the files and check whether there is any difference in the
contents of the file.● Move the file 'studentsinfo' to another directory by changing its name to
'studentsdetails'.
94

● Add the name of the subjects you are taught at the end of the file 'students'.
● Copy these added contents to the file 'studentinfo'.● Save the file 'studentinfo' and close it.
95

Title Precautions while Operating (deletion, shutdown etc)Date May, 2007 Ref No. 2.30Contributors Manjesh Kumar, Farida Std: 2
Reviewers: Farida
Brief Description
This section deals with the precautions while operating (deleting, shutdown) and teaches how to perform operation such as deletion of any files or folders in safe mode and shut down of the computer appropriately.
Goal The purpose of this lesson is to teach cautious operations of the computer
Prerequisites Familiarity with computers and file managementDuration 1 session (35 Minutes)
Detailed Description
Computers allow us to be fast in our work. But if, by mistake we delete a file or folder permanently, recovery of deleted data is not possible and we might loose a lot of important work. Hence, it is important that students learn to be cautious in deleting files or folder. They have to be taught to think well before deleting any file or file from the computer. The following steps result in cautious approach on the part of the computer use.
● Temporary Deletion: If you are moving the file to 'Trash', the file can be recovered because when you will delete the file using 'Move to Trash', then file is moved to Trash. Trash is like dustbin of computer, where you put all unwanted files or folders. As by this action, the file is not deleted permanently, this process is known as 'temporary deletion' of data. Please note that file remain in Trash until you delete from the Trash.
● Permanently Deletion: After selecting a file, if you press shift key and while it is pressed also press the delete key, it will ask for confirmation to delete it. If you press 'Delete', the file will be deleted permanently and will not be recovered again. But if you will select 'Cancel' the file will not be deleted. This process is known as ‘permanently deletion’. As by this action, you will not be able to get the file after it is deleted, it is important to be sure that you do not want the file before using this procedure. It is safe to use temporary deletion, so that you can get the file again whenever required.
96

● Shutdown operation: This operation is used to close the computer. While performing this operation make sure that the files you were working on are saved. If the computer is shut down without saving the files, important information may be lost from these files and you might end up doing the same work all over again.
Lesson Plan
1. In the class room, explain what trash is in a computer. Compare it to the waste paper basket. Show the icon in a computer.
2. Ask the students what will they do if they have thrown an important paper (e.g. tickets of the amusement park) in the waste paper basket. They might say, they will search for it in the basket. Now ask them, if they did not use the waste paper basket and threw the tickets from their window. What will happen? Will they get them back? If they made this mistake, what will they do next time? Will they use the waste paper basket or throw the unwanted material out of the window from where they will not be able to get it again!
3. Once the idea of the importance of trash box is fixed, come to the computer technology and explain temporary and permanent deletion of files.
97
Figure a
4. Now ask them if they are colouring a drawing at home and their friend calls them for playing. What will they do? Will they just leave all the crayons and drawing paper and run to play or will they put everything in its proper place and then go? Make the students think. Ask them what will happen if they leave everything lying on their desk. They may say “ I will loose some crayons, will misplace my drawing paper”. Ask them what will happen if you put things in proper place. They might say, “I can find it when I need it back.” Now introduce the concept of shut down and tell them how it helps in preventing loss of important information. Emphasize on the importance of being cautious, and being proactive. Do not wait to make a mistake and then learn from it, when you can avoid making mistakes!
5. Now you can take them to the computer lab and demonstrate temporary and permanent deletion and shut down of computer. You can use the following demonstration:
How to delete any file or folder from the computer: There are two ways of deletion of any file or folder
A) Temporary Deletion :
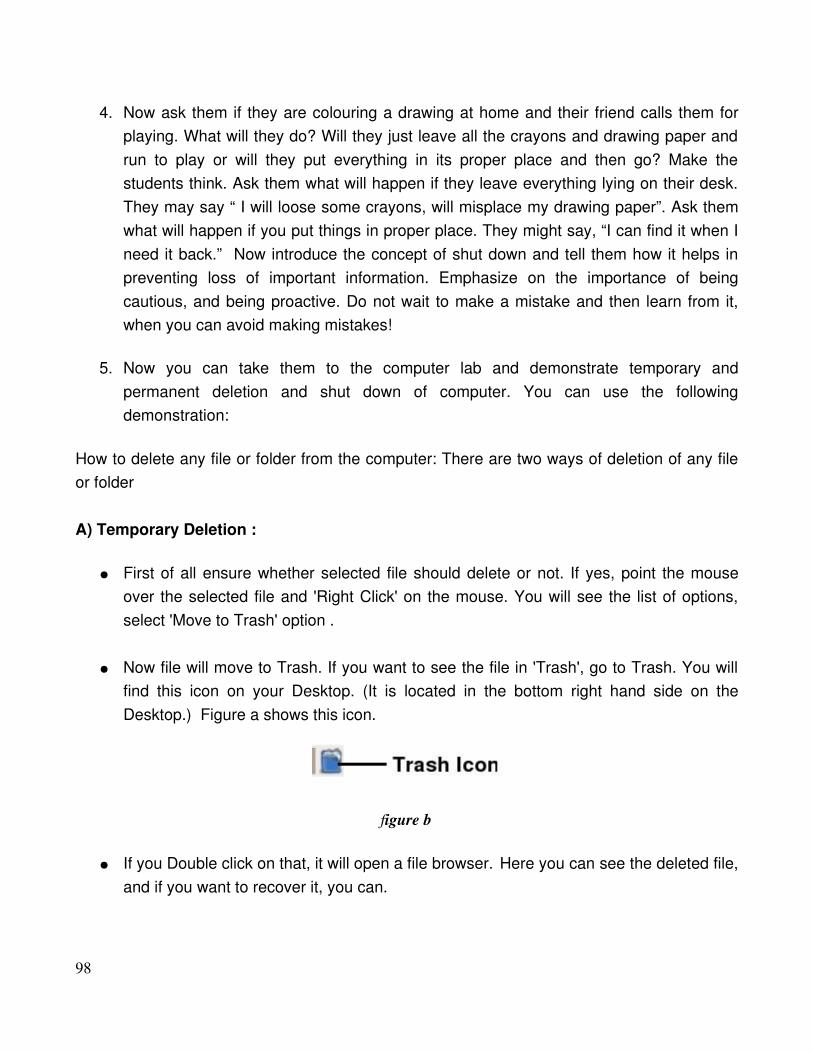
● First of all ensure whether selected file should delete or not. If yes, point the mouse over the selected file and 'Right Click' on the mouse. You will see the list of options, select 'Move to Trash' option .
● Now file will move to Trash. If you want to see the file in 'Trash', go to Trash. You will find this icon on your Desktop. (It is located in the bottom right hand side on the Desktop.) Figure a shows this icon.
● If you Double click on that, it will open a file browser. Here you can see the deleted file,
and if you want to recover it, you can.
98
figure b

Figure c
B) Permanent Deletion:
● After selecting a file, if you press shift key along with the delete key, you will see one warning window pop up. It has two options 'Delete' and 'Cancel' Se the figure below:
99

● If you select 'Delete', file will be deleted permanently and cannot be recovered again.
C) Shut Down:
At the time of computer shutdown you should save all files or work whatever you are doing currently otherwise you will loss your work. Here also the system will ask you whether to shutdown/ logout/ restart. Select the option to proceed further.
100
figure d

Worksheet (Ref. No. 2.30)
Fill in the blanks
1) Choose the correct words from below to show how you will delete a file temporarily.
101
File left right shut down delete

2) Unscramble and fill in the blanks
For permanent deletion of any file
● select the _ _ _ _ ( L I E F)
● press shift + _ _ _ _ _ _ key . (E D L T E E)
● (c) Click on _ _ _ _ _ _ button from warning window. (L E D E T E)
3) Select Right or Wrong:
a.
b. Sonu saves all the files and closes them before he shuts down the computer. _____________
Reema shuts down the computer without saving the files. ______________
102

4. Rahul wants to delete the paint file that he prepared in the first semester. Tell him what steps he should follow by arranging the following in proper order.
5. Sita wants to delete the file she had prepared in class I. Tell her what steps she should follow by arranging the following in proper order.
103
Select move to
trashSelect the file
Right click the mouse
Press Shift + Delete
Select the file
Right click the mouse