tps smartbook - soldier support institute - u.s. army
TRANSCRIPT

TACTICAL PERSONNELSYSTEM
(TPSv2.3)
SMARTBOOK

Table of Contents SOFTWARE INSTALLATION Installing TPSv2.3 and Barcode Scanner
Page 3
MANIFEST OPERATIONS Page 6Invoicing personnel for deployment PERSONNEL PROCESSING Individual Personnel Records
Page 14
TASK FORCE OPERATIONS Organizing personnel for deployment
Page 19
REPORTS Display of pre-formatted information for analysis
Page 22
SYSTEM ADMINISTRATION Page 28Essential functions for managing the system CREW Establishing min/max crews for specific equipment
Page 33
AD HOC Searching the Database for specific information
Page 36
TROUBLESHOOTING What to do if the system is not working properly
Page 40
APPENDICES A: Pre-Deployment Operations UIC Upload; Pre-manifesting; Edit
Locations B: Deployment and Sustainment Operations Manifesting; File Outputs: AMC, WINPAS;
TRN C: Redeployment Operations Redeployment Manifesting D: Scanner Setup Barcodes E: TPS Technical Support
Page 41 Page 42 Page 46 Page 53 Page 54 Page 60
Help Desk; Webpage
1

This page left intentionally blank
2

SOFTWARE INSTALLATION Installing TPSv2.3 and SCANBAR
Prior to installing TPSv2.3 the previous version of TPS must be uninstalled. If Version 1 user: Go to START, SETTINGS, CONTROL PANEL, ADD/REMOVE PROGRAMS. Then, select TPS. Once this is completed, go to WINDOWS EXPLORER and delete the C:\FMS folder and the C:\SQLANY50 folder. If Version 2, 2.1, and 2.2 user: Go to START, SETTINGS, CONTROL PANEL, ADD/REMOVE PROGRAMS. Then select TPSv2. Once this is completed, go to WINDOWS EXPLORER and delete the C:\tps folder.
Software Installation of TPSv2.3 (WIN 98, NT, 2000, and XP Compliant)
1. Insert TPSv2.3 CD in CD ROM Drive. 2. Select START, and then RUN. 3. Select BROWSE and locate CD ROM Drive. 4. Double click on SET-UP, and then select OK. 5. Follow prompts. 6. SCANBAR will install automatically and will be placed in START UP Directory.
RECOMMENDATION: Create a directory: C:\TPS1 and make a copy of the TPS database (C:\tps\tps.db) and copy it to C:\TPS1. Barcode Scanning using SCANBAR *Note: Be advised that most commercial off the shelf barcode readers can be used with TPS. Just ensure that the readers can read the one-dimensional linear barcode, Code 39, on the CAC and ID card. Additionally, ensure that the readers connect to the computer via an RS232 cable and to the serial (COM) port.
1. Double click on the SCANBAR icon located on the computer system desktop.
Scanbar.lnk
2. Select SCANBAR, which opened, and is now located on your Status Bar. 3. Left Click once on the “COM1” button on the SCANBAR COM Port Setting (Fig 1). 4. Set SCANBAR respective ‘COM’ Port Settings (Fig 2) to:
For INTERMEC Barcode Scanners: COM Settings: - Model 6480 “slot reader”: 9600; 7; Even; 1; Hardware - Sabre 1552 “Wireless” Laser: 9600; 7; Even; 1; Hardware - Model 1551-B0200: 9600; 8; Even; 1; Hardware - Model 1551-C0200: 9600; 7; Even; 1; Hardware
5. Select START on SCANBAR screen. SCANBAR can scan:
3

a. RAPIDS (Military ID Card): use ‘Social Security Number’ output b. DoD Common Access Card: use ‘Regular Barcode’ output
Click on ‘START’ after you have verified the COM port settings.
Click once on available COM port. (and only once). The default is COM1
Fig 1
By DEFAULT, COM Port Settings will be set to the following:
Fig 2: COM Port Settings for the Barcode Scanner
4

TPSv2.3 MAIN FRAME (main menu)
Fig 3
TPS MAIN menu: Accesses eight (8) functional modules and EXIT function.
5

MANIFEST OPERATIONS Invoicing personnel for deployment
NOTE: Ensure the TAPDB CD is in the drive. This must be done prior to opening TPSv2.3. If not, exit TPSv2.3 and place TAPDB in CD ROM drive and reopen TPSv2.3 after your system has recognized the TAPDB CD (takes about 10-15 seconds). Invoicing personnel for deployment
Two (2) Types of Manifests
• ‘DEPLOYED’ – Inserts a Deployment Date. • ‘REDEPLOYED’ – Deletes soldier’s Deployment Date from the database.
I. Creating a Manifest Shell Page 7
II. Adding Personnel to a “Regular” Manifest Page 8
III. Change UIC Data Page 10
IV. Change Personal Data Page 11
V. Jump Manifest Page 12
6

I. Creating a Manifest Shell:
1. From TPS Main Frame, select ‘MANIFEST’ icon. 2. Select ‘INSERT’ located on the bottom toolbar (see item 1 below).
3. Must enter a Mission Number or Mission name (item 2): (Assign a Flight #, etc.) 4. Select Manifest type: ‘DEPLOY’ or ‘REDEPLOY’ (item 3). *Note: A “Re-deployed” Manifest deletes a soldier’s deployment date from the database. *Note: The remaining fields on the Manifest Shell may be left blank or user may accept default 5. Save the Manifest Shell by clicking on the ‘SAVE’ icon (item 4), then
‘OK’.
6. You can now insert personnel/UICs on manifest (see pg. 8), or close the manifest
shell for future use.
Fig 4: Initialize a Manifest
2 3
1 4
7

II.
8
Adding Personnel to a “Regular” Manifest: If your Manifest Main Frame is still open, start at step 2 below. If you need to open an existing manifest shell, start at step 1.
1. From the TPSv2.3 Main Screen, select ‘MANIFEST’. 2. Highlight desired manifest and click on ‘SELECT’, or Double Click on desired
Manifest. 3. Select the ‘INSERT’ icon. The ‘Insert SSN/UIC/TRN/Upload SSN File’ will appear.
User can select from the following 4 options:
Fig 5: Option Screen
a. SSN/Foreign Nationals 1.) Select ‘SSN/FOREIGN NATIONALS’ filter. 2.) Select ‘OK’.
a.) Select ‘DOD PERSONNEL’ filter. (1.) Use barcode scanner to scan SSN (or type in). (2.) Optional fields:
- Weight - Deployed UIC (Dpl. UIC)
(3). Select ‘OK’. II. Adding Personnel to a “Regular” Manifest: (continued)
b.) Select ‘FOREIGN NATIONALS’ filter.

(1.) SEARCH (a.) Select ‘SEARCH’. (b.) Type last name and select OK. (c.) Highlight desired person and click on ‘SELECT’.
(2.) Enter information. (3.) Select ‘OK’.
2.) Upon completion of manifesting all deploying soldiers by the single person select ‘CANCEL’. Select ‘SAVE’, then ‘OK’.
*NOTE- information will only be accepted if persons are on the TAPDB, or have been manually added to the database in the Personnel Module. Instructions for this are on page 14.
b. UIC
1.) Select UIC filter; then select ‘OK’. *Note: TPS will display all the UICs on the Database containing deployed soldiers.
2.) Select the desired UIC. 3.) Click on ‘SELECT’. 4.) System will upload personal data. Select ‘SAVE’, then ‘OK’.
c. TRN (Transfer) Format
The TRN File allows a TPS workstation to save a manifest and share it with another TPS workstation via diskette/CD-ROM or electronically (e-mail). The TRN file can also serve as a backup for each manifest (recommended).
1.) Importing “TRN” Formatted Files. a.) Select the ‘TRN FORMAT’ filter. b.) Select ‘OK’. c.) Highlight desired file and select ‘OPEN’, or double click on desired field. d.) System will upload TRN file.
II. Adding Personnel to a “Regular” Manifest: (continued) 2.) Saving a manifest as a TRN file.
a.) With desired manifest open, select the ‘TRN’ icon on the second row of toolbars, or go to ‘Actions’ on menu, then ‘SAVE AS TRN’. b.) Select desired location and determine a filename for file to be saved. c.) Press ‘SAVE’ and confirm with YES, NO, or CANCEL. d.) Select ‘OK’.
d. Upload SSN File 1.) Select the ‘UPLOAD SSN FILE’ filter, then ‘OK’. 2.) Highlight desired file and select ‘OPEN’, or double click on desired file. 3.) System uploads personnel into database.
9

III. Change UIC Data
1. Select (highlight) individual or collective group of personnel who require a UIC, ULN, Rank, Location, Weight, Citizenship, Emergency POC (point of contact) Name, Emergency POC phone number, INS (Immigration and Naturalization Service) Document Number, INS Country of issue, and/or INS Doc (document) Expiration change.
2. Select the ‘MFST EDIT’ icon. 3. Enter correct data. When choosing INS Doc Types there are nine choices. Most likely,
being a military member, you will choose M-military identification. In doing so INS Doc Number, Country Issue, and Doc expiration will gray out, not allowing you to enter information. This information will automatically fill the selected personnel record(s) with the appropriate social security number (ssn) and Expiration Term of Service date for the military member. The INS Country Issue will default to US (United States).
4. Select ‘OK’. 5. Select ‘SAVE’, then ‘OK’.
Caution: This function will change the information for multiple personnel records. Pay close attention to records highlighted for change.
‘Deployed UIC’ is required if you want to populate the Deployment date, UIC authorizations, and view reports in the REPORT module.
Fig 6
10

IV. Change Personal Data
1. Highlight individual who requires changes. 2. Select ‘PERS EDIT’ icon at bottom of screen. 3. Make changes to record. 4. Select ‘SAVE’, then ‘OK’. 5. Select ‘CLOSE’.
Fig 7
Item 1
Item 2
Note: If you change the value in the ‘DOD COMPONENT’ (item 1) field, for example you change from ‘A’ (U.S. ARMY) to ‘F’ (U.S. Air Force) you will receive the USAF Rank and MOS tables. TPSv2.3 has the complete Rank and MOS tables for all services. Should you identify a MOS or Rank that is not in the tables, please contact Dan Addison at DSN: 221-9405/3837 or via e-mail: [email protected]. Note: TPS does not have the UIC’s (or UIC equivalents) for USAF, USN, or USMC. To add UIC’s for the other services, you can do so using the ‘Rapid UIC Upload’ function. (See instructions located within System Administration section, page 28) Note: Just ‘double-left-click’ on the UIC field (item 2), and the UIC table will open. This will allow the TPS user to see if a UIC exists in the table. If not, just go to ‘SYSTEM ADMINSTRATION’ and add that UIC.
11
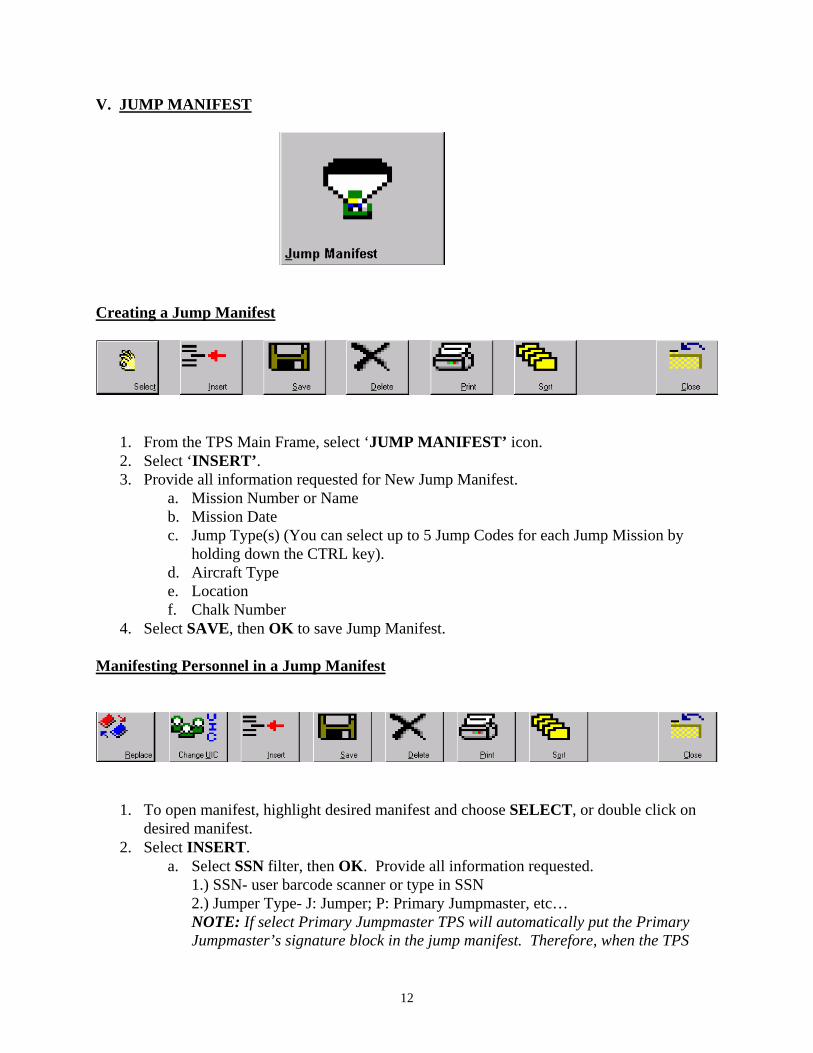
V. JUMP MANIFEST
Creating a Jump Manifest
1. From the TPS Main Frame, select ‘JUMP MANIFEST’ icon. 2. Select ‘INSERT’. 3. Provide all information requested for New Jump Manifest.
a. Mission Number or Name b. Mission Date c. Jump Type(s) (You can select up to 5 Jump Codes for each Jump Mission by
holding down the CTRL key). d. Aircraft Type e. Location f. Chalk Number
4. Select SAVE, then OK to save Jump Manifest. Manifesting Personnel in a Jump Manifest
1. To open manifest, highlight desired manifest and choose SELECT, or double click on desired manifest.
2. Select INSERT. a. Select SSN filter, then OK. Provide all information requested.
1.) SSN- user barcode scanner or type in SSN 2.) Jumper Type- J: Jumper; P: Primary Jumpmaster, etc…
NOTE: If select Primary Jumpmaster TPS will automatically put the Primary Jumpmaster’s signature block in the jump manifest. Therefore, when the TPS
12

operator chooses to print, the signature block of the selected Primary Jumpmaster will appear in the jump manifest memorandum (DA Form 1306-E).
Creating a Jump Manifest (continued) 3.) Weight
4.) Jump Door: type ‘L’ for left door, ‘R’ for right door, ‘C’ for center 5.) Type of Jump: See table (select up to 5 codes)
*NOTE: Must enter SSN and Jumper Type!!!!
b. Select Foreign Nationals filter, then OK. Provide all information requested. 1.) Name 2.) Jumper Type 3.) Date of Birth 4.) Weight 5.) Citizenship 6.) Jump Door 7.) Identification 8.) Type of Jump 9.) Type ID
3. Select ‘OK’. 4. When finished adding personnel, select ‘CANCEL’, then ‘SAVE’, then ‘OK’. 5. To delete an individual from the manifest after saving, highlight the name and press
‘DELETE’, then ‘YES’, then ‘OK’, then ‘OK’. 6. To change personal information: a. Highlight desired name. b. Select ‘REPLACE’ and make desired changes.
c. Select ‘OK’. d. Select ‘SAVE’, then ‘OK’.
** Important Note: Before Jump Manifest operations, please ensure that all of the personnel that are going to jump have their UIC on the TPS UIC table. If not, go to System Administration, and add that UIC to your UIC table.
PERSONNEL PROCESSING
13

Individual Personnel Records
I. Adding Personnel to the Database Page 15 II. Updating Data Elements for Page 18 Individual Soldiers The Personnel Module of TPS allows you to create personnel records for all Military Personnel, all DoD and Federal Civilians, Contractors, and Foreign Nationals. Should you want to upload large numbers of Military Personnel to the TPS database, you can do so within System Administration.
14

I. Adding Personnel to the Database
From TPSv2.3 Main Frame, select PERSONNEL. You will have the following three choices:
Fig 8
a. Service Member
1. Select ‘SERVICE MEMBER’. *Note: If service member is an Army soldier, the information may be pulled from the TAPDB.
2. Enter all data on Required page, all other pages are optional. 3. Select ‘SAVE’, then ‘OK’. 4. Select ‘ADD’ to add another person and ‘CLOSE’ when finished.
*Note: When entering a soldier’s name, enter Last name, First name, Middle name with one space between each.
b. Civilian 1. Select ‘CIVILIAN’. 2. Enter all data on Required page, all other pages are optional. 3. Select ‘SAVE’, then ‘OK’. 4. Select ‘ADD’ to add another person and ‘CLOSE’ when finished.
c. Foreign National 1. Select ‘FOREIGN NATIONAL’. 2. Enter all data on Required page, all other pages are optional. 3. Select ‘SAVE’, then ‘OK’. 4. Select ‘ADD’ to add another person and ‘CLOSE’ when finished.
15

16
‘REQUIRED’ TAB
Fig 9: Tab One of Adding a Soldier to the database Required Data Elements: SSN, NAME, DOD COMPONENT, SERVICE COMPONENT, MPC, RANK, UIC, MOS ‘GENERAL INFO’ TAB
Fig 10: Tab Two of Adding a Soldier to the database Required Data Elements: None Recommended: DATE OF BIRTH and BLOOD TYPE
17
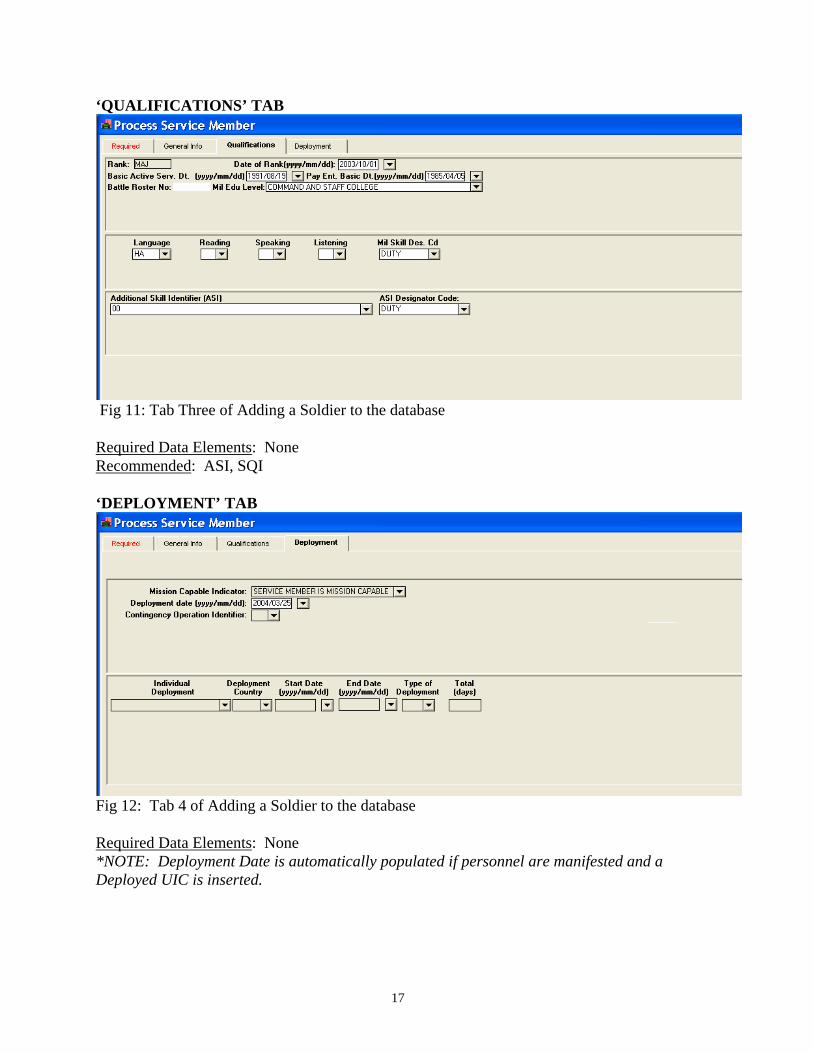
‘QUALIFICATIONS’ TAB
Fig 11: Tab Three of Adding a Soldier to the database Required Data Elements: None Recommended: ASI, SQI ‘DEPLOYMENT’ TAB
Fig 12: Tab 4 of Adding a Soldier to the database Required Data Elements: None *NOTE: Deployment Date is automatically populated if personnel are manifested and a Deployed UIC is inserted.
18
II. Updating Data Elements for Personnel
1. Within the Manifest. a. From TPSv2.3 Main Frame, select MANIFEST. b. Open desired Manifest. c. Highlight desired person. d. Select PERS EDIT. e. Make desired changes to record. f. Select SAVE, then OK.
2. In the Personnel Screen. a. From TPSv2.3 Main Frame select PERSONNEL, then select either
SERVICE MEMBER, CIVILIAN, OR FOREIGN NATIONAL. b. Make desired changes to record. c. Select SAVE, then OK.
19
TASK FORCE OPERATIONS Organizing Personnel for Deployment
I. Creating a Task Force Page 20 II. Combining Multiple Task Forces Page 20 III. Deleting a UIC From a Task Force Page 21

20
I. Creating a Task Force
1. Create a Task Force Shell.
a. From the TPSv2.3 Main Frame, select ‘TASK FORCE’. b. Select ‘INSERT’. c. Create a ‘TASK FORCE IDENTIFIER’ (ie. TF Freedom). d. Type in ‘DESCRIPTION’ (ie. 1/5 INF, 1/22 INF, etc.). e. Select ‘SAVE’, then ‘OK’.
2. Insert a single person into a Task Force.
a. Open Task Force by Double Clicking on ‘TASK FORCE IDENTIFIER’, or highlighting the Identifier and selecting ‘SELECT’.
b. Select ‘INSERT’. c. Highlight desired person and ‘Drag and Drop’ into Task Force. d. Select ‘OK’, then ‘CANCEL’, then ‘SAVE’, then ‘OK’.
3. Insert multiple personnel into a Task Force. a. Open Task Force. b. Select ‘INSERT’. c. Select multiple personnel by holding down the CONTROL KEY and
highlighting desired individuals. d. Once all individuals are highlighted, ‘Drag and Drop’ into Task
Force. II. Combining Multiple Task Forces
1. Select the Task Force to combine other Task Forces into. 2. Select ‘SELECT’. 3. Select ‘COMBINE TASK FORCES’ from 2nd tool bar.
4. Select desired Task Force(s), and select ‘SELECT’. 5. Select ‘CANCEL’ when finished. 6. Select SAVE, then OK

21
III. Deleting a complete UIC From a Task Force
1. Open desired Task Force. 2. Select DELETE UIC from 2nd Toolbar at the top of the page.
3. Highlight UIC to be deleted. 4. Select SELECT. 5. Select SAVE, then OK.
Fig 13

22
REPORTSDisplay of pre-formatted information for analysis
I. Army Personnel Summary Page 24 II. Personnel Requirements Page 24 III. Deployed Civilian Personnel Page 25 IV. Deployed Personnel Roster Page 25 V. Deployed Foreign Nationals Page 26 VI. Joint Personnel Summary Page 26

23
REPORTS: When using the reports, it is critical to realize that all reports are based on deployed personnel. The numbers do NOT reflect all the assigned soldiers within the unit. The authorized columns reflect MTOE or TDA authorizations. The Deployed columns reflect the number of soldiers deployed or manifested through the database. The PDY column reflects the number of soldiers with an Exercise Duty Status of PDY. (NOTE: Remember that if you do not have a Deployed UIC for an individual(s) they will not have a Deployment date and will not be reflected in the report).
• From TPSv2.3 Main Frame, select REPORTS. • To open a report, highlight desired report, then choose one of the following
options, then select SELECT:
Fig 14
TPSv2.3 contains the following pre-formatted reports:
Fig 15

24
I. Army Personnel Summary: This report shows the number of deployed personnel broken down by Enlisted, Warrant Officer, and Officer. It shows Required, Authorized, Assigned, Operational Strength, and Operational Percentage. It also shows the number of replacements and number attached. It breaks down Duty Status into KIA, MIA, WIA, NBI, RTD, TDY, and Others.
Fig 16: Army Personnel Summary
II. Personnel Requirements:
The output will display each MOS/AOC by grade in the category of Required. We define “Required” as the difference between the deployed and exercise PDY strength. The report will only reflect shortages. If the unit is at 100 percent strength, there will not be any requirements. The report is broken down into 3 categories: Officer, Warrant Officer, and Enlisted. To select each of these, click on desired tab at the top of the report.
Fig 17: Personnel Requirements Report:

25
III. Deployed Civilian Personnel:
This report shows name, SSN, Pay Plan, Pay Grade, Series, Sex, DoD Comp, UIC, Organization (Employer), and Duty Status.
Fig 18: Civilian Personnel
IV. Deployed Personnel Roster: Report shows NAME, SSN, MPC, SVC COMP, GRADE, DUTY STATUS, DUTY MOS, SEX, UIC, and LOCATION DEPLOYED TO.
Fig 19: Deployed Personnel Roster: Note: The TPS user can save all Reports in other file formats, such as EXCEL, dBASE, ASCIII text, SQL, etc.. Just click on the “SAVE AS” icon located at the top of the screen.

26
V. Deployed Foreign Nationals: Report shows NAME, ID, SEX, MILITARY OR CIVILIAN, TITLE, and COUNTRY.
Fig 20: Deployed Foreign Nationals VI. Joint Personnel Summary: Report shows same as Army Personnel Summary, but is also broken down into Army, Air Force, Navy, Marine, Civilians, and Foreign Nationals.
Fig 21: Joint Personnel Summary

27
*NOTES: • If Task Force filter is selected, then highlight desired Task Force and select
SELECT. • If UIC Filter is selected, then type desired UIC and select SELECT. • If location filter is selected, then highlight desired location, then select OK.

28
SYSTEM ADMINISTRATION Essential functions for managing the system
I. Adding UICs to TPS Database Page 29 II. Personnel Uploads Page 30
III. Resetting all Personnel to PDY Page 30 IV. Removing a Record from Database (use caution) Page 31
V. Changing Duty Status for Multiple Persons Page 31
29
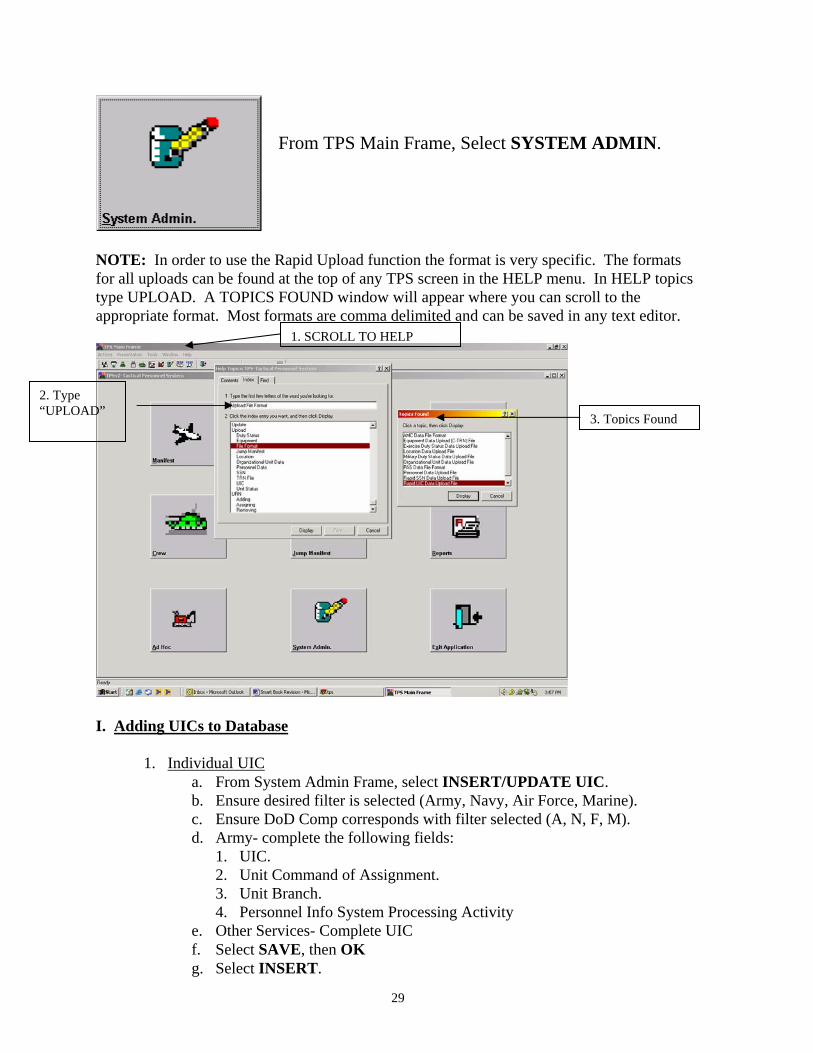
From TPS Main Frame, Select SYSTEM ADMIN.
NOTE: In order to use the Rapid Upload function the format is very specific. The formats for all uploads can be found at the top of any TPS screen in the HELP menu. In HELP topics type UPLOAD. A TOPICS FOUND window will appear where you can scroll to the appropriate format. Most formats are comma delimited and can be saved in any text editor.
1. SCROLL TO HELP
2. Type “UPLOAD” 3. Topics Found
I. Adding UICs to Database
1. Individual UIC a. From System Admin Frame, select INSERT/UPDATE UIC. b. Ensure desired filter is selected (Army, Navy, Air Force, Marine). c. Ensure DoD Comp corresponds with filter selected (A, N, F, M). d. Army- complete the following fields:
1. UIC. 2. Unit Command of Assignment. 3. Unit Branch. 4. Personnel Info System Processing Activity
e. Other Services- Complete UIC f. Select SAVE, then OK g. Select INSERT.

30
h. When finished adding UICs, Select CLOSE. 2. Rapid UIC Upload
a. From System Admin Frame, select RAPID UIC. b. Select UPLOAD. c. Find File to be uploaded. This file can be easily made in a notebook, all
capital letters and must be in the following format: UIC[tab]UNIT DESCRIPTION[tab]DOD COMPONENT
d. Select OK. e. Select CLOSE.
II. Personnel Uploads
1. Personnel a. From System Admin Frame, select PERSONNEL. b. Find file to be uploaded. (Additional instructions can be found in appendix
H, Personnel Upload.) This file can be easily made in a notebook, all capital letters and must be in the following format: SSN,NAME,SEX,DOD COMP,SERVICE COMP,PAY
GRADE,RANK,PMOS,ASI,SQI,HUIC,CUIC,DOB *NOTE- ASI and SQI are not required fields, however, a comma must be entered as a placeholder for them. EX.
741852963,ARMY GOVERNMENT ISSUE,M,A,R,E8,MSG,91B,,,ATEST1,ATEST2,19720601 987654321,MARINE JOHN DOE,M,M,R,E6,SSgt,0193,,,MTEST,MTES2,19700530 654321987,NAVY JANET DOE,F,N,R,E5,PO2,HM2,,,NTEST,NTES2,19650813 321654987,FORCE AIR JORDAN,M,F,R,E6,TSgt,0321,,,AFTEST01,AFTEST02,19620720
c. Select OK. d. Select ADD, then OK, then CLOSE, then YES.
2. Rapid SSN
a. From System Admin Main Frame, select RAPID SSN. b. Find file to be uploaded. This file can be easily made in a notebook, all capital
letters and must be in the following format: SSN,UIC c. Select OK.
1. Select ADD to add personnel to a manifest. a. Highlight desired manifest. b. Select SELECT, then OK. c. Select CLOSE, then OK.
2. Select CLOSE, then YES to exit screen. III. Resetting all Personnel to PDY (Present for Duty)
1. From System Admin Main Frame, select RESET STATUS.

31
2. Select from the following three choices to reset duty status:
Fig 22
a. Exercise Duty b. Military Duty Status c. All
3. Select OK, then CLOSE. IV. Removing a Record from the Database
1. From System Admin Main Frame, select DATABASE MANAGEMENT. 2. Highlight name to be deleted. 3. Select DELETE, then YES, then SAVE, then OK.
V. Changing Duty Status for Multiple Persons 1. From System Admin Main Frame, select DUTY STATUS.
2. Select from the following 2 options:
Fig 23
a. Exercise Duty Status b. Military Duty Status
3. Select OK.

32
4. Find file to be uploaded. This file can be easily made in a notebook, all capital letters and must be in the following format:
SSN,DUTY STATUS 5. Select OPEN. 6. Select OK, then ADD, then OK. 7. Select CLOSE, then YES.

33
CREWING Establishing min/max crews for specific equipment
I. Add/Update Equipment Page 34 II. Assign SSN to Equipment Page 35 III. Assign a Crew to a Designation (Task Force) Page 35
34
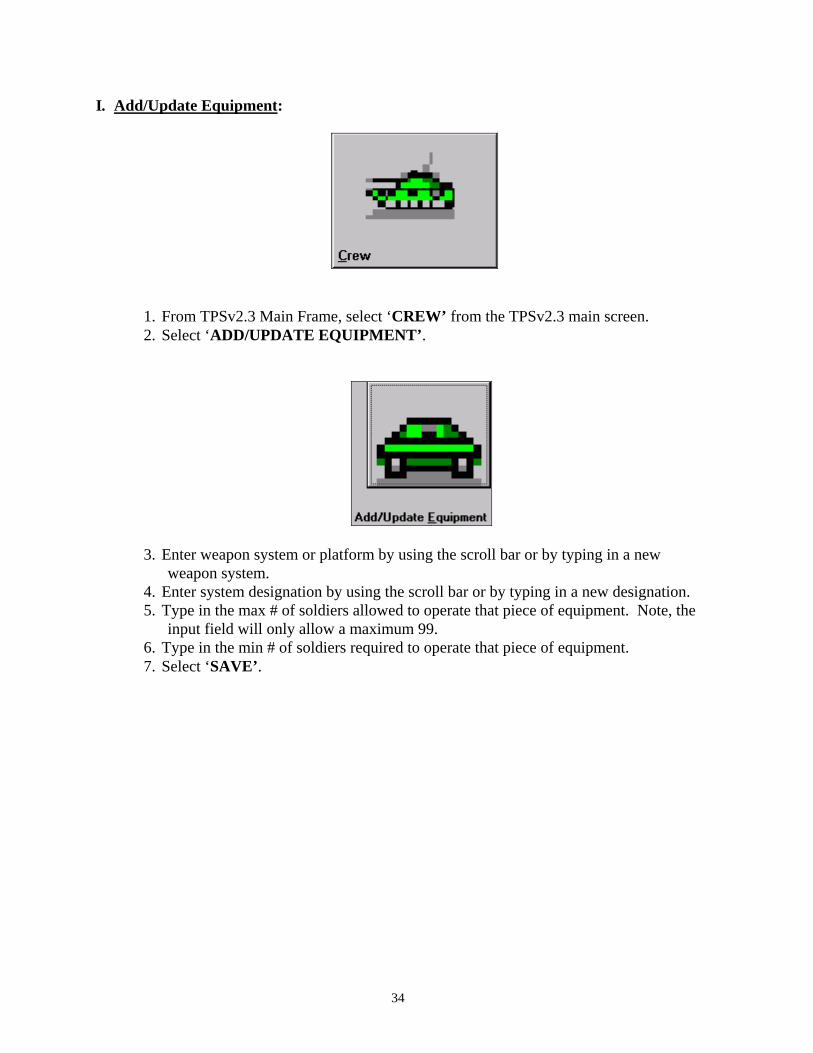
I. Add/Update Equipment:
1. From TPSv2.3 Main Frame, select ‘CREW’ from the TPSv2.3 main screen. 2. Select ‘ADD/UPDATE EQUIPMENT’.
3. Enter weapon system or platform by using the scroll bar or by typing in a new weapon system.
4. Enter system designation by using the scroll bar or by typing in a new designation. 5. Type in the max # of soldiers allowed to operate that piece of equipment. Note, the
input field will only allow a maximum 99. 6. Type in the min # of soldiers required to operate that piece of equipment. 7. Select ‘SAVE’.

35
II. Assign SSN (or Crew) to Equipment:
1. From Crew Main Screen, select ASSIGN SSN TO DESIGNATION.
2. To add Bumper Number/URN, highlight the designation (in left box), select INSERT, type number and hit the ENTER key.
3. To assign, highlight SSN. Drag SSN (in right box) and drop on bumper number/URN (in left box).
4. To unassign, highlight SSN (in left box) and drag and drop on UIC/SSN (in right box).
5. Select CLOSE. (NOTE: TPS can only assign soldiers)
III. Assign a Crew to a Designation:
1. From Crew Main Screen, select ASSIGN CREW TO A DESIGNATION 2. To assign, highlight Bumper Number/URN (in right box). Drag and drop into
Task Force (in left box). 3. To transfer, Drag and Drop SSN on bumper Number/URN (within right box only). 4. To undo, highlight the previously assigned Bumper number/URN (in left box),
select UNDO from 2nd toolbar at the top of the page. 5. Select CLOSE. (NOTE: TPS can only assign soldiers)

36
AD HOC Query Searching the Database for specific information
(i.e., Personnel, Task Force, Crew, and Deployment Data)
The Ad Hoc window allows users to build simple select query reports. •
• From the TPSv2.3 Main Frame, select AD HOC. The Ad Hoc Query window provides the following features:
1. The STYLE menu is automatically selected after the AD HOC has been selected.
– The user can select one of three report formats: -Grid (recommended by default)
-Form -Tabular
2. Click on SELECT TABLE. The user can select up to two tables. The system will not allow the selection of more than two tables.
*Note: In the example below, we have selected the "DOD_PERSON” and “DOD_PERSONNEL_MANIFEST.”
Fig 24 Ad Hoc Query (continued)
3. Select COLUMNS. TPSv2.3 provides a table that includes various fields:
-Column Selection – Allows the user to select only the required table columns to be displayed on the report. The Column tab also provides the following three functions:
-Perform Count – When the user selects this option the Quick Query will
return a record count of the number of records that the query found. The user can simply double click in the report display area to retrieve these records.

37
-Distinct -- Gives the user the option to force the Quick Query to return only unique values.
-Sum Columns – When this option is selected, the Columns tab will only
display numeric columns. When the user selects these columns the Quick Query will return a summed total of these columns.
Fig 25
4. Select JOIN. *Note: Active only when two tables are selected – Allows the user to select a single column that the two selected tables have in common. This will cause the Quick Query to return only the rows that are in common between the two selected tables. Ad Hoc Query: continued
Fig 26
5. Select SORT. Allows the user to sort the report based on the columns of the selected tables. Columns will be sorted by ascending unless the descending block is checked.
Fig 27
38
6. Select RETRIEVE (middle right of screen) in order to run the query. Optional: SQL (Structured Query Language) – Should the TPSv2.3 user wish, this function allows the user to view the SQL statement that was built (Note: The SQL tab is not populated until the query is executed). Ad Hoc Query: continued Custom queries: Filtering Data - Many records may be returned when executing a query. TPS provides a way to further narrow the search criteria and return only those records that you want to see. The filter section of the Ad Hoc Query window is the section that provides this functionality.
1. Click Ad Hoc Query in the TPS-Tactical Personnel System Main window. The Ad Hoc Query window will appear.
2. Build a query using the tabs at the bottom of the Ad Hoc Query window. For more information, see Adhoc and Designing Custom Queries in the HELP menu.
3. Select the column that contains the data that you want to filter on using the list of available columns provided.
4. Select the operator from the list of available operators. They are as follows: · = Equal · < Less Than · > Greater Than · <> Not Equal · <= Less Than or Equal · >= Greater Than or Equal · %...% Like · Is 5. Type the value that you would like to filter on or choose from the list of
available columns in the Value field. (NOTE: Value codes can be found using TESS at the top of the page)
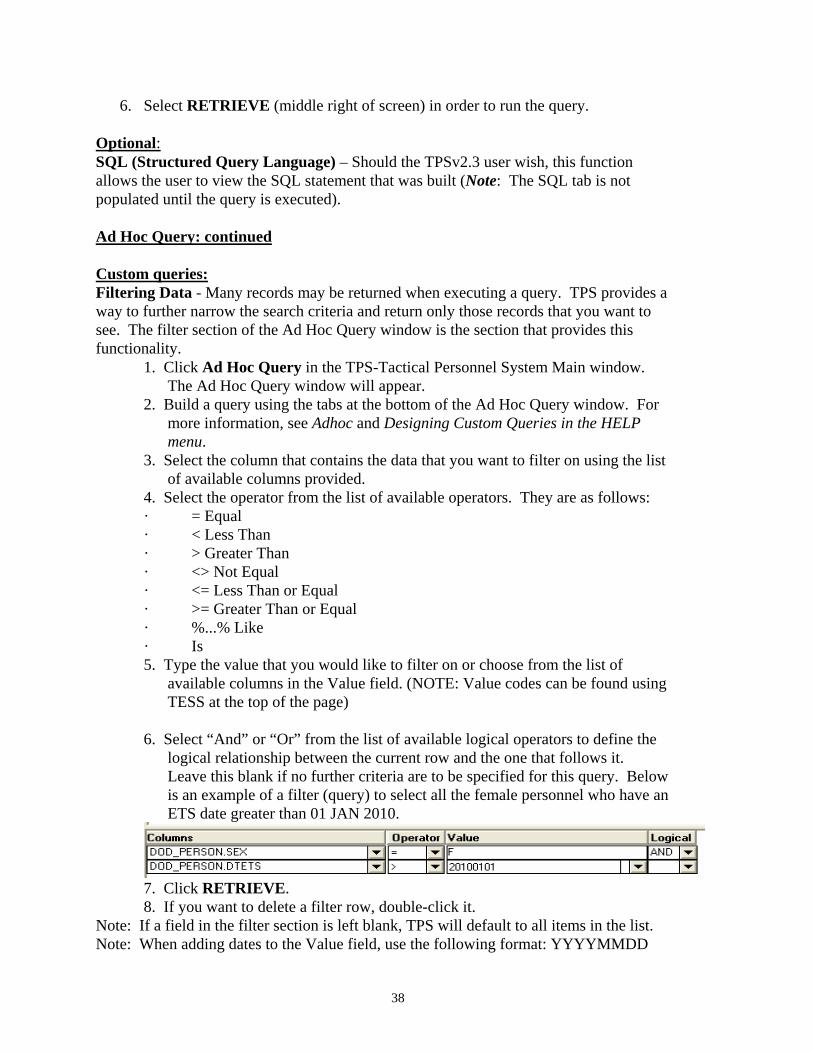
6. Select “And” or “Or” from the list of available logical operators to define the
logical relationship between the current row and the one that follows it. Leave this blank if no further criteria are to be specified for this query. Below is an example of a filter (query) to select all the female personnel who have an ETS date greater than 01 JAN 2010.
7. Click RETRIEVE. 8. If you want to delete a filter row, double-click it.
Note: If a field in the filter section is left blank, TPS will default to all items in the list. Note: When adding dates to the Value field, use the following format: YYYYMMDD
39
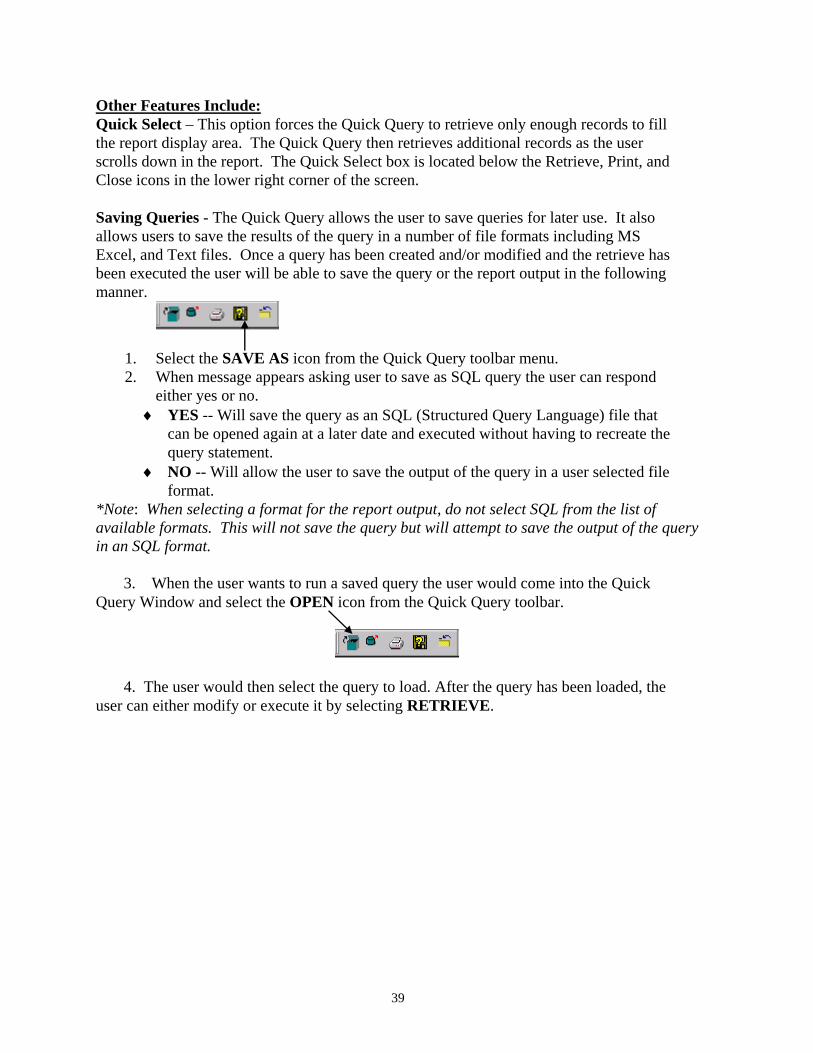
Other Features Include: Quick Select – This option forces the Quick Query to retrieve only enough records to fill the report display area. The Quick Query then retrieves additional records as the user scrolls down in the report. The Quick Select box is located below the Retrieve, Print, and Close icons in the lower right corner of the screen. Saving Queries - The Quick Query allows the user to save queries for later use. It also allows users to save the results of the query in a number of file formats including MS Excel, and Text files. Once a query has been created and/or modified and the retrieve has been executed the user will be able to save the query or the report output in the following manner.
1. Select the SAVE AS icon from the Quick Query toolbar menu. 2. When message appears asking user to save as SQL query the user can respond
either yes or no. ♦ YES -- Will save the query as an SQL (Structured Query Language) file that
can be opened again at a later date and executed without having to recreate the query statement.
♦ NO -- Will allow the user to save the output of the query in a user selected file format.
*Note: When selecting a format for the report output, do not select SQL from the list of available formats. This will not save the query but will attempt to save the output of the query in an SQL format.
3. When the user wants to run a saved query the user would come into the Quick Query Window and select the OPEN icon from the Quick Query toolbar.
4. The user would then select the query to load. After the query has been loaded, the user can either modify or execute it by selecting RETRIEVE.

40
TROUBLESHOOTING What to do if the system is not working properly
TPSv2.3 Trouble Shooting: 1. Unable to access TPS Database: Should you receive a “database roll-back error”:
a. Open C:\tps within WINDOWS EXPLORER, and delete the tps2.log file. If this doesn’t work, then you may have a corrupted database. See item ‘b”.
b. Copy the saved database (tps.db file) from your TEMP directory and hopefully you did this as instructed by the SMARTBOOK within TPSv2.3 Software Installation instructions. If not, then you will need to reinstall TPSv2.3
2. Unable to access TAPDB file:
a. Make sure that you have the TAPDB CD inserted, and you clicked on the TAPDB icon on your toolbar. Give the system time to access the TAPDB CD before clicking on the TAPDB icon.
b. If not a., then check the CD to see if it is scratched or nicked. If so, please use another CD, and destroy this CD once it is no longer needed.
3. Unable to scan in SSN using barcode scanner and SCANBAR:
a. The SCANBAR COM settings may be incorrect, please see page 3 of this SMARTBOOK.
b. Ensure that the Barcode Scanner has been set-up correctly. - You may want to run the ‘set-up’ barcodes through the ‘Slot Reader’ type barcode scanner, or if you are using the “wireless-type”, just scan the ‘set-up’ pages.
4. Receive a SQL Anywhere window prompting for a user id and password: a. The connection with the TPS database has been corrupted. b. Click CANCEL in the SQL Anywhere window. c. Open the TPS folder located in the C:\ drive (c:\tps). d. Locate the tps2.log or the tps6.log file and delete it. e. Restart TPS.

41
APPENDICES
Table of Contents
APPENDIX A PRE-MANIFEST OPERATIONS PAGE 42-45
APPENDIX B
DEPLOYMENT/ MAINTAINING AND
SUSTAINING A DEPLOYED DATABASE
PAGE 46-52
APPENDIX C REDEPLOYMENT OPERATIONS
PAGE 53
APPENDIX D SCANNER SETUP BARCODES PAGE 54-59
APPENDIX E HELP DESK/WEB PAGE PAGE 60

42
APPENDIX A
PRE-MANIFEST OPERATIONS 1. UIC SCRUB This is an important process that cannot be overlooked. The user must ensure that the organization table (table of UICs) on the TPS database includes all UICs that will be encountered during the deployment. This is a very tedious process that entails attention to detail to acquire complete accuracy. The following steps will facilitate this process. a. Acquire a compiled list of UICs b. Click on the System Admin icon; click on the Insert/Update icon c. Choose the filter for the appropriate Service (i.e. Army, Air Force, Nave, Marines) d. Type in the first UIC in the UIC field; click the Save icon e. If the UIC already exists on the TPS database, the user will receive a “Duplicate UIC” message. The user is ready to check the next UIC. If the UIC does not exist on the TPS database, the user will receive an “Error” message. The user must finish populating the required fields for the UIC to save properly. 2. ADDING ADDITIONAL UICs USING ‘RAPID UIC UPLOAD’
The RAPID UIC upload allows the user to upload an entire list of UICs into the database using a specific file format. APPENDIX A: RAPID UIC UPLOAD (continued)
1. The ‘UIC’ file can be sent to another TPSv2.3 laptop for rapid UIC upload.
2. To upload a “UIC” file, simply perform the following steps:
a. Select the Systems Admin icon on the TPS main menu.
b. Select Rapid UIC icon (seen above). c. Select the correct file name for the UIC file that you are uploading, and select OPEN. After uploading the UICs to the database, select OK.

43
UIC Text File Upload Requirements:
Format: 1. Comma Delimited format: UIC, Unit Description (no more than 15 characters), DOD Component 2. Carriage Return EXAMPLES: ARMY WHWMAA, 571ST MP CO, A AIRFORCE AFTEST01, AIRFORCE UNIT, F NAVY NAVY1, NAVY UNIT, N MARINE MARIN, MARINE UNIT, M 3. PRE-MANIFESTING INDIVIDUALS/UICs The pre-manifesting process allows the user to “lean forward in the foxhole” and begin preparation for the establishment of a deployed database. The below instructions will facilitate this process. 3. PRE-MANIFESTING INDIVIDUALS/UICs (continued) 1. Create a TPS manifest shell 2. Click on "INSERT" 3. Select the "UIC" option 4. Type your first UIC, then you can use the “control” key to highlight all of the UICs that you want to put on that manifest. Notes:
a. We recommend against exceeding 15 UICs per manifest. This is mainly due to the time that it would take to write all of the personnel to the manifest and database for a large number of UICs at one time. b. Ensure everyone is on the manifested UIC, if not, add the missing folks individually by inserting via SSN. c. Do not provide "pre-manifested" personnel with a "deployed UIC", due to the impact that this will have on your Authorization Files and Reports.
44
5. After all personnel that need to be added to the manifests have been added, and you have removed all those no longer assigned, then you are ready, to save this as a "TRN file", and provide it to all of your TPS users. 6. Have all the TPS users create a manifest shell, then select INSERT, "TRN" file format. 7. After all TPS users have uploaded the TRN file, click SAVE. 8. All TPS users must now select System Admin; click on RESET status and reset "deployment dates". 4. ADD/EDIT LOCATIONS TPSv2.3 will allow the user to modify existing locations or add new locations to the location table. This gives the user the ability to delete all locations that are not applicable during the current deployment, as well as add additional locations that may not be present on the TPS database.
1. Select ‘MANIFEST’ from the TPSv2.3 Main Frame. 2. Select a manifest; open the manifest 3. Select ‘EDIT LOCATION’ (located on the top…second toolbar)
4. To ‘ADD/EDIT’ a location, select ‘INSERT’. Type the Location ID and Location
Name for new location into the fields. 5. To ‘DELETE’ a location, highlight the desired location and click delete. Finally
click the save icon. The location is no longer present on the TPS location table.

45
Fig 30
6. Select ‘SAVE’, then ‘OK’. The new location is now added to the locations table. 7. Select ‘CLOSE’ to return to the Manifest window.

46
APPENDIX B
DEPLOYMENT OPERATIONS 1. TPS MANIFEST The manifest is the platform for establishing the deployed personnel database. Personnel can be added to a TPSv2.3 manifest in the following ways: • Inserting personnel (soldiers and DoD civilians) via “scanning” RAPIDS/CAC card
with a barcode scanner, or manually typing the SSN. • Adding single/multiple UICs off of the TAPDB CD. • Personnel Uploads • Rapid SSN Uploads • “Rapid SSN Entry” process (see page 30). This process allows for loading a
column or “string” of SSN’s into the TPSv2.3 database, and establishment of a deployment data for all of these personnel. A TPSv2.3 user can load as many personnel at a time with this method as desired.

47
Fig 31 2. SORTING THE MANIFEST The manifest can be sorted as desired by the user. The most common ‘sort’ is “alphabetically by current UIC and name. The sort function is a simple ‘drag and drop’ process.
Sort Icon

48
Fig 32 *Note: The creation of a TPSv2.3 manifest accomplishes the following tasks: (All at one time)
• Creates a Personnel Deployment Manifest. • Provides this manifest in a format for TRANSCOM In-Transit Visibility. • Provides a file for WINPAS upload. • Provides a format/back-up of this manifest for sharing
with other TPSv2.3 users. • Establishes a Deployed Personnel Database.

49
APPENDIX B: DEPLOYMENT OPERATIONS (continued) 3. AMC FORMAT 1. TPSv2.3 provides a file that can be provided directly to the Air Force or
TRANSCOM, thus allowing for ‘In-Transit Visibility’ of deploying personnel. 2. The TPSv2.3 user only needs to have the TPSv2.3 manifest open, then click on the
“AMC” icon, save the AMC file to a diskette, then give the diskette to an Air Force or TRANSCOM representative.
AMC Icon 3. Below is an example of a comma delimited AMC input file taken directly from a
TPSv2.3 manifest: AMC File Example: DOE JOHN,111111111,PV1,CEFCAA,11B,A SMITH MARY,222222222,MAJ,CEFCAA,42A,A BOND JAMES,007007007,LTC,CEGCAA,11A,A Note: The fields above are: Name, SSN, Rank, ‘ULN’, MOS, DoD Component 4. To create AMC from TPSv2.3 Manifest:
a. Select SAVE AS AMC b. Name the file and designate where it is to be saved. c. Select YES, then OK.
50
APPENDIX B: DEPLOYMENT OPERATIONS (continued) 4. “PAS” (WINPAS) FORMAT
1. The TPSv2.3 user can save the open TPSv2.3 manifest directly to WINPAS (PAS) format for upload in-Theater in Europe, to include Bosnia, and Hungary. Just click on the ‘PAS’ icon, and save the ‘PAS’ file to a diskette.
*Note: ‘PAS’ file is automatically named: RCIS.txt.
2. Example of TPSv2.3 WINPAS (‘PAS’) file output:
DOE JOHN HAROLD 111111111 PV1 1PTAA BOND JAMES 007007007 LTC ASFT0 SMITH MARY ELIZABETH 222222222 MAJ 1PTAA WINPAS (PAS) File Upload Requirements: 1. 64 Characters wide, fixed-width format. 2. Records are “wrapped” (no carriage return). 3. File must be re-named “rcis.txt”. Format: Name SSN Rank UIC 27 char 1 space 9 char 1 space 3 char 6 spaces 5 char 12 spaces To create PAS from TPSv2.3 Manifest:
1. Select SAVE AS PAS. 2. Select YES, then OK.

51
APPENDIX B: DEPLOYMENT OPERATIONS (continued) 5. “TRN” FORMAT
TRN Icon 1. The ‘TRN’ (TRANSFER) file format allows for the back-up and “sharing” of the TPSv2.3 personnel manifest. Every record must contain a UIC! Perform a sort by CURUIC prior to performing a “TRN” File Save.
2. The ‘TRN’ file can be sent to another TPSv2.3 laptop for manifest upload. 3. To upload a “TRN” file, simply perform the following steps:
f. Create a “new” Manifest Shell within TPSv2.3 Manifest Operations as per Page 6.
g. Select INSERT as per Page 7, and select TRN FORMATTED FILE. h. Select the correct file name for the TRN file that you are uploading, and
select OPEN. After uploading the Personnel Records to your Manifest Shell, select SAVE.
*Note: Not only does this process populate your Manifest Shell, it also established these records on your database, thus establishing the Deployed Personnel Database on TPSv2.3. To create TRN from TPSv2.3 Manifest:
1. Select ‘SAVE AS TRN’. 2. Name the file and designate where it is to be saved (. 3. Select YES, then OK.
6. Maintaining and Sustaining a Deployed Database
1. Incoming Personnel: As a Theater TPS user, you will rely heavily on receiving TPS ‘TRN’ files from the APOE’s. Upon receiving a ‘TRN’
APPENDIX B: DEPLOYMENT OPERATIONS (continued)
1. Incoming Personnel (continued)
file from a TPS user, ensure that upon ‘inserting’ the TRN file, you ensure all records on the manifest have a ‘deployed UIC’

52
a. Ensure all incoming personnel are placed on a ‘deployment’ manifest. b. All personnel records on ‘deployment manifests’ must have ‘deployed UIC’s’. c. If a record does not have a have a deployed UIC, then this record will create a
delta between ASSIGNED/OPERATING strength versus REQUIRED/ AUTHORIZED strength. Should you observe the delta mentioned above, you should immediately suspect that you have a manifest(s) that has a record(s) missing a ‘deployed UIC’. If this is the case, perform the following operation:
1.) Open Manifest Operations 2.) Open each manifest one at a time, and perform a SORT by ‘Deployed
UIC’. All records missing a ‘Deployed UIC’ will be among the top records on the manifest. Highlight the record missing the deployed UIC, and click on the ‘MANIFEST EDIT’ icon, and type in the correct deployed UIC for that soldier. You may need to contact the S1 or 1SG for this soldier in order to ensure you have the correct deployed UIC.
2. Redeploying Personnel
a. Ensure all departing personnel are placed on a ‘redeployment manifest. b. The ‘redeployment manifest’ automatically removes the ‘deployment date’ for
TPS personnel records, thus ensuring accurate Reports. 3. Reports: The three primary reports that you will use to display you deployed personnel database are:
53
APPENDIX B: DEPLOYMENT OPERATIONS (continued) a. Army Personnel Summary: TPSv2.3 can run this report by ‘All Deployed’, or by
individual UIC. Unfortunately, TPSv2.3 is unable to run this report by Task Force or Location due because we still need to be able to create Authorization Files ‘on the fly’ at this level of resolution. This report displays a summary of personnel broken down by Enlisted, Warrant Officer and Officer. It displays Required, Authorized, Assigned, and Operating Strength. Just click on REPORTS, then click on Army Personnel Summary.
b. Joint Personnel Summary: This report provides the same display as the Army
Personnel Summary, but it does so for USA, USAF, USMC and USN personnel, as well as civilians (DoD personnel and Foreign Nationals). Just click on REPORTS, then click on Joint Personnel Summary.
c. Deployed Personnel Roster: This report displays the following data on all deployed personnel: Name, SSN, MPC, DoD Component, Rank, Duty Status, MOS, Gender, Deployed UIC, and Location. This report can be run at all levels of resolution: All Deployed; UIC; Task Force; and Location. The user can save this report in other formats, such as EXCEL, Text, SQL, DBASE, etc.

54
APPENDIX C
RE-DEPLOYMENT OPERATIONS
A ‘REDEPLOY’ MANIFEST deletes the soldier’s Deployment Date from the database. This removes the soldier’s authorization/requirement file from the TPS UIC authorization table, therefore, removing the soldier from all reports. However, the soldier still remains on the TPS database. This is an integral piece to maintaining and sustaining a deployed database. Creating a Redeploy Manifest is covered in “CREATING A MANIFEST SHELL” on page 6.

55
Appendix D SCANNER SETUP BARCODES
Setup for the 6480 Slot Reader for use with TPS
Option 1 is the quickest and easiest option.
Option 1: Use SCANTEAM barcodes provided in this appendix, or if you prefer, you can print them from the TPS WebPages. 1. Attach the RS-232 (9-pin serial) cable of the 6480 “Slot Reader” to the RS-232 port on the
back of your laptop. Plug in the power source for the 6480 “Slot Reader”. Power on your laptop/PC.
2. Slowly slide the barcodes (with the barcode pointing towards the white label on top of the
6480 Slot Reader) in the following sequence “Enter”, “V”, “A”, and “Exit”. Ensure that you see a Green Light flash as you slide the barcode through the 6480 Slot Reader. That’s it! -- Use the 4 barcodes in the following sequence • Enter - should see the green light flash twice • V - should see the green light flash once • A - should see the green light flash once • Exit - should see the green light flash twice
3. If any questions on this, please call DSN: 734-8568, commercial (803) 751-8568, or email
[email protected] Options 2: Setting up the Bar Code Reader BCR-6480 slot-scanner, using the Welch-Allyn software: 1. Download the attached file “BCRSETUP” to your “C:\” directory 2. Connect scanner to computer and power supply 3. Insert the Welch Allyn 3.5 floppy disk into the computer 4. Click on RUN from the START menu 5. Click on BROWSE 6. Select the A:\ drive then select the BCR-MENU file 7. click OPEN then Click RUN, this will open the BCR MENU program (Note: the mouse DOES NOT WORK in the BCR-MENU program use the arrow keys to navigate the screen, instructions are at the bottom of the screen) 8. When the BCR-MENU program opens, LOAD SETTINGS will be highlighted. Press ENTER, this will move the cursor and open a box labeled FILENAME 9. Type the location and name of the setup file, i.e. C:\BCRSETUP, then press ENTER LOAD SETTINGS will be highlighted again, arrow over to the right 3 times till the words INSTALL_TO_BCR are highlighted and press ENTER 10. The words SERIAL PORT -- COM1 will be highlighted, press ENTER

56
INSTALL_TO_BCR will be highlighted again and there will be a symbol in front of the highlighted word to indicate the installation is in progress 11. The installation will take approximately one minute or less. After the installation is finished arrow to right 1(one) time to EXIT and press ENTER

57
Appendix D(continued) Setup of the Sabre 1552 Laser Scanner MicroBar 9745 Base Station
Setting Up and Connecting the Cordless System for use with ScanBar and the Tactical Personnel System (TPS): Install the base and Cordless Scanner by following the steps shown below: Important: Make sure the Cordless Scanner’s battery pack has been fully charged for 6-8 hours prior to use. Just plug the battery pack directly into a power strip or wall outlet.
1. Turn off the power to the host system. In the RS-232 configuration (below), connect your interface cable between the base unit (step 1 in the illustration) and the host system (2). You also need to use an external power supply (3).
2. Turn on the power to the host system. Verify that the base is on; the green LED on top of the unit should blink. (The base does not have a beeper.)
3. Using the Cordless Scanner, scan the Association Bar Code (the bar code label on the
top of the base) to link that scanner to the base (see the illustration shown below).

58
Two quick beeps followed by clicking and a single beep indicate a “good” association. The scanner is now in communication with the base. Note: After association, if the battery pack is removed from the scanner and replaced, the scanner automatically reassociates to the base if the base has remained powered up. In this case, the scanner beeps when a charged battery pack is installed and beeps a second time after full association, about five to ten seconds later. After your Cordless Scanner has been associated with its base unit: Program your Cordless System to work with your terminal or computer for RS-232 operation by scanning the following Terminal Setup Codes in the following order:
59
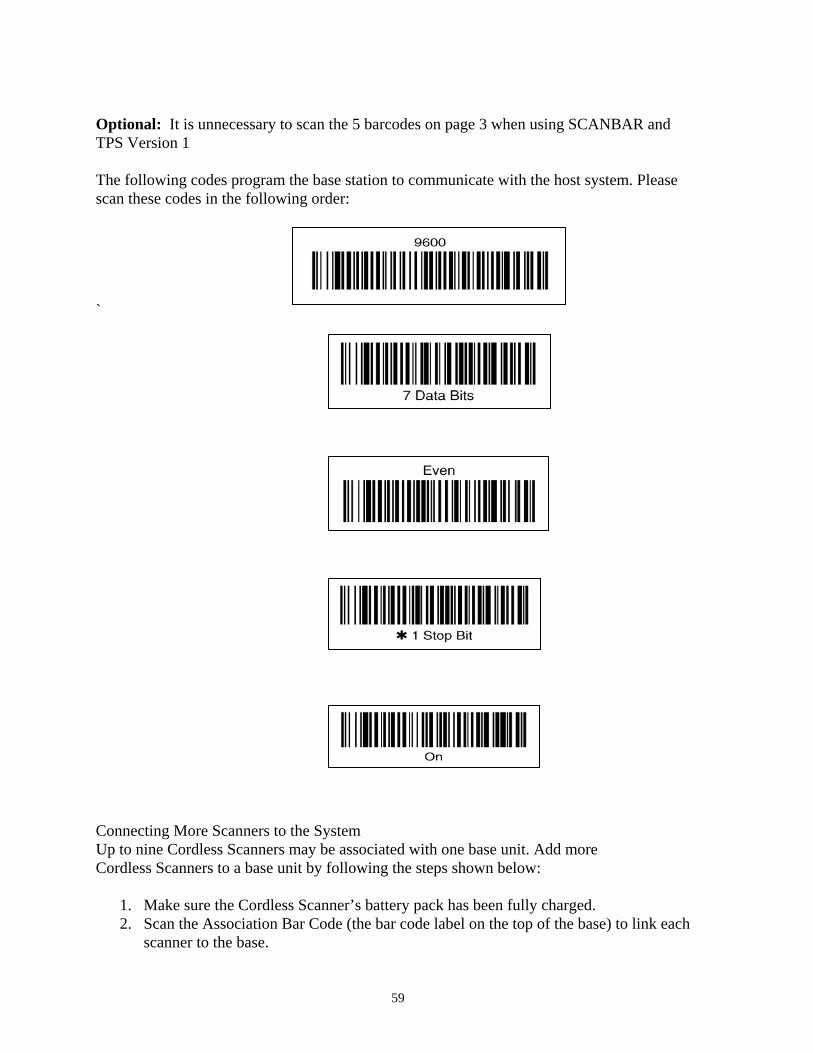
Optional: It is unnecessary to scan the 5 barcodes on page 3 when using SCANBAR and TPS Version 1 The following codes program the base station to communicate with the host system. Please scan these codes in the following order: ` Connecting More Scanners to the System Up to nine Cordless Scanners may be associated with one base unit. Add more Cordless Scanners to a base unit by following the steps shown below:
1. Make sure the Cordless Scanner’s battery pack has been fully charged. 2. Scan the Association Bar Code (the bar code label on the top of the base) to link each
scanner to the base.

60
The base stores a unique I.D. for each scanner (up to nine) to identify the scanner during data communication. Two beeps followed by clicking and a single beep from the scanner indicate a “good” association. The base rejects a tenth Cordless Scanner trying to link to its network, sending the scanner an error command. (A rejected scanner beeps three times, indicating an unsuccessful association.) Note: When you associate more scanners with the base, you don’t have to program your Cordless System to communicate with your terminal or computer if you’ve already completed step 5, above.

61
APPENDIX E TPS TECHNICAL SUPPORT
ABOUT TPSv2.3 / HELP DESK / WEB PAGE
ABOUT TPSv2.3: Released on March 04. SMART BOOK: Written on 16 Oct 01
Revised on 25 Mar 04
HELP DESK Mr. Dan Addison Email: [email protected]
Commercial Phone: (703) 325-9405/3837 DSN: 221-9405/3837
WEB PAGE
http://agsssi-www.army.mil/TPS/TPS.htm