trend micro incorporated reserves the right to make...
TRANSCRIPT


Trend Micro Incorporated reserves the right to make changes to this document and tothe product described herein without notice. Before installing and using the product,please review the readme files, release notes, and/or the latest version of the applicabledocumentation, which are available from the Trend Micro website at:
http://docs.trendmicro.com/en-us/home.aspx
Trend Micro, the Trend Micro t-ball logo, InterScan, and Control Manager aretrademarks or registered trademarks of Trend Micro Incorporated. All other product orcompany names may be trademarks or registered trademarks of their owners.
© 2018. Trend Micro Incorporated. All Rights Reserved.
Document Part No.: APEM57876/170627
Release Date: June 2018
Protected by U.S. Patent No.: 5,951,698

This documentation introduces the main features of the product and/or providesinstallation instructions for a production environment. Read through the documentationbefore installing or using the product.
Detailed information about how to use specific features within the product may beavailable in the Trend Micro Online Help and/or the Trend Micro Knowledge Base atthe Trend Micro website.
Trend Micro always seeks to improve its documentation. If you have questions,comments, or suggestions about this or any Trend Micro document, please contact us [email protected].
Evaluate this documentation on the following site:
http://www.trendmicro.com/download/documentation/rating.asp

Privacy and Personal Data Collection Disclosure
Certain features available in Trend Micro products collect and send feedback regardingproduct usage and detection information to Trend Micro. Some of this data isconsidered personal in certain jurisdictions and under certain regulations. If you do notwant Trend Micro to collect personal data, you must ensure that you disable the relatedfeatures.
The following link outlines the types of data that Trend Micro Virtual MobileInfrastructure collects and provides detailed instructions on how to disable the specificfeatures that feedback the information.
https://success.trendmicro.com/data-collection-disclosure
Data collected by Trend Micro is subject to the conditions stated in the Trend MicroPrivacy Policy:
https://www.trendmicro.com/en_us/about/legal/privacy-policy-product.html

i
Table of ContentsPreface
Preface .................................................................................................................. v
Audience ............................................................................................................. vi
Virtual Mobile Infrastructure Documentation ............................................. vi
Document Conventions .................................................................................. vii
Chapter 1: Introducing Virtual Mobile InfrastructureAbout Virtual Mobile Infrastructure ........................................................... 1-2
Why Use Virtual Mobile Infrastructure ...................................................... 1-2
What's New in this Release (5.5)? ................................................................ 1-3
Architecture of Virtual Mobile Infrastructure ............................................ 1-6Single Server Installation Model ........................................................... 1-6Multiple Server Installation Model ...................................................... 1-7Virtual Mobile Infrastructure High Availability ................................. 1-8
Components of Virtual Mobile Infrastructure ........................................... 1-9Why Use Secure Access ...................................................................... 1-10
Chapter 2: Getting StartedAccessing Virtual Mobile Infrastructure Administration Web Console 2-2
The Dashboard Screen .................................................................................. 2-3
Chapter 3: Managing Users and DevicesUser Management in Virtual Mobile Infrastructure .................................. 3-2
Managing Groups and Users ................................................................ 3-2Searching Users ..................................................................................... 3-10
Device Management in Virtual Mobile Infrastructure ............................ 3-11Enabling or Disabling Device Binding ............................................. 3-11Importing Mobile Devices .................................................................. 3-11

Virtual Mobile Infrastructure 5.5 Administrator's Guide
ii
Binding or Unbinding Mobile Devices ............................................. 3-12Deleting Mobile Device ...................................................................... 3-13
Chapter 4: Managing ProfilesProfiles in Virtual Mobile Infrastructure ..................................................... 4-2
Creating a Cloud Workspace Profile ........................................................... 4-2
Changing Profile Order ................................................................................. 4-4
Deleting Profiles ............................................................................................. 4-5
Kiosk Mode in Virtual Mobile Infrastructure ............................................ 4-5Enabling or Disabling Kiosk Mode ..................................................... 4-5
Chapter 5: Mobile Device ManagementConfiguring MDM Settings ........................................................................... 5-2
Mobile Device Enrollment ............................................................................ 5-3Enrolling an Android Mobile Device .................................................. 5-3Enrolling an iOS Mobile Device .......................................................... 5-4
Mobile Device Management ......................................................................... 5-5Exporting Server Data ........................................................................... 5-5Editing Mobile Device Information .................................................... 5-6Deleting a Mobile Device ...................................................................... 5-6Resetting Password Remotely .............................................................. 5-7
Lost Device Protection .................................................................................. 5-8Locating a Remote Mobile Device ...................................................... 5-8Locking a Remote Mobile Device ....................................................... 5-9Wiping a Remote Mobile Device ......................................................... 5-9
Policies in Virtual Mobile Infrastructure .................................................. 5-10Password Policy .................................................................................... 5-10Wi-Fi Policy ........................................................................................... 5-11Managing Policies ................................................................................. 5-11
Chapter 6: Managing ApplicationsCloud Workspace Applications .................................................................... 6-2
Uploading Applications to Server ........................................................ 6-2

Table of Contents
iii
Adding a Web Clip to the Server ......................................................... 6-2Deleting an Application or a Web Clip from the Server .................. 6-3Enabling or Disabling Default Applications in User Workspace ... 6-3Hiding or Unhiding Applications in User Workspace ...................... 6-4Application Security Risk Levels .......................................................... 6-4
Managing Wallpapers ..................................................................................... 6-5
Single Sign On Support ................................................................................. 6-6Preparing an Application using Single Sign On Processor .............. 6-7Deleting Application from Single Sign On Processor ...................... 6-8
Chapter 7: Managing ServersServers in Virtual Mobile Infrastructure ..................................................... 7-2
Starting or Stopping a Server ................................................................ 7-2Adding a Server ....................................................................................... 7-3Editing a Server ....................................................................................... 7-3Removing a Server ................................................................................. 7-4Adding a Site ........................................................................................... 7-4Editing a Site ........................................................................................... 7-5Removing a Site ...................................................................................... 7-5
Configuring Security-Enhanced Linux (SELinux) .................................... 7-6Enabling, Disabling or Checking Status for SELinux ...................... 7-6
Configuring Server High Availability (HA) ................................................ 7-6Enabling or Disabling High Availability (HA) ................................... 7-7Configuring Secure Access .................................................................... 7-8
Configuring External Storage (Optional) .................................................... 7-9
Configuring Network Settings .................................................................... 7-10
Chapter 8: Managing Reports and LogsReports in Virtual Mobile Infrastructure .................................................... 8-2
Generating a Quick Report ................................................................... 8-3Configuring Scheduled Report ............................................................. 8-4
Logs in Virtual Mobile Infrastructure ......................................................... 8-4Viewing Logs ........................................................................................... 8-5Log Maintenance .................................................................................... 8-5

Virtual Mobile Infrastructure 5.5 Administrator's Guide
iv
Chapter 9: Administration SettingsAdministrator Accounts Management ........................................................ 9-2
Adding Administrator Account ............................................................ 9-4Modifying Administrator Account Information ............................... 9-5Changing Administrator Account Password ...................................... 9-5Deleting Administrator Account ......................................................... 9-6
Configuring LDAP Settings (Optional) ...................................................... 9-6Disabling LDAP Server ......................................................................... 9-7
Configuring Mobile Client Settings .............................................................. 9-8
Configuring Microsoft Exchange Server and Office 365 Settings(Optional) ...................................................................................................... 9-10
Configuring Proxy Settings ......................................................................... 9-11
Configuring External Storage (Optional) ................................................. 9-12
Configuring Email Notifications ................................................................ 9-13
Configuring Syslog (System Logs) ............................................................. 9-14
Configuring Advanced Settings .................................................................. 9-15
Generating Client Enrollment Certificate ................................................. 9-18
Managing Certificates ................................................................................... 9-19Uploading a Certificate ........................................................................ 9-20Deleting Certificate .............................................................................. 9-20
Product License ............................................................................................ 9-20
Upgrading Virtual Mobile Infrastructure and Secure Access ................ 9-21Upgrading Virtual Mobile Infrastructure Server ............................. 9-21Upgrading Secure Access .................................................................... 9-22

v
Preface
PrefaceWelcome to the Trend Micro™Virtual Mobile Infrastructure™ version 5.5Administrator’s Guide. This guide provides detailed information about all VirtualMobile Infrastructure configuration options. Topics include how to update yoursoftware to keep protection current against the latest security risks, how to configureand use policies to support your security objectives, configuring scanning, synchronizingpolicies on mobile devices, and using logs and reports.
This preface discusses the following topics:
• Audience on page vi
• Virtual Mobile Infrastructure Documentation on page vi
• Document Conventions on page vii

Virtual Mobile Infrastructure 5.5 Administrator's Guide
vi
AudienceThe Virtual Mobile Infrastructure documentation is intended for both administrators—who are responsible for administering and managing Mobile Device Agents in enterpriseenvironments—and mobile device users.
Administrators should have an intermediate to advanced knowledge of Windows systemadministration and mobile device policies, including:
• Installing and configuring Windows servers
• Installing software on Windows servers
• Configuring and managing mobile devices (such as smartphones and Pocket PC/Pocket PC Phone)
• Network concepts (such as IP address, netmask, topology, and LAN settings)
• Various network topologies
• Network devices and their administration
• Network configurations (such as the use of VLAN, HTTP, and HTTPS)
Virtual Mobile Infrastructure DocumentationThe Virtual Mobile Infrastructure documentation consists of the following:
• Installation and Deployment Guide—this guide helps you get "up and running" byintroducing Virtual Mobile Infrastructure, and assisting with network planning andinstallation.
• Administrator's Guide—this guide provides detailed Virtual Mobile Infrastructuretechnologies and configuration.
• Online help—the purpose of online help is to provide "how to's" for the mainproduct tasks, usage advice, and field-specific information such as valid parameterranges and optimal values.

Preface
vii
• Readme—the Readme contains late-breaking product information that is notfound in the online or printed documentation. Topics include a description of newfeatures, installation tips, known issues, and release history.
Tip
Trend Micro recommends checking the corresponding link from the DocumentationCenter (http://www.docs.trendmicro.com/) for updates to the product documentation.
Document ConventionsThe documentation uses the following conventions.
TABLE 1. Document Conventions
CONVENTION DESCRIPTION
UPPER CASE Acronyms, abbreviations, and names of certaincommands and keys on the keyboard
Bold Menus and menu commands, command buttons, tabs,and options
Italics References to other documents
Monospace Sample command lines, program code, web URLs, filenames, and program output
Navigation > Path The navigation path to reach a particular screen
For example, File > Save means, click File and then clickSave on the interface
Note Configuration notes
Tip Recommendations or suggestions

Virtual Mobile Infrastructure 5.5 Administrator's Guide
viii
CONVENTION DESCRIPTION
Important Information regarding required or default configurationsettings and product limitations
WARNING! Critical actions and configuration options

1-1
Chapter 1
Introducing Virtual MobileInfrastructure
This chapter assists administrators in planning the server components for TrendMicro™Virtual Mobile Infrastructure™.
This chapter contains the following sections:
• About Virtual Mobile Infrastructure on page 1-2
• Why Use Virtual Mobile Infrastructure on page 1-2
• What's New in this Release (5.5)? on page 1-3
• Architecture of Virtual Mobile Infrastructure on page 1-6
• Components of Virtual Mobile Infrastructure on page 1-9

Virtual Mobile Infrastructure 5.5 Administrator's Guide
1-2
About Virtual Mobile InfrastructureTrend Micro Virtual Mobile Infrastructure is a service that hosts independentworkspaces for every user. A user workspace is based on the Android operating system,which is accessible via the Virtual Mobile Infrastructure mobile client applicationinstalled on an Android, iOS or a Windows mobile device. Using the mobile clientapplication, users can access the same mobile environment that includes all theirapplications and data from any location, without being tied to a single mobile device.The mobile client application preserves the original Android user experience byproviding all the Android features and their controls to the user.
Since all the workspaces are hosted onto the server and maintained by the administrator,Virtual Mobile Infrastructure enables a clear separation between the personal andcorporate data available to the users. This clear separation ensures data safety andprovides more centralized and efficient workspaces that are easier to manage andmaintain.
Why Use Virtual Mobile InfrastructureVirtual Mobile Infrastructure provides the following benefits:
BENEFIT DESCRIPTION
Data Protection All enterprise applications and data are saved in securecorporate servers under administrator's control.
Good User Experience Users can use their personal mobile device to accesscorporate data, and therefore the mobile OS userexperience is preserved.
Easy-to-use system to access corporate virtual workspace.
Natural screen touch experience for smartphones andtablets.
Simplified Management Administrator can centrally manage all users from singleWeb console.

Introducing Virtual Mobile Infrastructure
1-3
BENEFIT DESCRIPTION
Single Sign-On Reducing time spent in re-entering passwords in virtualworkspace.
Reducing administration cost due to lower number of IThelp desk calls about passwords.
Workspace Customization Administrator can create a personal virtual mobileworkspace for each employee.
Administrator can centrally customize applications foremployees in their virtual workspaces from the server.
User-based Profile Provides user based profile management.
Users can use their own virtual workspace from any oftheir mobile devices.
Manageable Life Cycle Administrator can remotely manage a workspace's entirelife cycle-from provisioning to the end of life.
Easy Deployment Provides on-premise deployment.
Provides self-contained Linux-based operating system foreasy deployment.
Integration with EnterpriseInfrastructure
Provides integration with LDAP and external storage.
What's New in this Release (5.5)?This release of Virtual Mobile Infrastructure includes the following new features:
FEATURE DESCRIPTION
Improved support for baremetal servers
Supports more bare metal servers by upgrading kernel toversion 3.18.58.
Date and time VerificationDuring Installation
Added a verification step for system time during VirtualMobile Infrastructure server and Secure Accessinstallation.

Virtual Mobile Infrastructure 5.5 Administrator's Guide
1-4
FEATURE DESCRIPTION
Bluetooth Support in CloudWorkspace
Supports Bluetooth 3.0 and 4.0 in Android and iOS clientapplications, and enables you to configure Bluetoothsettings in profiles.
License Seat Control • Improves seat control for locally imported and LDAPusers.
• Restricts uploading applications after license expires.
• Displays a warning message on client application afterthe license expires.
Audio/video support inworkspaces
Adds audio/video playback and recording quality optionson Web console.
High-Resolution AppSupport
Supports configuring workspace resulution higher than1080p for the applications that do not display in userworkspaces with resolution less than 1080p.
Application Data TrafficMonitoring
Monitors real-time data traffic consumption for theapplications deployed in Virtual Mobile Infrastructure, anddisplays these statistics for the top 5 applications onadministration web console.
Enhanced Email UserExperience
A quick action bar is added at the bottom to enable usersto reply, replay all, and forward email messages. A floatingmenu is also added for easily selecting and copying text.
SMS Support Supports sending SMS messages on real mobile devicesfrom user cloud workspace.
Client App Availability onOfficial Stores
Enables users to download client app directly from GooglePlay store, Apple App Store and Windows Store.
APNs via Secure Access Supports APNs connection via Secure Access for VMIservers with no Internet connection to receive Apple pushnotifications.
Integration with GoogleCloud Message
Provides support for Google Cloud Message to displayAndroid Client notifications.
Bandwidth Test on VirtualMobile Infrastructure Client
Enables you to test bandwidth between Virtual MobileInfrastructure server and mobile device on Android andiOS client applications.

Introducing Virtual Mobile Infrastructure
1-5
FEATURE DESCRIPTION
Session Resumption (iOSOnly)
Supports session resumption after network connectionchanges or the mobile device disconnects from thenetwork for a short interval.
Updated RenderingOptions (iOS Only)
Provides three rendering options: Quality, Balance, andPerformance.
Security Enhancement Uses SSL certificate to verify server integrity. Usesadvanced checks to avoid data changes on client mobiledevices.
Fingerprint Unlock (Android6.0 or later only)
Supports unlocking using fingerprint in TMVMI client onthe mobile devices that provide fingerprint support.
Full Camera Support Supports front and rare camera on the mobile device whenusing TMVMI client.
iPhone X support Adds support for iPhone X.
Secure LDAP Integration Supports integration with secure LDAP server to enableyou to import users from secure LDAP server.
Enhanced Device BindingFeature
Enables you to configure Virtual Mobile Infrastructure toautomatically bind the first mobile device used by a newuser, with their account.
Enhanced UserManagement Feature
• Enables you to configure Virtual Mobile Infrastructureto automatically send an email notification to newusers.
• In multiple-server environment, displays the IPaddress of the server on which the user is running inactive or idle mode.
Updated Lock Screen Adds a Sign Out button on the lock screen.
Enhanced Dashboard Displays information about the top five (5) applicationsused, based on launch times, network data consumed,and the duration of the usage for each application. TheDashboard also displays the top five (5) applications usedbased on launch times.

Virtual Mobile Infrastructure 5.5 Administrator's Guide
1-6
FEATURE DESCRIPTION
Updated Settings inWorkspace
Enables you to configure display notifications and clear thedefault launch preferences for each application in userworkspace.
Picture Attachment in EmailApp
Enables you to capture a picture using camera to attach inthe Email app in user workspace.
Kernel Upgrade Upgrades kernel to enhance system stability.
Enhanced AdministratorAccount Management
Enables adding administrator accounts from the activedirectory.
Enhanced UserManagement
Enables wiping user workspace and resend invitationemail messages to multiple users at the same time.
Graphics Quality Settingson Server
Provides an option on the management console to setdefault graphics quality on mobile devices.
Enhanced ApplicationUsage Settings
Provides option on management console to collect userlocation for applications.
Enhanced Reports Collects and display the application launch time for eachuser separately.
Architecture of Virtual Mobile InfrastructureDepending on your company scale and requirements, Trend Micro Virtual MobileInfrastructure enables you to deploy single or multiple Servers and Secure Access. In thecase of multiple servers, Virtual Mobile Infrastructure balances the load between serversto achieve maximum efficiency.
Trend Micro Virtual Mobile Infrastructure also supports high availability forManagement Server and Secure Access.
Single Server Installation ModelThe Single Server Installation Model is the deployment of only one Virtual MobileInfrastructure Server and Secure Access.

Introducing Virtual Mobile Infrastructure
1-7
Note
Trend Micro strongly recommends deploying Secure Access in your environment to enablemobile clients to access Virtual Mobile Infrastructure Server via Internet. See Why UseSecure Access on page 1-10 for more information.
FIGURE 1-1. Trend Micro Virtual Mobile Infrastructure Single Server Installation Model
Multiple Server Installation ModelThe Multiple Server Installation Model is the deployment of more than one VirtualMobile Infrastructure Server and Secure Access.

Virtual Mobile Infrastructure 5.5 Administrator's Guide
1-8
FIGURE 1-2. Trend Micro Virtual Mobile Infrastructure Multiple Server InstallationModel
Virtual Mobile Infrastructure High AvailabilityVirtual Mobile Infrastructure enables you to configure High Availability (HA) to ensurethe uninterrupted service to users. To support HA, you need at least two Virtual MobileInfrastructure servers. One server acts as a primary server, and the other server acts as abackup server. Similarly, to support HA for Virtual Mobile Infrastructure Secure Access,you must configure at least two active Secure Access servers.
FIGURE 1-3. Trend Micro Virtual Mobile Infrastructure High Availability architecture

Introducing Virtual Mobile Infrastructure
1-9
Components of Virtual Mobile InfrastructureThe Virtual Mobile Infrastructure system includes the following components:
TABLE 1-1. Virtual Mobile Infrastructure Components
COMPONENT DESCRIPTIONREQUIRED OR
OPTIONAL
Virtual MobileInfrastructure Server
The Virtual Mobile Infrastructure Servercontains Web Console, Web Service,Controller and Resource Pool.
• Web console provides centralmanagement console for administrator.
• Web service manages user logon,logoff and the connection to user’sworkspace.
• Controller allows Web console tomanage a resource pool.
• Resource pool hosts workspaces. Eachworkspace runs as a Virtual MobileInfrastructure instance.
Required
Virtual MobileInfrastructure MobileClient Application
The mobile client application is installed onthe mobile devices. The client applicationconnects with the Virtual MobileInfrastructure server to allow users to usetheir workspaces hosted on the server.
Required
Secure Access The Virtual Mobile Infrastructure SecureAccess enables mobile clients to accessVirtual Mobile Infrastructure server viaInternet, and provide Mobile DeviceManagement (MDM) services. See WhyUse Secure Access on page 1-10 for moreinformation.
Stronglyrecommended
Active Directory The Virtual Mobile Infrastructure serverimports groups and users from ActiveDirectory.
Optional

Virtual Mobile Infrastructure 5.5 Administrator's Guide
1-10
COMPONENT DESCRIPTIONREQUIRED OR
OPTIONAL
External Database External Database provides scalable datastorage for user data. By default, VirtualMobile Infrastructure server maintains adatabase on its local hard drive. However, ifyou want to store the data on an externallocation, then you will need to configureExternal Database.
Optional
External Storage Using this option will enable you to store theuser data in an external storage.
Optional
Why Use Secure Access
Virtual Mobile Infrastructure Secure Access enables mobile device clients to securelyaccess the Virtual Mobile Infrastructure server via the Internet. If you do not want toexpose the Virtual Mobile Infrastructure Server on the Internet, not even in the DMZ,you will need to install Secure Access. If required, you can install multiple Secure Accessthrough an L4 switch for load balancing.
The following are the advantages of using Secure Access:
• If using Secure Access, you only need to open one IP Address and one portnumber for mobile clients. The Secure Access receives a mobile device clientenrollment request through HTTPS, and relays it to the Virtual MobileInfrastructure server.
• Secure Access and Virtual Mobile Infrastructure server use a firewall for outboundnetwork connections to ensure security.
• You can use mobile device management (MDM) features in Virtual MobileInfrastructure, which can only be used through Secure Access.
Secure Access can be deployed in a DMZ or an Intranet, using single or two networkcards:
• You need only one network card, if you configure the Internet mobile devices andSecure Access in different networks.
Introducing Virtual Mobile Infrastructure
1-11
• You need two network cards, if you configure the Internet mobile devices andSecure Access in the same network, in bridge mode. That is, one network cardprovides connection between the mobile device clients and Secure Access, whilethe other network card connects Secure Access with the Virtual MobileInfrastructure server.


2-1
Chapter 2
Getting StartedThis chapter contains the following sections:
• Accessing Virtual Mobile Infrastructure Administration Web Console on page2-2
• The Dashboard Screen on page 2-3

Virtual Mobile Infrastructure 5.5 Administrator's Guide
2-2
Accessing Virtual Mobile InfrastructureAdministration Web Console
To access the Virtual Mobile Infrastructure Web console:
Procedure
1. Using a Web browser, open the following URL:
https://<Virtual Mobile Infrastructure_domain_name_or_IP_address>:8443
The following screen appears.
FIGURE 2-1. Virtual Mobile Infrastructure Web console logon screen
2. Type a user name and password in the fields provided and click Log On.
Note
The default User Name for Virtual Mobile Infrastructure Web console is admin andthe Password is admin.
Make sure that you change the administrator password after your first sign in. Referto the topic Changing Administrator Account Password on page 9-5 for theprocedure.

Getting Started
2-3
The Dashboard ScreenThe Dashboard screen displays first when you access the Virtual Mobile InfrastructureWeb console. This screen provides the usage overview and the server's system status.
The Dashboard screen is divided into two tabs:
• Usage Overview–shows the highlights of the workspace usage and the applicationusage. This tab displays the following information:
• Top 5 Users By Online Time–displays the top (5) most active users who haveaccessed their workspace for the longest period of time.
• Users Status–displays the current users' statuses. The four user statuses are:
• Active–shows that the user is currently connected to the server, and isaccessing the workspace.
• Idle–shows that the user is connected to the server, but is not currentlyaccessing the workspace.
• Offline–shows that the user is disconnected from the server.
• Disabled–shows that the user account has been disabled and the usercannot access the server.
• Top 5 Applications Used–shows the top five (5) most frequently usedapplications in terms of:
• Times Launched–shows the top five (5) application that are launched byall the users combined.
• Duration–shows the top five (5) application that are used by all the userscombined for the longest period (in minutes).
• Network Data Consumed–shows the top five (5) application thatconsumed the most data traffic from all the users combined.
• Top 5 Web Clips Used–shows the top five (5) most used Web clips.
• System Status–shows the system resource usage status. In this category, you canview:
Virtual Mobile Infrastructure 5.5 Administrator's Guide
2-4
• Storage Usage of All Servers–shows the disk storage status of all VirtualMobile Infrastructure servers.
• Memory Usage of All Servers–shows the current memory usage status of allVirtual Mobile Infrastructure servers.
• CPU Usage of All Servers–shows the CPU usage status of all Virtual MobileInfrastructure servers. This information is updated every five minutes sincethe servers started running.

3-1
Chapter 3
Managing Users and DevicesThis chapter contains the following sections:
• User Management in Virtual Mobile Infrastructure on page 3-2
• Managing Groups and Users on page 3-2
• Searching Users on page 3-10
• Device Management in Virtual Mobile Infrastructure on page 3-11

Virtual Mobile Infrastructure 5.5 Administrator's Guide
3-2
User Management in Virtual MobileInfrastructure
The User Management screen enables you to import users and groups from the ActiveDirectory (AD), and enable or disable user accounts. This screen also enables you tocreate, modify, and delete user accounts locally.
Managing Groups and Users
Virtual Mobile Infrastructure enables you to add users and groups manually or importthem from the Active Directory (AD). On importing a group from AD, Virtual MobileInfrastructure inherits all user account information from the Active Directory DomainController.
Note
User accounts imported from the Active Directory cannot be modified from the VirtualMobile Infrastructure server.
Importing Groups or Users from Active Directory
Before importing groups or users from Active Directory, make sure that you havealready configured the Active Directory settings. See Configuring LDAP Settings(Optional) on page 9-6 for the procedure.
Use the User Management screen to import groups or users from Active Directory.
Procedure
1. Click Import.
The Import Group or User from Active Directory screen appears.
2. Type the group or user information in the search field provided, and click Search.
3. Select the site in which you want to import users.

Managing Users and Devices
3-3
4. Select the groups or users that you want to import from the search result, and thenclick Import or Import & Send Invitation.
Note
If you click Import & Send Invitation, the Virtual Mobile Infrastructure serverimports the selected users or groups, and sends an invitation email to all users andusers in the imported groups. The invitation email includes the user accountinformation to log on to server.
Import Users from File
Virtual Mobile Infrastructure allows you to import multiple local users via csv or txtfile format.
Procedure
1. Click Import User.
The Import Users screen appears.
2. Click Download the sample file to download a file with sample data. Use this file toensure that your data is in the correct format.
Note
The data should be the following format:
display_name1,login_name1,email1,group1,password1
display_name2,login_name2,email2,group2,password2.
The password is optional. If you keep password cell blank, the default password is123456.
3. Modify the file that you just downloaded in the previous step, to add theinformation of all the users that you want to add.

Virtual Mobile Infrastructure 5.5 Administrator's Guide
3-4
Note
If the data in the imported file is not correct, the user will fail to import. You need tofollow the format in the data file.
User login name: The User name must be between 3 and 20 characters long andcontain the following characters: A to Z, a to z, 0 to 9, - or _.
User Email: The length of the email address should not exceed 75 characters, andshould be in the format: [email protected].
Group: The Group name must be between 3 and 20 characters long and contain thefollowing characters: A to Z, a to z, 0 to 9, - or _.
Important
Virtual Mobile Infrastructure has the seat contrl for users. If the account of user ismore than the seat, the exceed user can not import.
4. Click Browse on the Import Users screen to upload the file.
Creating a User Account Locally
Virtual Mobile Infrastructure allows you to add a local user account to the server.However, you cannot use Active Directory in conjunction with the local users. Thismeans, you will need to disable Active Directory to add a local user.
Before you can create a local user account, make sure that you have disabled the ActiveDirectory integration. See Disabling LDAP Server on page 9-7 for the procedure.
Use the User Management screen to create a user account locally.
Procedure
1. Click Add User.
Add A New User screen appears.
2. Configure the following:
• User name

Managing Users and Devices
3-5
• First name
• Last name
• Email address
• Group—select a group from the drop-down menu for the user.
• Profile—select a profile from the drop-down menu for the user.
3. Click Add.
Virtual Mobile Infrastructure server sends an invitation email to the user. The invitationemail includes the user account information to log on to server.
Disabling or Enabling a User
Use the User Management screen to disable or enable users in Virtual MobileInfrastructure.
Procedure
1. In the user list on the left side of the screen, click the user name that you want toenable or disable.
2. Do one of the following:
• To disable user, click Disable User, and then click OK on the pop-up dialogbox to confirm.
• To enable user, click Enable User.
Enabling or Disabling VIP Setting for a User
To save resources, Virtual Mobile Infrastructure disables the inactive workspaces afterthe user is disconnected from the network for several hours. This means, to be able touse the workspace next time, user may need to wait a few seconds to connect to theworkspace. To avoid this delay, you can enable the VIP setting for a user that needsuninterrupted access to the workspace.

Virtual Mobile Infrastructure 5.5 Administrator's Guide
3-6
CAUTION!
Use this setting with caution, because it will reserve resources on the server until the usersigns out manually, which, in turn, limits the server capacity.
Use the User Management screen to enable or disable VIP setting for users in VirtualMobile Infrastructure.
Procedure
1. In the user list on the left side of the screen, click the user name for which youwant to enable or disable VIP setting.
2. Click Enable or Disable before VIP, and then click OK on the pop-up dialog boxto confirm.
Wiping User Workspace
If a user does not need to use the workspace anymore, you can wipe the user workspaceto delete all of the data saved on the workspace.
Use the User Management screen to wipe user workspace in Virtual MobileInfrastructure.
CAUTION!
This procedure will delete all the user data from the workspace. Once the data is removed,it cannot be recovered.
Procedure
1. Do one of the following:
• To wipe workspace for multiple users:
a. On the user list on the left side of the screen, select the user names forwhich the workspace you want to wipe.

Managing Users and Devices
3-7
b. Click Wipe on the menu bar, and then click OK on the pop-up dialogbox to confirm.
• To wipe workspace for single user:
a. On the user list on the left side of the screen, click the user name forwhich the workspace you want to wipe.
b. Click Wipe before Wipe workspace, and then click OK on the pop-updialog box to confirm.
2.
Resending Invitation to a User
Use the User Management screen to resend invitation to users in Virtual MobileInfrastructure.
Procedure
1. Do one of the following:
• To resend invitation to multiple users:
a. On the user list on the left side of the screen, select the user nameswhom you want to resend the invitation.
b. Click Resend Invitation on the menu bar, and then click OK on theconfirmation pop-up dialog box.
• To resend invitation to single user:
a. On the user list on the left side of the screen, click the user name whomyou want to resend the invitation.
b. Click Resend Invitation, and then click OK on the confirmation pop-updialog box.

Virtual Mobile Infrastructure 5.5 Administrator's Guide
3-8
Sending Usage Alerts to Users
When the storage in a user workspace occupies more than 80% of its capacity, VirtualMobile Infrastructure shows a warning message on the Dashboard screen.
You can modify the warning message that Virtual Mobile Infrastructure sends to theuser. See Configuring Email Notifications on page 9-13 for details.
Procedure
1. Navigate to the User Management screen and click Alert User.
2. On the Alert Users List screen, select the user to whom you want to send a usagealert in an email message.
3. Click Send Mail.
Virtual Mobile Infrastructure sends an email to alert the user about current andremaining workspace storage.
Changing User or Group Profile
Use the User Management screen to change user or group profile in Virtual MobileInfrastructure.
Procedure
1. Click the user name whose profile you want to change.
2. Click Change.
The Edit Group dialog box pops up.
3. Select one of the following:
• Profile
• Inherit from parent group
• Specified

Managing Users and Devices
3-9
• Site
4. Click Save on the Edit Group dialog box.
Delete a User or a Group
Note
You cannot delete any Active Directory group or a user if it belongs to any group underRoot.
Use the User Management screen to delete a user or a group in Virtual MobileInfrastructure.
Procedure
1. Click the user or the group name that you want to delete.
2. Click Delete.
Viewing Application Usage for a User
Use the User Management screen to see the application usage for a user in VirtualMobile Infrastructure.
Procedure
1. In the user list on the left side of the screen, click the user name for which youwant to see the application usage.
The Applications Used table at the bottom of the screen lists all the applicationsused by the user.
Click on an application name to see the usage details for the application.

Virtual Mobile Infrastructure 5.5 Administrator's Guide
3-10
Note
To see the app usage duration, enable this setting on System Settings > Advanced.
Exporting User Device ID
Procedure
1. Navigate to the User Management screen, and do one of the following:
• To export device ID for all users, click Export Device ID without selectingany user.
• To export device ID for specific users, select user names from the list whosedevice ID you want to export, and then click Export Device ID.
2. Save file on your computer.
Virtual Mobile Infrastructure exports the user device ID in a file on the localcomputer.
Searching Users
On the User Management screen, you can search using a name, email addresses or akeyword.
Procedure
1. In the search field Search in selected group, type the user name or the emailaddress to search.
2. Press Enter.

Managing Users and Devices
3-11
Device Management in Virtual MobileInfrastructure
The Device Binding Management screen enables you to bind mobile devices withcertain user accounts. Whenever a users attempts to sign in from a mobile device, theDevice Binding Management screen displays the mobile device information andprovides you an option to approve or disapprove the workspace access from the mobiledevice.
Enabling or Disabling Device BindingBinding mobile devices with user accounts will allow users to access workspace fromthese certain mobile devices. You can bind more than one mobile devices with one useraccount.
Use the Device Binding Management screen to bind mobile devices with user accounts.
Procedure
1. Select Enable Device Binding to enable this option.
Importing Mobile DevicesWhenever a users attempts to sign in from a mobile device, the Device BindingManagement screen displays the mobile device information and provides you an optionto approve or disapprove the workspace access from the mobile device. However, youcan also import users to the list.
You can import the device information TMVMI server before user login, the device inthe list will be bind to the user. The device can login directly. Note: Import devices onlysupport android platform. The file format is user name, IMEI1 User name, IMEI2 …You need to refresh the screen to display the information that you just imported.
Use the Device Binding Management screen to import mobile devices and bind withuser accounts.

Virtual Mobile Infrastructure 5.5 Administrator's Guide
3-12
Procedure
1. Select Enable Device Binding to enable this option.
2. Select Automatically bind the first mobile device used by new user if you want tobind the first mobile device for users that are not yet registered with the server.
3. Click Import Devices.
Virtual Mobile Infrastructure only supports importing Android mobile devices andcsv or txt file format.
The Import Devices screen appears.
4. Click Browse and select a csv or txt file that you want import.
Note
The imported file must contains the information in the following format:
Username1,IMEI1Username2,IMEI2Username3,IMEI3...
5. Click Import .
Binding or Unbinding Mobile DevicesUse the Device Binding Management screen to bind or unbind mobile devices in VirtualMobile Infrastructure.
Procedure
1. On the mobile device list on the left side of the screen, click the mobile device thatyou want to bind or unbind.
2. Do one of the following
• To bind a mobile device, click Bind Device, and then click OK on the pop-updialog box to confirm.

Managing Users and Devices
3-13
• To unbind a mobile device, click Unbind Device, and then click OK on thepop-up dialog box to confirm.
Deleting Mobile Device
Note
User the Device Binging Management screen to delete mobile devices in Virtual MobileInfrastructure.
Procedure
1. Click the device record that you want to delete.
2. Click Delete.


4-1
Chapter 4
Managing ProfilesThis chapter contains the following sections:
• Profiles in Virtual Mobile Infrastructure on page 4-2
• Creating a Cloud Workspace Profile on page 4-2
• Deleting Profiles on page 4-5
• Changing Profile Order on page 4-4

Virtual Mobile Infrastructure 5.5 Administrator's Guide
4-2
Profiles in Virtual Mobile InfrastructureVirtual Mobile Infrastructure supports two types of profiles: Cloud Workspace profilesfor virtual mobile workspace, and local workspace profiles for apps that are installed onmobile devices.
Virtual Mobile Infrastructure uses profiles to let you set the default system settings andthe applications for the newly added users. You can create multiple profiles and applythem to different users and groups, depending on the requirements.
Creating a Cloud Workspace ProfileUse the Profile Management screen to create Cloud Workspace profiles in VirtualMobile Infrastructure.
Procedure
1. Click Add.
2. Under Step 1: Basic Information section, provide the following information:
• Profile name
• Description
• Profile type–select Cloud Workspace to create a profile for virtual mobileworkspace.
• Copy from–select a previously created profile whose settings you want tocopy. By default, Virtual Mobile Infrastructure copies settings from theDefault Profile.
• Site–select a site that this profile will able to.
• Storage limit–set a storage limit for the profile.
3. Click Next.
4. Under Step 2: Cloud Workspace System Settings section, do the following:

Managing Profiles
4-3
• Select a wallpaper from the list. To upload a new wallpaper to the list, clickthe + icon, and then select a jpg, png or a gif file.
• Select Enable watermark in cloud workspace, and then type the text into thefield provided, to display the text as watermark on user cloud workspaces.
Note
If you do not type any text into the field provided, the client app shows the username and the login time stamp as watermark on user cloud workspaces.
• If the application that is installed in user cloud workspace need to translatedata through Bluetooth, select Enable Bluetooth in cloud workspace, andthen select the Device synchronization list to use:
• All: All the bluetooth devices that are detected by the mobile device willbe allowed to connect to the user cloud workspace.
Approved list: Only the bluetooth devices that are added into theapproved list will be allowed to connect to the user cloud workspace.
Blocked list: Only the bluetooth devices that are added into the blockedlist will not be allowed to connect to the user cloud workspace.
If there are applications in the user workspace that use Bluetooth 3.0 protocolon iOS devices, select Enable Bluetooth 3.0 conversion on iOS devices optionto support such application on iOS client, and then click Add to add theBluetooth ID. If you have any difficulty in locating the Bluetooth ID, contactTrend Micro technical support for help.
5. Click Next.
6. Under Step 3: Applications section, do the following:
a. Click Add.
The Add Allowed Applications screen pops up.
b. Select the applications you want to add to this profile, and then click Add.

Virtual Mobile Infrastructure 5.5 Administrator's Guide
4-4
Note
You can also delete an application from the list by selecting the application andclicking Remove.
7. Click Next
8. Under Mobile Device Management (MDM) Settings section, select Enforce MobileDevice Management to enable management for mobile devices.
Note
To use MDM features, you must configure MDM settings for Android and iOSmobile devices. Navigate to MDM > Device Management > MDM Settings toconfigure MDM settings for mobile devices.
9. Click Save.
Changing Profile OrderUse the Profile Management screen to change profile order in Virtual MobileInfrastructure.
Procedure
1. Click Change Order.
The Change Profile Order screen pops up.
2. Click and drag the profiles to rearrange the profiles in the desired order.
3. Click Save on the Change Profile Order screen, and then click OK on theconfirmation dialog box.

Managing Profiles
4-5
Deleting ProfilesVirtual Mobile Infrastructure uses the Default Profile for all users that do not use anyspecific profile. The Default Profile cannot be deleted.
Use the Profile Management screen to delete profiles in Virtual Mobile Infrastructure.
Procedure
1. Check the Applied Users/Groups column for the profile you want to delete, tomake sure that the profile is not applied to any user or a group. If the profile isapplied to any user or a group, change the group profile. See Configuring LDAPSettings (Optional) on page 9-6 for the procedure.
2. Select the profiles that you want to delete.
3. Click Delete.
Kiosk Mode in Virtual Mobile InfrastructureThe Kiosk Mode in Virtual Mobile Infrastructure automatically launches the specifiedapplication automatically after the user signs in.
Enabling or Disabling Kiosk ModeUse the Profile Management screen to enable or disable the Kiosk Mode for a profile inVirtual Mobile Infrastructure.
Procedure
1. On the Profile Management screen, click the profile on which you want to enableor disable the Kiosk Mode.
2. Click Edit.
3. Do one of the following:
Virtual Mobile Infrastructure 5.5 Administrator's Guide
4-6
• To enable Kiosk Mode, click the
icon on an application. This application will be launched automatically afterthe user logs on to the workspaces.
• To disable Kiosk Mode, click the
icon on the application that is configured as the single app.
4. Click Save.

5-1
Chapter 5
Mobile Device ManagementVirtual Mobile Infrastructure provide lightweight security solution for your mobiledevices. Administrator can remote lock, locate or wipe the mobile devices to protectsensitive data using security policies.
This chapter contains the following sections:
• Configuring MDM Settings on page 5-2
• Mobile Device Enrollment on page 5-3
• Mobile Device Management on page 5-5
• Lost Device Protection on page 5-8
• Policies in Virtual Mobile Infrastructure on page 5-10

Virtual Mobile Infrastructure 5.5 Administrator's Guide
5-2
Configuring MDM SettingsTrend Micro Virtual Mobile Infrastructure's mobile device management (MDM)function enables you to manage and monitor any corporate- or employee¬ownedmobile device that accesses business critical data.
Important
You MUST:
• install Secure Access to use MDM features in Virtual Mobile Infrastructure.
• open inbound TCP port 8883 for Android Push Notification service on SecureAccess.
Important
Before configuring these settings, you must generate an Apple Push Notification service(APNs) certificate, which is required for managing iOS mobile devices.
If you need assistance regarding the procedure of generating an APNS certificate forMDM, contact Trend Micro technical support.
Use the MDM > Device Management screen to configure MDM settings in VirtualMobile Infrastructure
Procedure
1. On the System Settings screen, click the Mobile Client tab.
2. Under the Secure Access Settings, make sure the following information isconfigured:
• Domain name or IP address
Note
If Secure Access is connected to a gateway or an external router, type the IPaddress or domain name of the gateway or the router instead of the IP addressof Secure Access.

Mobile Device Management
5-3
• Port number
3. Open Terminal on the Virtual Mobile Infrastructure Secure Access, log on with theuser account: root, and do the following:
a. Type the following command to generate a new SSL certificate for SecureAccess:
python /vmi/gateway/gen_cert.py <xxxx>
Note
Replace <xxxx> with the Domain name or IP address that you configured inStep 1 of this procedure.
b. Type the following command to restart Secure Access service:
service vmigateway restart
4. On the Device Management screen, click MDM Setting, type the intranet IPaddress and port number of Secure Access server, and then upload an APNscertificate.
5. Click Save.
Mobile Device EnrollmentIf you have configured Virtual Mobile Infrastructure user workspace or local workspaceprofile to enforce MDM, then the mobile device agent (TMVMI Client) will requireusers to enroll their mobile devices during the login process.
Enrolling an Android Mobile DeviceWhen you sign in to the user workspace using user name and password, the TMVMIclient software requires you to activate Device Administrator on your mobile device. Ifyou do not activate Device Administrator, you will not be able to sign in to theworkspace.

Virtual Mobile Infrastructure 5.5 Administrator's Guide
5-4
Enrolling an iOS Mobile DeviceTo manage iOS mobile devices from the Virtual Mobile Infrastructure, you must installa provisioning profile on the mobile devices. This provisioning profile must identify you(through your development certificate) and your device (by listing its unique deviceidentifier).
Procedure
1. Start the TMVMI client app on the mobile device, type user name and password tosign in.
Note
A dialog box may pop up requiring you to install Root CA configured for the VirtualMobile Infrastructure. If you do not see this dialog box, skip steps 4 to 6 and proceedto step 7.
2. Tap OK.
The Install Profile screen for TMVMIMDM-CA displays.
3. On the Install Profile screen, tap Install, and then on the Warning screen, tapInstall.
4. After the profile is installed, click Done on the Profile Installed screen.
5. If required, type the user name and password in the fields provided, and tap LogIn.
The Install Profile screen for MDM Enrollment Profile displays.
6. On the Install Profile screen, tap Install, and then tap Install Now on theconfirmation pop-up dialog box.
7. If the mobile device requires a passcode, type your passcode on the Enter Passcodescreen that appears, and then tap Done.
The Installing Profile screen appears.
8. Tap Install on the Warning confirmation screen.
Mobile Device Management
5-5
The profile installation process begins. After the process is completed, the ProfileInstalled screen displays.
9. Tap Done.
Mobile Device ManagementVirtual Mobile Infrastructure enables you to perform different tasks on the mobiledevices from the Devices Management screen.
Exporting Server Data
You can export data for further analysis or a backup from the Managed Devices tab onDevice Management screen.
Procedure
1. Log on to the Virtual Mobile Infrastructure administration web console.
2. Click MDM > Device Management from the menu bar.
The Device Management screen displays.
3. Select the mobile device group from the device tree whose data you want to export.
4. Click Export.
5. If required, click Save on the pop-up that appears to save the .zip file on yourcomputer.
6. Extract the downloaded .zip file content and open the .csv file to view themobile device information.

Virtual Mobile Infrastructure 5.5 Administrator's Guide
5-6
Editing Mobile Device Information
Procedure
1. Log on to the Virtual Mobile Infrastructure administration web console.
2. Click MDM > Device Management from the menu bar.
The Device Management screen displays.
3. Click the mobile device from the device tree whose information you want to edit.
4. On the Device Details, screen, click Edit Device.
5. Update the information in the following fields:
• Device Name—the name of the mobile device to identify the device in thedevice tree.
• Device Ownership—the name of the group to which the mobile devicebelongs from the drop-down list.
• Asset Number—type the asset number assigned to the mobile device.
• Description—any additional information or notes related to the mobile deviceor the user.
6. Click Save.
Deleting a Mobile Device
Procedure
1. Log on to the Virtual Mobile Infrastructure administration web console.
2. Click MDM > Device Management from the menu bar.
The Device Management screen displays.
3. On the Managed Devices tab, click the mobile device from the device tree that youwant to delete.

Mobile Device Management
5-7
4. Click Delete and then click OK on the confirmation dialog box.
The mobile device is deleted from the mobile device tree, and is no longer enrolled withthe Virtual Mobile Infrastructure server.
Resetting Password Remotely
If a user has forgotten the power-on password, you can remotely reset the password andunlock the mobile device from the Virtual Mobile Infrastructure. After the mobiledevice is successfully unlocked, the user is able to change the power-on password.
Removing the Password for an iOS Mobile Device
Procedure
1. Log on to the Virtual Mobile Infrastructure administration web console.
2. Click MDM > Device Management from the menu bar.
The Device Management screen displays.
3. Select the mobile device from the tree, and then click Password Reset.
4. Click OK on the confirmation dialog box that appears. The power on password forthe selected iOS mobile device will be removed.
Updating Mobile Device Information
The Virtual Mobile Infrastructure server automatically obtains the device informationfrom managed mobile devices at scheduled intervals and displays the device informationon the Devices screen.
You can update the device information of a managed device on the Managed Devicestab before the next scheduled automatic update.

Virtual Mobile Infrastructure 5.5 Administrator's Guide
5-8
Procedure
1. Log on to the Virtual Mobile Infrastructure administration web console.
2. Click MDM > Device Management from the menu bar.
The Device Management screen displays.
3. Select the mobile device from the device tree whose information you want toupdate.
4. Click Update.
Lost Device ProtectionIf a user loses or misplaces the mobile device, you can remotely locate, lock or delete allof the data on that mobile device.
Locating a Remote Mobile DeviceYou can locate the mobile device through the wireless network or by using mobiledevice's GPS. The Virtual Mobile Infrastructure server displays the mobile devicelocation on Google Maps.
Procedure
1. Log on to the Virtual Mobile Infrastructure administration web console.
2. Click MDM > Device Management from the menu bar.
The Device Management screen displays.
3. Click the mobile device from the device tree that you want to locate.
4. Click Device Locate and then click OK on the confirmation dialog-box.
The Virtual Mobile Infrastructure tries to locate the mobile device and displays theGoogle Maps link on the Remote Locate Device screen.

Mobile Device Management
5-9
5. Click the Google Maps link on the Remote Locate Device screen to see the mobiledevice’s most recent GPS location on the map.
Locking a Remote Mobile Device
You can send lock instruction from the administration web console to remotely lock amobile device.
Procedure
1. Log on to the Virtual Mobile Infrastructure administration web console.
2. Click MDM > Device Management from the menu bar.
The Device Management screen displays.
3. Click the mobile device from the device tree that you want to lock.
4. Do one of the following:
For an Android mobile device, click Remote Lock and then click OK on theconfirmation dialog-box.
For an iOS mobile device, click Remote Lock then type the user's phone numberand a message that you want to send to the user, and then click Lock.
The Success message displays on the screen if the lock command is generatedsuccessfully.
Wiping a Remote Mobile Device
WARNING!
Be careful when you use this feature as the action CANNOT be undone. All data will belost and irrecoverable.

Virtual Mobile Infrastructure 5.5 Administrator's Guide
5-10
You can remotely reset the mobile device to factory settings and clear the mobile deviceinternal memory/SD card. This feature helps ensure the security of the data for lost,stolen or misplaced mobile devices.
Procedure
1. Log on to the Virtual Mobile Infrastructure administration web console.
2. Click MDM > Device Management from the menu bar.
The Device Management screen displays.
3. Click the mobile device from the device tree that you want to wipe.
4. Click Remote Wipe.
The Remote Wipe Device screen displays.
5. Click Remote Wipe Device.
All data is deleted from the mobile device and the Mobile Device Agent isunregistered from the server.
Policies in Virtual Mobile InfrastructureYou can configure security policies for a user or a group on the Virtual MobileInfrastructure server. These policies apply to all mobile devices that belong to the useraccount in the group.
Virtual Mobile Infrastructure provides the following policies:
• Wi-Fi Policy
• Password Policy
Password PolicyThe password policy prevents unauthorized access to data on mobile devices.

Mobile Device Management
5-11
To configure password policy settings, click MDM > Policies, then click the policyname, and then click Password Policy from the left-menu.
Wi-Fi PolicyWi-Fi Policy enables you to deliver your organization's Wi-Fi network information toAndroid and iOS mobile devices; including the network name, security type andpassword.
To configure Wi-Fi policy settings, click MDM > Policies, then click the policy name,and then click Wi-Fi Policy.
Managing PoliciesVirtual Mobile Infrastructure enables you to quickly create a policy using the defaultsecurity policy templates.
Use the Policy screen to create, edit, copy or delete security policies for mobile devices.
Creating a Policy
Procedure
1. Log on to the Virtual Mobile Infrastructure administration web console.
2. Click MDM > Policies on the menu bar.
The Policy Management screen displays.
3. Click Add.
The Create Policy screen displays.
4. Configure the following fields:
• Policy Name
• Description
• Platform: Select the Android or iOS from the drop-down list.

Virtual Mobile Infrastructure 5.5 Administrator's Guide
5-12
• Copy From: Select a previously created profile whose settings you want tocopy. By default, Virtual Mobile Infrastructure copies settings from theDefault Policy.
5. Click Next.
6. Select the user or the ownership to whom you want to assign this policy.
Important
If you assign the policy to a user as well as to the ownership, the user MUST belongto both the groups to receive this policy. If the user belongs to only one of thesegroups, the policy will not be applied to such user.
7. Click Next.
8. Configure the policies that you want to apply to the related mobile devices.
9. Click Save.
Editing a Policy
Procedure
1. Log on to the Virtual Mobile Infrastructure administration web console.
2. Click MDM > Policies on the menu bar.
The Policy Management screen displays.
3. In the policy list, click the policy name whose details you want to edit.
The Edit Policy screen displays.
4. Modify the policy details and then click Save.
Mobile Device Management
5-13
Deleting Policies
You cannot delete the Default policy and any policy that is applied to a group. Makesure to remove the policy from all the groups before deleting a policy. See Editing aPolicy on page 5-12 for the procedure to modify the policy.
Procedure
1. Log on to the Virtual Mobile Infrastructure administration web console.
2. Click MDM > Policies on the menu bar.
The Policy Management screen displays.
3. Select the policy that you want to delete, and then click Delete.
Policy Deployment Statuses
The Policy Management screen displays the current status of each policy.
The following are the two statuses that the Policy Management screen displays:
• Pending: This column displays the number of mobile devices to which this policy isrequired to be deployed but has not yet been deployed.
Click on the number displayed under Pending column to see the details.
• Deployed: This column displays the number of mobile devices to which this policyhas already been deployed.
Click on the number displayed under Deployed column to see the details.


6-1
Chapter 6
Managing ApplicationsThis chapter contains the following sections:
• Cloud Workspace Applications on page 6-2
• Uploading Applications to Server on page 6-2
• Adding a Web Clip to the Server on page 6-2
• Deleting an Application or a Web Clip from the Server on page 6-3
• Enabling or Disabling Default Applications in User Workspace on page 6-3
• Application Security Risk Levels on page 6-4
• Managing Wallpapers on page 6-5
• Single Sign On Support on page 6-6

Virtual Mobile Infrastructure 5.5 Administrator's Guide
6-2
Cloud Workspace ApplicationsVirtual Mobile Infrastructure enables you to upload Android applications and Web clipsto the server. Using these applications, you can later create profiles for the users, whichwould install these applications on to the users' workspaces.
Uploading Applications to ServerUse the Cloud Workspace Application Management screen to upload applications onVirtual Mobile Infrastructure server.
Procedure
1. Click Add Application.
The Add Application screen pops up.
2. Click Browse and select an apk file.
The server starts uploading the selected application (apk) file. The server also scansthe application file for the security risk and displays its risk level.
3. Click OK.
4. If Edit Application screen appears, edit the application details as required, and clickDone.
Adding a Web Clip to the ServerUse the Cloud Workspace Application Management screen to add Web clips on VirtualMobile Infrastructure server.
Procedure
1. Click Add Web Clip.
The Add Web Clip screen pops up.
Managing Applications
6-3
2. Type the URL and click Verify URL.
The server starts verifying the URL. After it completes, the Display name andDescription fields appear.
3. Type a name for the URL in the Display name field and a description in theDescription field.
4. Click OK.
The Web clip appears in the applications list.
Deleting an Application or a Web Clip from the Server
Use the Cloud Workspace Application Management screen to delete applications orWeb clips on Virtual Mobile Infrastructure server.
Procedure
1. Select the applications or Web clips you want to delete, and then click Delete.
2. Click OK on the confirmation dialog box.
Enabling or Disabling Default Applications in UserWorkspace
Use the Cloud Workspace Application Management screen to enable or disableapplications on the user workspaces.
Procedure
1. On the default application that you want to enable or disable, click or iconto toggle the setting.

Virtual Mobile Infrastructure 5.5 Administrator's Guide
6-4
The applications with icon will be enabled on the user workspaces, while theapplications with icon will be disabled.
Hiding or Unhiding Applications in User Workspace
Use the Cloud Workspace Application Management screen to hide or unhideapplications on the user workspaces. Hiding an application only hides the applicationicon, while the application reamains installed and available for use.
Procedure
1. On the Cloud Workspace Application Management screen, click Hide Application.
2. Do one of the following:
• To hide applications, select the applications that you want to hide, and thenclick Hide.
• To unhide applications, select the applications that you want to unhide, andthen click Unhide.
Application Security Risk Levels
Trend Micro scans every application that is uploaded for security risk and identifies arisk level for every application.
TABLE 6-1. Virtual Mobile Infrastructure Components
COMPONENT DESCRIPTION REQUIRED OR OPTIONAL
Malicious Malicious applications can collect users' personal andprivate data such as pictures, contacts, videos and audiorecordings.

Managing Applications
6-5
COMPONENT DESCRIPTION REQUIRED OR OPTIONAL
Notable Notable applications can access user's email address,location information, media files and Web browserbookmarks. Applications that can change the Webbrowser's home page, add icons on home screen orshow irremovable advertisements are also Notableapplications.
PUA Potentially unwanted applications (PUA) may pose highrisk or have untoward impact on your security and/orprivacy.
Clean These are the applications that are safe to use.
Unknown Trend Micro has not yet scanned these applications.Virtual Mobile Infrastructure checks Trend Micro'sdatabase, once a day, for the risk level of everyuploaded application, and displays the latest risk level.
Managing WallpapersUse the Wallpaper Management tab in System Settings to upload the wallpapers to theVirtual Mobile Infrastructure server. You can use these wallpapers to attach to a profilefor the workspaces.
Procedure
1. On the Wallpaper Management screen, do one of the following:
• To add a wallpaper, click Add, and then select an image to upload (in jpg, pngor gif file format).
• To delete wallpapers, select the wallpapers you want to delete, and then clickDelete.

Virtual Mobile Infrastructure 5.5 Administrator's Guide
6-6
Single Sign On SupportVirtual Mobile Infrastructure enables you to configure single sign on for theapplications. The apps that are prepared for single sign on will not require users toprovide their authentication information. Instead, these apps will use the sameauthentication information that the users used to sign in to Virtual MobileInfrastructure.
Virtual Mobile Infrastructure provides two options for single sign on for theapplications:
• Intent method: This method enables you to modify the application to receive theuser name and password through the Android operating system's Intent service.You can add the following sample code to the application with the help of thedeveloper:
@Overrideprotected void onCreate(Bundle savedInstanceState) { String strUsernameFromIntent = null; String strPasswordFromIntent = null;
Intent intent = getIntent(); Bundle bundleExtra = intent.getExtras(); if (bundleExtra != null) { strUsernameFromIntent = bundleExtra.getString("username"); strPasswordFromIntent = bundleExtra.getString("password"); if (strUsernameFromIntent == null && strPasswordFromIntent == null) { // No username/password in Bundle } } else { // No extras in Intent }}
You can enable or disable single sign on whenever required from the EditApplication screen. This method works well in most of the cases.
• App wrapper method: This method wraps the application to enable single sign on.The application will be signed again by Trend Micro during the wrap process. Youwill not be able to disable single sign on once the wrapped application is uploadedto the cloud workspace. This method may not work in some cases.

Managing Applications
6-7
Use the following URL to access the Single Sign On Processor screen:
https://<Virtual Mobile Infrastructure_domain_name_or_IP_address>:8443/apps/appwrap.htm
Preparing an Application using Single Sign On Processor
Note
You must be logged on to the Virtual Mobile Infrastructure administration Web consolebefore performing this procedure.
Procedure
1. Navigate to the following URL:
https://<Virtual Mobile Infrastructure_domain_name_or_IP_address>:8443/apps/appwrap.htm
This Single Sign On Processor screen appears.
2. Click Upload.
3. Click Browse, and then select an Android app (.apk file) that you want to preparefor single sign on.
The application starts uploading. Wait until the upload completes.
4. After the app upload completes, click Refresh. Check if the status of the app in theStatus column has changed to Success. If not, then wait for a while, and then clickRefresh again.
5. In the Action column, click the icon to download the app to the hard disk.
The Single Sign On Processor completes processing the app and the app is now enabledfor the single sign on. Upload this app on the Application Management screen to installthis app on the user workspaces.

Virtual Mobile Infrastructure 5.5 Administrator's Guide
6-8
Deleting Application from Single Sign On Processor
Note
You must be logged on to the Virtual Mobile Infrastructure administration Web consolebefore performing this procedure.
Procedure
1. Navigate to the following URL:
https://<Virtual Mobile Infrastructure_domain_name_or_IP_address>:8443/apps/appwrap.htm
This Single Sign On Processor screen appears.
2. Select an application that you want to delete from the Single Sign On Processor,and then click Delete.

7-1
Chapter 7
Managing ServersThis chapter contains the following sections:
• Servers in Virtual Mobile Infrastructure on page 7-2
• Starting or Stopping a Server on page 7-2
• Adding a Server on page 7-3
• Editing a Server on page 7-3
• Removing a Server on page 7-4
• Adding a Site on page 7-4
• Editing a Site on page 7-5
• Removing a Site on page 7-5
• Configuring Server High Availability (HA) on page 7-6

Virtual Mobile Infrastructure 5.5 Administrator's Guide
7-2
Servers in Virtual Mobile InfrastructureVirtual Mobile Infrastructure enables you to add multiple servers and sites to increasethe capacity to accommodate more users and support large-scale deployment. In thecase of multiple servers or sites, Virtual Mobile Infrastructure balances the load betweenservers to achieve maximum efficiency.
Multiple Virtual Mobile Infrastructure servers can be installed on different physicalcomputers or virtual machines. Refer to the Trend Micro Virtual Mobile InfrastructureBest Practice Guide to determine the best configuration for achieving maximumefficiency.
If your organization is located in different geographical locations, you can deployseparate servers at each location and add these servers as different Sites in VirtualMobile Infrastructure. Multiple site deployment efficiently distributes load betweenservers and provide better experience to users. The Global Super Administrator canmanage all the servers from one location and can create a Site Administrator formanaging users, profiles and servers at different sites. See Administrator AccountsManagement on page 9-2 for the detailed permissions for Global Super Administratorand Site Administrator.
Note
In case of Multiple Server Installation Model, you can add all the servers under DefaultSite. However, if you have deployed Virtual Mobile Infrastructure in Multiple SitesDeployment Model, then Trend Micro strongly recommends adding the different serversunder respected sites.
Starting or Stopping a ServerUse the Server Management screen to start or stop a Virtual Mobile Infrastructureserver.
Procedure
1. Do one of the following:
• Select a server, and then click Start or Stop.

Managing Servers
7-3
• Click a server name, and then click Start or Stop.
Adding a Server
Before you can add and configure a Virtual Mobile Infrastructure server, make sure todo the following:
• Configure an external storage on current Virtual Mobile Infrastructure server. SeeConfiguring External Storage (Optional) on page 7-9 for the procedure.
• Install a new server on a separate physical computer or on a virtual machine. Referto the Installation and Deployment Guide for the installation procedures.
Use the Server Management screen to add a Virtual Mobile Infrastructure server.
Procedure
1. Click Add.
The Add Server screen appears.
2. Under Step 1: Search server, type the server IP address that you want to add.
Note
Make sure to type the correct IP address of the server. If the server IP address is notcorrect, the applications in the user workspace will not work.
3. Click Next.
4. Under Step 2: Server Information, type the server name and its description.
5. Click Save.
Editing a Server
Use the Server Management screen to edit a Virtual Mobile Infrastructure server.

Virtual Mobile Infrastructure 5.5 Administrator's Guide
7-4
Procedure
1. Click the server name whose details you want to edit.
2. Click Edit.
3. Update the following fields as required:
• Basic Information
• Server name
• Description
4. Click Save.
Removing a Server
Note
The server localhost cannot be removed.
Use the Server Management screen to remove a Virtual Mobile Infrastructure server.
Procedure
1. Select a server, and then click Remove.
Adding a SiteUse the Server Management screen to add a site.
Procedure
1. Click Add Site.
2. Add the following information on the screen:

Managing Servers
7-5
• Name: Type a name for the site.
• Secure Access: Type the server domain name or IP address that the mobiledevices can access through the internet.
• Description: Type a description for the site.
3. Click Save.
Editing a SiteUse the Server Management screen to edit a site.
Procedure
1. Click the site name whose details you want to edit.
2. Click Edit Site.
3. Update the following fields on the screen as required:
• Name
• Secure Access
• Description
4. Click Save.
Removing a Site
Procedure
1. Click the site name that you want to delete.
2. Click Remove Site.
3. Click OK on the confirmation dialog box.

Virtual Mobile Infrastructure 5.5 Administrator's Guide
7-6
Configuring Security-Enhanced Linux(SELinux)
Virtual Mobile Infrastructure server and secure access support Security-Enhanced Linux(SELinux) to support access control security policies. The SELinux setting is enabled bydefault in Secure Access.
Enabling, Disabling or Checking Status for SELinux
Procedure
1. Open Terminal on the Virtual Mobile Infrastructure server, and log on with theuser account: root.
2. Do one of the following:
• To enable SElinux, type the following command:
• /vmi/manager/manage.py enable_selinux
• To disable SELinux, type the following command:
• /vmi/manager/manage.py disable_selinux
• To check SELinux status:
• /usr/sbin/sestatus -v
3. Reboot Virtual Mobile Infrastructure server for the settings to take effect.
Configuring Server High Availability (HA)Virtual Mobile Infrastructure enables you to configure High Availability (HA) to ensurethe uninterrupted service to the users. Along with the main server (primary server), youcan configure another server (secondary server) to act as a backup to the primary server.

Managing Servers
7-7
Whenever the information in the database of the primary server changes, the primaryserver synchronize the database with the secondary server immediately.
Important
Before performing this procedure, make sure that you have added and configured at leasttwo Virtual Mobile Infrastructure servers. If you have configured only one server, set upand configure at least one more server to act as a backup to the primary server.
Enabling or Disabling High Availability (HA)
Procedure
1. Add a server in Virtual Mobile Infrastructure web console. Refer to the topicAdding a Server on page 7-3 for the procedure.
2. Open Terminal on the Virtual Mobile Infrastructure server, and log on with theuser account: admin.
Note
To log on, use the root account password that you created during Virtual MobileInfrastructure server installation.
3. Type enable to enable privileged mode.
4. Do one of the following:
• To enable high availability, type the following command:
ha enable <secondary server (eth0) IP address> <commonIP>
Note
Replace <secondary server (eth0) IP address> with the IP address of the serverthat you want to configure as a secondary server, and replace <common IP>with a new unoccupied IP address of the same subnet.

Virtual Mobile Infrastructure 5.5 Administrator's Guide
7-8
Important
Both the primary server and secondary server must exist in the same subnet.
• To disable high availability, type the following command:
ha disable
5. Press Enter.
The HA on Virtual Mobile Infrastructure is enabled or disabled.
6. Run the following command to verify the status of High Availability settings:
ha status
Note
After enabling high availability, access the administrator Web console using thefollowing format:
https://<Common_IP_address>:8443
What to do next
If you have Secure Access installed and configured, reconfigure Secure Access to use thecommon IP address to access Virtual Mobile Infrastructure server. Refer to ConfiguringSecure Access on page 7-8 for the procedure.
Configuring Secure Access
Procedure
1. Open Terminal on the Virtual Mobile Infrastructure Secure Access, and log onwith the root user account.
2. Open file /vmi/gateway/configuration.json in a text editor.
3. Search for the server IP address in the file, such as "server": 10.18.12.1, and changethe IP address to the common IP address that you have configured in step 2 onpage 7-7 of procedure Enabling or Disabling High Availability (HA) on page 7-7.

Managing Servers
7-9
4. Save changes and close the file.
5. On the Terminal window on Virtual Mobile Infrastructure Secure Access, type thefollowing command to restart the Secure Access service:
service vmigateway restart
6. Press Enter.
Configuring External Storage (Optional)Virtual Mobile Infrastructure enables you to use external storage to store user data.External storage is also required if you want to use multiple servers with Virtual MobileInfrastructure.
Use the Server Management screen to configure external storage for Virtual MobileInfrastructure server.
Procedure
1. On the Server Management screen, click Default Site.
2. Click External Storage.
3. Select Enable external storage, and configure the following:
• Host name or IP address
• Path–type the location where you want to save the user data on the specifiedhost or IP address.
4. Click Test Connection and then click OK on the pop-up dialog box.
5. Click Save.
The server tests the connection with the external storage and saves the ServerManagement screen.

Virtual Mobile Infrastructure 5.5 Administrator's Guide
7-10
Configuring Network SettingsVirtual Mobile Infrastructure enables you to configure network setting using commandline interface.
Procedure
1. Open Terminal on the Virtual Mobile Infrastructure server, and log on with theuser account: root.
Note
To log on, use the root account password that you created during Virtual MobileInfrastructure server installation.
2. Type enable to enable privileged mode.
3. Do one of the following:
• To configure eht0, type the following command:
• configure network interface ipv4 eth0 <ipaddress><submask>
• To configure the gateway, type the following command:
• configure network route default ipv4 <ipaddress>
• To configure the DNS, type the following command:
• configure network dns ipv4 <ipaddress for DNS1>
• To configure the secondary DNS, type the following command:
• configure network dns ipv4 <ipaddress for DNS1> ipv4<ipaddress for DNS2>

8-1
Chapter 8
Managing Reports and LogsThis chapter contains the following sections:
• Reports in Virtual Mobile Infrastructure on page 8-2
• Generating a Quick Report on page 8-3
• Configuring Scheduled Report on page 8-4
• Logs in Virtual Mobile Infrastructure on page 8-4
• Viewing Logs on page 8-5
• Deleting Logs Manually on page 8-6
• Scheduling Log Deleting on page 8-6

Virtual Mobile Infrastructure 5.5 Administrator's Guide
8-2
Reports in Virtual Mobile InfrastructureYou can configure Virtual Mobile Infrastructure to generate reports to know theworkspace usage and system status. The status report includes:
• Workspace Usage Reports:
• User Status–provides count and percentage of users in the following statuses:
• Active
• Idle
• Offline
• Disabled
• Users Active/Idle Time–shows time in hours for which the users were inactive or idle statuses.
• Mobile App Launch Frequency–shows number of times each application waslaunched by each user.
• Mobile App Usage Duration–shows the usage duration of each application.
• Web App Launch Frequency–shows number of times each Web clip waslaunched.
• System Resource Usage Reports–shows the following information in percentage inthe graphical format:
• Memory Usage (Percentage)
• Storage Usage (Percentage)
• CPU Usage (Percentage)
• Mobile Device Operating System Information–shows mobile device operatingsystem version summary for the logged in mobile devices.
• Mobile Device Operating System Version Summary
• Android Operating System Version Summary

Managing Reports and Logs
8-3
• iOS Operating System Version Summary
• Windows Phone Operating System Version Summary
• User Storage Information–shows the information about the user storage.
• User Storage Usage Summary
Virtual Mobile Infrastructure enables you to generate the following types of reports:
• Quick report
• Scheduled report
Generating a Quick Report
Use quick report to collect the details about the current workspace usage and systemstatus.
Use the Report Management screen to generate a quick report.
Procedure
1. On the Quick Report tab, configure the following:
• Report name: type a name for the report.
• Time range: select a time period of the report (either Today, Last 7 Days, Last30 Days, or select the date and time from the From and To fields).
• Action when report is generated:
• Keep report online for later check only
• Keep report online and send it out by email: if you select this option,type the email address of the receivers in the Email addresses field. Usesemicolons (;) to separate email addresses.
2. Click Generate New Report.

Virtual Mobile Infrastructure 5.5 Administrator's Guide
8-4
Configuring Scheduled ReportConfigure Virtual Mobile Infrastructure server to automatically send workspace usageand system status report at the specified time.
Use the Report Management screen to configure scheduled reports.
Procedure
1. On the Scheduled Report tab, configure the following:
• Frequency: select the frequency for the report:
• Daily, at 12:00 AM
• Weekly, Monday at 12:00 AM
• Monthly, first day of every month at 12:00 AM
• Delivery: type the email addresses of the receivers in the field provided. Usesemicolons (;) to separate email addresses.
2. Click Save.
Logs in Virtual Mobile InfrastructureVirtual Mobile Infrastructure keeps the user logs on server so that you can check logswhenever required. Virtual Mobile Infrastructure server records the following logs:
• Event logs
• Successful logon or unsuccessful logon attempt
• Successful user logoff
• Screen capture on iOS mobile devices
• Audit logs
• Administrator operations such as logon, adding or modifying users, uploadingor modifying applications, and so on

Managing Reports and Logs
8-5
• Application usage log
• Name of the applications used and the usage duration for each application
You can search specific event logs or audit logs by specifying query criteria.
Viewing Logs
Use the Log screen to view user logs.
Procedure
1. On the Log tab, specify the query criteria for the logs you want to view. Theparameters are:
• User name: type the user name whose generated logs you want to search.
• Time range: select a time period of the log (either Today, Last 7 days, and Last30 days, or select the date and time from the From and To fields).
• From: type the date and hour for the earliest log you want to view. Clickthe calendar icon to select a date from the calendar, and hour drop downlist to select the hour.
• To: type the date and hour for the latest log you want to view. Click thecalendar icon to select a date from the calendar, and hour drop down listto select the hour.
2. Click Query to begin the query.
Log Maintenance
When users generate event logs, the logs are sent and stored on the Virtual MobileInfrastructure server. To keep the size of logs from occupying too much space on yourhard disk, delete the logs manually or configure Virtual Mobile Infrastructureadministration Web console to delete the logs automatically based on a schedule on theLog Maintenance tab on the Log screen.

Virtual Mobile Infrastructure 5.5 Administrator's Guide
8-6
Deleting Logs Manually
Procedure
1. On the Log screen, click Log Maintenance tab.
2. Select whether to delete all the logs from the beginning or those older than thespecified number of days.
3. Click Delete Now.
Auditing Logs
The Audit Log tab on the Log screen records all the operations performed by anadministrator, such as: login, import/add/modify users, change groups, upload/modifyapplications, create/modify profiles and so on.
Procedure
1. On the Log screen, click Audit Log tab.
2.
Scheduling Log Deleting
Procedure
1. On the Log screen, click Log Maintenance tab.
2. Select Enable scheduled deletion of logs.
3. Select whether to delete all the logs from the beginning or those older than thespecified number of days.
4. Specify the log deletion frequency and time.

Managing Reports and Logs
8-7
5. Click Save.


9-1
Chapter 9
Administration SettingsThis chapter contains the following sections:
• Modifying Administrator Account Information on page 9-5
• Configuring LDAP Settings (Optional) on page 9-6
• Configuring Mobile Client Settings on page 9-8
• Configuring Microsoft Exchange Server and Office 365 Settings (Optional) onpage 9-10
• Configuring Proxy Settings on page 9-11
• Configuring External Storage (Optional) on page 7-9
• Configuring Email Notifications on page 9-13
• Configuring Syslog (System Logs) on page 9-14
• Configuring Advanced Settings on page 9-15
• Generating Client Enrollment Certificate on page 9-18
• Managing Certificates on page 9-19
• Product License on page 9-20
• Upgrading Virtual Mobile Infrastructure and Secure Access on page 9-21

Virtual Mobile Infrastructure 5.5 Administrator's Guide
9-2
Administrator Accounts ManagementThe Administrator Account Management screen enables you to create administratoraccounts with different role for Virtual Mobile Infrastructure server.
The default Administrator account for accessing Virtual Mobile Infrastructure server is“admin” (password: “admin”). The "admin" account cannot be deleted and can only bemodified.
The roles for administrator accounts in Virtual Mobile Infrastructure are as follows:
• Super (default): This role has the maximum access to all settings on the server.
• Monitor: The administrator with the monitor role can only view the web consolebut cannot modify any settings.
The following table provides the details regarding privileges for Global SuperAdministrator and Site Administrator roles in Virtual Mobile Infrastructure.
TABLE 9-1. Global and Site Administrators Privileges in Virtual Mobile Infrastructure
SERVER COMPONENTS PERMISSIONSGLOBAL SUPERADMINISTRATOR
SITE ADMINISTRATOR
Dashboard View Dashboarddata
Can view data for allsites
Can only view dataof the site the SiteAdministratorbelongs to
Can only view Top5 Users and UserStatus widgets onUsage Overviewtab on Dashboard

Administration Settings
9-3
SERVER COMPONENTS PERMISSIONSGLOBAL SUPERADMINISTRATOR
SITE ADMINISTRATOR
User management Add, import ordelete users
Supported Not supported
Enable or disableusers
Supported Supported
Wipe workspace Supported Supported
Clear workspace Supported Supported
Edit user Supported Supported
Profile management Manage profiles Can manageprofiles of all sites
Can only manageprofiles of the sitethe SiteAdministratorbelongs to
Applicationmanagement
Manage workspaceapplications
Supported Can view all theapplications butcannot manage
Manage localapplications
Supported Can view all theapplications but cannot manage
Reports Generate and sendreport
Can generate andsend report for allthe sites
Can generate andsend report for thesite the SiteAdministratorbelongs to
Logs View and maintainlogs
View and maintainlogs for all the sites
Not supported
Email settings Configure SMTPserver
Supported Not supported
Email templatesetting
Configure emailtemplate settings
Configure emailtemplate settings forall the sites
Not supported

Virtual Mobile Infrastructure 5.5 Administrator's Guide
9-4
SERVER COMPONENTS PERMISSIONSGLOBAL SUPERADMINISTRATOR
SITE ADMINISTRATOR
Administratormanagement
Manageadministratoraccount
Supported Can only managethe administrator forthe site the SiteAdministratorbelongs to
System settings Manage systemsettings
Supported Not supported
Certificate settings Manage certificate Supported Not supported
Licensemanagement
Manage productlicense
Supported Not supported
Adding Administrator Account
Procedure
1. On the Virtual Mobile Infrastructure administration web console, go toAdministration > Administration Account Management.
2. Click Add Administrator to add a new account.
3. Update the following fields as required:
• Name
• Description
• Password
• Site: If you have configured multiple sites, select a site to add a site admin, orselect the default site to add a Global Super Administrator account. If you donot have multiple sites, select the default site. See Table 9-1: Global and SiteAdministrators Privileges in Virtual Mobile Infrastructure on page 9-2 fordetails.

Administration Settings
9-5
• Role: Select a role for the administrator. A Super Administrator can manageall the settings, a monitor admin can only view the settings on administrationweb console.
4. Click Save on Administrator Account Management screen.
Modifying Administrator Account Information
Use the My Account screen to modify the administrator's account information details inVirtual Mobile Infrastructure.
Procedure
1. Update the following fields as required:
• First name
• Last name
• Email address: add an email address to receive email notification messagesfrom Virtual Mobile Infrastructure.
• Password: click Change password, type the old and new passwords in thefields provided, and then click Save.
2. Click Save on My Account screen.
Changing Administrator Account Password
Use the My Account screen to modify the administrator's account password in VirtualMobile Infrastructure.
Attention
Trend Micro recommends changing the administrator's account password every 30 to 90days.

Virtual Mobile Infrastructure 5.5 Administrator's Guide
9-6
Procedure
1. Under Account Information section, click Change password.
The Change Password dialog box pops up.
2. Use the following fields:
• Old password–type the current administrator password.
• New password and Confirm password–type the new administrator password.
3. Click Save on the pop-up dialog box.
4. Click Save on the My Account screen.
Deleting Administrator Account
Procedure
1. On the Virtual Mobile Infrastructure administration web console, go toAdministration > Administration Account Management.
2. Select the account that you want to delete, and then click Delete. Click OK on theconfirmation message that appears.
Configuring LDAP Settings (Optional)Virtual Mobile Infrastructure provides optional integration with Microsoft ActiveDirectory and OpenLDAP to manage users and groups more efficiently.
Use the LDAP tab in System Settings to enable and configure the LDAP settings.
If you do not want to import users and groups from LDAP, or want to manage userslocally on the Virtual Mobile Infrastructure server, then you will need to disable theLDAP integration.

Administration Settings
9-7
Procedure
1. On the System Settings screen, click the LDAP tab.
2. Select Use LDAP to enable the feature
3. Configure the following:
• LDAP Server Type–select the LDAP server.
• Server name or IP address
• Server port
• Base DN–select a Base DN from the drop down list.
• User name and Password–a user name and password to access the LDAPserver.
• Update frequency–select a time from the list to determine how often tosynchronize content with the LDAP server.
• LDAP encryption–select encryption method according to your LDAP serversettings.
4. Click Save.
The server tests the connection with the LDAP server and saves System Settings.
Disabling LDAP ServerUse the LDAP tab in System Settings to disable the LDAP settings.
Procedure
1. Click the LDAP tab.
2. Clear Use LDAP checkbox to disable the feature.
3. Click Save.

Virtual Mobile Infrastructure 5.5 Administrator's Guide
9-8
Configuring Mobile Client SettingsThe Virtual Mobile Infrastructure mobile client provides access to the user workspacefrom a mobile device.
Use the Mobile Client tab on the System Settings screen to configure mobile clients forVirtual Mobile Infrastructure.
Procedure
1. On the System Settings screen, click the Mobile Client tab.
2. Under User Settings section, configure the following:
• If you want to allow users to save their passwords on their mobile devices,select Allow users to save password on mobile device.
• If you want users to wait for a certain time before retrying after typing in awrong password, select Enable unsuccessful signin restriction, and then selectthe number of attempts and the waiting time from the drop-down lists.
• If you want to configure the password security level for user workspaces ontheir mobile devices, select a security option from the Workspace screen locksecurity level drop-down list.
Note
This setting will take effect when the users sign in the next time.
• If you want to stop users from taking screenshots on Android, select Do notallow user to take screenshot.
Note
On iOS mobile devices, if the screenshot is taken, the Virtual MobileInfrastructure mobile client logs the event and transfers it to the server.
• From User keyboard for cloud workspace, select the keyboard you want usersto use during their Virtual Mobile Infrastructure session.

Administration Settings
9-9
• If you want to restrict users from accessing workspace from a rooted orjailbroken mobile device, select Do not allow users to log in from rooted orjailbroken mobile devices.
• From the Graphics Options drop-down menu, select one of the followingoptions:
• Performance: This option provides more speed, but less quality (screenclarity), and utilizes less bandwidth.
• Balance (default): This option provides balance between quality (screenclarity) and speed.
• Quality: This option provides more quality (screen clarity), but lessspeed, and utilizes more bandwidth.
3. Under User Alert Email Setting section, select Send an alert email automatically touser when the user storage is 80% full, if you want to send email to the usersautomatically.
Note
If enabled, sends the alert email at 00:00 AM to the concerned user.
See Configuring Email Notifications on page 9-13 for details on configuring useralert notification.
4. Under QR Code Scanning and Audio/Video Playback section, if you want to allowusers to scan QR code and play audio or video files residing on the workspace orstreaming online, select Allow users to scan QR code and play audio/video files onmobile device, and then select the quality levels for audio playback and recording,and video recording.
5. Under the Secure Access Settings, configure the following:
• Domain name or IP address
Note
If Secure Access is connected to a gateway or an external router, type the IPaddress or domain name of the gateway or the router instead of the IP addressof Secure Access.

Virtual Mobile Infrastructure 5.5 Administrator's Guide
9-10
• Port number
6. Click Save.
Configuring Microsoft Exchange Server andOffice 365 Settings (Optional)
If you have already set up an Exchange server in your enterprise environment, you canconfigure Virtual Mobile Infrastructure to automatically configure Exchange server andOffice 365 settings for all the users on their workspace.
Note
You can only configure Virtual Mobile Infrastructure to use an Exchange server if you areusing Active Directory server to manage user and group permissions in Virtual MobileInfrastructure.
Use the Exchange Server tab on System Settings screen to configure Microsoft ExchangeServer and Microsoft Office 365 settings.
Procedure
1. On the System Settings screen, click the LDAP tab.
2. Make sure that the Use LDAP checkbox is selected, and the LDAP settings areconfigured.
3. Click the Exchange Server tab.
4. Select Use automatic configuration for Exchange Server on workspace, and thentype the server name in the Exchange server field.
5. Select Office 365 customization, if you are using Exchange Online, and type theOffice 365 login ID in the User name field.

Administration Settings
9-11
Note
For Office 365 Exchange Online, usually the user name in email account setting isthe value of the user's User Principal Name (UPN) in Active Directory. However, insome environments administrators use the alternate login ID functionality. If youhave used an alternate login ID, type the correct attribute of the a user object otherthan UPN in the User name field.
6. Click Save.
Configuring Proxy SettingsIf your network settings require a proxy to connect to the Internet, configure the proxysettings on Virtual Mobile Infrastructure server.
Use the Proxy tab in System Settings to configure proxy settings for Virtual MobileInfrastructure server.
Procedure
1. Click the Proxy tab.
2. Select Use the following proxy settings, and configure the following:
• Host name or IP address
• Port number
• Proxy server authentication
• User name
• Password
• Bypass proxy for these addresses
Note
The bypass setting only takes effect for the user workspaces, and from thenext time users sign in.
Virtual Mobile Infrastructure 5.5 Administrator's Guide
9-12
3. Type a URL in the Test address field, and then click Test Connection to verifyproxy settings.
4. Click Save.
Configuring External Storage (Optional)Virtual Mobile Infrastructure enables you to use external storage to store user data.External storage is also required if you want to use multiple servers with Virtual MobileInfrastructure.
Use the Server Management screen to configure external storage for Virtual MobileInfrastructure server.
Procedure
1. On the Server Management screen, click Default Site.
2. Click External Storage.
3. Select Enable external storage, and configure the following:
• Host name or IP address
• Path–type the location where you want to save the user data on the specifiedhost or IP address.
4. Click Test Connection and then click OK on the pop-up dialog box.
5. Click Save.
The server tests the connection with the external storage and saves the ServerManagement screen.

Administration Settings
9-13
Configuring Email NotificationsYou must set up an email server and then configure the email notification settings tosend the invitation or reset password emails to the users.
Use Email Notifications screen to configure email notifications in Virtual MobileInfrastructure.
Procedure
1. On the Email Settings tab, configure the following:
• From–type the address from which you want to send the email notification.SMTP
• SMTP Server–type the SMTP server name or IP address.
• Port–type the SMTP server port number.
• Authentication–if the SMTP address requires authentication, select this optionand type the following information:
• User name
• Password
• Use TLS protocol for authentication–if the SMTP server requires TLSprotocol for authentication, select this option.
2. Click Test Connection to verify SMTP server address and port number.
Note
This test does not verify the user name and password configured to access the SMTPserver.
3. Select Automatically send email notification to new users if you want to send aninvitation email to new users that are added from LDAP.
4. On the Invitation Email Template Settings tab, type the following:
• Subject–the subject of the email message.

Virtual Mobile Infrastructure 5.5 Administrator's Guide
9-14
• Message–the body of the email message.
Note
While editing the Message field, make sure to include the token variables %(name)s, %(username)s and %(password)s, which will be replaced by the actualvalues in the email message.
5. On the Reset Password Template Settings tab, type the following:
• Subject–the subject of the email message.
• Message–the body of the email message.
Note
While editing the Message field, make sure to include the token variables %(name)s, %(username)s, %(password)s, which will be replaced by the actualvalues in the email message.
6. On the User Alert Template Settings tab, configure the following:
• Subject–the subject of the email message.
• Message–the body of the email message.
Note
While editing the Message field, make sure to include the token variables %(name)s, %(username)s, %(password)s, which will be replaced by the actualvalues in the email message.
7. Click Save to save settings.
Configuring Syslog (System Logs)Configure syslog server settings to save server debug logs.
Use the Syslog tab in System Settings to configure system logs settings for VirtualMobile Infrastructure.

Administration Settings
9-15
Procedure
1. On the System Settings screen, click the Syslog tab.
2. Select Enable syslog.
3. Configure the following settings for the syslog server:
• Protocol
• Host name or IP address
• Port number
4. Click Save.
Configuring Advanced SettingsThe advanced settings in Virtual Mobile Infrastructure includes the following:
• Application usage log setting, to collect application usage log from userworkspaces, to learn more about user behavior.
• Mobile device location for each users using applications in user workspace.
• Port range manual configuration for Virtual Mobile Infrastructure.
• Screen resolution setting for user workspace.
• OAuth 2.0 protocol configuration for user authorization. OAuth 2.0 providesspecific authorization flows for Web applications, desktop applications, mobilephones, and living room devices. Virtual Mobile Infrastructure Secure Accessincludes the Authorization Server, which is required for OAuth 2.0 authentication.
Before you can configure OAuth 2.0 authentication settings, you must configureSecure Access Settings in Mobile Client tab. Refer to Configuring Mobile ClientSettings on page 9-8.
Use the Advanced tab in System Settings to configure advance settings for VirtualMobile Infrastructure.

Virtual Mobile Infrastructure 5.5 Administrator's Guide
9-16
Procedure
1. On the System Settings screen, click the Advanced tab.
2. Under Application Usage Log section, configure the following settings:
• Collect application usage log: If enabled, you can view the application usagelog on the following screens:
• Dashboard, in Top 5 Applications Used widget (also available even whenthe feature is disabled).
• User Management, on the user details screen for each user. Click on auser name to see user details. The applications usage information on thisscreen includes the complete list of applications used, sequence andduration of usage and the locations where the applications were used.
• Logs, using Apps Used Log query, you can look at the name of theapplications used by users and the usage duration for each application.
• Configure mobile device location: If enabled, you can view the details aboutlocation of users using certain applications.
3. Under Virtual Mobile Infrastructure Server Port Setting section, type the port rangein the field provided. Change this setting only if any of your application requires aport number ranging between 5900 and 6923, to avoid network conflict.
4. Under Virtual Mobile Infrastructure Server Screen Resolution Setting section,select Enable high quality screen resolution for user workspacesoption if any of theapplications installed in user workspace requires high-resolution, or does notdisplay correctly using the default resolution.
Note
Enabling this feature consumes more data traffic for the Virtual MobileInfrastructure server.
5. Under OAuth 2.0 Authentication section, select Enable OAuth 2.0 authentication.
6. Configure the following options:
• Client ID and Client Secret: The Virtual Mobile Infrastructure server ID andsecret code generated by the Authorization Server. The Client ID represents
Administration Settings
9-17
Virtual Mobile Infrastructure in Authorization Server and the secret code isrequired by the Authorization Server for access authorization.
Use the following command on the command console on Secure Access toget the Client ID and Client Secret:
/vmi/authorizationService/manage.py create_app "TrendMicro Virtual Mobile Infrastructure" https://{yoursecure access address:port}/api/v1/portal/oauth
Note
Replace {your secure access address:port} with Secure Access IP address andport number.
• Authorization URL: The Authorization URL for the users to providecertificate authorization.
• Token URL: The Token URL for the Virtual Mobile Infrastructure to getaccess token and refresh token from the Authorization Server. An accesstoken has a limited lifetime. If Virtual Mobile Infrastructure needs access toAuthorization Server beyond the lifetime of a single access token, it obtains arefresh token. The refresh token allows Virtual Mobile Infrastructure toobtain new access tokens.
• Account Information URL: The Account Information URL is generated bythe Authorization Server and includes the user account information forauthentication.
• Client Certificate: Client certificate is used to create a mutual authenticationSSL connection to Authorization Server or Identity Provider (IdP). Generate,and then upload the client certificate file here.
Use the following command to generate the client certificate file:
/vmi/authorizationService/manage.py init_cert
The Authorization Server generates the client certificate file at the followinglocation:
/etc/pki/vmi/client.pass.p12

Virtual Mobile Infrastructure 5.5 Administrator's Guide
9-18
Note
Virtual Mobile Infrastructure only supports .p12 and .pfx client certificatefile types.
• Certificate Password: Type the following client certificate password: vmi
• Verify authorization server certificate: Select this option if you want to verifythe CA certificate, and then upload the CA certificate in the CertificateAuthority field. The CA Certificate is available at the following location:
/vmi/testcert/root.crt
• Certificate Authority: Certificate Authority is used to avoid man-in-the-middle(MitM) attack and verify Authorization Server certificate.
Note
Virtual Mobile Infrastructure only supports .pem CA certificate file types.
Note
The Authorize URL, Token URL and Account Information URL fields areautomatically filled with the relevant information.
7. (Optional) Click Test Connection to verify your settings.
8. Click Save.
What to do next
Generate individual certificates for mobile users for enrollment. See Generating ClientEnrollment Certificate on page 9-18.
Generating Client Enrollment CertificateBefore following this procedure, make sure that you have already configured OAuth 2.0Authentication. See Configuring Advanced Settings on page 9-15 for details.

Administration Settings
9-19
Procedure
1. Log on to the Secure Access server.
2. On the Secure Access server command console, type the following command andpress Enter:
/vmi/authorizationService/manage.py create_cert “Full Name”[email protected]
Note
Replace Full Name with the actual user name, and [email protected] with theactual user email address that is configured on the administration Web console.
Secure Access generates the client enrollment certificate at the following location:
/vmi/testcert/full_name
Where, full_name is the name of the folder created for the user.
What to do next
Provide the certificate to the user to enroll to the Virtual Mobile Infrastructure server.
Managing CertificatesIf you want to deploy certificates to the user workspaces to enable them to accessorganization's resources, you can upload these certificates to the Virtual MobileInfrastructure server. Virtual Mobile Infrastructure server will deploy these certificatesto the user workspaces immediately. However, you must also configure OAuth 2.0 foruser authentication to delpoy certificates to user workspaces. See Configuring AdvancedSettings on page 9-15 for configuring OAuth 2.0 settings.
Use the Certificate Management screen to upload single .pfx or .p12 certificates tothe Virtual Mobile Infrastructure server. You can also upload multiple certificates byarchiving them in a .tar, .gz, .bz2 or .zip file. All the certificates in the archivemust use the same password.

Virtual Mobile Infrastructure 5.5 Administrator's Guide
9-20
Uploading a Certificate
Procedure
1. Click Administration > Certificate Management.
2. Click Upload.
The Upload certificate screen appears.
3. Click Choose File and then do one of the following:
• To upload a single certificate, select a .pfx or .p12 certificate file.
• To upload multiple certificates, create a .tar, .gz, .bz2 or .zip archivefile, and then select the file.
Important
The certificate files in an archive must use the same password.
4. Type the certificate password in the Password field.
5. Click Save.
Deleting Certificate
Procedure
1. Click Administration > Certificate Management.
2. Select certificates or archives that you want to delete, and then click Delete.
Product LicenseAfter the Trial version license expires, all program features will be disabled.

Administration Settings
9-21
If your license expires, you will need to renew your current Activation Code, or registerthe Virtual Mobile Infrastructure server with a new Activation Code. Consult your localTrend Micro sales representative for more information.
Virtual Mobile Infrastructure supports seat control for the number of seats (workspaces)included in a license. This means, you can import any number of users to the VirtualMobile Infrastructure server, but all the additional users will be disabled. Also, if thenumber of users reach the maximum number of seats available under your license, or isalready more than the available seats, you will not be able to add users locally.
To see the number of seats available under your license, navigate to Administration >Product License.
Upgrading Virtual Mobile Infrastructure andSecure Access
Important
Before performing the upgrade to Virtual Mobile Infrastructure and Secure Access,consider the following reminders:
• Make sure that the users are offline before upgrading. Otherwise, the TMVMI serverwill lose all the application and user data after the upgrade. To disconnect all the users,you may consider stopping the server.
• If you have enabled High Availability (HA) mode in TMVMI server, you need to runthe "ha disable" command to disable it. Once the server upgrade is done, you canenable the HA mode again by running the "ha enable <secondary server eth0><common IP>" command.
Upgrading Virtual Mobile Infrastructure Server
Procedure
1. Download the upgrade package for Virtual Mobile Infrastructure from thedownload center.
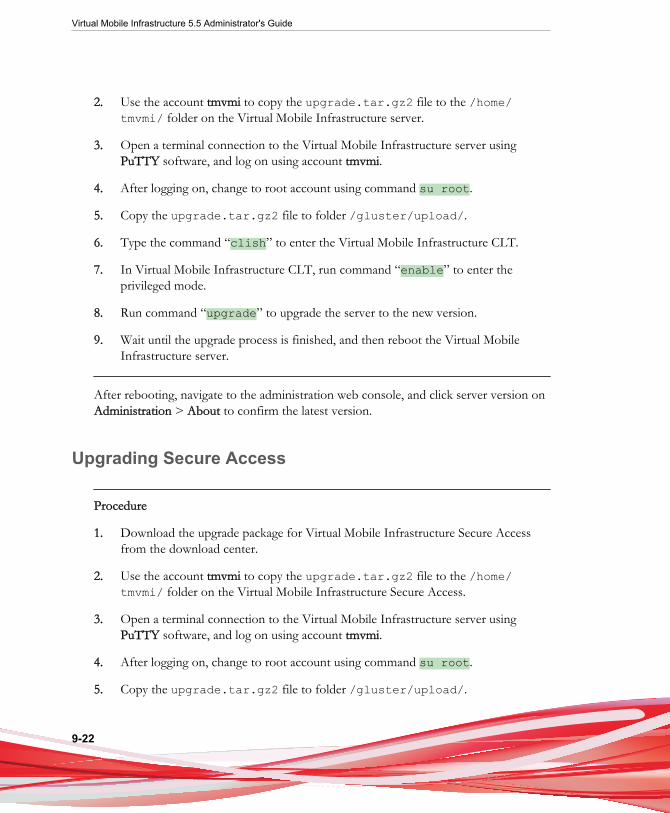
Virtual Mobile Infrastructure 5.5 Administrator's Guide
9-22
2. Use the account tmvmi to copy the upgrade.tar.gz2 file to the /home/tmvmi/ folder on the Virtual Mobile Infrastructure server.
3. Open a terminal connection to the Virtual Mobile Infrastructure server usingPuTTY software, and log on using account tmvmi.
4. After logging on, change to root account using command su root.
5. Copy the upgrade.tar.gz2 file to folder /gluster/upload/.
6. Type the command “clish” to enter the Virtual Mobile Infrastructure CLT.
7. In Virtual Mobile Infrastructure CLT, run command “enable” to enter theprivileged mode.
8. Run command “upgrade” to upgrade the server to the new version.
9. Wait until the upgrade process is finished, and then reboot the Virtual MobileInfrastructure server.
After rebooting, navigate to the administration web console, and click server version onAdministration > About to confirm the latest version.
Upgrading Secure Access
Procedure
1. Download the upgrade package for Virtual Mobile Infrastructure Secure Accessfrom the download center.
2. Use the account tmvmi to copy the upgrade.tar.gz2 file to the /home/tmvmi/ folder on the Virtual Mobile Infrastructure Secure Access.
3. Open a terminal connection to the Virtual Mobile Infrastructure server usingPuTTY software, and log on using account tmvmi.
4. After logging on, change to root account using command su root.
5. Copy the upgrade.tar.gz2 file to folder /gluster/upload/.

Administration Settings
9-23
6. Type the command “clish” to enter the Virtual Mobile Infrastructure SecureAccess CLT.
7. In Virtual Mobile Infrastructure CLT, run command “enable” to enter theprivileged mode.
8. Run command “upgrade” to upgrade the server to the new version.
9. Wait until the upgrade process is finished, and then reboot the Virtual MobileInfrastructure Secure Access.

