tutorial - 2d drawings and assembly
TRANSCRIPT

7/27/2019 Tutorial - 2d Drawings and Assembly
http://slidepdf.com/reader/full/tutorial-2d-drawings-and-assembly 1/12
Tutorial: Assemblies and 2-D Drawings
2-D DrawingsDrawings are useful in the real world because they are the actual paper representation of a component.
These drawings are typically given to machinists to create the actual part. They are put onto engineering
paper and contain all of the information required to have a stranger recreate the part. This means all the
dimensions must be displayed, the tolerances, material type, creator, revision numbers, and other
information that would be useful to a third party.
1) Download all of the Planet Express file on courselink.
Unzip the file and put it into your H: drive
Open File: Planet Express->Main Building->Side Ark Support
Go into 2-D view: File->Make Drawing From Part
Select “A4 (ISO)”. This makes it a standard paper size

7/27/2019 Tutorial - 2d Drawings and Assembly
http://slidepdf.com/reader/full/tutorial-2d-drawings-and-assembly 2/12
On the right side is the default available views of the drawing, drag over the “Front” Side image
onto the paper. Click
Now move your mouse to the top right of the page and click again once the isometric view
appears. Place the right side and top side views on the page as well.
7/27/2019 Tutorial - 2d Drawings and Assembly
http://slidepdf.com/reader/full/tutorial-2d-drawings-and-assembly 3/12
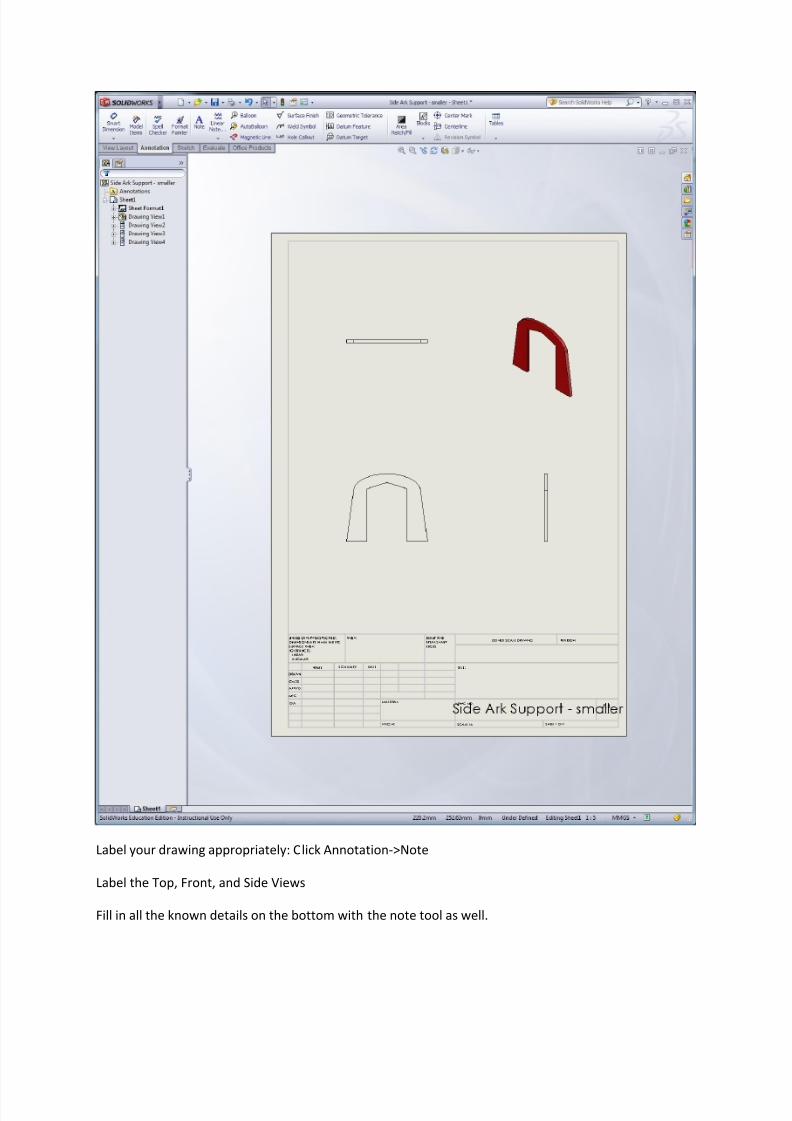
Label your drawing appropriately: Click Annotation->Note
Label the Top, Front, and Side Views
Fill in all the known details on the bottom with the note tool as well.
7/27/2019 Tutorial - 2d Drawings and Assembly
http://slidepdf.com/reader/full/tutorial-2d-drawings-and-assembly 4/12
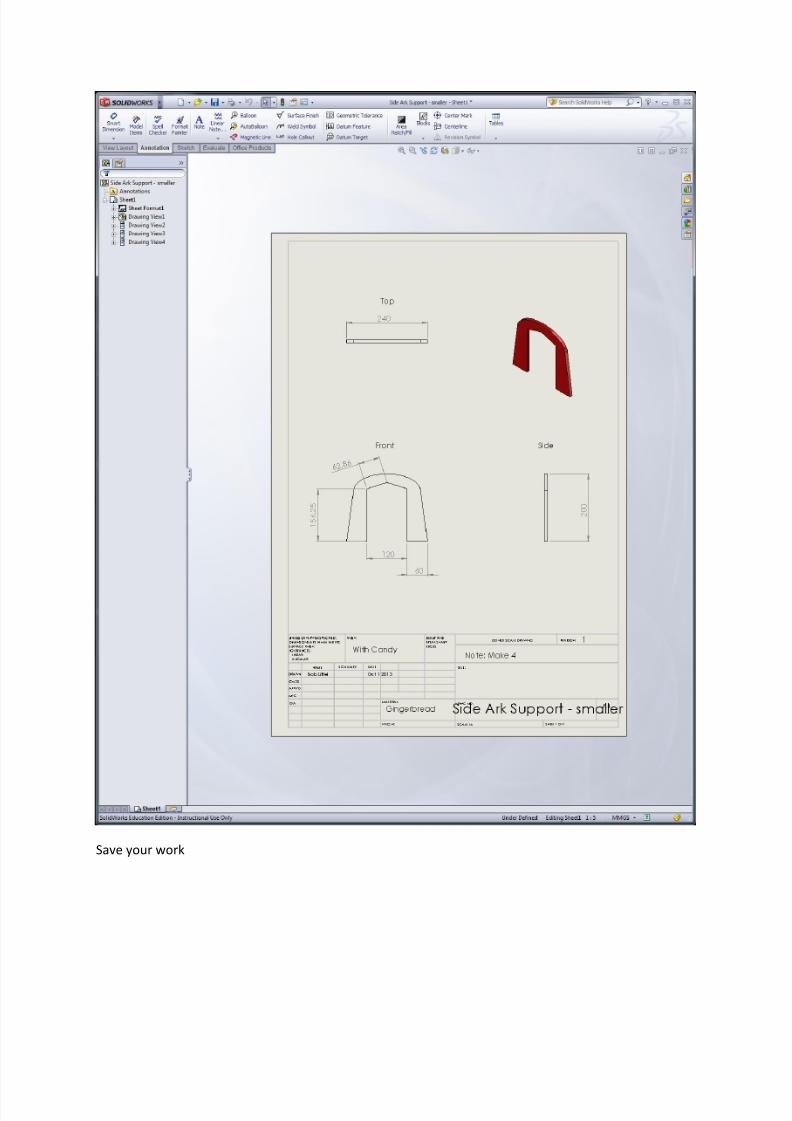
Save your work

7/27/2019 Tutorial - 2d Drawings and Assembly
http://slidepdf.com/reader/full/tutorial-2d-drawings-and-assembly 5/12
Assembly
Assemblies will have your creations come to life. It is very interesting to see how all of the pieces fit
together so you can visualize a final product
Objective:
To create a gingerbread house assembly in solidworks. The objective is the Planet Express Building fromFuturama:
It has been simplified into gingerbread form as the following assembly:
7/27/2019 Tutorial - 2d Drawings and Assembly
http://slidepdf.com/reader/full/tutorial-2d-drawings-and-assembly 6/12
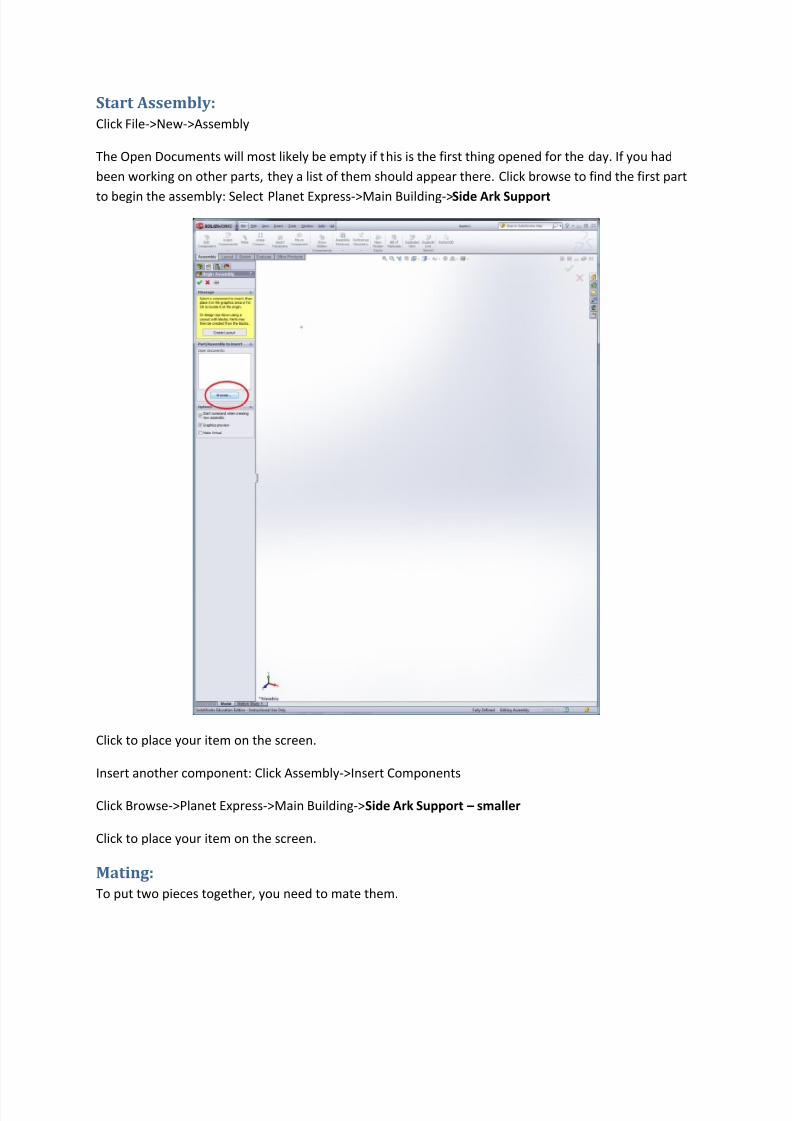
Start Assembly:
Click File->New->Assembly
The Open Documents will most likely be empty if this is the first thing opened for the day. If you had
been working on other parts, they a list of them should appear there. Click browse to find the first part
to begin the assembly: Select Planet Express->Main Building->Side Ark Support
Click to place your item on the screen.
Insert another component: Click Assembly->Insert Components
Click Browse->Planet Express->Main Building->Side Ark Support – smaller
Click to place your item on the screen.
Mating:
To put two pieces together, you need to mate them.

7/27/2019 Tutorial - 2d Drawings and Assembly
http://slidepdf.com/reader/full/tutorial-2d-drawings-and-assembly 7/12
Click Assembly->Mate
Select Coincident and then choose the two faces you would like to line up. Most pieces mated by
coincident will require three mates to hold it in place.

7/27/2019 Tutorial - 2d Drawings and Assembly
http://slidepdf.com/reader/full/tutorial-2d-drawings-and-assembly 8/12
Mate the bottom of each plane together, as well as the faces that are ‘looking’ at each other to result in
this:
Add a second side ark support –small to the first one.

7/27/2019 Tutorial - 2d Drawings and Assembly
http://slidepdf.com/reader/full/tutorial-2d-drawings-and-assembly 9/12
Next insert 3 more components: 2 walls, and the ‘roof small’.
Mate the outside edges of the silver small roof with the outside edges of the wall.
Center the Silver small roof in the slot on top of the wall: Select Mate->Advanced Mates-
>Width
In the blue box at the top (Width selections) choose the two faces you want something centered
between (select the wall edges):
In the purple box (tab selections) choose the object walls you want to be centered. Select both faces of
the silver small roof.
Offset a mate:
To try to make the wall centered between the ark you can use a distance mate to off set the location of
the mate:

7/27/2019 Tutorial - 2d Drawings and Assembly
http://slidepdf.com/reader/full/tutorial-2d-drawings-and-assembly 10/12
Select Mate->Distance
Let face 1 be the inside of the wall, and face 2 be the inside of the small ark. Set the distance offset to 10

7/27/2019 Tutorial - 2d Drawings and Assembly
http://slidepdf.com/reader/full/tutorial-2d-drawings-and-assembly 11/12
Finishing
Use the reference photos in the Planet Express-Photos Folder to help you understand how the whole
thing is put together. If confused how something was achieved, then you can open up the planetexpress
assembly file included in the root folder. Use that history tree to understand how it was made. There are
many other types of mates which can be very useful.
This assembly was actually made into a gingerbread house. All of the part files were printed as 2-d
drawings so gingerbread could be molded to the correct shape.
Here is the final product
Tips and Tricks
Hold down right click to rotate an object in free space.
You can right click on an object and view its mates. You can then modify or delete any mates that are
causing issues.
You can expand the history tree of the mates to edit or delete mates. Highlighting a mate will highlight it
on the screen.

7/27/2019 Tutorial - 2d Drawings and Assembly
http://slidepdf.com/reader/full/tutorial-2d-drawings-and-assembly 12/12