tutorial in making a video using windows movie maker
TRANSCRIPT

Tutorial on making a video using Windows Movie Maker
westlean.wordpress.com 1

First, let us learn what is Windows Movie Maker?
westlean.wordpress.com 2

Windows Movie Maker is a freeware video editing
software by Microsoft.
westlean.wordpress.com 3

(codenamed Sundance, formerly known as Windows
Live Movie Maker in Windows 7)
westlean.wordpress.com 4

It is a part of Windows Essentials software suite
westlean.wordpress.com 5
and offers the ability to create and edit videos
westlean.wordpress.com 6

as well as to publish them on OneDrive, Facebook, Vimeo,
YouTube, and Flickr.
westlean.wordpress.com 7

The first release of Windows Movie Maker was included with Windows ME in 2000.
westlean.wordpress.com 8

Version 1.1 was included in Windows XP a year later,
westlean.wordpress.com 9

and included support for creating DV AVI and WMV 8 files.
westlean.wordpress.com 10

Version 2.0 was released as a free update in November
2002, and added a number of new features
westlean.wordpress.com 11

Version 2.1, a minor update, is included in Windows XP Service
Pack 2.
westlean.wordpress.com 12
The Movie Maker in Windows XP Media Center Edition 2005 had more transitions and support
for DVD burning.
westlean.wordpress.com 13

An updated version, Windows Live Movie Maker 2011,
westlean.wordpress.com 14
was released on August 17, 2010, adding webcam capture,
support for high-definition video,
westlean.wordpress.com 15

the ability to upload videos directly to SkyDrive
and Facebook,
westlean.wordpress.com 16

and the ability to add media files stored on network shares to
projects.
westlean.wordpress.com 17

With the discontinuation of the Windows Live brand
westlean.wordpress.com 18
(and the re-branding of the Windows Live suite as Windows Essentials),
westlean.wordpress.com 19

Windows Movie Maker 2012 was released in April 2012.
westlean.wordpress.com 20
Support for recording voiceovers was restored, along
with an audio mixer and integration
westlean.wordpress.com 21

with several free stock music services. H.264/MP4 became the default export
format
westlean.wordpress.com 22

(replacing Windows Media Video), support for uploading
to Vimeo was introduced,
westlean.wordpress.com 23

and hardware accelerated video stabilization was also added as
an exclusive feature for Windows 8 users.
westlean.wordpress.com 24

Now, lets start this tutorial.
westlean.wordpress.com 25
Open Windows movie makerby clicking the start icon in
lower left of our screen.
westlean.wordpress.com 26

westlean.wordpress.com 27

Then click Windows live movie maker.
westlean.wordpress.com 28

westlean.wordpress.com 29
westlean.wordpress.com 30

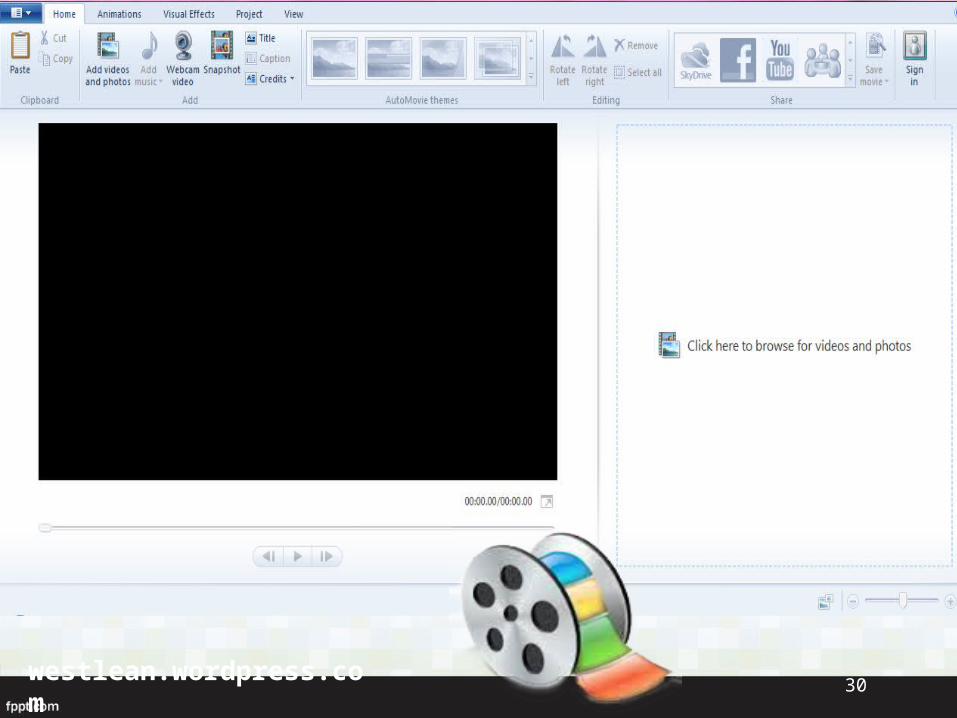
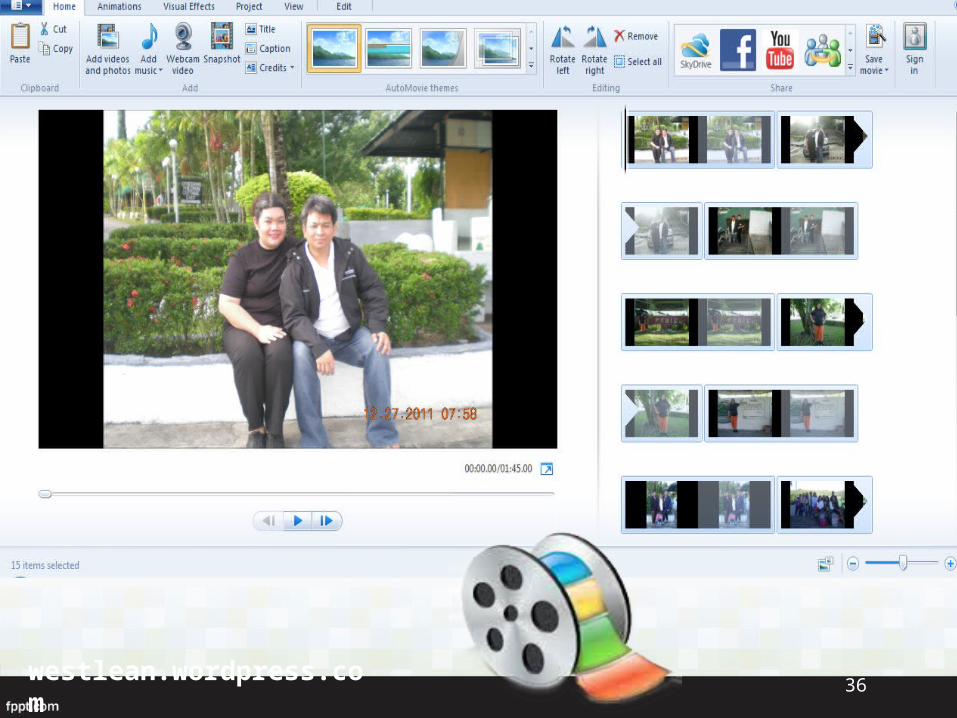
To start our movie making project,
Click Add videos and photo.
westlean.wordpress.com 31

westlean.wordpress.com 32
westlean.wordpress.com 33
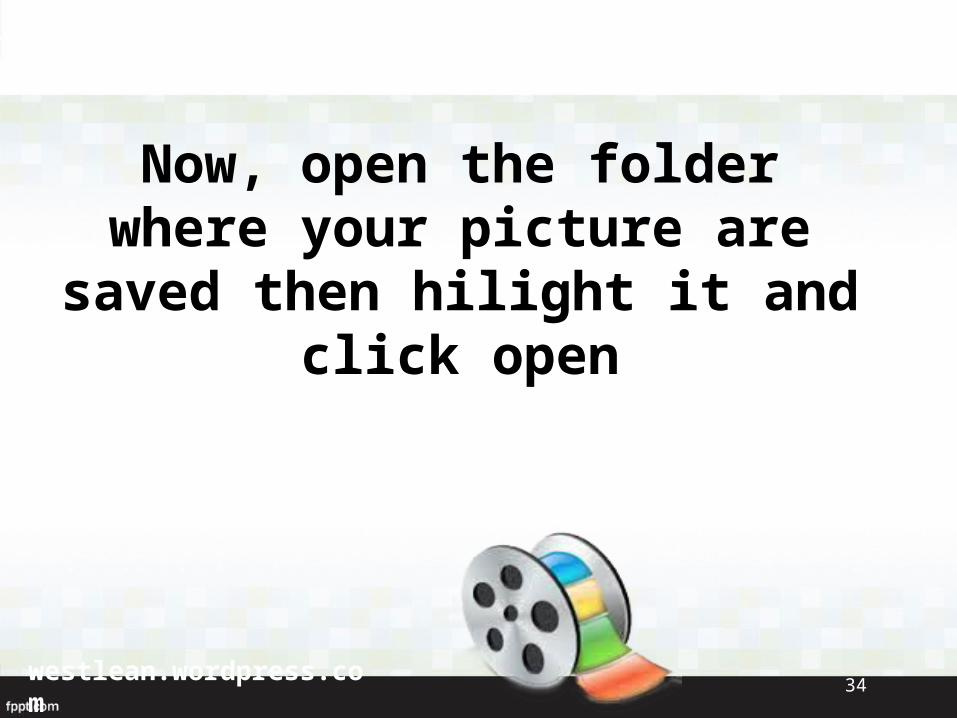
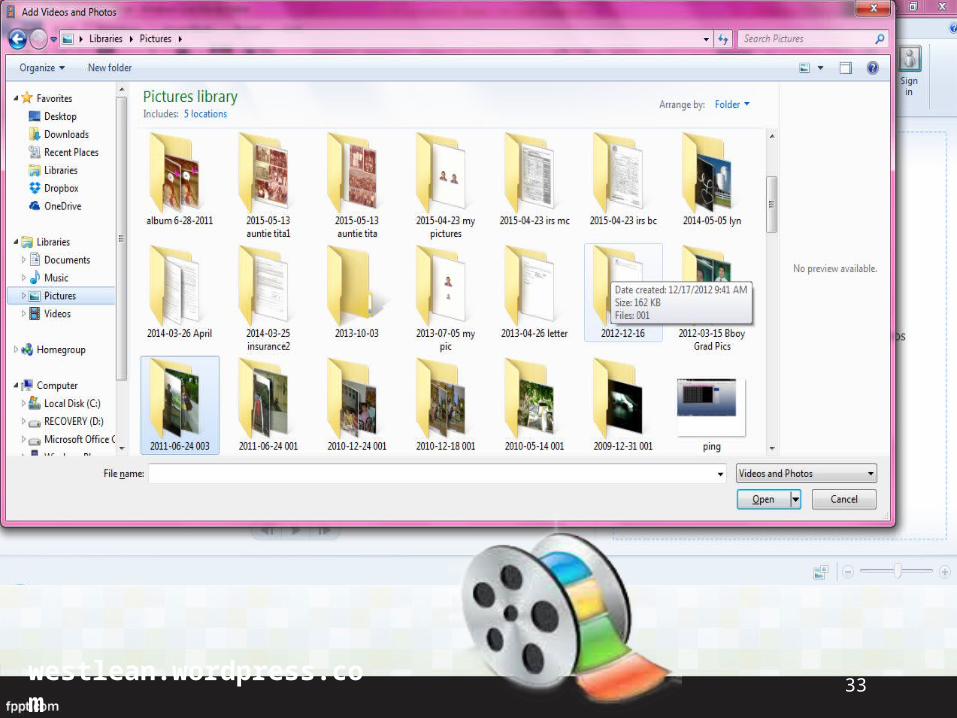
Now, open the folder where your picture are saved then
hilight it and click open
westlean.wordpress.com 34

westlean.wordpress.com 35
westlean.wordpress.com 36
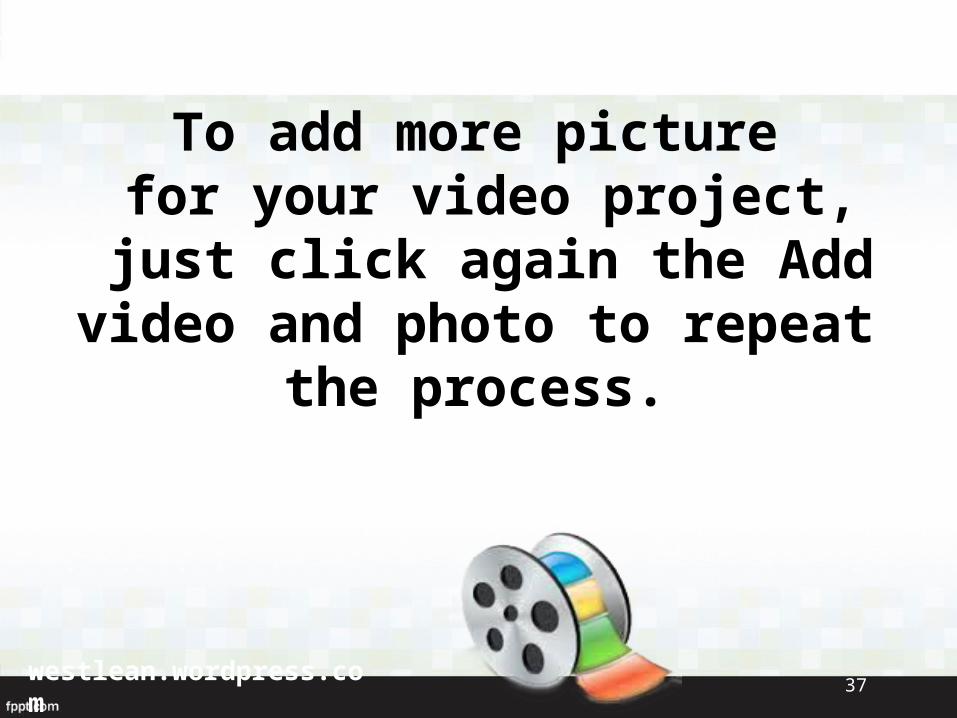
To add more picture for your video project,
just click again the Add video and photo to repeat the process.
westlean.wordpress.com 37

westlean.wordpress.com 38

To delete the photo that you dont want to be added in your
movie project,Click the photo then press
delete button on your keyboard.
westlean.wordpress.com 39

westlean.wordpress.com 40

westlean.wordpress.com 41

To add music for your movie project,
click Add music.
westlean.wordpress.com 42

westlean.wordpress.com 43

westlean.wordpress.com 44
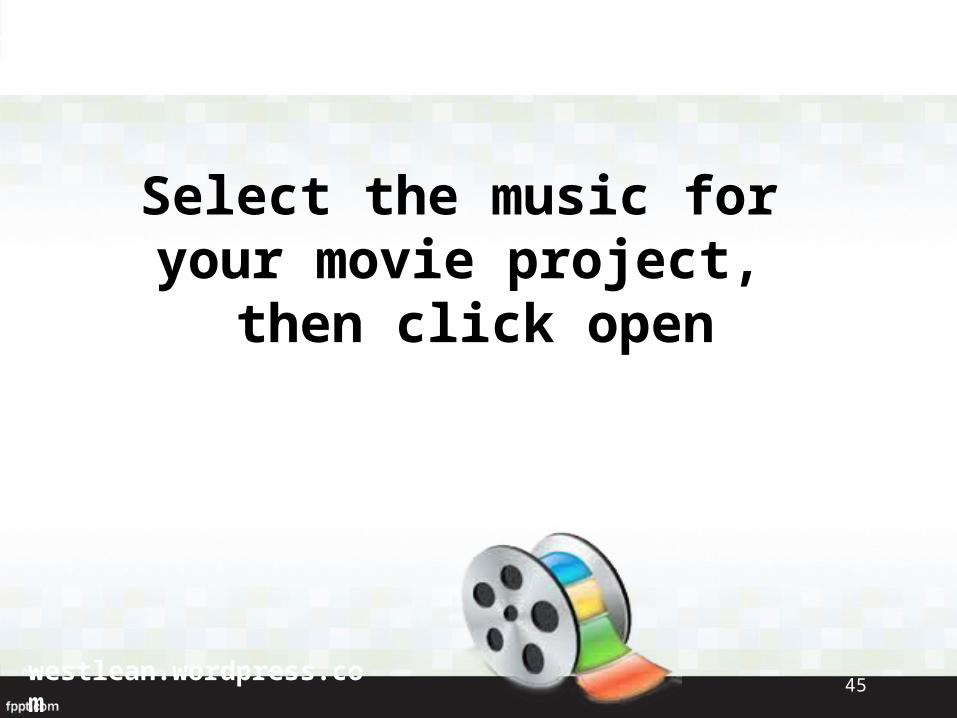
Select the music for your movie project,
then click open
westlean.wordpress.com 45

westlean.wordpress.com 46

westlean.wordpress.com 47

To add title for your movie project,
click Title.
westlean.wordpress.com 48
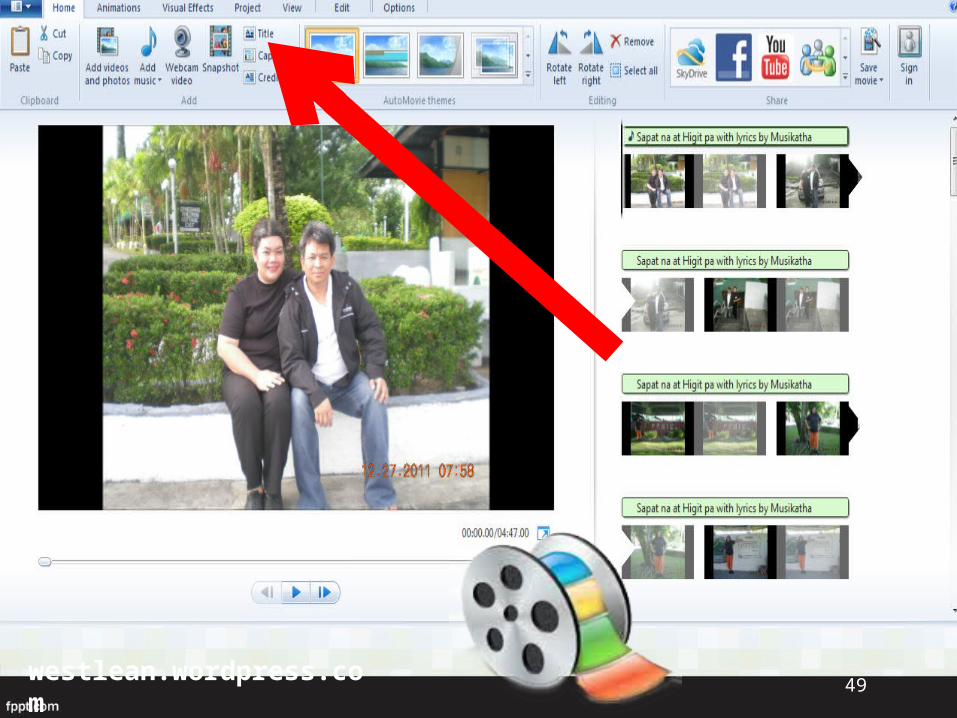
westlean.wordpress.com 49
westlean.wordpress.com 50

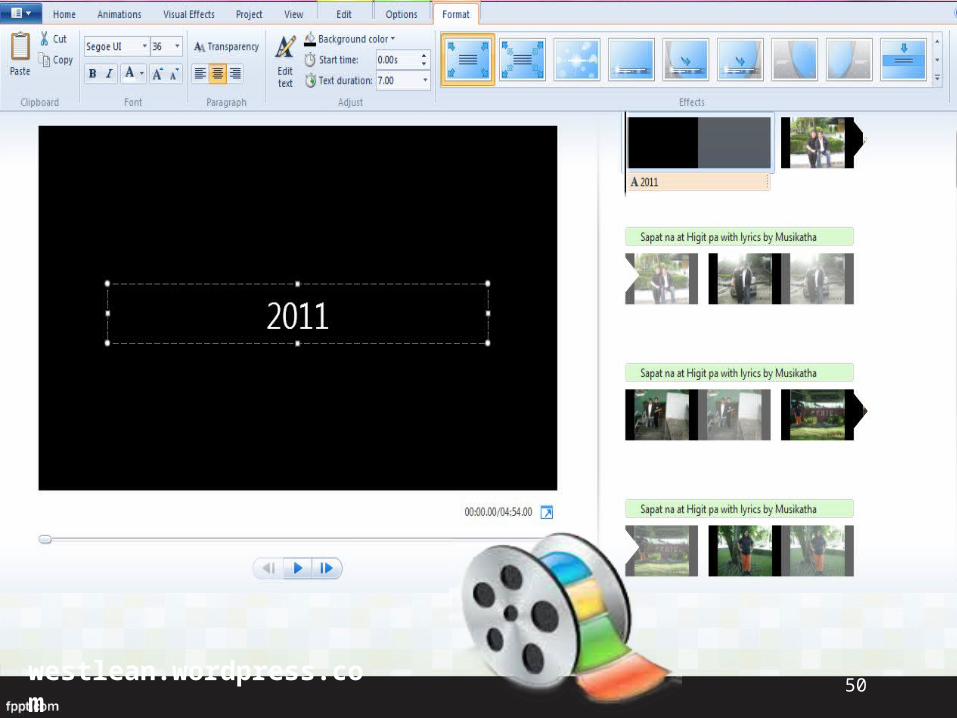
Now edit the title for your movie project.“Life of Truth ChurchWorkers Convention
@ Peniel 2011”
westlean.wordpress.com 51

westlean.wordpress.com 52

westlean.wordpress.com 53
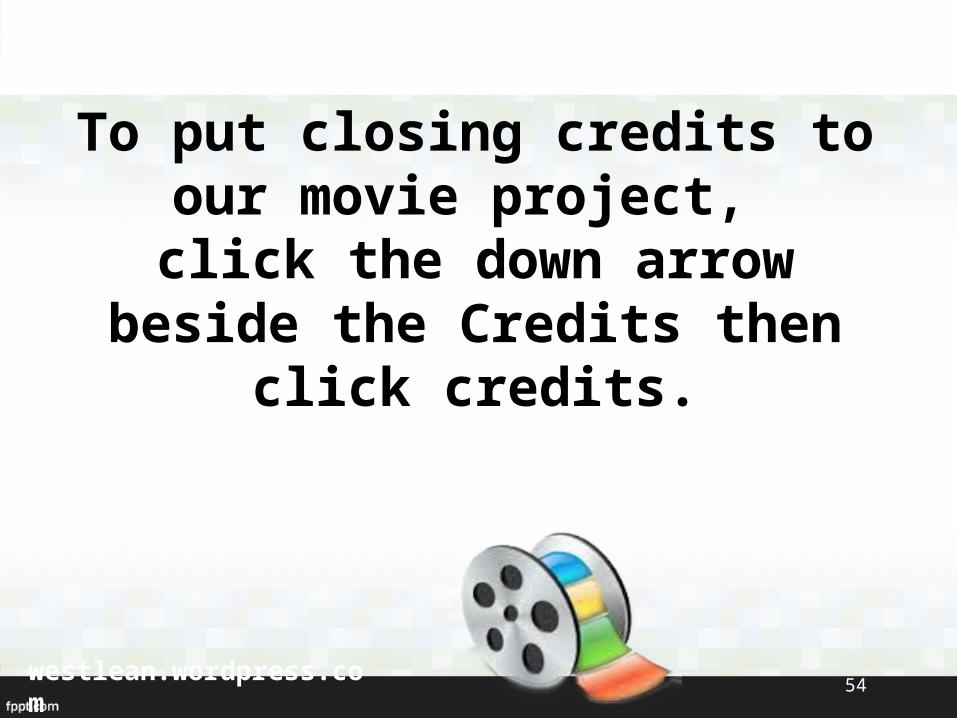
To put closing credits to our movie project,
click the down arrow beside the Credits then click credits.
westlean.wordpress.com 54

westlean.wordpress.com 55

westlean.wordpress.com 56
Add the closing credits for your movie project.
westlean.wordpress.com 57

westlean.wordpress.com 58

westlean.wordpress.com 59

Now to add animation to our movie project,
click Animation
westlean.wordpress.com 60

westlean.wordpress.com 61
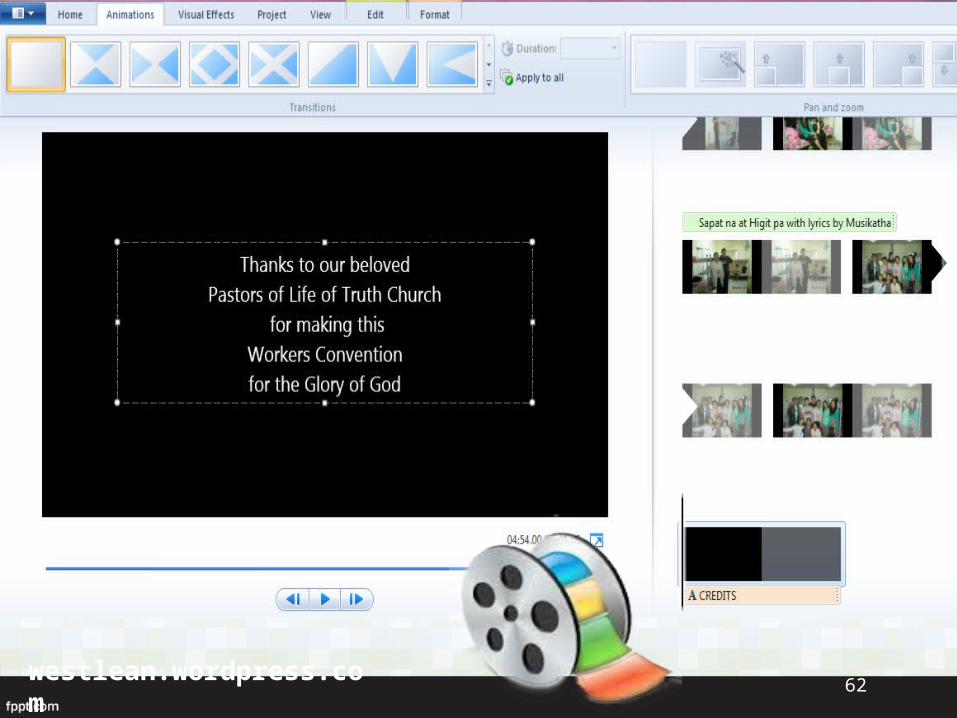
westlean.wordpress.com 62

Select animations for Transitions,
this can apply to all or individually.
For now I will select Apply to all.
westlean.wordpress.com 63

westlean.wordpress.com 64
westlean.wordpress.com 65

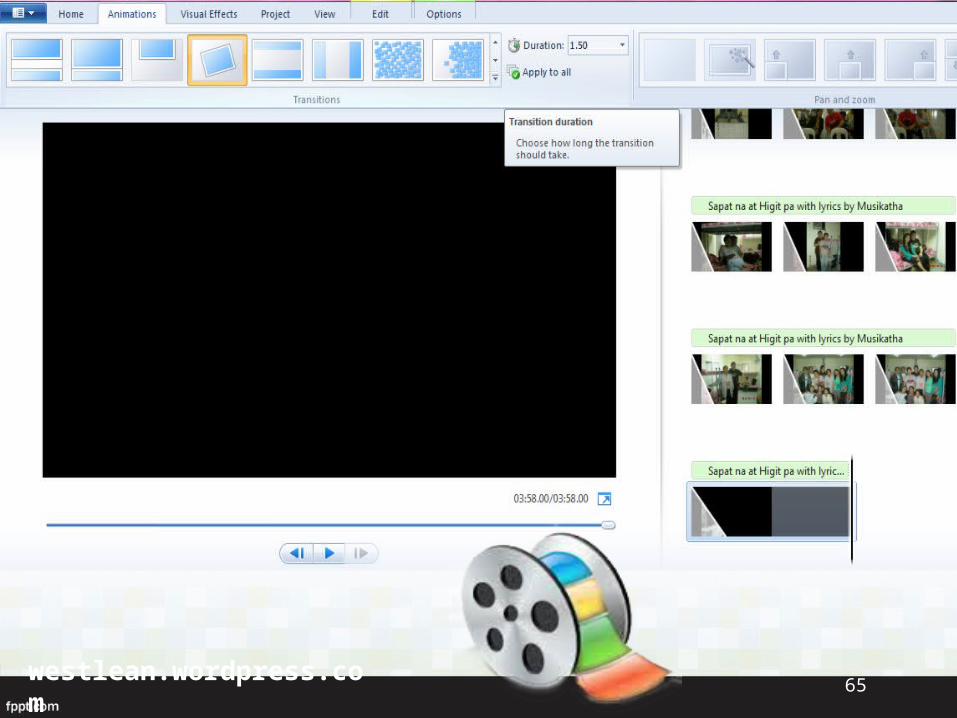
Click any picture to select for Pan and Zoom
animation.Then click selected animation
then click apply to all.
westlean.wordpress.com 66

westlean.wordpress.com 67

westlean.wordpress.com 68
Now that you added your music, animation and credits to your
movie project. Its time to edit the timing of each slides to insync
with the music.
westlean.wordpress.com 69

Since the music we added has 4 minutes and 41 seconds
duration and our slides only has 3 minutes and 58 seconds.
westlean.wordpress.com 70
Click Edit, then add seconds to
the slide that you chose. Do this until you reach
the same length of time of your music,
westlean.wordpress.com 71

westlean.wordpress.com 72

westlean.wordpress.com 73
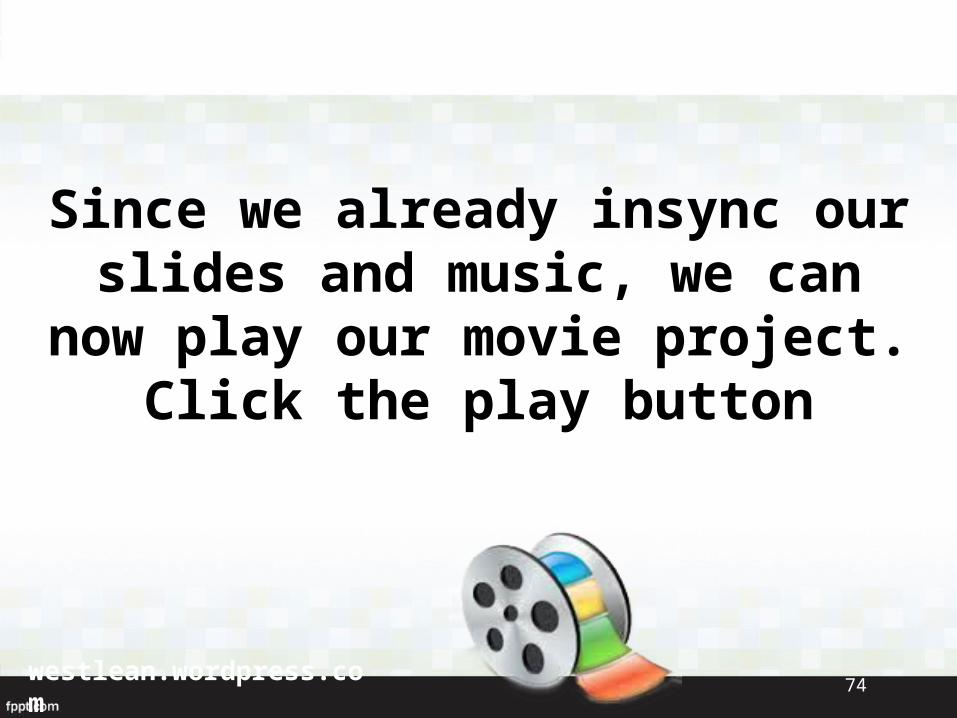
Since we already insync our slides and music, we can now play our
movie project.Click the play button
westlean.wordpress.com 74
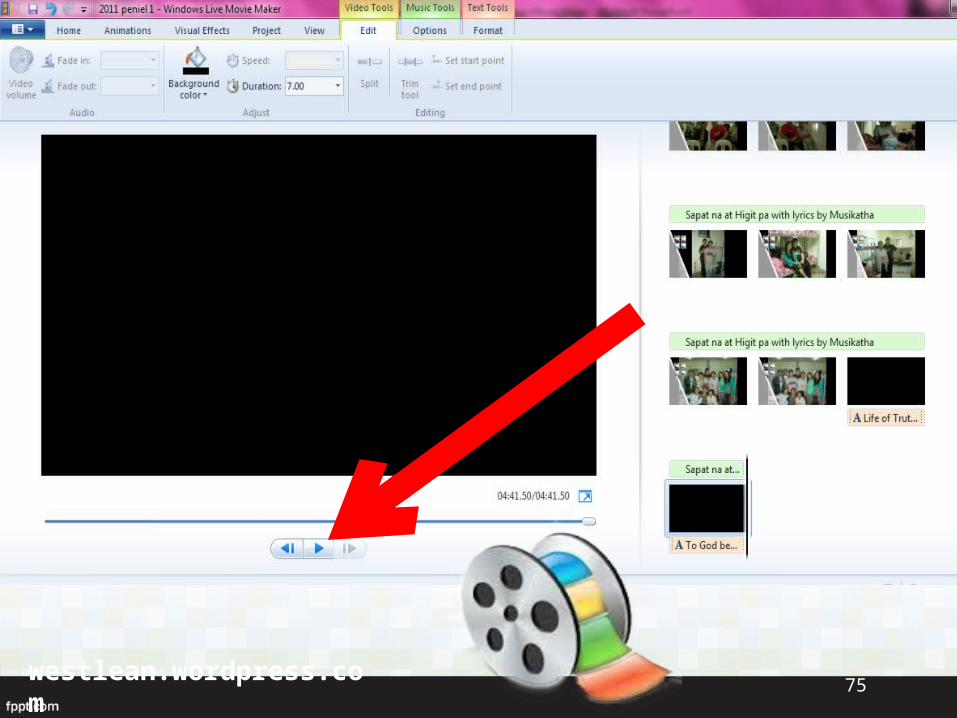
westlean.wordpress.com 75

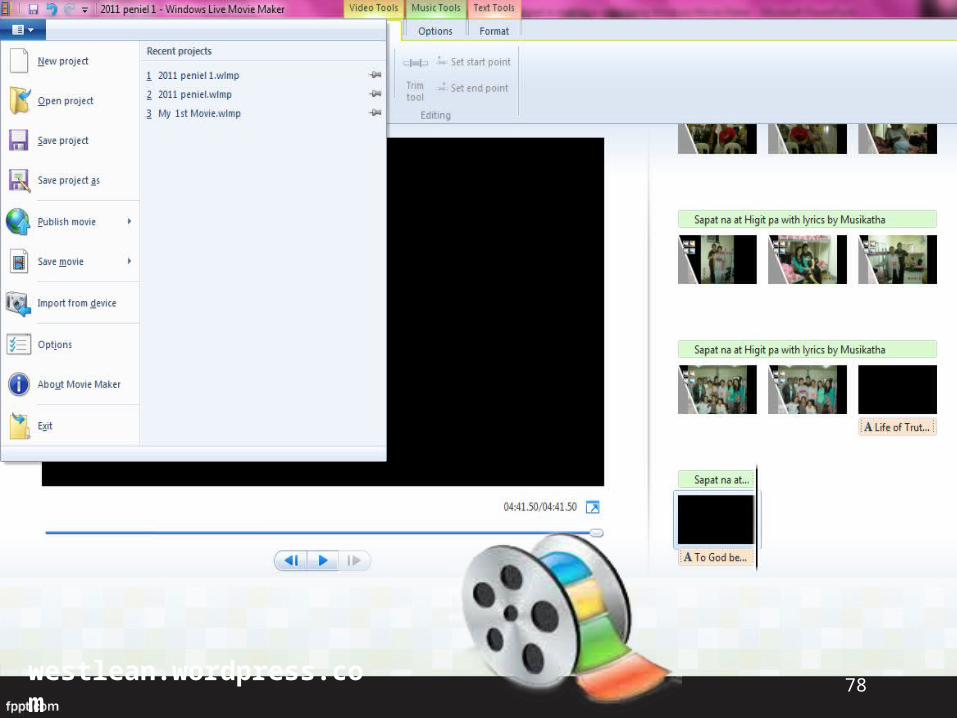
Now to save our movie project,click the arrow besides
the movie maker
westlean.wordpress.com 76

westlean.wordpress.com 77
westlean.wordpress.com 78
Click save project as.
westlean.wordpress.com 79

westlean.wordpress.com 80

Then name your movie project and click save.
westlean.wordpress.com 81

westlean.wordpress.com 82
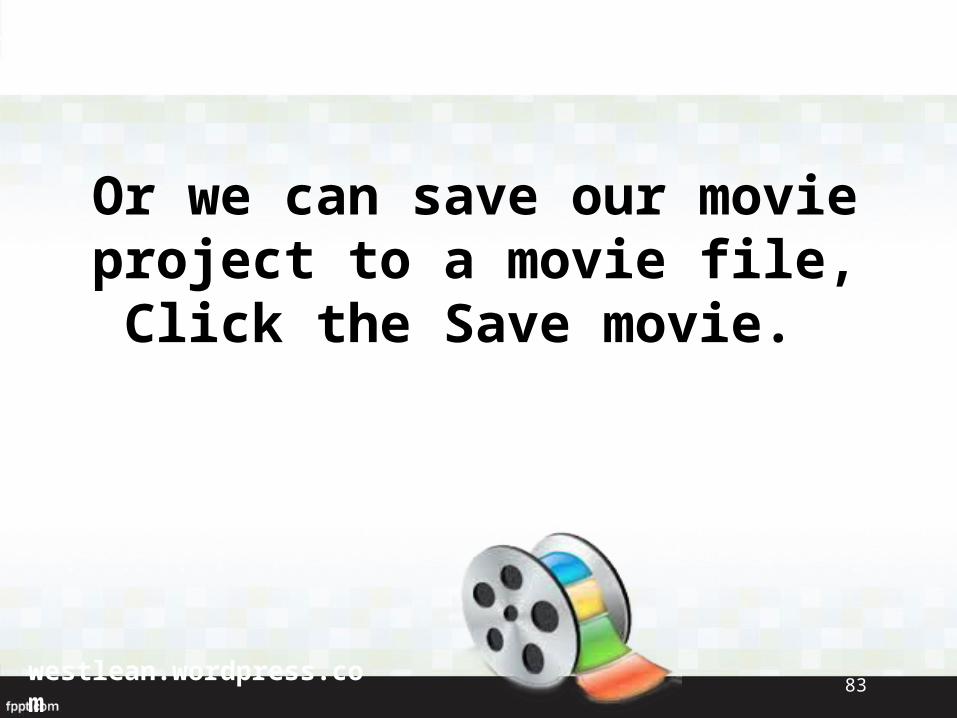
Or we can save our movie project to a movie file,Click the Save movie.
westlean.wordpress.com 83

westlean.wordpress.com 84

westlean.wordpress.com 85

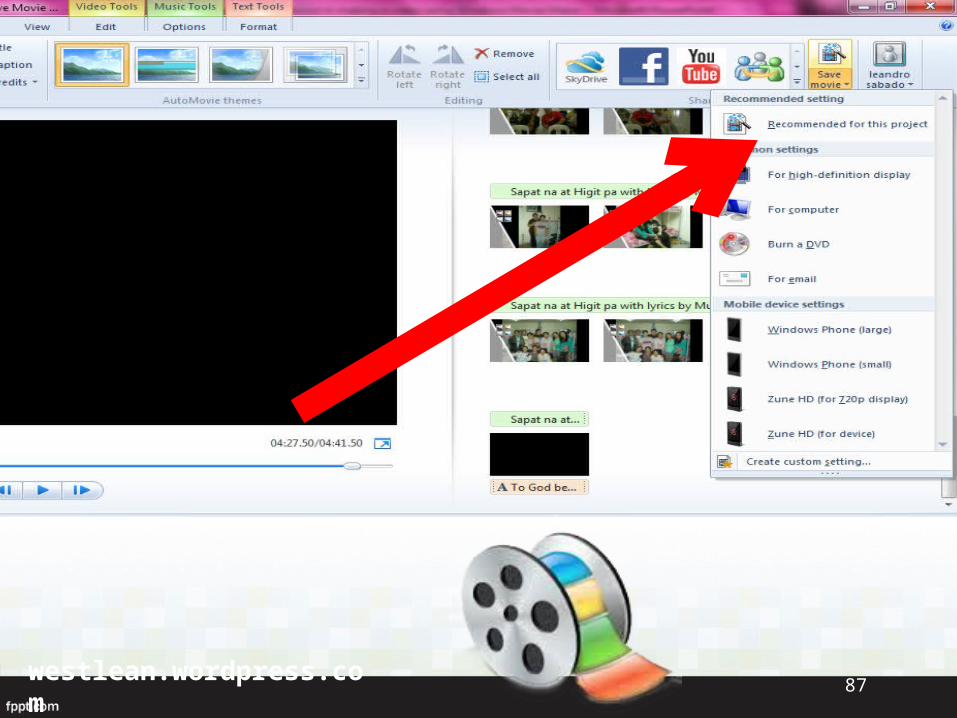
Then click Recommended for this project
westlean.wordpress.com 86
westlean.wordpress.com 87

westlean.wordpress.com 88

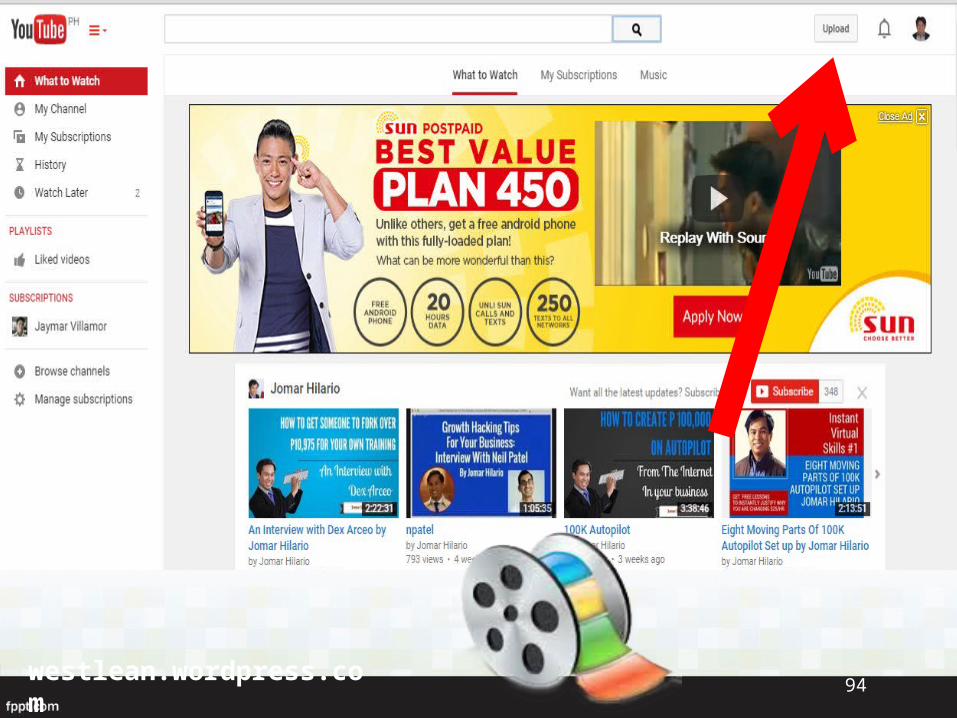
Lets upload our movie in Youtube
westlean.wordpress.com 89

Open your Gmail Account then click Youtube
westlean.wordpress.com 90

westlean.wordpress.com 91

westlean.wordpress.com 92

Click upload
westlean.wordpress.com 93
westlean.wordpress.com 94

westlean.wordpress.com 95

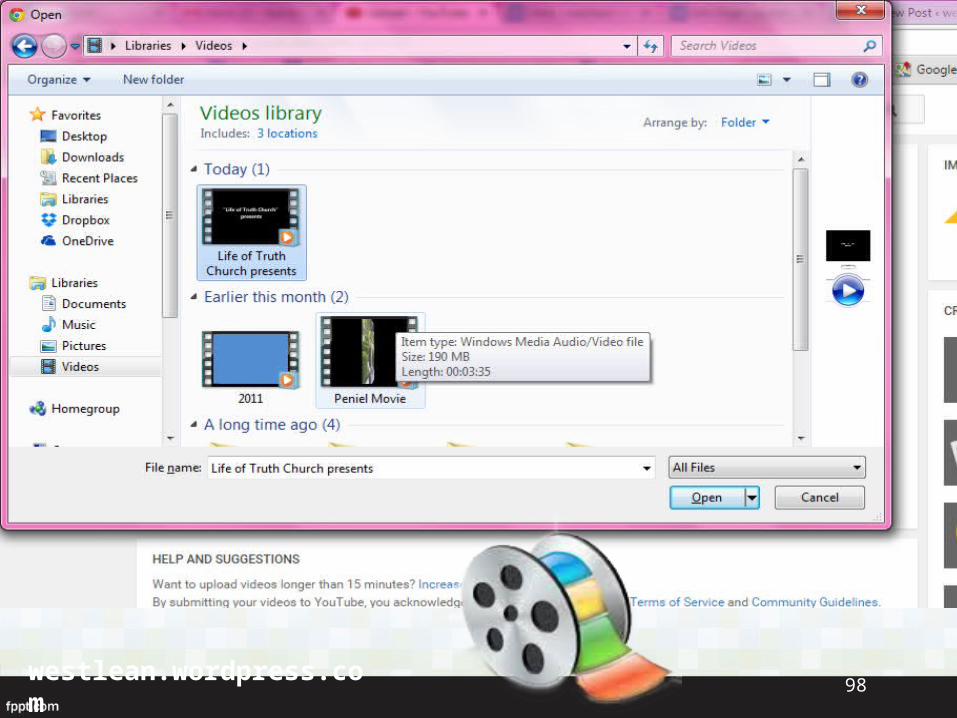
Then click theSelect files to upload
westlean.wordpress.com 96

westlean.wordpress.com 97
westlean.wordpress.com 98

Click the saved movie projectand click open
westlean.wordpress.com 99

westlean.wordpress.com 100
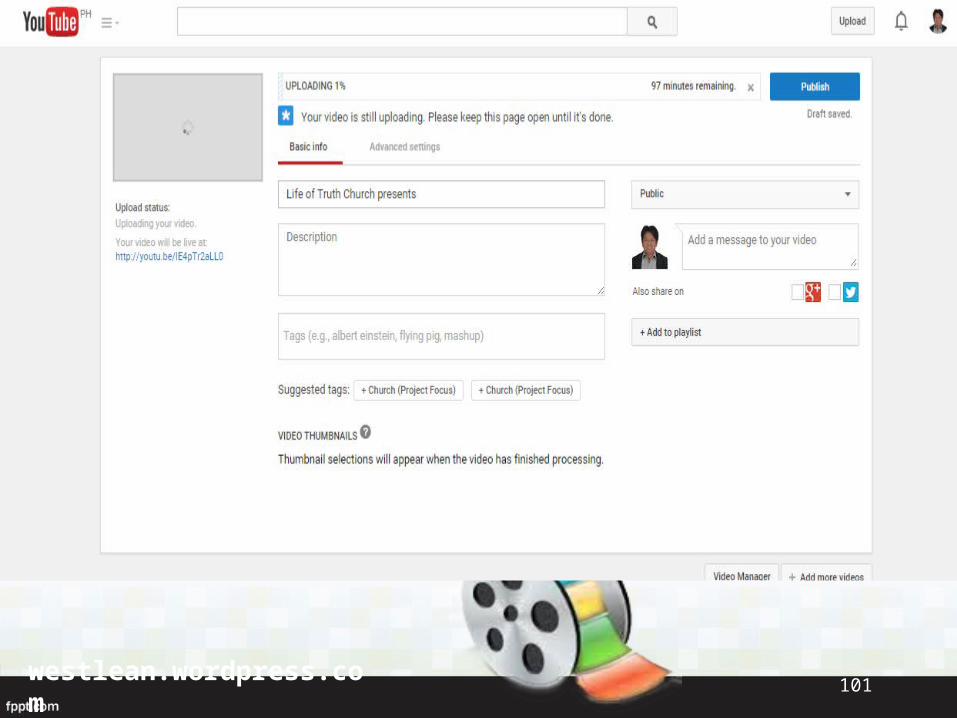
westlean.wordpress.com 101
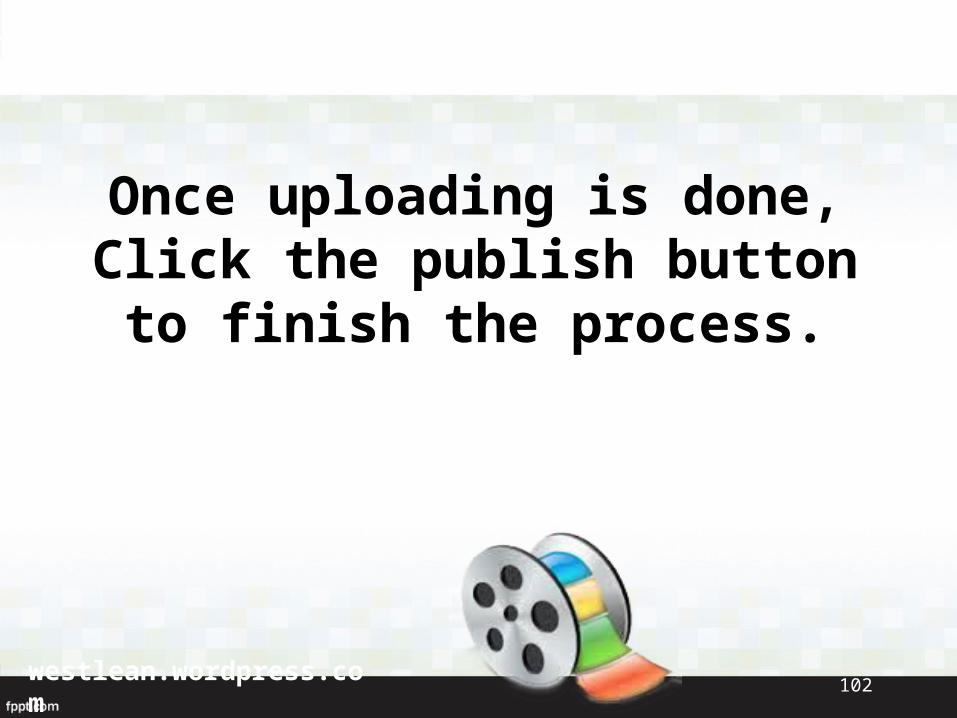
Once uploading is done,Click the publish button to finish
the process.
westlean.wordpress.com 102

westlean.wordpress.com 103

You can now see your movie in your Youtube channel
westlean.wordpress.com 104

westlean.wordpress.com 105

Thanks for your time and I hope you have learned
from this tutorial.
westlean.wordpress.com 106

Please visit my Blogsite:www.westlean.wordpress.com
Facebook Page:www.facebook.com/Virtual-
Assistant-Entrepreneur
God bless.
westlean.wordpress.com 107