type fdm30 - lakeland.co.uk · replacing the fuse. if the fuse cover is lost then the plug must not...
TRANSCRIPT

HEAD OFFICE: Kenwood Limited, 1-3 Kenwood Business Park, New Lane, Havant, Hampshire PO9 2NH
134699/1
instructions
TYPE FDM30
English 2 - 12
´¸∂w31 - 22
134699 Iss 1 FDM30 Eng_Arabic.B5.indd 1-4 21/03/2017 15:59

2
safetyl Read these instructions carefully and retain for future reference.l Remove all packaging and any labels.l If the cord is damaged it must, for safety reasons, be replaced by KENWOOD
or an authorised KENWOOD repairer.l The blades and discs are very sharp, handle with care. Always hold by the
finger grip at the top, away from the cutting edge, both when handling and cleaning.
l DO NOT process hot ingredients.l Do not lift or carry the processor by the handle - or the handle may break
resulting in injury.l Always remove the knife blade before pouring contents from the bowl.l Keep hands and utensils out of the processor bowl and blender goblet whilst
connected to the power supply.l Switch off and unplug:
before fitting or removing parts; when not in use; before cleaning.
l Never use your fingers to push food down the feed tube. Always use the pusher supplied.
l Never fit the blade assembly to the power unit without the blender goblet or mill jar fitted.
l Before removing the lid from the bowl, blender or multi mill from the power unit: switch off; wait until the attachment/blades have completely stopped; be careful not to unscrew the blender goblet or mill jar from the blade
assembly.l Do not use the lid to operate the processor, always use the on/off speed
control.l This appliance will be damaged and may cause injury if the
interlock mechanism is subjected to excessive force.l Always unplug your food processor when not in use.l Never use an unauthorised attachment.l Never leave the appliance unattended when it is operating.l Never use a damaged appliance. Get it checked or repaired: see “service and
customer care”.l Never let the power unit, cord or plug get wet.l Do not let excess cord hang over the edge of a table or worktop or touch hot
surfaces.
D - optional attachments
C - standard attachmentsA - Plastic blender
B - Glass blender
1
2
3
4
5
6
7
cr
cm
c
co
cp
p
q
r
s
t
c
cq
o
m
m
o
2
1
4
5
9
7
5
4
6
68
bk
3
8
c
b
b
b
b
b
p – q c – cp
cq – cr
s – c
r
cm
c
au
au
bu
cu
du
eu
fubu
9
cp
co
c
cq
cr
134699 Iss 1 FDM30 Eng_Arabic.B5.indd 5-3 21/03/2017 15:59

3 4
l Do not exceed the maximum capacities stated in the recommended speed chart.
l Children should be supervised to ensure that they do not play with the appliance.
l This appliance shall not be used by children. Keep the appliance and its cord out of reach of children.
l Appliances can be used by persons with reduced physical, sensory or mental capabilities or lack of experience and knowledge if they have been given supervision or instruction concerning use of the appliance in a safe way and if they understand the hazards involved.
l Only use the appliance for its intended domestic use. Kenwood will not accept any liability if the appliance is subject to improper use, or failure to comply with these instructions.
l Misuse of your processor, blender or mill can result in injury.l The maximum rating is based on the attachment that draws the greatest load.
Other attachments may draw less power.blender
l DO NOT process hot ingredients.l SCALD RISK: Hot ingredients must be allowed to cool to room temperature
before placing in the goblet or before blending.l Always take care when handling the blade assembly and avoid touching the
cutting edge of the blades when cleaning.l Only operate the blender with the lid in place.l Only use the goblet with the blade assembly supplied.l Never run the blender empty.l To ensure the long life of your blender, do not run it for longer than 60 seconds.l Smoothie recipes - never blend frozen ingredients that have formed a solid
mass during freezing, break it up before adding to the goblet.mill attachments
l Never fit the blade assembly to the power unit without the jar/lid fitted.l Never unscrew the jar/lid while the mill is fitted to your appliance.l Do not touch the sharp blades – Keep the blade assembly away from children.l Never remove the mill until the blades have completely stopped.l The appliance will not work if the mill is incorrectly fitted.l Do not process hot ingredients in the mill allow to cool down to room
temperature before processing.multi mill
l To ensure the long life of your multi mill, never run for longer than 30 seconds. Switch off as soon as you have got the right consistency.
l The processing of spices is not recommended as they may damage the plastic parts.
134699 Iss 1 FDM30 Eng_Arabic.B5.indd 3 21/03/2017 16:05
4
before plugging inl Make sure your electricity supply is the same as the one shown
on the underside of your appliance.
Important – UK onlyl The wires in the cord are coloured as follows: Blue = Neutral, Brown = Live.l The appliance must be protected by a 13A approved (BS1362)
fuse. Note:l For non-rewireable plugs the fuse cover MUST be refitted when
replacing the fuse. If the fuse cover is lost then the plug must not be used until a replacement can be obtained. The correct fuse cover is identified by colour and a replacement may be obtained from your Kenwood Authorised Repairer (see Service).
l If a non-rewireable plug is cut off it must be DESTROYED IMMEDIATELY. An electric shock hazard may arise if an unwanted non-rewireable plug is inadvertently inserted into a 13A socket outlet.
l This appliance conforms to EC Regulation 1935/2004 on materials and articles intended to come into contact with food.
before using for the first time1 Remove the plastic blade covers from the knife blade. Take
care the blades are very sharp. These covers should be discarded as they are to protect the blade during manufacture and transit only.
2 Wash the parts see “care and cleaning”.
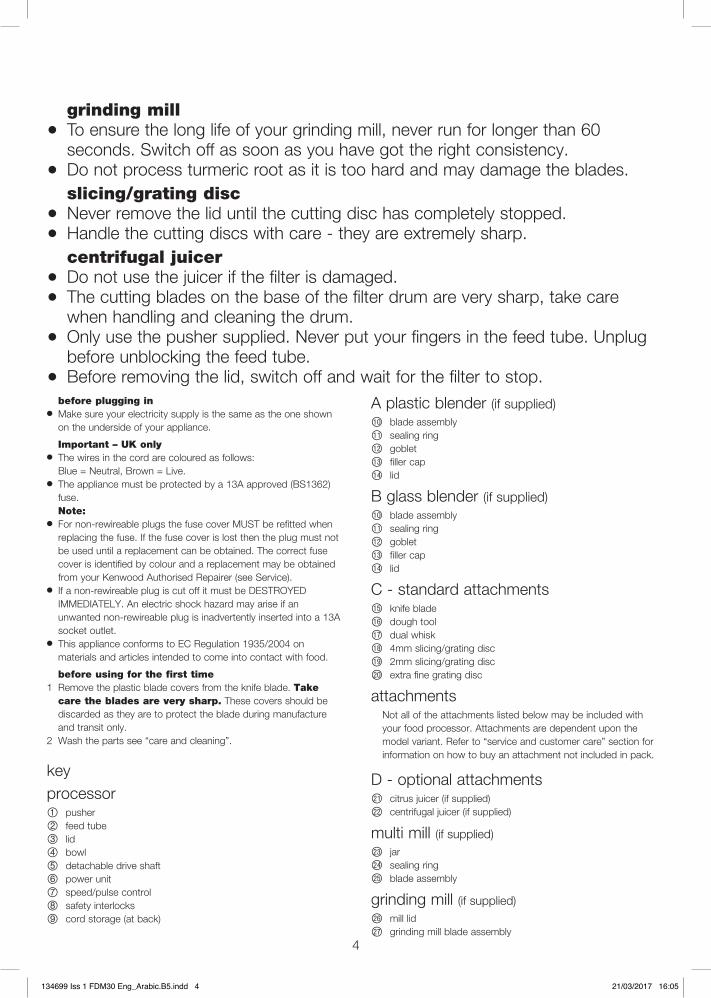
keyprocessor1 pusher2 feed tube3 lid4 bowl5 detachable drive shaft6 power unit7 speed/pulse control8 safety interlocks9 cord storage (at back)
A plastic blender (if supplied) blade assembly sealing ringm goblet filler capo lid
B glass blender (if supplied) blade assembly sealing ringm goblet filler capo lid
C - standard attachmentsp knife bladeq dough toolr dual whisks 4mm slicing/grating disct 2mm slicing/grating discc extra fine grating disc
attachments Not all of the attachments listed below may be included with
your food processor. Attachments are dependent upon the model variant. Refer to “service and customer care” section for information on how to buy an attachment not included in pack.
D - optional attachmentsc citrus juicer (if supplied)cm centrifugal juicer (if supplied)
multi mill (if supplied)
c jarco sealing ring cp blade assembly
grinding mill (if supplied)
cq mill lidcr grinding mill blade assembly
grinding milll To ensure the long life of your grinding mill, never run for longer than 60
seconds. Switch off as soon as you have got the right consistency.l Do not process turmeric root as it is too hard and may damage the blades.
slicing/grating discl Never remove the lid until the cutting disc has completely stopped.l Handle the cutting discs with care - they are extremely sharp. centrifugal juicerl Do not use the juicer if the filter is damaged.l The cutting blades on the base of the filter drum are very sharp, take care
when handling and cleaning the drum.l Only use the pusher supplied. Never put your fingers in the feed tube. Unplug
before unblocking the feed tube.l Before removing the lid, switch off and wait for the filter to stop.
134699 Iss 1 FDM30 Eng_Arabic.B5.indd 4 21/03/2017 16:05

65
to use your food processor1 Fit the detachable drive shaft onto the power unit 1.2 Then fit the bowl by aligning the on the bowl with the on the
power unit, turn clockwise 2until it locks .
3 Fit an attachment over the bowl drive shaft.
l Always fit the bowl and attachment onto the processor before adding ingredients.
4 Fit the lid 3- ensuring the top of the drive shaft/tool locates into the centre of the lid.
l Do not use the lid to operate the processor, always use the on/off speed control.
5 Plug in, switch on and select a speed. (Refer to the recommended speed chart).
l The processor will not operate if the bowl or lid are not fitted correctly into the interlock. Check that the feed tube and bowl handle are situated to the right front hand corner.
l Use the pulse (P) for short bursts. The pulse will operate for as long as the control is held in position.
6 Reverse the above procedure to remove the lid, attachments and bowl.
l Always switch off and unplug before removing the lid. importantl Your processor is not suitable for crushing or grinding coffee
beans, or converting granulated sugar to caster sugar.l When adding almond essence or flavouring to mixtures avoid
contact with the plastic as this may result in permanent marking.
A plastic blender (if supplied)
to use your blender1 Fit the sealing ring into the blade assembly - ensuring the
seal is located correctly in the grooved area.l Leaking will occur if the seal is damaged or
incorrectly fitted.2 Hold the underside of the blade assembly and insert the
blades into the goblet - turn anti-clockwise until it is secure 4. Refer to the graphics on the underside of the blade assembly as follows:
- unlocked position - locked position
The blender will not operate if incorrectly assembled.3 Put your ingredients into the goblet.4 Fit the lid onto the goblet and turn clockwise 5 until it clicks. Fit
the filler cap.5 Place the blender onto the power unit, align the on the blender
with the on the power unit and turn clockwise 6 to lock .l The appliance will not operate if the blender is
incorrectly fitted to the interlock.6 Select a speed (refer to the recommended speed chart) or use
the pulse control.
B glass blender (if supplied)
to use your blender1 Fit the sealing ring into the blade unit - ensuring the seal is
located correctly in the grooved area.l Leaking will occur if the seal is damaged or
incorrectly fitted.2 Screw the goblet onto the blade assembly 4. Refer to the
graphics on the underside of the blade unit as follows:
- unlocked position - locked position
The blender will not operate if incorrectly assembled.3 Put your ingredients into the goblet.4 Fit the lid to the goblet and push down to secure 5. Fit the
filler cap.5 Place the blender onto the power unit, align the on the blender
with the on the power unit and turn clockwise 6 to lock .l The appliance will not operate if the blender is
incorrectly fitted to the interlock.6 Select a speed (refer to the recommended speed chart) or use
the pulse control.
multi mill (if supplied)
Use the multi mill for processing nuts, coffee beans and purées.
1 Put the ingredients into the jar c.2 Fit the sealing ring cointo the blade assembly cp.3 Turn the blade assembly upside down. Lower it into the jar,
blades down.4 Screw the blade assembly onto the jar until finger tight 7.
Refer to the graphics on the underside of the blade assembly as follows:
- unlocked position
- locked position
5 Place the multi mill onto the power unit, align the on the mini multi mill with the on the power unit and turn clockwise 8 to lock .
6 Switch onto maximum speed or use the pulse control.
grinding mill (If supplied)
Use the grinding mill for processing dry ingredients such as coffee beans and for grinding spices such as:-
Black peppercorns, cardamom seeds, cumin seeds, coriander seeds, fennel seeds, fresh ginger root, garlic cloves and fresh chillies.
to use your grinding mill.1 Place your ingredients into the blade assembly cr.2 Fit the lid cq and turn clockwise to lock 9.3 Place the mill onto the power unit and turn clockwise to lock bk.4 Select a speed or use the pulse (P).
134699 Iss 1 FDM30 Eng_Arabic.B5.indd 5 21/03/2017 16:05
6
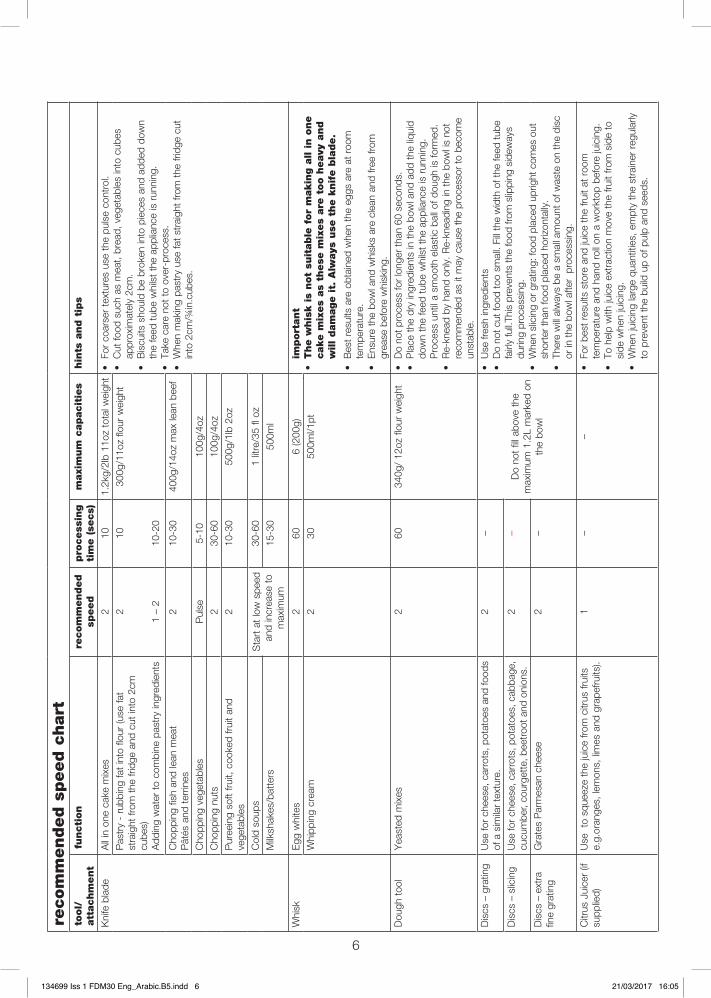
recom
mended s
peed c
hart
tool/
att
achm
ent
functi
on
recom
mended
speed
pro
cess
ing
tim
e (
secs)
maxi
mum
capacit
ies
hin
ts a
nd t
ips
Kni
fe b
lade
All
in o
ne c
ake
mix
es2
101.
2kg/
2lb
11oz
tot
al w
eigh
t•
For
coar
ser
text
ures
use
the
pul
se c
ontr
ol.
•C
ut fo
od s
uch
as m
eat,
brea
d, v
eget
able
s in
to c
ubes
ap
prox
imat
ely
2cm
.•
Bis
cuits
sho
uld
be b
roke
n in
to p
iece
s an
d ad
ded
dow
n th
e fe
ed t
ube
whi
lst
the
appl
ianc
e is
run
ning
.•
Take
car
e no
t to
ove
r-pr
oces
s.•
Whe
n m
akin
g pa
stry
use
fat
stra
ight
from
the
frid
ge c
ut
into
2cm
/¾in
.cub
es.
Pas
try
- ru
bbin
g fa
t in
to fl
our
(use
fat
stra
ight
from
the
frid
ge a
nd c
ut in
to 2
cm
cube
s)A
ddin
g w
ater
to
com
bine
pas
try
ingr
edie
nts
2
1 –
2
10
10-2
0
300g
/11o
z flo
ur w
eigh
t
Cho
ppin
g fis
h an
d le
an m
eat
Pât
és a
nd t
errin
es2
10-3
040
0g/1
4oz
max
lean
bee
f
Cho
ppin
g ve
geta
bles
Pul
se5-
1010
0g/4
ozC
hopp
ing
nuts
230
-60
100g
/4oz
Pur
eein
g so
ft fru
it, c
ooke
d fru
it an
d ve
geta
bles
210
-30
500g
/1lb
2oz
Col
d so
ups
Sta
rt a
t lo
w s
peed
an
d in
crea
se t
o m
axim
um
30-6
01
litre
/35
fl oz
Milk
shak
es/b
atte
rs15
-30
500m
l
Whi
skE
gg w
hite
s2
606
(200
g)
import
ant
•T
he w
his
k i
s not
suit
able
for
makin
g a
ll i
n o
ne
cake m
ixes
as
these
mix
es
are
too h
eavy
and
will
dam
age i
t. A
lways
use
the k
nif
e b
lade.
•B
est
resu
lts a
re o
btai
ned
whe
n th
e eg
gs a
re a
t ro
om
tem
pera
ture
.•
Ens
ure
the
bow
l and
whi
sks
are
clea
n an
d fre
e fro
m
grea
se b
efor
e w
hisk
ing.
Whi
ppin
g cr
eam
230
500m
l/1pt
Dou
gh t
ool
Yea
sted
mix
es2
6034
0g/
12oz
flou
r w
eigh
t•
Do
not p
roce
ss fo
r lo
nger
than
60
seco
nds.
•P
lace
the
dry
ingr
edie
nts
in t
he b
owl a
nd a
dd t
he li
quid
do
wn
the
feed
tub
e w
hils
t th
e ap
plia
nce
is r
unni
ng.
Pro
cess
unt
il a
smoo
th e
last
ic b
all o
f dou
gh is
form
ed.
•R
e-kn
ead
by h
and
only
. Re-
knea
ding
in t
he b
owl i
s no
t re
com
men
ded
as it
may
cau
se th
e pr
oces
sor
to b
ecom
e un
stab
le.
Dis
cs –
gra
ting
Use
for
chee
se, c
arro
ts, p
otat
oes
and
food
s of
a s
imila
r te
xtur
e.2
–
Do
not
fill a
bove
the
m
axim
um 1
.2L
mar
ked
on
the
bow
l
•U
se fr
esh
ingr
edie
nts
•D
o no
t cut
food
too
smal
l. Fi
ll th
e w
idth
of t
he fe
ed tu
be
fairl
y fu
ll.Th
is p
reve
nts
the
food
from
slip
ping
sid
eway
s du
ring
proc
essi
ng.
•W
hen
slic
ing
or g
ratin
g: fo
od p
lace
d up
right
com
es o
ut
shor
ter
than
food
pla
ced
horiz
onta
lly.
•Th
ere
will
alw
ays
be a
sm
all a
mou
nt o
f was
te o
n th
e di
sc
or in
the
bow
l afte
r p
roce
ssin
g.
Dis
cs –
slic
ing
Use
for
chee
se, c
arro
ts, p
otat
oes,
cab
bage
, cu
cum
ber,
cour
gett
e, b
eetr
oot a
nd o
nion
s.2
–
Dis
cs –
ext
ra
fine
grat
ing
Gra
tes
Par
mes
an c
hees
e 2
–
Citr
us J
uice
r (if
su
pplie
d)U
se
to s
quee
ze t
he ju
ice
from
citr
us fr
uits
e.
g.or
ange
s, le
mon
s, li
mes
and
gra
pefru
its).
1–
–•
For
best
res
ults
sto
re a
nd ju
ice
the
fruit
at r
oom
te
mpe
ratu
re a
nd h
and
roll
on a
wor
ktop
bef
ore
juic
ing.
• To
hel
p w
ith ju
ice
extr
actio
n m
ove
the
fruit
from
sid
e to
si
de w
hen
juic
ing.
•
Whe
n ju
icin
g la
rge
quan
titie
s, e
mpt
y th
e st
rain
er r
egul
arly
to
pre
vent
the
bui
ld u
p of
pul
p an
d se
eds.
134699 Iss 1 FDM30 Eng_Arabic.B5.indd 6 21/03/2017 16:05

7
recom
mended s
peed c
hart
tool/
att
achm
ent
functi
on
recom
mended
speed
pro
cess
ing
tim
e (
secs)
maxi
mum
capacit
ies
hin
ts a
nd t
ips
Ble
nder
Col
d liq
uids
and
drin
ks2
601.
2 lit
re•
Whe
n m
akin
g m
ayon
nais
e, p
ut a
ll th
e in
gred
ient
s, e
xcep
t th
e oi
l, in
to t
he b
lend
er. R
emov
e th
e fil
ler
cap.
The
n, w
ith t
he a
pplia
nce
runn
ing,
add
the
oil
slow
ly t
hrou
gh t
he h
ole
in t
he li
d.•
Thic
k m
ixtu
res,
e.g
. pât
és a
nd d
ips,
may
nee
d sc
rapi
ng d
own.
If
the
mix
ture
is d
iffic
ult t
o pr
oces
s, a
dd m
ore
liqui
d.•
The
proc
essi
ng o
f spi
ces
is n
ot r
ecom
men
ded
as t
hey
may
da
mag
e th
e pl
astic
par
ts.
• To
ble
nd d
ry in
gred
ient
s -
cut
into
pie
ces,
rem
ove
the
fille
r ca
p,
then
with
the
app
lianc
e ru
nnin
g, d
rop
the
piec
es d
own
one
by
one.
Kee
p yo
ur h
and
over
the
ope
ning
. For
bes
t re
sults
em
pty
regu
larly
.•
Do
not
use
the
blen
der
as a
sto
rage
con
tain
er. K
eep
it em
pty
befo
re a
nd a
fter
use.
•N
ever
ble
nd m
ore
than
1.2
litr
es -
less
for
froth
y liq
uids
like
m
ilksh
akes
.
Do n
ot
pro
cess
hot
ingre
die
nts
Milk
shak
e/C
old
milk
bas
ed m
ixtu
res
215
1 lit
re
Mul
ti m
ill (if
su
pplie
d)H
erbs
210
10g/
½ o
z•
Her
bs a
re b
est
mille
d w
hen
clea
n an
d dr
y.•
Bab
y fo
od/p
urée
- a
llow
coo
ked
food
to
cool
dow
n to
roo
m
tem
pera
ture
bef
ore
proc
essi
ng in
the
mill.
•Fo
r be
st r
esul
ts t
he m
ain
bow
l is
reco
mm
ende
d w
hen
chop
ping
he
rbs.
Nut
s2
10 –
30
50g/
2oz
Cof
fee
bean
s2
3050
g/2o
z
Unc
ooke
d m
eat (
beef
ste
ak) c
ut in
to 2
cm
cube
s2
550
g/2o
z
Grin
ding
mill
(if
supp
lied)
Pro
cess
ing
spic
es2
30 –
60
50g/
2oz
•Fo
r op
timum
per
form
ance
whe
n pr
oces
sing
spi
ces
we
reco
mm
end
that
you
do
not
proc
ess
mor
e th
an 5
0g a
t a
time
in
the
mill.
•W
hole
spi
ces
reta
in t
heir
flavo
ur fo
r a
muc
h lo
nger
tim
e th
an
grou
nd s
pice
s so
it is
bes
t to
grin
d a
smal
l qua
ntity
fres
h at
a
time
to r
etai
n th
e fla
vour
.•
To r
elea
se t
he m
axim
um fl
avou
r an
d es
sent
ial o
ils w
hole
spi
ces
are
best
roa
sted
prio
r to
milli
ng.
•D
o no
t pr
oces
s tu
rmer
ic r
oot
in t
he m
ill as
it is
too
har
d an
d m
ay
dam
age
the
blad
es.
•C
ut g
inge
r up
into
sm
all p
iece
s be
fore
pro
cess
ing.
•Fo
r be
st r
esul
ts t
he m
ain
bow
l is
reco
mm
ende
d w
hen
chop
ping
he
rbs.
Grin
ding
cof
fee
bean
s2
50g/
2oz
Cho
ppin
g nu
tsP
ulse
–50
g/2o
z
Pro
cess
ing
garli
c cl
oves
, fre
sh c
hillie
s an
d ro
ot g
inge
rP
ulse
–30
g/1o
z
Cen
trifu
gal
juic
er (i
f su
pplie
d)
Har
d fru
it an
d ve
geta
bles
ie c
arro
ts a
nd
appl
es2
800g
/1lb
12o
z•
Bef
ore
proc
essi
ng r
emov
e st
ones
and
pip
s (e
g pe
pper
, mel
on,
plum
) and
tou
gh s
kins
(e.g
. mel
on, p
inea
pple
). Y
ou d
o no
t ne
ed
to p
eel o
r co
re a
pple
s an
d pe
ars.
•U
se fi
rm, f
resh
frui
t an
d ve
geta
bles
.•
Citr
us fr
uit
- pe
el a
nd r
emov
e th
e w
hite
pith
, oth
erw
ise
the
juic
e m
ay t
aste
bitt
er. F
or b
est
resu
lts u
se t
he c
itrus
juic
er.
Sof
t fru
it ie
tom
atoe
s an
d gr
apes
150
0g/1
lb 2
oz
134699 Iss 1 FDM30 Eng_Arabic.B5.indd 7 21/03/2017 16:05

8
recom
mended s
peed c
hart
tool/
att
achm
ent
functi
on
recom
mended
speed
pro
cess
ing
tim
e (
secs)
maxi
mum
capacit
ies
hin
ts a
nd t
ips
Ble
nder
Col
d liq
uids
and
drin
ks2
601.
2 lit
re•
Whe
n m
akin
g m
ayon
nais
e, p
ut a
ll th
e in
gred
ient
s, e
xcep
t th
e oi
l, in
to t
he b
lend
er. R
emov
e th
e fil
ler
cap.
The
n, w
ith t
he a
pplia
nce
runn
ing,
add
the
oil
slow
ly t
hrou
gh t
he h
ole
in t
he li
d.•
Thic
k m
ixtu
res,
e.g
. pât
és a
nd d
ips,
may
nee
d sc
rapi
ng d
own.
If
the
mix
ture
is d
iffic
ult t
o pr
oces
s, a
dd m
ore
liqui
d.•
The
proc
essi
ng o
f spi
ces
is n
ot r
ecom
men
ded
as t
hey
may
da
mag
e th
e pl
astic
par
ts.
• To
ble
nd d
ry in
gred
ient
s -
cut
into
pie
ces,
rem
ove
the
fille
r ca
p,
then
with
the
app
lianc
e ru
nnin
g, d
rop
the
piec
es d
own
one
by
one.
Kee
p yo
ur h
and
over
the
ope
ning
. For
bes
t re
sults
em
pty
regu
larly
.•
Do
not
use
the
blen
der
as a
sto
rage
con
tain
er. K
eep
it em
pty
befo
re a
nd a
fter
use.
•N
ever
ble
nd m
ore
than
1.2
litr
es -
less
for
froth
y liq
uids
like
m
ilksh
akes
.
Do n
ot
pro
cess
hot
ingre
die
nts
Milk
shak
e/C
old
milk
bas
ed m
ixtu
res
215
1 lit
re
Mul
ti m
ill (if
su
pplie
d)H
erbs
210
10g/
½ o
z•
Her
bs a
re b
est
mille
d w
hen
clea
n an
d dr
y.•
Bab
y fo
od/p
urée
- a
llow
coo
ked
food
to
cool
dow
n to
roo
m
tem
pera
ture
bef
ore
proc
essi
ng in
the
mill.
•Fo
r be
st r
esul
ts t
he m
ain
bow
l is
reco
mm
ende
d w
hen
chop
ping
he
rbs.
Nut
s2
10 –
30
50g/
2oz
Cof
fee
bean
s2
3050
g/2o
z
Unc
ooke
d m
eat (
beef
ste
ak) c
ut in
to 2
cm
cube
s2
550
g/2o
z
Grin
ding
mill
(if
supp
lied)
Pro
cess
ing
spic
es2
30 –
60
50g/
2oz
•Fo
r op
timum
per
form
ance
whe
n pr
oces
sing
spi
ces
we
reco
mm
end
that
you
do
not
proc
ess
mor
e th
an 5
0g a
t a
time
in
the
mill.
•W
hole
spi
ces
reta
in t
heir
flavo
ur fo
r a
muc
h lo
nger
tim
e th
an
grou
nd s
pice
s so
it is
bes
t to
grin
d a
smal
l qua
ntity
fres
h at
a
time
to r
etai
n th
e fla
vour
.•
To r
elea
se t
he m
axim
um fl
avou
r an
d es
sent
ial o
ils w
hole
spi
ces
are
best
roa
sted
prio
r to
milli
ng.
•D
o no
t pr
oces
s tu
rmer
ic r
oot
in t
he m
ill as
it is
too
har
d an
d m
ay
dam
age
the
blad
es.
•C
ut g
inge
r up
into
sm
all p
iece
s be
fore
pro
cess
ing.
•Fo
r be
st r
esul
ts t
he m
ain
bow
l is
reco
mm
ende
d w
hen
chop
ping
he
rbs.
Grin
ding
cof
fee
bean
s2
50g/
2oz
Cho
ppin
g nu
tsP
ulse
–50
g/2o
z
Pro
cess
ing
garli
c cl
oves
, fre
sh c
hillie
s an
d ro
ot g
inge
rP
ulse
–30
g/1o
z
Cen
trifu
gal
juic
er (i
f su
pplie
d)
Har
d fru
it an
d ve
geta
bles
ie c
arro
ts a
nd
appl
es2
800g
/1lb
12o
z•
Bef
ore
proc
essi
ng r
emov
e st
ones
and
pip
s (e
g pe
pper
, mel
on,
plum
) and
tou
gh s
kins
(e.g
. mel
on, p
inea
pple
). Y
ou d
o no
t ne
ed
to p
eel o
r co
re a
pple
s an
d pe
ars.
•U
se fi
rm, f
resh
frui
t an
d ve
geta
bles
.•
Citr
us fr
uit
- pe
el a
nd r
emov
e th
e w
hite
pith
, oth
erw
ise
the
juic
e m
ay t
aste
bitt
er. F
or b
est
resu
lts u
se t
he c
itrus
juic
er.
Sof
t fru
it ie
tom
atoe
s an
d gr
apes
150
0g/1
lb 2
oz
using the attachmentsRefer to recommended speed chart for each attachment.
pknife blade Follow the instructions under "to use your food processor".
qdough tool Use for yeasted dough mixes.
Follow the instructions under "to use your food processor".
rdual whisk Use for light mixtures only eg egg whites, cream, evaporated
milk and for whisking eggs and sugar for fatless sponges. Heavier mixtures such as fat and flour will damage it.
using the whisk1 Fit the bowl onto the power unit, add the detachable drive shaft.2 Push each beater securely into the drive head.3 Fit the whisk by carefully turning until it drops over the drive
shaft.4 Add the ingredients.5 Fit the lid - ensuring the end of the shaft locates into the centre
of the lid.6 Switch on.
discs s-c To use the discs.
Follow the instructions under "to use your food processor".
to use the cutting discs 1 Fit the bowl onto the power unit, add the detachable drive shaft.2 Holding by the centre grip , place the disc onto the drive shaft
with the appropriate side uppermost.3 Fit the lid.4 Put the food in the feed tube.5 Switch on and push down evenly with the pusher - never put
your fingers in the feed tube.
ccitrus juicer (if supplied)
Use the citrus juicer to squeeze the juice from citrus fruits (e.g. oranges, lemons, limes and grapefruits).
cone sieve
to use the citrus juicer1 Fit the drive shaft and bowl onto the power unit.2 Fit the sieve into the bowl - ensuring the sieve handle is locked
into position directly over the bowl handle.3 Place the cone over the drive shaft turning until it drops all the
way down.4 Cut the fruit in half. Then switch on and press the fruit onto the
cone.l The citrus juicer will not operate if the sieve is not
locked correctly.
cmcentrifugal juicer (if supplied)
Use the centrifugal juicer for making juice from firm fruit and vegetables.
pusher centrifugal lid pulp remover filter drum bowl juicing spout
to use the centrifugal juicer1 Place the juicer bowl with the spout onto the power unit,
align the on the bowl with the on the power unit and turn clockwise until it locks .
2 Place the pulp remover into the filter drum - ensuring the tabs locate with the slots in the bottom of the drum .
3 Fit the filter drum N.4 Place the attachment lid onto the bowl and turn until it
locks . Your juicer will not operate if the bowl or lid are not fitted correctly into the interlock h.
5 Place a suitable glass or jug under the juice outlet.6 Cut the food to fit the feed tube.7 Switch on and push down evenly with the pusher - never put
your fingers in the feed tube. Process fully before adding more.
l After adding the last piece, let the juicer run for a further 30 seconds to extract all the juice from the filter drum.
importantl If the juicer starts to vibrate, switch off and empty the pulp from
the drum. (The juicer vibrates if the pulp becomes unevenly distributed).
l Maximum capacity that can be processed at one time is 800g of fruit or vegetables.
l Some very hard foods may make your juicer slow down or stop. If this happens switch off and unblock the filter.
l Switch off and clear the pulp collector regularly during use.
134699 Iss 1 FDM30 Eng_Arabic.B5.indd 8 21/03/2017 16:05
9
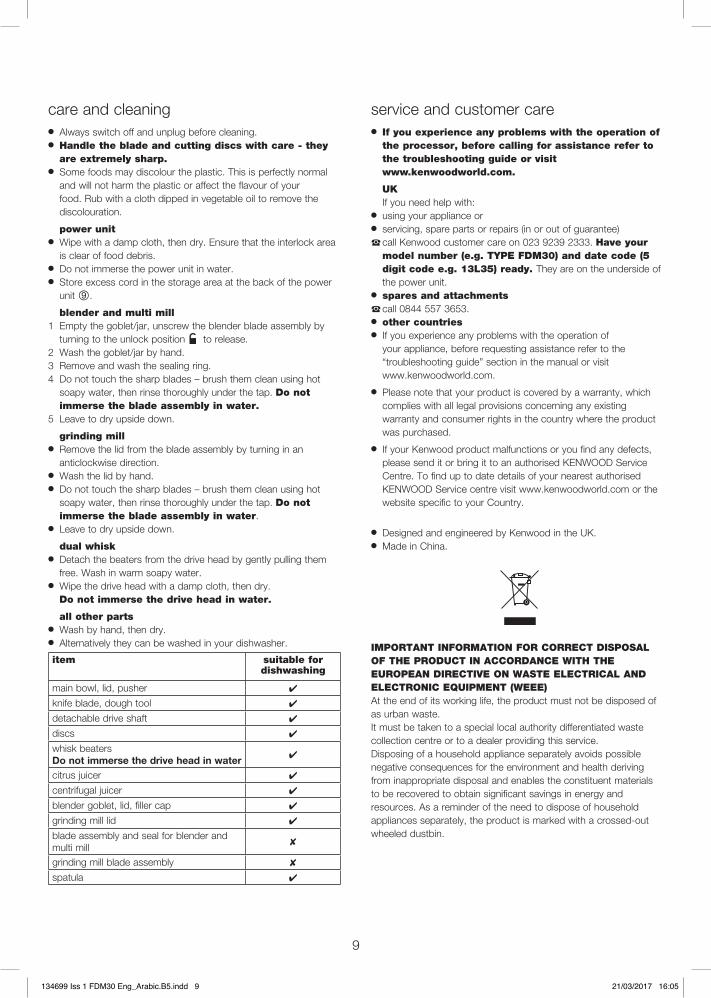
care and cleaningl Always switch off and unplug before cleaning.l Handle the blade and cutting discs with care - they
are extremely sharp.l Some foods may discolour the plastic. This is perfectly normal
and will not harm the plastic or affect the flavour of your food. Rub with a cloth dipped in vegetable oil to remove the discolouration.
power unitl Wipe with a damp cloth, then dry. Ensure that the interlock area
is clear of food debris.l Do not immerse the power unit in water.l Store excess cord in the storage area at the back of the power
unit 9.
blender and multi mill1 Empty the goblet/jar, unscrew the blender blade assembly by
turning to the unlock position to release.2 Wash the goblet/jar by hand.3 Remove and wash the sealing ring.4 Do not touch the sharp blades – brush them clean using hot
soapy water, then rinse thoroughly under the tap. Do not immerse the blade assembly in water.
5 Leave to dry upside down.
grinding milll Remove the lid from the blade assembly by turning in an
anticlockwise direction.l Wash the lid by hand.l Do not touch the sharp blades – brush them clean using hot
soapy water, then rinse thoroughly under the tap. Do not immerse the blade assembly in water.
l Leave to dry upside down.
dual whiskl Detach the beaters from the drive head by gently pulling them
free. Wash in warm soapy water.l Wipe the drive head with a damp cloth, then dry.
Do not immerse the drive head in water.
all other partsl Wash by hand, then dry.l Alternatively they can be washed in your dishwasher.
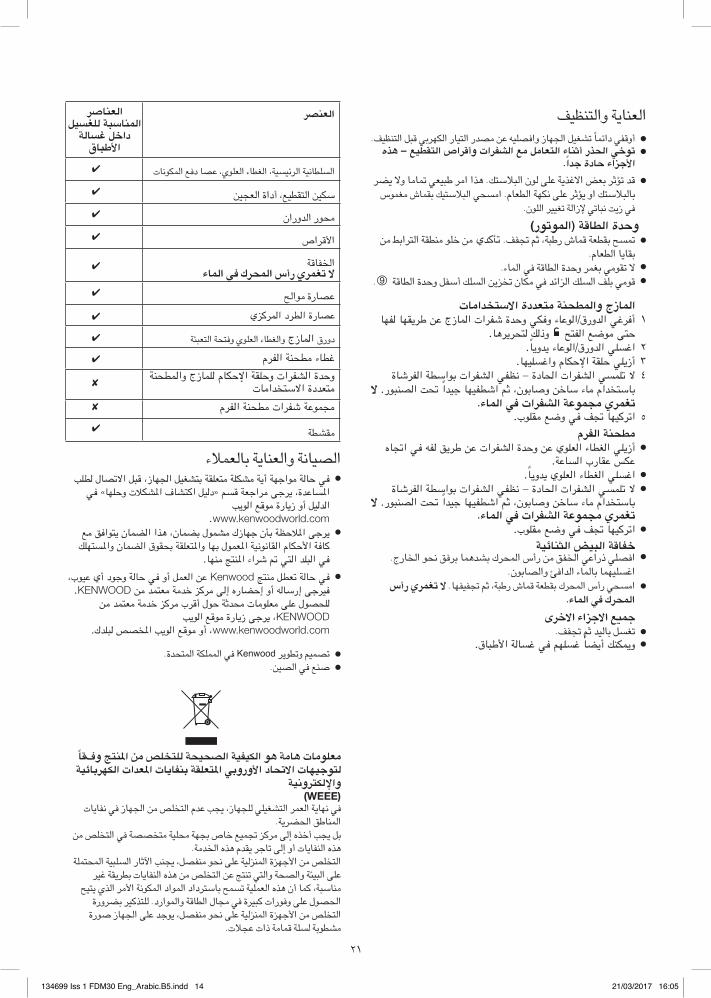
item suitable for dishwashing
main bowl, lid, pusher 4
knife blade, dough tool 4
detachable drive shaft 4
discs 4
whisk beatersDo not immerse the drive head in water 4
citrus juicer 4
centrifugal juicer 4
blender goblet, lid, filler cap 4
grinding mill lid 4
blade assembly and seal for blender and multi mill 8
grinding mill blade assembly 8
spatula 4
service and customer carel If you experience any problems with the operation of
the processor, before calling for assistance refer to the troubleshooting guide or visit www.kenwoodworld.com.
UK If you need help with:l using your appliance orl servicing, spare parts or repairs (in or out of guarantee)Z call Kenwood customer care on 023 9239 2333. Have your
model number (e.g. TYPE FDM30) and date code (5 digit code e.g. 13L35) ready. They are on the underside of the power unit.
l spares and attachmentsZcall 0844 557 3653.l other countriesl If you experience any problems with the operation of
your appliance, before requesting assistance refer to the “troubleshooting guide” section in the manual or visit www.kenwoodworld.com.
l Please note that your product is covered by a warranty, which complies with all legal provisions concerning any existing warranty and consumer rights in the country where the product was purchased.
l If your Kenwood product malfunctions or you find any defects, please send it or bring it to an authorised KENWOOD Service Centre. To find up to date details of your nearest authorised KENWOOD Service centre visit www.kenwoodworld.com or the website specific to your Country.
l Designed and engineered by Kenwood in the UK.l Made in China.
IMPORTANT INFORMATION FOR CORRECT DISPOSAL OF THE PRODUCT IN ACCORDANCE WITH THE EUROPEAN DIRECTIVE ON WASTE ELECTRICAL AND ELECTRONIC EQUIPMENT (WEEE)At the end of its working life, the product must not be disposed of as urban waste.It must be taken to a special local authority differentiated waste collection centre or to a dealer providing this service.Disposing of a household appliance separately avoids possible negative consequences for the environment and health deriving from inappropriate disposal and enables the constituent materials to be recovered to obtain significant savings in energy and resources. As a reminder of the need to dispose of household appliances separately, the product is marked with a crossed-out wheeled dustbin.
134699 Iss 1 FDM30 Eng_Arabic.B5.indd 9 21/03/2017 16:05

10
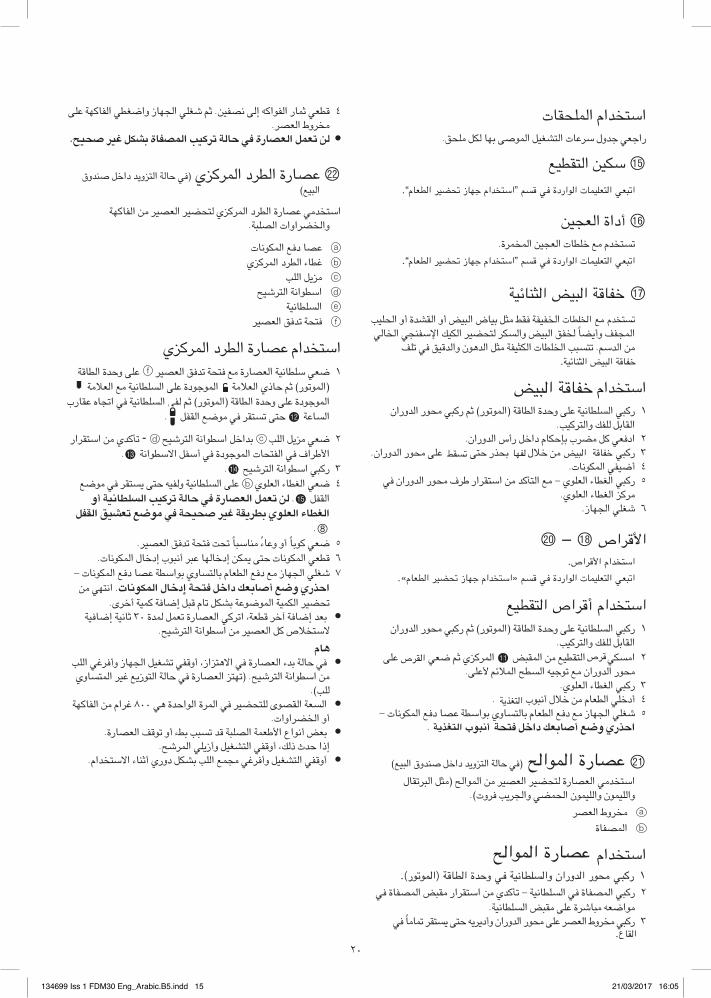
troubleshooting guide Problem Cause Solution
The processor will not operate. No Power. Check processor is plugged in. Bowl not fitted to power unit correctly. Check bowl is located correctly and the handle is situated towards the right front hand corner.
Bowl lid not locked on correctly. Check that the lid interlock is located correctly into the handle area.
The processor will not work if the bowl and lid are fitted incorrectly.
If none of the above check the fuse/circuit breaker in your home.
Blender or mill will not operate Blender or mill not locked on correctly. The blender or mill will not operate if fitted incorrectly to the interlock.
Blender or mill not assembled correctly. Check blade assembly is fully tightened into the goblet/jar.
Processor stops during Processor overloaded/maximum capacities Check maximum capacities stated processing exceeded. in the recommended speed chart.
Lid unlocked. Check lid is locked correctly.
Blender or multi mill leaking from blade Seal missing Check seal is fitted correctly and not assembly base. Seal incorrectly fitted damaged. To obtain a replacement Seal damaged. seal see “service and customer care”.
Poor performance of tools/attachments Refer to hints in relevant “using the attachment” section. Check attachments are assembled correctly.
guarantee UK only If your food processor goes wrong within one year from the date
you bought it, we will repair it (or replace it if necessary) free of charge provided:
l it has been used in accordance with these instructions.l you have not misused, neglected, or damaged it;l it has not been modified (unless by KENWOOD);l it is not second hand;l it has not been used commercially;l you have not fitted a plug incorrectly; andl you supply your receipt to show when you bought it. This guarantee does not affect your statutory rights.
134699 Iss 1 FDM30 Eng_Arabic.B5.indd 10 21/03/2017 16:05
11
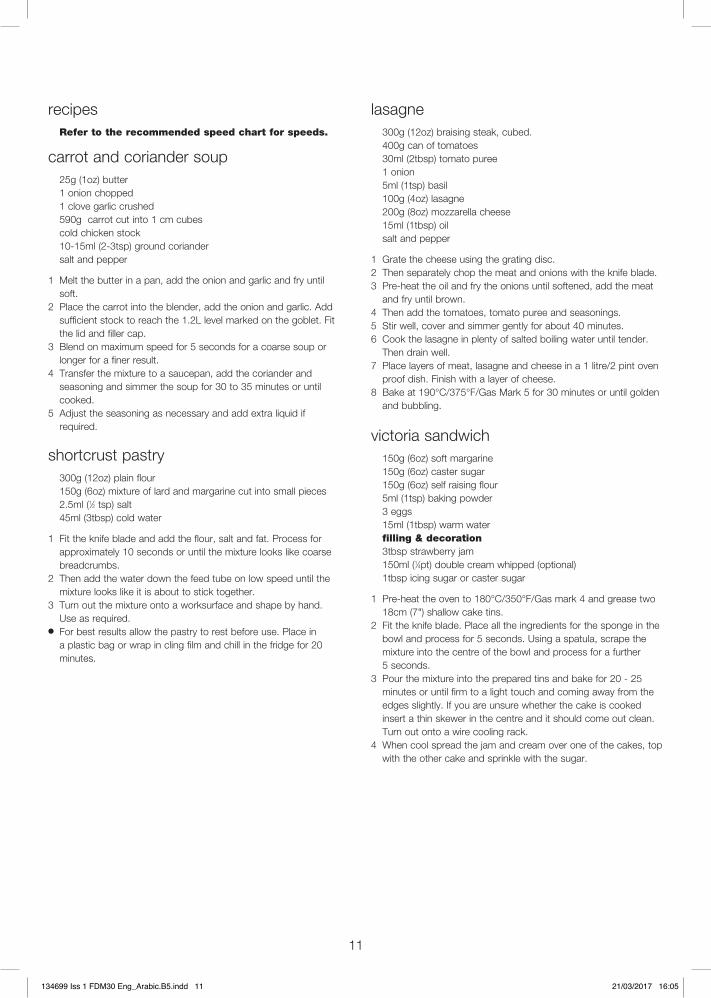
recipes Refer to the recommended speed chart for speeds.
carrot and coriander soup 25g (1oz) butter 1 onion chopped 1 clove garlic crushed 590g carrot cut into 1 cm cubes cold chicken stock 10-15ml (2-3tsp) ground coriander salt and pepper
1 Melt the butter in a pan, add the onion and garlic and fry until soft.
2 Place the carrot into the blender, add the onion and garlic. Add sufficient stock to reach the 1.2L level marked on the goblet. Fit the lid and filler cap.
3 Blend on maximum speed for 5 seconds for a coarse soup or longer for a finer result.
4 Transfer the mixture to a saucepan, add the coriander and seasoning and simmer the soup for 30 to 35 minutes or until cooked.
5 Adjust the seasoning as necessary and add extra liquid if required.
shortcrust pastry 300g (12oz) plain flour 150g (6oz) mixture of lard and margarine cut into small pieces 2.5ml (1⁄2 tsp) salt 45ml (3tbsp) cold water
1 Fit the knife blade and add the flour, salt and fat. Process for approximately 10 seconds or until the mixture looks like coarse breadcrumbs.
2 Then add the water down the feed tube on low speed until the mixture looks like it is about to stick together.
3 Turn out the mixture onto a worksurface and shape by hand. Use as required.
l For best results allow the pastry to rest before use. Place in a plastic bag or wrap in cling film and chill in the fridge for 20 minutes.
lasagne 300g (12oz) braising steak, cubed. 400g can of tomatoes 30ml (2tbsp) tomato puree 1 onion 5ml (1tsp) basil 100g (4oz) lasagne 200g (8oz) mozzarella cheese 15ml (1tbsp) oil salt and pepper
1 Grate the cheese using the grating disc.2 Then separately chop the meat and onions with the knife blade.3 Pre-heat the oil and fry the onions until softened, add the meat
and fry until brown.4 Then add the tomatoes, tomato puree and seasonings.5 Stir well, cover and simmer gently for about 40 minutes.6 Cook the lasagne in plenty of salted boiling water until tender.
Then drain well.7 Place layers of meat, lasagne and cheese in a 1 litre/2 pint oven
proof dish. Finish with a layer of cheese.8 Bake at 190°C/375°F/Gas Mark 5 for 30 minutes or until golden
and bubbling.
victoria sandwich 150g (6oz) soft margarine 150g (6oz) caster sugar 150g (6oz) self raising flour 5ml (1tsp) baking powder 3 eggs 15ml (1tbsp) warm water filling & decoration 3tbsp strawberry jam 150ml (1⁄4pt) double cream whipped (optional) 1tbsp icing sugar or caster sugar
1 Pre-heat the oven to 180°C/350°F/Gas mark 4 and grease two 18cm (7") shallow cake tins.
2 Fit the knife blade. Place all the ingredients for the sponge in the bowl and process for 5 seconds. Using a spatula, scrape the mixture into the centre of the bowl and process for a further 5 seconds.
3 Pour the mixture into the prepared tins and bake for 20 - 25 minutes or until firm to a light touch and coming away from the edges slightly. If you are unsure whether the cake is cooked insert a thin skewer in the centre and it should come out clean. Turn out onto a wire cooling rack.
4 When cool spread the jam and cream over one of the cakes, top with the other cake and sprinkle with the sugar.
134699 Iss 1 FDM30 Eng_Arabic.B5.indd 11 21/03/2017 16:05
12
white bread 300g(10oz) strong white bread flour 5ml (1tsp) salt 6g(1⁄4oz) lard 15g (1⁄2oz) fresh yeast or 10ml(2tsp) dried yeast + 5ml (1tsp)
caster sugar. 175ml (6 fl oz) warm water
1 Dried yeast (the type that needs reconstituting): Add the yeast and sugar to the warm water. Leave to stand for 5 - 10 minutes until frothy.
Fresh yeast: crumble into the flour Other types of yeast: follow the manufacturer’s instructions.2 Fit the dough tool or knife blade and add the flour (with fresh
yeast if used), salt and lard. Process for a few seconds to evenly distribute the ingredients.
3 Then with the motor running quickly pour the liquid in a steady stream down the feed tube until the mixture forms an elastic soft dough. This will take about 60 seconds.
4 Remove the dough, place in a bowl, cover with an oiled piece of cling film or a plastic bag, and leave in a warm place for 45 - 60 minutes or until doubled in size.
5 Re-knead by hand for 2 - 3 minute. Re-kneading in the bowl is not recommended as it may cause the processor to become unstable. Shape into a loaf or 15 rolls and place on greased baking trays and leave until double in size.
6 Then bake in a pre-heated oven at 230°C/450°F/Gas mark 8 for 20 - 25 minutes for the loaf or 10 - 15 minutes for bread rolls. When ready they should sound hollow when tapped on the base.
134699 Iss 1 FDM30 Eng_Arabic.B5.indd 12 21/03/2017 16:05

13
«∞LAJKW«∞º∂V«∞∫qÒ
§NU“ ¢∫COd «∞DFU ô ¥FLq.«∞πNU“ Od ±uÅq °LBb¸ ¢OU ØNd°Uzw.¢∫IIw ±s «∞ºKp «∞JNd°Uzw Ë√≤t ±uÅq °LMHc «∞∑OU «∞JNd°Uzw.
¢QØbÍ ±s ¢FAOo «∞GDU¡ «∞FKuÍ °AJq Å∫O ≠w ±MDIW
«∞LI∂i.
∞s ¥FLq §NU“ ¢∫COd «∞DFUÂ ≠w •U∞W ¢dØOV
Ë«∞GDU¡ «∞FKuÍ °AJq Od Å∫O.
≠w •U∞W b •q «∞LAJKW °U∞∫Ku‰ √öÁ, ¢∫IIw ±s «∞LMBNd/
ÆU©l «∞b«zd… «∞JNd°UzOW ≠w «∞LMe‰.
¢uÆn §NU“ ¢∫COd «∞DFUÂ √£MU¡ «∞∑AGOq.¢πUË“ •b «∞∑∫LOq ∞πNU“ ¢∫COd
«∞DFUÂ/¢πUË“ «∞ºFU‹ «∞IBuÈ
¢r ≠∑ «∞GDU¡ «∞FKuÍ.
¢∫IIw ±s «∞ºFU‹ «∞IBuÈ «∞LuÅv °NU Ë«∞L∫bœ… ≠w §bˉ
«∞ºdU‹.
¢QØbÍ ±s ÆHq «∞GDU¡ «∞FKuÍ °AJq Å∫O.
•KIW «ù•JU Od ±dØ∂W.
•KIW «ù•JU Od ±dØ∂W ≠w
±u{FNU §Ob«.
•KIW «ù•JUÂ ¢U∞HW.
¢∫IIw ±s ¢dØOV •KIW «ù•JUÂ ≠w ±u{FNU «∞B∫O Ë°Dd¥IW
Å∫O∫W Ë√≤NU Od ¢U∞HW. ∞K∫Bu‰ Kv •KIW ≈•JU ôß∑∂b«‰
«∞∫KIW «∞∑U∞HW. «§Fw ƺr «∞BOU≤W ˸U¥W «∞FLö¡
ô ¢FLq «_œË«‹/«∞LK∫IU‹ °AJq §Ob.¸«§Fw «∞∑KLO∫U‹ «∞L∑FKIW °Jq √œ«… √Ë ±K∫o ≠w ƺr («ß∑ªb«Â «∞LK∫o). ¢QØbÍ ±s ¢dØOV «∞LK∫IU‹ °AJq
Å∫O.
تأكدي من تركيب السلطانية بشكل صحيح وأن المقبض متجه ناحية الركن األمامي األيمن.
لن يعمل المازج في حالة التركيب بشكل غير صحيح في المازج أو المطحنة غير مركبين بشكل صحيح.المازج أو المطحنة ال تعمل.موضع تعشيق القفل.
لم يتم تركيب المازج أو المطحنة بالطريقة الصحيحة.
تأكدي من ربط وحدة الشفرات بإحكام في الدورق/وعاء الطحن.
دليل اكتشاف المشكالت وحلها
تسرب من المازج أو المطحنة متعددة االستخدامات في قاعدة وحدة الشفرات.
22
السلطانية غير مركبة على وحدة الطاقة )الموتور( بشكل صحيح.
غطاء السلطانية غير مركب بشكل صحيح.
السلطانية
134699 Iss 1 FDM30 Eng_Arabic.B5.indd 13 21/03/2017 16:05
14
«∞FMU¥W Ë«∞∑MEOn
l√ËÆHw œ«zLUÎ ¢AGOq «∞πNU“ Ë«≠BKOt s ±Bb¸ «∞∑OU «∞JNd°w Æ∂q «∞∑MEOn.
lÆb ¢R£d °Fi «ô¨c¥W Kv ∞uÊ «∞∂öß∑p. ≥c« «±d ©∂OFw ¢LU±U Ëô ¥Cd
°U∞∂öß∑p «Ë ¥R£d Kv ≤JNW «∞DFUÂ. «±º∫w «∞∂öß∑Op °ILU‘ ±GLu”
≠w “¥X ≤∂U¢w ù“«∞W ¢GOOd «∞KuÊ.
l¢Lº` °IDFW ÆLU‘ ©∂W, £r ¢πHn. ±s îKu ±MDIW «∞∑d«°j ±s
°IU¥U «∞DFUÂ.
l ô ¢Iu±w °GLd Ë•b… «∞DUÆW ≠w «∞LU¡.
l Æu±w °Kn «∞ºKp «∞e«zb ≠w ±JUÊ ¢ªe¥s «∞ºKp √ßHq Ë•b… «∞DUÆW 9.
توخي الحذر أثناء التعامل مع الشفرات وأقراص التقطيع – هذه lاألجزاء حادة جدا.
وحدة الطاقة (الموتور)تأكدي
المازج والمطحنة متعددة االستخدامات أفرغي الدورق/الوعاء وفكي وحدة شفرات المازج عن طريقها لفها ١
حتى موضع الفتح وذلك لتحريرها.اغسلي الدورق/الوعاء يدويا. ٢
أزيلي حلقة اإلحكام واغسليها. ٣ال تلمسي الشفرات الحادة – نظفي الشفرات بواسطة الفرشاة ٤
باستخدام ماء ساخن وصابون، ثم اشطفيها جيدا تحت الصنبور. ال تغمري مجموعة الشفرات في الماء.
اتركيها تجف في وضع مقلوب. ٥مطحنة الفرم
أزيلي الغطاء العلوي عن وحدة الشفرات عن طريق لفه في اتجاه l
عكس عقارب الساعة.اغسلي الغطاء العلوي يدويا. l
ال تلمسي الشفرات الحادة – نظفي الشفرات بواسطة الفرشاة l
باستخدام ماء ساخن وصابون، ثم اشطفيها جيدا تحت الصنبور. ال تغمري مجموعة الشفرات في الماء.
اتركيها تجف في وضع مقلوب. l
خفاقة البيض الثنائية l«≠BKw –¸«w «∞ªHo ±s √” «∞L∫d„ °Ab≥LU °d≠o ≤∫u «∞ªUÃ.
«ºKONLU °U∞LU¡ «∞b«≠T Ë«∞BU°uÊ.
l«±º∫w √” «∞L∫d„ °IDFW ÆLU‘ ©∂W, £r ¢πHOHNU. ô ¢GLdÍ √”
«∞L∫d„ ≠w «∞LU¡.
§LOl «ô§e«¡ «ôîdÈ
l¢Gºq °U∞Ob £r ¢πHn.
ويمكنك أيضا غسلهم في غسالة األطباق. l
«∞FMBd
«∞ºKDU≤OW «∞dzOºOW, «∞GDU¡ «∞FKuÍ, BU œ≠l «∞LJu≤U‹
ßJOs «∞∑IDOl, √œ«… «∞FπOs
±∫u¸ «∞b˸«Ê
«_Æd«’
«∞ªHUÆW
ô ¢GLdÍ √” «∞L∫d„ ≠w «∞LU¡
BU… ±u«∞
œË‚ Ë«∞GDU¡ «∞FKuÍ Ë≠∑∫W «∞∑F∂µW
±IADW
4
4
4
4
4
4
4
4
4
8
8
4
مجموعة شفرات مطحنة الفرم
غطاء مطحنة الفرموحدة الشفرات وحلقة اإلحكام للمازج والمطحنة
متعددة االستخدامات
المازج
العناصر المناسبة للغسيل
داخل غسالة األطباق
عصارة الطرد المركزي
«∞BOU≤W Ë«∞FMU¥W °U∞FLö¡
l ¢BLOr Ë¢Du¥d doowneK ≠w «∞LLKJW «∞L∑∫b….
l ÅMl ≠w «∞BOs.
≠w ≤NU¥W «∞FLd «∞∑AGOKw ∞KπNU“, ¥πV b «∞∑ªKh ±s «∞πNU“ ≠w ≤HU¥U‹
«∞LMU©o «∞∫Cd¥W.
°q ¥πV √îcÁ ≈∞v ±dØe ¢πLOl îU’ °πNW ±∫KOW ±∑ªBBW ≠w «∞∑ªKh ±s
≥cÁ «∞MHU¥U‹ √Ë ≈∞v ¢U§d ¥Ib ≥cÁ «∞ªb±W.
«∞∑ªKh ±s «_§Ne… «∞LMe∞OW Kv ≤∫u ±MHBq, ¥πMV «ü£U «∞ºK∂OW «∞L∫∑LKW
´Kv «∞∂OµW Ë«∞B∫W Ë«∞∑w ¢M∑Z s «∞∑ªKh ±s ≥cÁ «∞MHU¥U‹ °Dd¥IW Od
±MUß∂W, ØLU √Ê ≥cÁ «∞FLKOW ¢ºL °Uß∑dœ«œ «∞Lu«œ «∞LJu≤W «_±d «∞cÍ ¥∑O
«∞∫Bu‰ Kv Ë≠u¸«‹ Ø∂Od… ≠w ±πU‰ «∞DUÆW Ë«∞Lu«œ. ∞K∑cØOd °Cd˸…
«∞∑ªKh ±s «_§Ne… «∞LMe∞OW Kv ≤∫u ±MHBq, ¥u§b Kv «∞πNU“ Åu¸…
±ADu°W ∞ºKW ÆLU±W –«‹ πö‹.
يف حالة مواجهة أية مشلكة متعلقة بتشغيل اجلهاز، قبل االتصال لطلب l
املساعدة، يرىج مراجعة قسم »دليل اكتشاف املشكالت وحلها« يف الدليل أو زيارة موقع الويب
.www.kenwoodworld.comيرىج املالحظة بأن جهازك ممشول بضامن، هذا الضامن يتوافق مع l
اكفة األحاكم القانونية املعمول هبا واملتعلقة حبقوق الضامن واملسهتلك يف البلد اليت مت رشاء املنتج مهنا.
يف حالة تعطل منتج Kenwood عن العمل أو يف حالة وجود أي عيوب، l
.KENWOOD فريىج إرساله أو إحضاره إىل مركز خدمة معمتد منللحصول عىل معلومات حمدثة حول أقرب مركز خدمة معمتد من
KENWOOD، يرىج زيارة موقع الويب www.kenwoodworld.com، أو موقع الويب املخصص لبلدك.
معلومات هامة هو الكيفية الصحيحة للتخلص من املنتج وفقا لتوجهيات االحتاد األورويب املتعلقة بنفايات املعدات الكهربائية
واإللكرتونية )WEEE(
12
134699 Iss 1 FDM30 Eng_Arabic.B5.indd 14 21/03/2017 16:05
15
«ß∑ªb«Â «∞LK∫IU‹
¸«§Fw §bˉ ßdU‹ «∞∑AGOq «∞LuÅv °NU ∞Jq ±K∫o.
p ßJOs «∞∑IDOl
اتبعي التعليمات الواردة في قسم “استخدام جهاز تحضير الطعام”.
q √œ«… «∞FπOs
¢º∑ªb ±l îKDU‹ «∞FπOs «∞LªLd….
اتبعي التعليمات الواردة في قسم “استخدام جهاز تحضير الطعام”.
r خفاقة البيض الثنائية «∞ªHOHW ≠Ij ±∏q °OU÷ «∞∂Oi √Ë «∞IAb… √Ë «∞∫KOV
«∞LπHn Ë√¥CUÎ ∞ªHo «∞∂Oi Ë«∞ºJd ∞∑∫COd «∞JOp «ùßHMπw «∞ªU∞w
±s «∞bßr. ¢∑º∂V «∞ªKDU‹ «∞J∏OHW ±∏q «∞b≥uÊ Ë«∞bÆOo ≠w ¢Kn
«ß∑ªb«Â
1 ¸Ø∂w «∞ºKDU≤OW Kv Ë•b… «∞DUÆW («∞Lu¢u¸) £r Ø∂w ±∫u¸ «∞b˸«Ê
«∞IU°q ∞KHp Ë«∞∑dØOV.
2 «œ≠Fw Øq ±Cd» °S•JU œ«îq √” «∞b˸«Ê.
3 ¸Ø∂w ±s îö‰ °∫c¸ •∑v Kv ±∫u¸ «∞b˸«Ê.
4 √{OHw «∞LJu≤U‹.
5 ¸Ø∂w «∞GDU¡ «∞FKuÍ - ±l «∞∑QØb ±s «ß∑Id« ©d· ±∫u¸ «∞b˸«Ê ≠w
±dØe «∞GDU¡ «∞FKuÍ.
6 ®GKw «∞πNU“.
c – s األقراصاستخدام األقراص.
اتبعي التعليمات الواردة في قسم »استخدام جهاز تحضير الطعام«.
استخدام أقراص التقطيع1 ¸Ø∂w «∞ºKDU≤OW Kv Ë•b… «∞DUÆW («∞Lu¢u¸) £r Ø∂w ±∫u¸ «∞b˸«Ê
«∞IU°q ∞KHp Ë«∞∑dØOV.
2 «±ºJw «∞∑IDOl ±s «∞LI∂i b «∞LdØeÍ £r {Fw Kv
±∫u¸ «∞b˸«Ê ±l ¢u§Ot «∞ºD` «∞Lözr _´Kv.
3 ¸Ø∂w «∞GDU¡ «∞FKuÍ.
4 √œîKw «∞DFU ±s îö‰ √≤∂u» .
5 ®GKw «∞πNU“ ±l œ≠l «∞DFU °U∞∑ºUËÍ °u«ßDW BU œ≠l «∞LJu≤U‹ -
«•cÍ Ë{l √ÅU°Fp œ«îq ≠∑∫W .
c (≠w •U∞W «∞∑eË¥b œ«îq ÅMbË‚ «∞∂Ol)
«ß∑ªb±w «∞FBU… ∞∑∫COd «∞FBOd ±s «∞Lu«∞ (±∏q «∞∂d¢IU‰
Ë«∞KOLuÊ Ë«∞KOLuÊ «∞∫LCw Ë«∞πd¥V ≠dË‹).
±ªdË◊ «∞FBd
«∞LBHU…
«ß∑ªb«Â
2 ¸Ø∂w «∞LBHU… ≠w «∞ºKDU≤OW - ¢QØbÍ ±s «ß∑Id« ±I∂i «∞LBHU… ≠w
±u«{Ft ±∂U®d… Kv ±I∂i «∞ºKDU≤OW.
3 ¸Ø∂w ±ªdË◊ «∞FBd Kv ±∫u¸ «∞b˸«Ê Ë√œ¥d¥t •∑v ¥º∑Id ¢LU±UÎ ≠w
4 ÆDFw £LU «∞Hu«Øt ≈∞v ≤BHOs. £r ®GKw «∞πNU“ Ë«{GDw «∞HUØNW Kv
±ªdË◊ «∞FBd.
l∞s ¢FLq «∞FBU… ≠w •U∞W ¢dØOV «∞LBHU… °AJq Od Å∫O.
cm BU… «∞Ddœ «∞LdØeÍ (≠w •U∞W «∞∑eË¥b œ«îq ÅMbË‚
«∞∂Ol)
«ß∑ªb±w BU… «∞Ddœ «∞LdØeÍ ∞∑∫COd «∞FBOd ±s «∞HUØNW
Ë«∞ªCd«Ë«‹ «∞BK∂W.
BU œ≠l «∞LJu≤U‹
¨DU¡ «∞Ddœ «∞LdØeÍ
±e¥q «∞KV
«ßDu«≤W «∞∑d®O
«∞ºKDU≤OW
≠∑∫W ¢b≠o «∞FBOd
«ß∑ªb«Â BU… «∞Ddœ «∞LdØeÍ
1 {Fw ßKDU≤OW «∞FBU… ±l ≠∑∫W ¢b≠o «∞FBOd Kv Ë•b… «∞DUÆW
(«∞Lu¢u¸) £r •U–Í «∞Fö±W «∞Lu§uœ… Kv «∞ºKDU≤OW ±l «∞Fö±W
«∞Lu§uœ… Kv Ë•b… «∞DUÆW («∞Lu¢u¸) £r ∞Hw «∞ºKDU≤OW ≠w «¢πUÁ IU»
«∞ºUW b •∑v ¢º∑Id ≠w ±u{l «∞IHq .
2 {Fw ±e¥q «∞KV °b«îq «ßDu«≤W «∞∑d®O - ¢QØbÍ ±s «ß∑Id«
«_©d«· ≠w «∞H∑∫U‹ «∞Lu§uœ… ≠w √ßHq «ôßDu«≤W b.
3 ¸Ø∂w «ßDu«≤W «∞∑d®O b.
4 {Fw «∞GDU¡ «∞FKuÍ Kv «∞ºKDU≤OW Ë∞HOt •∑v ¥º∑Id ≠w ±u{l
«∞IHq b. ∞s ¢FLq «∞FBU… ≠w •U∞W ¢dØOV «∞ºKDU≤OW √Ë
«∞GDU¡ «∞FKuÍ °Dd¥IW Od Å∫O∫W ≠w ±u{l ¢FAOo «∞IHq
8.
5 {Fw Øu°UÎ √Ë ËU¡Î ±MUß∂UÎ ¢∫X ≠∑∫W ¢b≠o «∞FBOd.
6 ÆDFw «∞LJu≤U‹ •∑v ¥LJs ≈œîU∞NU ∂d √≤∂u» ≈œîU‰ «∞LJu≤U‹.
7 ®GKw «∞πNU“ ±l œ≠l «∞DFU °U∞∑ºUËÍ °u«ßDW BU œ≠l «∞LJu≤U‹ -
«•cÍ Ë{l √ÅU°Fp œ«îq ≠∑∫W ≈œîU‰ «∞LJu≤U‹. «≤∑Nw ±s
¢∫COd «∞JLOW «∞Lu{uW °AJq ¢U Æ∂q ≈{U≠W ØLOW √îdÈ.
l °Fb ≈{U≠W ¬îd ÆDFW, «¢dØw «∞FBU… ¢FLq ∞Lb… 03 £U≤OW ≈{U≠OW
ôß∑ªö’ Øq «∞FBOd ±s «ßDu«≤W «∞∑d®O.
≥UÂ
l ≠w •U∞W °b¡ «∞FBU… ≠w «ô≥∑e«“, √ËÆHw ¢AGOq «∞πNU“ Ë√≠dw «∞KV
±s «ßDu«≤W «∞∑d®O. (¢N∑e «∞FBU… ≠w •U∞W «∞∑u“¥l Od «∞L∑ºUËÍ
∞KV).
l «∞ºFW «∞IBuÈ ∞K∑∫COd ≠w «∞Ld… «∞u«•b… ≥w 008 d«Â ±s «∞HUØNW
√Ë «∞ªCd«Ë«‹.
l °Fi √≤u«Ÿ «_©FLW «∞BK∂W Æb ¢º∂V °j¡ √Ë ¢uÆn «∞FBU….
≈–« •bÀ –∞p, √ËÆHw «∞∑AGOq Ë√“¥Kw «∞Ld®`.
l √ËÆHw «∞∑AGOq Ë√≠dw ±πLl «∞KV °AJq œËÍ √£MU¡ «ôß∑ªb«Â.
ركبي محور الدوران والسلطانية في وحدة الطاقة )الموتور(. ١
عصارة الموالح
عصارة الموالح
02
القاع.
أنبوب التغذية
التغذية
خفاقة البيض
القرصقرص
تسقطلفهاخفاقة البيض
تستخدم مع الخلطات
خفاقة البيض الثنائية.
134699 Iss 1 FDM30 Eng_Arabic.B5.indd 15 21/03/2017 16:05

1691
«_œ«…/«∞LK∫o
«∞u™OHW
«∞ºd´W «∞LuÅ
v
°NU
«∞ºFU‹ «∞IB
uÈ
2
06 – 03
©∫s •∂u» «∞INu…
2
≠d «∞LJº
d«‹
–
≠d ≠B
u’
«∞∏u ˫∞HKHq «_•Ld «∞DU“Ã
Ë«∞e≤π∂Oq
–
«∞Hu«Øt Ë«∞ªC
dË«‹ «∞B
K∂W ±∏q «∞πe¸
Ë«∞∑HUÕ
2
–
008 ¨d«Â
• Æ∂q «∞∑∫C
Od √“¥Kw «∞MuÈ Ë«∞∂c˸ ±s «∞LJu≤U‹ (±∏q «∞HKHq Ë«∞∂DOa Ë«∞∂dÆu‚)
Ë«∞IA
d… «∞ªU¸§OW «∞B
K∂W («∞∂DOa Ë«_≤U≤U”
). ô ¢∫∑U§w ≈∞v ¢IA
Od √Ë ≈“«∞W «∞∂c˸
±s «∞∑HUÕ √Ë «∞JL∏dÈ.
• «ß
∑ªb±w ≠UØNW ËîC
d«Ë«‹ Å
K∂W Ë©U“§W.
• ≠w •U∞W «∞Lu«∞` - ÆA
dÍ «∞Hu«Øt Ë√“¥Kw «∞KV Ë≈ô ß
OB
∂` ±c«‚ «∞FB
Od ±d«Î.
«ß
∑ªb±w ´B
U¸… «∞Lu«∞` ∞K∫B
u‰ ´Kv √≠C
q «∞M∑UzZ.
«∞Hu«Øt «∞KOMW ±∏q «∞DLU©r Ë«∞FMV
1
–
005 ¨d«Â
ها ب
ىص
مو ال
تعا
سر ال
ولجد
ة ج
عاللم
ن ازم
ن(وا
)ثئح
صاون
ت حا
ميتل
بلوا
التجة
عالم
ضي نب
يلشغ
ت
ضي نب
يلشغ
ت
امغر
٥0
امغر
٥0
امغر
٥0
امغر
٣0
٥0
منر
كثر أ
ضيتح
م عد
ك بصح
ننبل
واالت
ر ضي
تحد
عنل
مثاأل
اء ألد
ى اعل
ل صو
لحل •
نة.طح
لمل ا
اخ د
دةاح
الورة
لمي ا
فات
ونمك
المن
م را
غك
لذلنة
حومط
البل
واالت
ن م
ولأط
ية من
زرة
فتها
هتنك
ة بمل
كا ال
بلوا
التن
رو ق
فظحت
ت •
ك وذل
ها ام
خدست
الملة
كا ال
بلوا
التن
رو ق
منرة
غيص
ية كم
ن طح
ل ض
ألفن ا
فمهة.
نكبال
ظ تفا
الحل
ل ض
ألفن ا
مملة
كا ال
بلوا
التن
رو ق
منية
سسا
ت أيو
وزهة
نكى
صأق
ى عل
ل صو
لحل •
ها.حن
طبل
قبل
واالت
ص مي
تحف
تتلد
وقدا
جلبة
صها
أنيث
ححنة
مط ال
طةس
وام ب
ركلك
ر اذو
جري
ضتح
ال •
ت.را
شفال
ته.لج
عا م
بل ق
رةغي
صع
قطى
إليل
جبزن
العي
قط •
م فر
د عن
ية س
سااأل
ية طان
سل ال
امخد
ست با
حكص
ننئج
نتا ال
ضلأف
ى عل
ل صو
لحل •
ب.شا
ألعا
م فر
الحنة
مطد
ويتز
الالة
حفي
(ق
دوصن
ل اخ
دع(
لبيا
رد لط
ة اار
صع
ي )ف
زيرك
المل
اخد د
ويتز
الالة
حع(
لبيق ا
دوصن
134699 Iss 1 FDM30 Eng_Arabic.B5.indd 16 21/03/2017 16:05

17
«_œ«…/«∞LK∫o
«∞u™OHW
«∞ºd´W
«∞LuÅ
v °NU
«∞ºFU‹ «∞IB
uÈ
2
–
• «ß
∑ªb±w ±Ju≤U‹ ©U“§W.
• «∞DFUÂ «∞Lu{
uŸ °A
Jq ¸√ß
w ¥ªdà ÆB
Od«Î ´s «∞DFUÂ «∞Lu{
uŸ °A
Jq íIw.
2
–
2
–
´B
U¸… ±u«∞` (≠w
•U∞W «∞∑eË¥b œ«îq
Å
MbË‚ «∞∂Ol)
1
–
–
• ∞K∫B
u‰ ´Kv √≠C
q «∞M∑UzZ, îe≤w «∞HUØNW Ë«´B
d¥NU ≠w œ¸§W •d«¸… «∞Gd≠W, √¥C
UÎ
∞OMw «∞HUØNW Æ∂q ´B
d≥U ´s ©d¥o œ•d§∑NU ´Kv ß
D` ±MC
b… «∞FLq ±l «∞C
Gj ´KONU
°d«•W ØHp.
• ∞KLº
U´b… ≠w «ß
∑ªö’
«∞FB
Od, •dØw «∞HUØNW ±s §U≤V üîd √£MU¡ «∞FB
d.
• ´Mb ´B
d ØLOW Ø∂Od… ±s «∞HUØNW, √≠d¨w «∞LB
HU… °U≤∑EU ∞∑πMV ¢d«Ør ∞V Ë°c˸
«∞HUØNW.
«∞º
u«zq Ë«∞LA
dË°U‹ «∞∂U¸œ…
06
•´Mb ¢∫C
Od «∞LU¥u≤Oe, {
Fw Øq «∞LJu≤U‹ ≠w «∞Lº
Oq ´b« «∞e¥X. √“¥Kw ¨DU¡ ≠∑∫W
«∞∑F∂µW. £r Å
∂Òw «∞e¥X °Dd¥IW °DOµW ±s îö‰ «∞H∑∫W «∞Lu§uœ… ≠w «∞GDU¡ «∞FKuÍ √£MU¡
¢A
GOq «∞πNU“.
•Æb ¢∫∑Uà «∞ªKDU‹ «∞º
LOJW ±∏q «∞LFπMU‹ «∞NA
W Ë«∞LGLuß
U‹ ≈∞v ¢IDOl. ≈–« ˧b‹
Å
Fu°W ≠w ¢∫C
Od≥U, √{
OHw «∞Le¥b ±s «∞º
u«zq.
•¨Od ±MB
uÕ °D∫s «∞∑u«°q ≠Ib ¢RœÍ ≈∞v ≈•b«À √{
d«¸ °U_§e«¡ «∞∂öß
∑OJOW.
• ±Ju≤U‹ §U≠W - ÆDÓFONU ≈∞v √§e«¡ Å
GOd… £r √“¥Kw ¨DU¡ ≠∑∫W «∞∑F∂µW Ë√ß
IDONU
ÆDFW ¢Ku «_îdÈ √£MU¡ ¢A
GOq «∞πNU“. √°o ¥b¥p ≠u‚ «∞H∑∫W. ∞K∫B
u‰ ´Kv √≠C
q
«∞M∑UzZ √≠d¨w «∞L∫∑u¥U‹ °A
Jq ±M∑Er.
•ô ¢º
∑ªb±w Ø∫UË¥W ¢ªe¥s .•U≠Ew ´Kv «∞b˸‚ ≠U¸¨UÎ Æ∂q Ë°Fb «ôß
∑ªb«Â.
•ô ¢ªKDw ß
FW √Ø∂d ±s 2.1 ∞∑d - «ß
∑ªb±w ß
FW √Æq ±l «∞º
u«zq «∞d¨u¥W ±∏q «∞∫KOV
«∞LªHu‚.
51
2
06
•¥LJs «∞∫B
u‰ ´Kv √≠C
q «∞M∑UzZ ´Mb±U ¢JuÊ «_´A
U» ≤EOHW ˧U≠W.
2
03 – 01
2
03
2
5
ها ب
ىص
مو ال
تعا
سر ال
ولجد
ة ج
عاللم
ن ازم
ن(وا
)ثئح
صاون
ت حا
ميتل
شرالب
- ص
راأق
-ص
راأق
يعرف
اليع
قطالت
ص قر
-ص
راأق
م اع
النر
شالب داج
ر صي
العر
ضيتح
ة لار
صالع
ي دم
تخس
ان
موللي
وال
تقابر
الثل
مح،
واللم
ن ام
ت.رو
فيب
جروال
ي ض
حم ال
ونيم
اللو
س اط
بطوال
ر جز
والن
جب ال
معم
داتخ
سلال
م.وا
القك
ذلس
نفها
ي لالت
مة طع
األو
س اط
بطوال
ر جز
والن
جب ال
معم
داتخ
سلال
ر نج
الب و
سةكو
والر
خياوال
ب رن
لكوا
ل.ص
البو
انيز
رملبا
ن اجب
ر ش
ب
عة س
الزي
اوتج
ال تر
شالم
ى اصو
القية
طانسل
اللى
عها
إليتر
١ ل,٢
ي وه
ية غذ
التب
بو أن
ع(قط
)مض
عري
جعل. ا
دا ج
رةغي
صع
قطى
إلام
طع ال
عيقط
ال ت •
ر ضي
تحاء
أثنب
وانلج
ى اعل
م عا
لطق ا
زال ان
ون د
لك ذ
وليح
و. سا
متل
شكئ ب
متلم
م.عا
لطا
ر ضي
تحد
بعية
طانسل
الفي
و ع أ
طيلتق
ح اسط
ى عل
ت ضال
الفن
مرة
غيص
ية كم
ما دائ
ك هنا
ى تبق
•م.
عالط
ا
زجما
ال٢
تر١ ل
.٢
يرض
حلت
ء انا
أثة
خنسا
ت نا
كو م
يدم
خست
تال
ب حلي
ى إل
دةستن
لمت ا
طاخل
/الوق
خفلم
ب احلي
الرد
با٢
تر١ ل
دة عد
متنة
طحلم
اي
)فت
مادا
تخس
االل
اخ د
هايد
زوة ت
حالع(
لبيق ا
دوصن
ابش
ألعا
اتسر
مكال
وةقه
الوب
حب ،)
ريبق
ك ستي
ة )هي
مط ال
ير غ
حمالل
ع قط
سم ٢
.٥ل
طوت ب
عبامك
ى إل
هاعي
قط
فة غر
الرة
را ح
جةدر
ي ف
ردلتب
ية طه
لمة ا
عمألط
ي ارك
ات–
اتس
رومه
/الضع
الراء
غذ •
نة.طح
لمي ا
فها
جتعال
مبل
قم
فرد
عنية
سسا
األية
طانسل
الام
خدست
باحك
ص نن
ئجنتا
الضل
أفى
علل
صولح
ل •
ب.شا
ألعا
امغر
١0
امغر
٥0
امغر
٥0
امغر
٥0
81
زجلم
زجما
ال
134699 Iss 1 FDM30 Eng_Arabic.B5.indd 17 21/03/2017 16:05

1871
«_œ«…/«∞LK∫o
«∞u™OHW
«∞ºd´W
«∞LuÅ
v °NU
«∞ºFU‹ «∞IB
uÈ
ß
JOs «∞∑IDOl
îKDU‹ «∞JFJU‹ «∞πU≥e…
2
01
• ¥πV ¢Jº
Od «∞∂º
Ju¥X ≈∞v ÆDl Å
GOd… Ë≈{
U≠∑t ´s ©d¥o ¨DU¡ √≤∂u»
√£MU¡ ¢A
GOq «∞πNU“.
• ¢uîw «∞∫c¸ •∑v ô ¢∑πUË“Í «∞H∑d… «∞LDKu°W ∞∑∫C
Od «∞DFUÂ.
• ´Mb ¢∫C
Od «∞LFπMU‹ «ß
∑ªb±w «∞b≥uÊ ±∂U®
d… ±s «∞LπLb ±l ¢IDOFNU ≠w Å
u¸…
±JF∂U‹ °∫πr ¢Id¥∂w 2ß
r.
≈{
U≠W «∞LU¡ ∞b±Z ±Ju≤U‹ «∞LFπMU‹
2
1 – 2
01
02 – 01
≠d «_ß
LU„ Ë«∞K∫uÂ
2
03 – 01
∞∫r °IdÍ
©dÍ
≠d «∞ªC
d«Ë«‹
01 – 5
≠d «∞LJº
d«‹
2
06 – 03
≥d”
«∞Hu«Øt «∞KOMW Ë«∞Hu«Øt Ë«∞ªC
dË«‹
«∞LDNOW
2
03 – 01
06 – 03
03 – 51
005
2
06
2
≥UÂ
•±C
d» «∞∂Oi
¨Od ±MUßV ∞öß∑ªb«Â ±l îKDU‹ «∞JFJU‹ «∞πU≥e… •OY √Ê
Æu«Â ≥cÁ «∞JFJU‹ £ªOs Ëßu· ¥∑º∂V ≠w ¢Kn «∞LC
d». «ß∑ªb±w œ«zLUÎ
≤B
q «∞ºJOs.
• ¥LJMp «∞∫B
u‰ ´Kv √≠C
q «∞M∑UzZ ´Mb±U ¢JuÊ œ¸§W •d«¸… «∞∂Oi
≥w ≤Hf
œ¸§W
•d«¸… «∞Gd≠W.
• ¢QØbÍ ±s ≤EU≠W «∞º
KDU≤OW ˱C
d» «∞∂Oi
Ë´b ˧uœ √Í œ≥uÊ Æ∂q «∞ªHo.
2
03
005
√œ«… «∞FπOs
«∞ªKDU‹ «∞LªLd…
2
06
• √´ObÍ «∞Fπs °Ob¥p ≠Ij. ¨Od ±MB
uÕ °S´Uœ… «∞Fπs ≠w «∞º
KDU≤OW •OY Æb ¥RœÍ –∞p
≈∞v ´b «ß
∑Id«¸ §NU“ ¢∫C
Od «∞DFUÂ.
ها ب
ىص
مو ال
تعا
سر ال
ولجد
ق دقي
المع
ن سم
اللط
خ–
اتجن
معال
جة ثال
المن
رة ش
مبان
هوالد
ي دم
تخس
)ال
طوت ب
عبامك
رة صو
ي ف
هايع
قطع ت
مم(
س٢
ضلبي
ة افاق
خ
حمالل
فة رغ
وأشة
الهن
جائالع
ردلبا
ء اسا
لحا
ئلةسا
الئن
جاالع
ق/فو
مخ ال
يبحل
ال
قةفو
مخ ال
دةش
الق
ضلبي
ض ابيا
ضي نب
يلشغ
ت
ة ج
عاللم
ن ازم
ن(وا
)ث ١,٢
ي مال
إلجن ا
وزال
غمك
٣00
ق دقي
الزن
وام
غر امغر
٤00
امغر
١00
امغر
١00
امغر
٥00
تر١ ل
مل
م)را
غ٢0
0)
مل
٣٤0
ق دقي
الزن
وام
غر
ئحصا
ونت
حامي
تل
ي.ض
لنبل ا
غيش
التع
ض و
ميخد
ست، ا
شن خ
امقو
ى عل
ل صو
لحل •
م.س
٢ل
طوت ب
عبامك
ى إل
اتاو
ضرلخ
، ابز
لخ، ا
حمالل
ل مث
م عا
لطي ا
طعق •
ية.ثان
٦0
منل
طوة أ
تر لف
كهوا
الفي
لجعا
ال ت •
حة فت
اء غط
ق ري
طعن
ل سائ
الفي
ضيوأ
ية طان
سل ال
فيبة
صل ال
اتون
مك ال
عيض
•ن
مدنة
ت لرا
كون
تكى
حتل
غيش
التي
فري
تمس
. ااز
جه ال
يلشغ
ء تثنا
ة أعبئ
التن.
جيالع
عة سر
اللى
عئي
بدا
دة زيا
المع
ضة خف
منال
وىص
القعة
سر ال
تىح
ذيةتغ
ال
134699 Iss 1 FDM30 Eng_Arabic.B5.indd 18 21/03/2017 16:05

61
ركبي محور الدوران في وحدة الطاقة )الموتور( 1. ١ركبي السلطانية عن طريق محاذاة العالمة الموجودة على ٢
السلطانية مع العالمة الموجودة على وحدة الطاقة )الموتور(، لفي السلطانية في اتجاه عقارب الساعة 2 لحين استقرارها في
. موضع القفل
ال تستخدمي الغطاء العلوي لتشغيل جهاز تحضير الطعام، l
.On/Off استخدمي دائما مفتاح تحكم السرعات
استخدام جهاز تحضير الطعام
3 ¸Ø∂w «∞LK∫o Kv ±∫u¸ «∞b˸«Ê «∞Lu§uœ ≠w «∞ºKDU≤OW.
l ¸Ø∂w œ«zLUÎ Ë«∞LK∫o ≠w §NU“ ¢∫COd «∞DFU Æ∂q ≈{U≠W
«∞LJu≤U‹.
4 ¸Ø∂w «∞GDU¡ «∞FKuÍ 3 - ±l «∞∑QØb ±s «ß∑Id« «∞πe¡ «∞FKuÍ ±s
±∫u¸ «∞b˸«Ê/«_œ«… ≠w ±dØe «∞GDU¡ «∞FKuÍ.
5 ËÅKw «∞πNU“ ±l ±Bb¸ «∞∑OU «∞JNd°w £r ®GKw «∞πNU“ Ë•bœÍ «∞ºdW
«∞LDKu°W. («§Fw §bˉ «∞ºdU‹ «∞LuÅv °NU).
l ∞s ¥FLq §NU“ ¢∫COd «∞DFU ≠w •U∞W ¢dØOV «∞ºKDU≤OW √Ë
«∞GDU¡ «∞FKuÍ °Dd¥IW Od Å∫O∫W ≠w ±u{l ¢FAOo «∞IHq.
¢QØbÍ ±s ¢u§Ot √≤∂u» ˱I∂i «∞ºKDU≤OW ≈∞v
«∞πU≤V «_¥Ls ∞KπNU“.
l«ß∑ªb±w ±H∑UÕ Ë{l «∞∑AGOq «∞M∂Cw (P) ∞K∑AGOq ∞H∑d«‹ ÆBOd….
¥FLq Ë{l «∞∑AGOq «∞M∂Cw ©u«‰ ≠∑d… «∞CGj Kv ±H∑UÕ «∞∑∫Jr.
6 «¢∂Fw «∞ªDu«‹ «∞ºU°IW °∑d¢OV ±FJu” ù“«∞W «∞GDU¡ «∞FKuÍ, «∞LK∫IU‹
l √ËÆHw œ«zLUÎ ¢AGOq «∞πNU“ Æ∂q ≈“«∞W «∞GDU¡ «∞FKuÍ.
±ö•EW ≥U±W
l§NU“ ¢∫COd «∞DFU Od ±özr ∞D∫s •∂u» «∞INu… √Ë ¢∫u¥q •∂O∂U‹
«∞ºJd ≈∞v ßJd °uœ¸….
l´Mb ≈{U≠W ËÕ √Ë ≤JNW «∞Ku“ ∞KªKDU‹, ¢πM∂w ±ö±º∑t ±l «∞∂öß∑Op •OY
Æb ¥RœÍ –∞p ≈∞v ¢d„ ö±U‹ ±º∑b¥LW Kv «∞∂öß∑Op.1 {Fw «∞LJu≤U‹ ≠w ËU¡ «∞D∫s c.
= ±u{l «∞H∑
= ±u{l «∞IHq
6 ®GKw «∞LD∫MW Kv «∞ºdW «∞IBuÈ √Ë «ß∑ªb±w Ë™OHW «∞∑AGOq
«∞M∂Cw.
w •U∞W «∞∑eË¥b œ«îq≠)المطحنة متعددة االستخدامات
ÅMbË‚ «∞∂Ol)
استخدمي المطحنة متعددة االستخدامات لطحن المكسرات وحبوب القهوة وتحضير المهروسات.
.cp في وحدة الشفرات co ركبي حلقة اإلحكام ٢اقلبي وحدة الشفرات. ضعيها داخل الوعاء بحيث يكون اتجاه ٣
الشفرات ألسفل.اربطي وحدة الشفرات في الوعاء بإحكام باستخدام أصابعك 7. ٤
راجعي الرسوم التوضيحية الموجودة على الجانب السفلي لمجموعة وحدة الشفرات وهي كالتالي:
ضعي المطحنة متعددة االستخدامات على وحدة الطاقة )الموتور( ثم ٥حاذي العالمة الموجودة على المطحنة متعددة االستخدامات مع العالمة الموجودة على وحدة الطاقة )الموتور( ثم لفي المطحنة
متعددة االستخدامات في اتجاه عقارب الساعة 8 حتى تستقر في . موضع القفل
مطحنة الفرم )في حالة التزويد داخل صندوق البيع(استخدمي مطحنة الفرم لمعالجة المكونات الجافة مثل حبوب القهوة
ولطحن التوابل مثل:-حبوب الفلفل األسود وبذور الهيل وبذور الكمون وبذور الكزبرة
وبذور الشمرة وجذور الزنجبيل الطازجة وفصوص الثوم وقرون الفلفل الحار.
استخدام مطحنة الفرم.cr ضعي المكونات على مجموعة الشفرات ١
ركبي الغطاء العلوي cq ولفيه ليستقر في موضع التعشيق 9. ٢ضعي المطحنة على وحدة الطاقة )الموتور( ثم لفيها في اتجاه ٣
.bk عقارب الساعة حتى تستقر في موضع التعشيق.)P( حددي السرعة المطلوبة أو استخدمي وضع التشغيل النبضي ٤
والسلطانية.
التغذية
السلطانية
ركبي حلقة اإلحكام على وحدة الشفرات – مع التأكد من ١استقرار حلقة اإلحكام في موضعها بشكل صحيح داخل التجويف.
أمسكي الجانب السفلي لوحدة الشفرات وركبي الشفرات داخل ٢الدورق – ثم لفيها في اتجاه عكس عقارب الساعة إلحكام القفل 4. راجعي الرسوم التوضيحية الموجودة على الجانب السفلي
لمجموعة وحدة الشفرات وهي كالتالي:
استخدام المازج
l ≈–« ØU≤X •KIW «ù•JU ¢U∞HW √Ë Od ±∫JLW °AJq Å∫O
≠ºu· ¥∫bÀ ¢ºd¥∂UÎ.
= ±u{l «∞H∑
= ±u{l «∞IHq
∞s ¥FLq ≠w •U∞W ¢dØO∂t °AJq Od Å∫O.
3 {Fw «∞bË‚.
4 ¸Ø∂w «∞GDU¡ «∞FKuÍ Kv «∞bË‚ Ë∞HOt ≠w «¢πUÁ IU» «∞ºUW 5.
•∑v ≈•JU «∞IHq. Ø∂w DU¡ ≠∑∫W «∞∑F∂µW.
5 {Fw Kv Ë•b… «∞DUÆW («∞Lu¢u¸) £r •U–Í «∞Fö±W «∞Lu§uœ…
´Kv ±l «∞Fö±W «∞Lu§uœ… Kv Ë•b… «∞DUÆW («∞Lu¢u¸) £r
∞Hw ≠w «¢πUÁ IU» «∞ºUW 6 •∑v ¥º∑Id ≠w ±u{l «∞IHq
.
l ∞s ¥FLq «∞πNU“ ≠w •U∞W ¢dØOV °AJq Od Å∫O ±l
¢FAOo «∞IHq.
6 •bœÍ «∞ºdW «∞LDKu°W («§Fw §bˉ «∞ºdU‹ «∞LuÅv °NU) √Ë
«ß∑ªb±w ¢∫Jr «∞∑AGOq «∞M∂Cw.
المازج
المازج المازجالمازج
المازج
المكونات داخل
A المازج
Plastic liquidiser
)في حالة التزويد داخل صندوق البيع( المسيل البالستيكي
«∞e§U§w
l ≈–« ØU≤X •KIW «ù•JU ¢U∞HW √Ë Od ±∫JLW °AJq Å∫O
≠ºu· ¥∫bÀ ¢ºd¥∂UÎ.
2 «°Dw «∞bË‚ Kv Ë•b… «∞AHd«‹ 4. «§Fw «∞dßu «∞∑u{O∫OW
«∞Lu§uœ… Kv «∞πU≤V «∞ºHKw ∞u•b… «∞AHd«‹ Ë≥w ØU∞∑U∞w:
= ±u{l «∞H∑
= ±u{l «∞IHq
∞s ¥FLq ≠w •U∞W ¢dØO∂t °AJq Od Å∫O.
3 {Fw «∞bË‚.
4 ¸Ø∂w «∞GDU¡ «∞FKuÍ Kv «∞bË‚ Ë«œ≠FOt _ßHq •∑v ¥º∑Id ≠w ±u{Ft
5. Ø∂w DU¡ ≠∑∫W «∞∑F∂µW.
5 {Fw Kv Ë•b… «∞DUÆW («∞Lu¢u¸) £r •U–Í «∞Fö±W «∞Lu§uœ…
´Kv ±l «∞Fö±W «∞Lu§uœ… Kv Ë•b… «∞DUÆW («∞Lu¢u¸) £r
∞Hw ≠w «¢πUÁ IU» «∞ºUW 6 •∑v ¥º∑Id ≠w ±u{l «∞IHq
.
l ∞s ¥FLq «∞πNU“ ≠w •U∞W ¢dØOV °AJq Od Å∫O ±l
¢FAOo «∞IHq.
6 •bœÍ «∞ºdW «∞LDKu°W («§Fw §bˉ «∞ºdU‹ «∞LuÅv °NU) √Ë
«ß∑ªb±w ¢∫Jr «∞∑AGOq «∞M∂Cw.
B)في حالة التزويد داخل صندوق البيع(
ركبي حلقة اإلحكام على وحدة الشفرات – مع التأكد من ١استقرار حلقة اإلحكام في موضعها بشكل صحيح داخل التجويف.
المازجالمكونات داخل
المازج المازجالمازج
المازج
المازج
134699 Iss 1 FDM30 Eng_Arabic.B5.indd 19 21/03/2017 16:05

51
قبل توصيل اجلهاز مبصدر التيار الكهريب تأكدي من متاثل مواصفات مصدر التيار الكهريب لديك مع l
املوصفات املوحضة عىل اجلانب السفيل للجهاز.يتوافق هذا الجهاز مع تنظيمات االتحاد األوروبي 1935/2004 l
المتعلقة بالمواد واألجسام المتالمسة مع األطعمة.
√Æd«’ «∞∑IDOl/«∞∑IDOl «∞Du∞w («∞∂Ad)
l ¥∫c¸ ≈“«∞W «∞GDU¡ «∞FKuÍ Æ∂q ¢uÆn «∞∑IDOl ¢LU±UÎ.
l ¢uîw «∞∫c¸ √£MU¡ «∞∑FU±q ±l «∞∑IDOl - «∞∑IDOl •Uœ… §b«Î.
BU… «∞Ddœ «∞LdØeÍ
lô ¢º∑ªb±w «∞FBU… ≠w •U∞W ¢Kn «∞Ld®`.
l ®Hd«‹ «∞∑IDOl «∞Lu§uœ… ≠w ÆUb… «ßDu«≤W «∞∑d®O •Uœ… §b«Î, ¢uîw «∞∫c¸ Mb
«∞∑FU±q ±l «ßDu«≤W «∞∑d®O Ë¢MEOHNU.
l «ß∑ªb±w ≠Ij BU œ≠l «∞LJu≤U‹ «∞LeËœ… œ«îq ÅMbË‚ «∞∂Ol. ¥∫c¸ Ë{l √ÅU°Fp
œ«îq √≤∂u» . «≠BKw «∞πNU“ s ±Bb¸ «∞∑OU «∞JNd°w Æ∂q ≠p
l Æ∂q ≈“«∞W «∞GDU¡ «∞FKuÍ, √ËÆHw ¢AGOq «∞πNU“ Ë«≤∑EdÍ •∑v ¥∑uÆn «∞Ld®`.
ال ينصح بمعالجة التوابل، فقد تتسبب في تلف األجزاء البالستيكية. lمطحنة الفرم
لضمان إطالة عمر مطحنة الفرم، ال تقومي بتشغيلها لفترة أطول من ٦0 ثانية. أوقفي lتشغيلها بمجرد حصولك على القوام المطلوب.
ال تحضري جذور الكركم بواسطة المطحنة حيث أنها صلبة جدا وقد تتلف الشفرات. l
Æ∂q «ôß∑FLU‰ ∞KLd… «ôË∞v
1 √“¥Kw √DOW «∞MBq «∞∂öß∑OJOW s ßJOs «∞∑IDOl. ¢uîw «∞∫c¸ ≠ºJOs
«∞∑IDOl •Uœ §b«Î. ¥πV «∞∑ªKh ±s ≥cÁ «_¨DOW •OY √≤NU ±eËœ… ∞∫LU¥W
ßJOs «∞∑IDOl √£MU¡ «∞∑BMOl Ë«∞MIq.
2 «ºKw «_§e«¡ ”¸«§Fw ƺr «∞dU¥W Ë«∞∑MEOn“.
±H∑UÕ «∞d±u“
§NU“ ¢∫COd «∞DFUÂ
BU œ≠l «∞DFUÂ
«≤∂u» «∞∑Gc¥W
±H∑UÕ «∞∑∫Jr ≠w «∞ºdW/«∞∑AGOq «∞M∂Cw
√ÆHU‰ «_±UÊ
±ªeÊ «∞ºKp (≠w «∞ªKn)
•KIW ≈•JU «ùö‚
«∞bË‚
≠∑∫W «∞∑F∂µW
– «∞e§U§w
•KIW ≈•JU «ùö‚
«∞bË‚
≠∑∫W «∞∑F∂µW
B
m
o
مجموعة الشفرات
الغطاء العلوي
1
2
3
4
5
6
7
8
9
السلطانية
m
o
مجموعة الشفرات
A – المازج
الغطاء العلوي
وحدة الطاقة )الموتور(محور دوران
الغطاء العلوي
Plastic liquidiser
)في حالة التزويد داخل صندوق البيع( المسيل البالستيكي
)في حالة التزويد داخل صندوق البيع(
C – ملحقات قياسية
مجموعة الشفرات
®Hd… «∞ºJOs
«œ«… «∞Fπs
خفاقة البيض الثنائية قرص التقطيع الرفيع/التقطيع الطولي )البشر( ٤ مم قرص التقطيع الرفيع/التقطيع الطولي )البشر( ٢ مم
قرص التقطيع الطولي )البشر( الناعم
p
q
r
s
t
c
ليس بالضرورة تزويد كل الملحقات المدرجة أدناه داخل عبوة بيع جهاز تحضير الطعام. تختلف الملحقات تبعا الختالف موديالت الجهاز. راجعي قسم »الصيانة ورعاية العمالء« للحصول على معلومات حول كيفية شراء المحلقات غير المزودة في عبوة بيع
الجهاز.
الملحقات
D – ملحقات اختيارية BU… ±u«∞ (≠w •U∞W «∞∑eË¥b œ«îq ÅMbË‚ «∞∂Ol)
عصارة الطرد المركزي )في حالة التزويد داخل صندوق البيع( c
cm
w •U∞W «∞∑eË¥b œ«îq≠)المطحنة متعددة االستخدامات
ÅMbË‚ «∞∂Ol)
c
co
cp
ËU¡ «∞D∫s
•KIW ≈•JU «ùö‚
مطحنة الفرم )في حالة التزويد داخل صندوق البيع(الغطاء العلوي للمطحنة
مجموعة شفرات مطحنة الفرم cq
cr
المكونات داخل أنبوب التغذية.إزالة انحشار التغذية
أقراصأقراصقرص
المازج
134699 Iss 1 FDM30 Eng_Arabic.B5.indd 20 21/03/2017 16:05

22
l ô ¢ºL∫w °∑b∞w «∞ºKp «∞JNd°w «∞e«zb s ©UË∞W «∞FLq Ëô ¢ºL∫w ∞t √¥CUÎ °U∞∑ö±f ±l
çD` .
l ô ¢∑πUË“Í «∞ºFU‹ «∞IBuÈ «∞LuÅv °NU Ë«∞L∫bœ… ≠w §bˉ «∞ºdU‹.
l¥πV «ù®d«· Kv «_©HU‰ ∞K∑QØb ±s b ∂∏Nr °U∞πNU“.
lô ¥πu“ «ß∑ªb«Â ≥c« «∞πNU“ ±s Æ∂q «_©HU‰. «•∑HEw °U∞πNU“ Ë«∞ºKp «∞JNd°w °FOb«Î s
±∑MUˉ «_©HU‰.
l¥LJs «ß∑ªb«Â «_§Ne… ±s Æ∂q √®ªU’ –ËÍ Æb¸«‹ §ºb¥W √Ë •ºOW √Ë IKOW ±MªHCW
˱Ls ≥r œËÊ î∂d… √Ë ±Fd≠W °Uß∑ªb«Â «_§Ne… ≠w •U∞W ±M∫Nr «∞∑FKOLU‹ «∞ªUÅW
°Uôß∑ªb«Â √Ë «ù®d«· KONr °∫OY ¥LJMNr «ß∑ªb«±t °Dd¥IW ¬±MW ±l ≈œ¸«„ «∞LªU©d
«∞∑w ¢MDuÍ Kv «ß∑ªb«Â «∞πNU“.
l«ß∑ªb±w «∞πNU“ ≠Ij ≠w «ôß∑ªb«±U‹ «∞LMe∞OW «∞LªBh ∞NU. ∞s ¢∑∫Lq ®dØW
doowneK √¥W ±ºµu∞OW ≠w •U∞W «ß∑ªb«Â «∞πNU“ °Dd¥IW Od Å∫O∫W √Ë b «ô±∑∏U‰
∞K∑FKOLU‹ «∞LcØu¸….
l ¢F∑Lb «∞ºFW «∞IBuÈ Kv «∞LK∫o «∞Lº∑ªb ˫∞cÍ ¥º∑Lb •Lq √Ø∂d. °Fi ±s «∞LK∫IU‹
«_îdÈ Æb ¢º∑Lb •Lq √Æq.
l ¢uîw «∞∫c¸ œ«zLUÎ Mb «∞∑FU±q ±l Ë•b… «∞AHd«‹ Ë¢πM∂w ∞Lf •U≠W «∞IDl «∞ªUÅW
°U∞AHd«‹ √£MU¡ «∞∑MEOn.
l¥πV ¢AGOq ≠Ij ±l ¢dØOV «∞GDU¡ «∞FKuÍ ≠w ±u{Ft.
l «ß∑ªb±w «∞bË‚ ≠Ij ±l Ë•b… «∞AHd«‹ «∞LeËœ….
l ¥∫c¸ ¢AGOq ≠U¨UÎ.
l ∞CLUÊ «∞∫Bu‰ Kv Ld ¢AGOKw ©u¥q , ô ¢AGKOt ∞Lb… √©u‰ ±s 06 £U≤OW.
l °U∞Mº∂W ∞uÅHU‹ «∞LAdË°U‹ «∞LªHuÆW –«‹ «∞du… - ô «∞LJu≤U‹ «∞LπLb… «∞∑w
¢∫u∞X ≈∞v Ø∑KW ÅK∂W √£MU¡ «∞∑πLOb, Ë∞Js ≥ALONU ≈∞v √§e«¡ Æ∂q ≈{U≠∑NU ≈∞v «∞bË‚.
41
قد يؤدي سوء استخدام جهاز تحضير الطعام أو المازج أو المطحنة إلى حدوث lإصابات.
l ال تستخدمي مكونات ساخنة أثناء التحضير.مخاطر التعرض لحروق: يجب ترك المكونات الساخنة حتى تبرد وتصبح في درجة l
حرارة الغرفة قبل إضافتها إلى الدورق أو قبل المزج.
ملحقات المطحنة يحذر تركيب وحدة الشفرات على وحدة الطاقة )الموتور( بدون تركيب وعاء الطحن/ l
الغطاء العلوي.يحذر فك وعاء الطحن/الغطاء العلوي عن المطحنة أثناء تركيبها في الجهاز. l
ال تلمسي الشفرات الحادة – ابعدي وحدة الشفرات عن متناول األطفال. lيحذر إزالة المطحنة قبل توقف الشفرات عن الدوران تماما. l
لن يعمل الجهاز في حالة تركيب المطحنة بشكل غير صحيح. lال تستخدمي مكونات ساخنة لمعالجتها في المطحنة، اتركيها لتبرد في درجة حرارة l
الغرفة قبل معالجتها.
ساخنة
مطحنة متعددة االستخدامات لضمان إطالة عمر المطحنة متعددة االستخدامات، ال تقومي بتشغيلها لفترة أطول من l
٣0 ثانية. أوقفي تشغيلها بمجرد حصولك على القوام المطلوب.
تمزجيللمازج
المازج
المازج
المازج
134699 Iss 1 FDM30 Eng_Arabic.B5.indd 21 21/03/2017 16:05
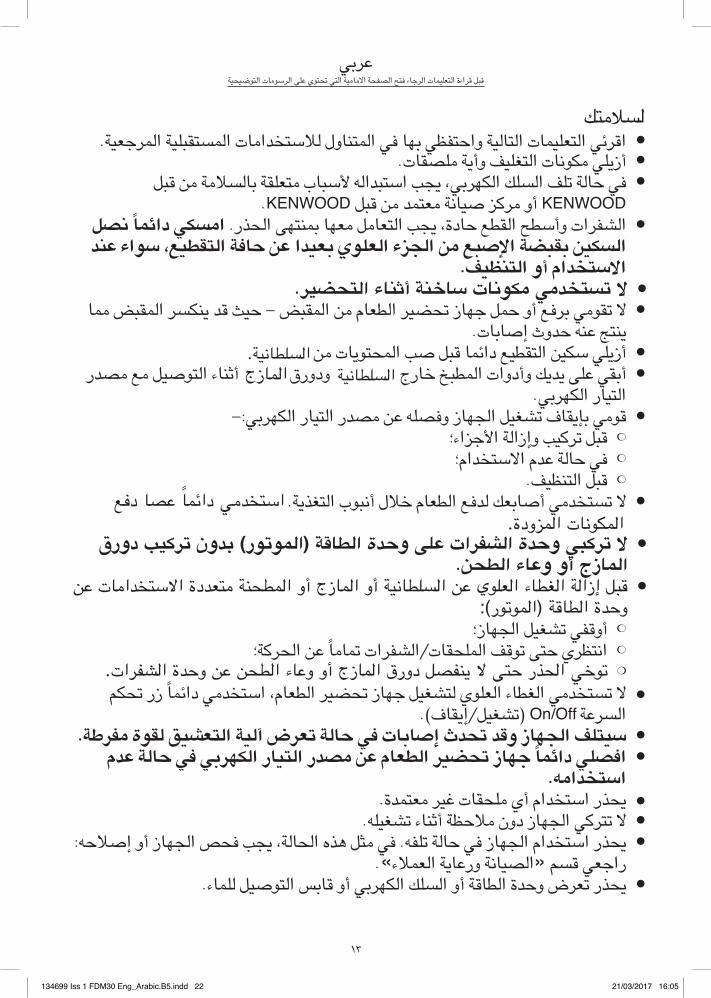
22
l «Ædzw «∞∑FKOLU‹ «∞∑U∞OW Ë«•∑HEw °NU ≠w «∞L∑MUˉ ∞öß∑ªb«±U‹ «∞Lº∑I∂KOW «∞Ld§FOW.
l √“¥Kw ±Ju≤U‹ «∞∑GKOn Ë√¥W ±KBIU‹.
l ≠w •U∞W ¢Kn «∞ºKp «∞JNd°w, ¥πV «ß∑∂b«∞t _ß∂U» ±∑FKIW °U∞ºö±W ±s Æ∂q
DOOWNEK √Ë ±dØe ÅOU≤W ±F∑Lb ±s Æ∂q DOOWNEK.
l «∞AHd«‹ Ë√ßD` «∞IDl •Uœ…, ¥πV «∞∑FU±q ±FNU °LM∑Nv «∞∫c¸. «±ºJw œ«zLUÎ ≤Bq
«∞ºJOs °I∂CW «ùÅ∂l ±s «∞πe¡ «∞FKuÍ °FOb« s •U≠W «∞∑IDOl, ßu«¡ Mb
«ôß∑ªb«Â √Ë «∞∑MEOn.
l ô ¢Iu±w °d≠l √Ë •Lq §NU“ ¢∫COd «∞DFU ±s «∞LI∂i - •OY Æb ¥MJºd «∞LI∂i ±LU
¥M∑Z Mt •bËÀ ≈ÅU°U‹.
l√“¥Kw ßJOs «∞∑IDOl œ«zLU Æ∂q ÅV «∞L∫∑u¥U‹ ±s
l √°Iw Kv ¥b¥p Ë√œË«‹ «∞LD∂a îUà ˜˂ √£MU¡ «∞∑uÅOq ±l ±Bb¸
«∞∑OU «∞JNd°w.
l Æu±w °S¥IU· ¢AGOq «∞πNU“ Ë≠BKt s ±Bb¸ «∞∑OU «∞JNd°w:-
mÆ∂q ¢dØOV Ë≈“«∞W «_§e«¡;
m≠w •U∞W b «ôß∑ªb«Â;
mÆ∂q «∞∑MEOn.
lô ¢º∑ªb±w √ÅU°Fp ∞b≠l «∞DFU îö‰ √≤∂u» «∞∑Gc¥W.
m √ËÆHw ¢AGOq «∞πNU“;
m «≤∑EdÍ •∑v ¢uÆn «∞LK∫IU‹/«∞AHd«‹ ¢LU±UÎ s «∞∫dØW;
lô ¢º∑ªb±w «∞GDU¡ «∞FKuÍ ∞∑AGOq §NU“ ¢∫COd «∞DFUÂ, «ß∑ªb±w œ«zLUÎ “¸ ¢∫Jr
«∞ºdW ffO/nO (¢AGOq/≈¥IU·).
l ßO∑Kn «∞πNU“ ËÆb ¢∫bÀ ≈ÅU°U‹ ≠w •U∞W ¢Fd÷ ¬∞OW «∞∑FAOo ∞Iu… ±Hd©W.
l«≠BKw œ«zLUÎ §NU“ ¢∫COd «∞DFU s ±Bb¸ «∞∑OU «∞JNd°w ≠w •U∞W bÂ
«ß∑ªb«±t.
l¥∫c¸ «ß∑ªb«Â √Í ±K∫IU‹ Od ±F∑Lb….
l ô ¢∑dØw «∞πNU“ œËÊ ±ö•EW √£MU¡ ¢AGOKt.
l ¥∫c¸ «ß∑ªb«Â «∞πNU“ ≠w •U∞W ¢KHt. ≠w ±∏q ≥cÁ «∞∫U∞W, ¥πV ≠∫h «∞πNU“ √Ë ≈Åö•t:
¸«§Fw ƺr »«∞BOU≤W ˸U¥W «∞FLö¡«.
l ¥∫c¸ ¢Fd÷ Ë•b… «∞DUÆW √Ë «∞ºKp «∞JNd°w √Ë ÆU°f «∞∑uÅOq ∞KLU¡.
Æ∂q Æd«¡… «∞∑FKOLU‹ «∞d§U¡ ≠∑ «∞BH∫W «ô±U±OW «∞∑w ¢∫∑uÍ Kv «∞dßu±U‹ «∞∑u{O∫OW
´d°w
لسالمتك
قبل توصيل اجلهاز مبصدر التيار الكهريب تأكدي من متاثل مواصفات مصدر التيار الكهريب لديك مع املوصفات املوحضة عىل l
اجلانب السفيل للجهاز.
ال تستخدمي مكونات ساخنة أثناء التحضير. l
استخدمي دائما عصا دفعالمكونات المزودة.
المازج
ال تركبي وحدة الشفرات على وحدة الطاقة )الموتور( بدون تركيب دورق lالمازج أو وعاء الطحن.
قبل إزالة الغطاء العلوي عن السلطانية أو المازج أو المطحنة متعددة االستخدامات عن lوحدة الطاقة )الموتور(:
توخي الحذر حتى ال ينفصل دورق المازج أو وعاء الطحن عن وحدة الشفرات. m
31
السلطانية.السلطانية
134699 Iss 1 FDM30 Eng_Arabic.B5.indd 22 21/03/2017 16:05