update the schedule of classes for a new...
TRANSCRIPT

Update the Schedule of
Classes for a New Term
Basic Data 3 Meetings 7 Enrollment Control 12 Reserve Cap 14 Notes 17 LMS 18 SAVE 19 Manage Auto-Enroll Sections, Enrollment and Waitlist Capacity 20

Scheduling Classes in PeopleSoft p. 2
Prepared by Kim Rant, Client Support 2-9800 Revised 1/08 for PS 8.9
Each Term classes are “rolled over” from the previous year in PeopleSoft (Fall 2009 will
be rolled into Fall 2010).
Department Schedulers are notified when they can begin making changes to the schedule
for the new Term.
The information that defaults on the scheduling pages defaults from the Course Catalog.
A course must be in the Course Catalog before you can schedule it.
The first step is to print an MS Review (Master Schedule Review) report to get a clear
sense of what courses and what sections have been “rolled over” from the previous year.
Then, using the MS Review report as a guide, Department Schedulers update the
Schedule of Classes to reflect any changes for the new Term. Perhaps the instructor for a
class has changed or the class is being held in a different room or more sections of a
course were added.
Navigation:
Curriculum Management > Schedule of Classes > Maintain Schedule of Classes
Enter the Term
Enter the Subject Area
Enter the Catalog Nbr
Click Search
If a course was not offered in the Term that was “rolled over” then it will not be in
the new Term. This course will have to be added as a “New Course” for this Term.
This is done in the Schedule New Course component:
Curriculum Management > Schedule of Classes > Schedule New Course

Scheduling Classes in PeopleSoft p. 3
Prepared by Kim Rant, Client Support 2-9800 Revised 1/08 for PS 8.9
Basic Data
Click the Previous/Next
arrows (or View All) to view
each section of this course.
Click Add a new row
only if you want to add
a new section to this
course for this Term

Scheduling Classes in PeopleSoft p. 4
Prepared by Kim Rant, Client Support 2-9800 Revised 1/08 for PS 8.9
Edit the fields for each section as needed:
Session: Make sure that you have the correct Session code
selected. The Session code is used to further break down
the Term. It is needed to accommodate the Summer
Session and HSC Mods (i.e., A = Full Fall Semester
Session, B = Full Spring Semester Session, Mod 4, Mod
5-7 U, etc.).
Class Section Each section is assigned a code as follows:
LECTURE 01, 02, 03, etc.
RECITATION R01, R02, R03, etc.
LABORATORY L01, L02, L03, etc.
SEMINAR S01,S 02, S03, etc.
TUTORIAL T01, T02, T03, etc.
SUPERVISED V01, V02, V03, etc.
CLINICAL C01, C02, C03, etc.
ONLINE 30, 31, 32, 33, etc.
MANHATTAN 60, 61, 62, 63, etc.

Scheduling Classes in PeopleSoft p. 5
Prepared by Kim Rant, Client Support 2-9800 Revised 1/08 for PS 8.9
Class Number: Each section of a course is automatically assigned a
Class Number. If you add a new section this number will
be assigned after you save.
Start/End Date: These dates default from the Academic Calendar.
Component Some courses have more than one component (lecture,
recitation, seminar, tutorial, etc.). Valid components for
this course have already been set up in the Course
Catalog. Click the LOOKUP button (magnifying glass)
to choose the component for this section.
Class Type Select Enrollment or Non-Enrollment.
For auto-enroll courses with more than one component
the component that the student must enroll in is set to
Enrollment and the component that the student gets
automatically enrolled in is set to Non-enrollment.
For instance for courses with a Lecture and Lab, the Lab
may be the Enrollment component and the Lecture may
be the Non-Enrollment component.
Associated Class The main purpose of this field is to associate multi-
component courses.
For single component courses - the Associated Class
number is the same as the Section number without the
zero (i.e., Lecture 01 is Associated Class “1”).
For multiple component courses - all of the Lectures
are assigned Associated Class “9999” and the other
components (Recitations and Labs) are assignedhe same
as the Section number without the zero as stated above
(i.e., Lab 01 is Associated Class “1”).

Scheduling Classes in PeopleSoft p. 6
Prepared by Kim Rant, Client Support 2-9800 Revised 1/08 for PS 8.9
Campus Defaults to the campus where the course is held (West,
HSC, Southampton, Manhattan, SUTRA (SPD).
Location Select West Campus, Southampton Campus, Off
Campus, International Academic Program or Online.
Course Administrator Not used.
Academic Organization: Defaults to the department offering the course. Do not
change.
Academic Group Defaults to the department’s College or School. Do not
change.
Holiday Schedule Defaults to Academic Holidays or HSC Academic
Holidays.
Instructor Mode Defaults to “In Person”. If this is an online class you
should select “World Wide Web”.
Primary Instr Section Defaults to the Section number.
Add Fee: Not used.
Schedule Print: Indicates whether the class should be printed in the Class
Schedule and MS Review report and appear in SOLAR.
Student Specific Permissions When this option is checked, the department has the
ability to issue permission for students to enroll in the
class if it’s full or if they don’t meet certain pre-
requisites.
Include in Dynamic Date Calc Not used.
Dynamic Data Calc Required Not used.
Generate Class Mtg Attendance Not used.
Sync Attendance with Class Mtg Not used
GL Interface Required Not used.
Course Topic ID If this is a course with different topics select the topic for
this section by clicking the LOOKUP button.
Setting up the Topic here will allow the Topic Title to
print in the Class Schedule and on student transcripts.
You can have multiple topics for different sections of a
single course in one semester. This is especially useful
for graduate courses. If the topic you want isn’t listed
contact the appropriate Dean’s Office and ask them to
add the topic title to the Course Catalog, so you can
schedule it.
Course Equivalent Course Group Displays the course equivalents.
Course Attribute Select the value only if applicable to your classes
otherwise leave blank (i.e., Study Abroad/Exchange
Courses, Contract Course, SPD, PEP, etc.).

Scheduling Classes in PeopleSoft p. 7
Prepared by Kim Rant, Client Support 2-9800 Revised 1/08 for PS 8.9
Meetings
This is where you assign the room, meeting days/times and instructors for the class.
IMPORTANT! If this is a course that is combined with other courses you cannot update the
Meetings page here. You must go to the Schedule Class Meetings page (Curriculum
Management > Schedule of Classes > Schedule Class Meetings). The courses must be “linked”
by the Registrar’s Office first!
CASA (Course and Section Analysis) data are derived from the Course Catalog and the Meetings
page therefore the completion of accurate information on this page is essential. Instructors should
be assigned right away. Other information on the Meetings page is opened for CASA editing after
the enrollment snapshot.
Facility ID You can only select a room that is controlled by your
Department or a large room that’s been assigned to you
for the class. Otherwise, leave this field blank and the
room will be assigned by the Registrar’s Office.
If you don’t know the Facility ID number, click
the LOOKUP button and search for it by
entering the Building number and Room
number. Be careful, this list contains every closet,
stairwell and bathroom in the building!
Click View All to
view all of the
instructors on one
page.

Scheduling Classes in PeopleSoft p. 8
Prepared by Kim Rant, Client Support 2-9800 Revised 1/08 for PS 8.9
Pat Select the day of the week pattern (MWF, TUTH, etc.).
The meeting end time will default from the pattern that
you pick.
For Recitation sections – use the meeting pattern code
that begins with “RE” only. These are 55 minute
meeting time blocks.
For Tutorial sections – use “APPT”.
For sections where hours are to be arranged – select
“HTBA”.
Mtg Start Enter the time that the class starts (remember to include
AM and PM appropriately)
Mtg End The class end time will default from the day of the week
pattern and Start Time that you selected.
Note: Tutorial, Clinical, Supervised teaching, and
distance-learning sections are entered with the default of
1:00 a.m. to 1:00 a.m.
Combined Sections Combined sections have to be setup in advance by the
Registrar’s Office. You cannot schedule a class until this
is done. You will see the Combined Sections link on
this page once the Registrar’s office has linked the
courses. Click it to see the Combined Section Detail.
New course combinations must be approved by the
Dean’s office first.
Remember…after the combined sections have been
linked by the Registrar’s office the fields on this page
will be grayed out. You must go to the “Schedule
Class Meetings” page to update the information on
this page.
If you have questions about combined sections contact
the Registrar’s Office.
ID Enter the instructor’s Stony Brook ID.
IMPORTANT! To remove an existing instructor ID
you must delete the entire row by clicking the Delete
Row ( - ) button. Then you can add the new instructor’s
ID.
If you do not know the ID number, click the
LOOKUP button and search for the instructor
by First name and Last name.

Scheduling Classes in PeopleSoft p. 9
Prepared by Kim Rant, Client Support 2-9800 Revised 1/08 for PS 8.9
Note: If the field turns red or the instructor is not in the
list you must check the Instructor Advisor table.
Your dept must be in the list of approved
courses for the Instructor
New instructors must be active (hired) in
PeopleSoft at least one day before the start of the
Term
To add another instructor for this class click the
Add a New Row button.
Instructor Role Select this instructor role.
The data that is entered here is used for determination of
instructional workload in CASA and other institutional
reporting. For the most accurate university reports,
please adhere to the revised rules below.
Primary Instructor Should be assigned to the instructor
who is fully responsible for the
course based on the course
instruction or contact minutes. Most
often the Primary Instructor should
be a faculty member, however, a
graduate student can be the Primary
Instructor if the graduate student is
solely responsible for the scheduled
course.
For multi-component courses, assign
the instructor a role of Primary
Instructor on the lecture and
“supervisor” on the additional
sections (eg., lab, recitation). This
provides the ability for departments
to allow grading access for the
primary instructor for the additional
sections.
For multi-component courses, do
NOT assign the instructor a role of
Primary Instructor on the lecture and
“Primary Instructor” on the
additional sections (eg., lab,
recitation) unless that same
instructor is fully responsible for
those sections.
In the instances where teaching
responsibility is shared between
more than one instructor, indicate a
maximum of ONE Primary
Instructor based on the course

Scheduling Classes in PeopleSoft p. 10
Prepared by Kim Rant, Client Support 2-9800 Revised 1/08 for PS 8.9
contact minutes (i.e., instruction).
Additional instructors should be
assigned the role of Secondary.
Secondary
Instructor
In the instances where teaching
responsibility is shared between
more than one instructor, indicate
ONE Primary Instructor based on the
course contact minutes and one or
more Secondary Instructors.
Note that the abbreviation “sec instr”
is not intended to stand for “section
instructor,” and should not be
applied as such.
Administrator This instructor role is not reported in
CASA, however, correct setup is
vital for grading access of the
instructor(s). This role is useful
when a course instructor has
arranged for a department
administrator (usually the ATC or
similar) to administer the course
(submit grades, manage rosters, etc).
In these cases, the primary instructor
remains on the course, and a course
administrator is assigned a role of
"admin" plus the appropriate level of
grading access.
Supervisor This instructor role is not reported in
CASA, however, correct setup is
vital for grading access of the
instructor(s). Use this for a course
with multi-components (eg.,
lecture/lab + recitation). The
instructor (usually Faculty) should
be assigned to the lecture as
"primary instructor" and as the
"supervisor" for each of the labs
and/or recitations.
Reader/Grader Assign this role for Graduate
students who read/grade papers and
don't actually meet with students.
For CASA reporting purposes, do
not add hours for these.
Print If you want the instructor to appear in the Class
Schedule and in SOLAR Class Search for this class,

Scheduling Classes in PeopleSoft p. 11
Prepared by Kim Rant, Client Support 2-9800 Revised 1/08 for PS 8.9
check this box. Supervisors, Administrators and
Reader/Graders should never be printed!
Access Select the instructor’s level of access to rosters and
submitting grades in SOLAR. Only one person per
class can have Approve access (usually the Primary
Instructor, Secondary Instructor or Supervisor)!
TA’s, Administrators and Reader/Graders should not
have Approve access.
Access View Roster Input
Grades
Submit
Grades
Approve Yes Yes Yes
Grade Yes Yes No
None Yes No No
Workload Not used.
Contact In general, departments do not have to enter contact
minutes. Contact minutes are calculated from section
start and end times and entered automatically for CASA
reporting.
Room Characteristic Not used.

Scheduling Classes in PeopleSoft p. 12
Prepared by Kim Rant, Client Support 2-9800 Revised 1/08 for PS 8.9
Enrollment Control
This page is used to indicate the class status, enrollment and waitlist capacities for classes.
Classes will “roll” from the previous year with the Class Status from that year. So a class that
was inactive last Fall is going to have a status of inactive this Fall too. Remember to check the
Class Status for every class when you begin scheduling for a new Term!
Class Status If this class is going to be offered, make sure the Class
Status is ACTIVE.
If the class is not going to be offered this Term, change
the Class Status to INACTIVE. Remember to also set
the Enrollment Capacity to “0”. Do not delete the
class. You may want to use it at a later date.
If you want to tentatively schedule a class that you are
pretty sure you’ll be offering, change the Class Status to
TENTATIVE SECTION.
Generally classes are only CANCELLED after you’ve
lost the ability to update courses. This option will be
used by the Registrar’s Office.
Consent Department or Instructor indicates that the student
needs department or instructor permission to register for
this class. No Consent indicates that the student can

Scheduling Classes in PeopleSoft p. 13
Prepared by Kim Rant, Client Support 2-9800 Revised 1/08 for PS 8.9
register without permission. If this is incorrect contact
the Registrar’s Office.
1st Auto Enroll Section These fields are used to associate multi-component
2nd
Auto Enroll Section sections for auto-enroll. No entry is required on this
Resection to Section page. You will use the Update Sections of a Class page
to do this. It’s easier.
Auto-Enroll from Waitlist This option will be checked for courses that allow wait
listing. Students who elect to be placed on the waitlist
will automatically be enrolled as seats become available.
You will be able to view the list of students on the
waitlist. You will also be able to get an “unmet
demand” report of students who tried to register, could
not get in, and chose NOT to be put on the waitlist.
Requested Room Capacity Enter the maximum enrollment that you will ever allow
for this class. Please be realistic!
Enrollment Capacity This is the maximum number of students allowed to
register for this class. You can change it if needed. This
number should not be greater than the Requested
Room Capacity.
For Inactive classes - change this number to “0”.
For multi-component classes with auto-enroll - make
sure that the enrollment capacity for the Lecture equals
the total enrollment capacity of all of the associated
“enrollment” sections (Recitations or Labs).
For combined courses – this number should equal the
total number of students allowed to enroll in both classes
combined.
Waitlist Capacity This number should be approximately 30% of the
enrollment capacity.
Minimum Enrollment Number Not used.
Cancel if Student Enrolled Not used.
Once students begin enrolling in classes you can refer to this page to see the Total Enrollment
Capacity and the Total Waitlist Capacity. These are actual real-time numbers. You will also
find this information on the Class Sections page.
This
shows the
course
These show the
enrollment numbers in
the course, and on the
waitlist.
Scheduling Classes in PeopleSoft p. 14
Prepared by Kim Rant, Client Support 2-9800 Revised 1/08 for PS 8.9
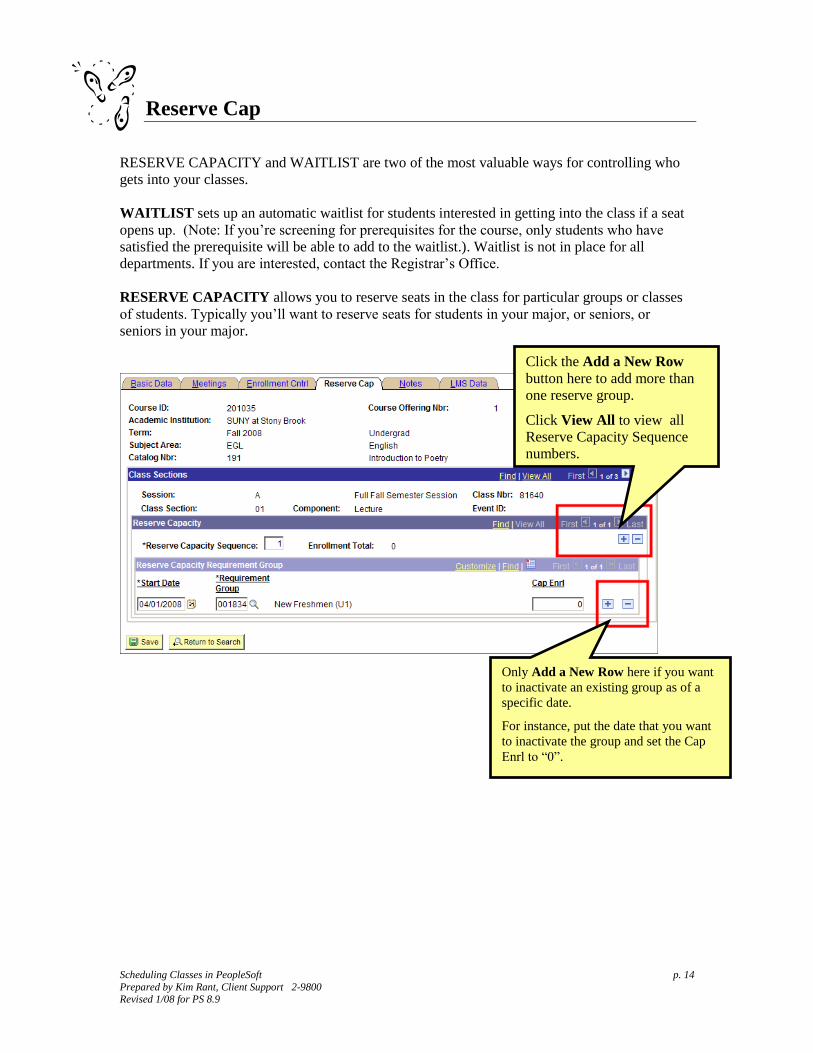
Reserve Cap
RESERVE CAPACITY and WAITLIST are two of the most valuable ways for controlling who
gets into your classes.
WAITLIST sets up an automatic waitlist for students interested in getting into the class if a seat
opens up. (Note: If you’re screening for prerequisites for the course, only students who have
satisfied the prerequisite will be able to add to the waitlist.). Waitlist is not in place for all
departments. If you are interested, contact the Registrar’s Office.
RESERVE CAPACITY allows you to reserve seats in the class for particular groups or classes
of students. Typically you’ll want to reserve seats for students in your major, or seniors, or
seniors in your major.
Click the Add a New Row
button here to add more than
one reserve group.
Click View All to view all
Reserve Capacity Sequence
numbers.
Only Add a New Row here if you want
to inactivate an existing group as of a
specific date.
For instance, put the date that you want
to inactivate the group and set the Cap
Enrl to “0”.

Scheduling Classes in PeopleSoft p. 15
Prepared by Kim Rant, Client Support 2-9800 Revised 1/08 for PS 8.9
Reserve Capacity Sequence A Reserve Capacity Sequence number is added each
time you insert a new row. If you have more than one
Requirement Group for a class, this number determines
which Requirement Group has priority. If a student
meets the requirements of 2 different groups, he/she will
be put into the one with priority (1 before 2, 2 before 3,
etc.).
Enrollment Total This number tells you how many students are currently
in each reserve capacity sequence.
Start Date The Start Date will automatically be set for the
beginning of advance registration for the Term. This date
is very important! Only change it to activate or inactivate
a reserve group on a specific date other than the
beginning of advance registration.
Requirement Group Requirement Groups have been setup in PeopleSoft and
are identified by a Requirement Group number. Think of
this as the requirements needed in order to fill this group
of seats.
Click the LOOKUP button to see list of Requirement
Groups. You can search by Academic Group or
Subject Area.
Examples of Requirement Groups:
U1 = Freshman
U2 = Sophomores
U3 = Juniors
U4 = Seniors
AFS MAJOR/MINOR will allow you to reserve seats for
students majoring or minoring in Africana Studies.
AFS MAJOR will allow you to reserve seats only for students
majoring in Africana Studies.
AFS MINOR will allow you reserve seats only for students
minoring in Africana Studies.
AFS U4 MAJOR will allow you reserve seats only seniors
majoring in Africana Studies
Cap Enrl Enter the number of seats you want to reserve for this
group of students. If you inactivate a group change the
Start Date and set the Cap Enrl to “0”.
You can have more than one Requirement Group for a class:
Notice that there are two areas on this page where you can insert/delete rows. Be careful!
Click the scroll arrows or View All to see each Requirement
Group Sequence.
To add a Requirement Group:
Click in the Reserve Capacity Sequence field and click the Add a New Row button to
the right of this field.
A new sequence number will be assigned to each group that you add in order of priority.
Scheduling Classes in PeopleSoft p. 16
Prepared by Kim Rant, Client Support 2-9800 Revised 1/08 for PS 8.9
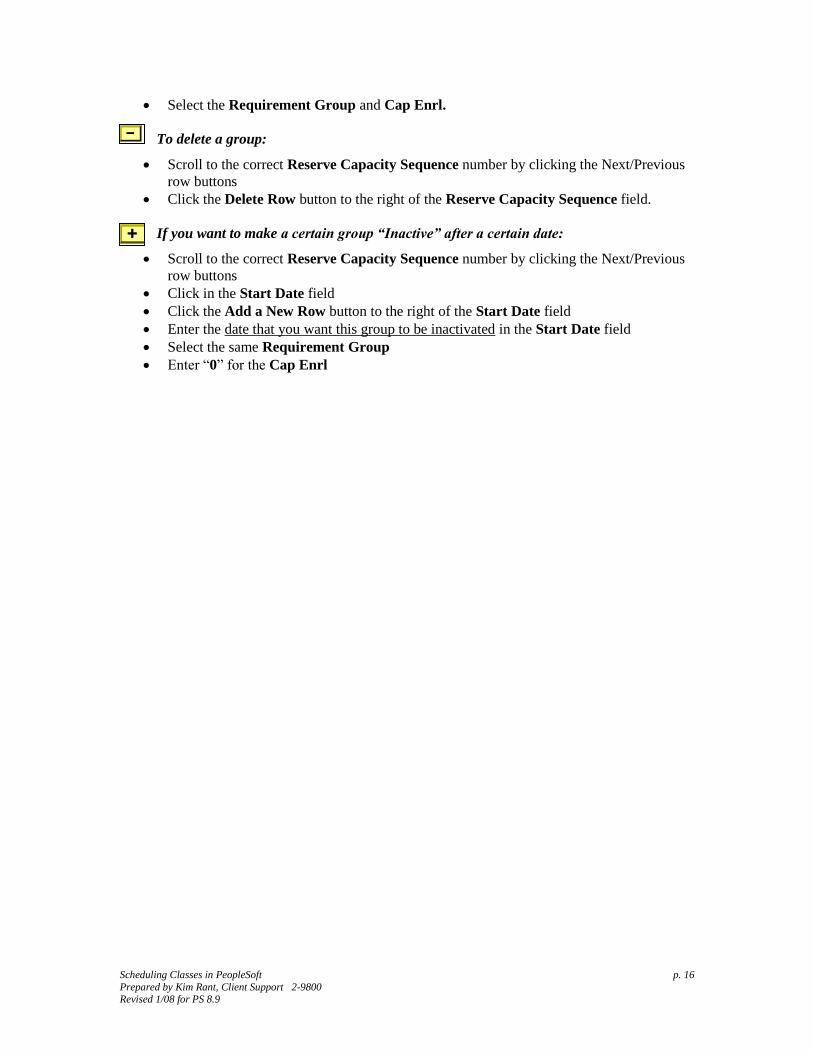
Select the Requirement Group and Cap Enrl.
To delete a group:
Scroll to the correct Reserve Capacity Sequence number by clicking the Next/Previous
row buttons
Click the Delete Row button to the right of the Reserve Capacity Sequence field.
If you want to make a certain group “Inactive” after a certain date:
Scroll to the correct Reserve Capacity Sequence number by clicking the Next/Previous
row buttons
Click in the Start Date field
Click the Add a New Row button to the right of the Start Date field
Enter the date that you want this group to be inactivated in the Start Date field
Select the same Requirement Group
Enter “0” for the Cap Enrl

Scheduling Classes in PeopleSoft p. 17
Prepared by Kim Rant, Client Support 2-9800 Revised 1/08 for PS 8.9
Notes
The class Notes page include special information about the class that may or may not be printed
in the Class Schedule (i.e., information about exams, waitlists, reserve groups, combined courses,
auto-enroll sections, etc.). Department Schedulers cannot add/change Notes. They must contact
the Registrar’s Office.

Scheduling Classes in PeopleSoft p. 18
Prepared by Kim Rant, Client Support 2-9800 Revised 1/08 for PS 8.9
LMS
The LMS fields must be completed in order for the classes to be available in Blackboard.
Click the drop down list for LMS Extract File Type and choose XML V1.1(req to
authenticate)
The LMS Extract Group ID will automatically be completed when you tab out of the LMS
Extract File Type field
SELECT the LMS TAB
Drop DOWN and select

Scheduling Classes in PeopleSoft p. 19
Prepared by Kim Rant, Client Support 2-9800 Revised 1/08 for PS 8.9
SAVE
You should save after each section that you update.
To add a new section for this course go back to the Basic Data page and click the Add a
New Row button. Complete all of the information for the next section. Remember to
save after completing each section.
If this is a multi-component Course with auto-enroll, when you are finished scheduling each
section go to the Update Sections of a Class page to complete the auto-enroll section
information (see instructions on following pages).
To check to see if Pre-requisite screening is turned on or off for each section of this course go to
the Adjust Class Associations page.
To remain in this component and search for another course, click the
Return to Search button.

Scheduling Classes in PeopleSoft p. 20
Prepared by Kim Rant, Client Support 2-9800 Revised 1/08 for PS 8.9
Manage Auto-Enroll Sections, Enrollment and Waitlist
Capacity
Navigation:
Curriculum Management > Schedule of Classes > Update Sections of a Class
You can easily view information for all of the sections of a course on one page. Please note that
only 8 rows are displayed at a time on this page. To see all of the rows on one page you must
click View All.
You will complete your scheduling for the auto-enroll courses here. In the Auto Enrl 1 enter the
section number of the Lecture that students will auto-enroll into when they register for each of the
Lab or Recitation sections.
Click the SAVE button to save the information that you entered.

Scheduling Classes in PeopleSoft p. 21
Prepared by Kim Rant, Client Support 2-9800 Revised 1/08 for PS 8.9
Also use this page to edit Enrollment Capacity and Waitlist Capacity for existing classes.
Once students begin enrolling in classes, use this page to view Enrollment and Waitlist Totals.
Click the SAVE button to save the information that you entered.