user guide and operating manual - vetequip inc. - the ... manual.pdf · user guide and operating...
TRANSCRIPT

User Guide andOperating Manual
&Mobile
Laboratory Animal Anesthesia System901807 / 901809
Table TopLaboratory Animal Anesthesia System
901806
VetEquip, Inc. - Pleasanton, California USA - 800-466-6463

VetEquip, Inc. - Pleasanton, California USA - 800-466-6463 – 2 –Rev. 0703
Table of Contents
Table ofContents User / Owner Responsibility ....................................................................................... 3
Receiving ................................................................................................................... 3
Guarantee .................................................................................................................. 4
Warnings and Cautions .............................................................................................. 5
Equipment Descriptions ............................................................................................. 6
Specifications ............................................................................................................. 7
Component Identification ........................................................................................ 8-9
System Assembly ................................................................................................ 10-12
Theory of Operation ................................................................................................. 13
Operational Flowchart ......................................................................................... 14-15
Pre-Operative Check & Operation ........................................................................... 16
Use Protocol ........................................................................................................ 17-18
Maintenance ............................................................................................................. 19
Web Site: www.vetequip.comE-mail: [email protected] Toll-Free: 1-800-466-6463International: +925-463-1828

VetEquip, Inc. - Pleasanton, California USA - 800-466-6463 – 3 –Rev. 0703
User/Owner Responsibility
User/OwnerResponsibility
PLEASE READ THIS MANUAL BEFOREOPERATING THE ANESTHESIA MACHINE.
The VetEquip Laboratory Animal Anesthesia System is for veterinary use only andis designed to function as specified when operated and maintained in accordance withthe instructions supplied in this manual.
This equipment must be periodically checked, calibrated, maintained and/or, compo-nents repaired and replaced when necessary for equipment to operate reliably. Partsthat have failed in whole or in part, exhibit excessive wear, are contaminated or areotherwise unfit for use, should be immediately discarded and replaced. To maintainthe warranty, replacement parts must be installed or supplied by VetEquip, Inc.Equipment that is not functioning correctly must not be used. This equipment mustnot be modified by unauthorized personnel or with unauthorized components.
Receiving
1. Examine shipping carton for signs of external damage.2. Unpack all items. Retain and store original shipping cartons and materials for use
in the event this anesthesia machine must be shipped.3. Inspect the anesthesia machine and accessories for any sign of damage that may
have occurred during shipping. If damage is discovered, immediately file adamage claim with the carrier. Notify VetEquip of the claim, and we will do all wecan to assist you.
4. Compare quantities received to quantities shown on packing list. Report anydiscrepancies to VetEquip immediately.
5. Complete the following information:
Packed by: _______________ Date: ___/___/___Serial Number: ___________________________________
Rec’d by: _________________ Date: ___/___/___Serial Number verified: __________
Receiving

VetEquip, Inc. - Pleasanton, California USA - 800-466-6463 – 4 –Rev. 0703
VetEquip’s100% Total Satisfaction Guarantee
To demonstrate just how serious we are, we are pleased to extend to you our“100% Total Satisfaction Guarantee.” What follows is the entire guarantee inall its simplicity. Read it as a reflection of the confidence we have in our qualityequipment, dedicated support and outstanding service. Finally, a guarantee that let’syou decide whether you’re satisfied.
VetEquip’s philosophy on quality can be summed up in just 3 simple points:
There is no room for mediocrity.
You should never pay for anything less than premium productsand services.
The customer is the best judge of quality.
This philosophy is more than just a credo; it dictates how we work.
Obtaining Warranty ServiceTo obtain warranty service, contact us directly. Warranty service is FOB Pleasanton, CA.
VetEquip, Inc. USA Toll-Free: 1-800-466-6463P.O. Box 10785 International: +925-463-1828Pleasanton, CA 94588-0785 Web Site: www.vetequip.comE-mail: [email protected]
What This Warranty Does Not Cover• Damages or malfunctions caused by negligence, abuse, or use not in accordance
with the operating manual.
• Defects or damages caused by unauthorized service or the use of other thanVetEquip supplied parts.
• Parts of the anesthesia machine that require replacement under normal use, suchas rubber or latex parts or components.
That’s it!Some guarantees guarantee products, some guarantee service and some have somuch fine print, the only thing you’re guaranteed is confusion.
Ours is simple - only you decide when you’re satisfied!
Guarantee
Guarantee
“Everything we sell isbacked by a 100%
1-year money-backguarantee.”
If you are not fully satisfied and delighted with theVetEquip product or service furnished to you, justcall us within 1 year of delivery and we will makearrangements to issue a full and prompt refund toyou.
“Everything we sell isbacked by a 100%
7-year unconditionalreplacementguarantee.”
If for any reason you become dissatisfied withyour VetEquip product, at your request we willreplace it without charge to you with an identicalitem or an item with comparable features andcapabilities.

VetEquip, Inc. - Pleasanton, California USA - 800-466-6463 – 5 –Rev. 0703
Warnings and Cautions
Warnings&
CautionsFor veterinary use only.
Personnel operating this Laboratory Animal Anesthesia System must bethoroughly familiar with the instruction manual and equipment operationprior to use with patients.
Tampering with the anesthesia system components by unauthorized per-sonnel voids all warranties and specifications. The prevention of tamper-ing with the anesthesia system is the sole responsibility of the user orowner. VetEquip assumes no liability for any malfunction, failure, damageor loss to either equipment or life.
(Model 901809) Failure to open the APL (evacuation) valve with a patientattached to the absorber assembly could result in the death of the patient.
Before using the anesthesia system, check that it is set up properly andensure all connections and settings are correct. For the Model 901809,perform the “10 Second Leak Test” as outlined in the “Pre-operative Check”section of this manual to verify the breathing circuit is leak-free.
Always adhere to proper Diameter Index Safety System (D.I.S.S.) hoseconnections. Failure to comply will void your warranty and could compro-mise patient safety.
If the oxygen flush button does not immediately return to the off positionafter being released or if the flow of oxygen does not immediately stopflowing from the common outlet after the oxygen flush button is released,remove the machine from service. The valve must be repaired by VetEquipor a VetEquip authorized service facility before using the machine.
When turning off flowmeters, it is only necessary to turn the flow controlknob clockwise until the ball float reaches the bottom of the tube. Exces-sive tightening will damage the valve seat, resulting in a leak requiringreplacement of the valve.

VetEquip, Inc. - Pleasanton, California USA - 800-466-6463 – 6 –Rev. 0703
Equipment Descriptions
EquipmentDescriptions
The Laboratory Animal Anesthesia System is designed for use with small animalmodels – mouse to pig. Standard configuration includes a stand assembly withoxygen flowmeter, oxygen flush valve, precision vaporizer and a 10-foot oxygen hoseassembly with threaded DISS connections. The standard system also includes adual-procedure circuit; 2-liter induction chamber; breathing circuit with rat-size &mouse-size nose cones; and 2 activated charcoal filters for waste gas removal.
Table-Top - 901806Compact and versatile. This model uses only 8” x 11” of counter space. Weight-balanced handle and non-skid feet make this unit usable virtually anywhere.
Mobile - 901807Rugged and portable. This model utilizes sturdy casters and a built-in handle toallow easy movement between rooms or buildings. All internal connections arecovered by a smooth panel, allowing easy cleaning.
Mobile with CO2 Absorber - 901809A carbon dioxide absorber assembly has been added to the mobile system(above). Positive sealing gaskets and molded construction virtually eliminatesleakage.

VetEquip, Inc. - Pleasanton, California USA - 800-466-6463 – 7 –0801 - Rev. A
lanoitarepOscitsiretcarahC
poTelbaT)608109(
eliboM)708109(
rebrosbA/weliboM)908109(
:emuloVretemwolFnegyxO etunimrepsretil4-0.isp55@
etunimrepsretil4-0.isp55@
etunimrepsretil4-0.isp55@
:emuloVhsulFnegyxO eutnimrepsretil53-51.isp55@
eutnimrepsretil53-51.isp55@
eutnimrepsretil53-51.isp55@
:ylppuSsaG SSIDelamnegyxOrotcennoc
SSIDelamnegyxOrotcennoc
SSIDelamnegyxOrotcennoc
erusserPsaG:stnemeriuqeR .isp55-05 .isp55-05 .isp55-05
slortnoC
:retemwolF evlavgniretemnrut-elgniS evlavgniretemnrut-elgniS evlavgniretemnrut-elgniS
:hsulFnegyxO -gnirps,detautca-regnulPevlavnruter
-gnirps,detautca-regnulPevlavnruter
-gnirps,detautca-regnulPevlavnruter
-erusserPelbatsujdA:evlaV)LPA(gnitimiL enoN enoN evlavgniretemnrut-eerhT
seitreporPlacisyhP
:thgieW )gk5.41(.sbl23.xorppA )gk14.52(.sbl65.xorppA )gk30.92(.sbl46.xorppA
:snoisnemiD h"41xd"8xw"11 h"05xd"81xw"91 h"05xd"91xw"22d"81xw"91:tnirptooFesaB
:lairetaM
leets;emarFmunimulA;swercsdnastlob,eldnah
;gnibutdnasevlavssarb.revocretemwolfcilyrca
stlobleets,emarFmunimulAsevlavssarb;swercsdna
retemwolfcilyrca;gnibutdna.eldnahnirleD;revoc
stlobleets;emarFmunimulAnoitcejni;swercsdnaenahteruylopdedlom
sevlavssarb;daehrebrosbaretsinaccilyrca;gnibutdnanirleD;revocretemwolfdna
LPAdnaeldnah.evlav)noitaucave(
:hsiniF lemanedetaert-taeH lemanedetaert-taeH lemanedetaert-taeH
Specifications
All specifications are for standard systems.
Prices, terms and product specifications are subject to change without notice.

VetEquip, Inc. - Pleasanton, California USA - 800-466-6463 – 8 –Rev. 0703
Table-Top Laboratory Animal Anesthesia System (LAAS)901806
Dual-Delivery Breathing CircuitIncluded with all Laboratory Animal Anesthesia Systems
991011
Table TopLaboratory
AnimalAnesthesia
System
OxygenFlowmeter
Flow ControlKnob
Oxygen Flush
Common Outlet
CarryingHandle
Vaporizer Dial
Vaporizer
Evacuation PortInduction ChamberFeed-Tube
Nose Coneattachment siteStopcocks
Charcoal Filters
BreathingCircuit
Dual BreathingCircuit
Component Identificaiton

VetEquip, Inc. - Pleasanton, California USA - 800-466-6463 – 9 –Rev. 0703
Handle &Hose/CircuitHanger
Vaporizer
Common Outlet
Mounting Holesfor optional 2ndVaporizer
Oxygen FlushButton
Syringe Holder
Mobile Laboratory Animal Anesthesia System (LAAS)901807
INSET: Optional CO2 Absorber Assembly901750
OxygenFlowmeter(A 2ndFlowmeter isoptional.)
MobileLaboratory
AnimalAnesthesia
System
Component Identification
CO2 AbsorberAssembly
Stainless SteelInstrument Shelf
Attachment sitefor optional
E-cylindermounts

VetEquip, Inc. - Pleasanton, California USA - 800-466-6463 – 10 –Rev. 0703
System Assembly
Assembly
STEP 2: (Fig. 3)Connect the second Charcoal Filter ontothe 22mm FlexHose at the end of thePatient Breathing Circuit.
STEP 3: (Fig. 4a & 4b)Insert either the 9mm, 12mm or 14mm Cone into the Patient Breathing Circuitelbow fitting.
Charcoal Filter connected to PatientBreathing Circuit
12/14mm Nose Cone 9mm Nose Cone
In order to quickly and properly set-up your Table Top or Mobile Laboratory AnimalAnesthesia System, please complete each step of the Assembly Procedures below.If you have any questions, concerns or comments regarding the assembly of yoursystem or with these instructions, please call us at 800-466-6463.
STEP 1: (Fig. 1)Insert the clear fitting connected to the semi-transparent feed-tube of the DualBreathing Circuit into either one of the Induction Chamber ports. Connect one endof the 22mm FlexHose to the remaining Induction Chamber port and the other endof the 22mm FlexHose to a Charcoal Filter.
NOTE: (Fig. 2) The 22mm FlexHose can be cut to your desired length bycutting the hose at the ridge in the smooth junctions.
Dual Breathing Circuit - Clear Fitting(semi-transparent feed-tube)
Charcoal Filter with 22mmFlexHose connected
Induction Chamber Ports
Fig. 1Cut the FlexHose only at the ridgein the smooth junctions.
Cut here
Fig. 2
Fig. 3
Fig. 4a Fig. 4b

VetEquip, Inc. - Pleasanton, California USA - 800-466-6463 – 11 –Rev. 0703
System Assembly
Assembly
STEP 4:Insert the blue connector of the Dual Breathing Circuit into the Common Outlet ofthe machine. (see Fig. 6a for the Table Top LAAS and Fig. 6b for the MobileLAAS).
(Table Top LAAS) - Insert the blue connector (black tubing)of the Dual Breathing Circuit to the Common Outlet.
(Mobile LAAS) - Insert the blue connector (black tubing)of the Dual Breathing Circuit to the Common Outlet.
Upon completion of STEP 3, theDual Breathing Circuit Assemblyshould look similar to that shownin Fig. 5.
Dual Breathing Circuit connected to theInduction Chamber and Charcoal Filters.
Fig. 5
Fig. 6a
Fig. 6b

VetEquip, Inc. - Pleasanton, California USA - 800-466-6463 – 12 –Rev. 0703
STEP 5:Connect the gas supply hose assembly to the rear inlet DISS fitting of the Labora-tory Animal Anesthesia System. Tighten gently with an 11/16” wrench on the hosefitting and a 5/8” wrench on the DISS inlet fitting. (see Fig. 8 for the Table TopLAAS and Fig. 9 for the Mobile LAAS).
(Table Top LAAS) - DISS HoseAssembly connection.
(Mobile LAAS) - DISS HoseAssembly connection.
IMPORTANT:The other end of the DISS hose assembly must be connected to your tank-mounted regulator or the outlet of your in-house O2 supply line with anoperating pressure of 55 PSI MAXIMUM. Pressure in excess of 55 PSIwill cause damage to the Laboratory Animal Anesthesia System.
DISS inlet - use 5/8” wrench
Hose fitting - use 11/16” wrench
System Assembly
Assembly
Fig. 8
Fig. 9
DISS inlet - use 5/8” wrench
Hose fitting - use 11/16” wrench

VetEquip, Inc. - Pleasanton, California USA - 800-466-6463 – 13 –Rev. 0703
Theory ofOperation An inhalation anesthesia system is designed to do the following:
1. Change a liquid anesthetic agent into a vapor.
2. Deliver that vapor to the patient in a precisely measurable amount.
3. Sustain the patient by delivering a metabolic gas in addition to the anestheticvapor.
4. Capture all waste gas.
5. Channel the waste gas to an evacuation system such as anactivated charcoal canister or a scavenging interface.
Theory of Operation

VetEquip, Inc. - Pleasanton, California USA - 800-466-6463 – 14 –Rev. 0703
Operational Flowchart
1. Oxygen flows from a pressurized tank that may be located on the anesthesiamachine, in the room with the anesthesia machine, or in a remote area with theoxygen being piped through the walls.
2. A regulator is attached to the supply tank and reduces the pressure of theoxygen from as high as 2200 PSI down to a useable 55 PSI.
3. The oxygen flow reaches the anesthesia machine through the DISS connectionand is then plumbed into two channels:
a. One channel goes to the oxygen flowmeter. By using the flow control knobon the flowmeter, you further reduce the 55 PSI to a flow measured in litersper minute (LPM).
b. The other channel goes to the oxygen flush valve. In the normal (closed)position, the flush valve has no flow through it. When the flush button ispushed, the oxygen flows directly into the patient circuit at a rate of approxi-mately 15-35 LPM. This oxygen does not pass through the vaporizer.
4. The oxygen flow from the flowmeter is delivered to the inlet of the vaporizer. Ifthe vaporizer is in the “OFF” position, the oxygen bypasses the vaporizer withoutpicking up any anesthetic agent. If the vaporizer dial is turned to any positionother than “OFF”, a precise concentration of vaporized anesthetic agent isdelivered through the outlet of the vaporizer to the patient circuit. The vaporizerdial is adjusted by the operator and determines the amount of anesthetic agentvapor that will be added to the oxygen flow. The amount is measured as apercentage of the total flow and can be varied from 0-5%.
5. Lines from the vaporizer and the oxygen flush valve merge through the commonoutlet and into the dual procedure circuit.
6. Once the gas enters the dual procedure circuit, it is bifurcated by a Y-fitting intotwo branches. A stopcock within each branch of the circuit provides independentcontrol of each branch.
a. One branch goes to the induction chamber. When the stopcock to theinduction chamber is open, the gases flow into the chamber through the feed-tube. Turbulence circulates the anesthetic gases throughout the chamberuntil it exits through the evacuation port on the induction chamber, flowingpassively through flexible evacuation tubing (FlexHose) and into a charcoalfilter.
b. The other channel goes to the patient breathing circuit. When the stopcockto the patient circuit is open, the gases flow to the nose cone of the breathingcircuit. The gases then continue through the down-tube of the breathingcircuit and into a second charcoal filter.
OperationalFlowchart

VetEquip, Inc. - Pleasanton, California USA - 800-466-6463 – 15 –0801 - Rev. A
Oxygen Supply(tank or house line)
Regulator
Oxygen FlushValve
(normally CLOSED)
FlowmeterD
.I.S.
S.H
ose
Common Outlet
O2 @ 0 to 4 LPM
O2 @ 2200 PSI
O2 @ 55 PSI
15-35 LPM withFlush Button
Activated
Laboratory AnimalAnesthesia System
Vaporizer
Stopcock#1
InductionChamber(Patient)
Nosecone ElbowFitting
CharcoalFilter
CharcoalFilter
Stopcock#2
Patient
Normal Flow withOxygen Flush closed:0-4 lpm of Oxygen and
% Anesthetic Agent
Flow with OxygenFlush Activated:
15-35 LPM of Oxygen
Dual BreathingCircuit
Operational Flowchart
O2 + Agent
VetEquip, Inc. - Pleasanton, California USA - 800-466-6463 – 16 –Rev. 0703
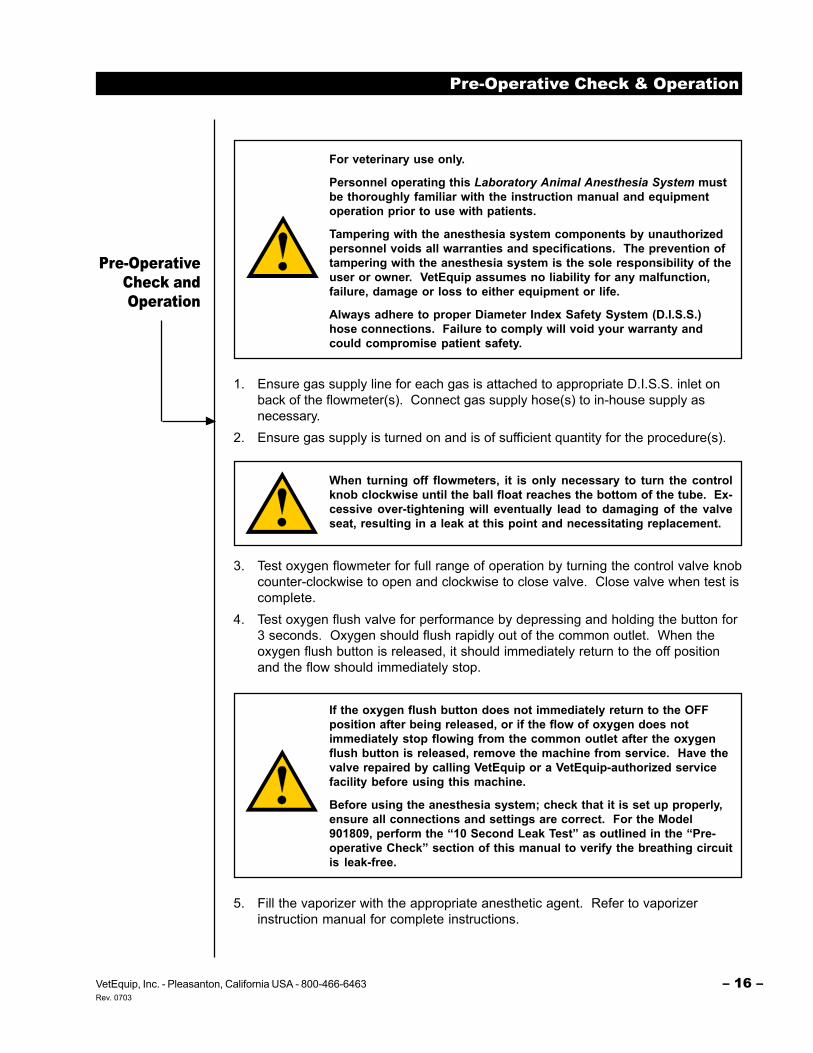
Pre-Operative Check & Operation
Pre-OperativeCheck andOperation
For veterinary use only.
Personnel operating this Laboratory Animal Anesthesia System mustbe thoroughly familiar with the instruction manual and equipmentoperation prior to use with patients.
Tampering with the anesthesia system components by unauthorizedpersonnel voids all warranties and specifications. The prevention oftampering with the anesthesia system is the sole responsibility of theuser or owner. VetEquip assumes no liability for any malfunction,failure, damage or loss to either equipment or life.
Always adhere to proper Diameter Index Safety System (D.I.S.S.)hose connections. Failure to comply will void your warranty andcould compromise patient safety.
1. Ensure gas supply line for each gas is attached to appropriate D.I.S.S. inlet onback of the flowmeter(s). Connect gas supply hose(s) to in-house supply asnecessary.
2. Ensure gas supply is turned on and is of sufficient quantity for the procedure(s).
When turning off flowmeters, it is only necessary to turn the controlknob clockwise until the ball float reaches the bottom of the tube. Ex-cessive over-tightening will eventually lead to damaging of the valveseat, resulting in a leak at this point and necessitating replacement.
3. Test oxygen flowmeter for full range of operation by turning the control valve knobcounter-clockwise to open and clockwise to close valve. Close valve when test iscomplete.
4. Test oxygen flush valve for performance by depressing and holding the button for3 seconds. Oxygen should flush rapidly out of the common outlet. When theoxygen flush button is released, it should immediately return to the off positionand the flow should immediately stop.
If the oxygen flush button does not immediately return to the OFFposition after being released, or if the flow of oxygen does notimmediately stop flowing from the common outlet after the oxygenflush button is released, remove the machine from service. Have thevalve repaired by calling VetEquip or a VetEquip-authorized servicefacility before using this machine.
Before using the anesthesia system; check that it is set up properly,ensure all connections and settings are correct. For the Model901809, perform the “10 Second Leak Test” as outlined in the “Pre-operative Check” section of this manual to verify the breathing circuitis leak-free.
5. Fill the vaporizer with the appropriate anesthetic agent. Refer to vaporizerinstruction manual for complete instructions.

VetEquip, Inc. - Pleasanton, California USA - 800-466-6463 – 17 –Rev. 0703
Use Protocol
UseProtocol
Every facility should have in place an inhalation anesthesia protocol / SOP.The following is an outline from which you can begin to create your own.If you need assistance writing your protocol, please call us at 800-466-6463.
1. After checking to ensure your oxygen supply tank(s) is/are open and that youhave sufficient gas pressure in the line(s) from the tank(s), assemble your systemand check all connections for possible oxygen leaks.
Oxygen tank to regulator (If oxygen is supplied from a free-standing tank)If any hissing is detected, check the condition of the gasket between the tankand regulator (E-cylinder only) and tighten the regulator onto the tank.Machine to dual delivery systemThis common outlet port is a friction-fit connection. Ensure connections madeare leak-free.Dual delivery system to nose cone and chamber connectionThese are friction-fit connections. Ensure connections made are leak-free.Breathing elbow down tube and chamber outlet port to charcoal filtersConnect tubing to charcoal filter to create a leak-free connection. For properoperation, the charcoal filter must be oriented vertically, ensuring the exit holesin the bottom are not obstructed. Filter canister holders are provided for thispurpose.
WARNINGThe chamber is airtight. If the oxygen flowmeter on the machine isturned off, there will be NO AIRFLOW into the chamber.
NEVER leave animals in the chamber without an oxygen flow.
WARNINGStanding filters directly on a surface will impede the airflowout the bottom of canister, rendering the filter useless andcausing back pressure in the breathing circuit.
2. If required, fill the vaporizer with the appropriate liquid agent, according toinstructions in the vaporizer manual.
3. Open the stopcock in the chamber tubing line.
4. Close the stopcock in the nose cone line.
5. Turn the oxygen flowmeter to at least one (1) liter per minute (lpm).
6. Place animal #1 in the induction chamber and secure the lid.NOTEYou may place as many animals in the chamber as will fit comfortably.

VetEquip, Inc. - Pleasanton, California USA - 800-466-6463 – 18 –Rev. 0703
Use Protocol
UseProtocol
7. Turn the vaporizer dial to 2-2½%. Animal #1 should begin to lose consciousnesswithin 2 minutes.
8. When Animal #1 has no response to rocking/jiggling the chamber, push theoxygen flush button for 20 to 30 seconds (for 2 liter chamber) to evacuate allanesthesia-saturated gas from the chamber.
NOTEThe brief oxygen flush evacuations of the chamber should not awakenalready anesthetized animals.
If the stopcock to the nose cone/mask is open when the oxygen flush buttonis depressed, the resulting oxygen pressure through the nose cone may pushthat animal’s nose out of the nose cone. Always close the stopcock to thenose cone mask before using oxygen flush.
9. Open the stopcock in the nose cone line.
10. Immediately close the stopcock in the chamber tubing line. Open the chamberand remove Animal #1.
11. Place Animal #1’s nose in the nose cone.
12. Place Animal #2 in the chamber and open the stopcock in the chamber tubingline.
13. When the procedure on Animal #1 is complete, close the stopcock in the nosecone line and place Animal #1 in a recovery unit. That animal will begin toawaken in approximately 2 minutes.
14. Repeat steps 8 through 12 with Animal #2, and all remaining models, until allprocedures have been completed.
15. Turn the vaporizer dial to the “OFF” position.
16. Turn off the oxygen flowmeter.
17. If a freestanding oxygen tank is used, turn off the oxygen at the tank.
18. Clean and sanitize the chamber and nose cone/mask as outlined in yourprocedure area cleaning protocols.

VetEquip, Inc. - Pleasanton, California USA - 800-466-6463 – 19 –Rev. 0703
Annual preventive maintenance and certification by qualified personnel is recom-mended to ensure proper operation. General upkeep and daily maintenance willenhance the longevity of your Lab Animal Anesthesia System.
DO NOT USE PETROLEUM BASED LUBRICANTS. If you must use a lubricant, useonly a silicone-based product.
Stand Assembly: Do not use harsh or abrasive cleaners. Wipe with a damp cloth toclean. The stand is coated with a baked-on enamel that will withstand most cleaning/disinfectant solutions. If a solution is to be used, it is recommended that you initiallytest its effect on an inconspicuous spot of the enamel.
Flowmeter(s): Do not use harsh or abrasive cleaners. Plastic flowmeter covers maybe removed and cleaned with a damp cloth. The exterior of the glass flowtube maybe cleaned in the same manner. Should dirt or an obstruction get inside the flowtube,contact VetEquip for assistance. The flow control requires no maintenance.
Oxygen Flush: This valve requires no maintenance.
Rubber Goods: Rubber is a natural product and will deteriorate with age and use. Allrubber goods are considered disposable and should be inspected daily for presence,condition and alignment.
Maintenance
Maintenance